
PROJECT STATEMENT
CRITICAL FRAME
This unit requires you to create a body of work ready for public presentation. This project work will be developed from starting points made in Individual Creative Practice and may be driven by themes of 7
interest, creative curiosity or technological methodologies. This work will be made in collaboration with your peers, the SODA research community and/or partners in the creative and digital industries.

You will produce a challenging, coherent and ambitious body of work through a choice of appropriate modes, formats and presentational contexts.
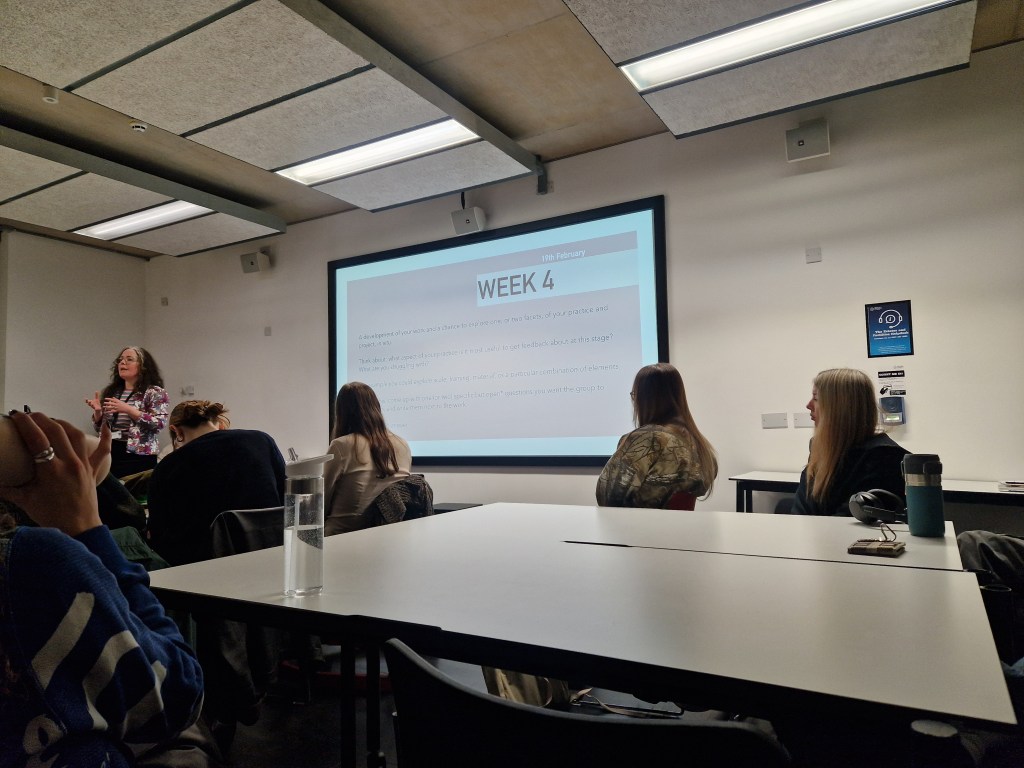
WEEK 1: 22-28 JANUARY (FUTURE ME WEEK)
During Future Me week, I attended two events that I was interested in. I wanted to participate more, but found myself extremely tired and needing rest. Nevertheless, the ones I did were especially beneficial and interesting to me.
STUDIO WORKSHOP WITH TRISTIAN
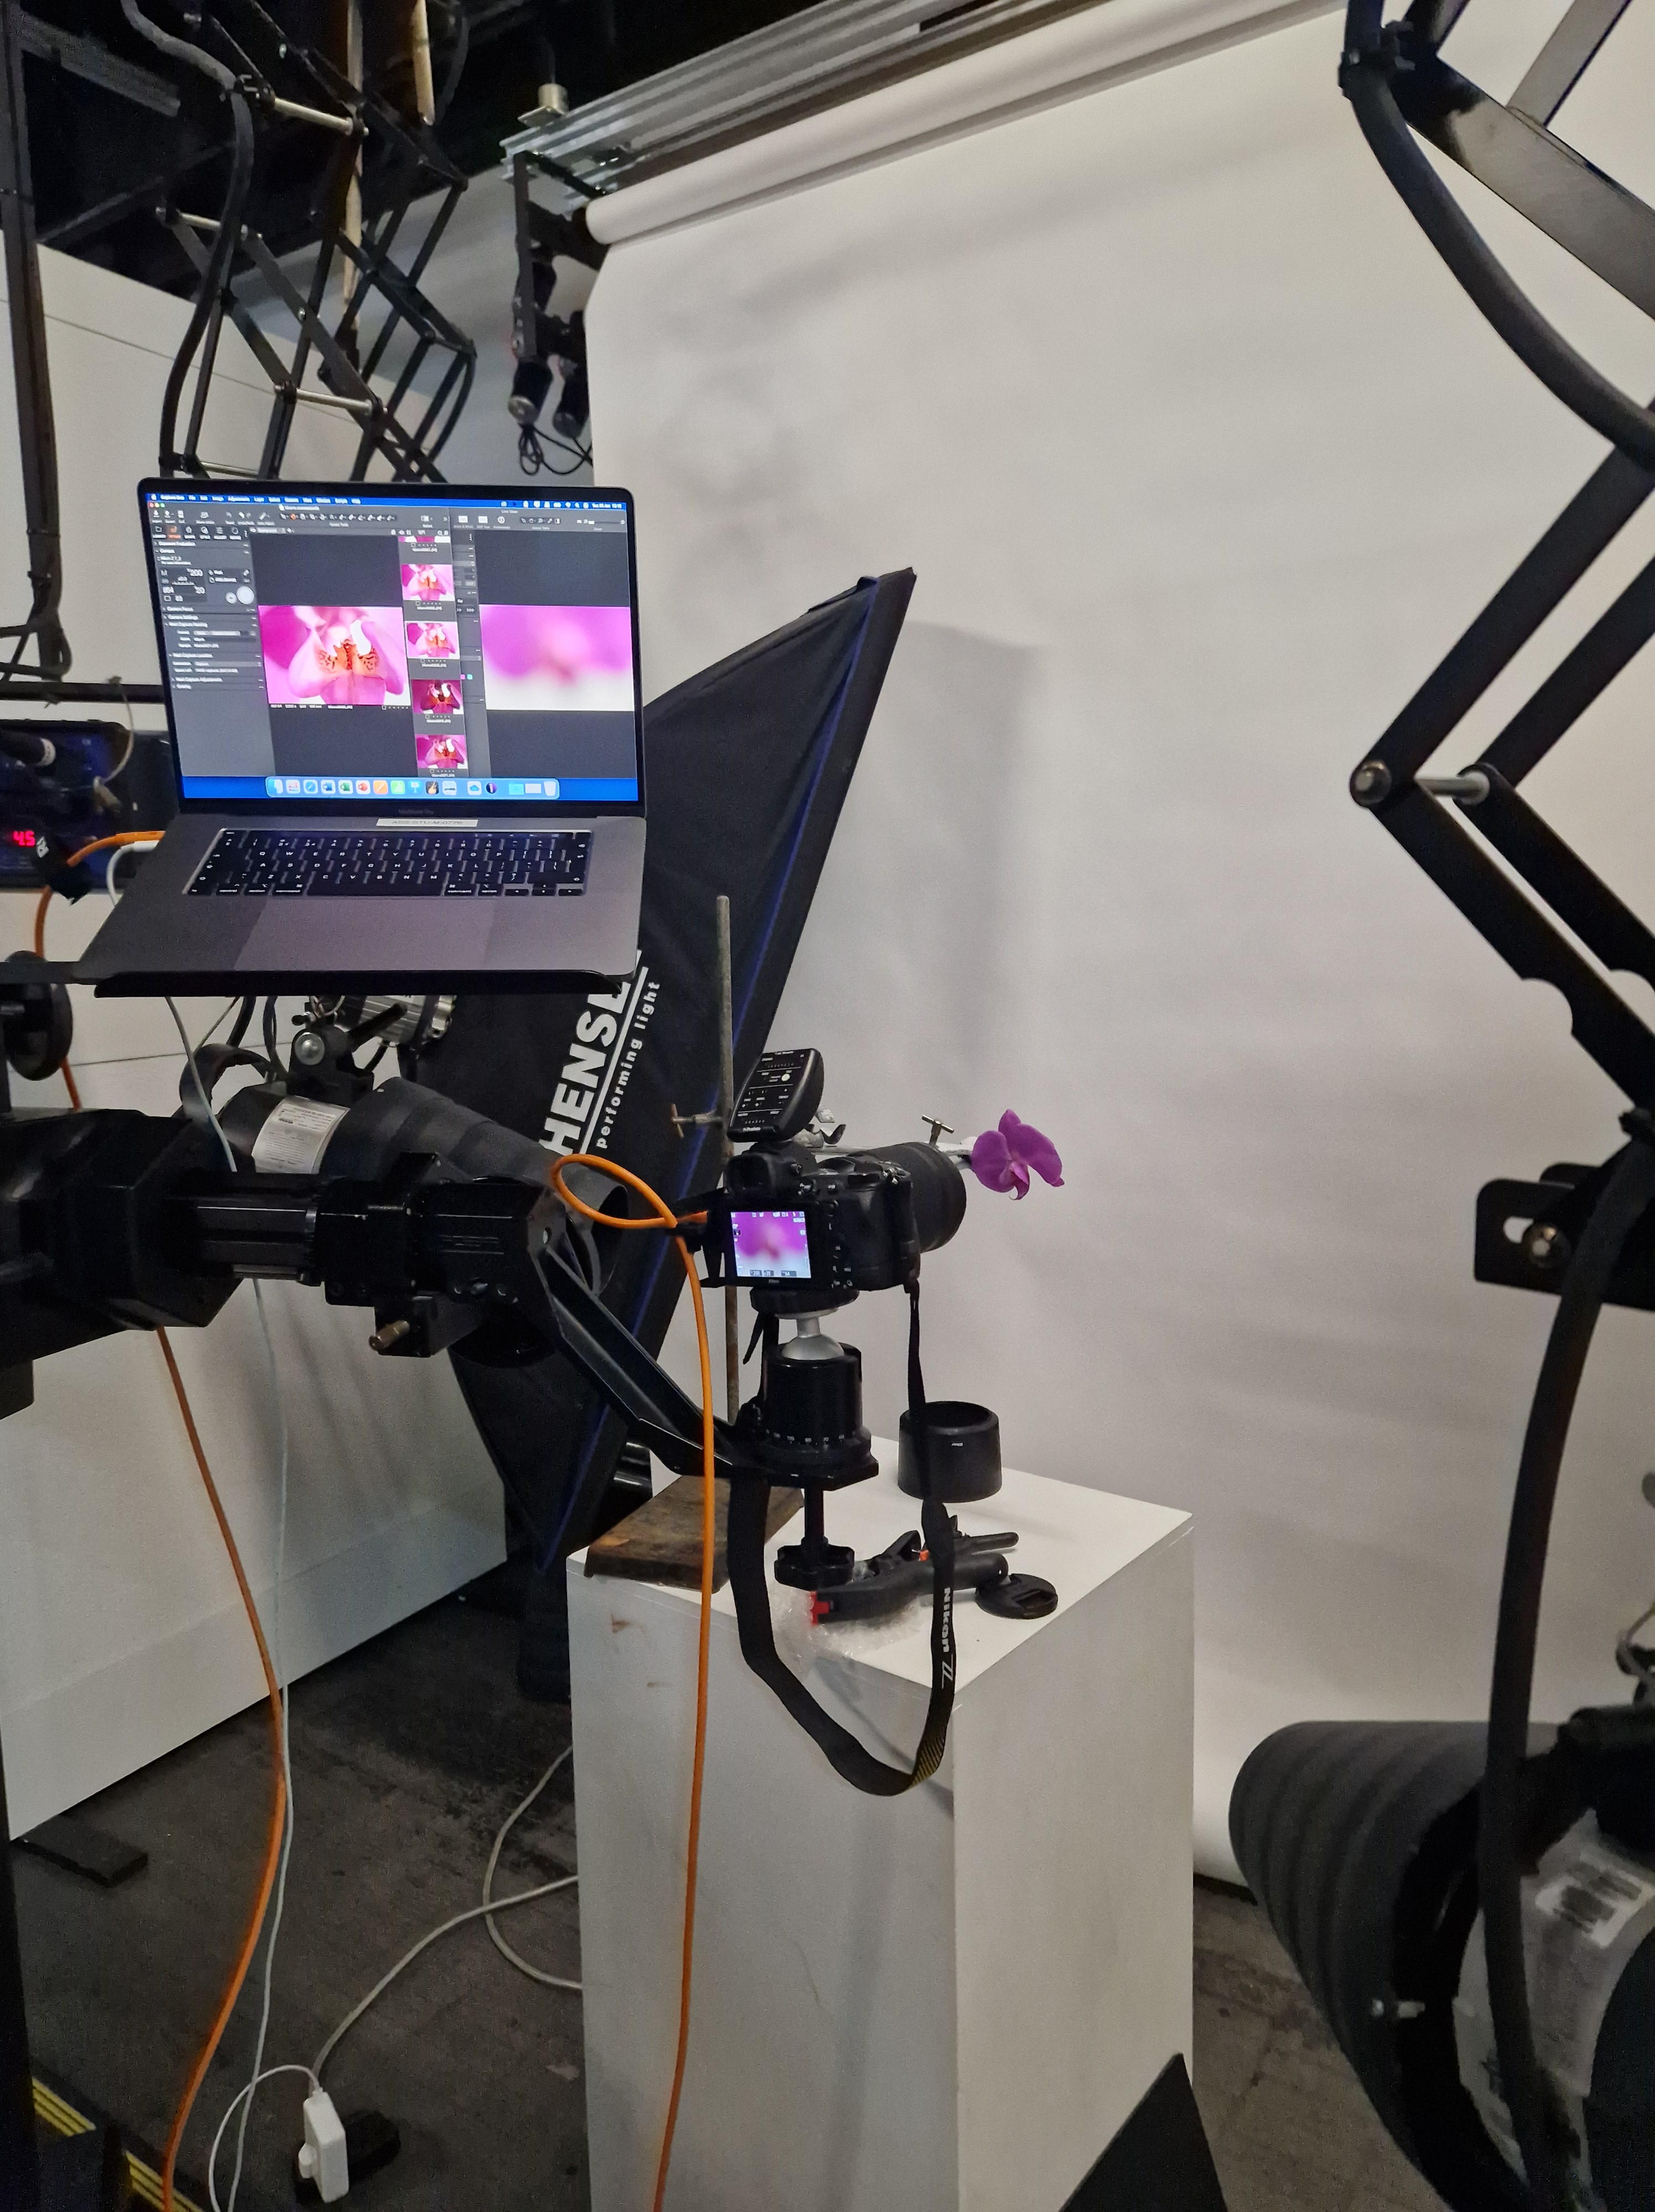
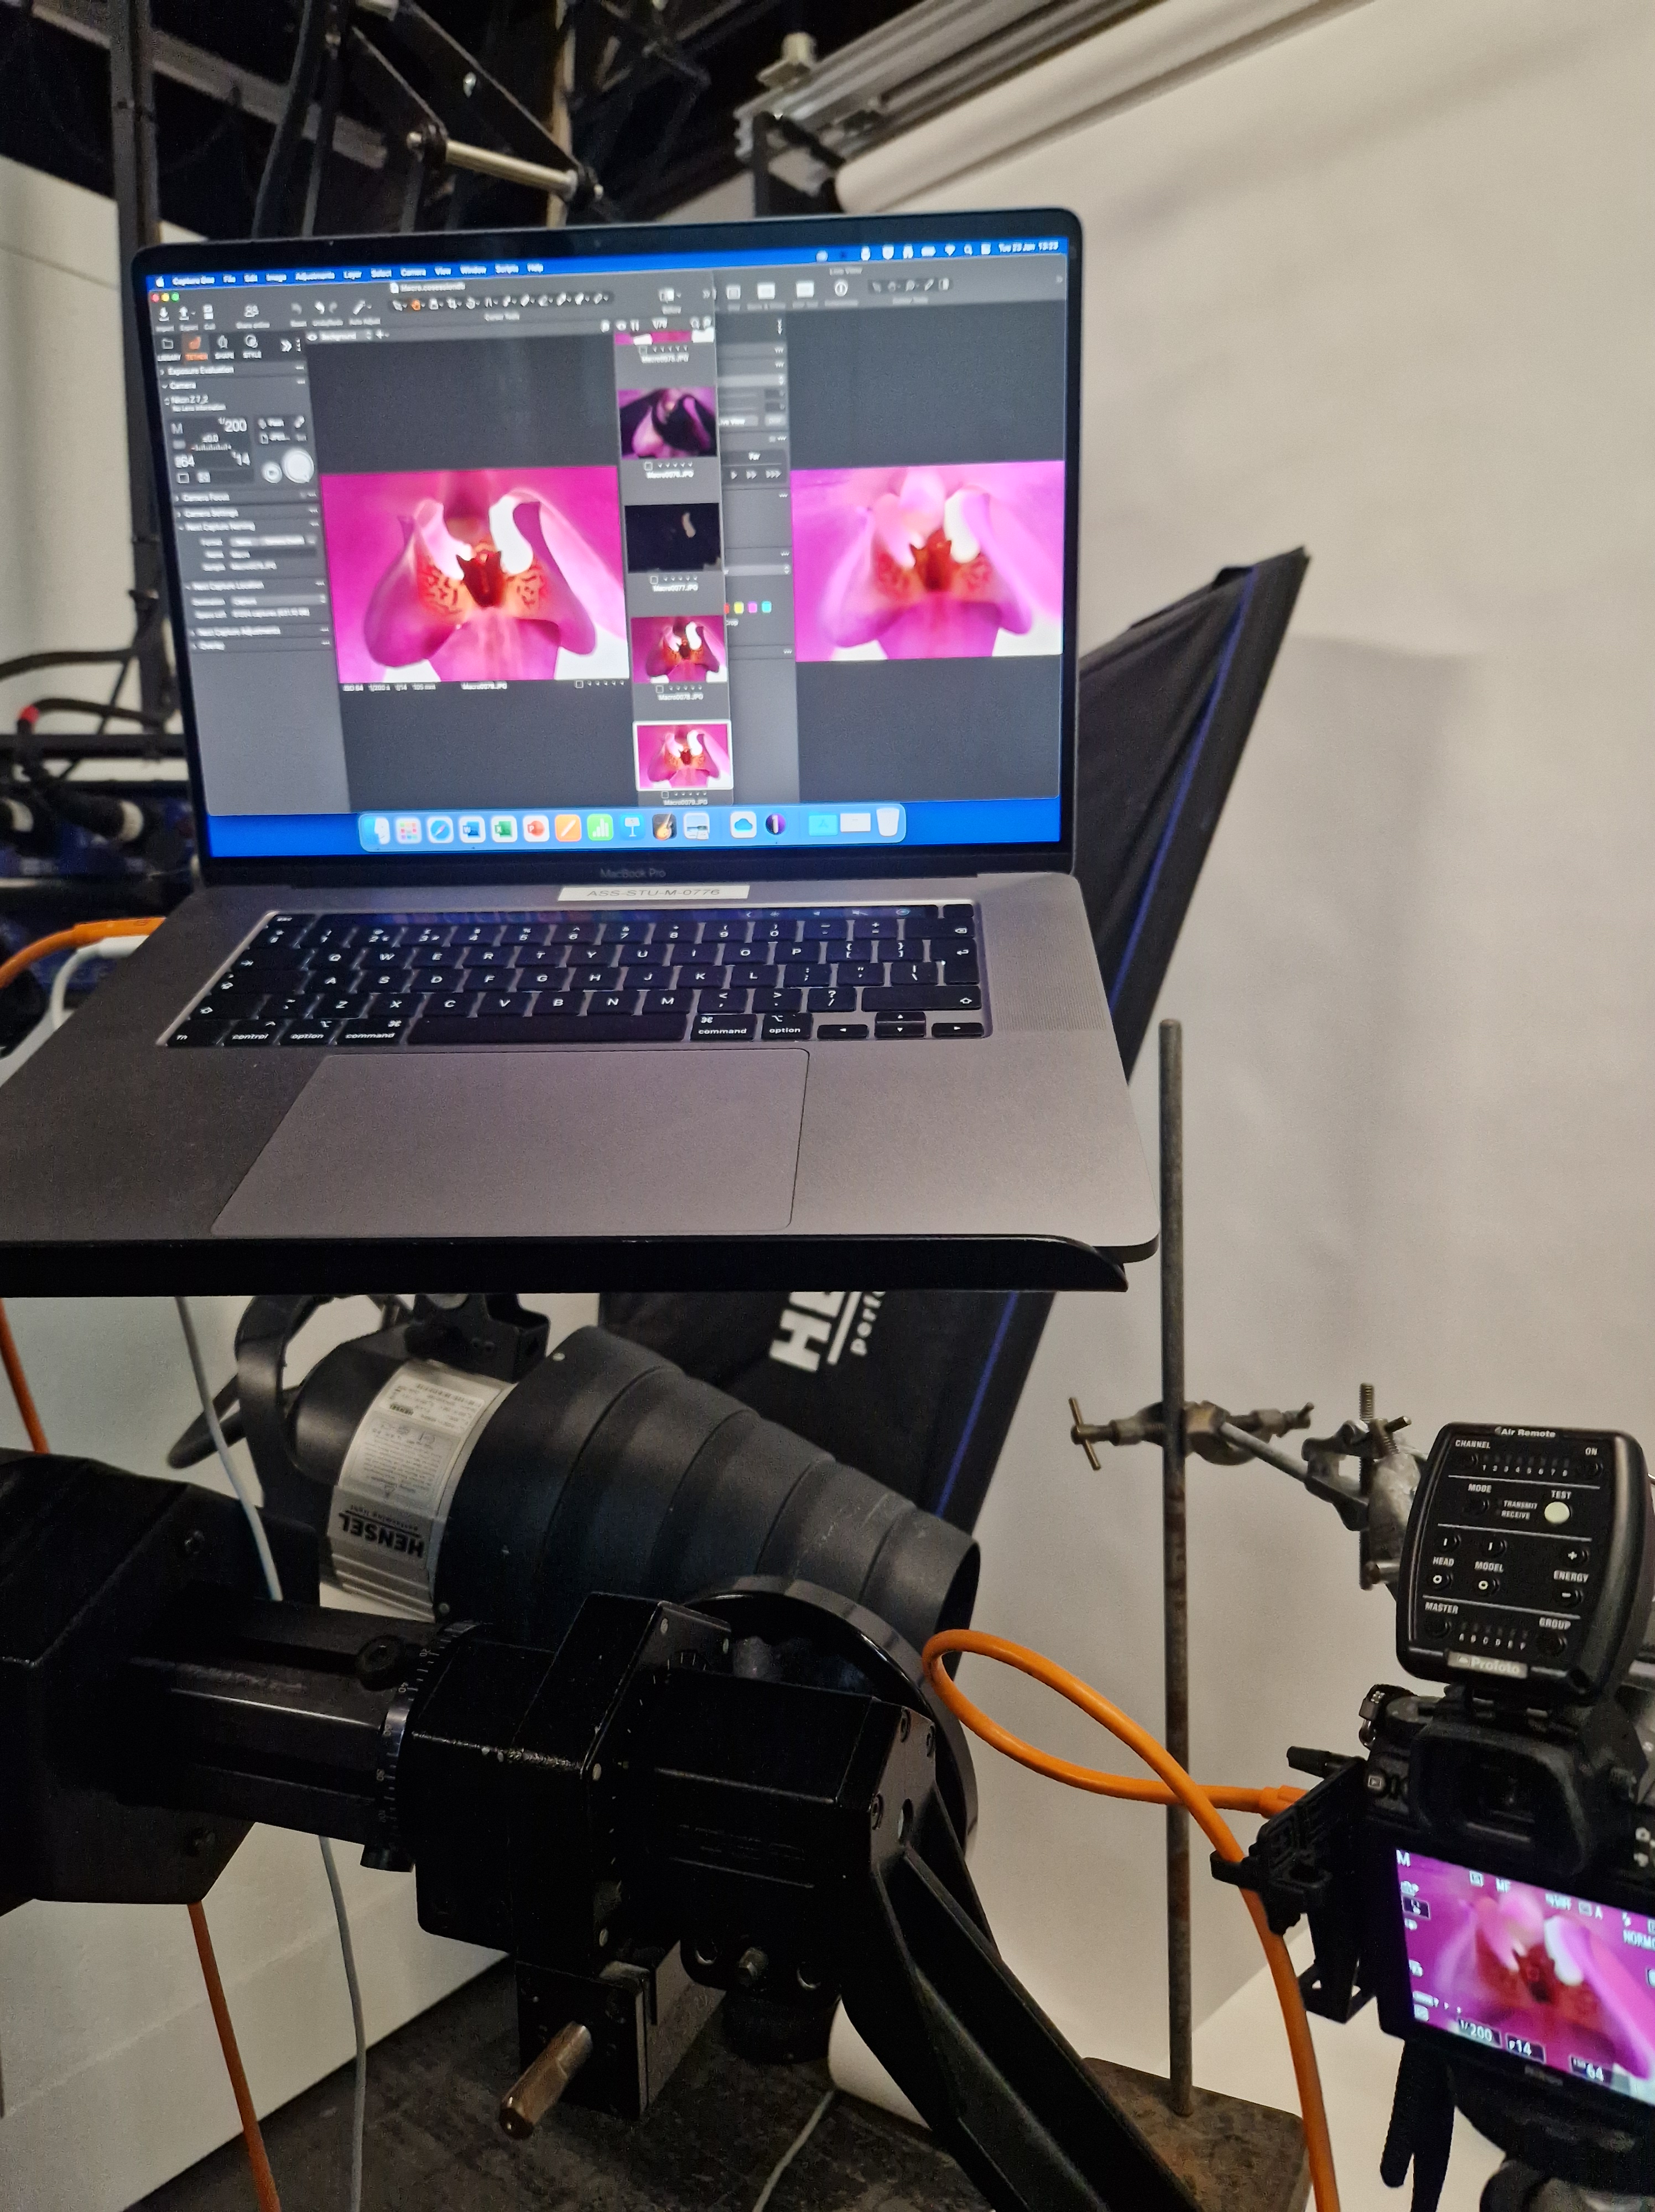
During this workshop, Tristian taught us three distinct skills in different setups. Each is a practical part of practice, so it is essential to develop these skills. Most of all, each was new to me (I shot macro but not on this level), hence I feel that it was a very valuable experience. I try to constantly push myself to try new things when given the opportunity, especially if they are out of my comfort zone.
MACRO SHOOTING
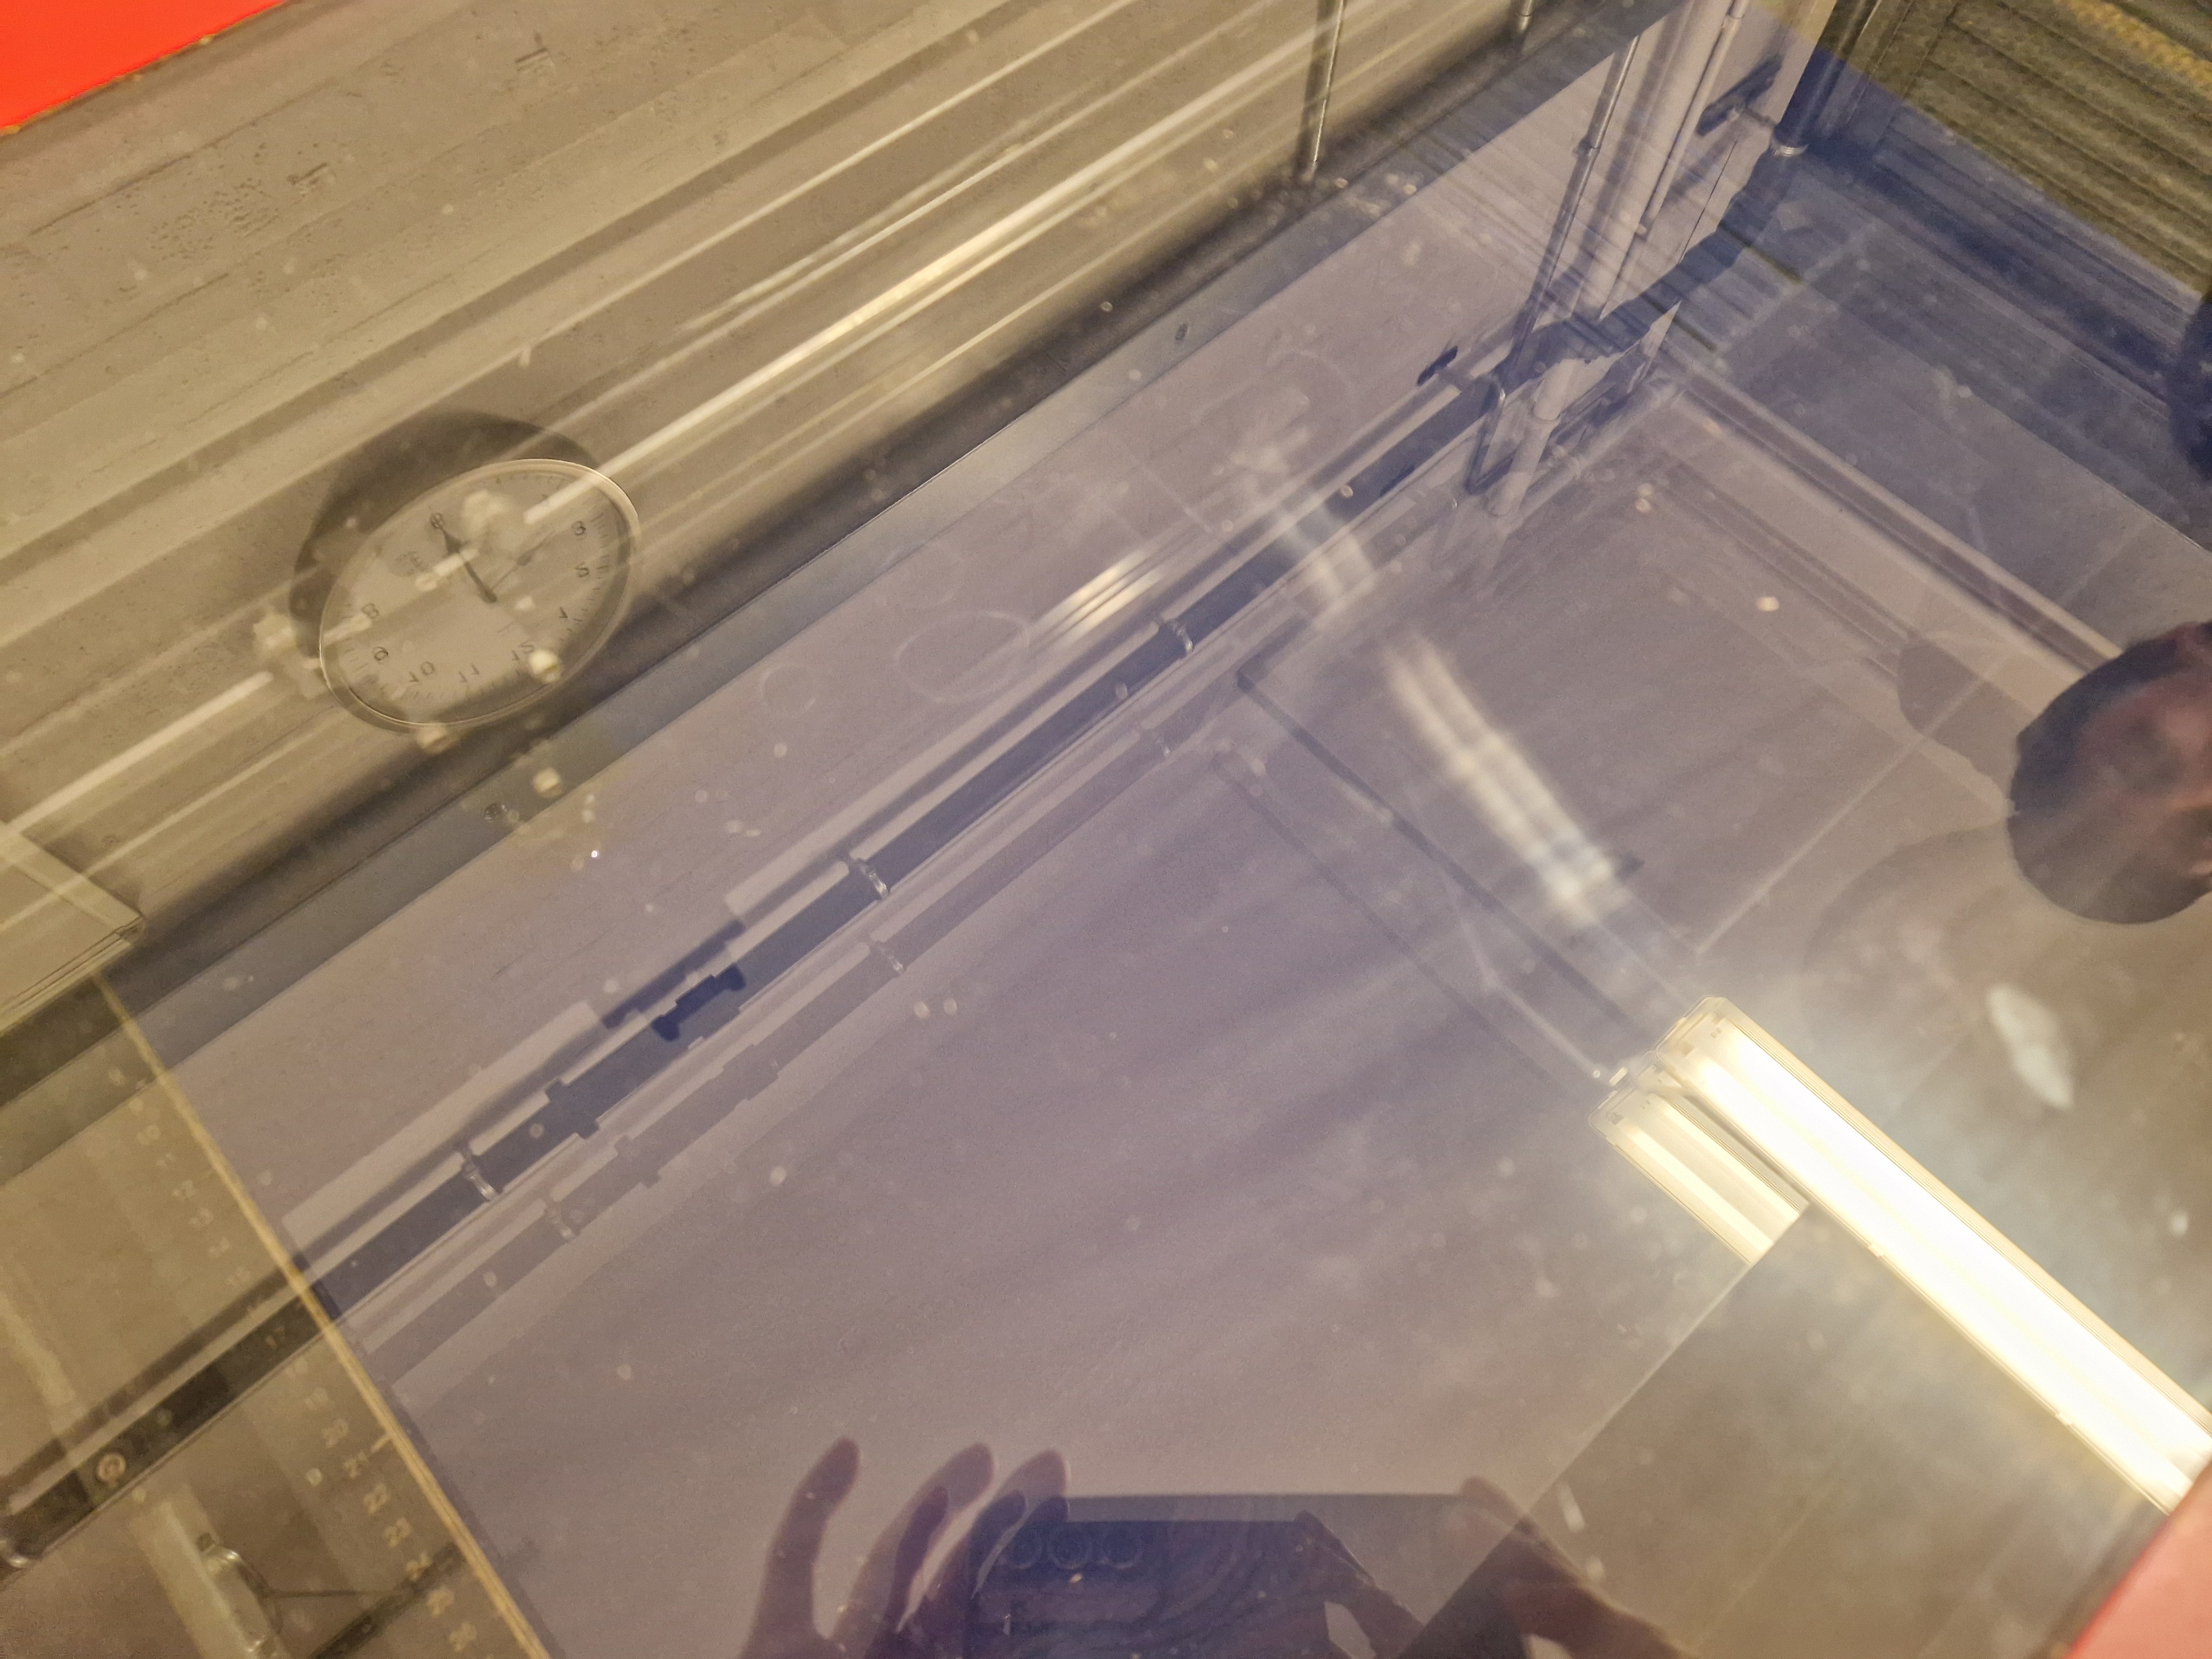
PHOTOGRAPHING GLASS/CONTROLLING REFLECTION
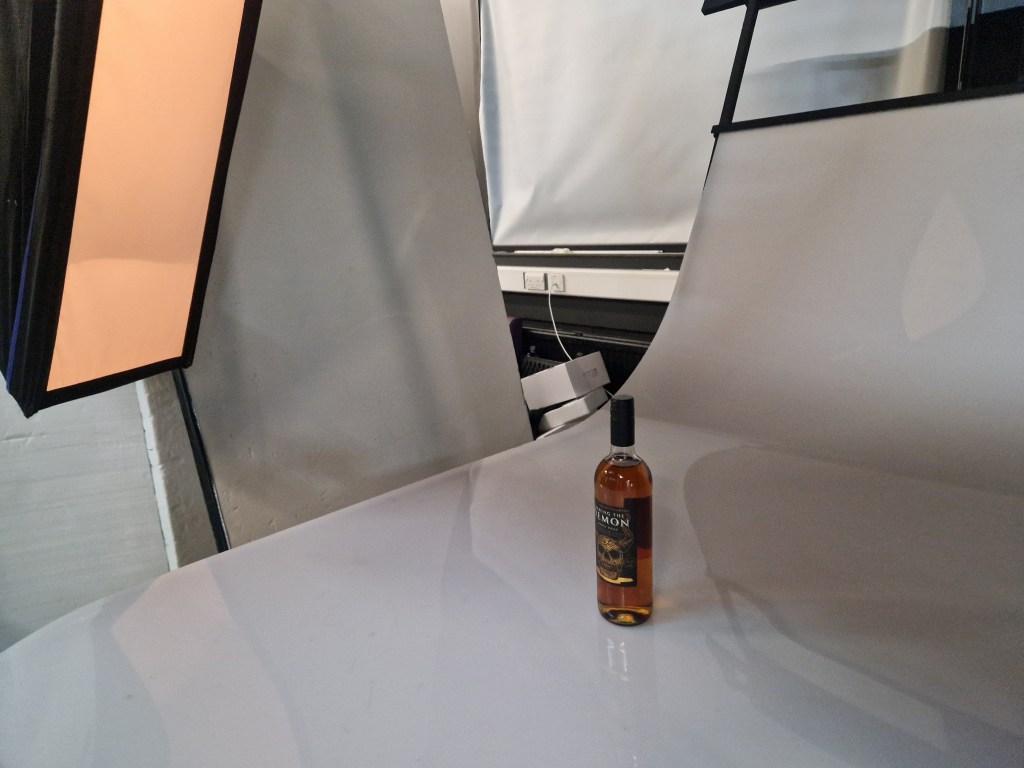
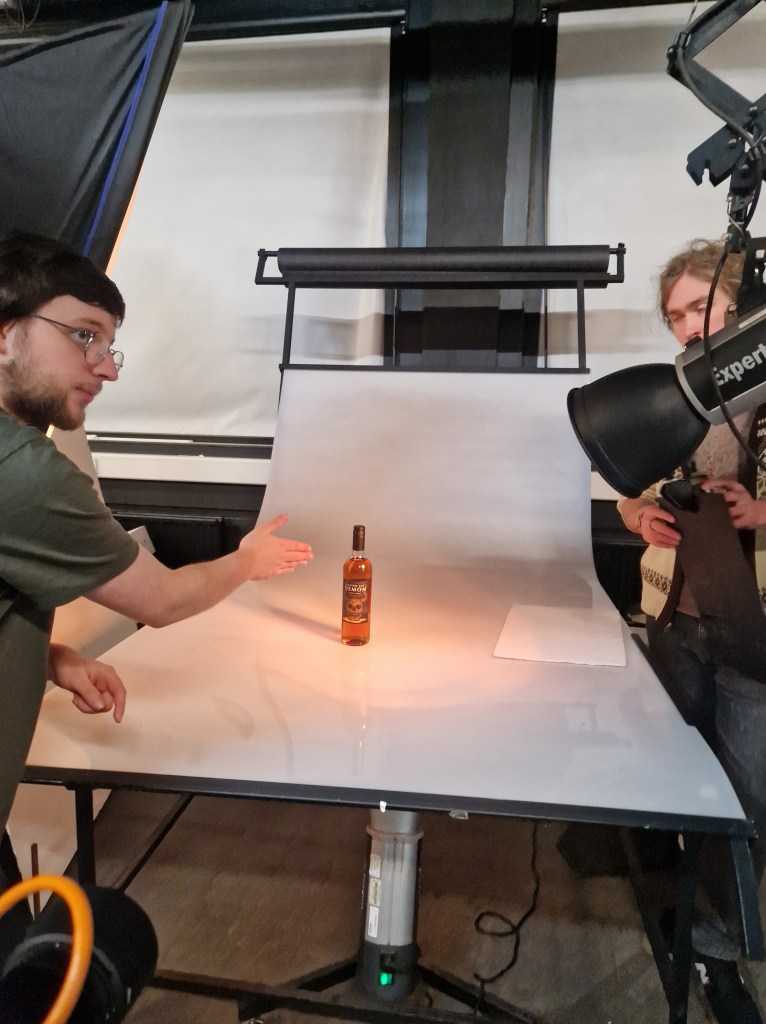
In both cases, I found it very interesting to try different setups and directions of light to see how the image is affected by it. The range was quite large, and it made me think of the possibilities of manipulating images through the smart use of lighting.
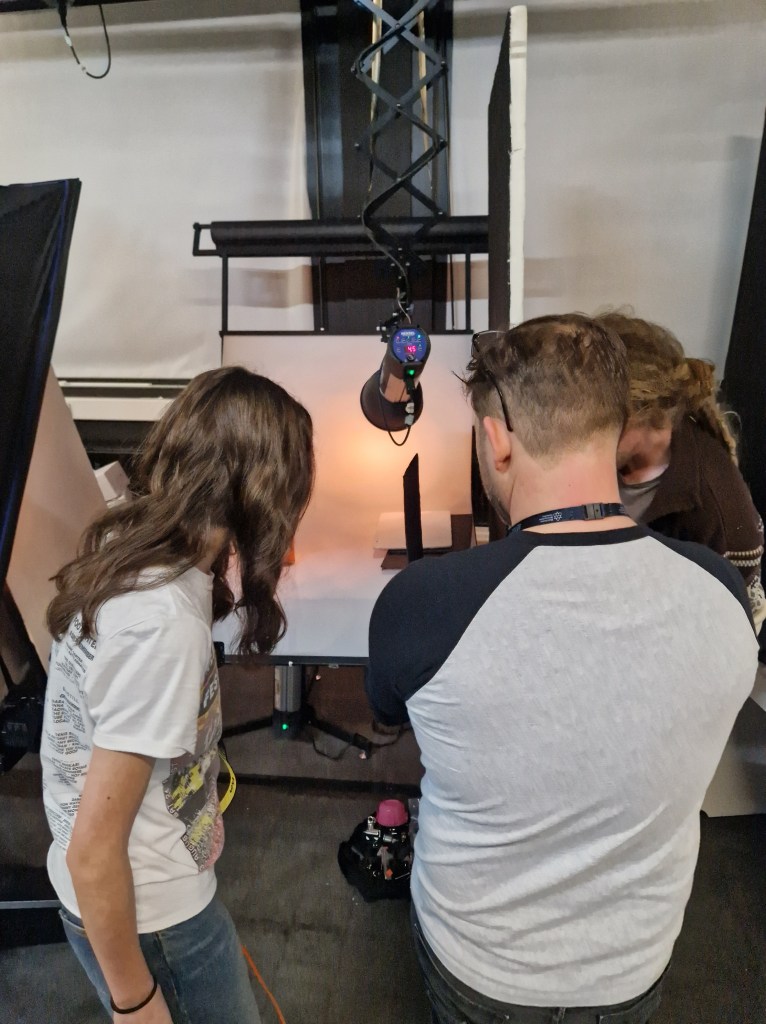
PHOTOGRAPHING ARTWORK/CONTROLLING REFLECTIONS
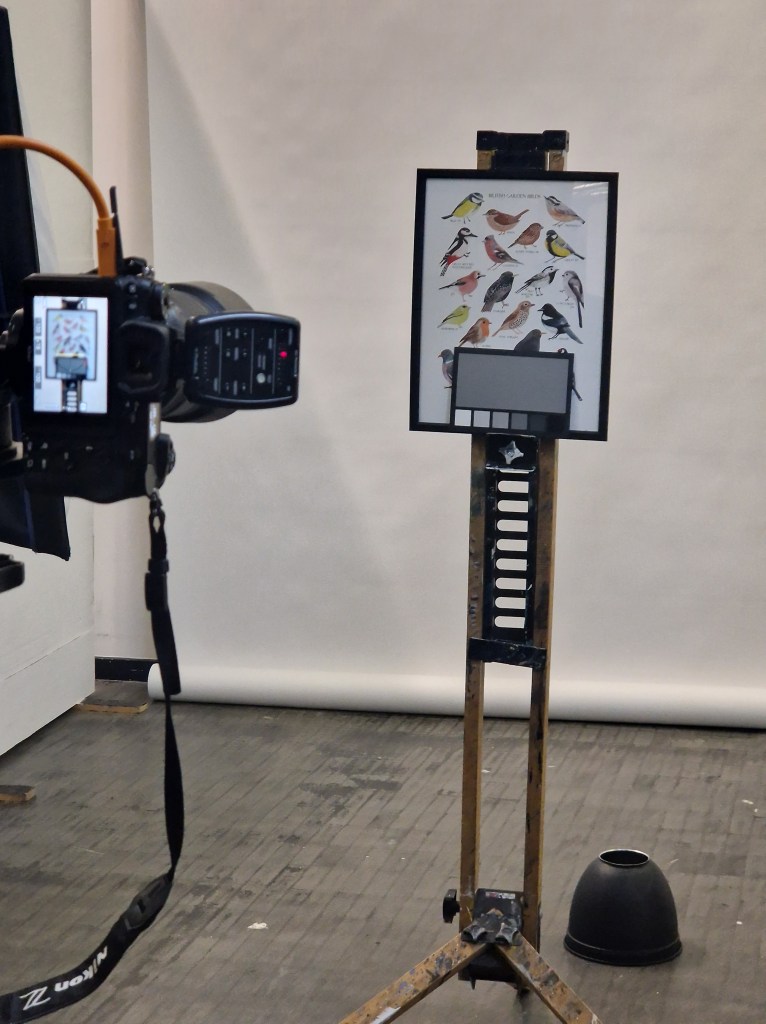

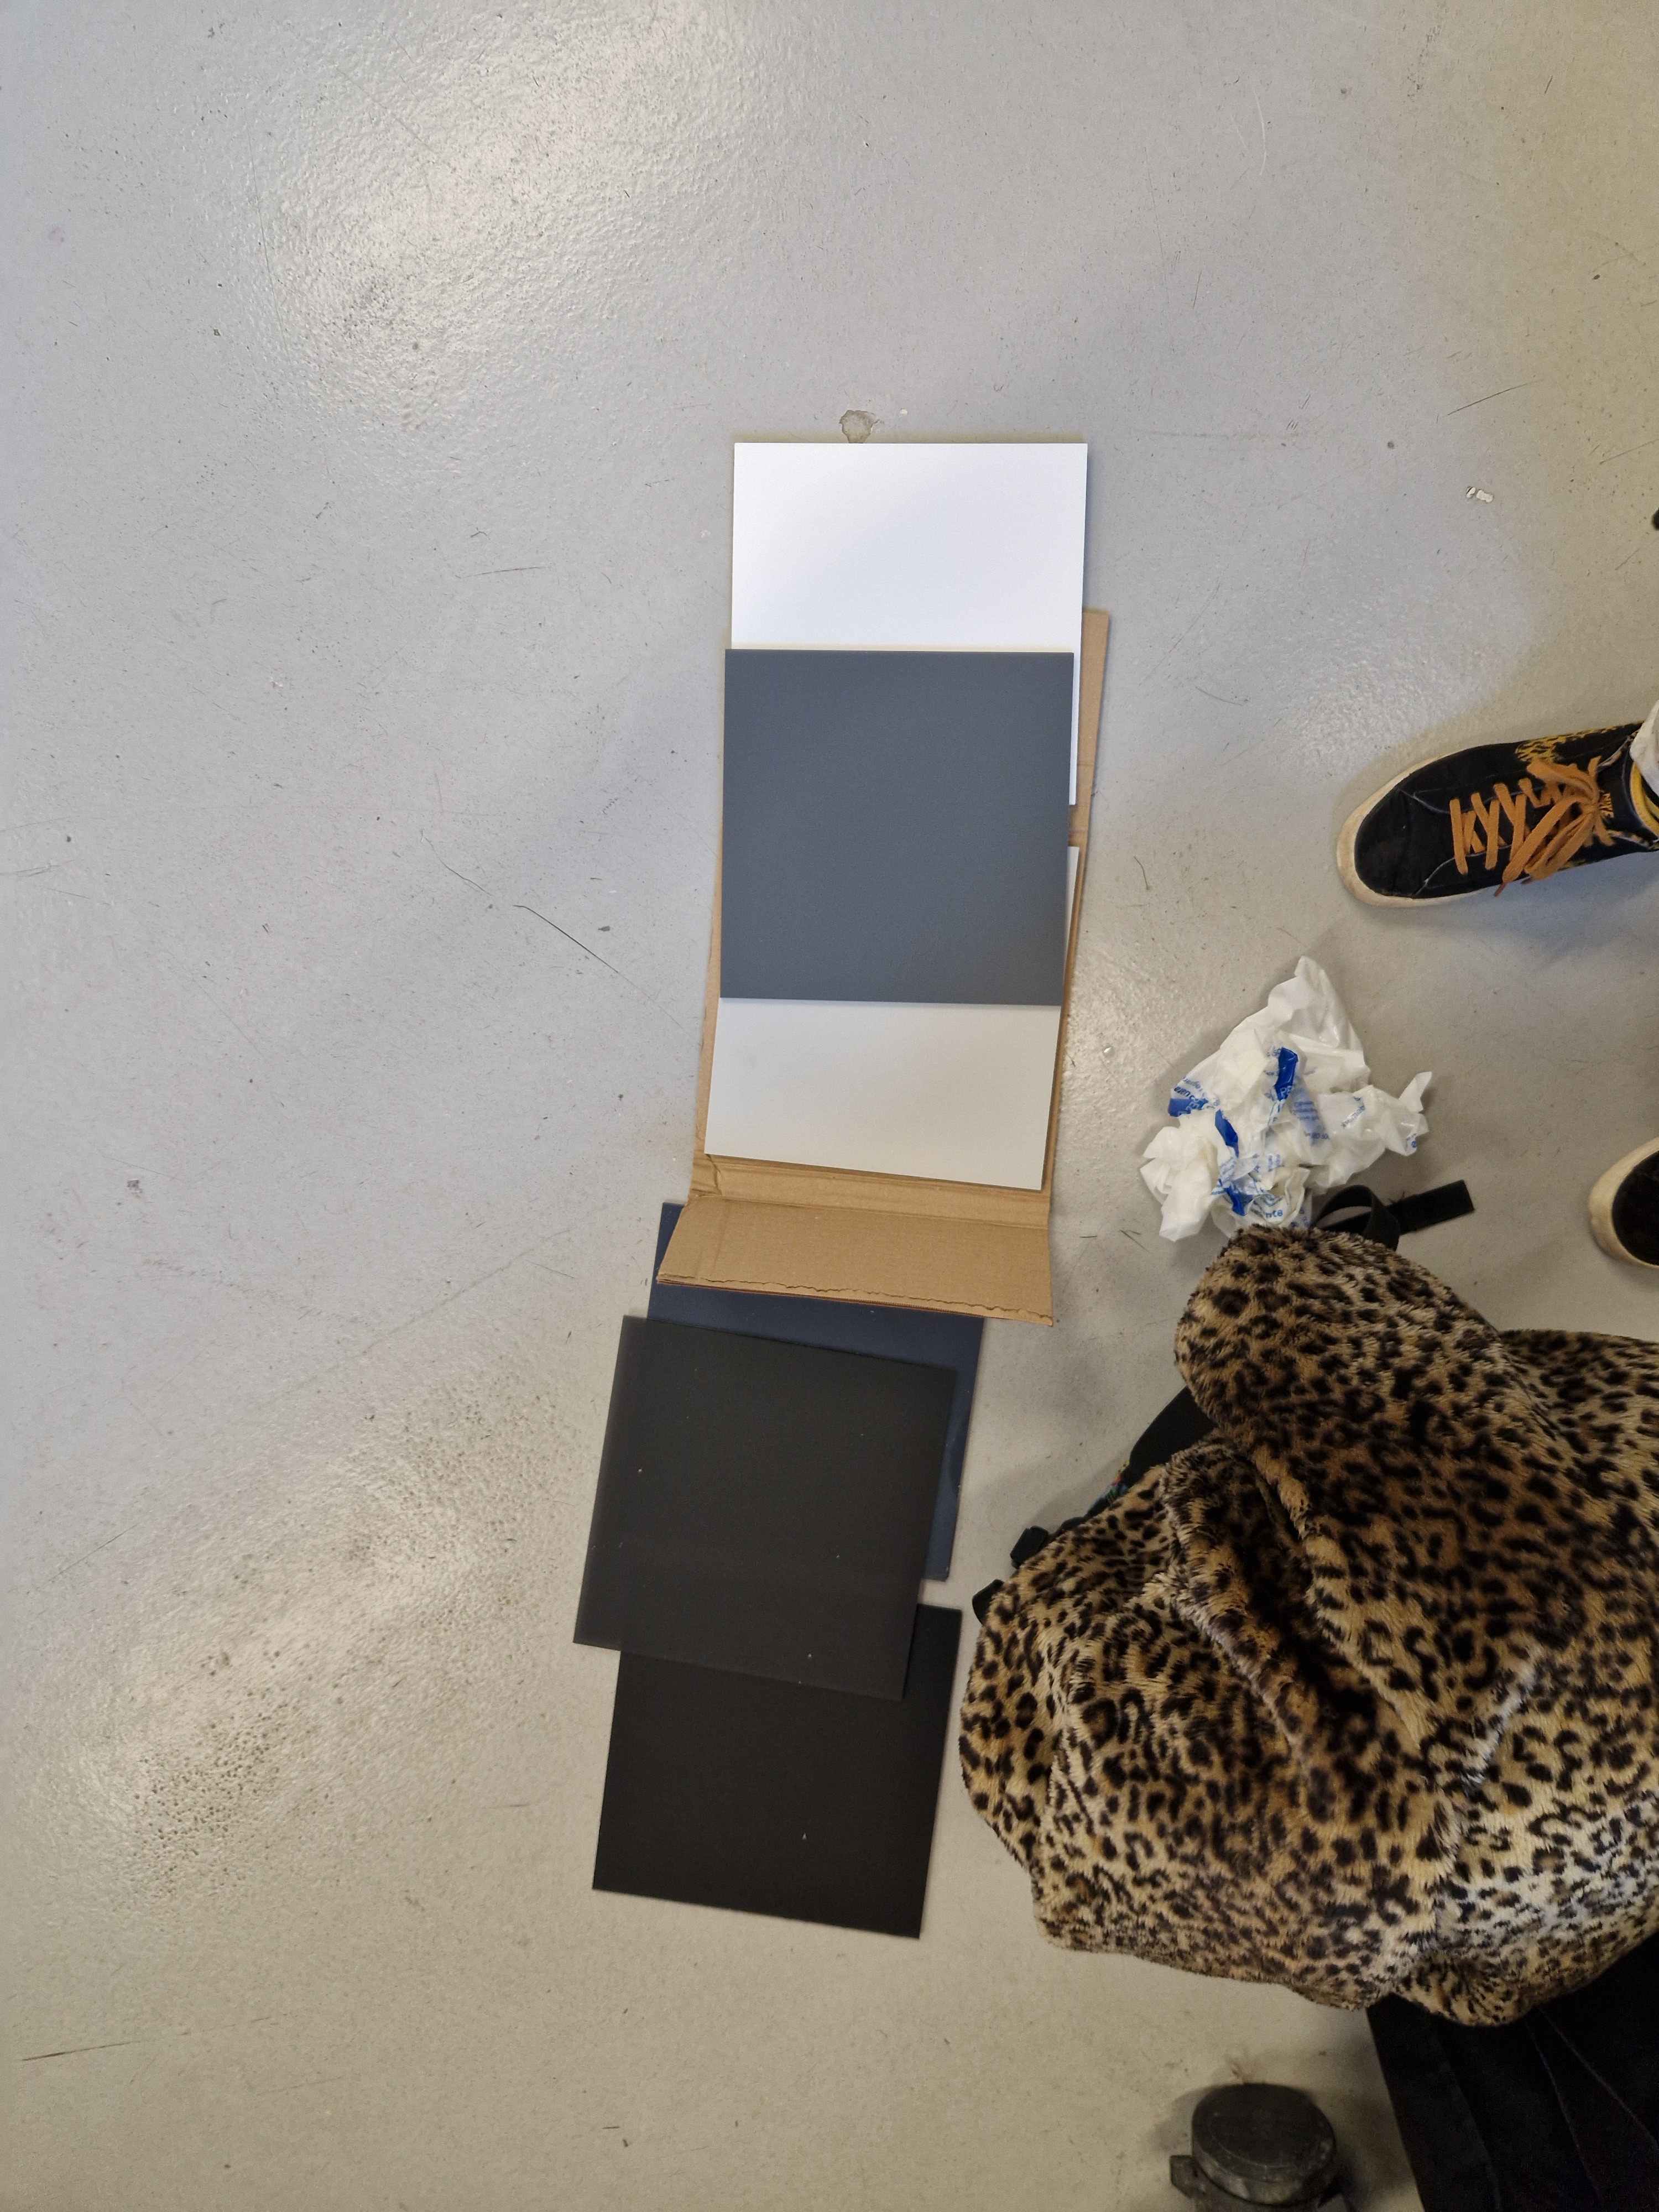
In this session, I learnt about a grey card for the first time. I found this great article explaining grey card in detail.
How to Use a Gray Card in Your Photography (Step By Step)
Асhіеvе ассurаtе аnd соnѕіѕtеnt соlоur, ехроѕurе соntrоl, аnd whіtе bаlаnсе wіth thе QРсаrd 101. Тhіѕ grеуѕсаlе rеfеrеnсе саrd fеаturеѕ thrее ѕресtrаllу nеutrаl раtсhеѕ – nеutrаl dаrk grеу (35*0*0), mіd grеу (48*0*0), аnd whіtе (95*0*0).Тhе саrd іѕ ѕеlf-аdhеѕіvе аnd еаѕіlу рlасеd wіthіn thе tеѕt іmаgе. Тhіѕ расk соntаіnѕ 3 саrdѕ.
REFLECTIONS: It was a great day during which I understood a lot of new things when it came to lighting and operating in the studio in general. I think one thing that I found especially useful (even though we spent the least time on it) was the part when we learned about how to photograph artwork, avoid reflections and test colour with the colour strip, as I think I will need this in my future practice. Yet again, pushing myself out of my comfort zone bears fruit and unavoidably broadens my horizons.
CREATIVE MAVERICKS TALK
On Wednesday I attended this amazing talk during which three very different artists shared their complex path to working in the creative industry.
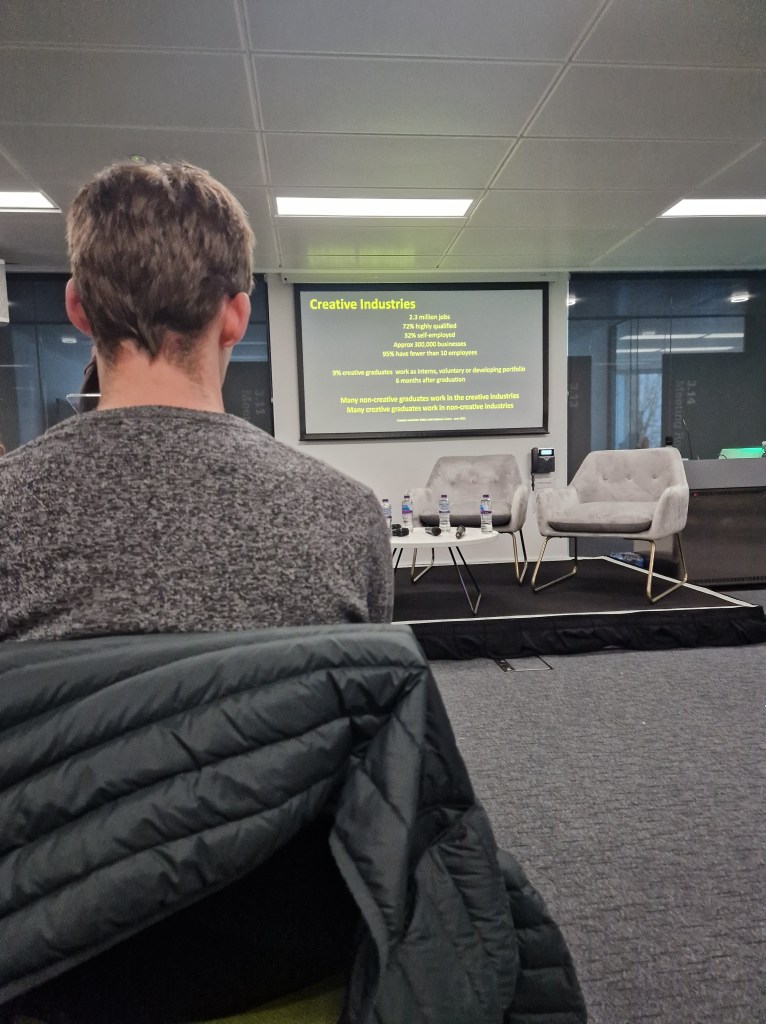
Artists at the talk included:
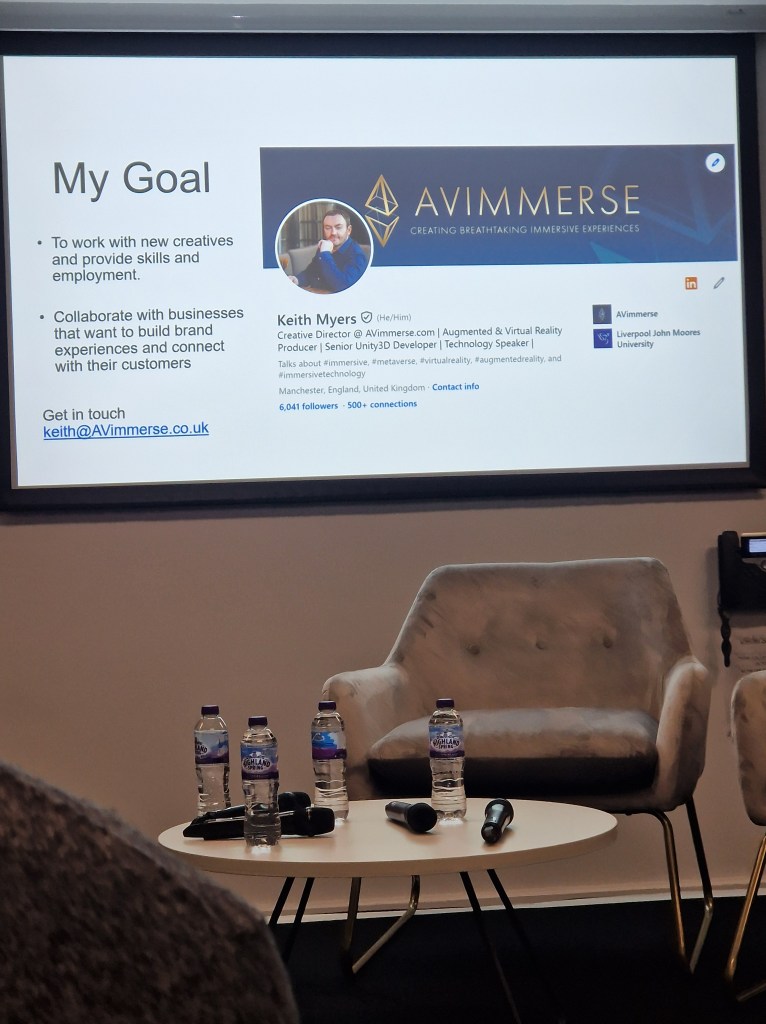
- Keith Myes (Director AV Immerse and Man Met alumni / Digital creative) keith@immerse.co.uk
Film making, VR, gaming, creative director, augmented and virtual reality, producer
- Ben Young (Director of Altogether Otherwise. Alumni of Man Met / Design Creative)
- Bethany Grace Lewin (Owner of Bessie Grace Creates and Man Met alumni / Artist) https://www.bessiegracecreates.com/
- Nicky Moore (Creative Director of Hold the Vision / Graduated in Media and Communications at Birmingham City University)
NOTES
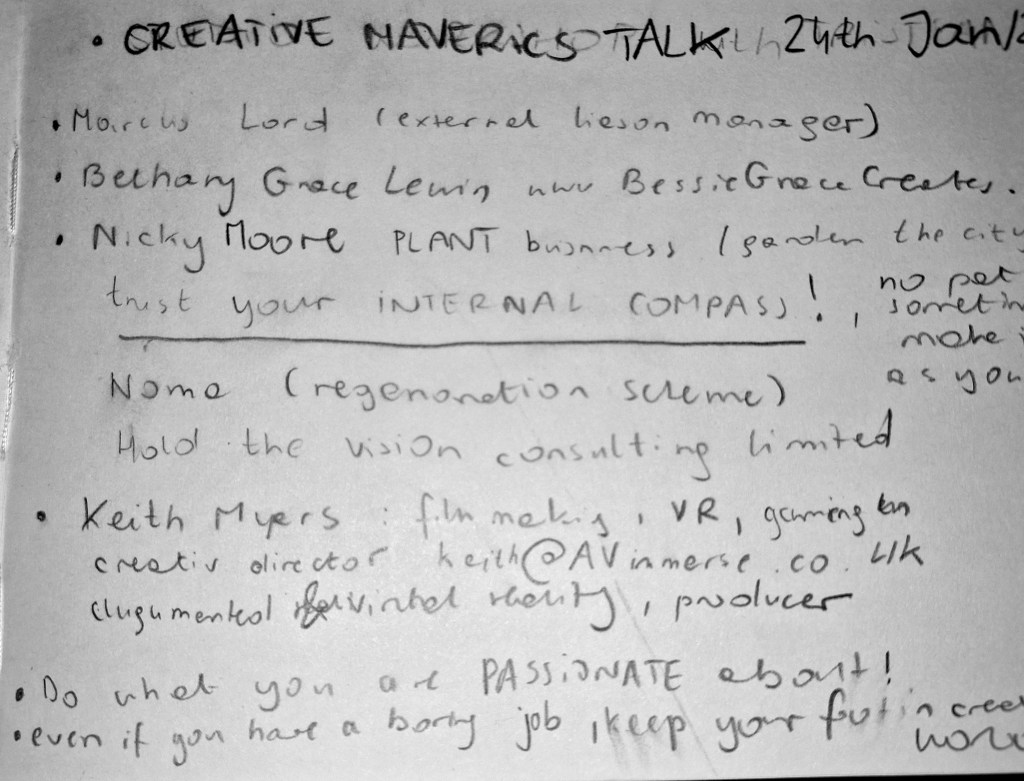
- Marcus Lord – external Liaison Manager
- TRUST YOUR INTERNAL COMPASS
- sometimes there is no path and you make it up as you go
- NOMA regeneration scheme
- Hold the Vision Consulting Limited
- do what you are PASSIONATE about
- even if you have a boring job to survive, always keep your foot in the creative world!
REFLECTIONS: One of the best talks I attended with a wide range of experiences from creatives working in a variety of industries. They all shared the different paths they took and stressed the importance of trusting your gut, following your passion, being open-minded, persevering and being ready for challenges. The energy and knowledge sharing in the room were very valuable, and I am grateful to the Future Me team for organising such a great talk.
WEEK 2: 29 JAN – 04 FEB
MONDAY
UNIT BRIEF FOR CREATIVE COLLABORATIONS
NOTES:
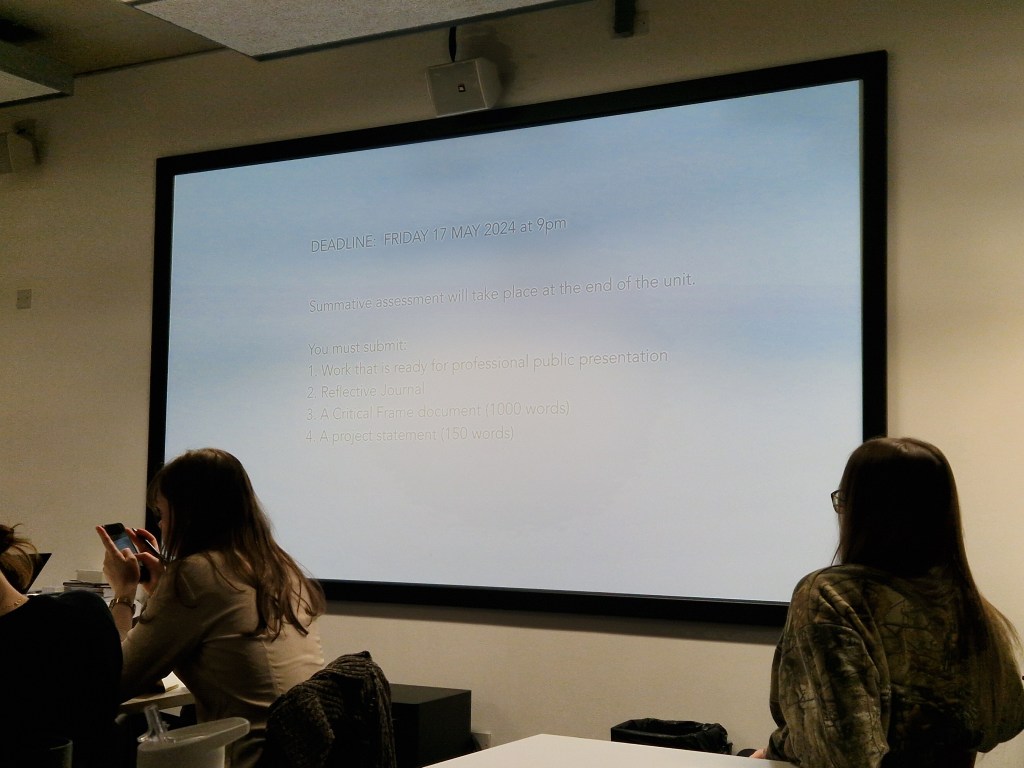
- DEADLINE FRIDAY 17TH OF MAY 9 PM
A summative assessment will take place at the end of the unit.
You must submit:
1. Work that is ready for professional public presentation
2. Reflective Journal
3. A Critical Frame document (1000 words)
4. A project statement (150 words)
- make it visible in the journal that I collaborated with people e.g. Jim in the concrete workshop/ Owen in frame making etc.
- sign up for workshops on Wednesday
- crits: 19th Feb/18th March/22 April
- funded trip to Notthingam on 29th of Feb
- Dark Peak Festival end of February
- Photo North in Leeds
- trip to Cumbria 18-21 of March – analogue, landscape
TUESDAY
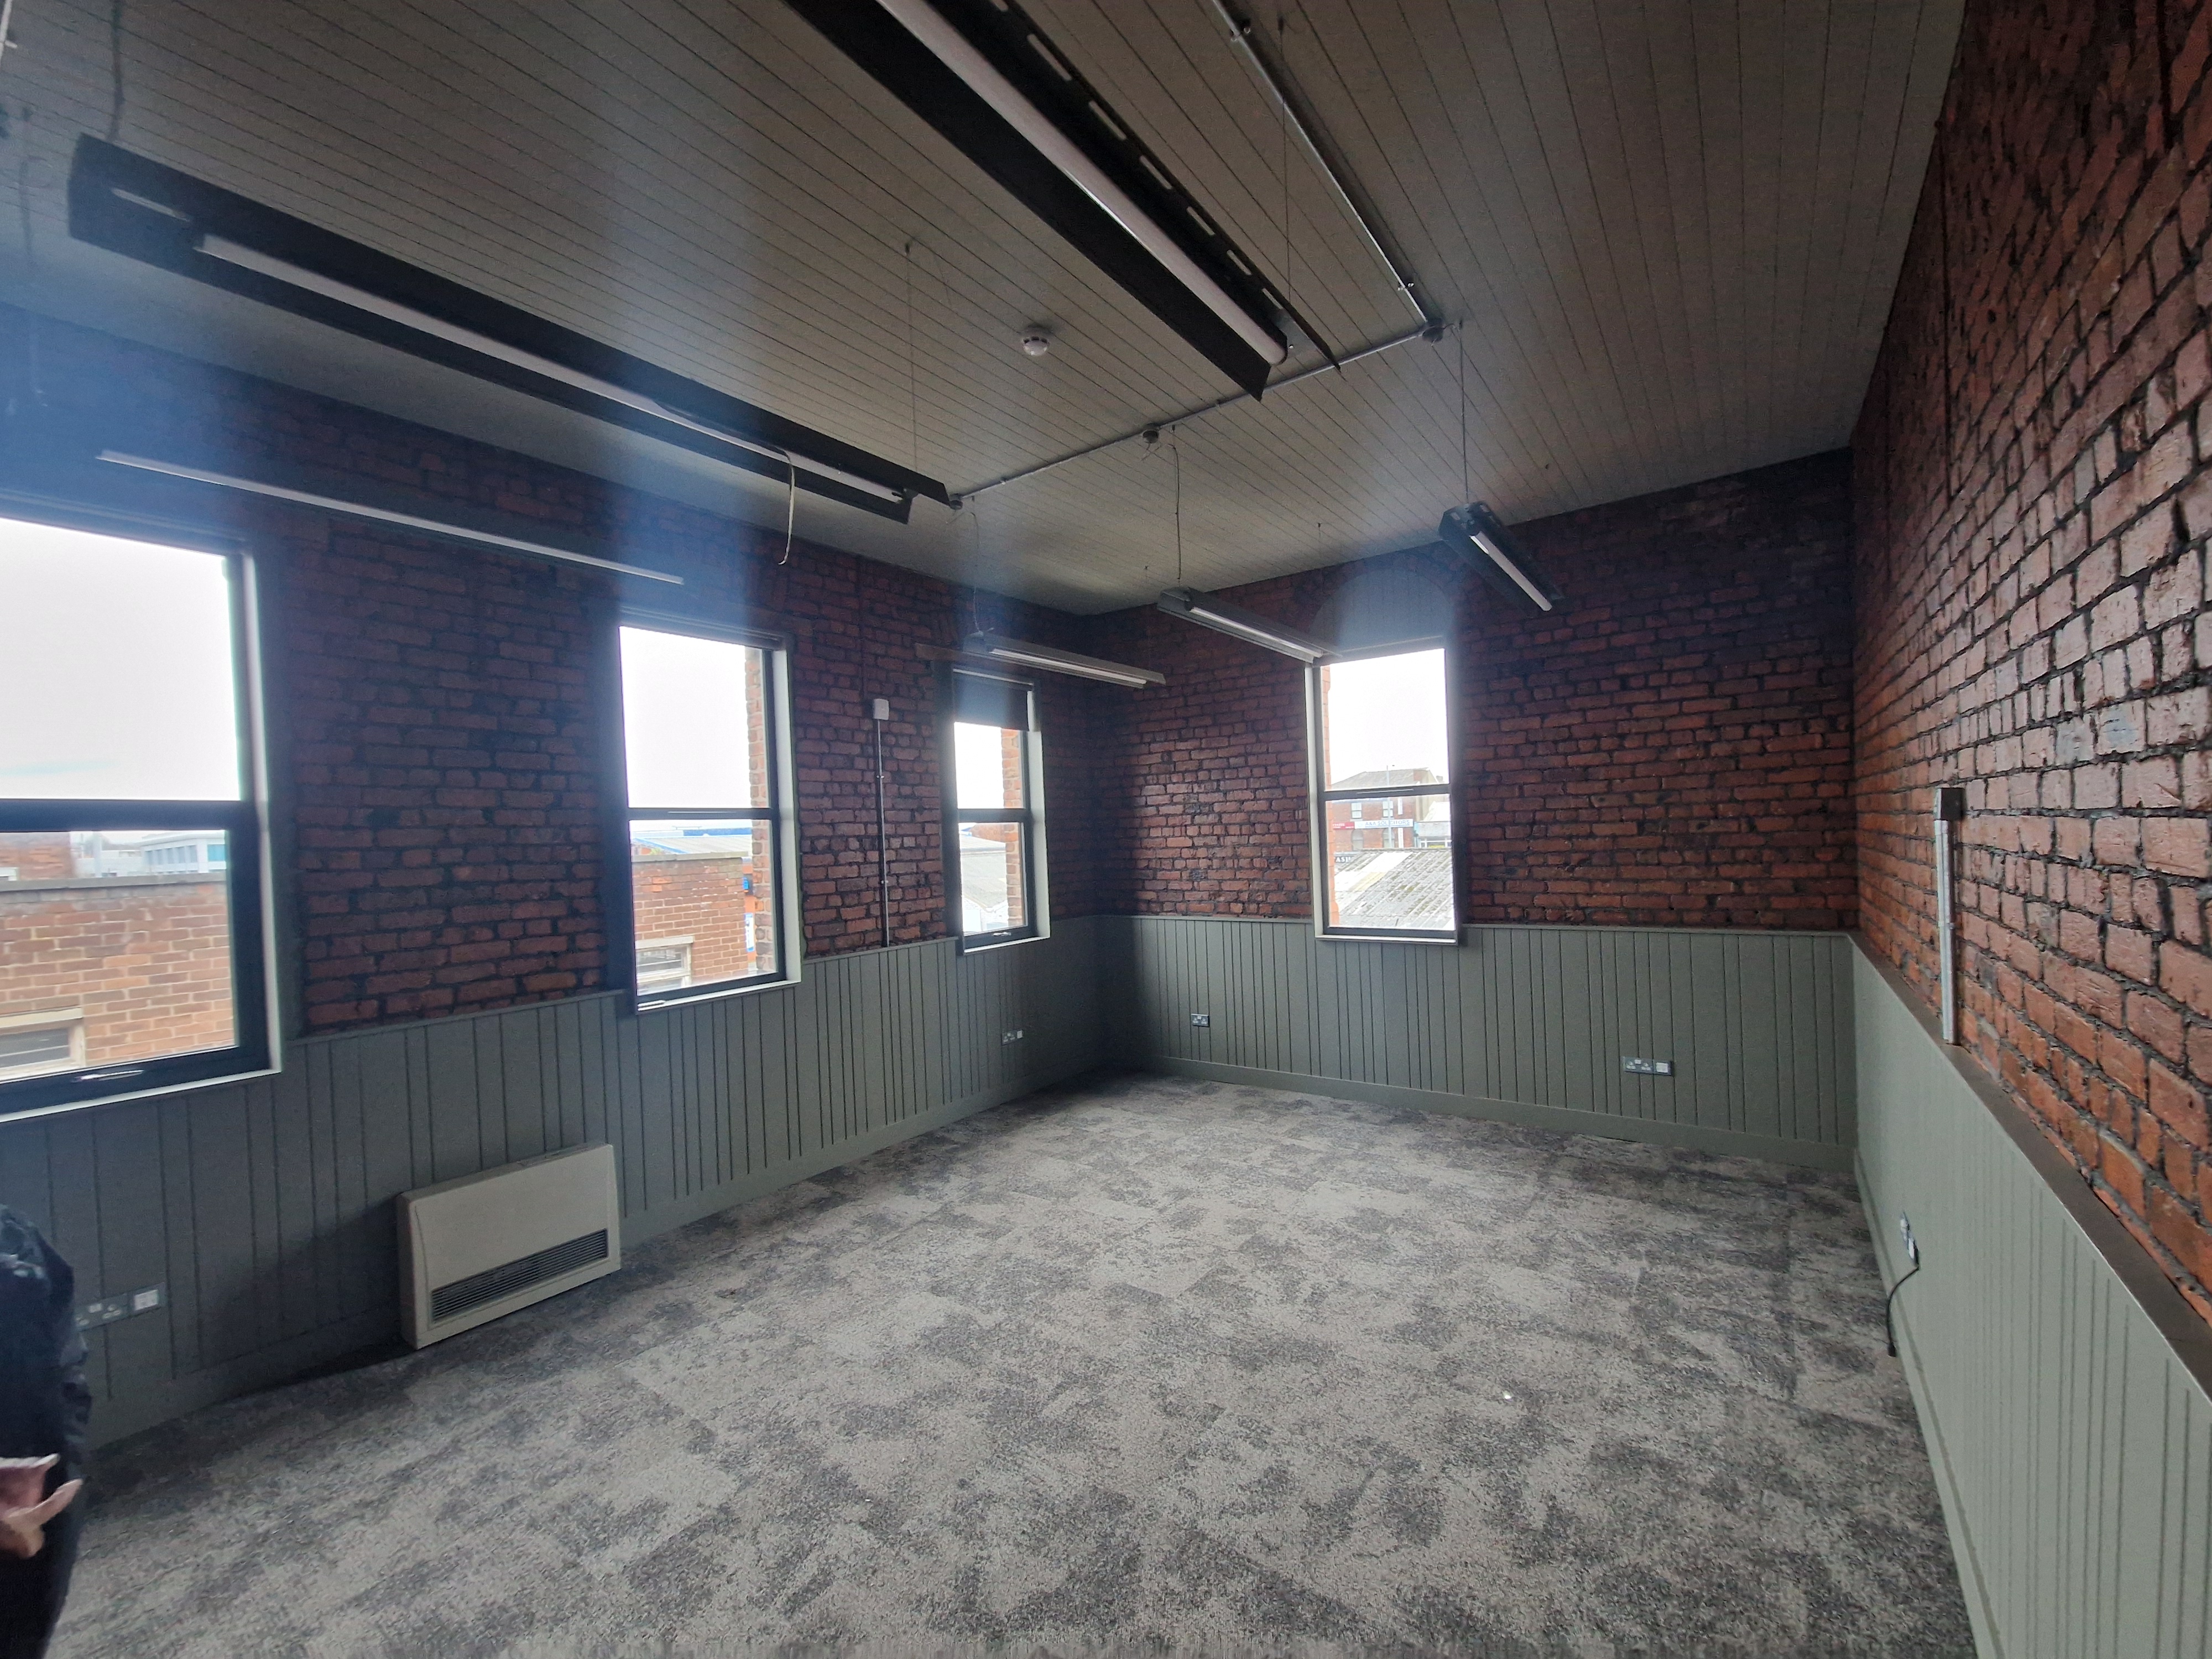
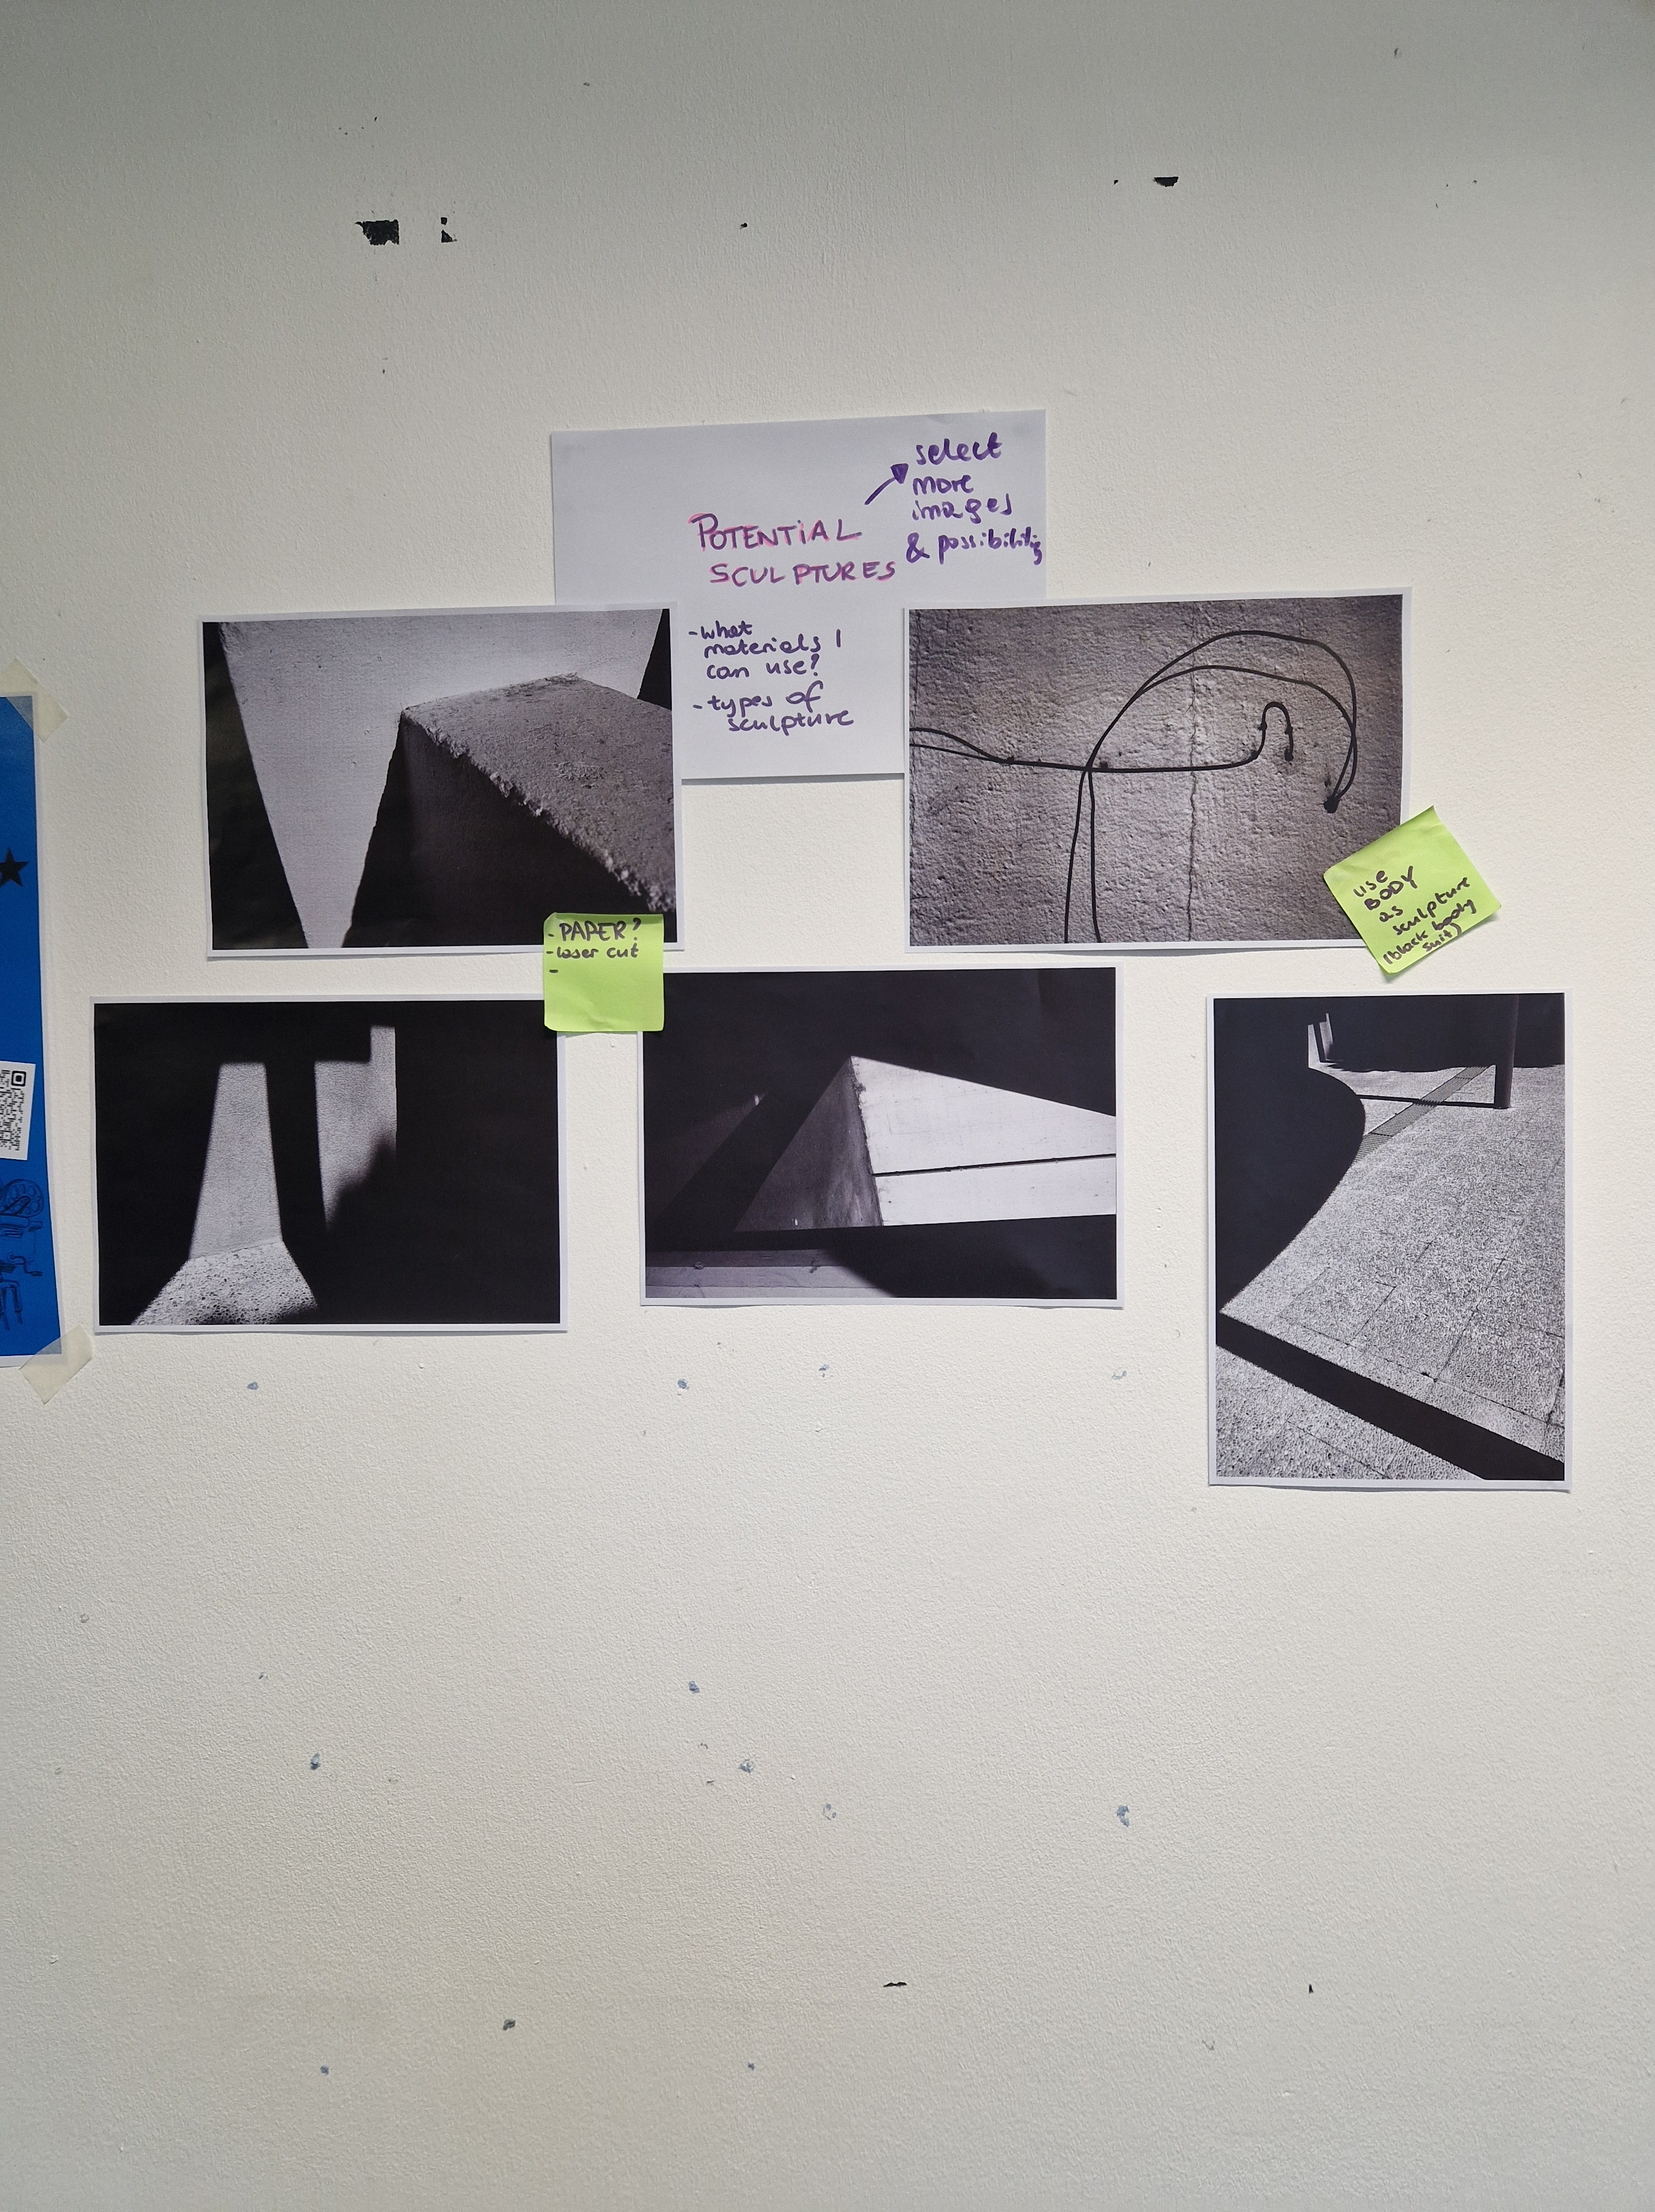
WALL SPACE
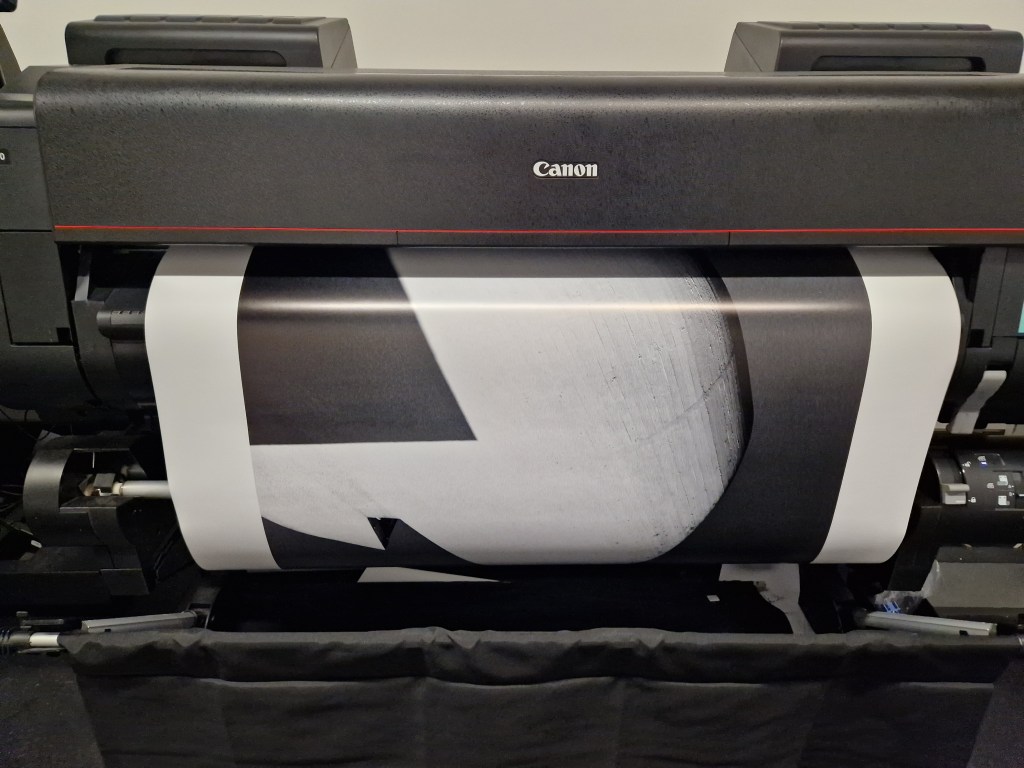
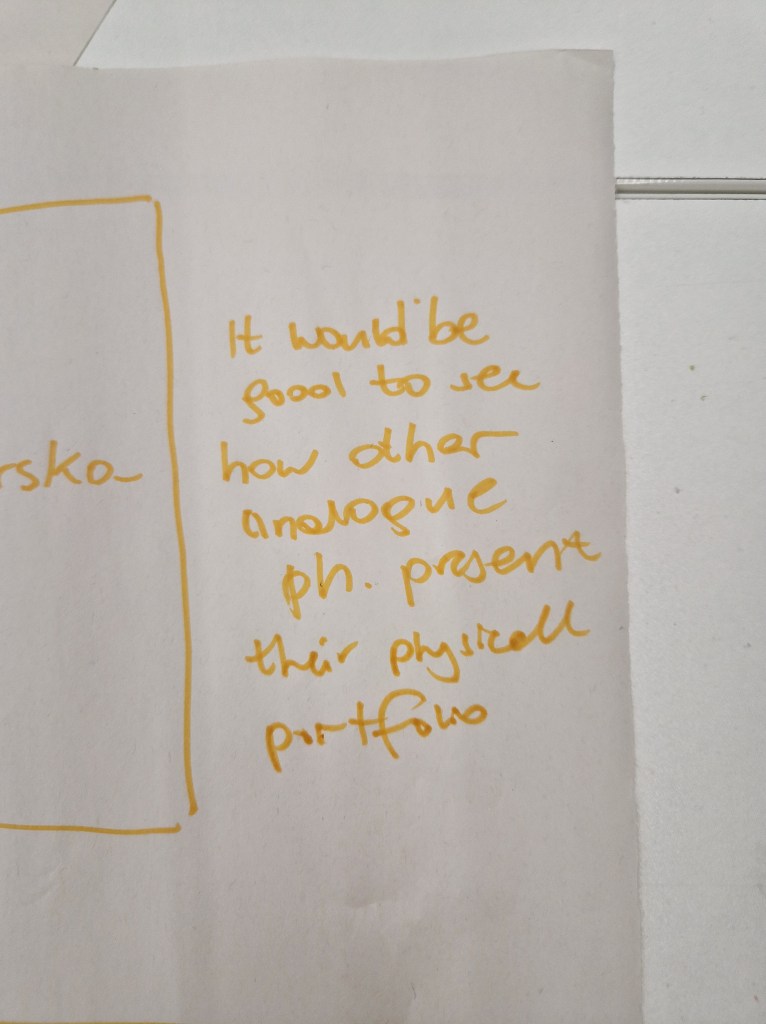
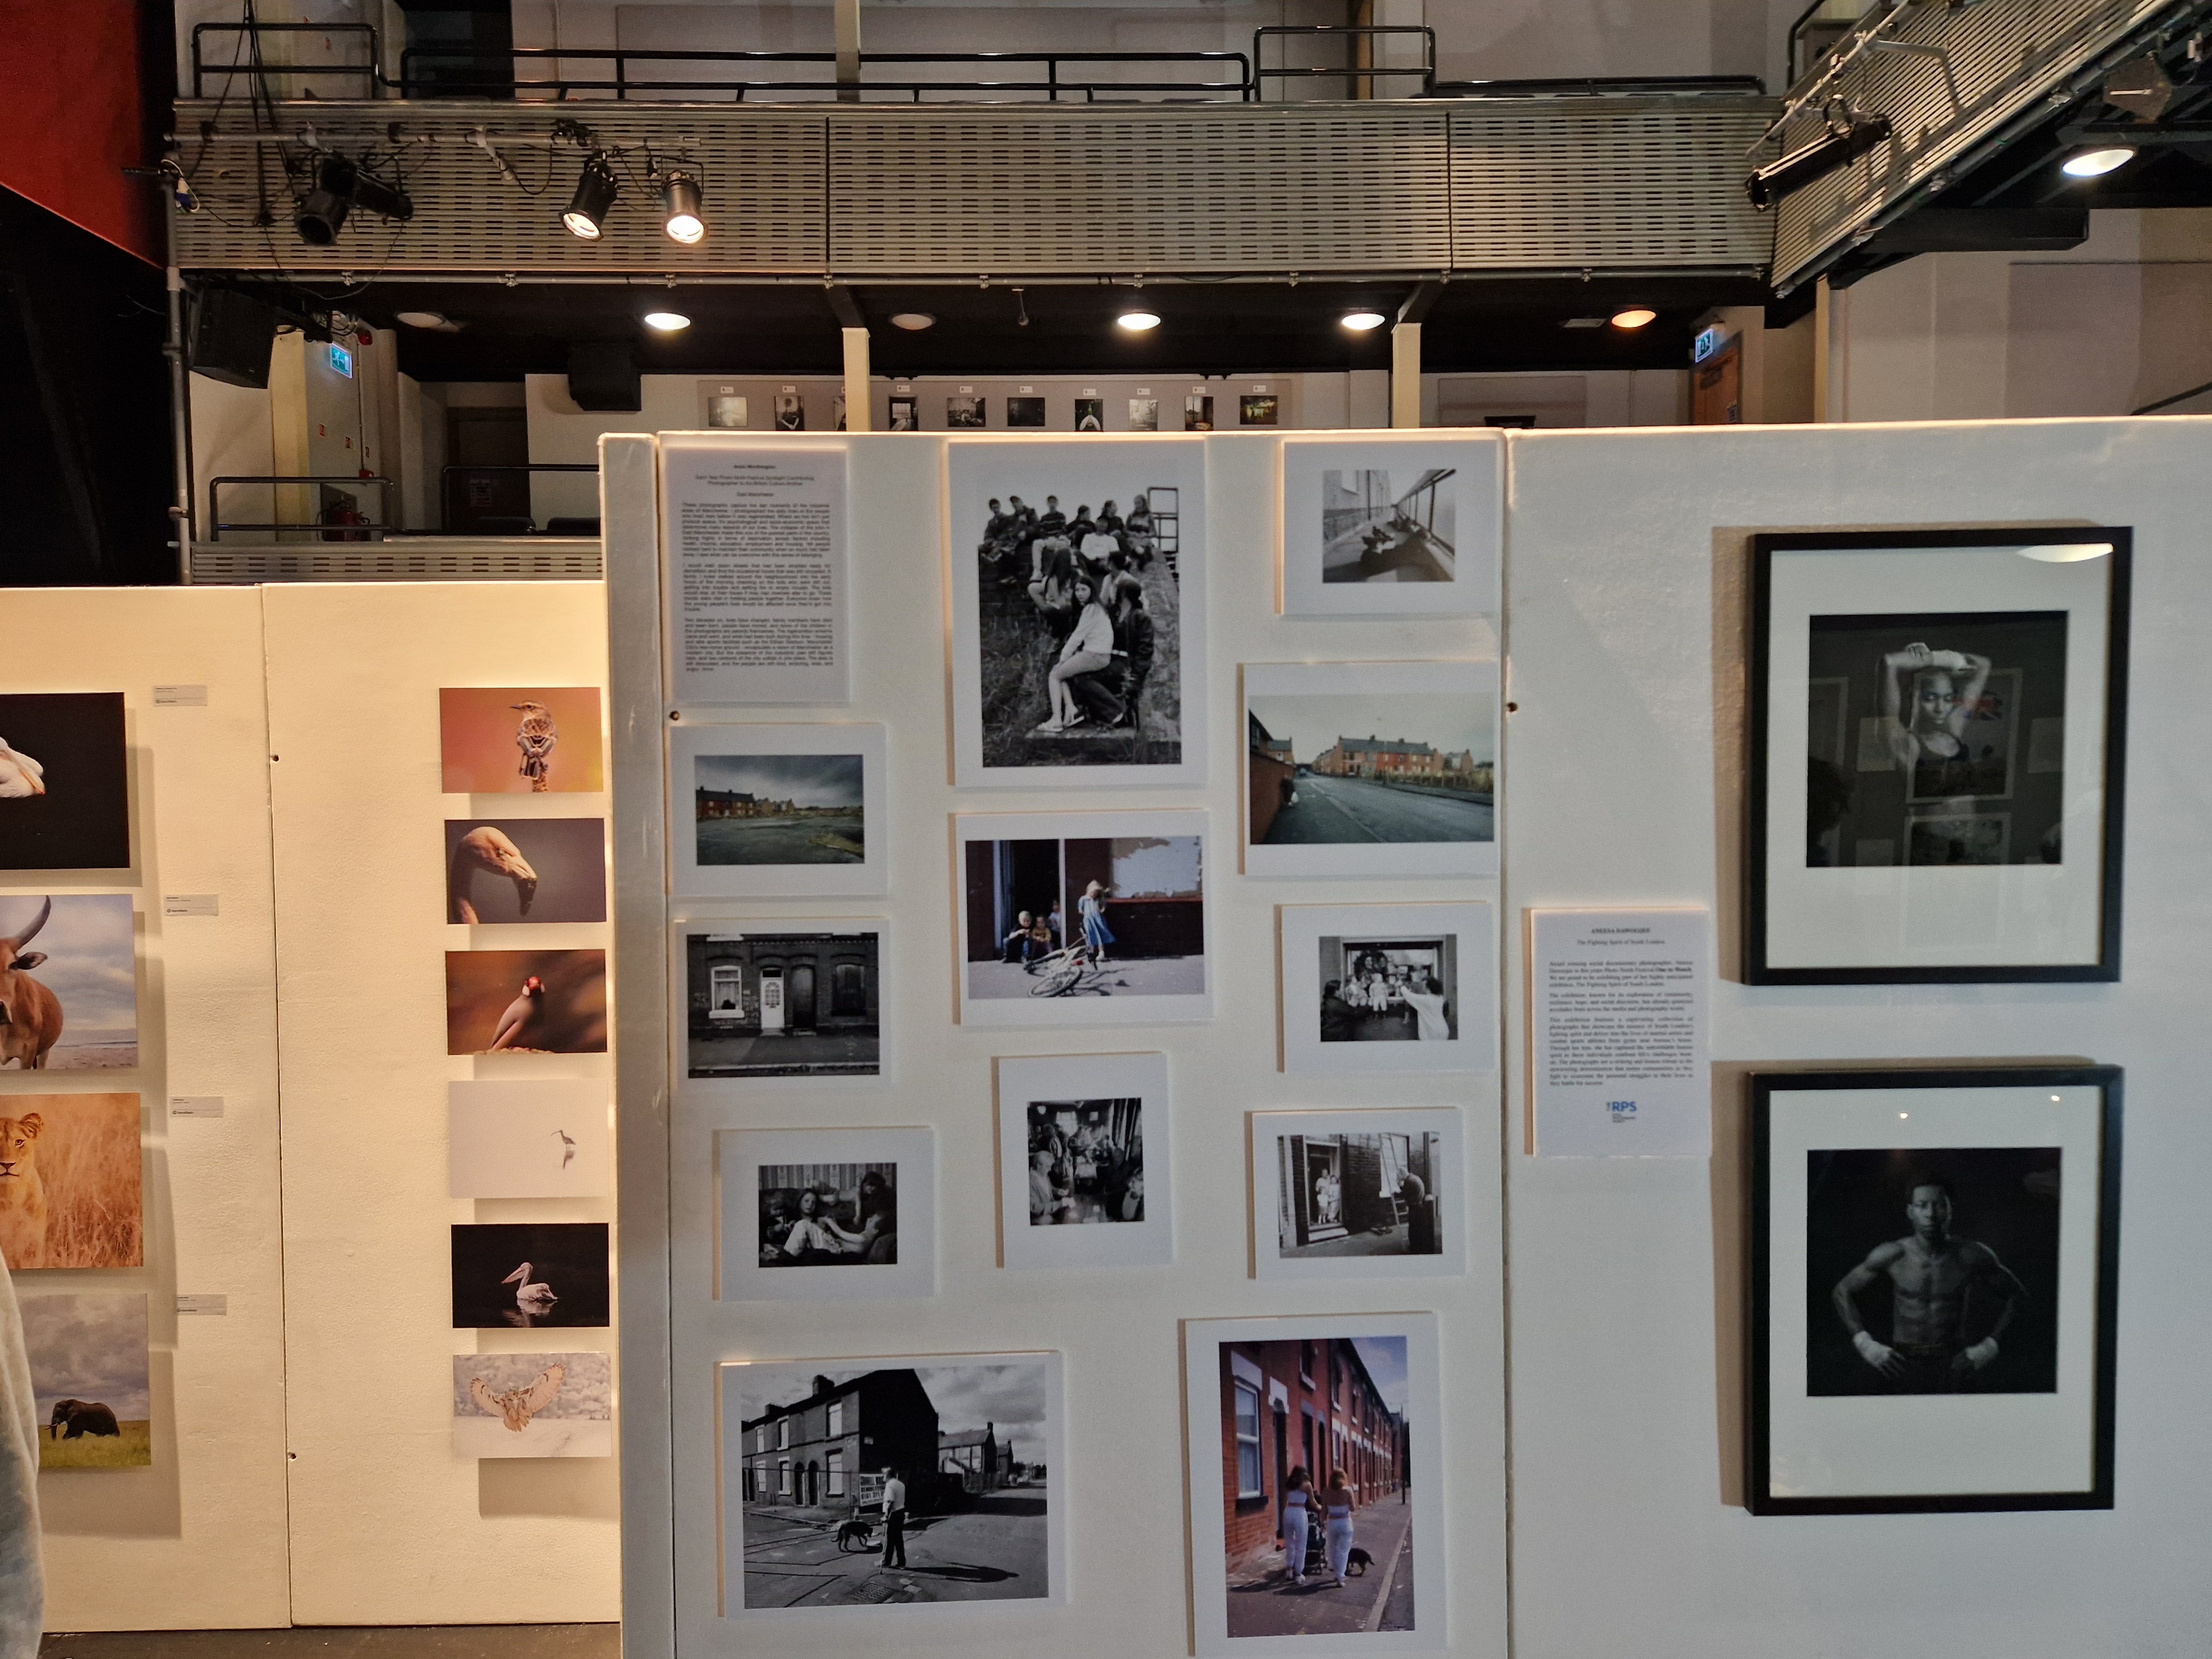
After the lectures, I spent some time printing my newest work and occupying a wall space on the 3rd floor. As always, it’s very beneficial to see the prints in physical form and on a large scale as opposed to just looking at them on the computer.
I find that only when standing in front of a print I can get the full experience and feel the feeling that is emanating from the image. This sensation can not be achieved otherwise. You can get an idea of it, but you can never fully KNOW until FACED WITH IT.

WEDNESDAY
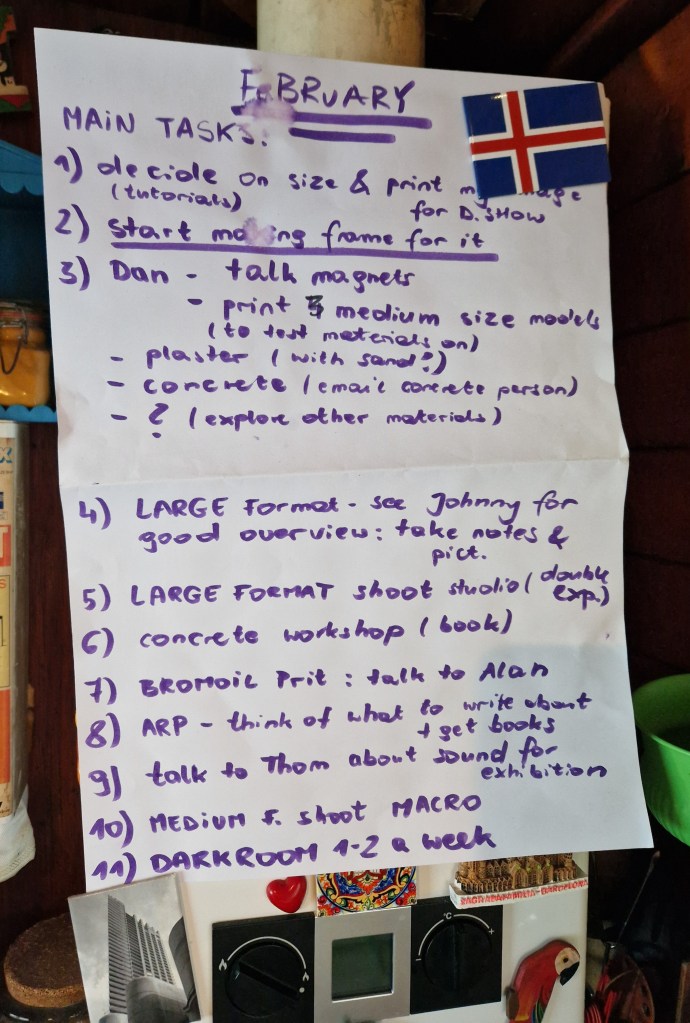
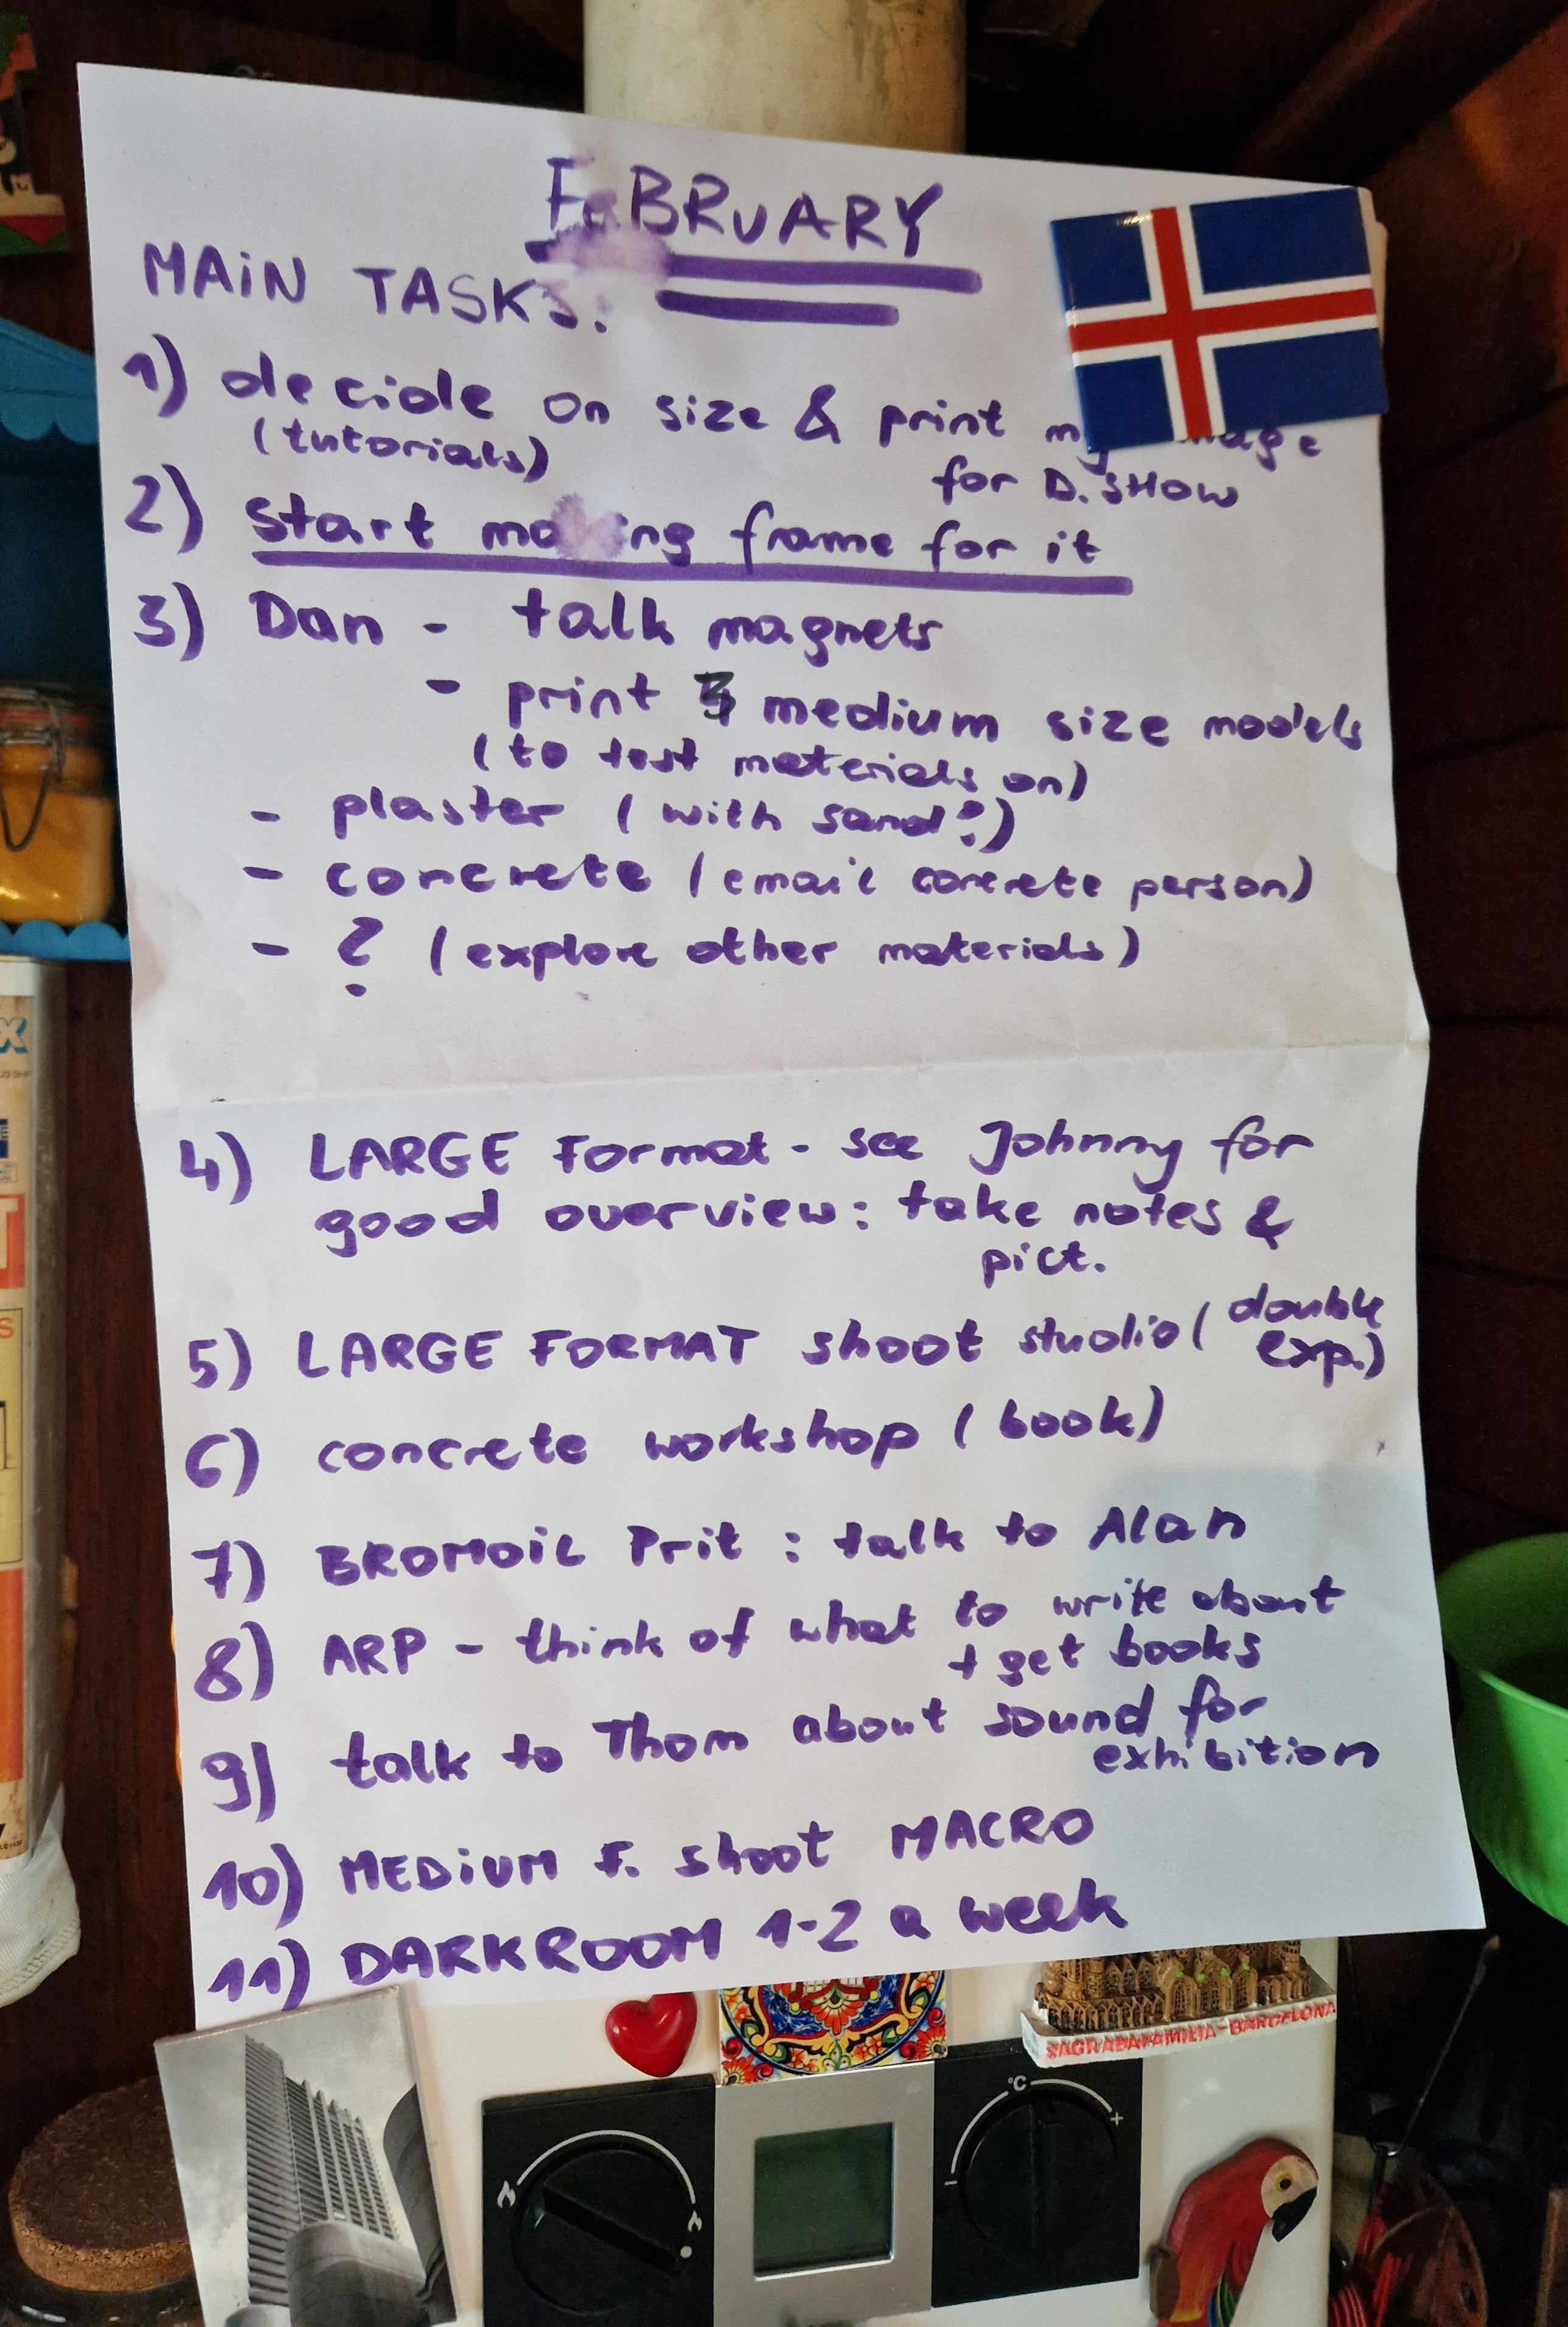
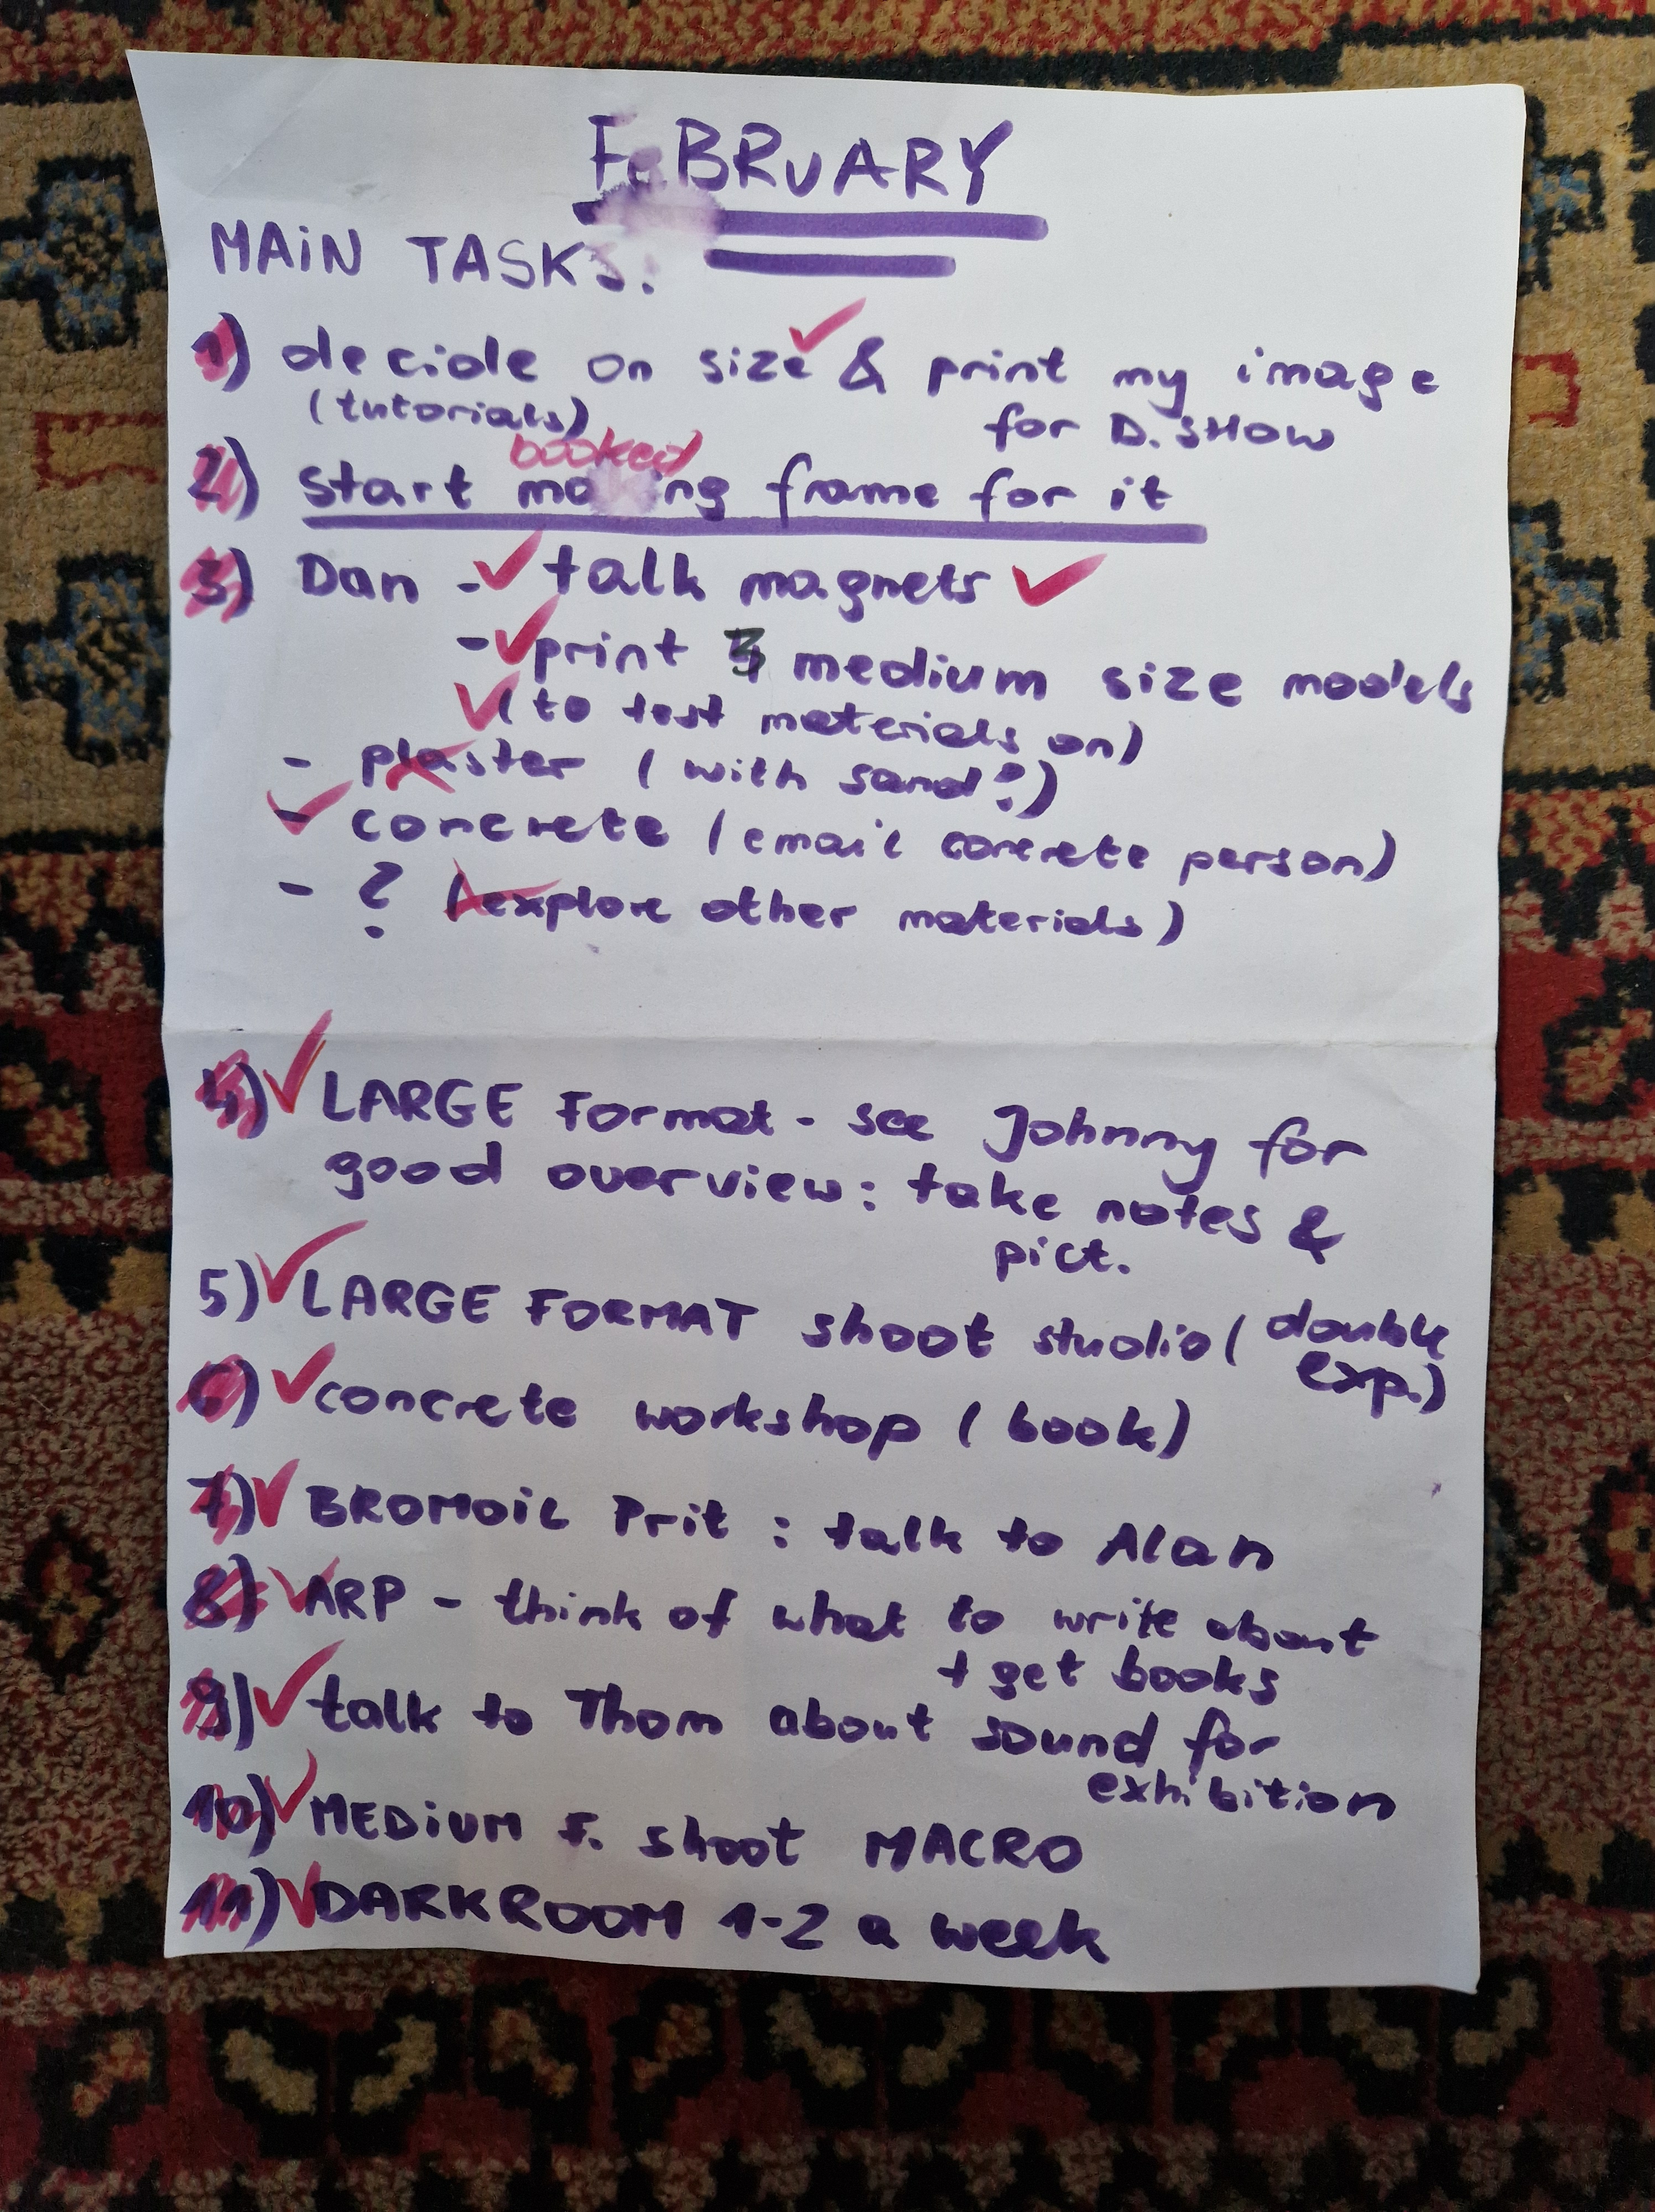
MAKING LEARNING PLAN FOR FEBRUARY
I made a list of goals for February and made a plan of action accordingly, working around Timetable and work commitments.
THURSDAY
MAYA AND PRINT CITY
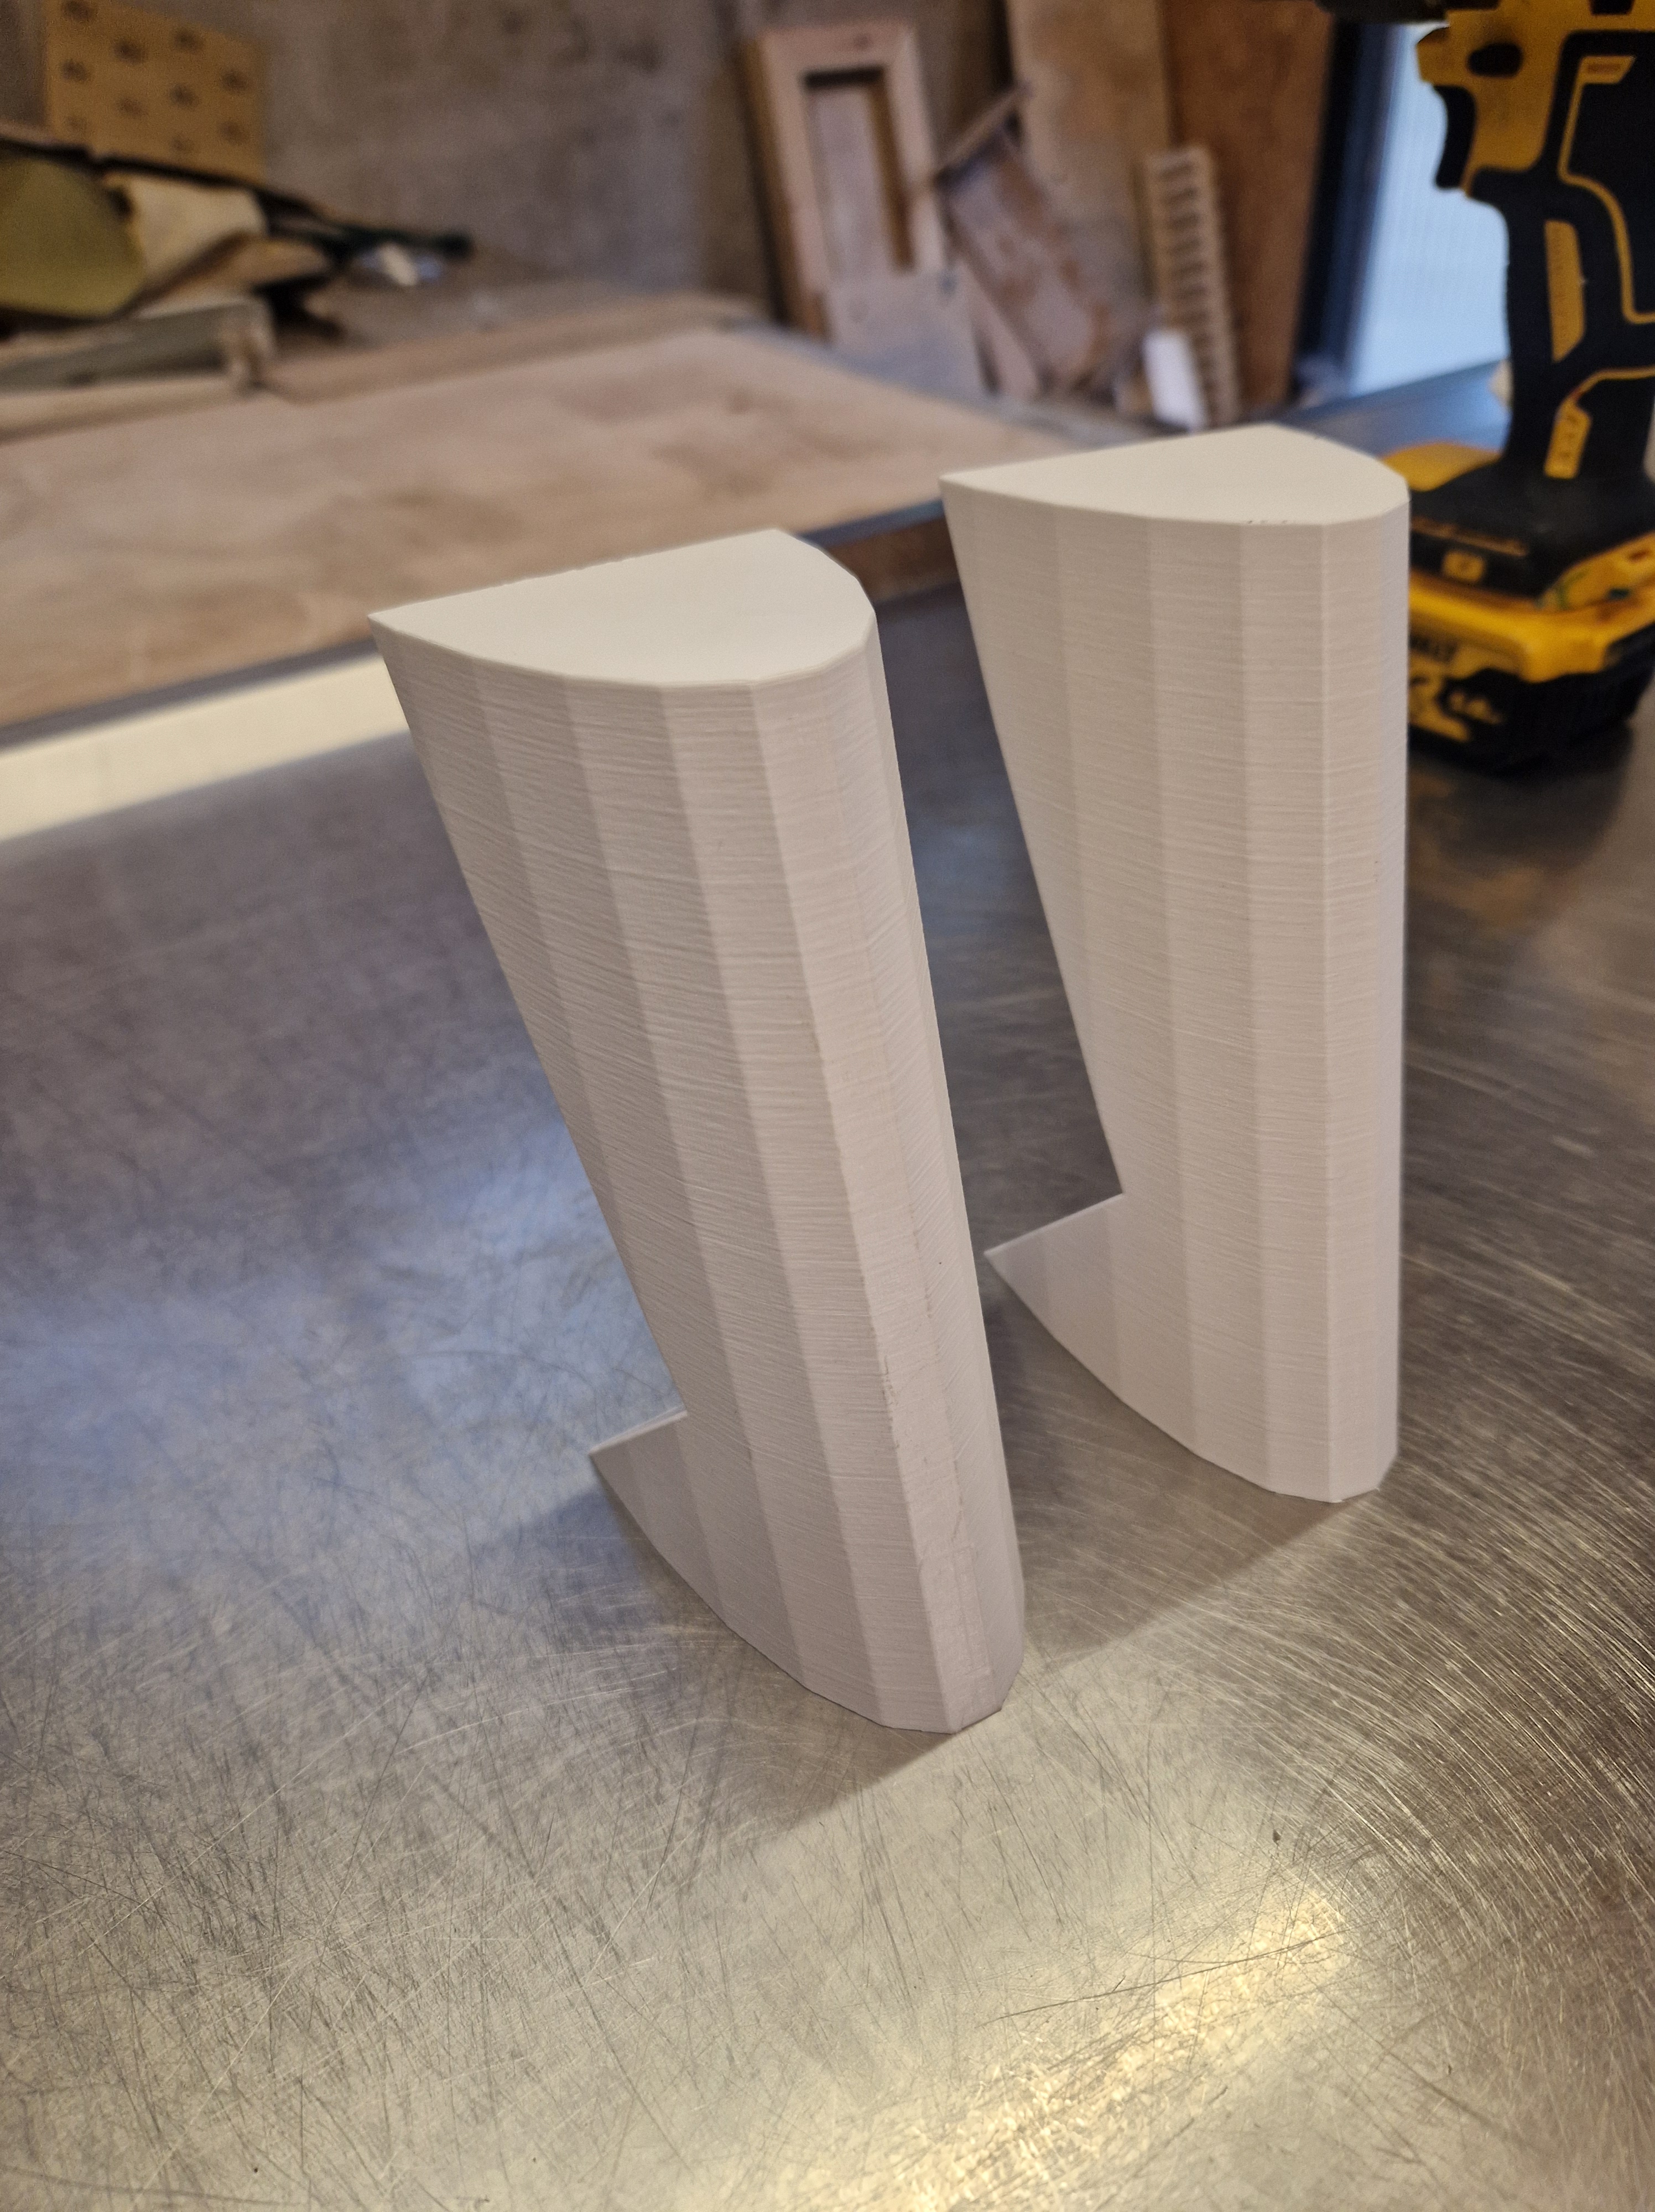
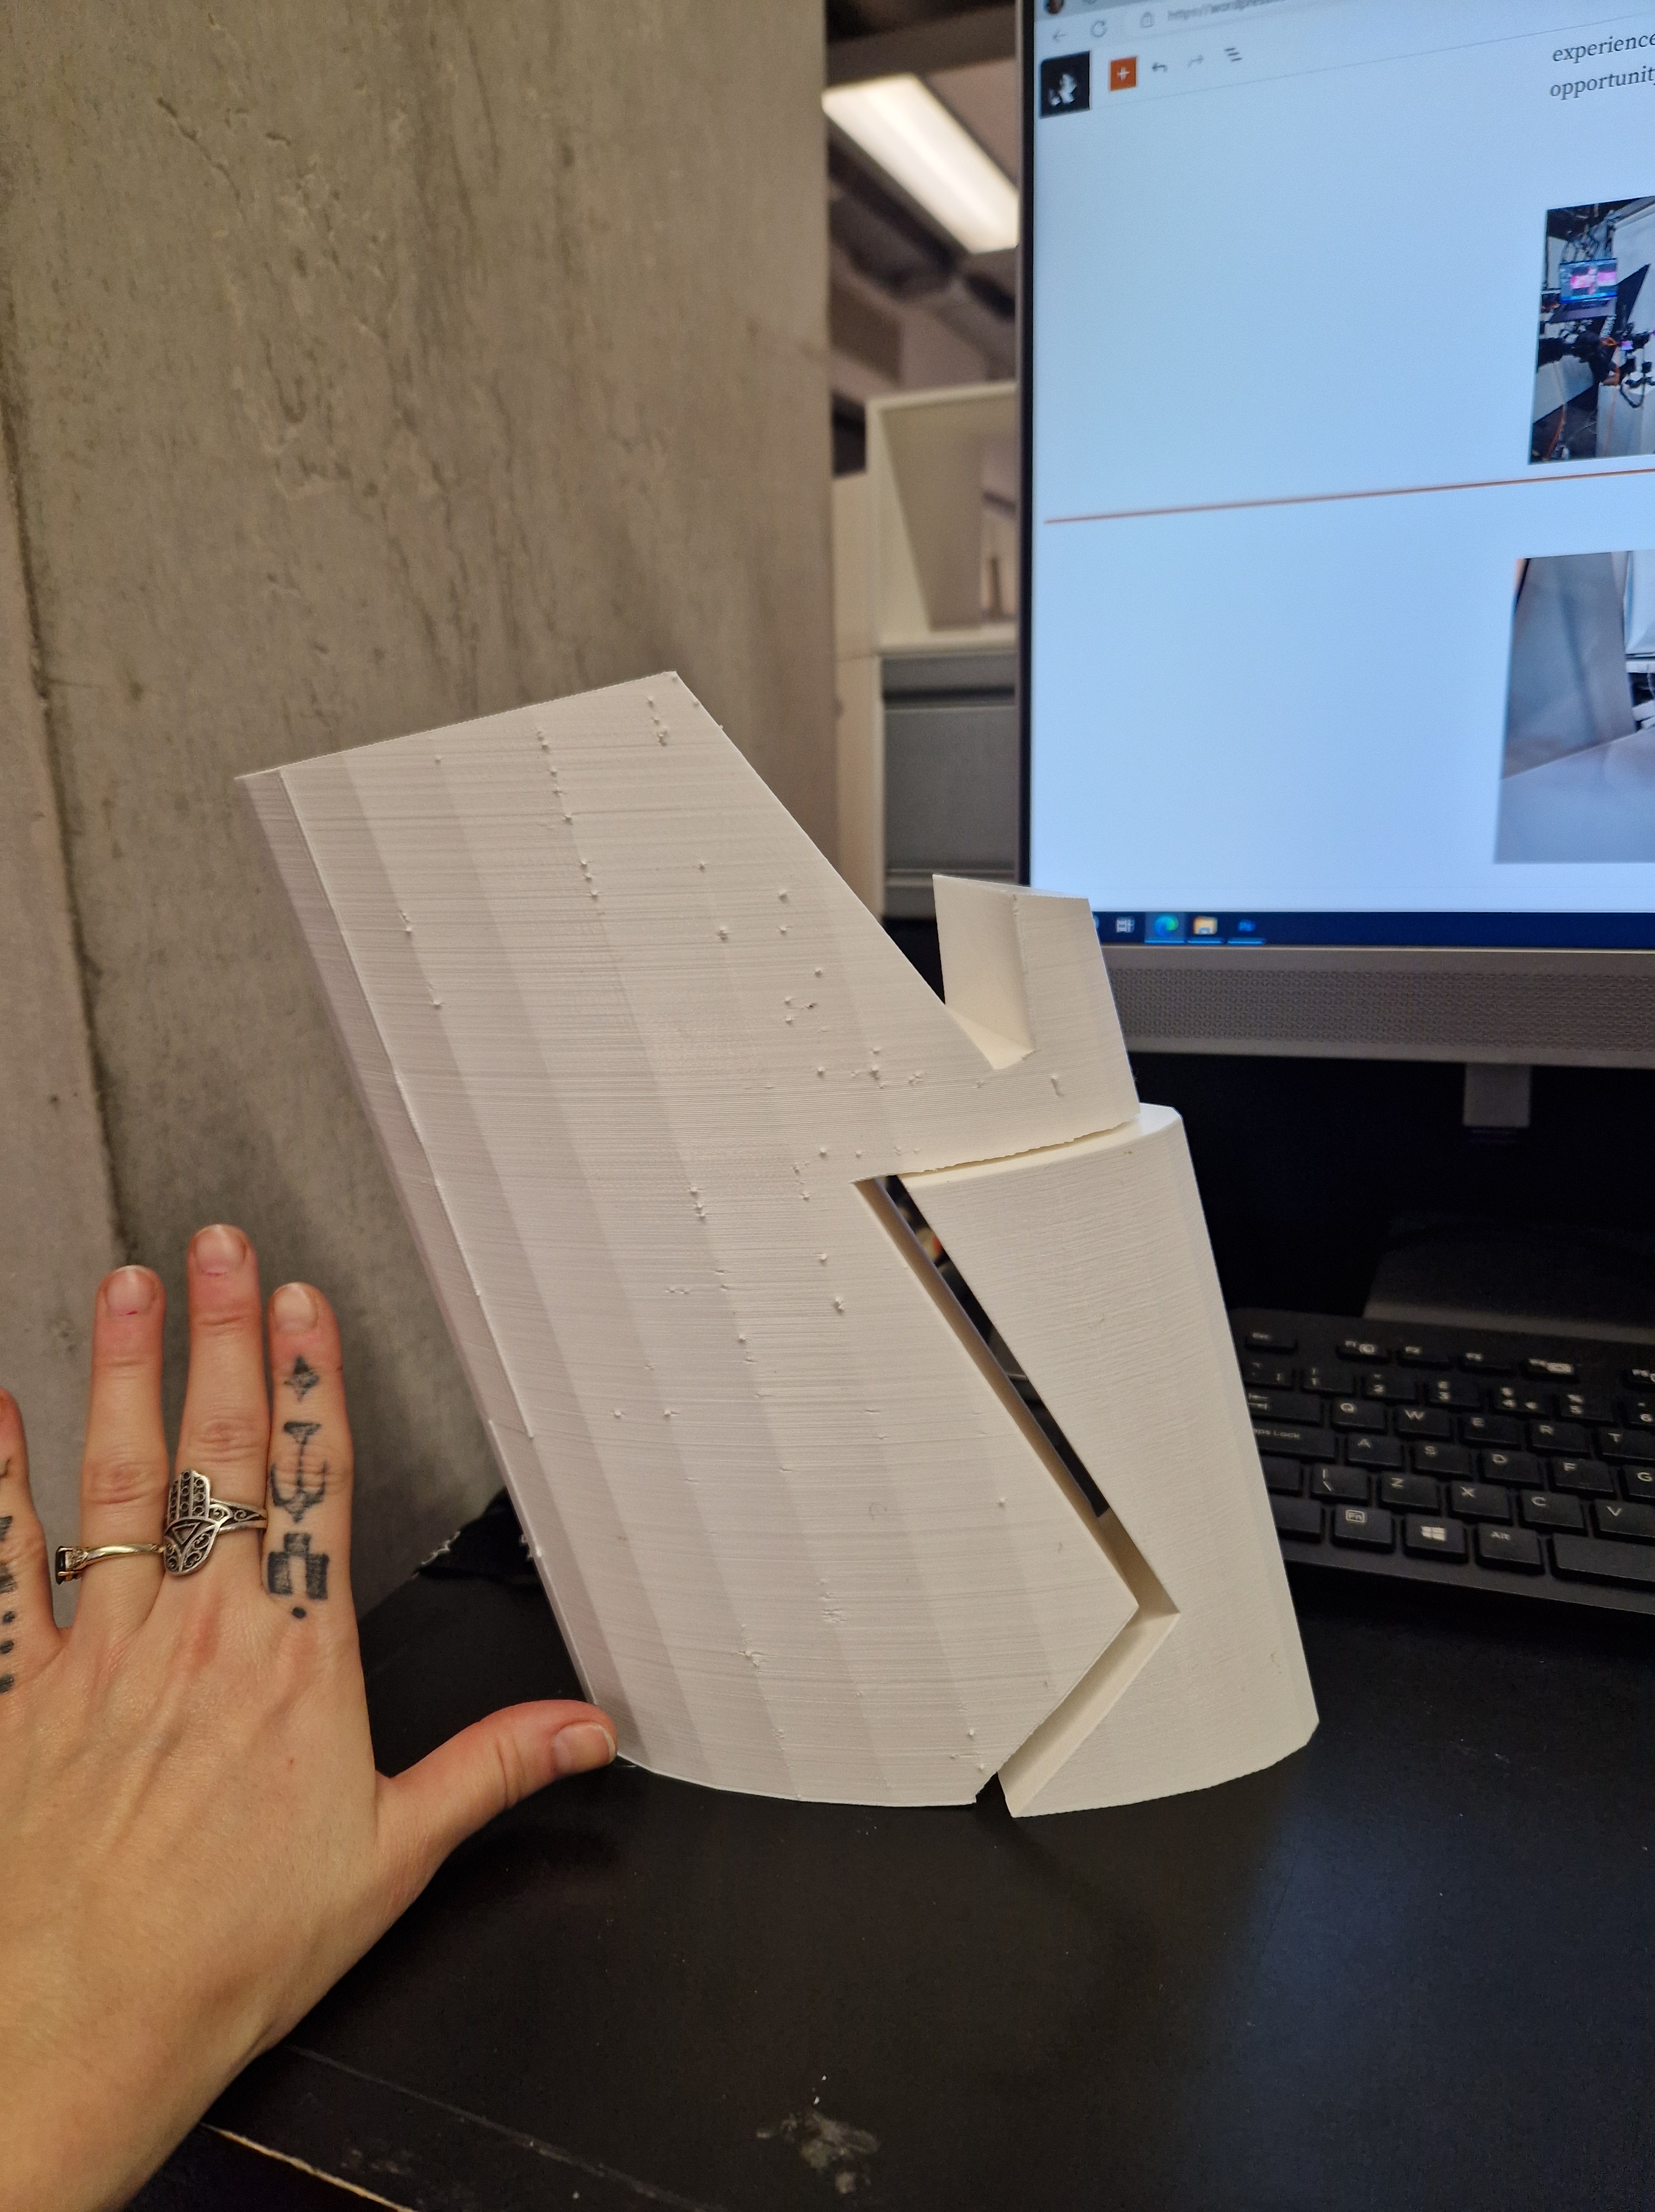
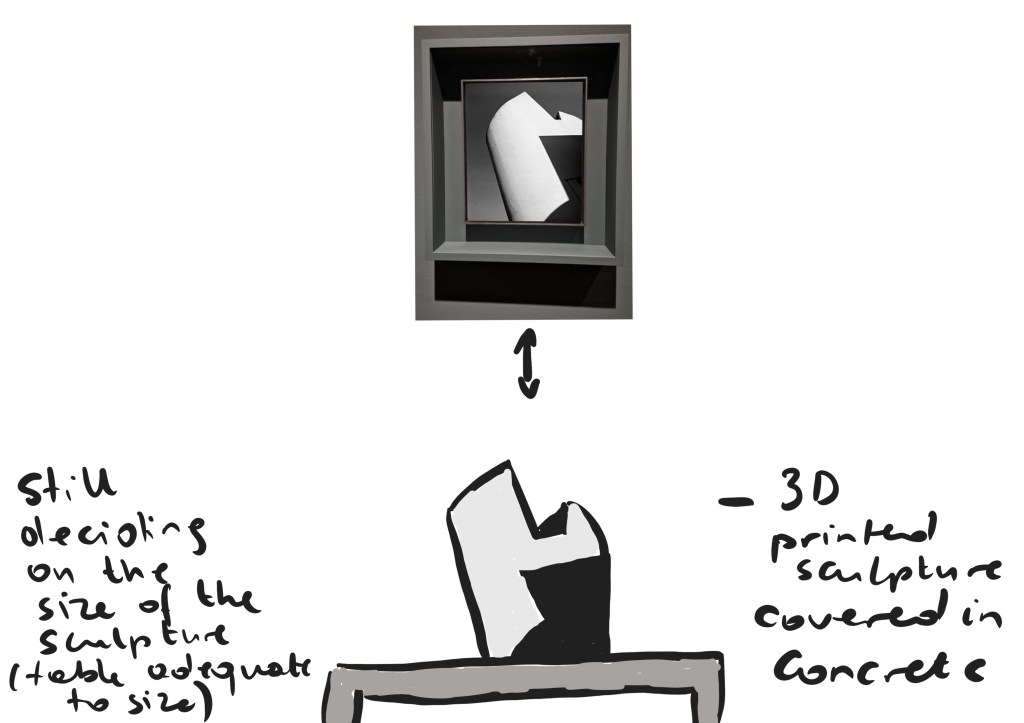
The next step in developing my project is to print 3 test models in a bigger size so I can experiment with applying textures (like cement, plaster etc.). Today, I spoke to Dan Hobbson about these options, as well as magnets to go inside the two parts, and he supported me in resizing the model to a larger size. I then went to a print City and placed an order for three models in 25 cm each. They should be ready by the beginning of next week.
I was recommended this Website to purchase magnets:
https://cpc.farnell.com/search?st=Disc+magnet
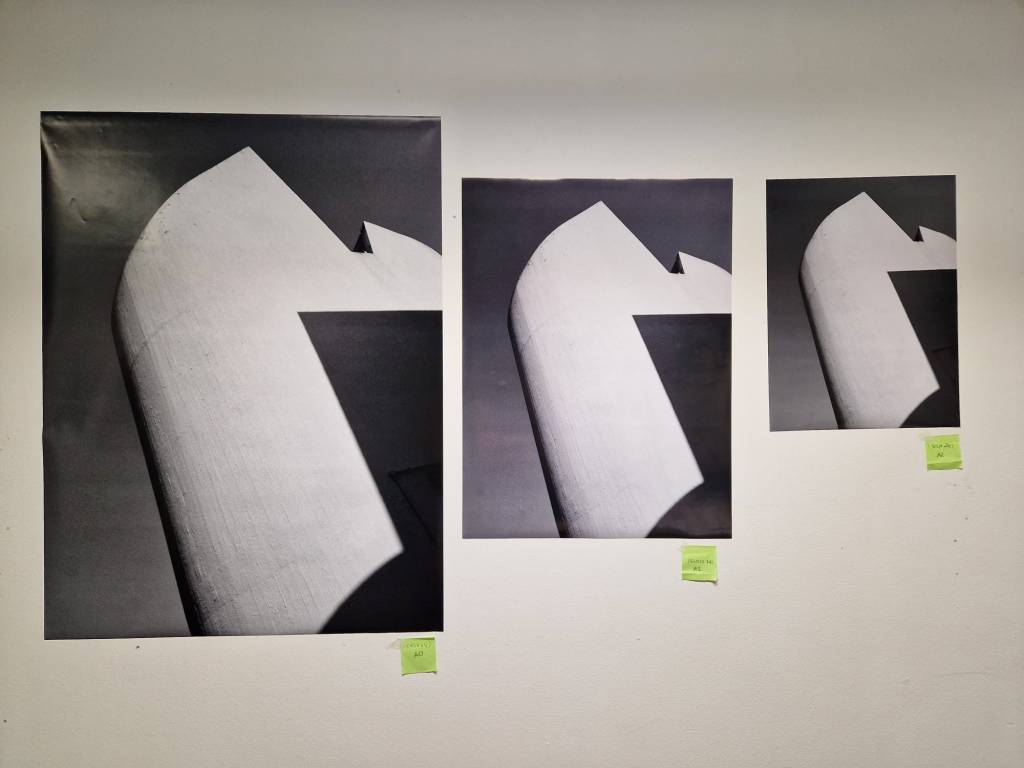
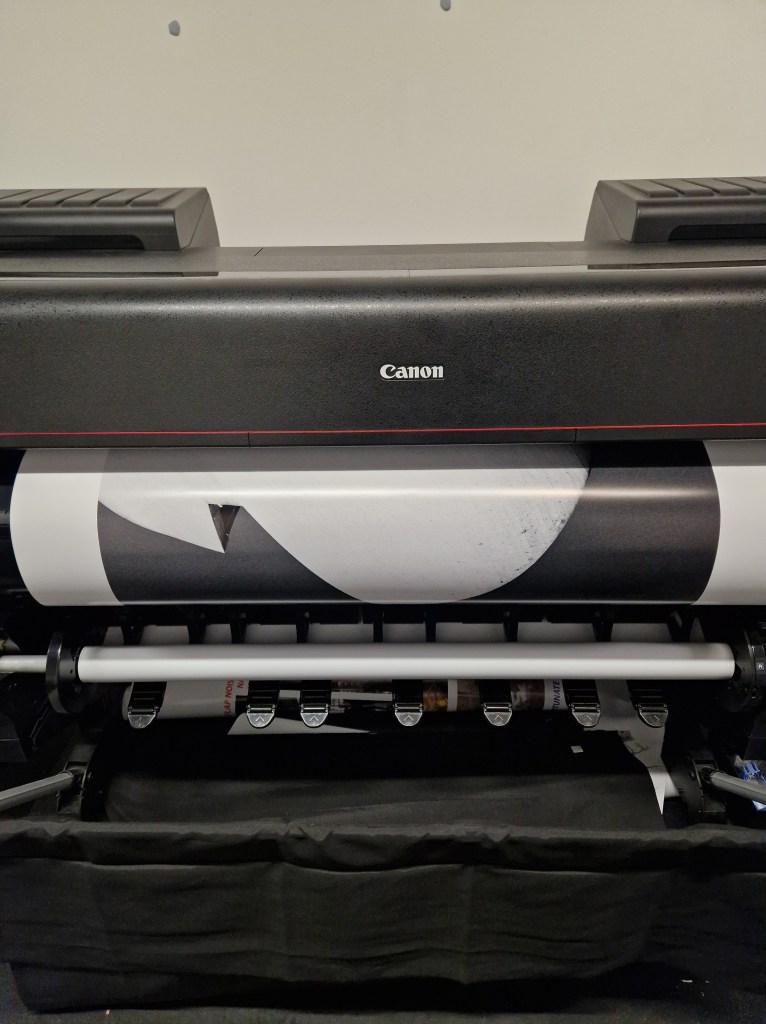
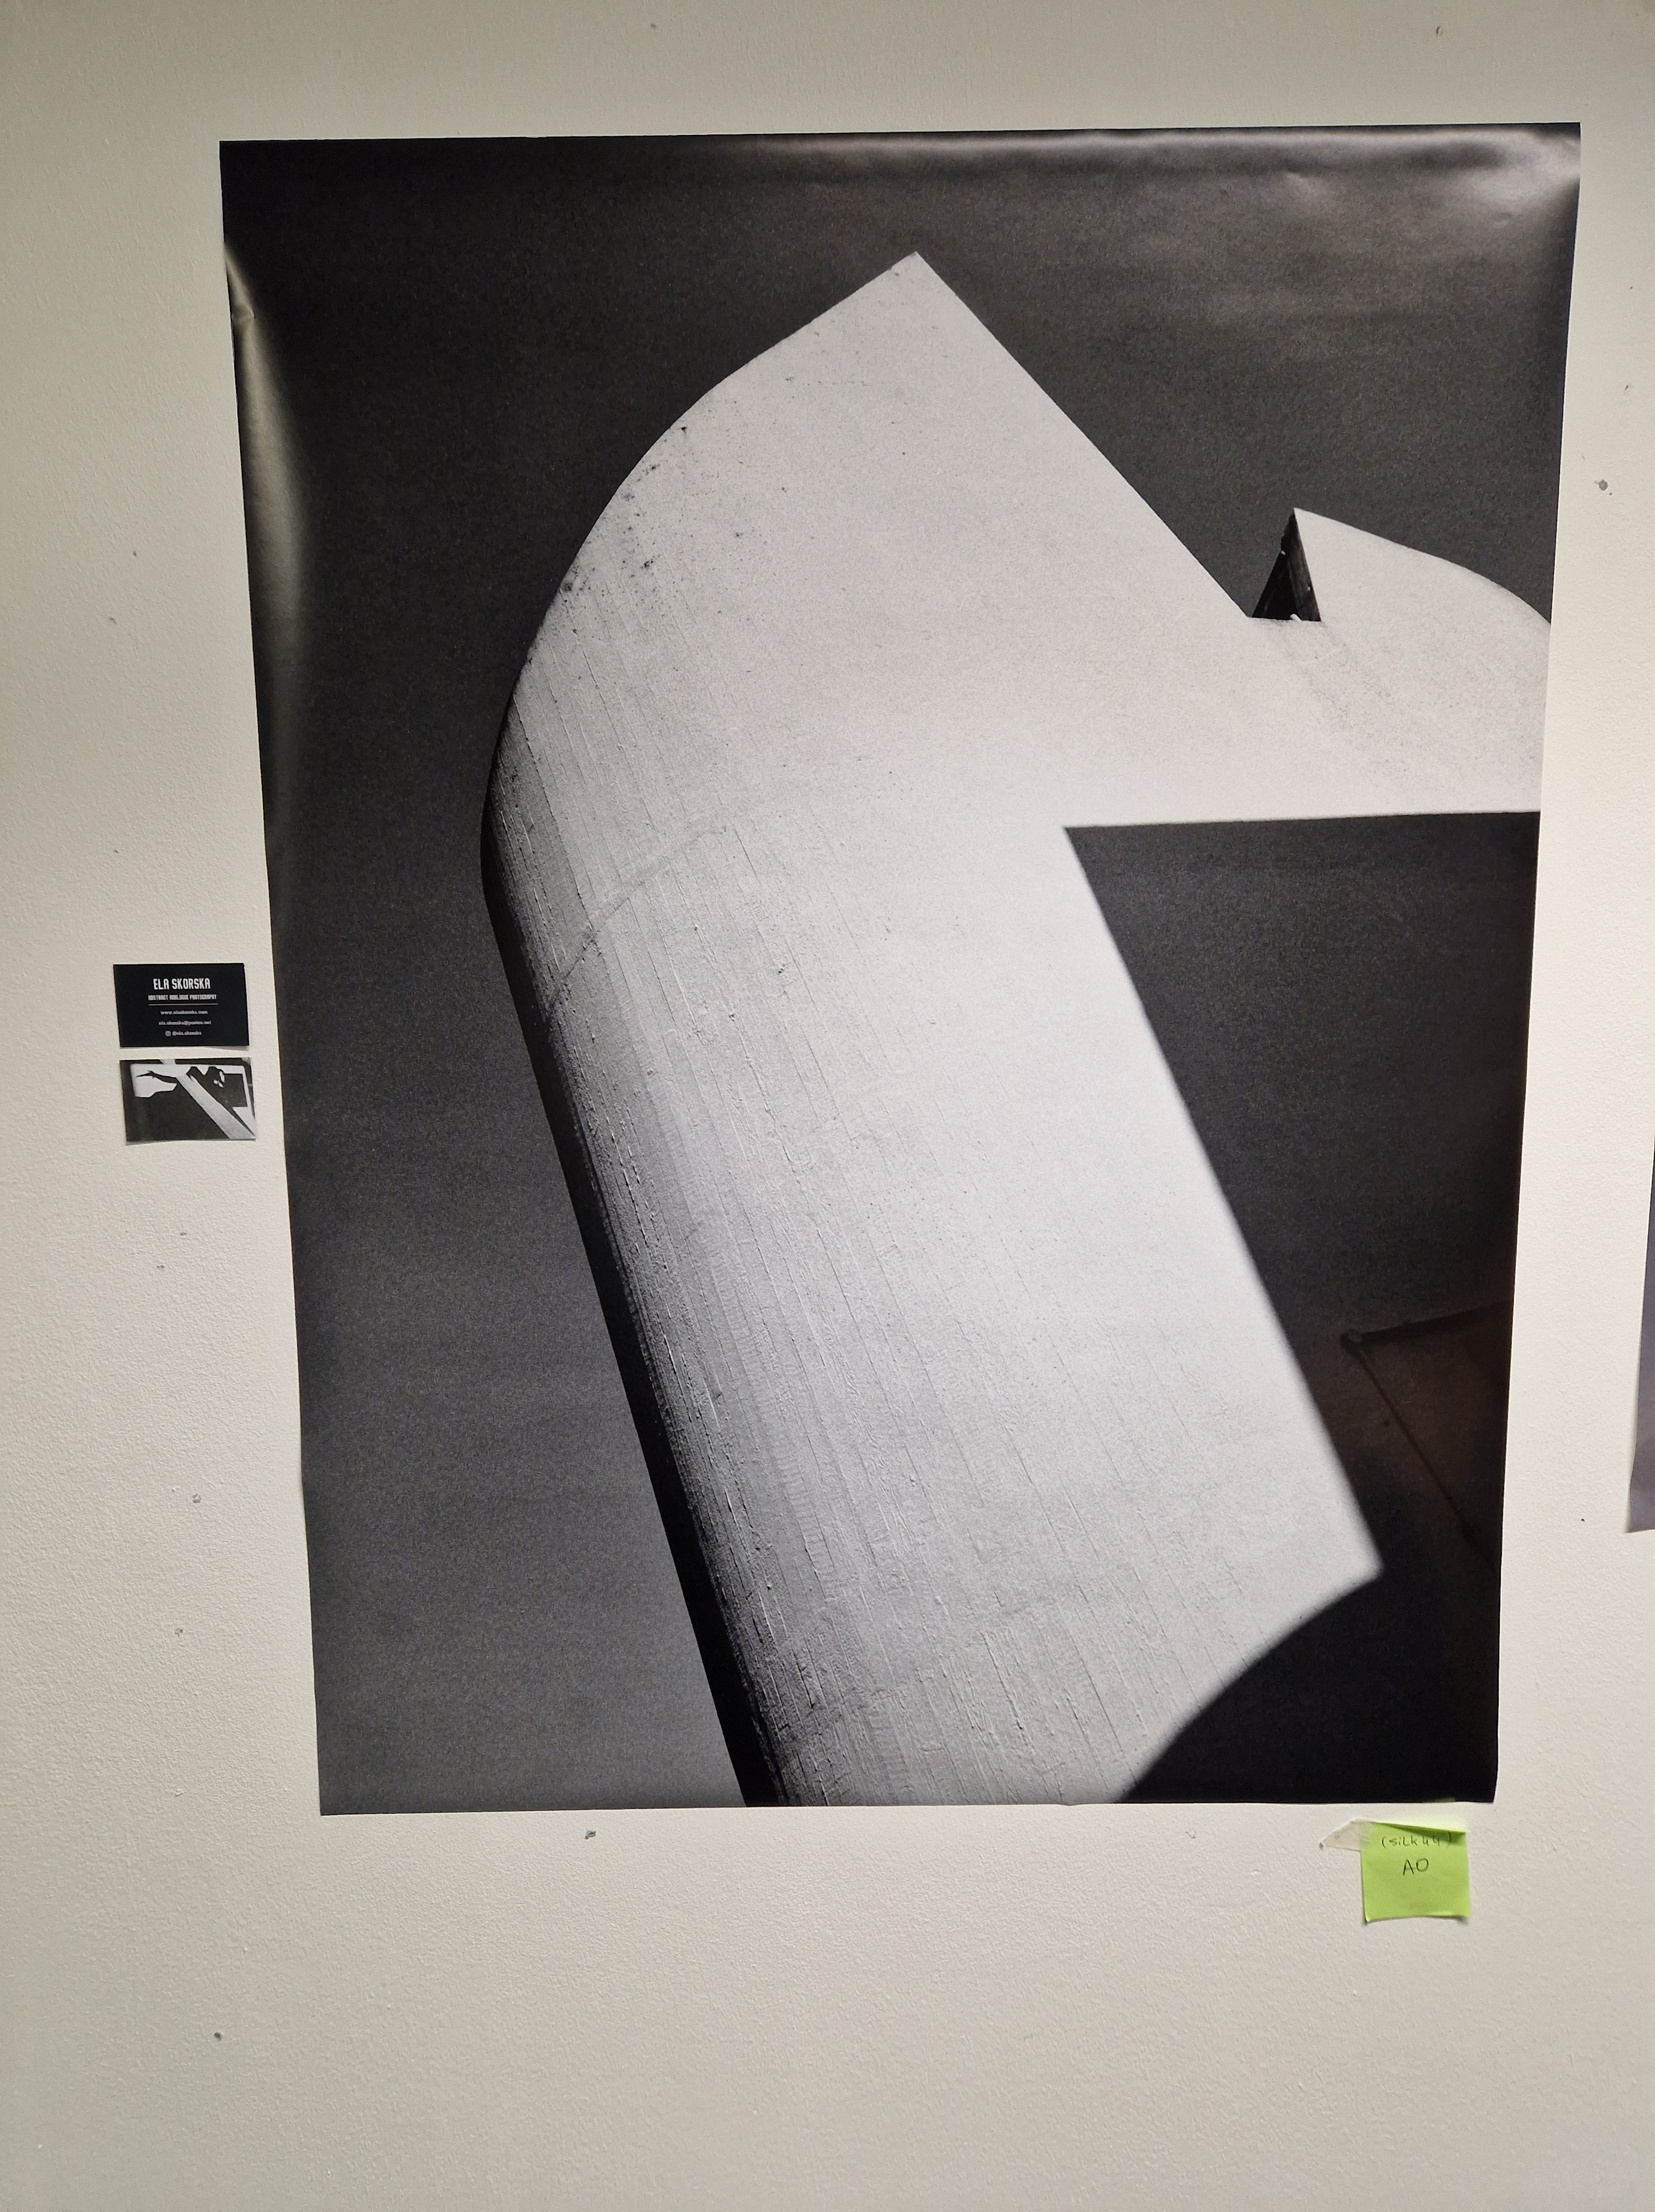
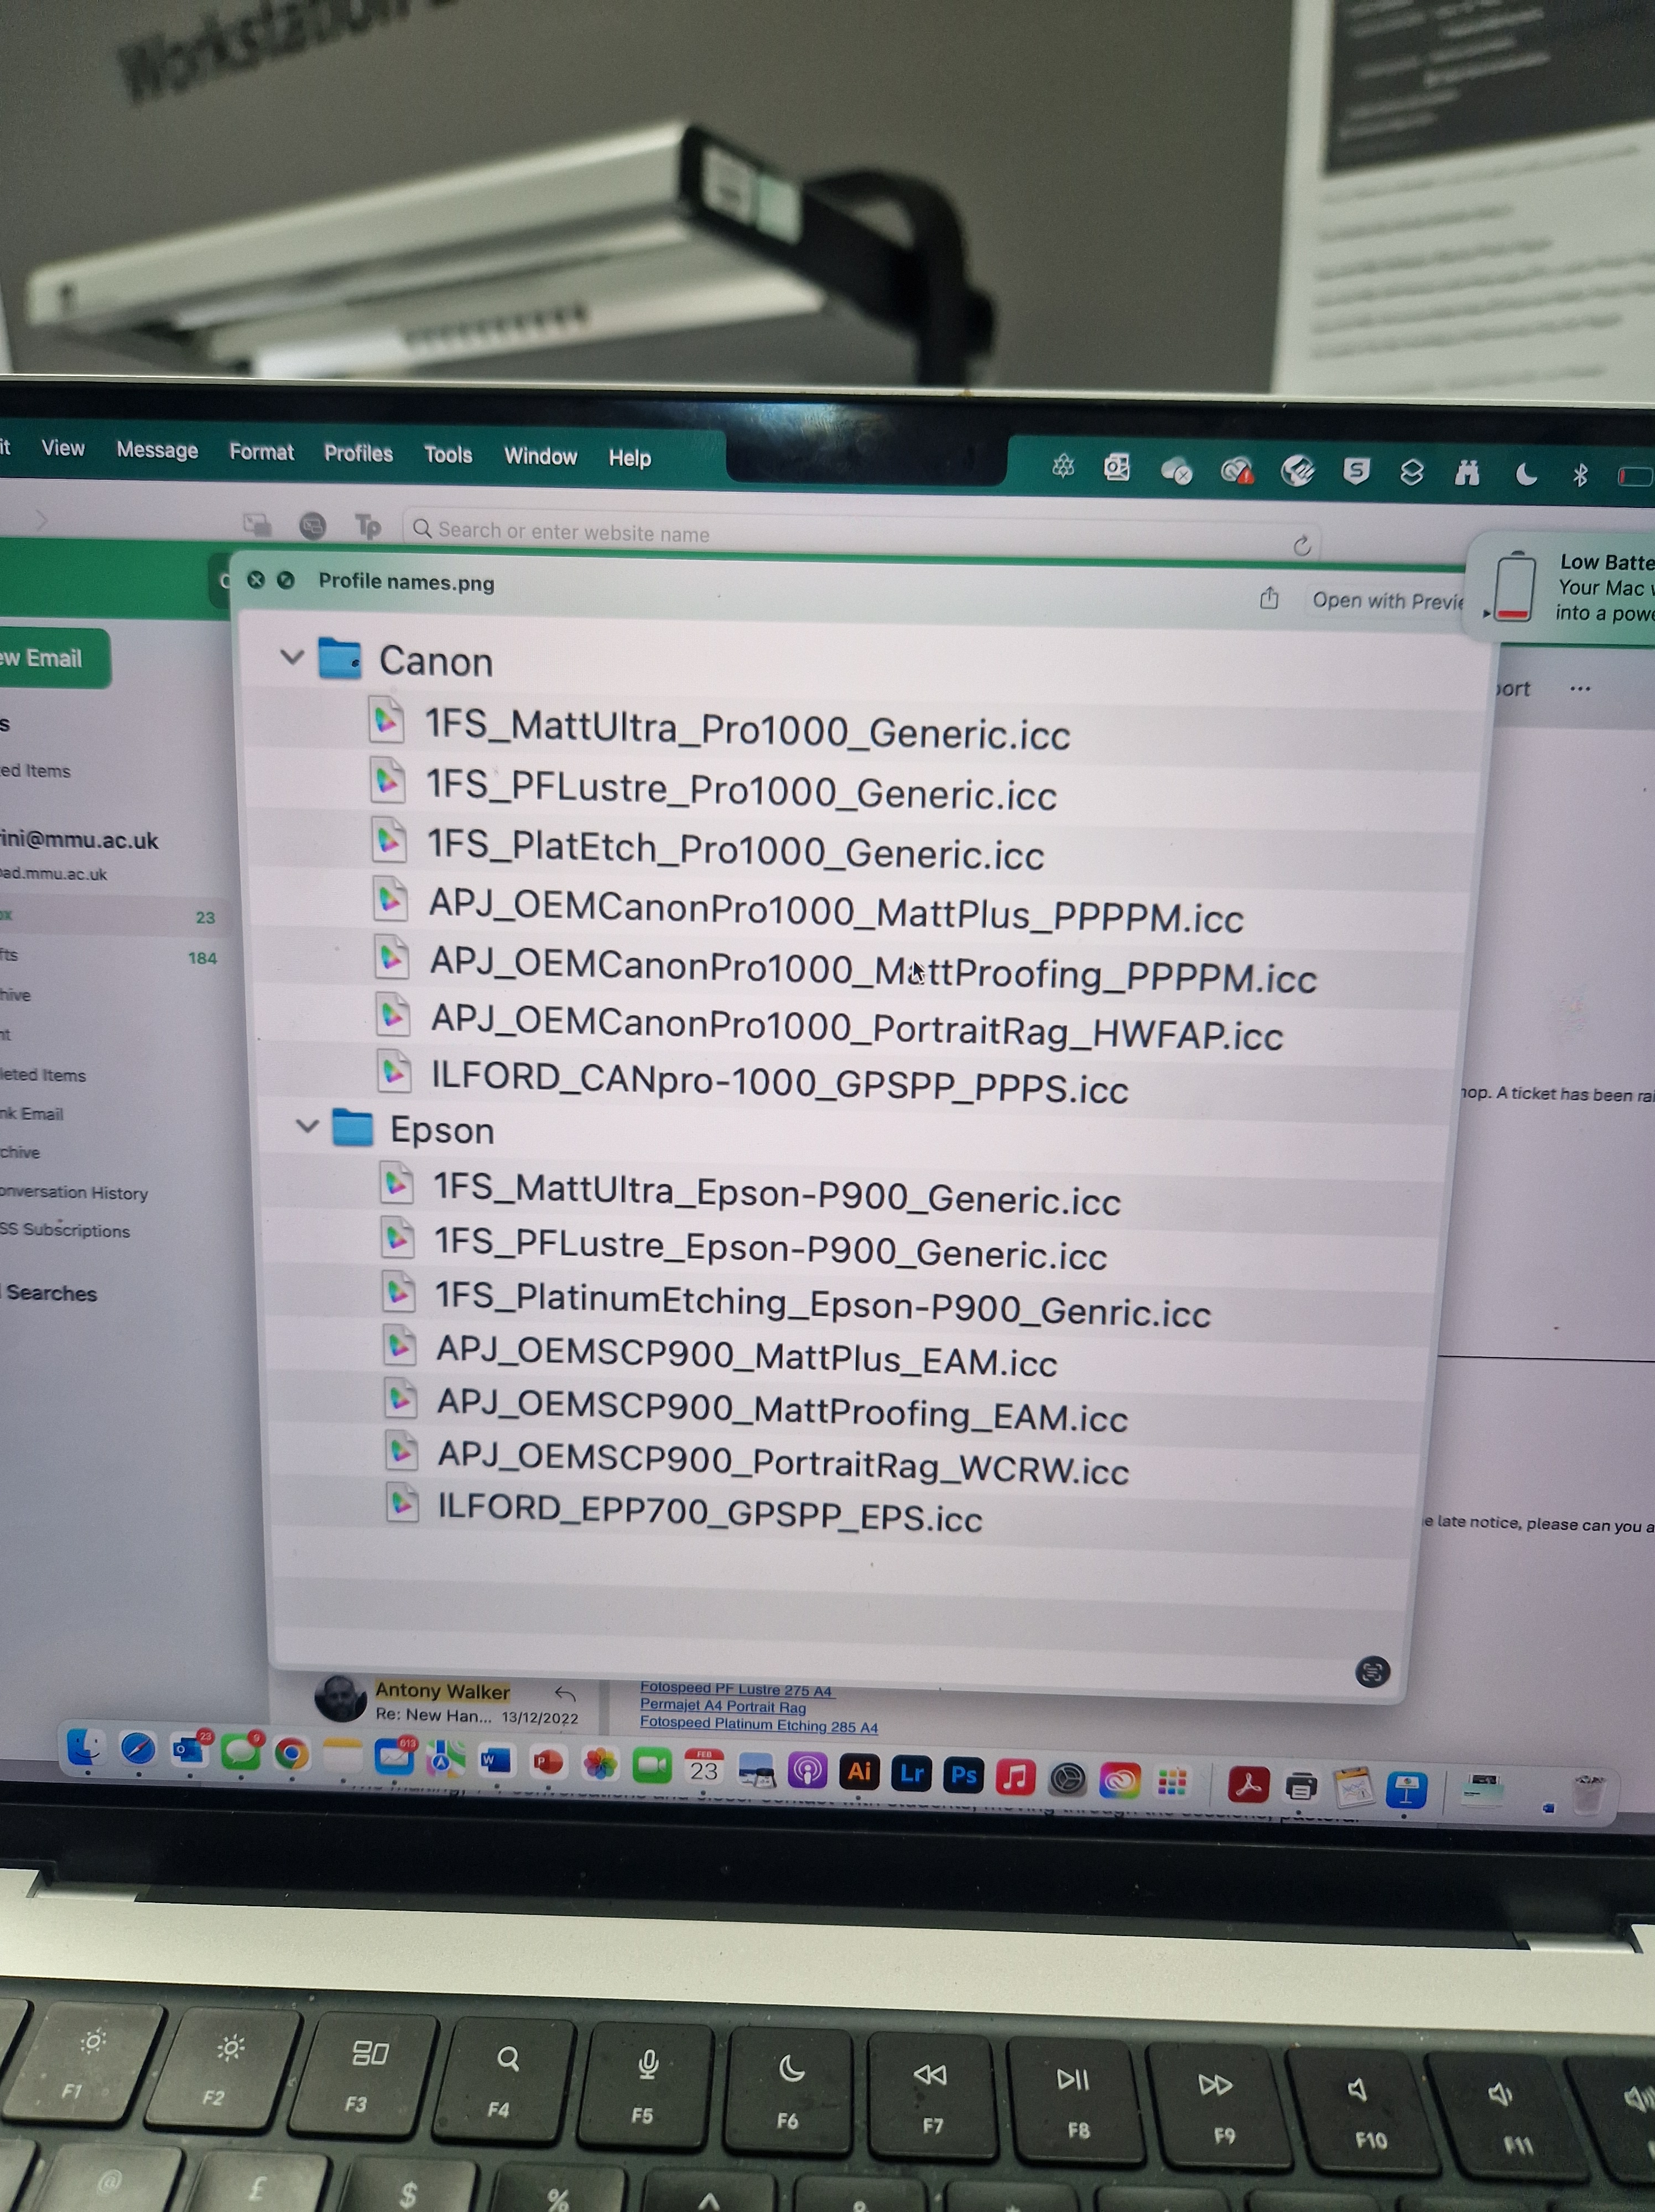
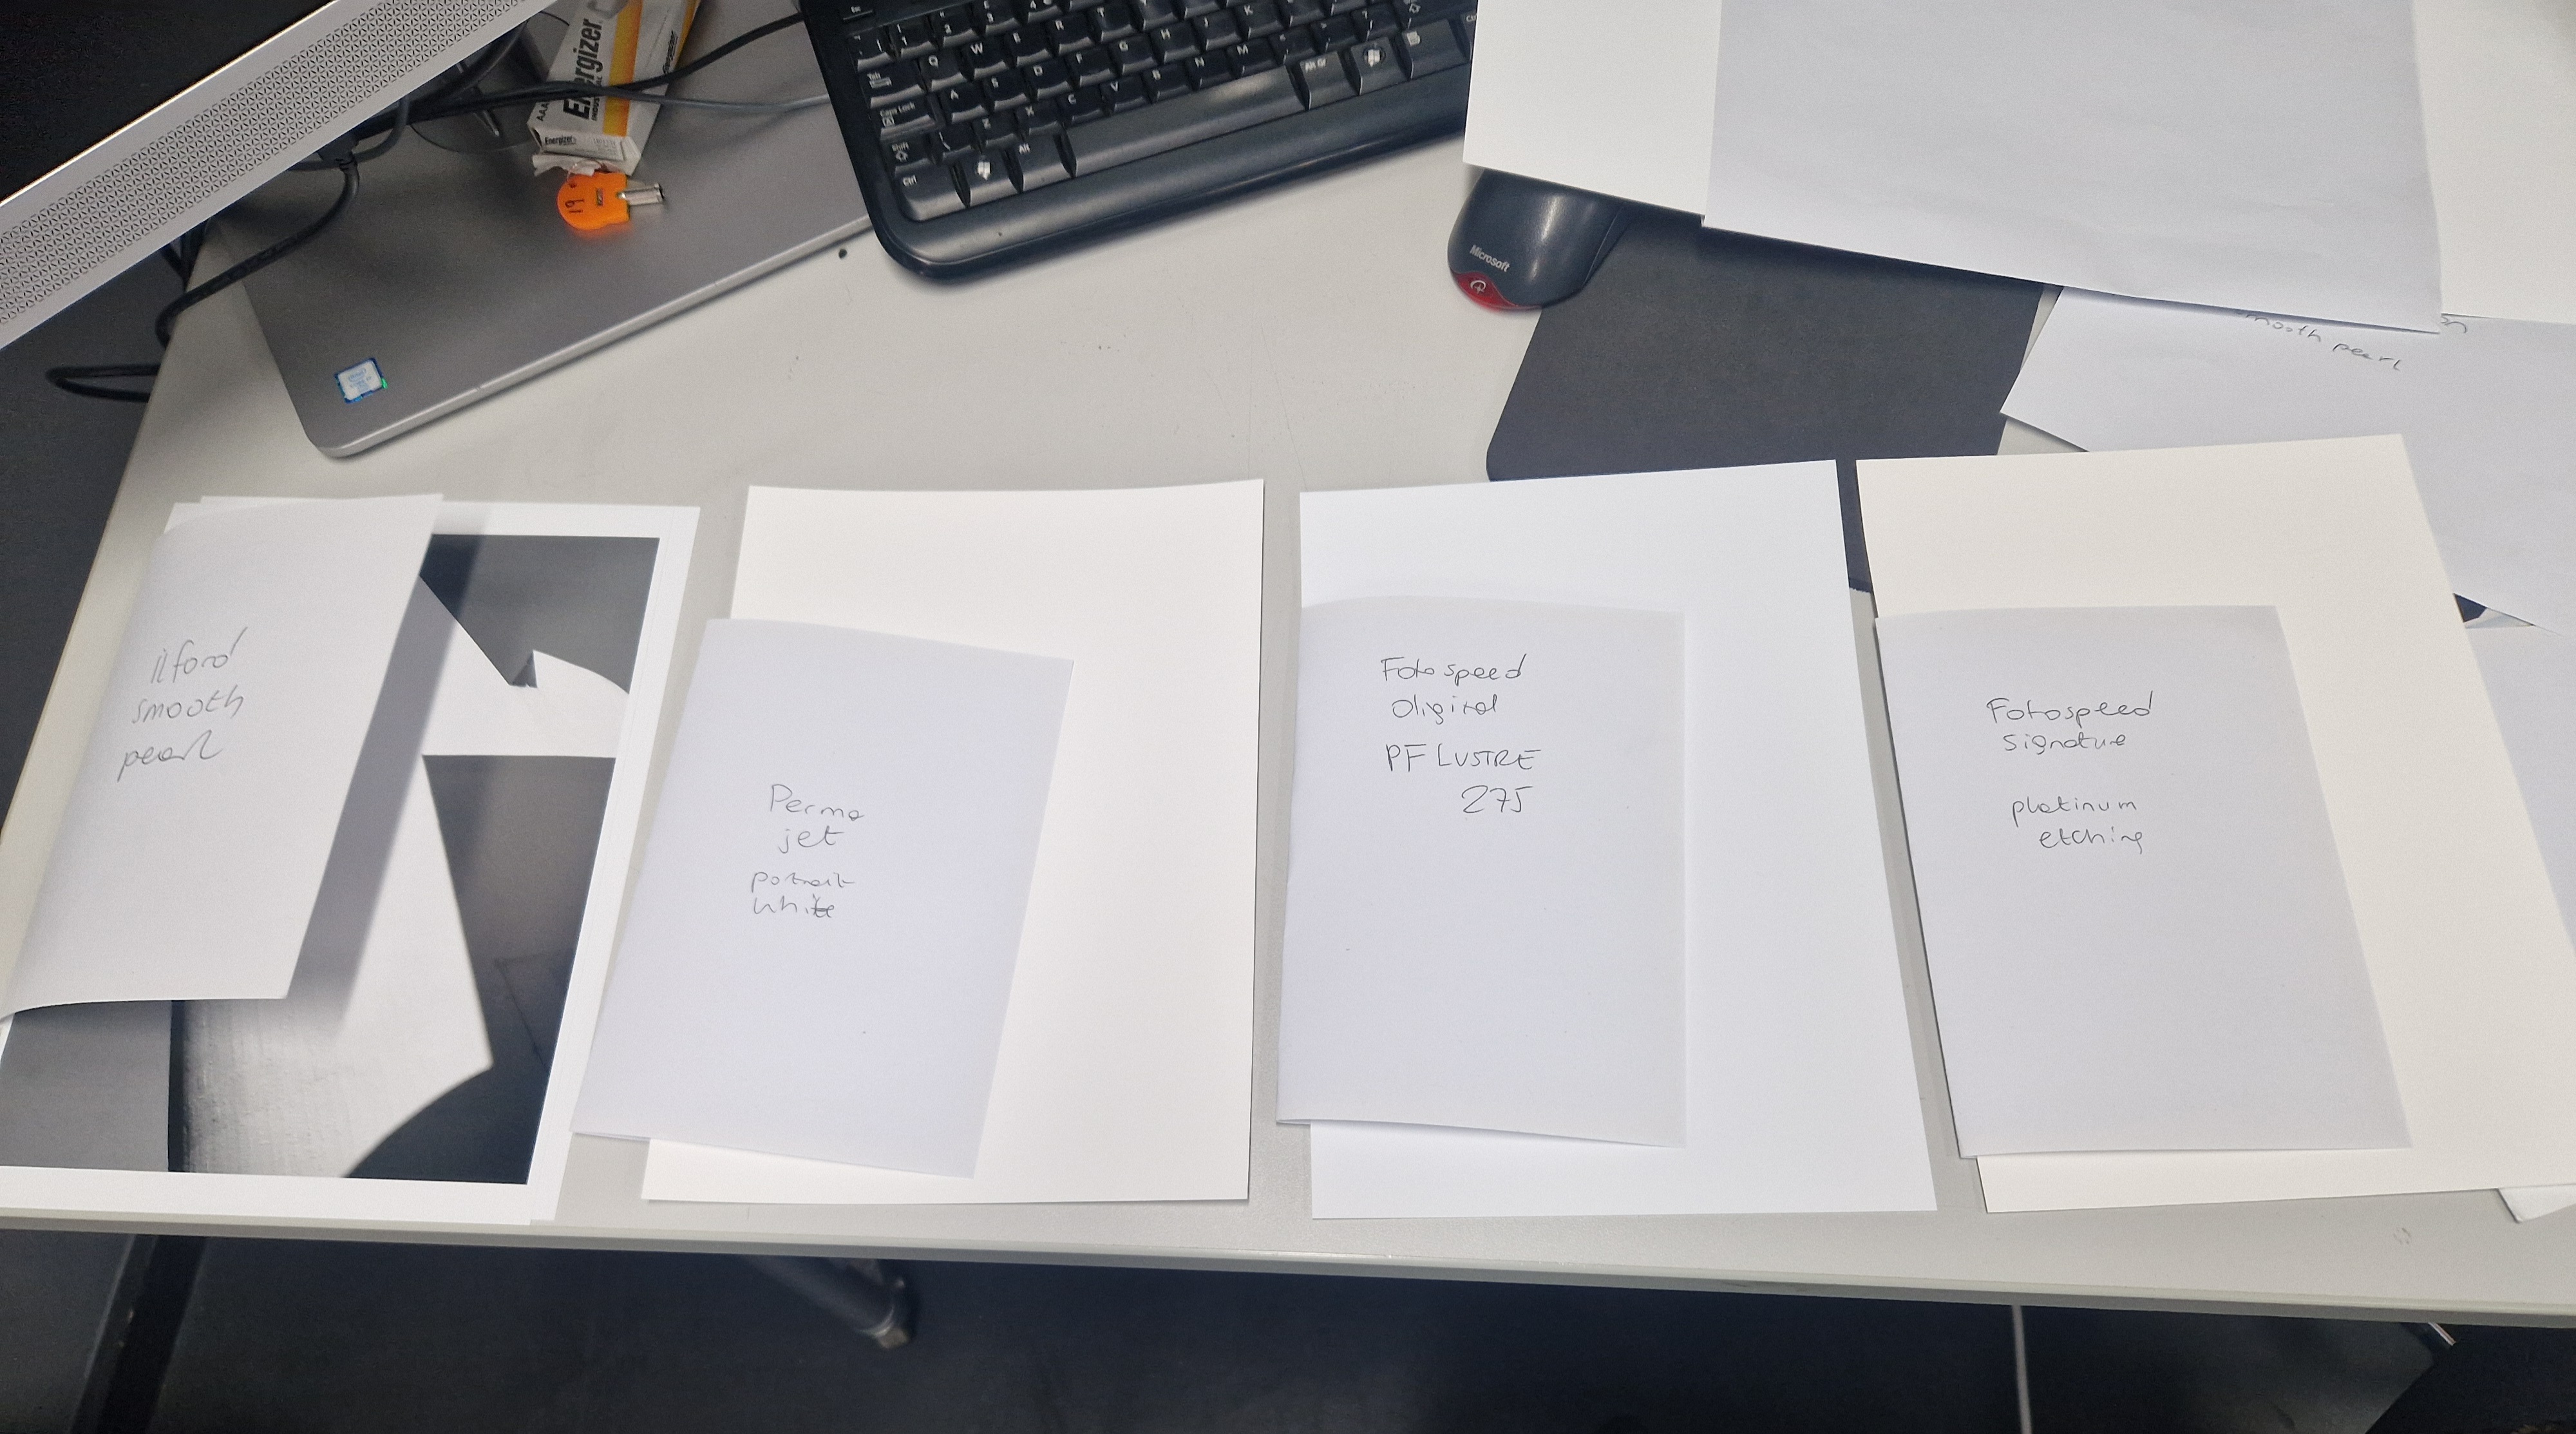
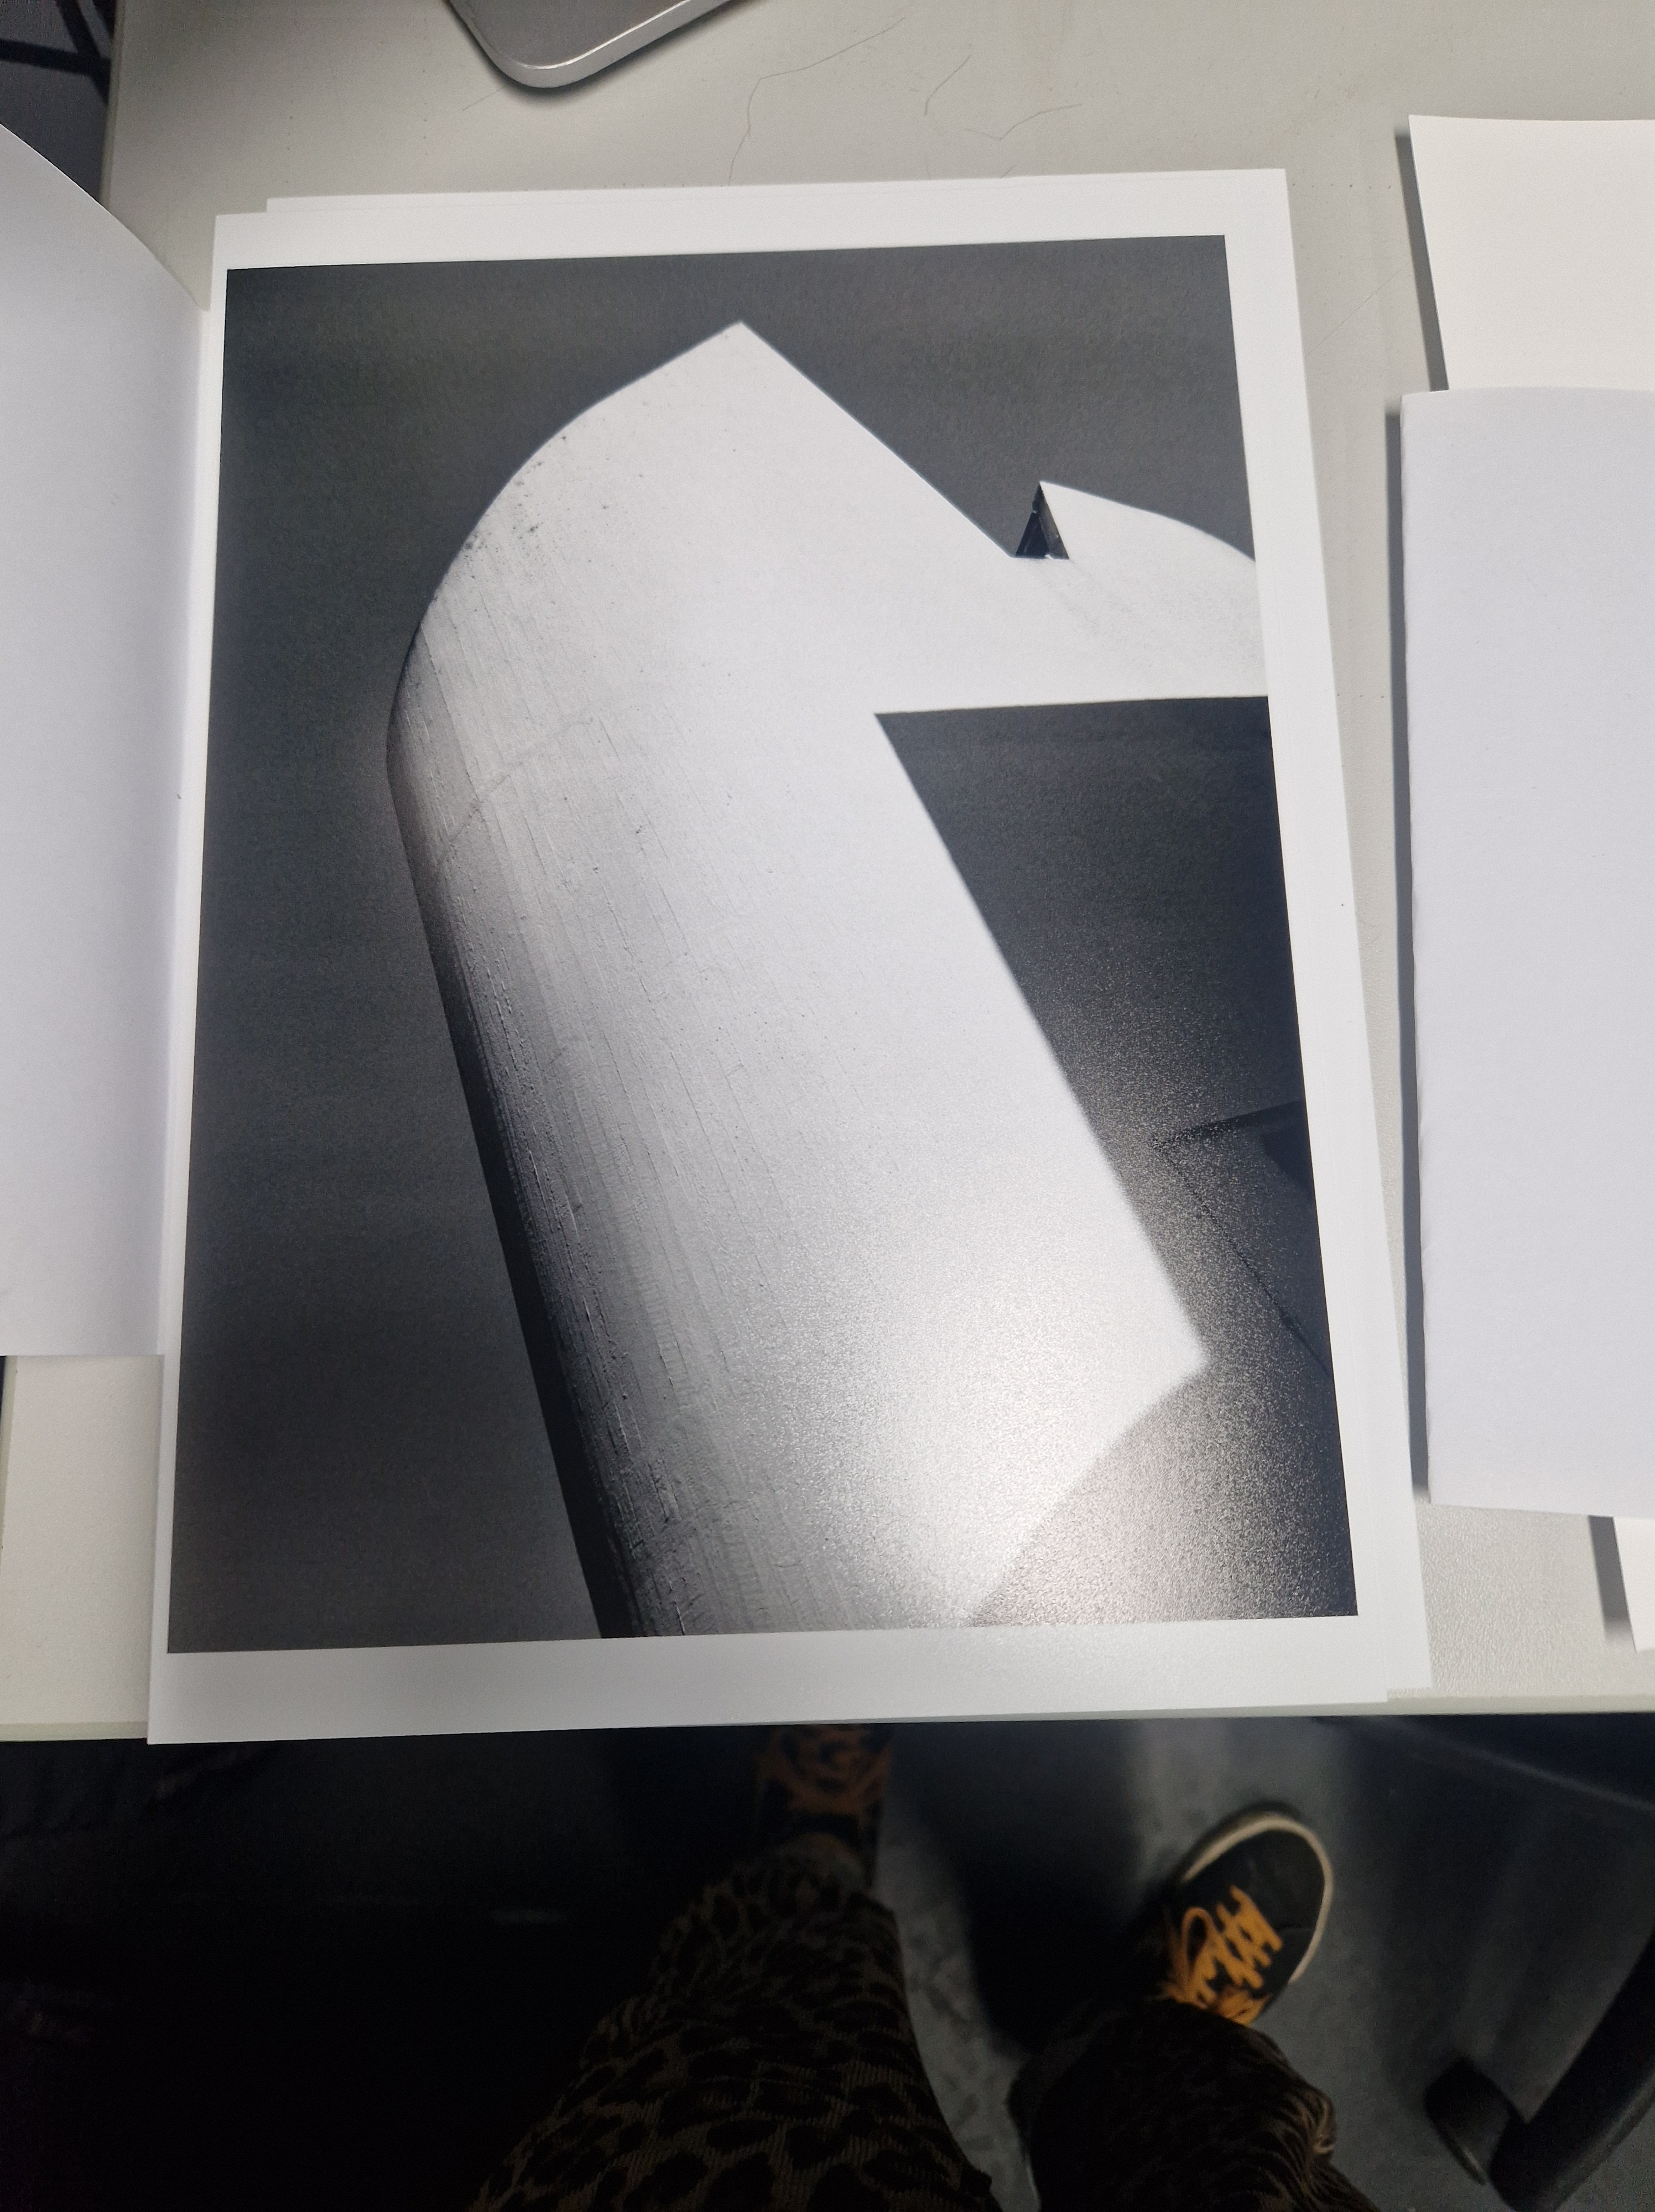
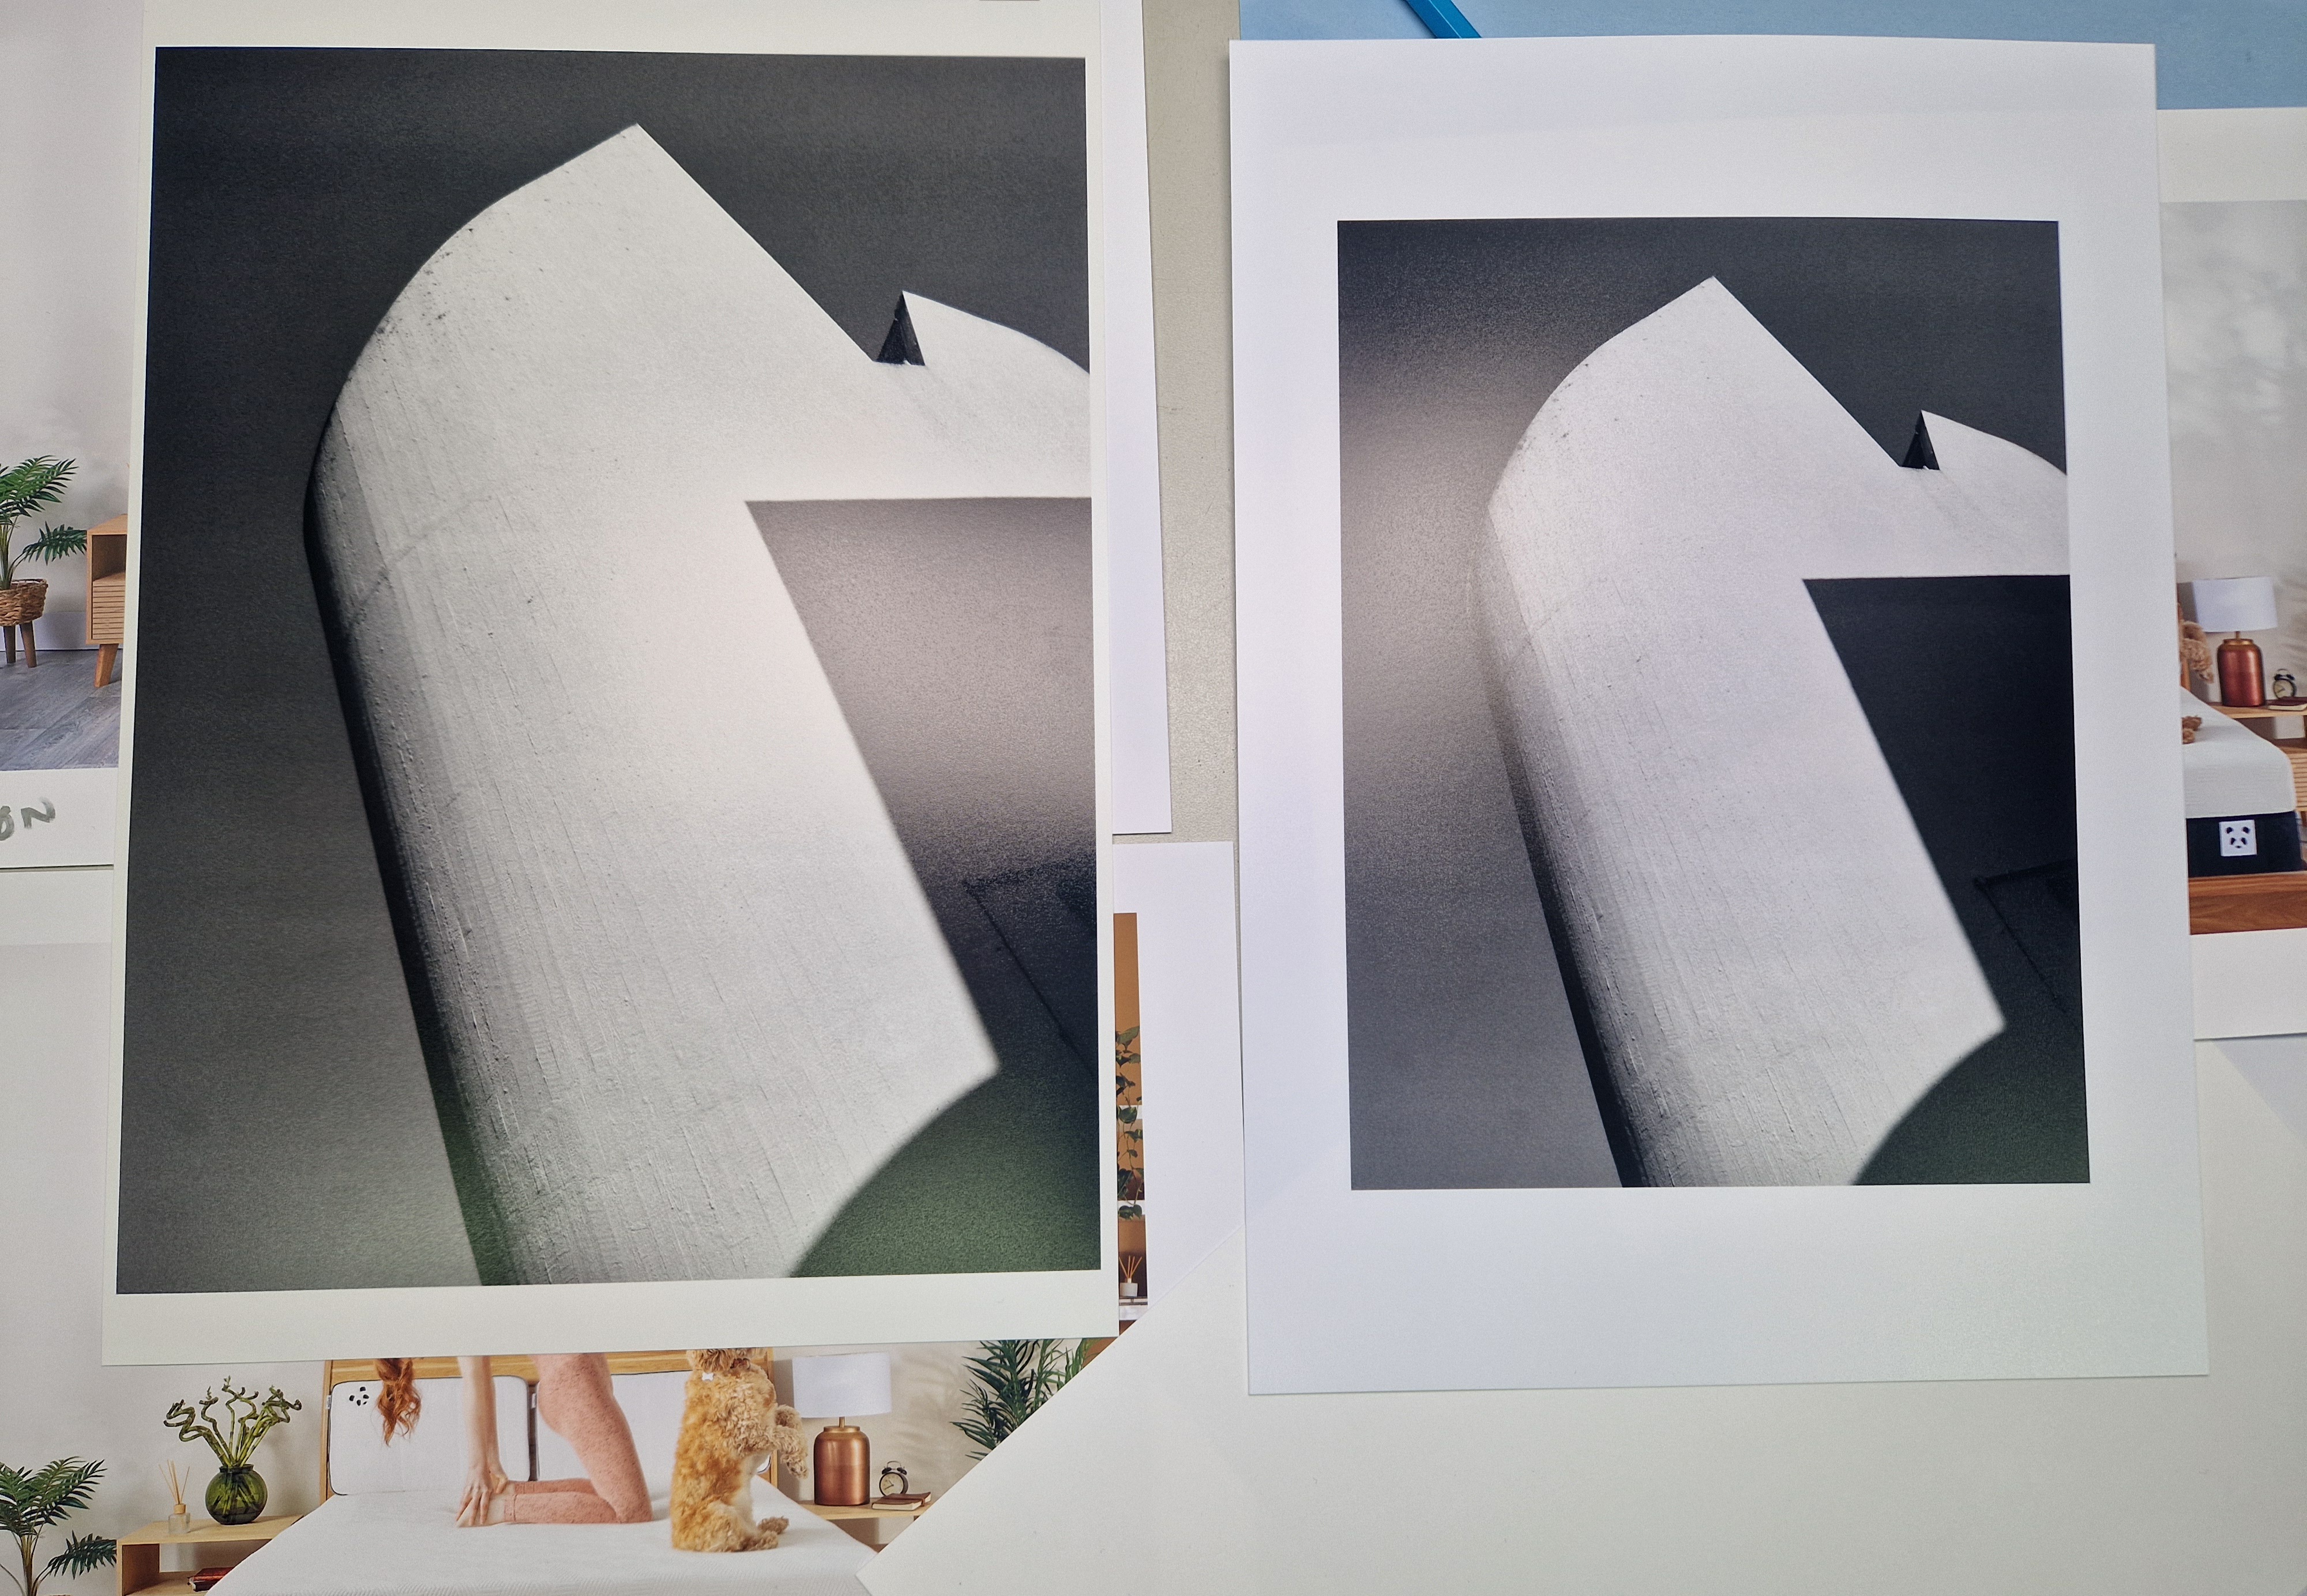
TESTING PRINT SIZE AND PAPER OPTIONS
After returning from Print City, I went to the 3rd floor and spent a few hours printing my Degree Show image in different sizes and papers (A2, A1 and A0 and silk and gloss). I then hung them up on a free wall to get an idea of how they looked and also for it to be ready for my tutorial with Thom on Tuesday. I hope that after showing him my tests and getting a chat/advice from him, I will have a clearer idea of what size I want my print and can start making the frame.
FRIDAY
BRIEF and SEMINAR
NOTES:
- Creative methodologies = portfolio + 1000 words overview
- 9th of May deadline/15 credit
- Professional presentation of my photographic work = portfolio
- Consider the chosen field and audience
- 3rd of May portfolio event
- You can invite people you want to review your portfolio to the event
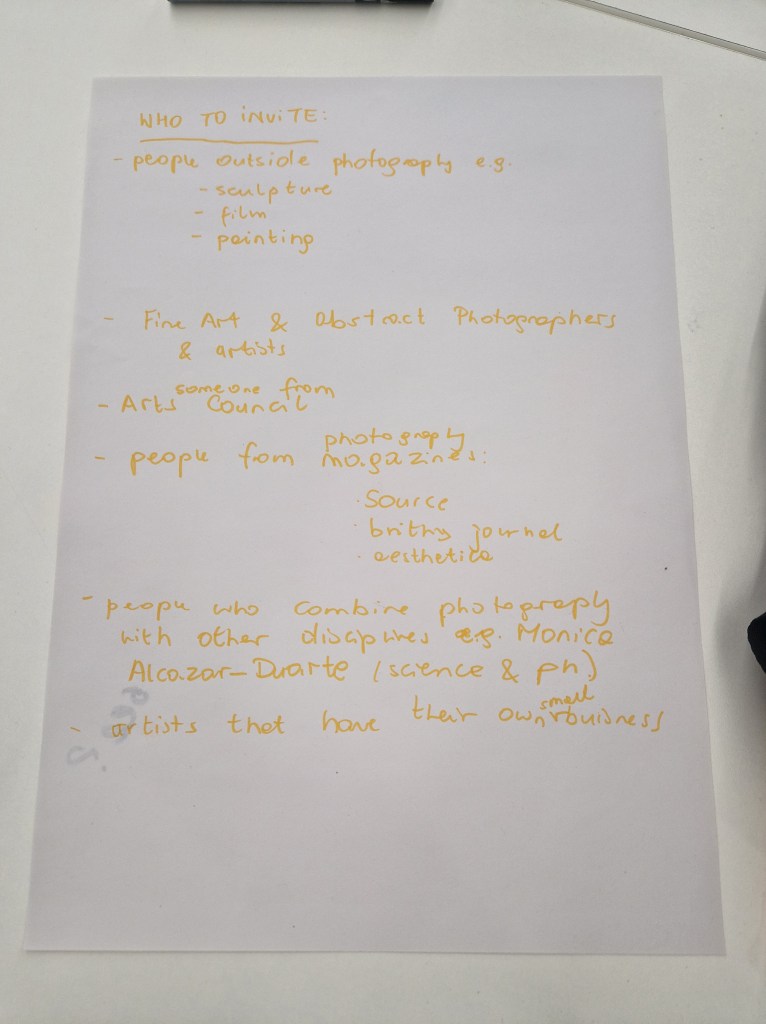
REFLECTIONS: Great group session that made us think about the possibilities and scale of our portfolio event.

Additionally, we were prompted to make a plan for making the portfolio, with timescale for each month. I am a strong believer of working this way as even a very big and overwhelming tasks seem completely achievable one broken down to baby steps and planned well.
PORTFOLIO PLAN
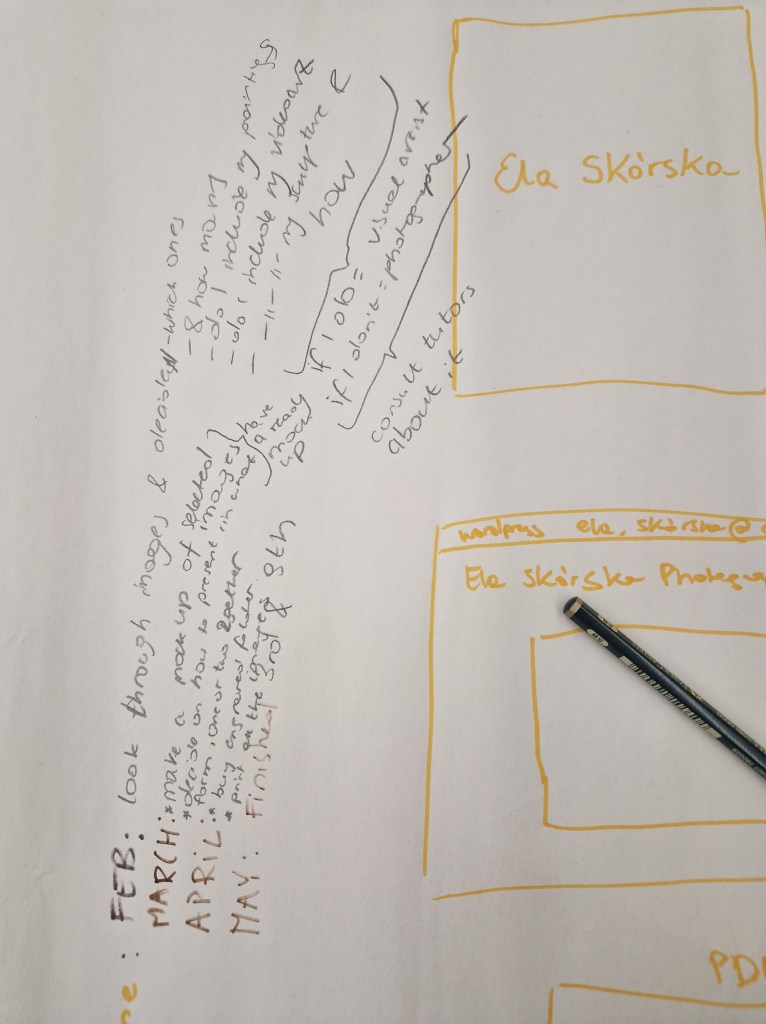
FEBRUARY
- look through my images and select ones for the portfolio
- how many
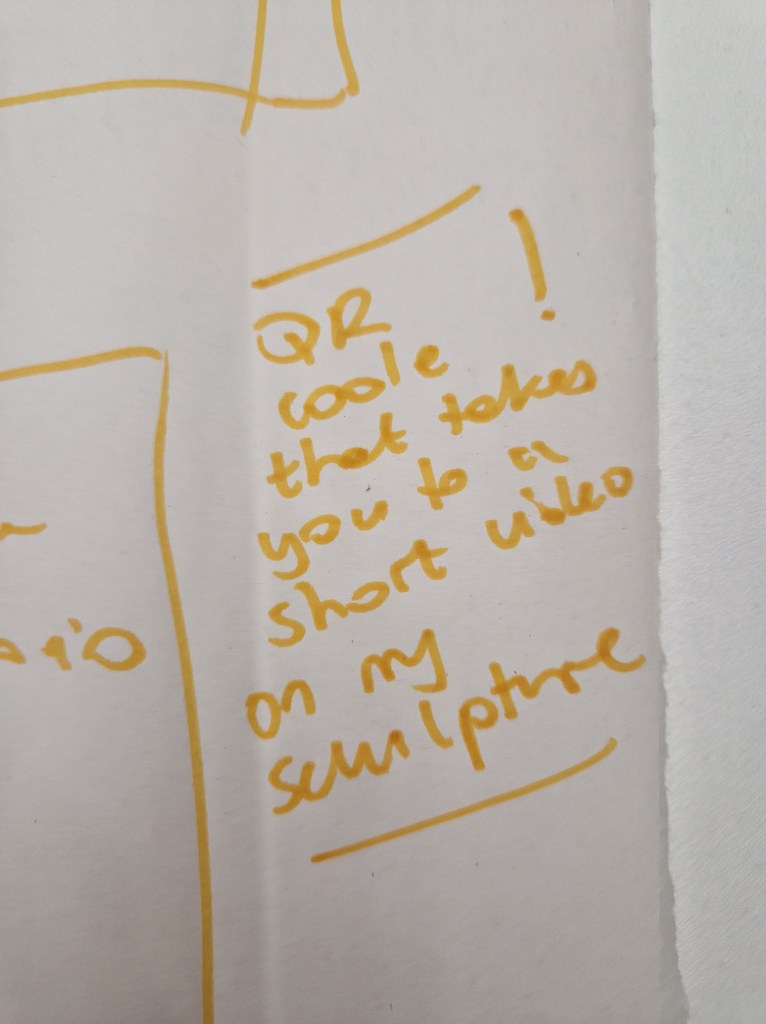
- do I include my paintings, sculpture (how?) and video art (QR code)
- if I do = visual artist if I don’t = photographer = CONSULT TUTORS
MARCH
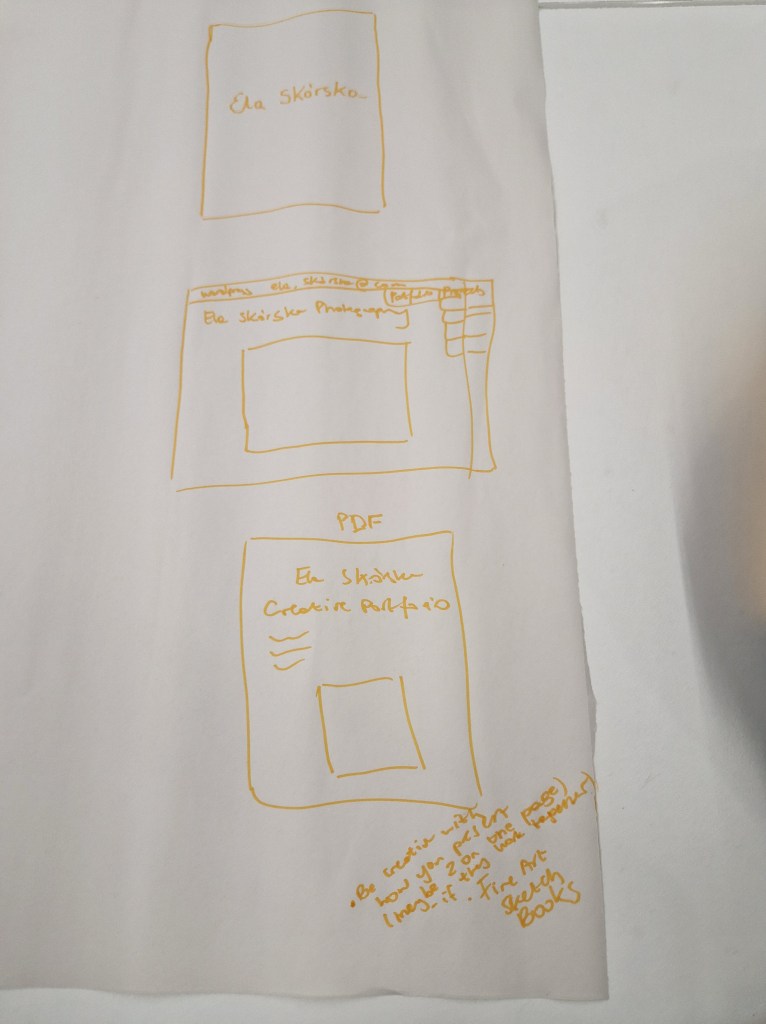
- make a mock-up of selected images
- decide on how to present it, in what form, and I think I will have to make two of these (one of what is expected = last project, and one for myself of my best work = something that really represents me)
APRIL
- research and buy an engraved folder (if I decide to go with a folder, but same will apply for the box or anything that I will choose)
- print all the images in the digital darkroom
MAY
- have everything finished for 3rd and 9th of May
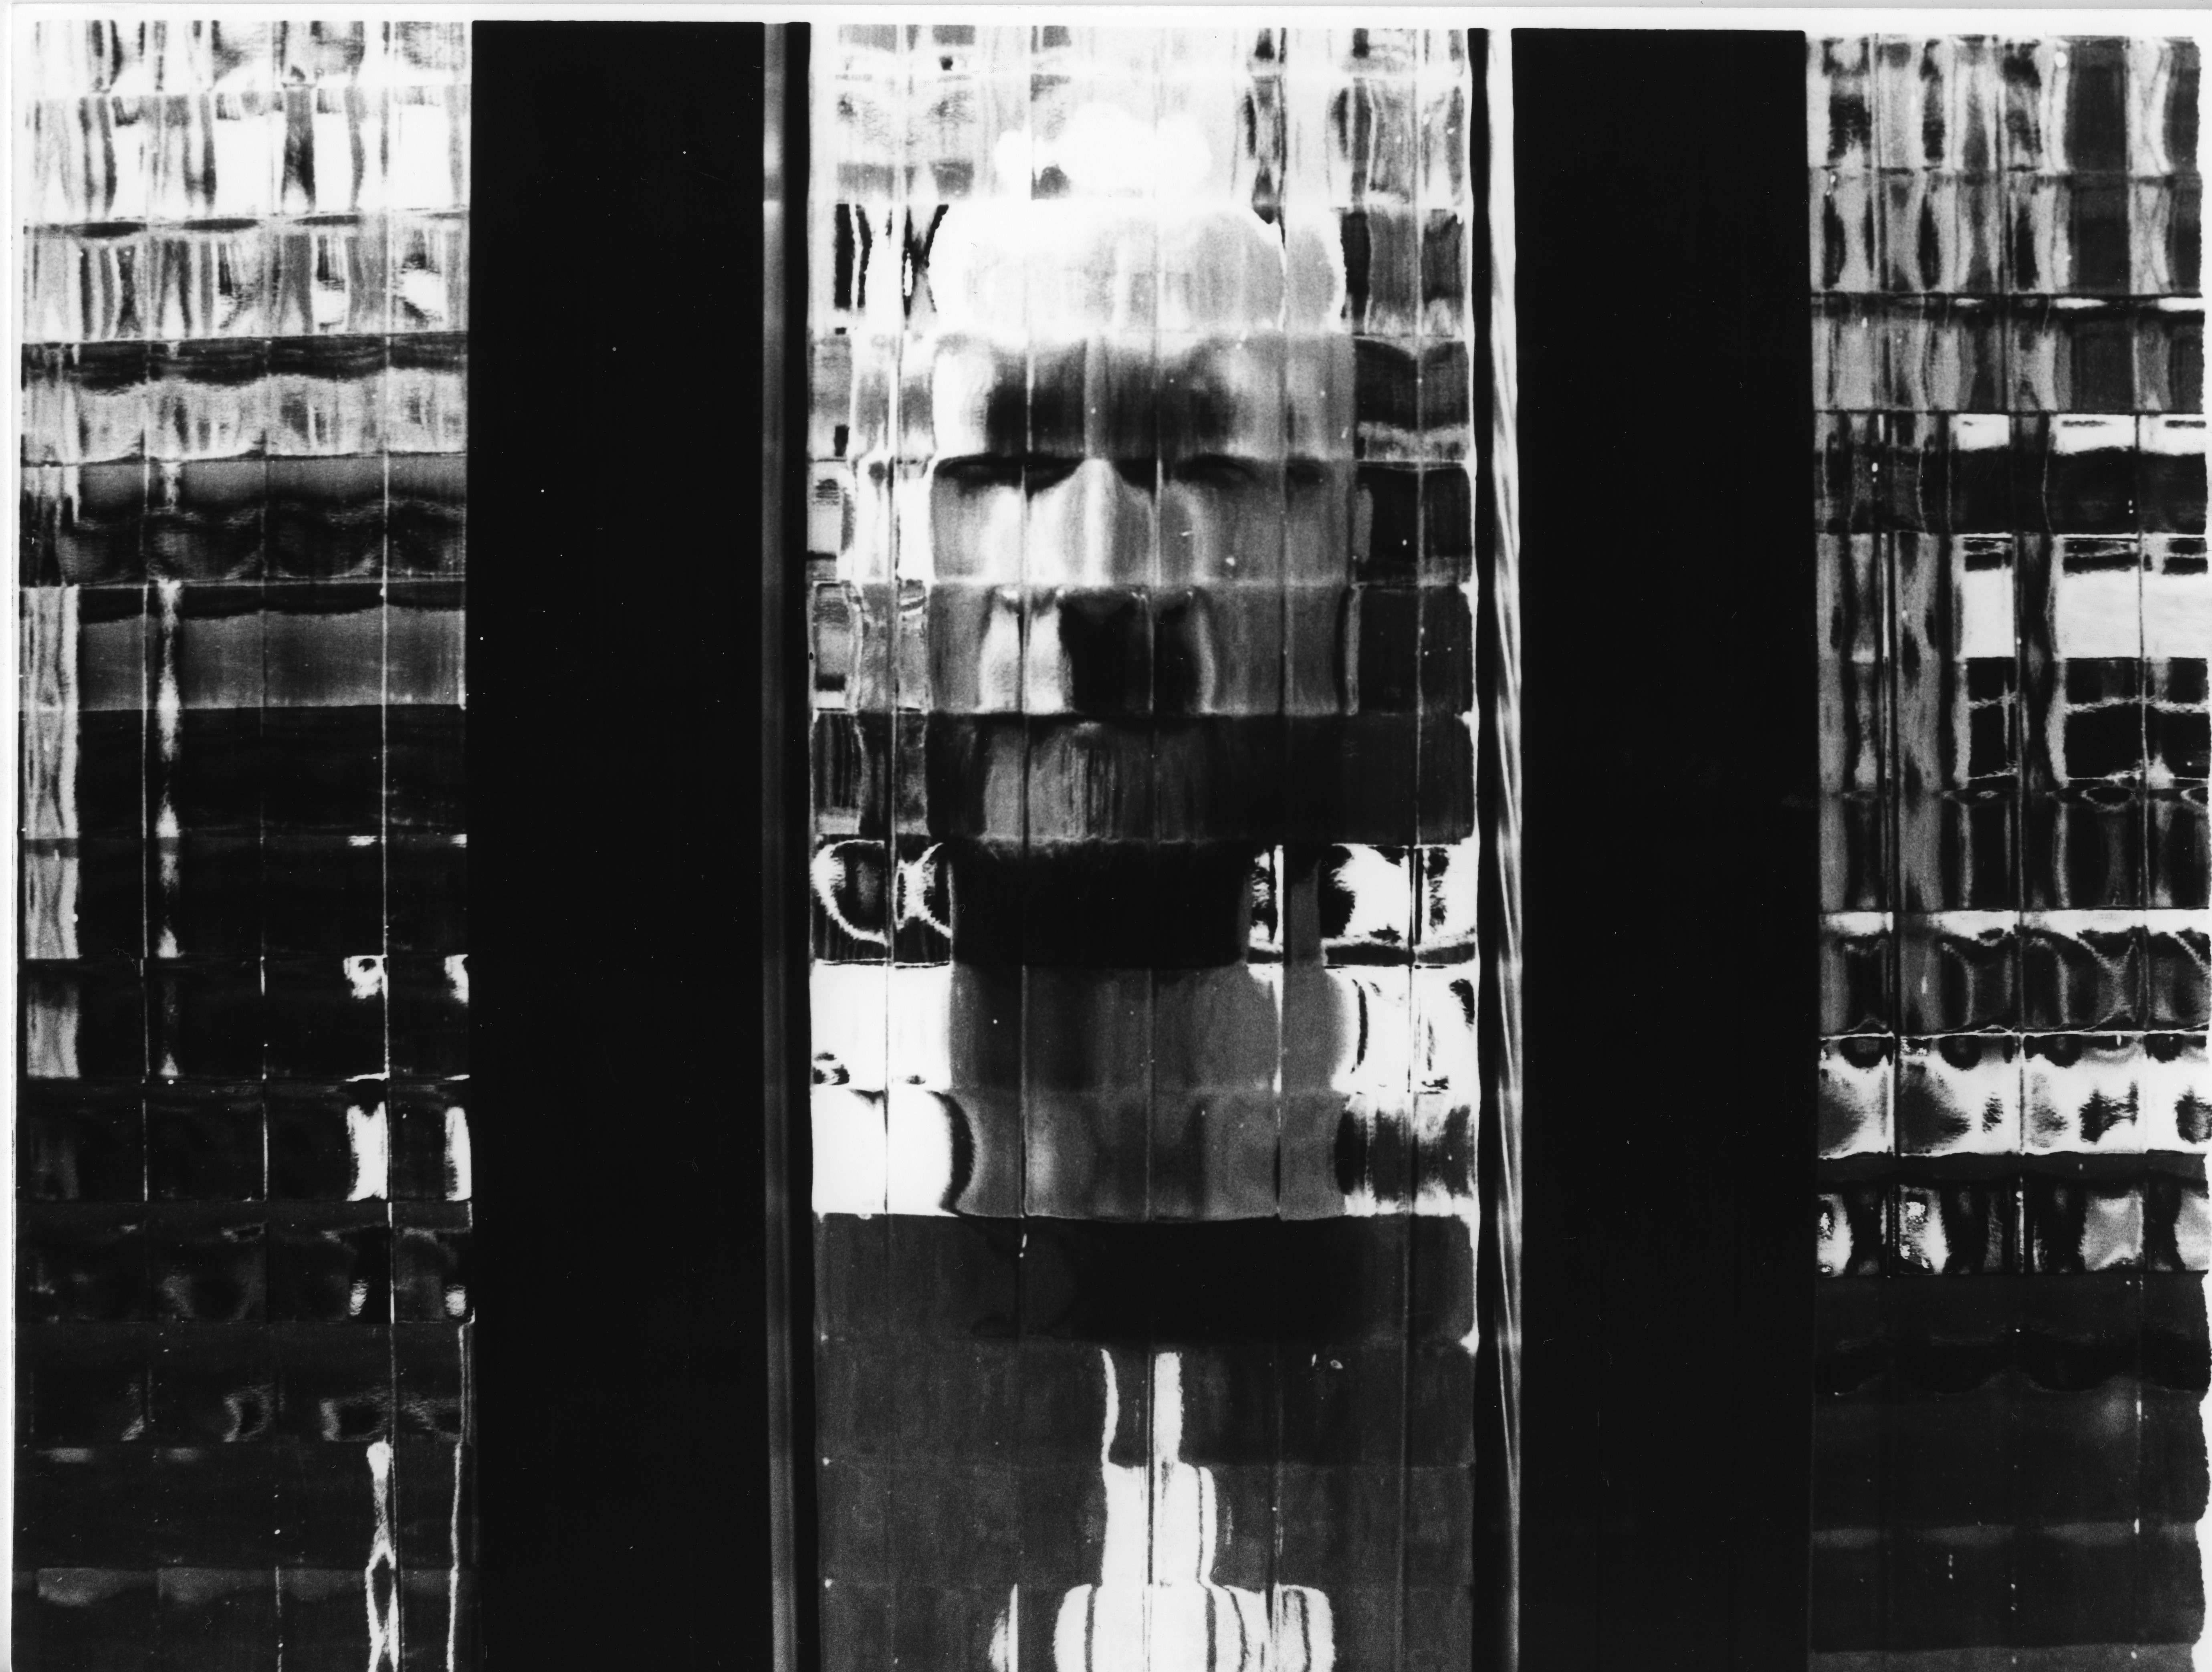
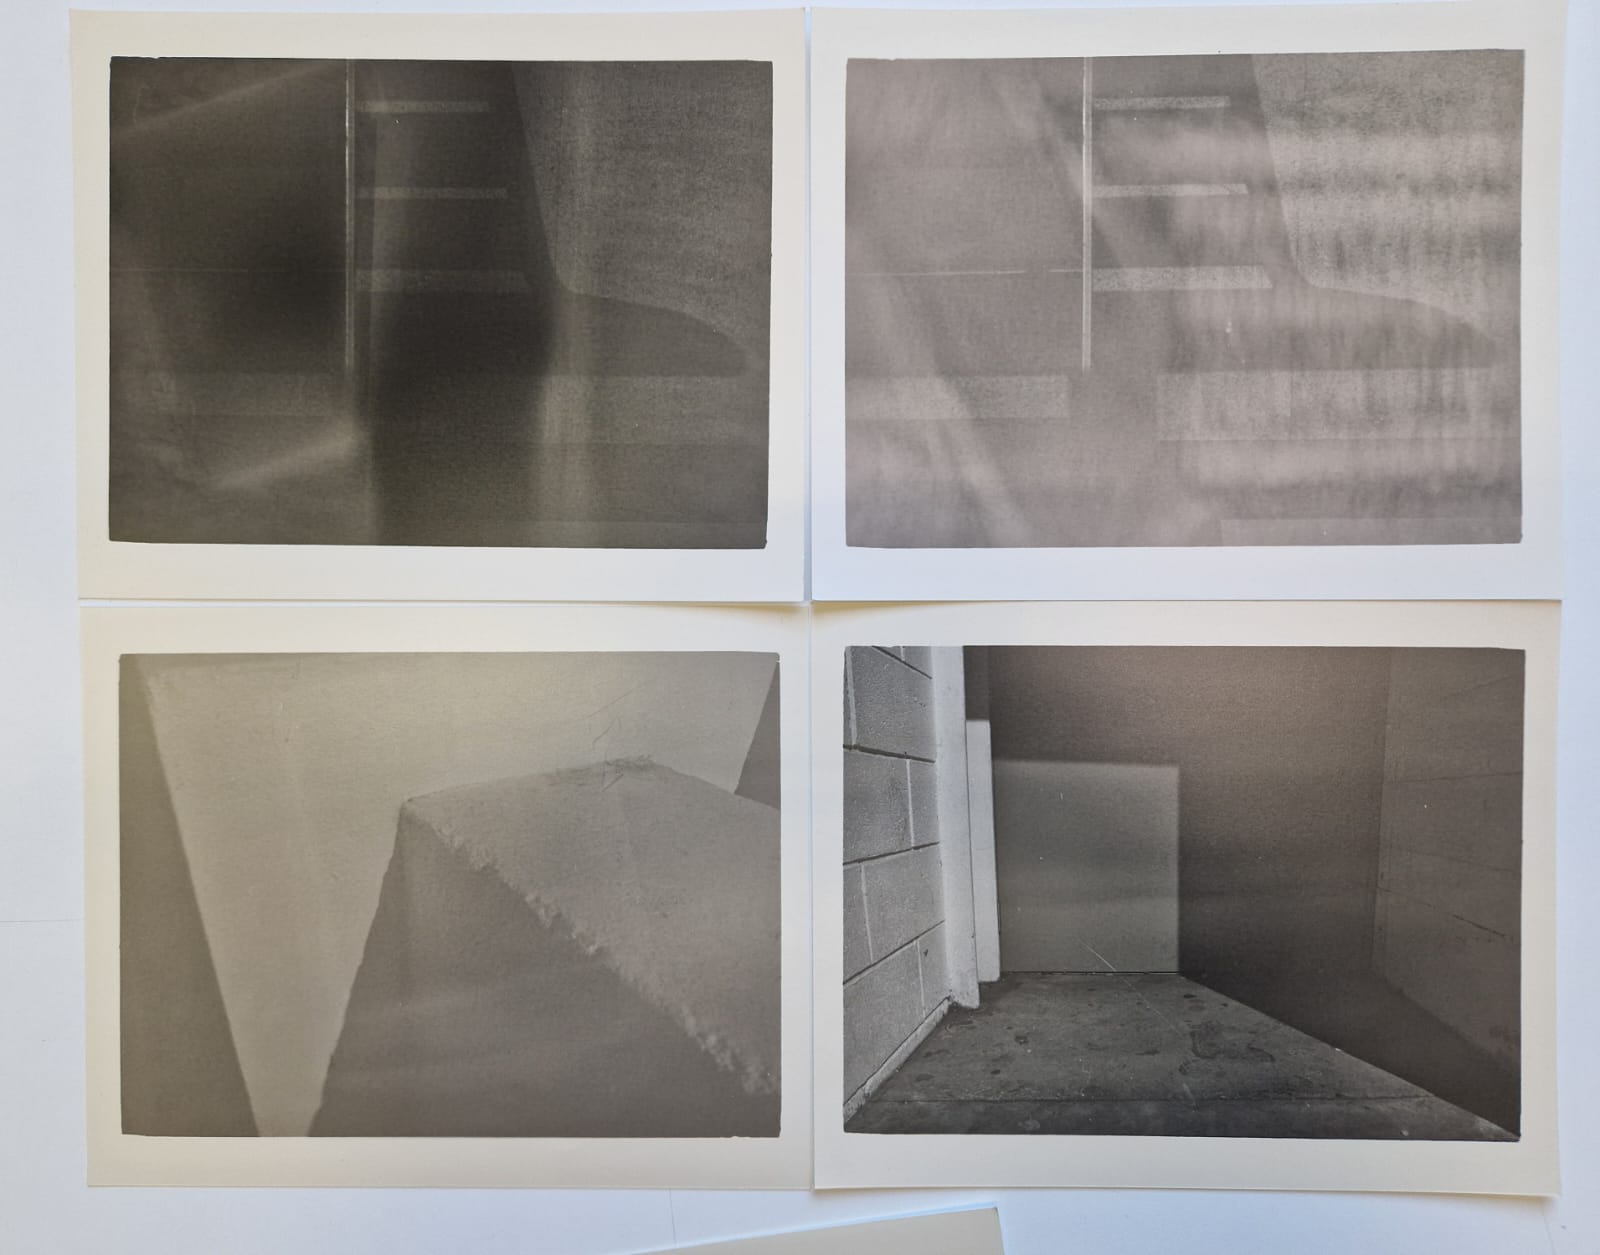
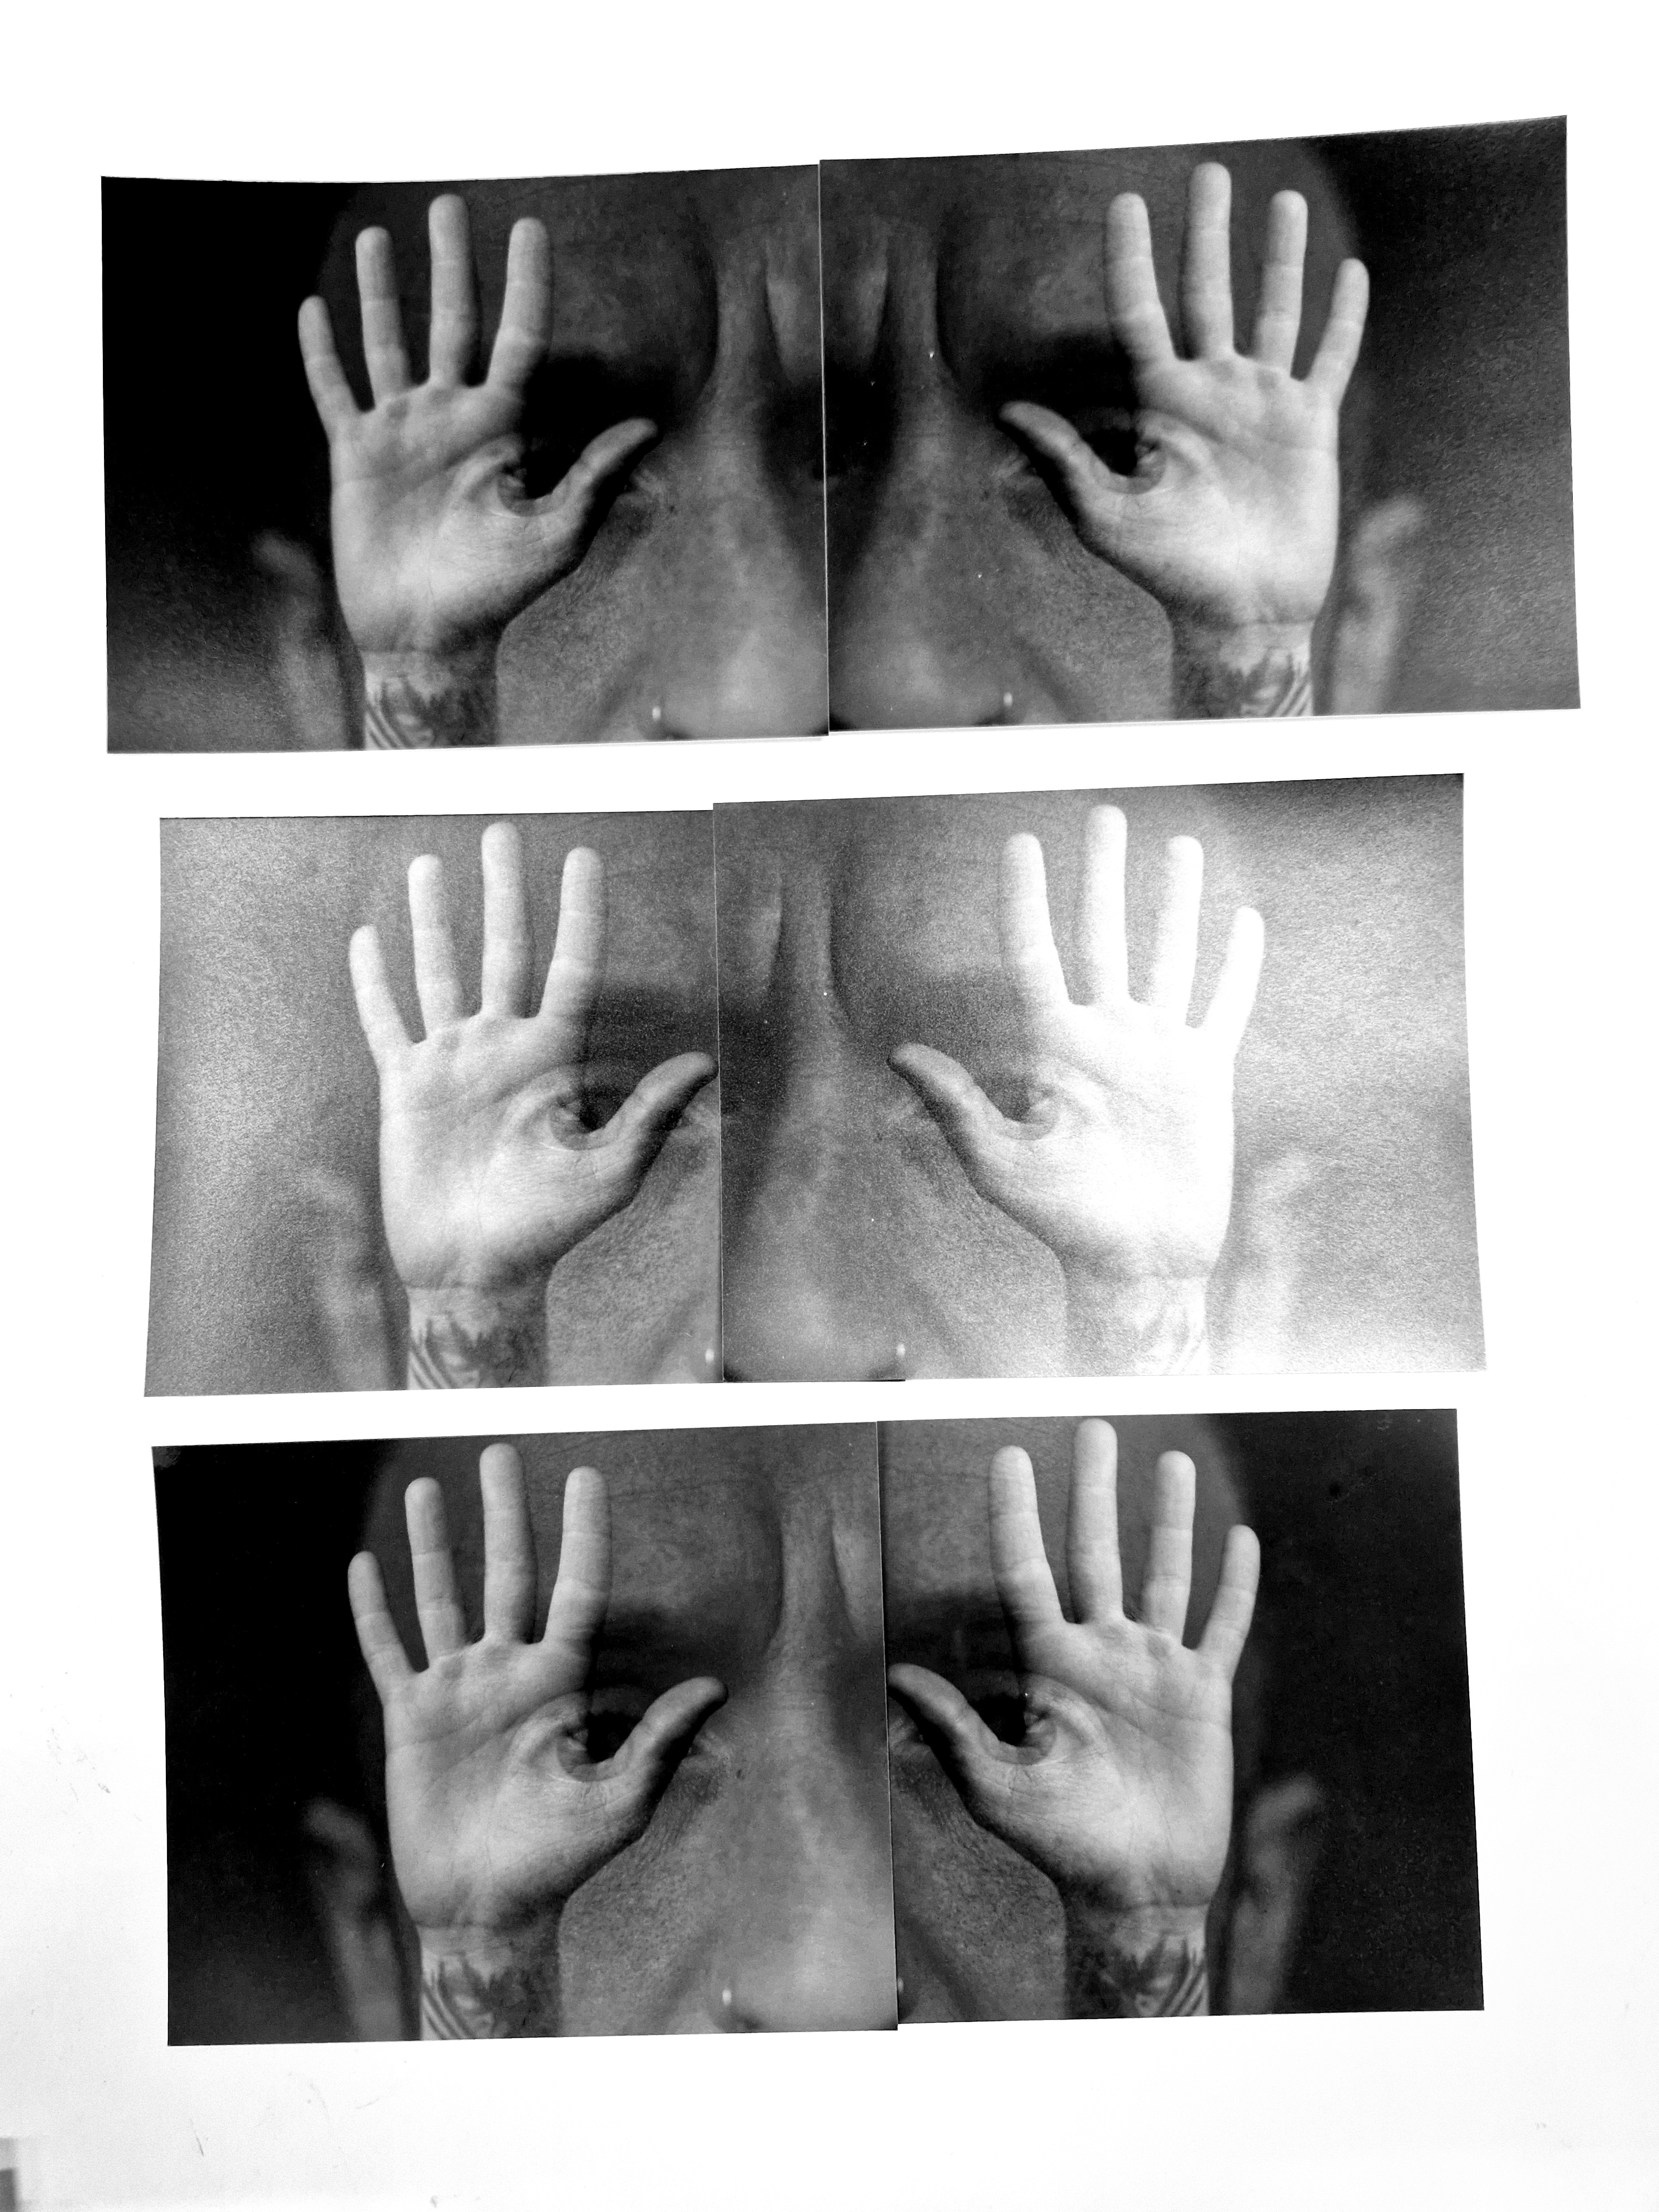
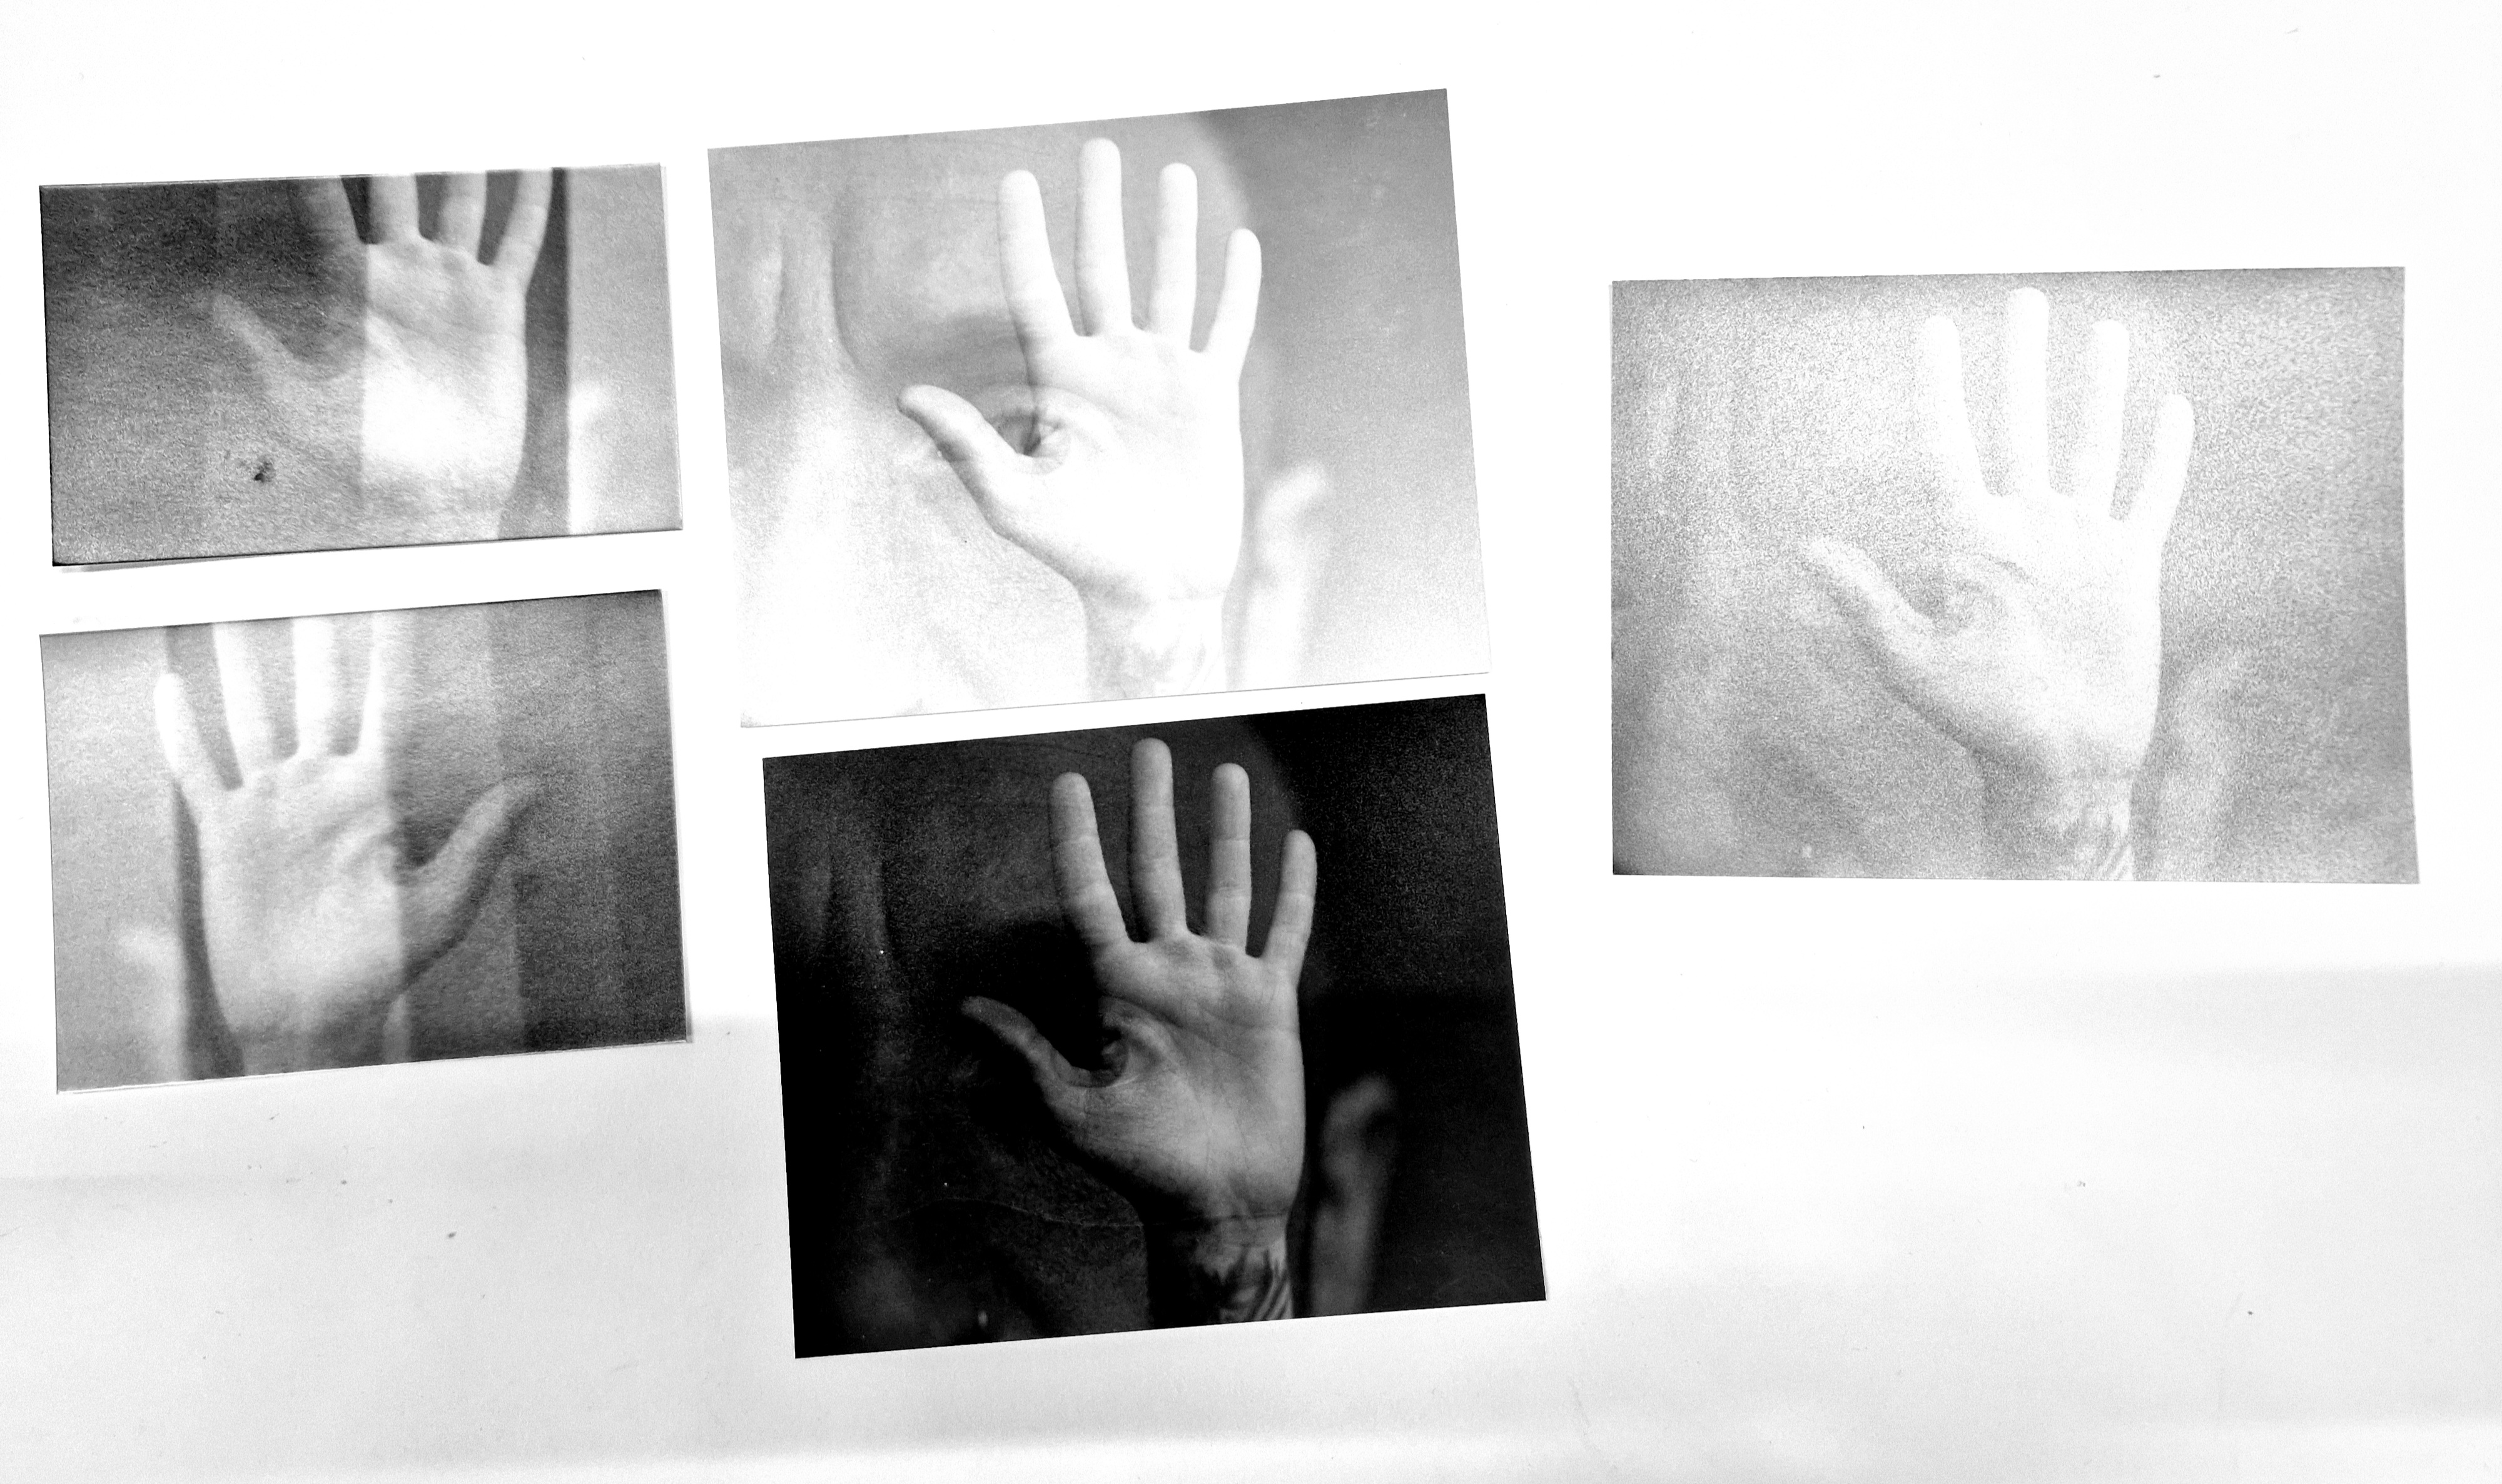
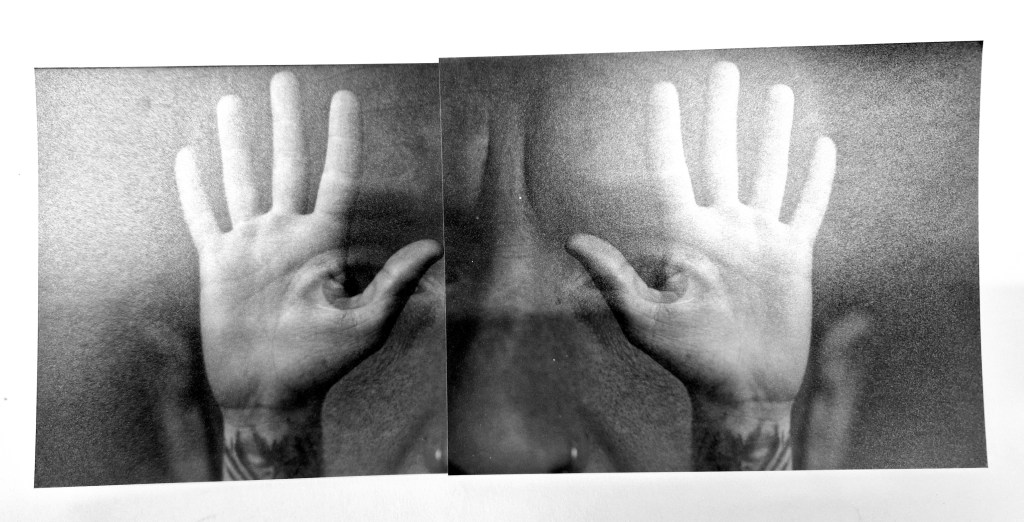
PLAYFUL SHOOTING
Between the brief and the seminar, I decided to have a session of playful shooting around Benzie, as I remembered how refreshing the experience with unexpected results was when we did a task like this in the first semester during our Monday task day.
Additionally, it was a perfect way to test my newest equipment addition – a macro lens for my Mamiya 645 PRO TL.
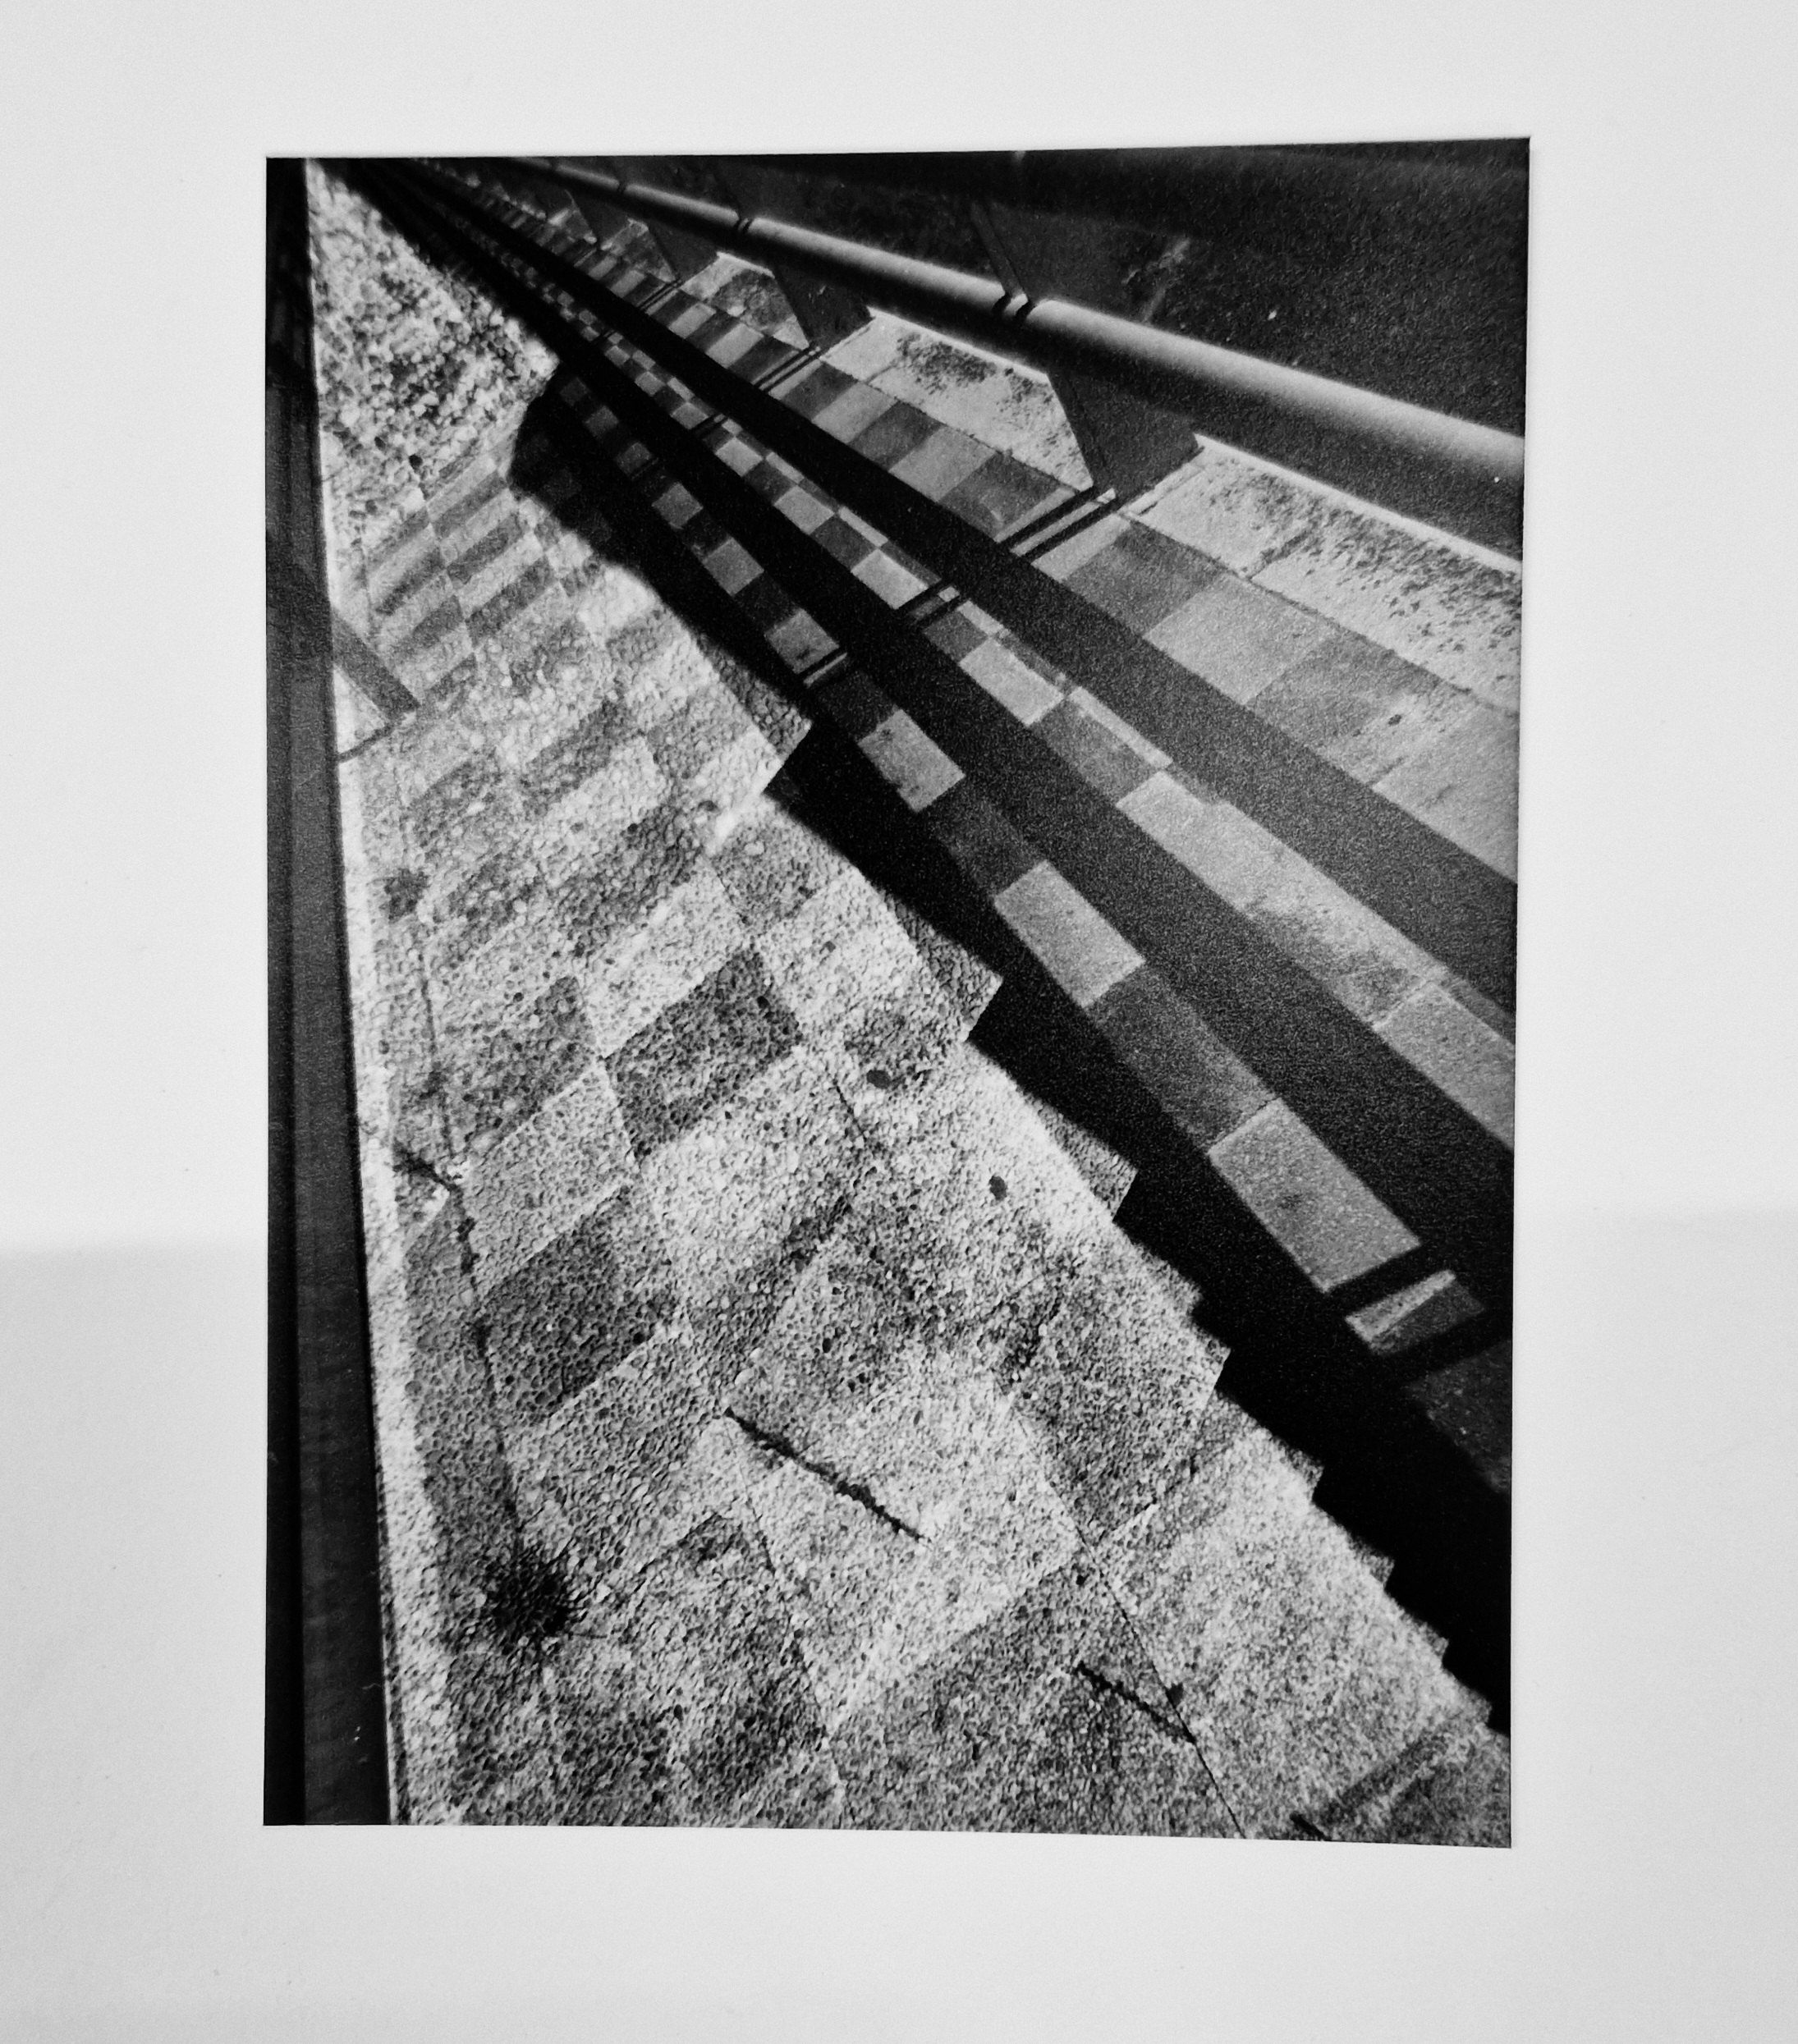
Luckily, there were about 30 minutes of sunny weather, which allowed me to shoot in my favourite way with light and shadow.
CONTACT SHEET
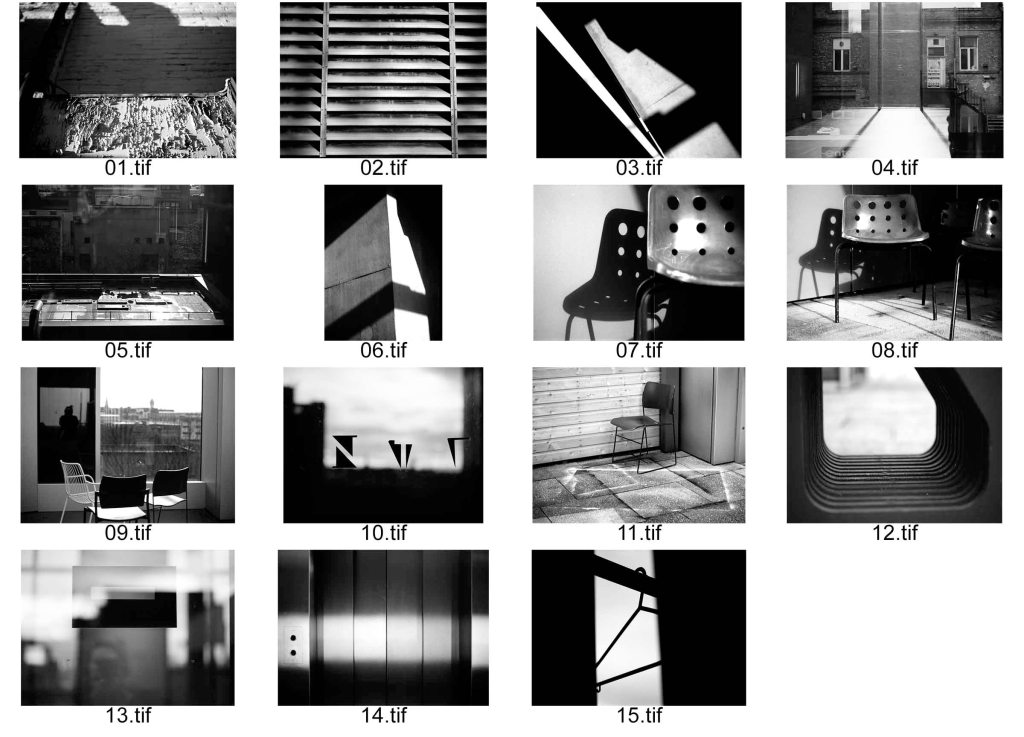
IMAGES
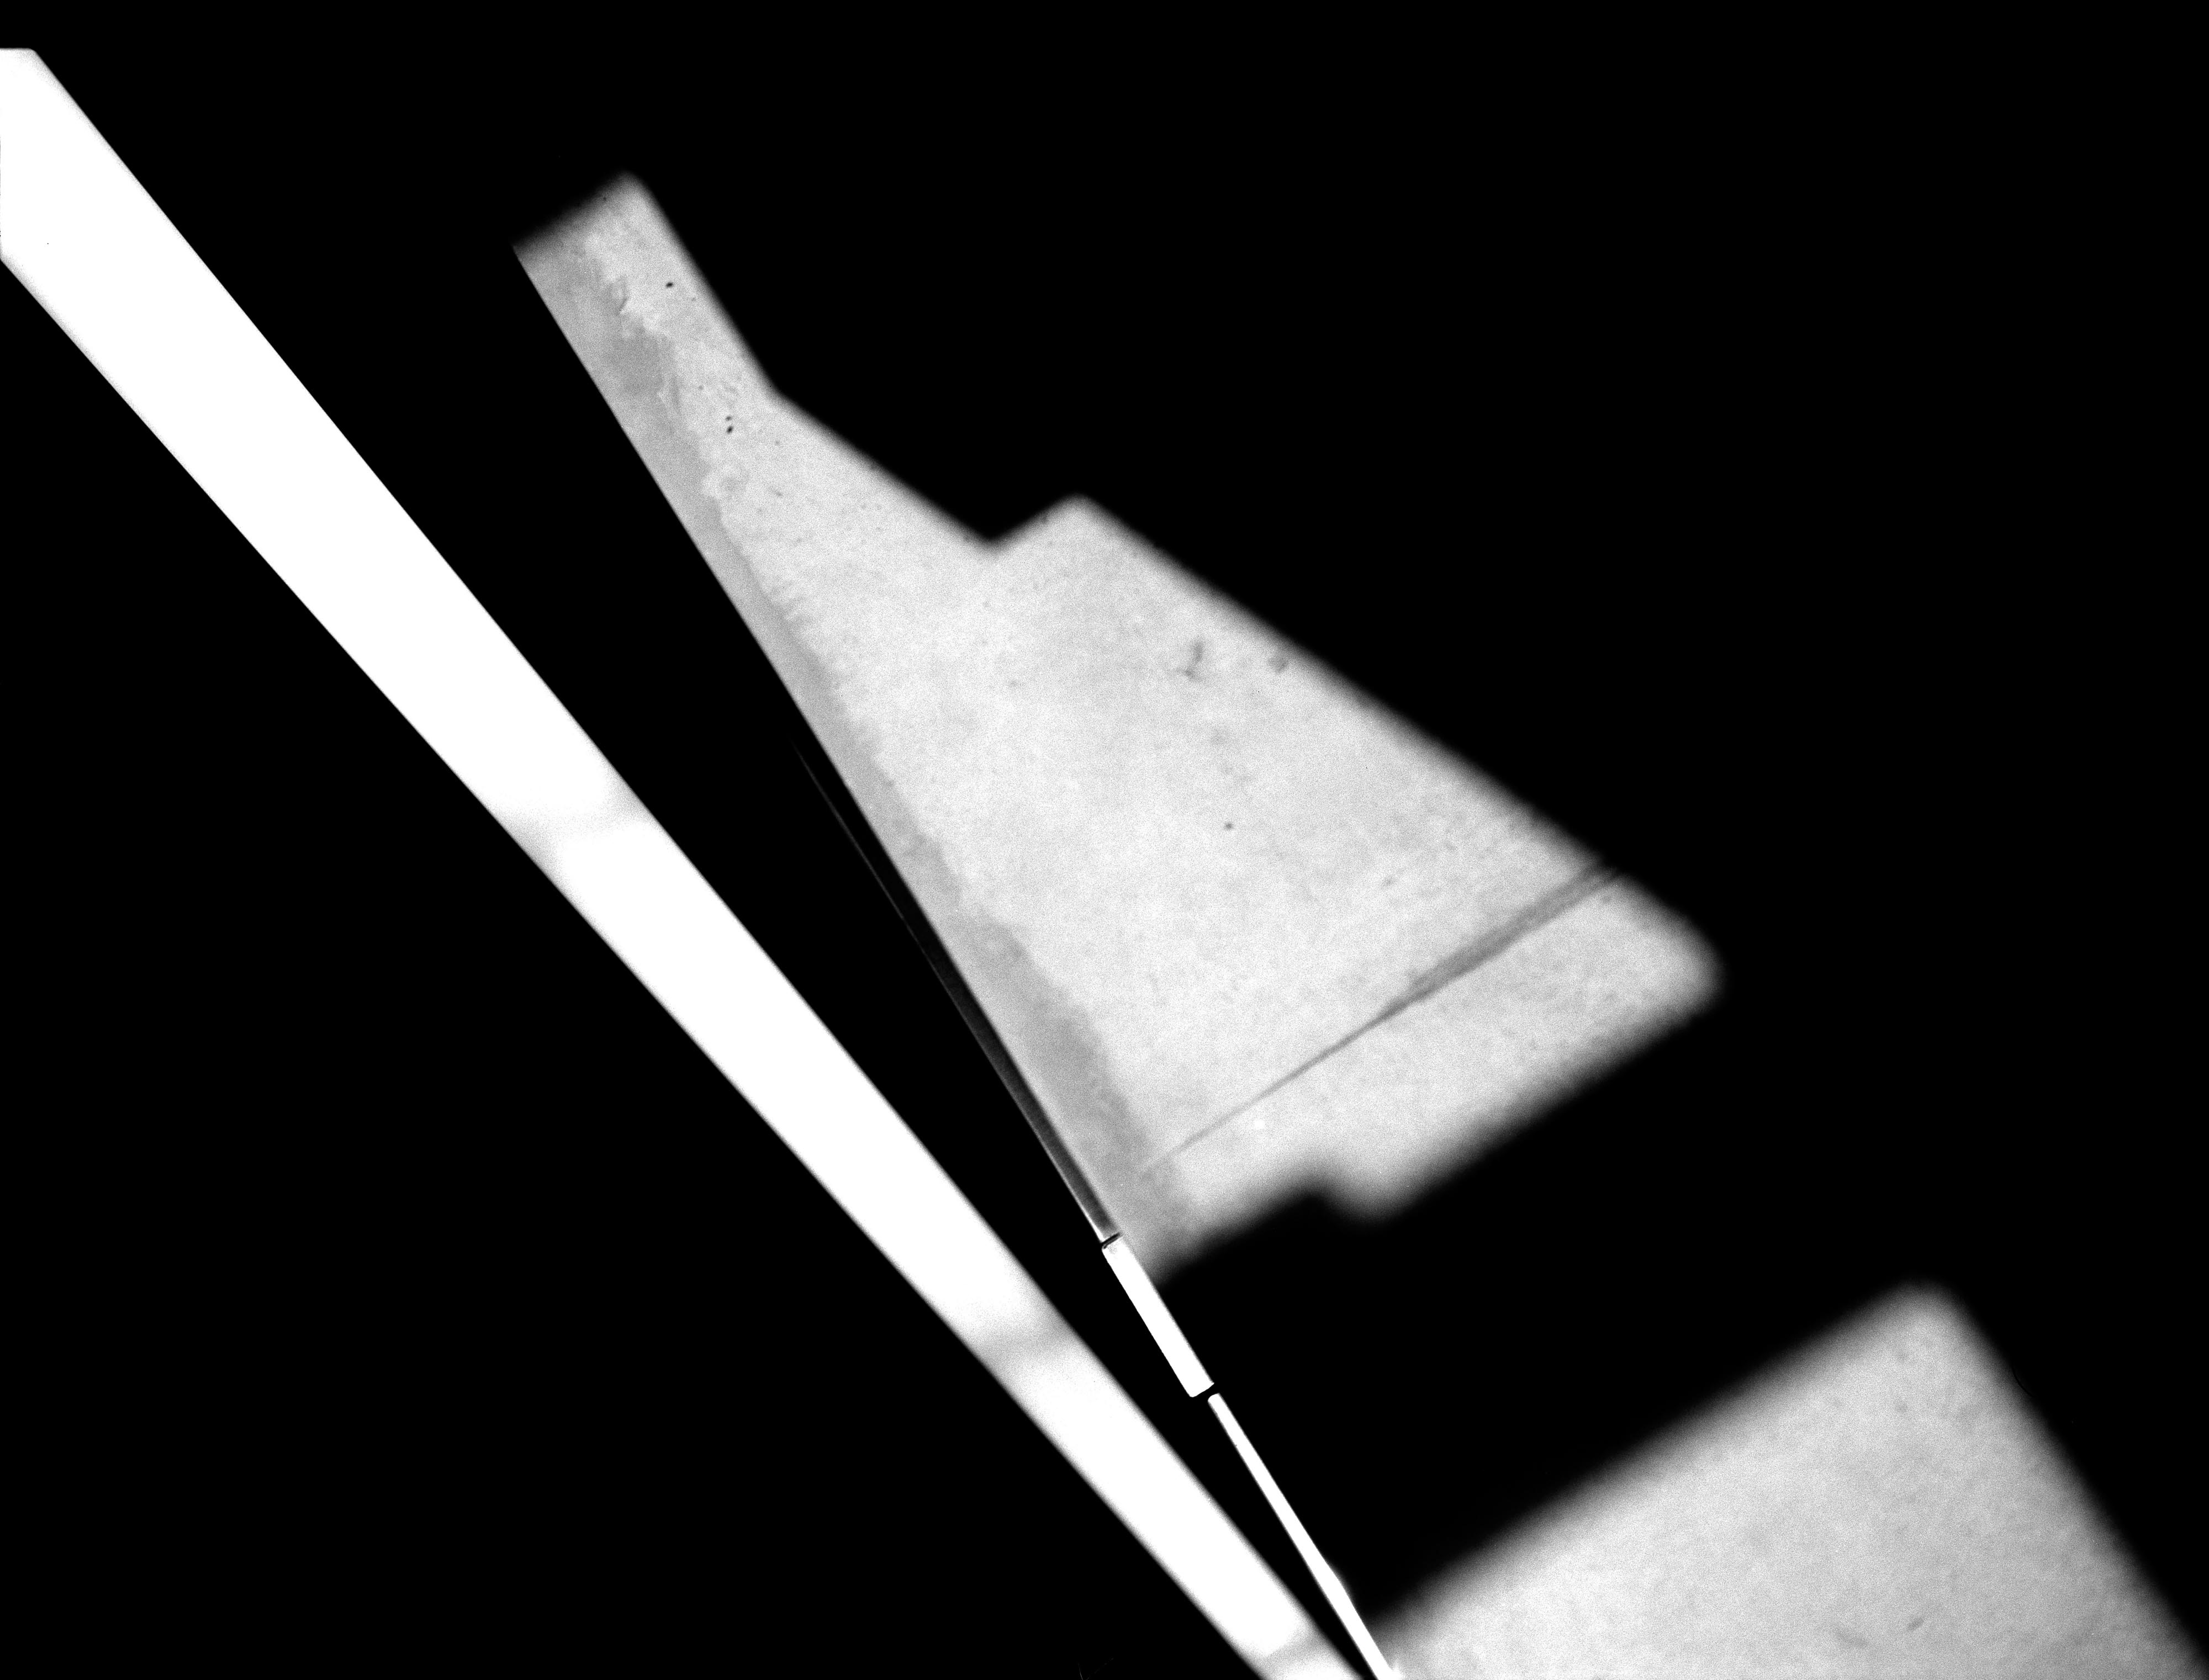
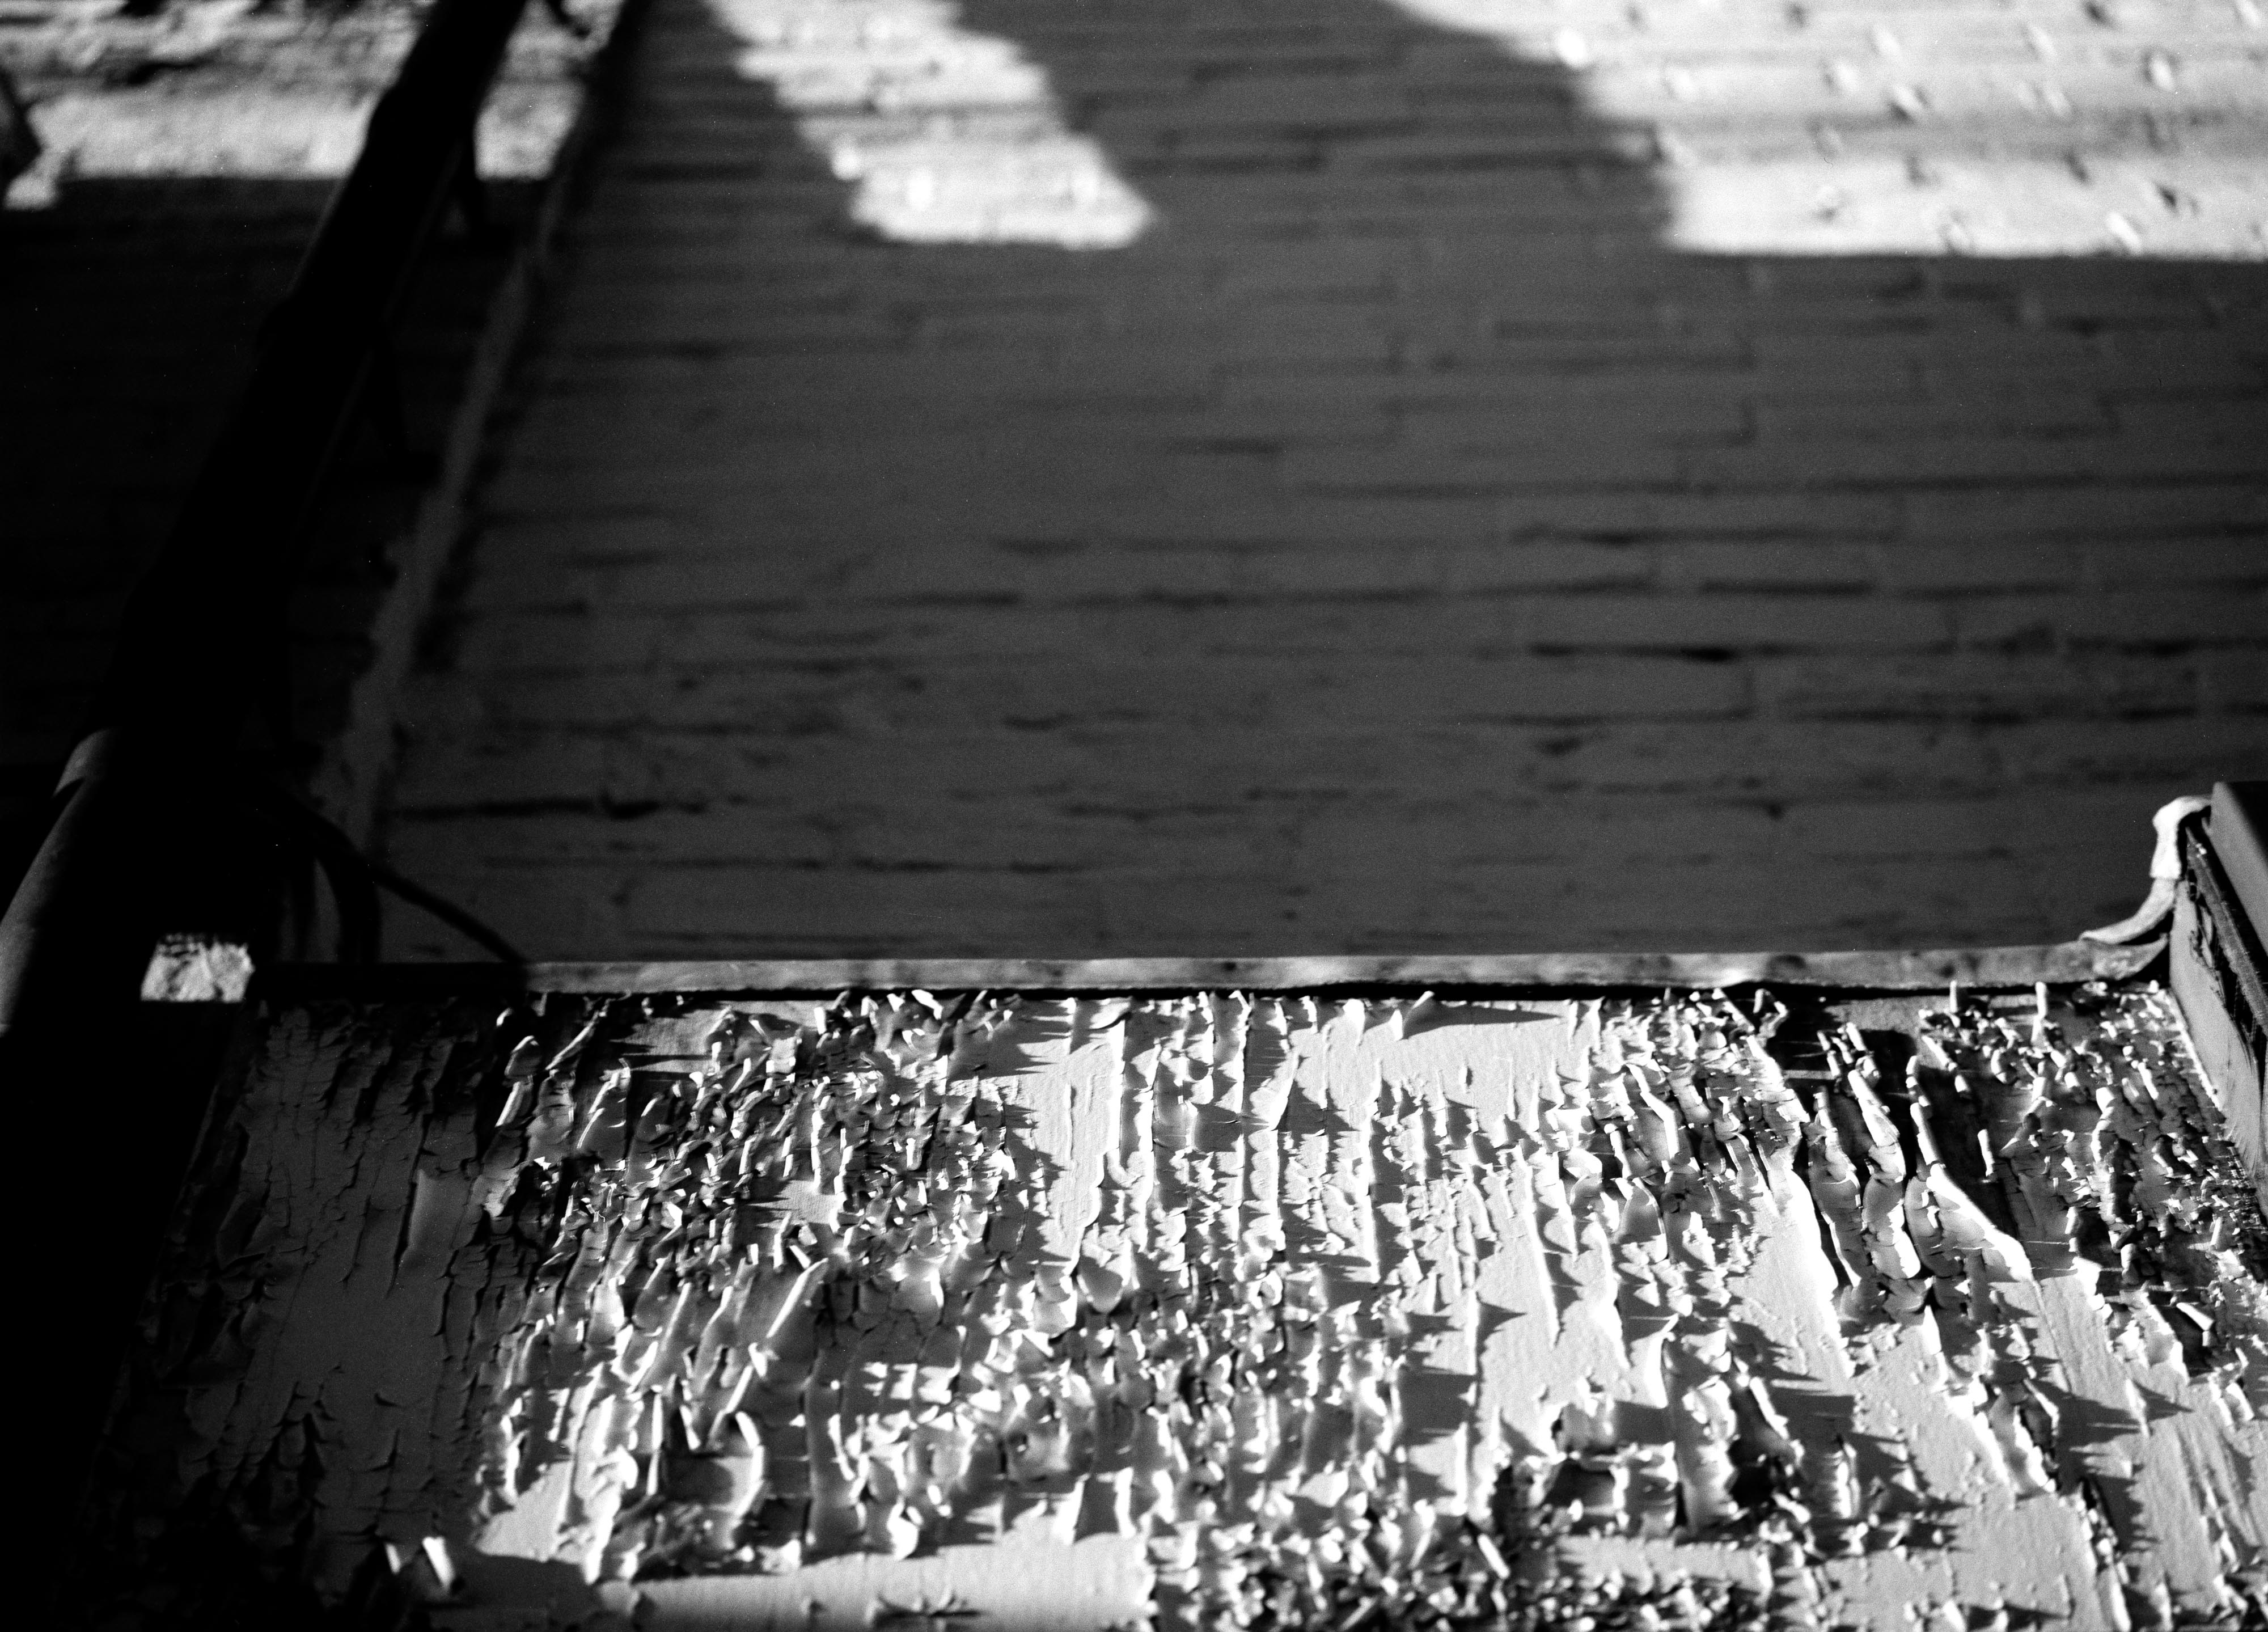
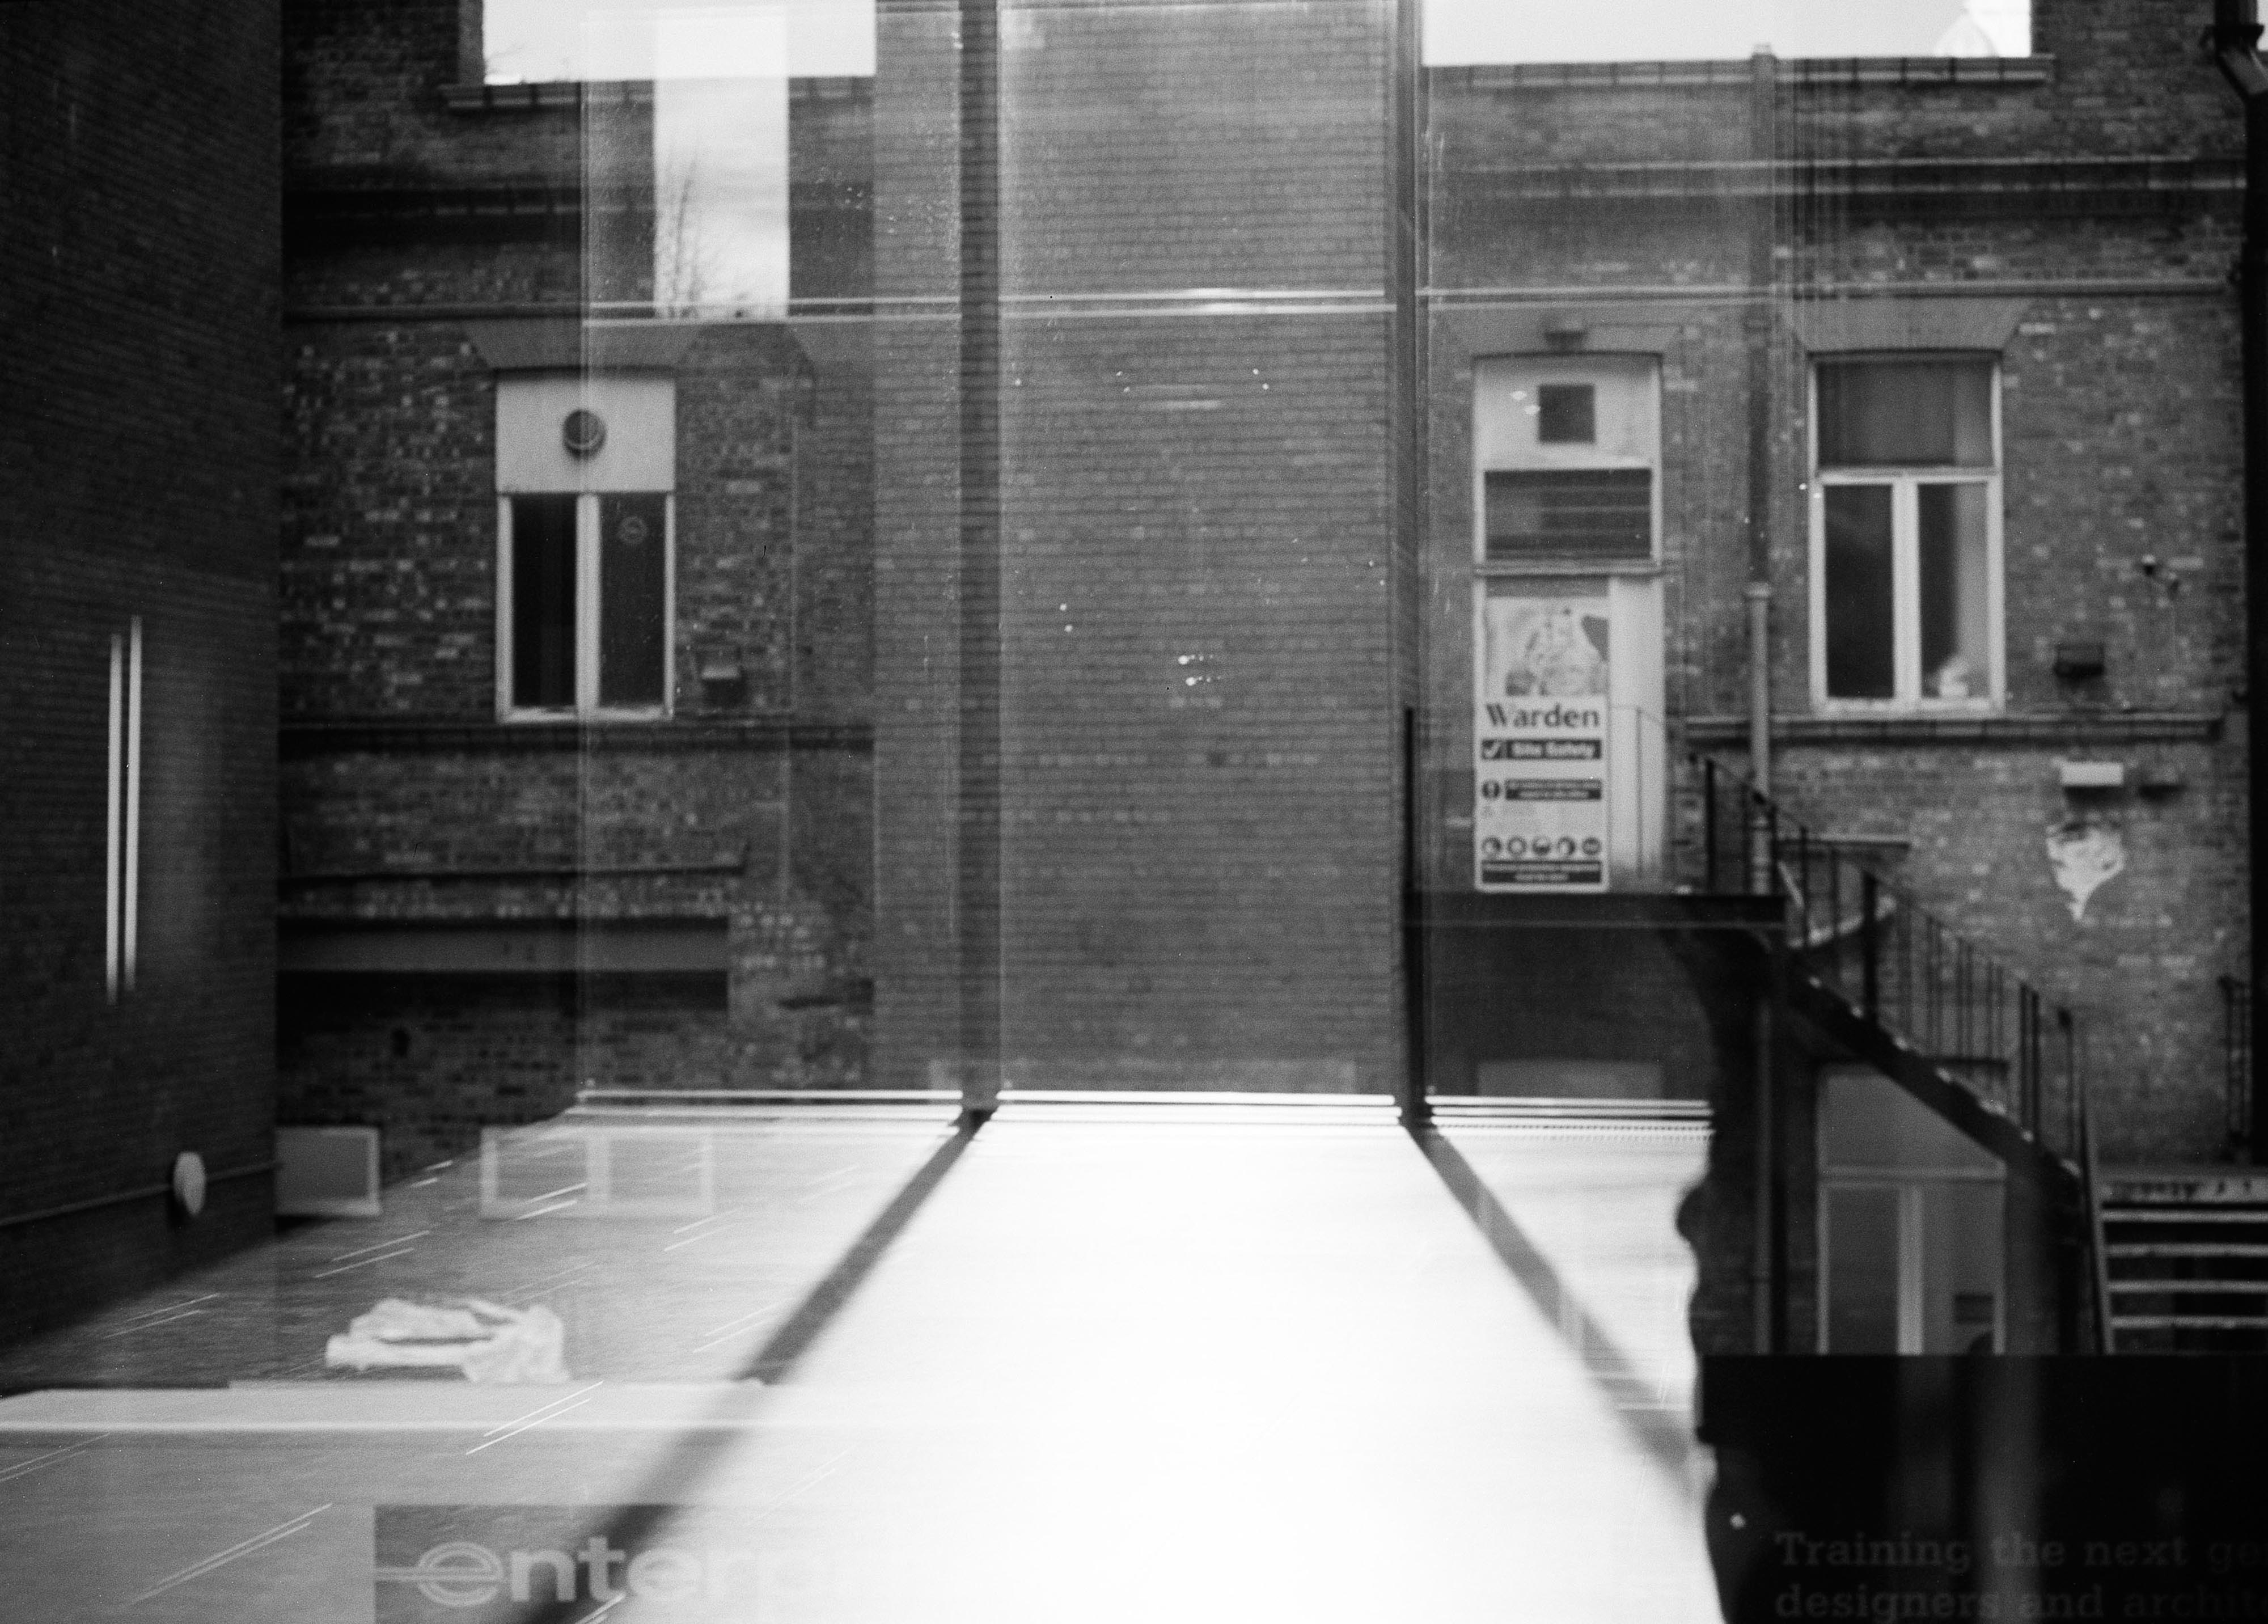
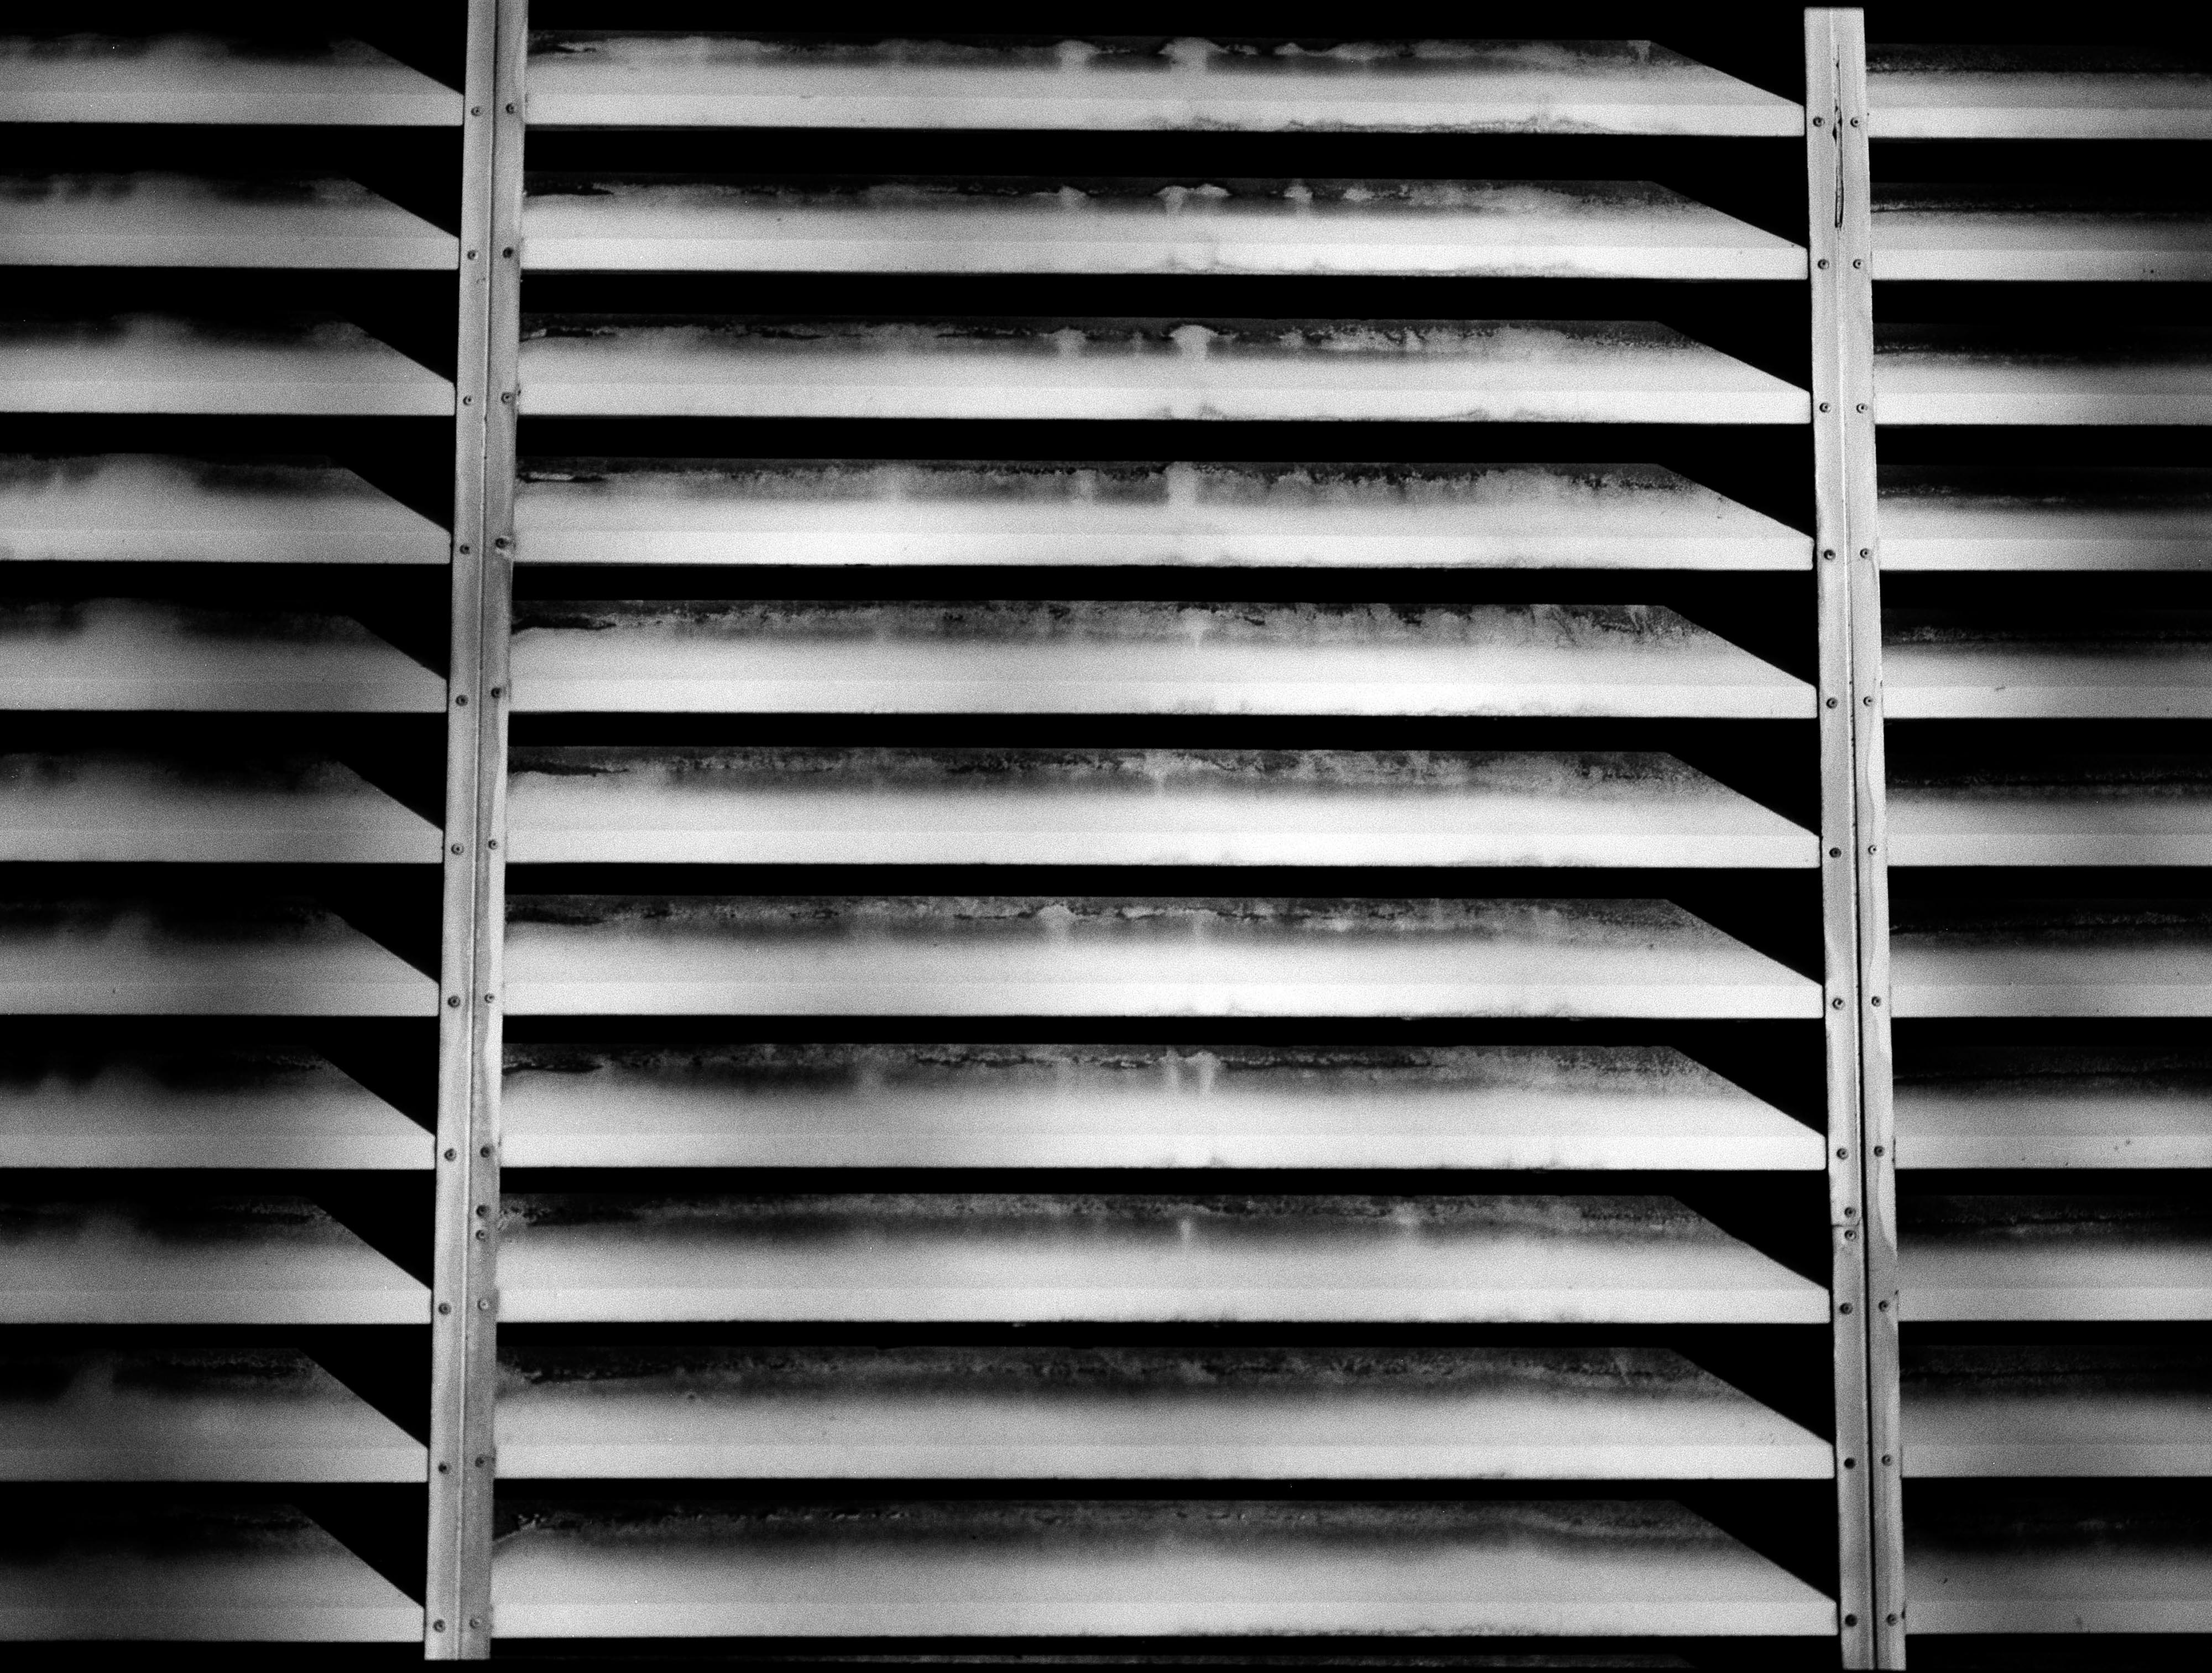
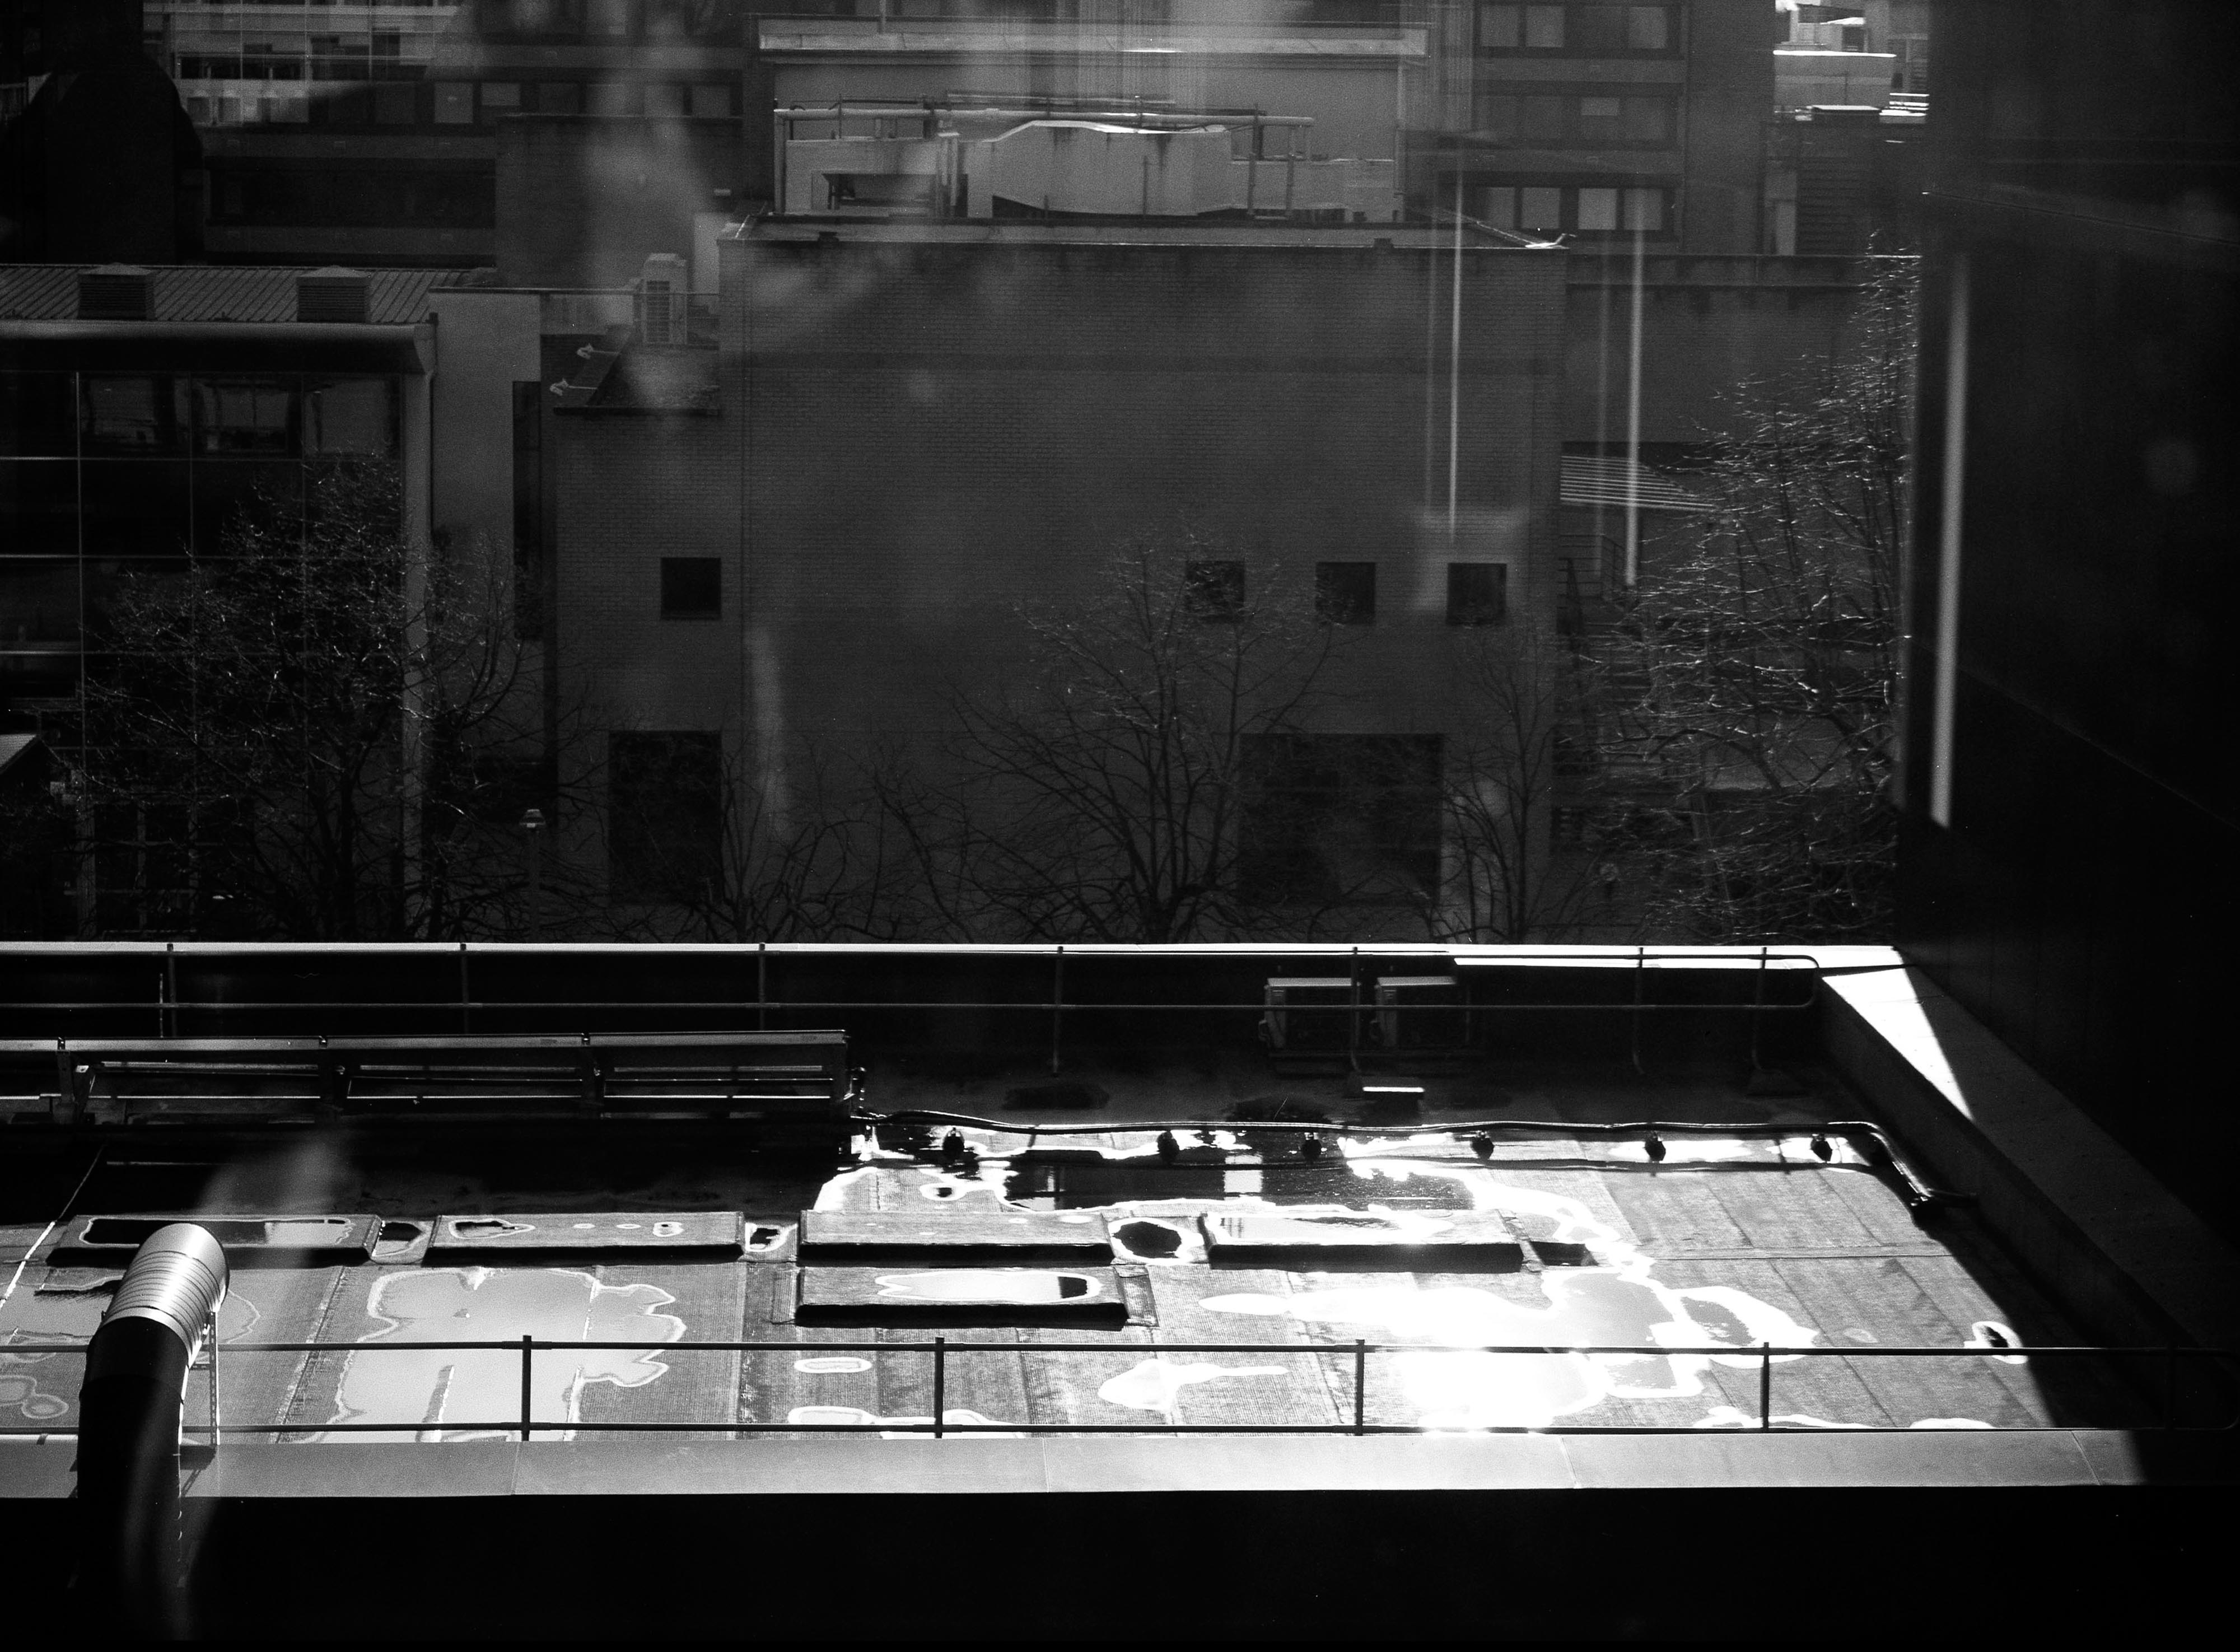
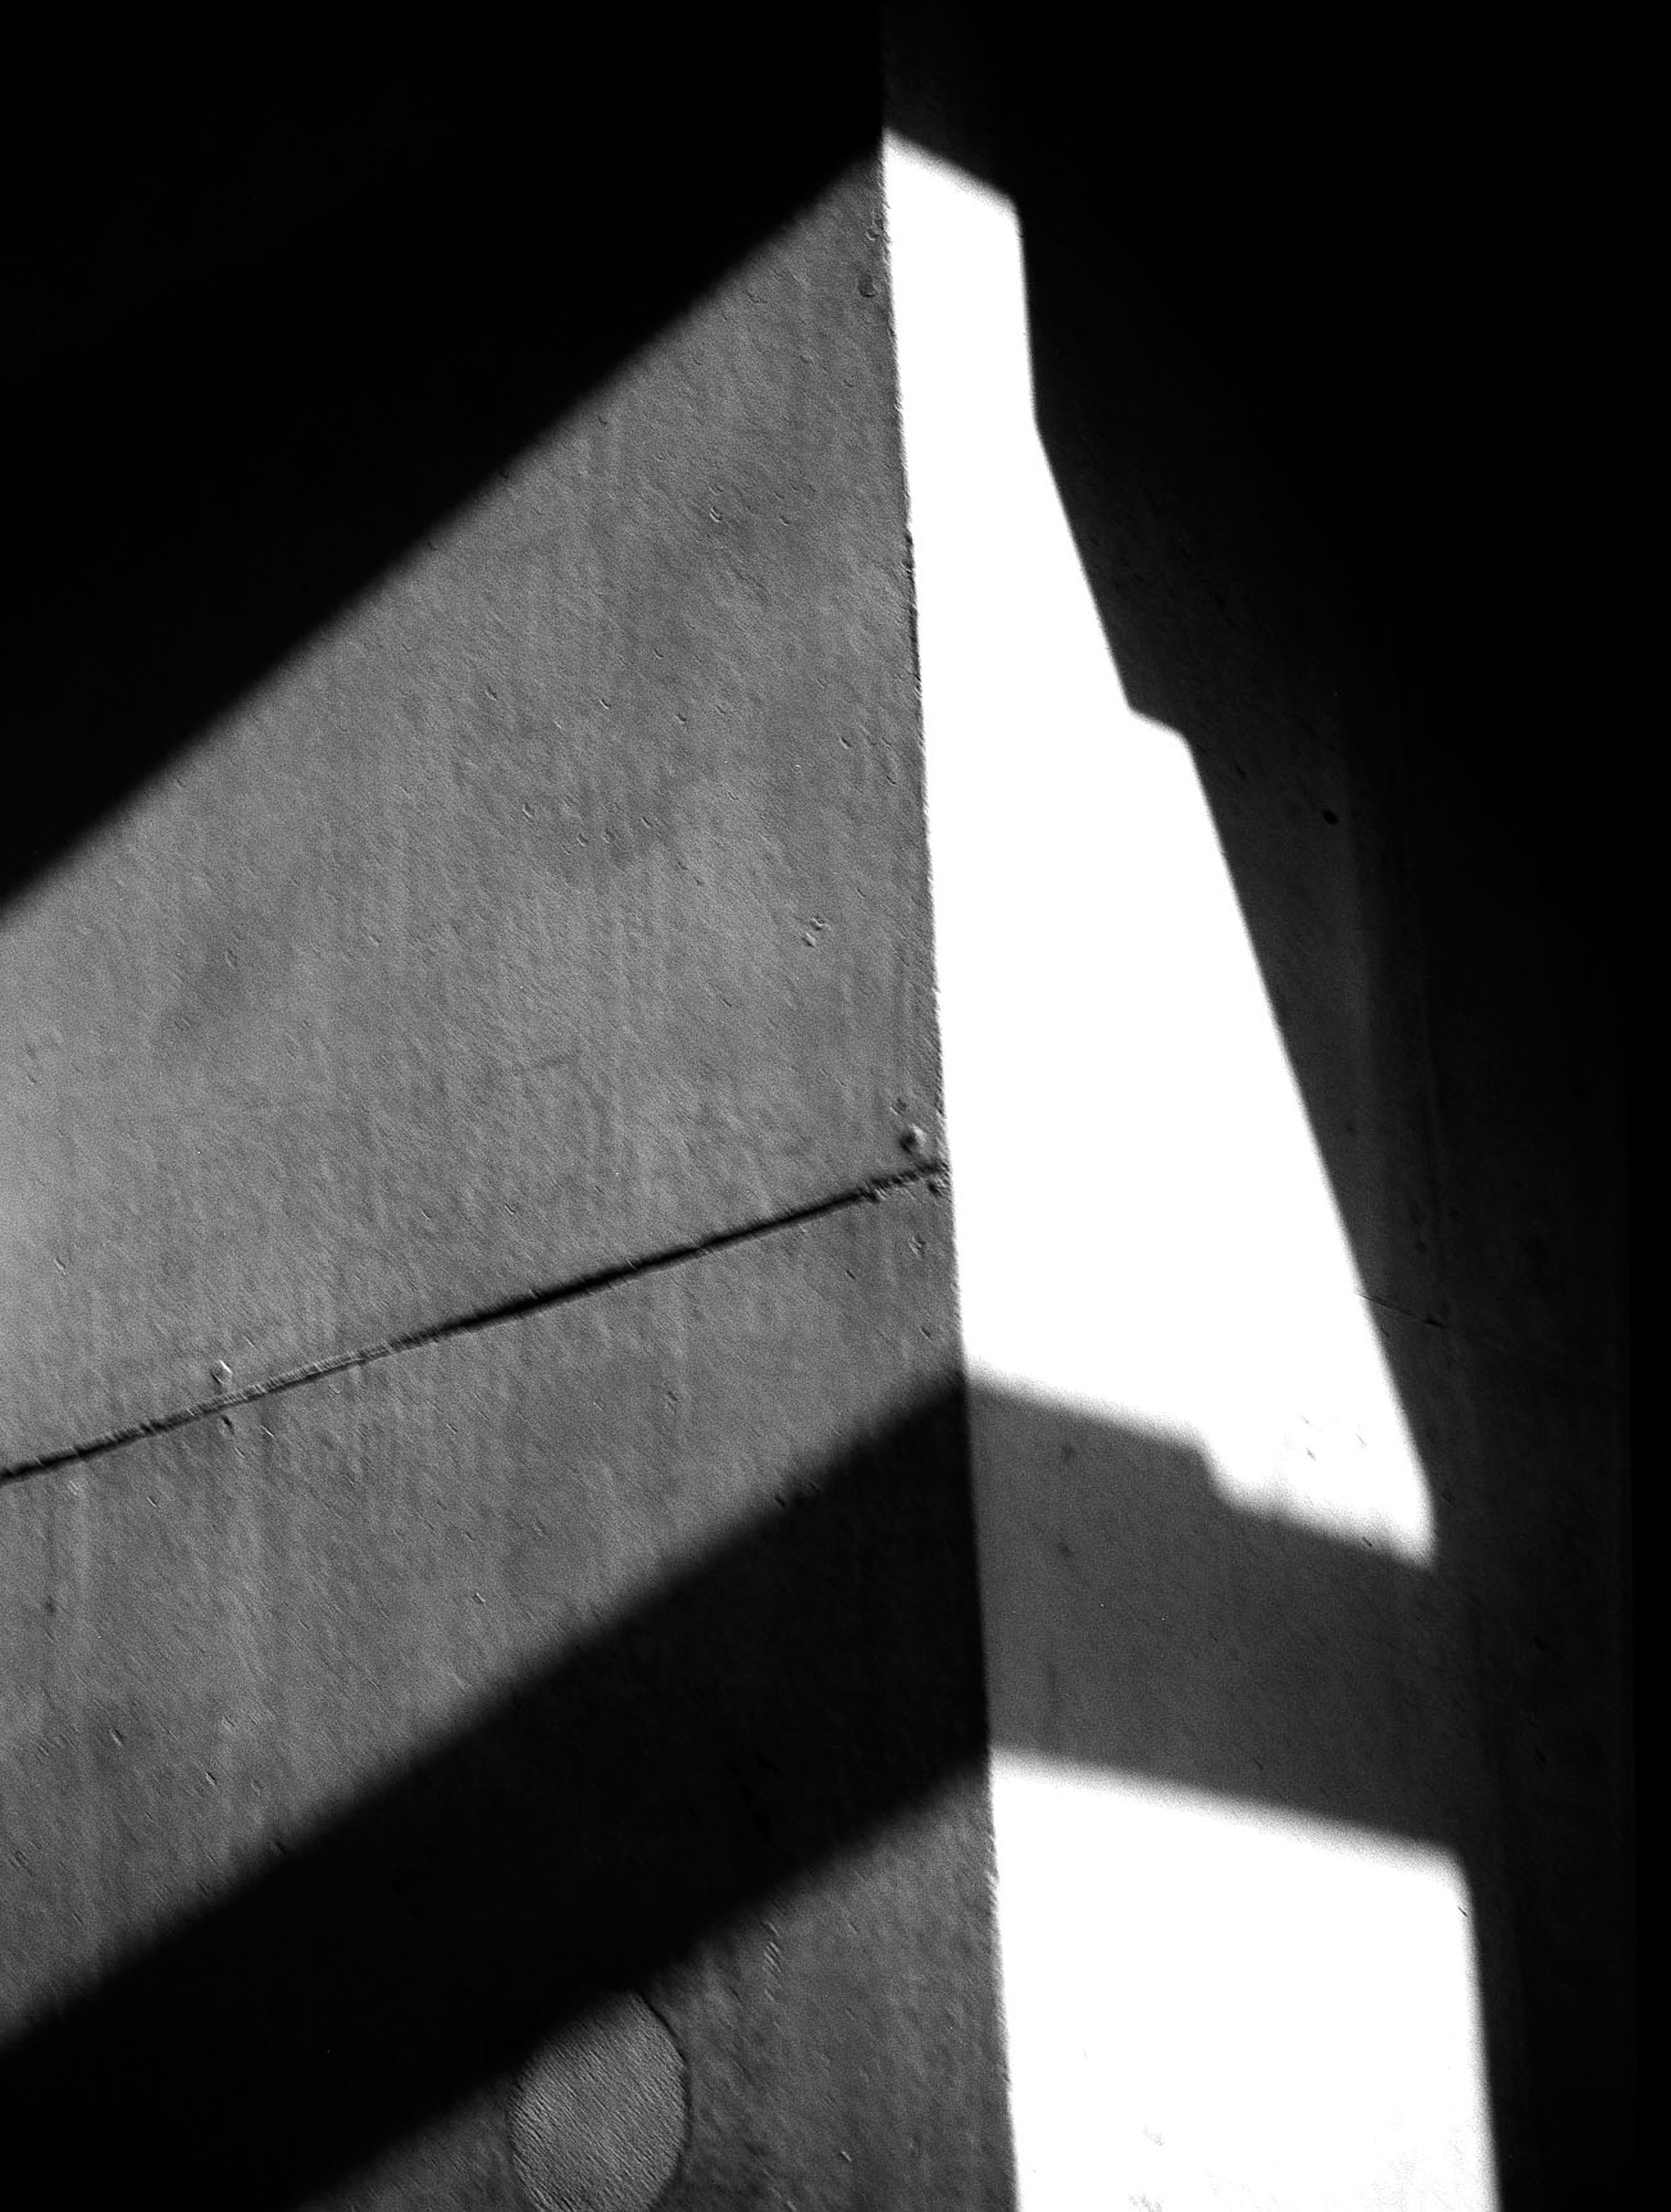
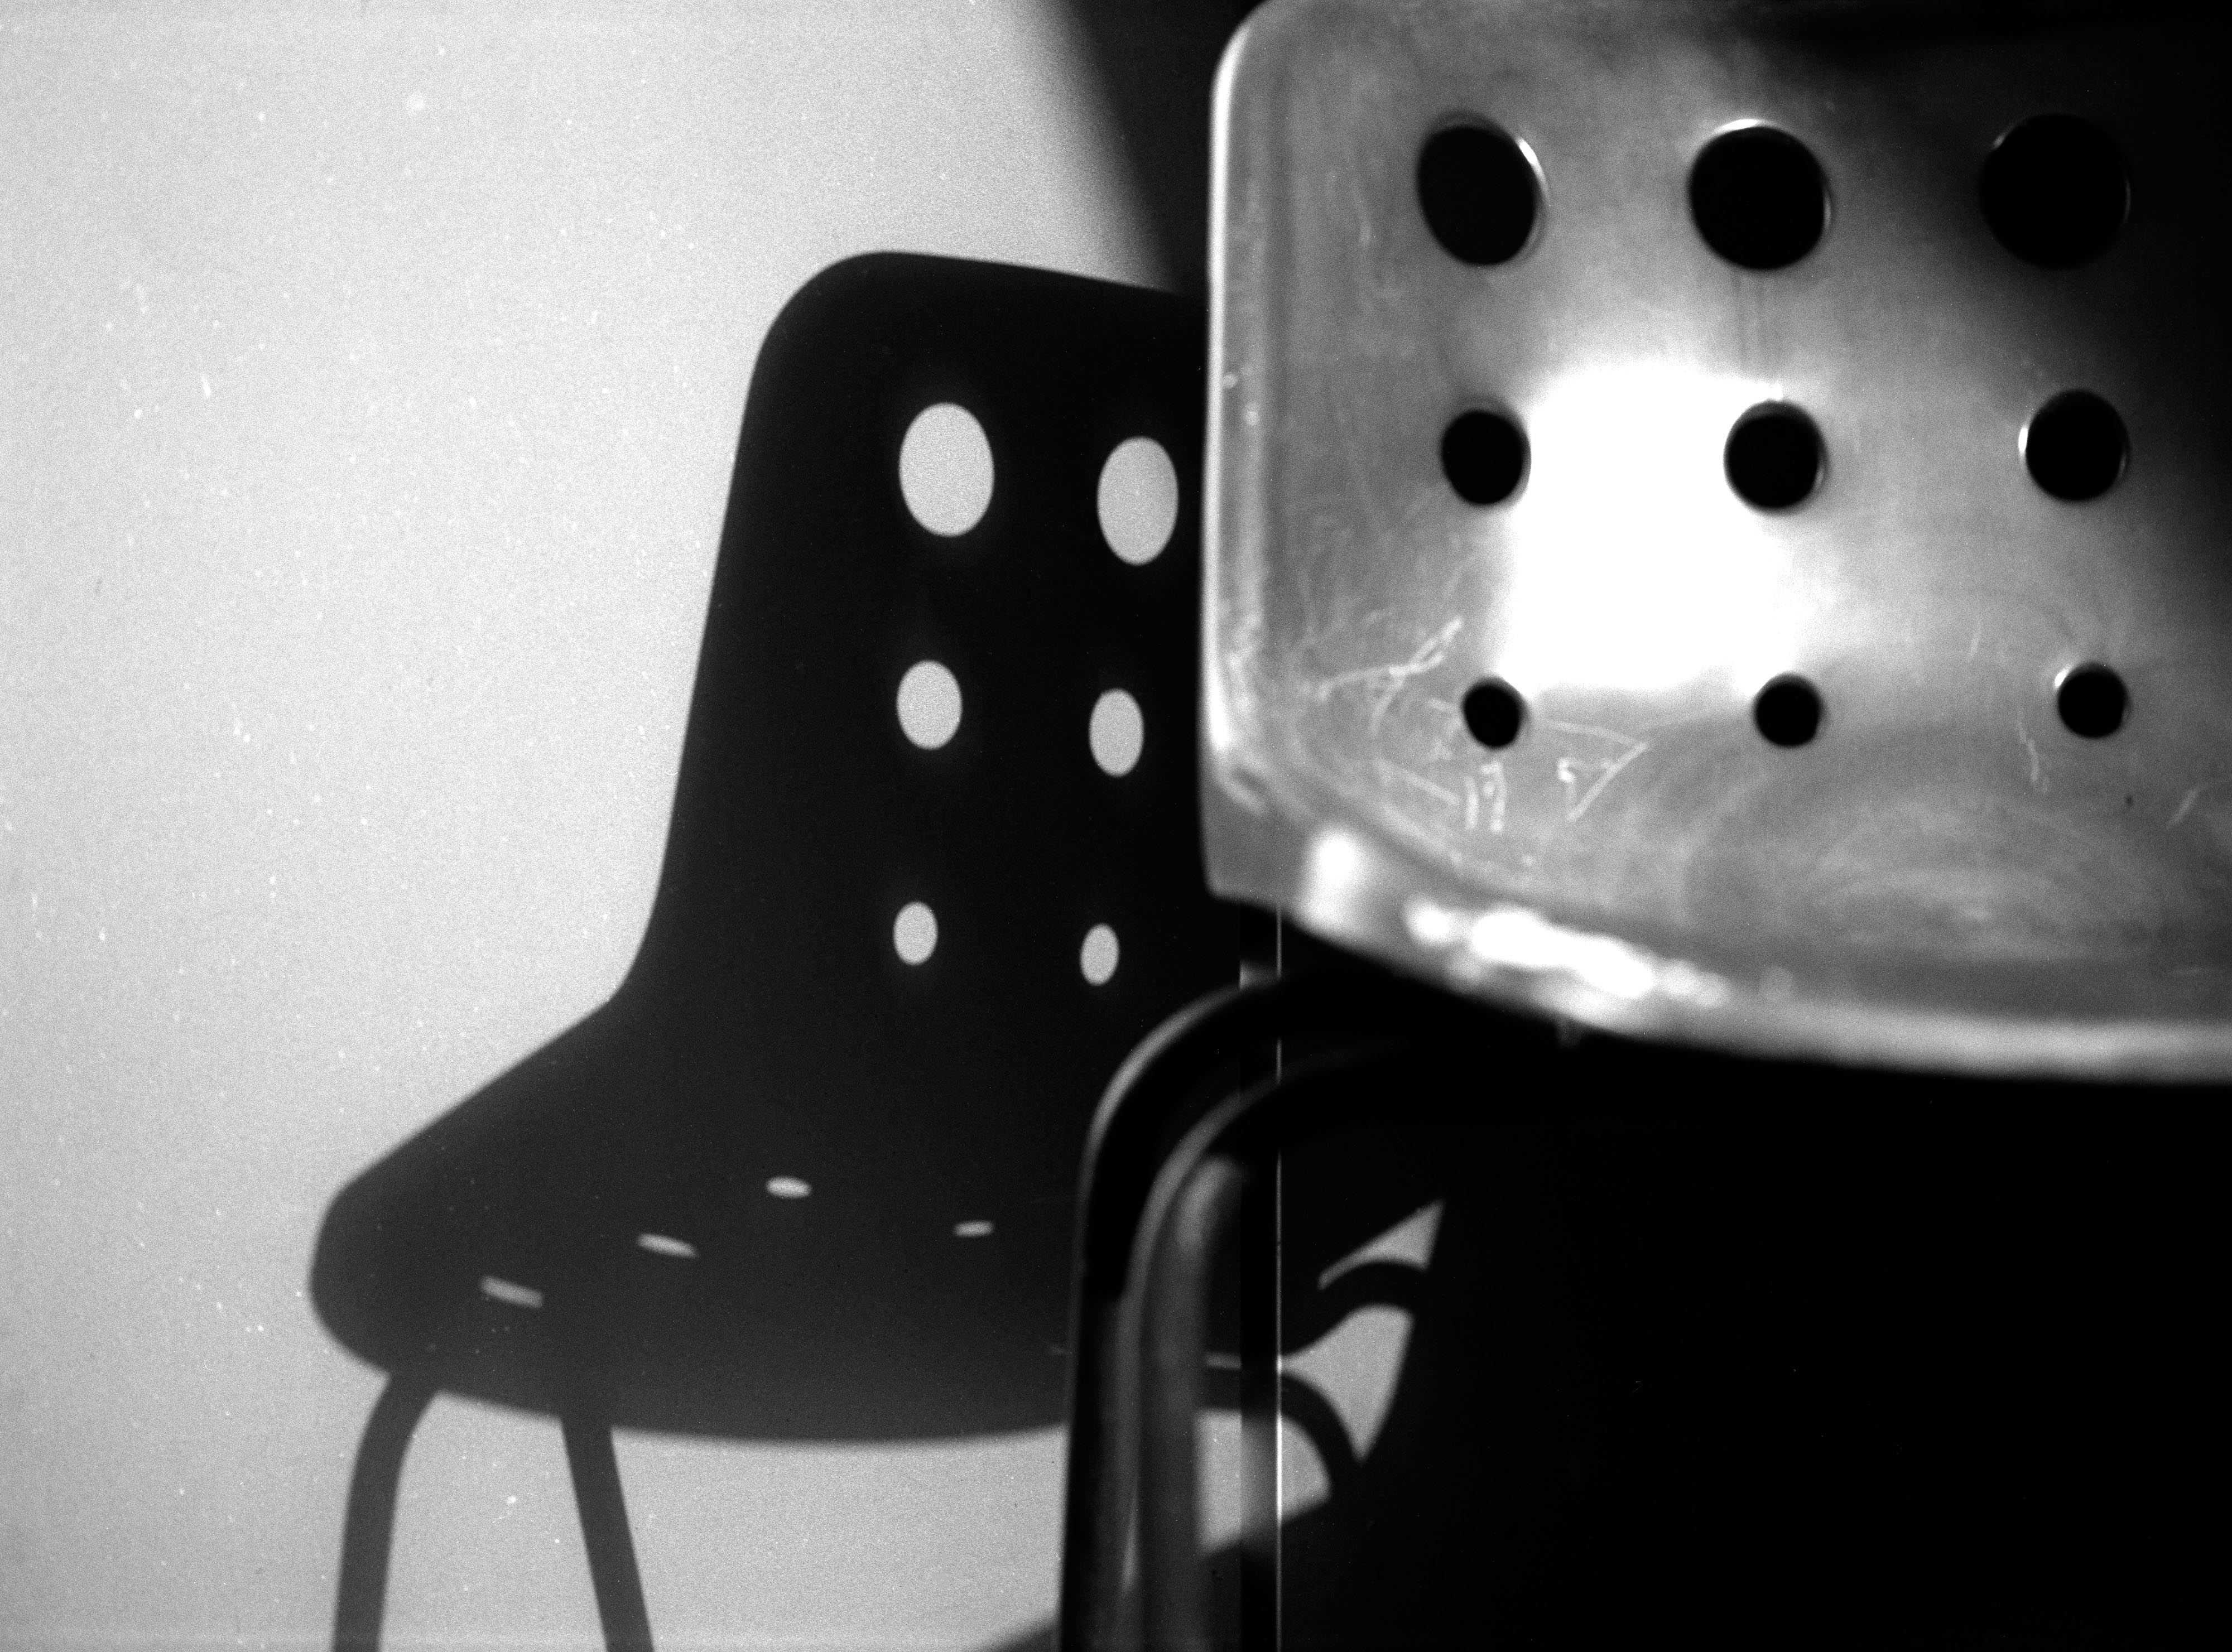
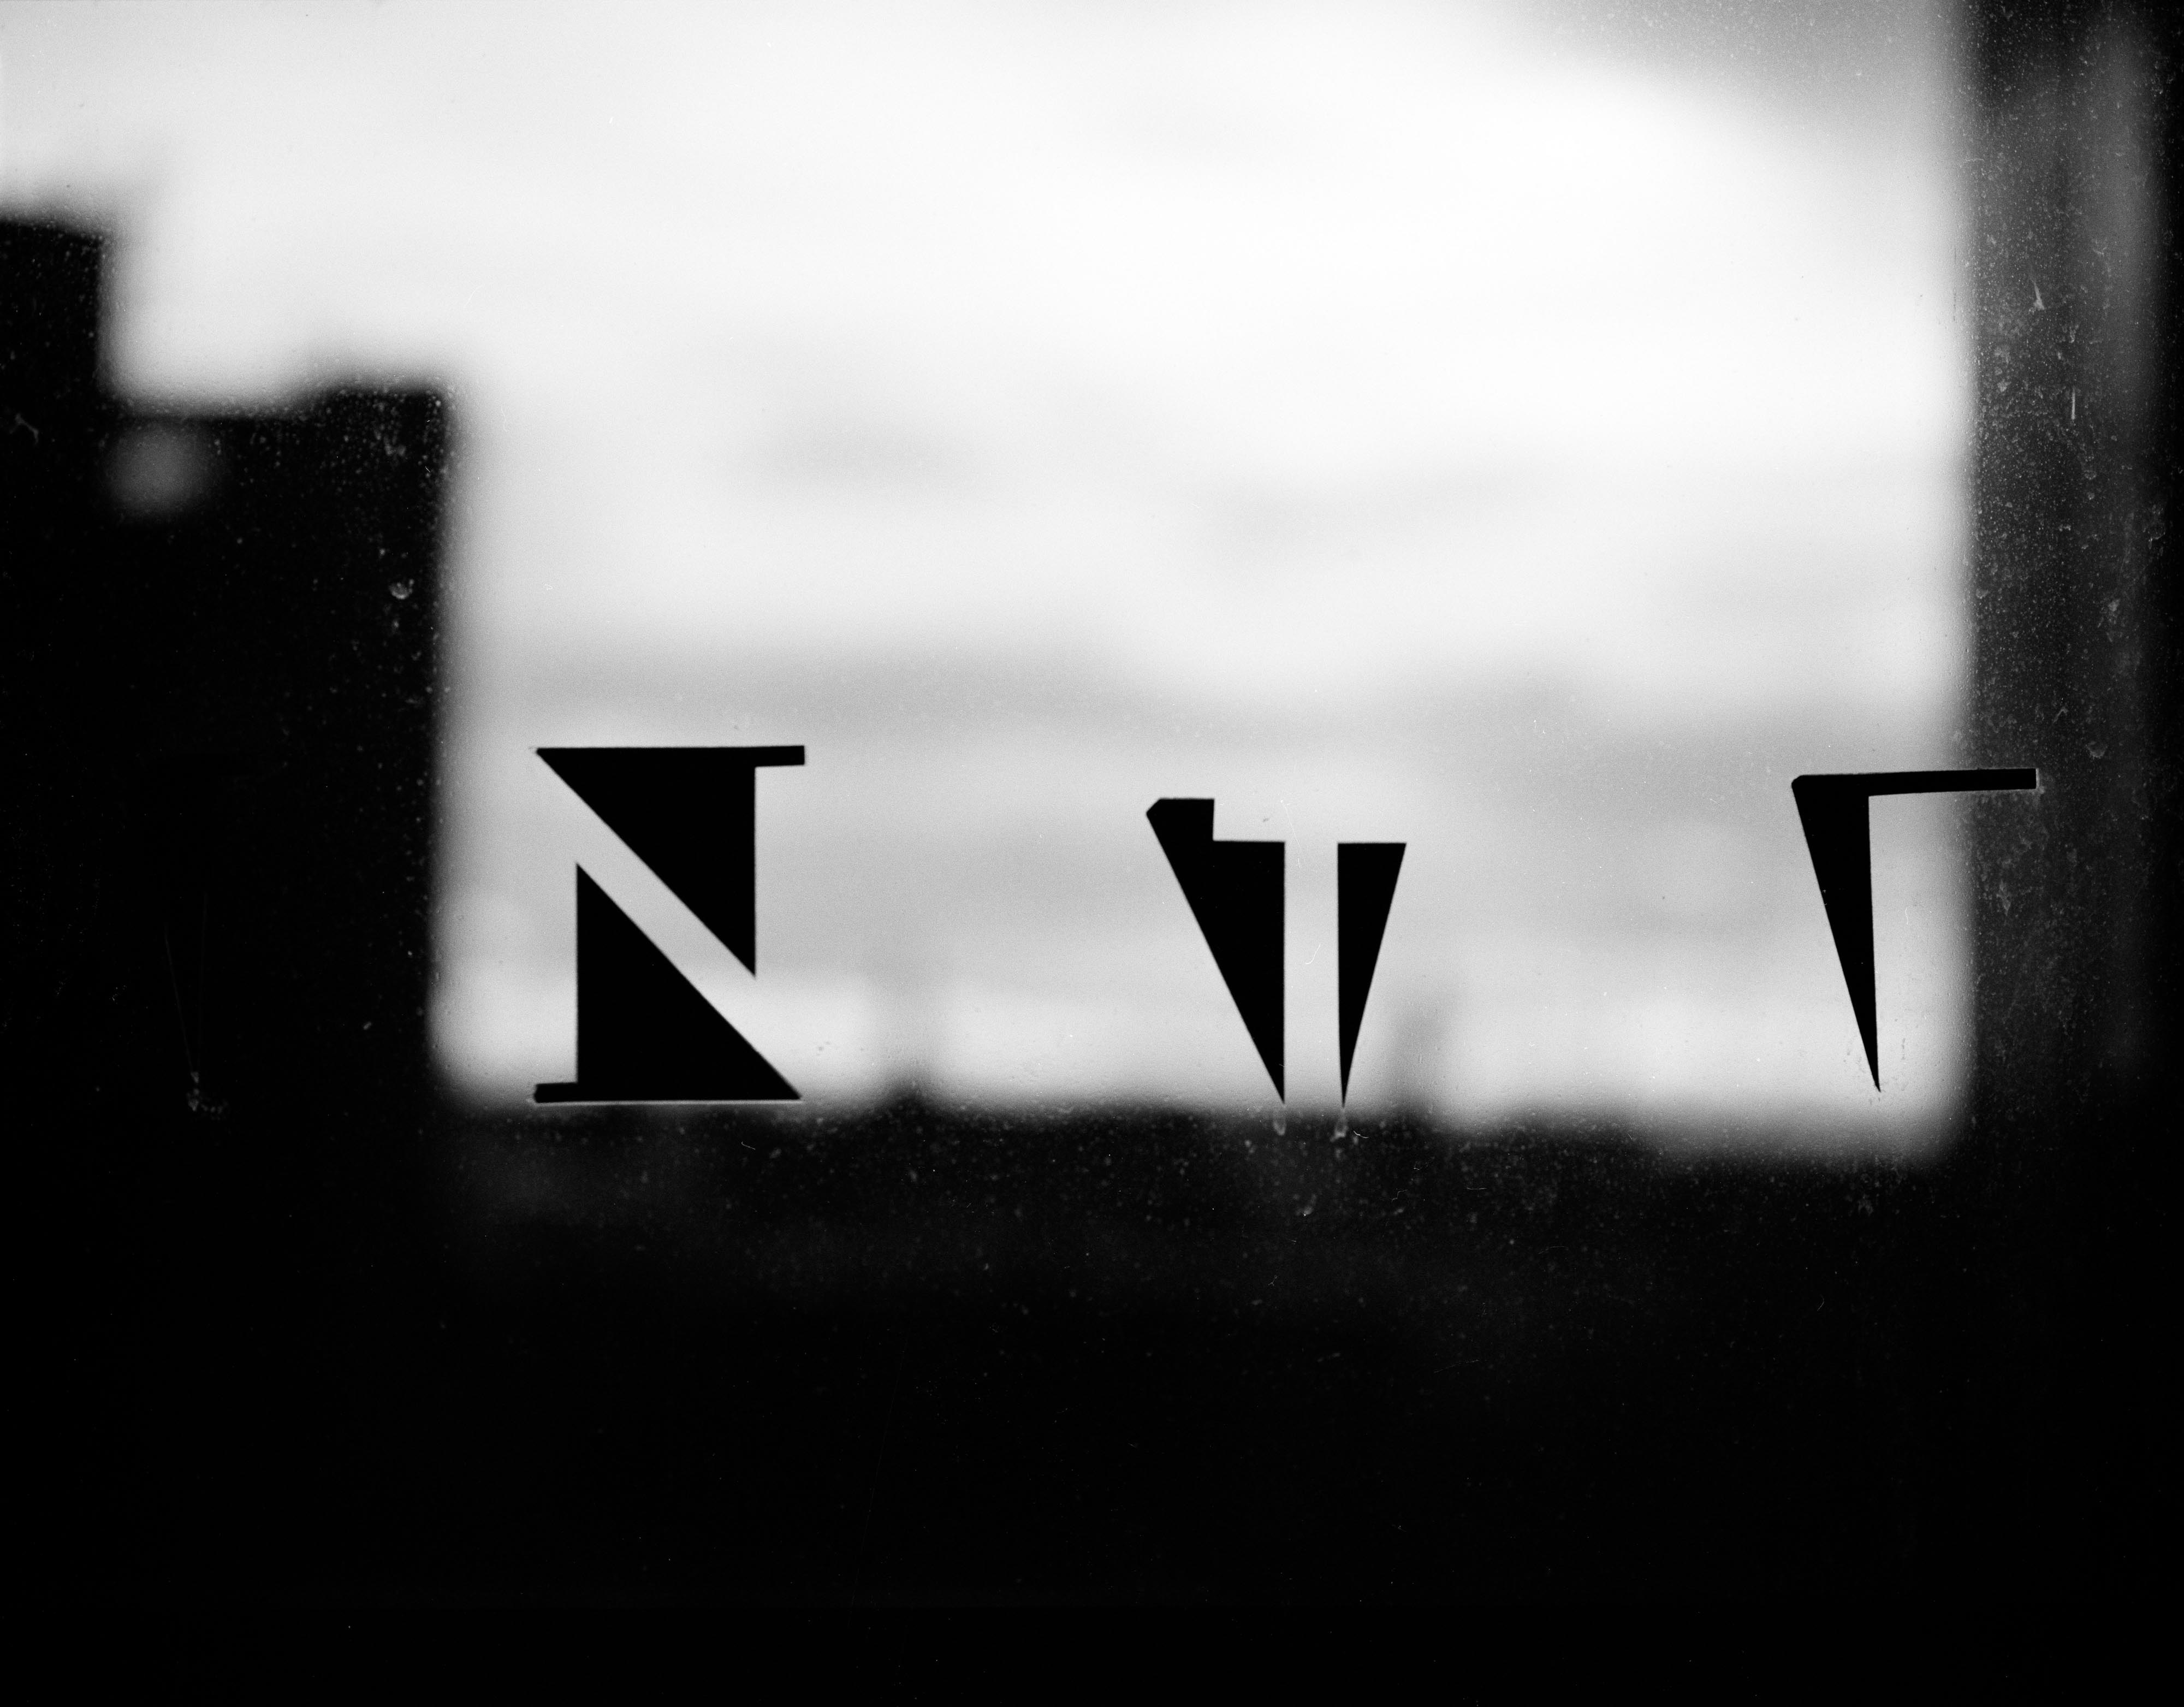
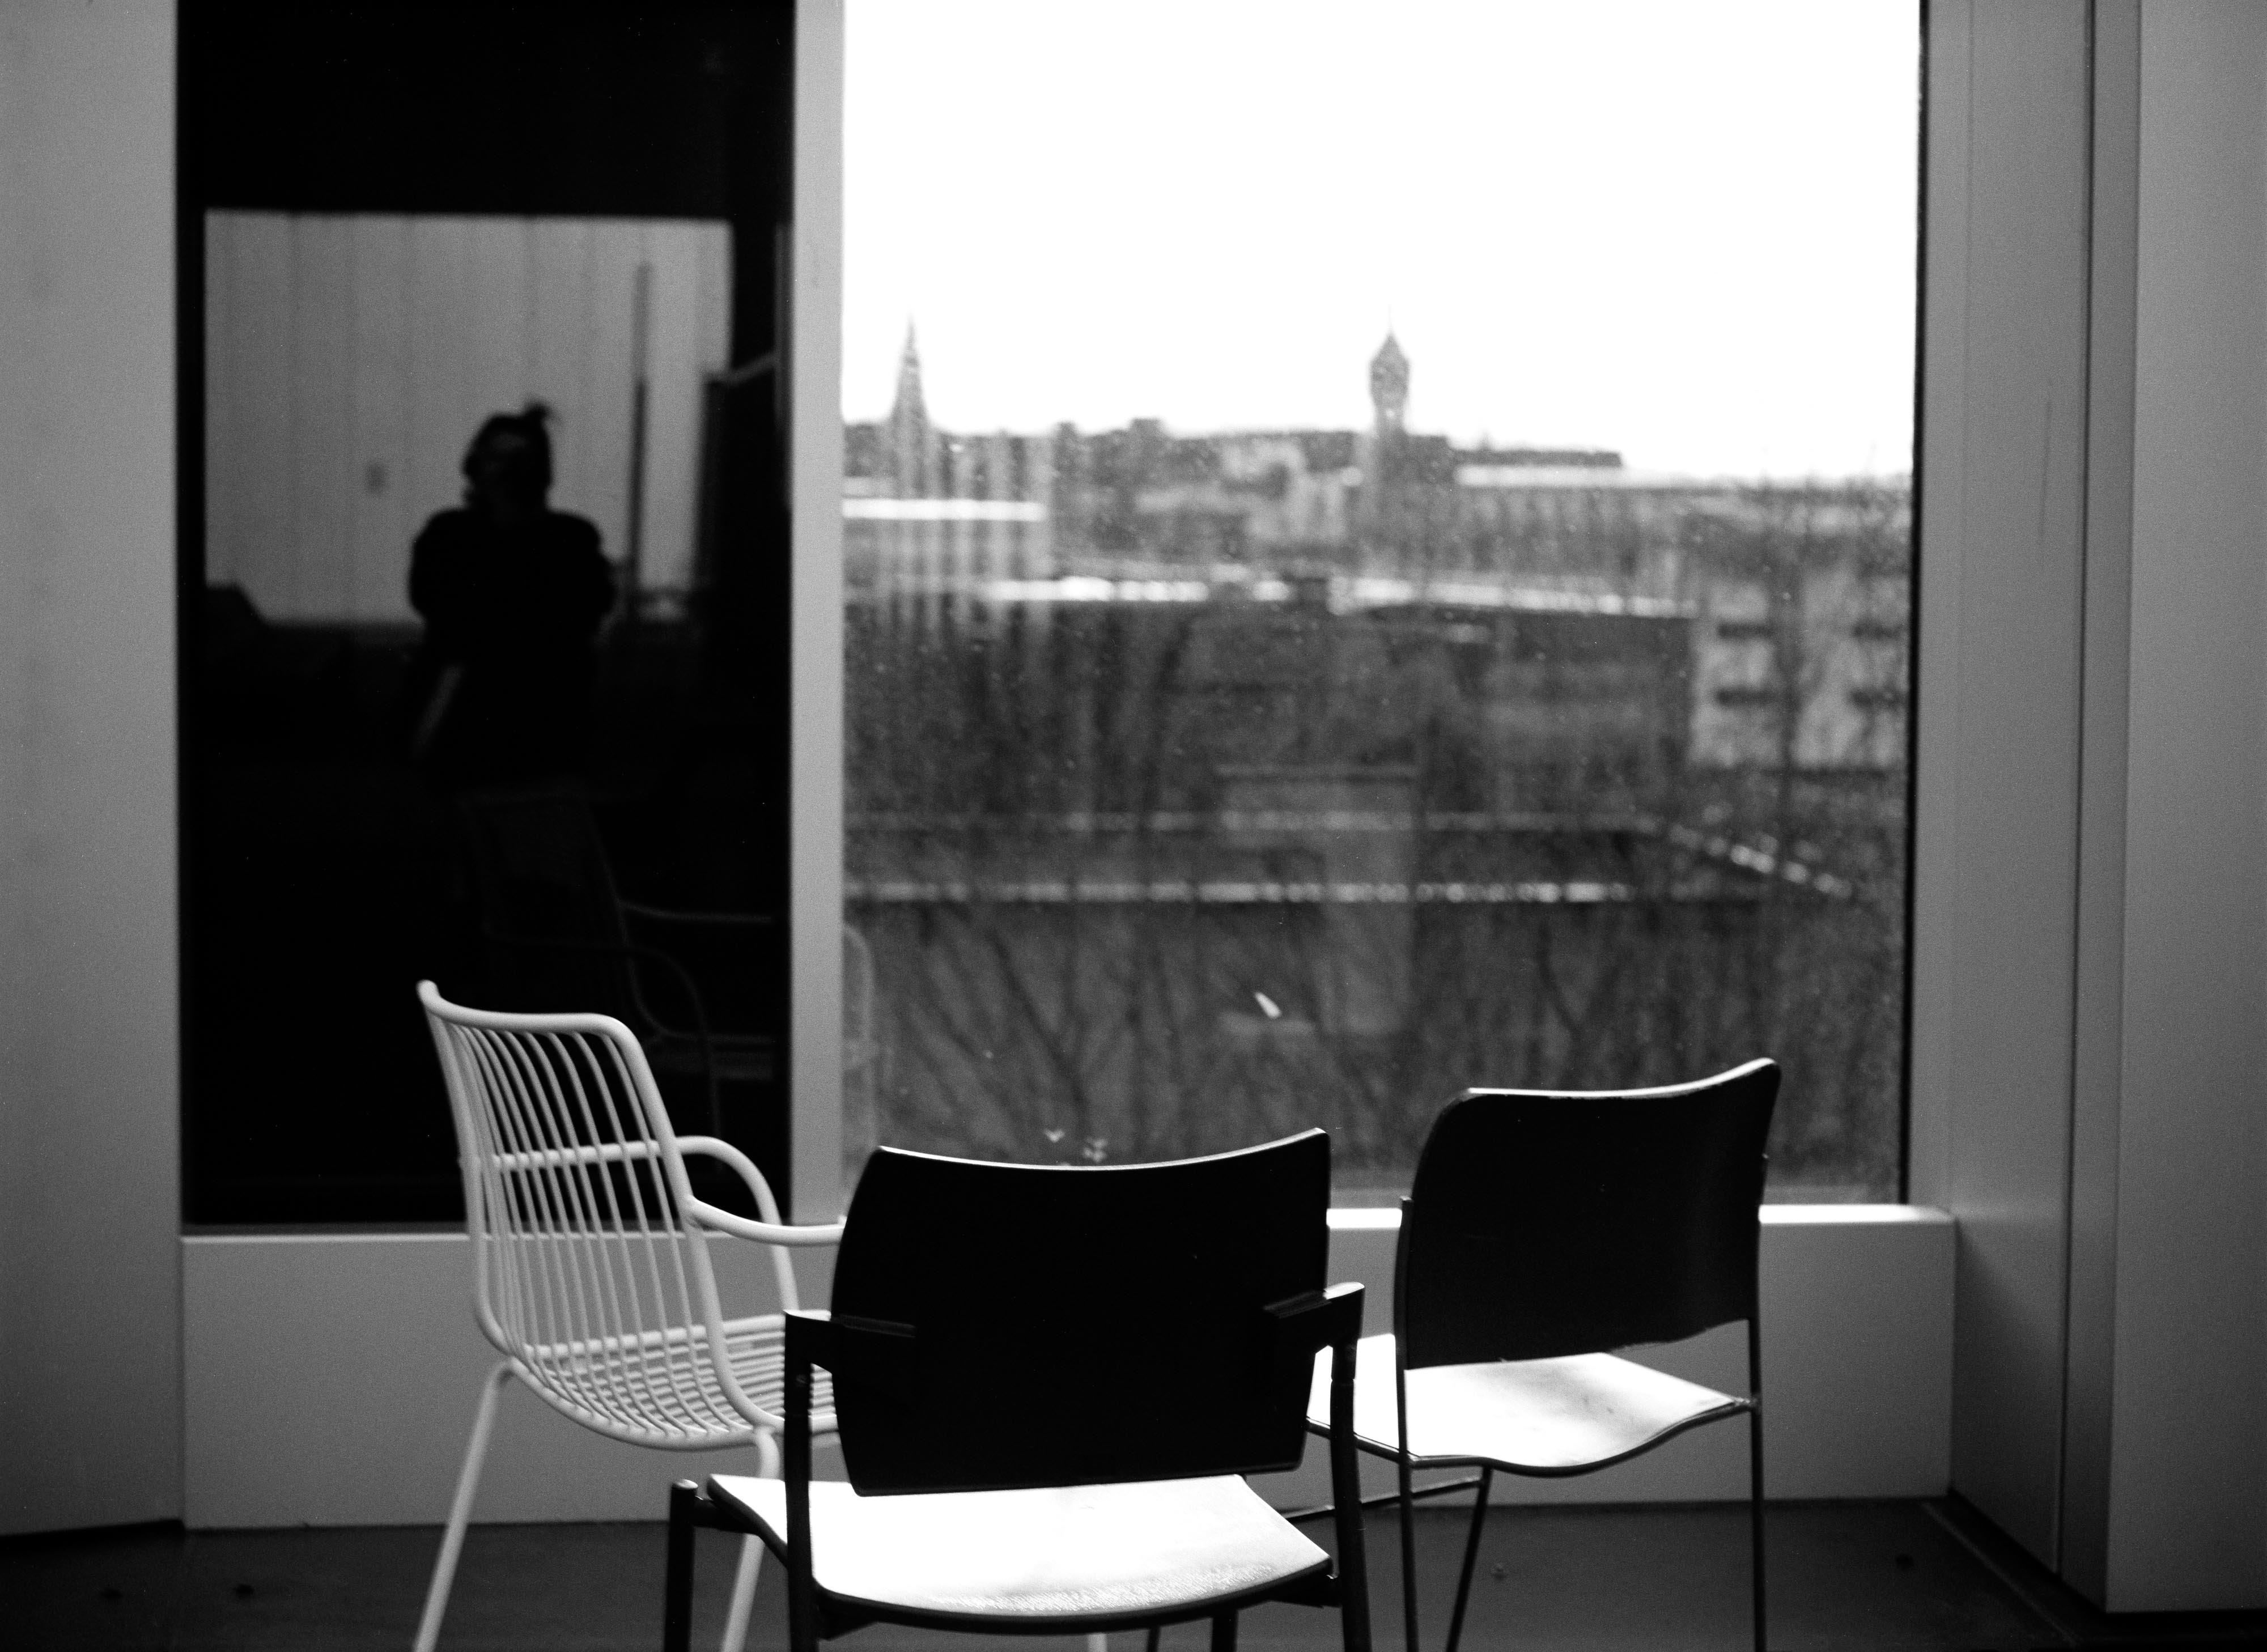

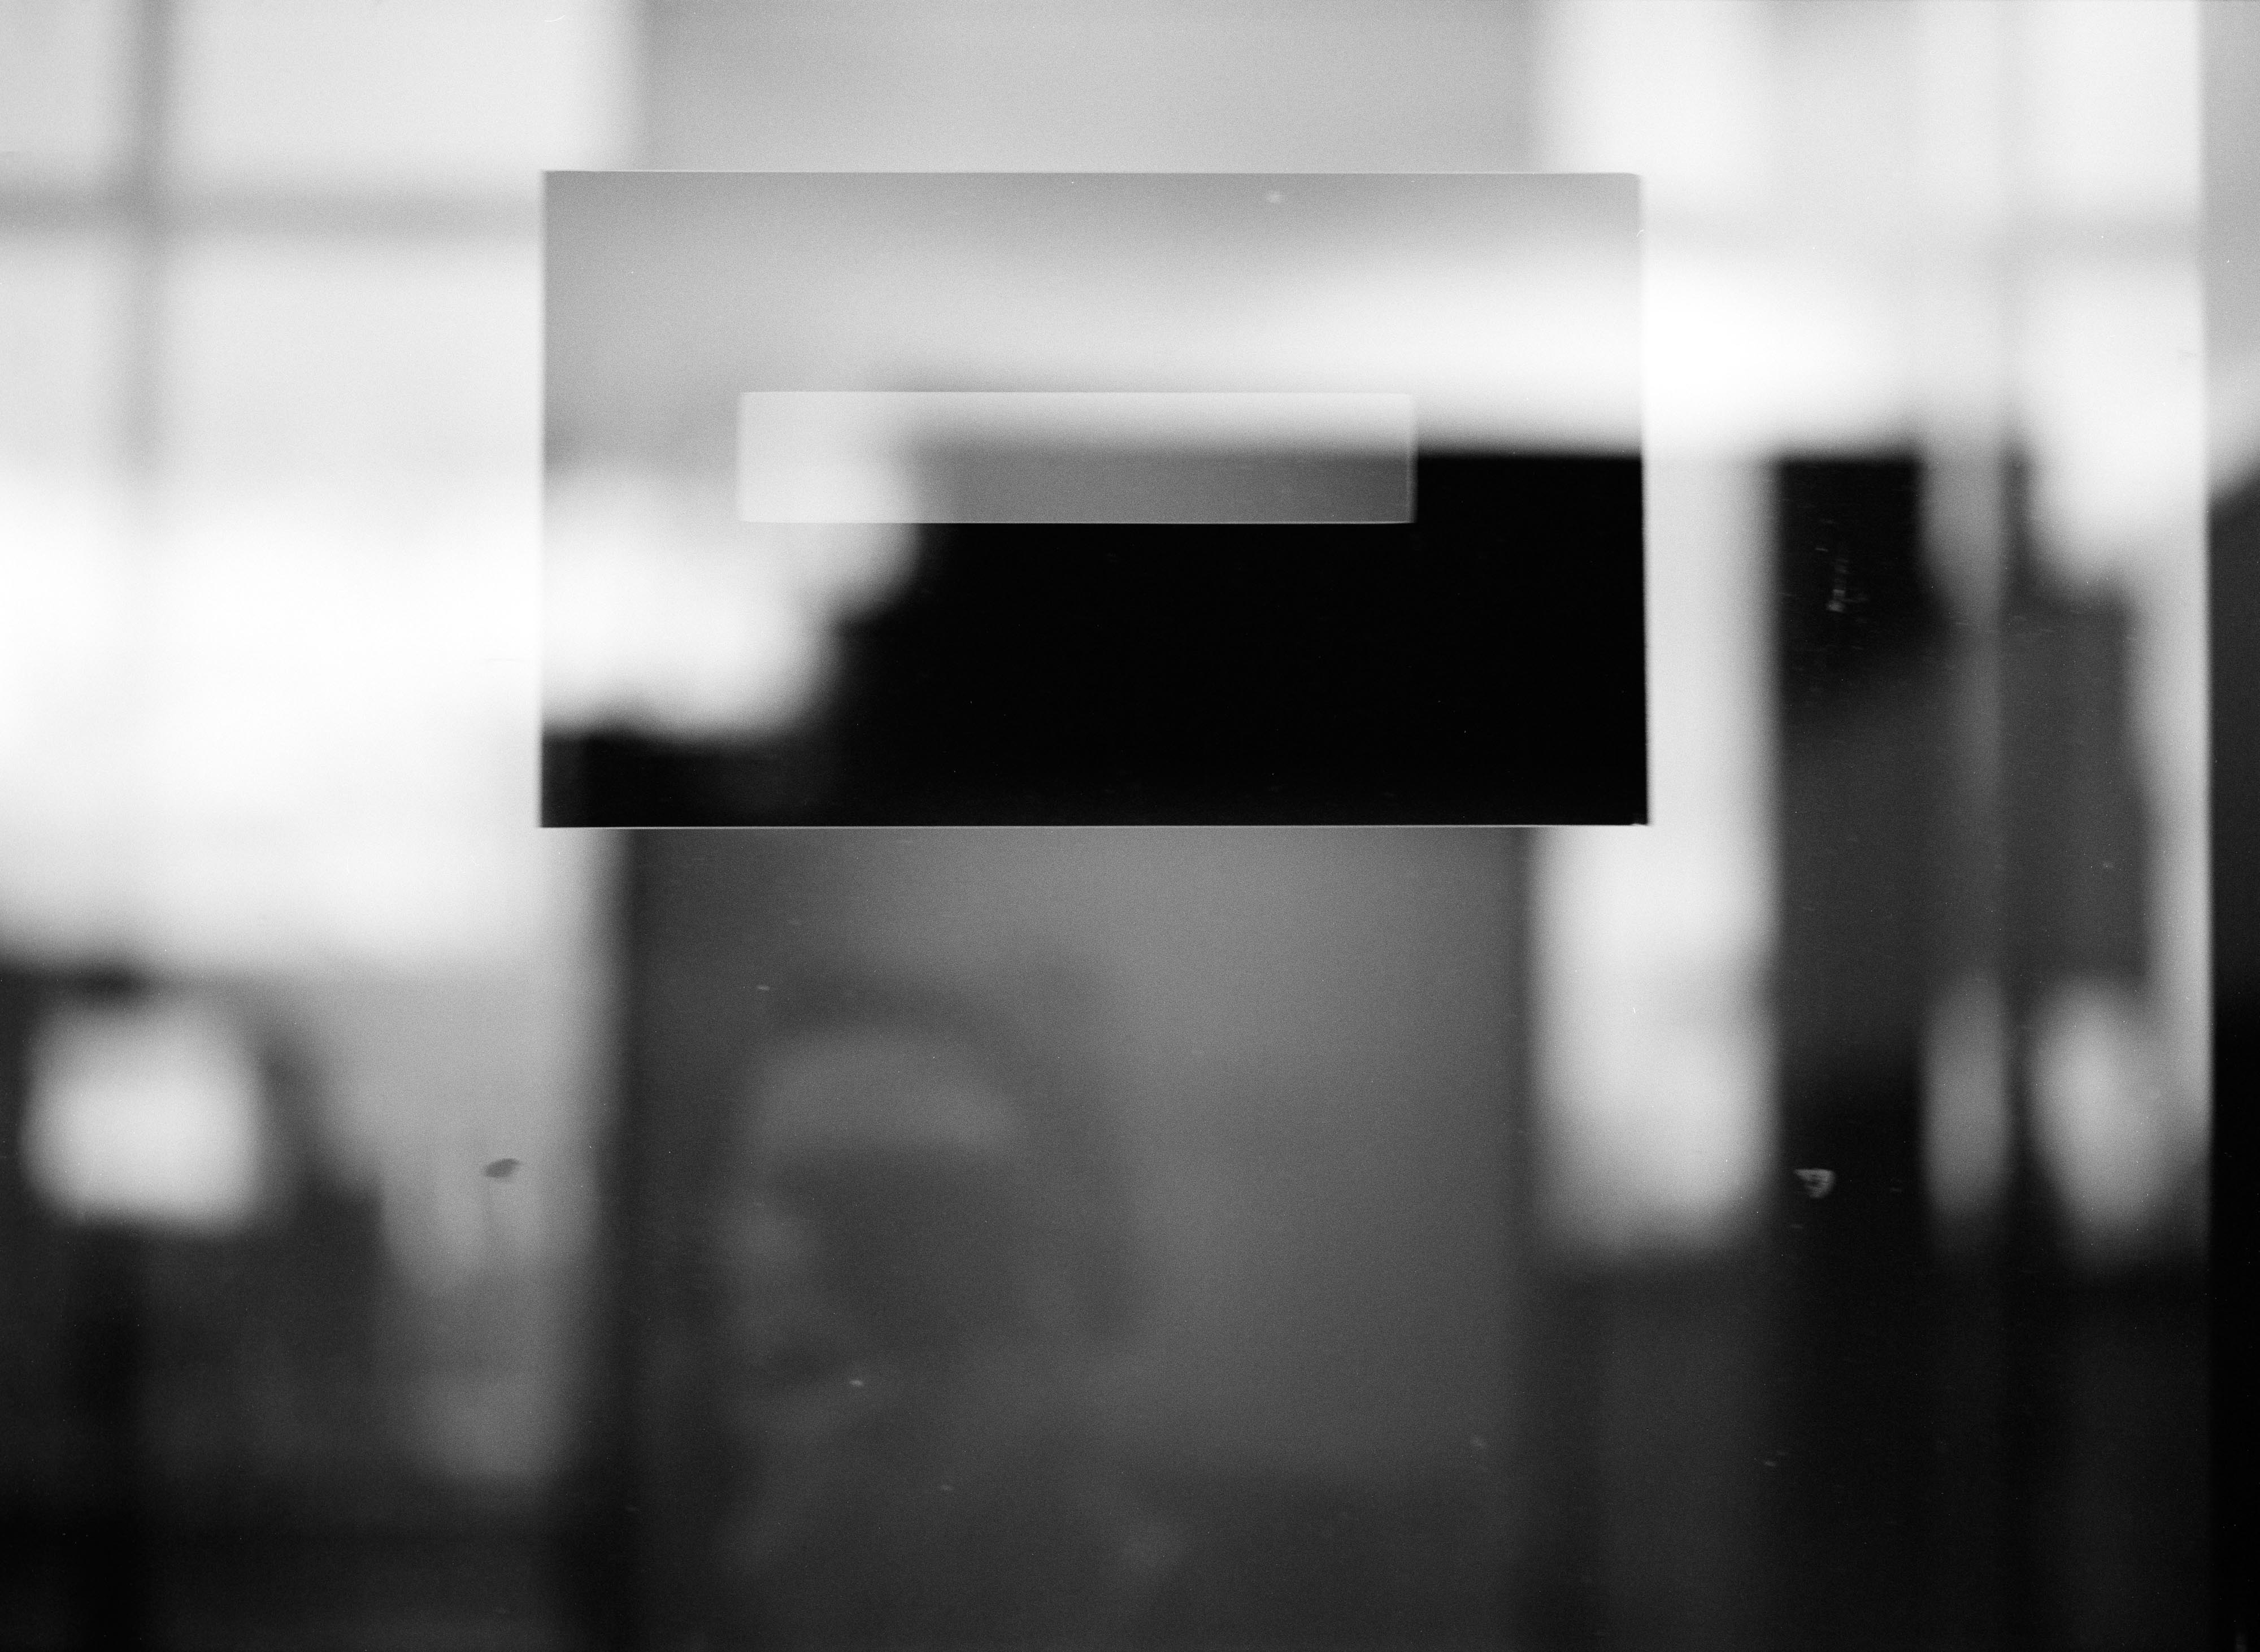
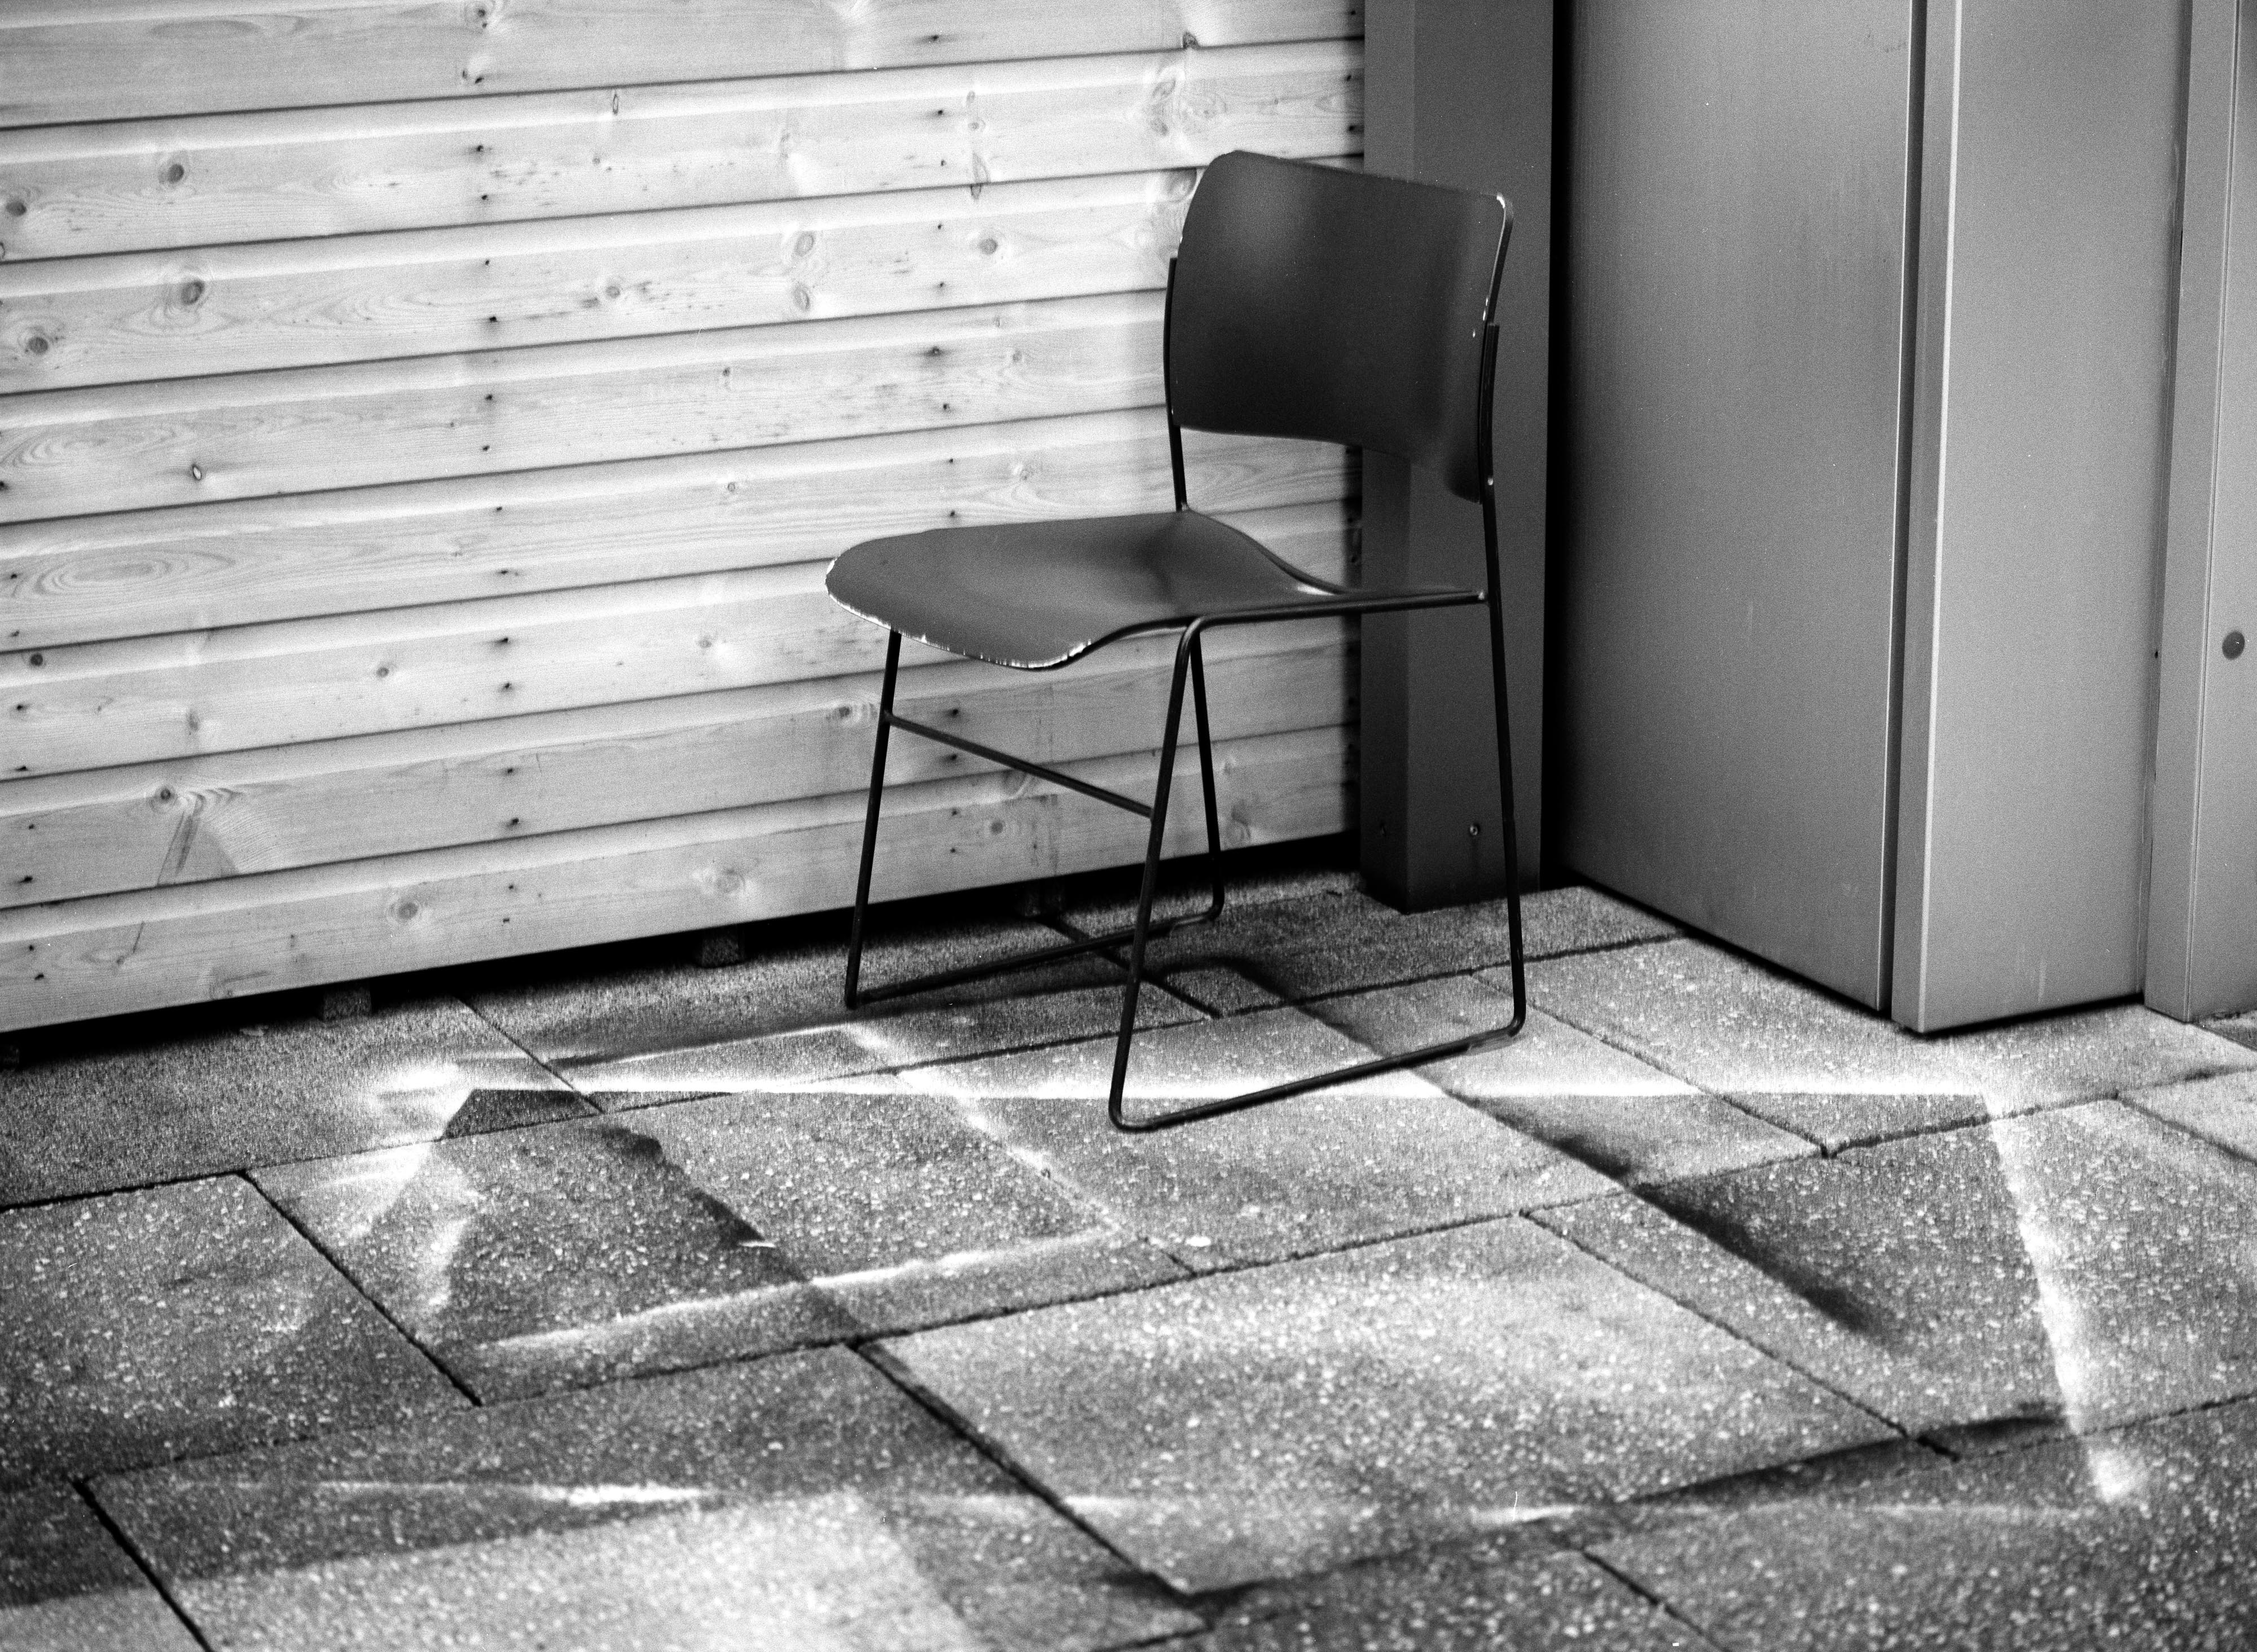
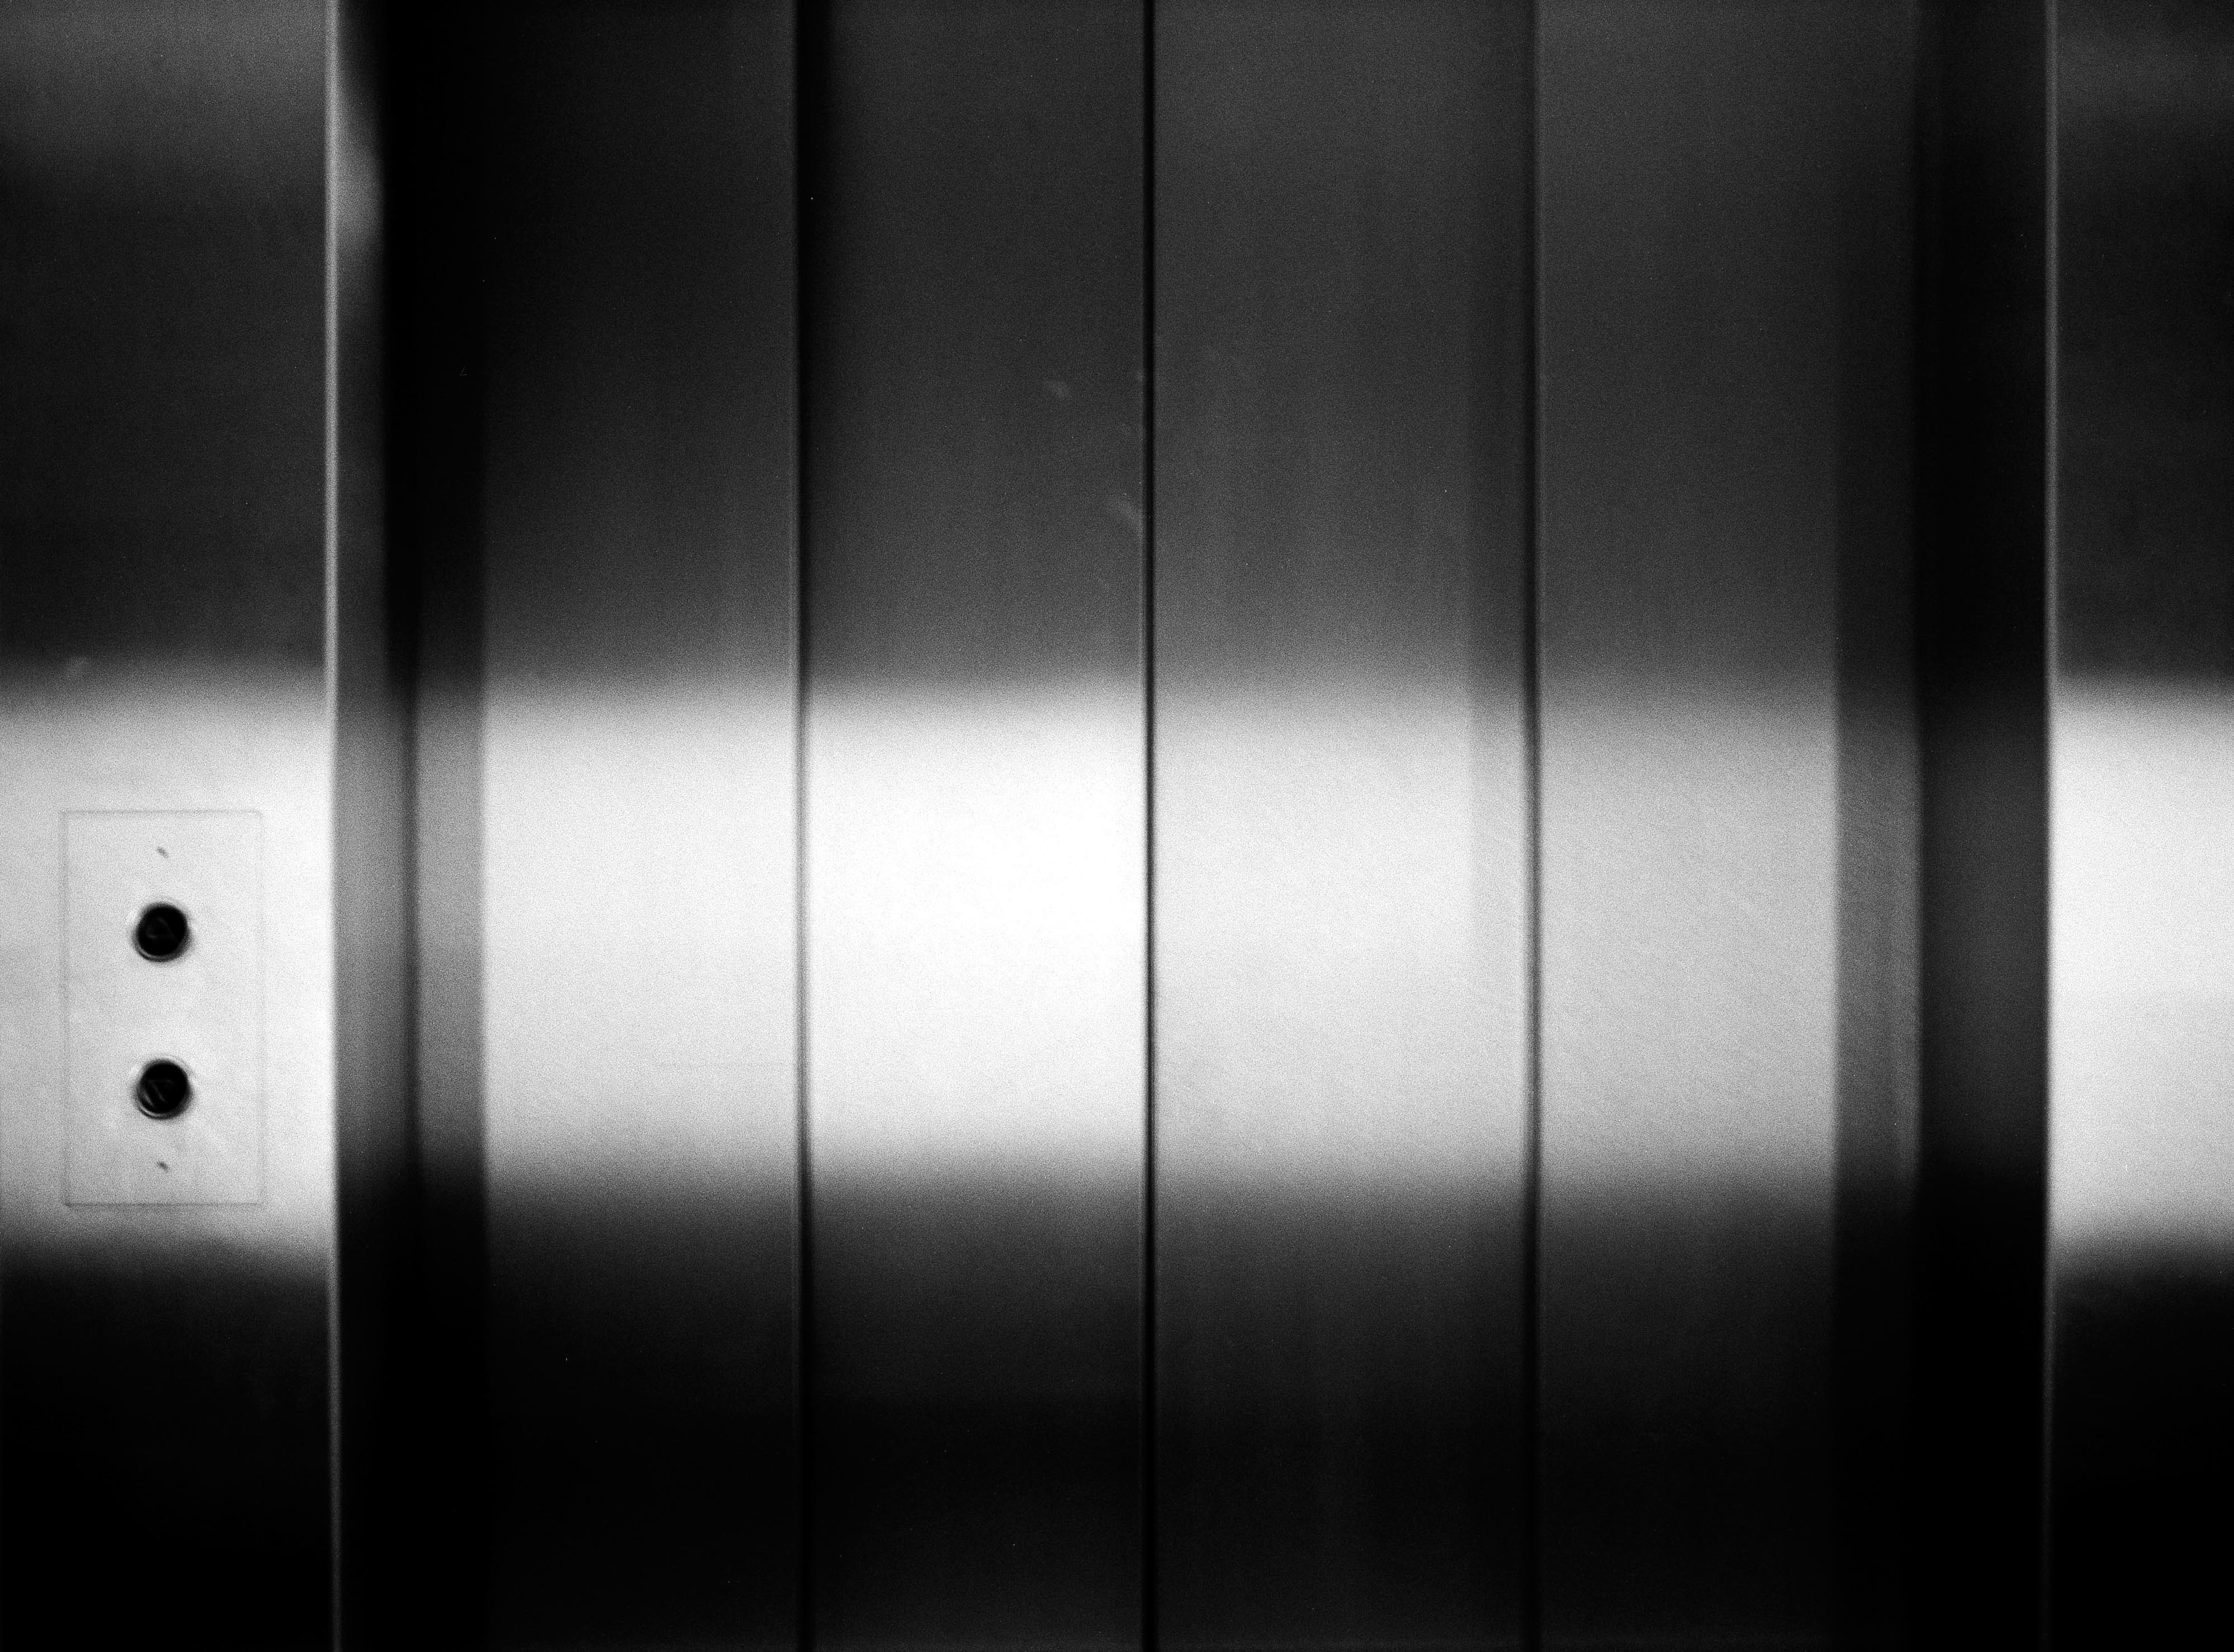
REFLECTIONS: I think it's vital to shoot this way, with no plan, no pressure, just playfulness and letting go. I believe it allows one to realise things that wouldn't be discovered otherwise, keep things fresh and surprise yourself by unveiling what's within our subconscious.
WEEK 3: 05-11 FEBRUARY
MONDAY
HOUSEKEEPING
NOTES:
- on Monday if I am not attending a workshop, it’s my day to work on my project, plus the tutorial
- Group B with Thom for seminars
- crits on the 19th of February, install on Friday 16th of February in Vertical Gallery
- next crits: 18th of March, 22nd of April
After the lecture and a group session, I went to Hasselblad where I scanned and edited some of my recent images.
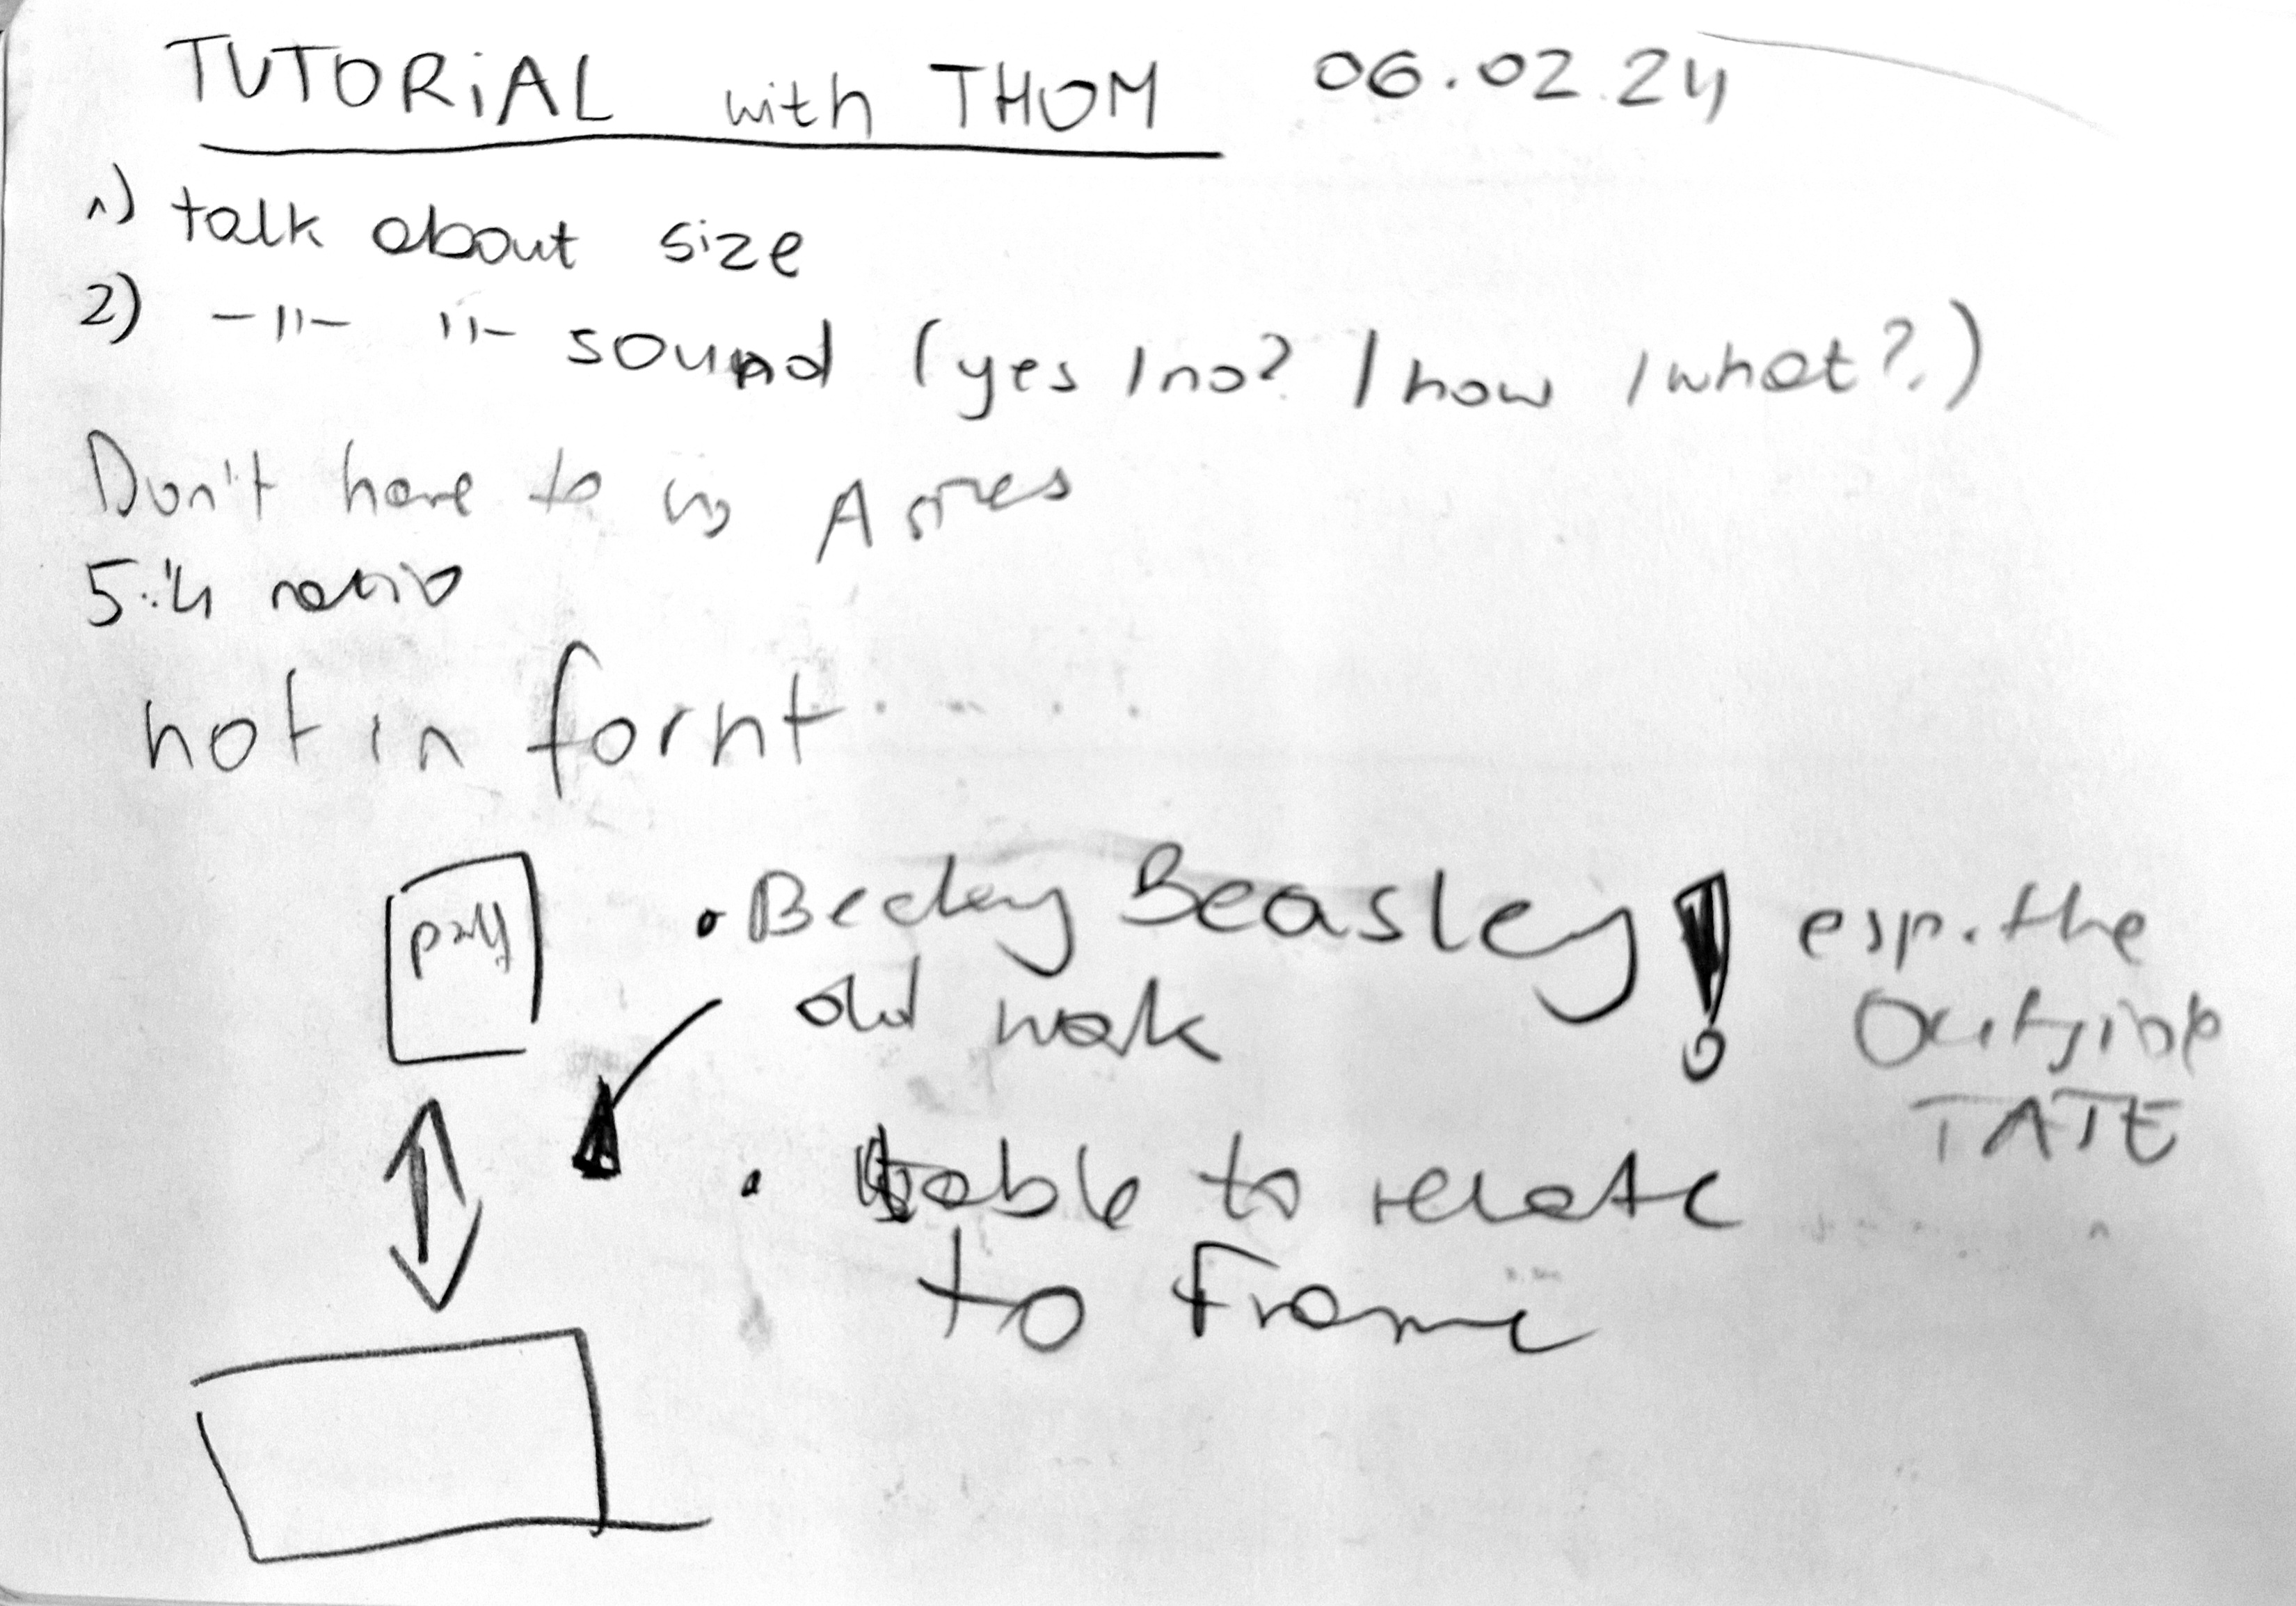
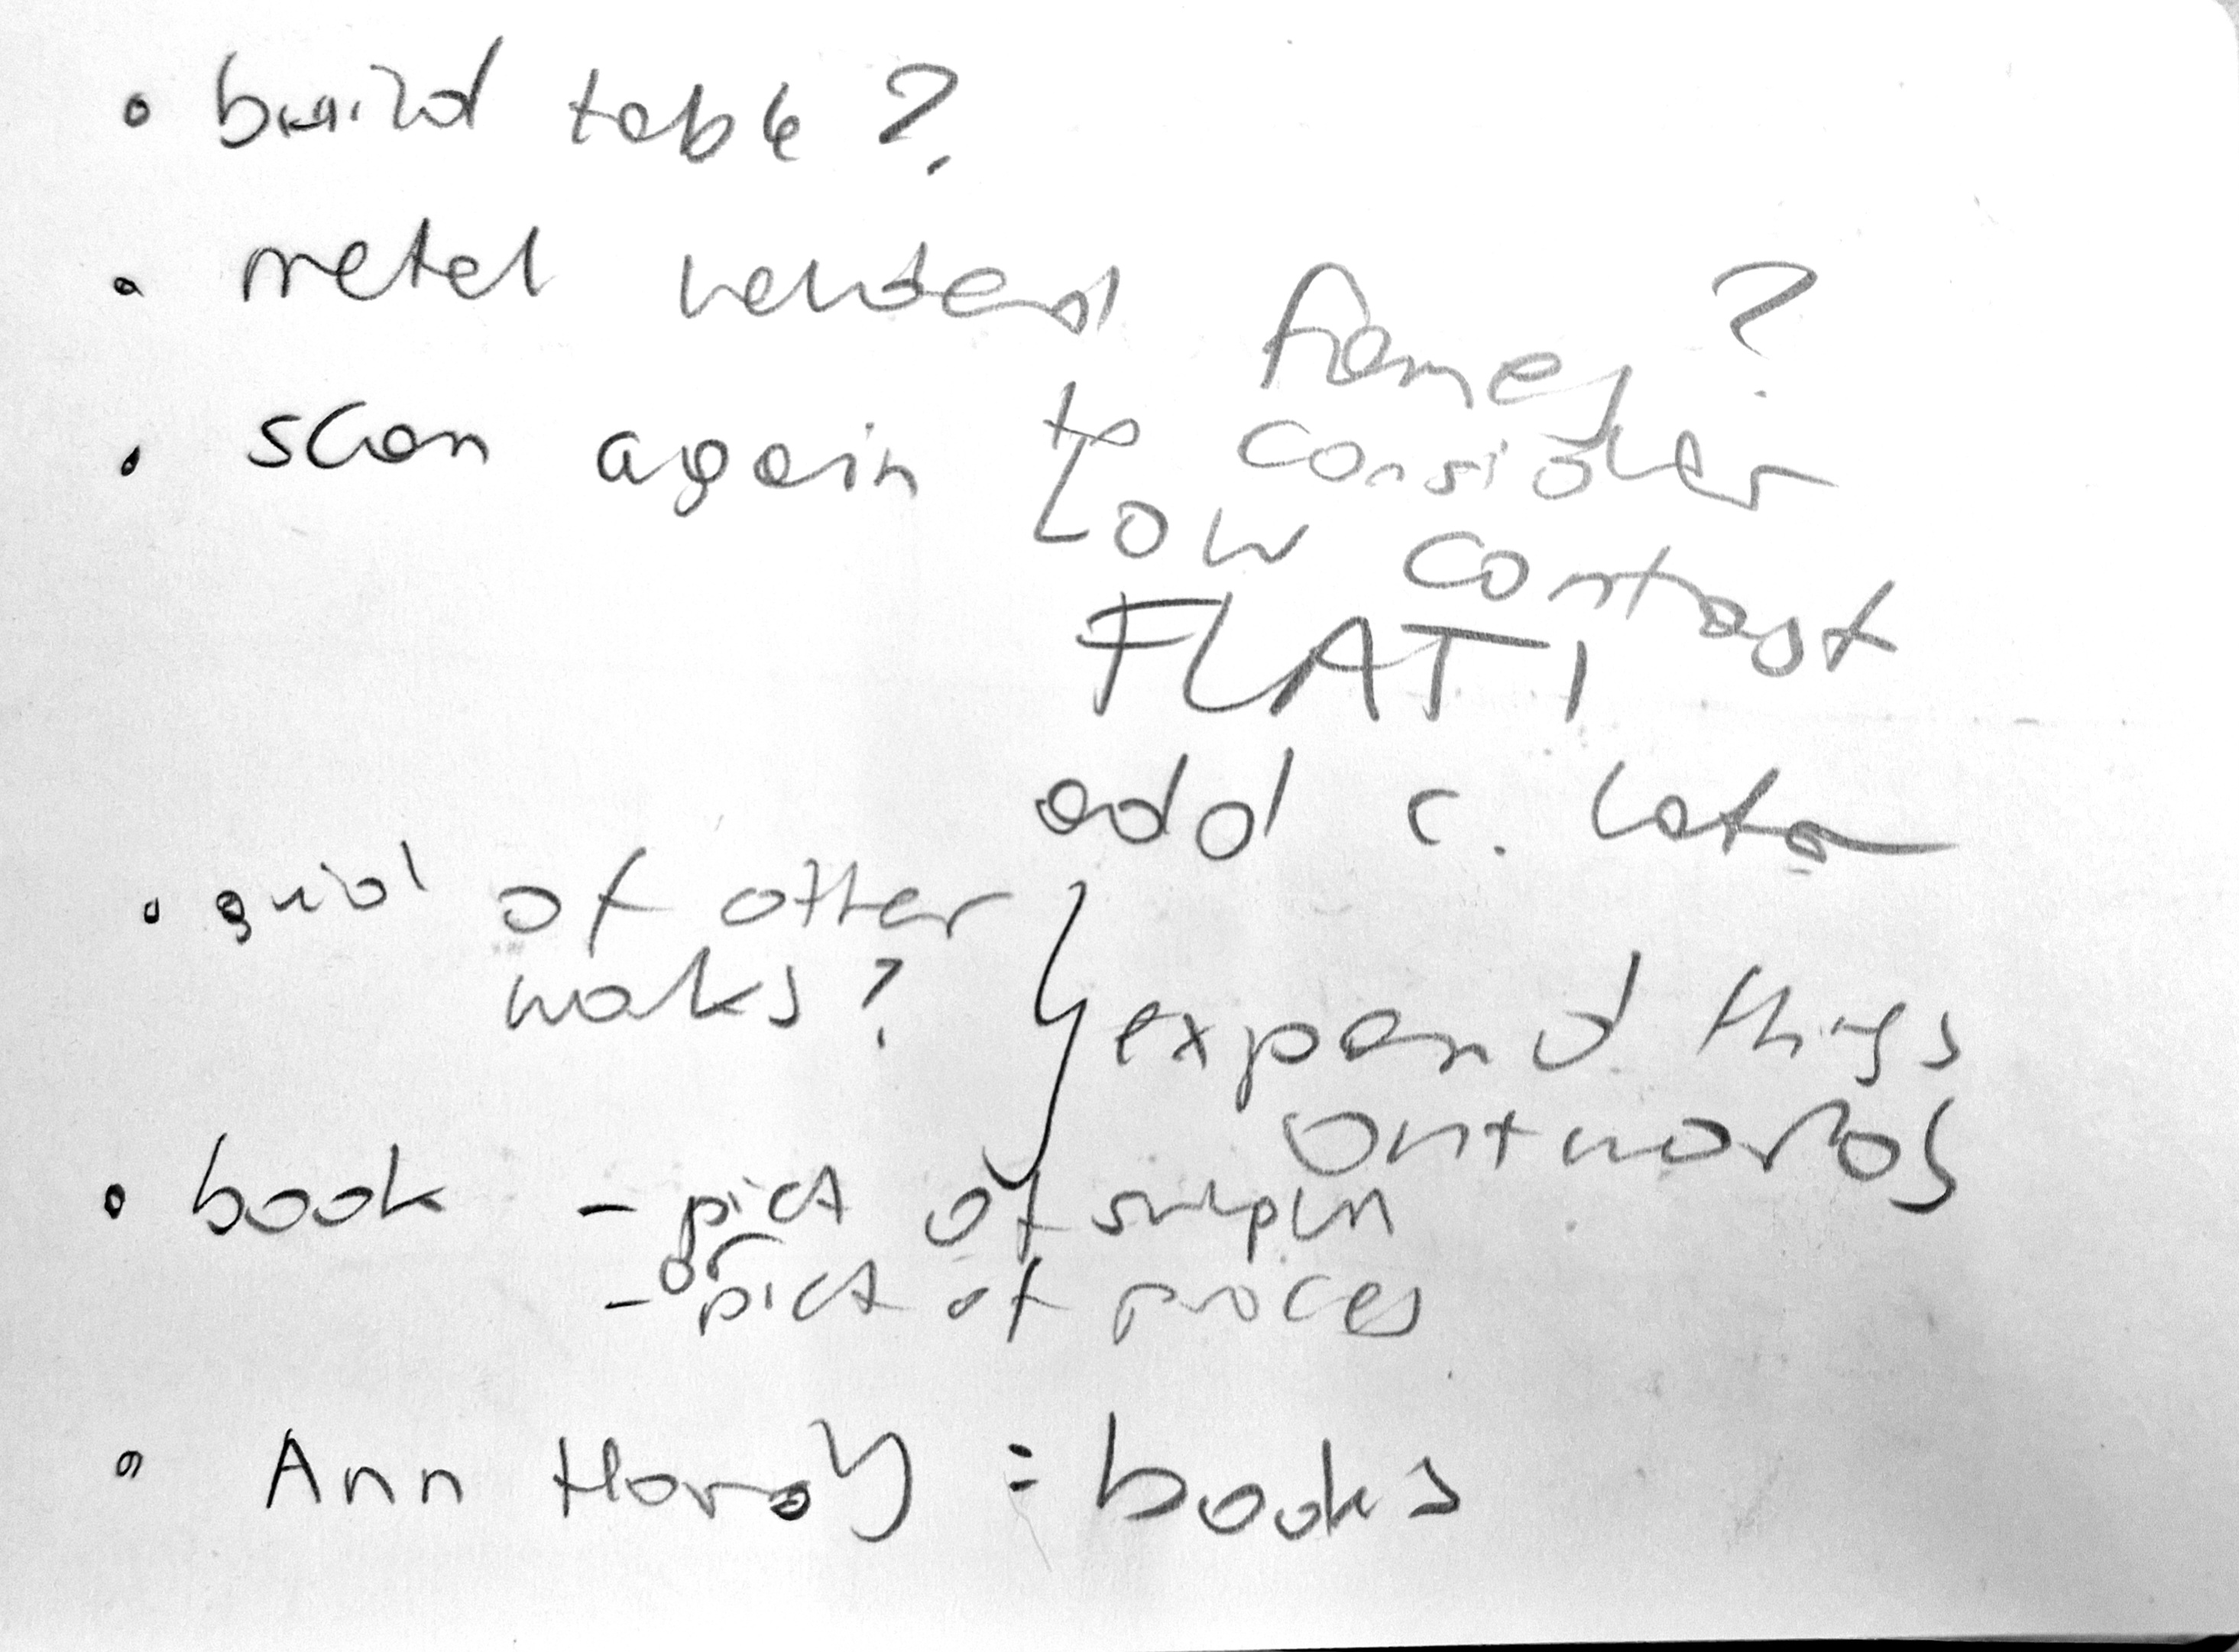
TUTORIAL WITH THOM
NOTES:
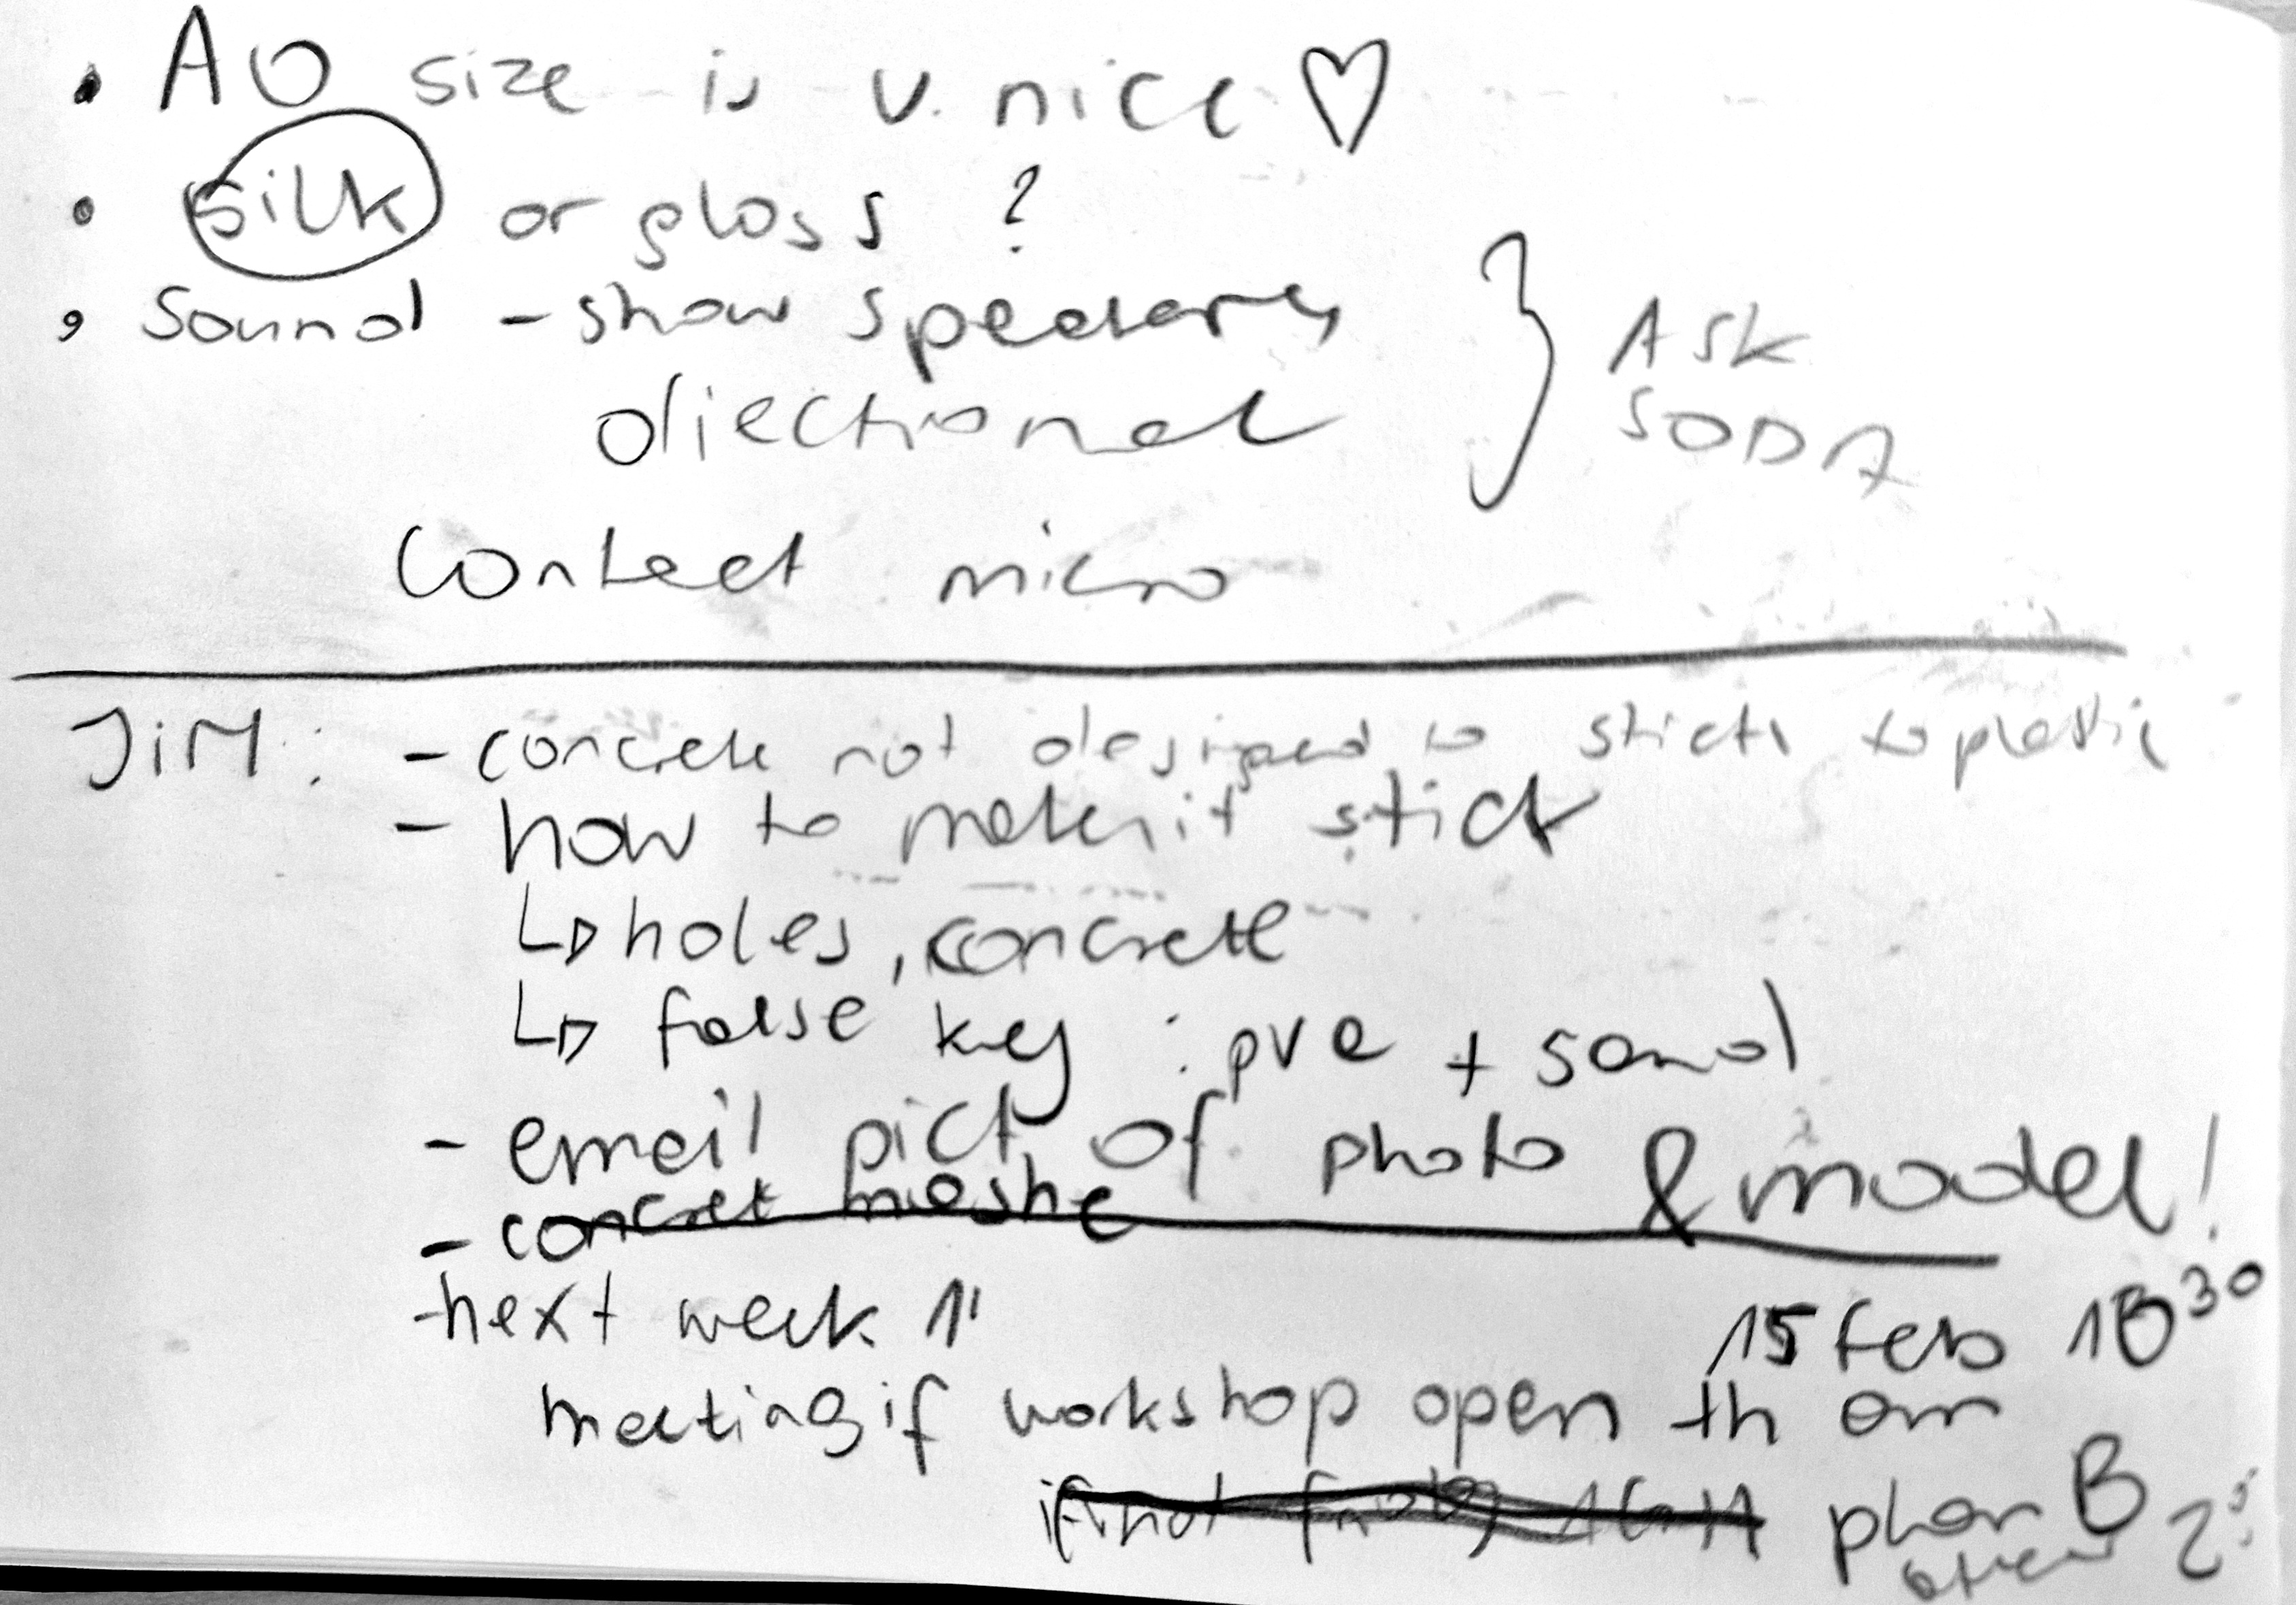
- silk over gloss
- after discussing the sizes and looking at my prints, we decided that AO size would be great, I was however encouraged to explore other sizes apart from A-sizing
- Thom suggested scanning the film again in low contrast/flat and adding contrast later to improve the quality of the image
- perhaps print a grid of other works – expand things outwards
- perhaps make a small publication with either pictures of sculptures or pictures of the process
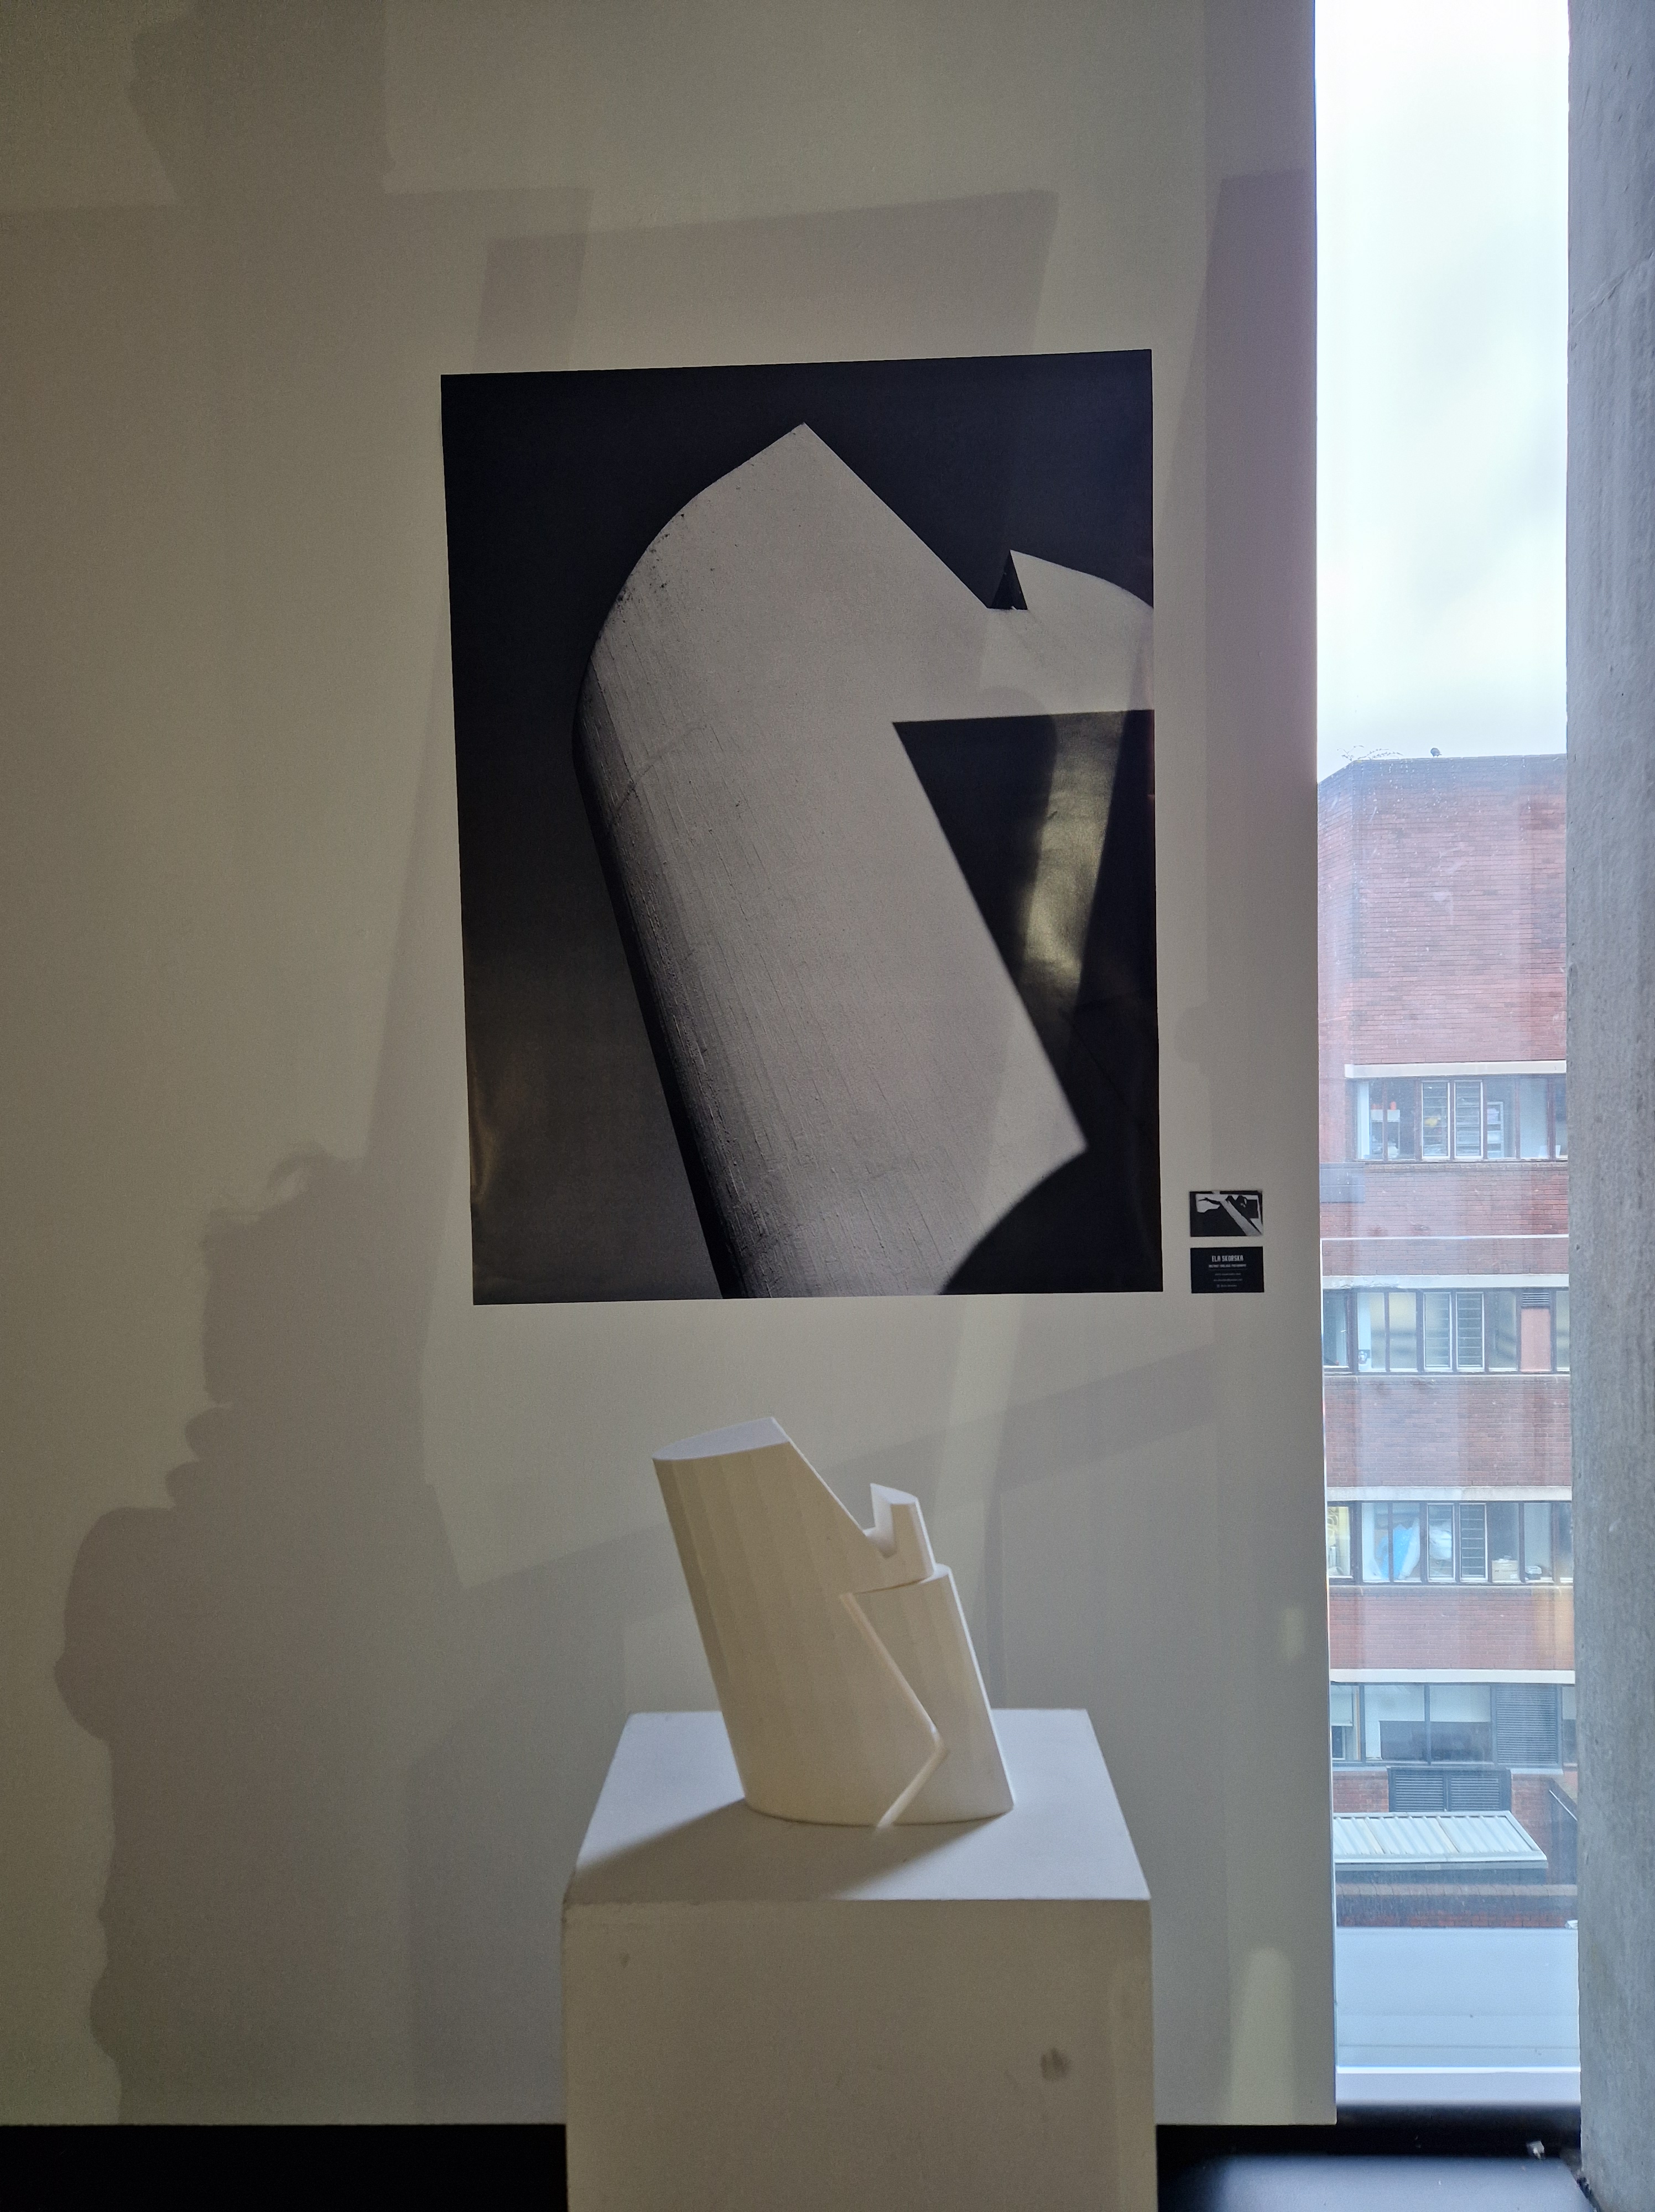
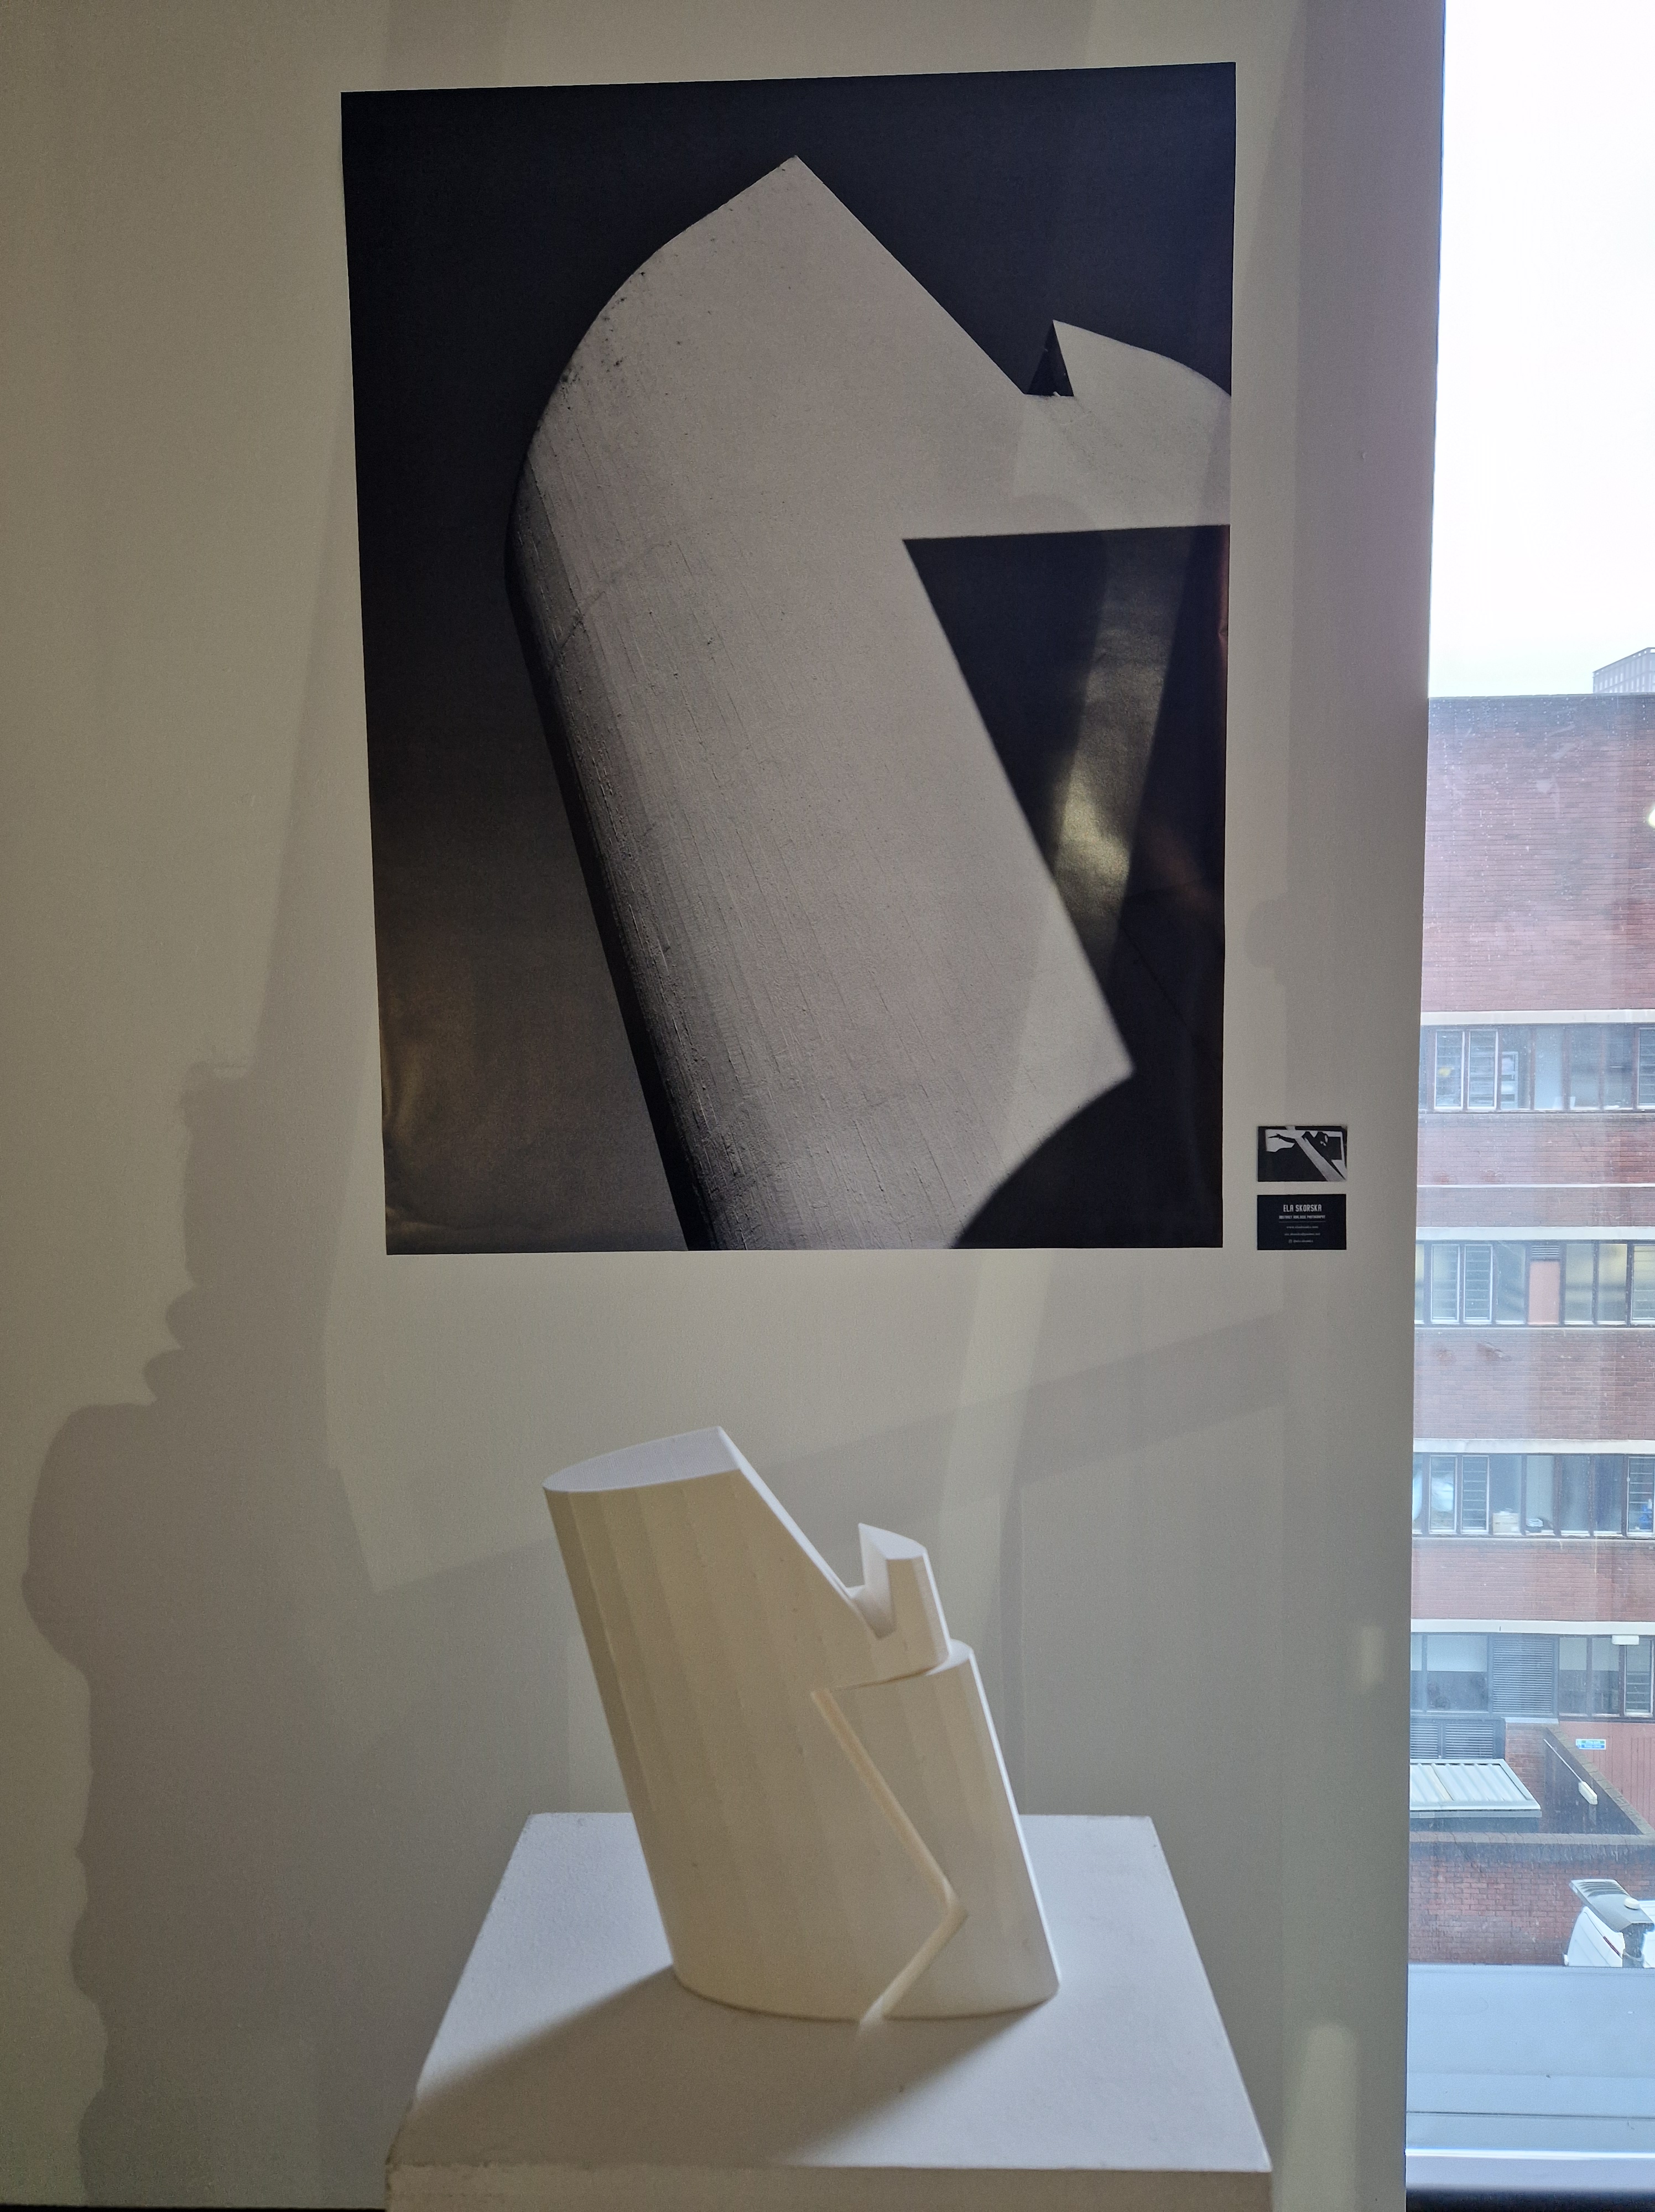
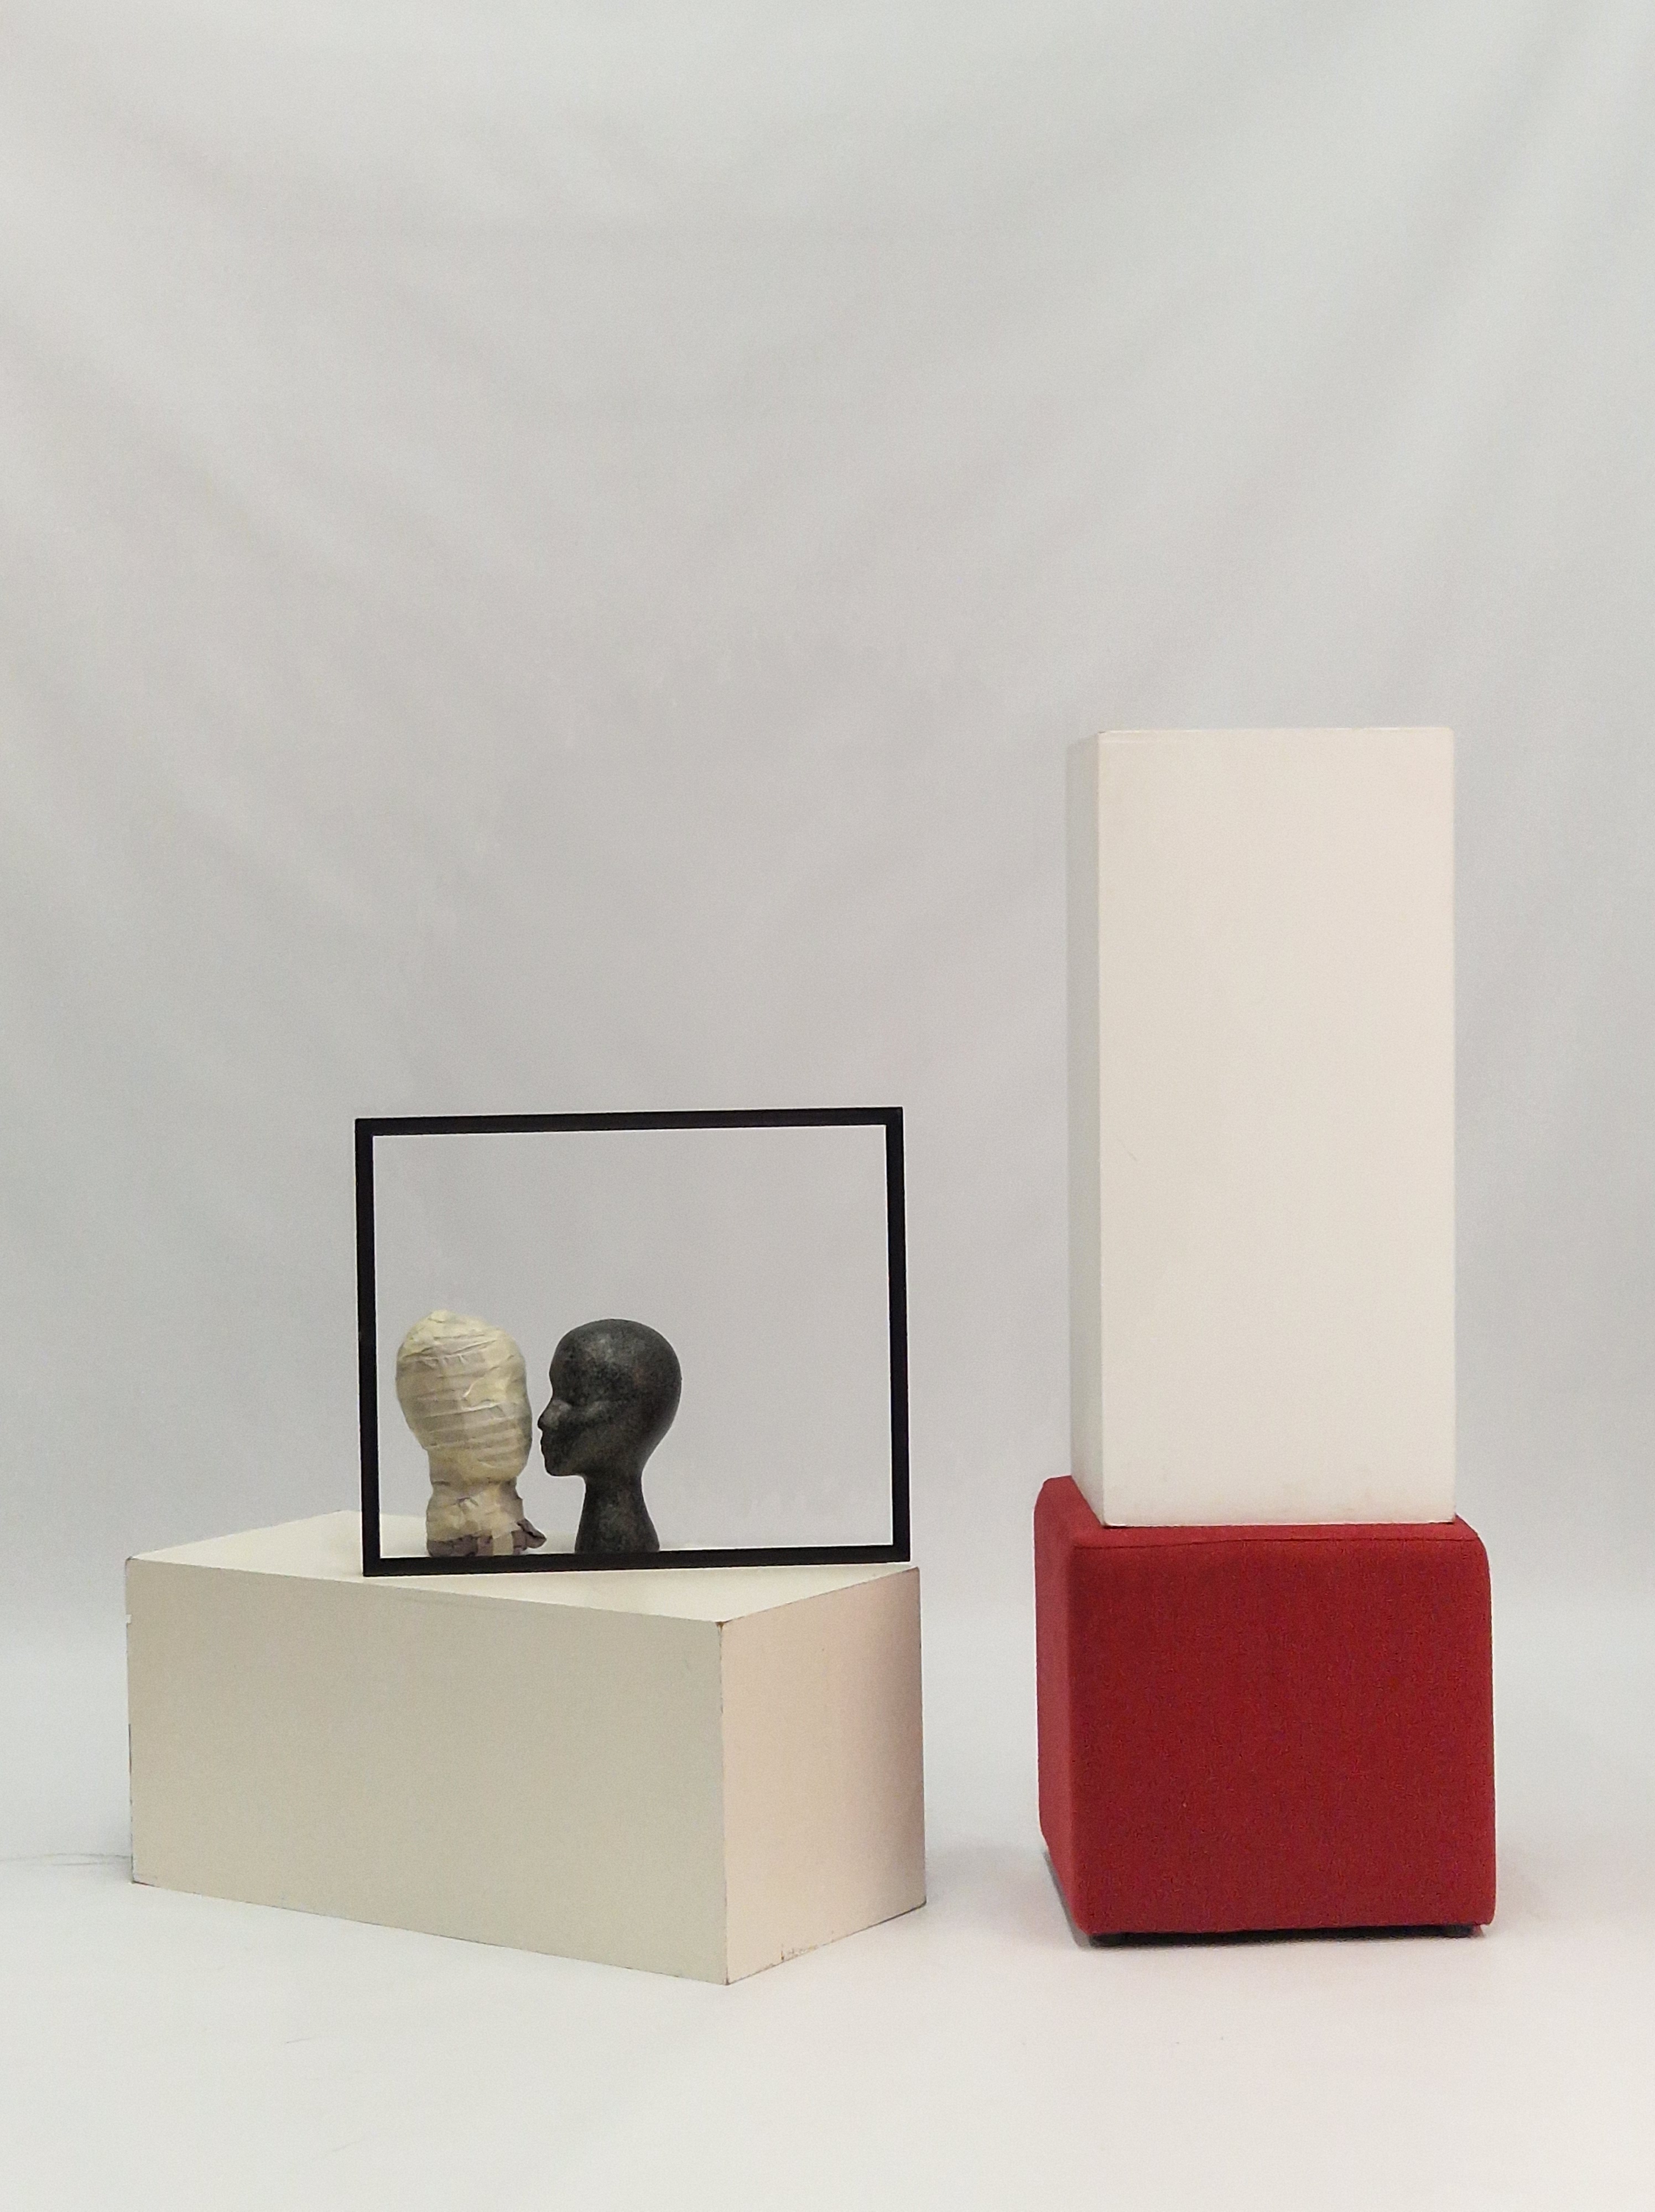
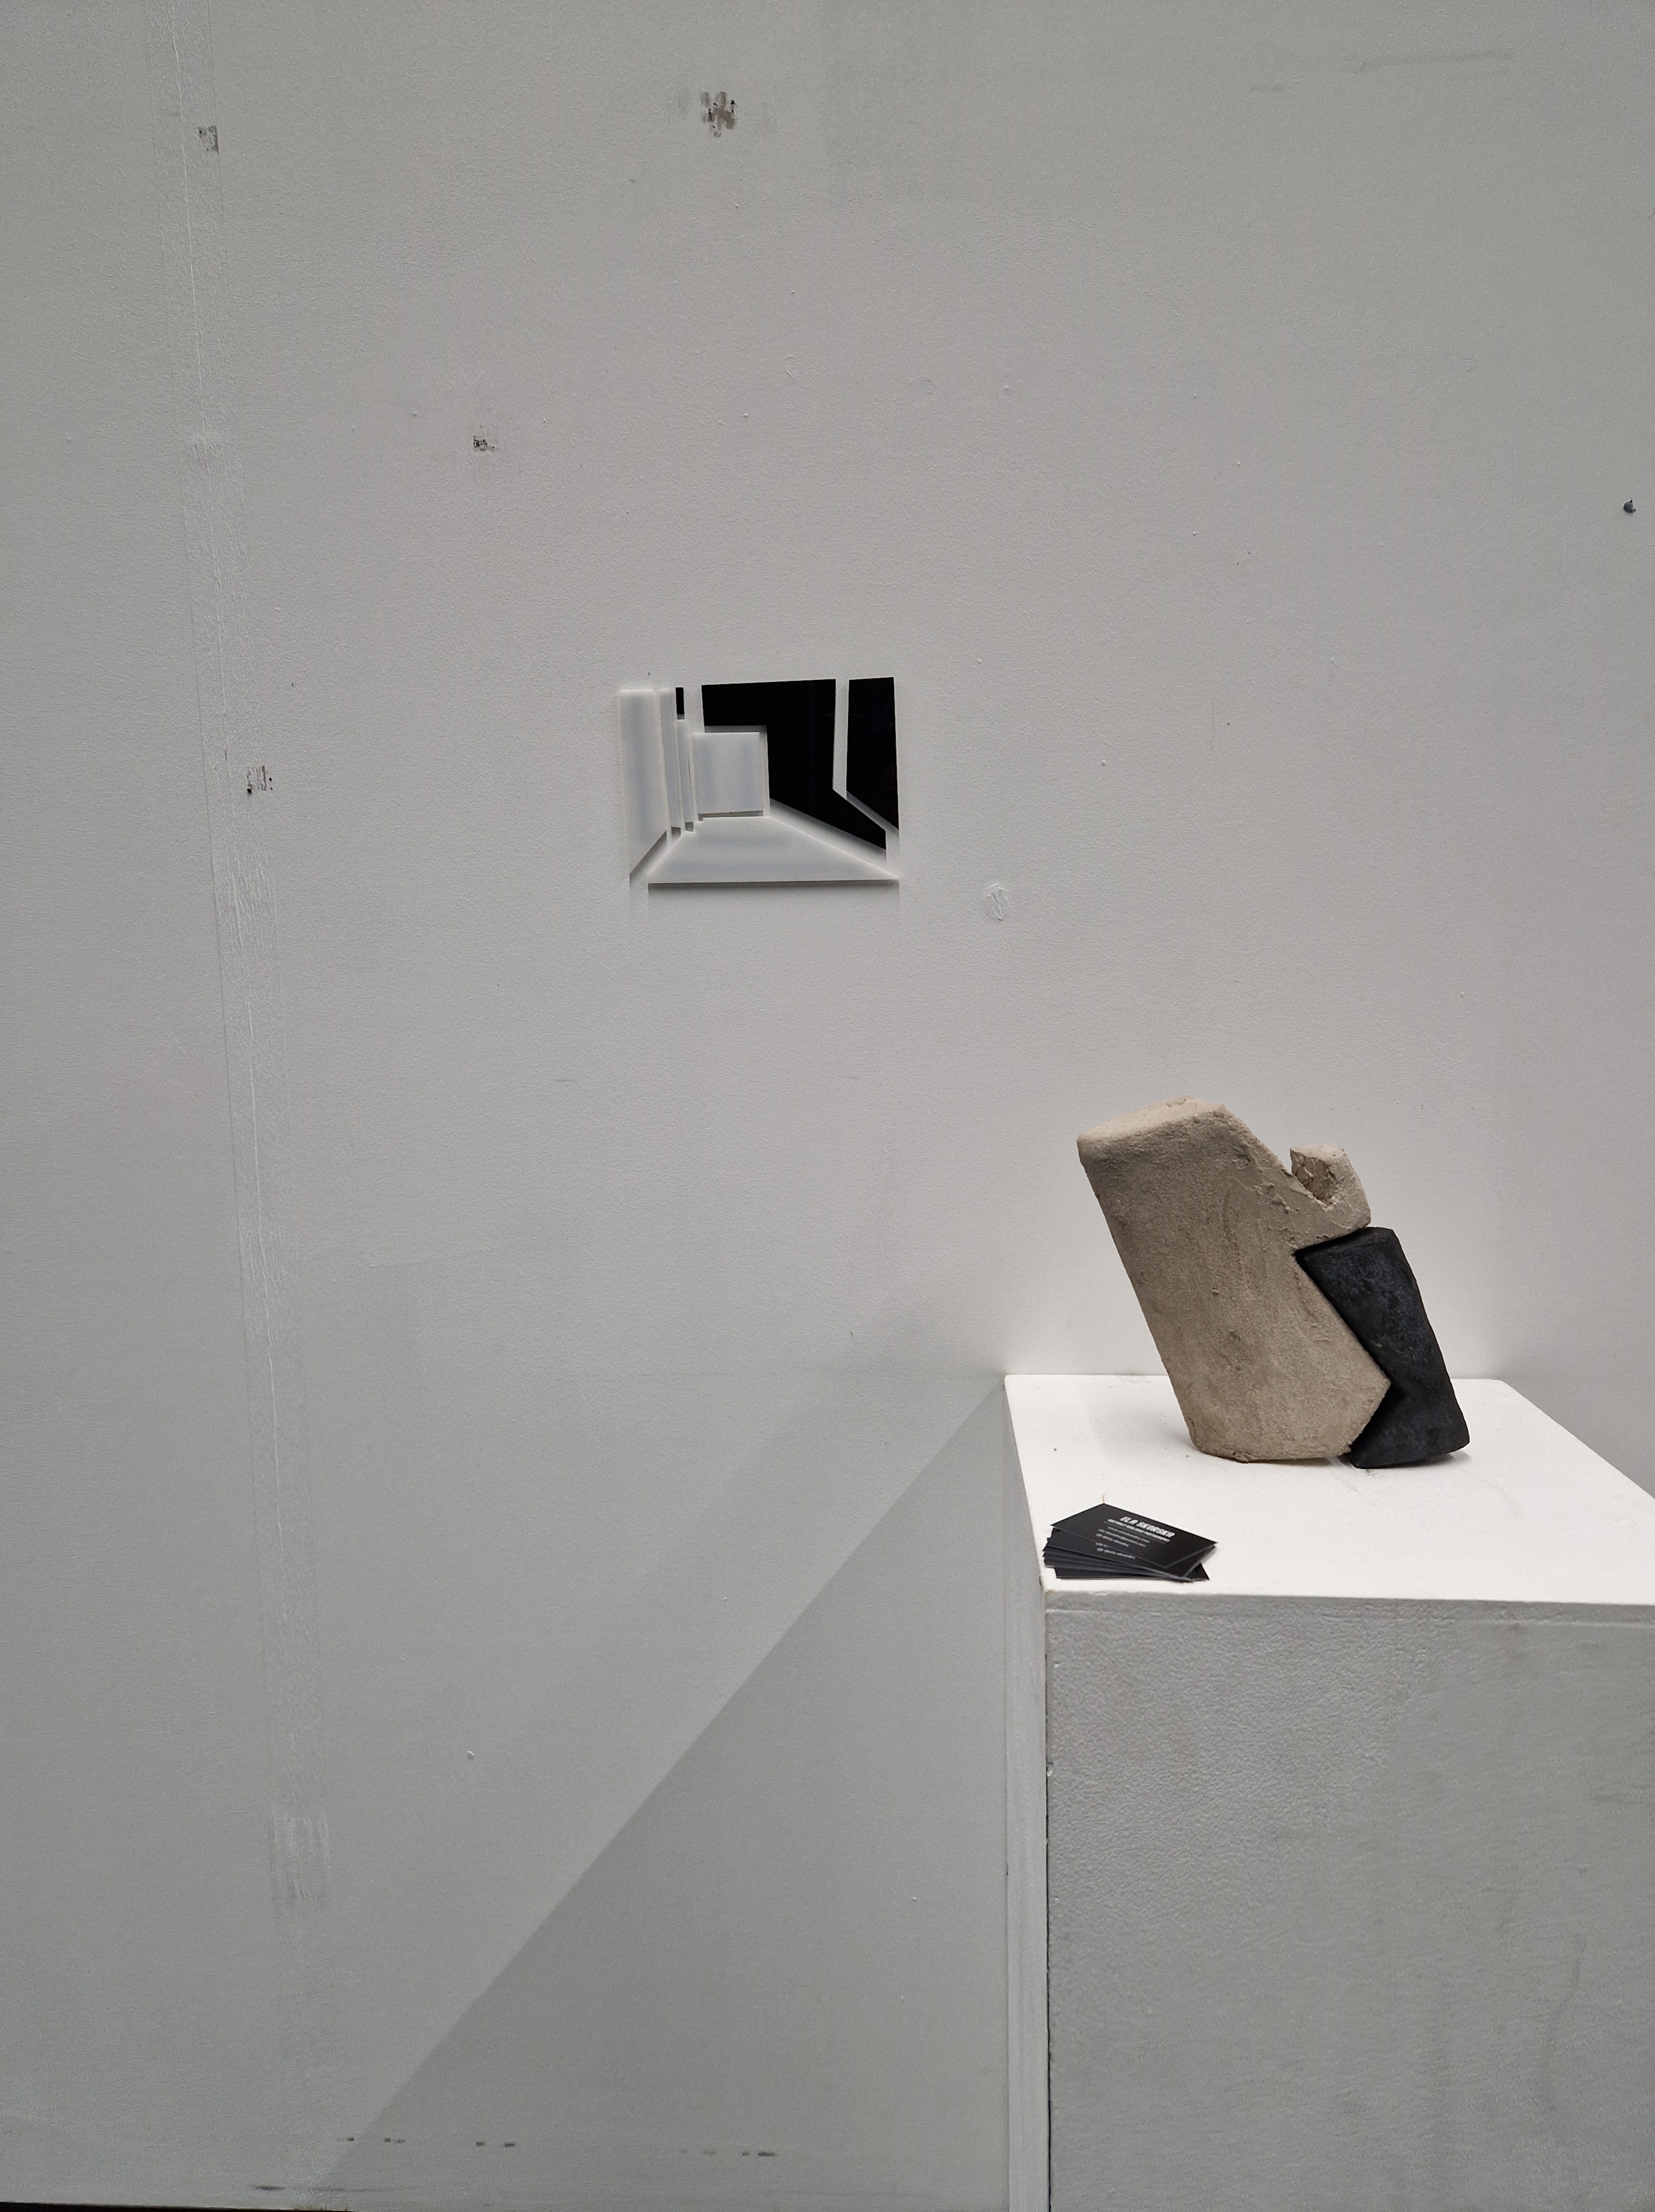
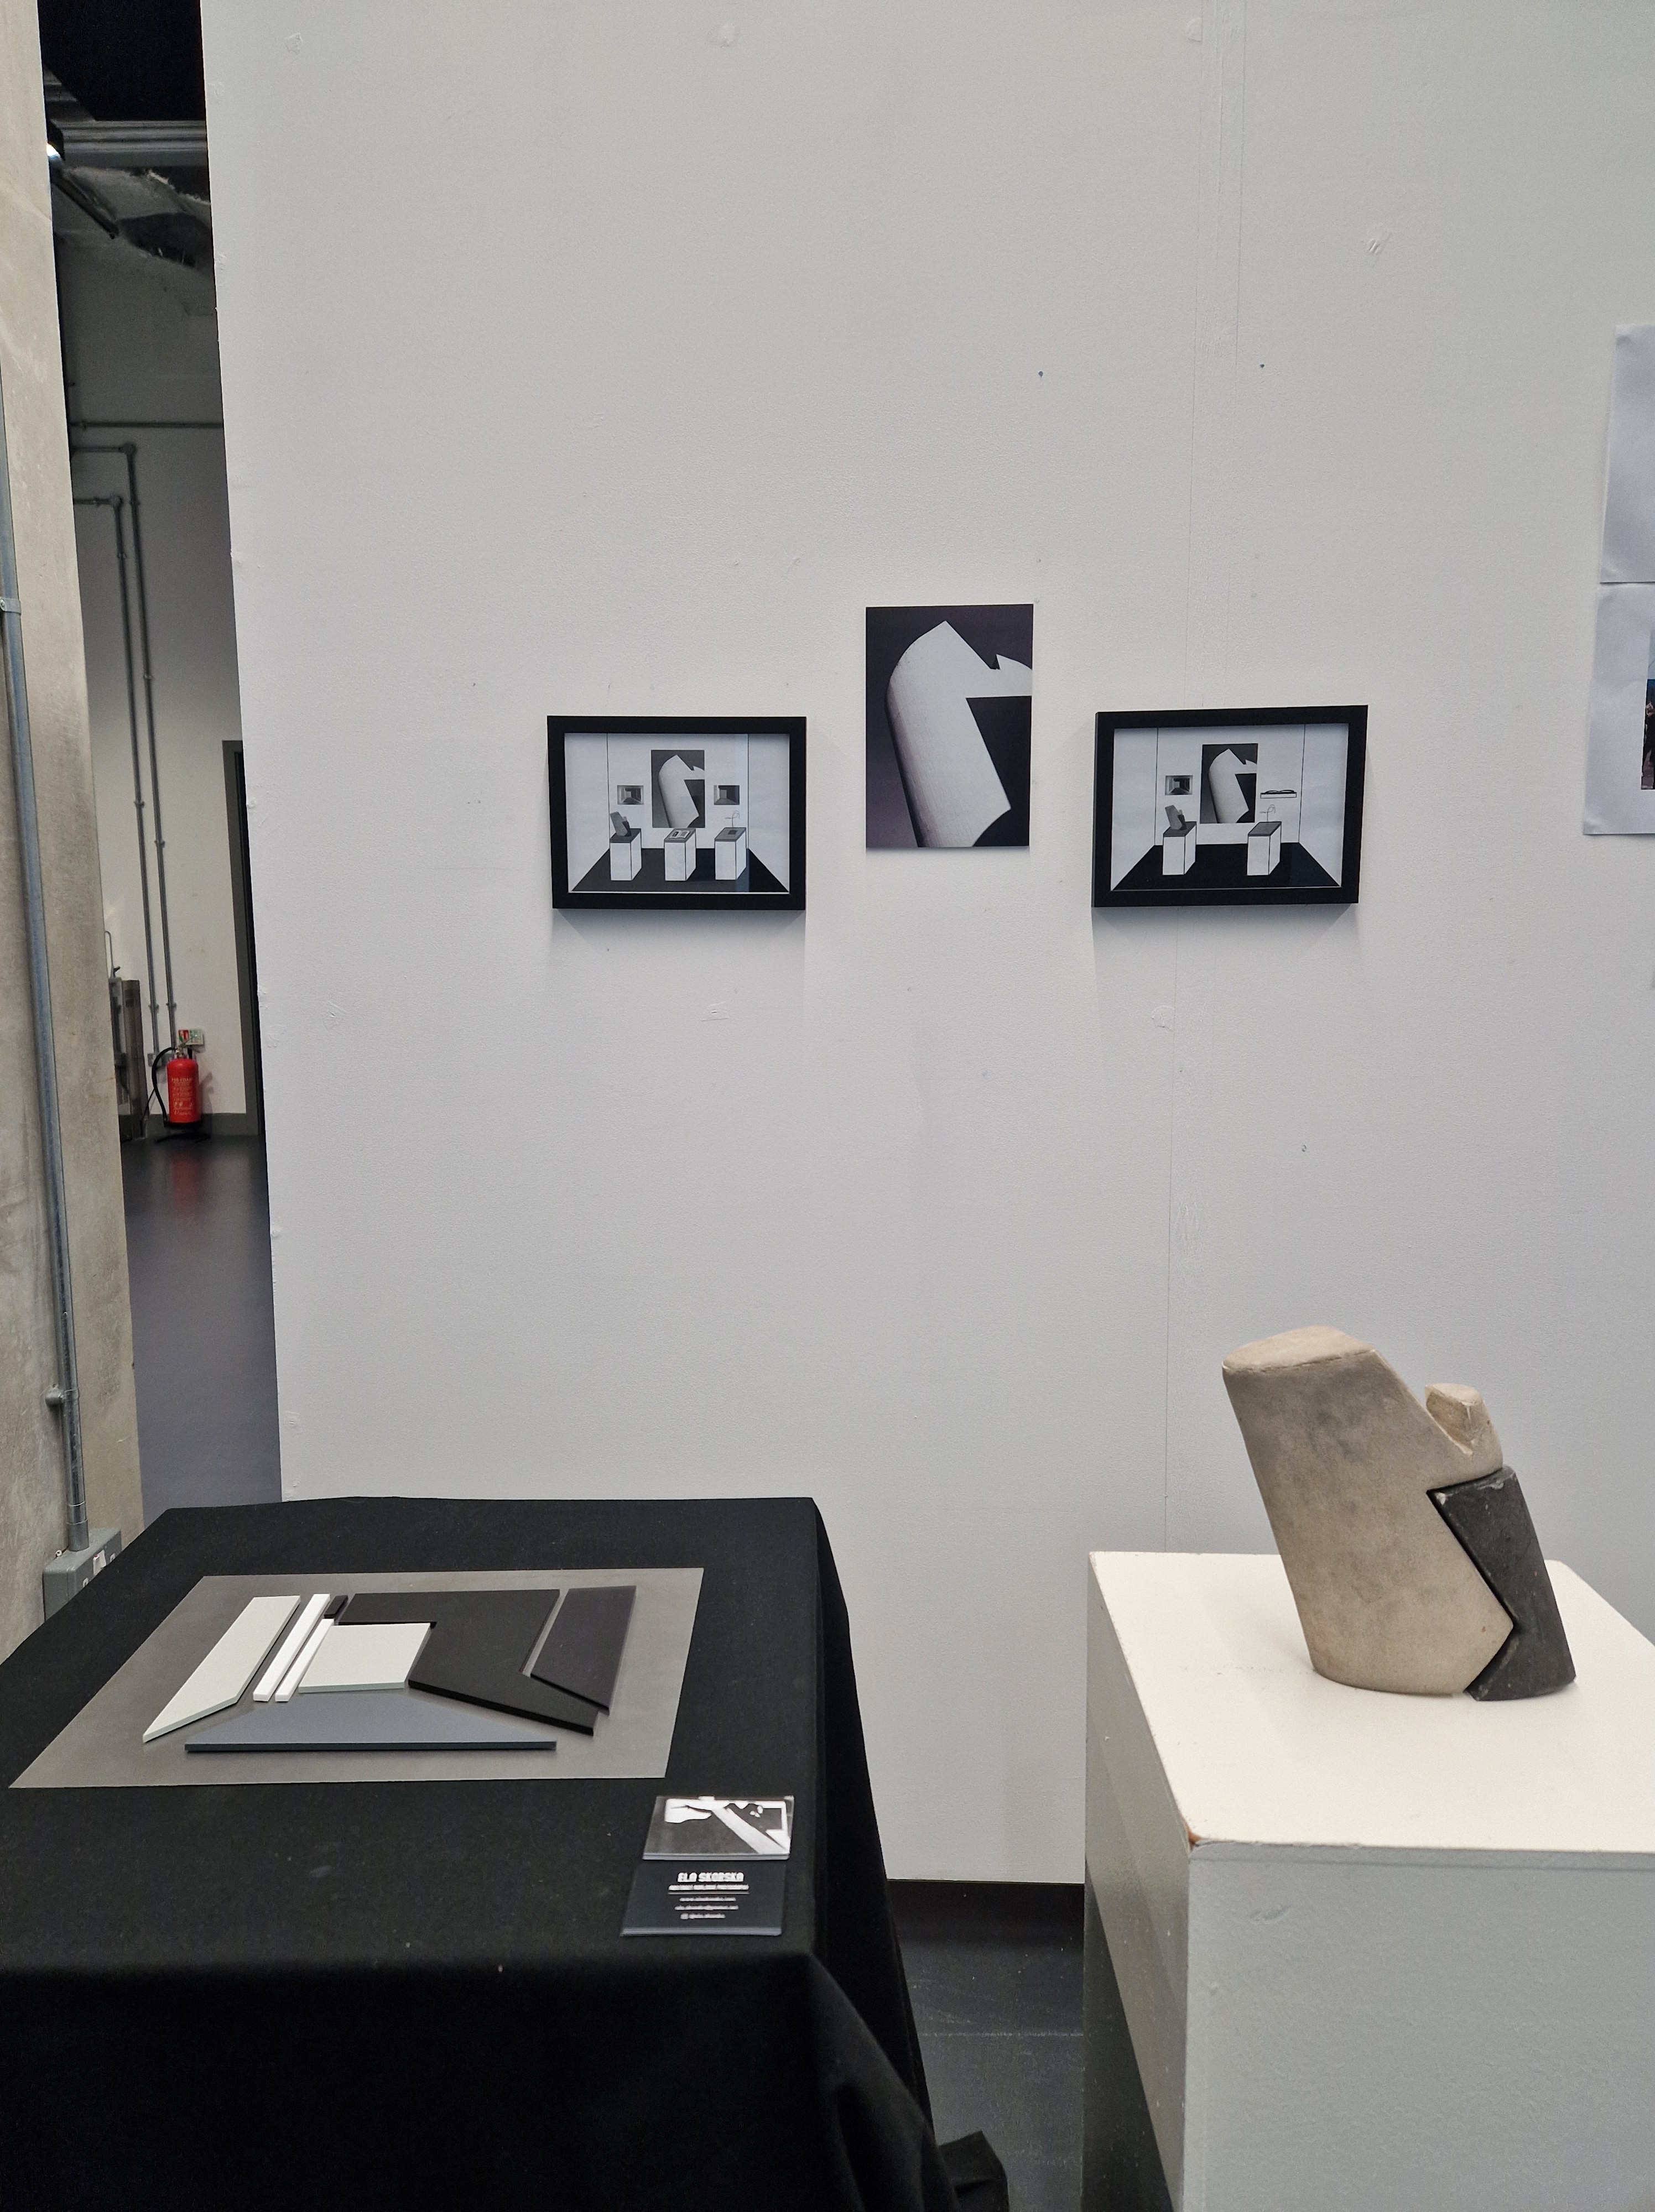
- position the sculpture opposite the image – NOT IN FRONT OF IT, use the same materials and colours for the frame and the table so they speak/relate to each other
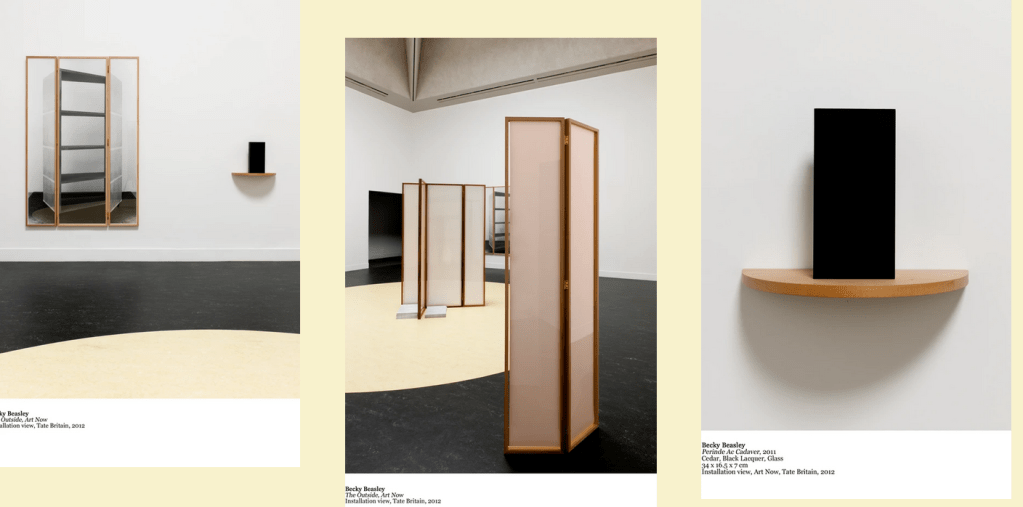
- Becky Beasley
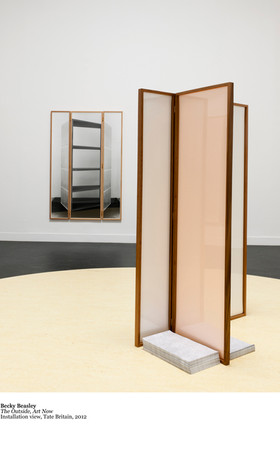
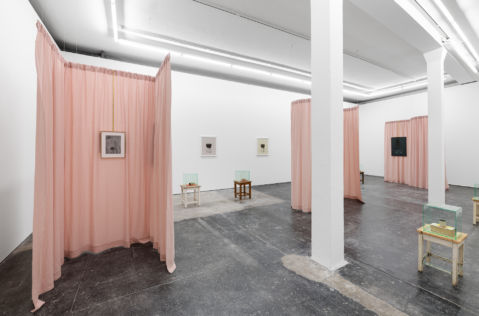
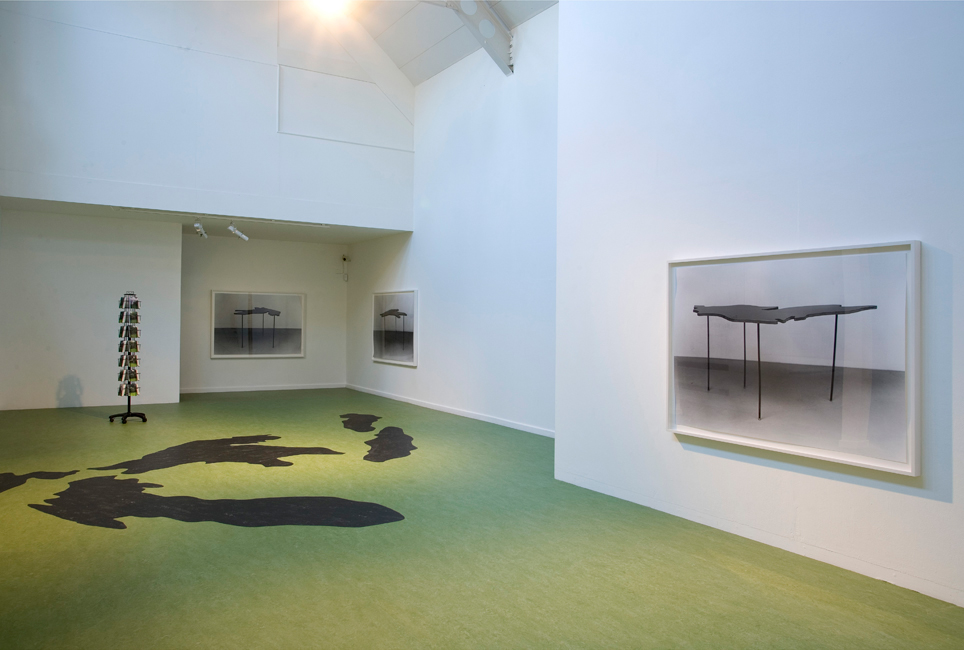
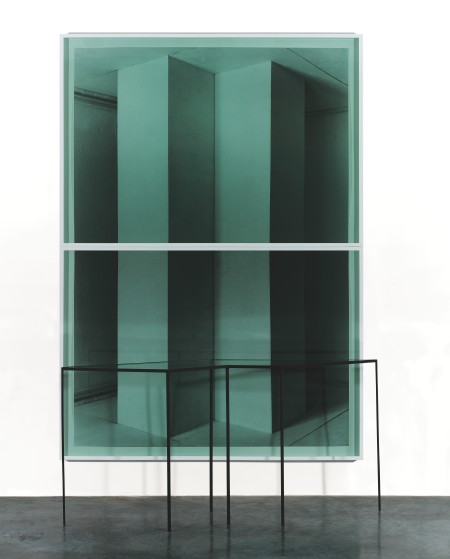
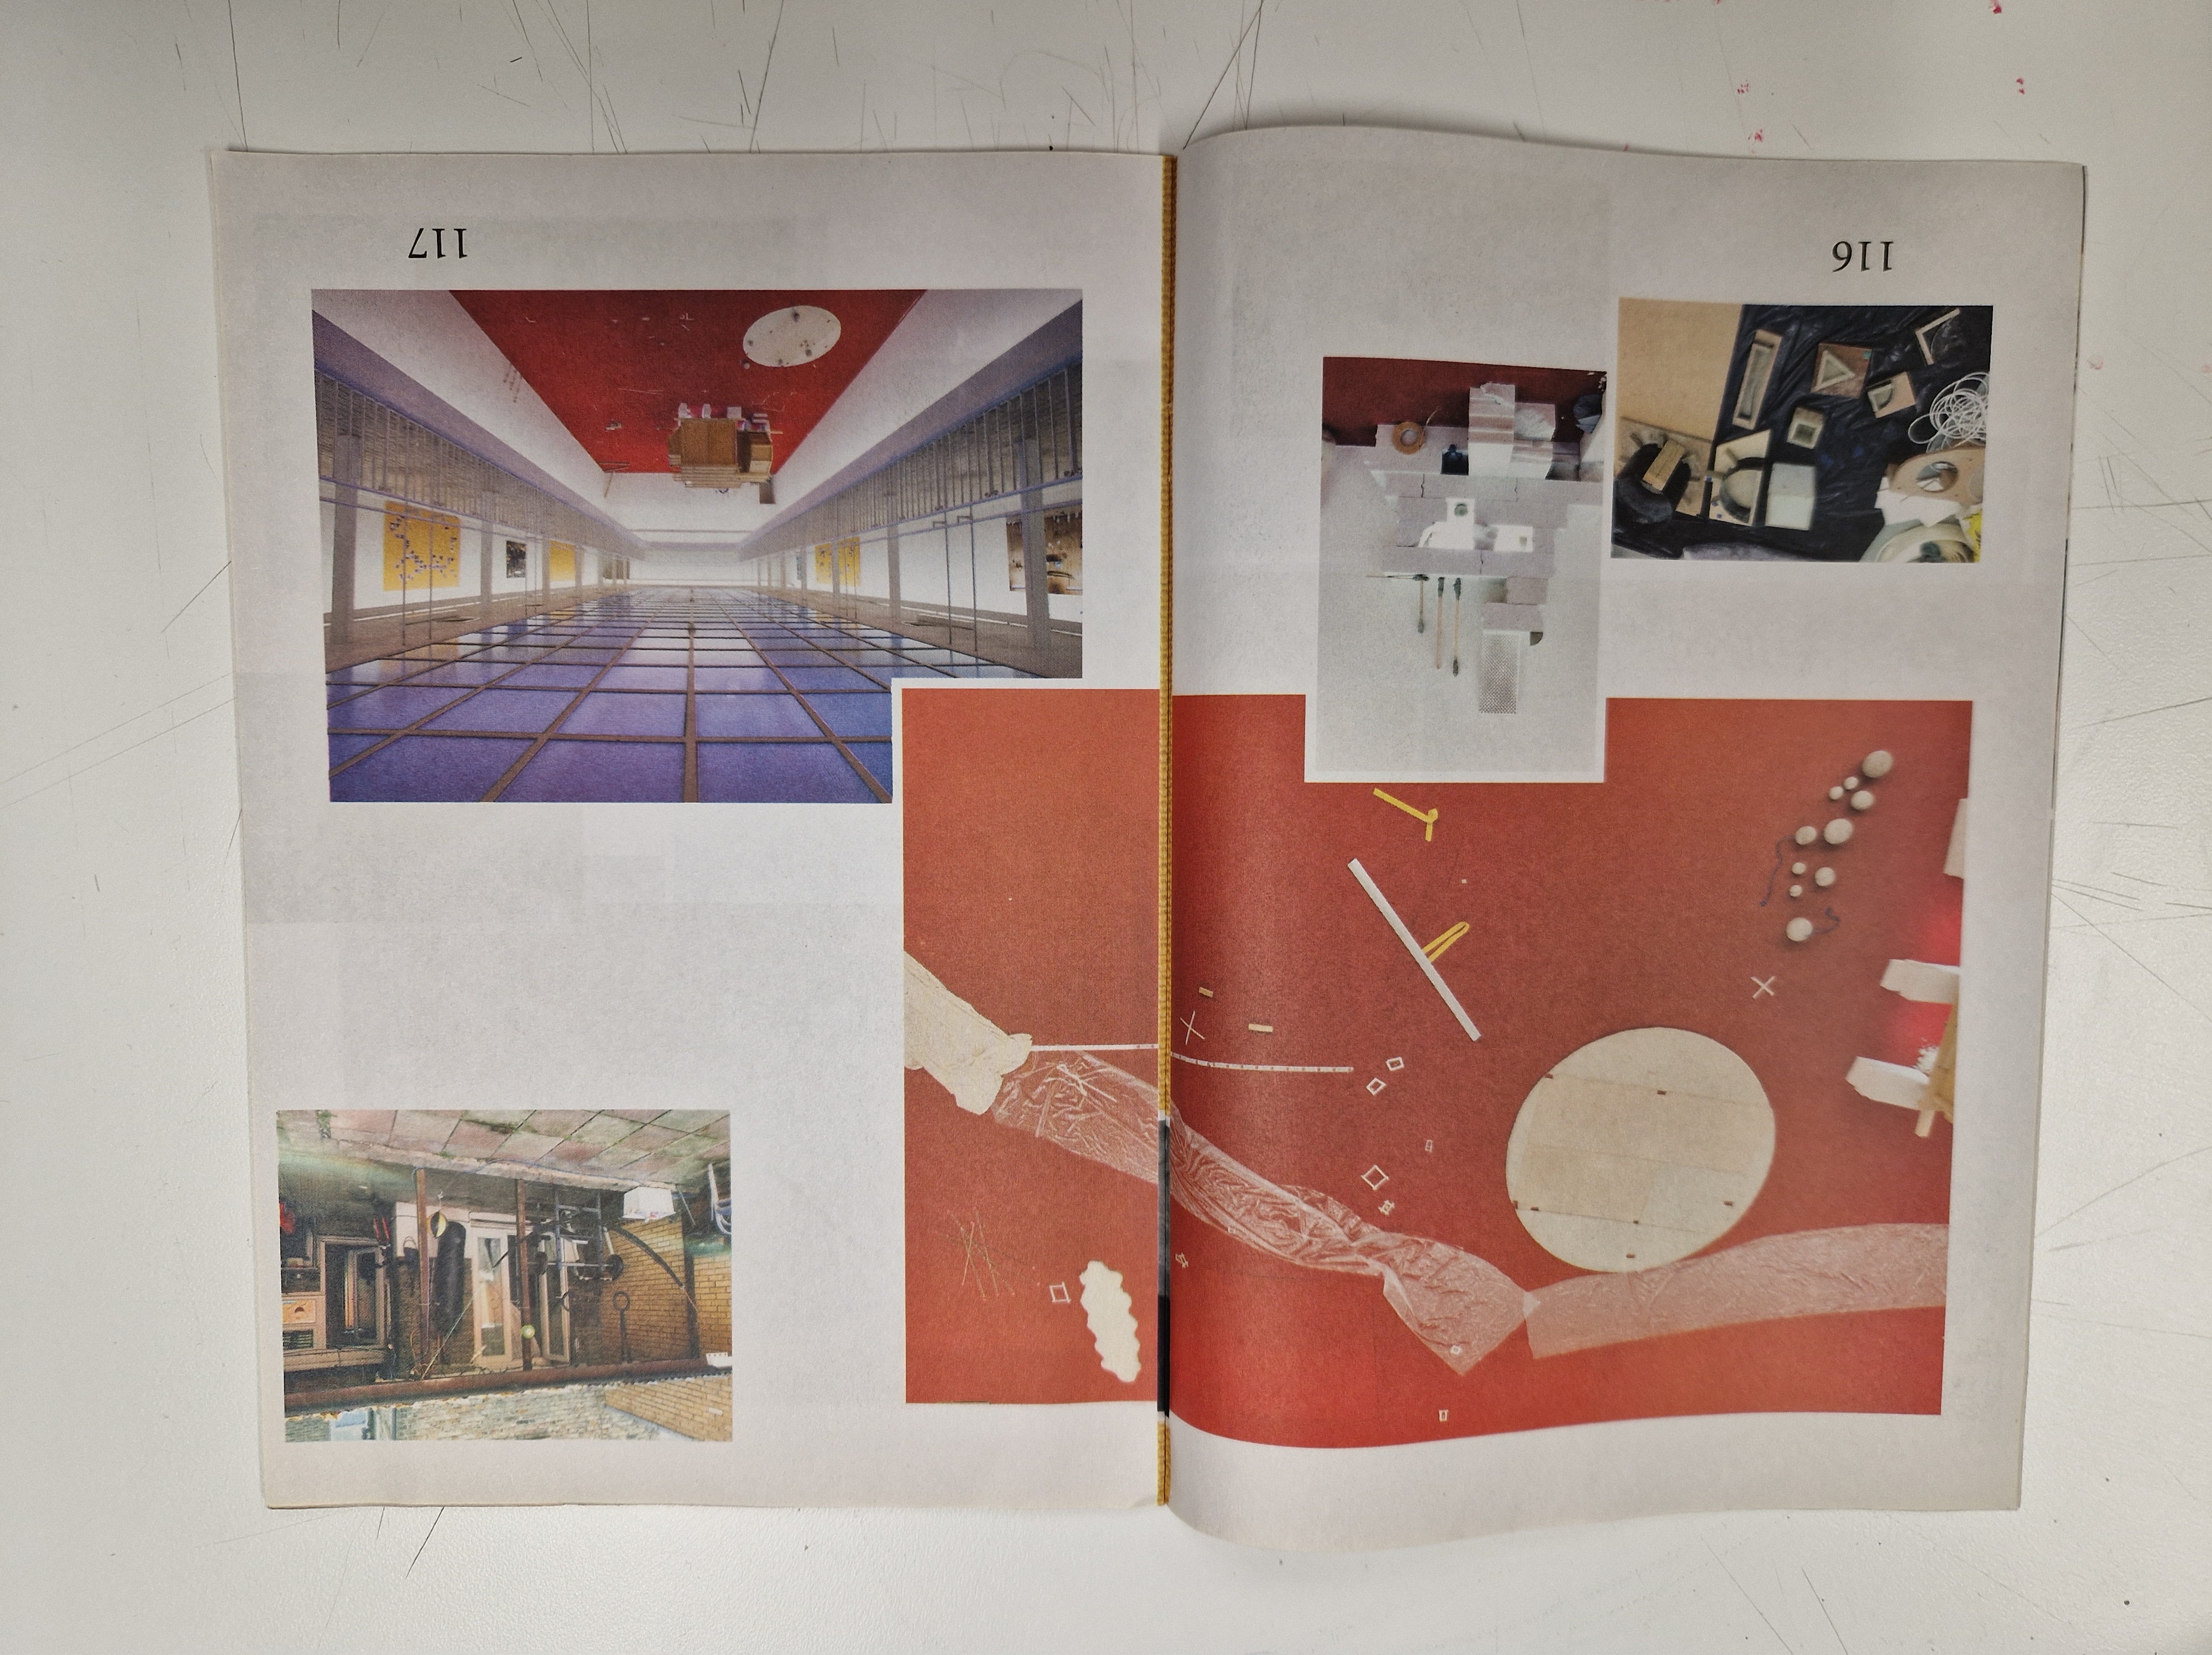
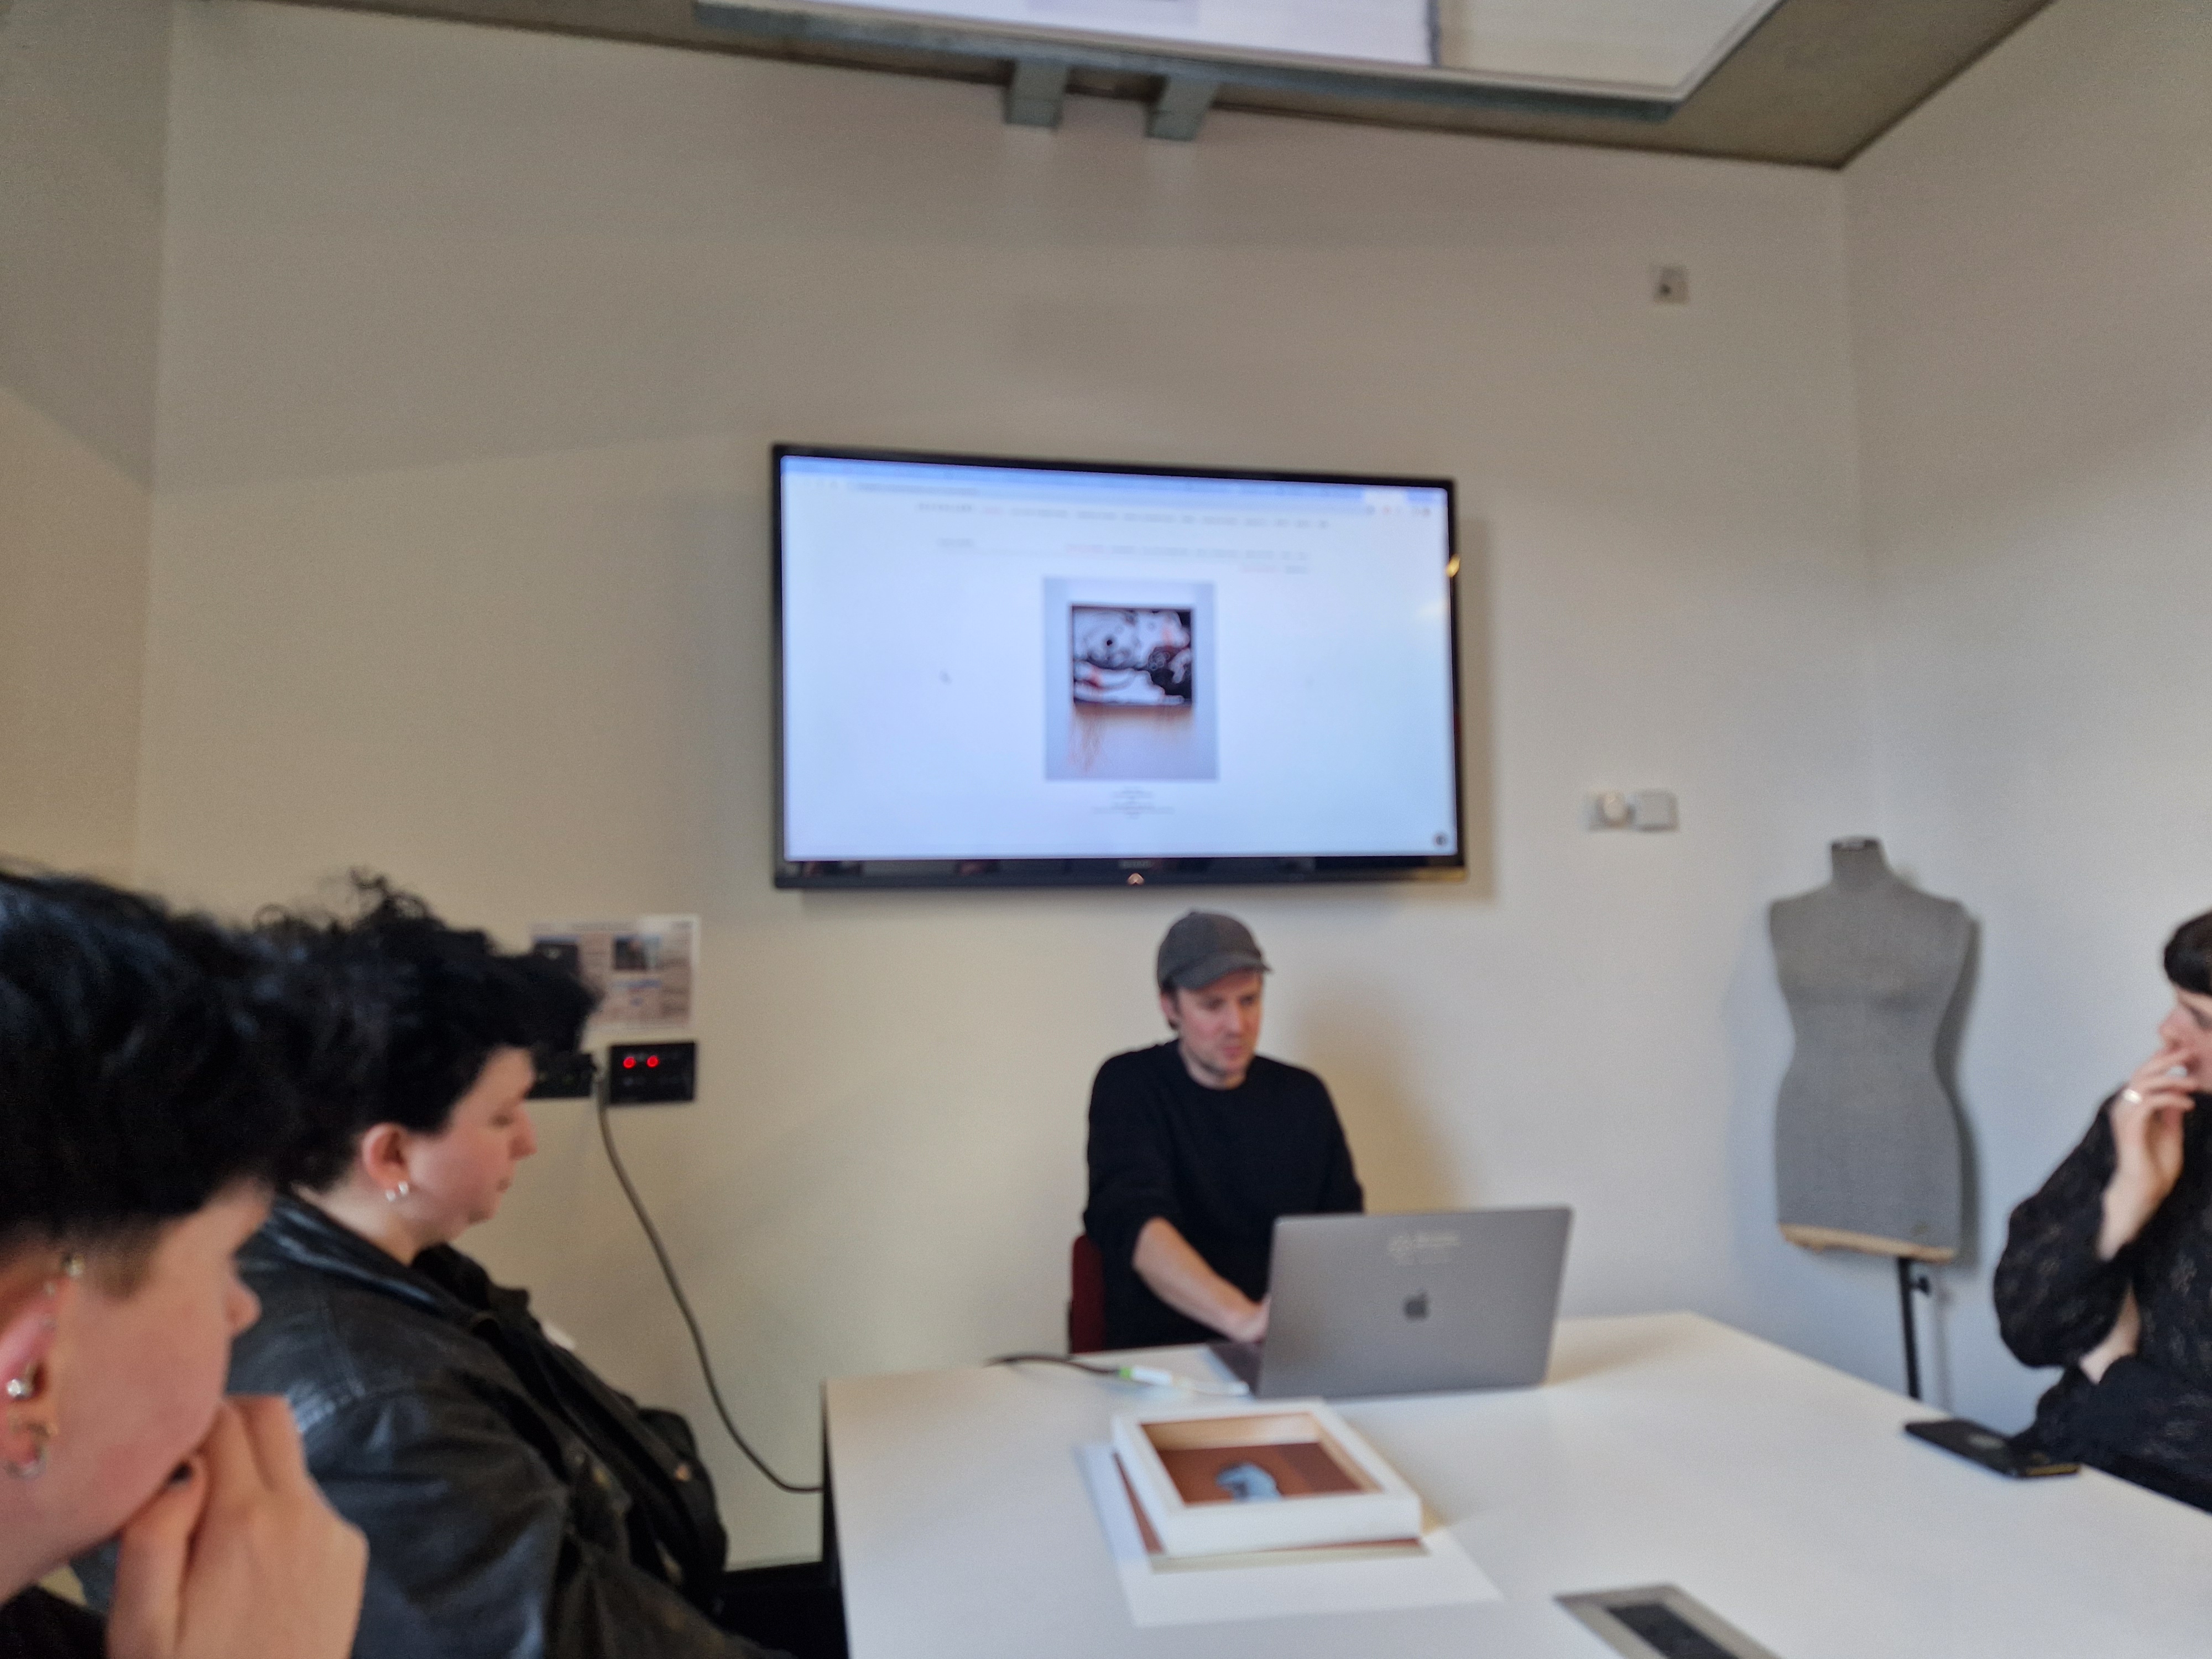
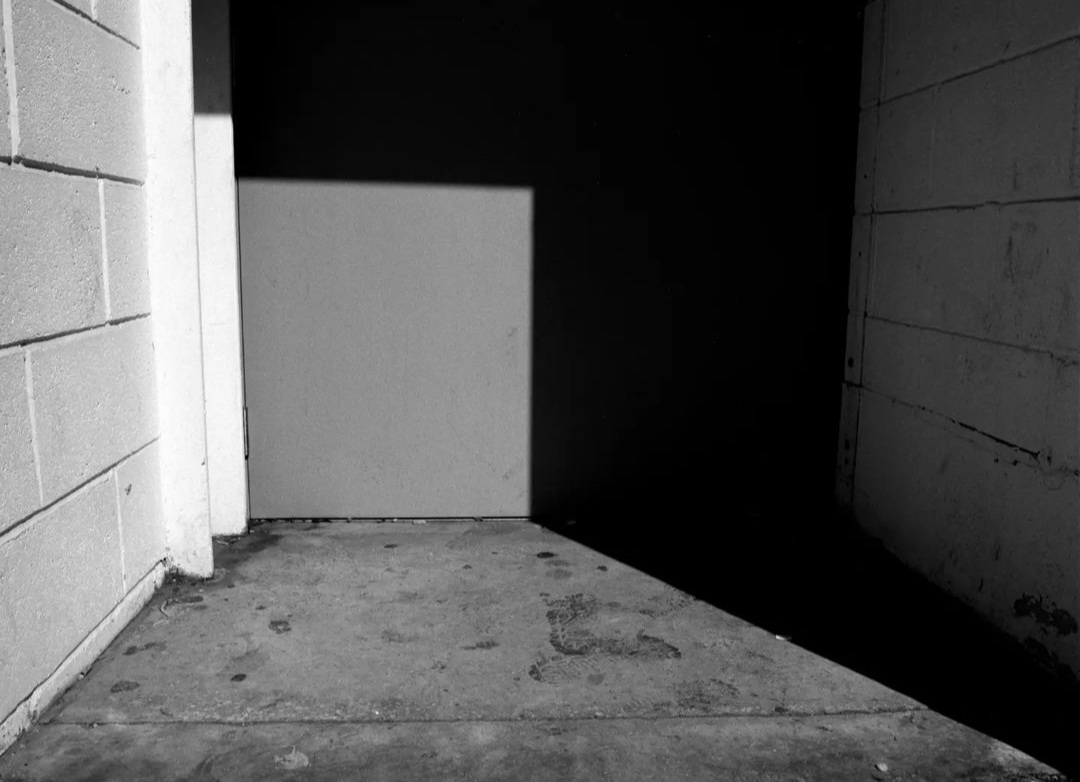
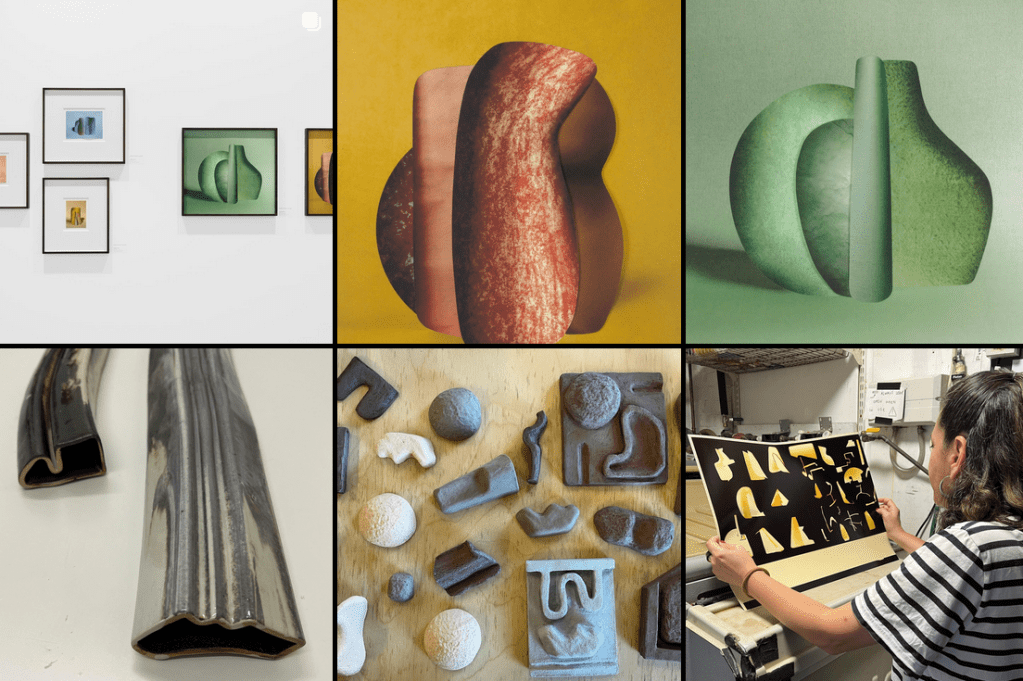
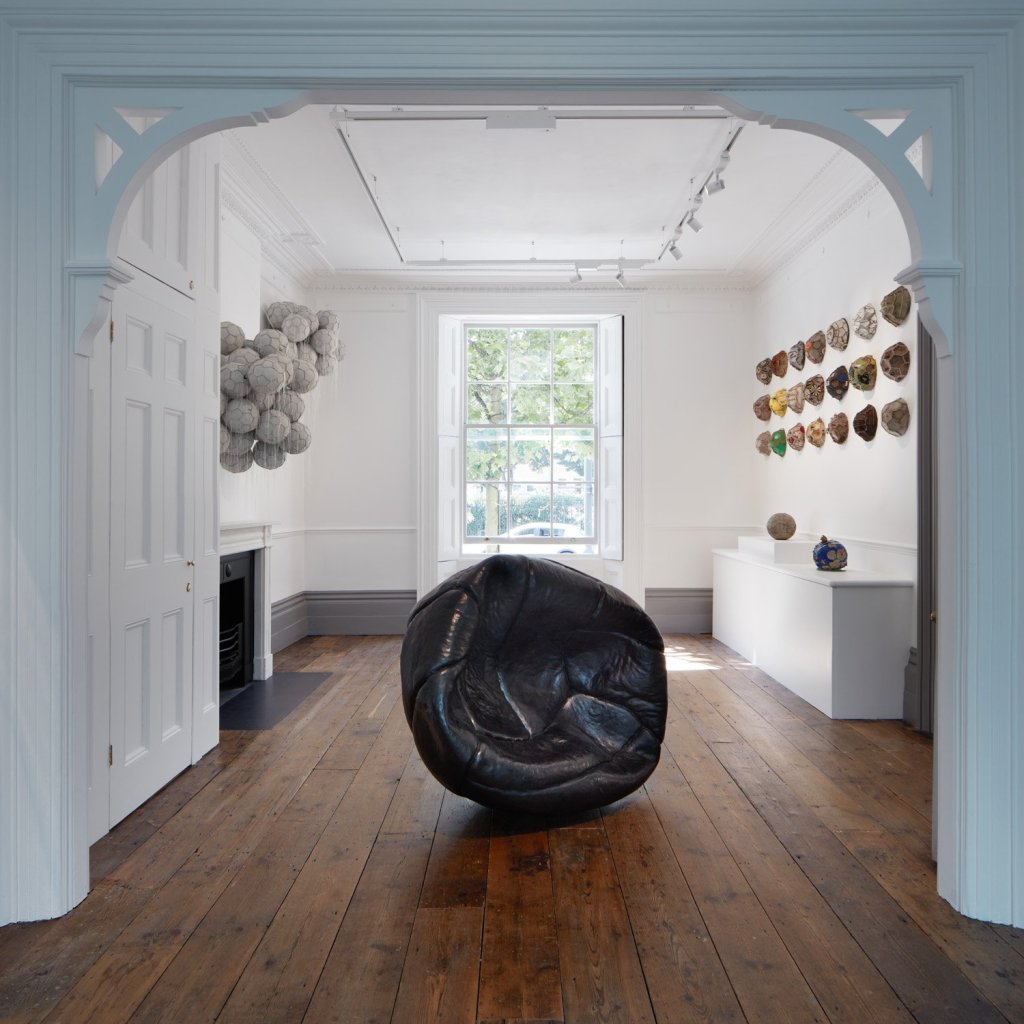
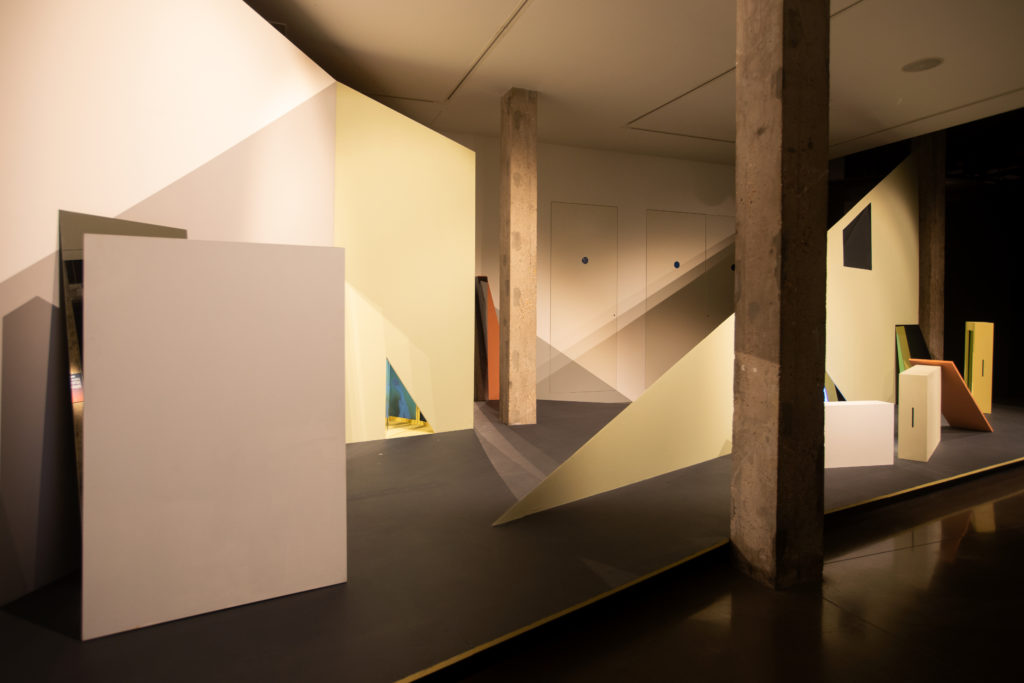
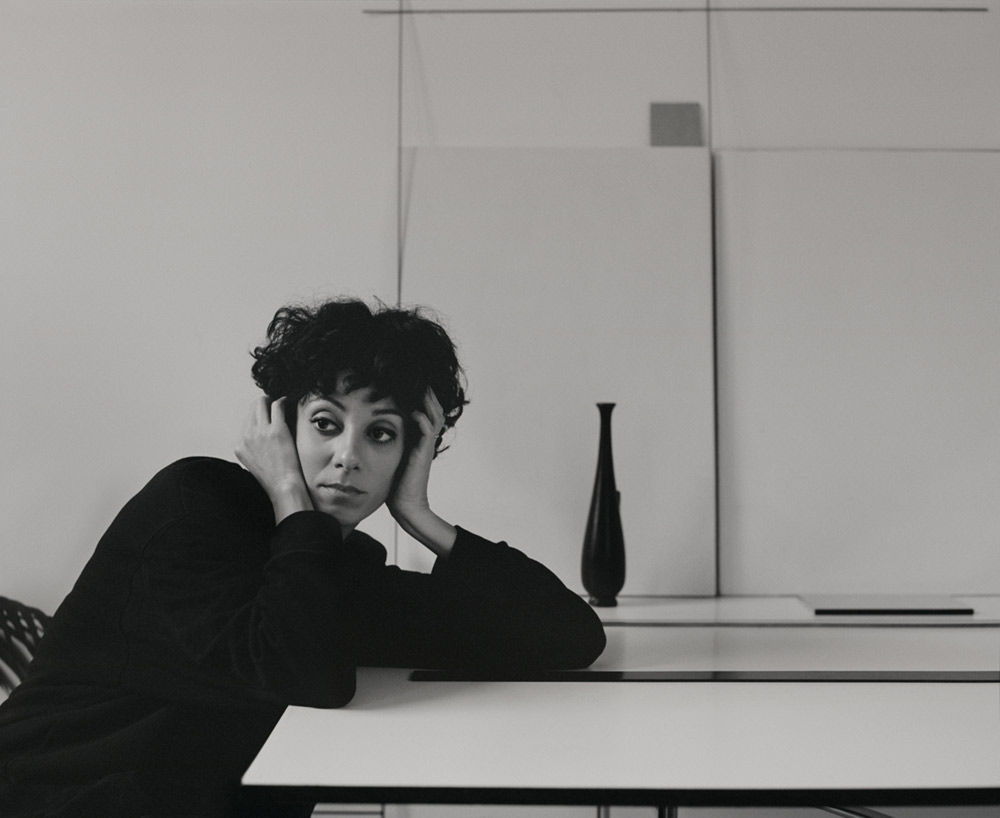
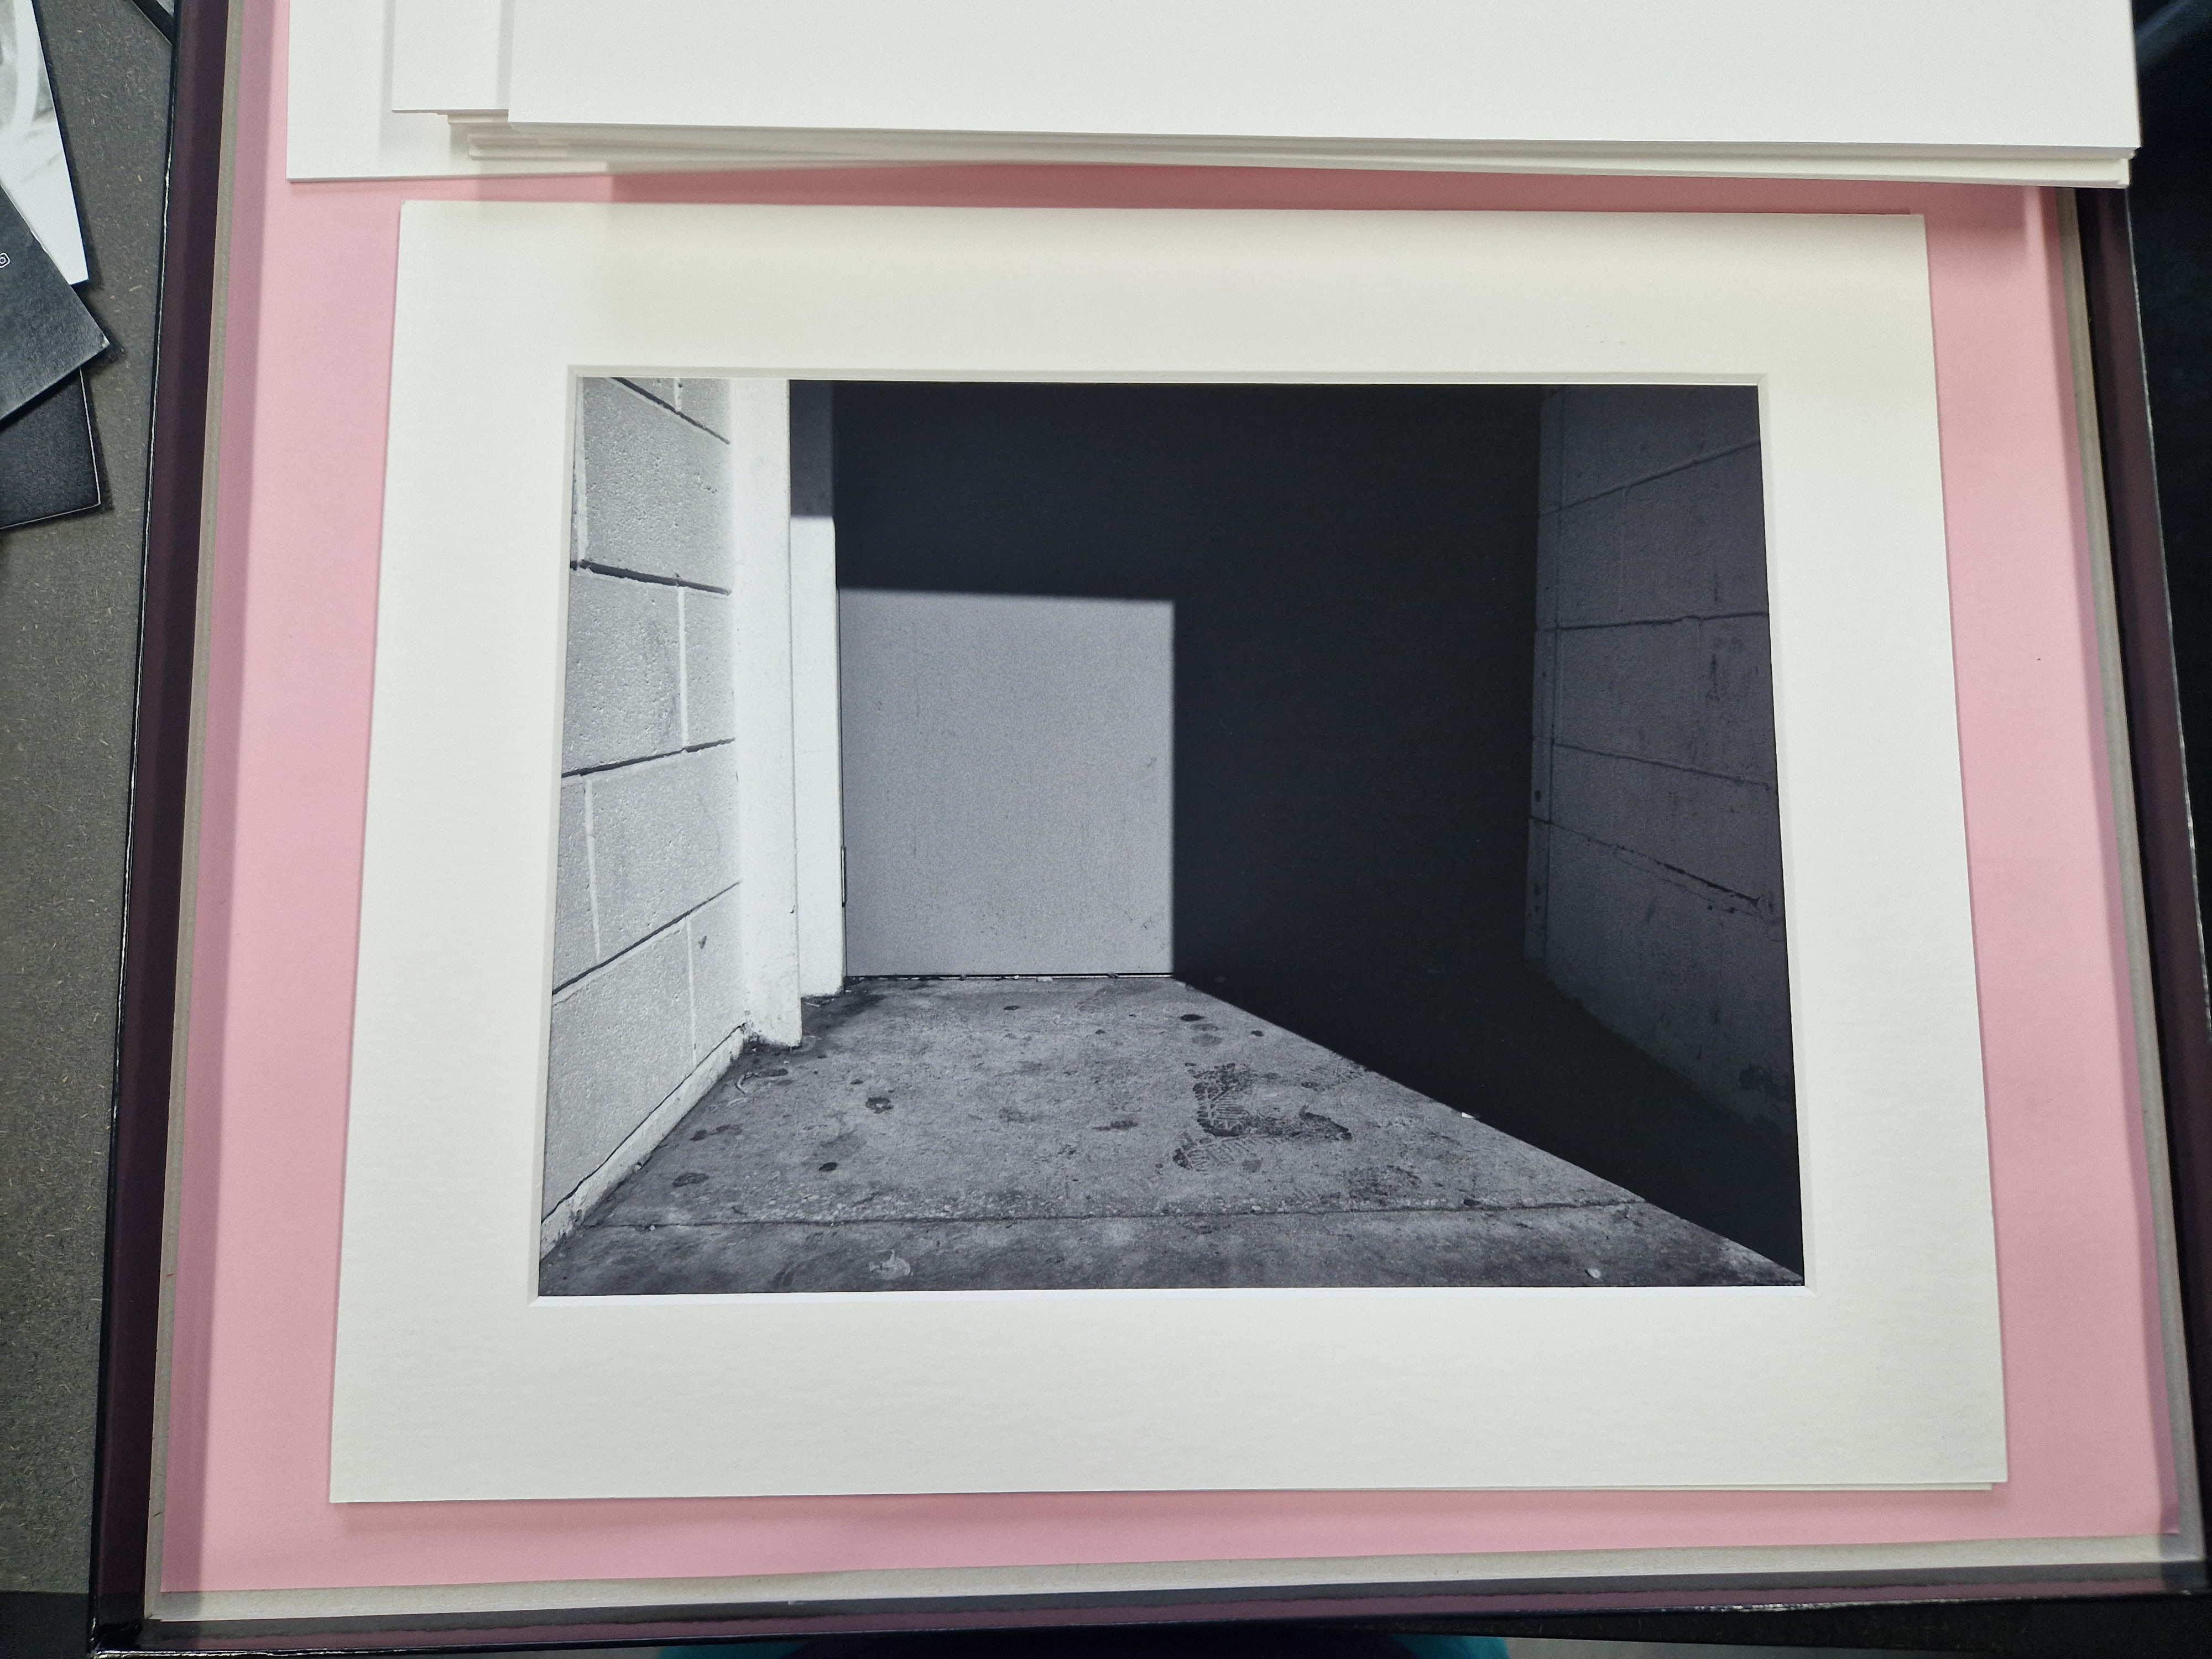
BECKY BEASLEY, THE OUTSIDE 2012
Becky Beasley’s photographs and sculptures develop from concerns such as the anxieties of decision-making, sanctuary, the history of photography and the approach of death. In recent years, she has incorporated a close reading of literary works and historical episodes.
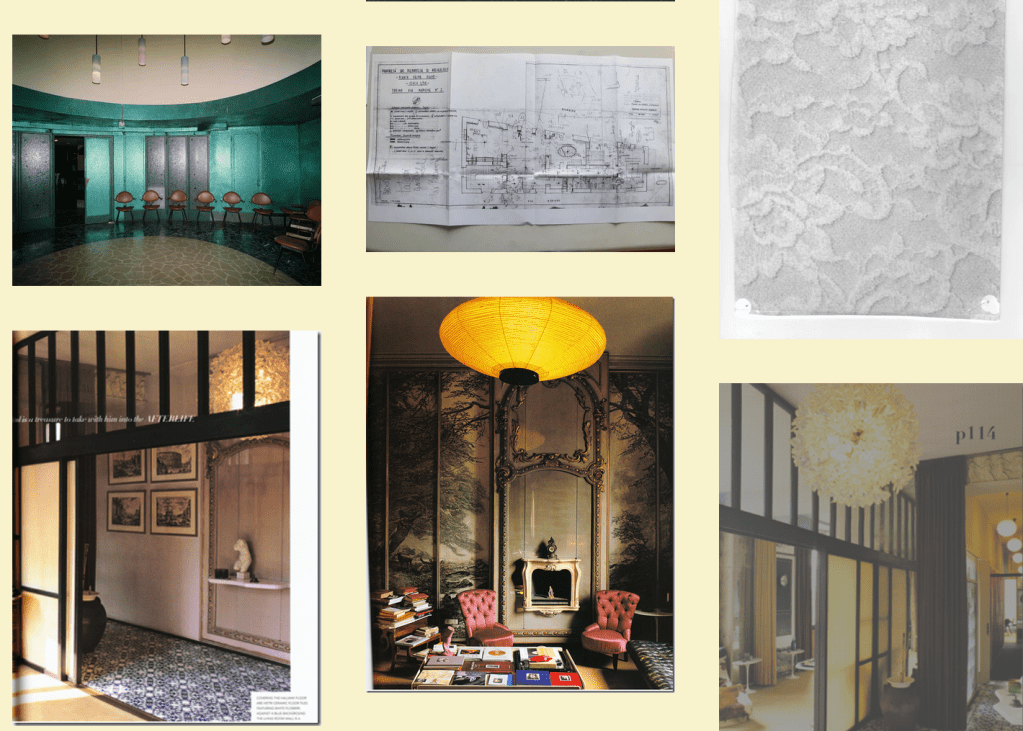
Following a visit to the private apartment of the Italian architect and designer Carlo Mollino in Turin – which he spent the latter part of his life secretly decorating and photographing without ever actually living there – Beasley discovered the blueprints for a pair of swing doors which Mollino designed but never produced. The dimensions for these became the inspiration for the works in The Outside. Mollino’s beautifully produced book, Il Messaggio Dalla Camera Oscura (Message from the Darkroom) 1949, the first history of photography published in Italian, also became important to Beasley.
Beasley has carefully choreographed the relationship between the two and three-dimensional work presented here. She has designed the linoleum floor as a key element of the installation to emphasise the symmetry of this perfectly square windowless room. The Outside is concerned with a space that is ultimately deeply interior.

I love the relationship between the design of the poster and the exhibition. It's obvious but not in an over-the-top way and it works so well - very clever and it makes me think. Something to consider in my future exhibitions.
REFLECTIONS: This amazing project and exhibition made me think about how to present my work in the SPACE and how important that is.
It's a partnership to consider gravely. I love how the exhibition reflects the colour scheme and shapes of the apartment - it's very elegant and original to her - she does not copy, only creates a visual link.
- Ben Green
Home
Ben Green is an independent videographer and owner of Greenwood Media Solutions. Based in South London, Ben & his team are highly skilled, experienced and offer full-service video production specialising in corporate, sports, cosmetic & branded content. His work resonates through the creative use of moving images, music, and motion graphics.
Website: https://bengreenfilms.co.uk/ Phone: 07590 11752
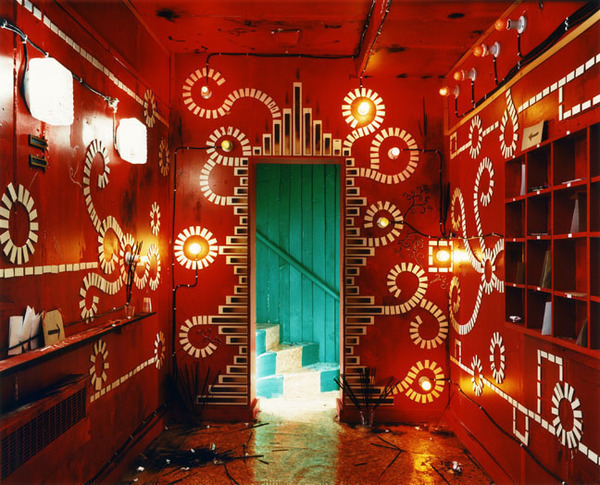
- Ann Hardy http://anne-hardy.co.uk/
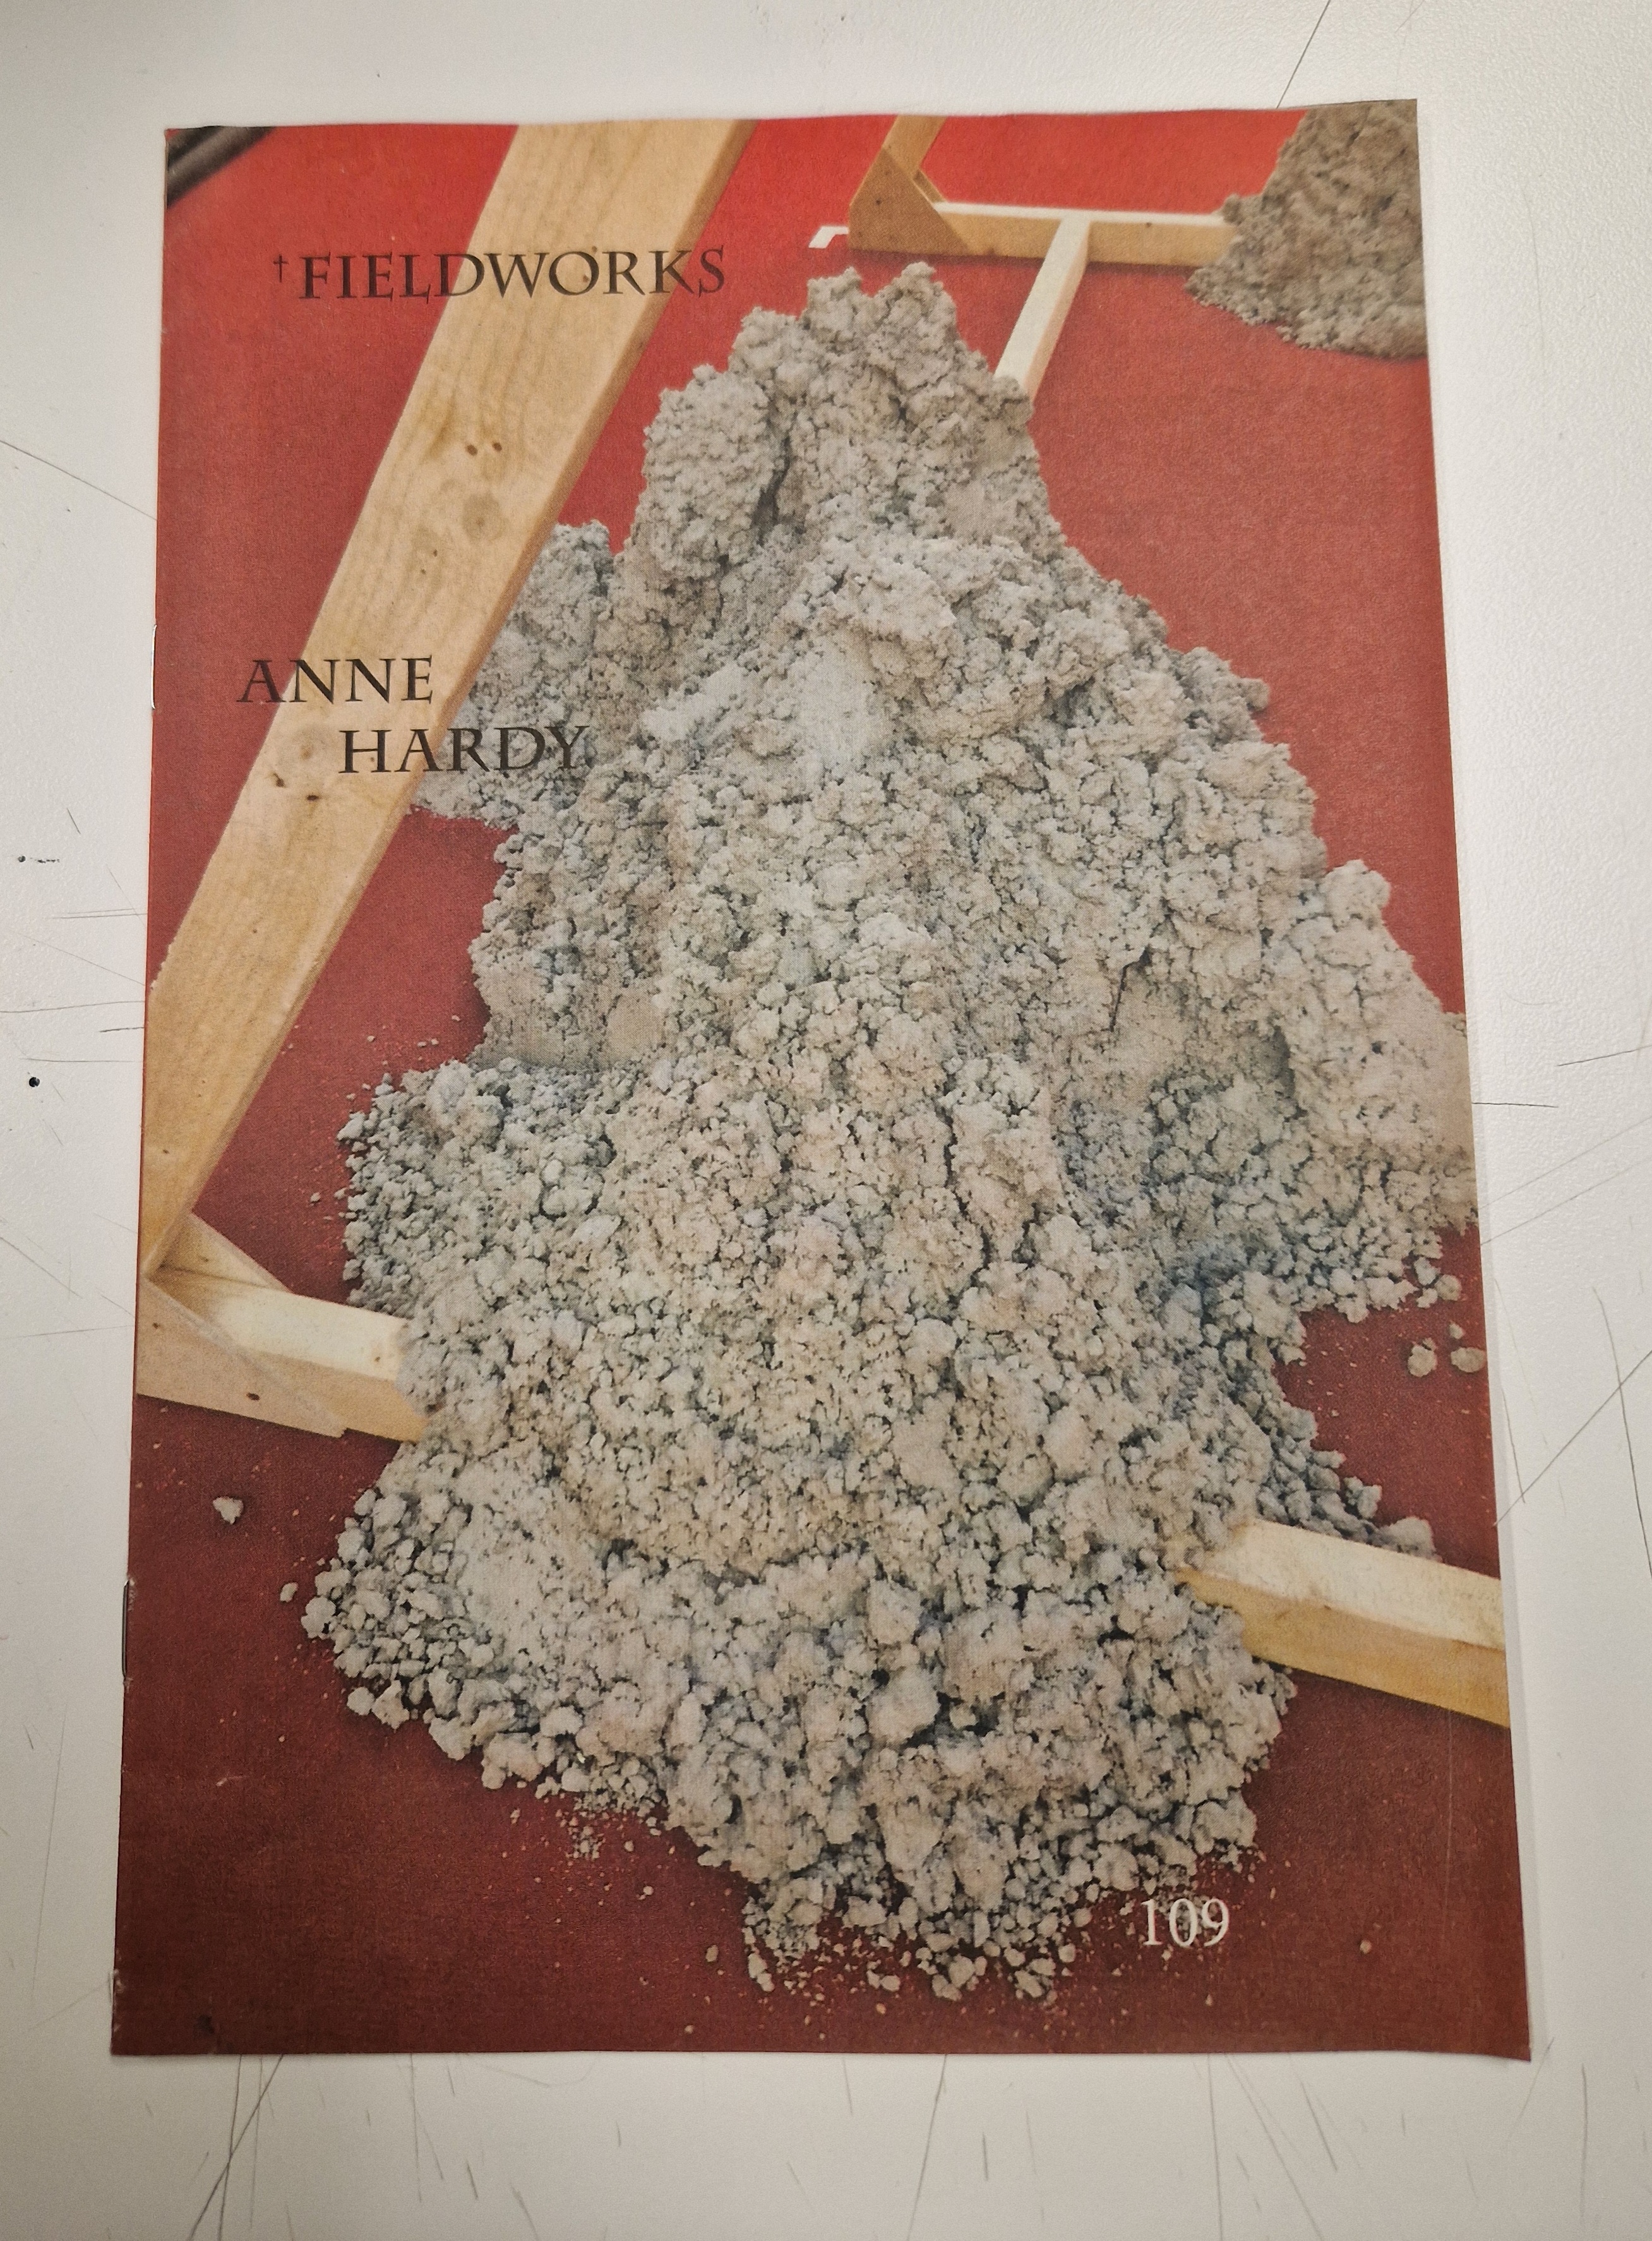
Anne Hardy’s photographs picture depopulated rooms that suggest surreal fictions. Working in her studio, Hardy builds each of her sets entirely from scratch; a labour-intensive process of constructing an empty room, then developing its interior down to the most minute detail. Using the transient nature of photography, Hardy’s images withhold the actual experience of her environments, allowing our relationship with them to be in our imagination.
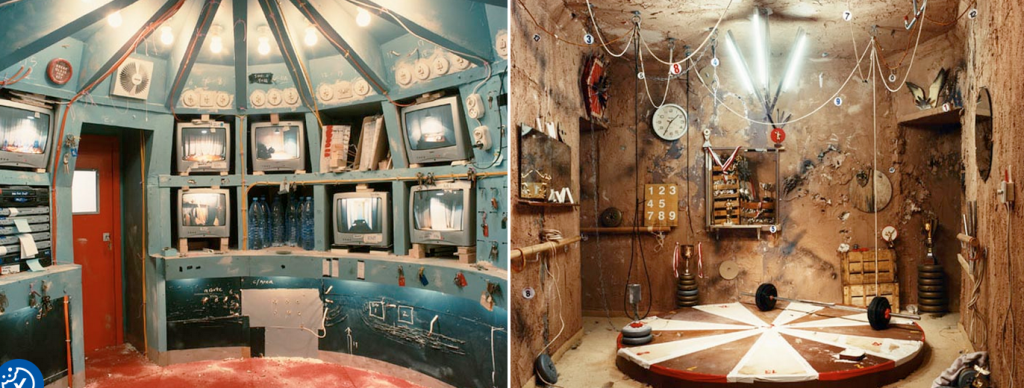

Amazing artist with an excellent understanding of the use of space.
It really made me think about what is possible to create with photography sitting in the space and how the interior can be arranged around it to accentuate it and bring it and the feelings it conveys even more to life.
- Contact microphone (to potentially use with shower speaker for my sculpture-photograph at the degree show)
A contact microphone is a form of microphone that senses audio vibrations through contact with solid objects. Unlike normal air microphones, contact microphones are almost completely insensitive to air vibrations but transduce only structure-borne sound. Often used as acoustic leakage probes, they also enjoy wide usage by electroacoustic music artists experimenting with sound. Contact microphones can be used to amplify sound from acoustic musical instruments, to sense drum hits, for triggering electronic samples, and to record sound in challenging environments, such as underwater under high pressure.
Contact microphones based on piezo materials are passive and high-impedance, and they sound tinny without a matching preamp.
The most commonly available contact microphone element is made of a thin piezoelectric ceramic round glued to a thin brass or alloy metal disc. This center disc is positively charged while the brass disc is negatively charged. The voltage can be measured across those parts and then amplified to produce sound.

Korg CM 300! The CHEAP Contact Microphone for Field Recording
Are you looking for an affordable and versatile contact microphone? The Korg CM 300 might be just what you need. This compact and lightweight microphone is designed to pick up vibrations from surfaces and convert them into audio signals.
- Shower speakers
- Green Ray film
After our conversation, Thom lent me his books by Anne Hardy to have a look at.
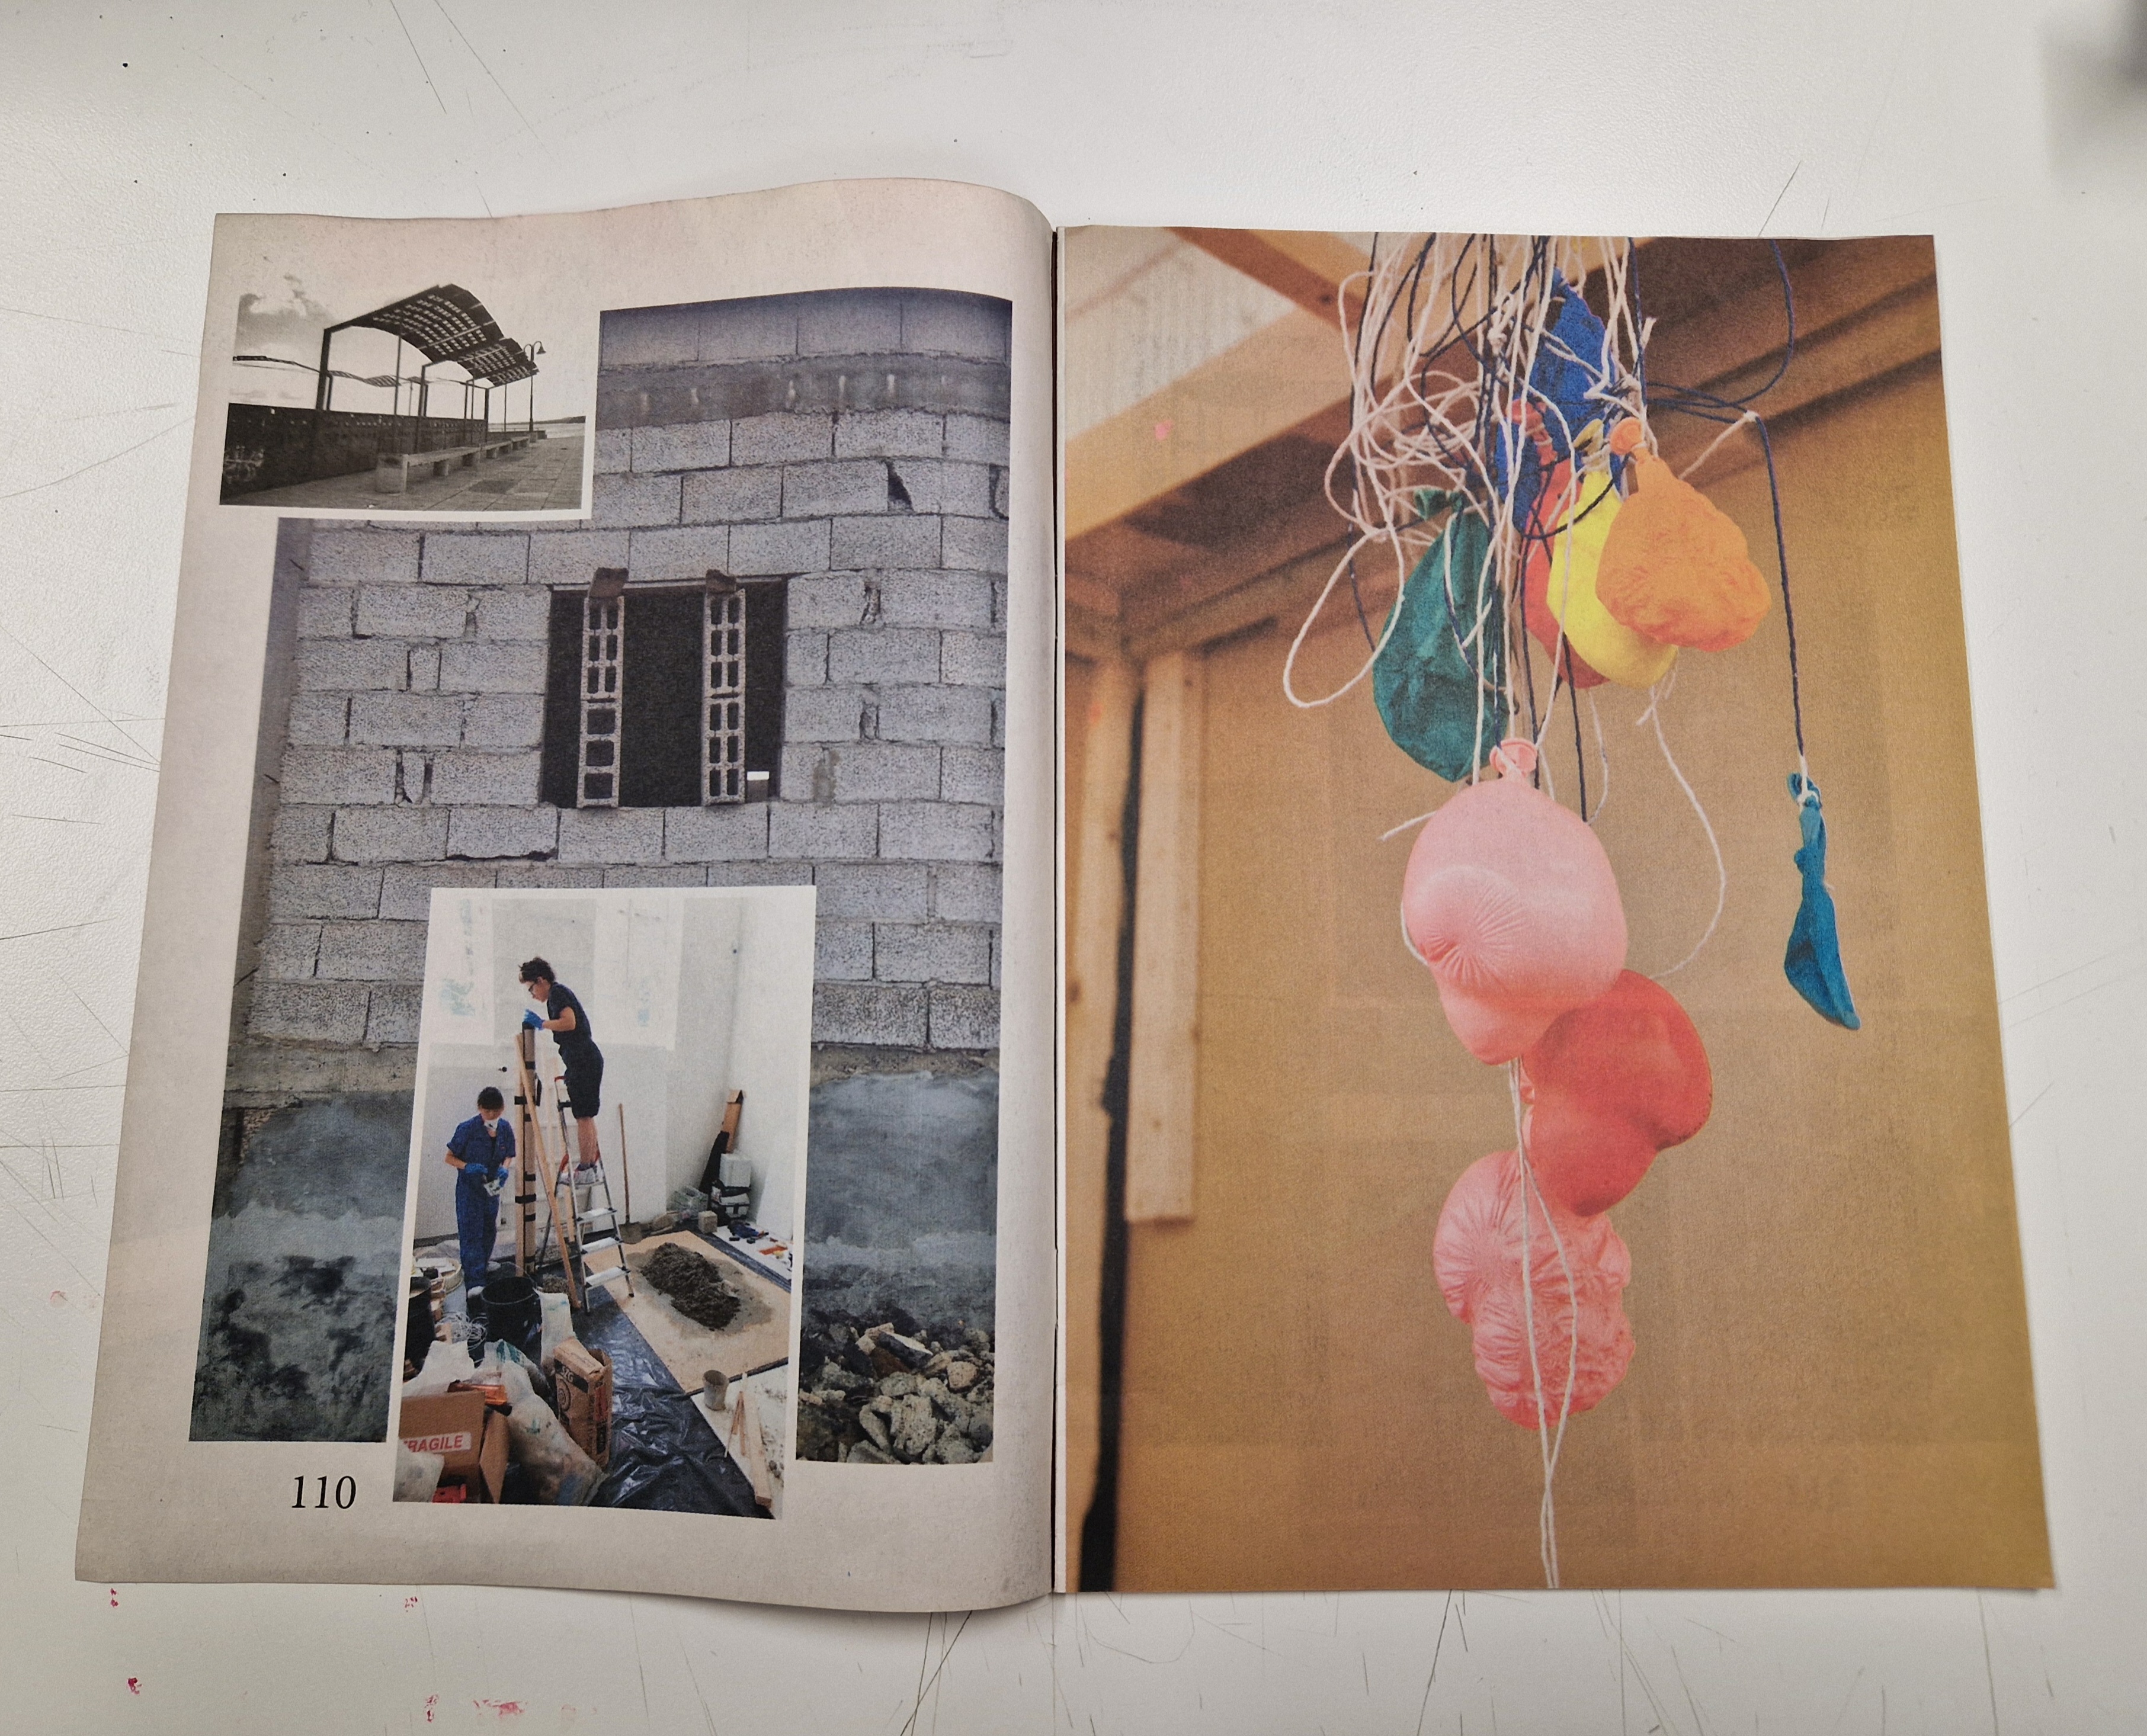
ANNE HARDY – FIELDWORKS


ANNE HARDY – TWIN FIELDS/FIELDS
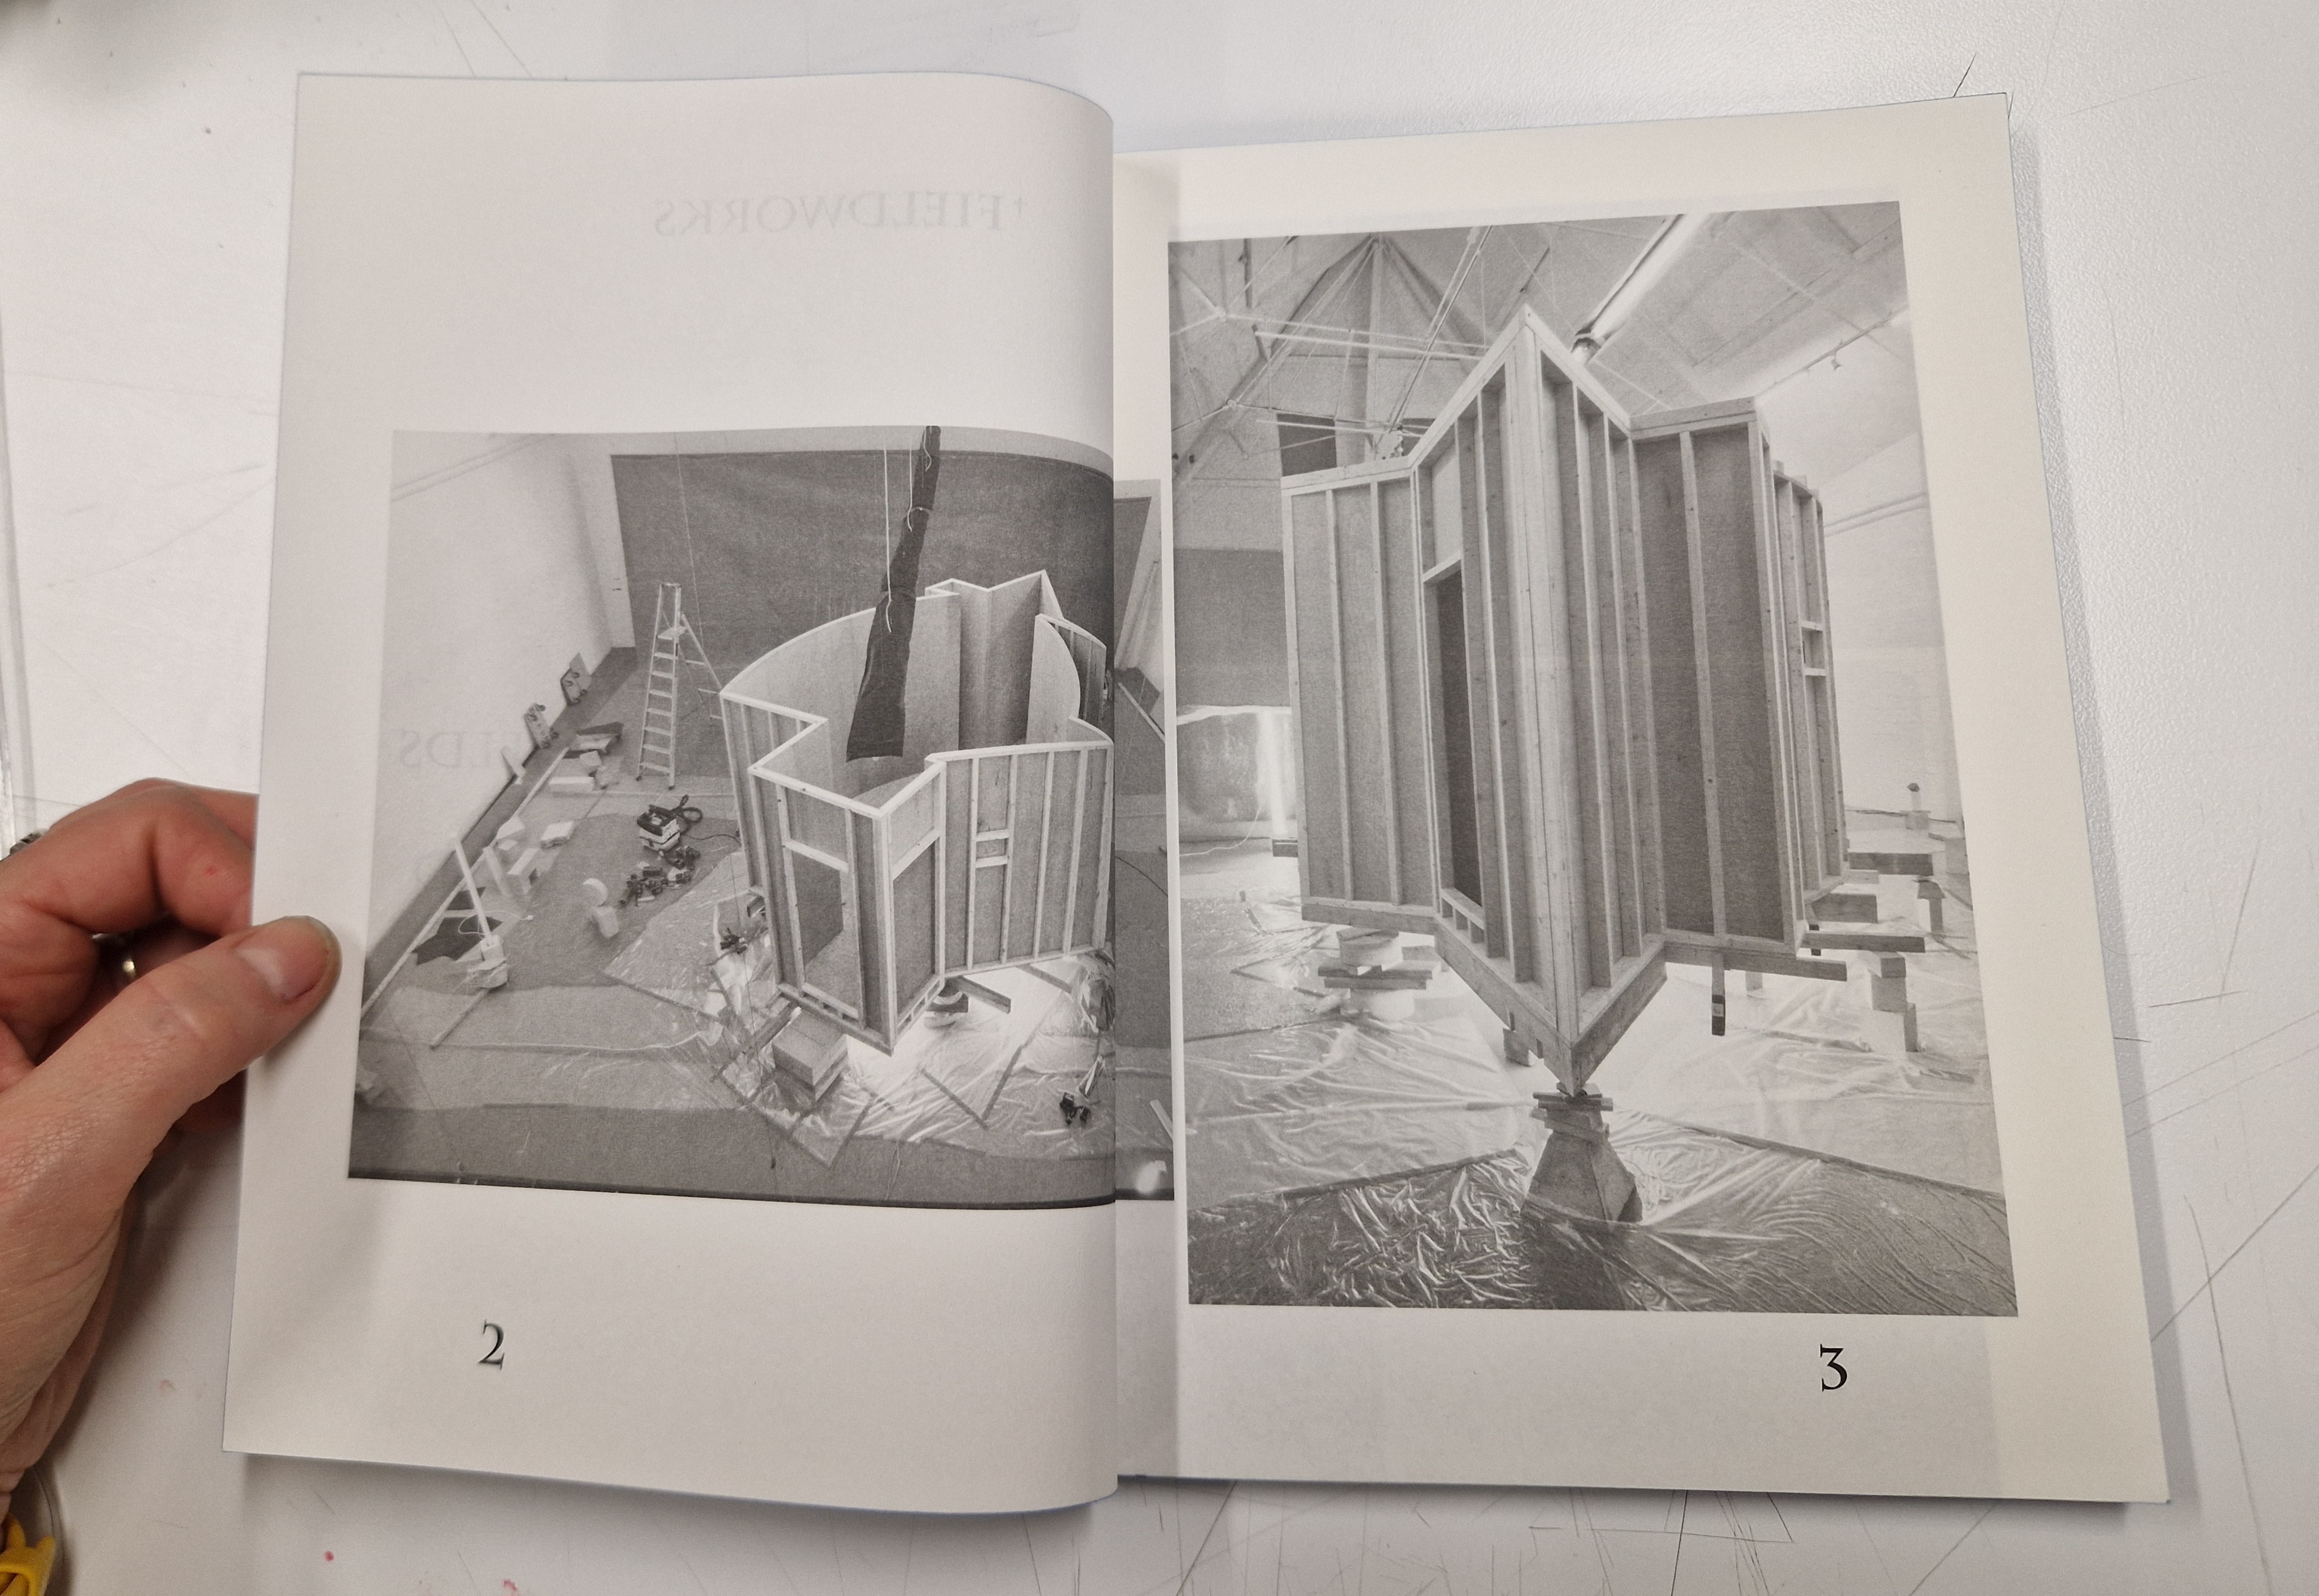
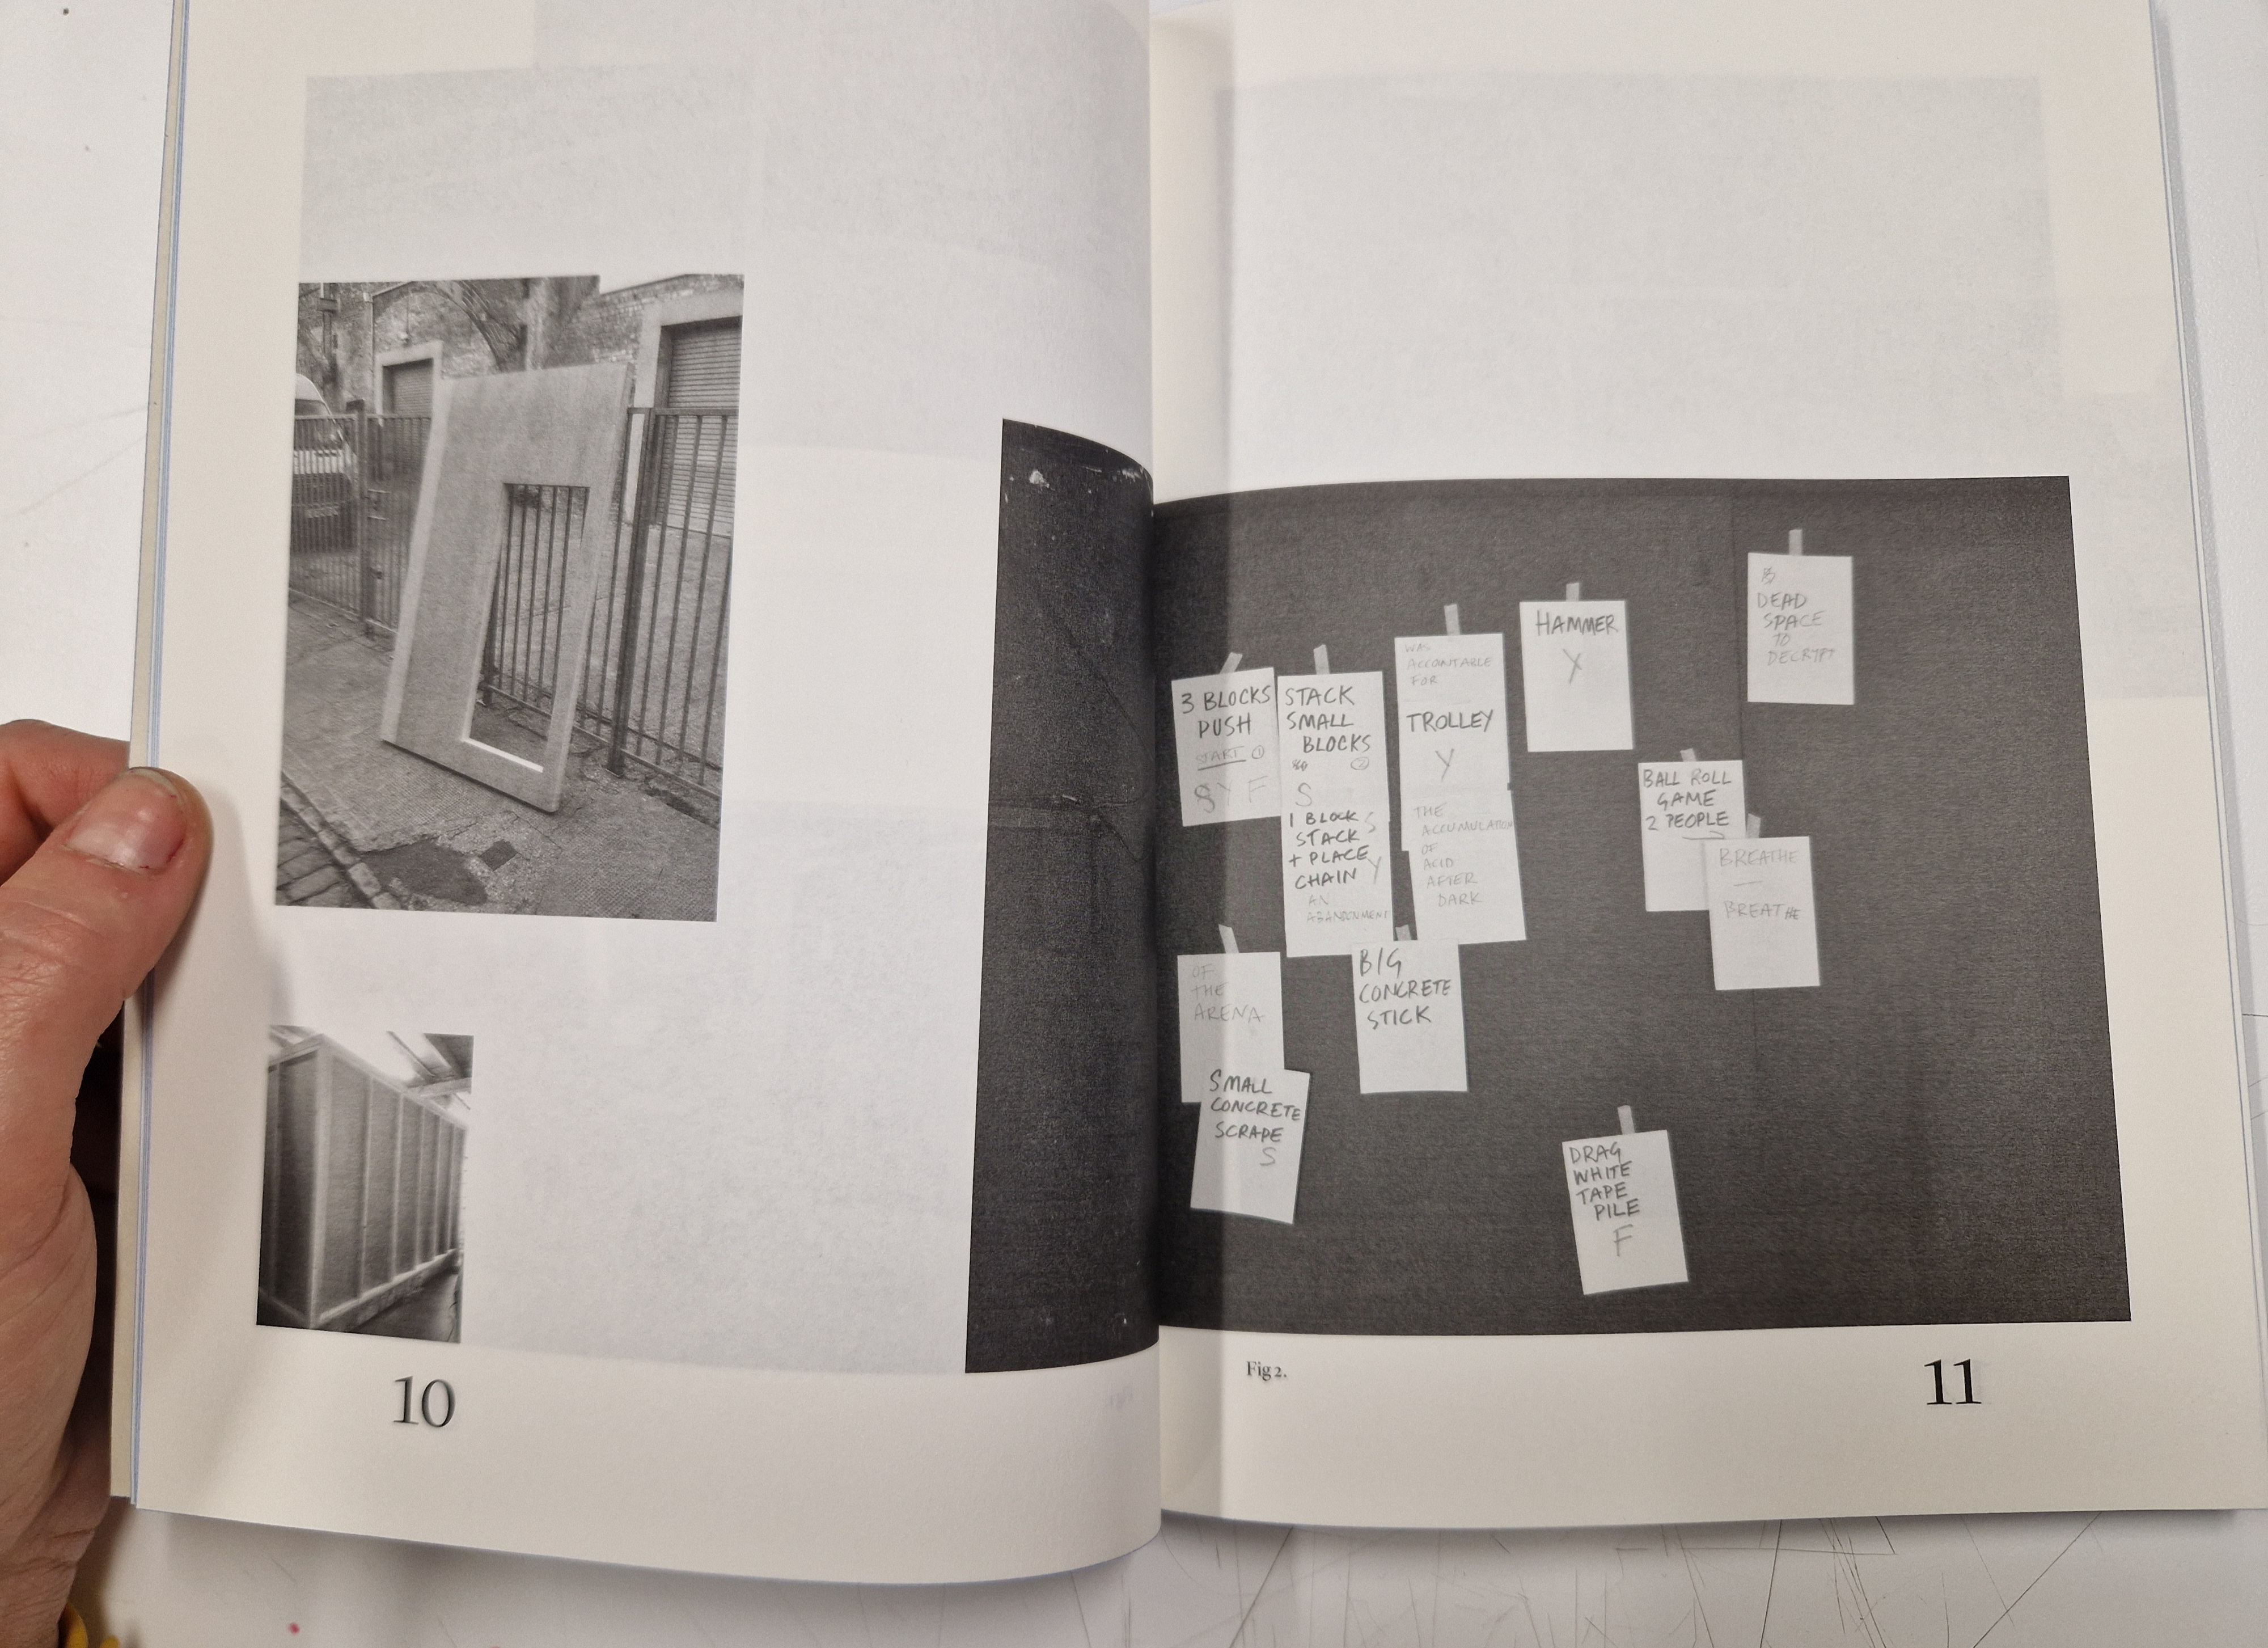
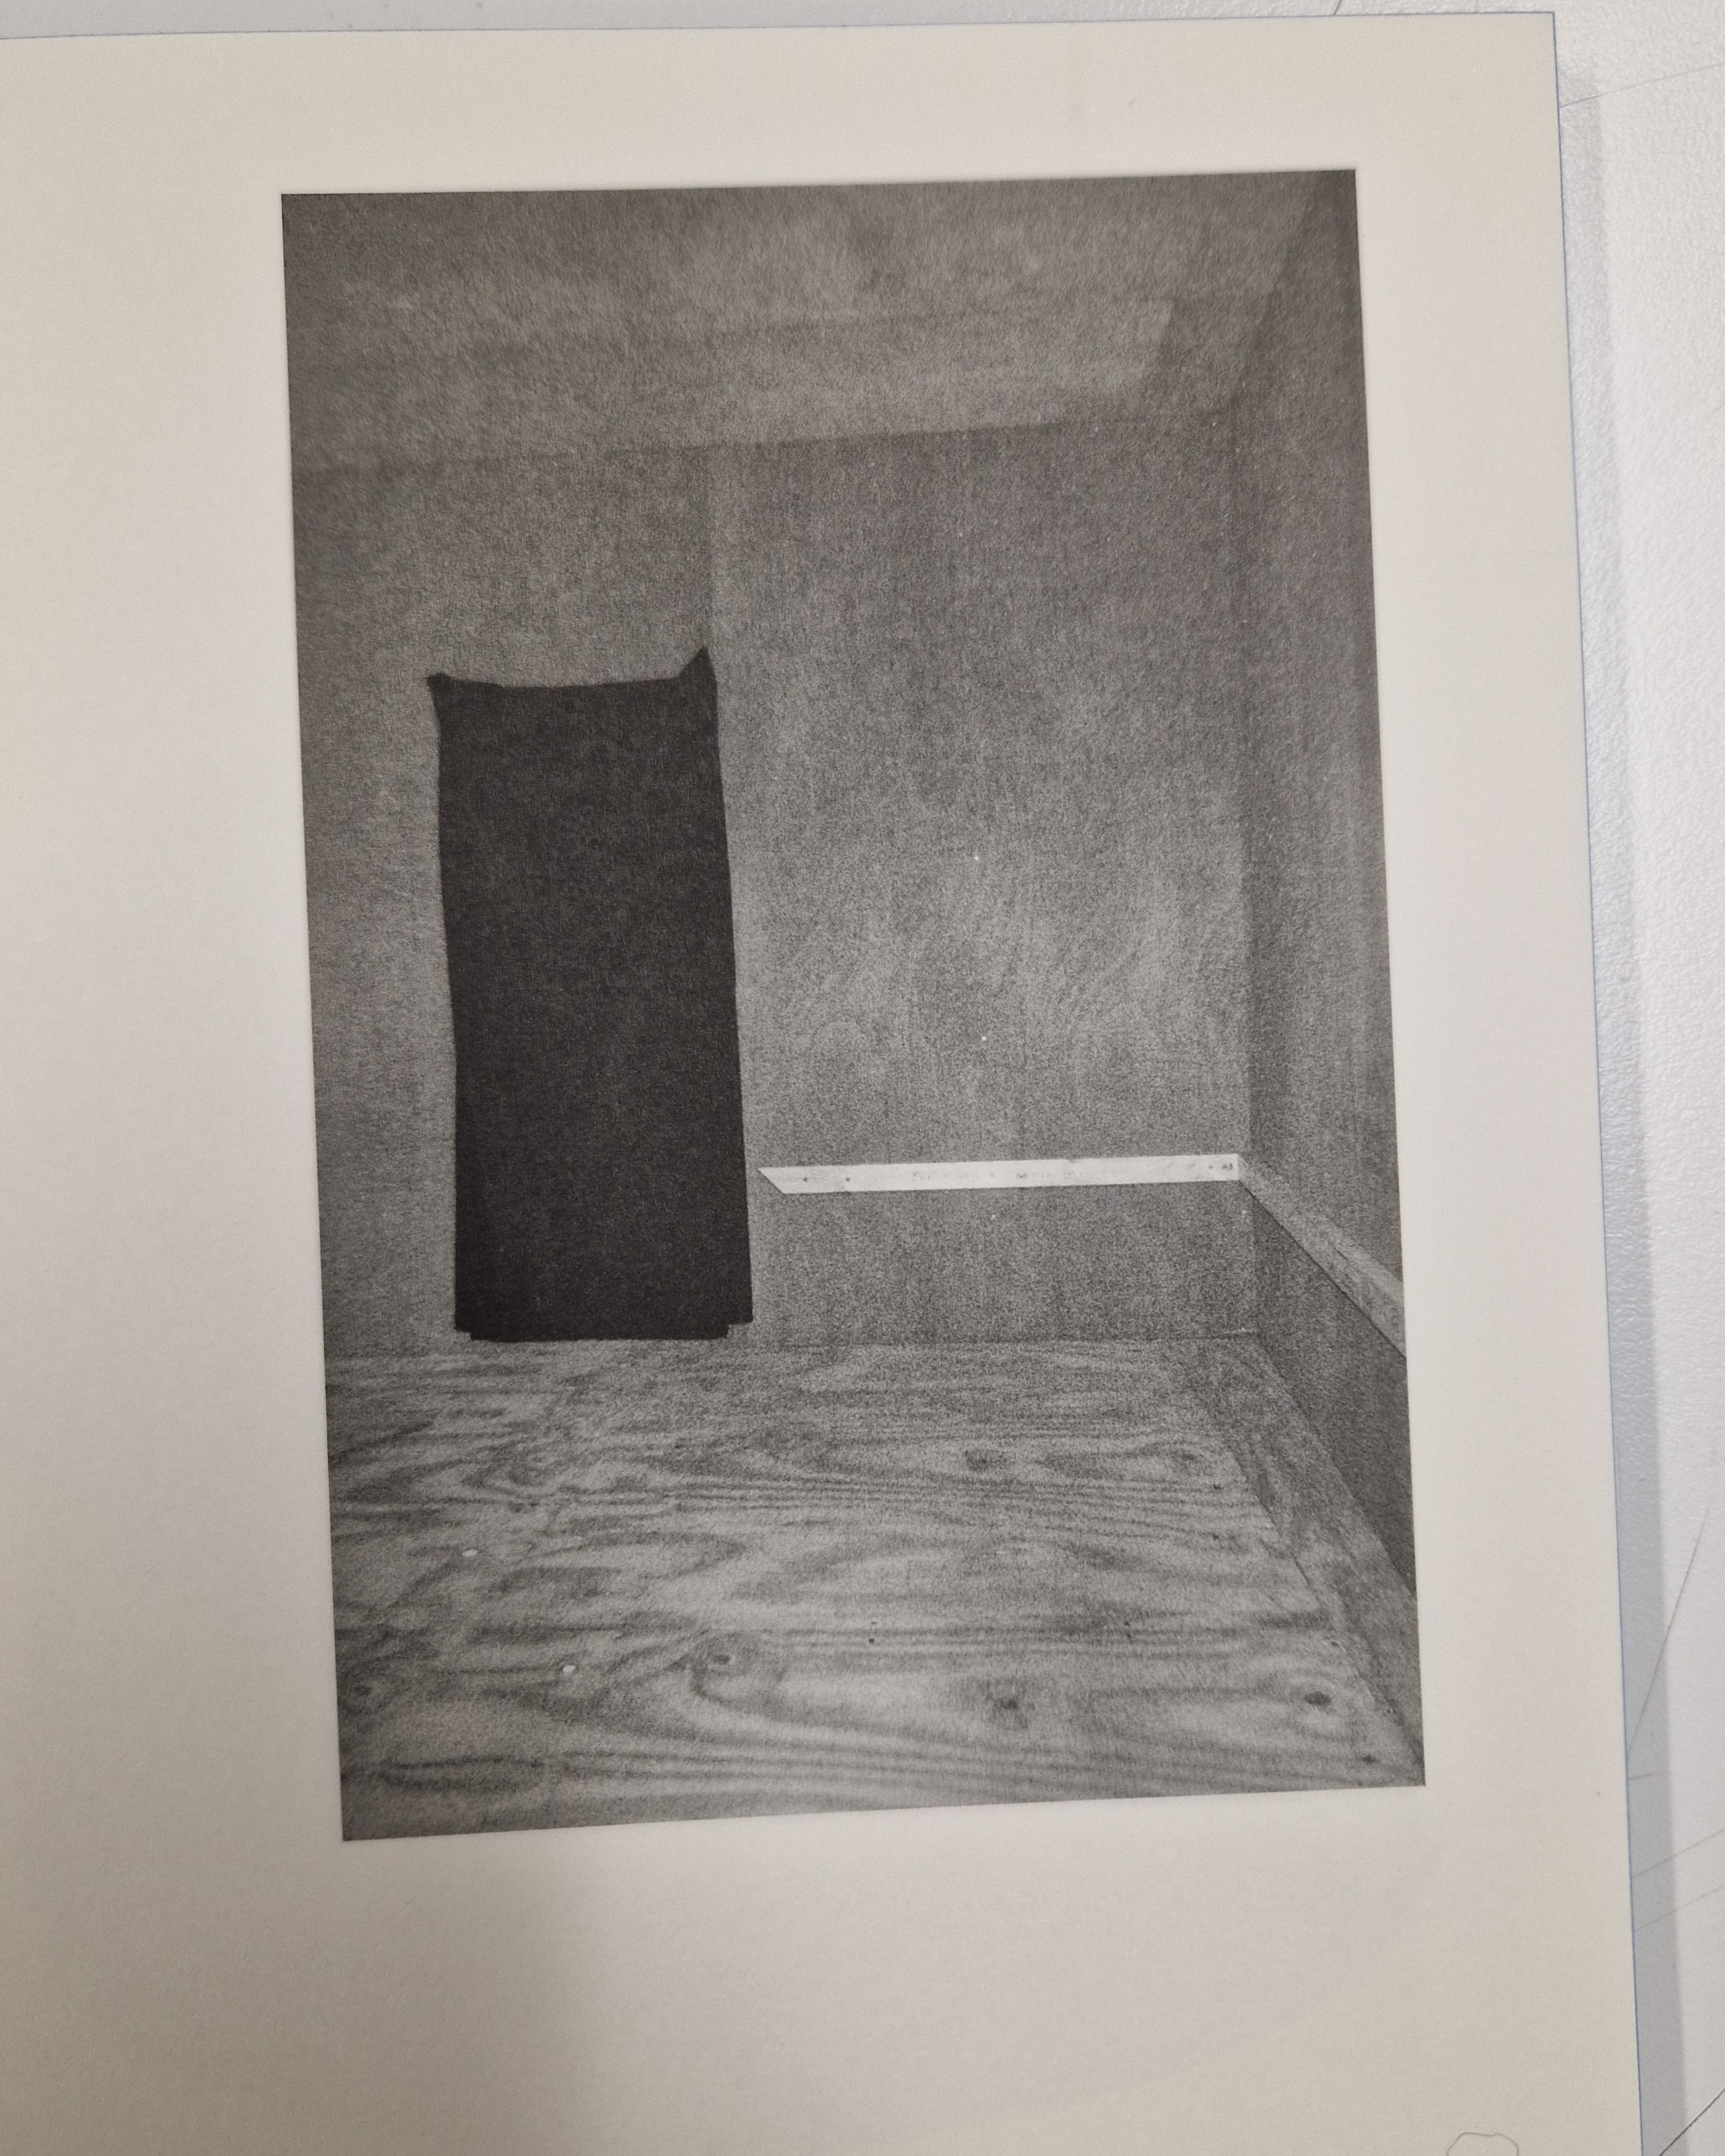
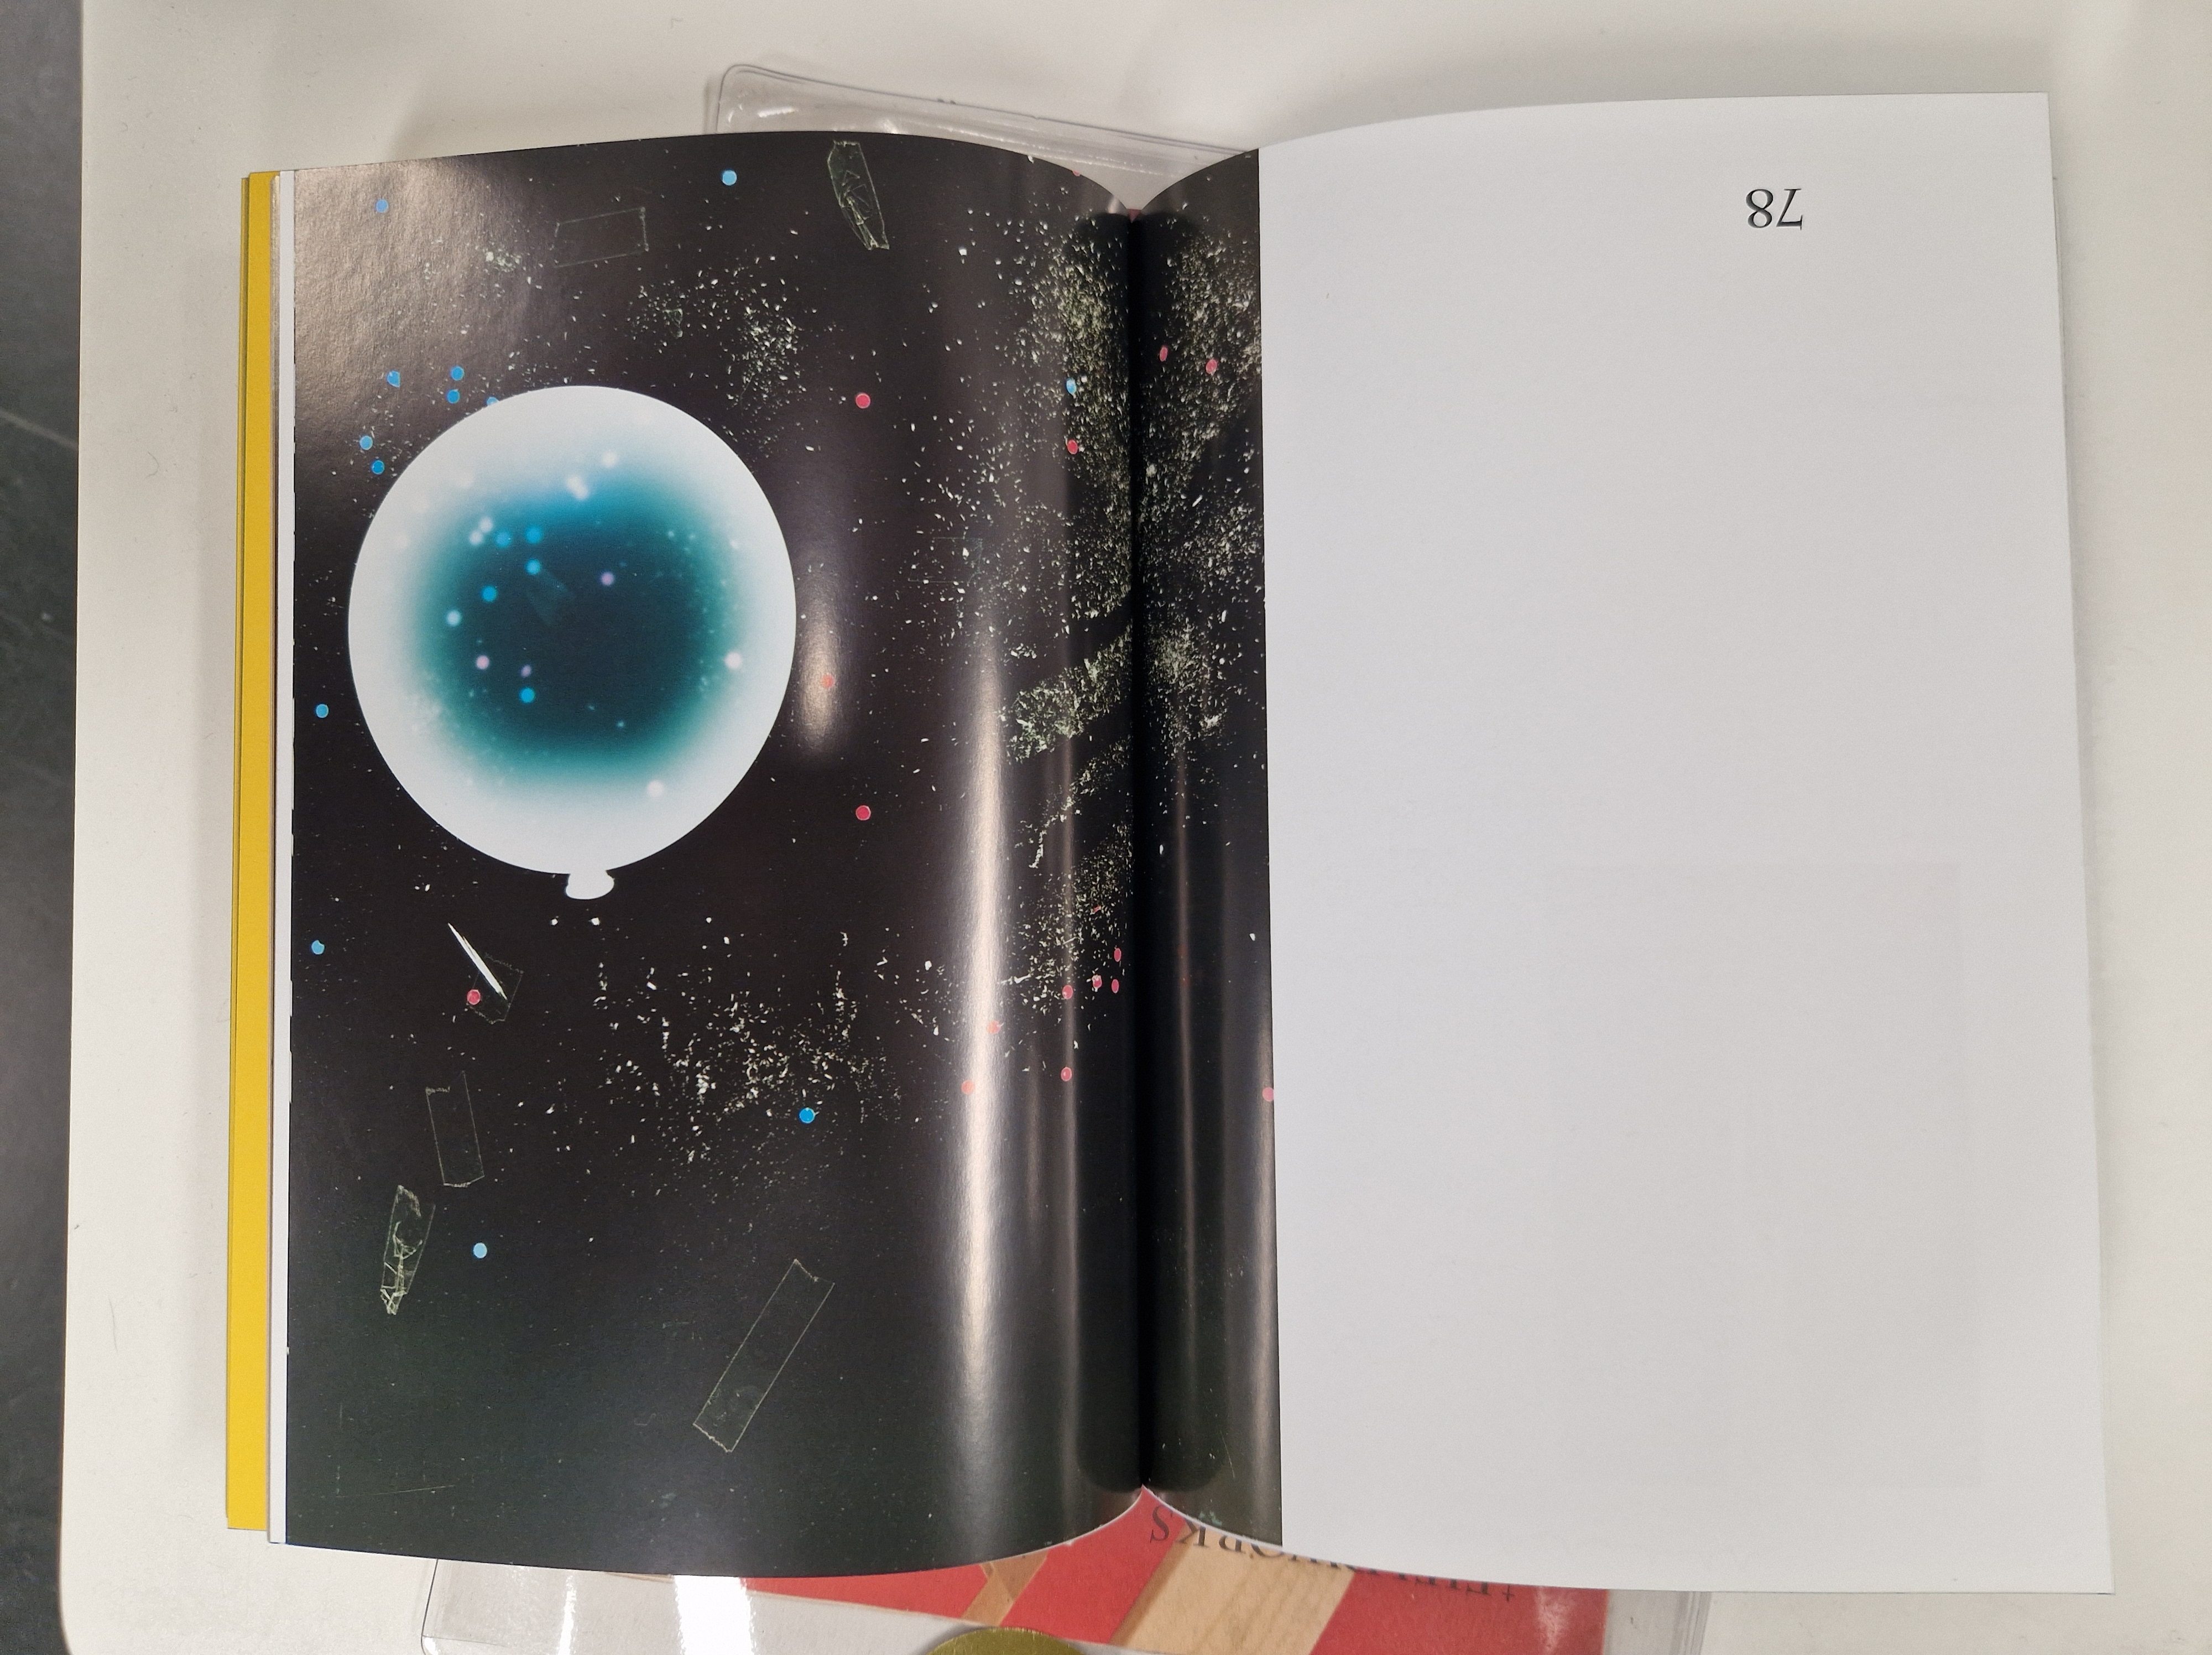
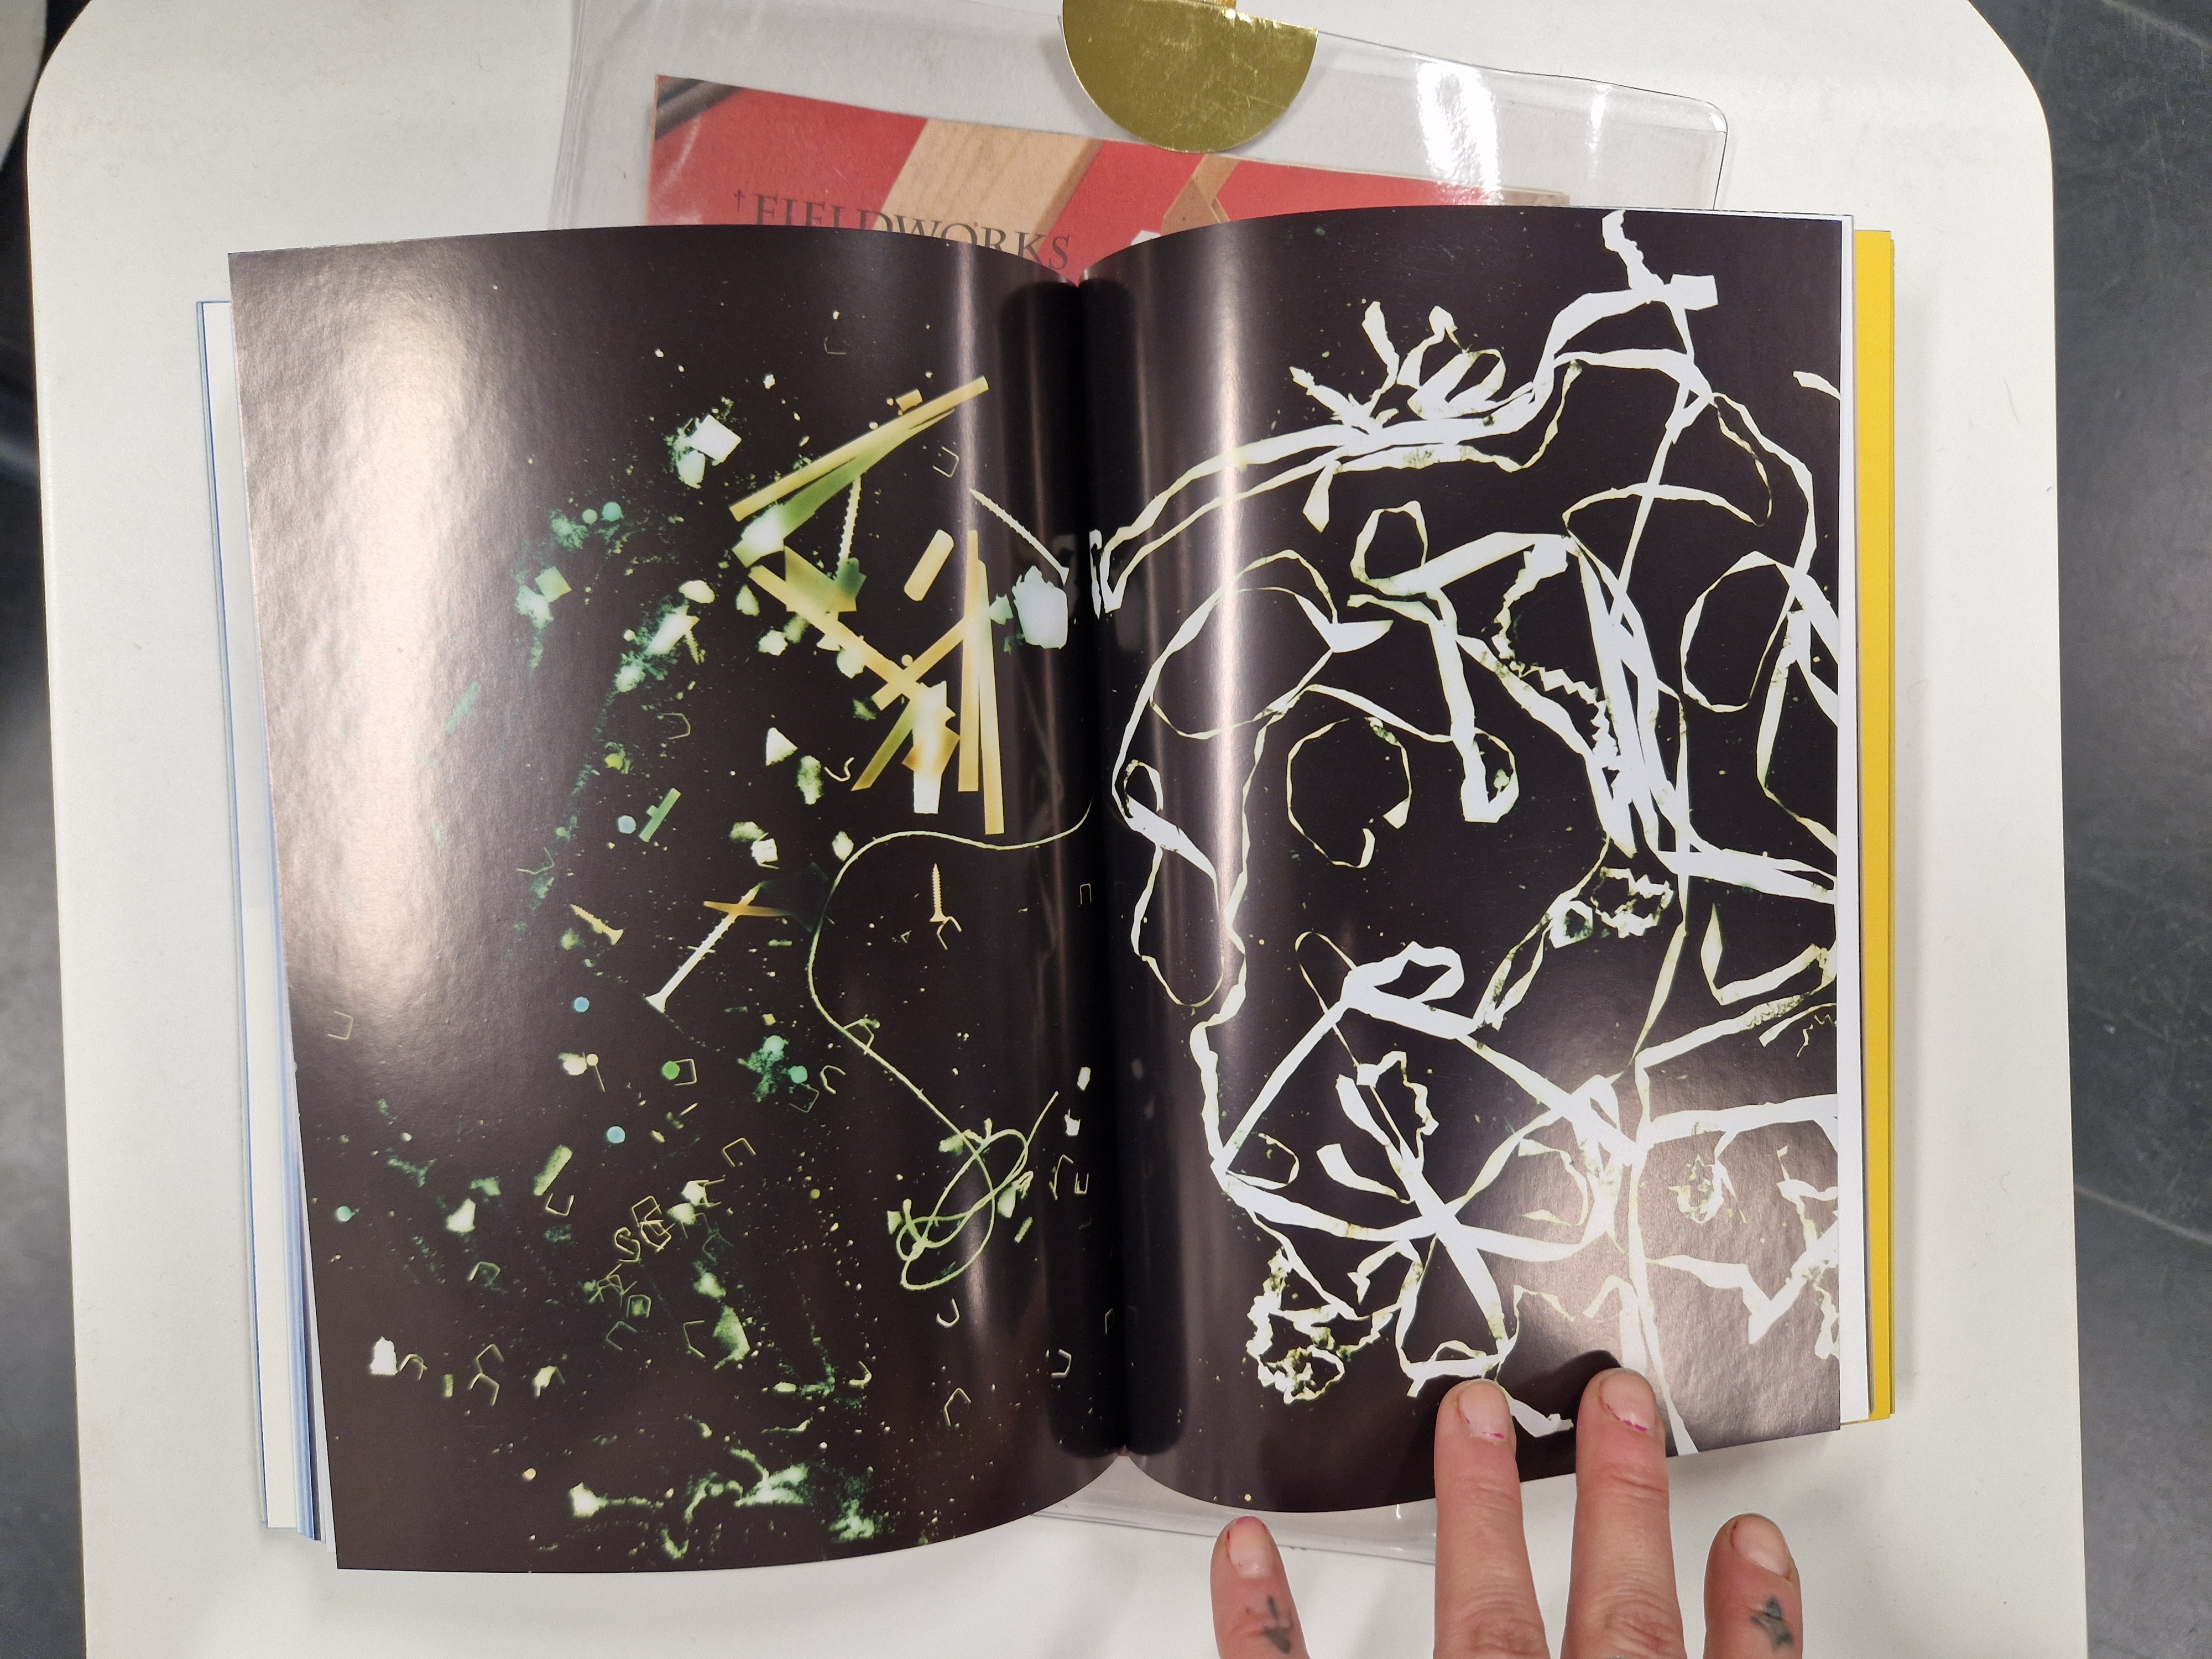
REFLECTIONS: A very intriguing publication concerned with space and process. I haven't seen many books that include strategies and methods, so seeing this book was a refreshing and eye-opening experience. It made me think of the possibilities and different options of what can be included in a book - definitely food for thought.
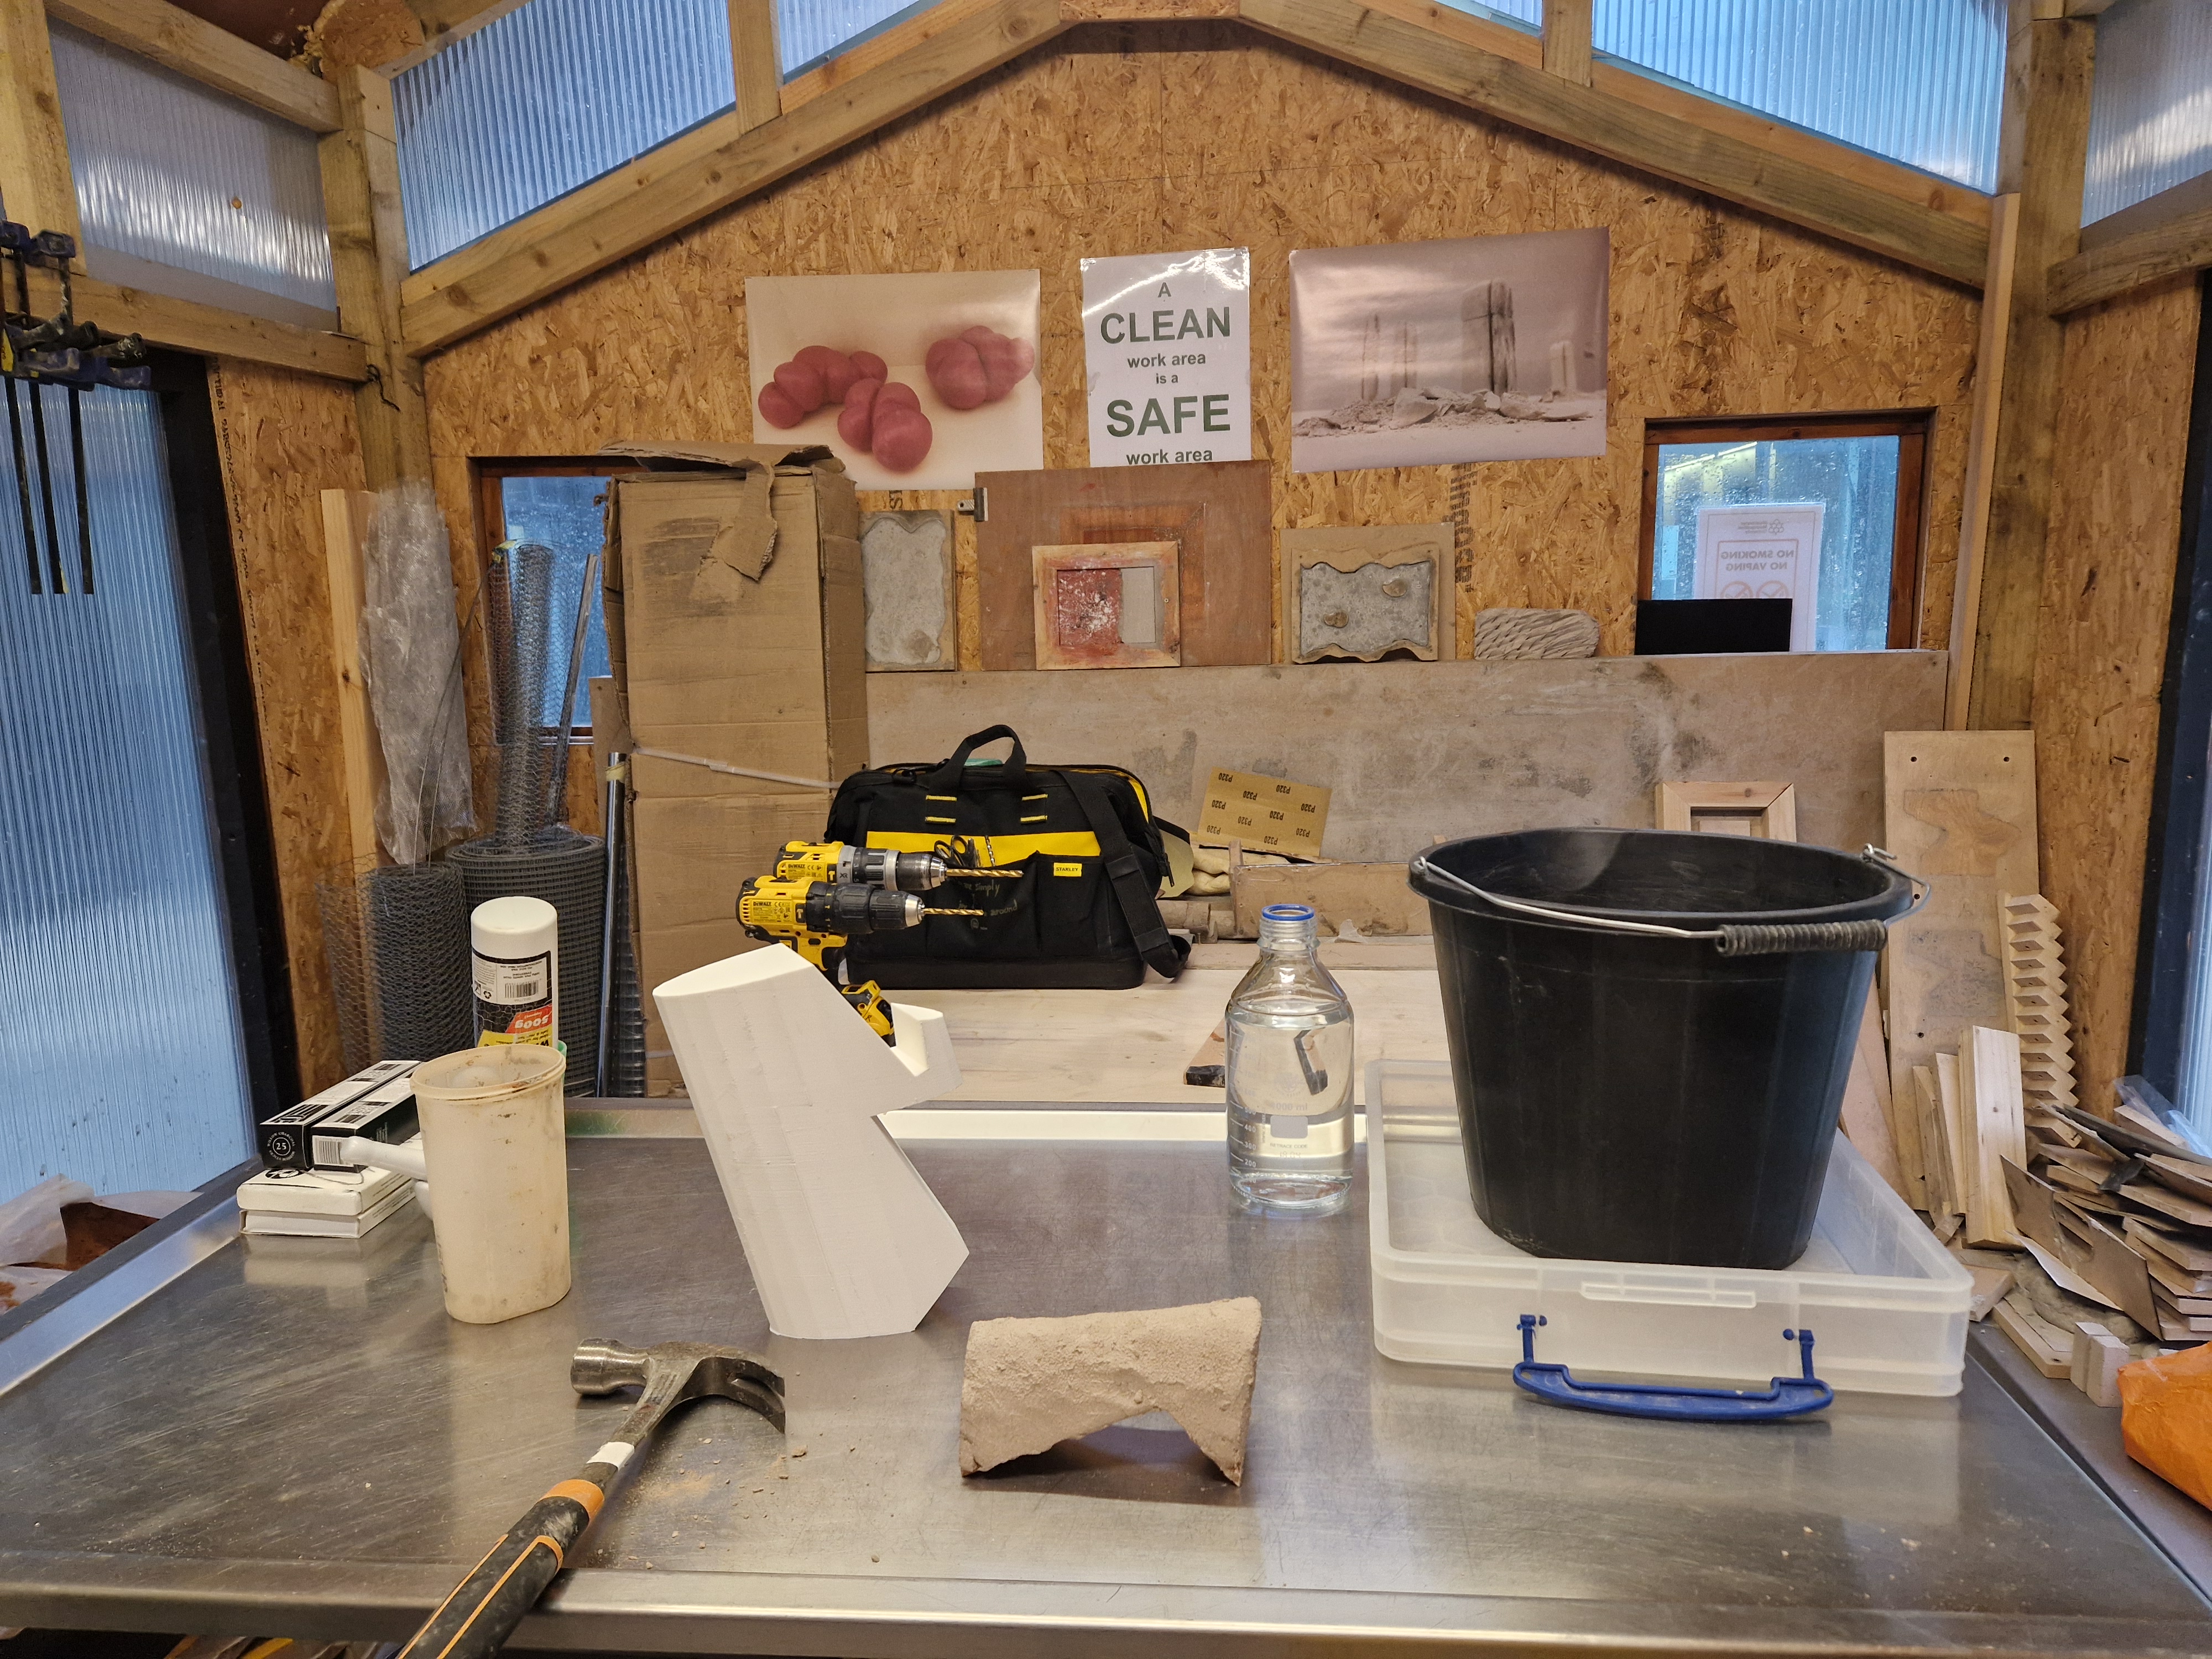
MEETING WITH JIM (CONCRETE WORKSHOP)
NOTES:
- meeting in the workshop for a session on Thursday
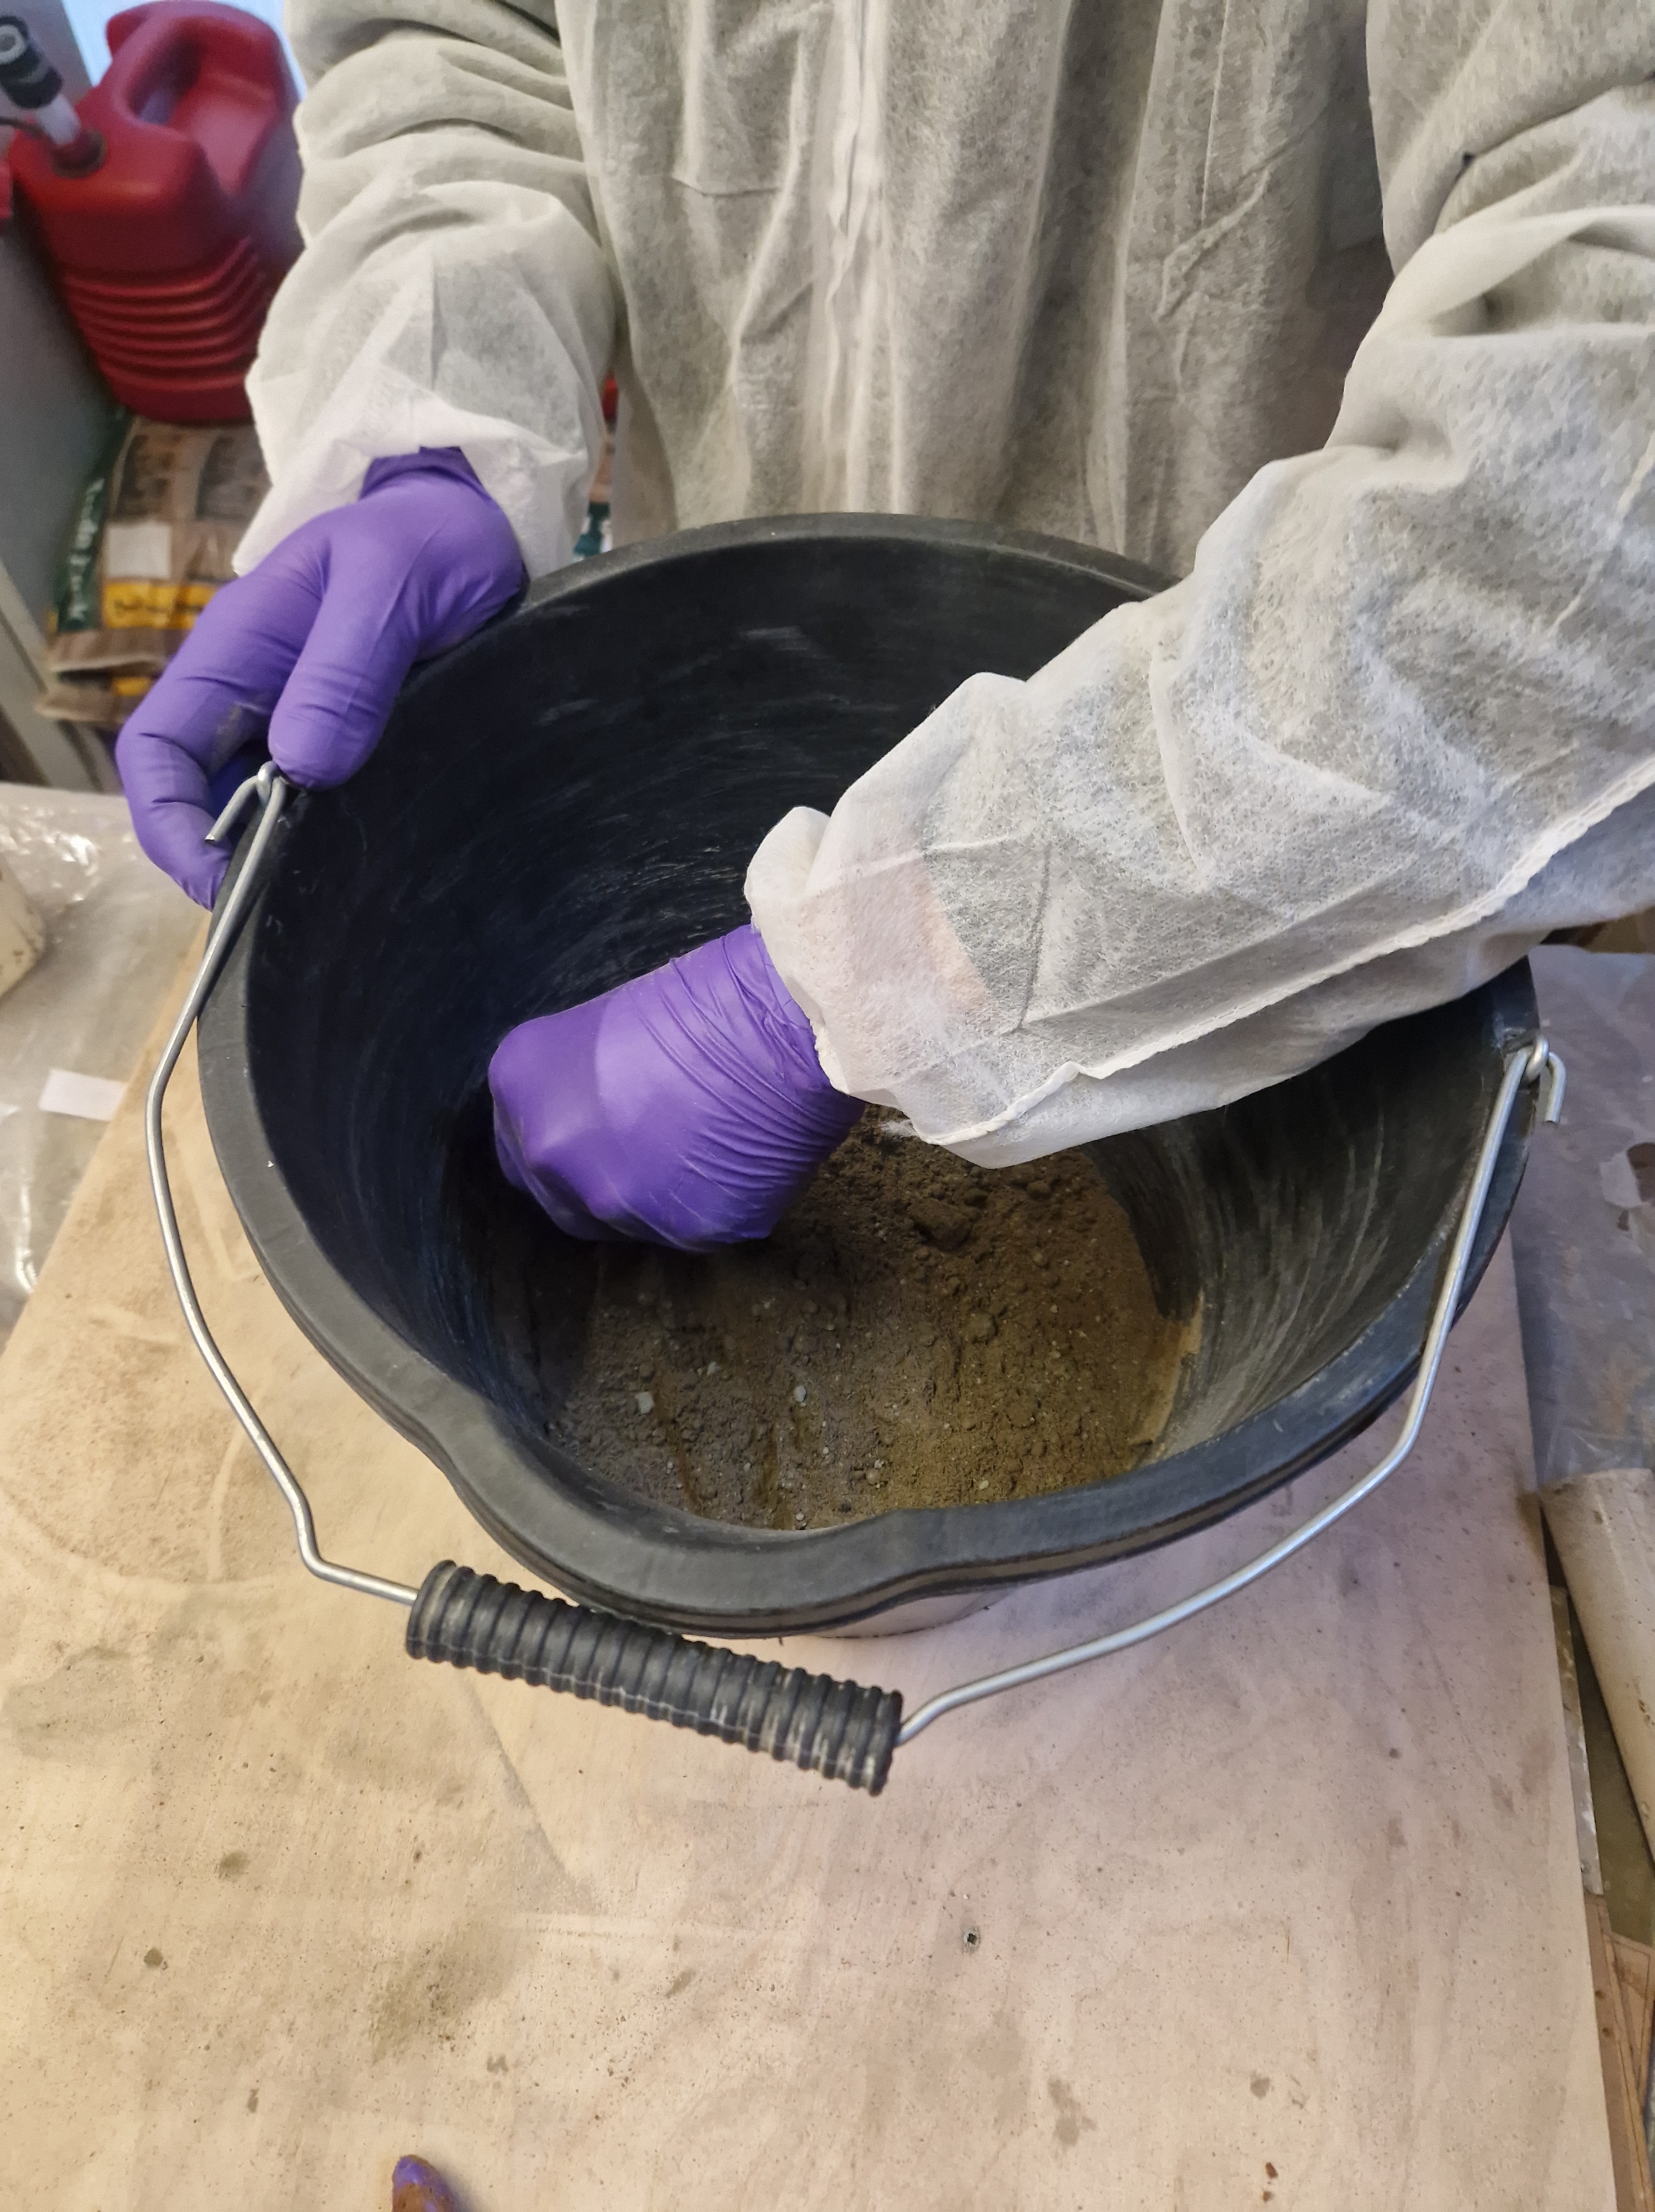
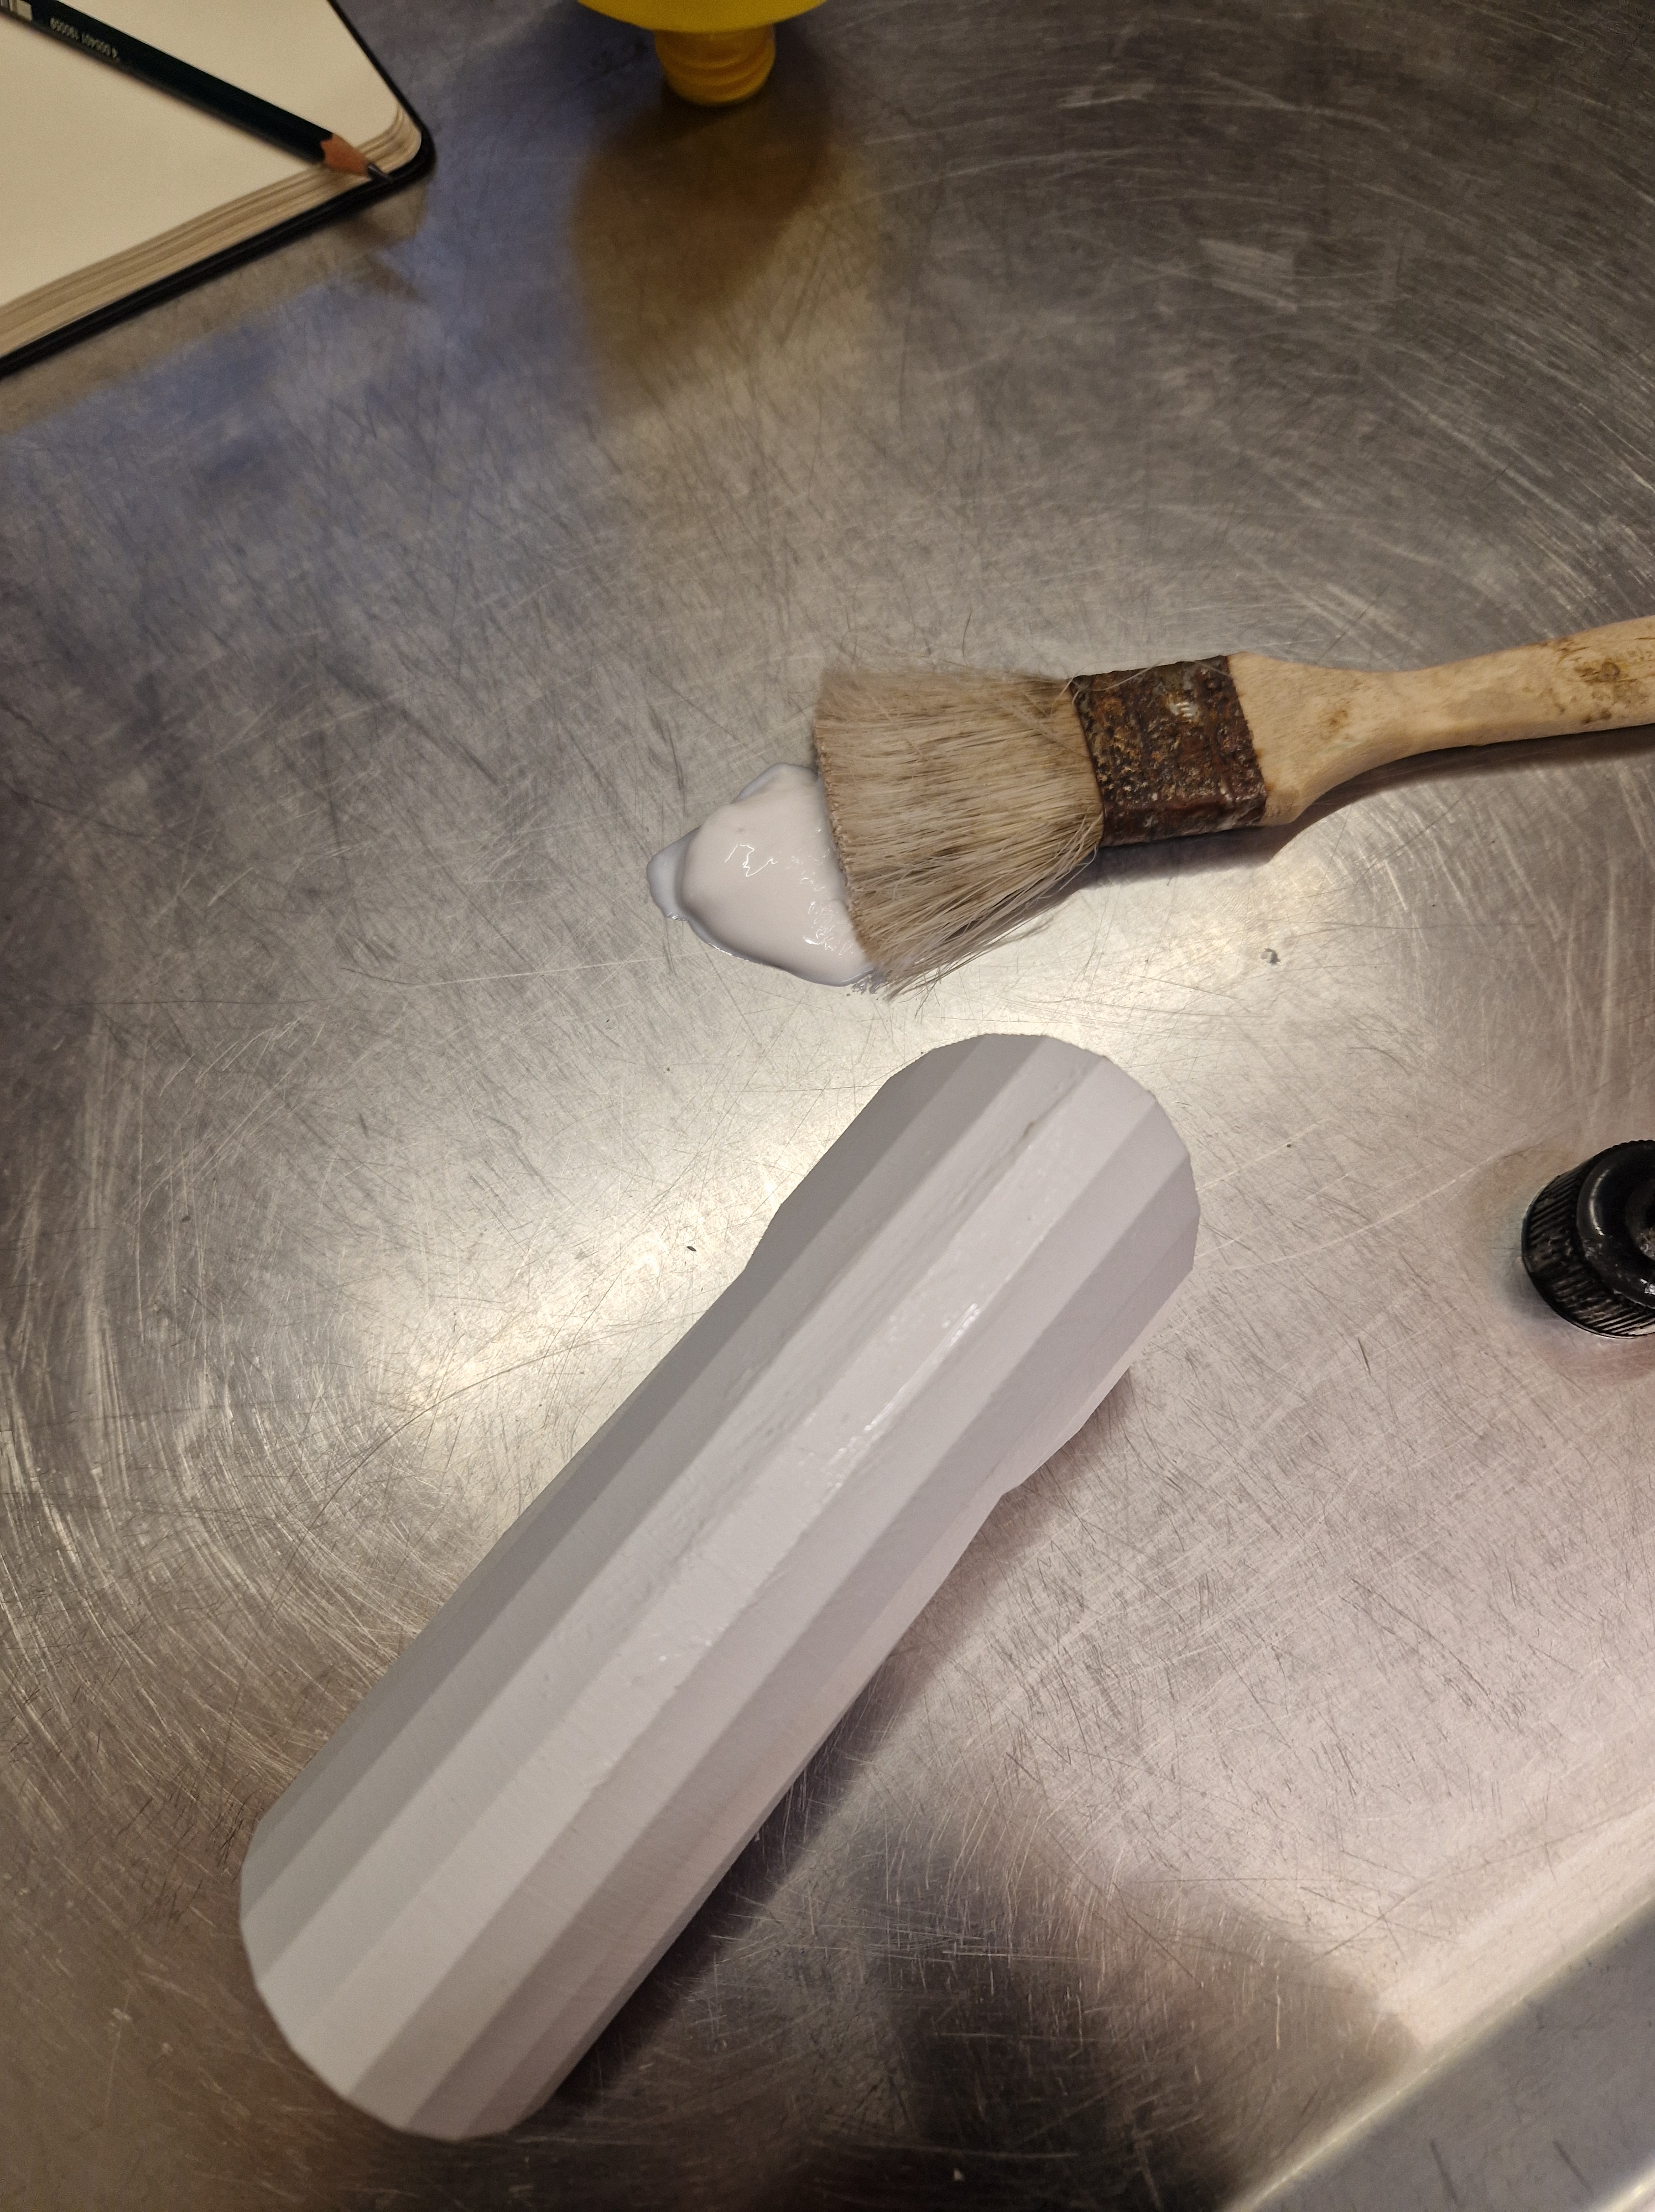
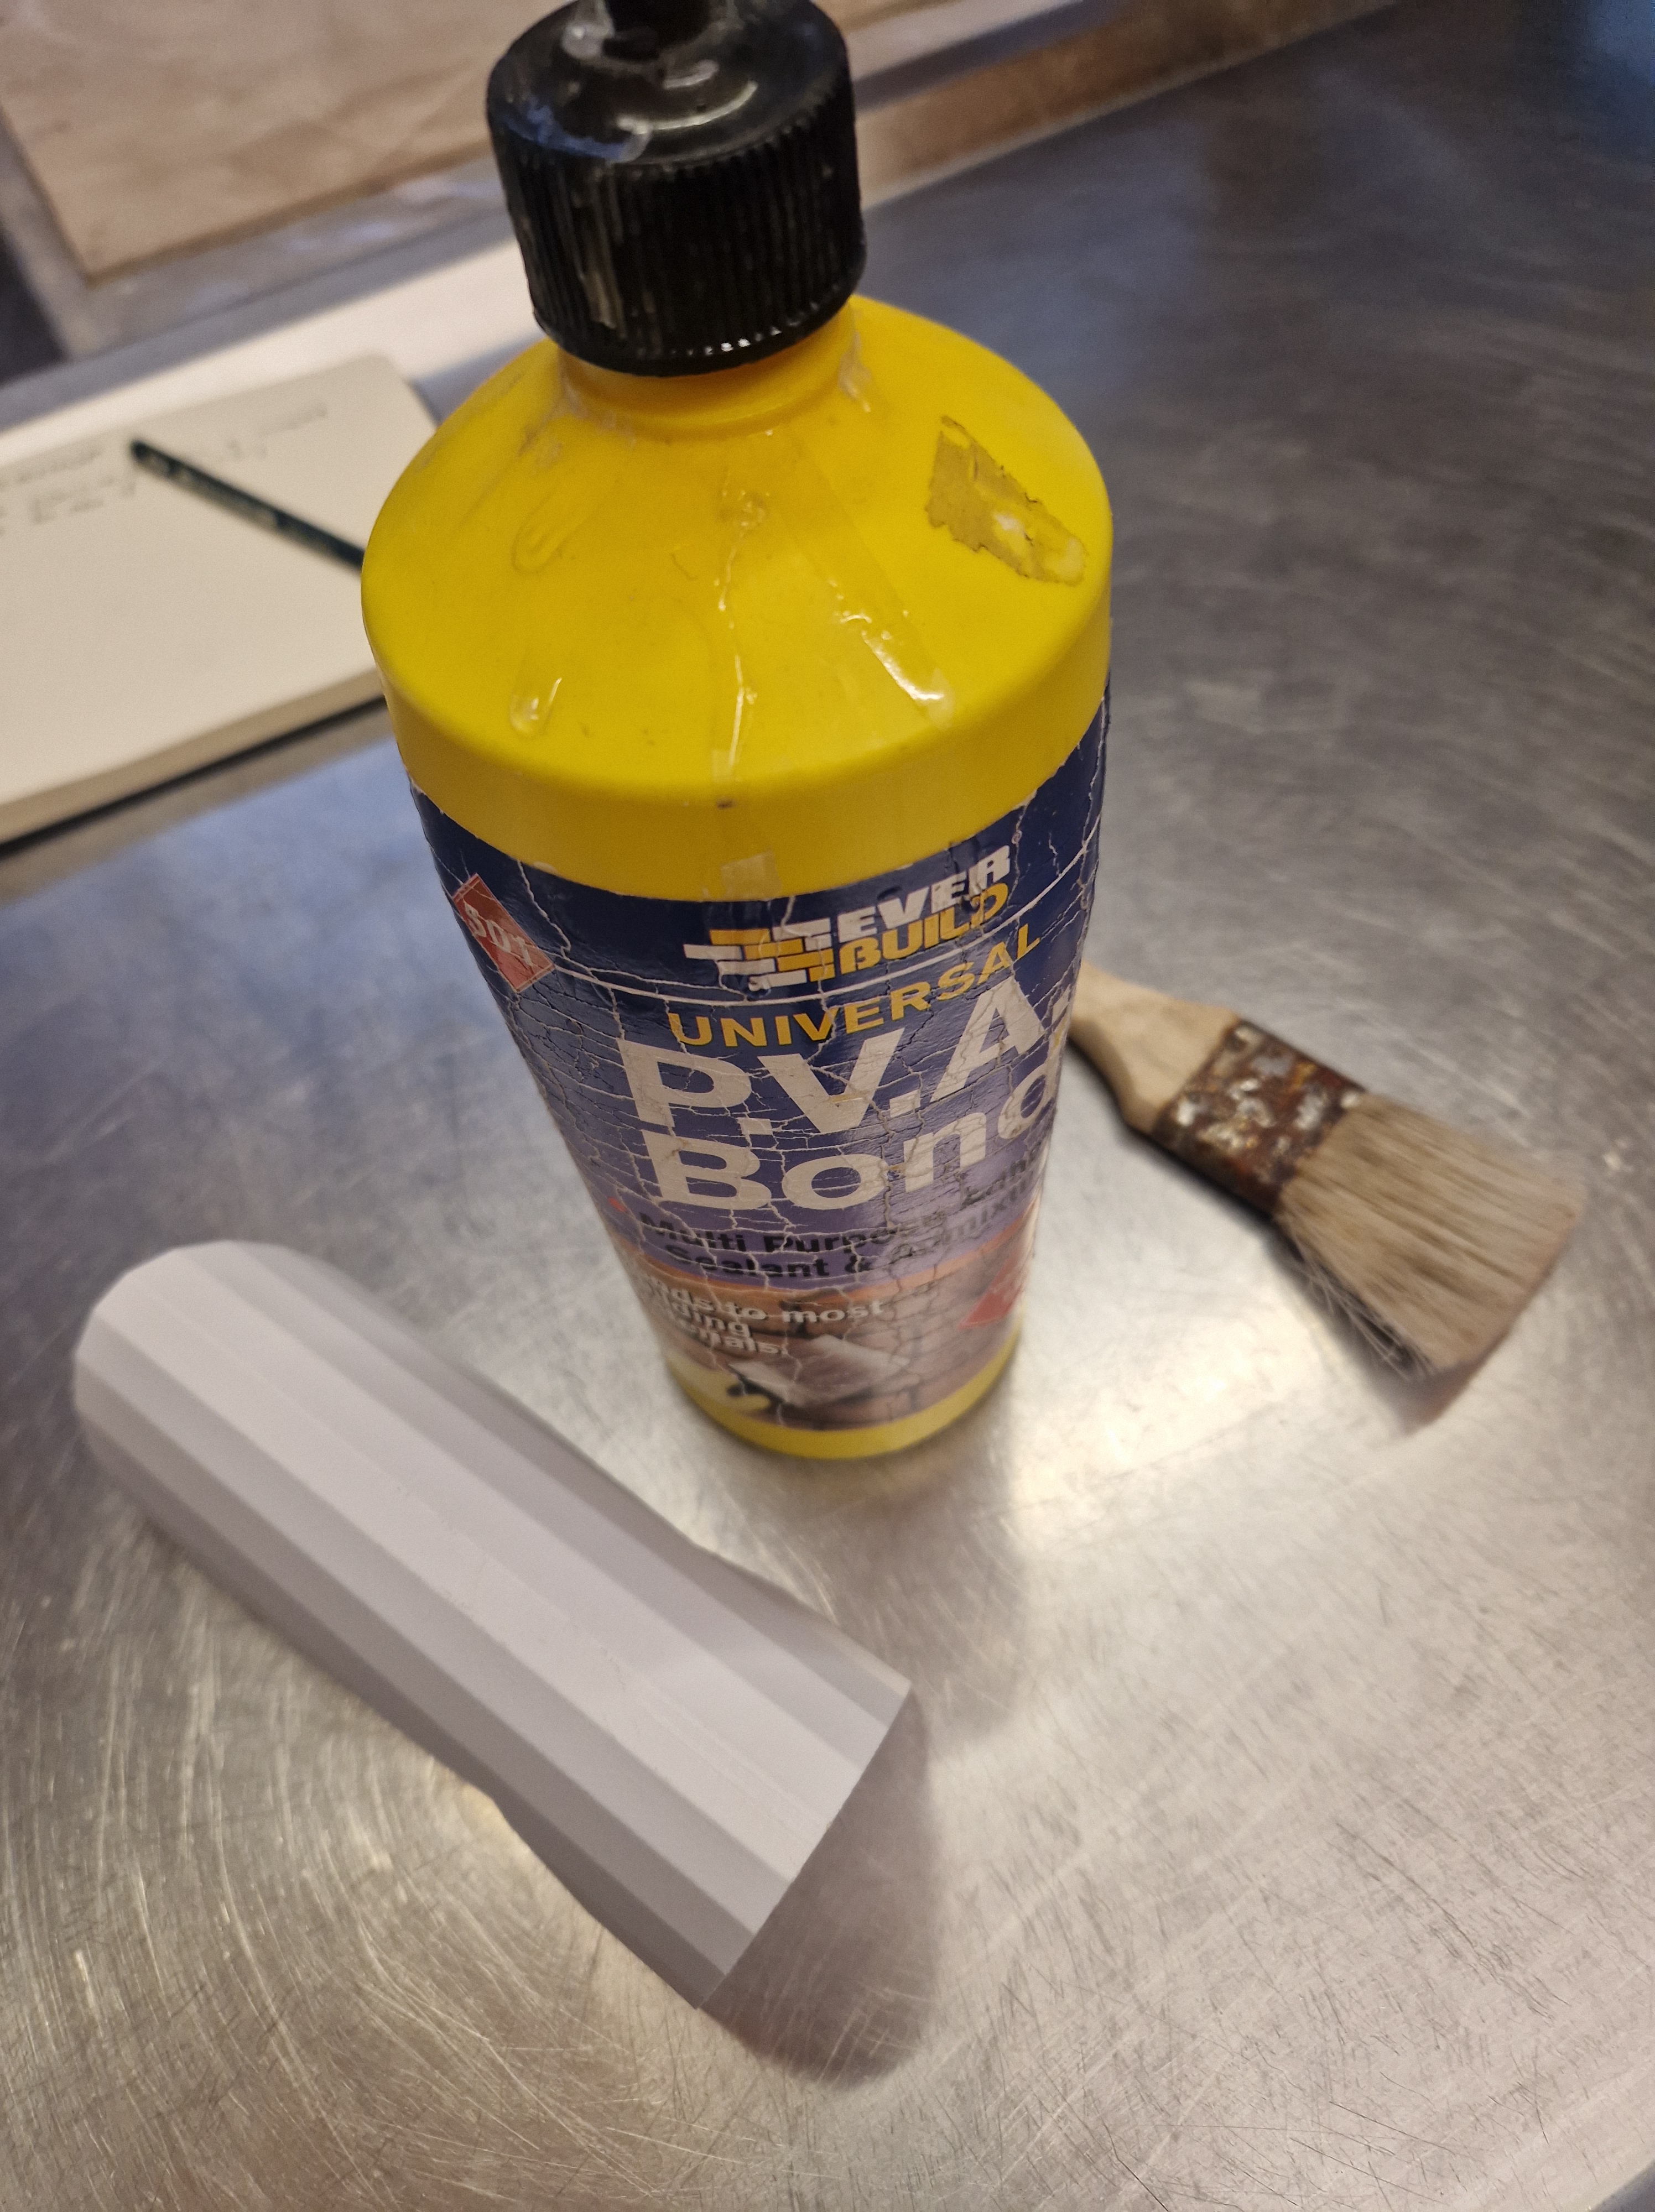
- troubleshooting – concrete not sticking to plastic: 2 options, PVA glue + sand as a base/ drill holes to allow concrete to have a base to hold onto
- once tested we proceed to work out the details and apply colour to one part of the sculpture
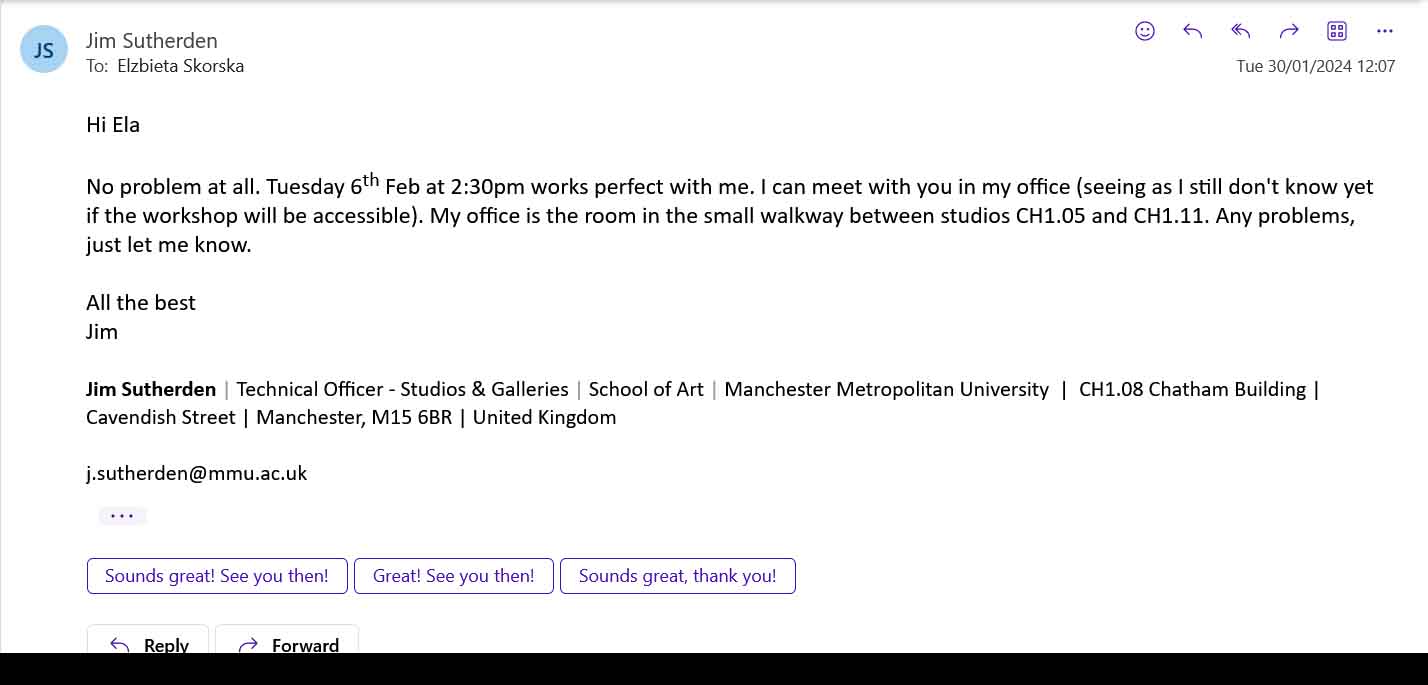

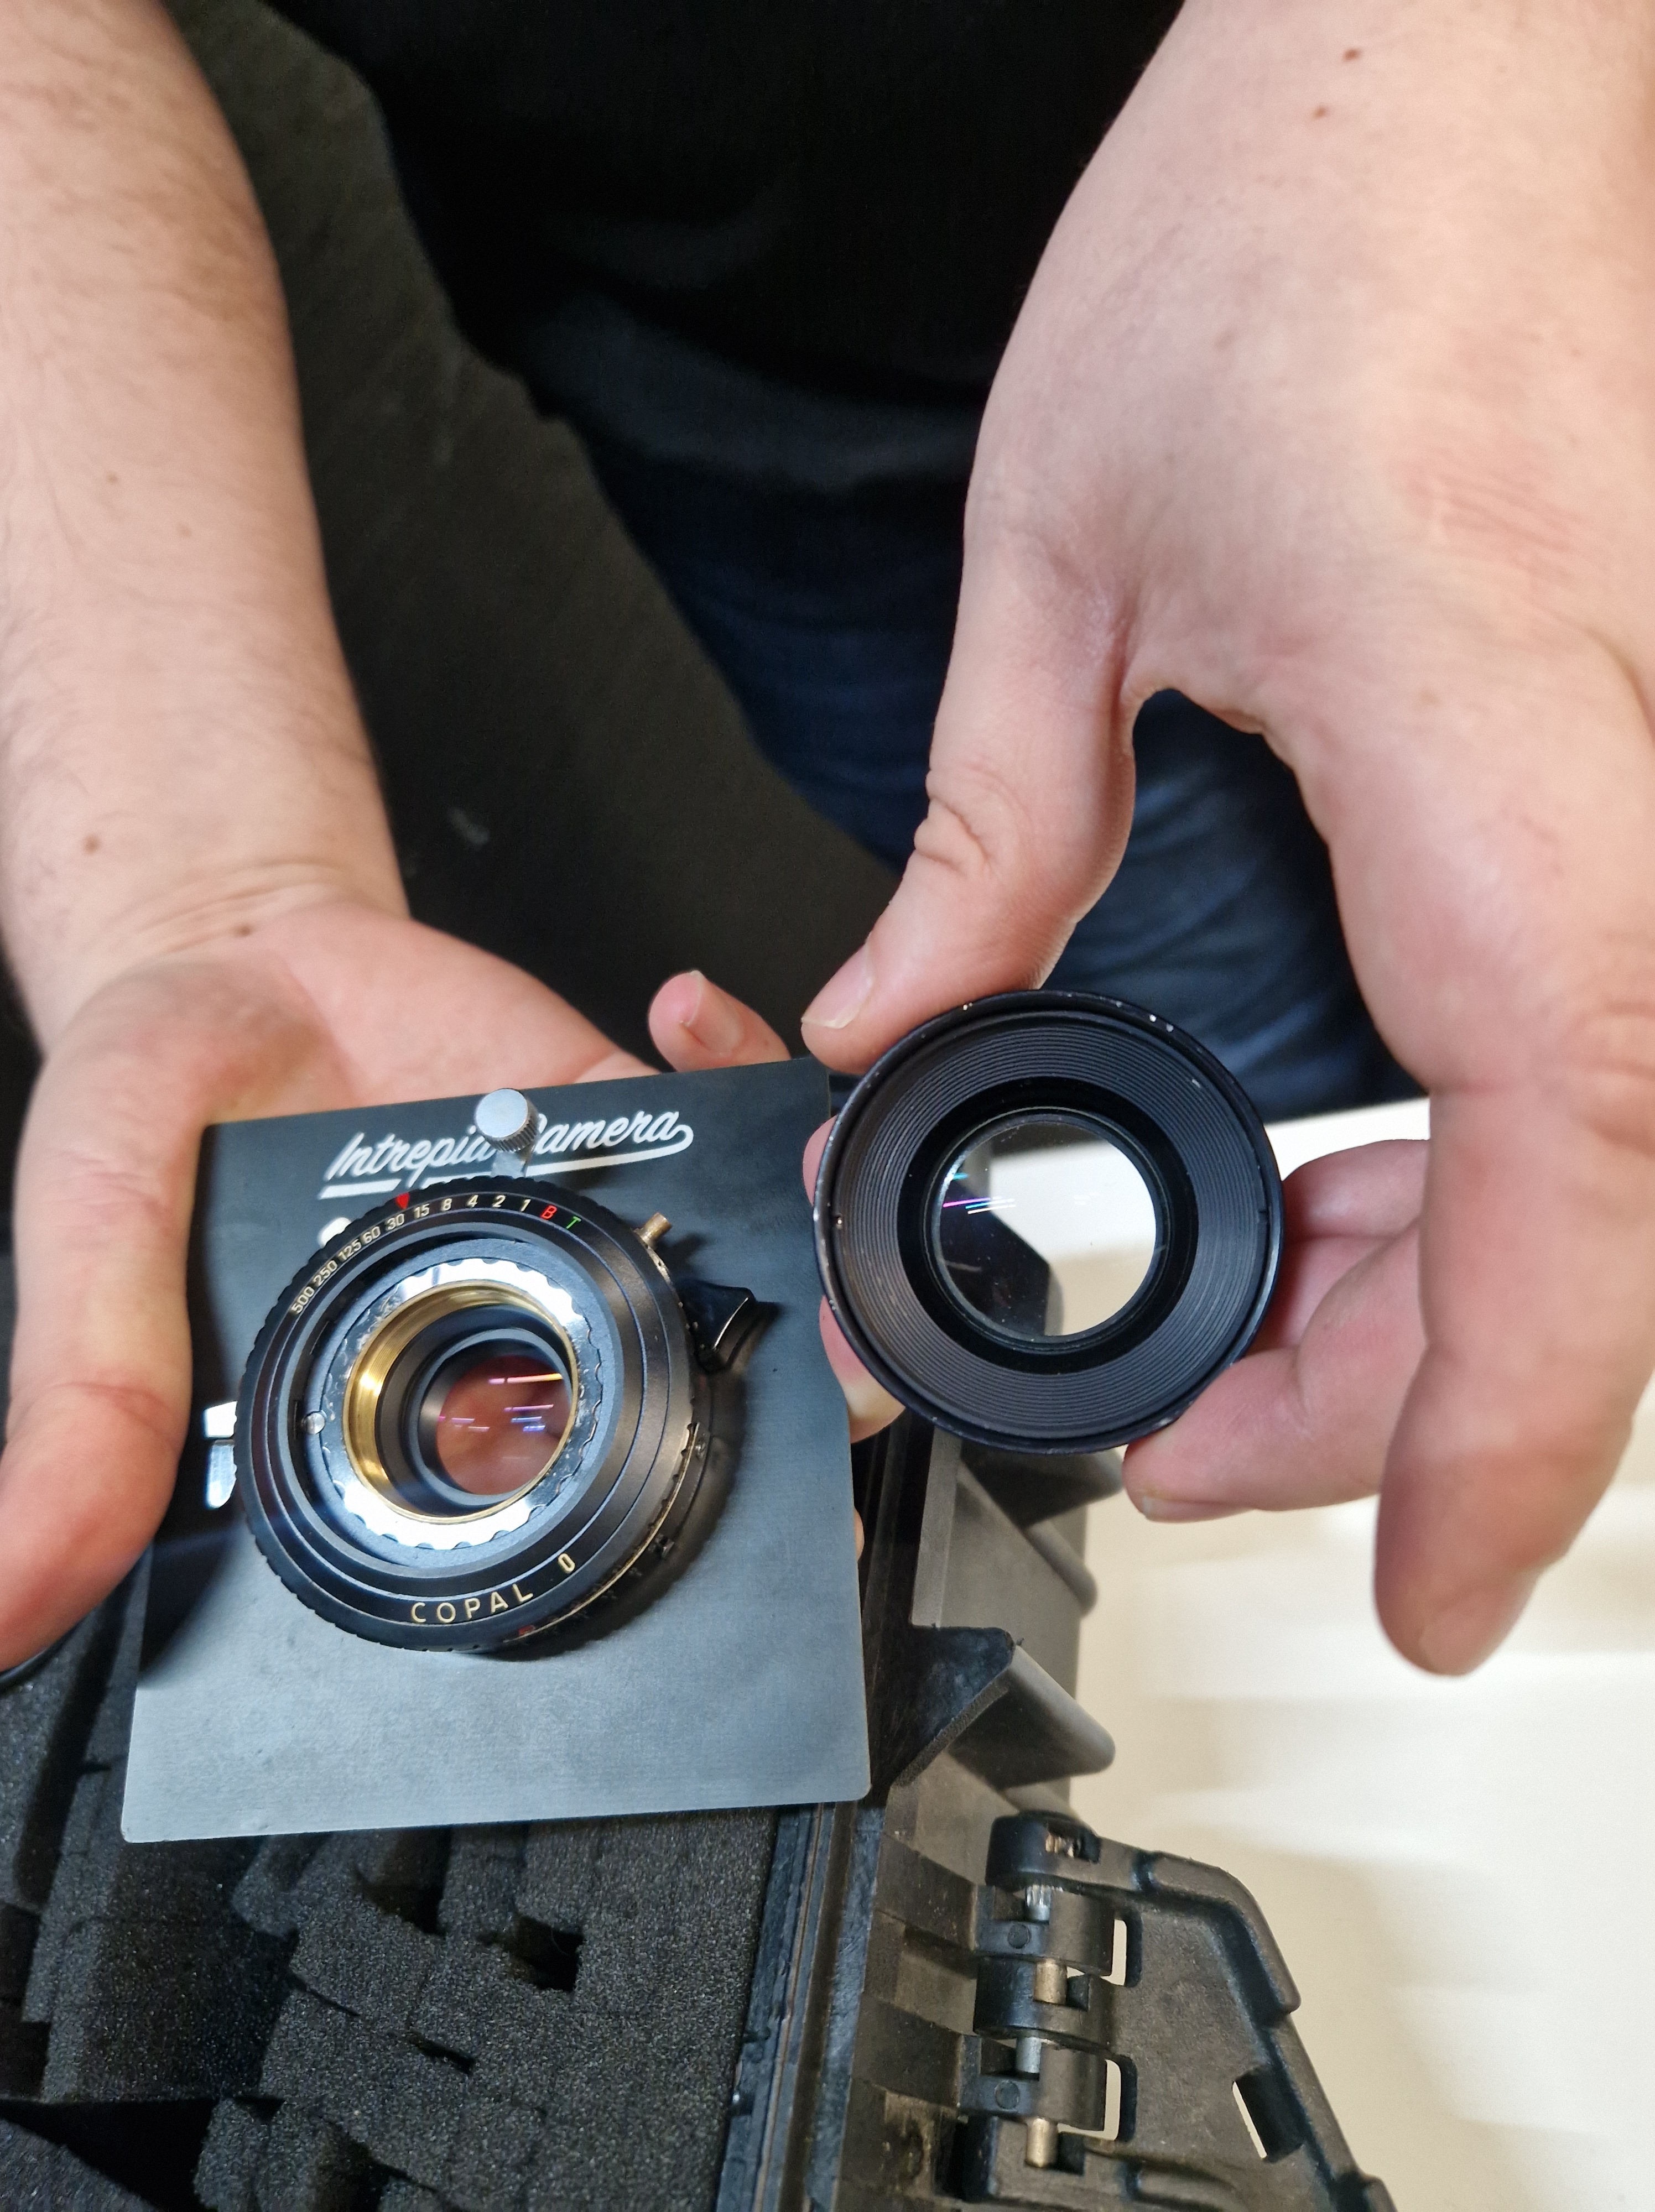
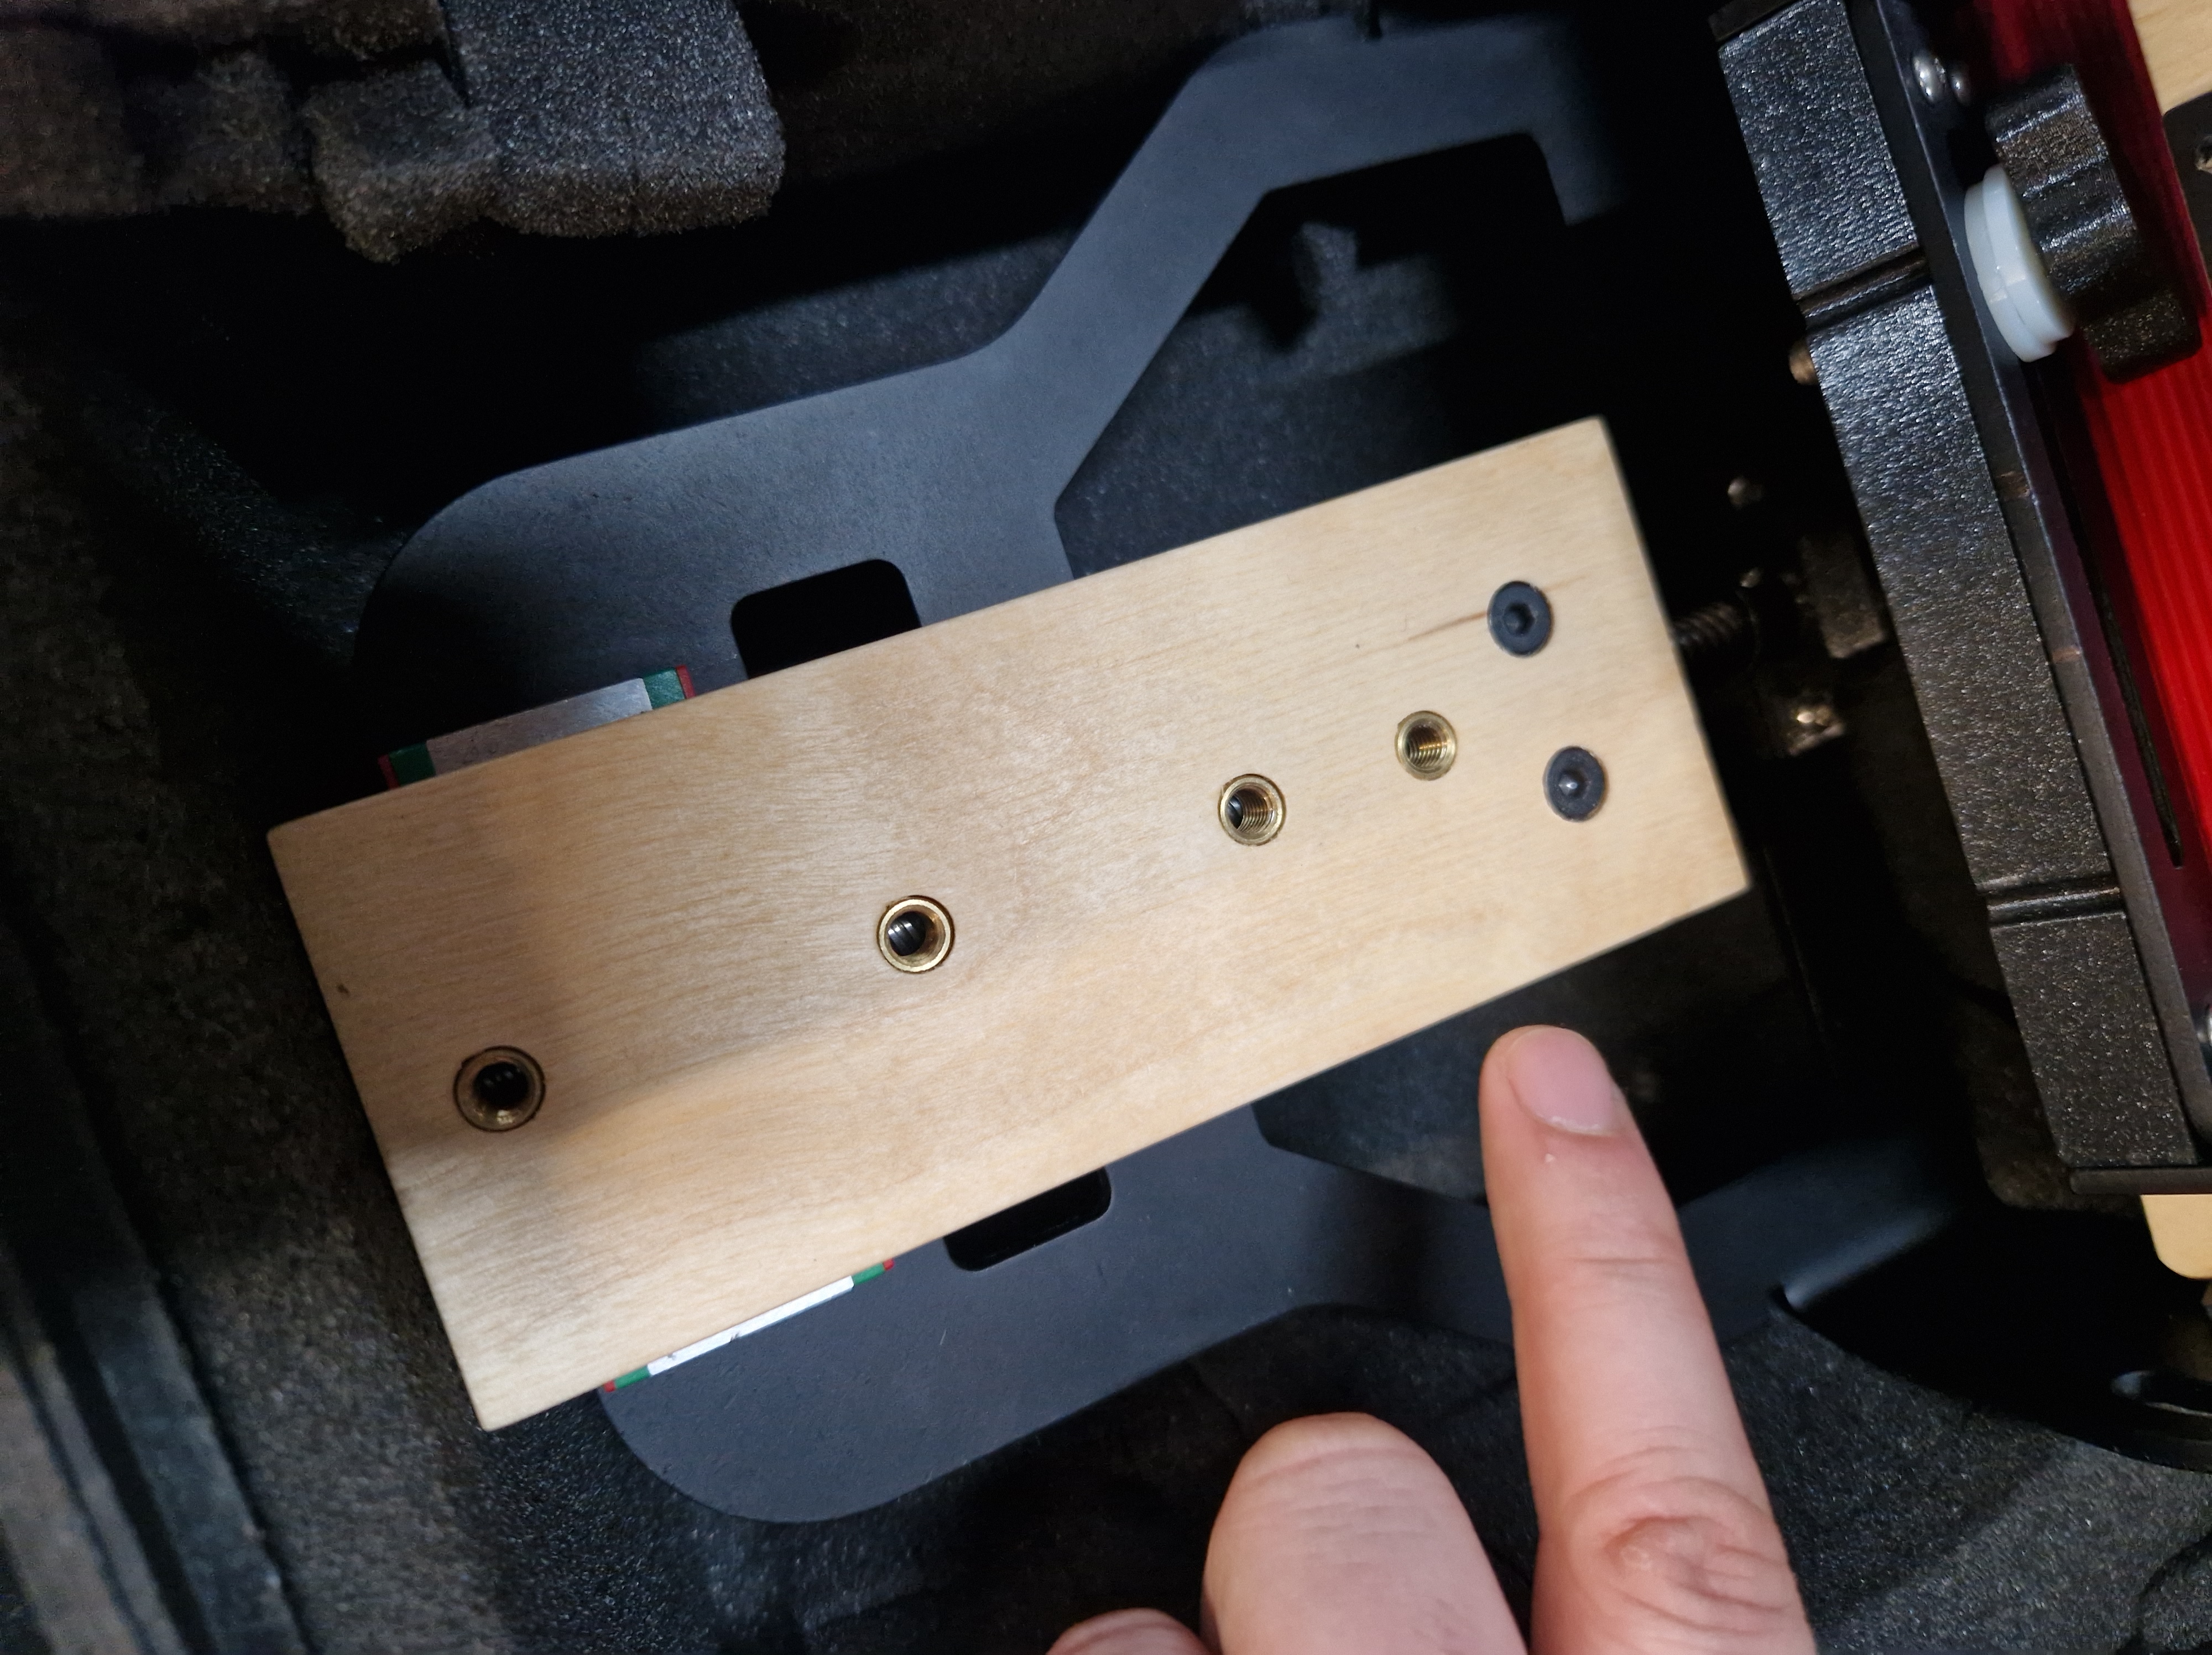
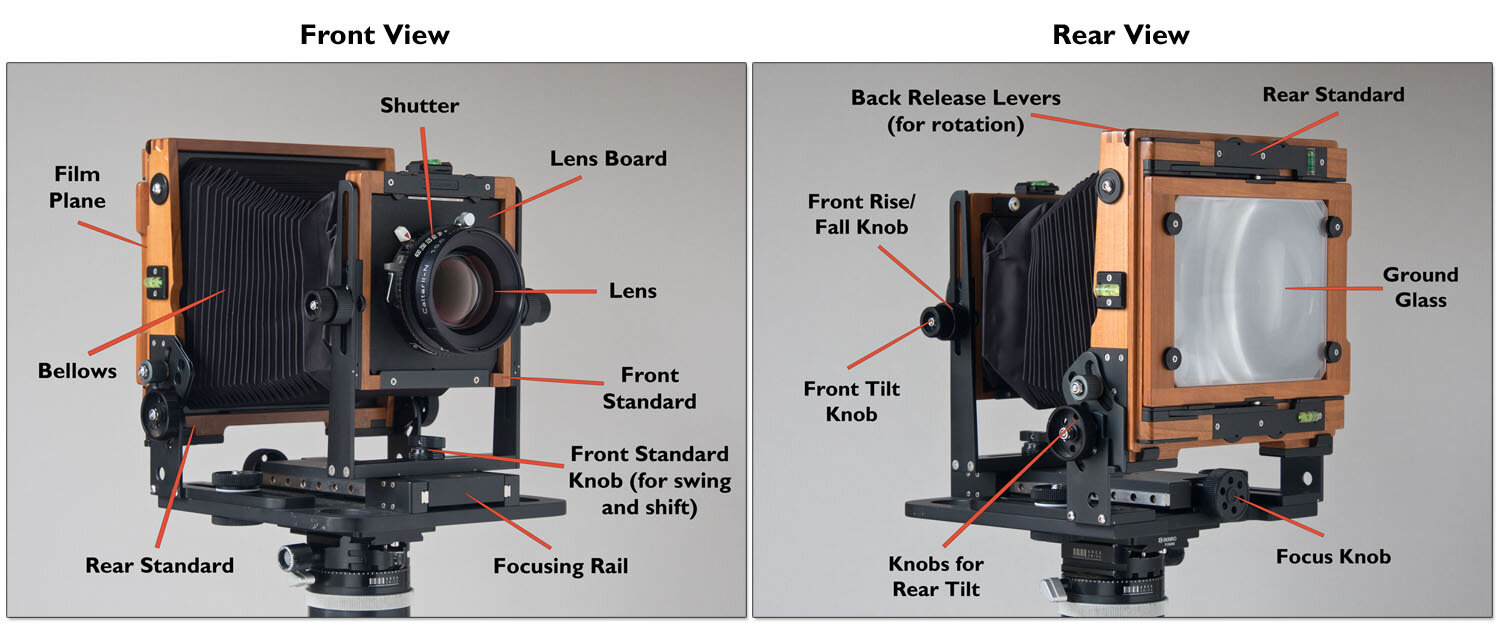
MEETING WITH JOHNNY (INTREPID)
As I would love to progress to a large format photography, and be fluent at it, I met up with Johnny to go through some more advanced ins and outs of a field camera.
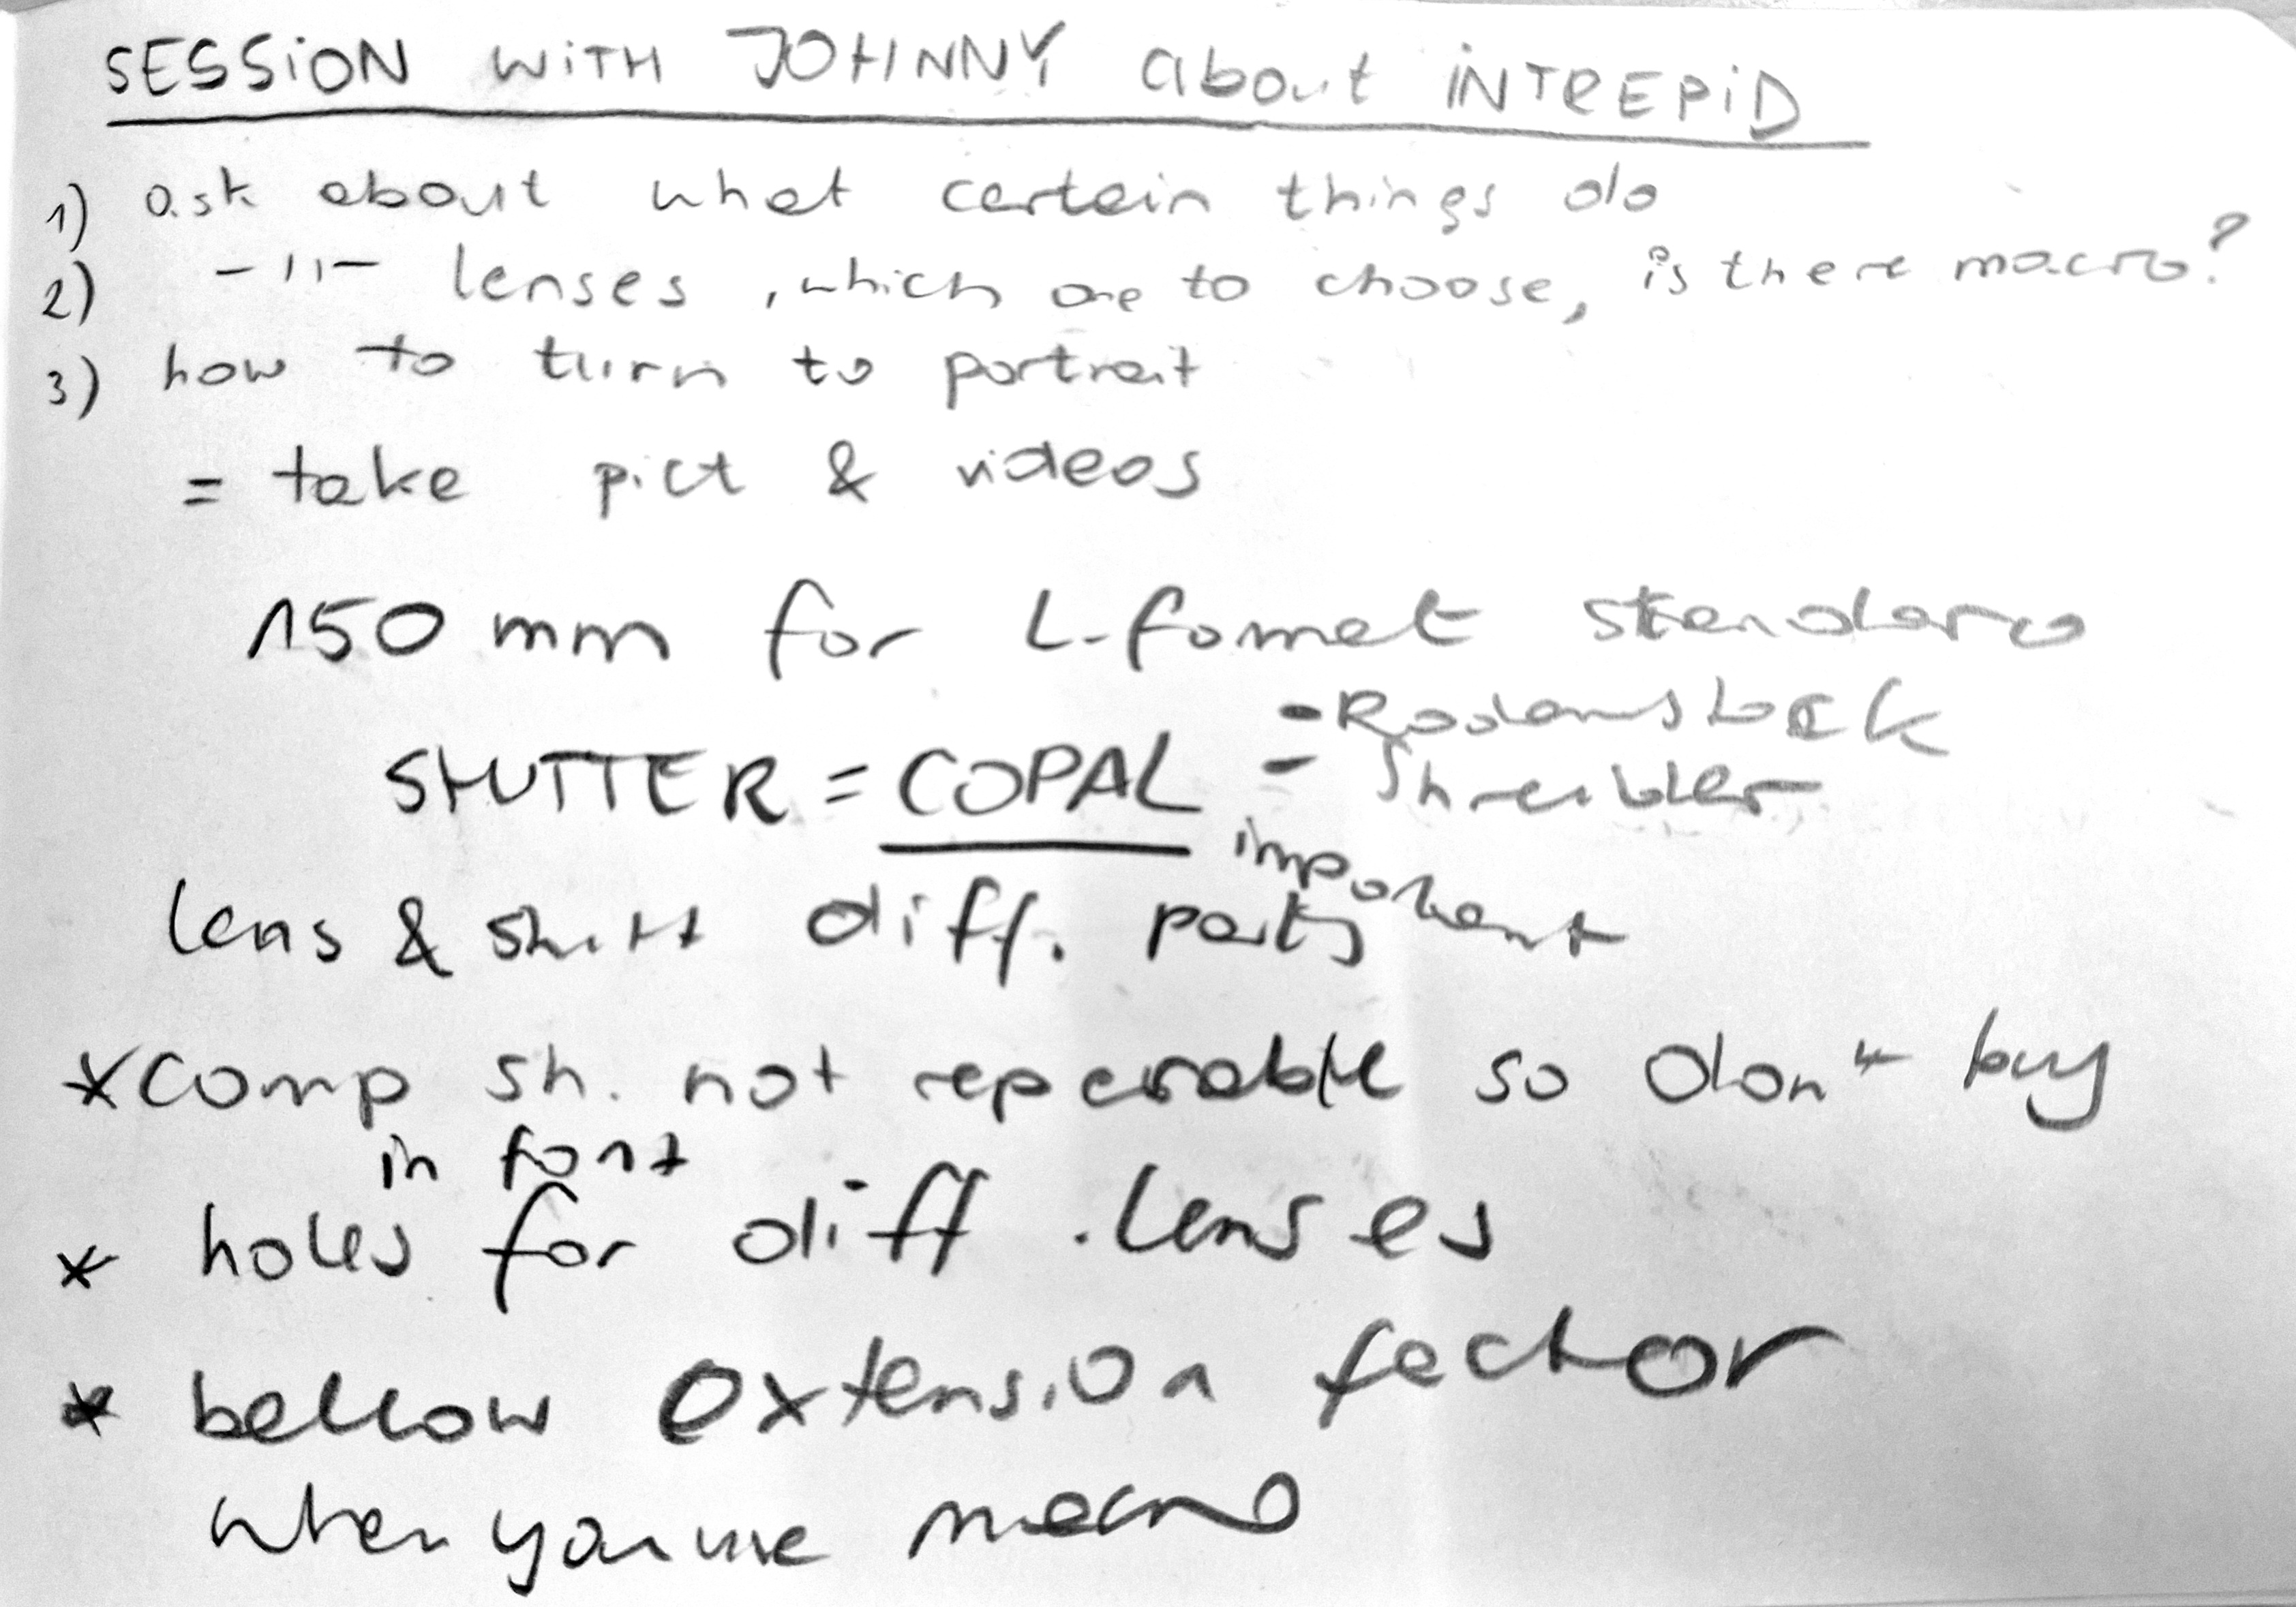
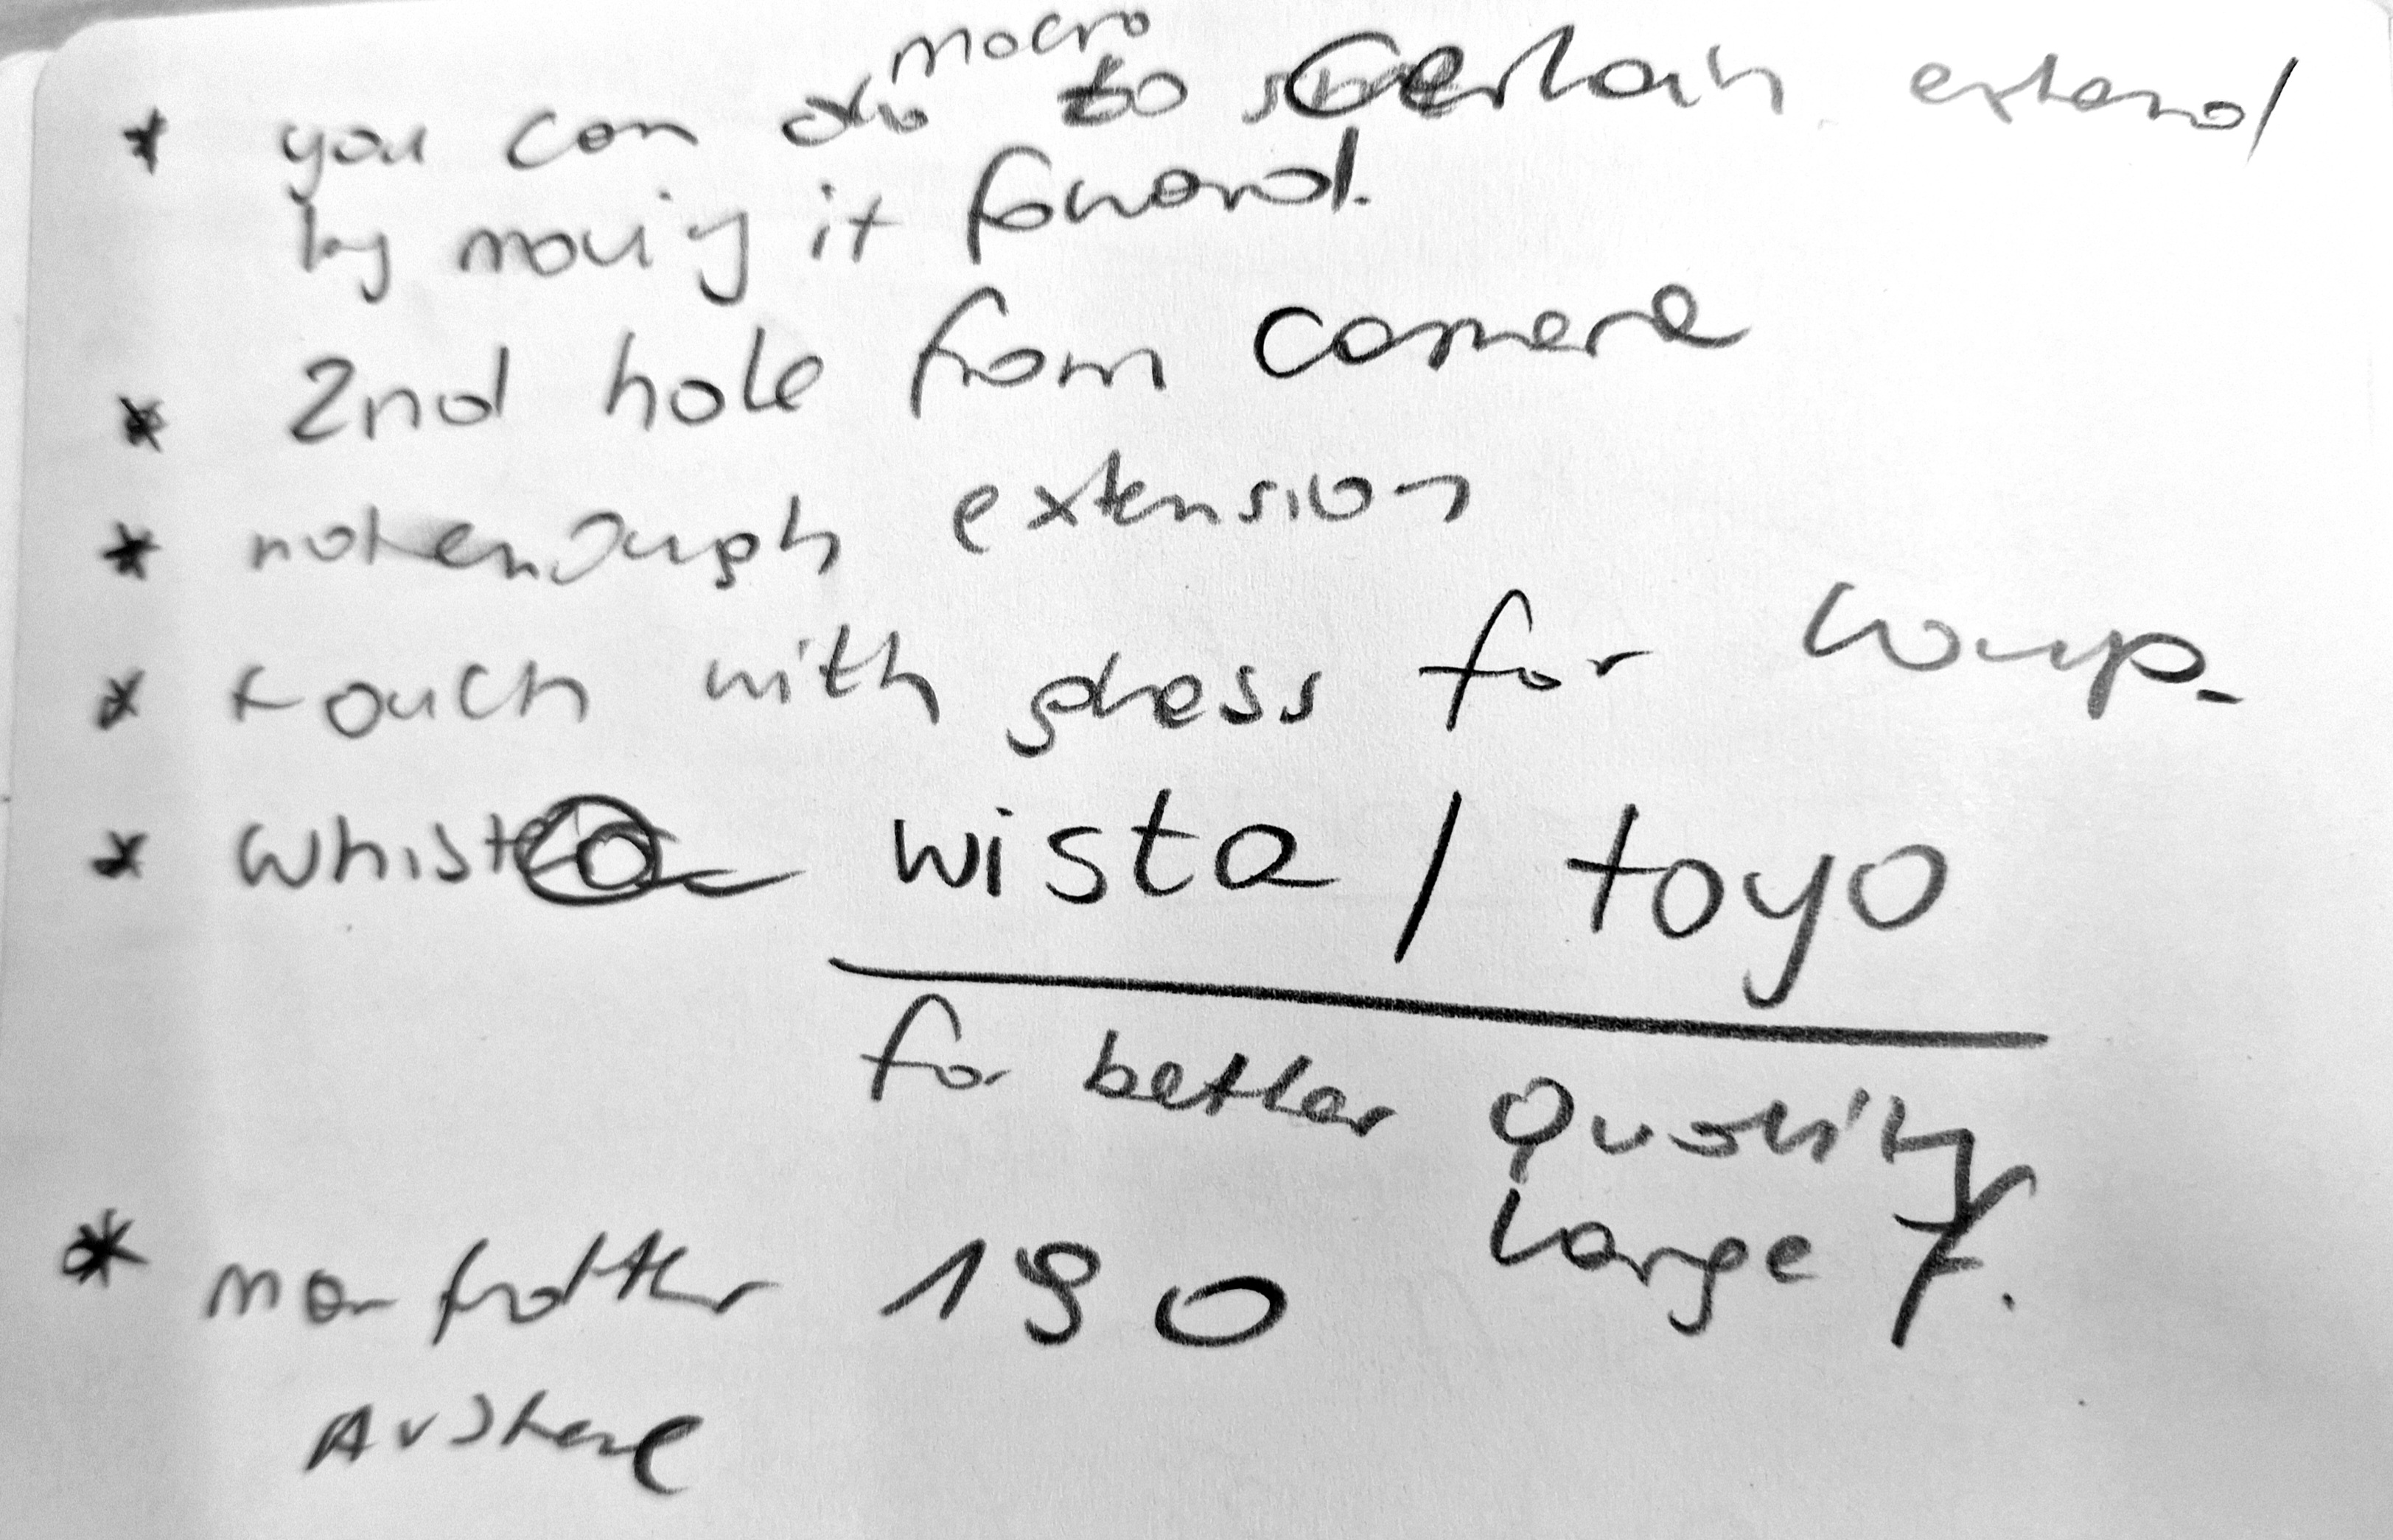
NOTES:
- 150mm is a standard lens for large-format
- The shutter ring is separate, a good one is COPAL
- good lens: Rodenstock and Schneider
- the front holes are for different lenses (150mm = second hole
- if shooting macro: bellow extension factor (learn more about it)
- you can do macro only to a certain extent
- touch the glass directly with a loupe for better focus
- better quality large format camera: WISTA and TOYO
- recommended tripod: Manfrotto 190 https://www.manfrotto.com/uk-en/collections/supports/190-series/
Film Photography: Factoring in Bellows Extension
When focusing on closer-than-infinity distances on a large format camera, you’ll have to extend the bellows to get the lens to focus properly on the ground glass. By pulling the lens further from the film standard, you can obtain a sharp image on a subject that’s perhaps only a few feet away. But you’ll also dim the light coming from that lens. Due to the inverse square law, light gets dimmer as it traverses a greater distance. Your camera is not immune to this law, which is why extending the bellows to achieve closer focus will cause the image on your ground glass to dim. And because of this, exposure must be added to your metered settings in order to maintain proper brightness. In this video I’ll cover how to factor in bellows extension to your metering process. This video is part of a larger course covering my techniques for light metering with analog film and, particularly, a metering process I call “The Precision Method” for manual metering.
RECIPROCIY APP (or other like that) for measuring the bellow extension and more!
https://intrepidcamera.co.uk/blogs/guides/setting-up-the-intrepid-4×5
https://www.alexburkephoto.com/blog/2018/2/13/choosing-a-4×5-camera-and-lenses

Getting Started with the Intrepid 4×5 MK2 Camera
Landscape Photographer Ben Horne takes you through the basics of what to do when your Intrepid 4×5 Camera arrives and how to get it all set up.
WEDNESDAY
MEETING WITH CINTHIA
NOTES:
REFLECTIONS: Great to catch up with Cinthia on a personal and professional level. She shared with me some practical information about self-employment, starting up a business and help available to do so.
THURSDAY
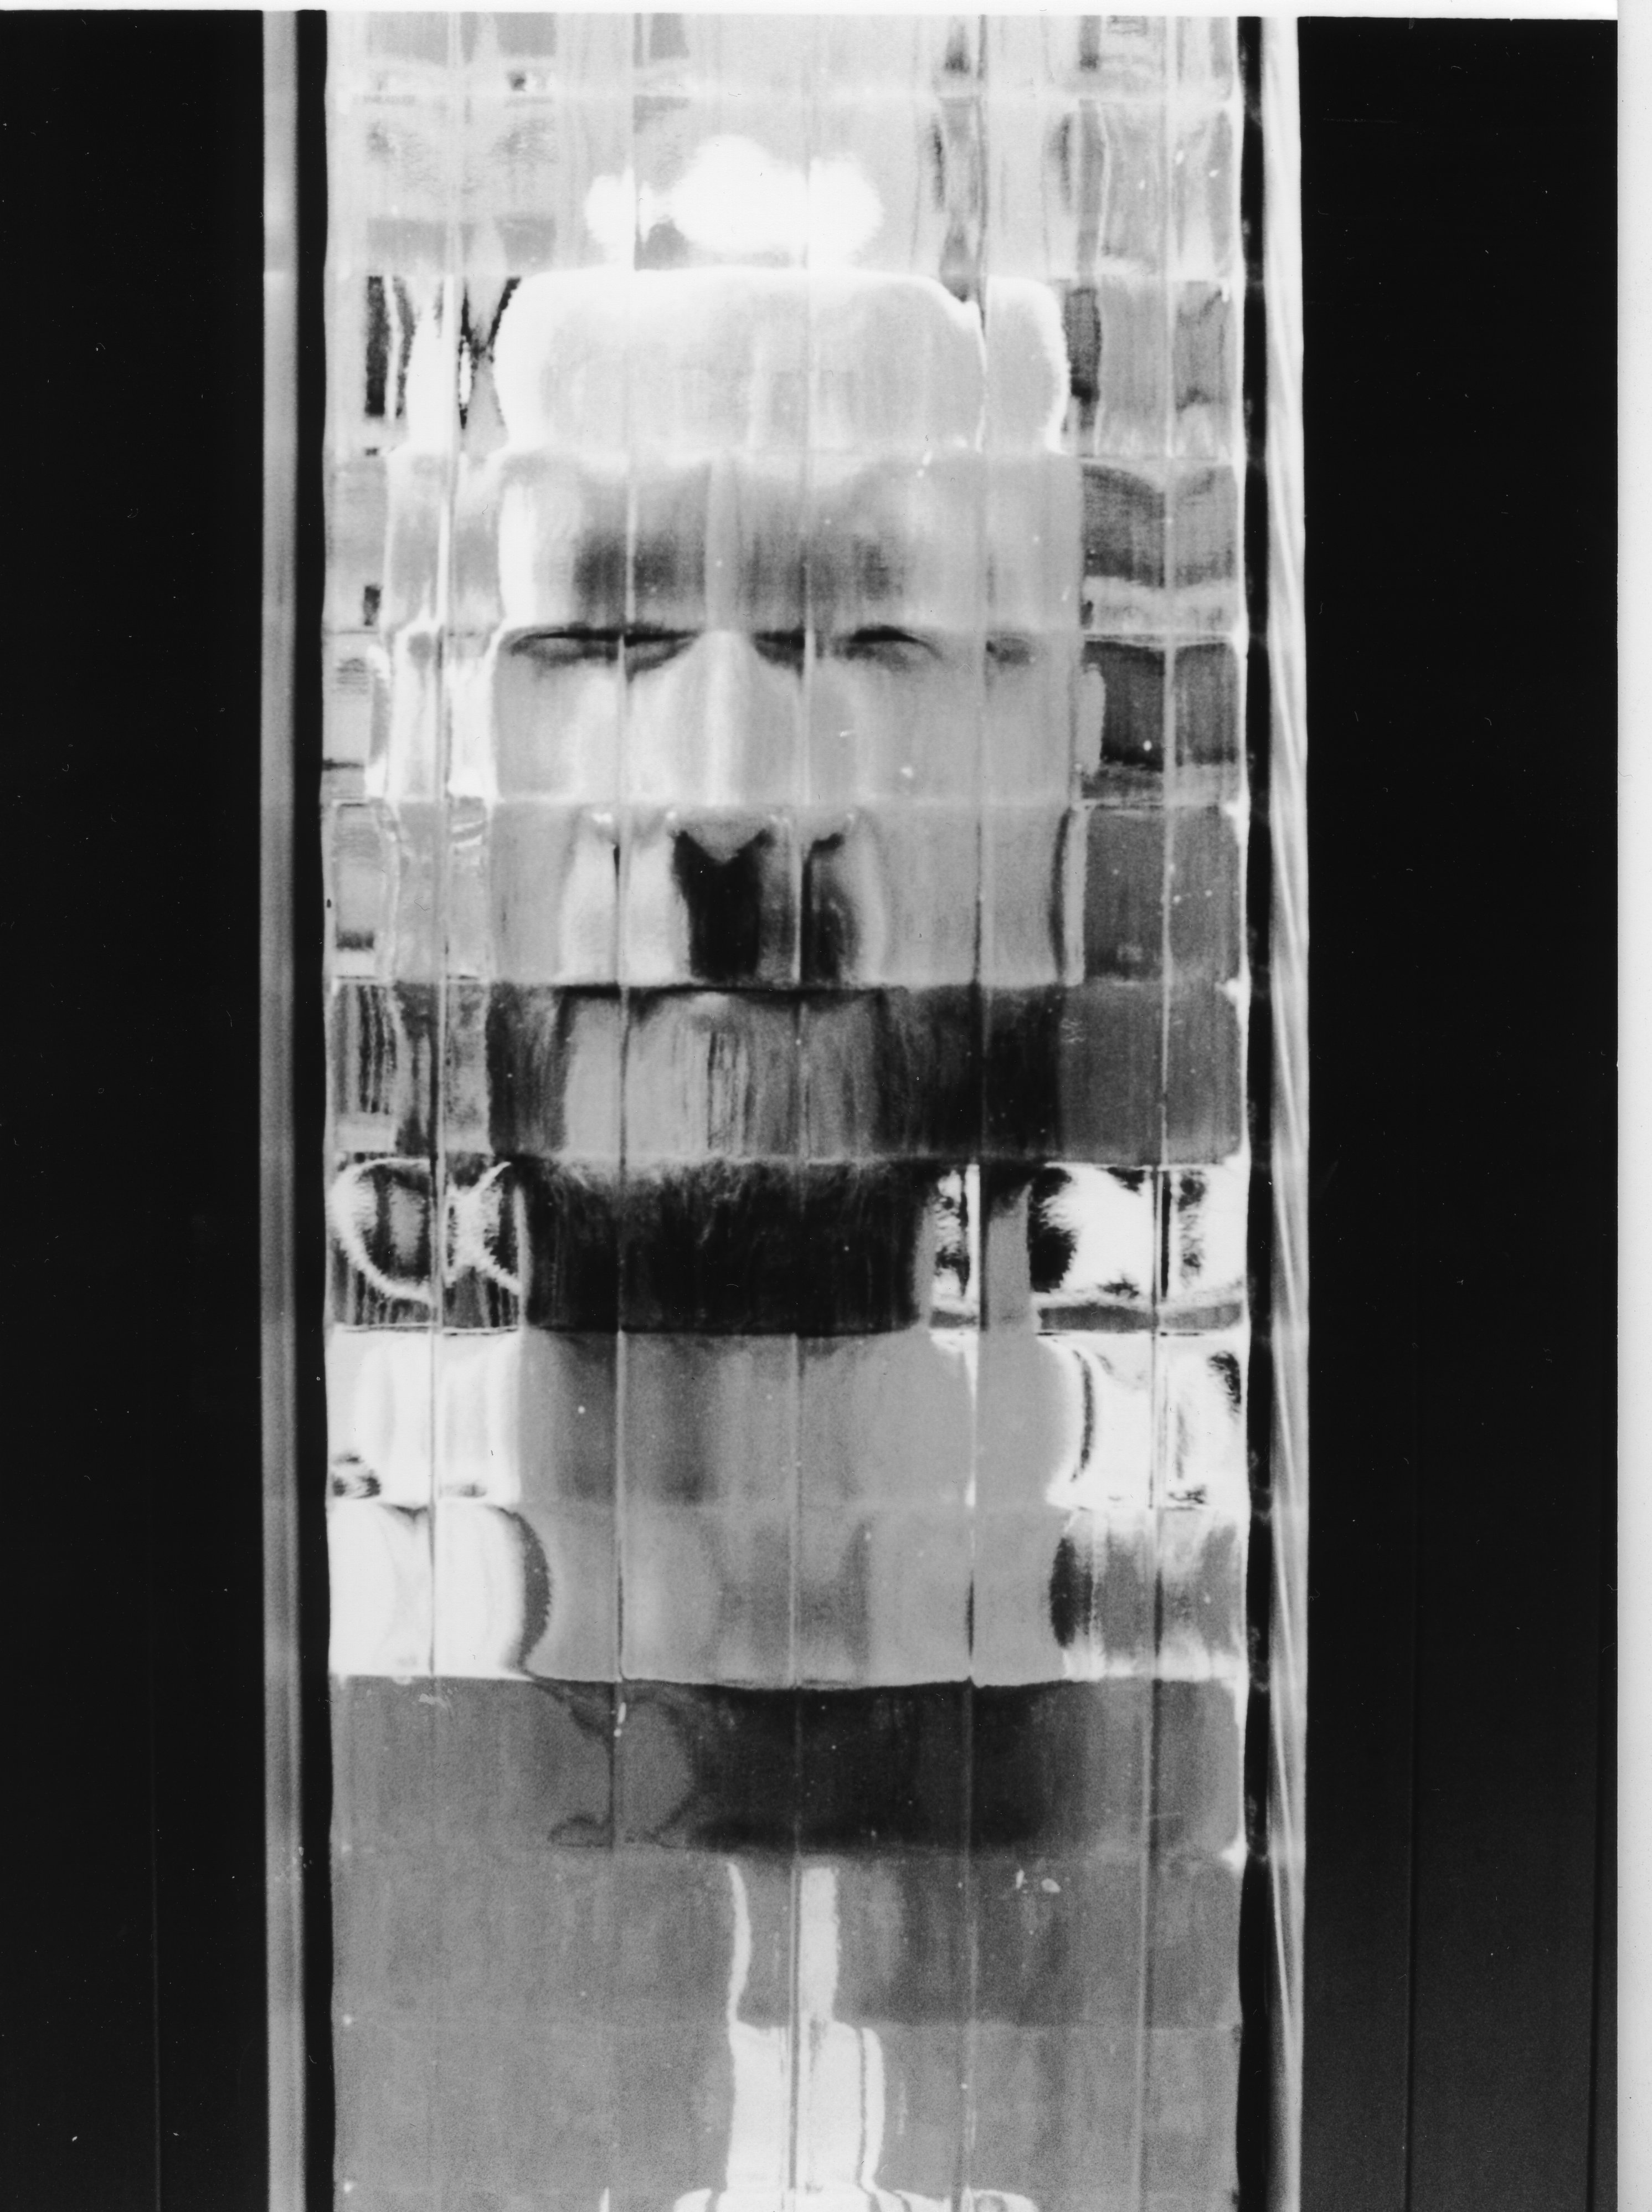
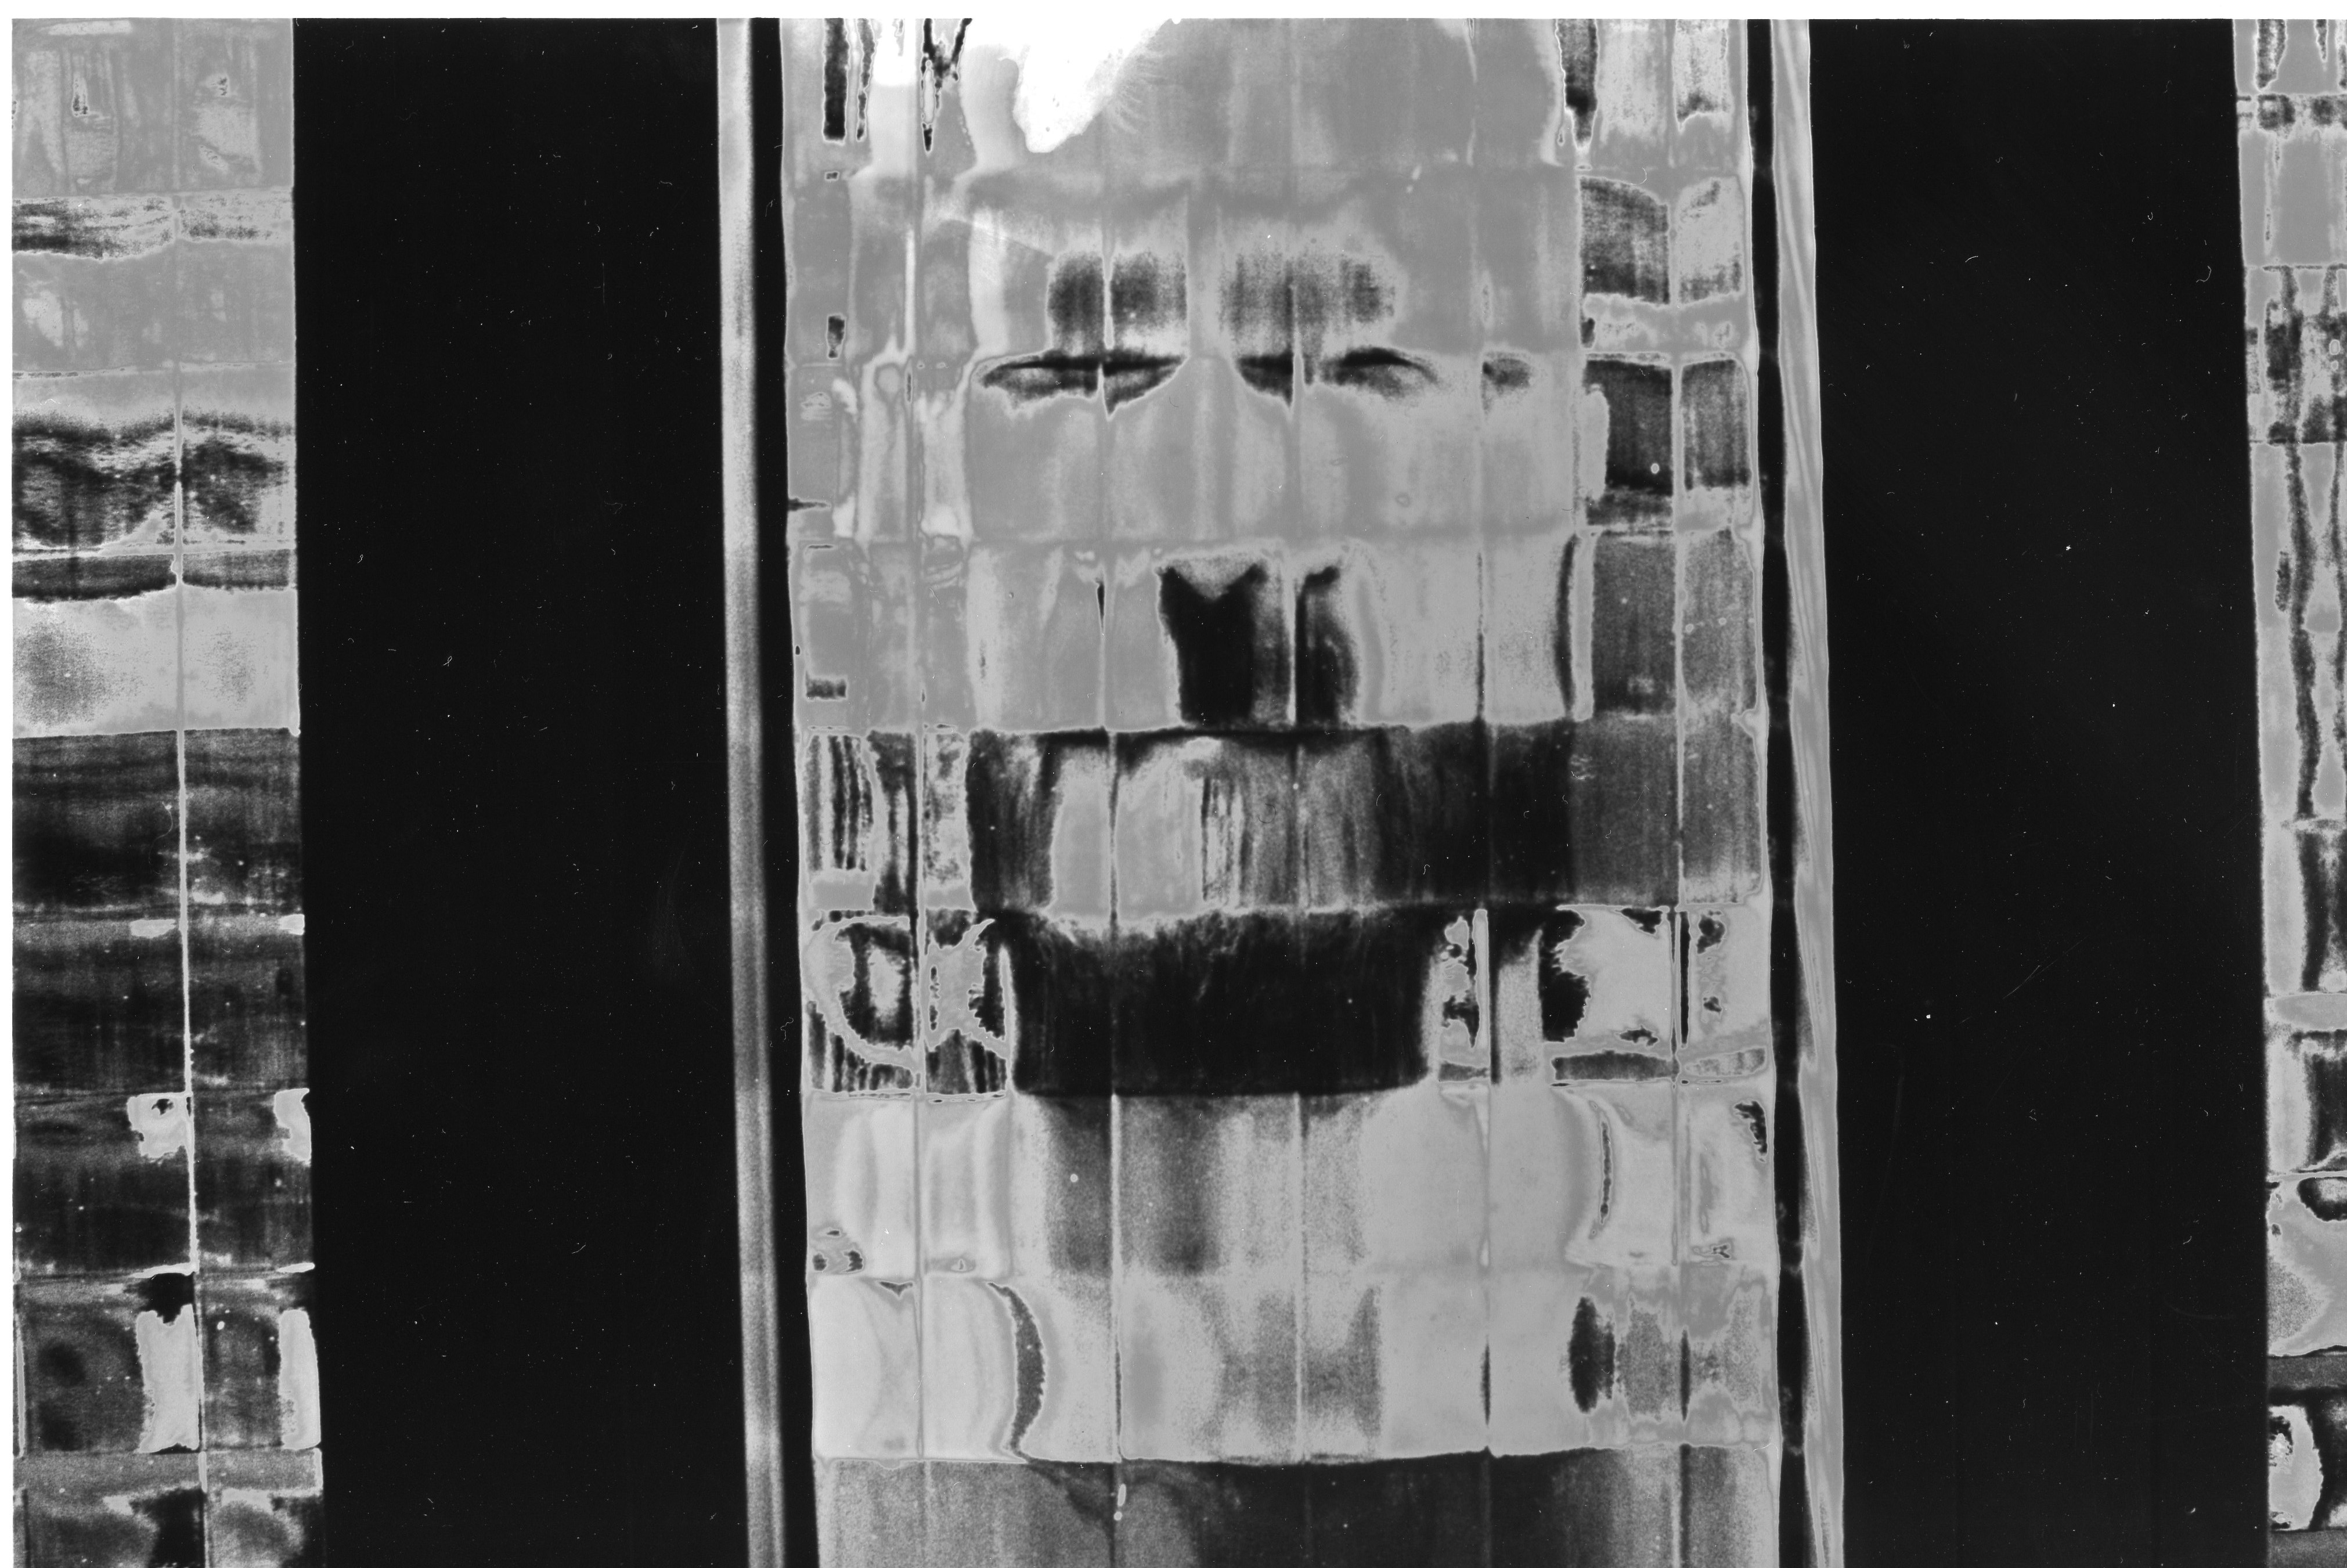
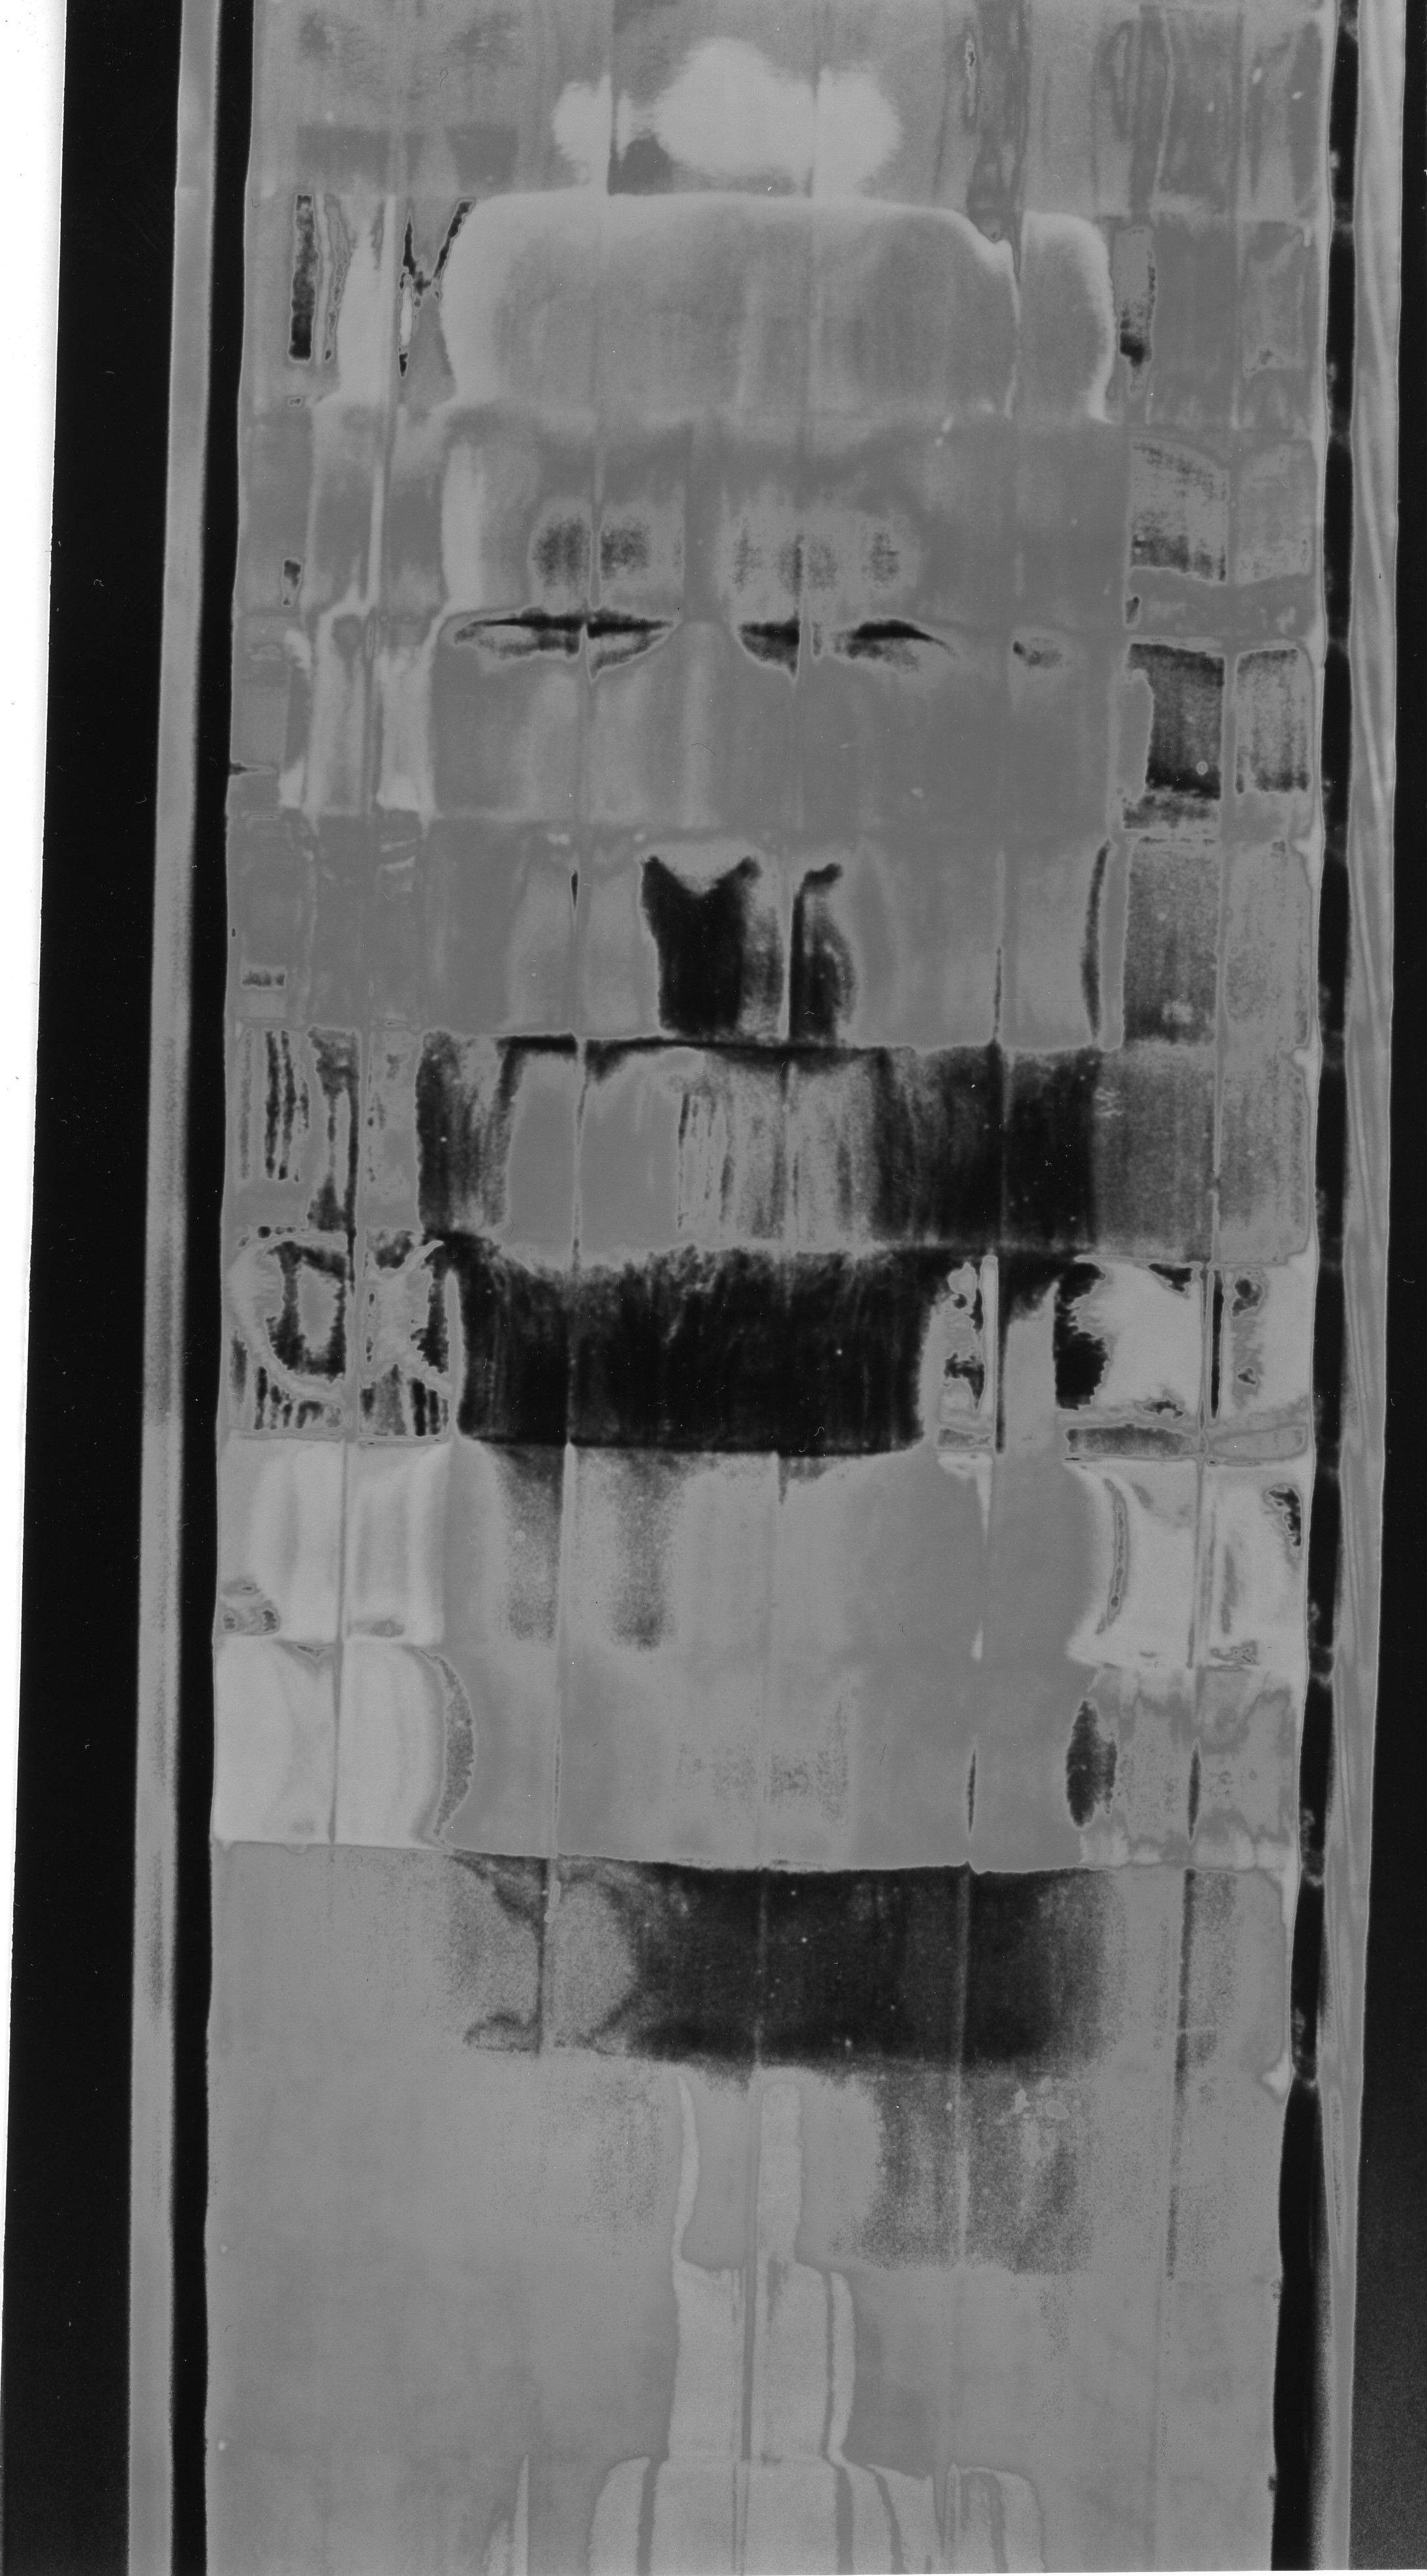
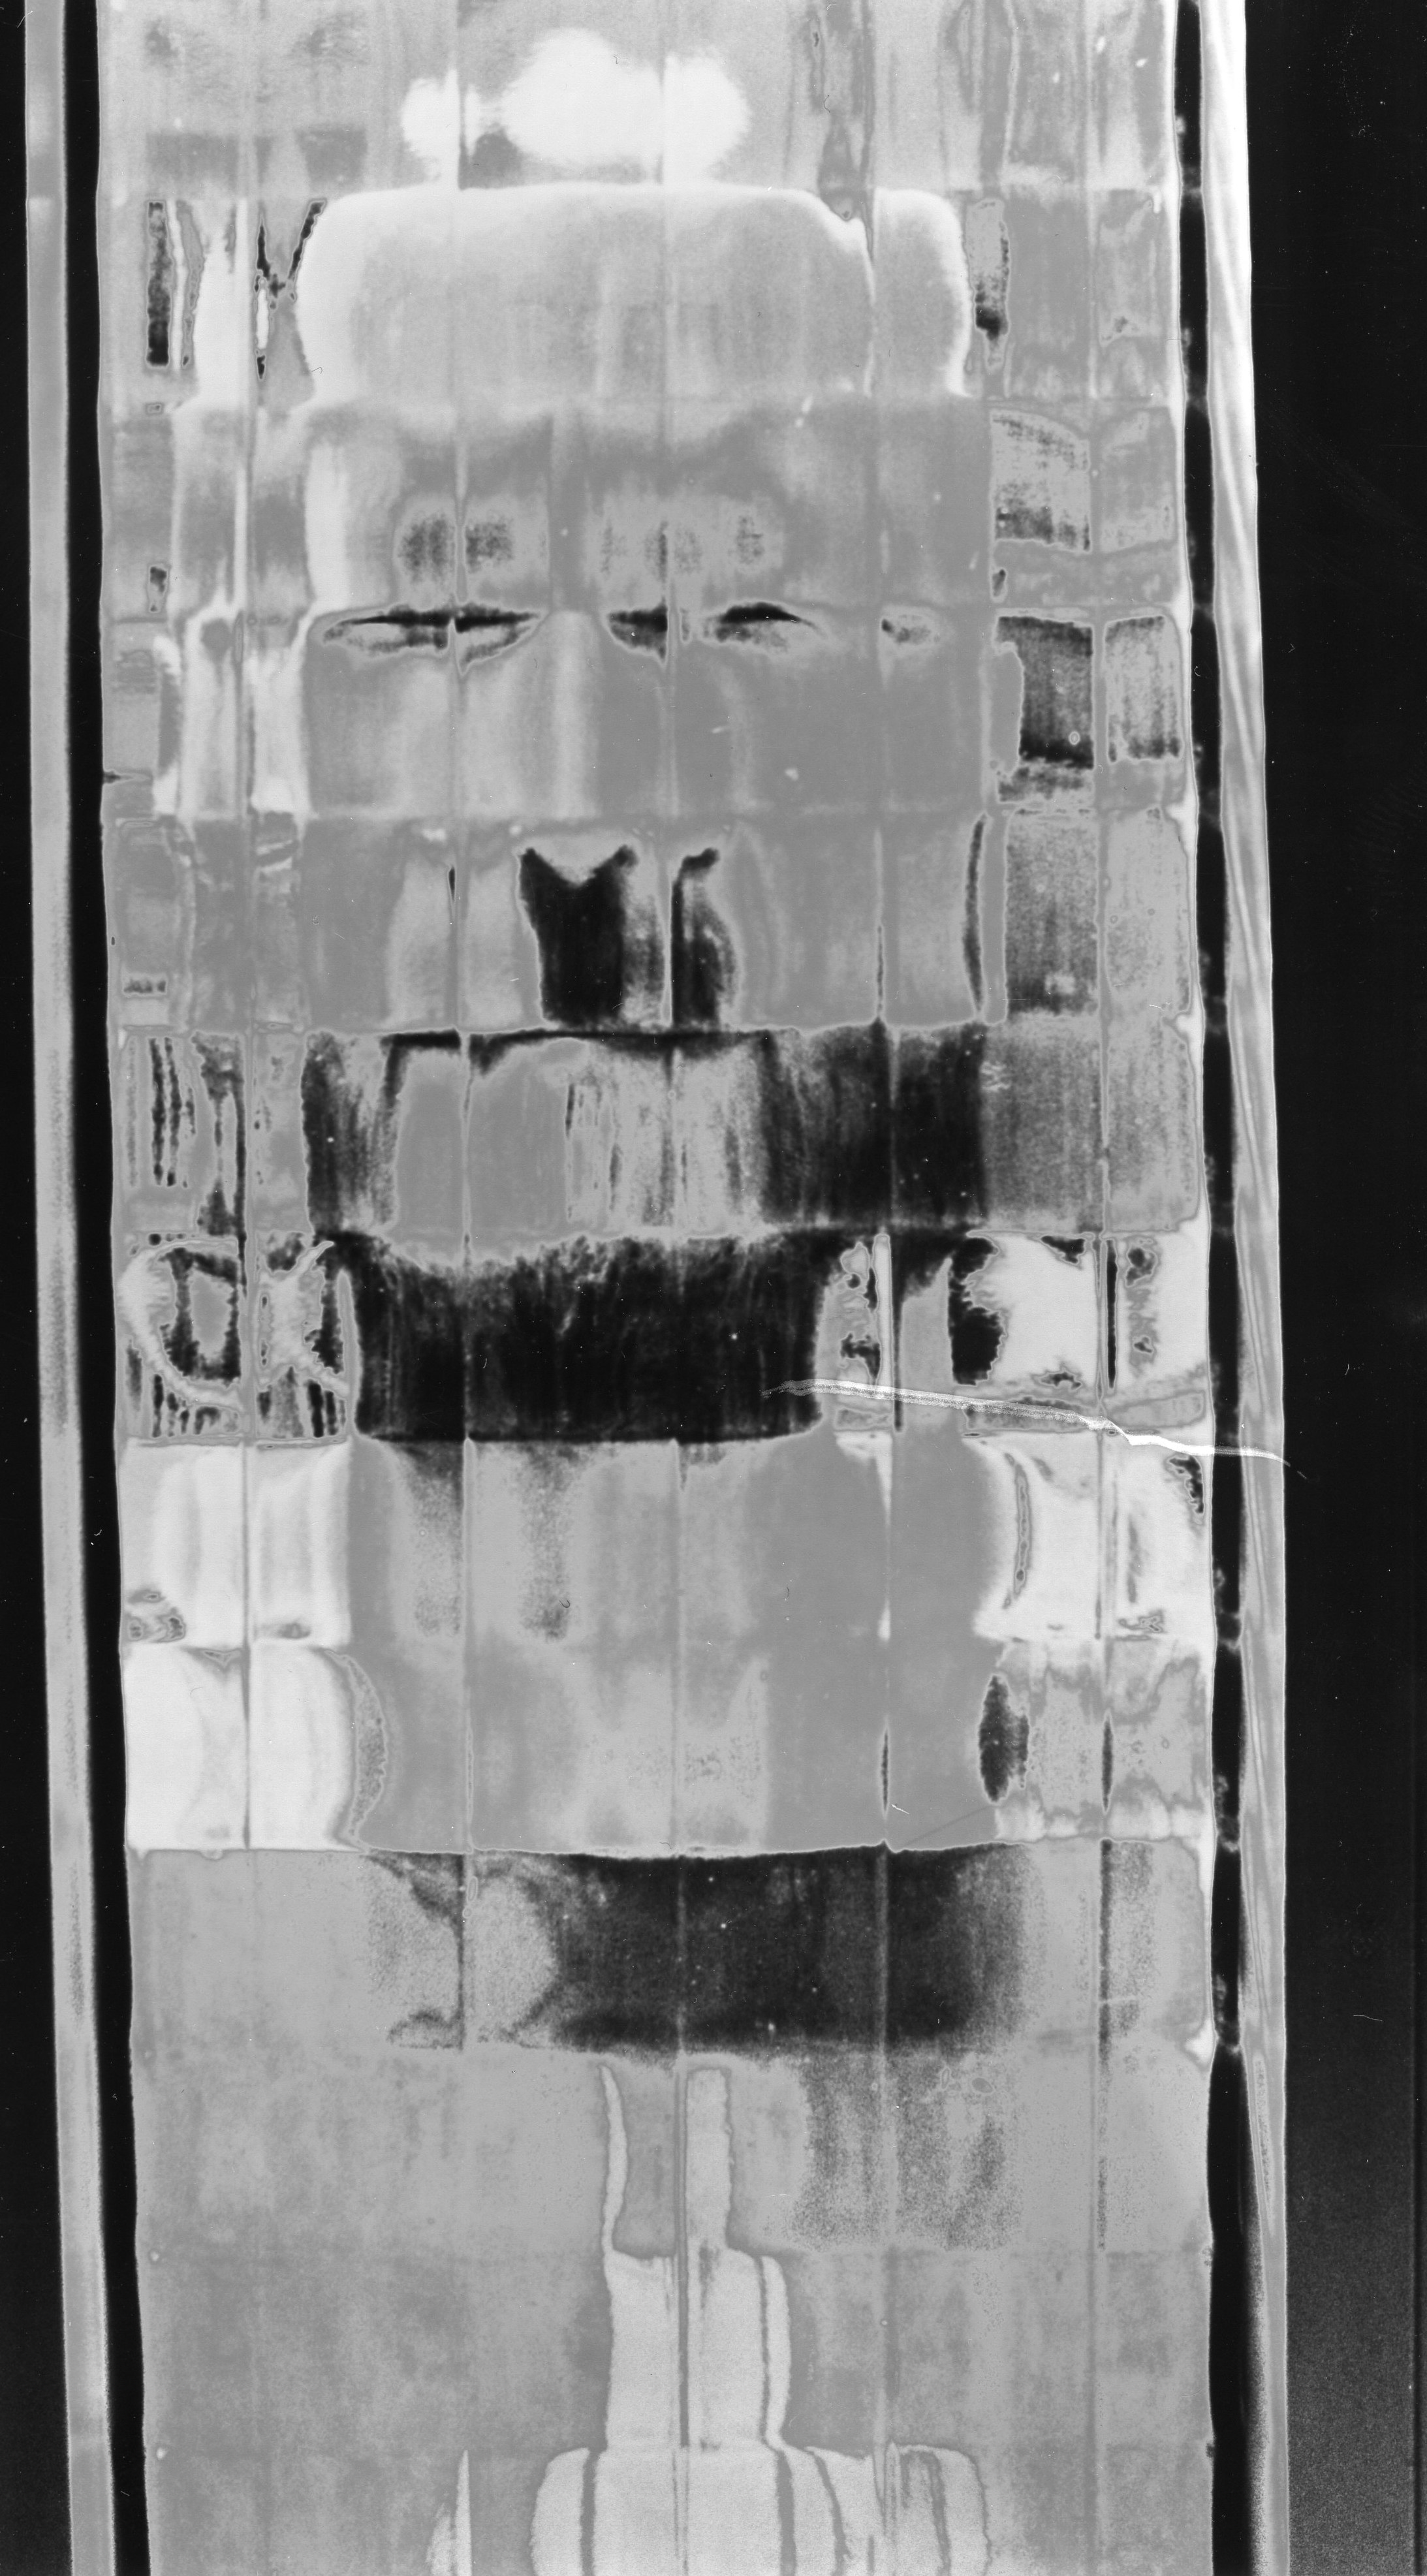
SOLARISATION
Before I will finish university, I decided to learn and practice some techniques in the darkroom that I might not have access to for a very long time after I graduate. On the top of my list is SOLARISATION or SABATTIER EFFECT.
Solarisation is a technique that involves exposing a partially developed photograph to light, before continuing processing, creating halo-like effects.
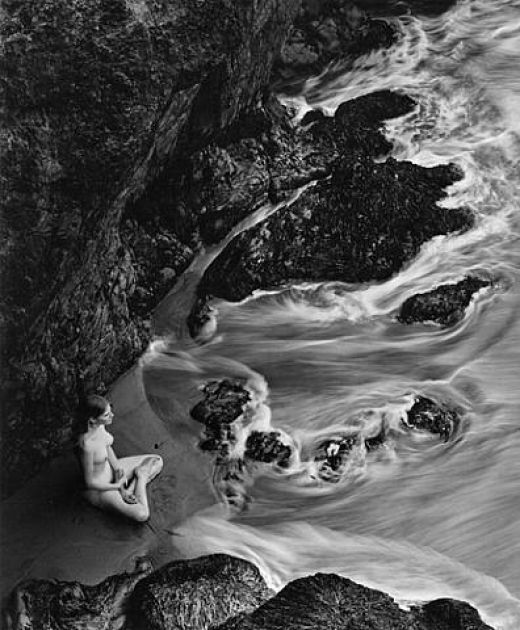
The technique was discovered accidentally by Man Ray and Lee Miller and quickly adopted by Man Ray as a means to ‘escape from banality’. He often applied the technique to photographs of female nudes, using the halo-like outlines around forms and areas of partially reversed tonality to emphasise the contours of the body.
How To Solarize Black and White Photography – The Sabattier Effect
Solarization is the process of re-exposing photographic paper during the development process. The result is an eerie silver image which contains light lines between the shadows and the highlighted areas.
Areas that have been exposed the least are affected the most during the re-exposure of the print. The darker areas or shadows on the prints show little change during the solarization process.
The Sabatier effect is a fairly easy process to achieve and can be done in a few easy steps.
The Process of Solarization
To begin the process, develop and agitate your paper normally. When the image begins to appear, remove the print from the developer and place it into a tray of water for about ten seconds. This will slow the development process.
The next step is to re-expose the paper to light. This exposure should last only about two seconds. The light source should be a low watt bulb, 15 to 20 watt, and should be three to four feet away from the print.
The final step is to put the paper back into the developer for the remaining development time. Complete the process of development using your stop bath, fixer and final wash.
In order to achieve the desired effects you may need to experiment with different exposure times. Two seconds is a good starting point, but you may need to vary the tone up or down depending on the print and the type of paper used.
Tips for gaining maximum results:
- Using high-contrast papers will give you a more dramatic effect.
- Slow films are easier to work with since they require longer exposure time to develop.
- Since re-exposure affects the highlights, use a print with a lot of light areas to achieve the most dramatic results.
- Dilute your developer to twice the manufacturer’s recommendations
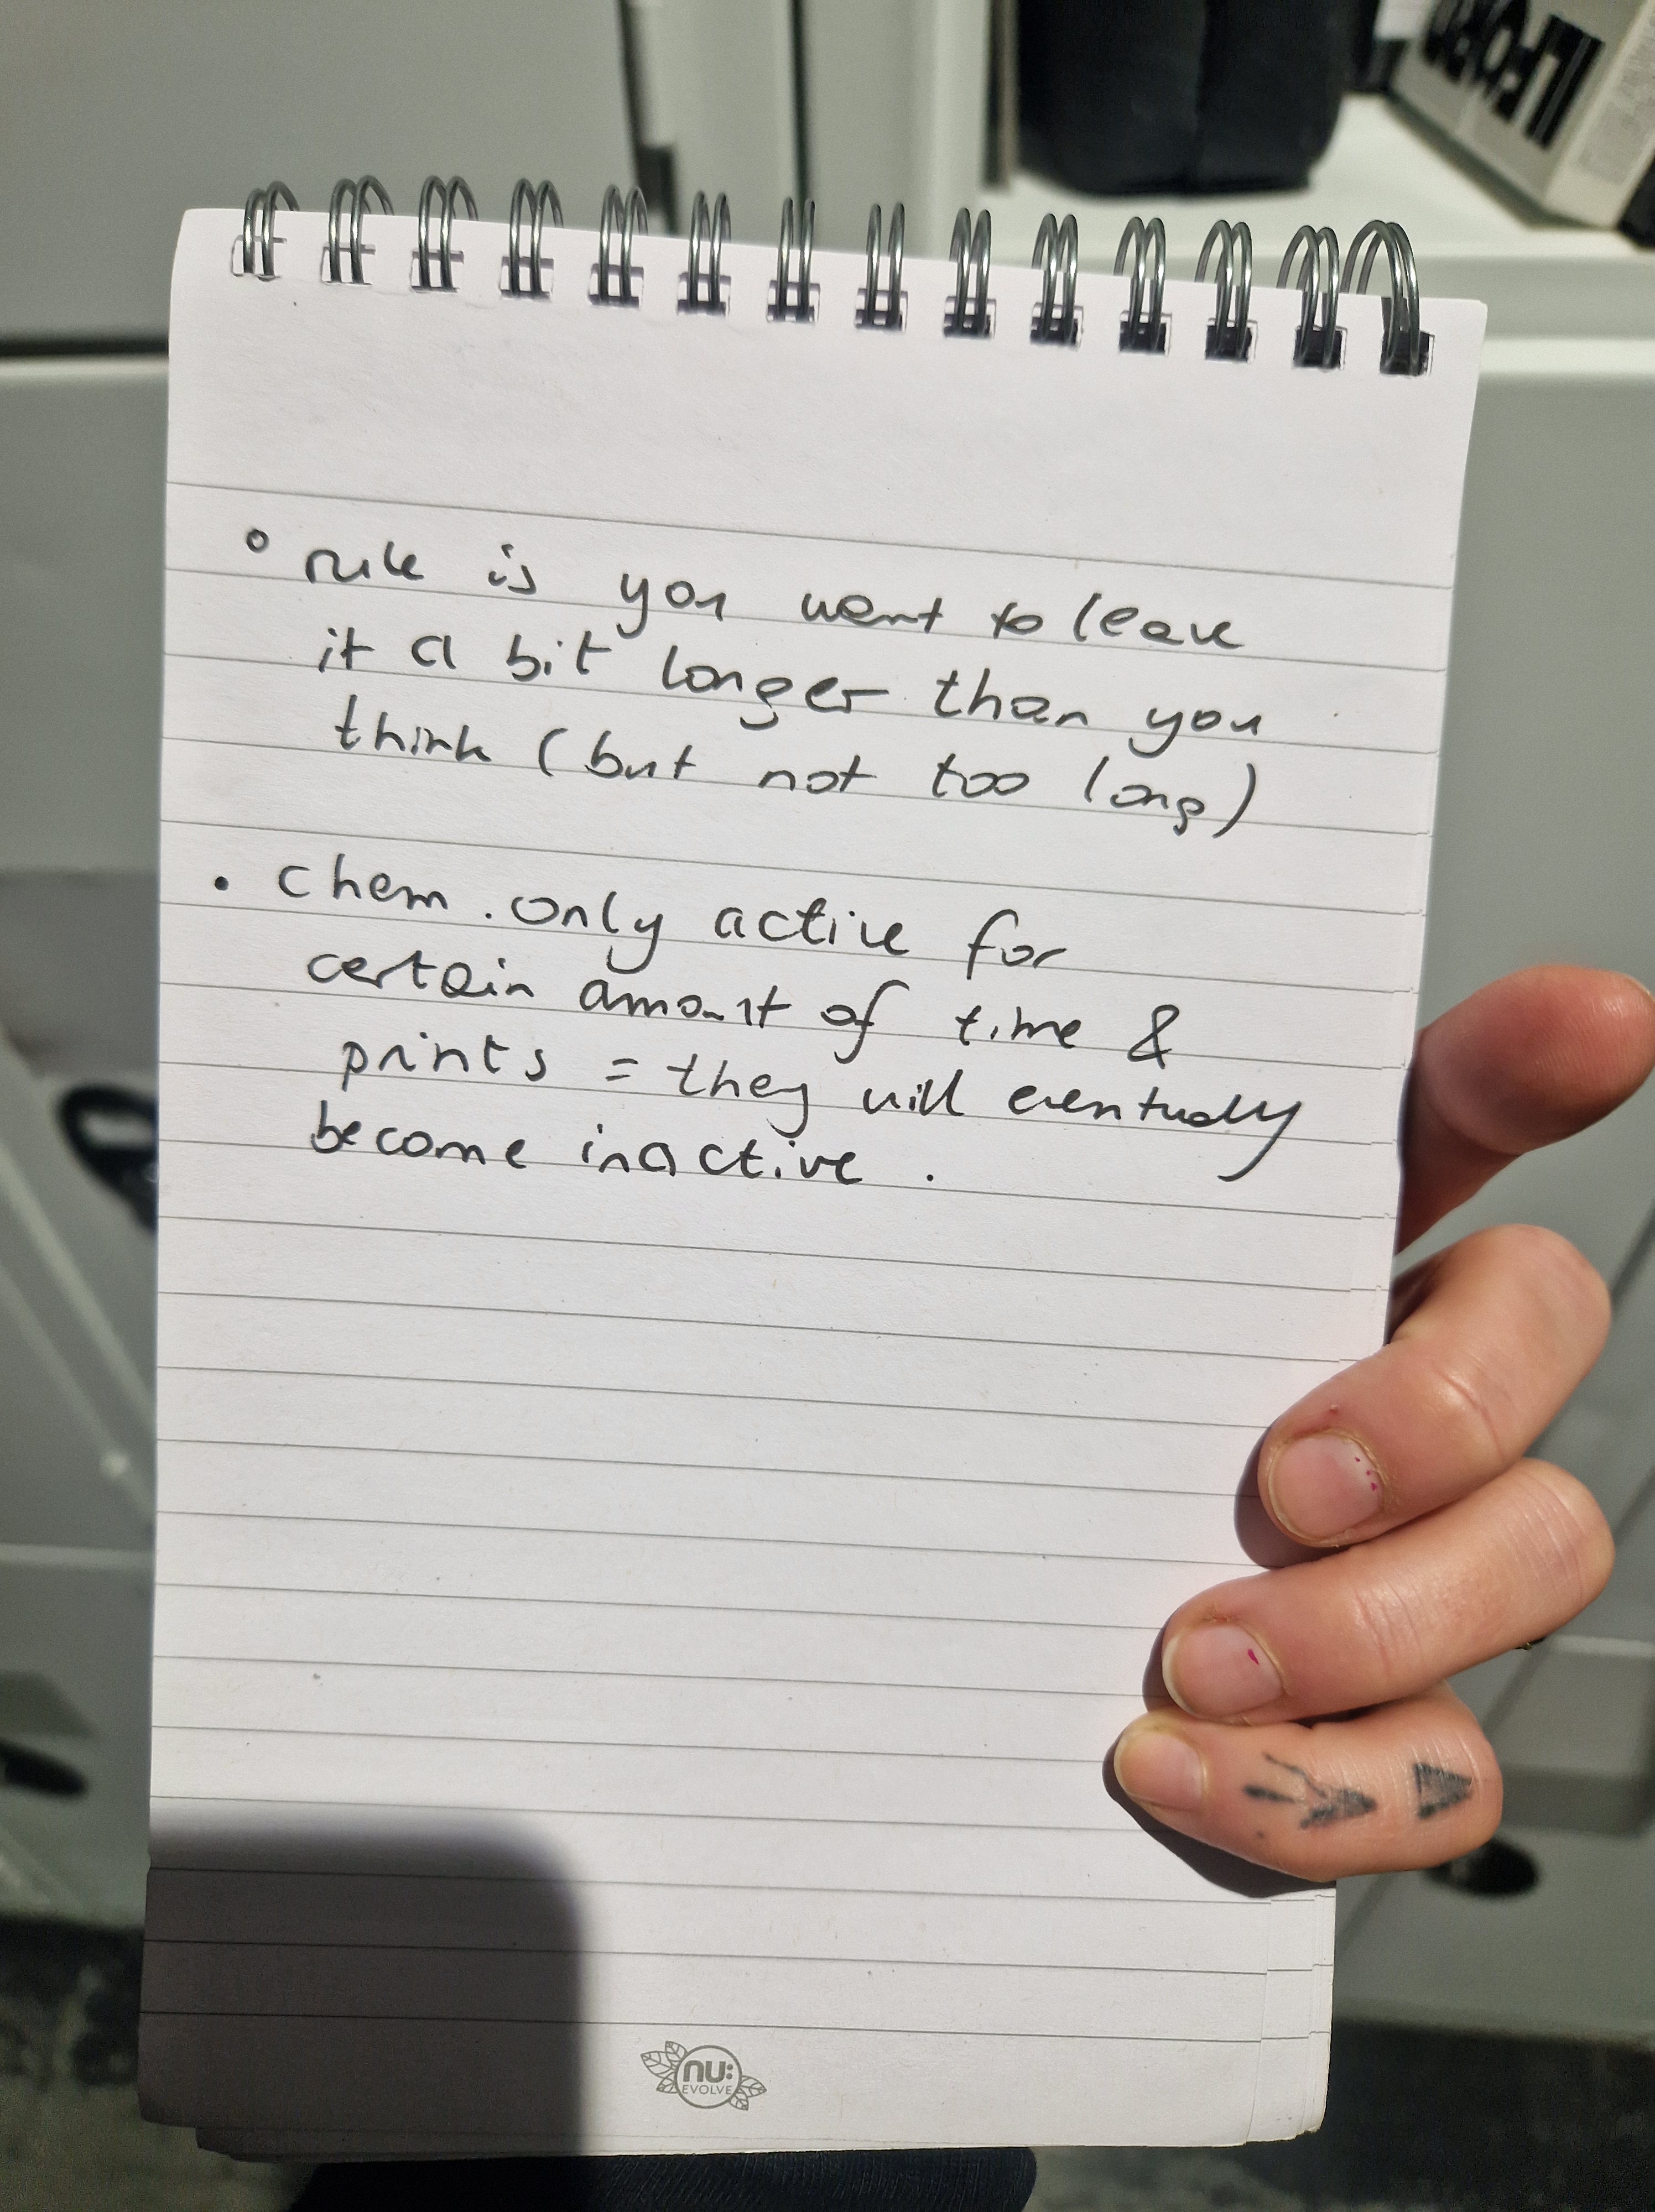
STEPS TO DO SOLARISATION
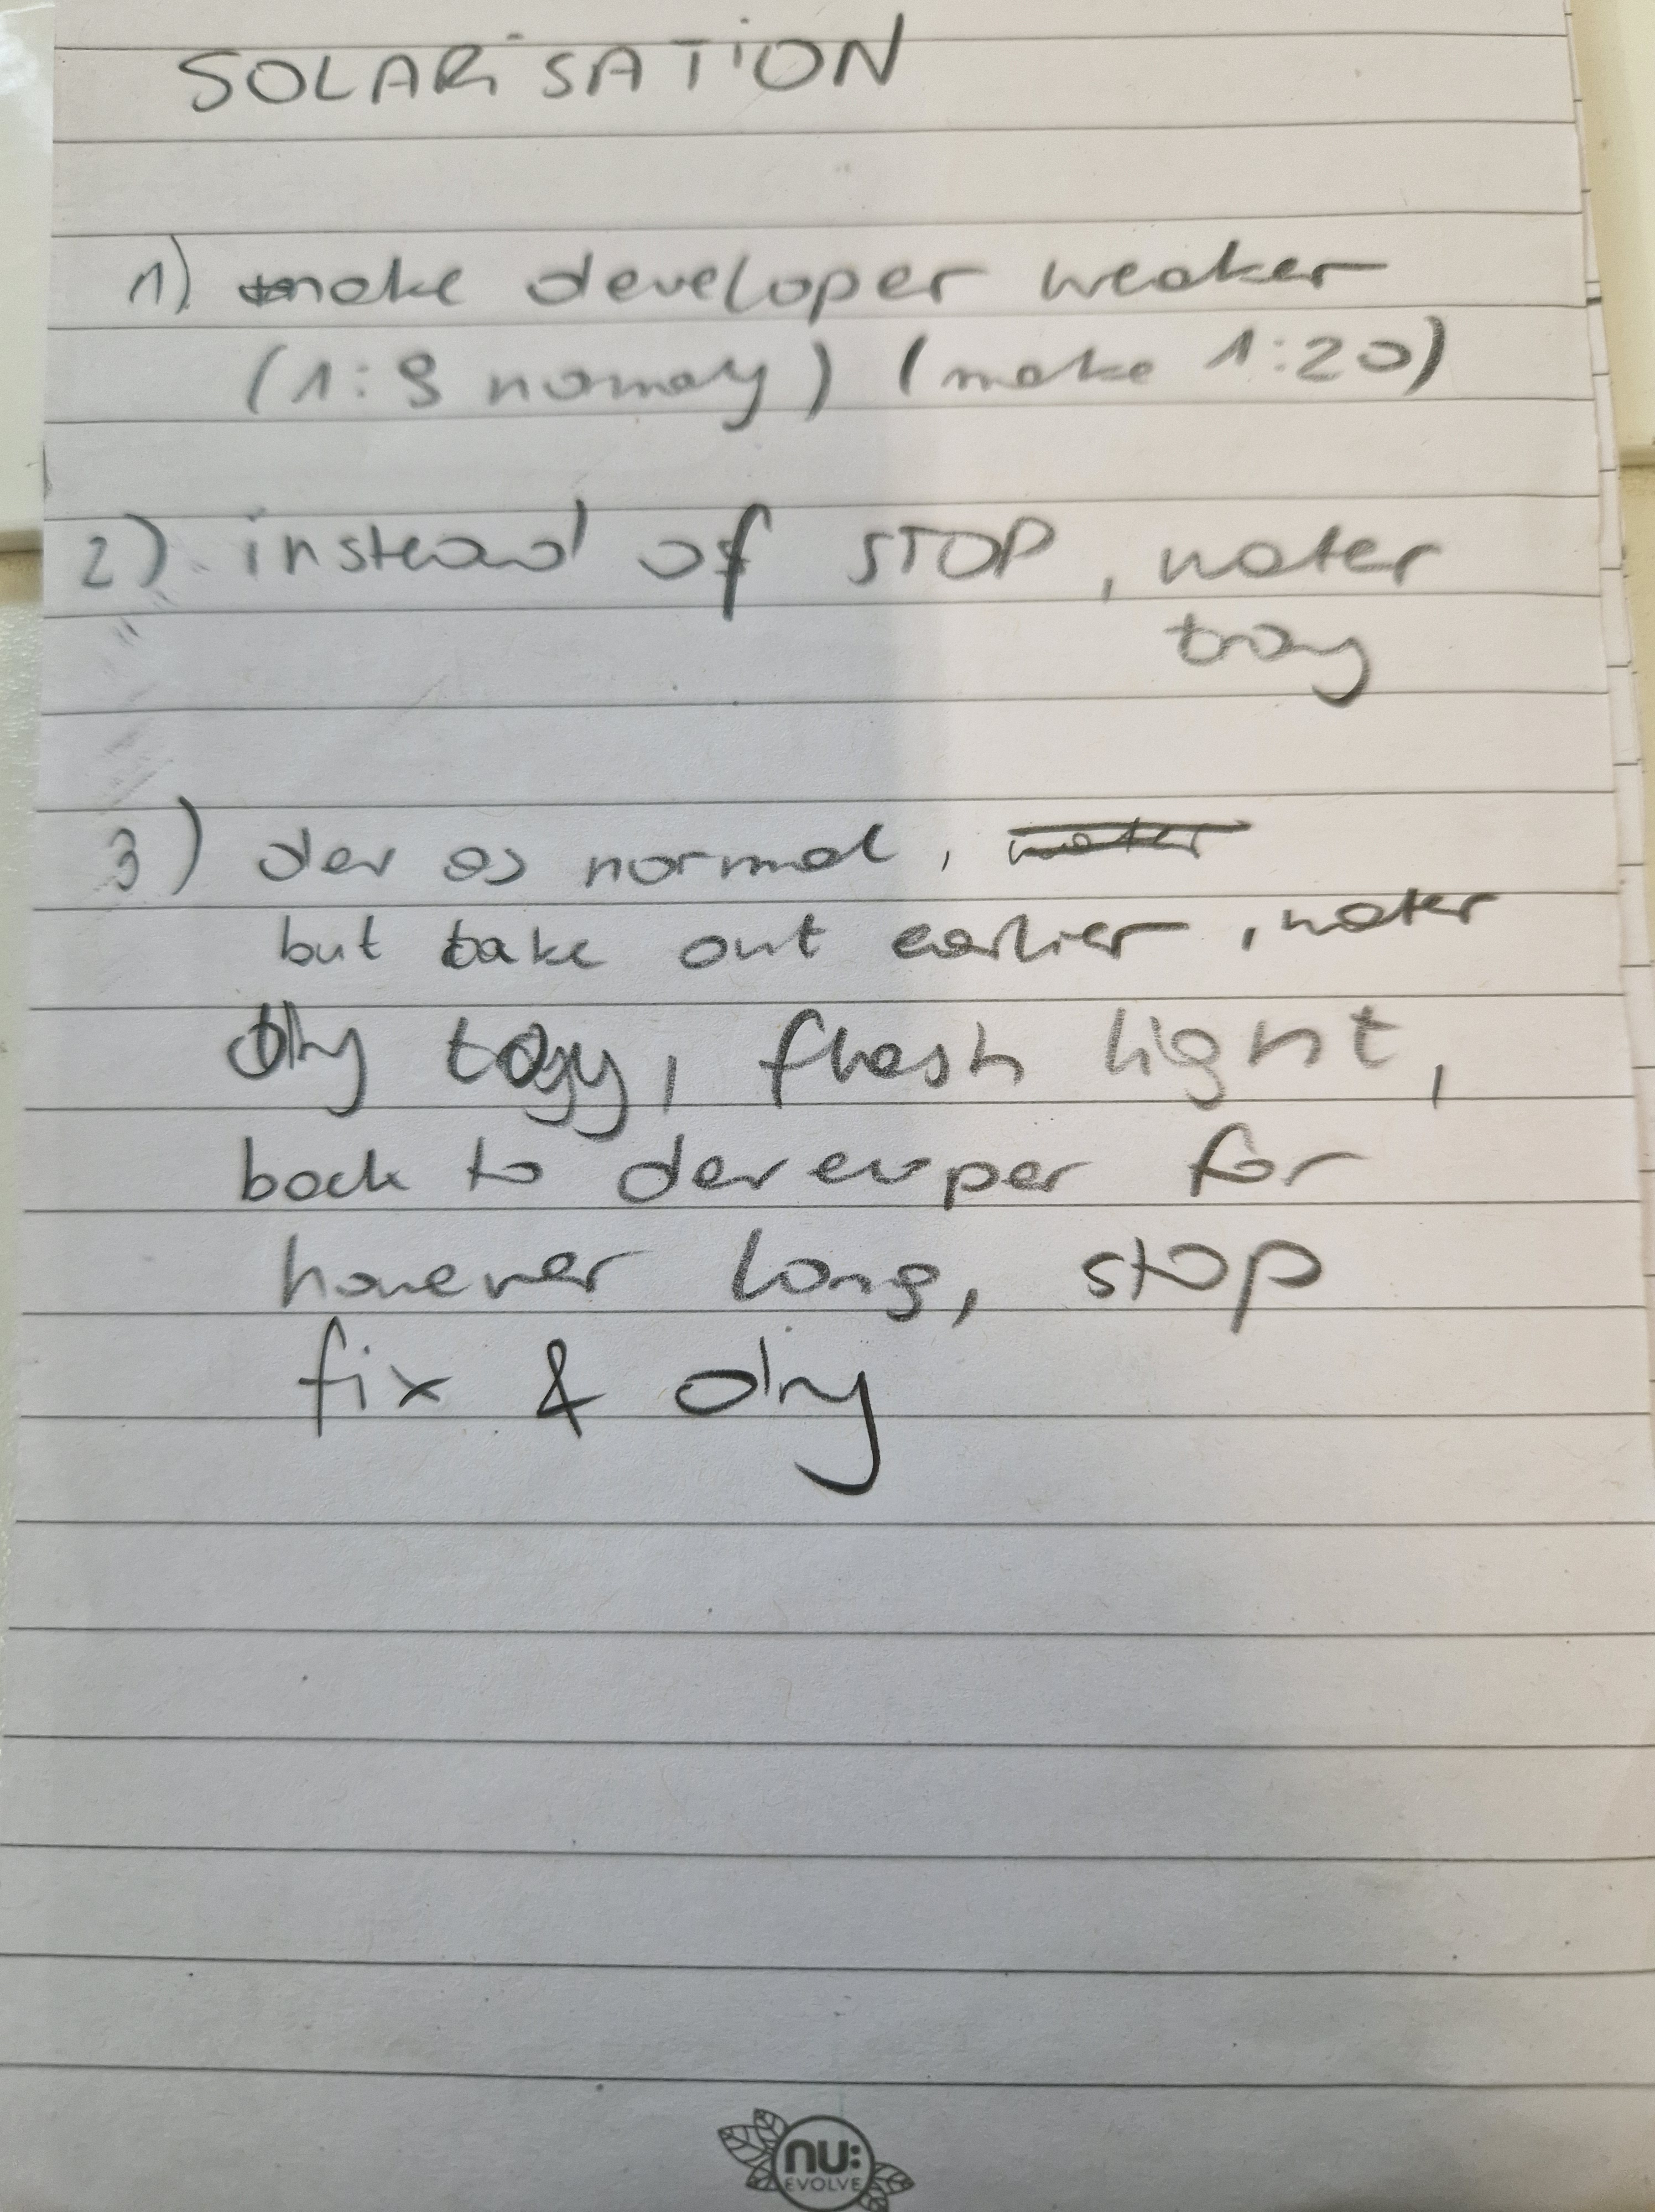
If you are making the developer yourself or if you could ask a person who does it to dilute it more (so instead of normal 1:9 you do 1:19) this gives you more time to play and a better way to control your solarisation as the speed of developing is massively slowed down).
Also – the choice of image is VERY IMPORTANT! When you solarise you want to use an image with a lot of midtones (greys and white) as black simply solarise as black, not very exciting is it? It’s with mid-tones that you get the desired silver effect.
PREPARE:
- 4 TRAYS – diluted developer, water, dry tray and fix
- 2 ENLARGERS, one for photo and one for light, the enlarger you use for light must be high up so the light is not too strong, you can also control it with the aperture
STEPS:
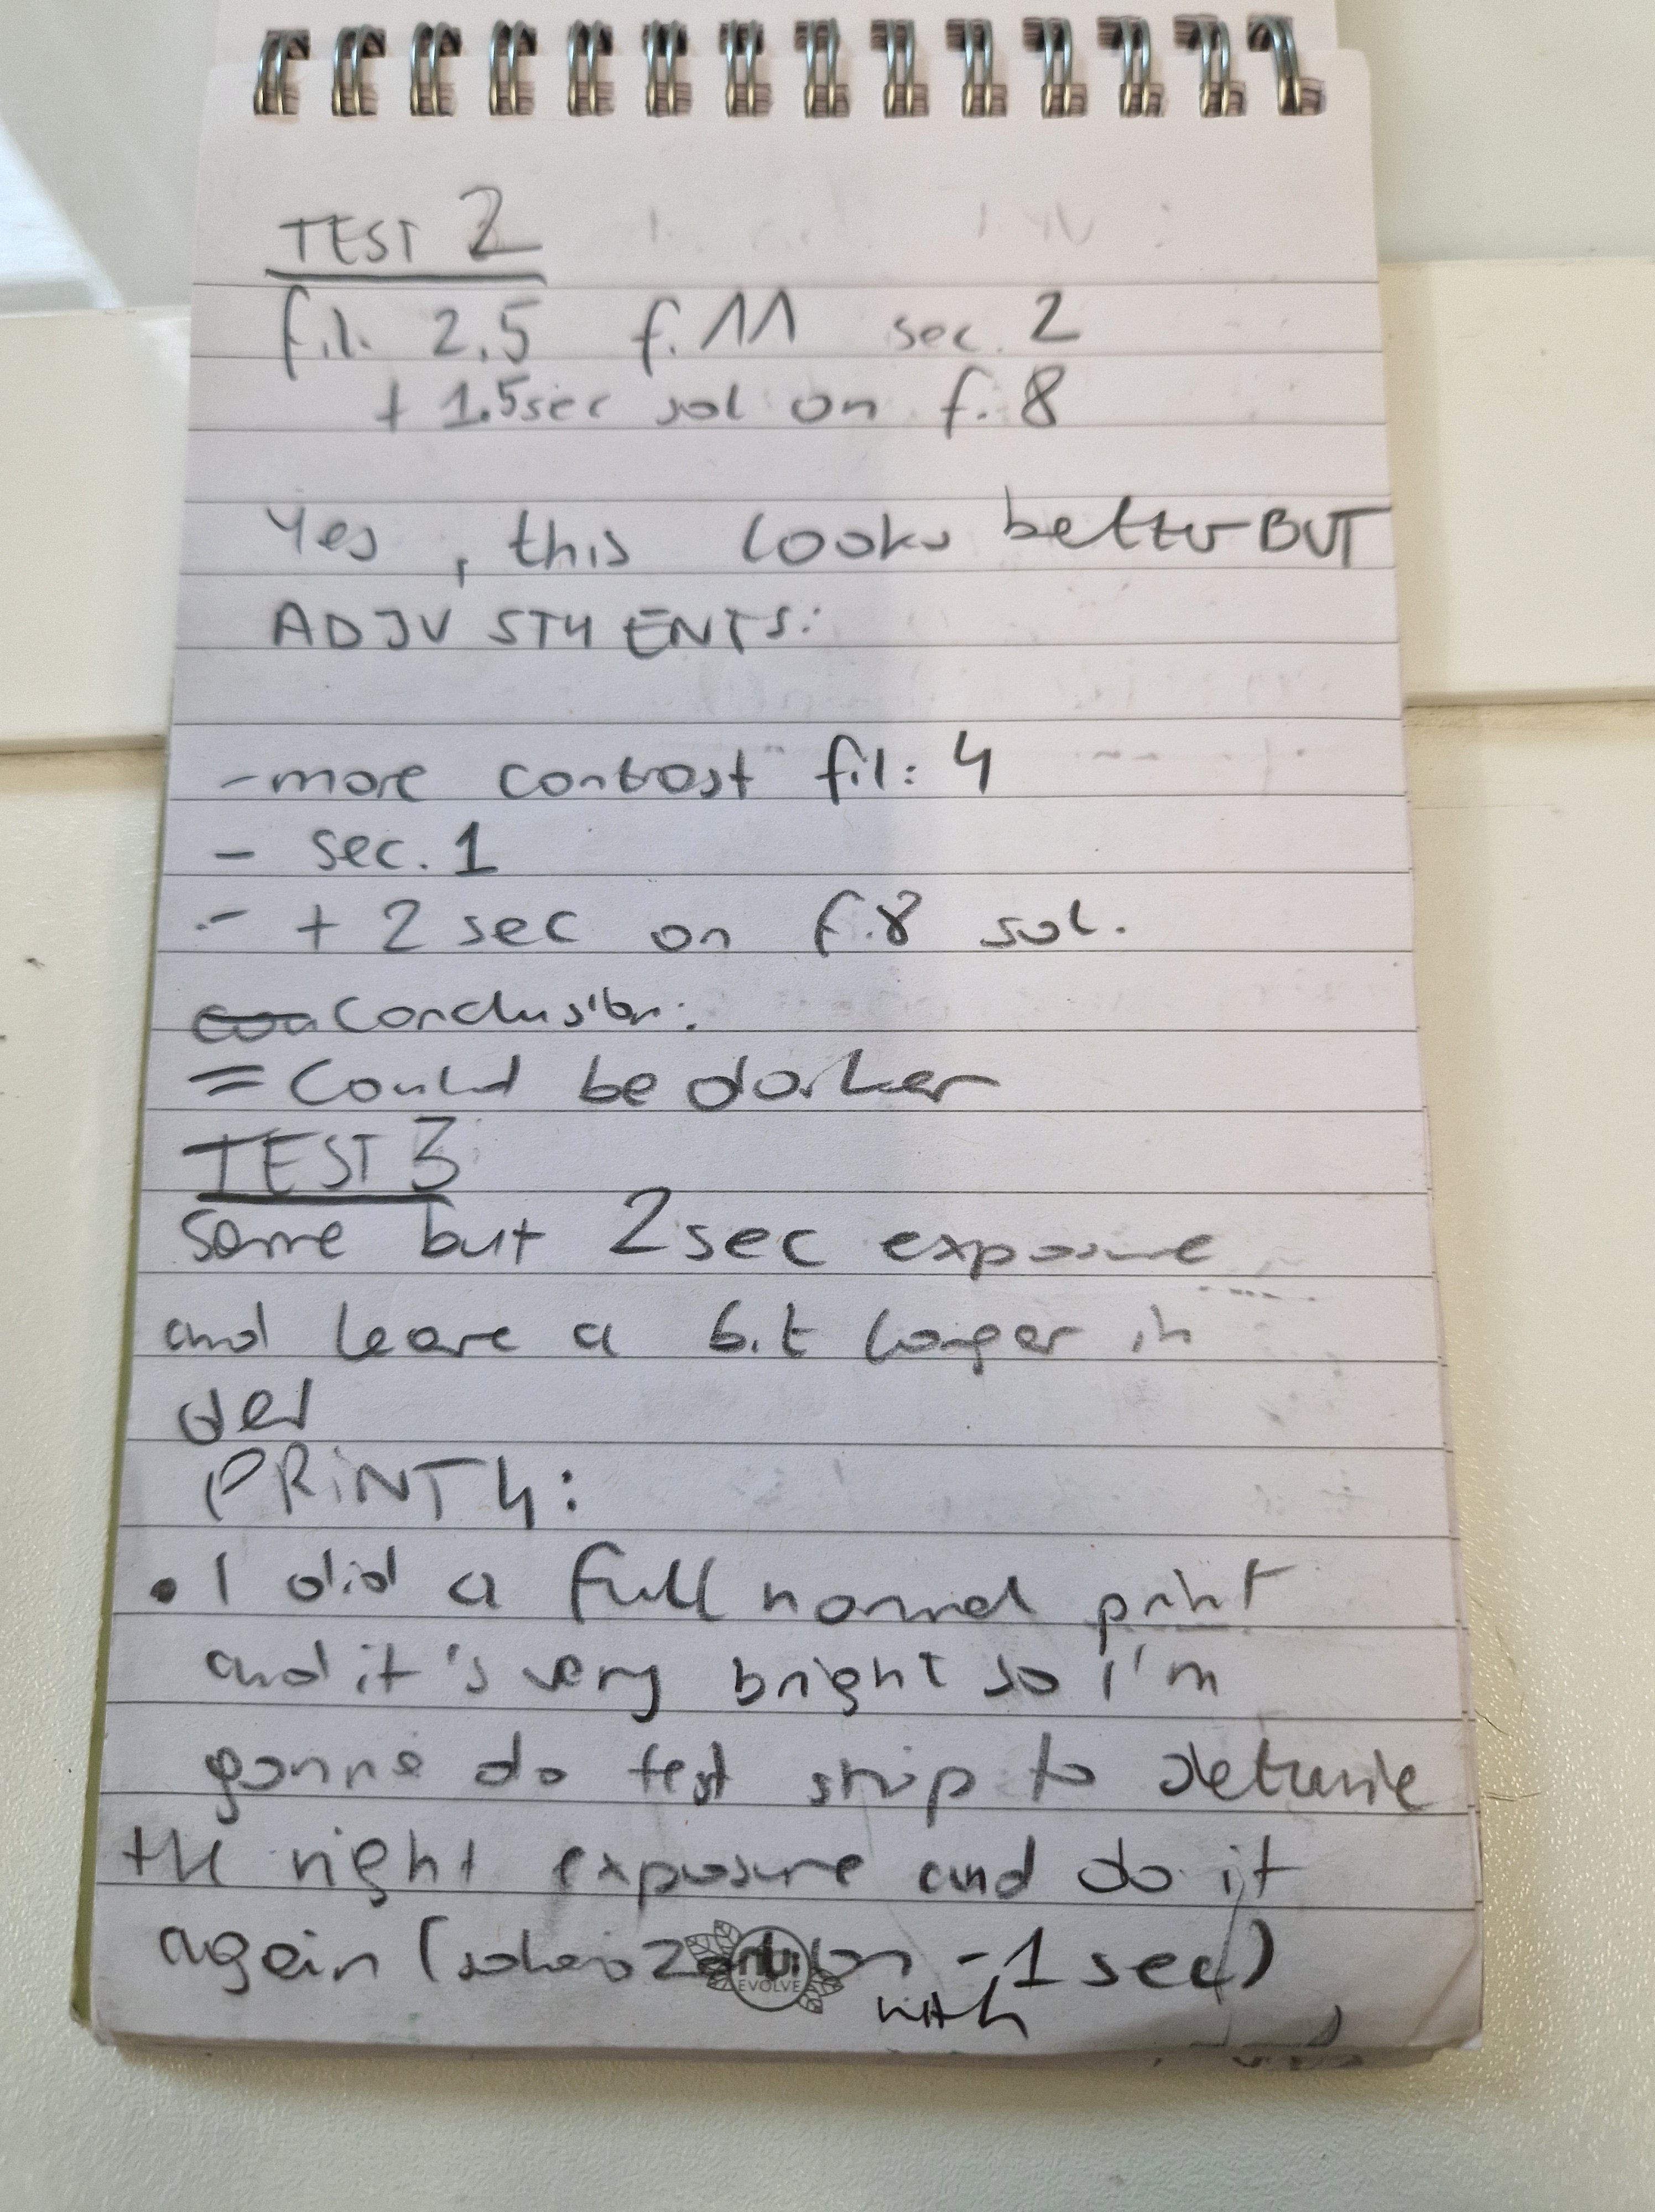
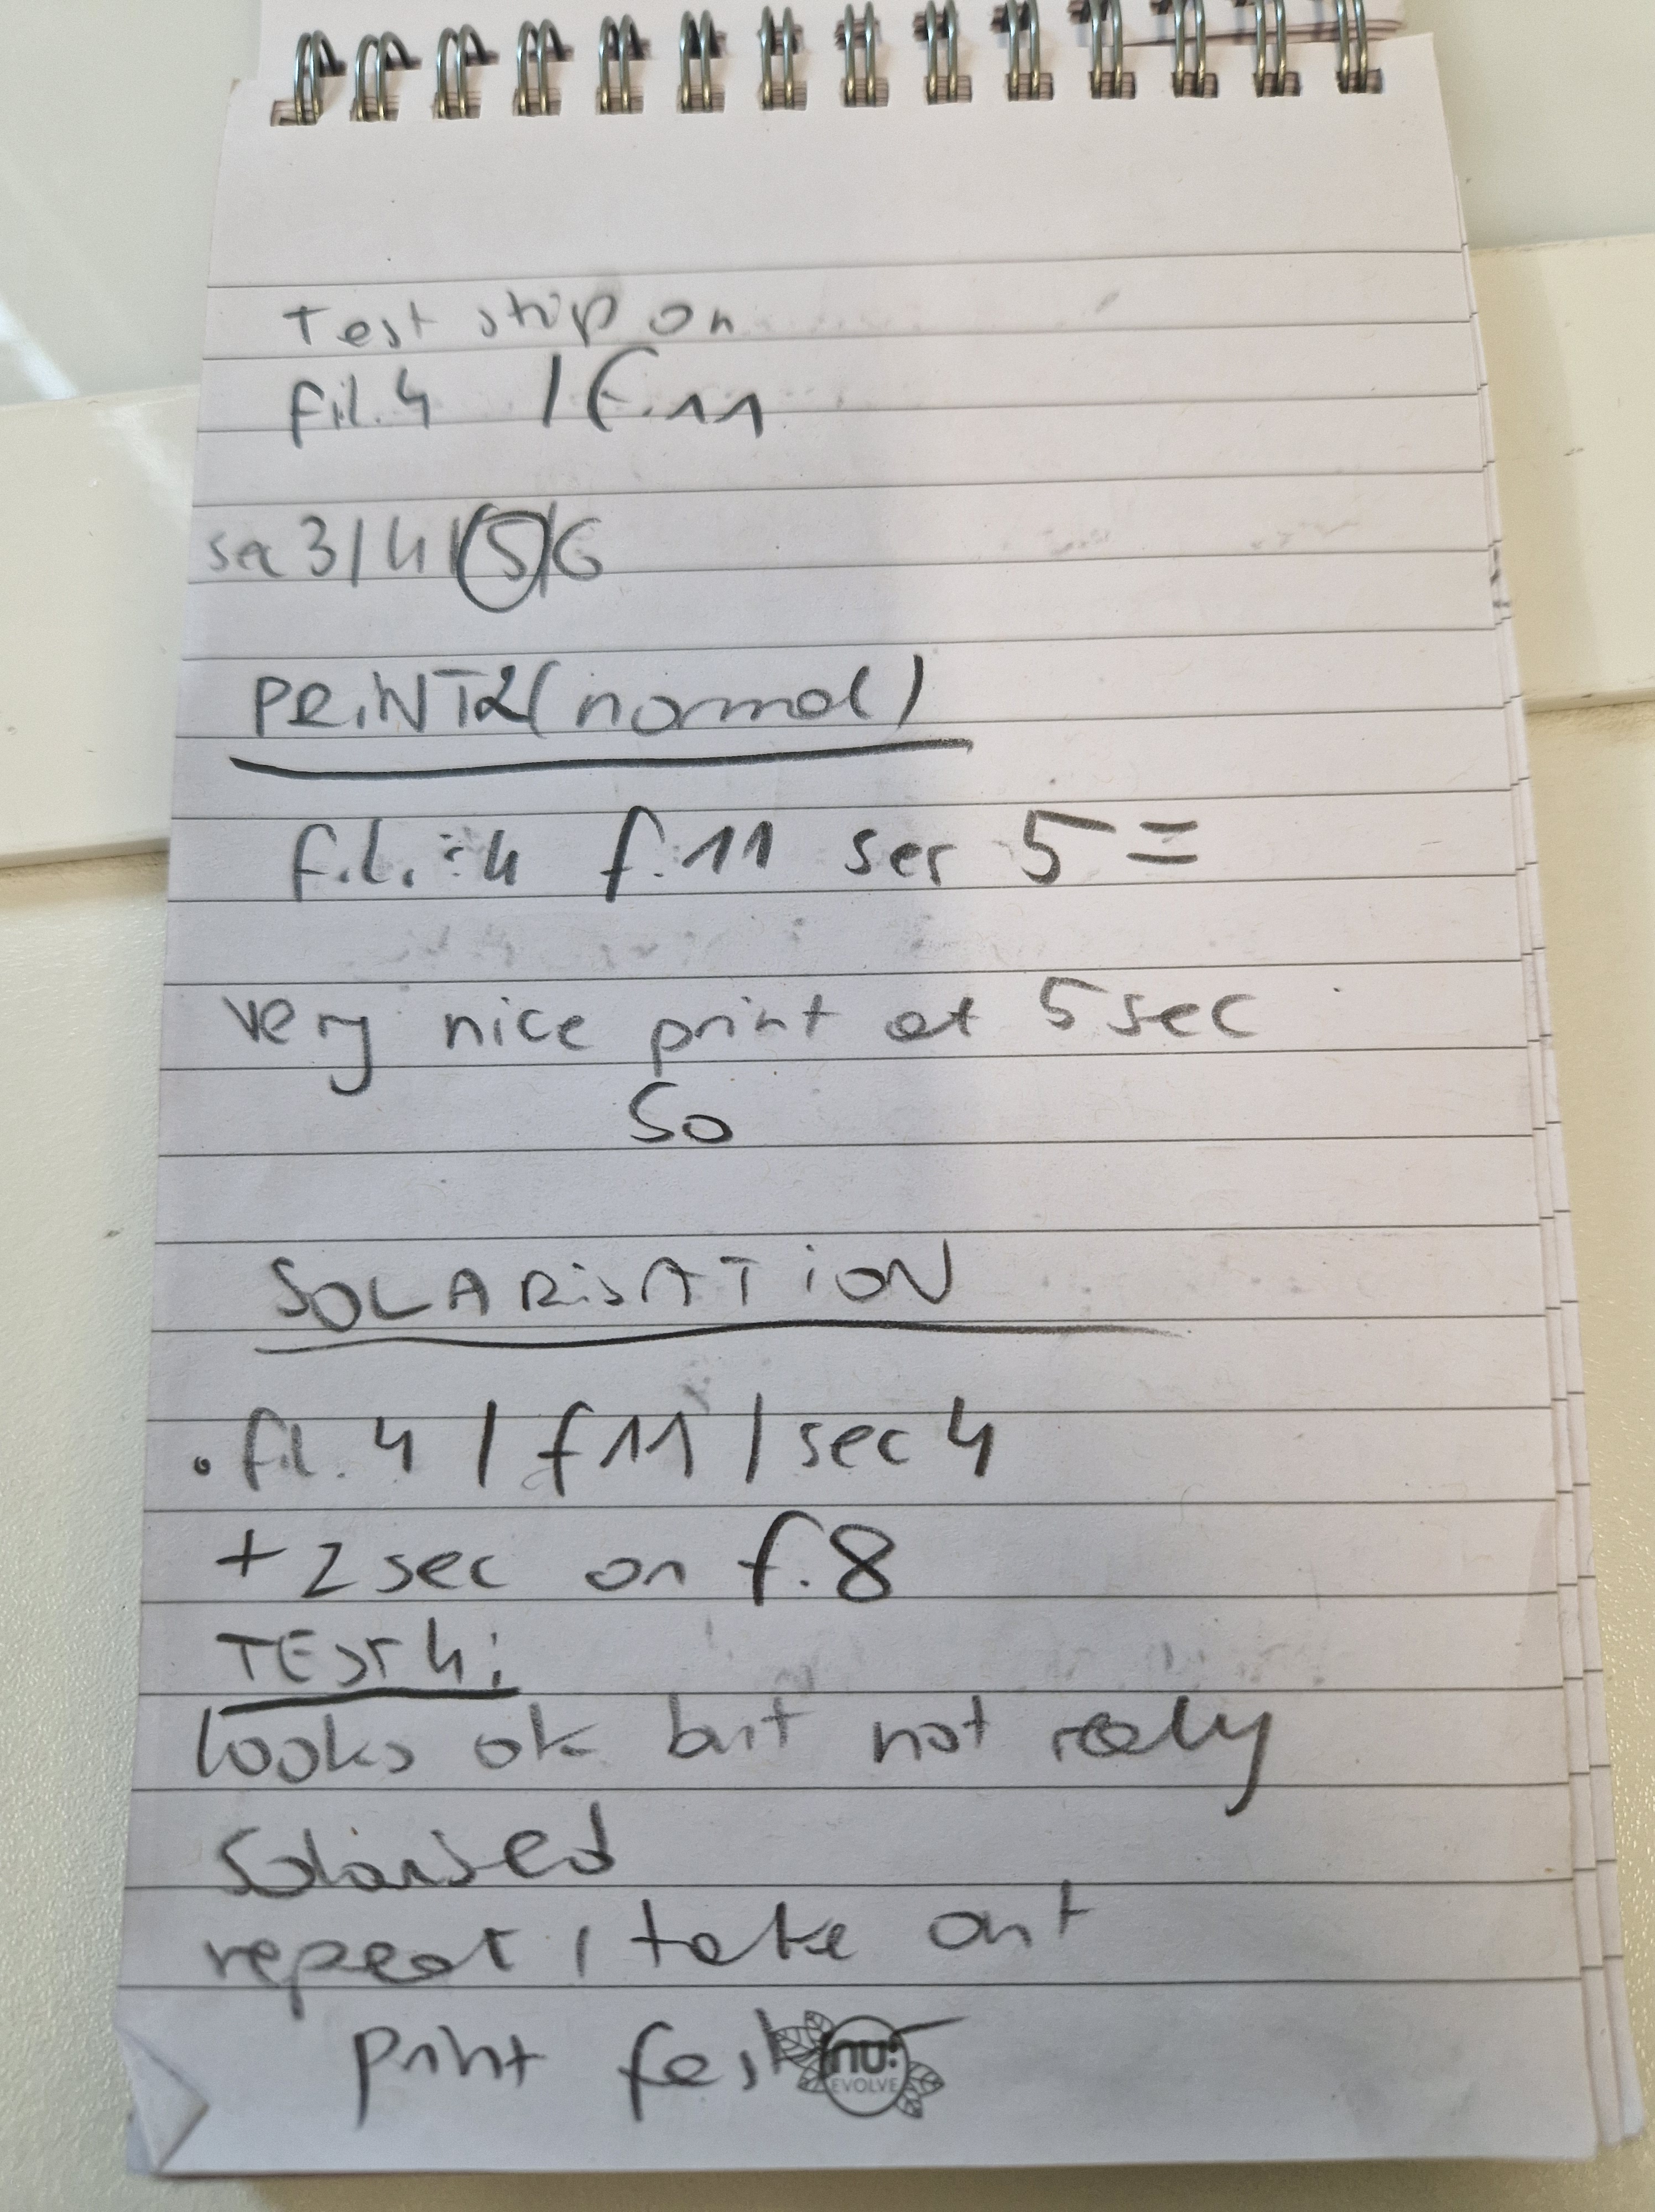
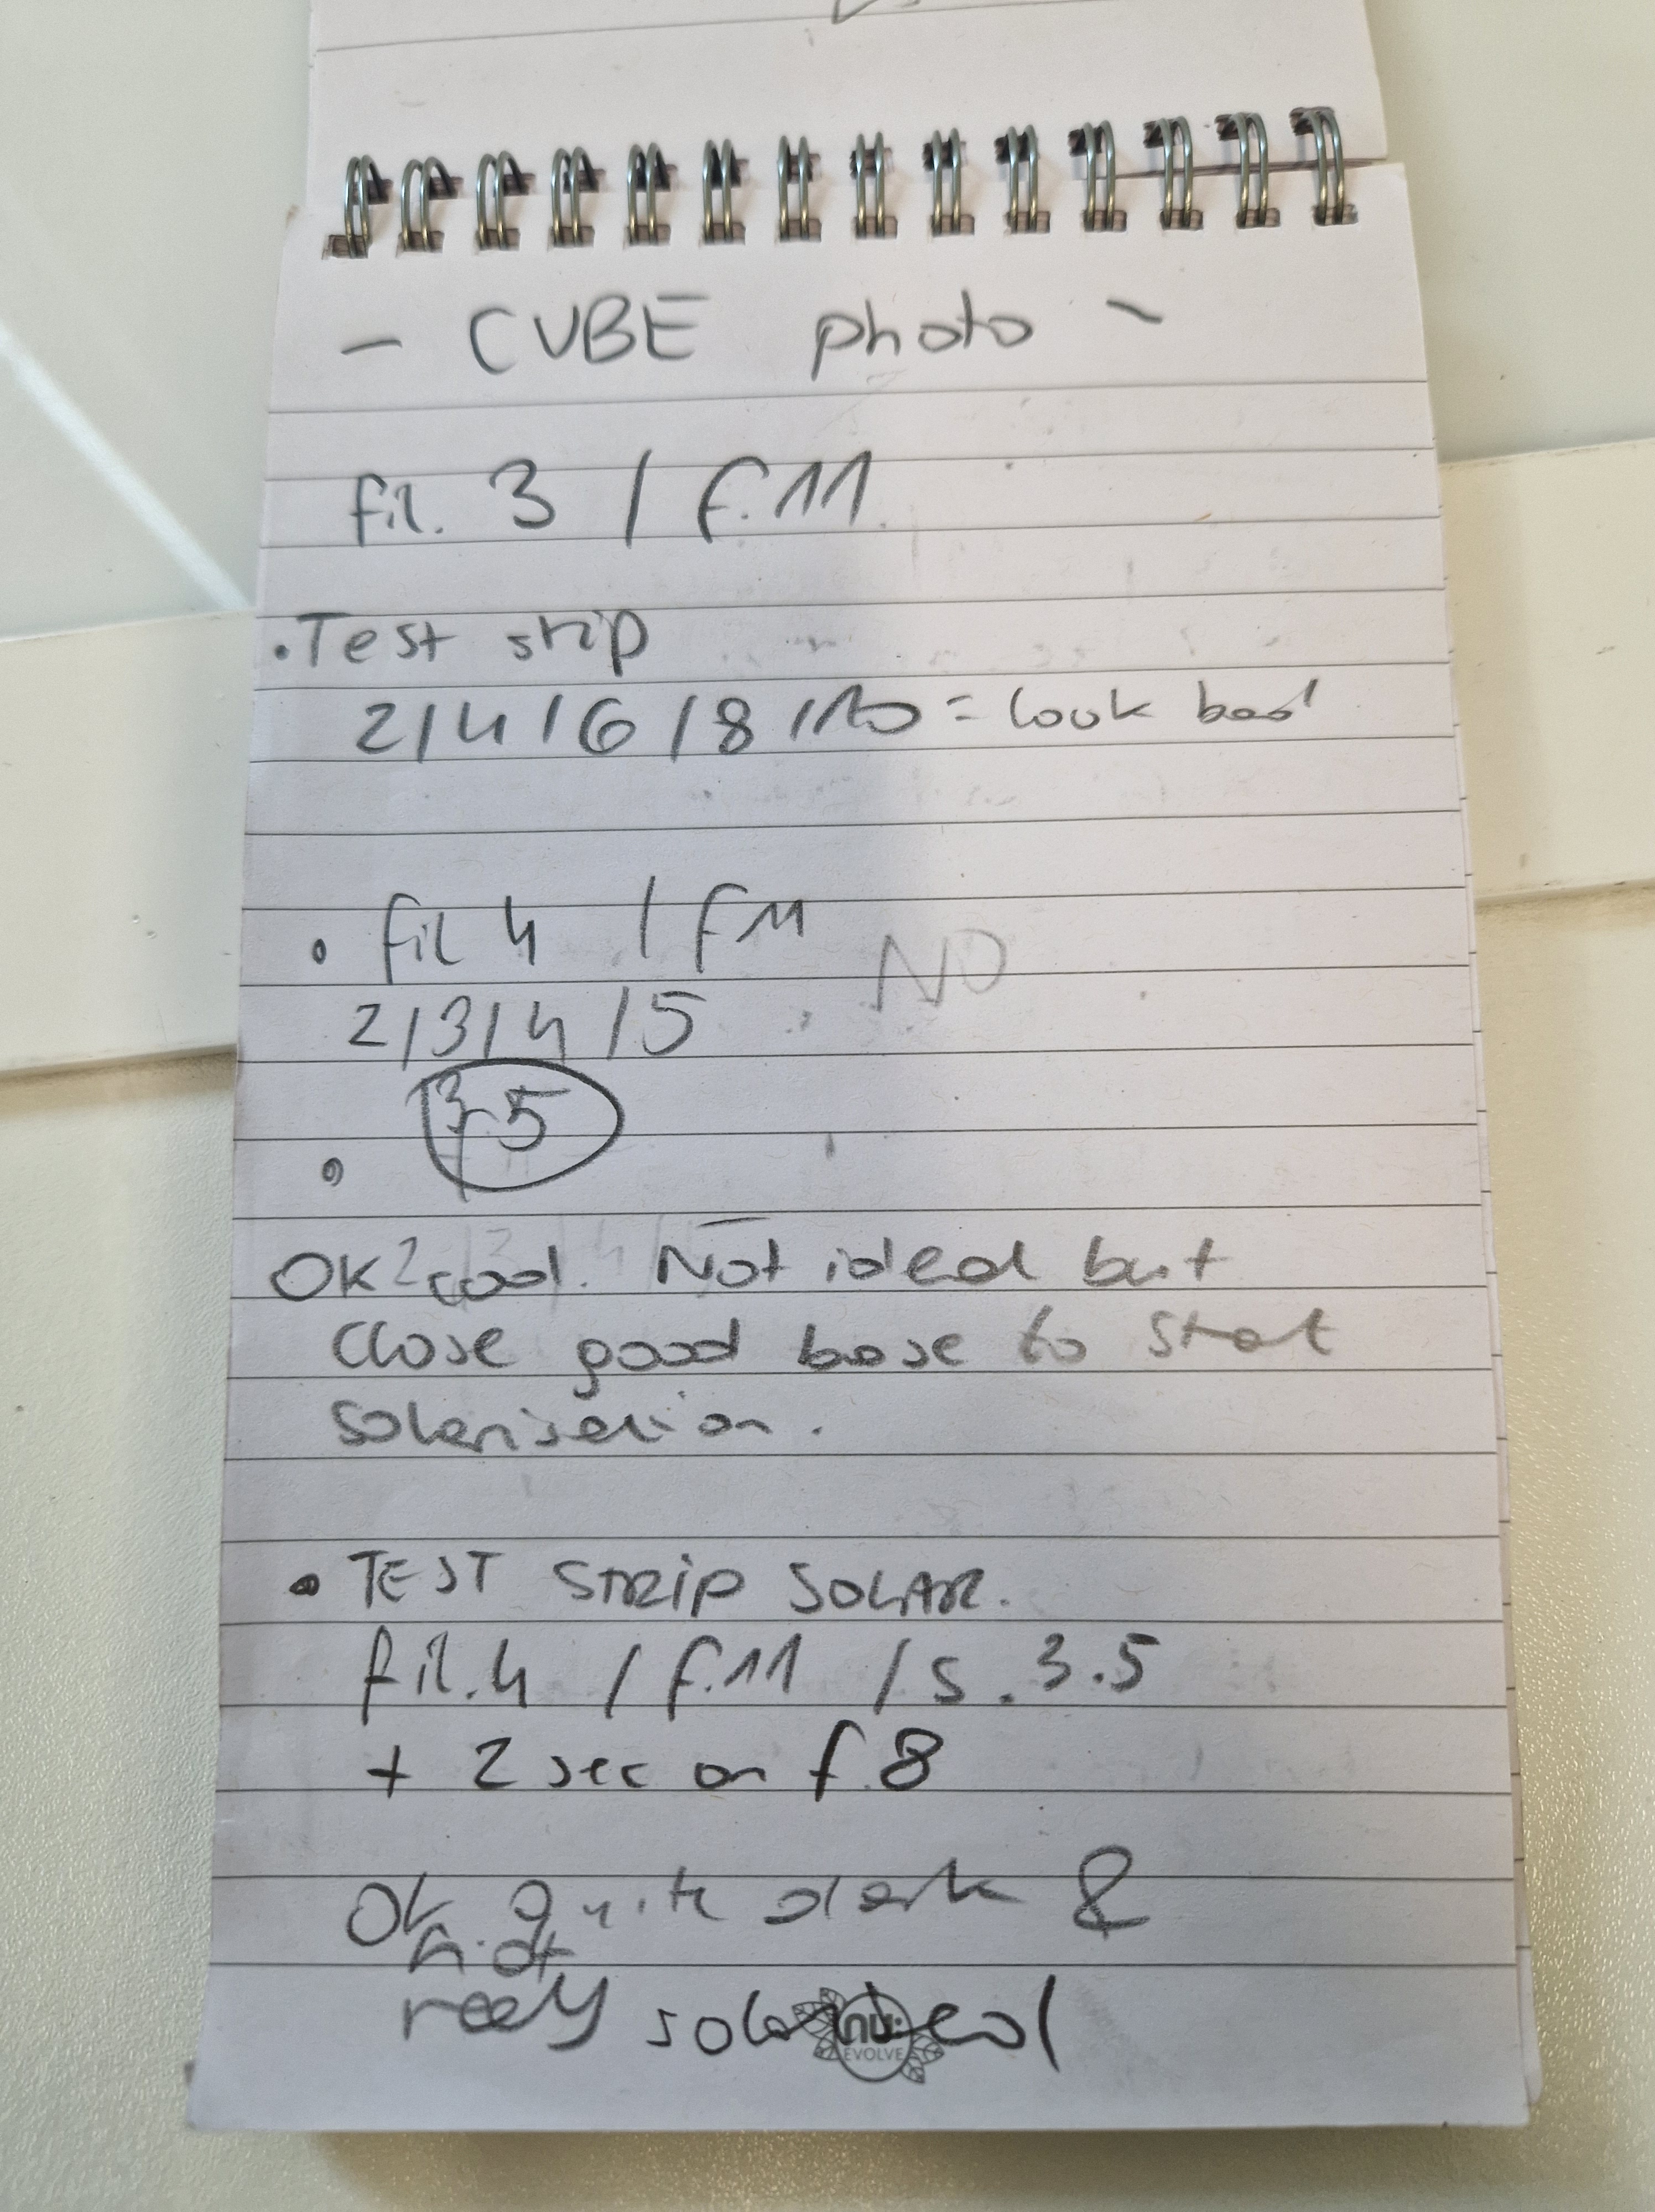
1. make a normal print – this will be your baseline to solarisation, once you know what a good, normal print looks like =settings, you take a few seconds away – create a bright print. I learned that if you are too close to a ‘normal’ print the solarisation does not take in as well, and the picture looks more normal but grey than solarised.
eg. If your print looks good on 5-sec exposure, do 2-3 seconds for solarisation
2. make an unexposed print
3. put it in developer, forget the timings, now you are doing everything by eye. Leave the print in developer till you start seeing the image – take it out!
4. STOP it in water for a second
5. PUT it in a dry tray, take it to the projector/enlarger, and expose it for 1-2 (perhaps more, you need to work this out by try and error) seconds
6. back to the developer, again, good luck – you are doing everything by eye and feeling
7. once happy, take it out, put it in your water stop for 30 seconds
8. then in your fix for a standard of 2 minutes
9. wash out for 10 minutes in running water
After you fix it, you can give it a quick rinse and take it to the light to see results, but remember to put it back in the water for 10 minutes once you have a look at it
10. dry
YOU DID IT! YOU SOLARISED!
Man Ray: Solarization
This amazing video explains the potential invention of Solarisation as well as step by step guide to how to do it.
solarization in the darkroom
Another helpful video about solarisation.
DARKROOM PHOTOGRAPHY PROCESS – SOLARIZATION
I took some notes, seems pretty straightforward, now to venture to the darkroom.


RESULTS
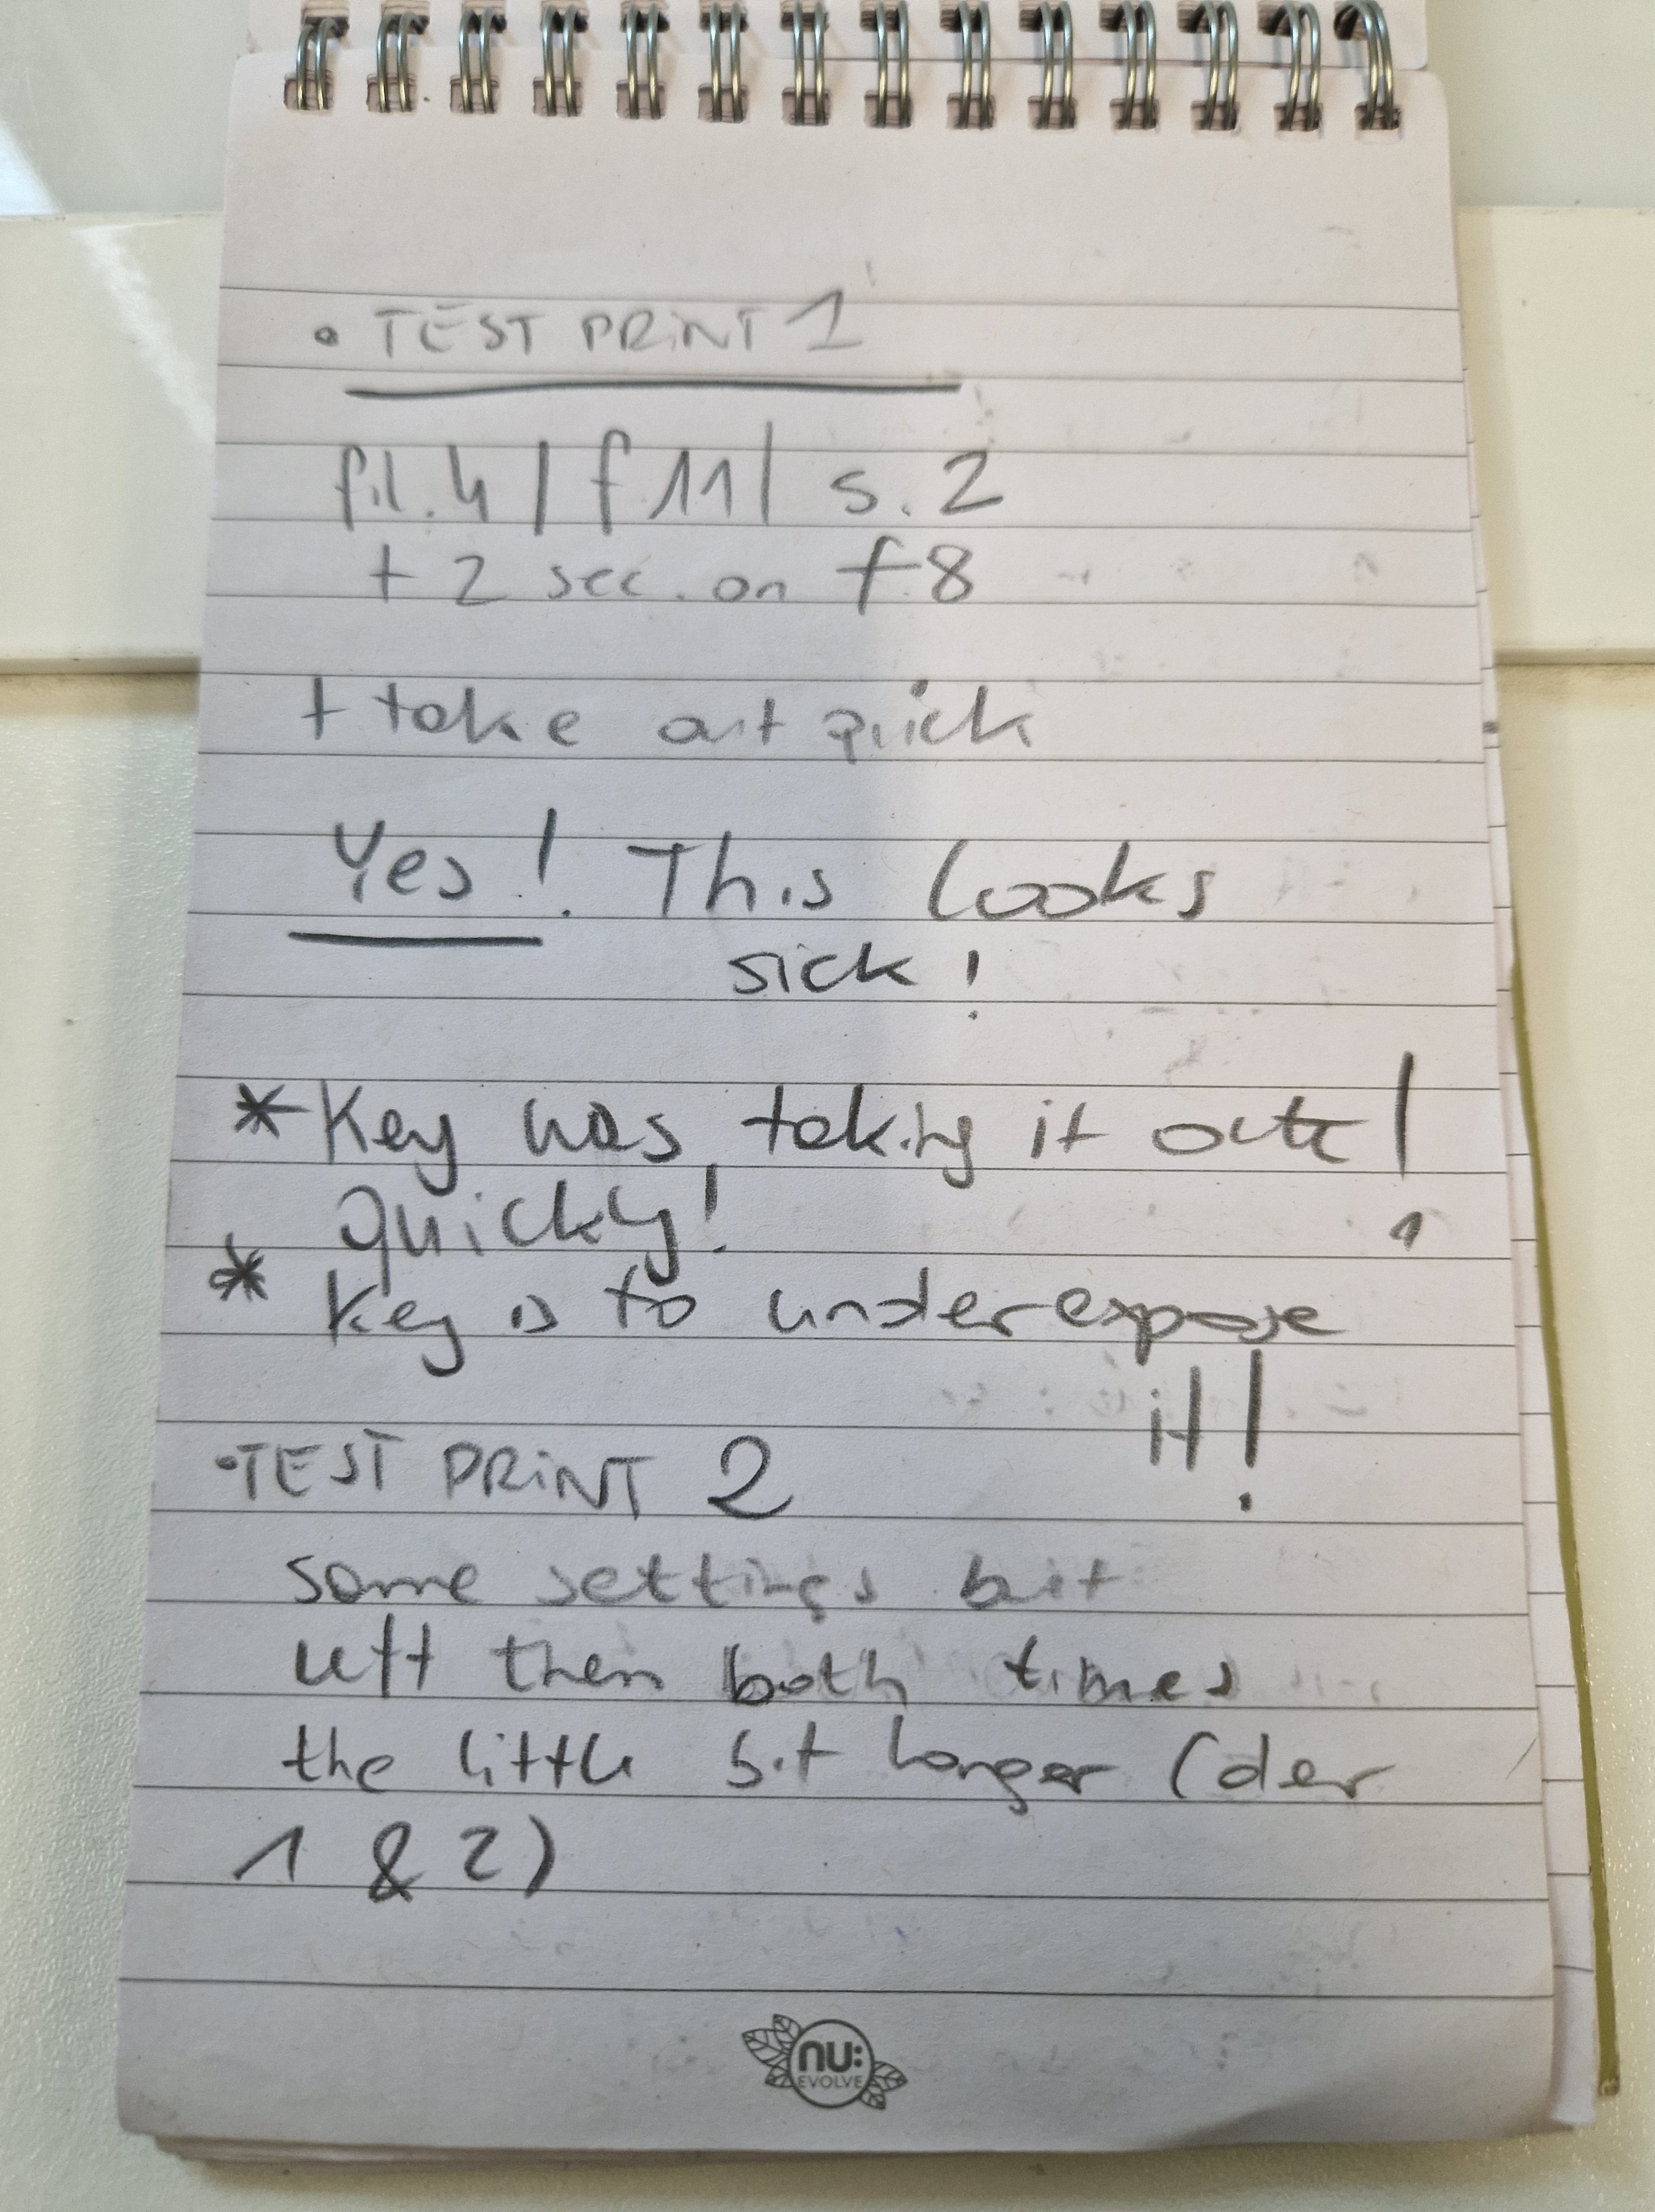
My experience is that the earlier you take out the image the better however I found it hard and had to fight my instincts of leaving the print in that little bit longer = too long. I found that images that I underexposed most, took out from the developer the earliest, and didn’t leave for too long on the second development came out the best.
All day’s work. I think I was somewhat successful but I think this could be better!
TEST STRIPS


FULL PRINTS
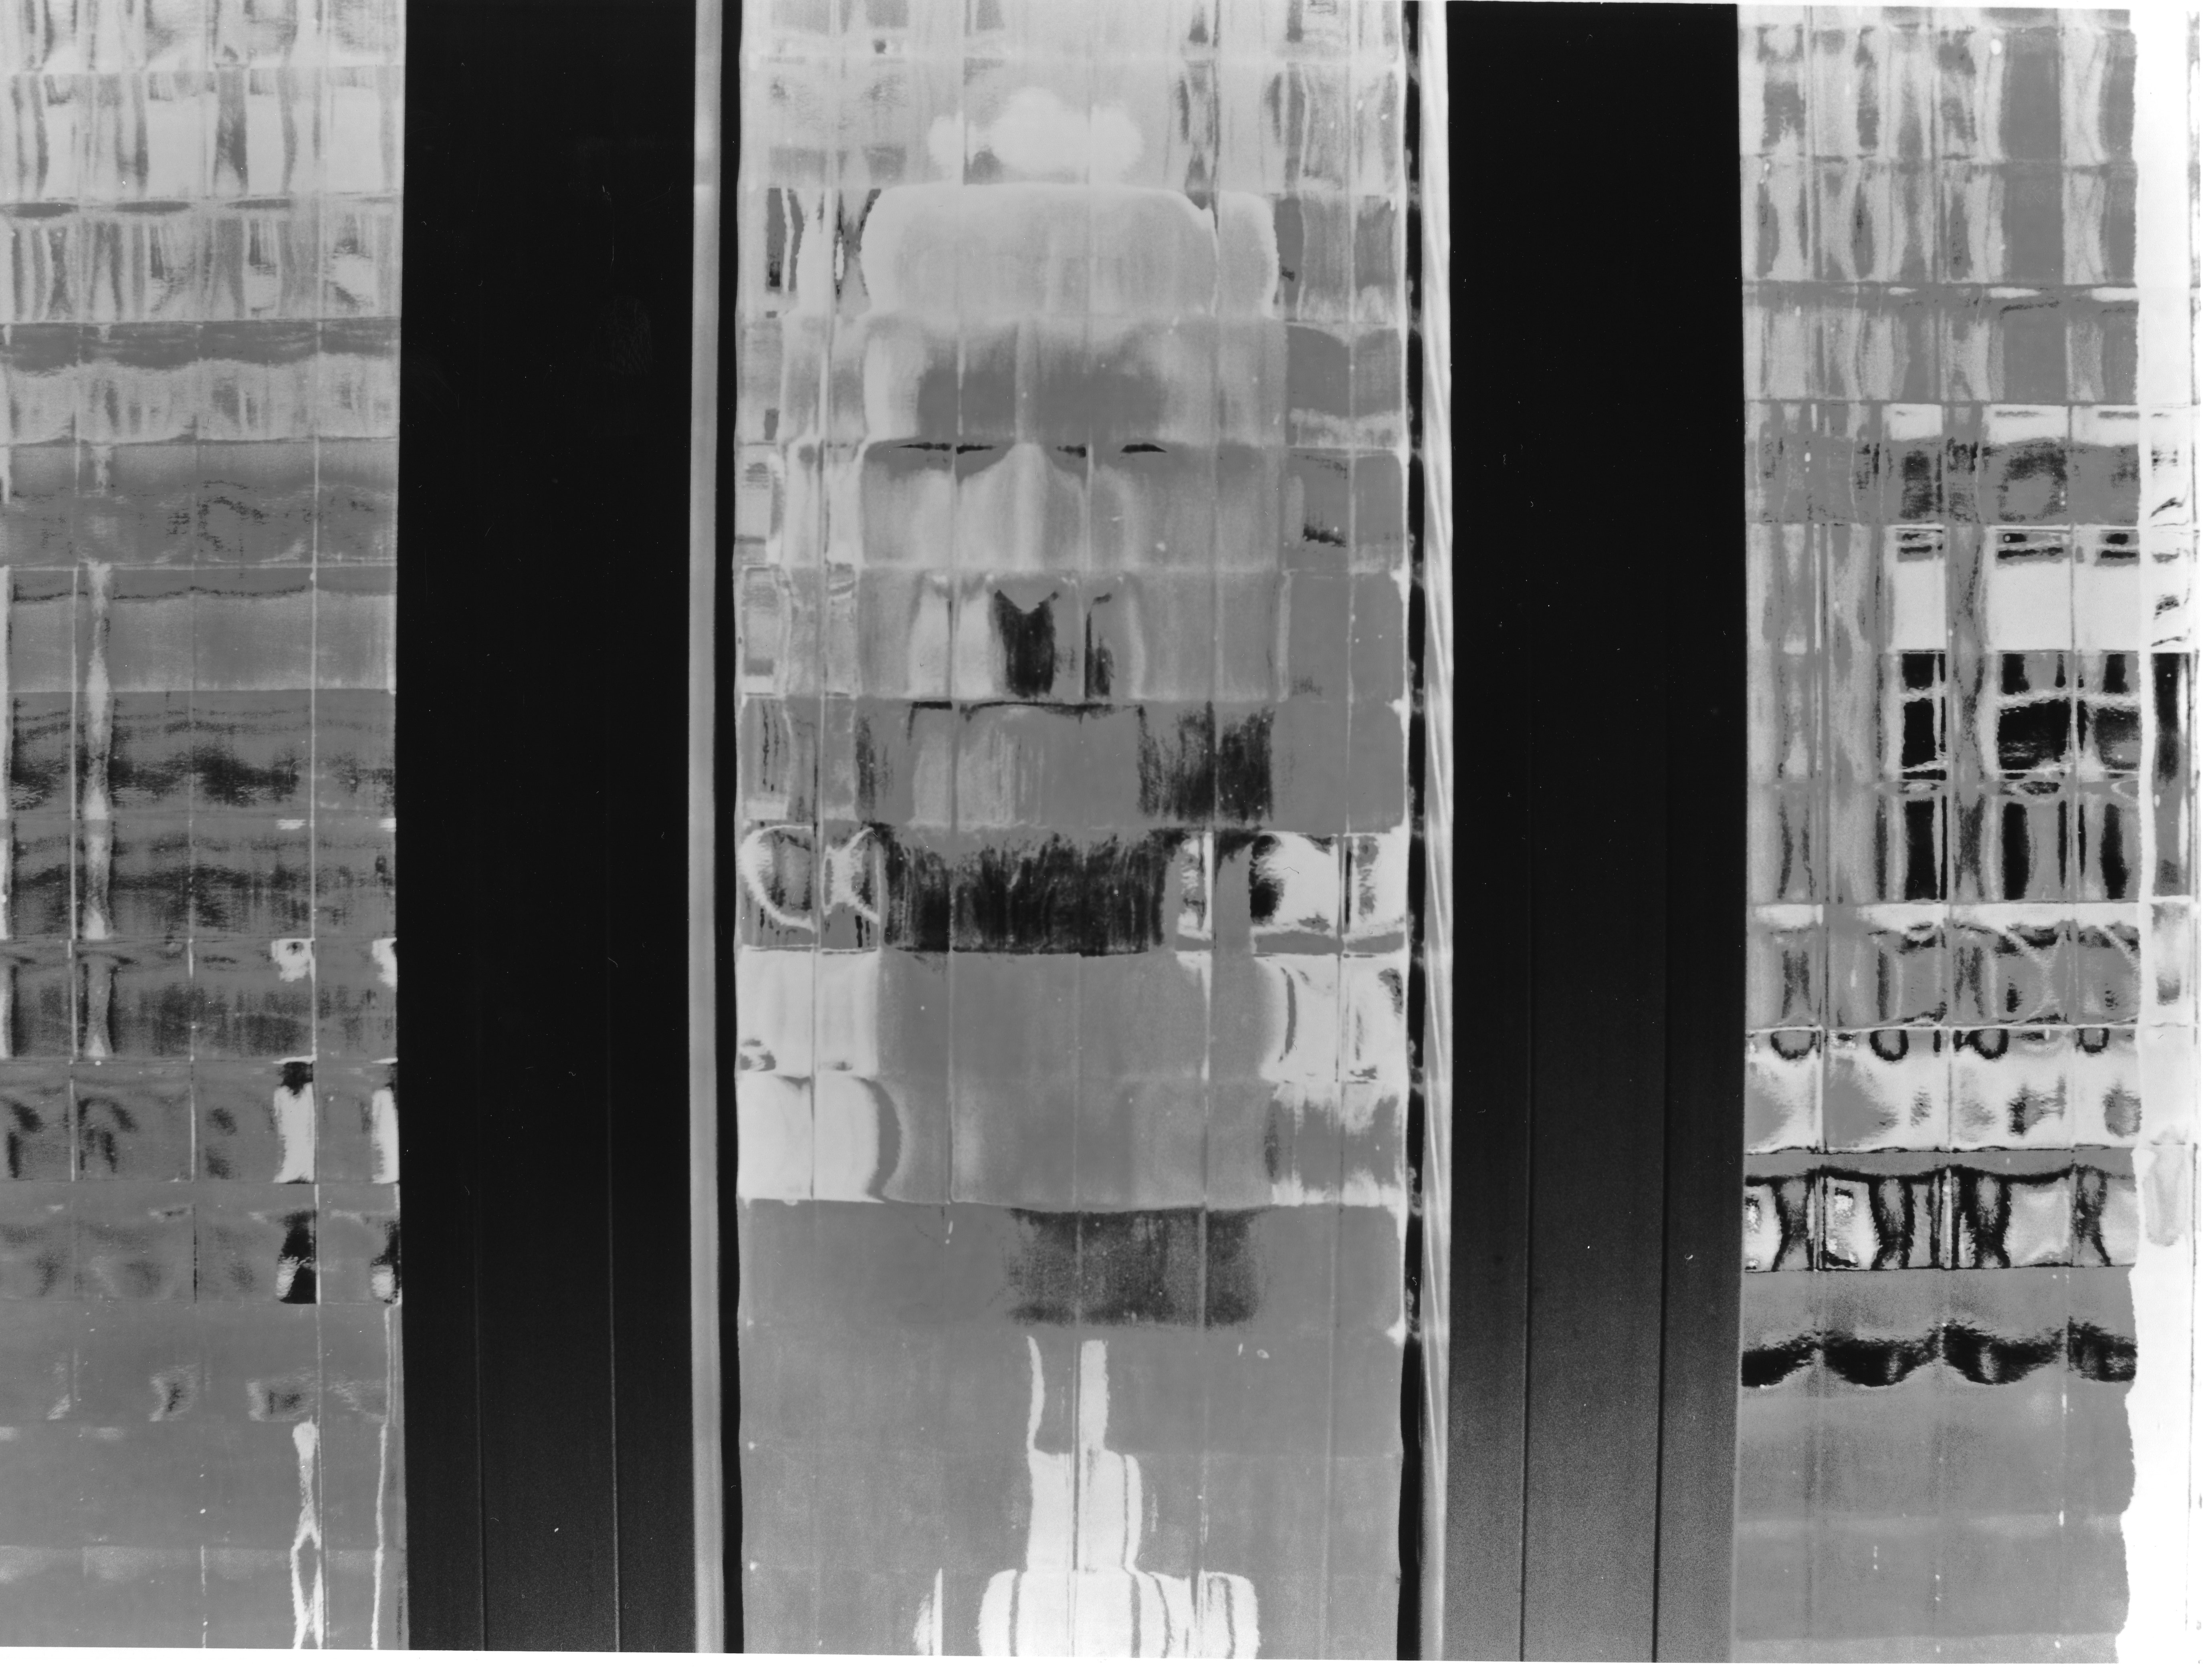
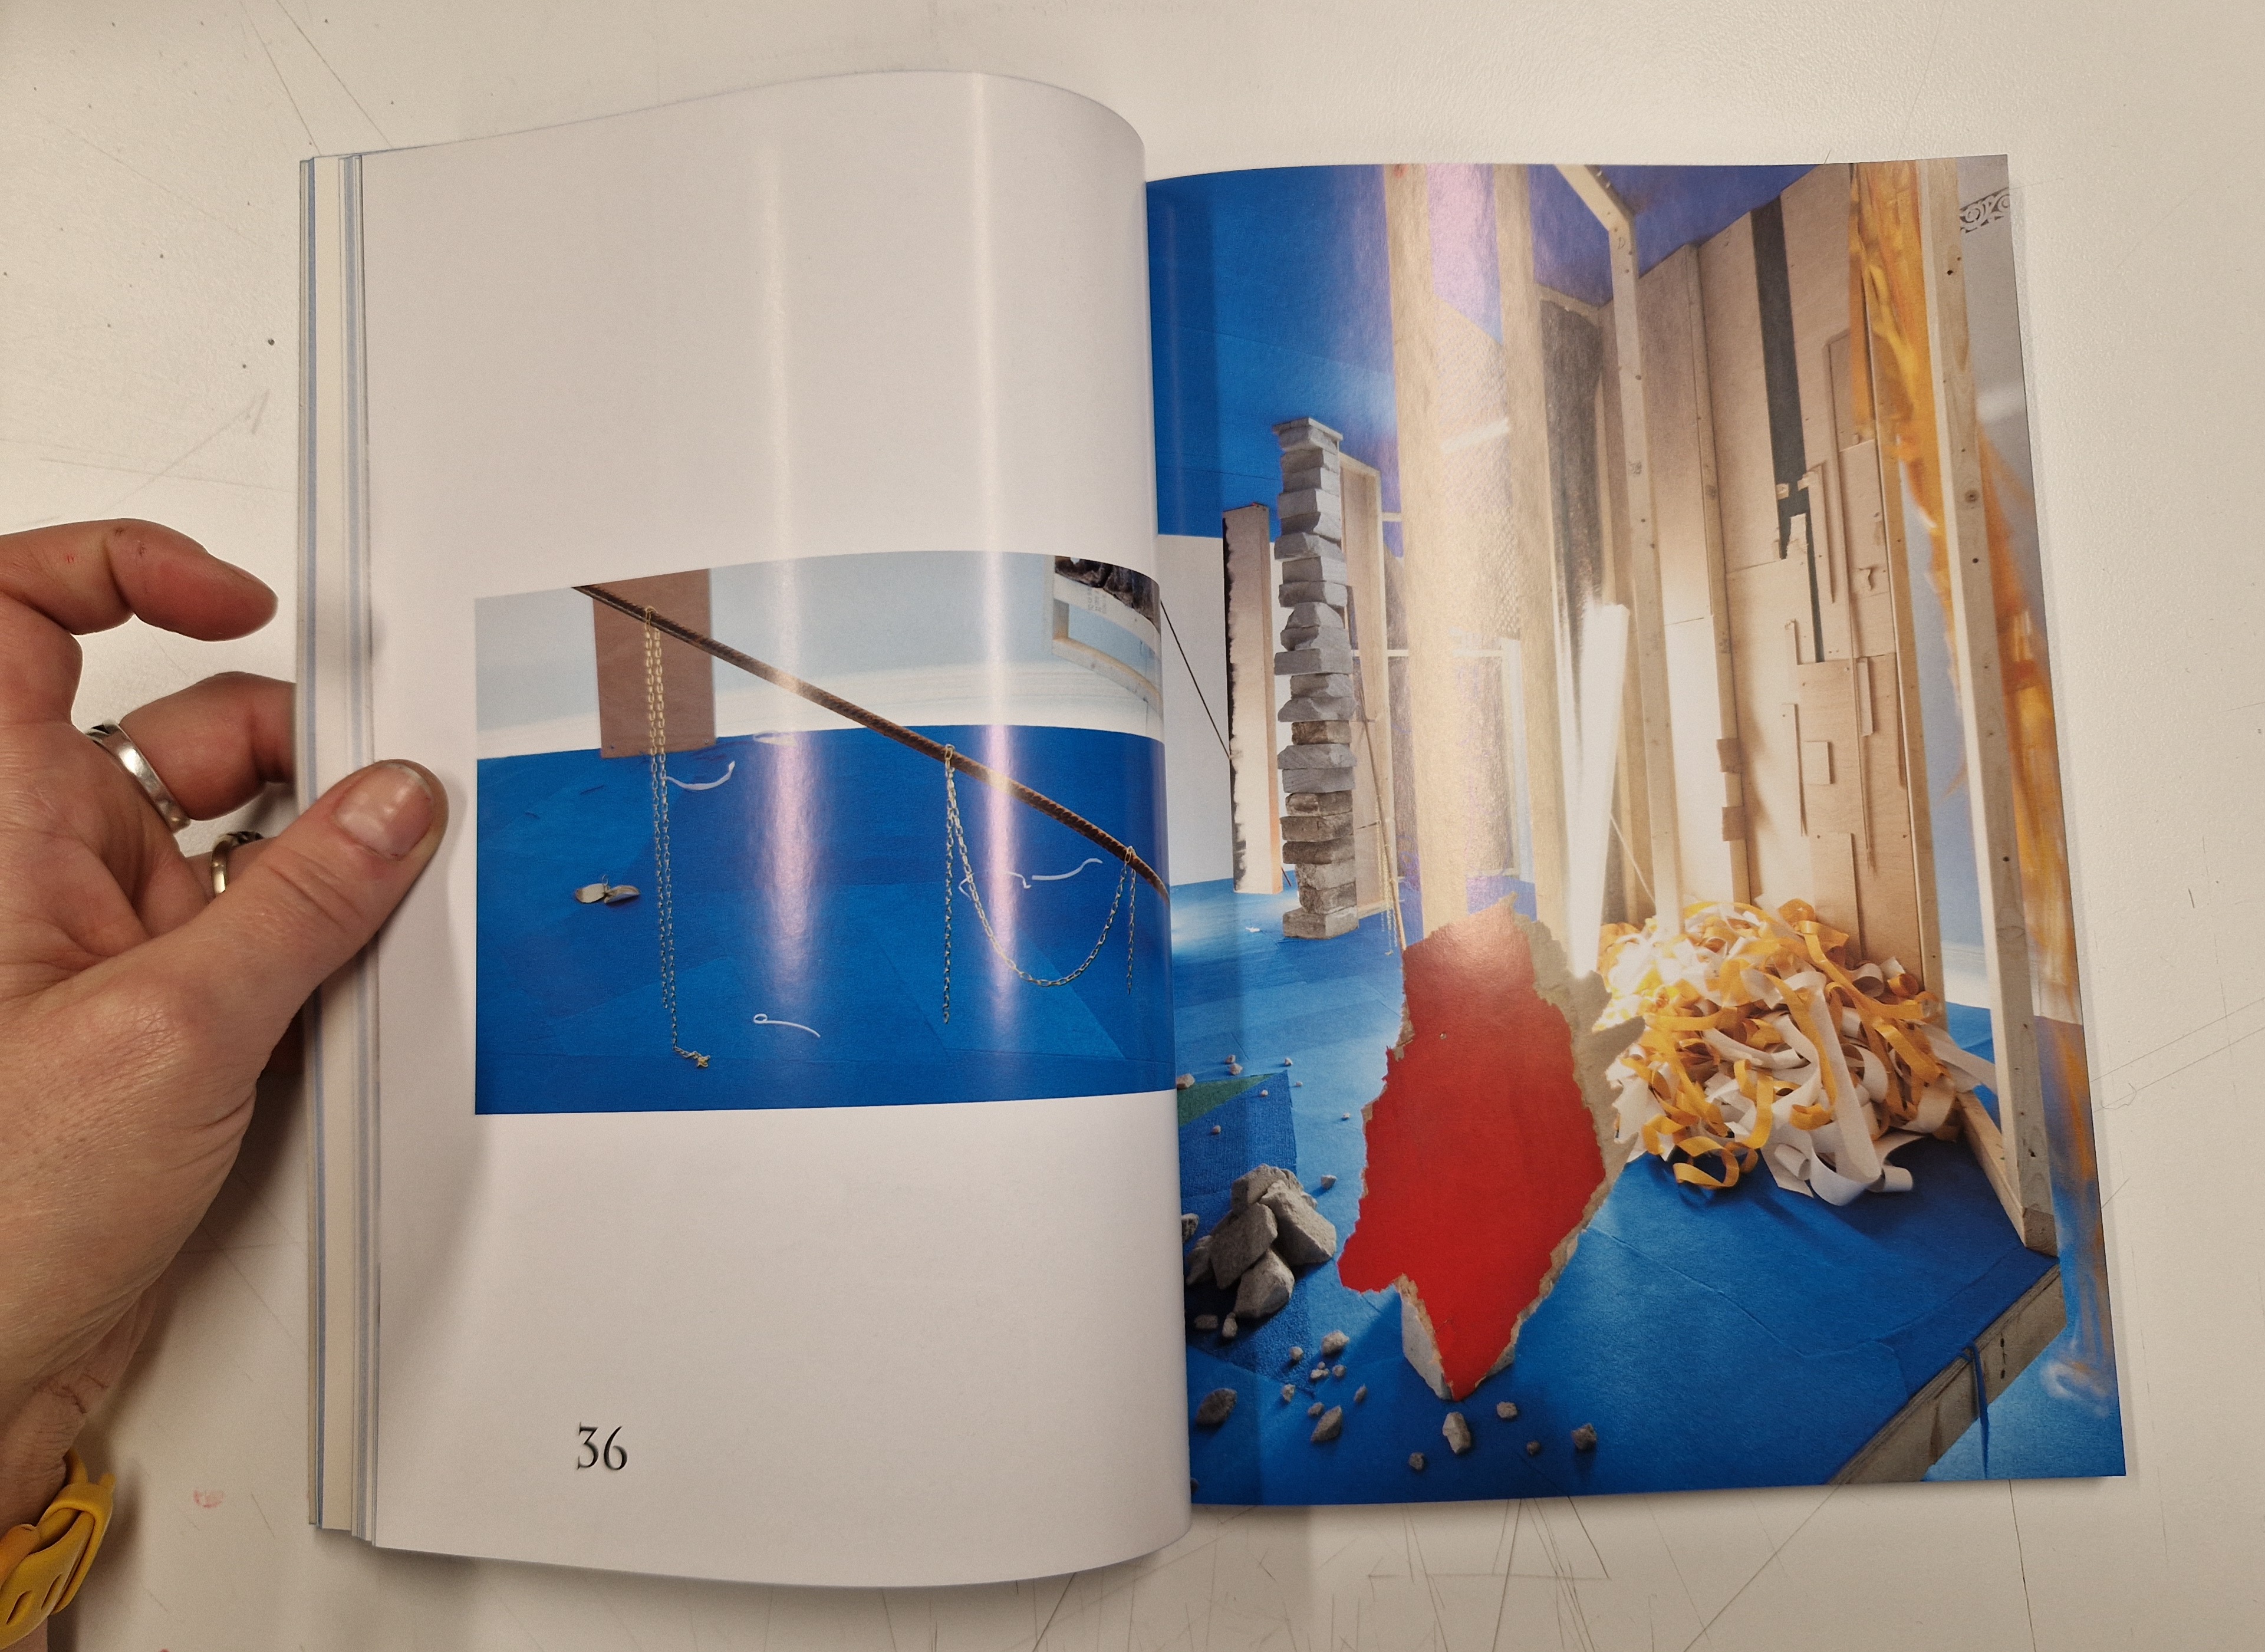
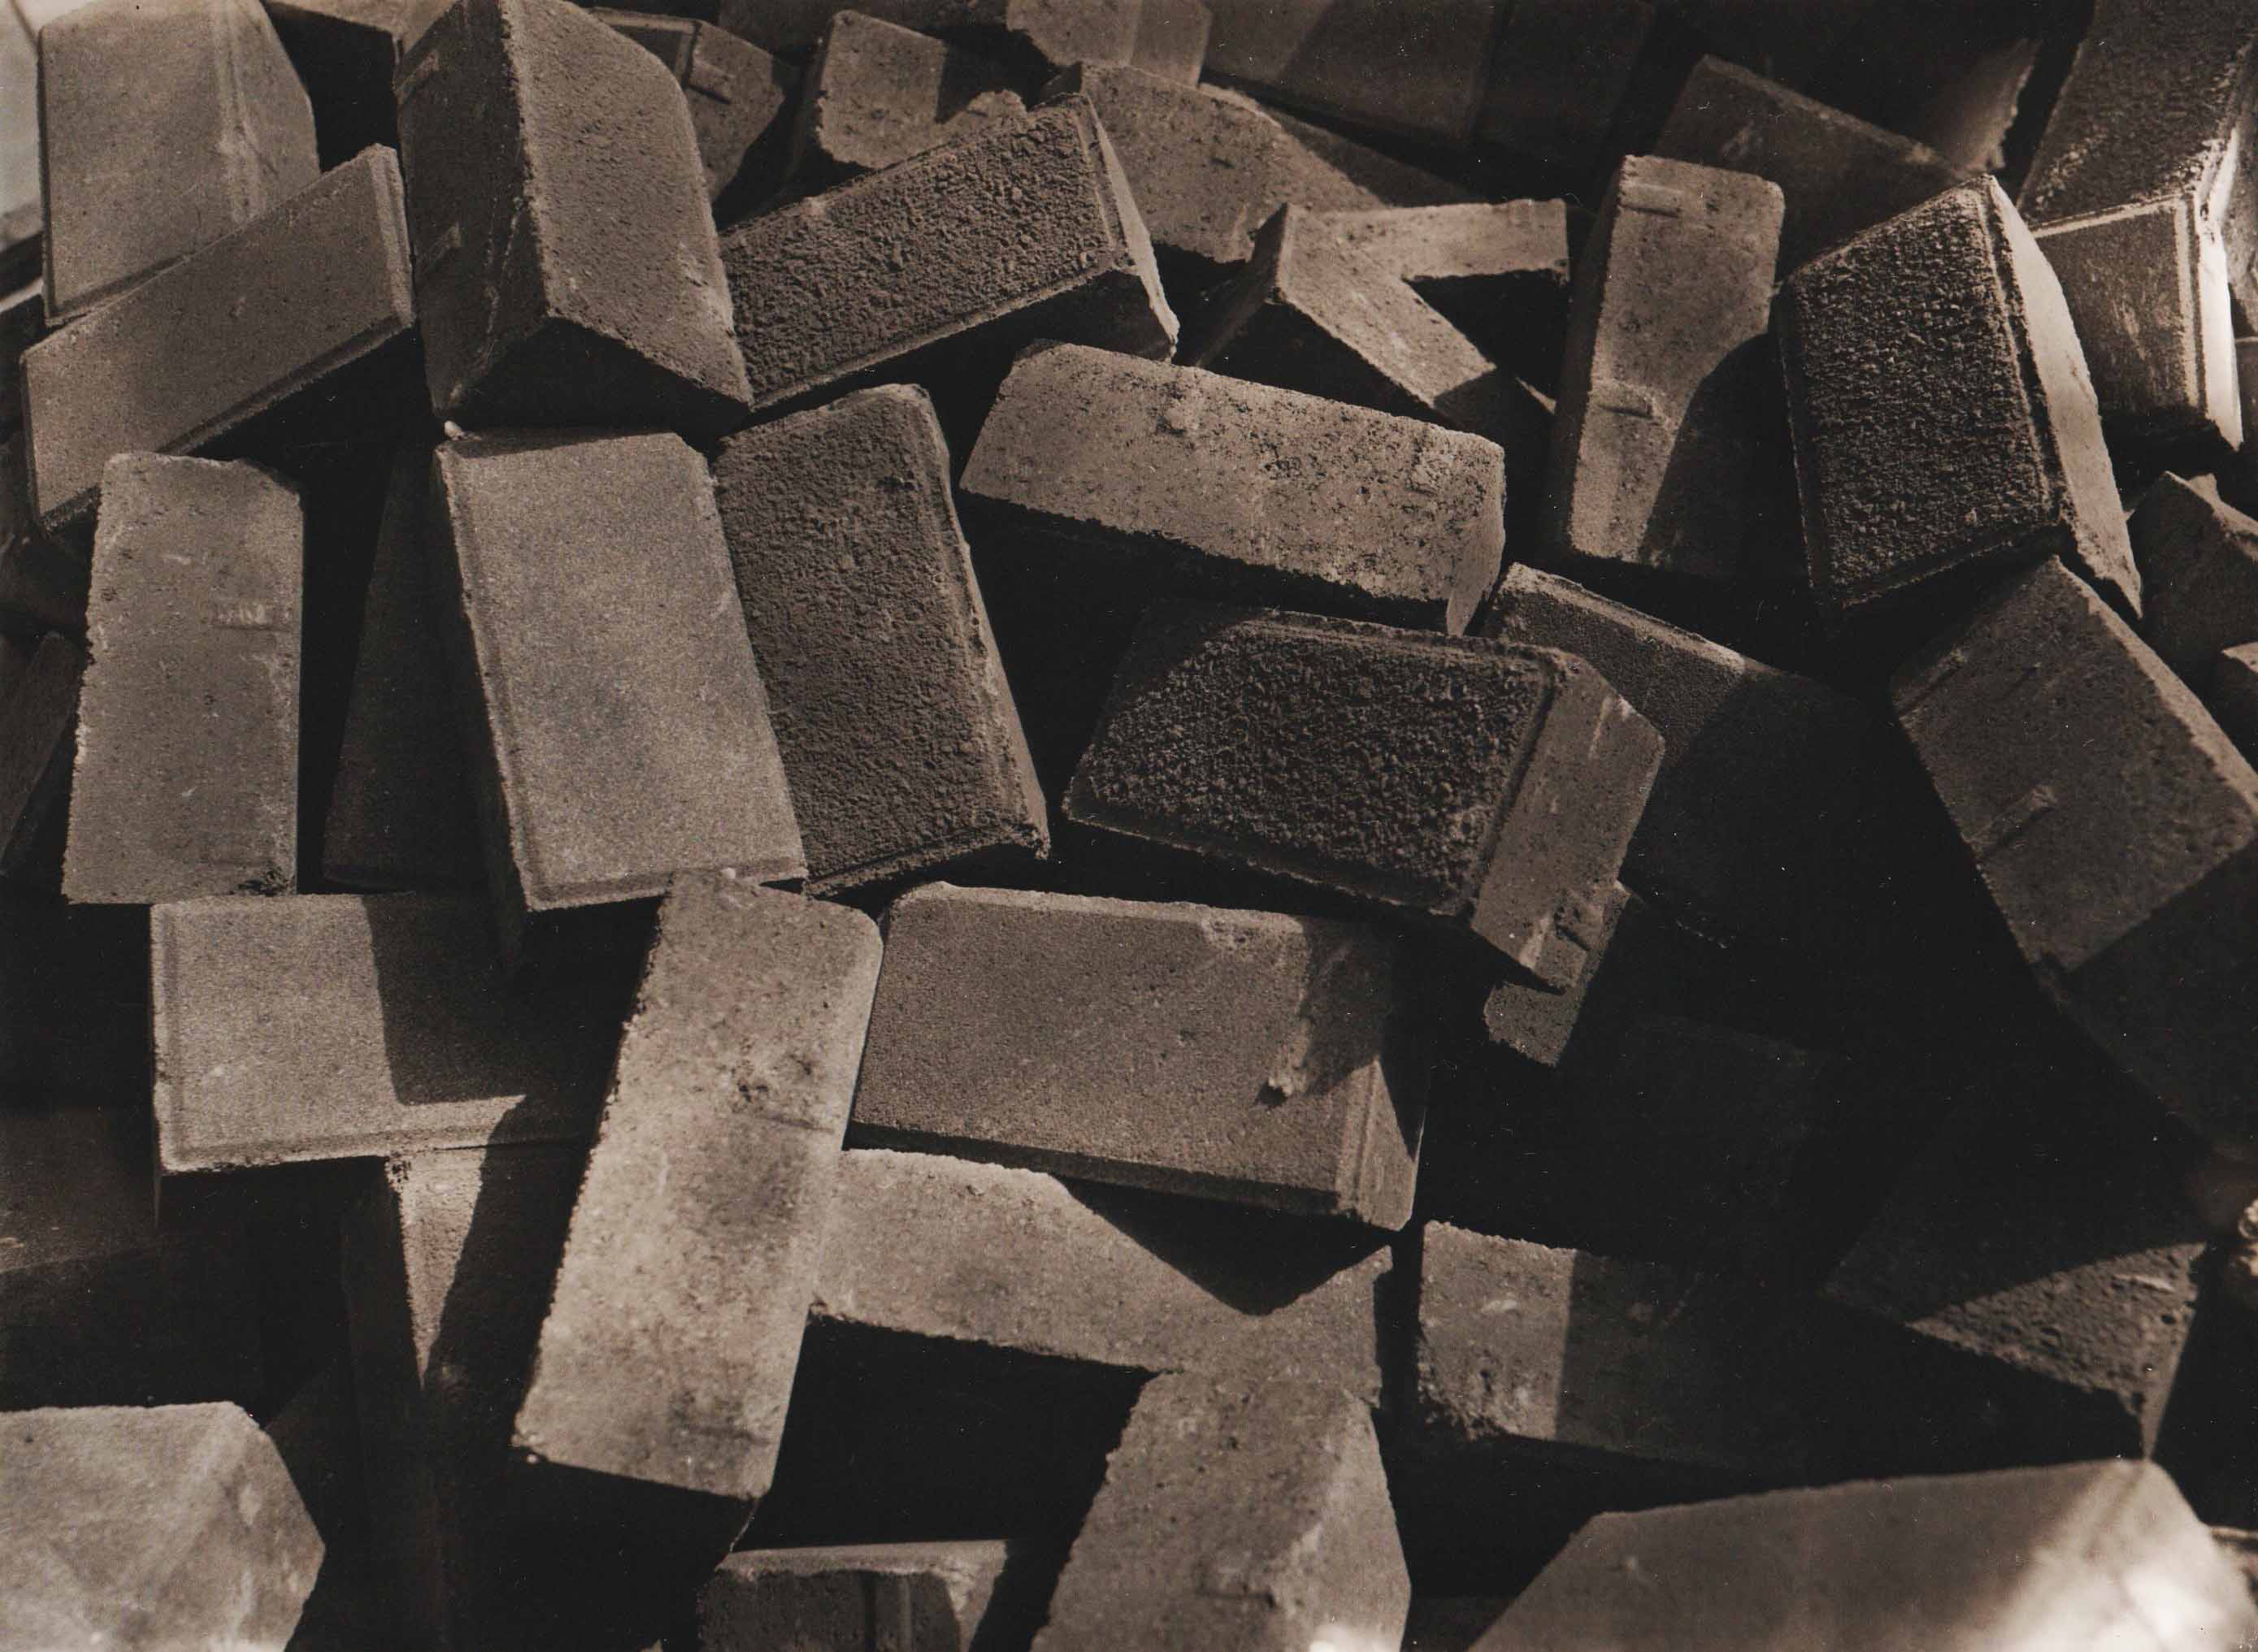
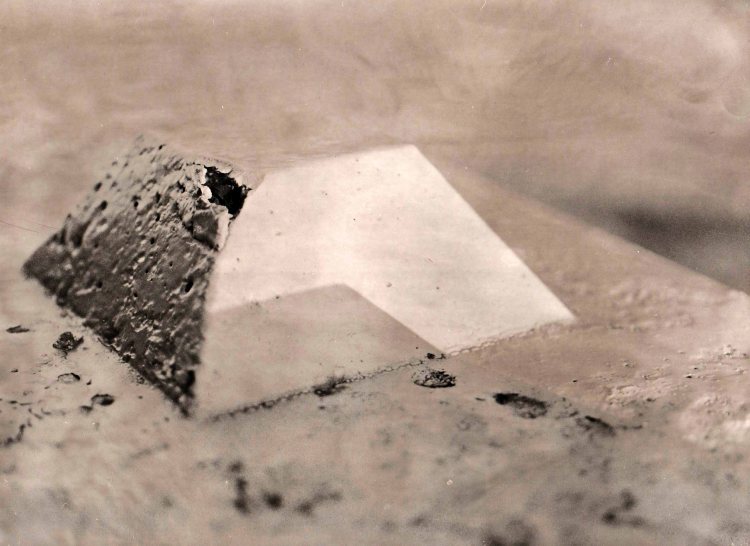
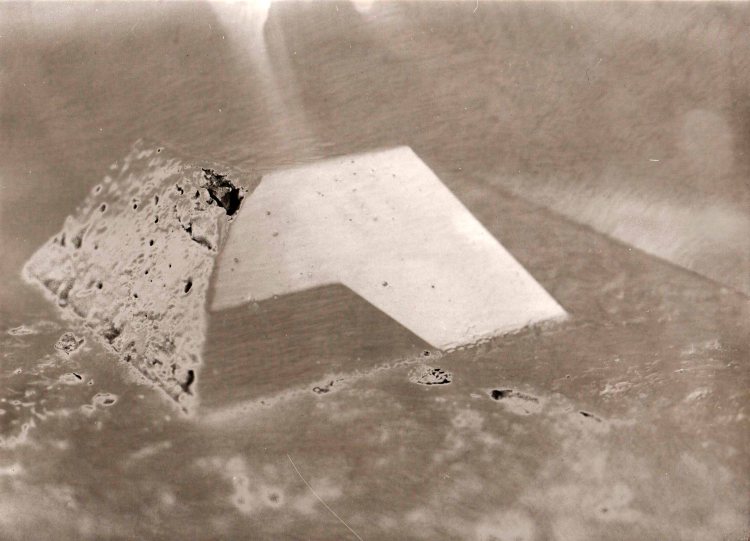
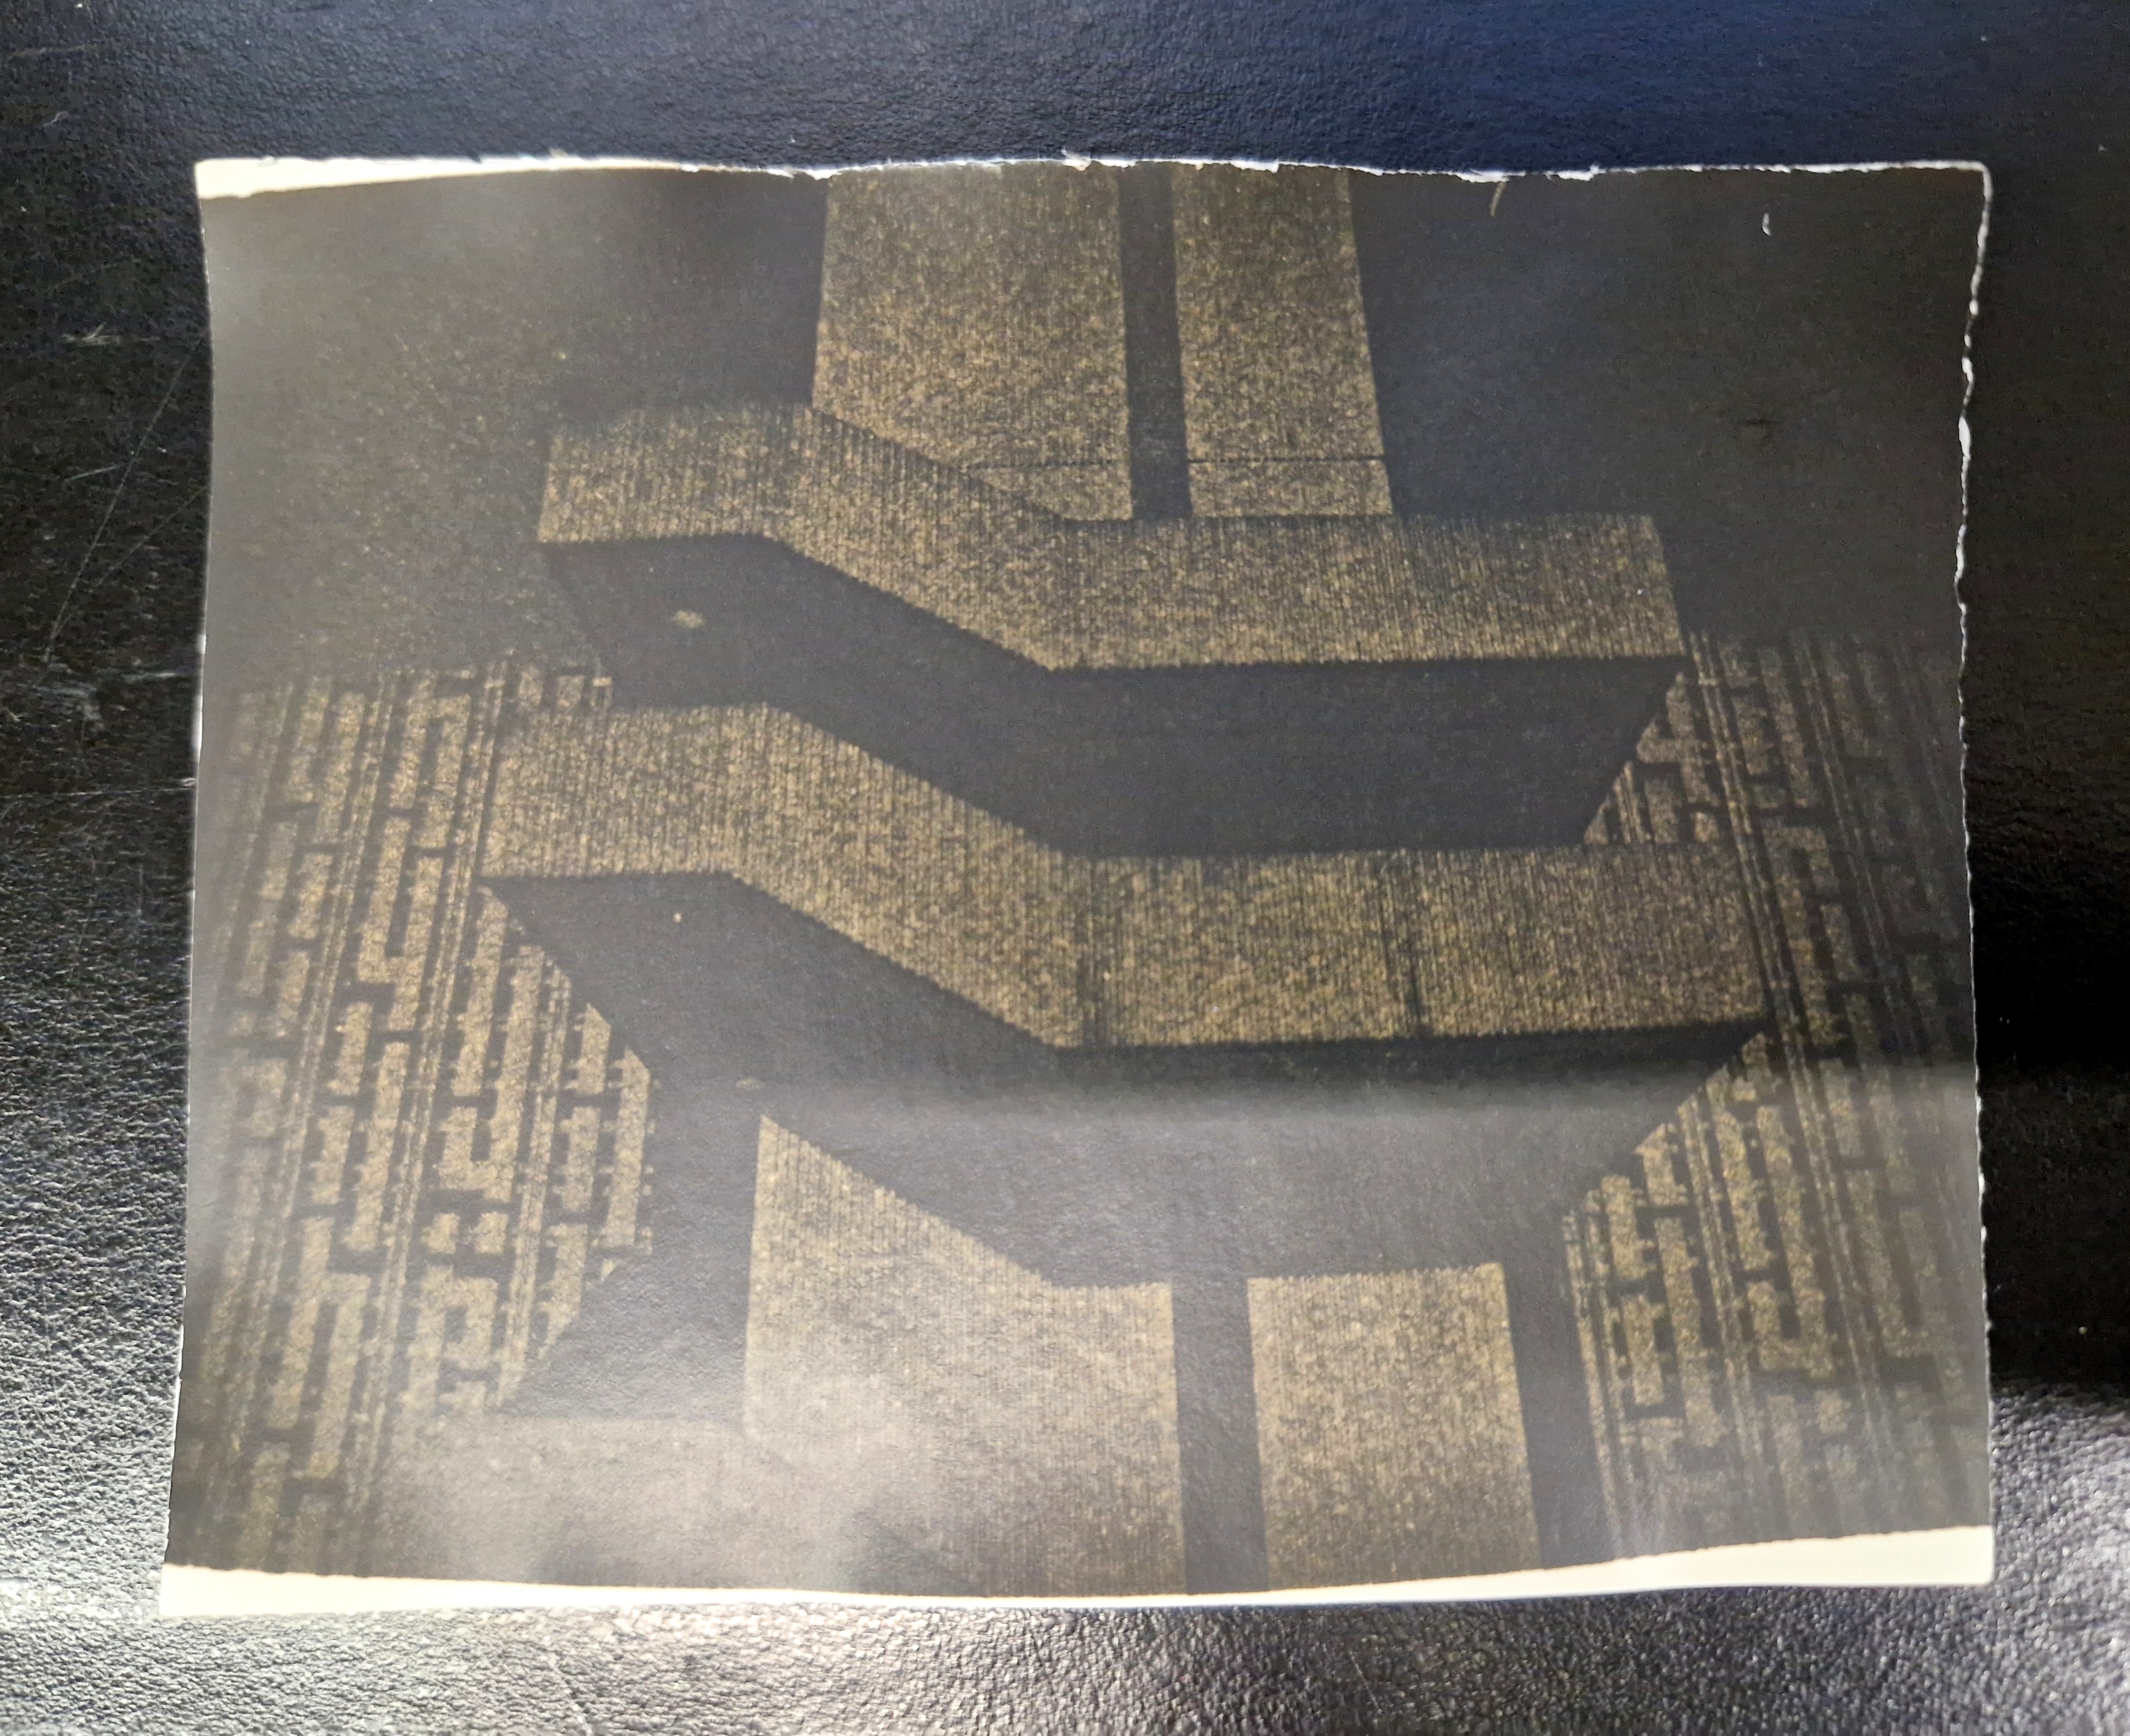
BRICKS
I spent a few hours working on this image and even though I didn’t get it quite right, I feel like it’s been a very valuable lesson that I then applied to the next image immediately.
FIRST I MADE A NORMAL PRINT

THEN I STARTED TO SOLARISE


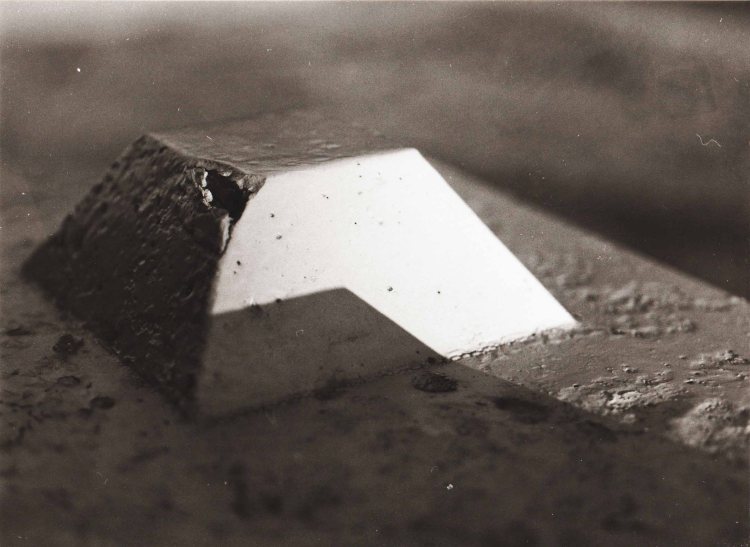
GETTING A HOLD OF IT


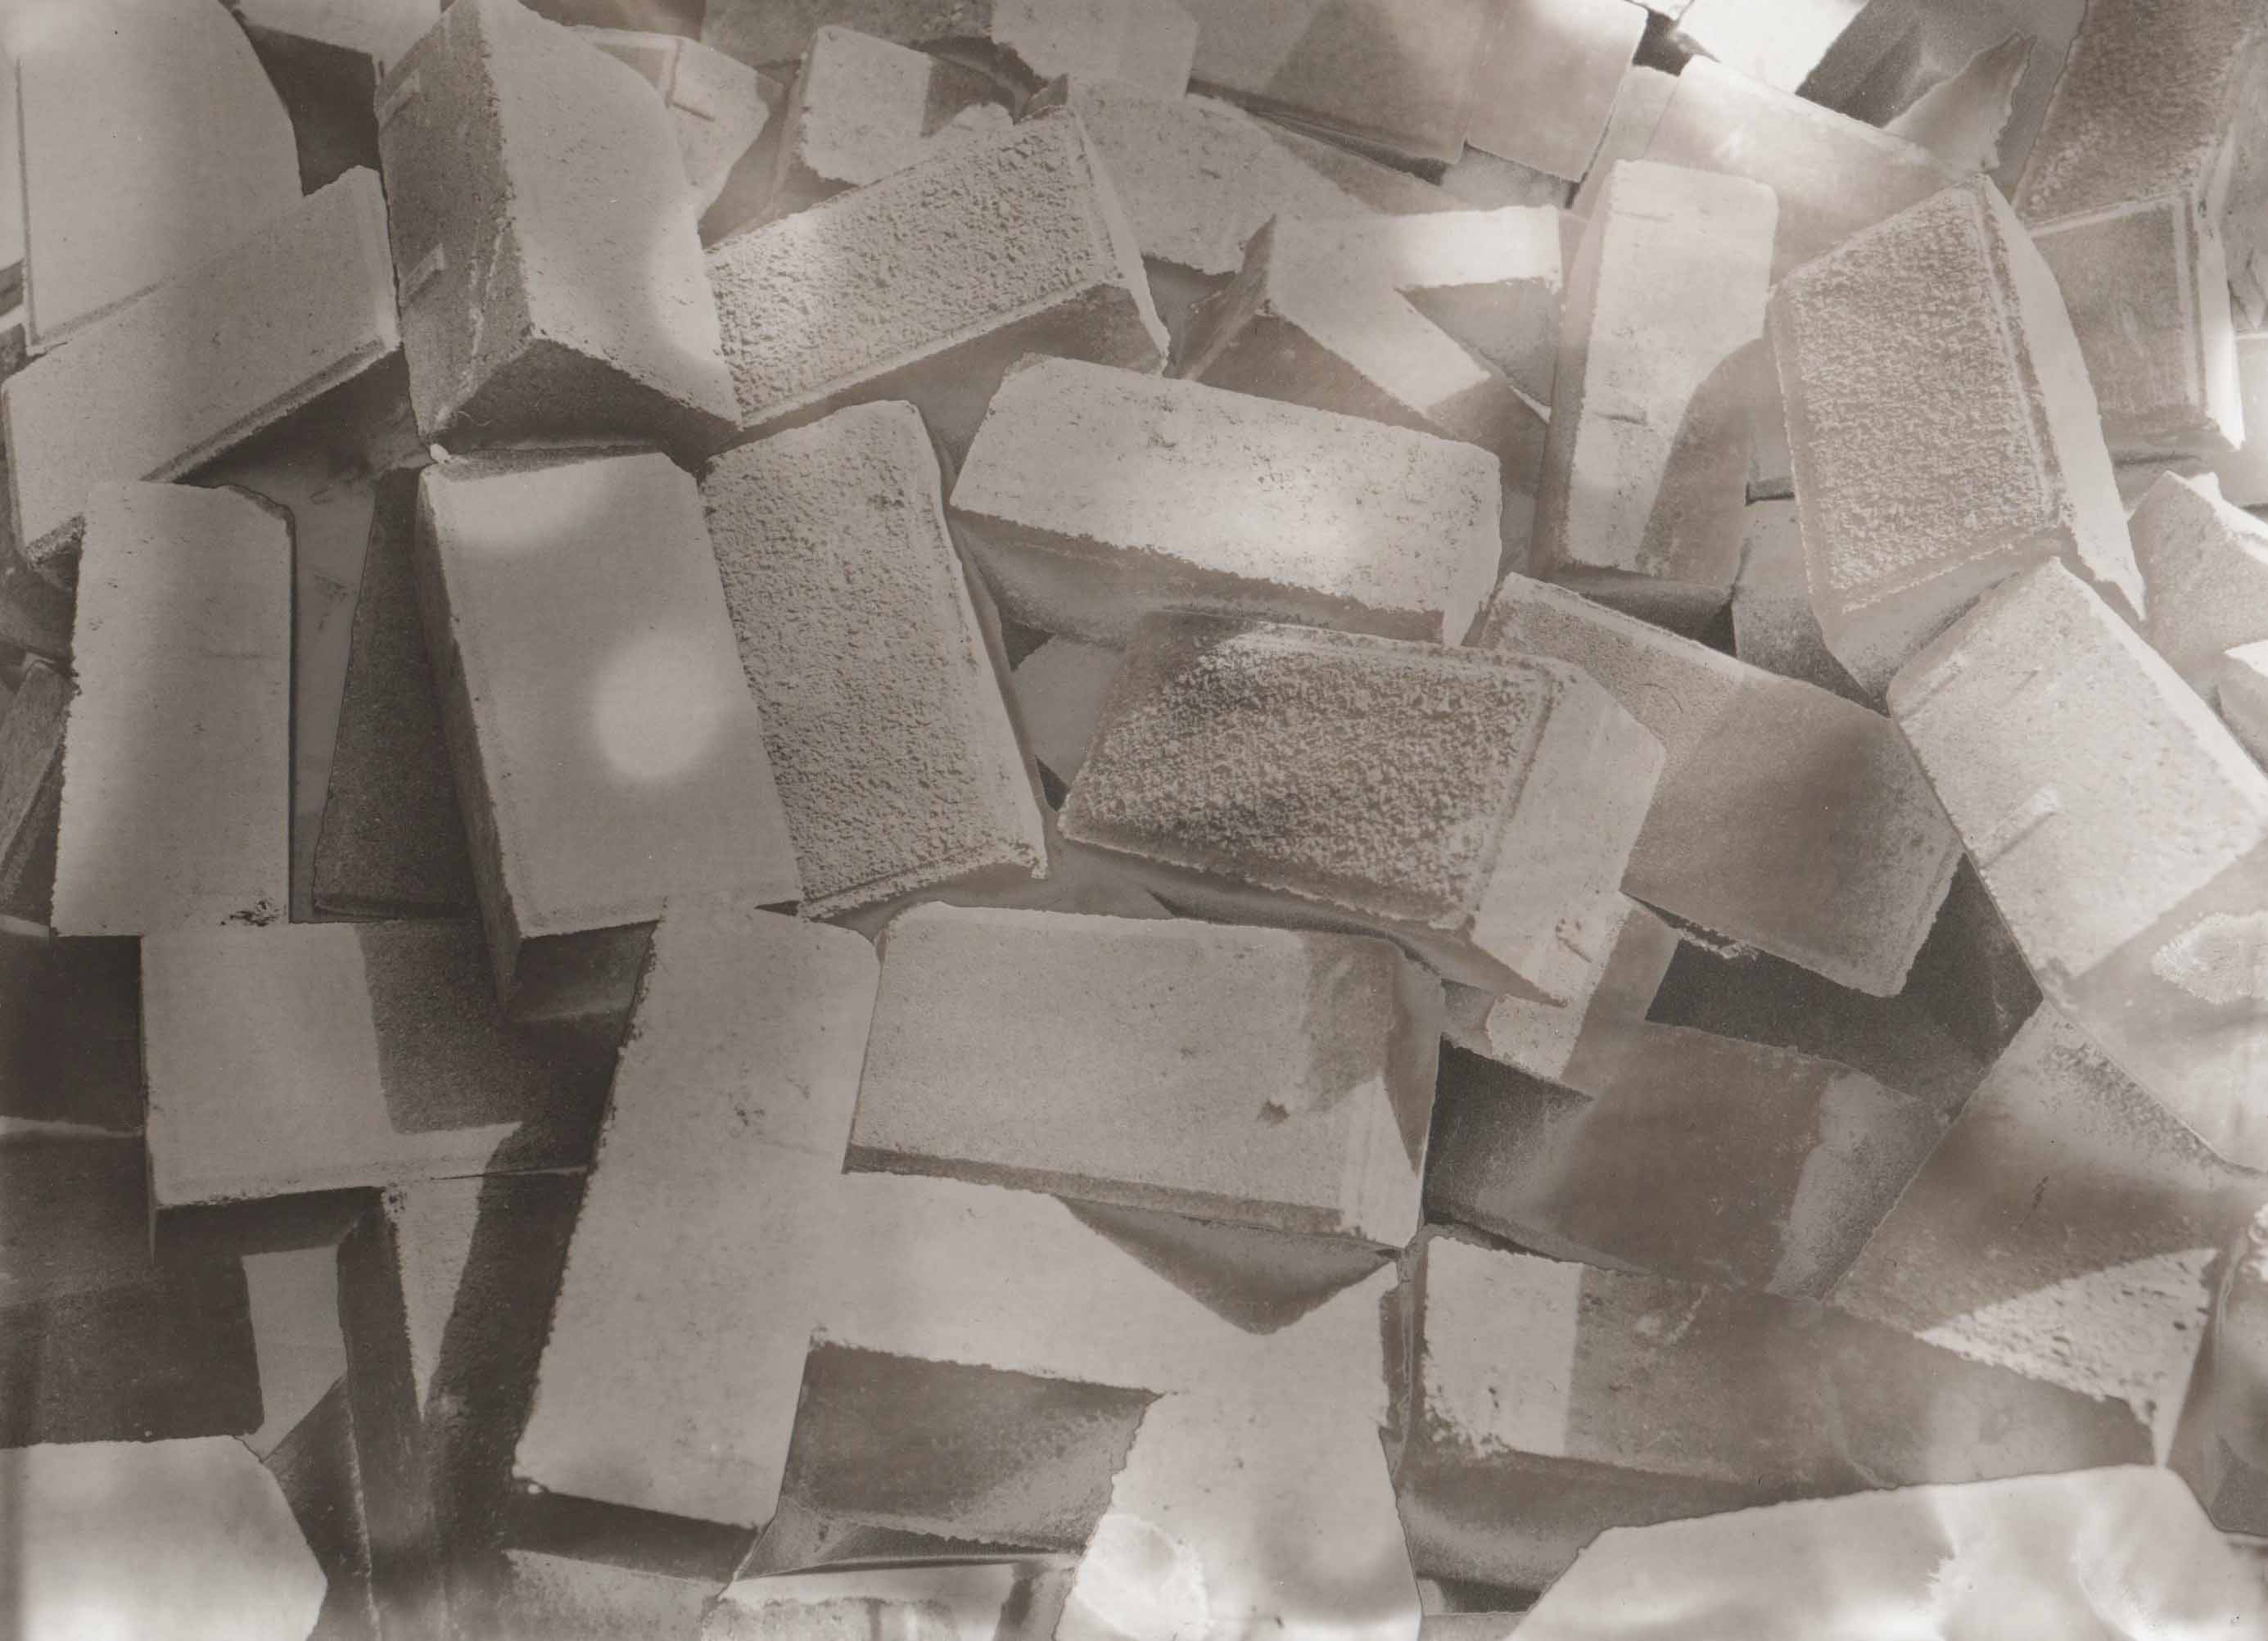
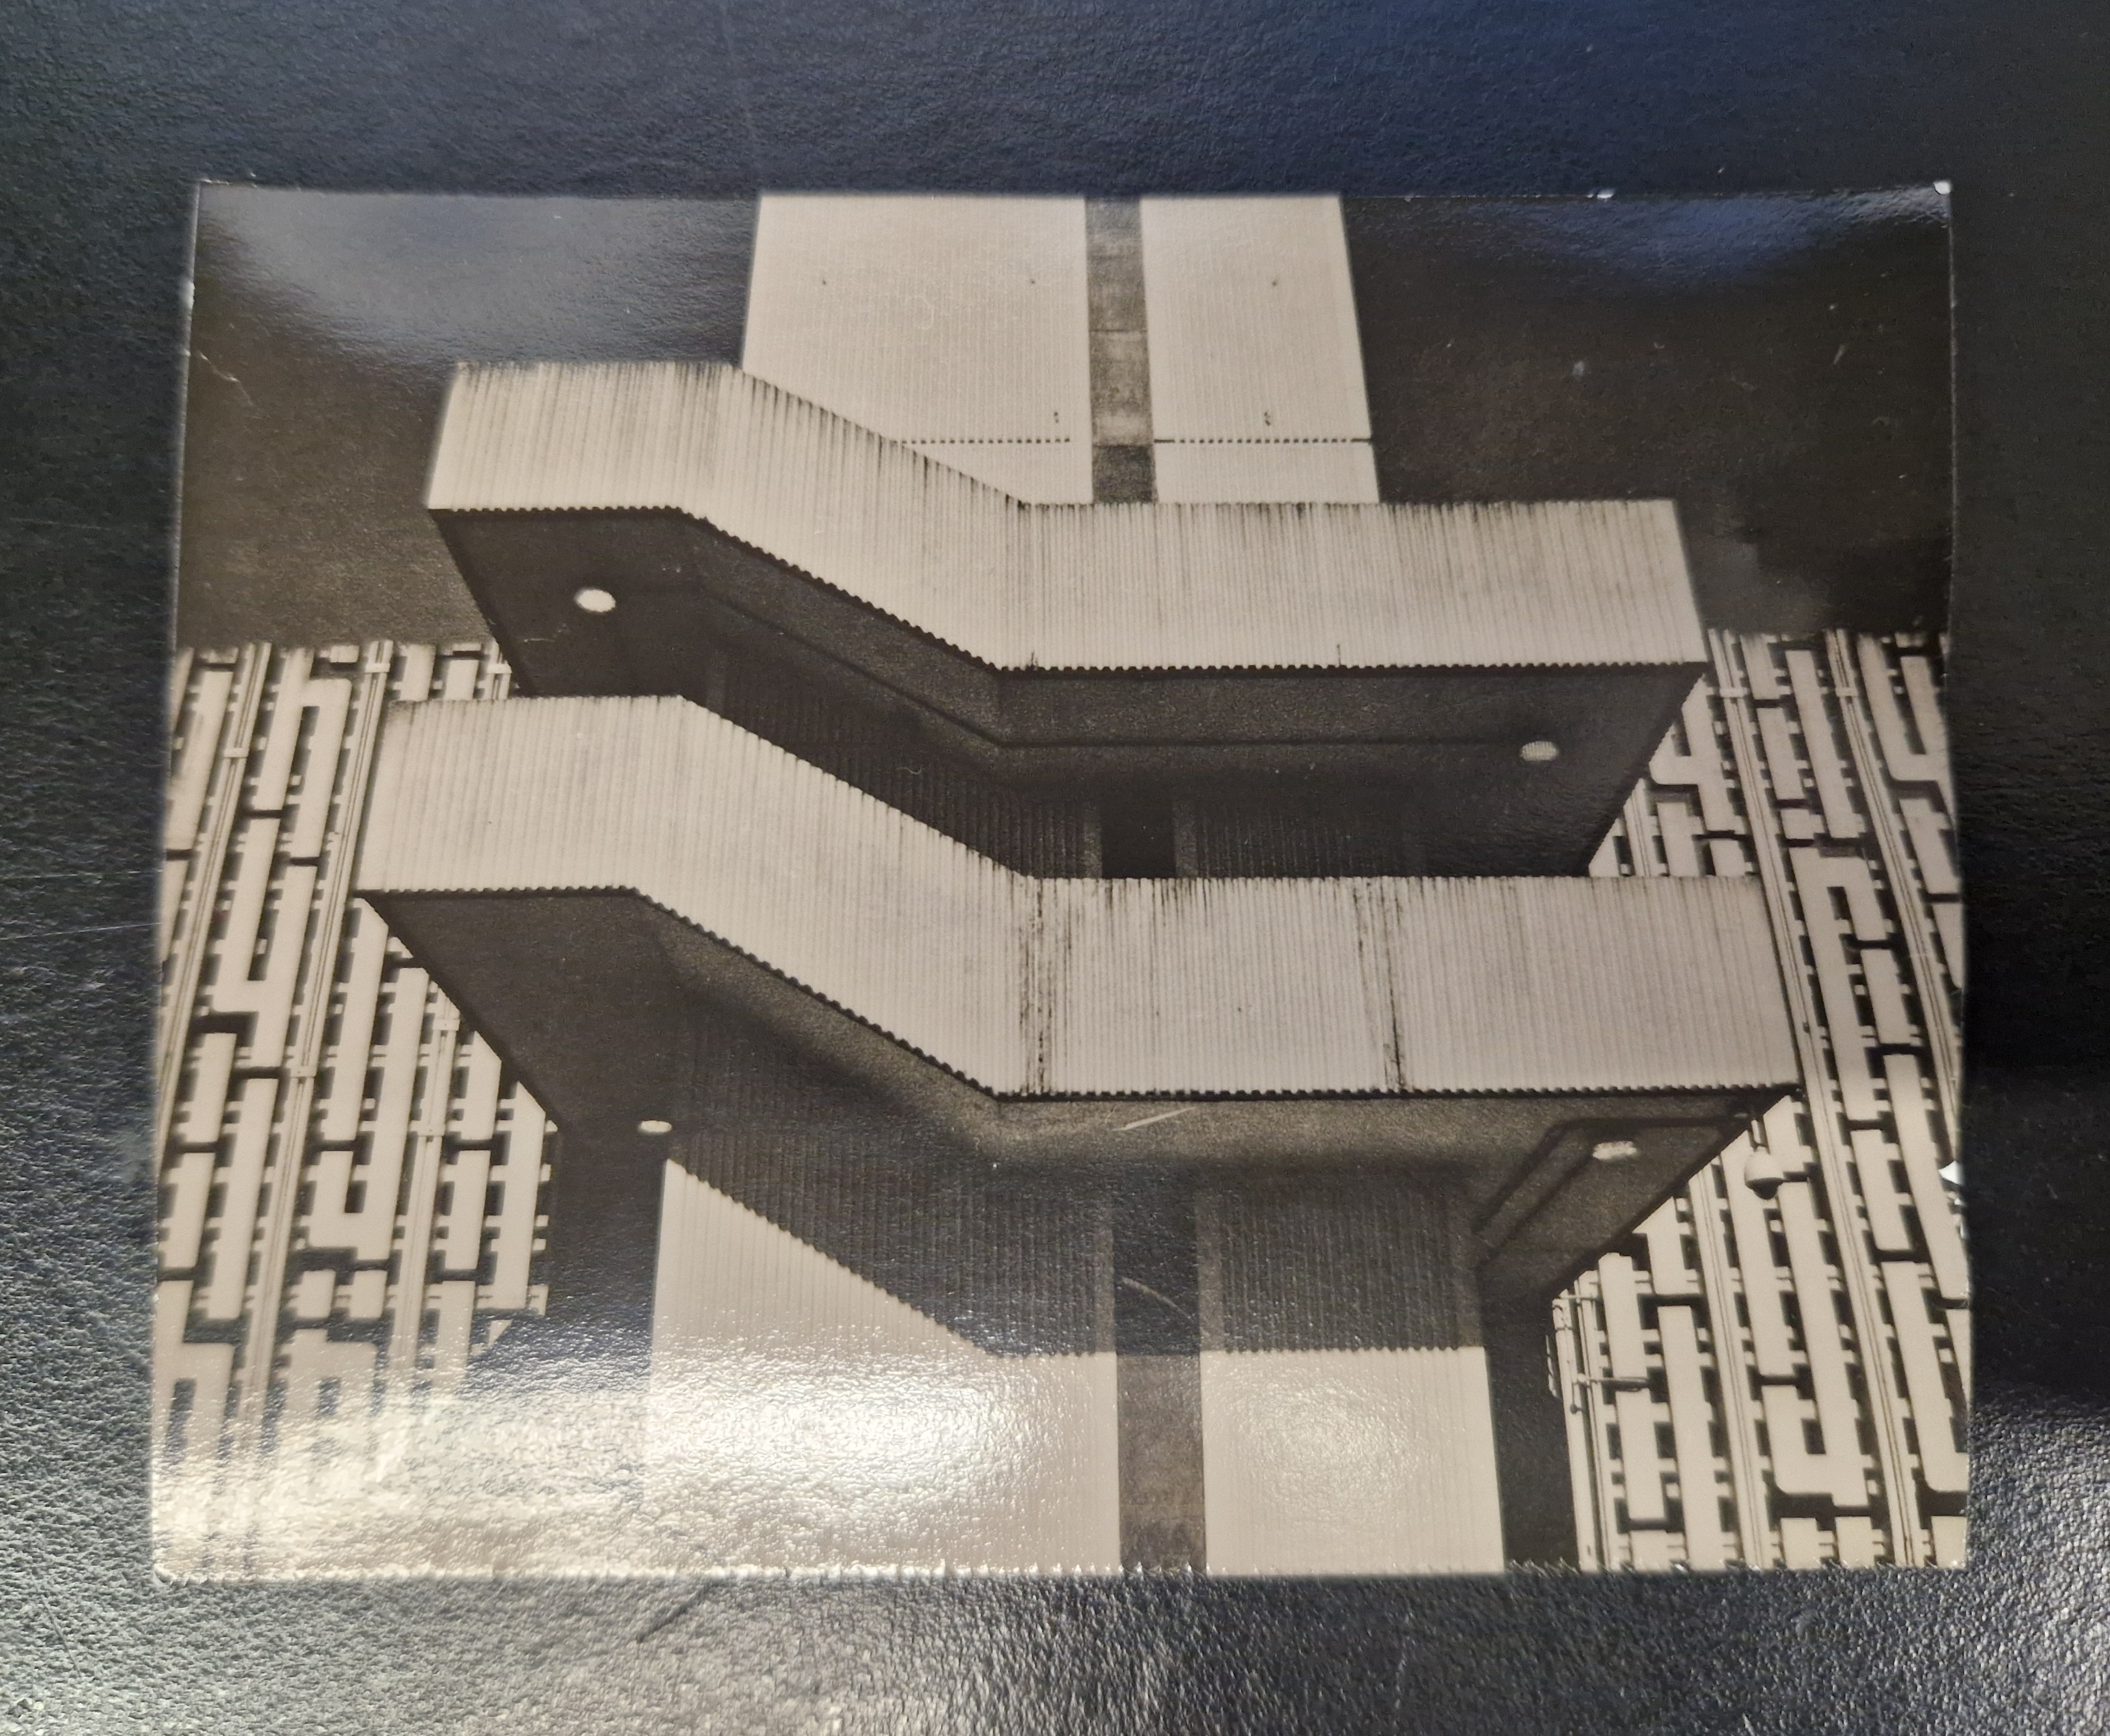
After these few hours of mostly not getting the effect I wanted, I felt that the time had come to change the image, summarise what I had learned/observed and use that knowledge. To my excitement and a bit of surprise, I immediately achieved the Sabatier effect in the following image.
NORMAL PRINT
SOLARISATION 1
SOLARISATION 2
REFLECTIONS: If you want to Solarise, prepare yourself to give it time and a lot of photographic paper and accept that, unlike with a standard print, you can't ever fully control it. A lot depends on how long you expose your print - how long you develop it during the first and second stages and the timing of extra exposure to light. Yes, you control all of these processes, but it's difficult to repeat the same print twice or get exactly what you want as a big part of the process happens by eye, not specific measurements. I had a great time doing it, and I will definitely do it again and would recommend it. Just go with the flow and accept the unpredictable whilst using your knowledge about solarisation.
WEDNESDAY
DARKROOM
Today I went to the darkroom to print an image for Pickles, a sculptor who I commissioned to make a box for my model in exchange for a print of his choice. I also printed another image, which took my session to the closing time of the darkroom.
REFLECTIONS: Part of my development plan is to go to the darkroom at least once a week and, by far, I kept up with this plan, and I am going to continue. It's hard sometimes to find time for everything, but it is vital to incorporate it into your routine and chip away. Sooner or later, this attitude, systematic practice and hard work will bear fruit.
FRIDAY
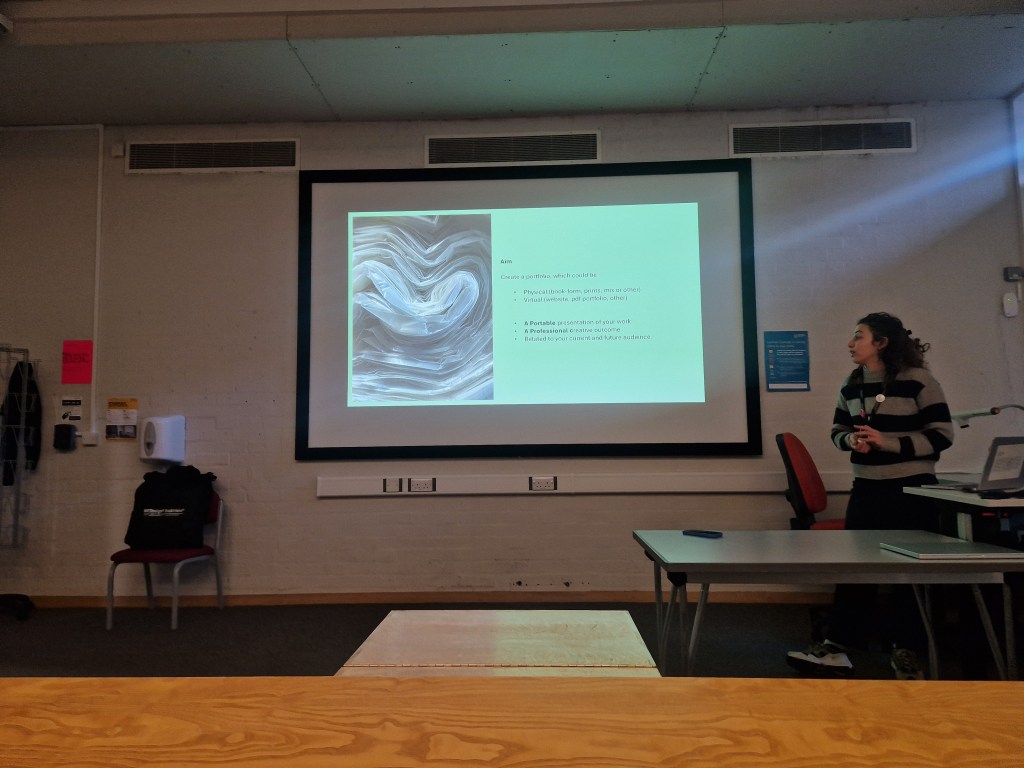
PORTFOLIO SEMINAR

REFLECTIONS: Invaluable day learning and gaining an understanding of ways of presenting work. Very inspiring to see not just people’s portfolios but also their work. I came out of the session with some food for thought and ideas on how to show my artwork in the final submission.
WEEK 4: 12-18 FEBRUARY
MONDAY
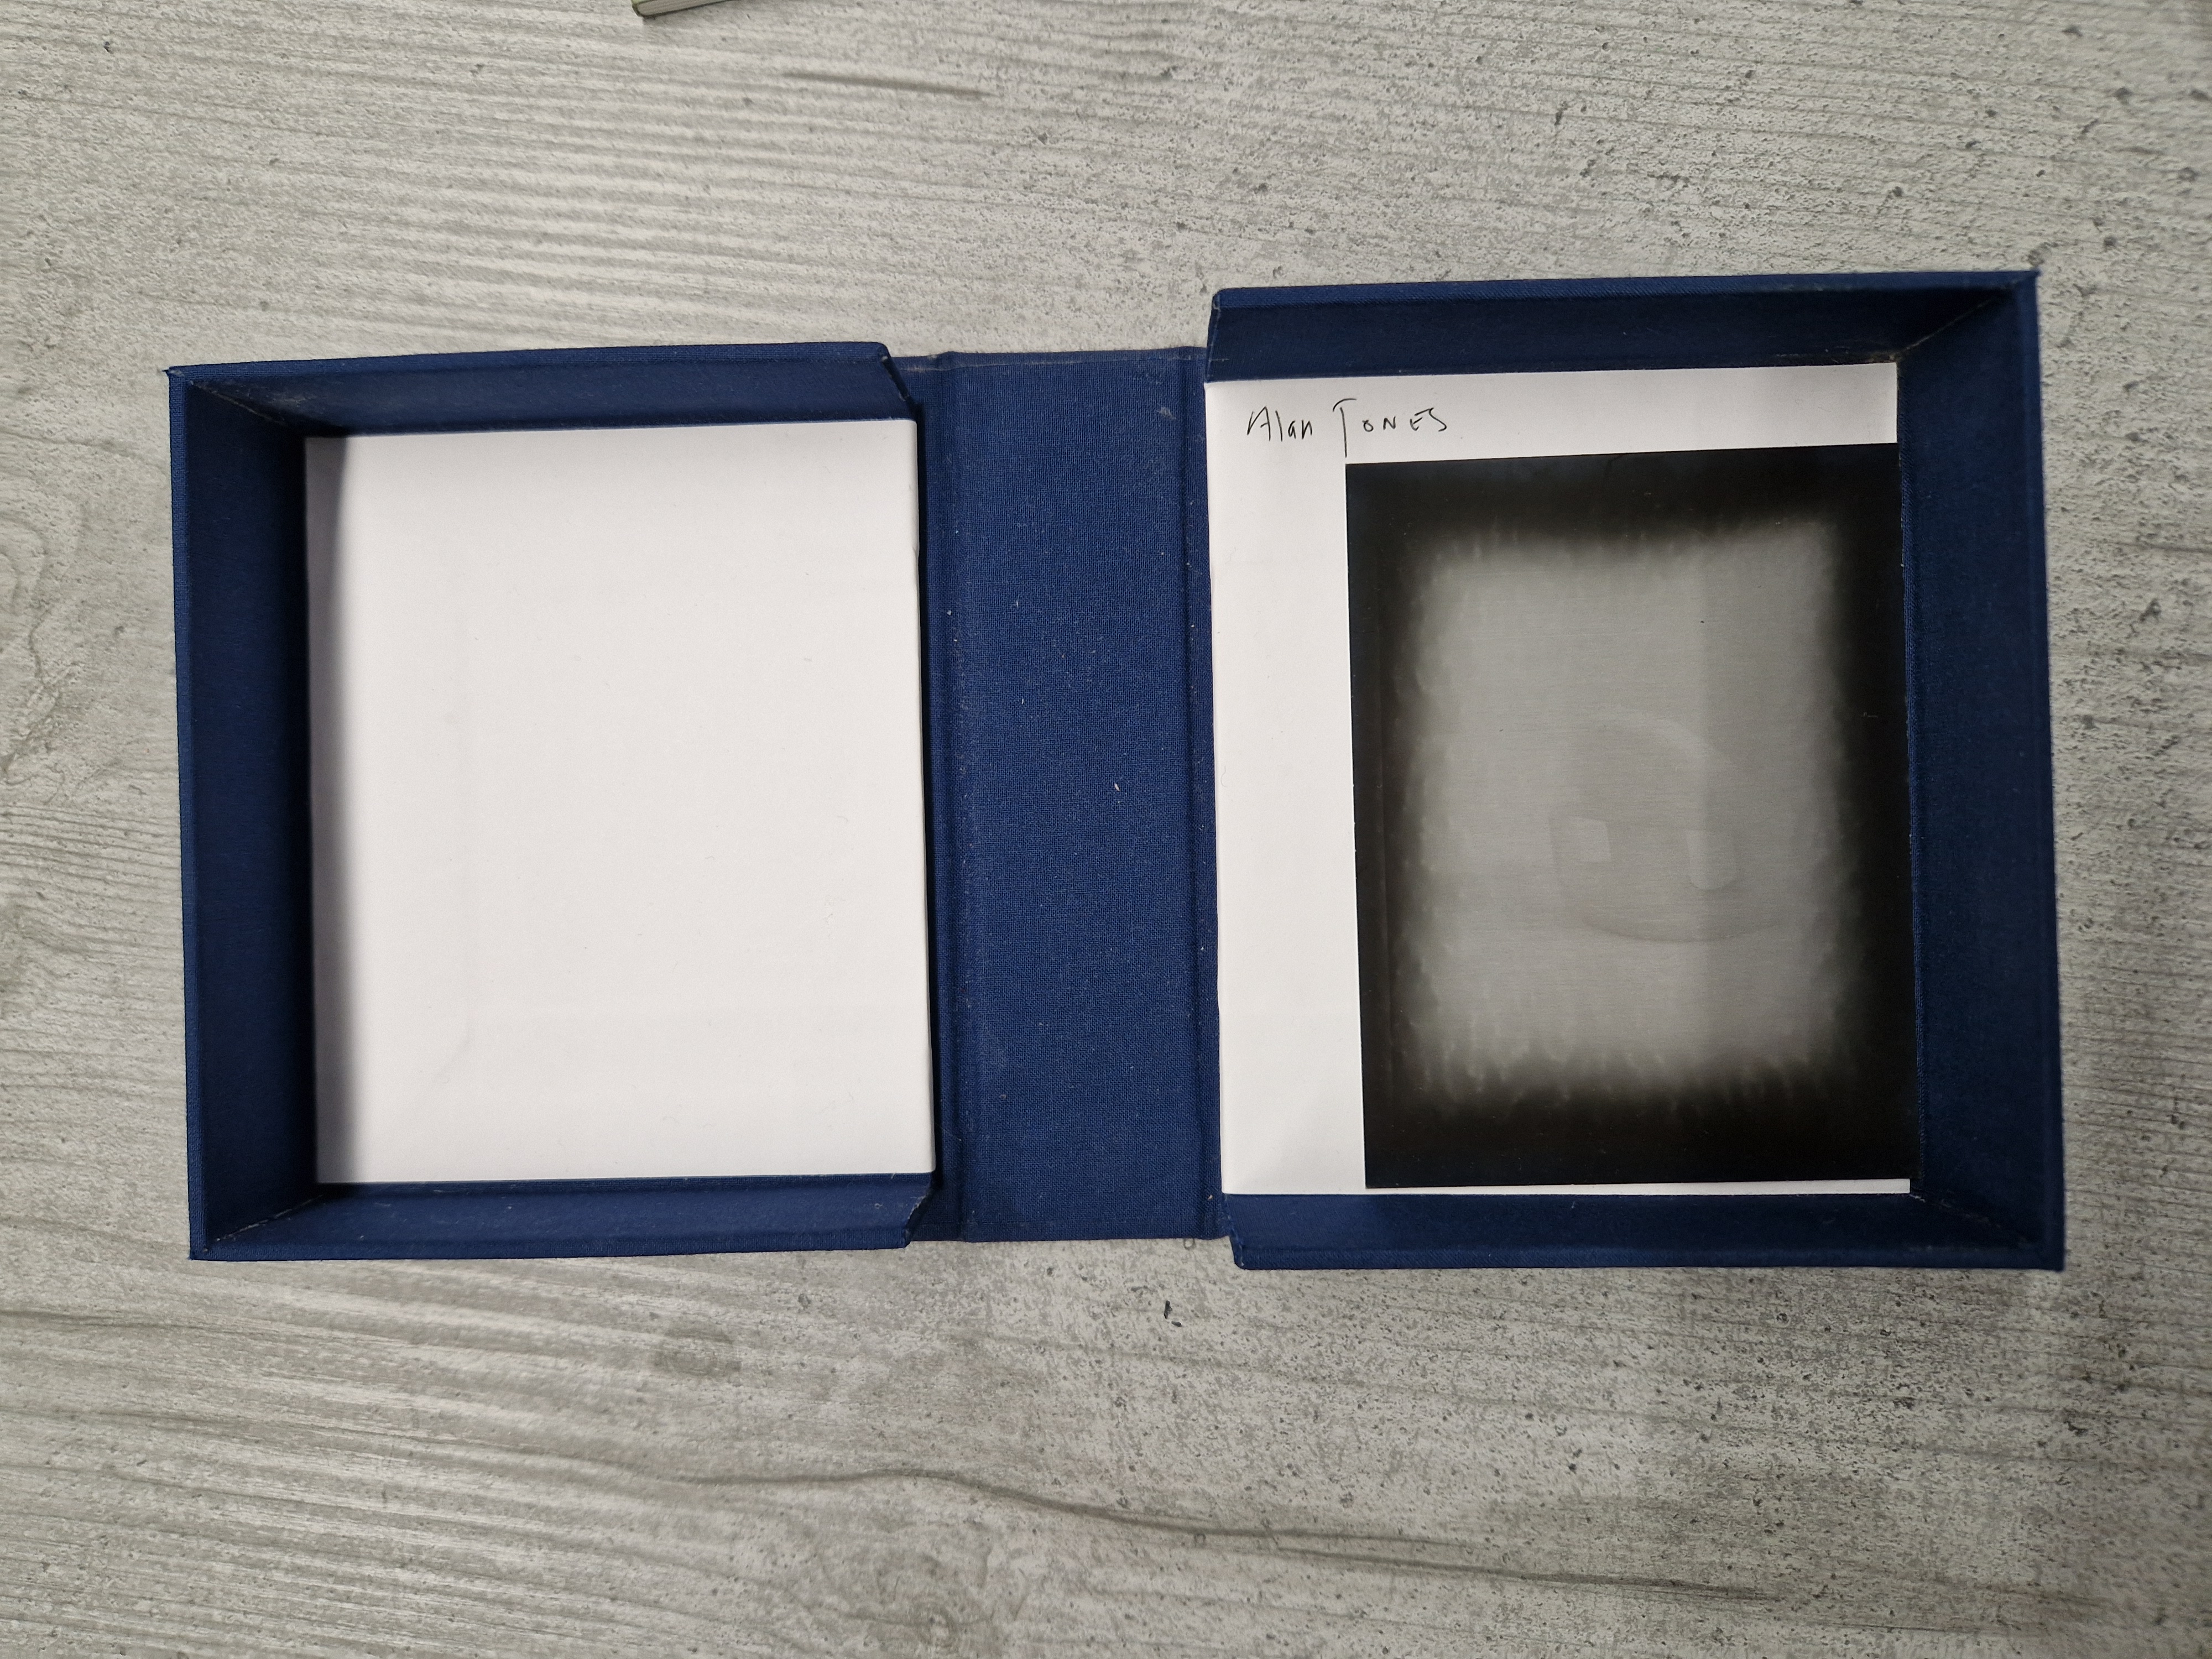
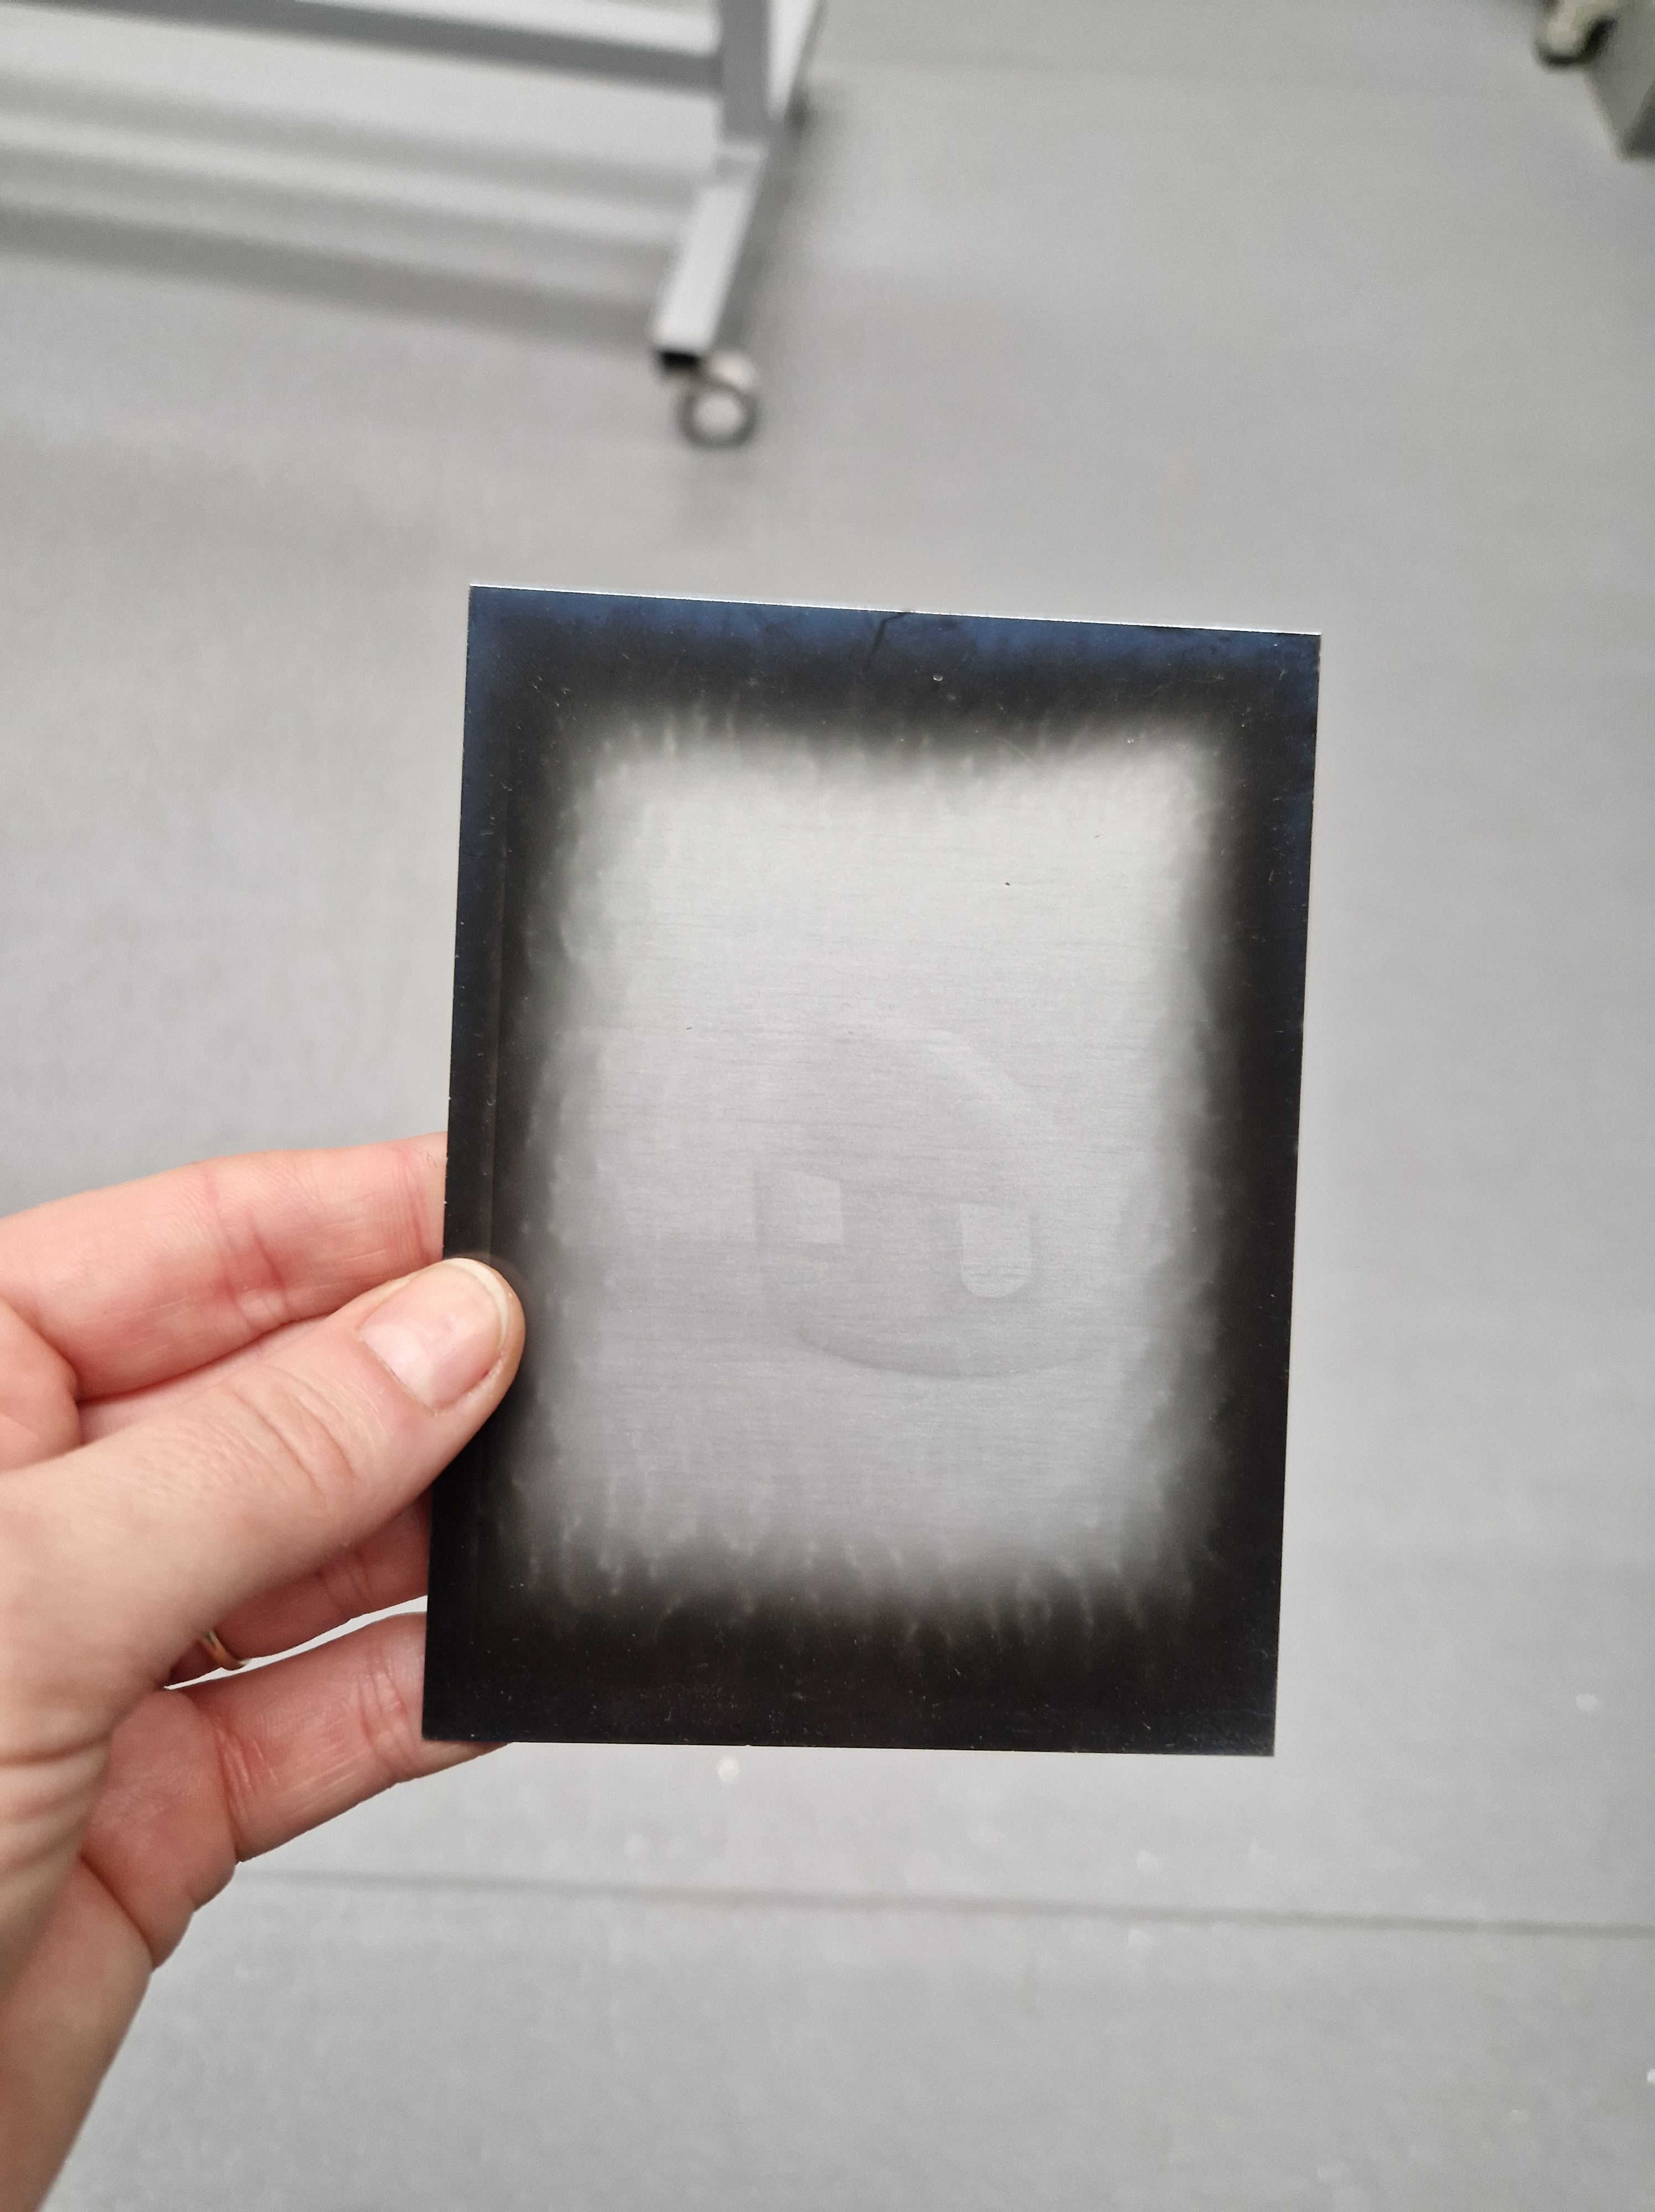
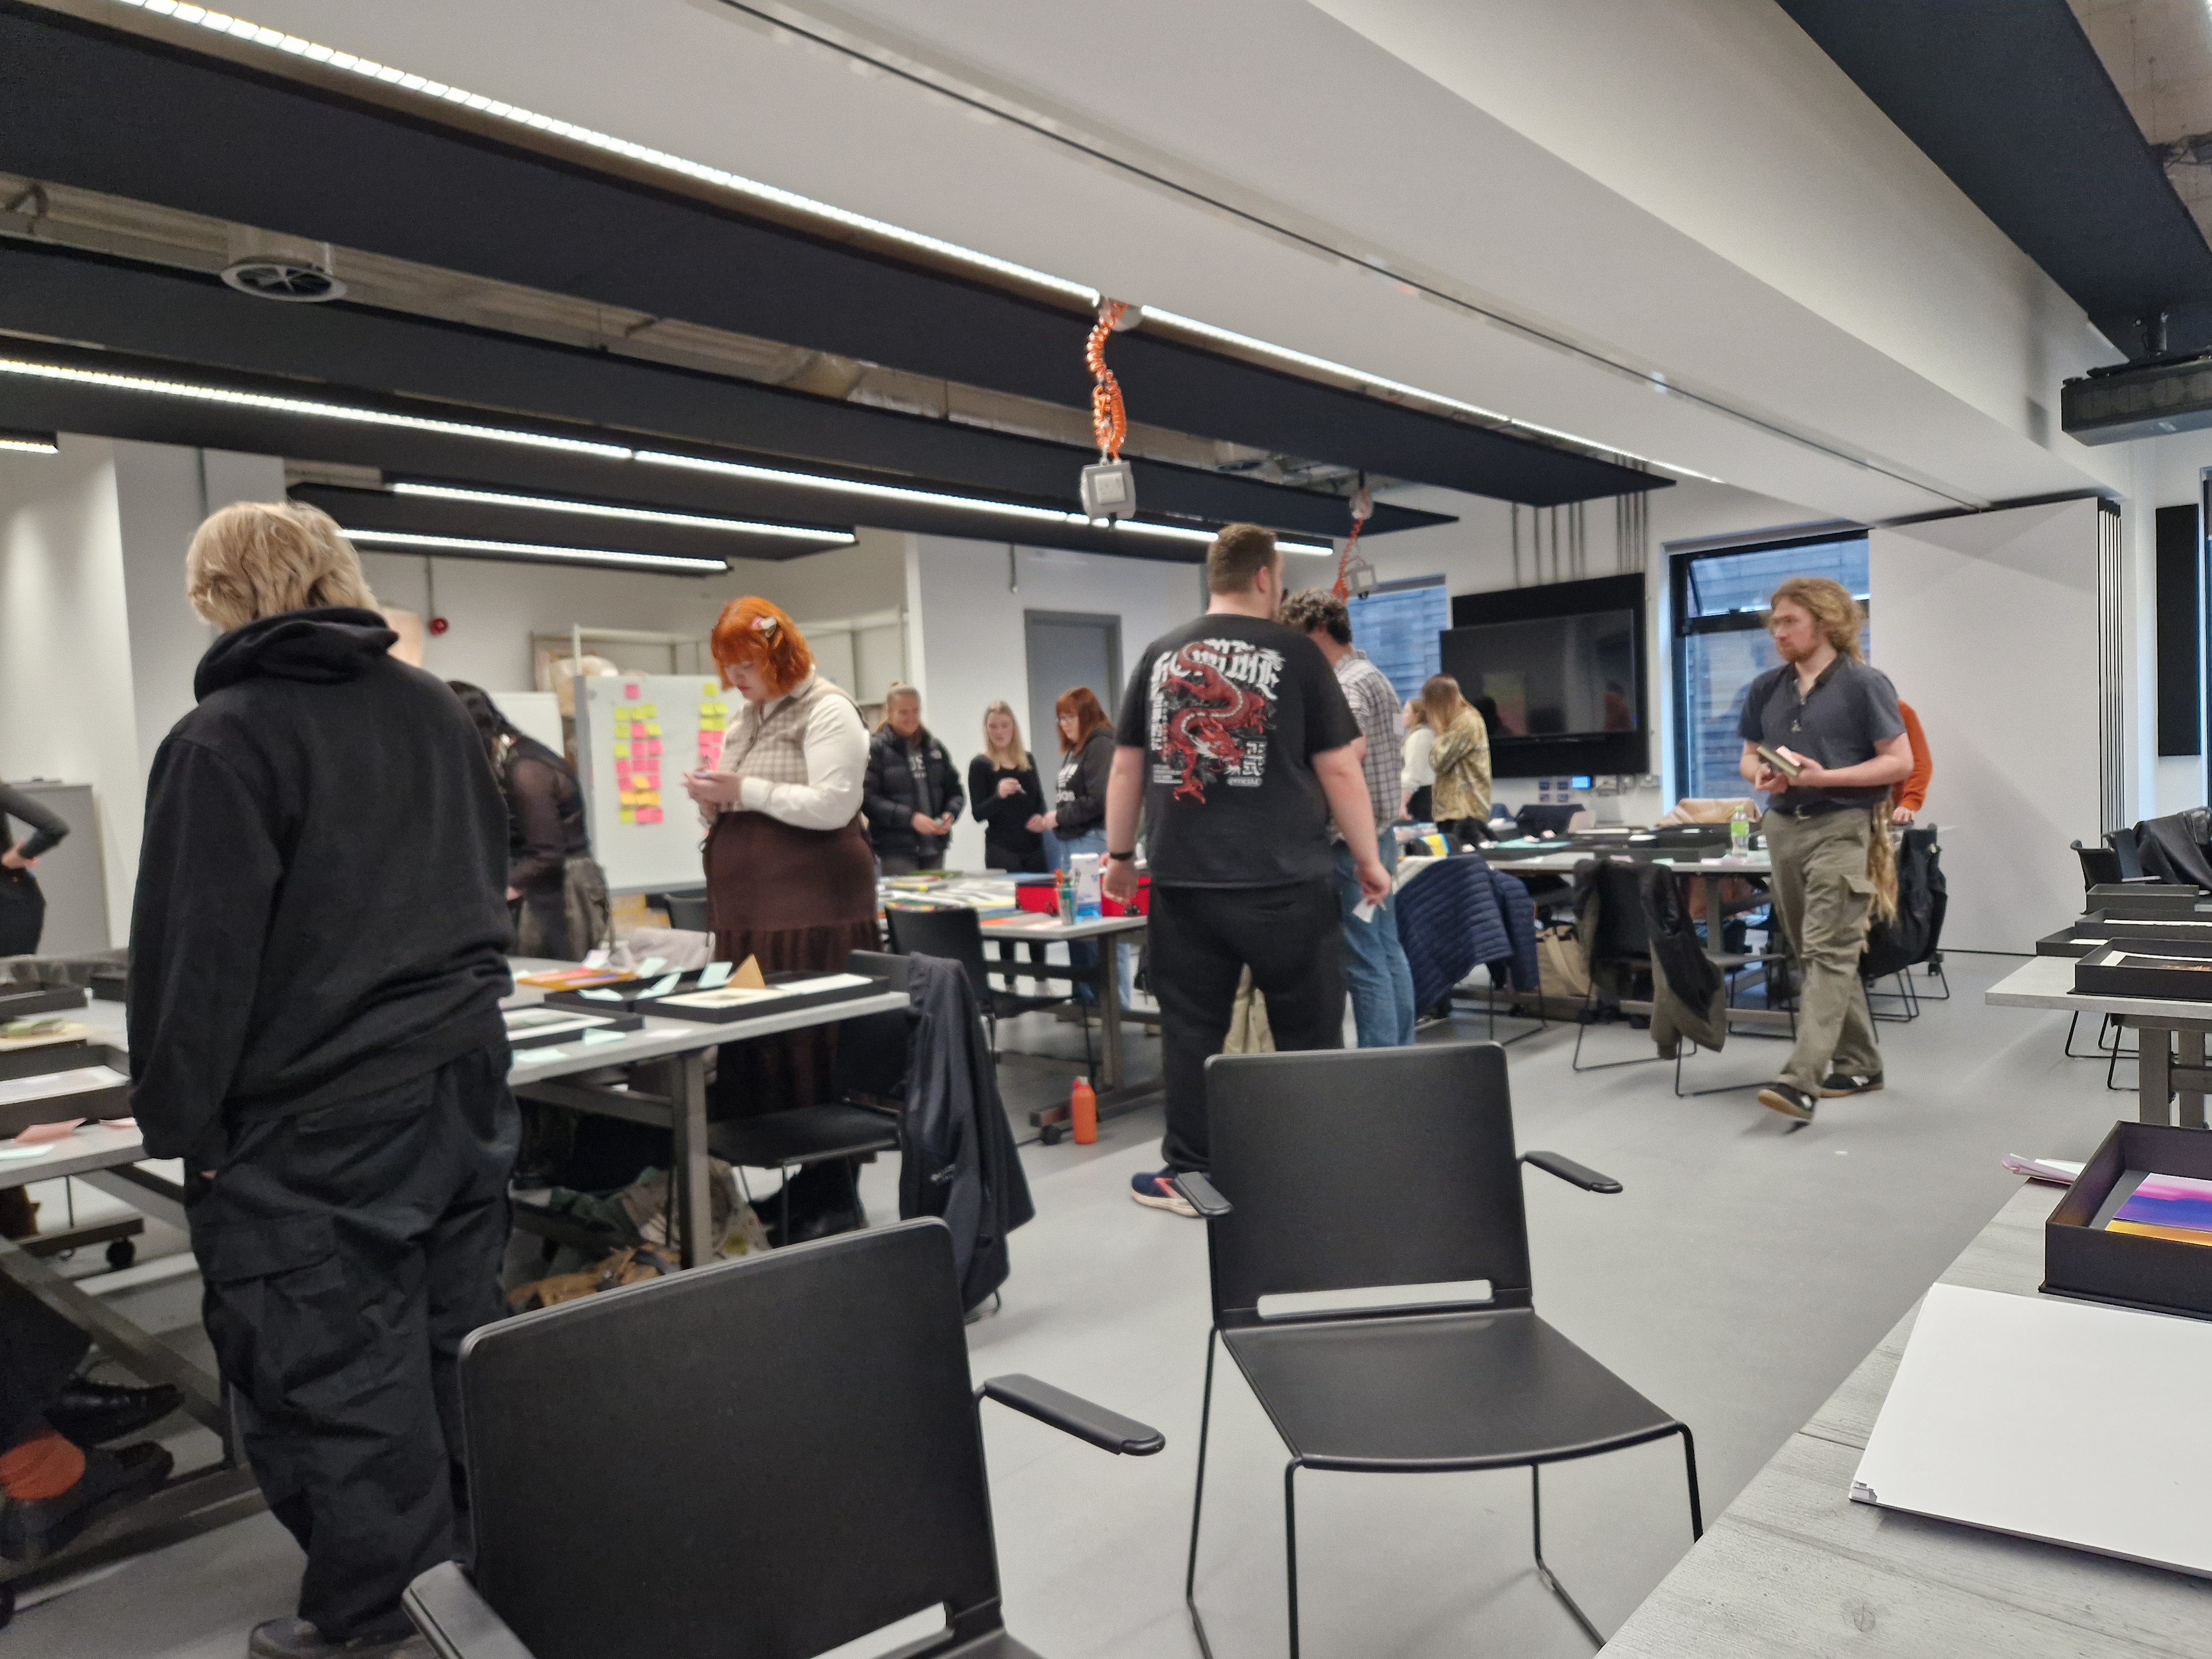
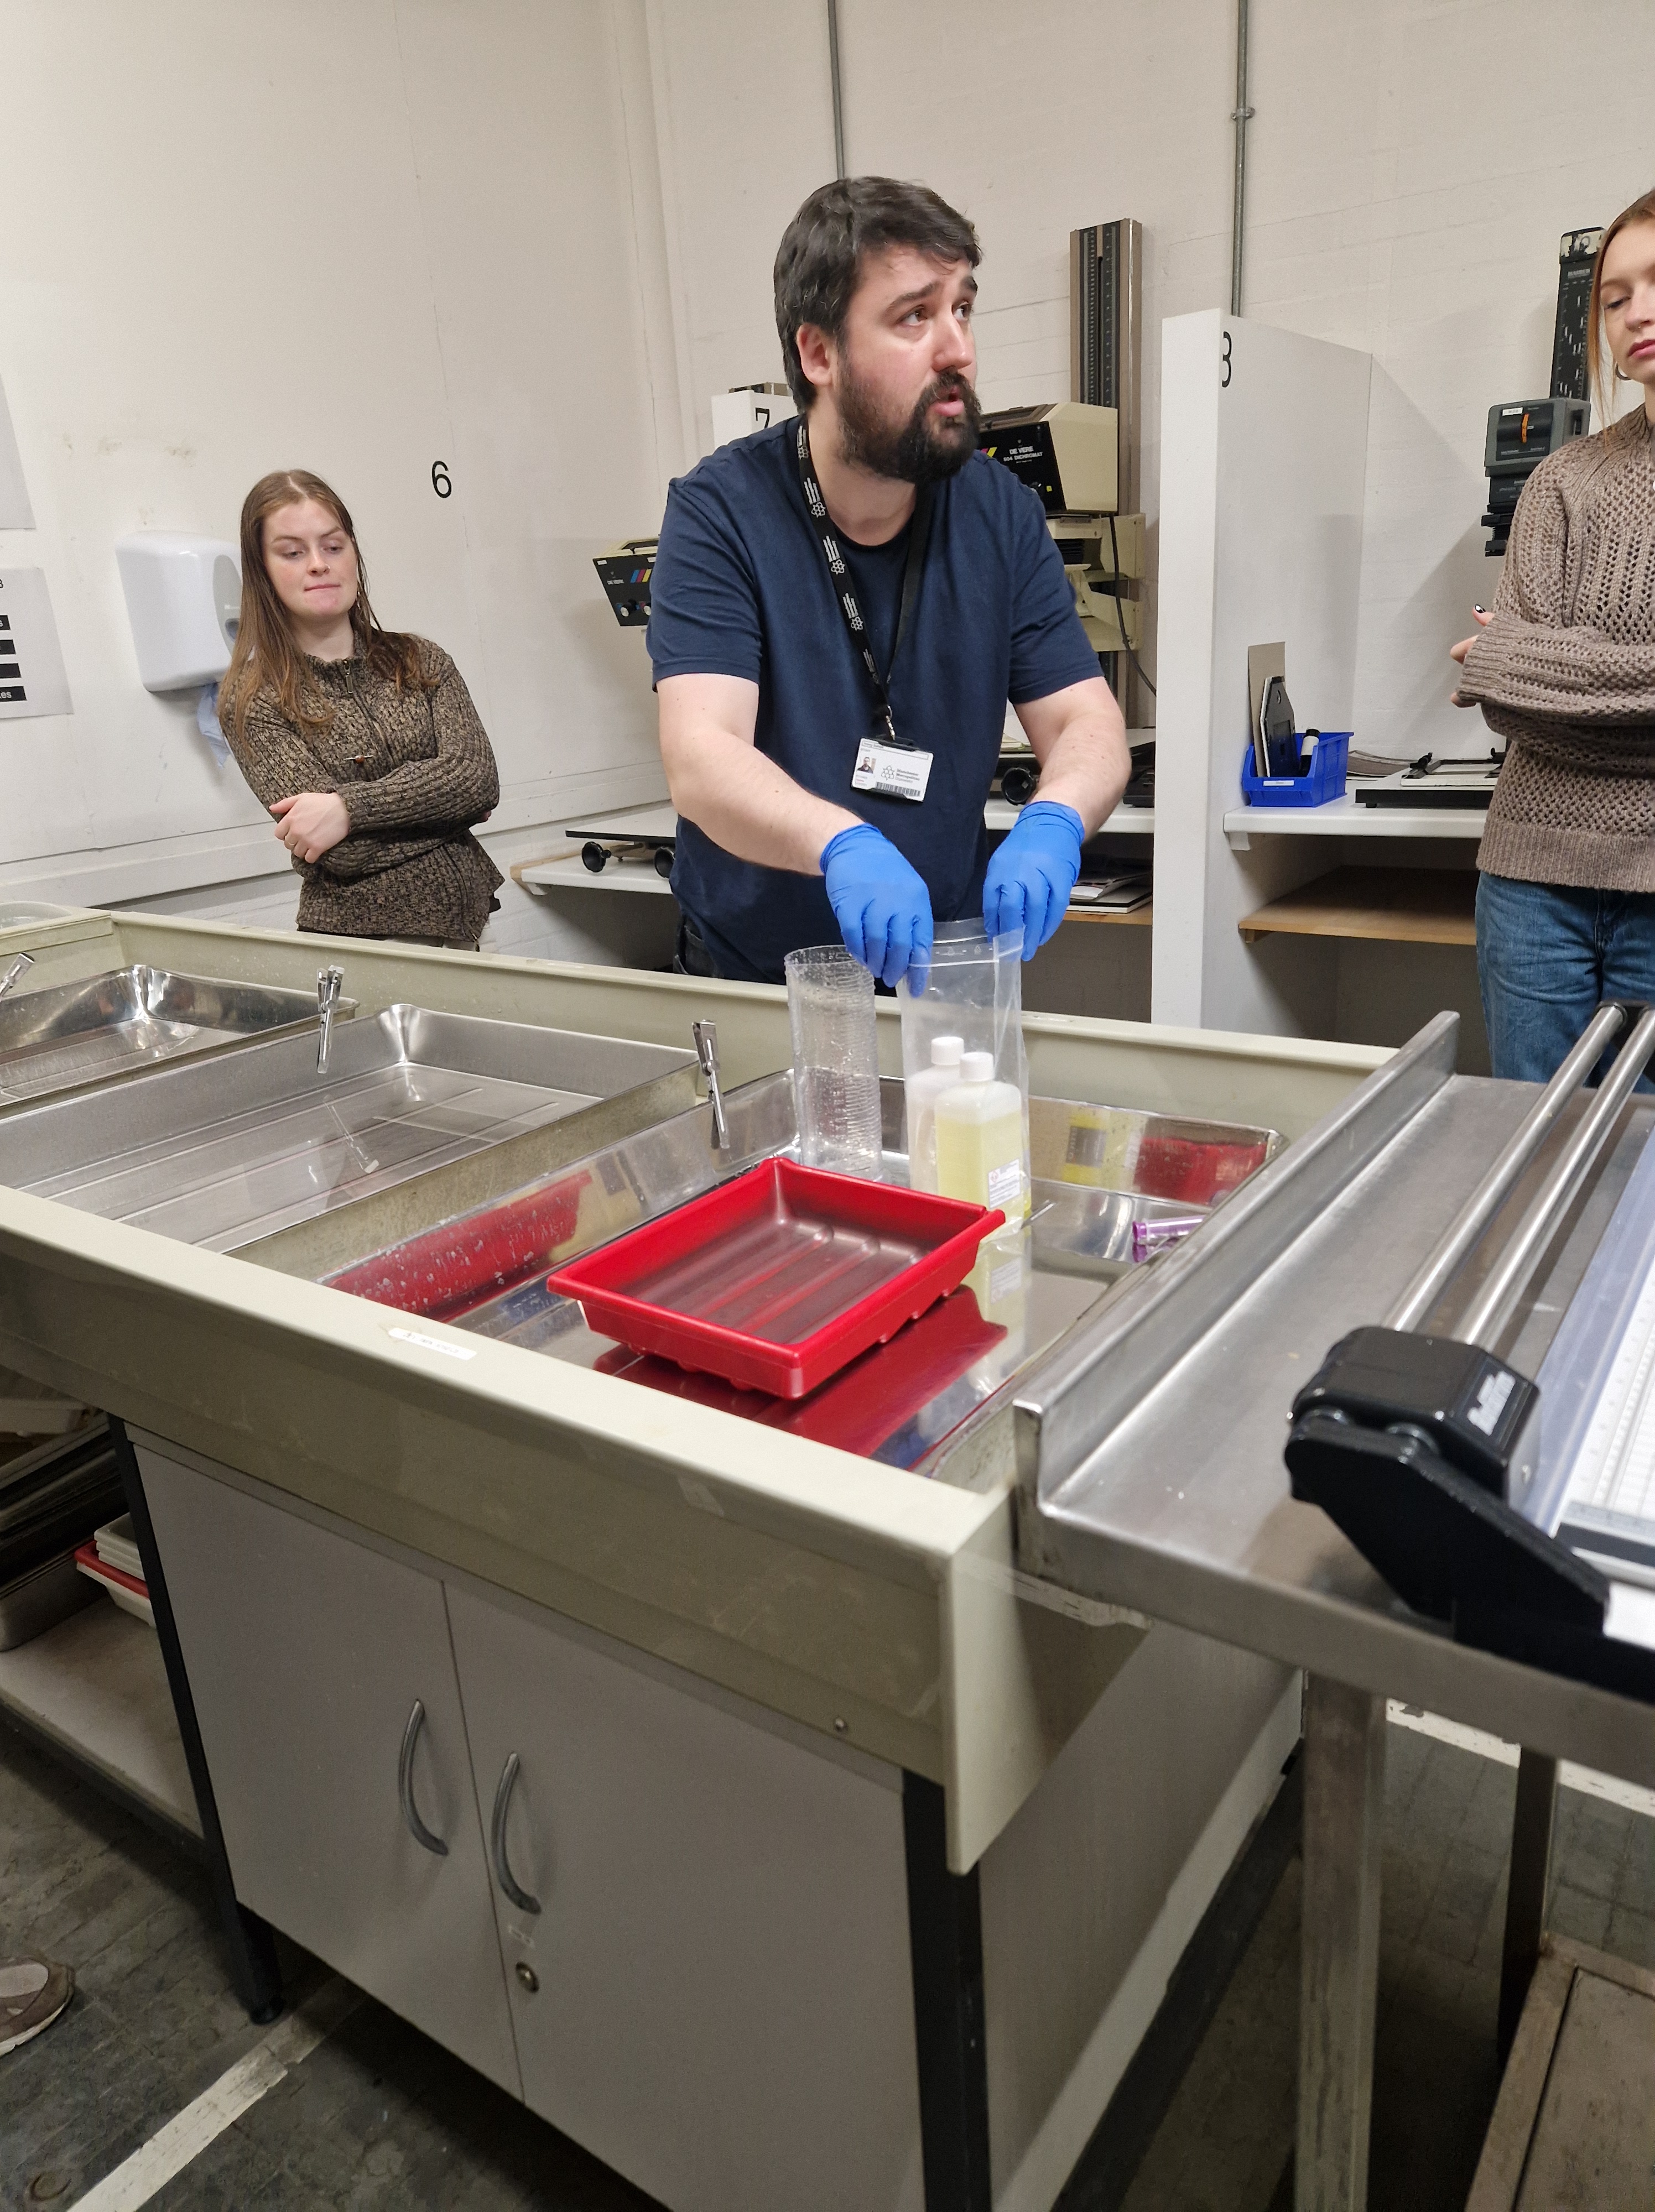
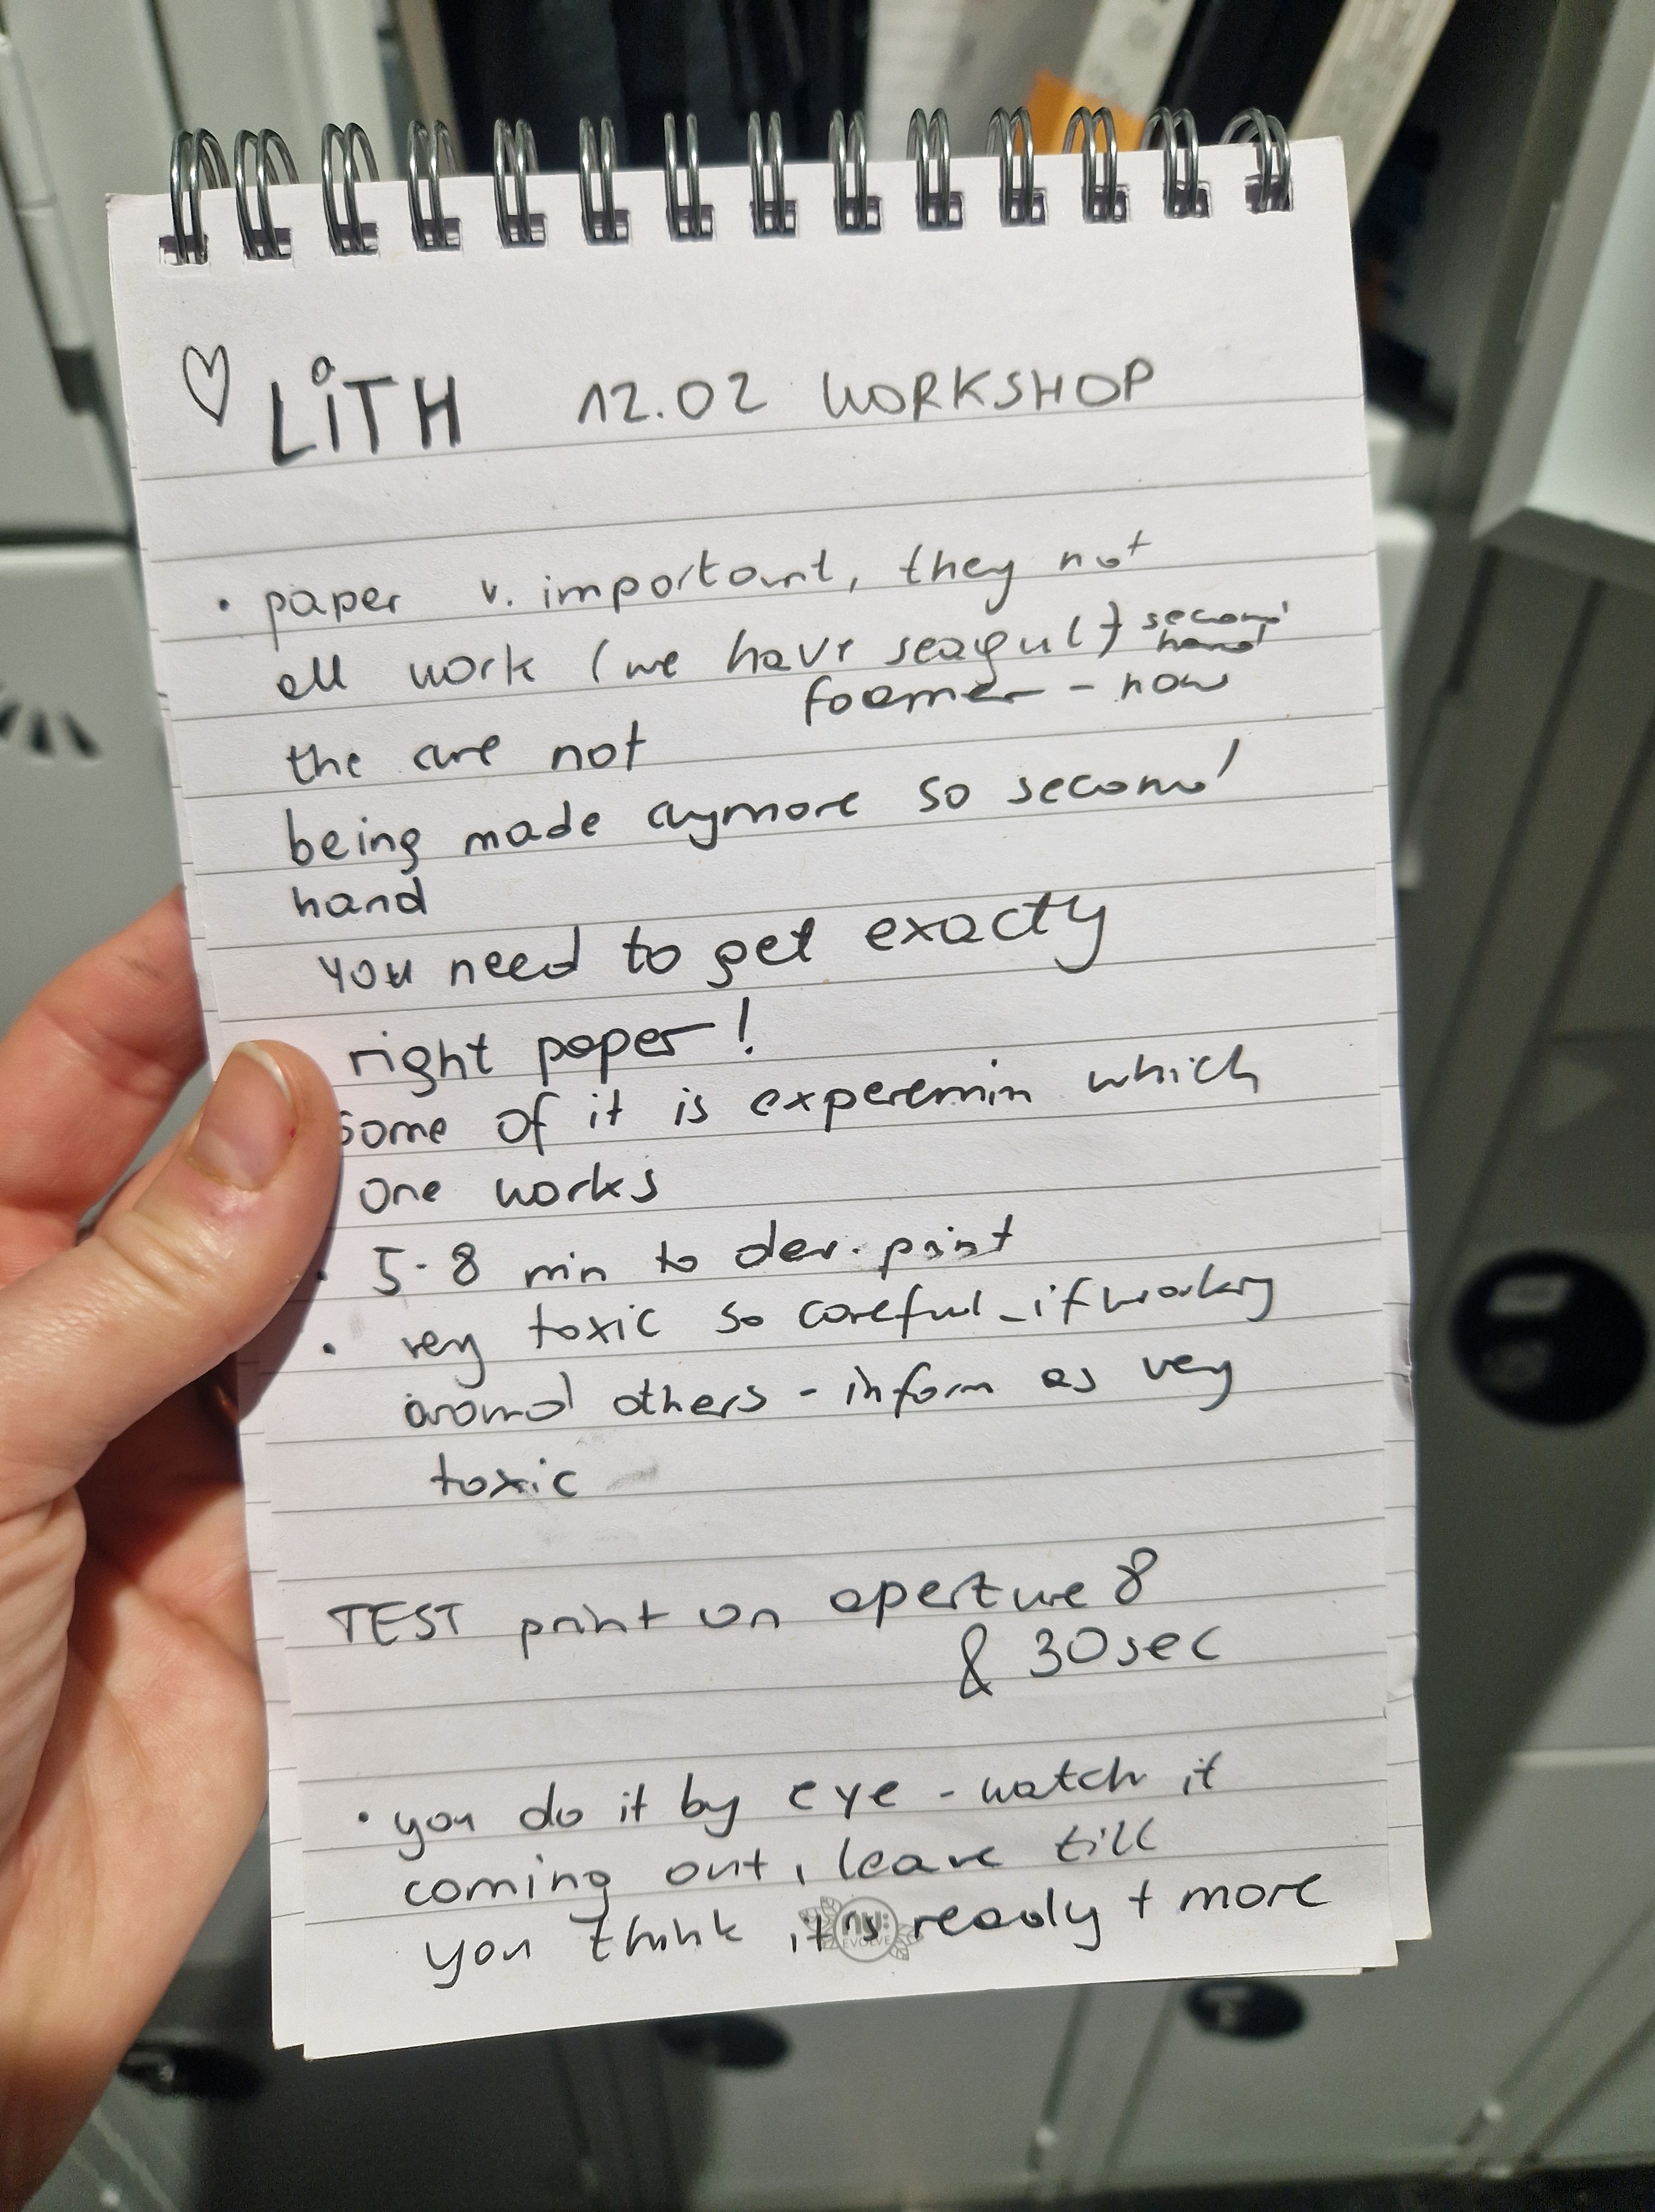
LITH WORKSHOP WITH ALAN JONES

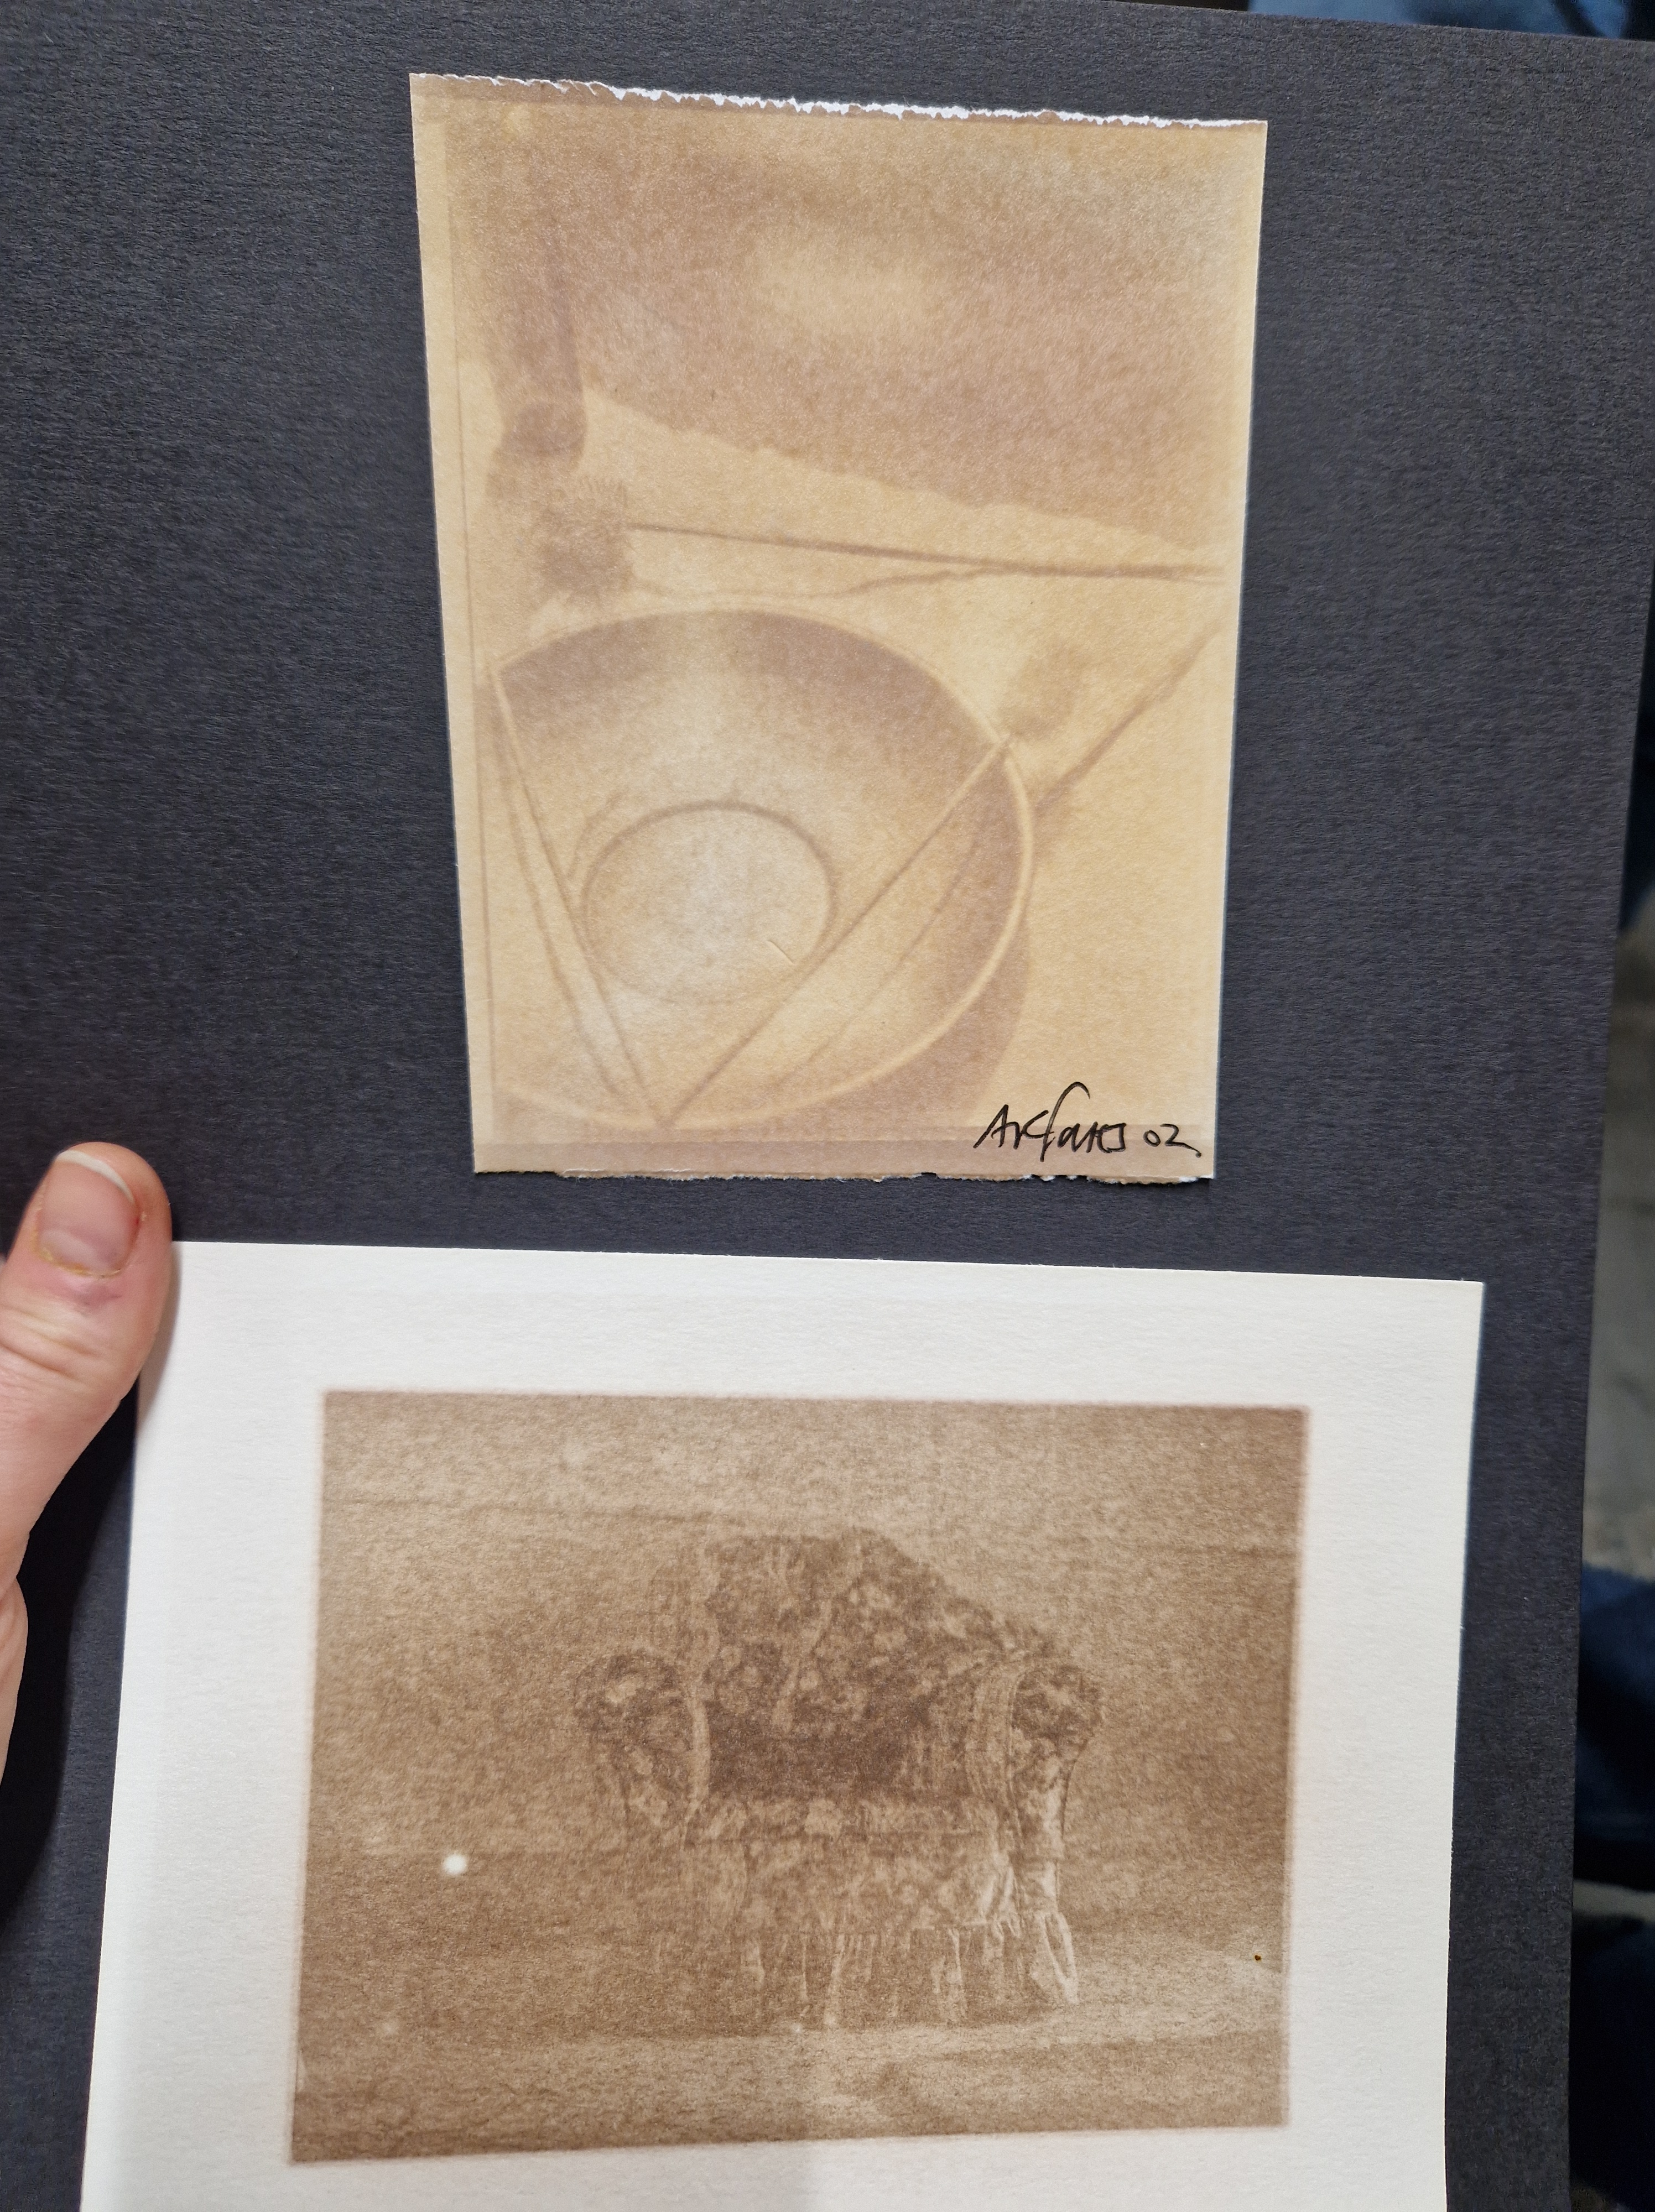
RESULTS
REFLECTIONS: Absolutely amazing workshop expanding the possibilities of darkroom printing. The only thing I wish for is that we had the opportunity to learn it sooner. I love and welcome the unpredictability and collaboration with chance in my work, so this method really resonates with me. I would love to print using this technique more in the future.
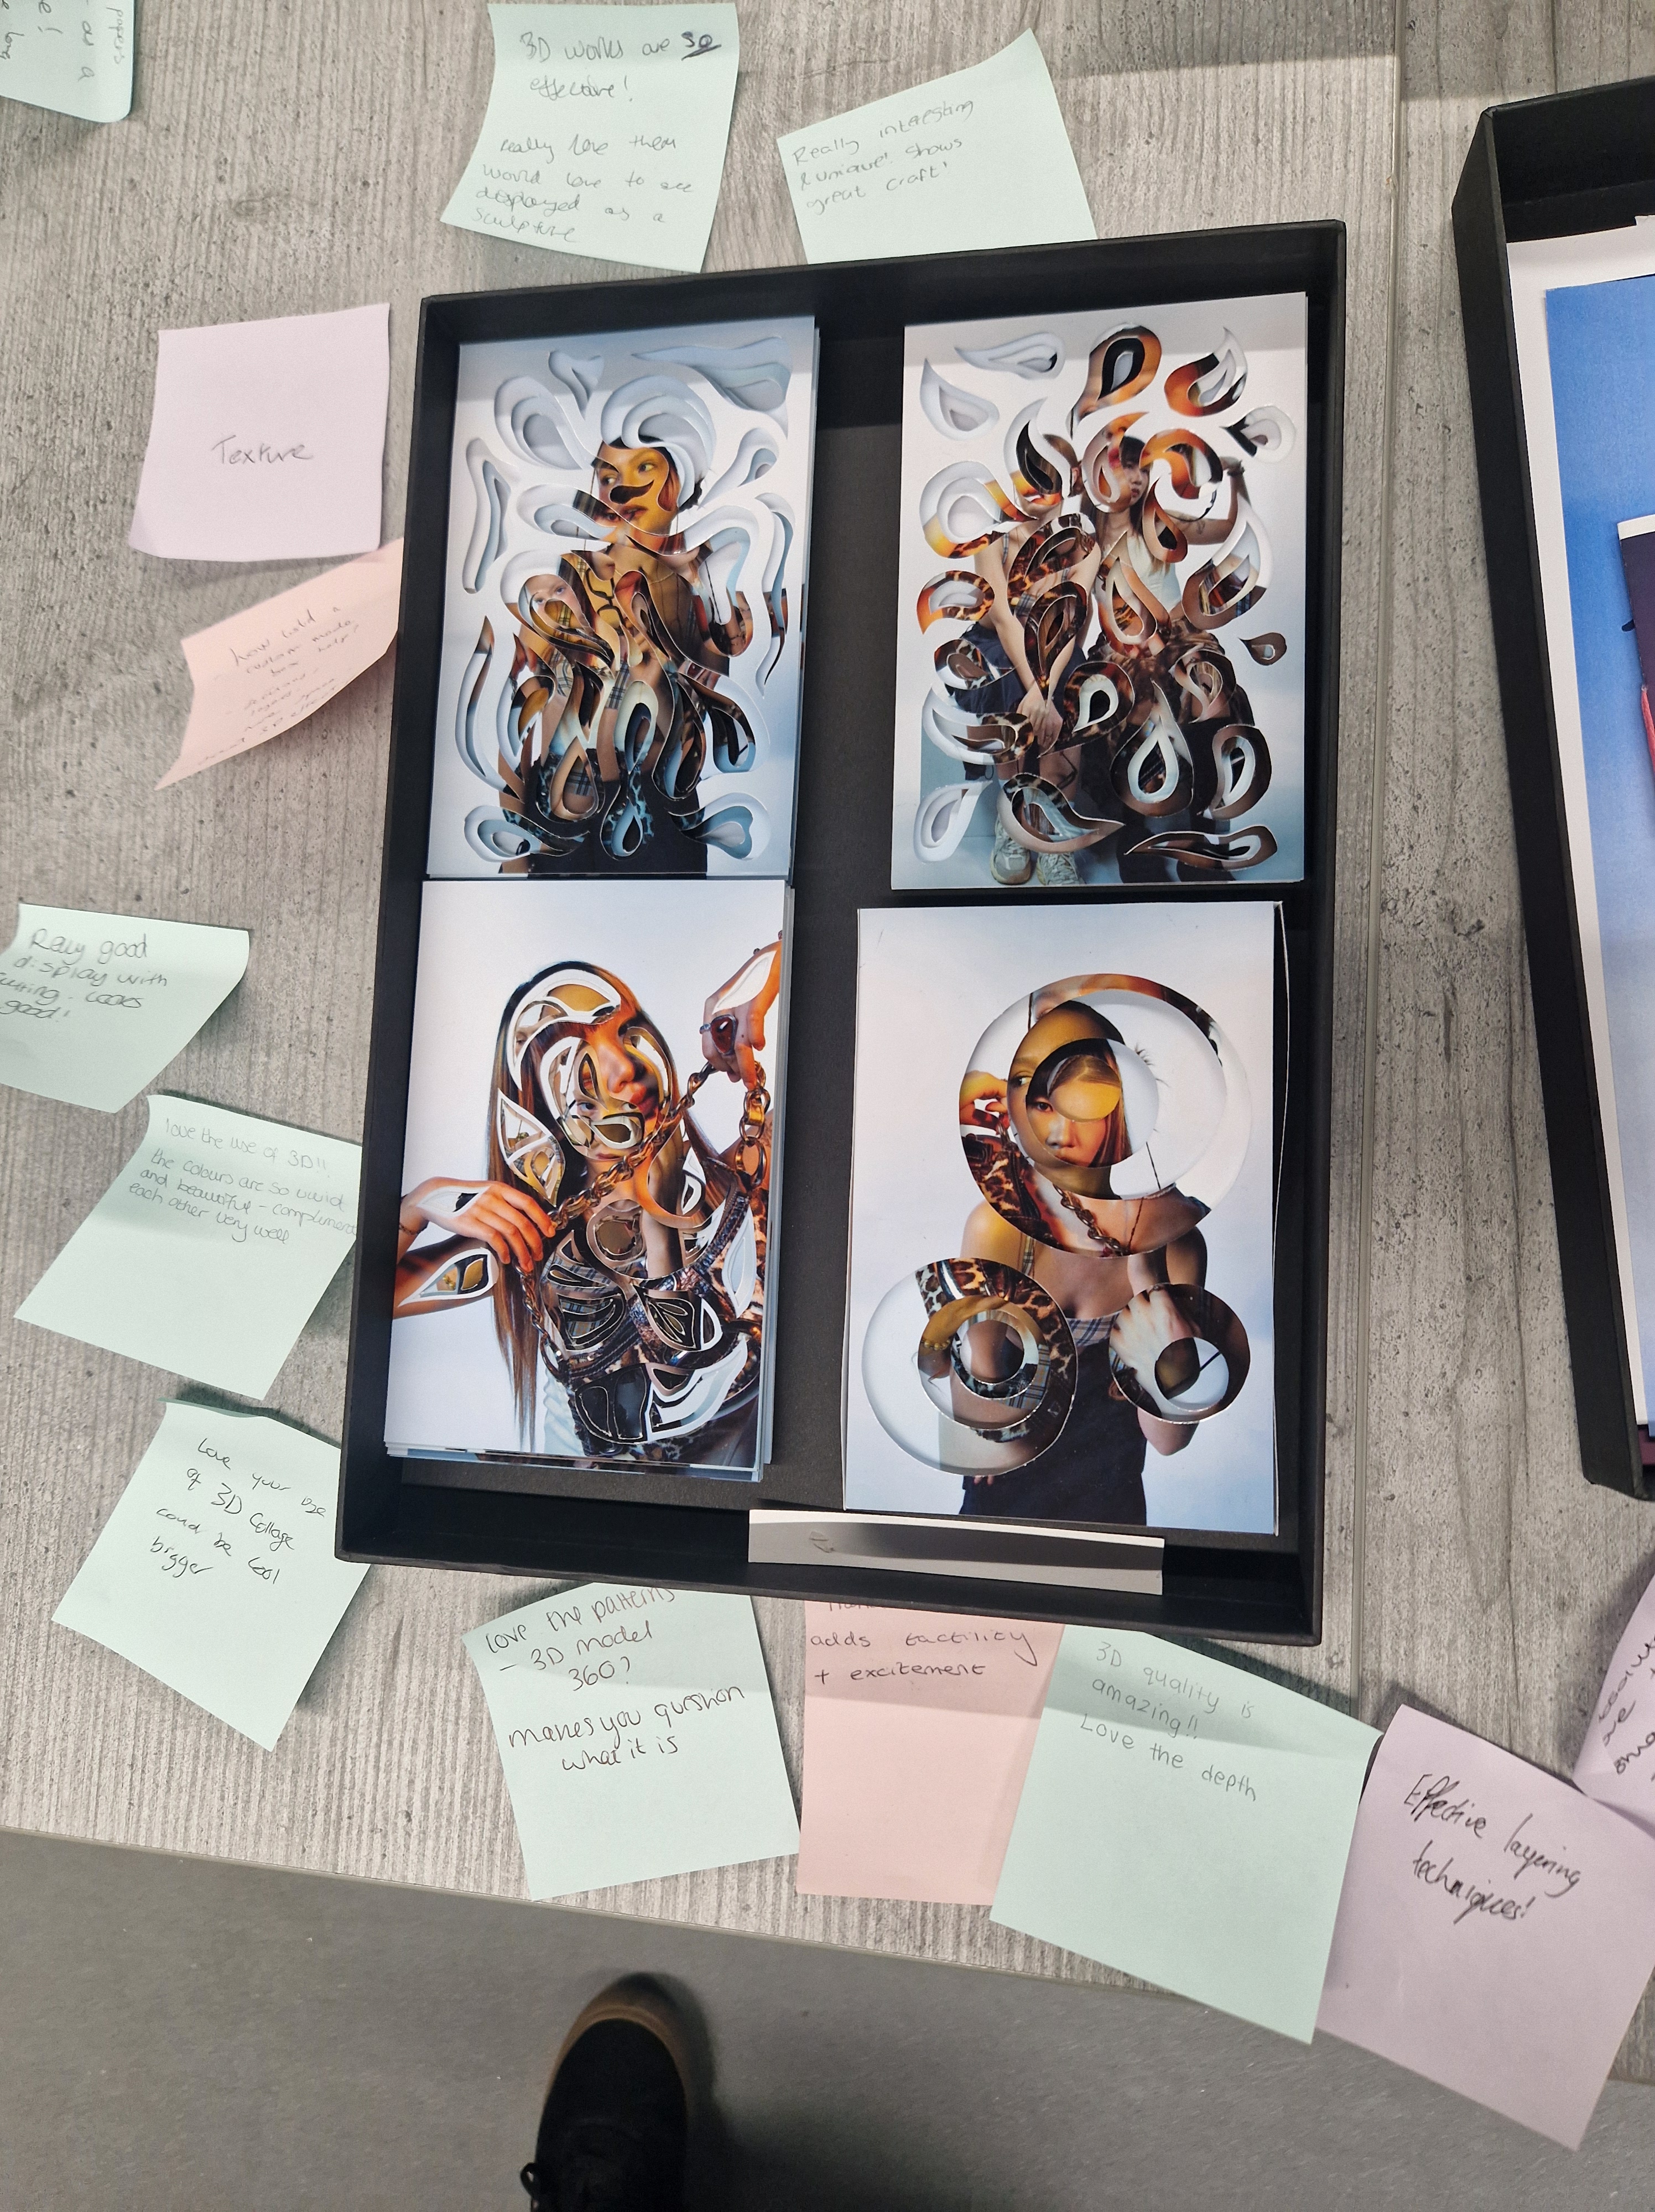
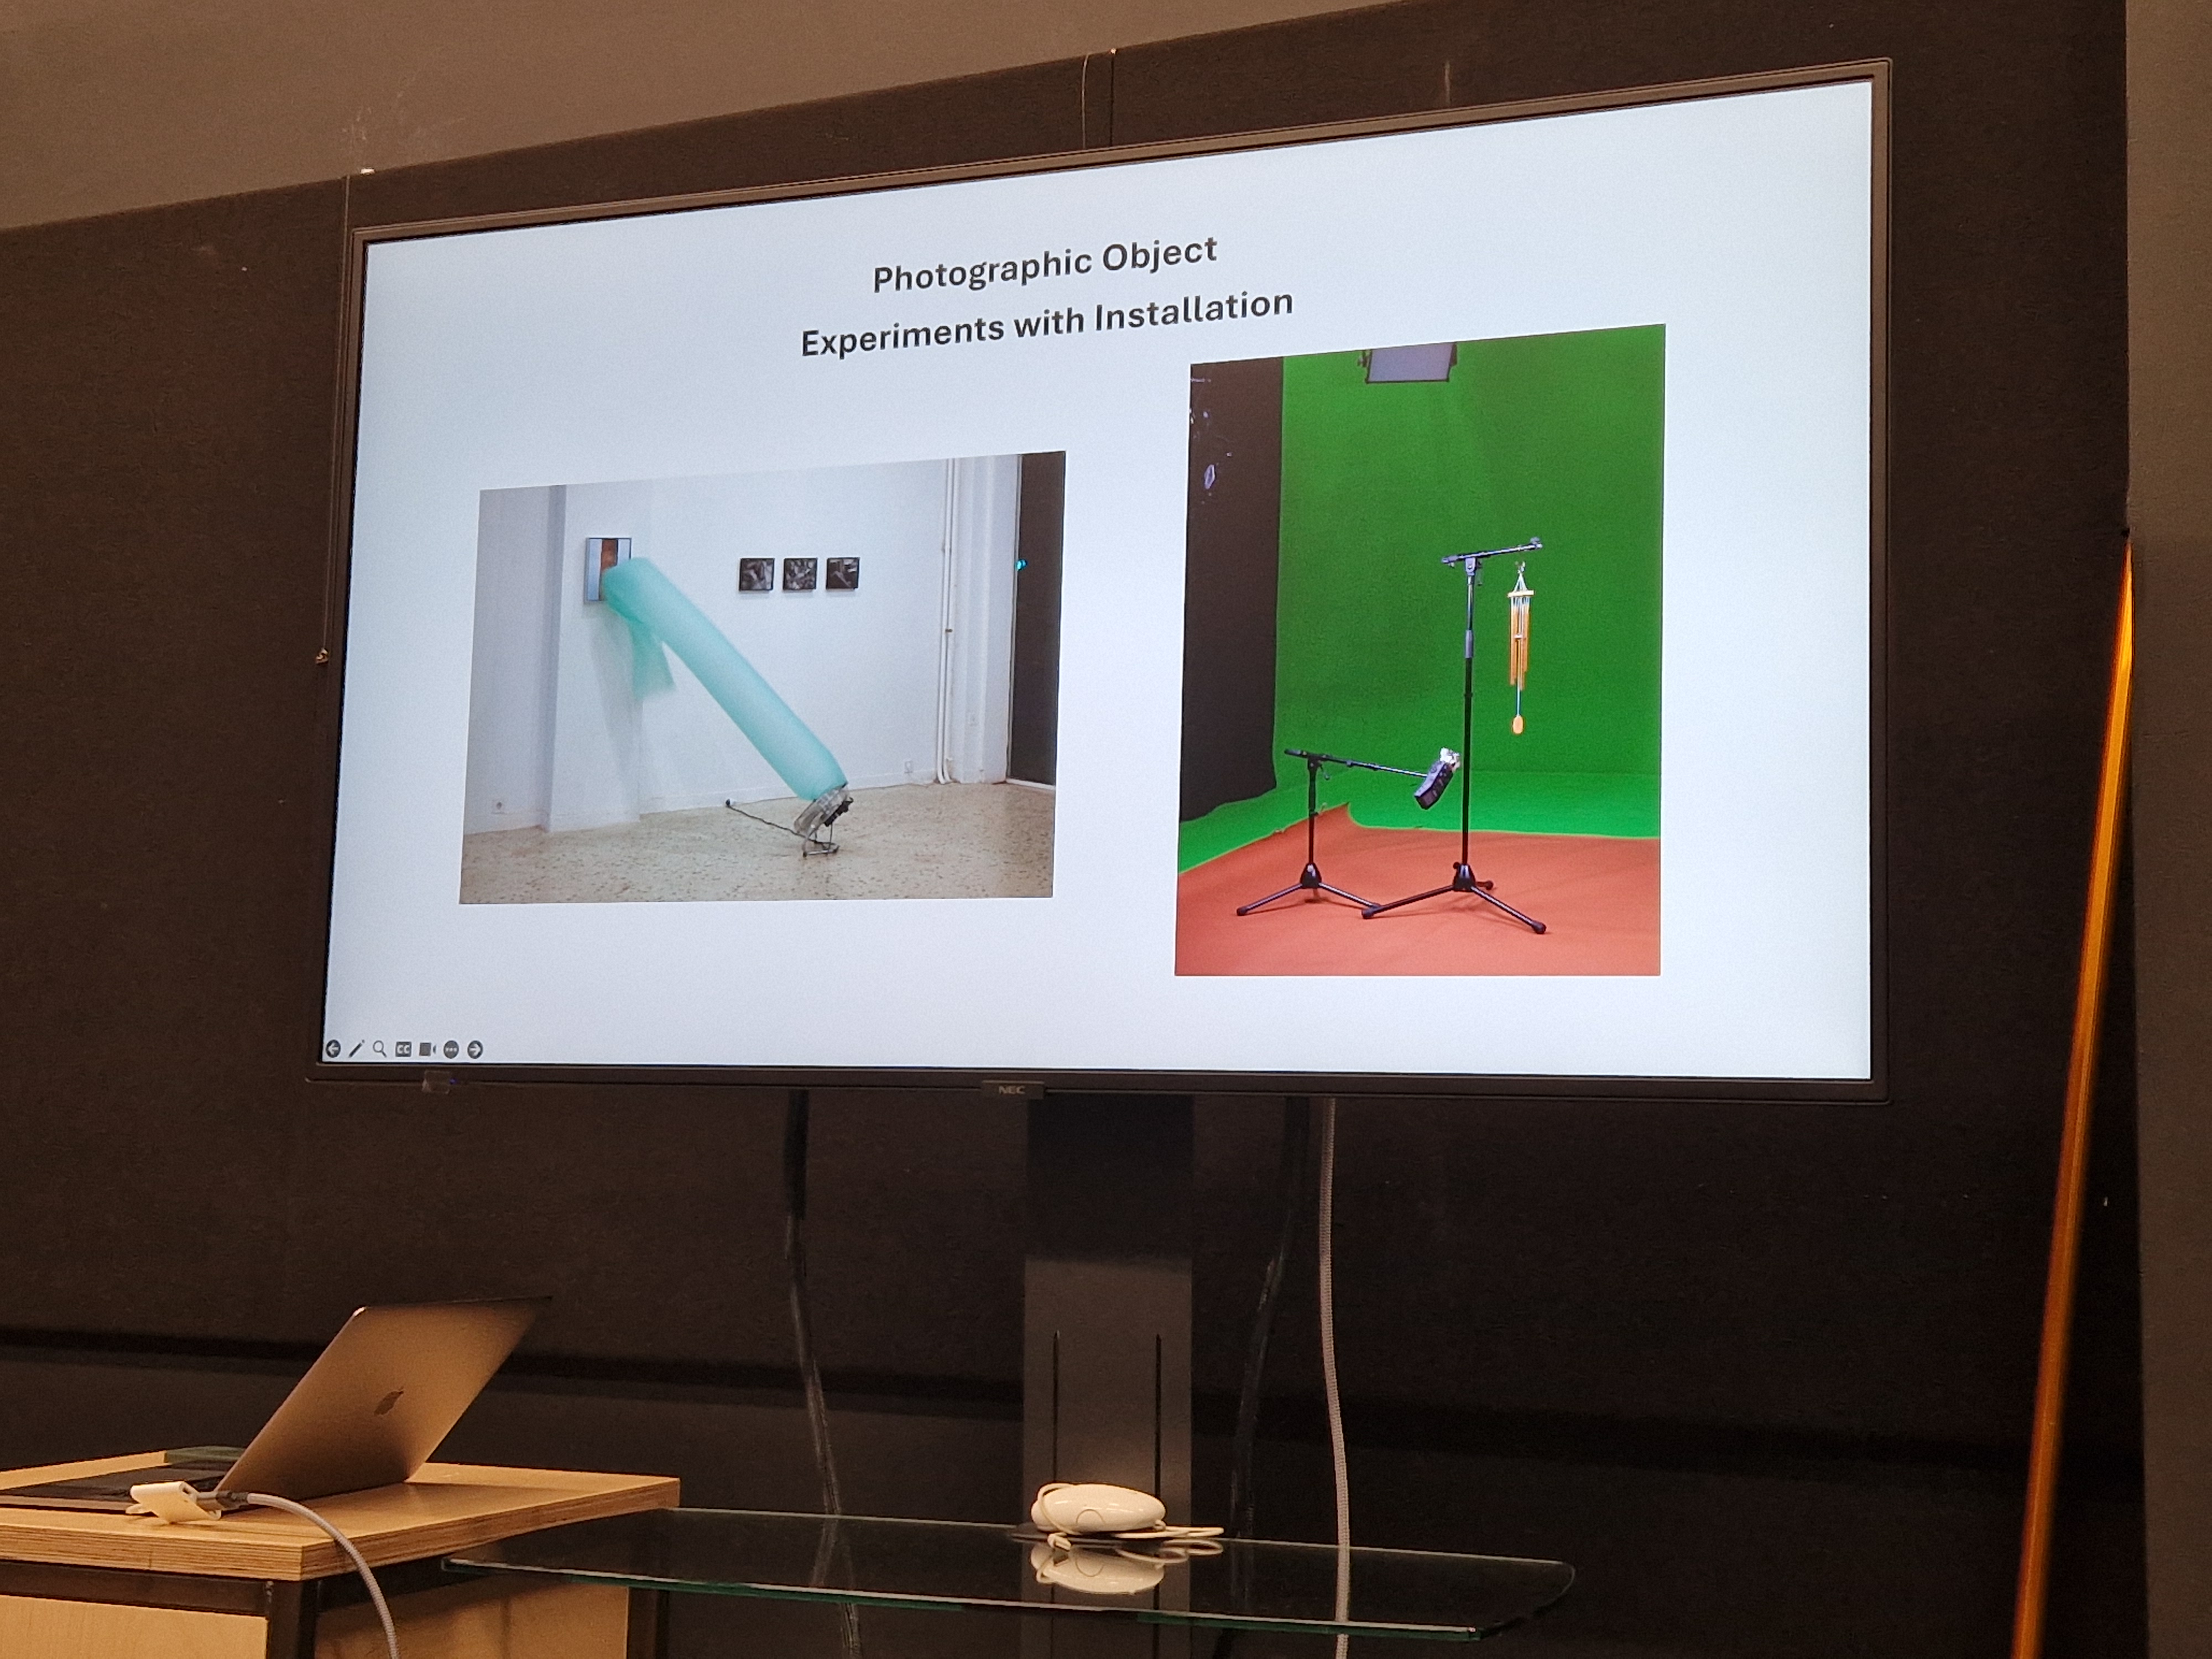
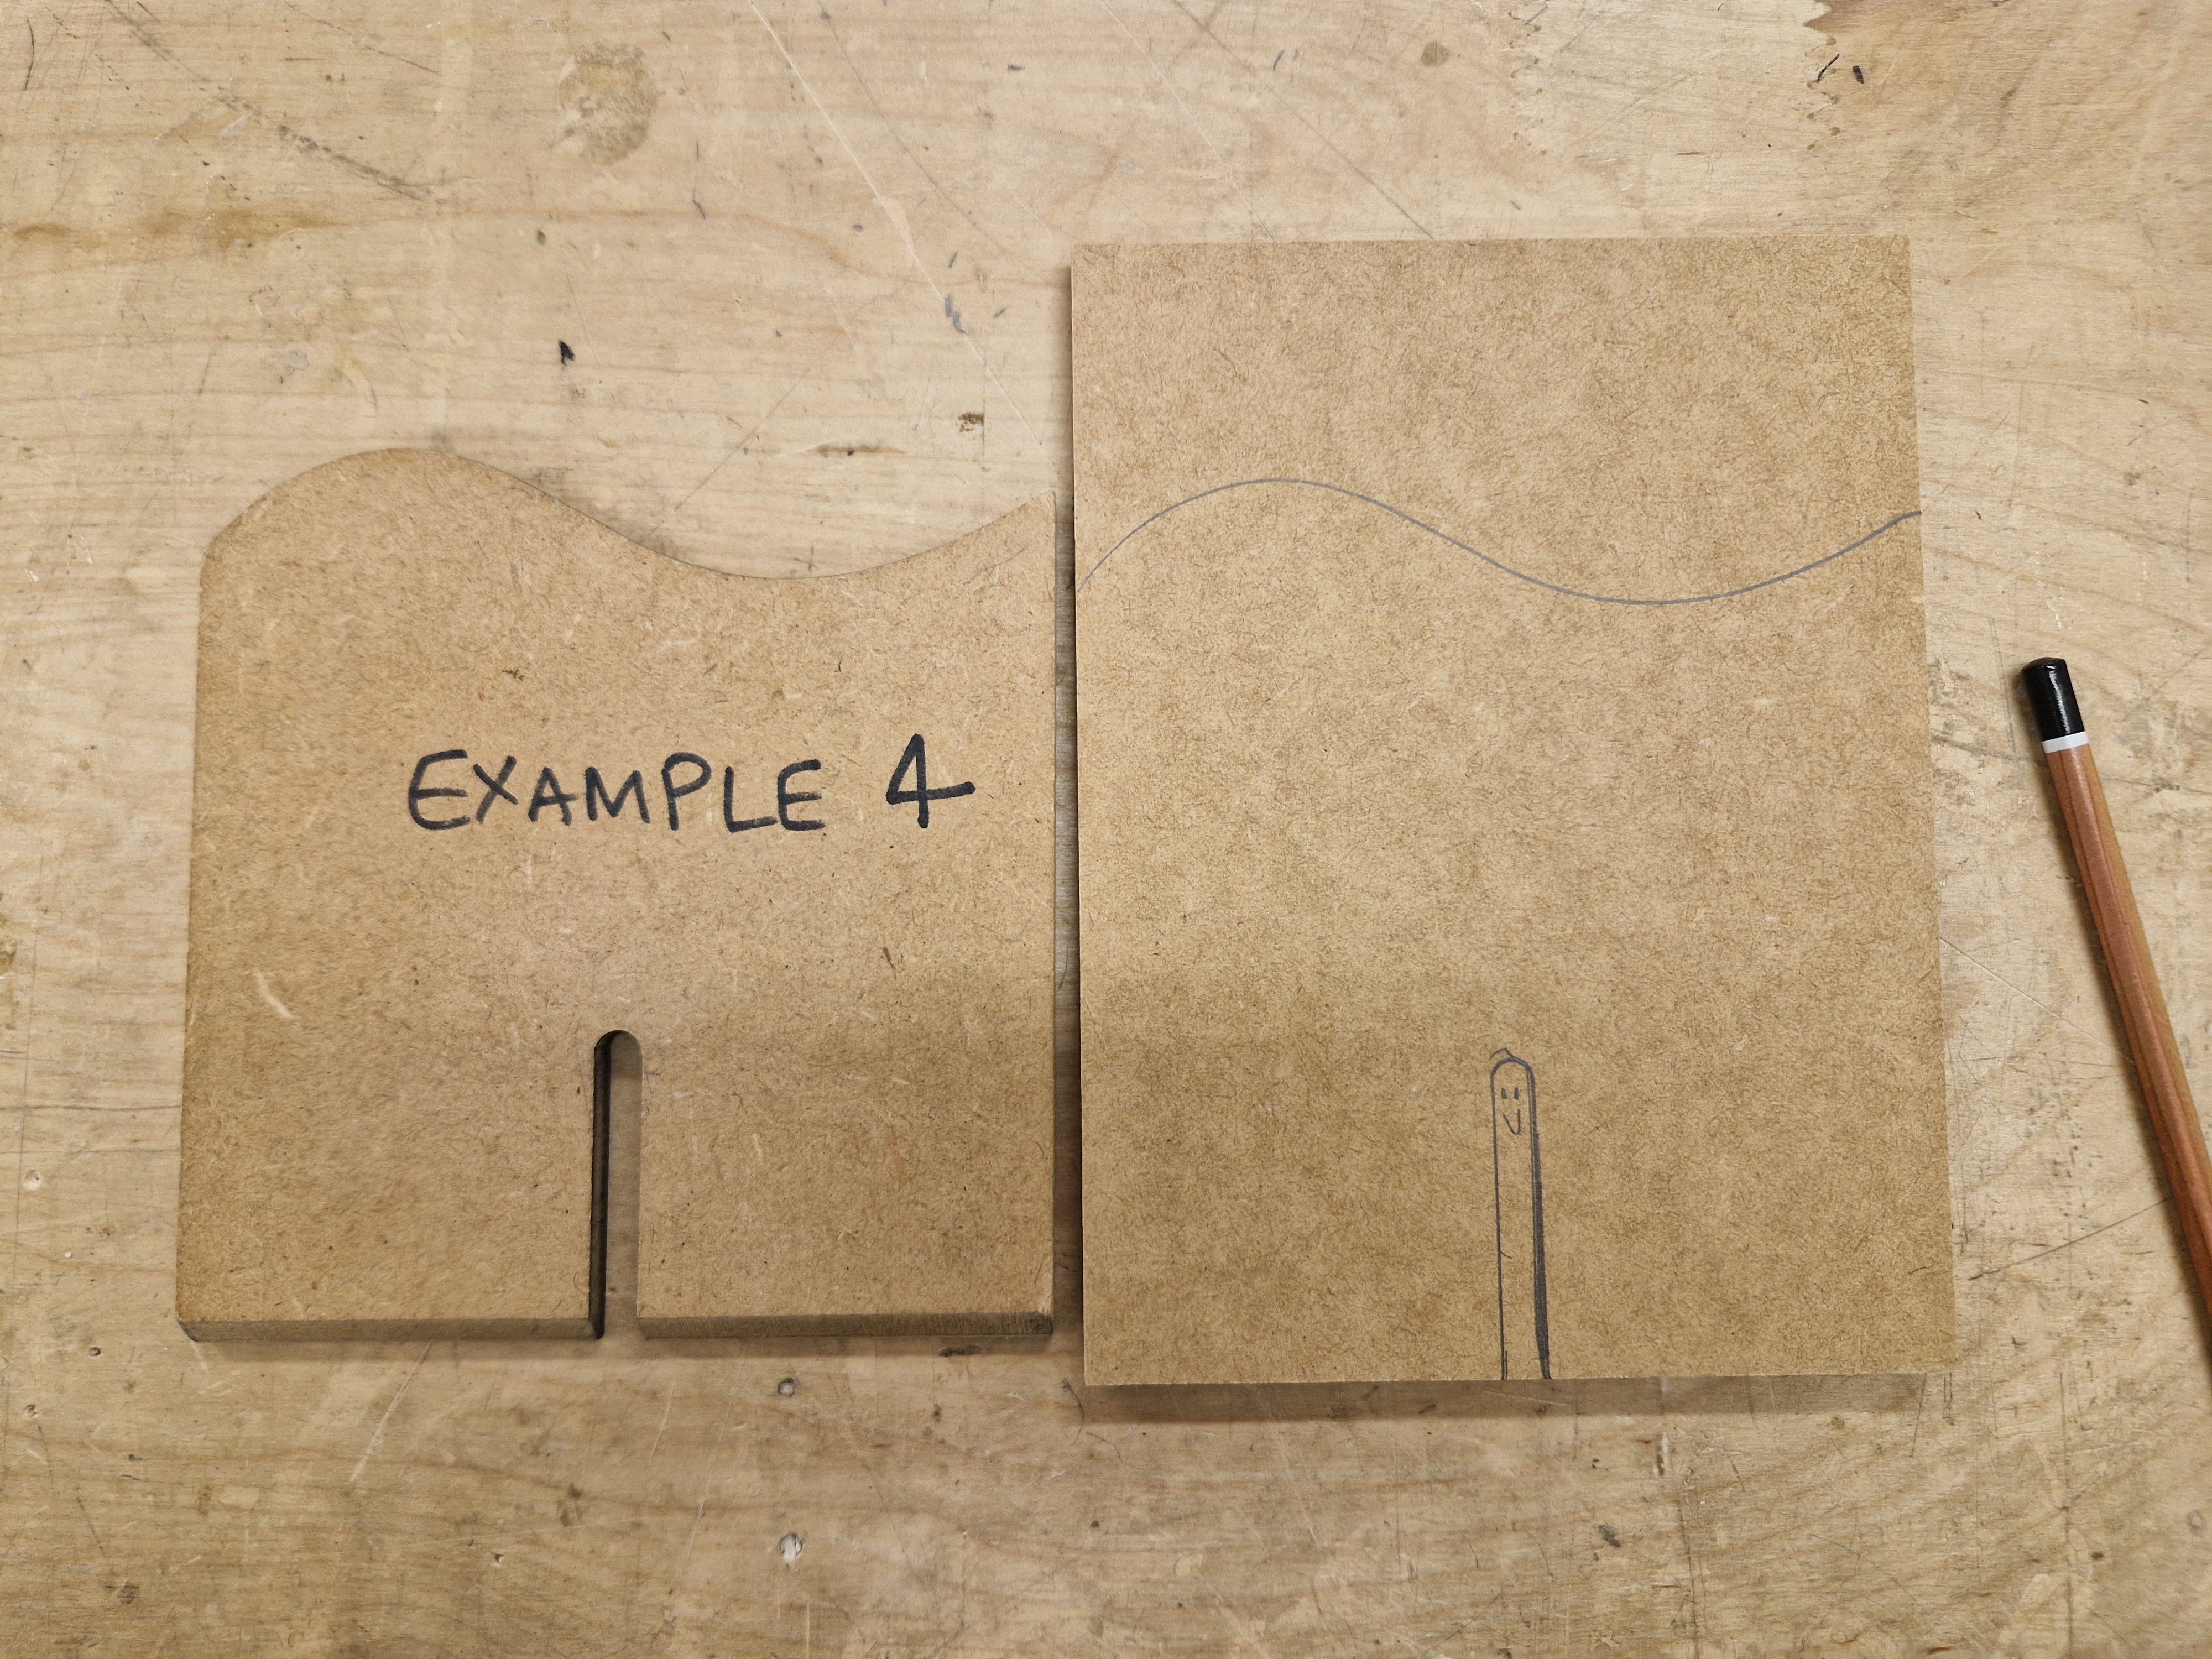
OBJECT/PHOTOGRAPH/OBJECT WORKSHOP WITH DAVID PENNY
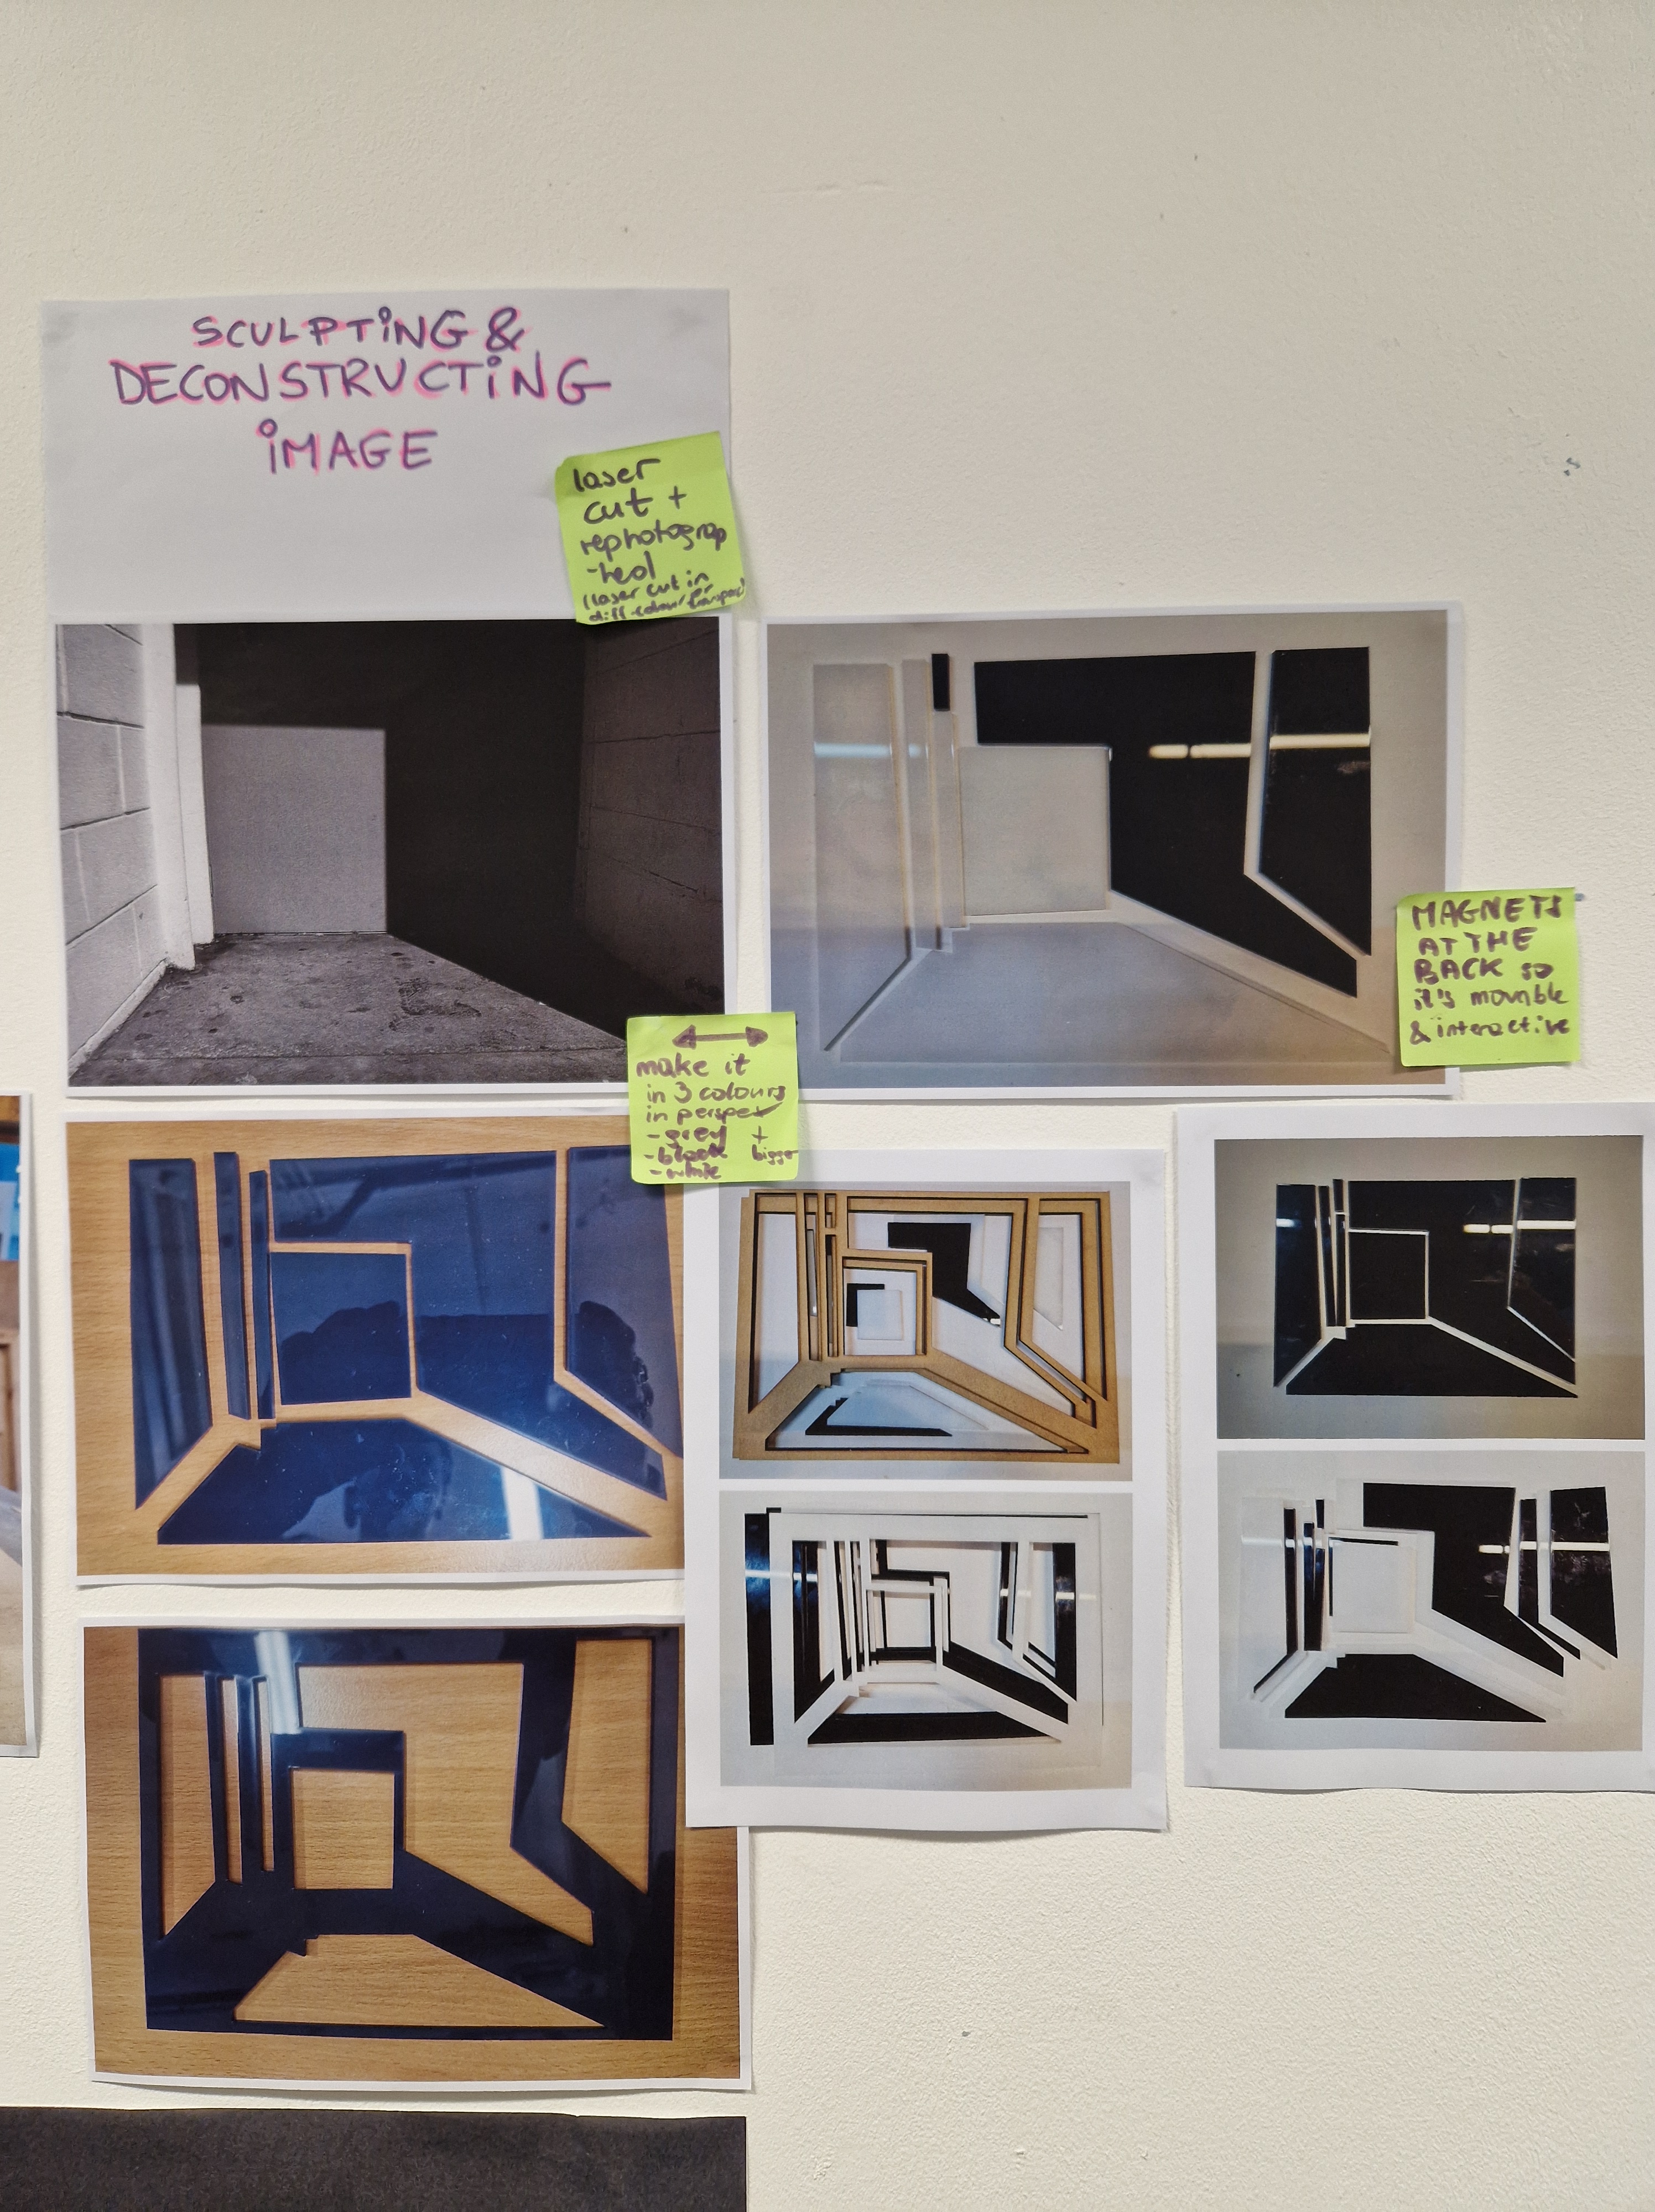
During this workshop, we were prompted to be playful with the image in Illustrator, carving, and cutting it in whatever way we wanted, and given some inspiration from a short lecture that kick-started the workshop. With our files ready to cut we then ventured to the laser-cut facilities.
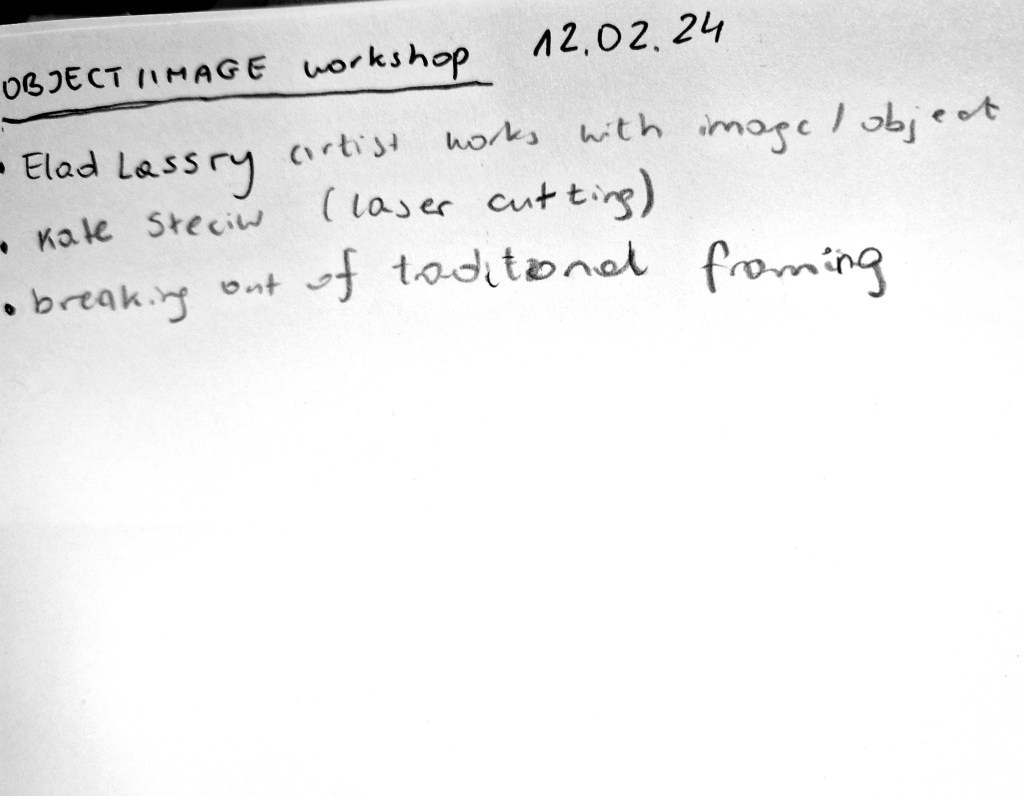
REFLECTIONS: It was without a doubt one of the most beneficial workshops I attended that completely opened my eyes to new possibilities and really made me think about the techniques and materials that could be useful for my concept of making photographs into sculptures. Mind blown! Consequently, I decided to work on the piece I created in this workshop and include it in my degree show.
TUESDAY
SEMINAR WITH THOM

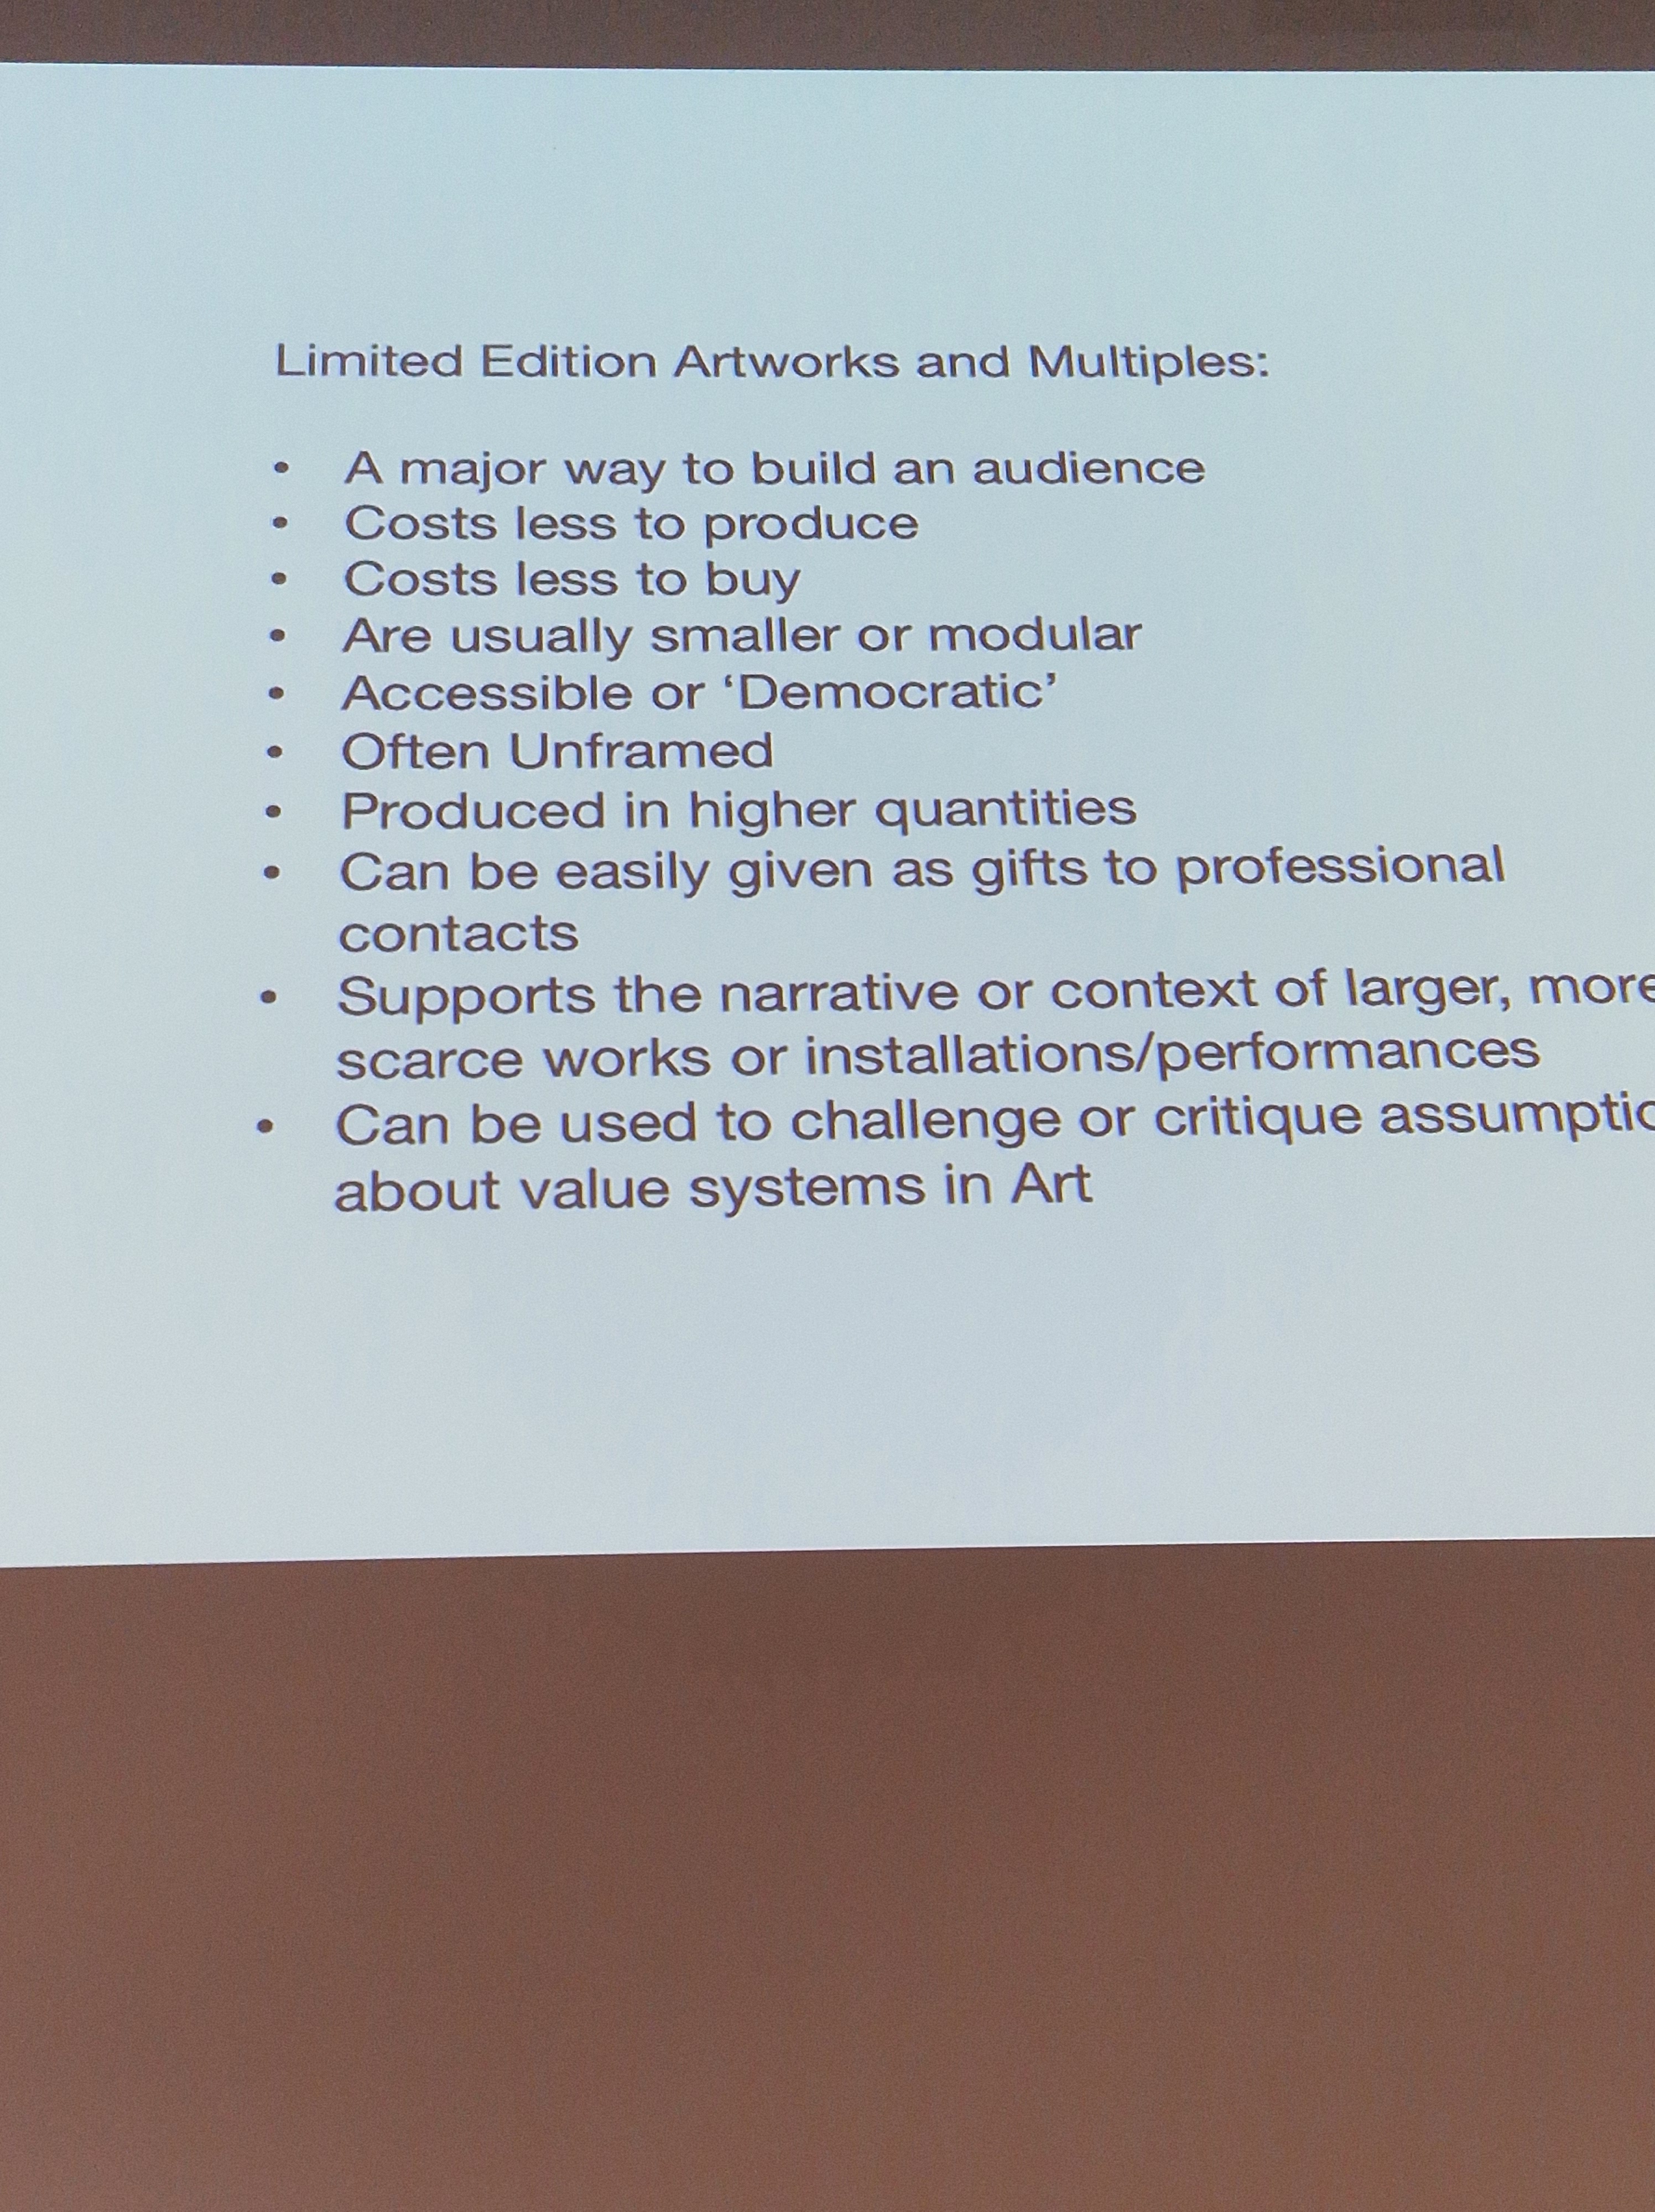
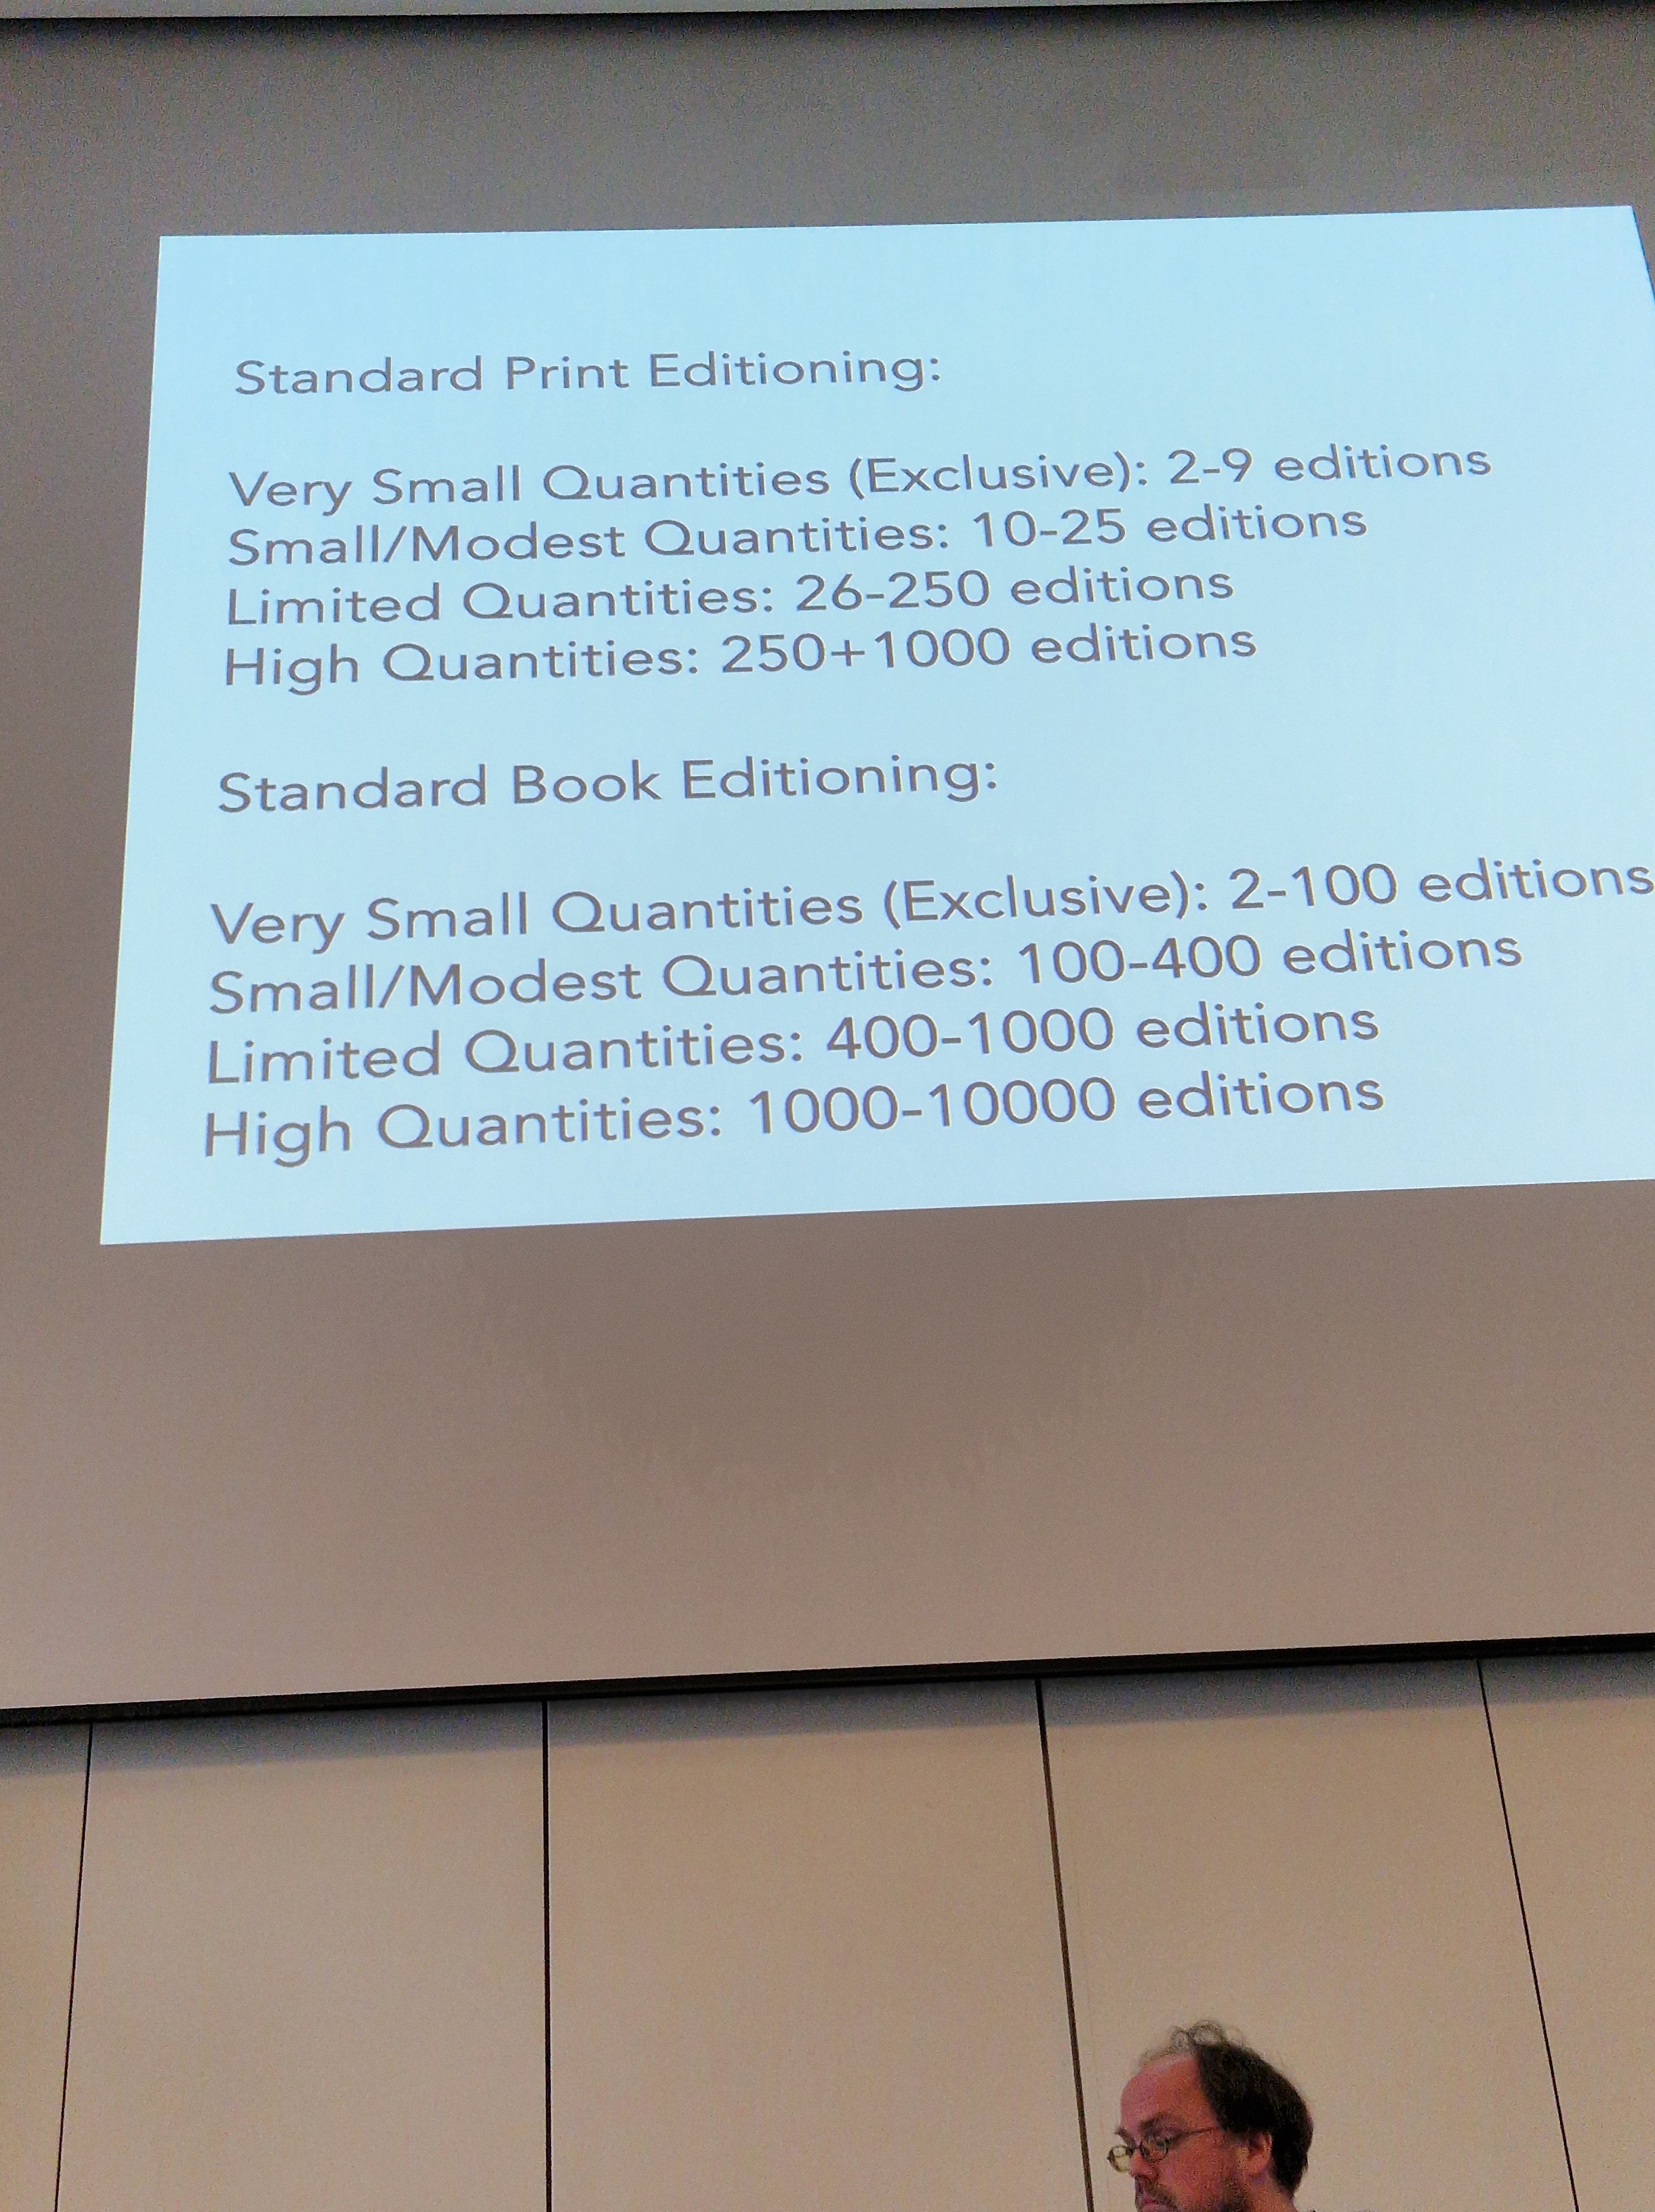
REFLECTIONS: A practical seminar on photographic industries, networking and more. Full of important and practical information the slides from the lecture will be put to use in my post-university life.
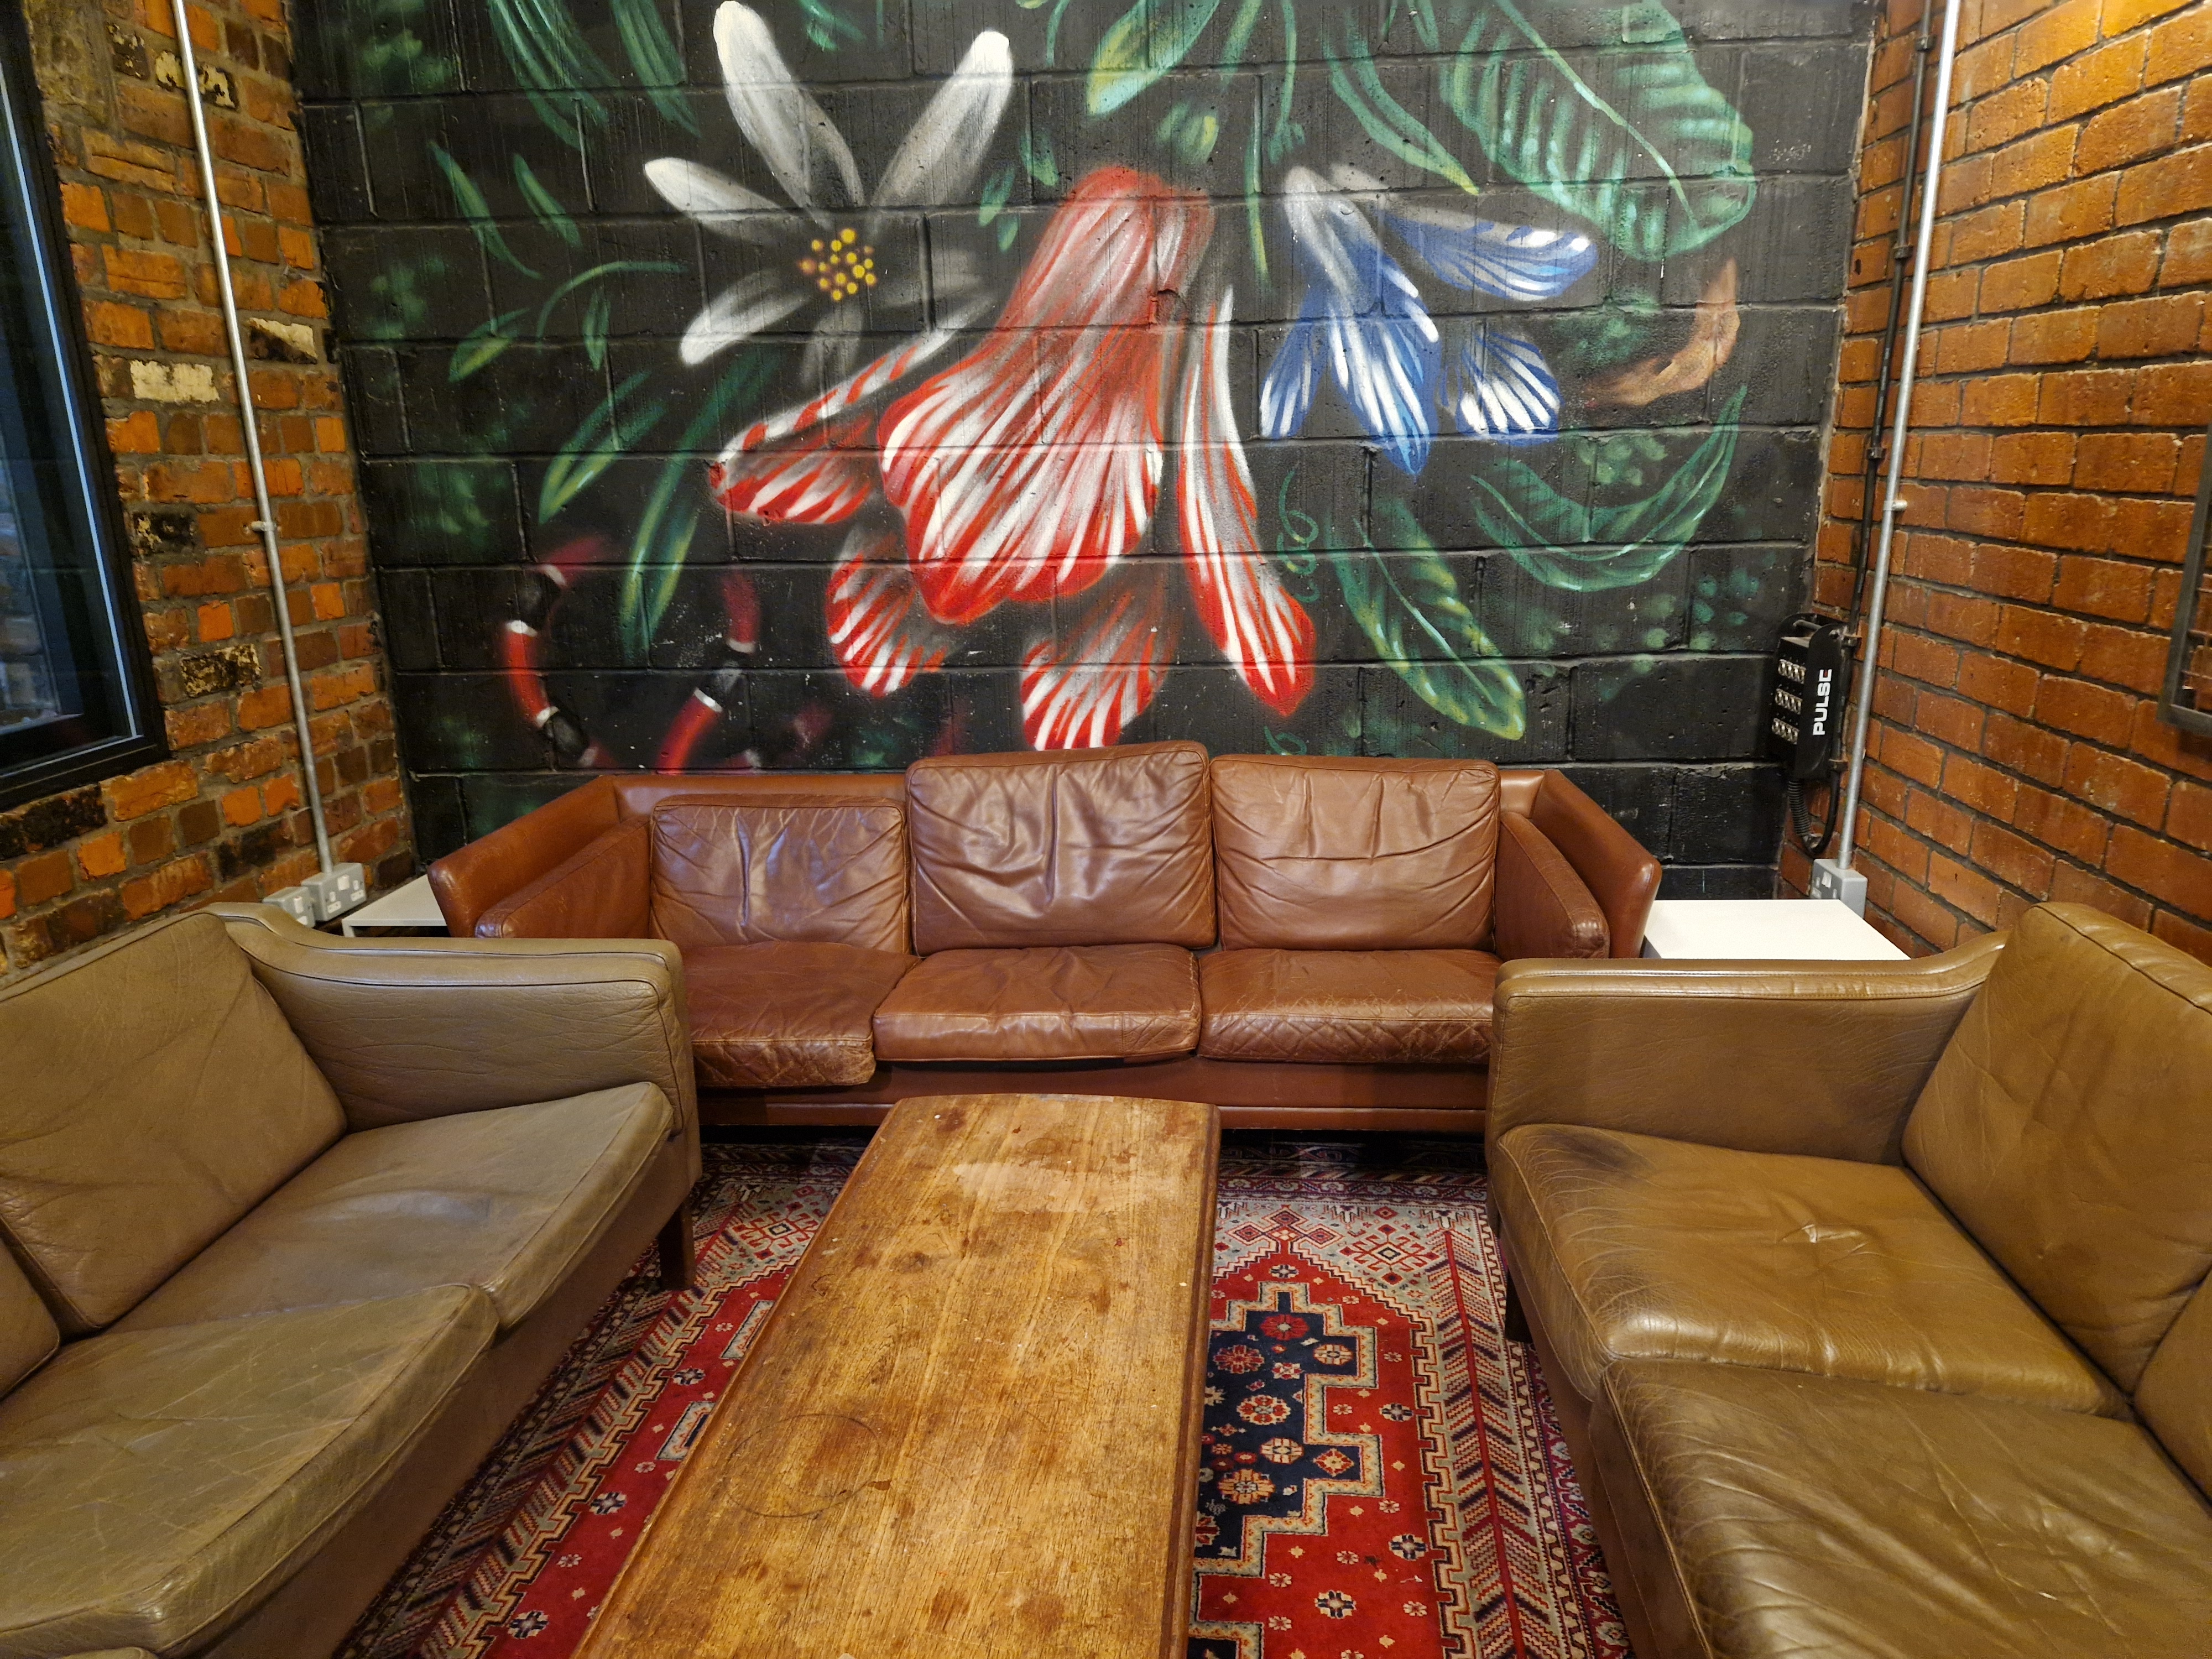
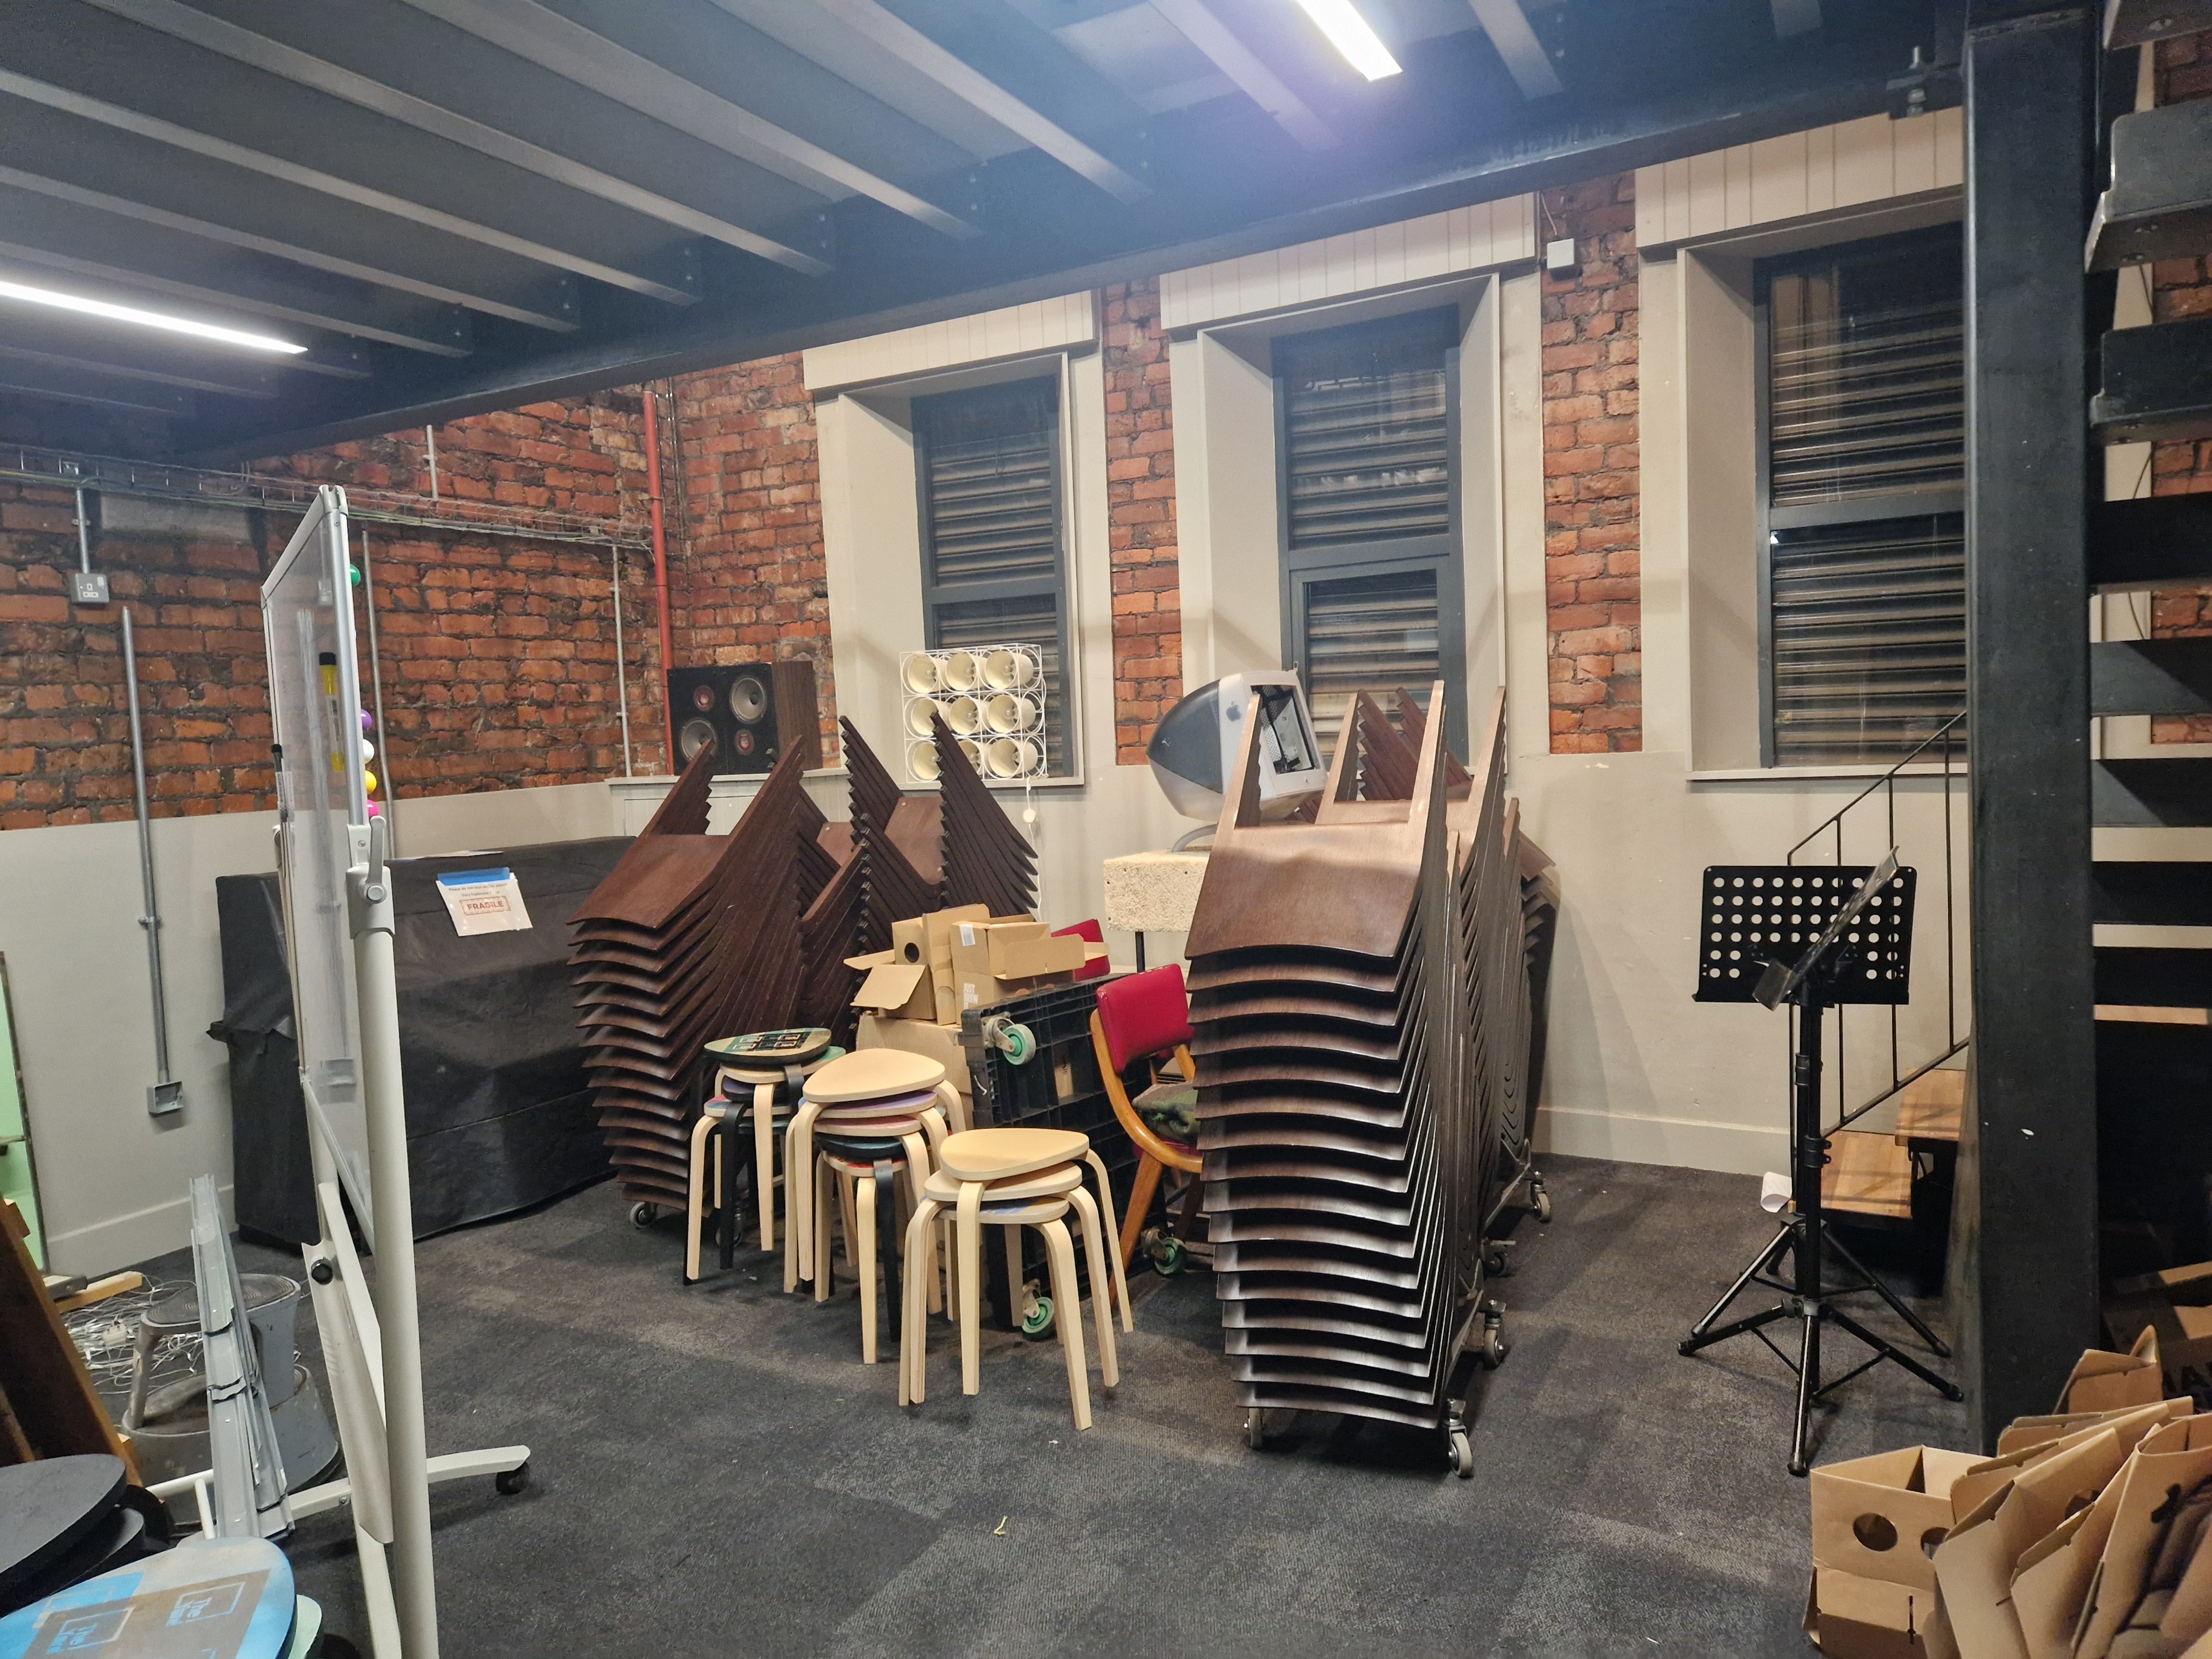
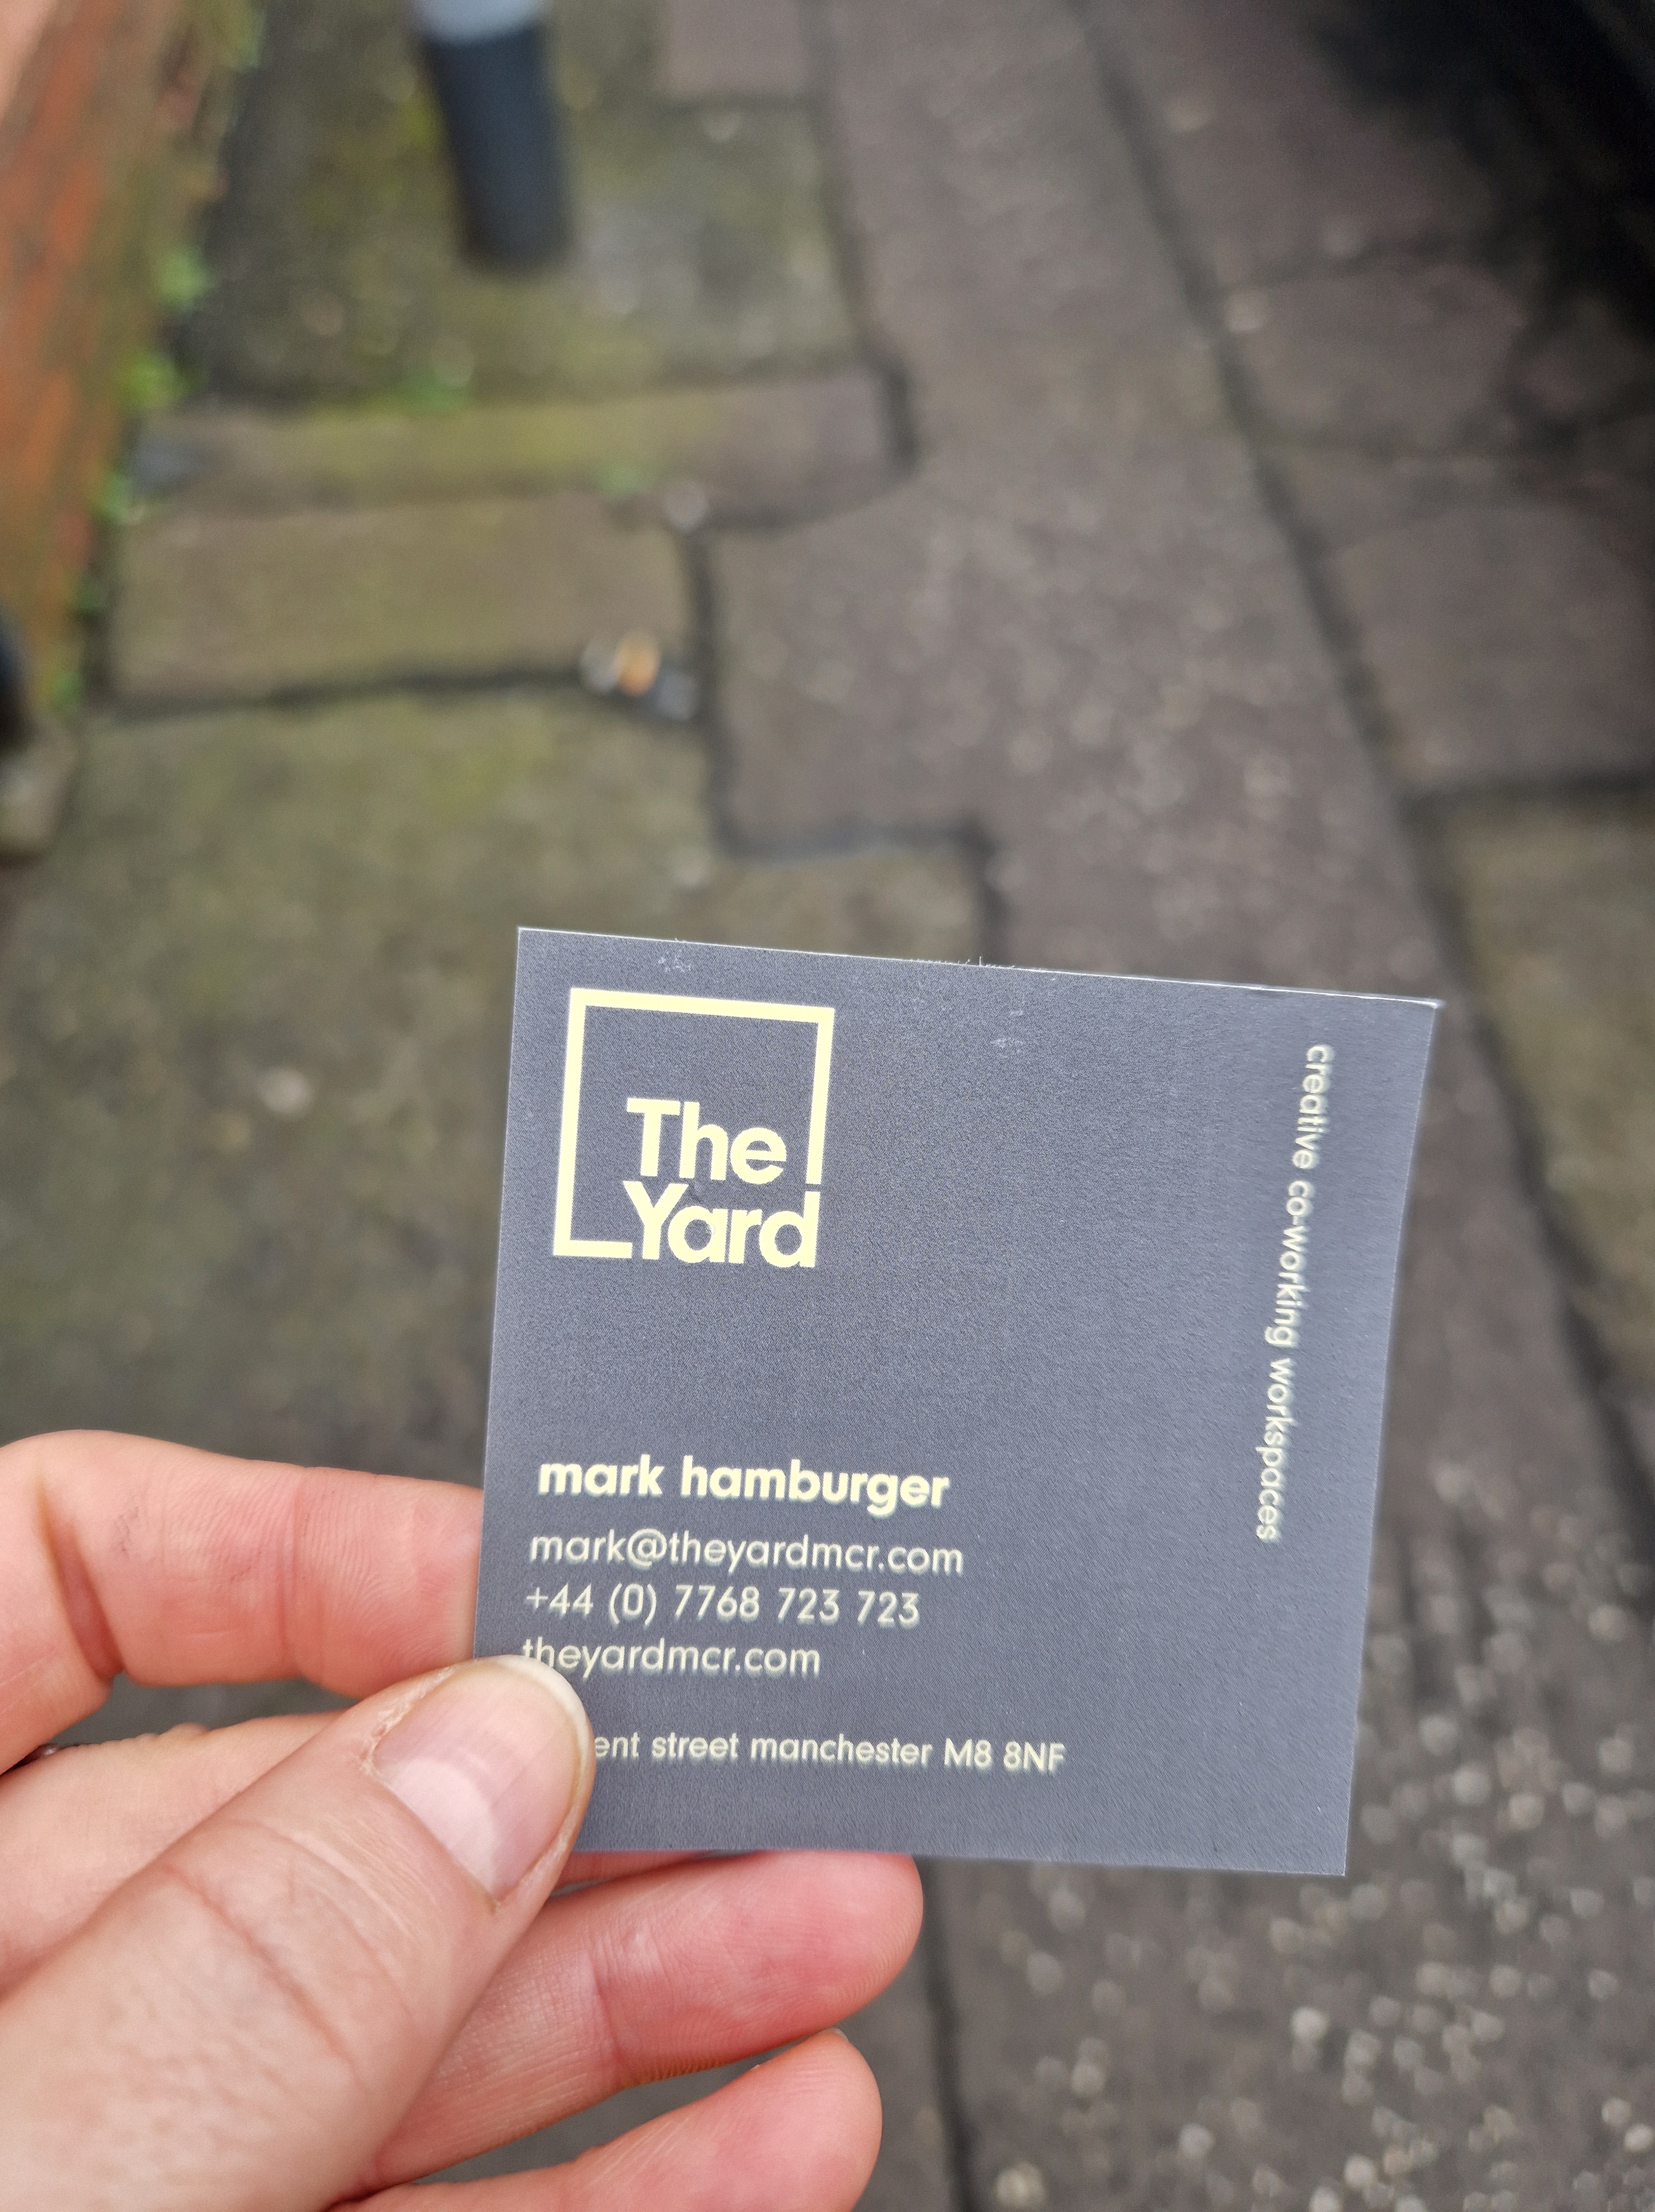
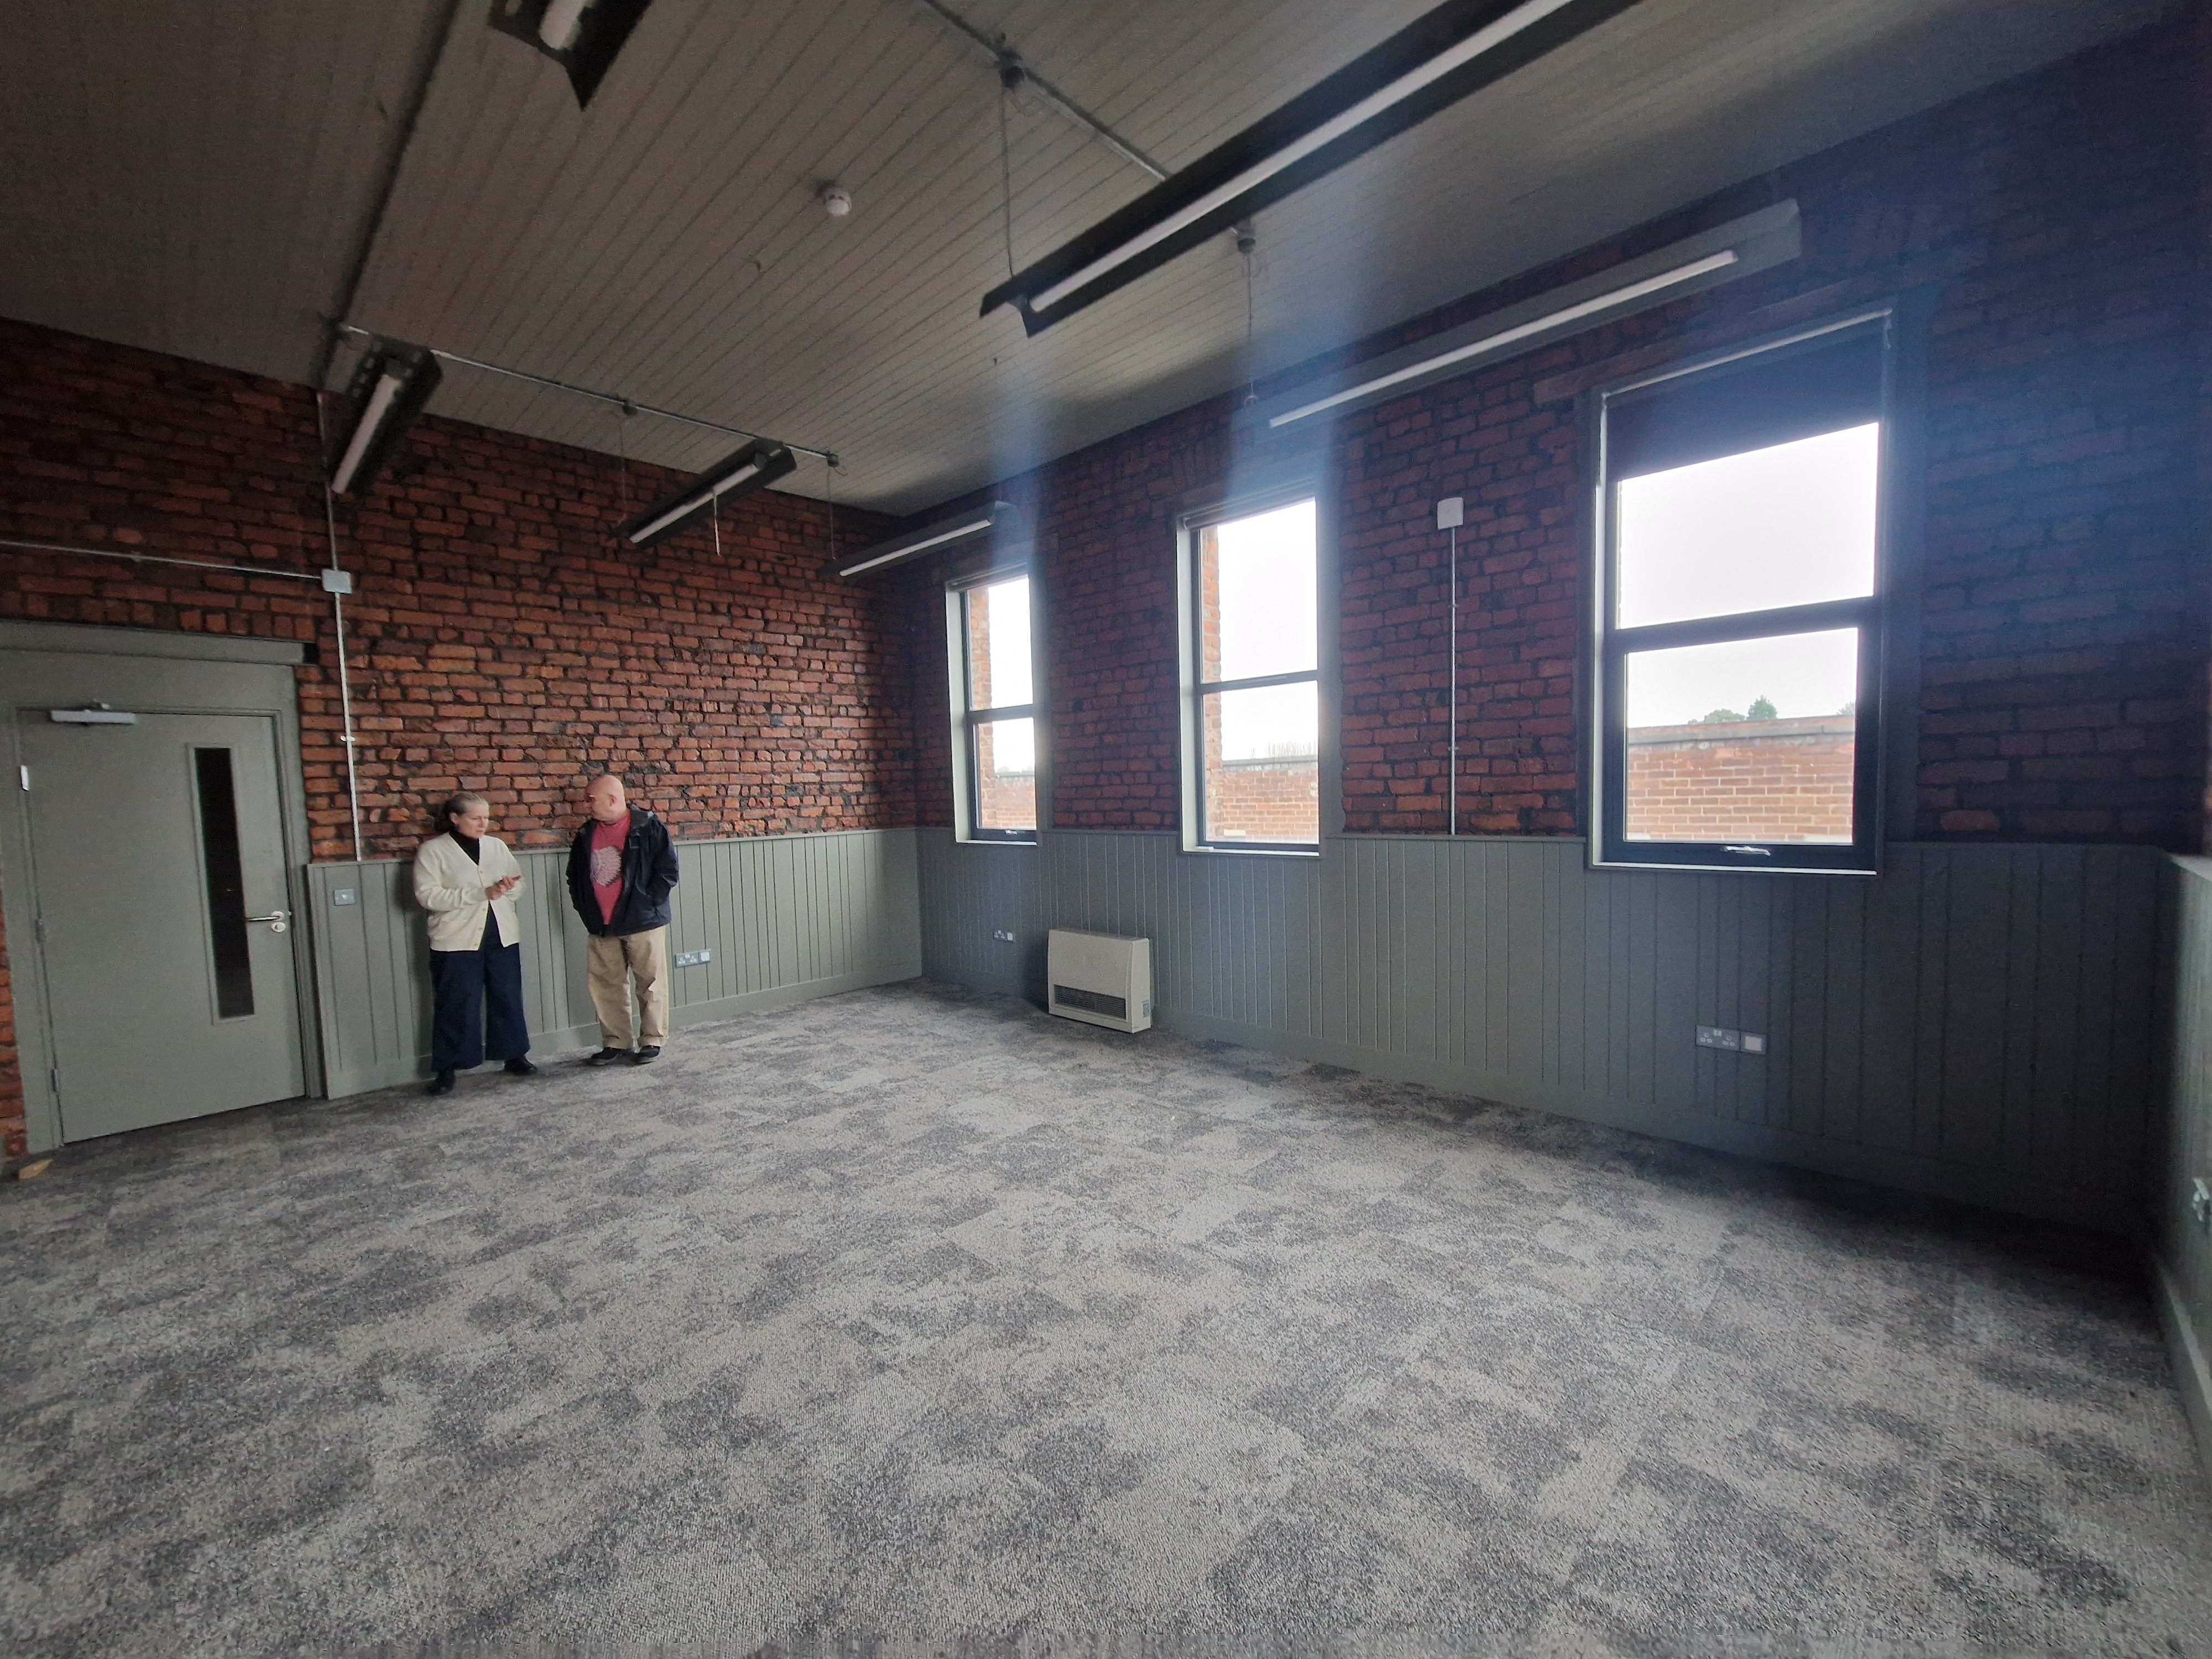
VISITING THE YARD FOR OPEN DAY
After the seminar, I ventured to the other part of Manchester to visit art studios in THE YARD. I met the lady who runs the fashion side of studios, Mark who runs the operation and had a tour of the building. It’s an amazing s[pace and despite not securing a studio (it was not suitable for me), I am very glad I made this trip, met people and gained confidence in exploring this possibility.
One of the aims for this month is to find a studio, and I will proceed to look for one.
Next, I will contact two studios in Stockport :
DARKROOM CLUB
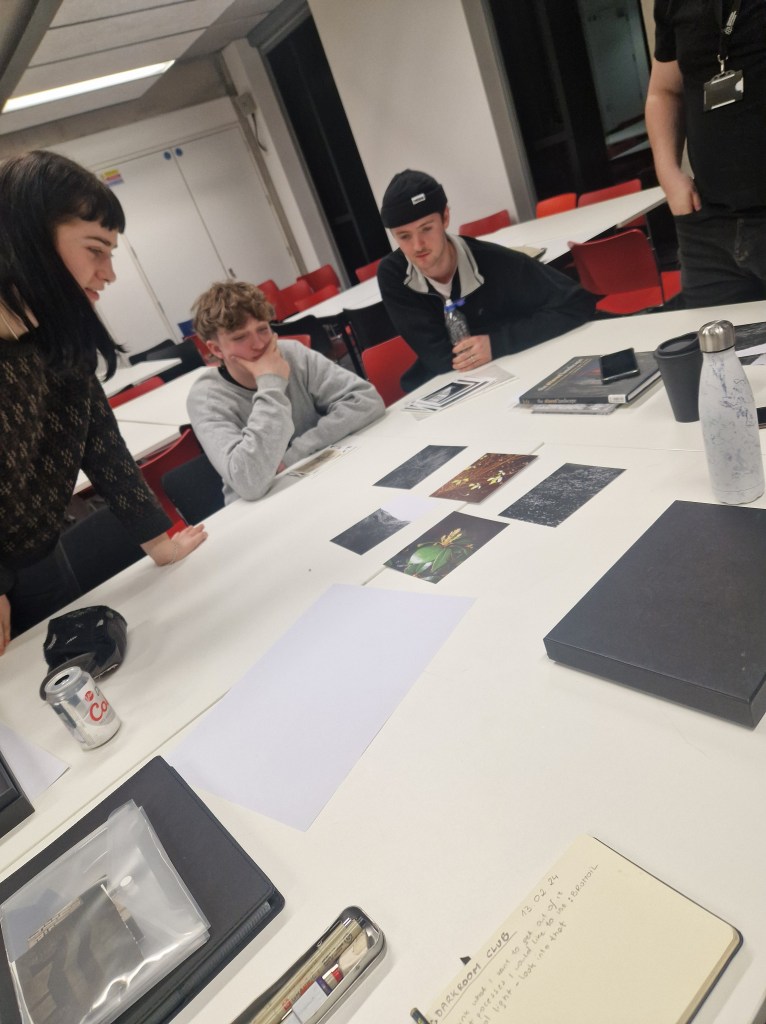
I ended this long day by attending a 2.5-hour session with a re-emerging darkroom club.
We introduced ourselves and our work and discussed our plans, opinions and alternative processes that we would like to try in the darkroom.
It was a good session and I am very excited to try all the techniques.
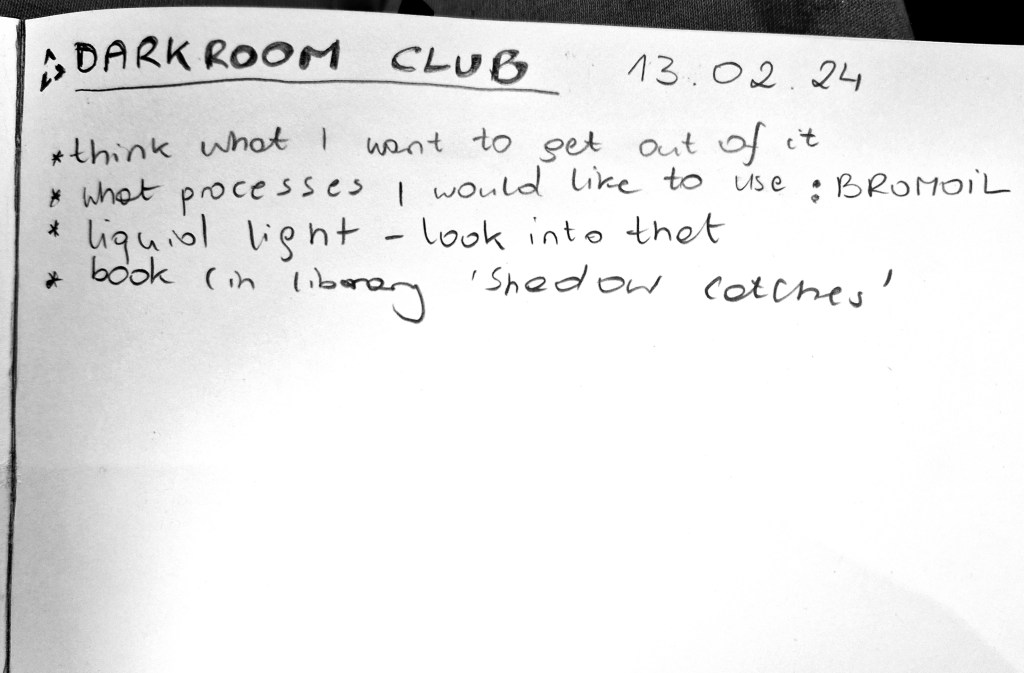
NOTES:
- think about what I want to get out of it
- what processes I would like to try: BROMOIL
- what is liquid light?
- book in the library ‘Shadow Catches’ https://www.mgoddingltd.co.uk/product/195981/Shadow-Catchers-Camera-less-Photography
THURSDAY
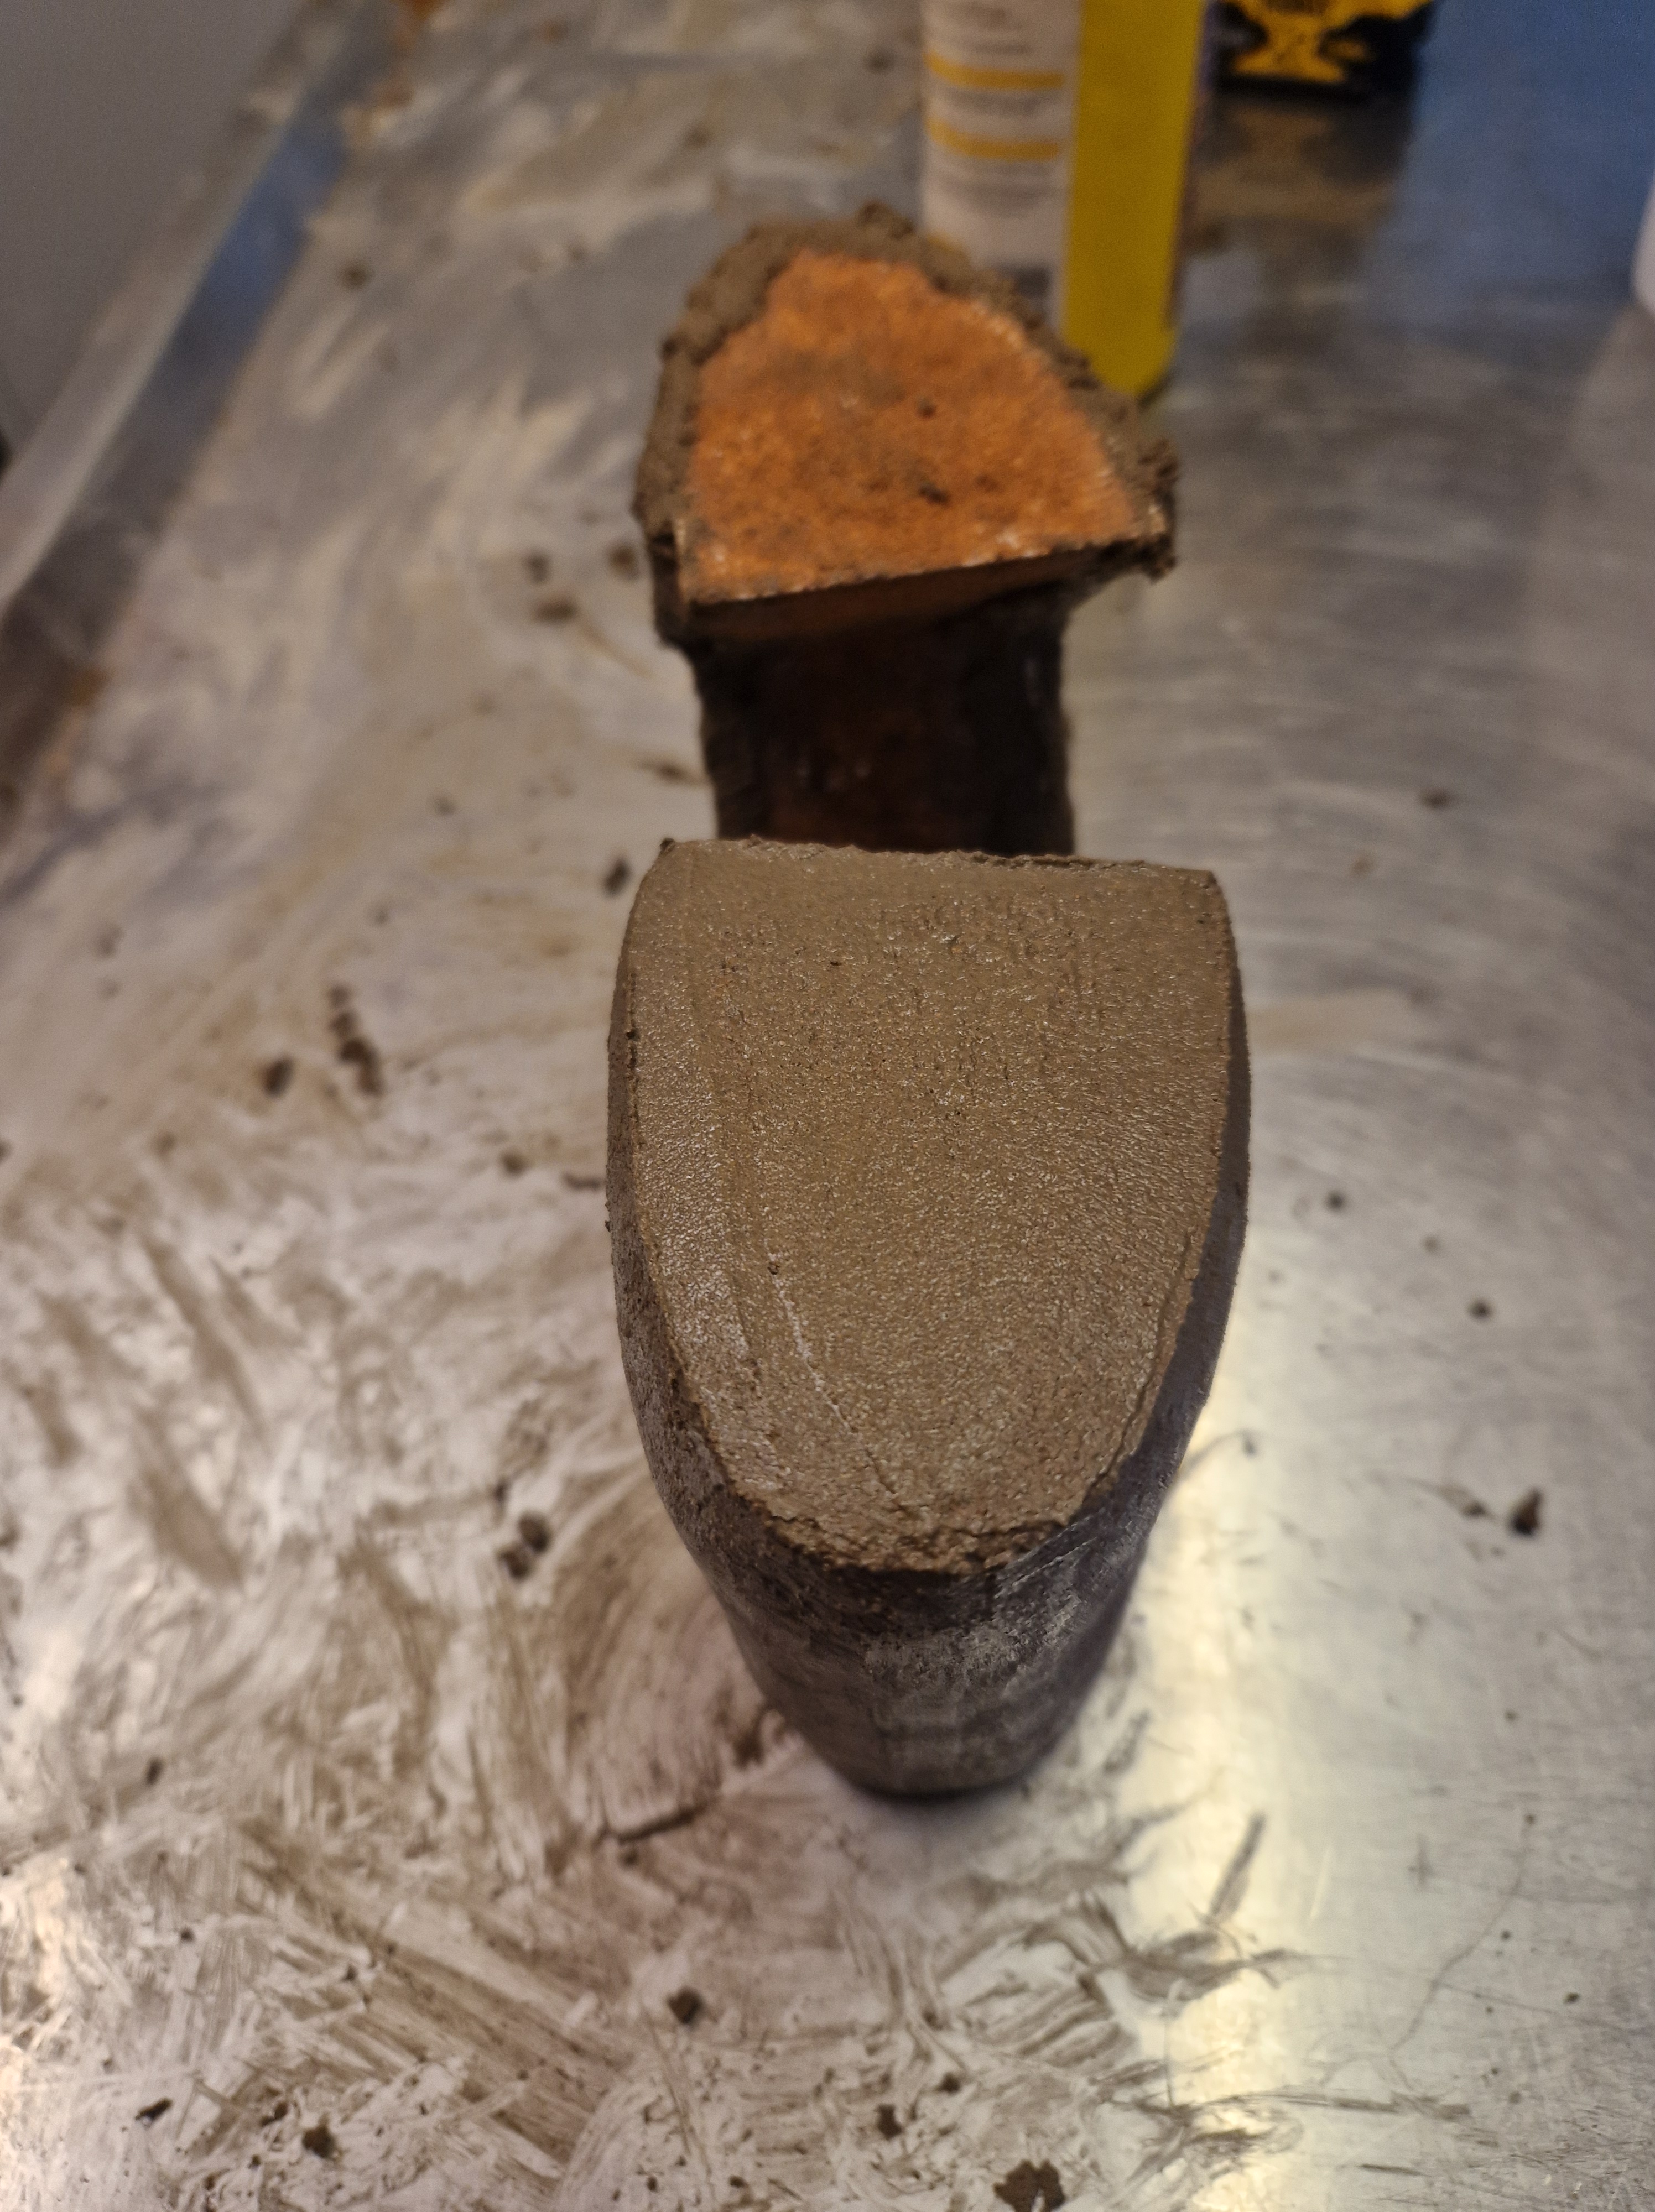
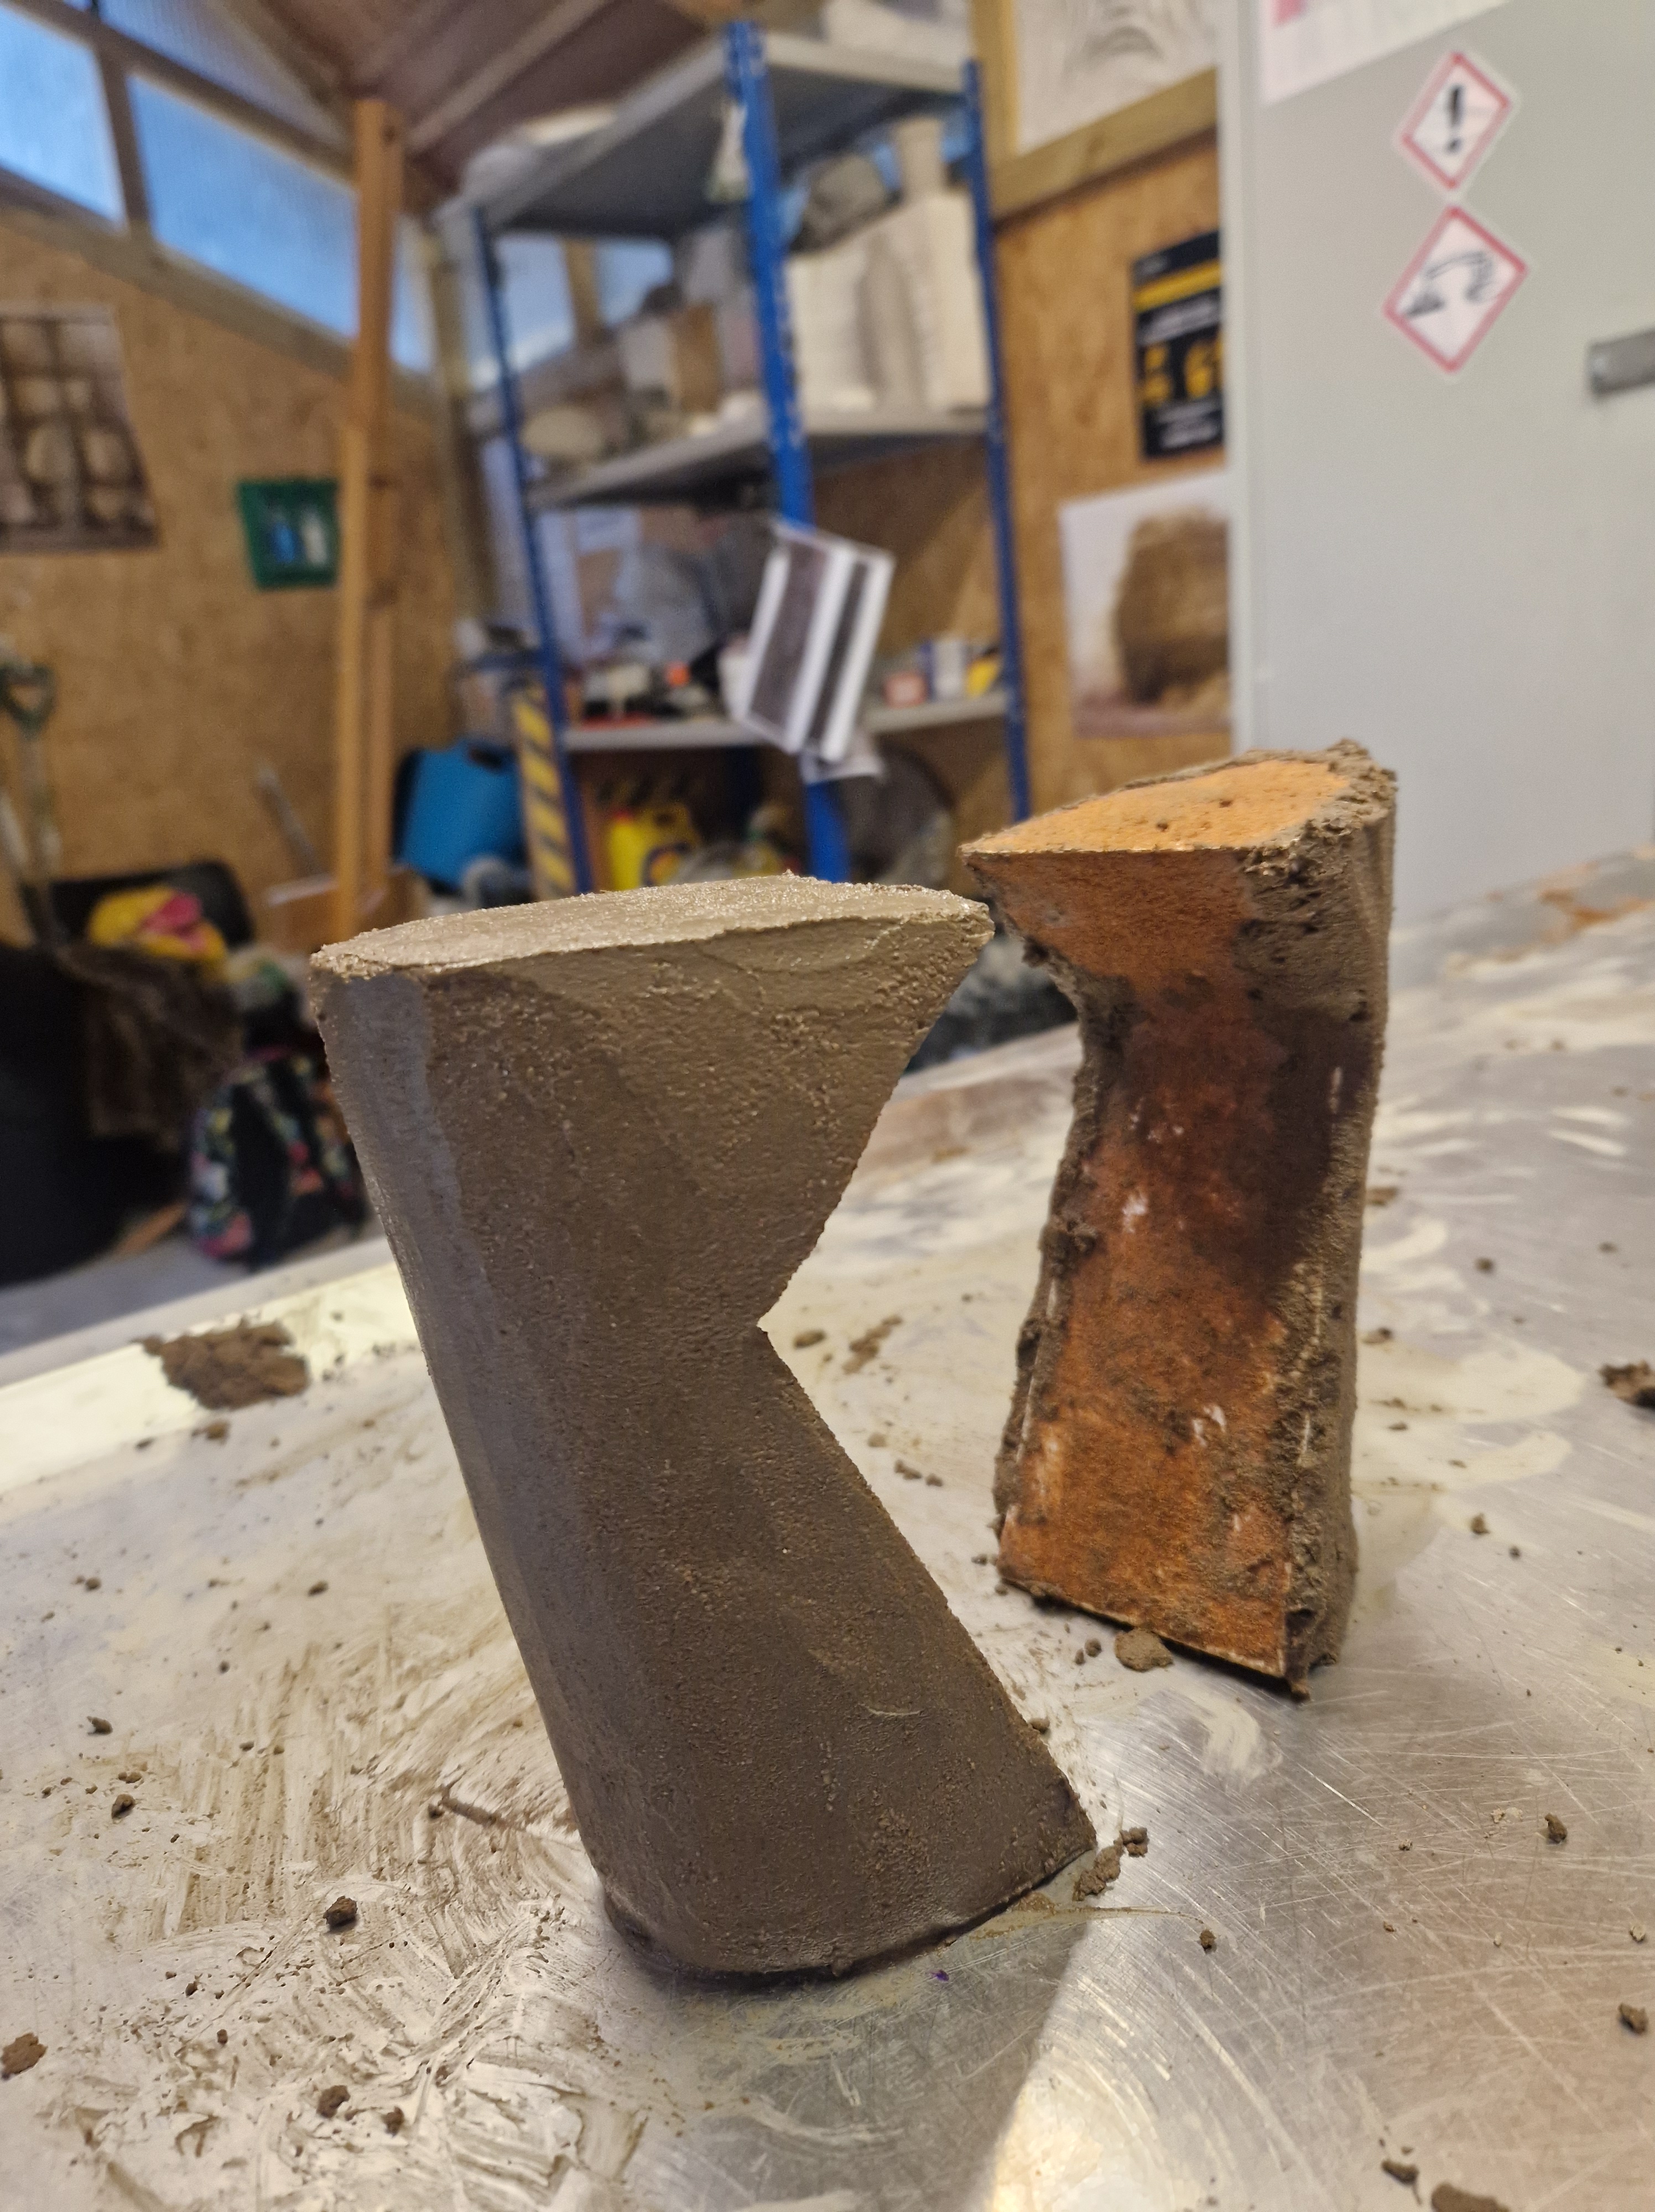
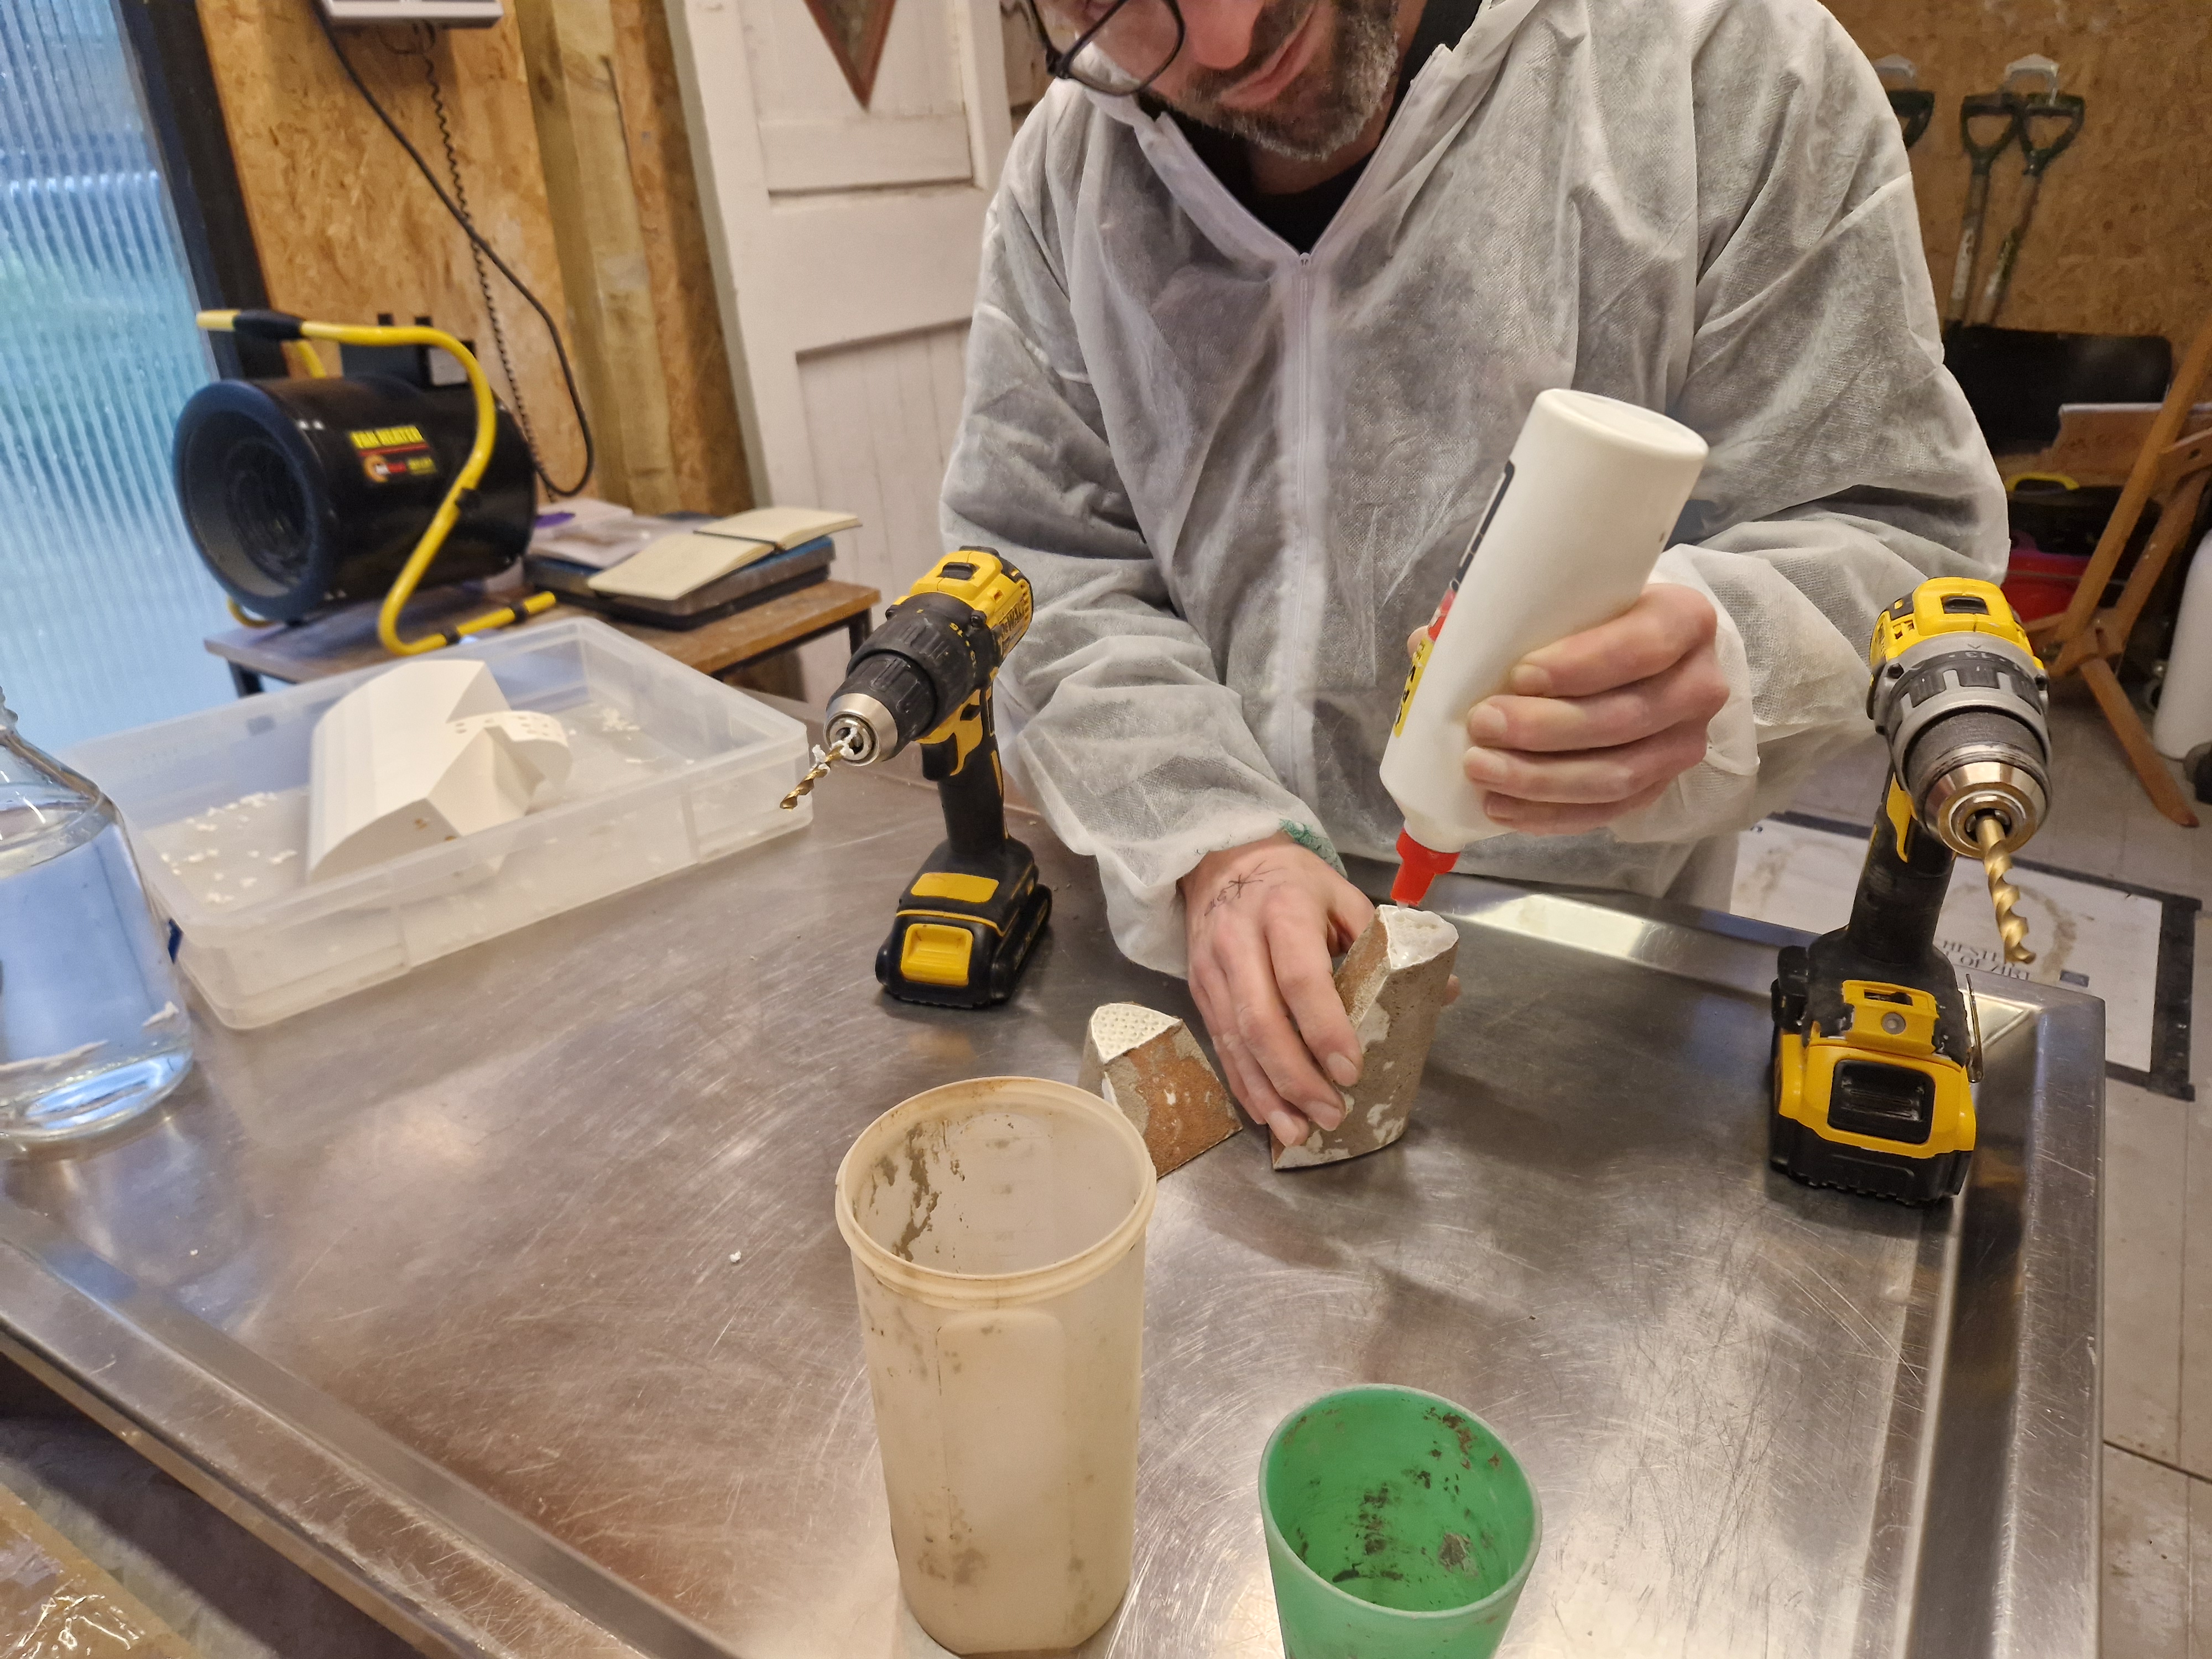
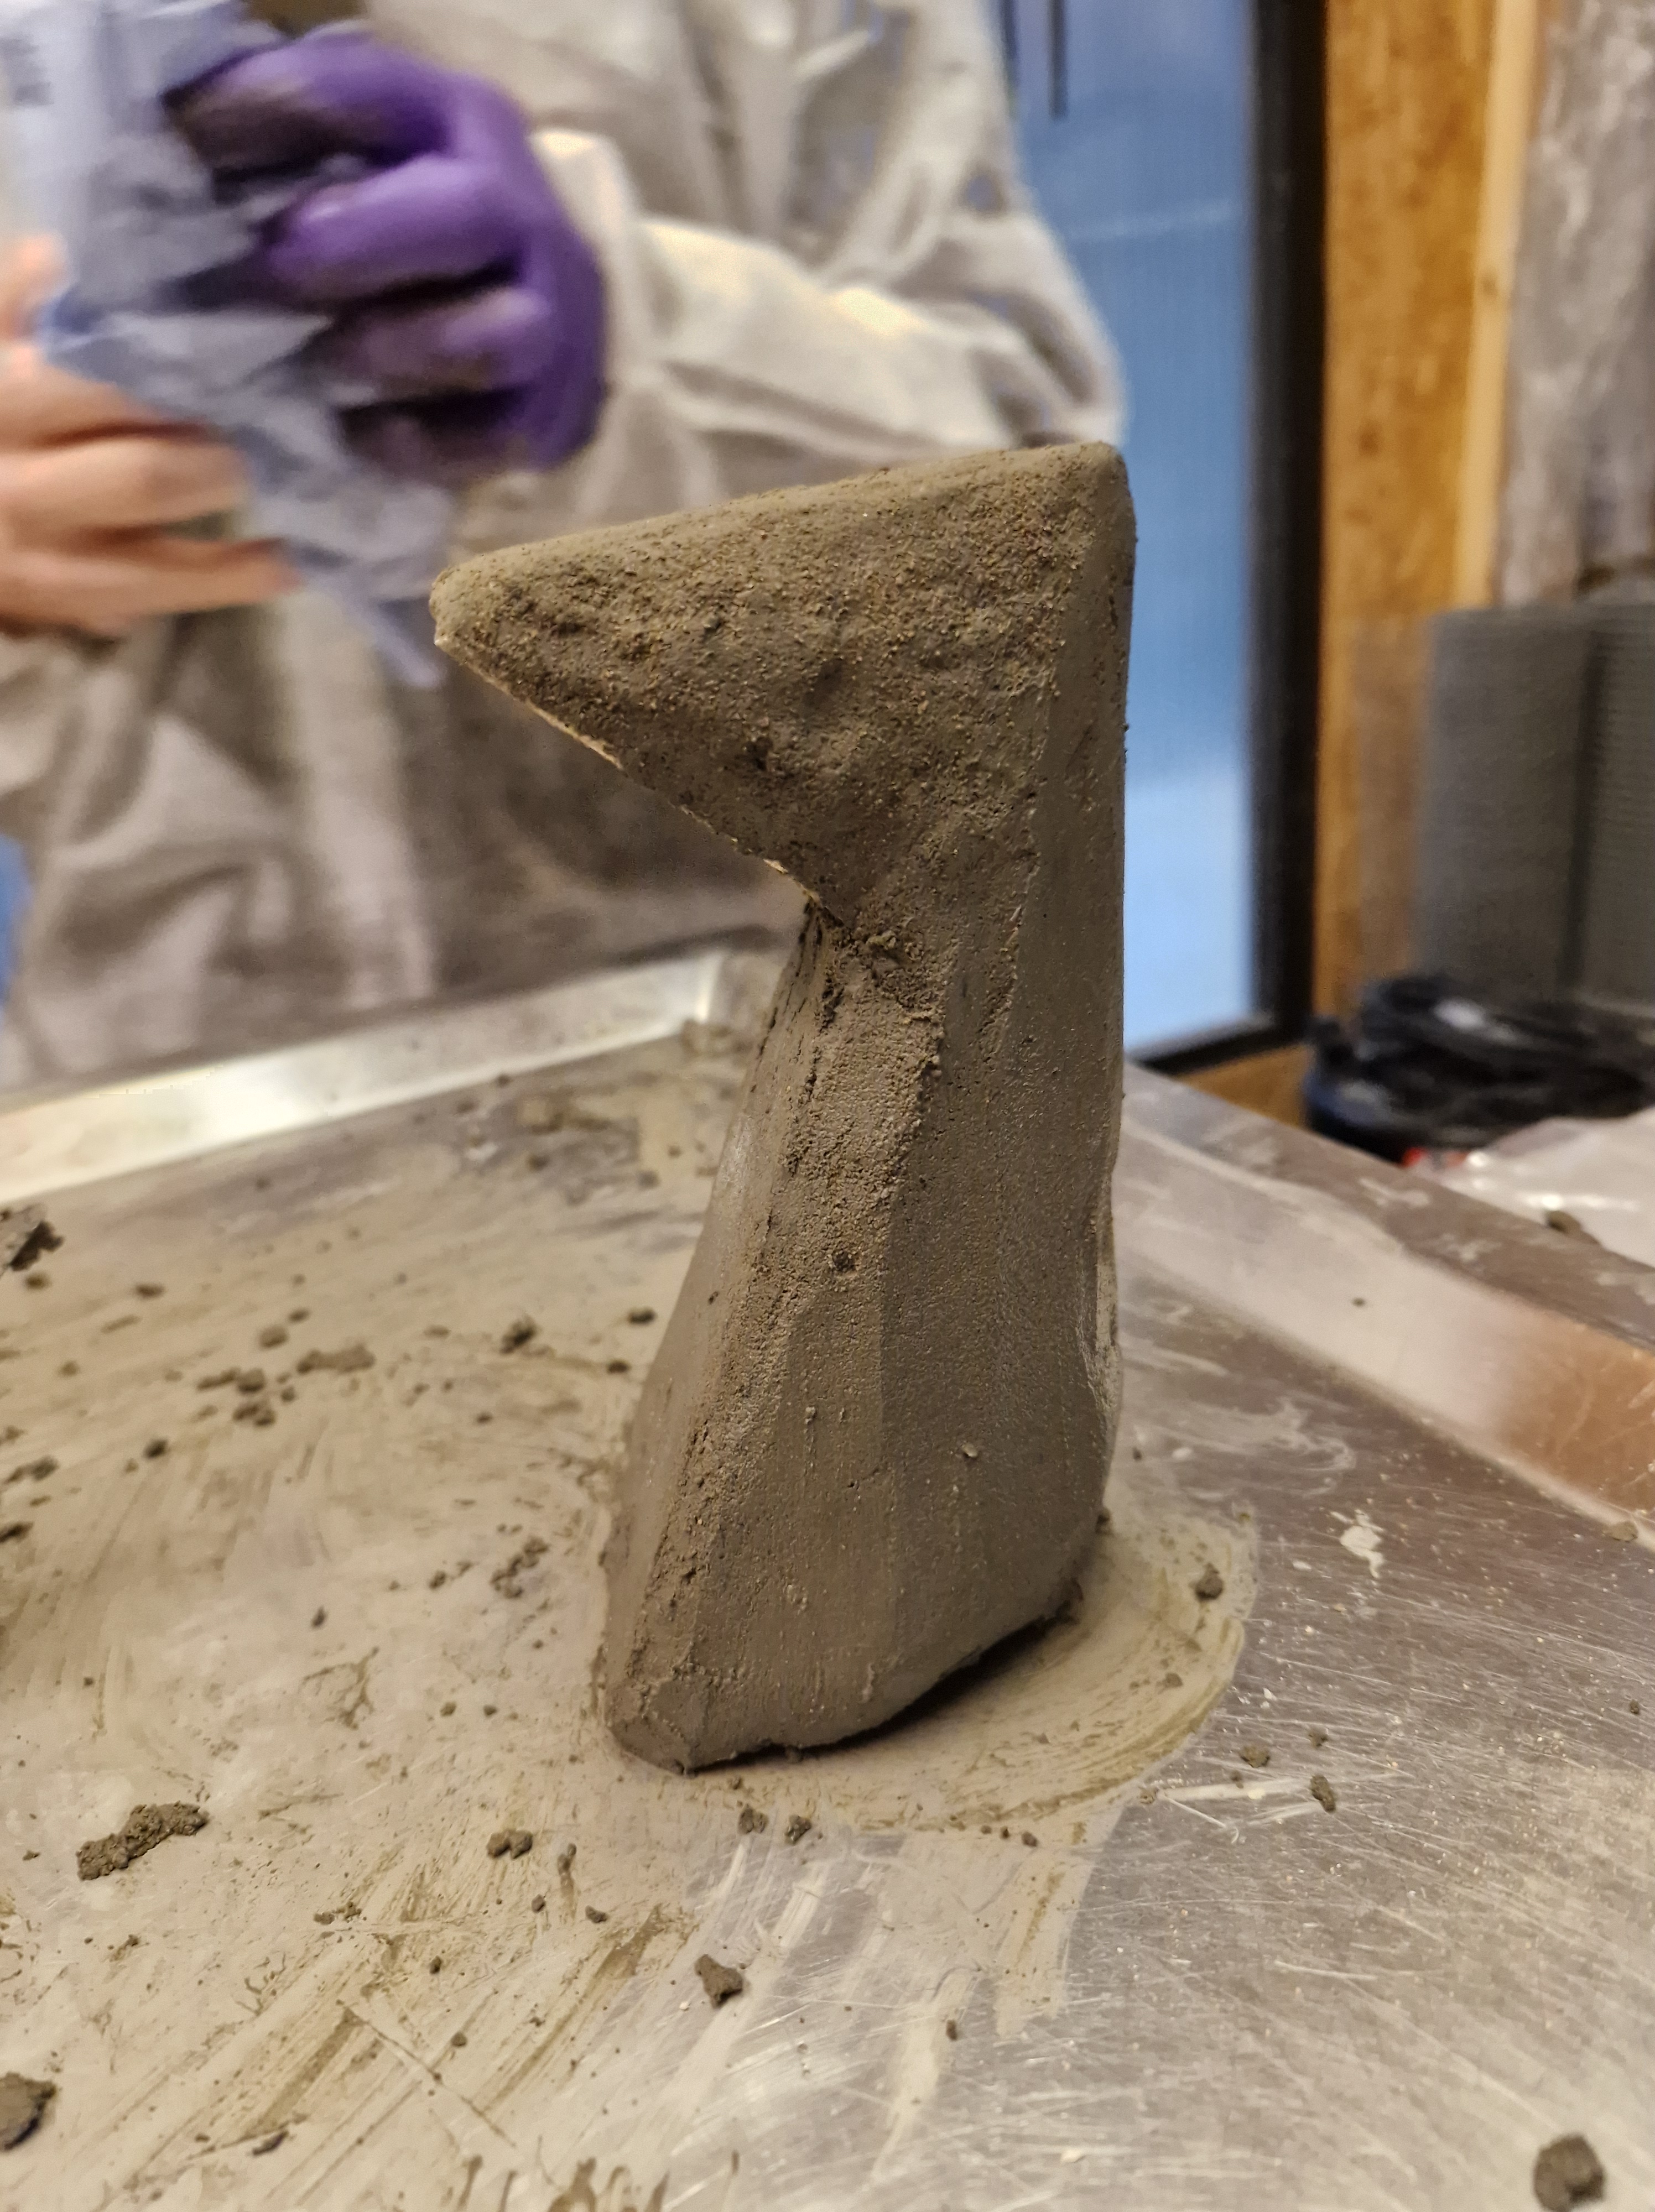
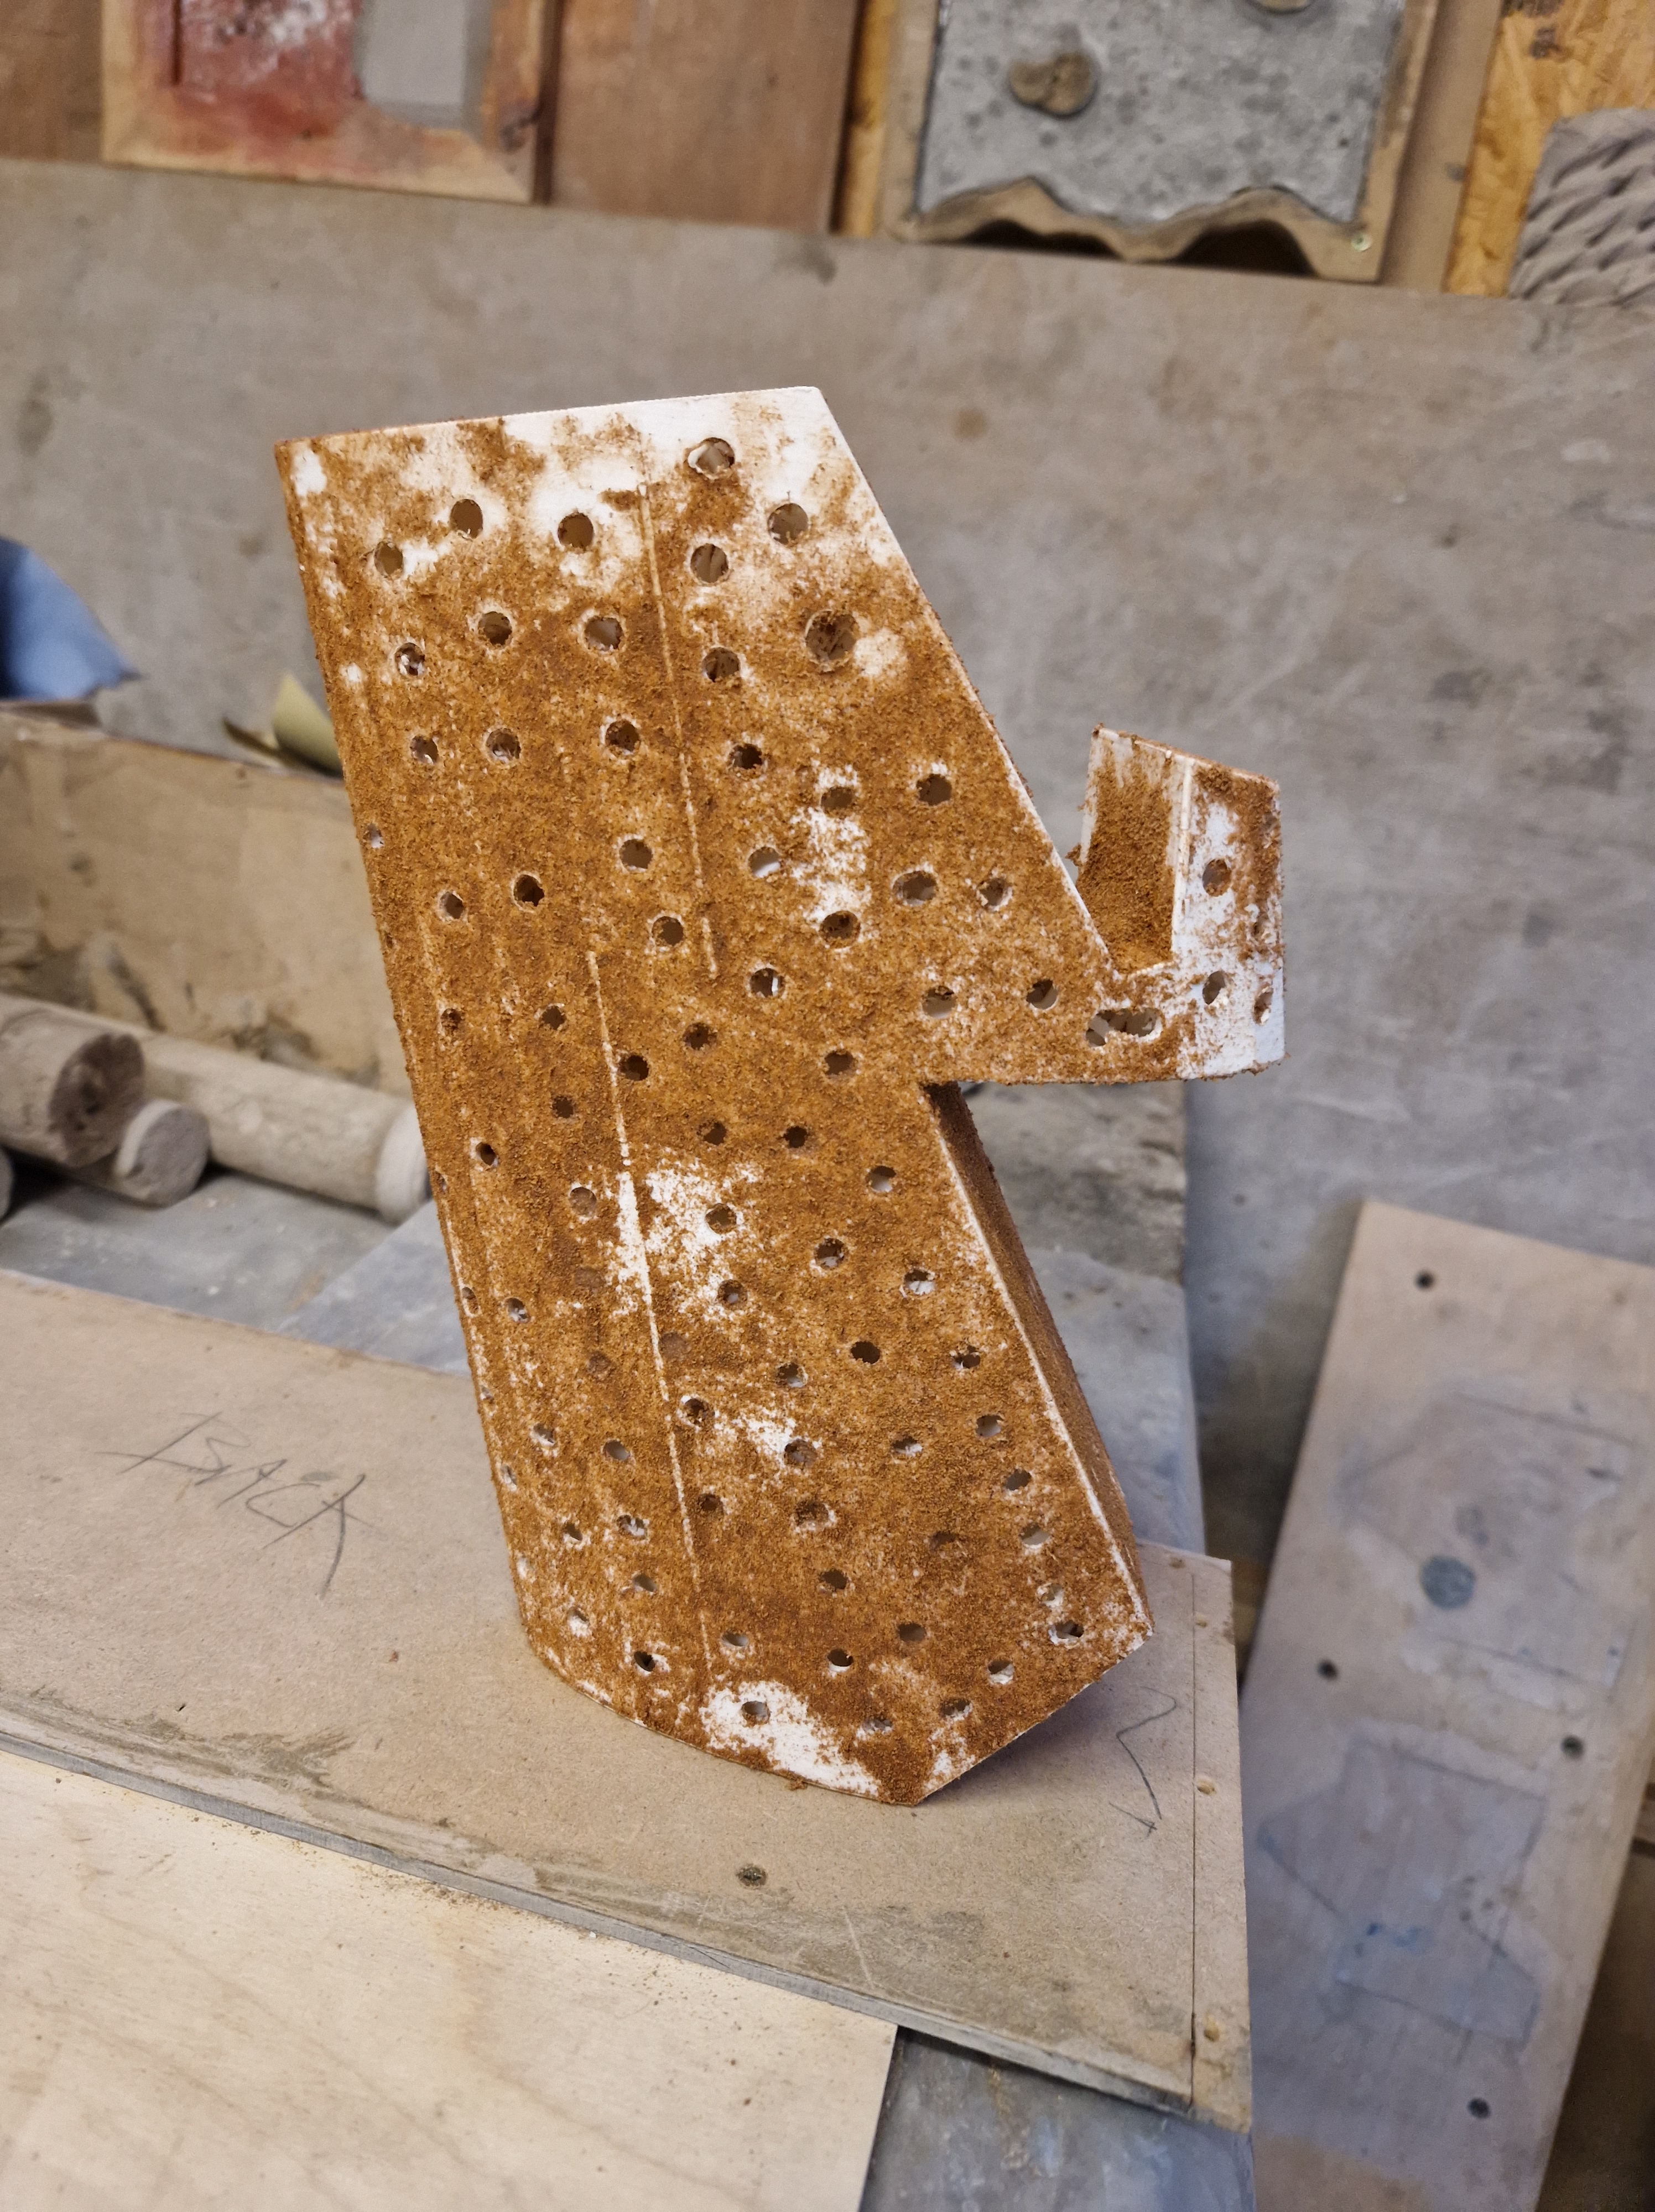
CONCRETE WORKSHOP 1 WITH JIM
NOTES
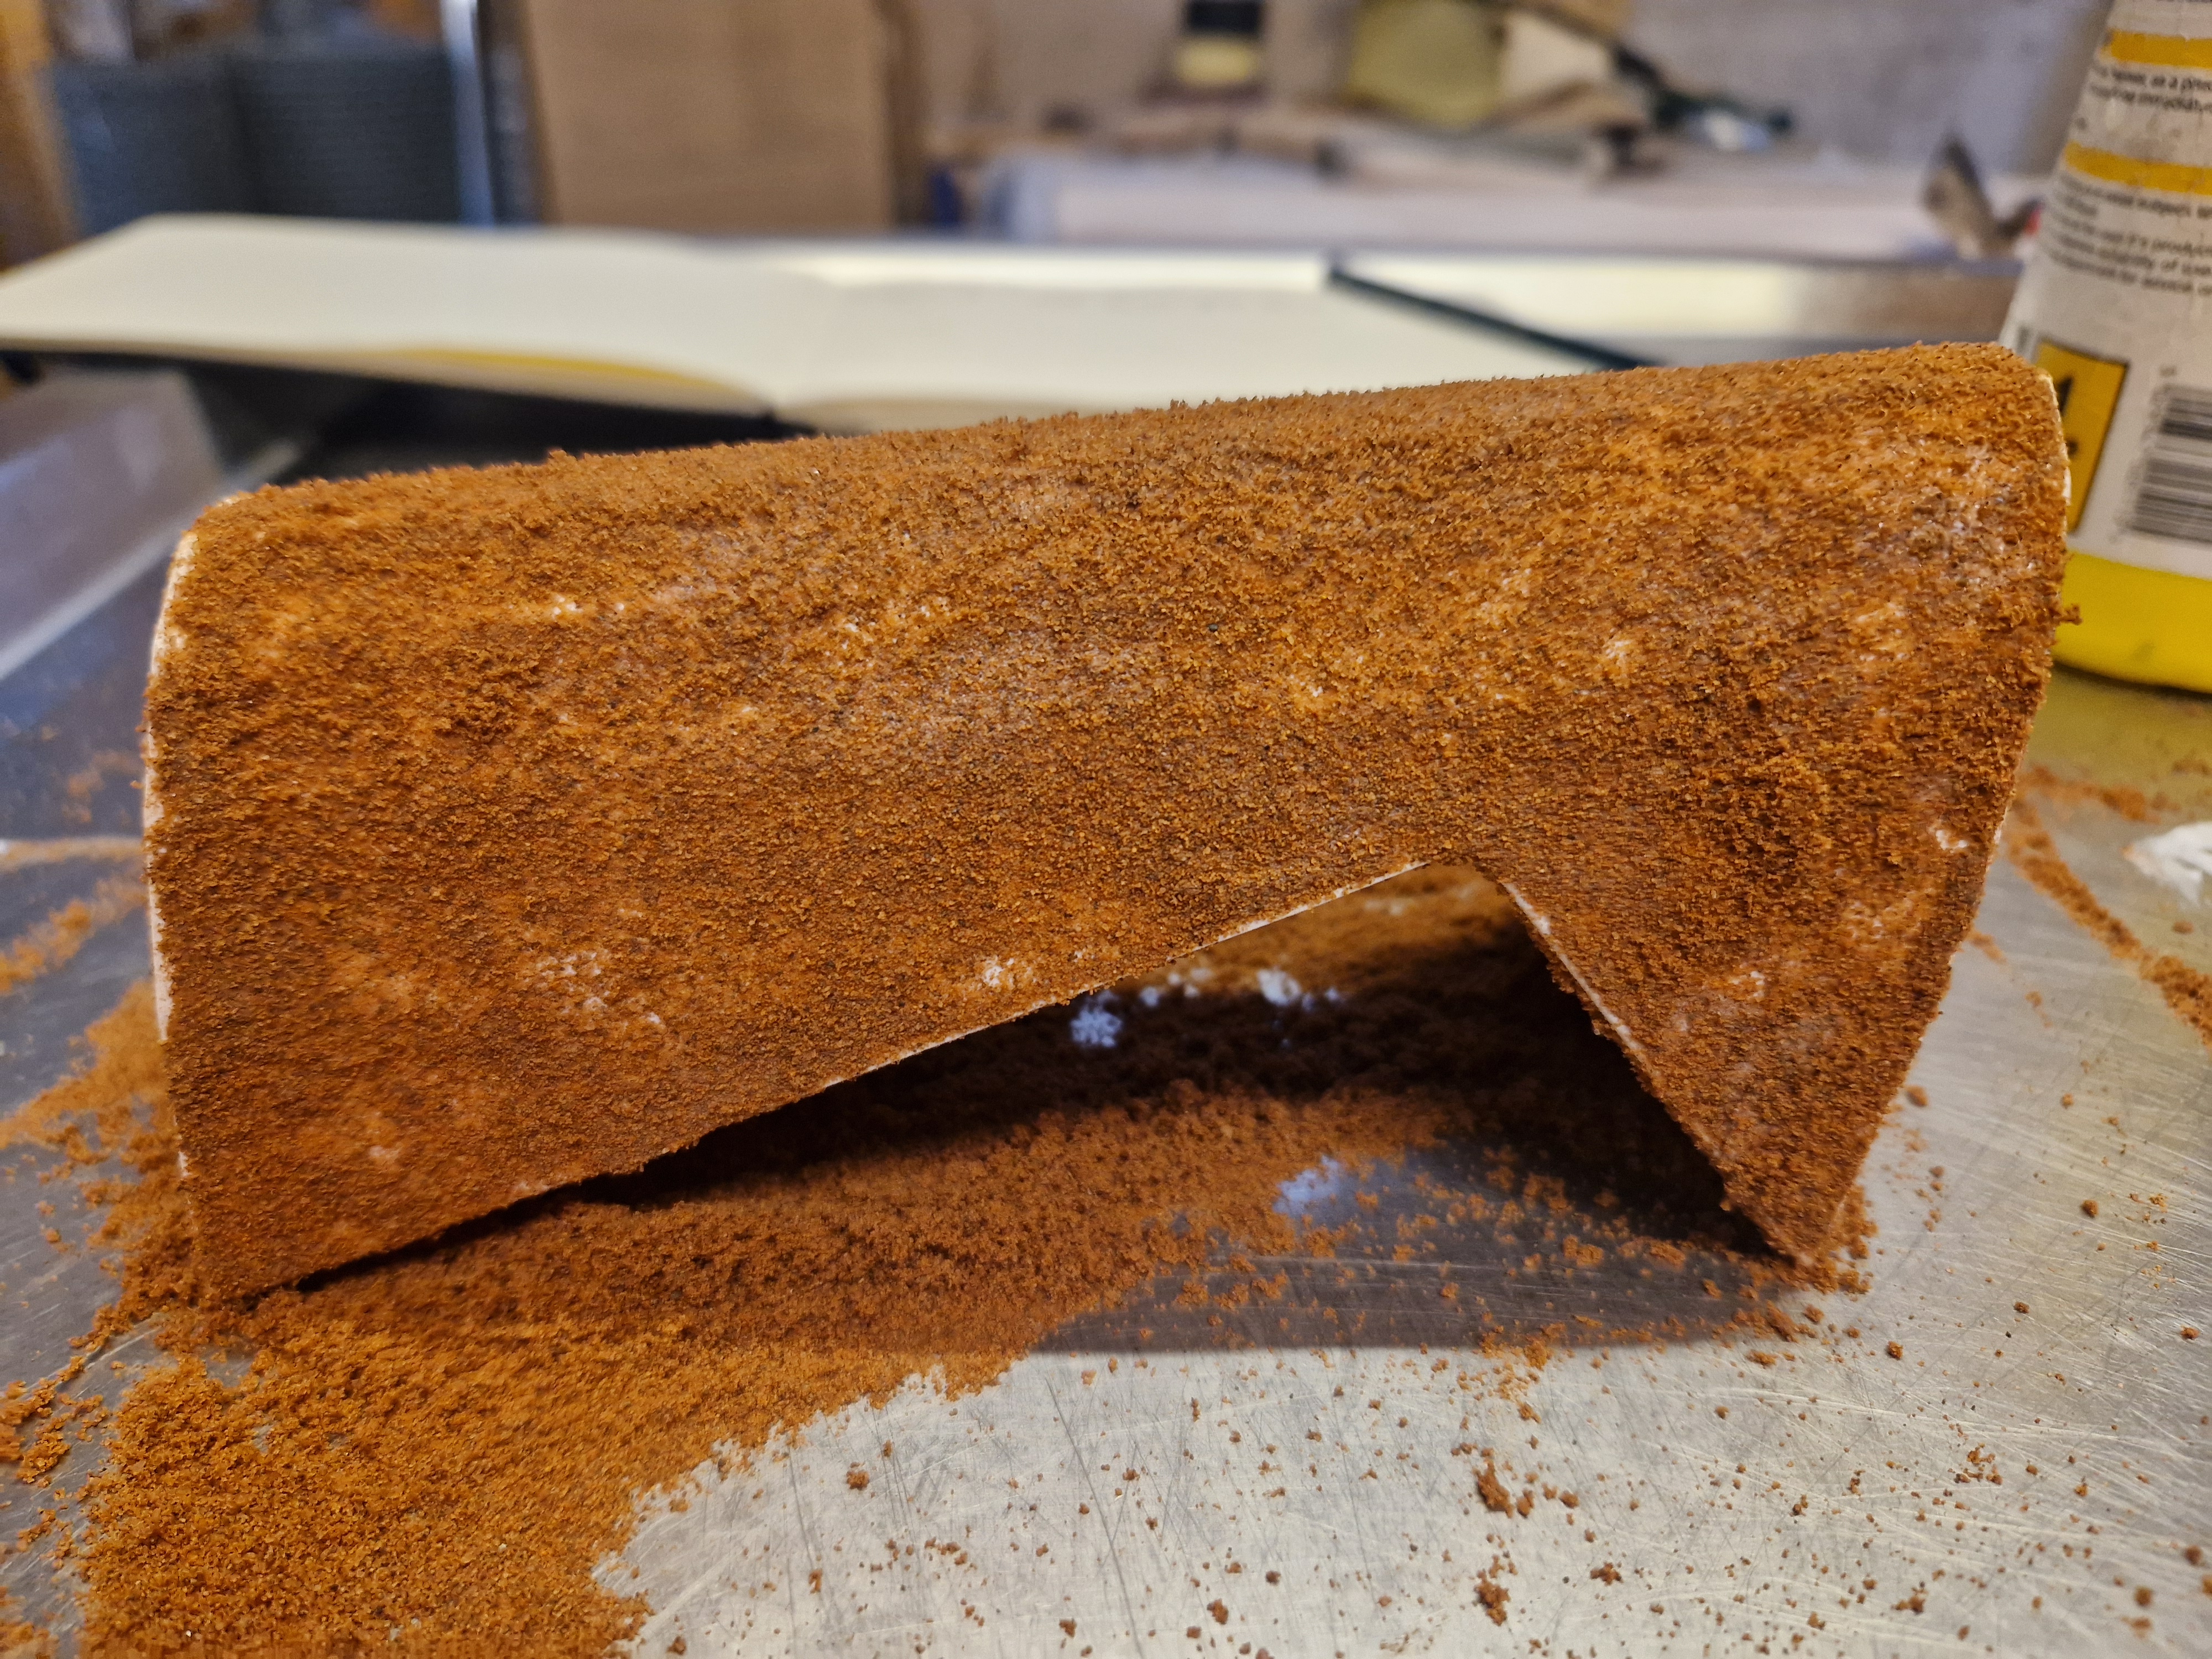
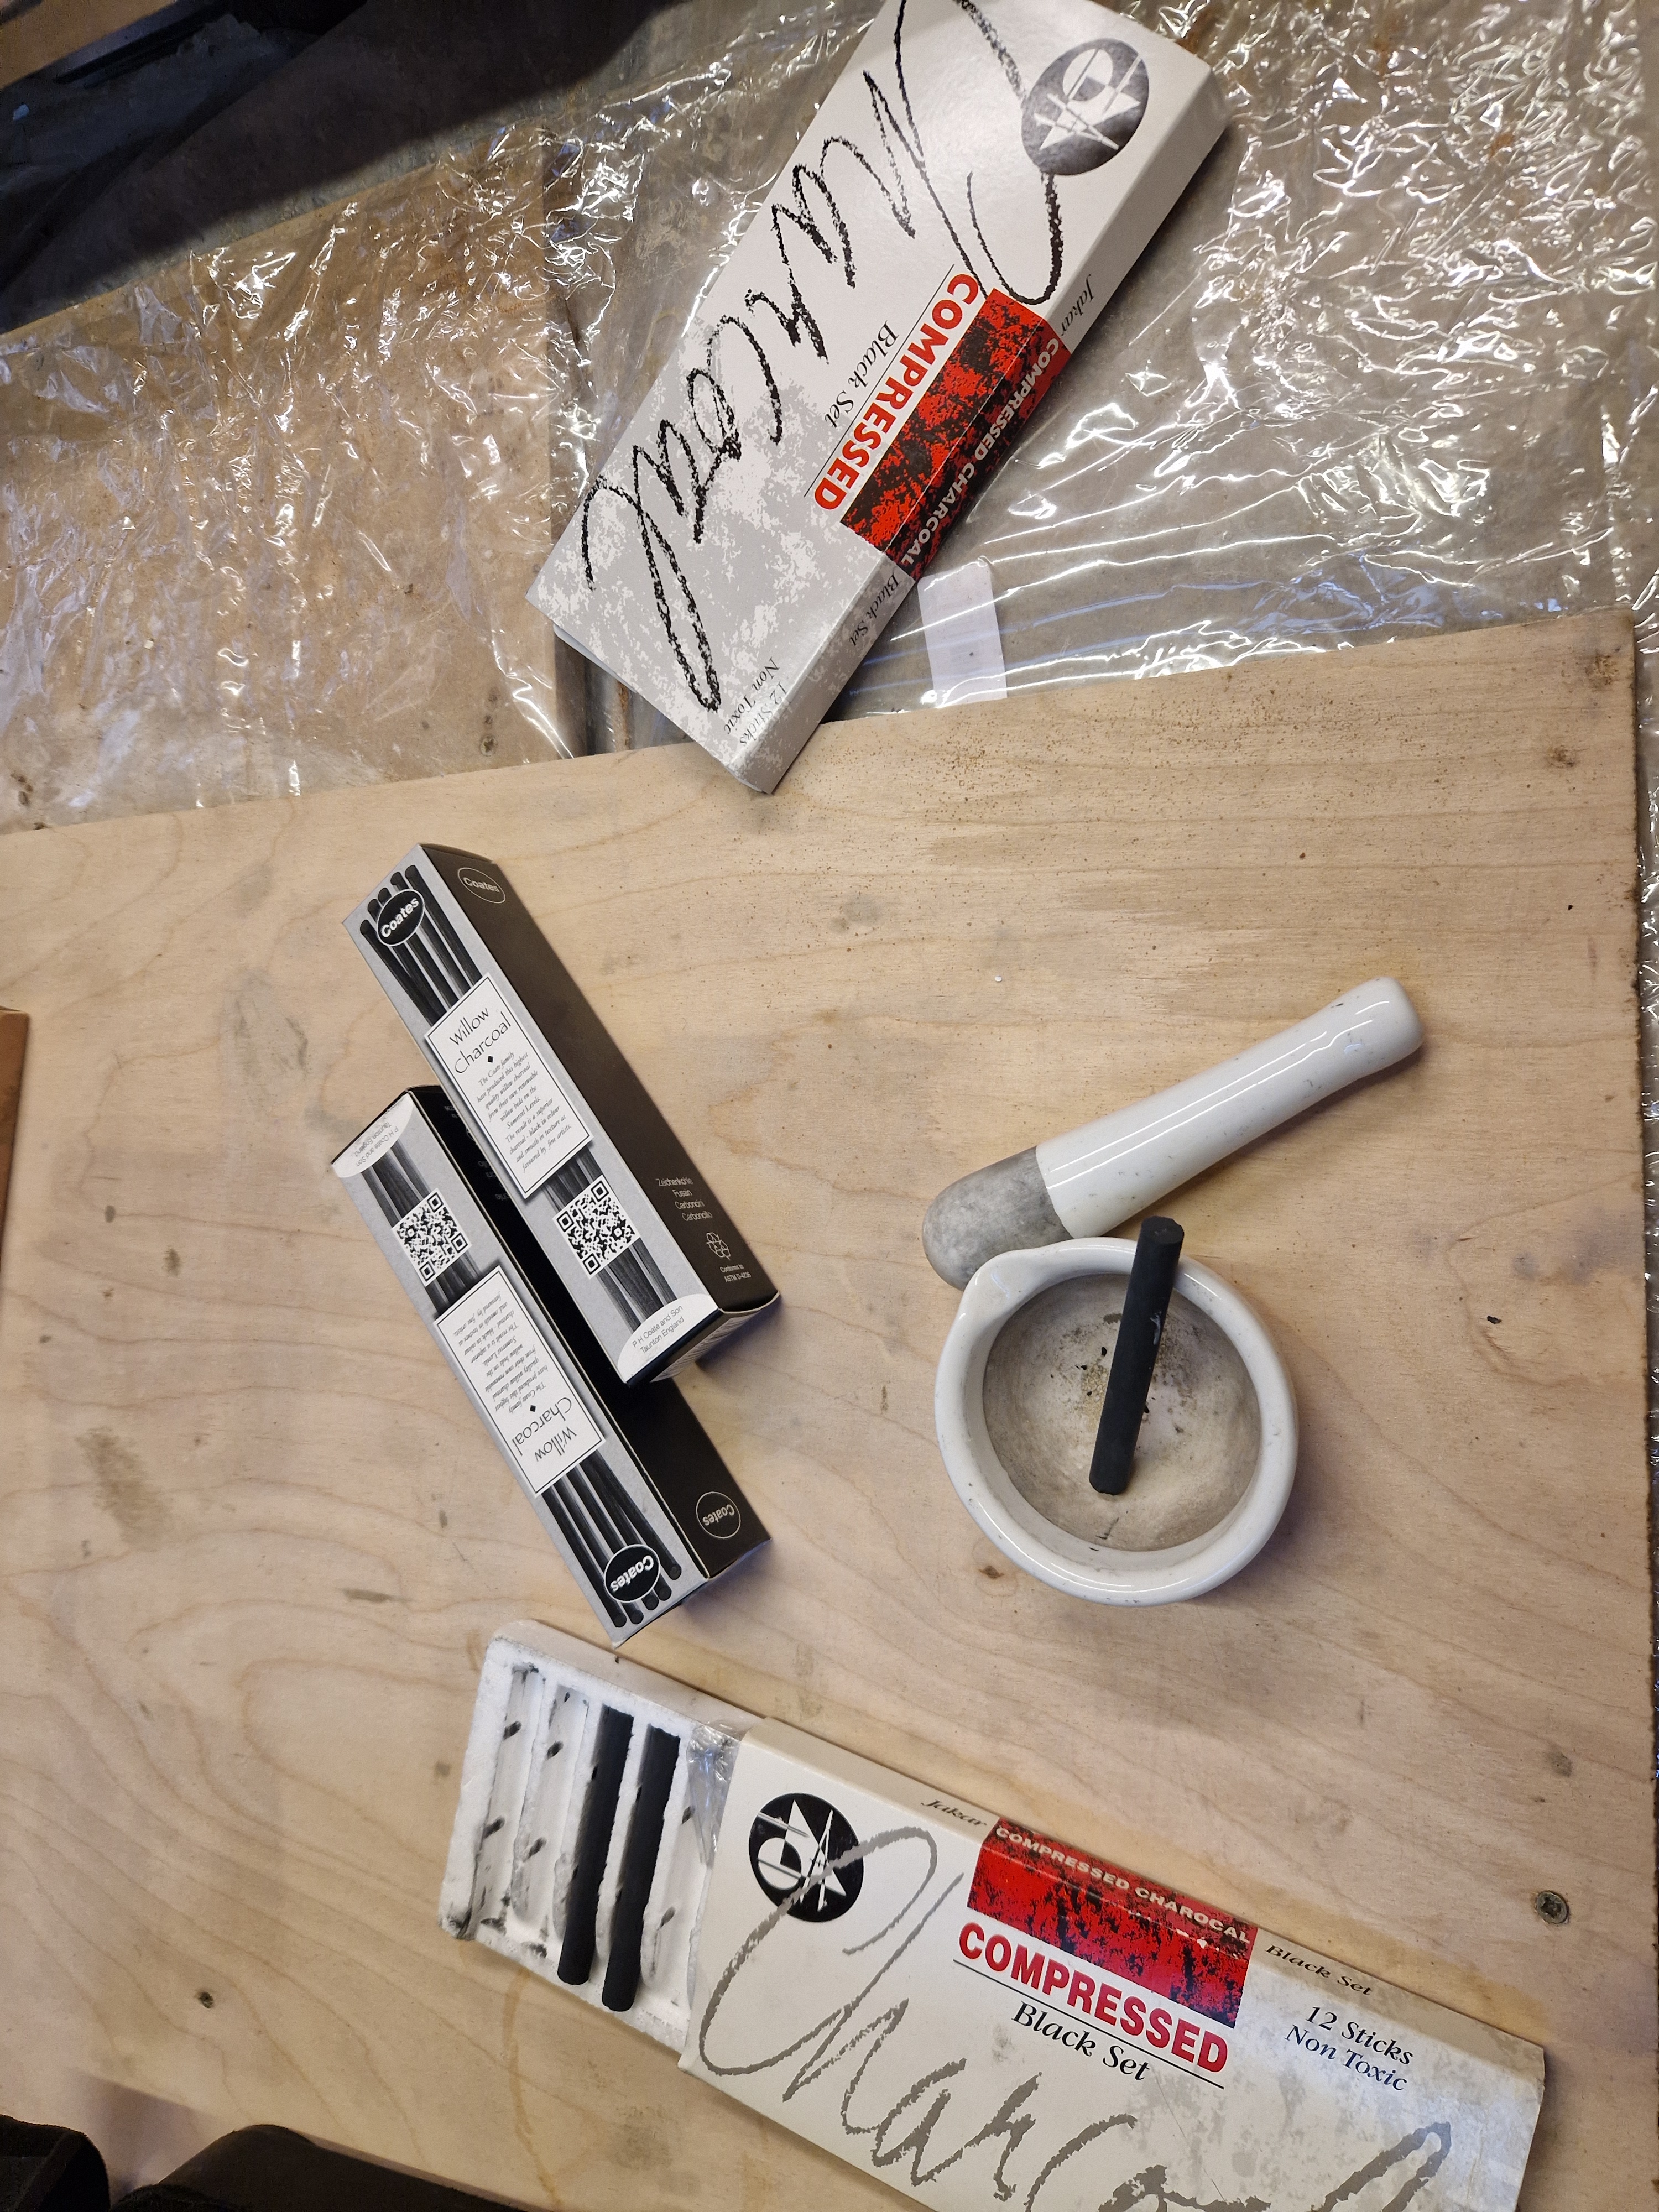
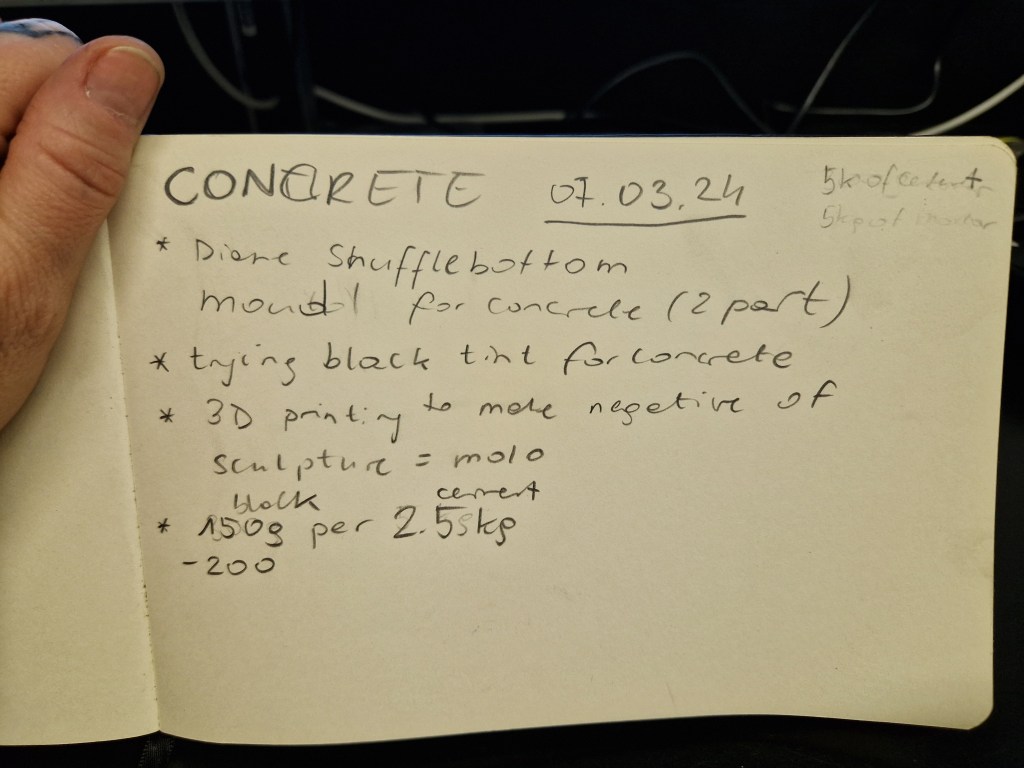
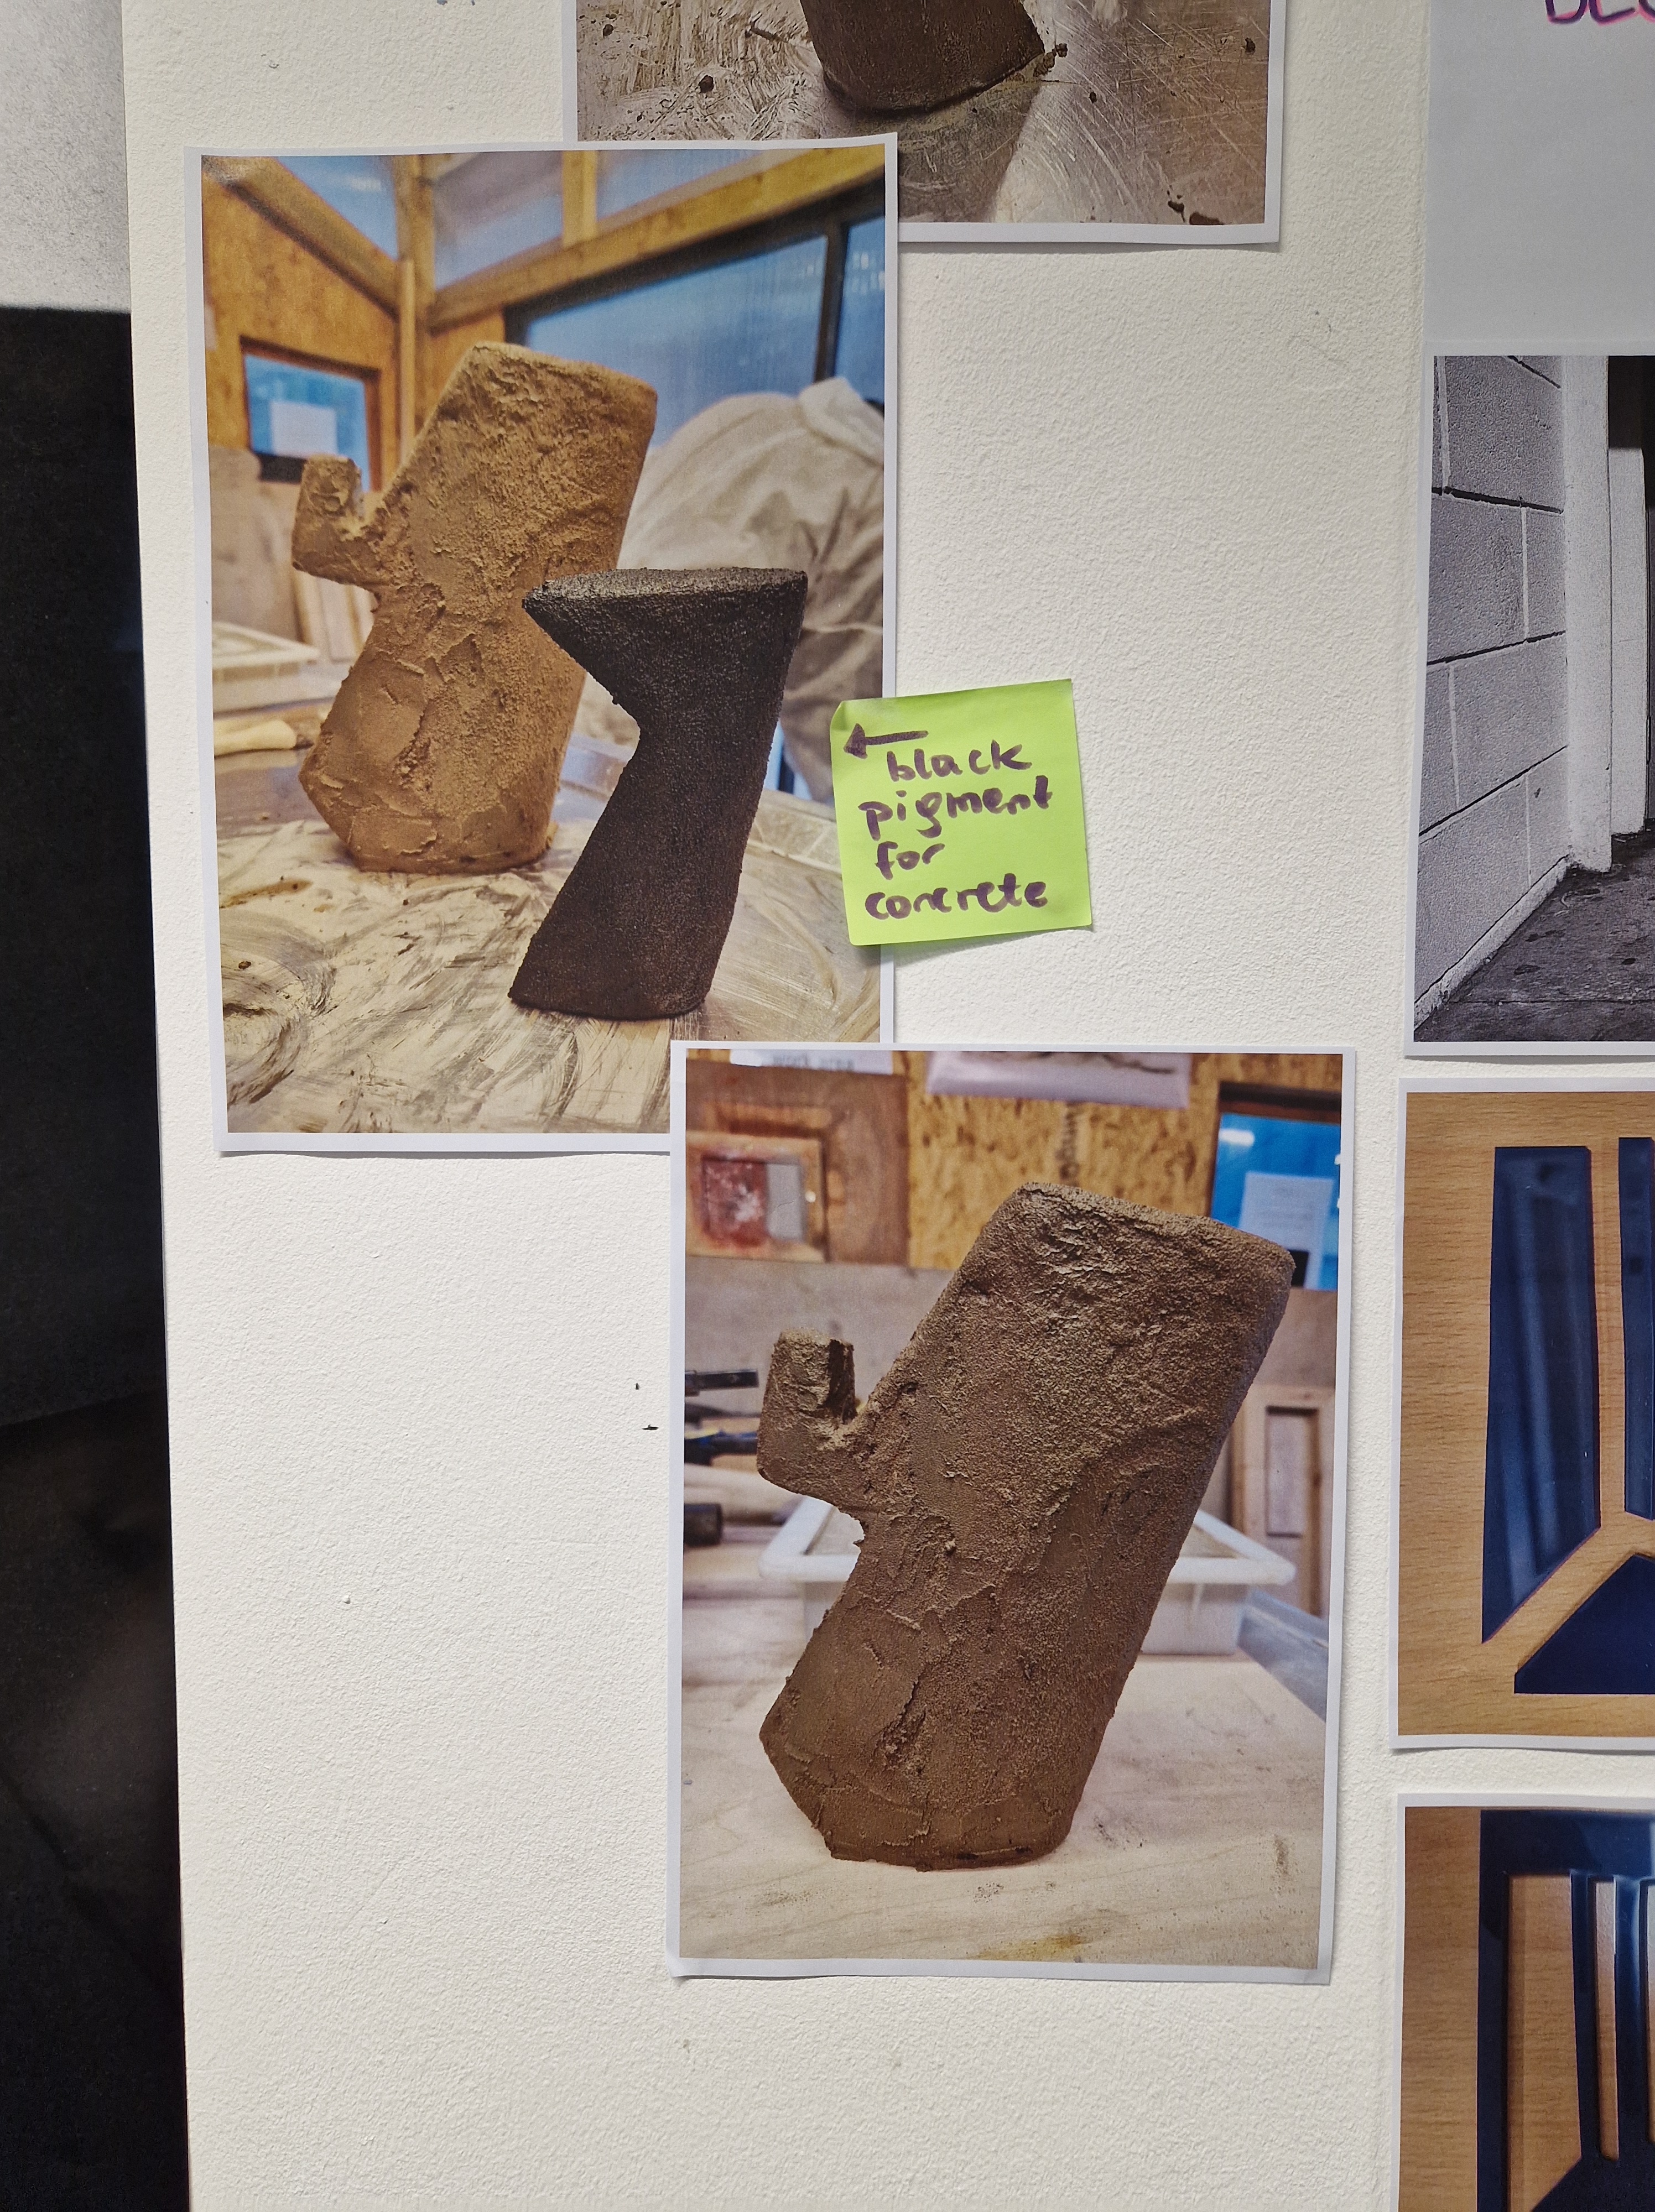
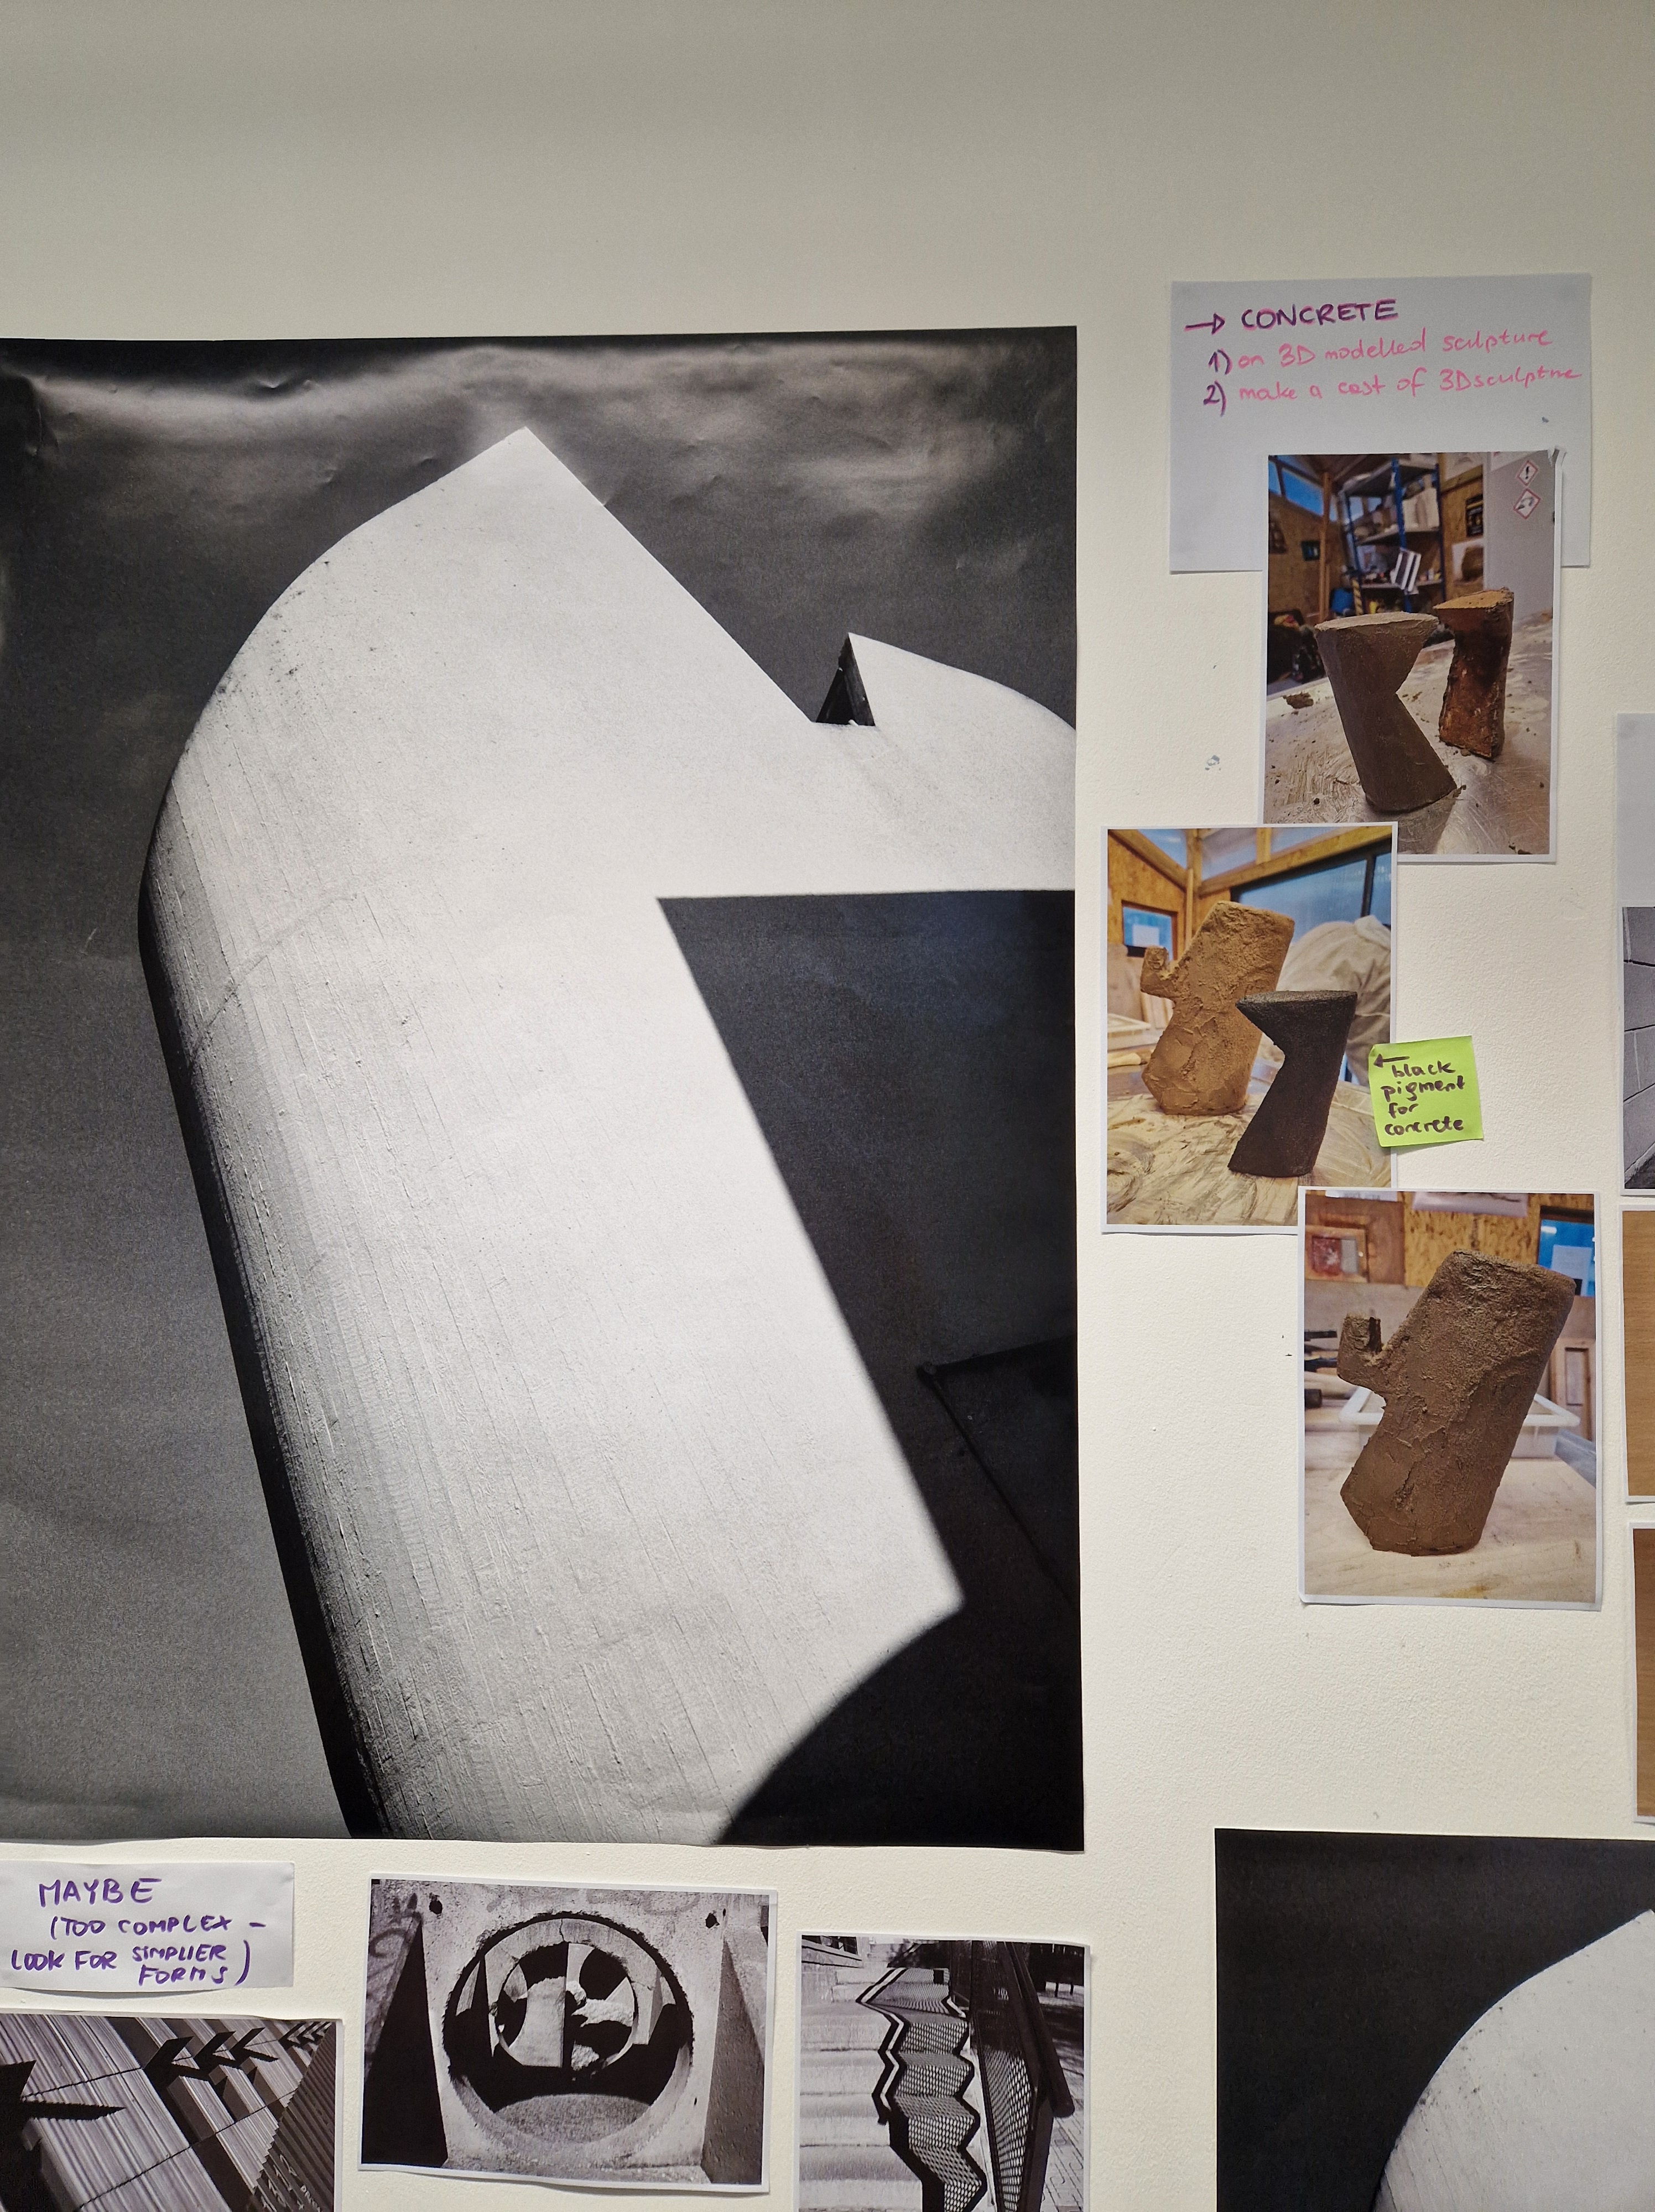
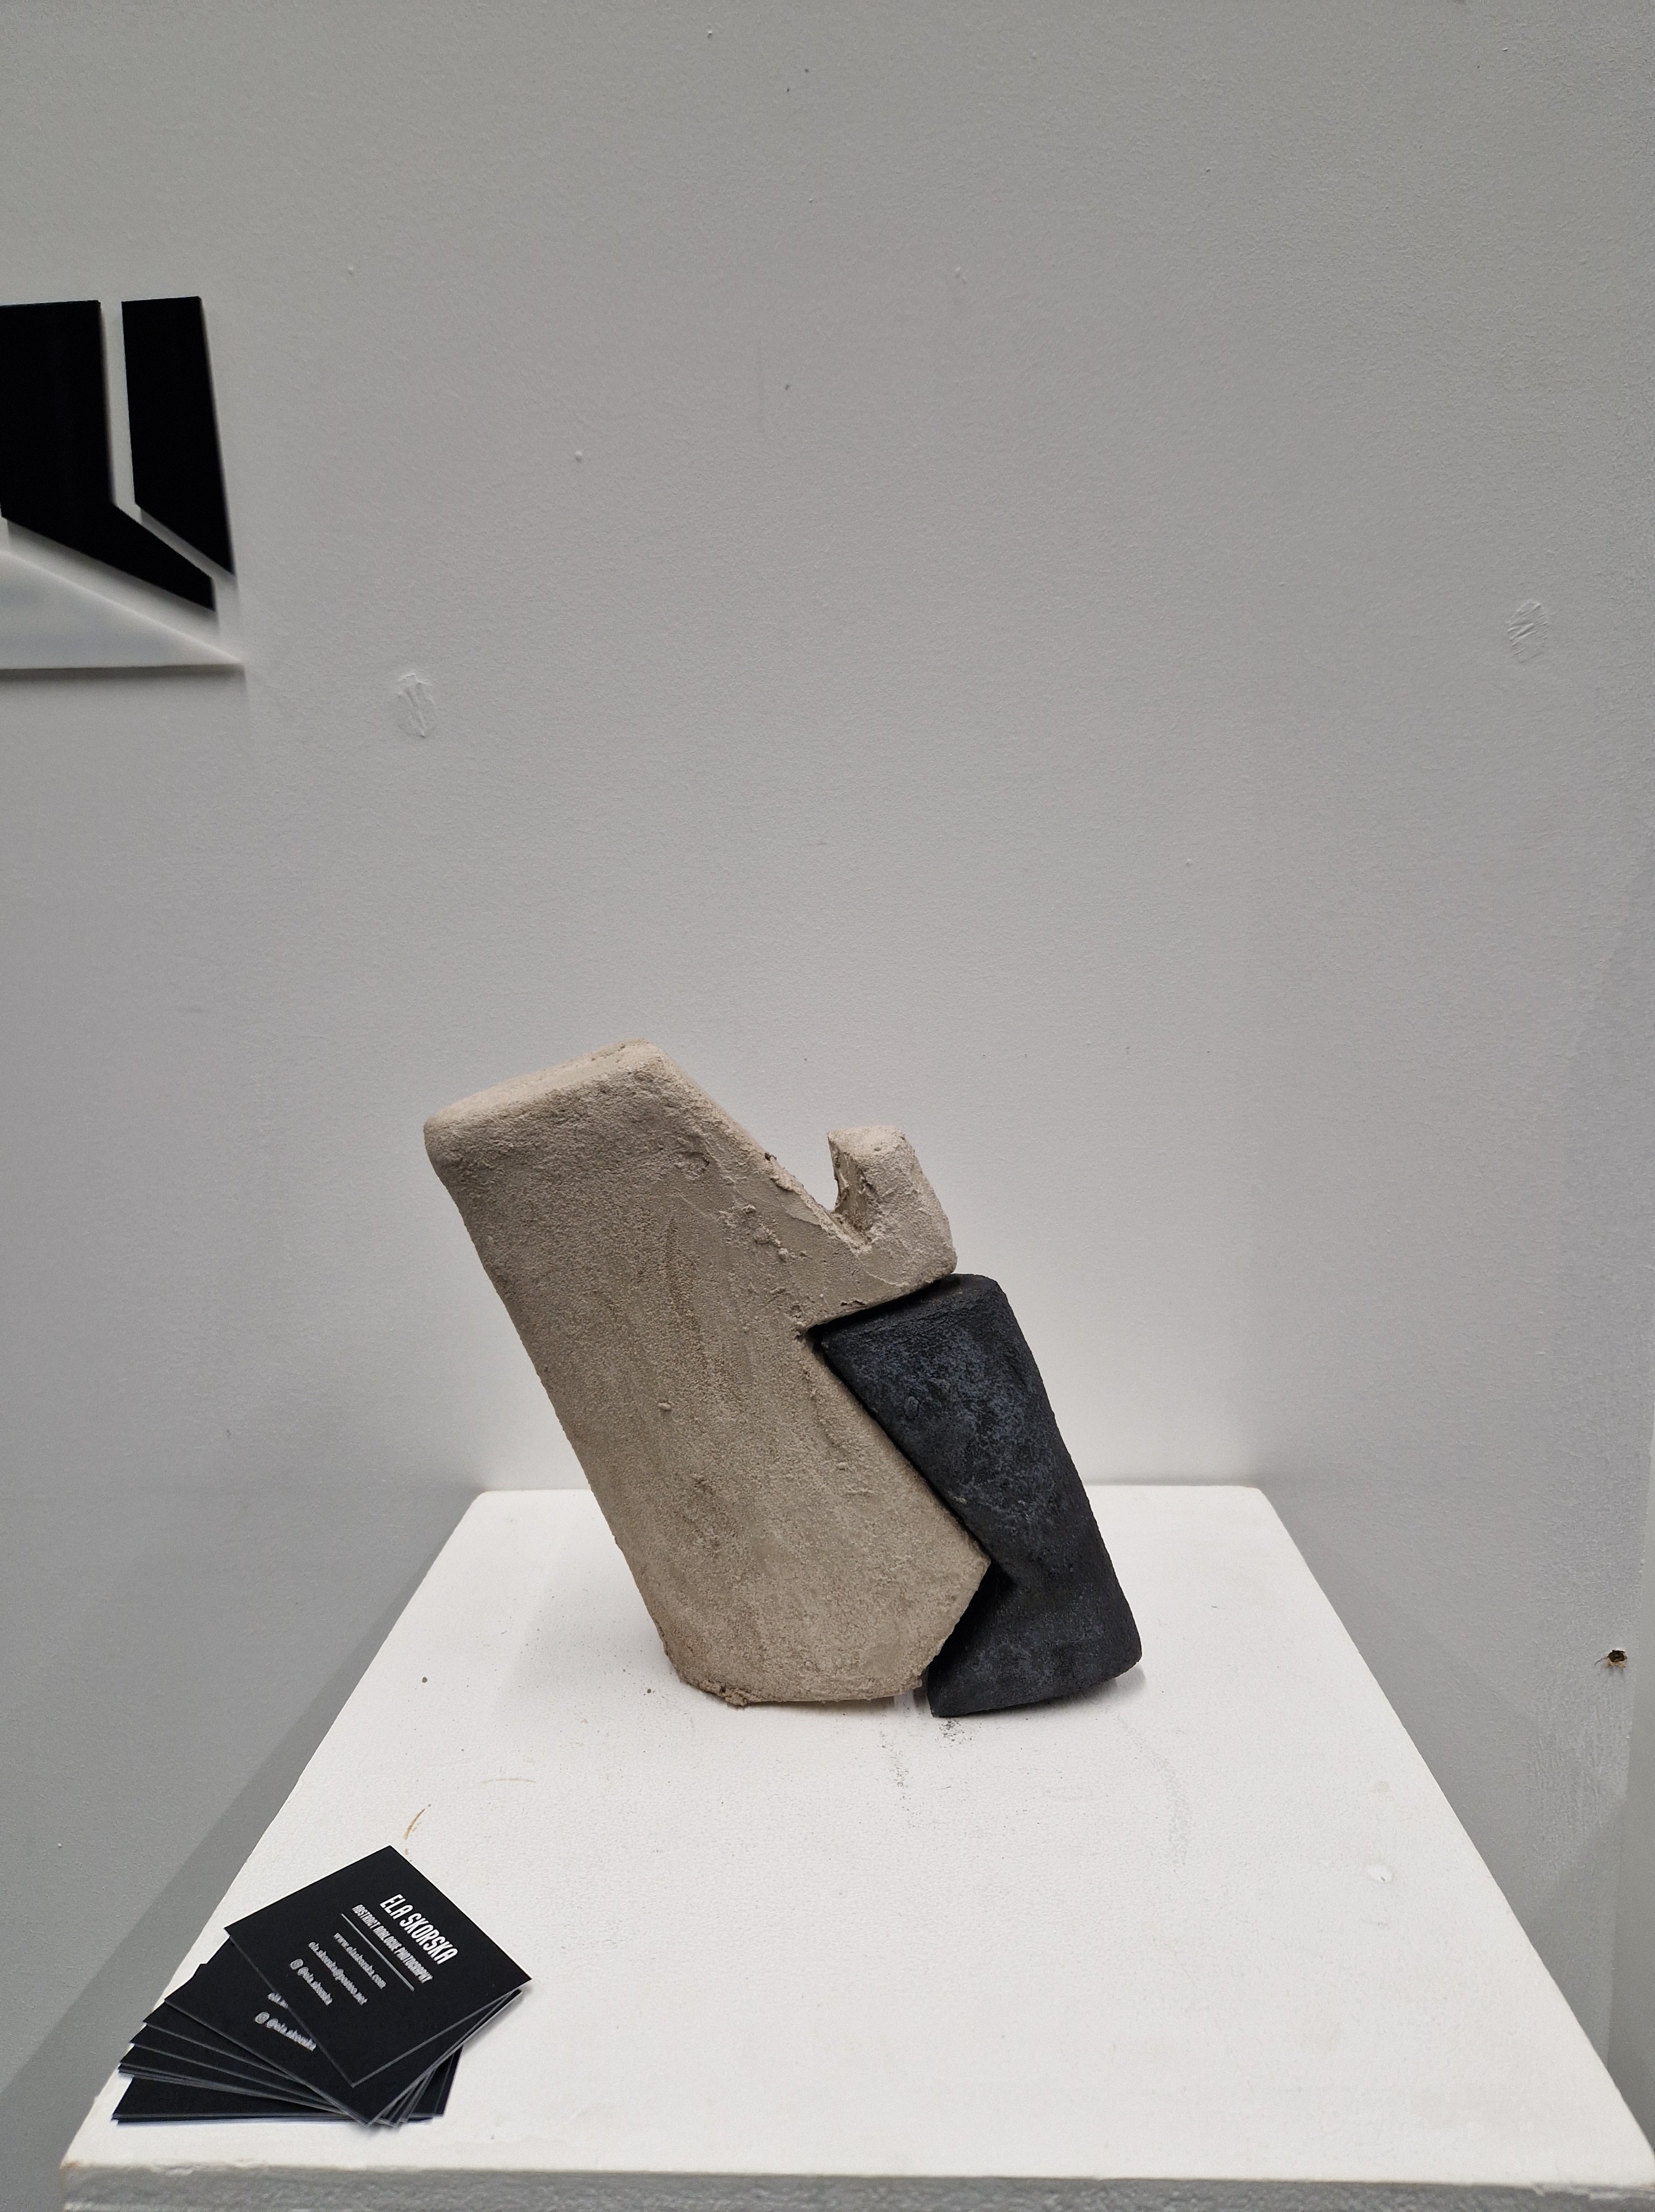
Today we tested two methods that would allow concrete to stick to the 3D-modelled sculpture: PVA glue and drilling holes. We then applied concrete to both to see which method was better and left them to dry. We discussed ways of adding pigment and decided to do two tests during the next session: one with crushed charcoal and one with special black pigment for concrete.
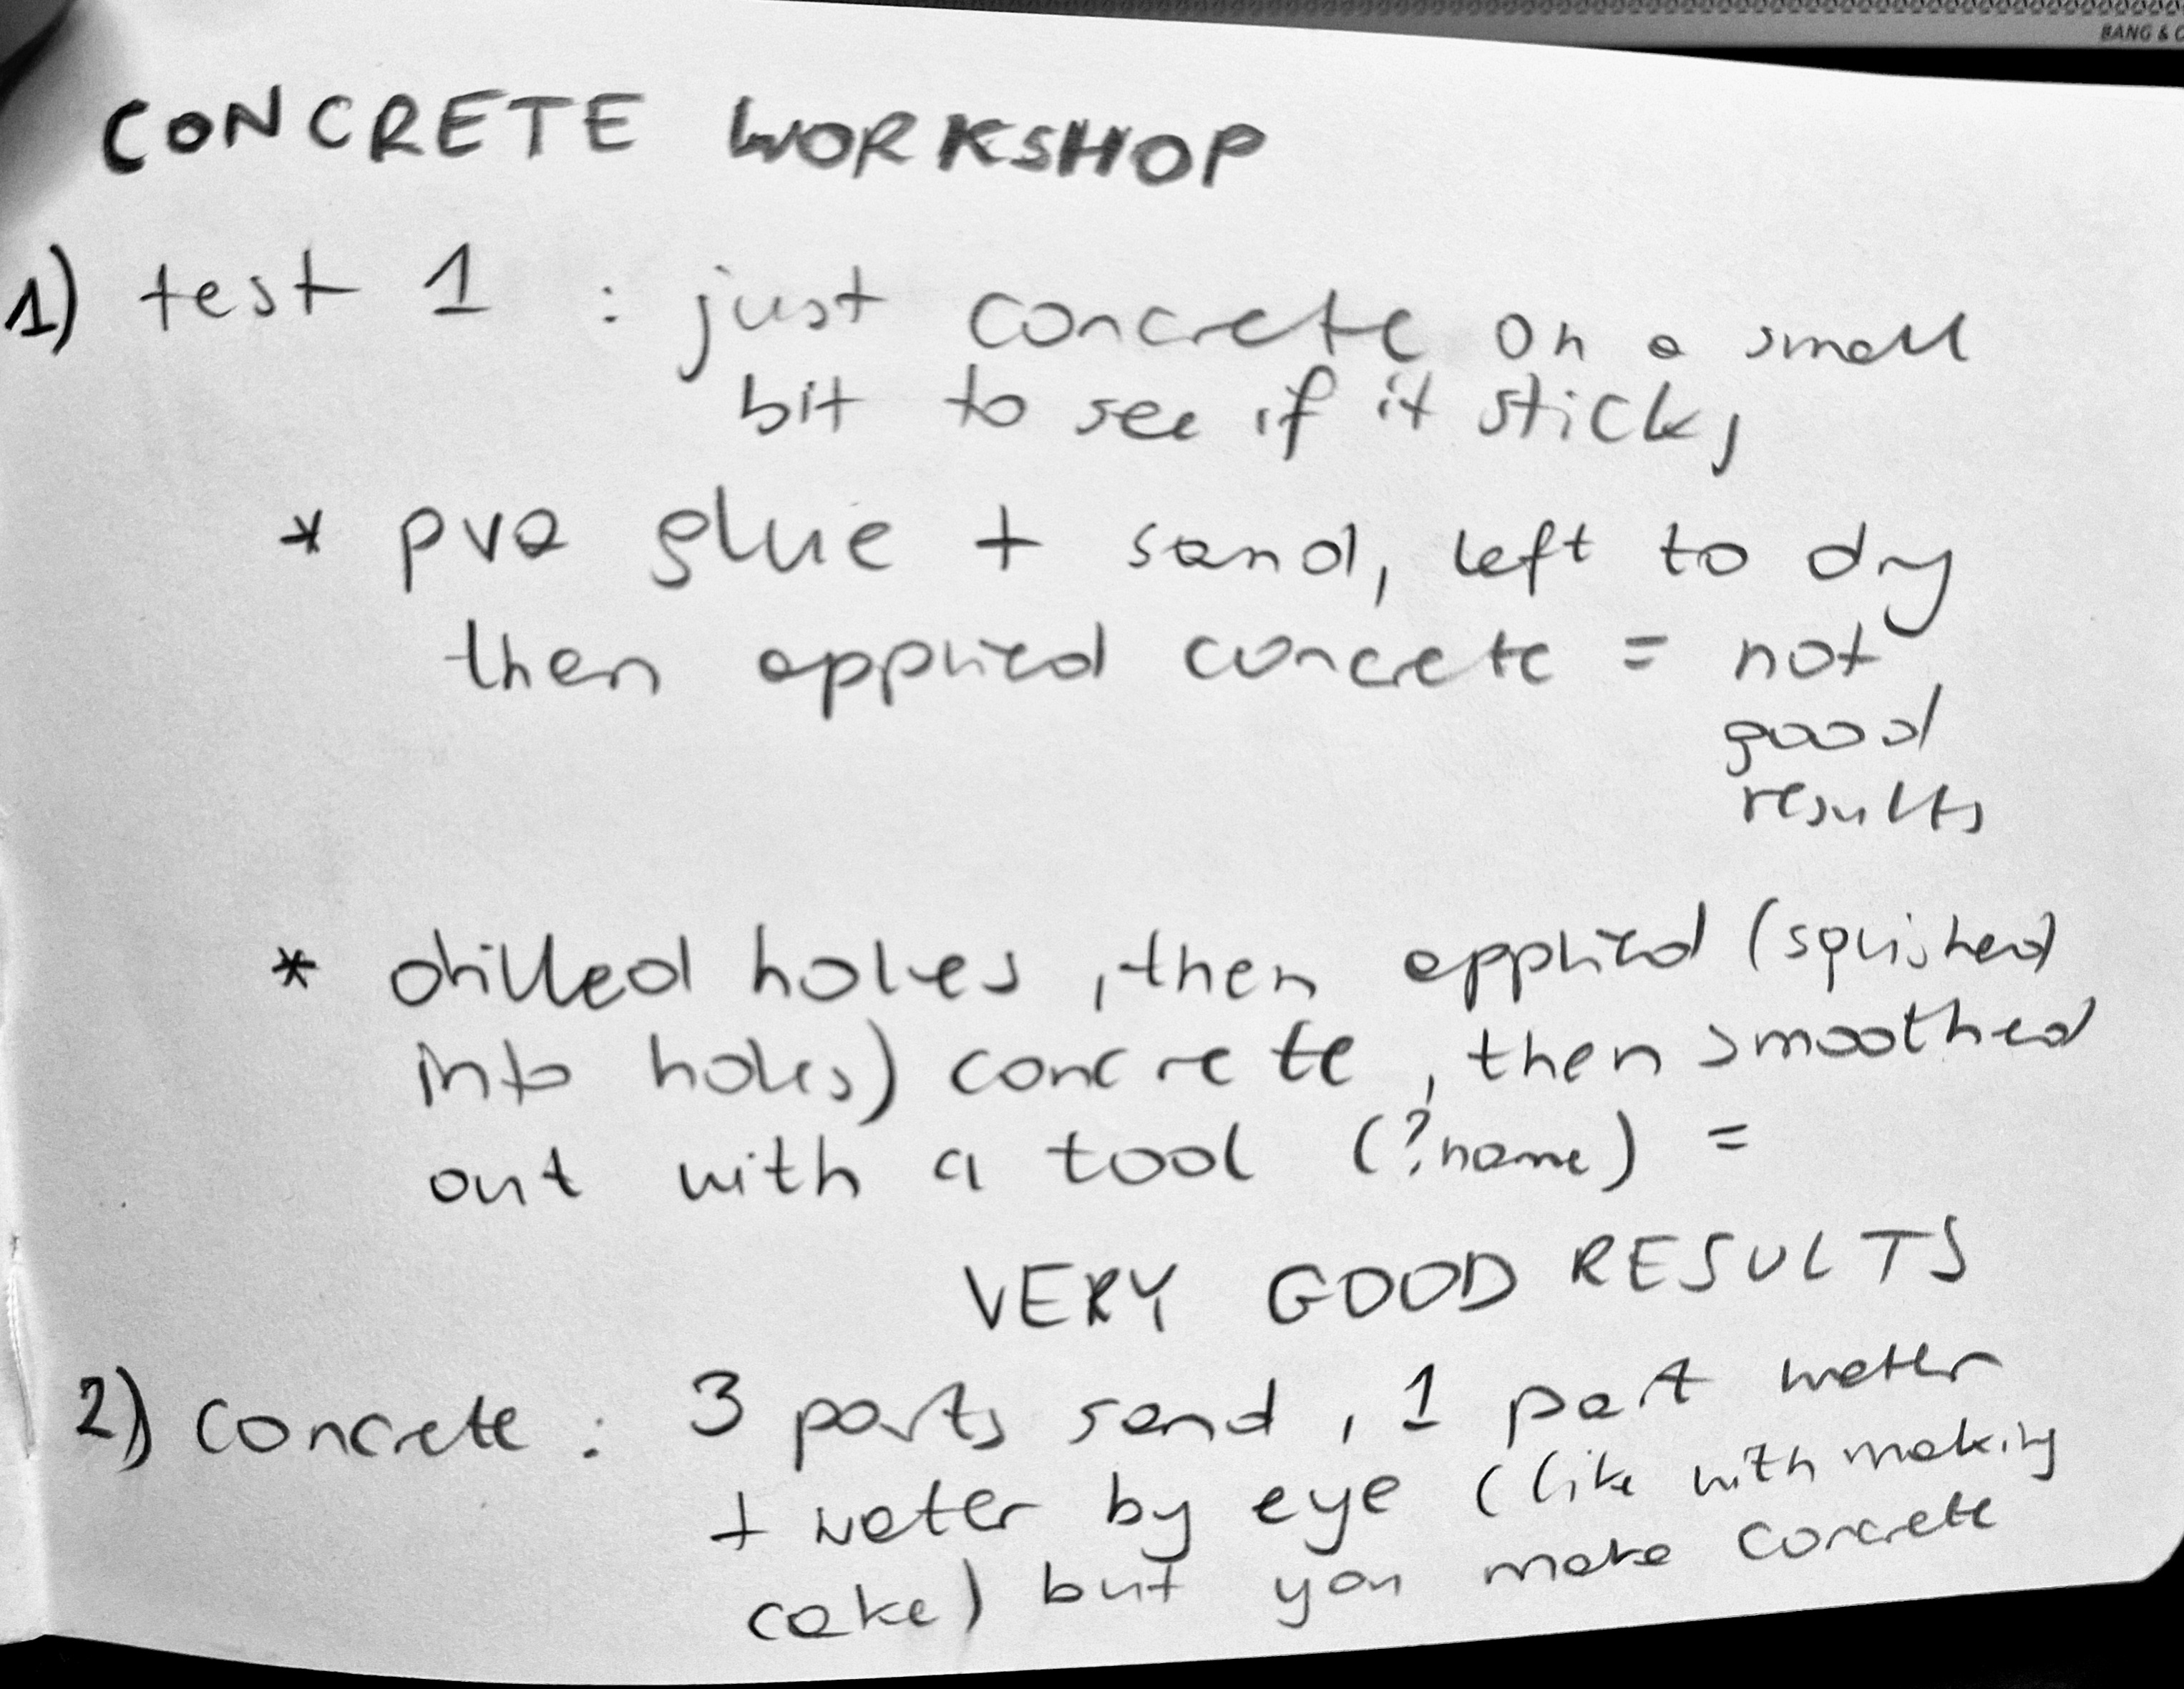
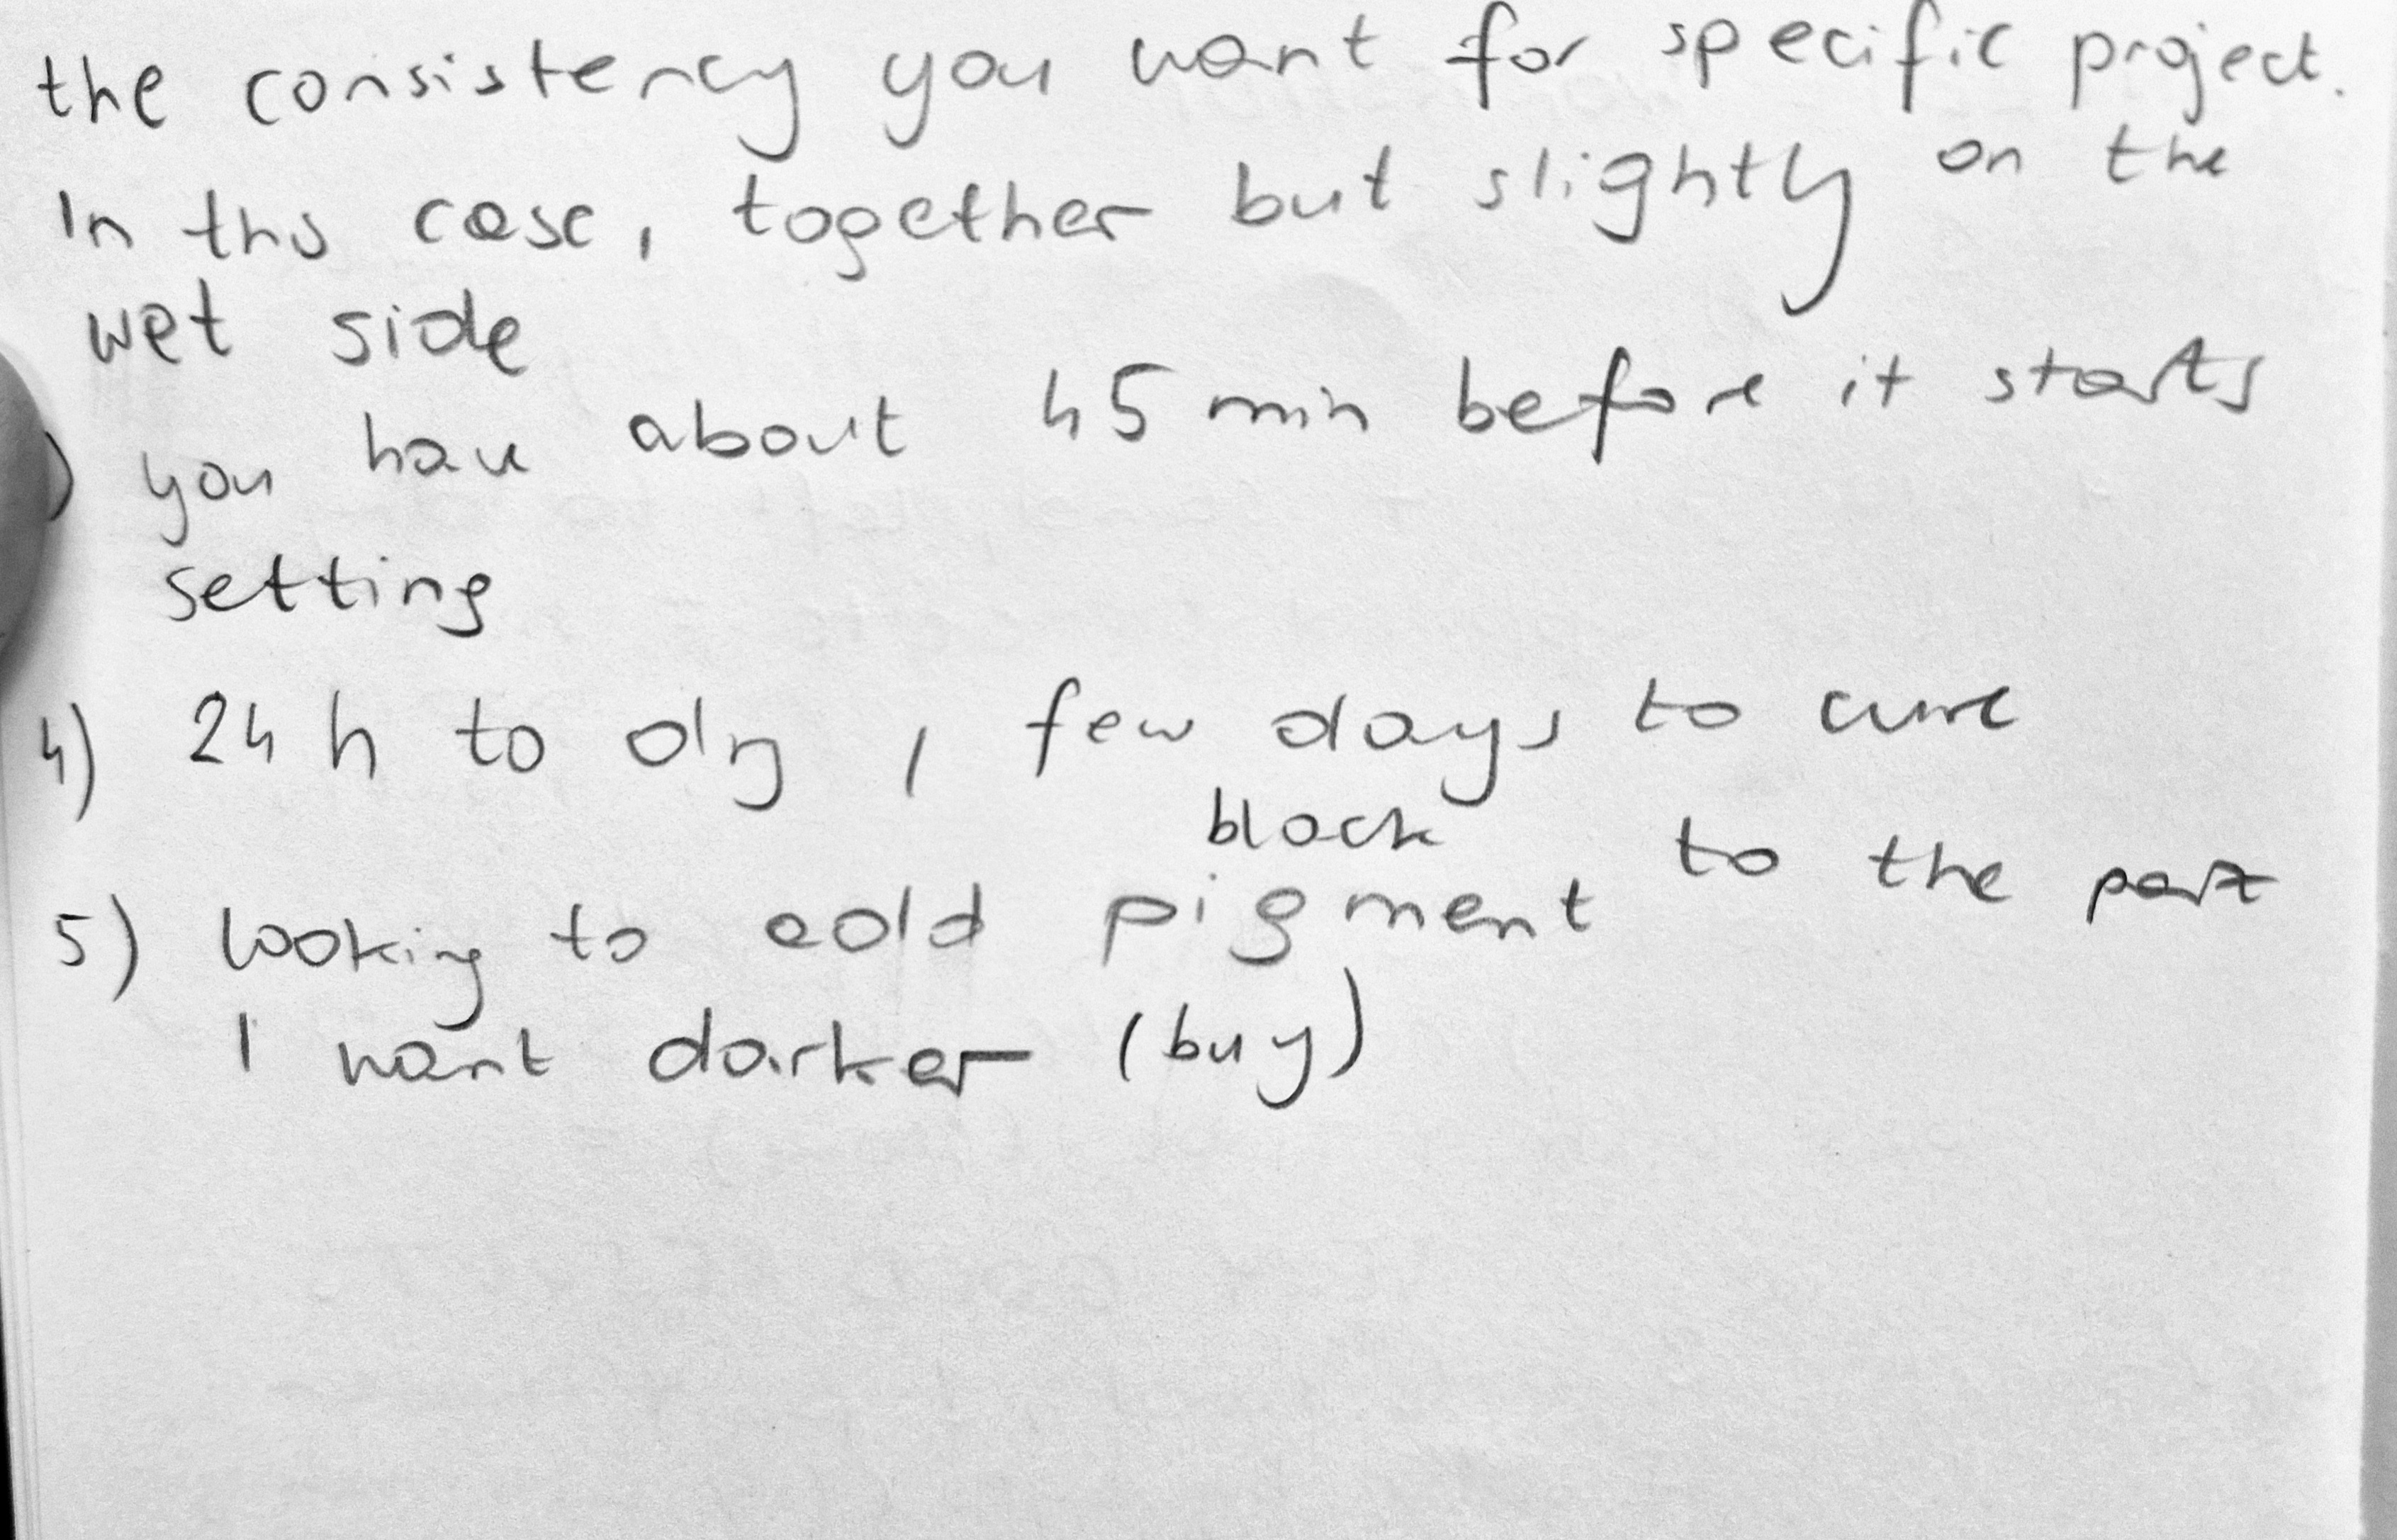
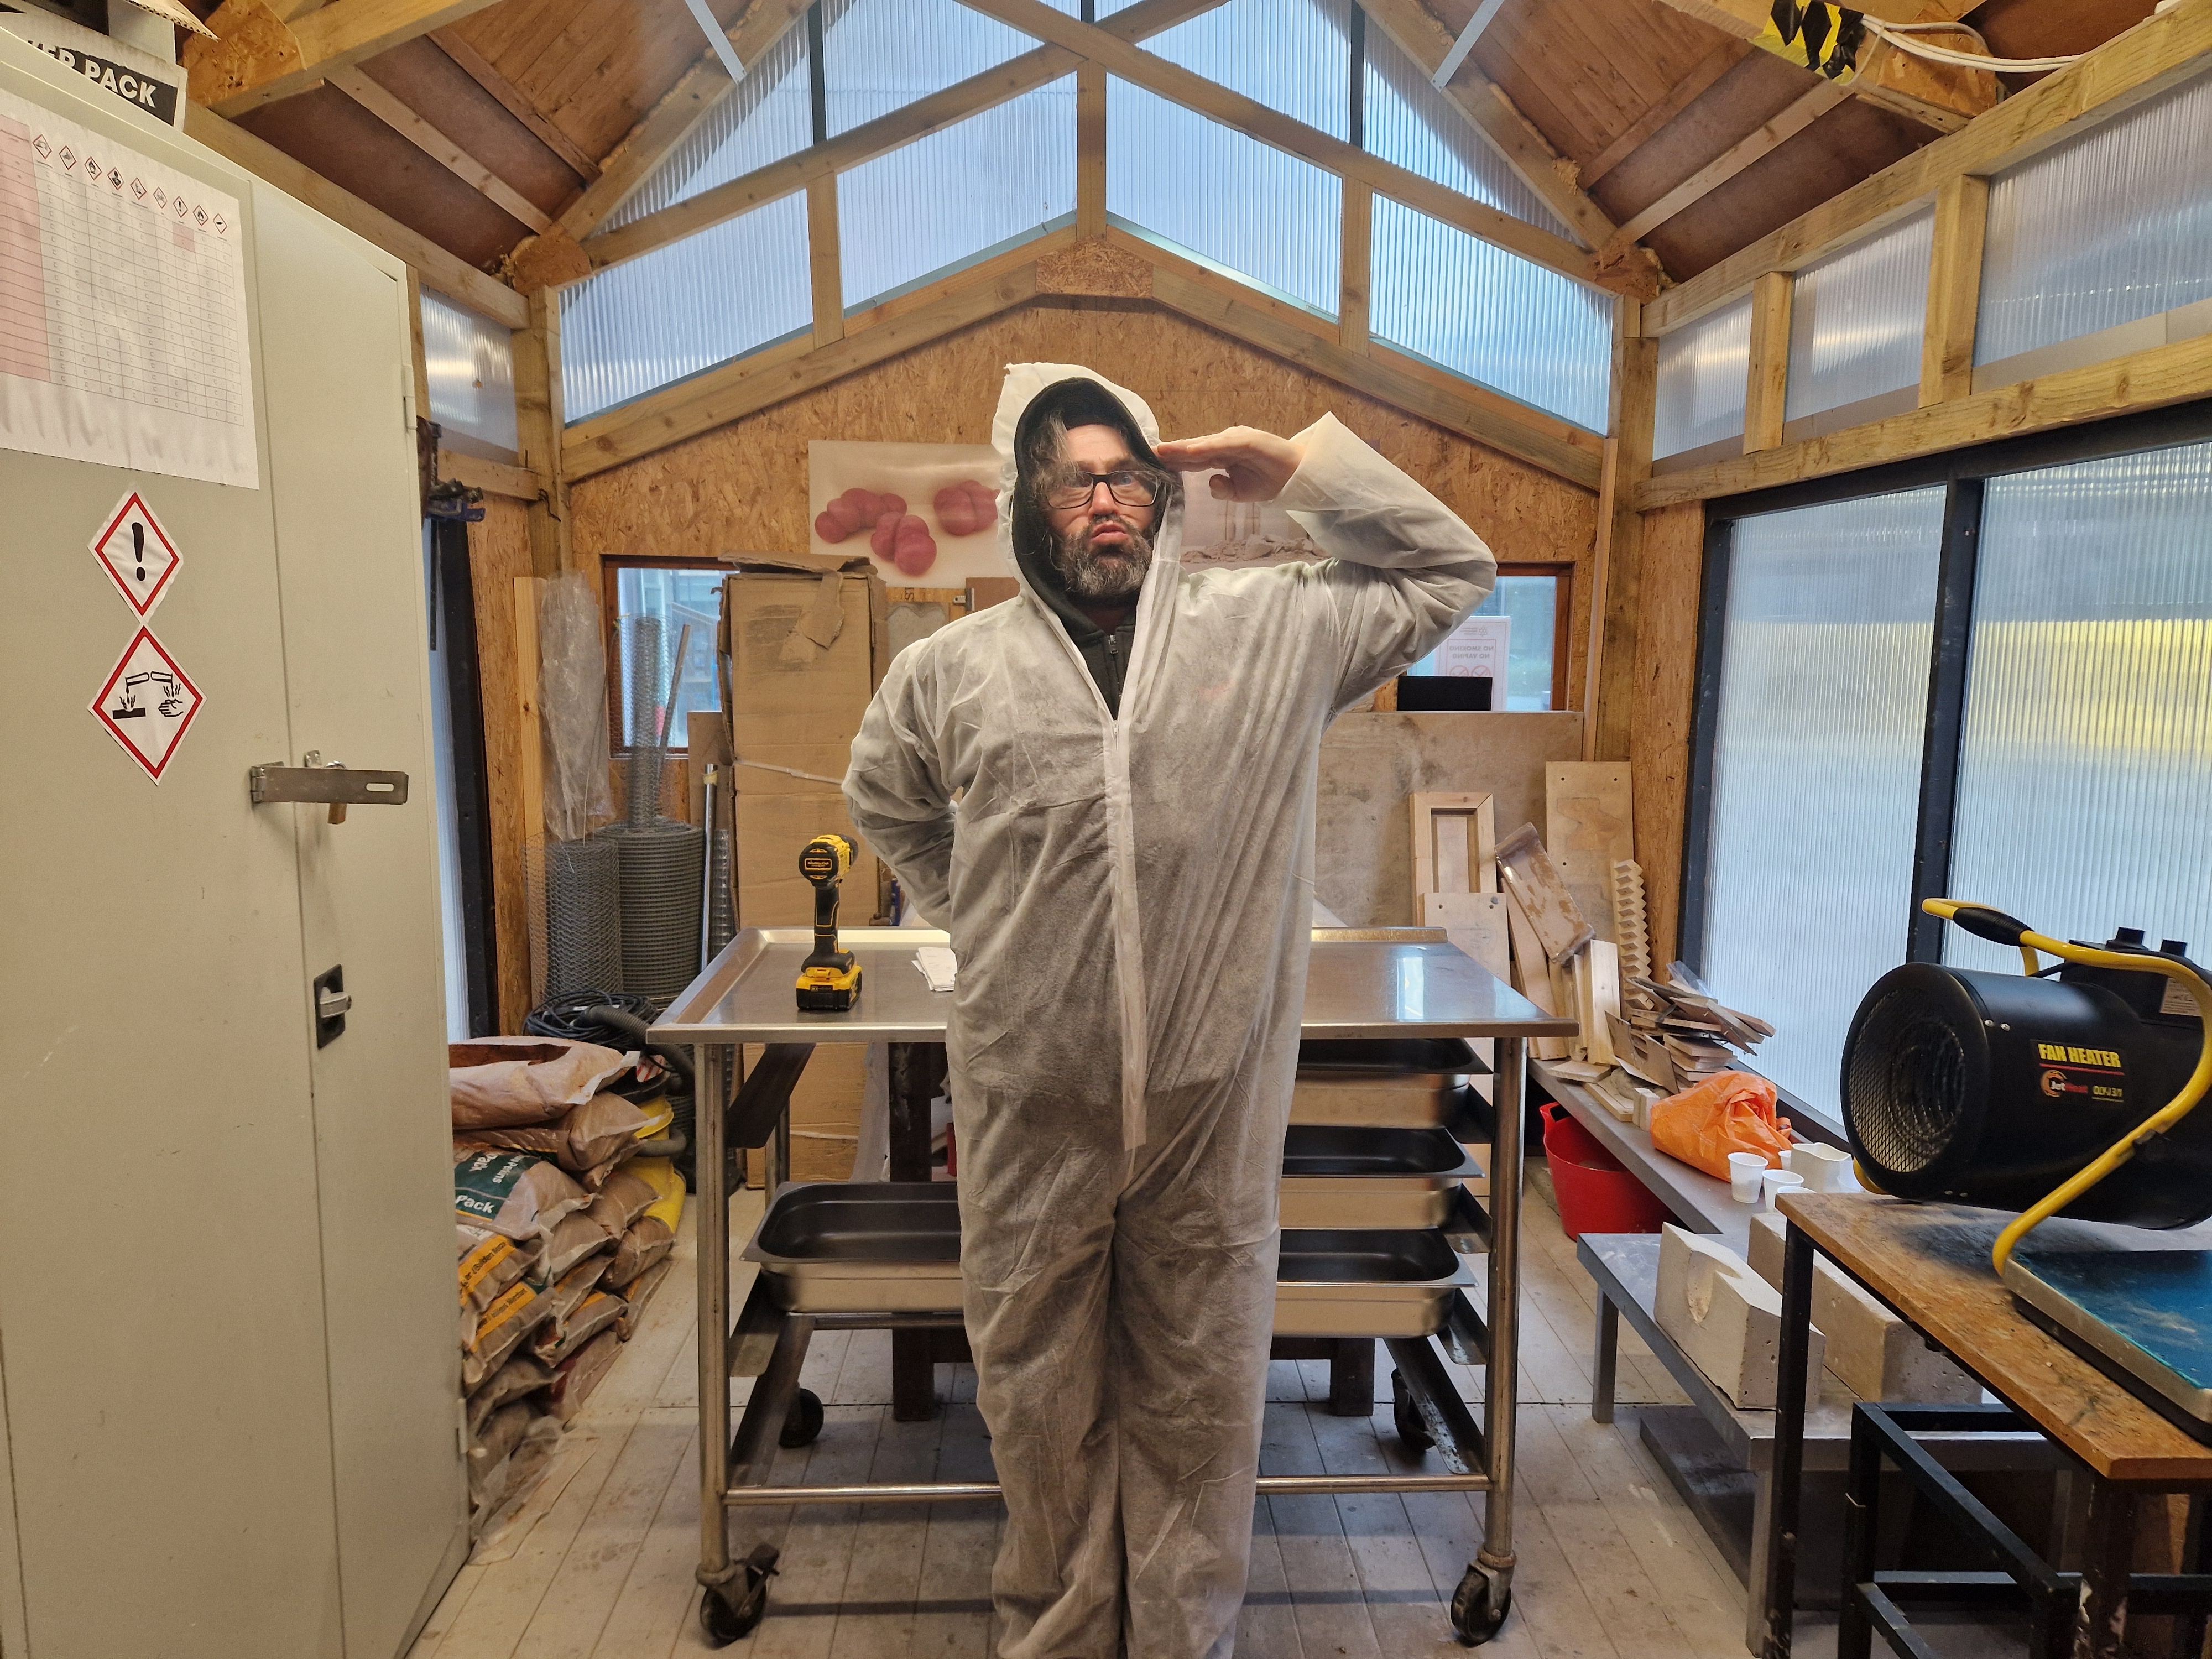

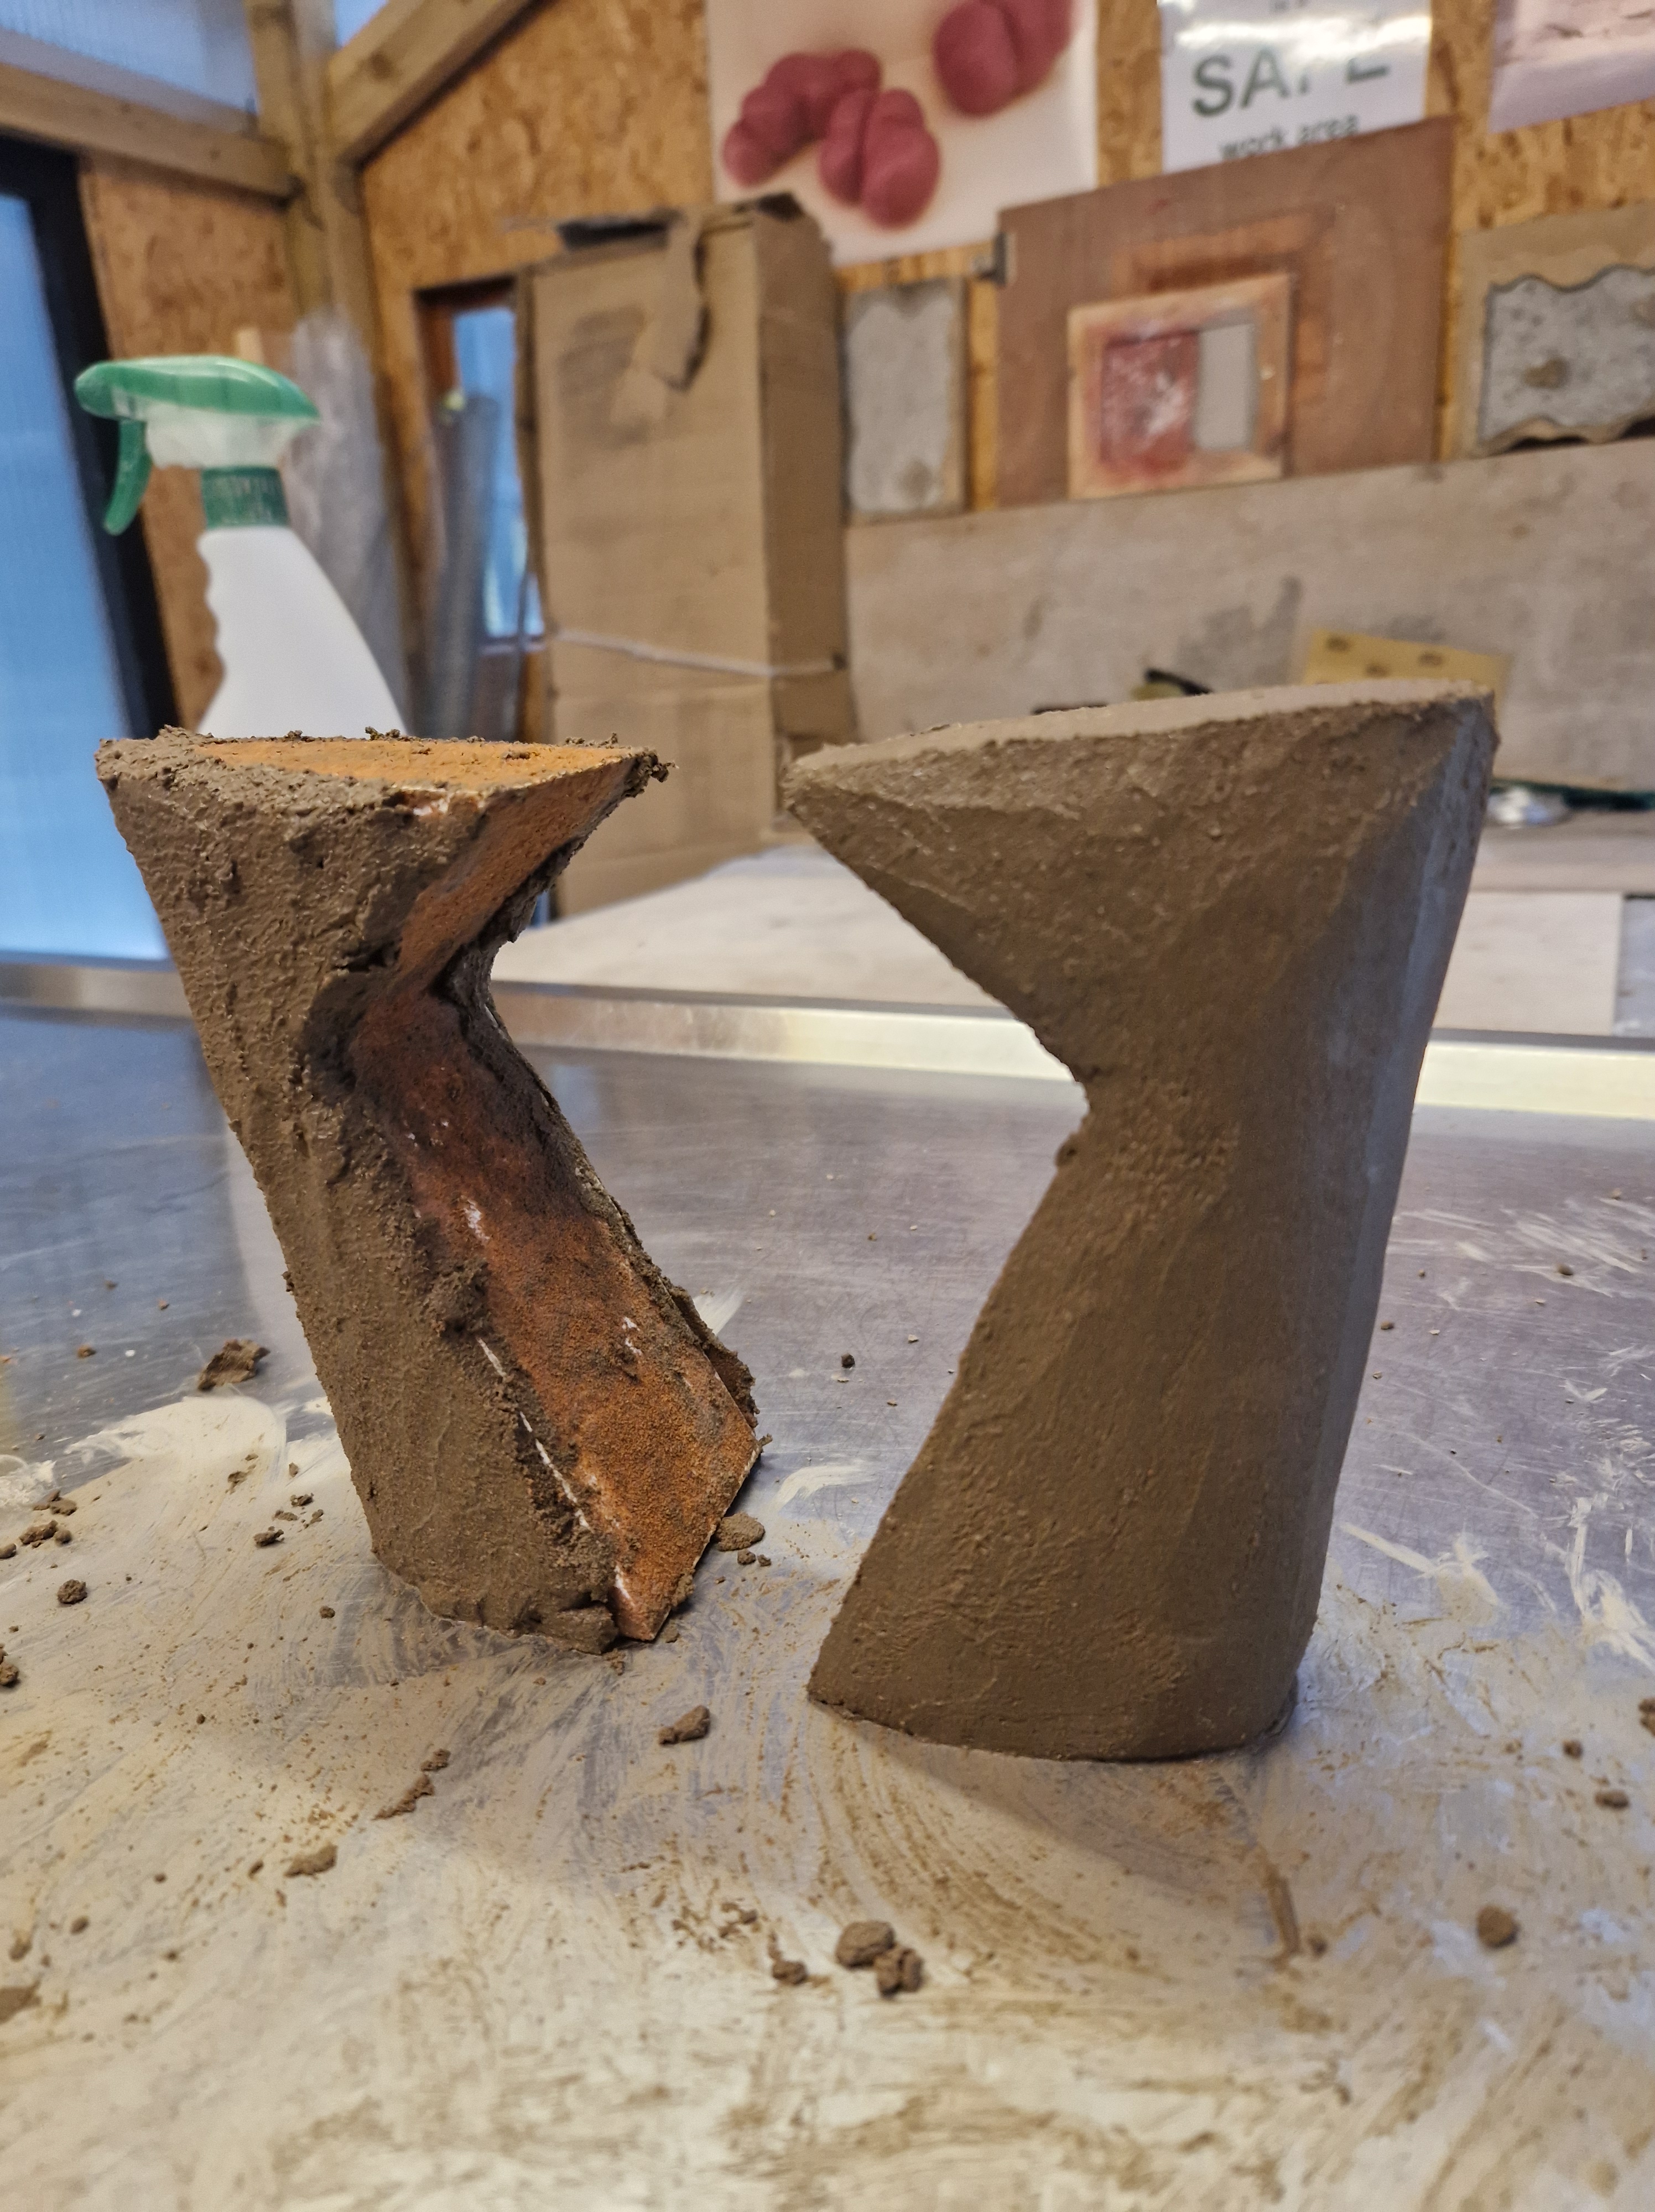
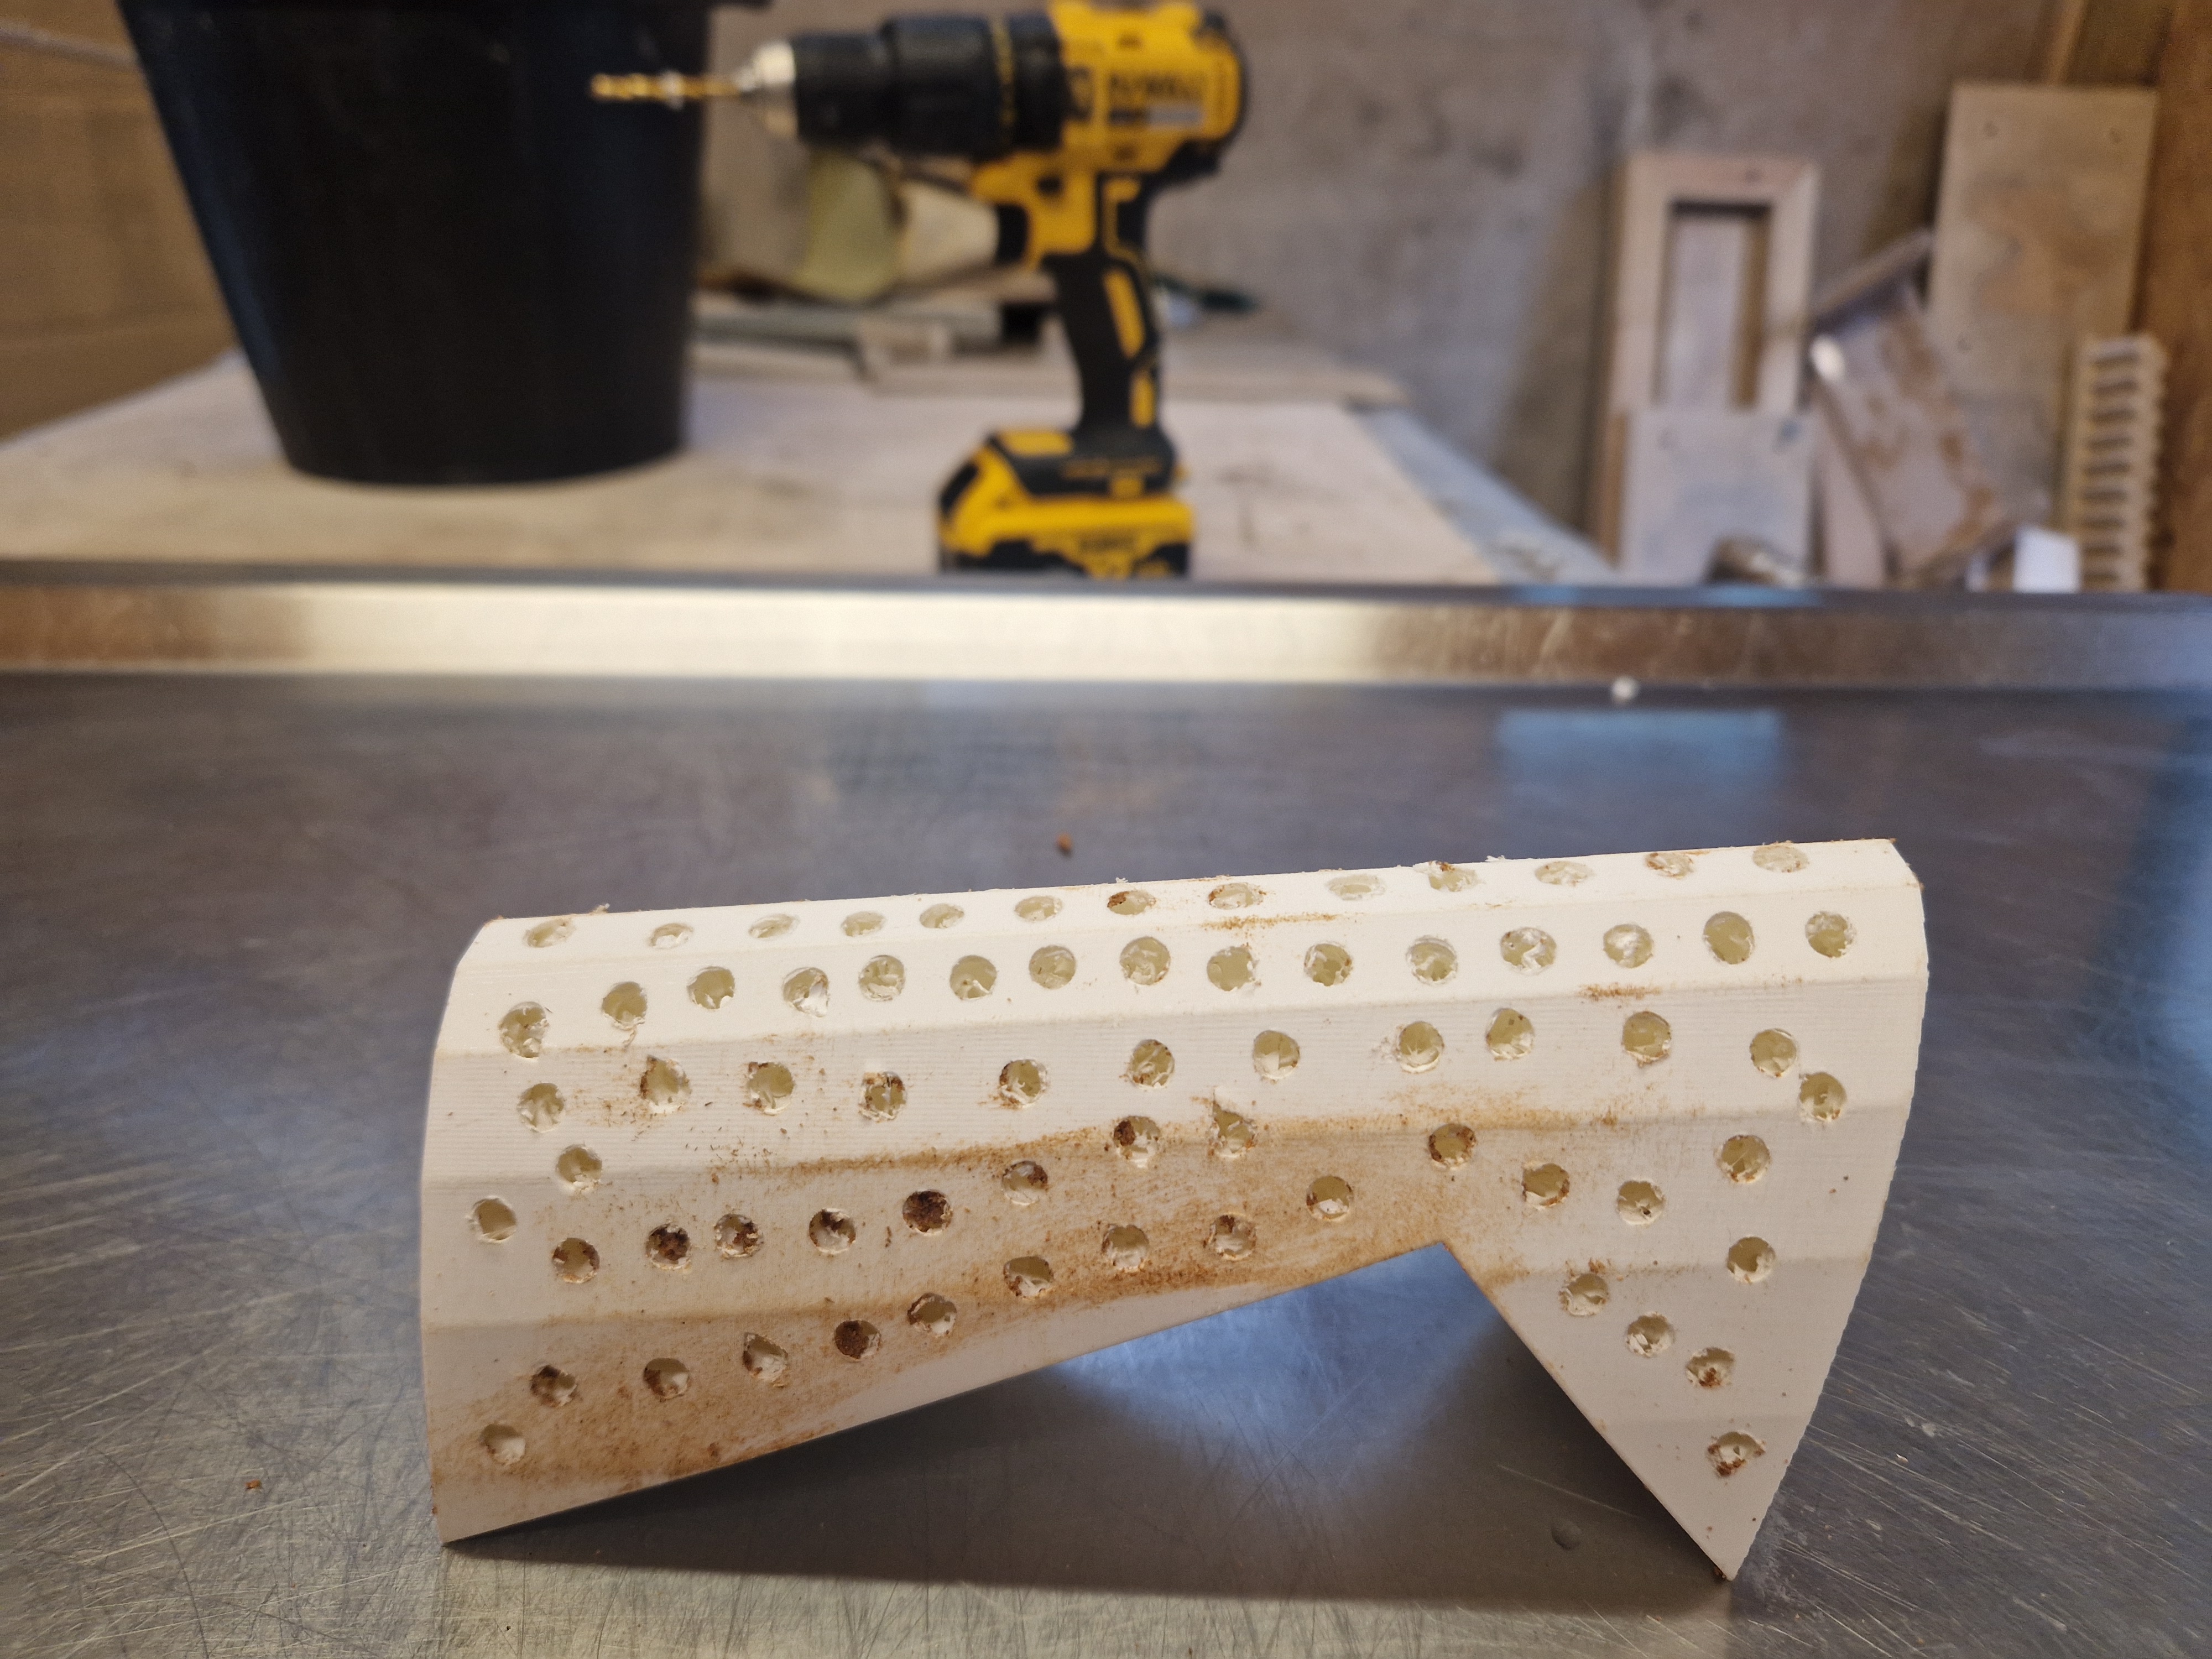
REFLECTIONS: A fantastic first session, during which we troubleshot several options.
We drilled holes in the object so the concrete stayed in better, then sanded and covered two objects with glue and glue and sand respectively. Left to dry, to revisit in the next few days to find out what the results are - which option is the best.
Amazing starting point - I am very excited to have finally gotten to this stage of my idea.
WRITING PROJECT STATEMENT
A practical session writing project statement.
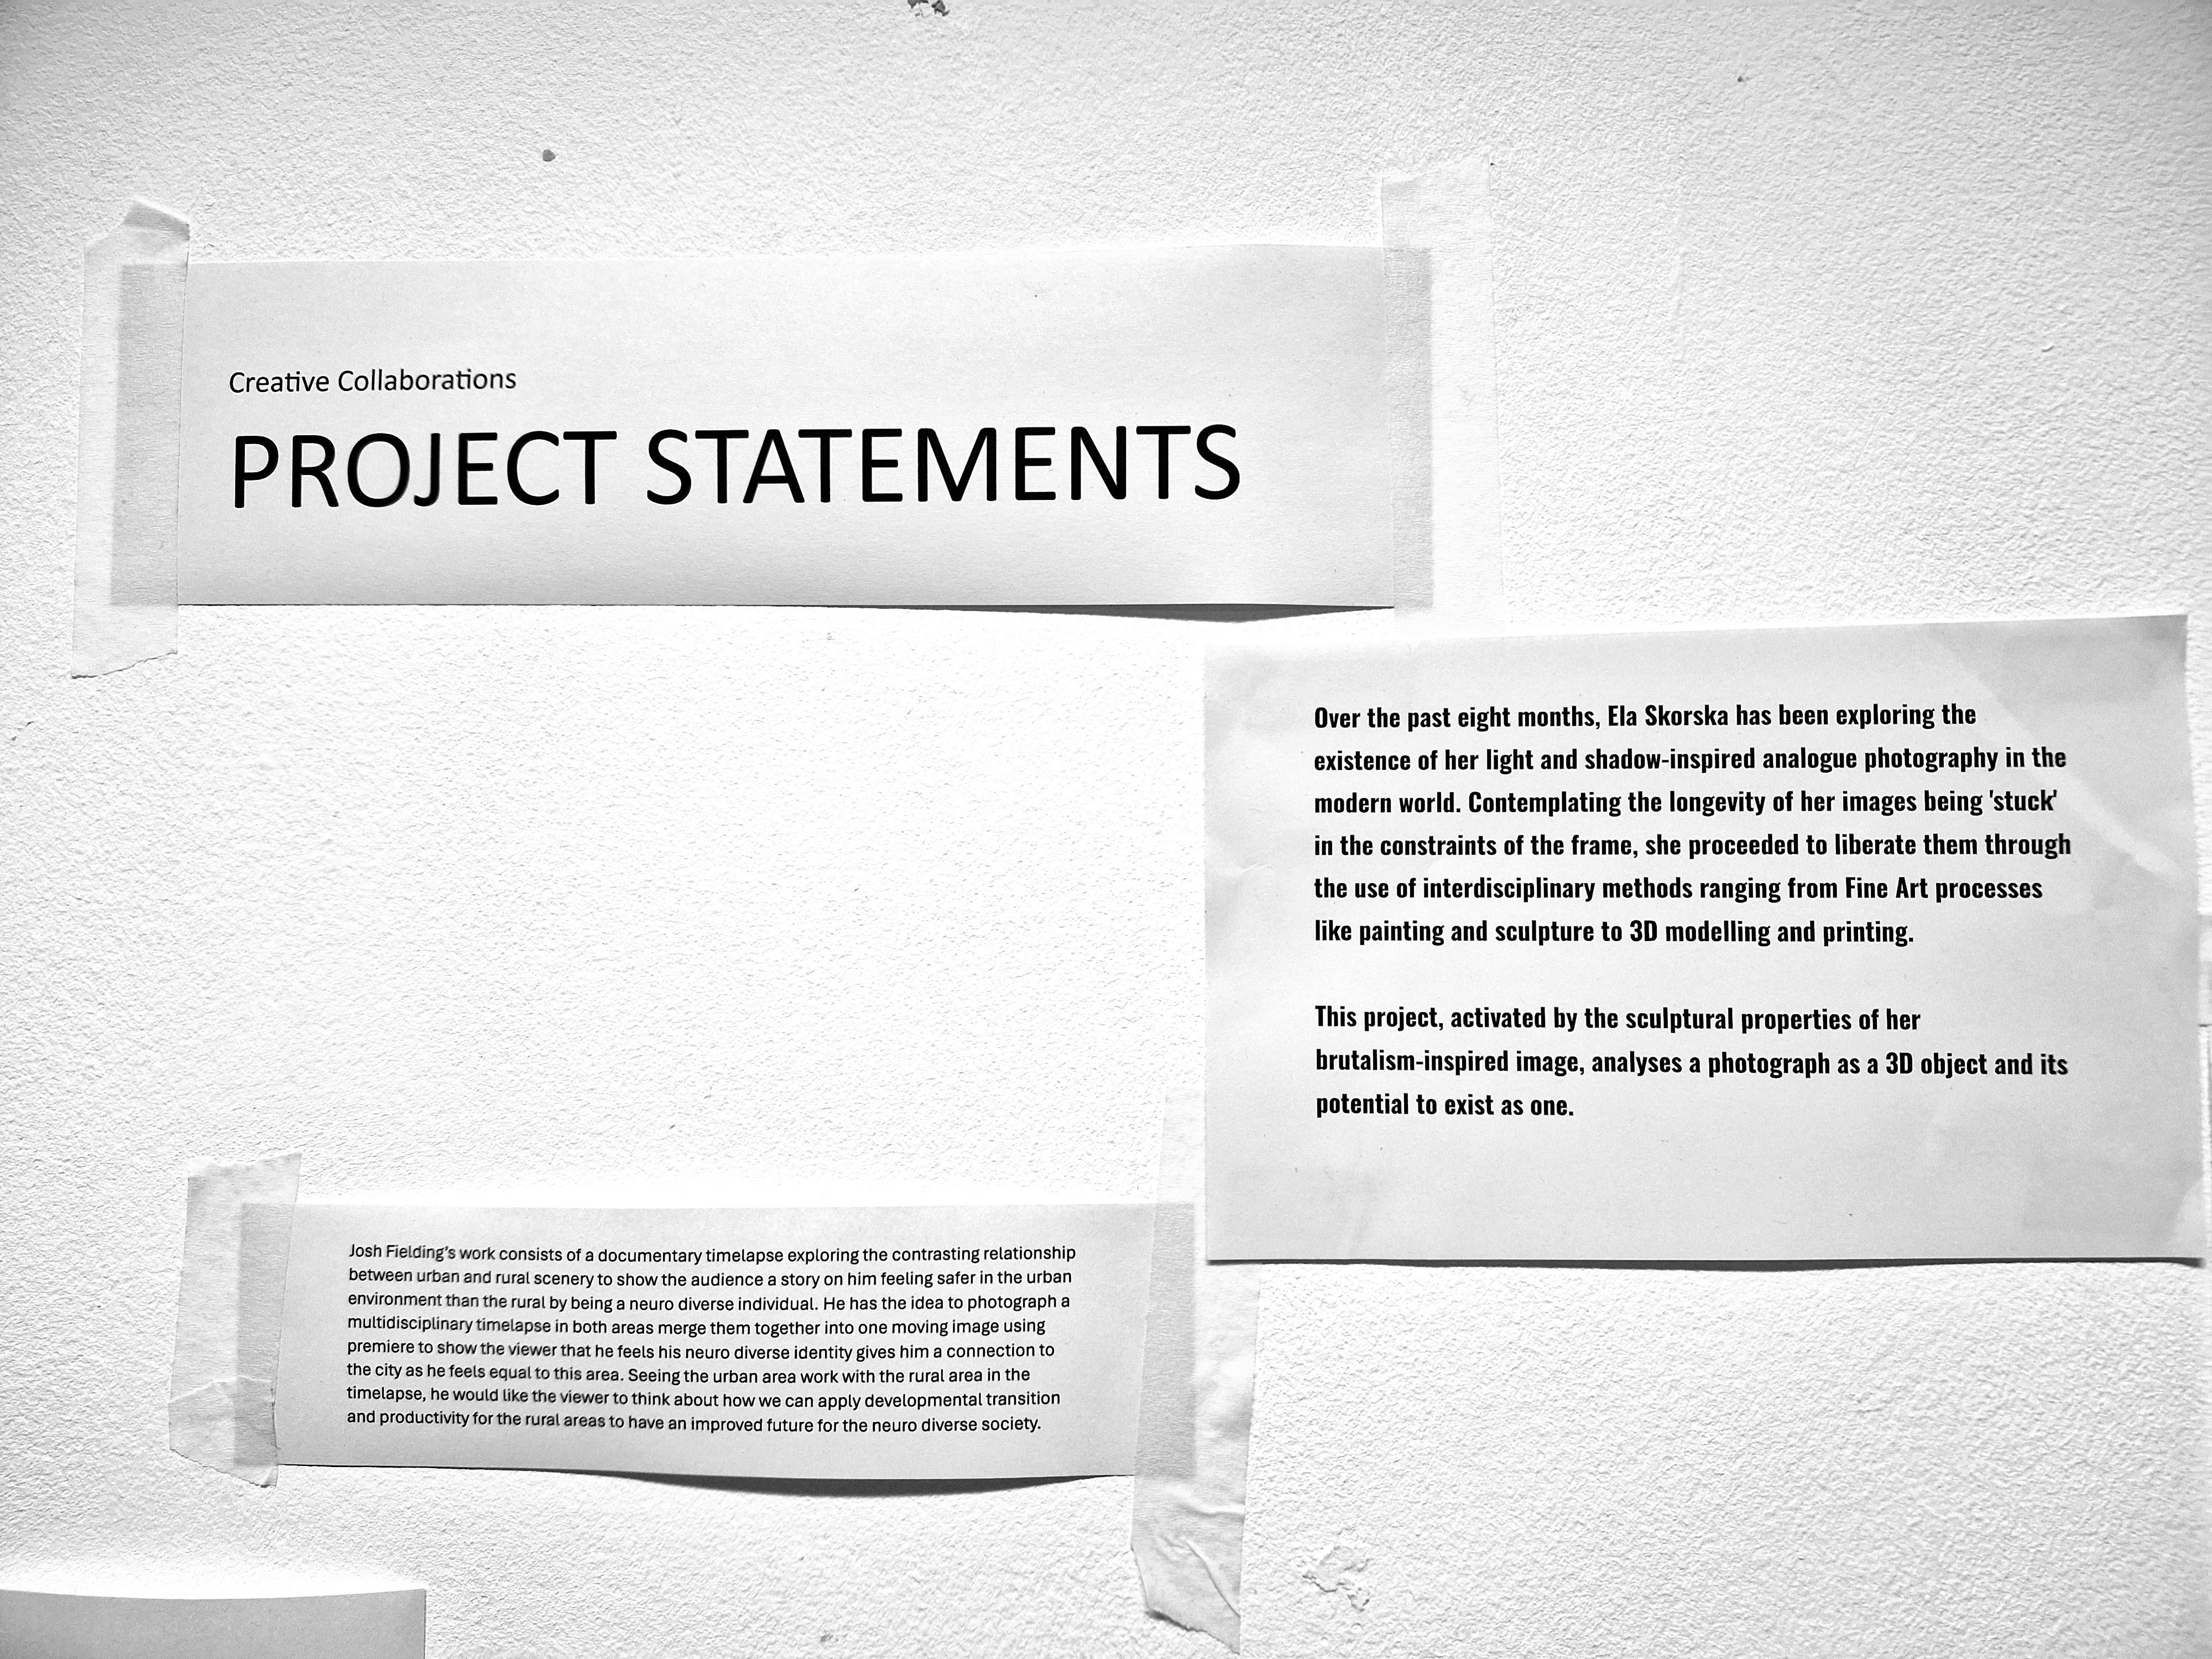
PROJECT STATEMENT (FIRST EDITION)
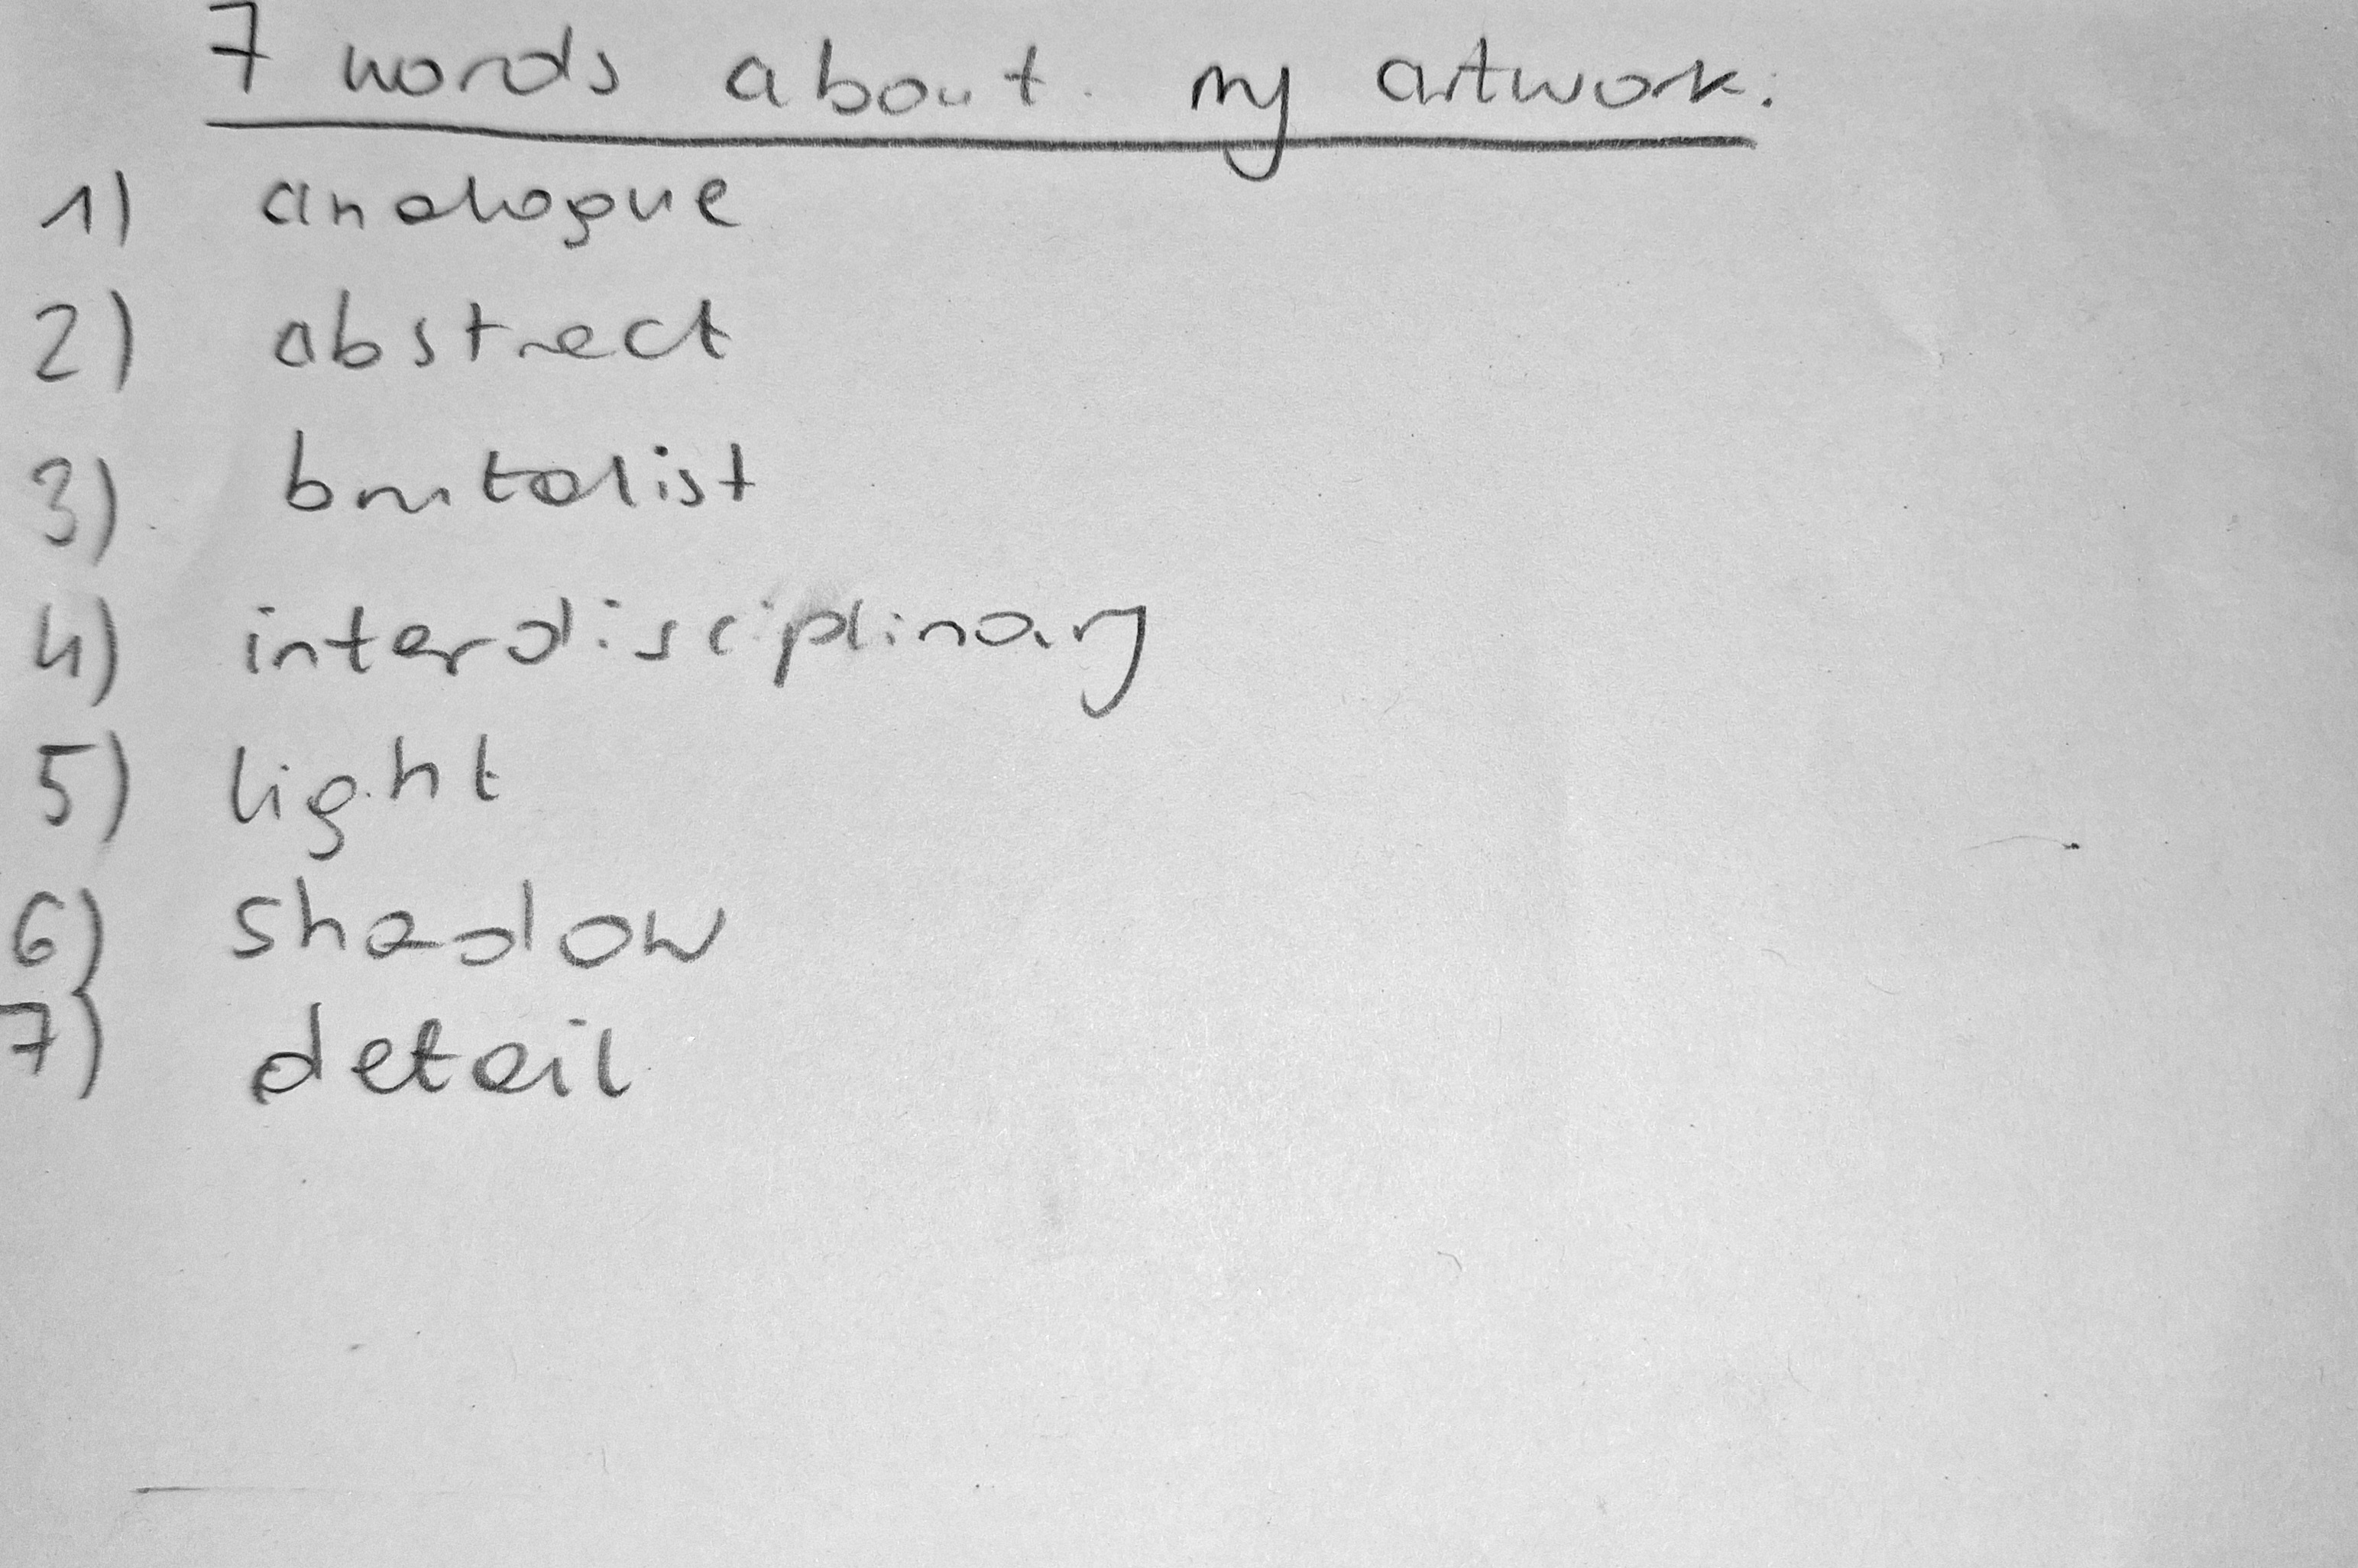
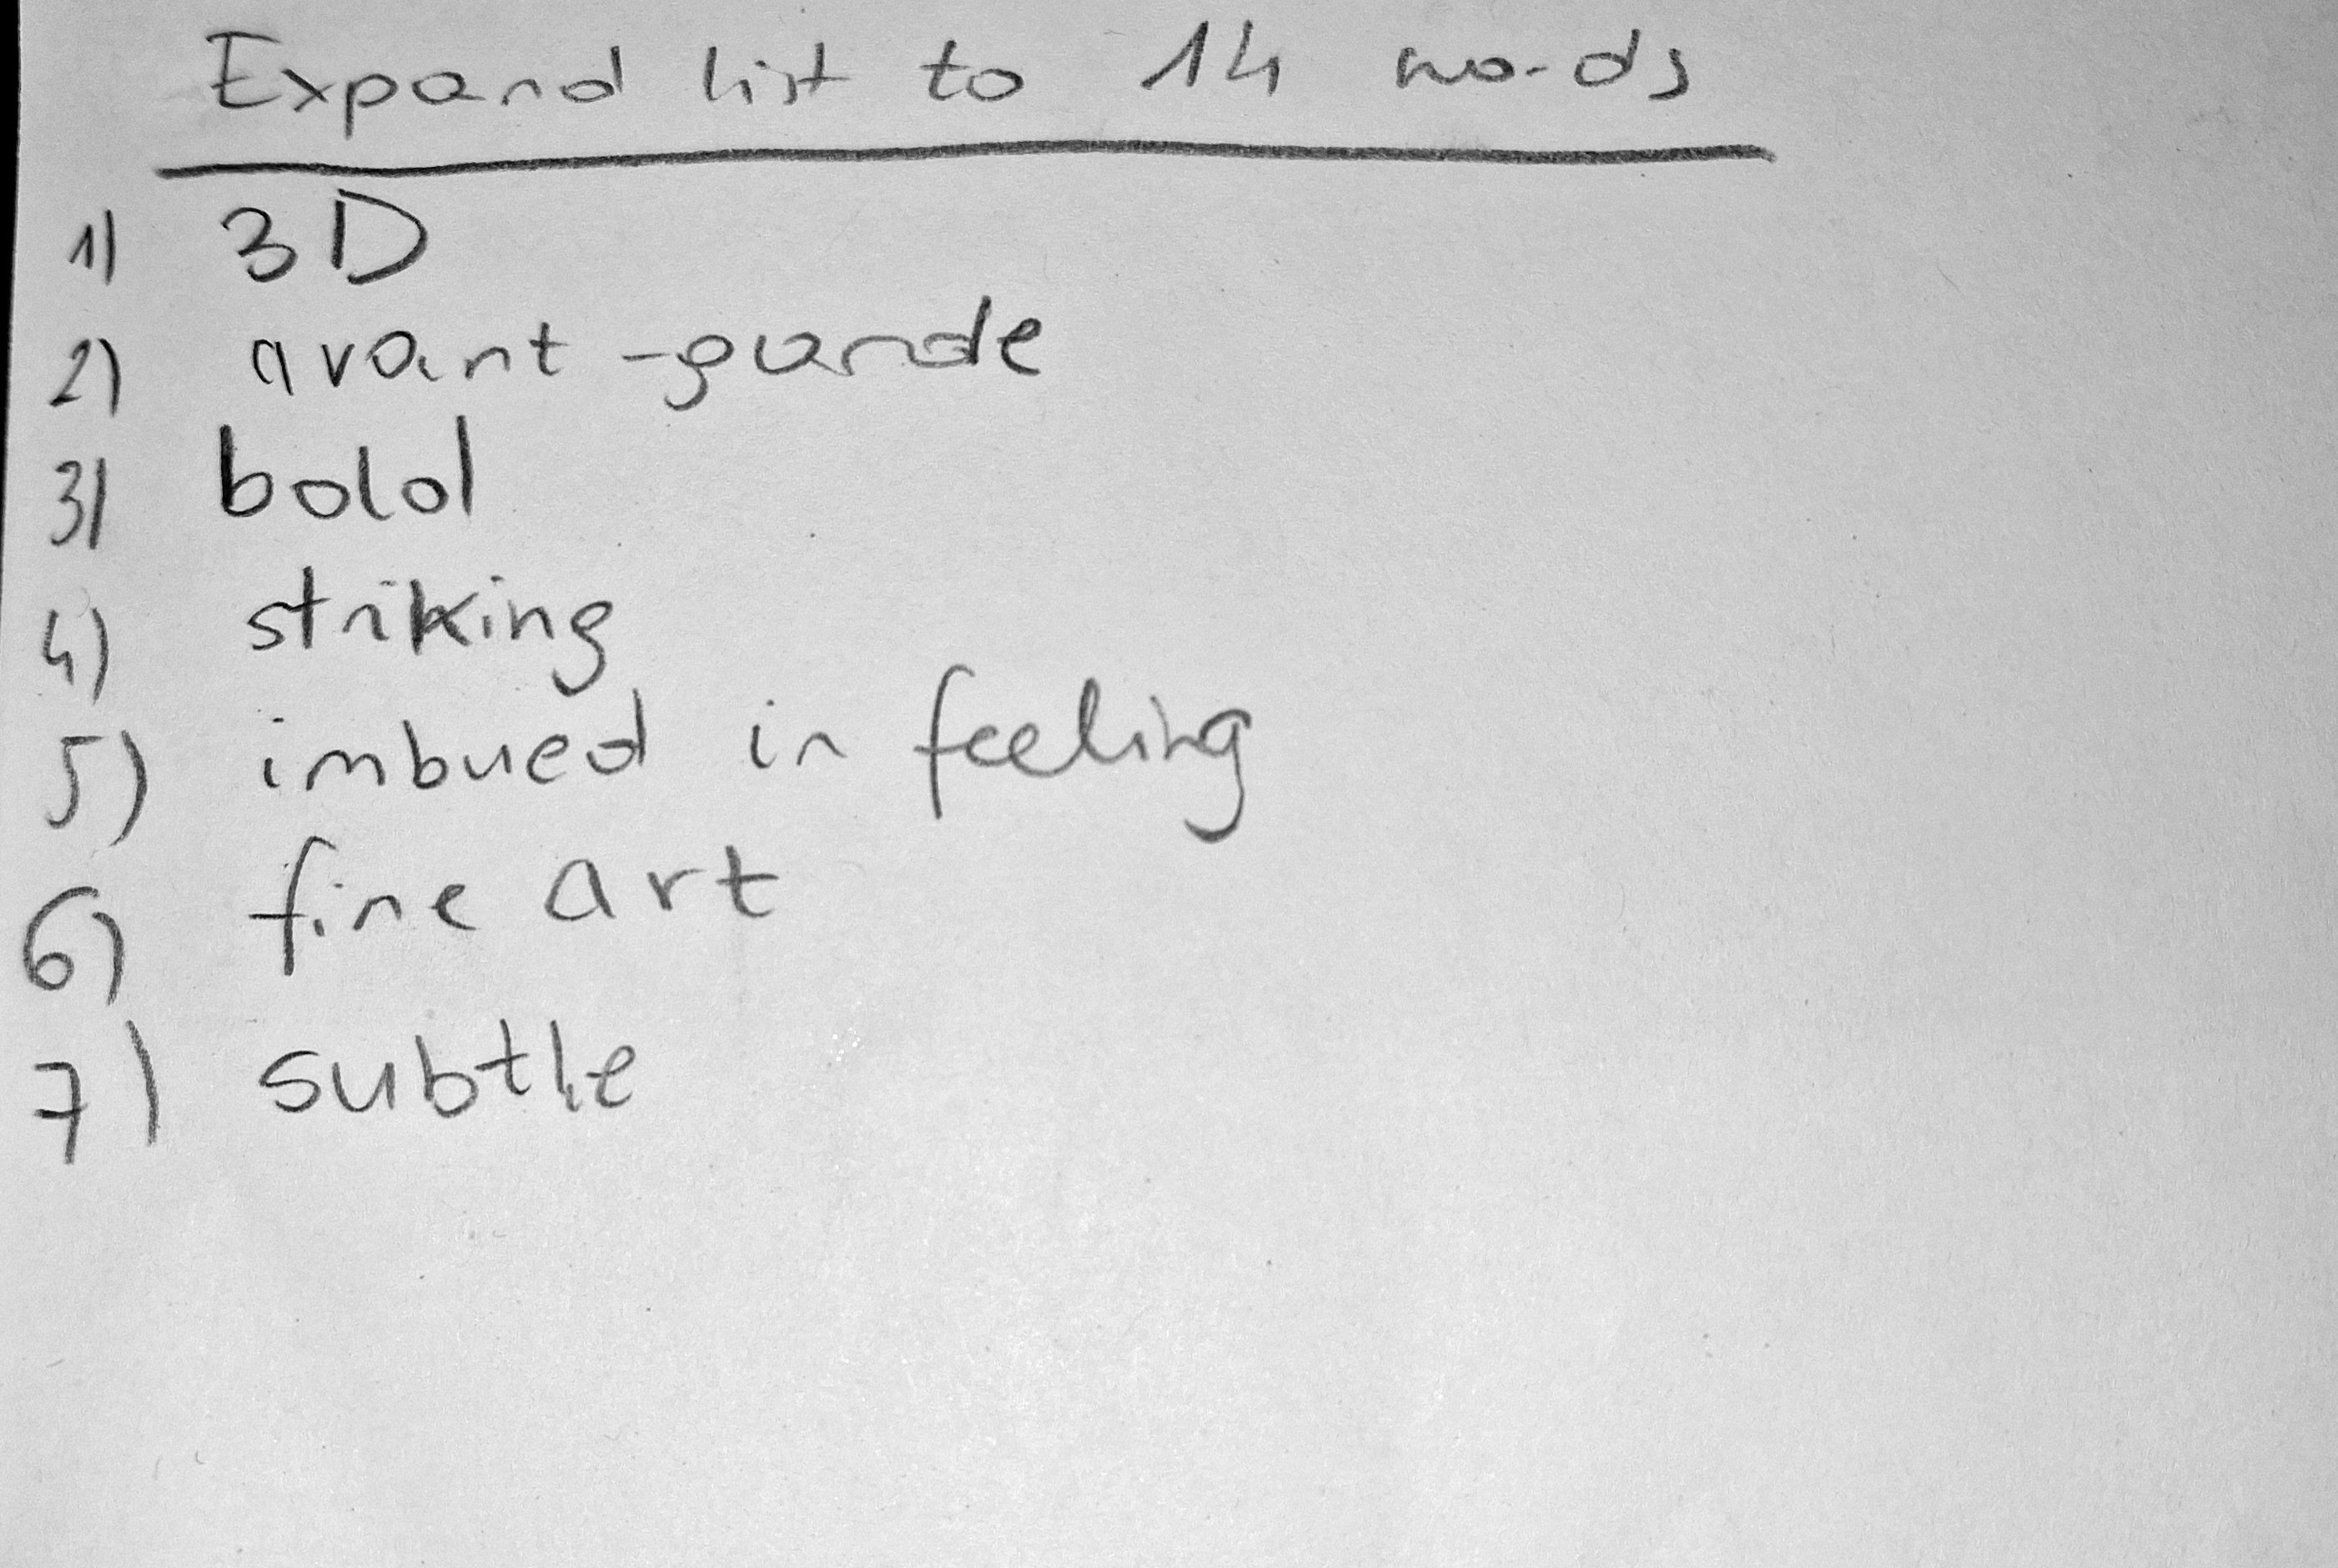
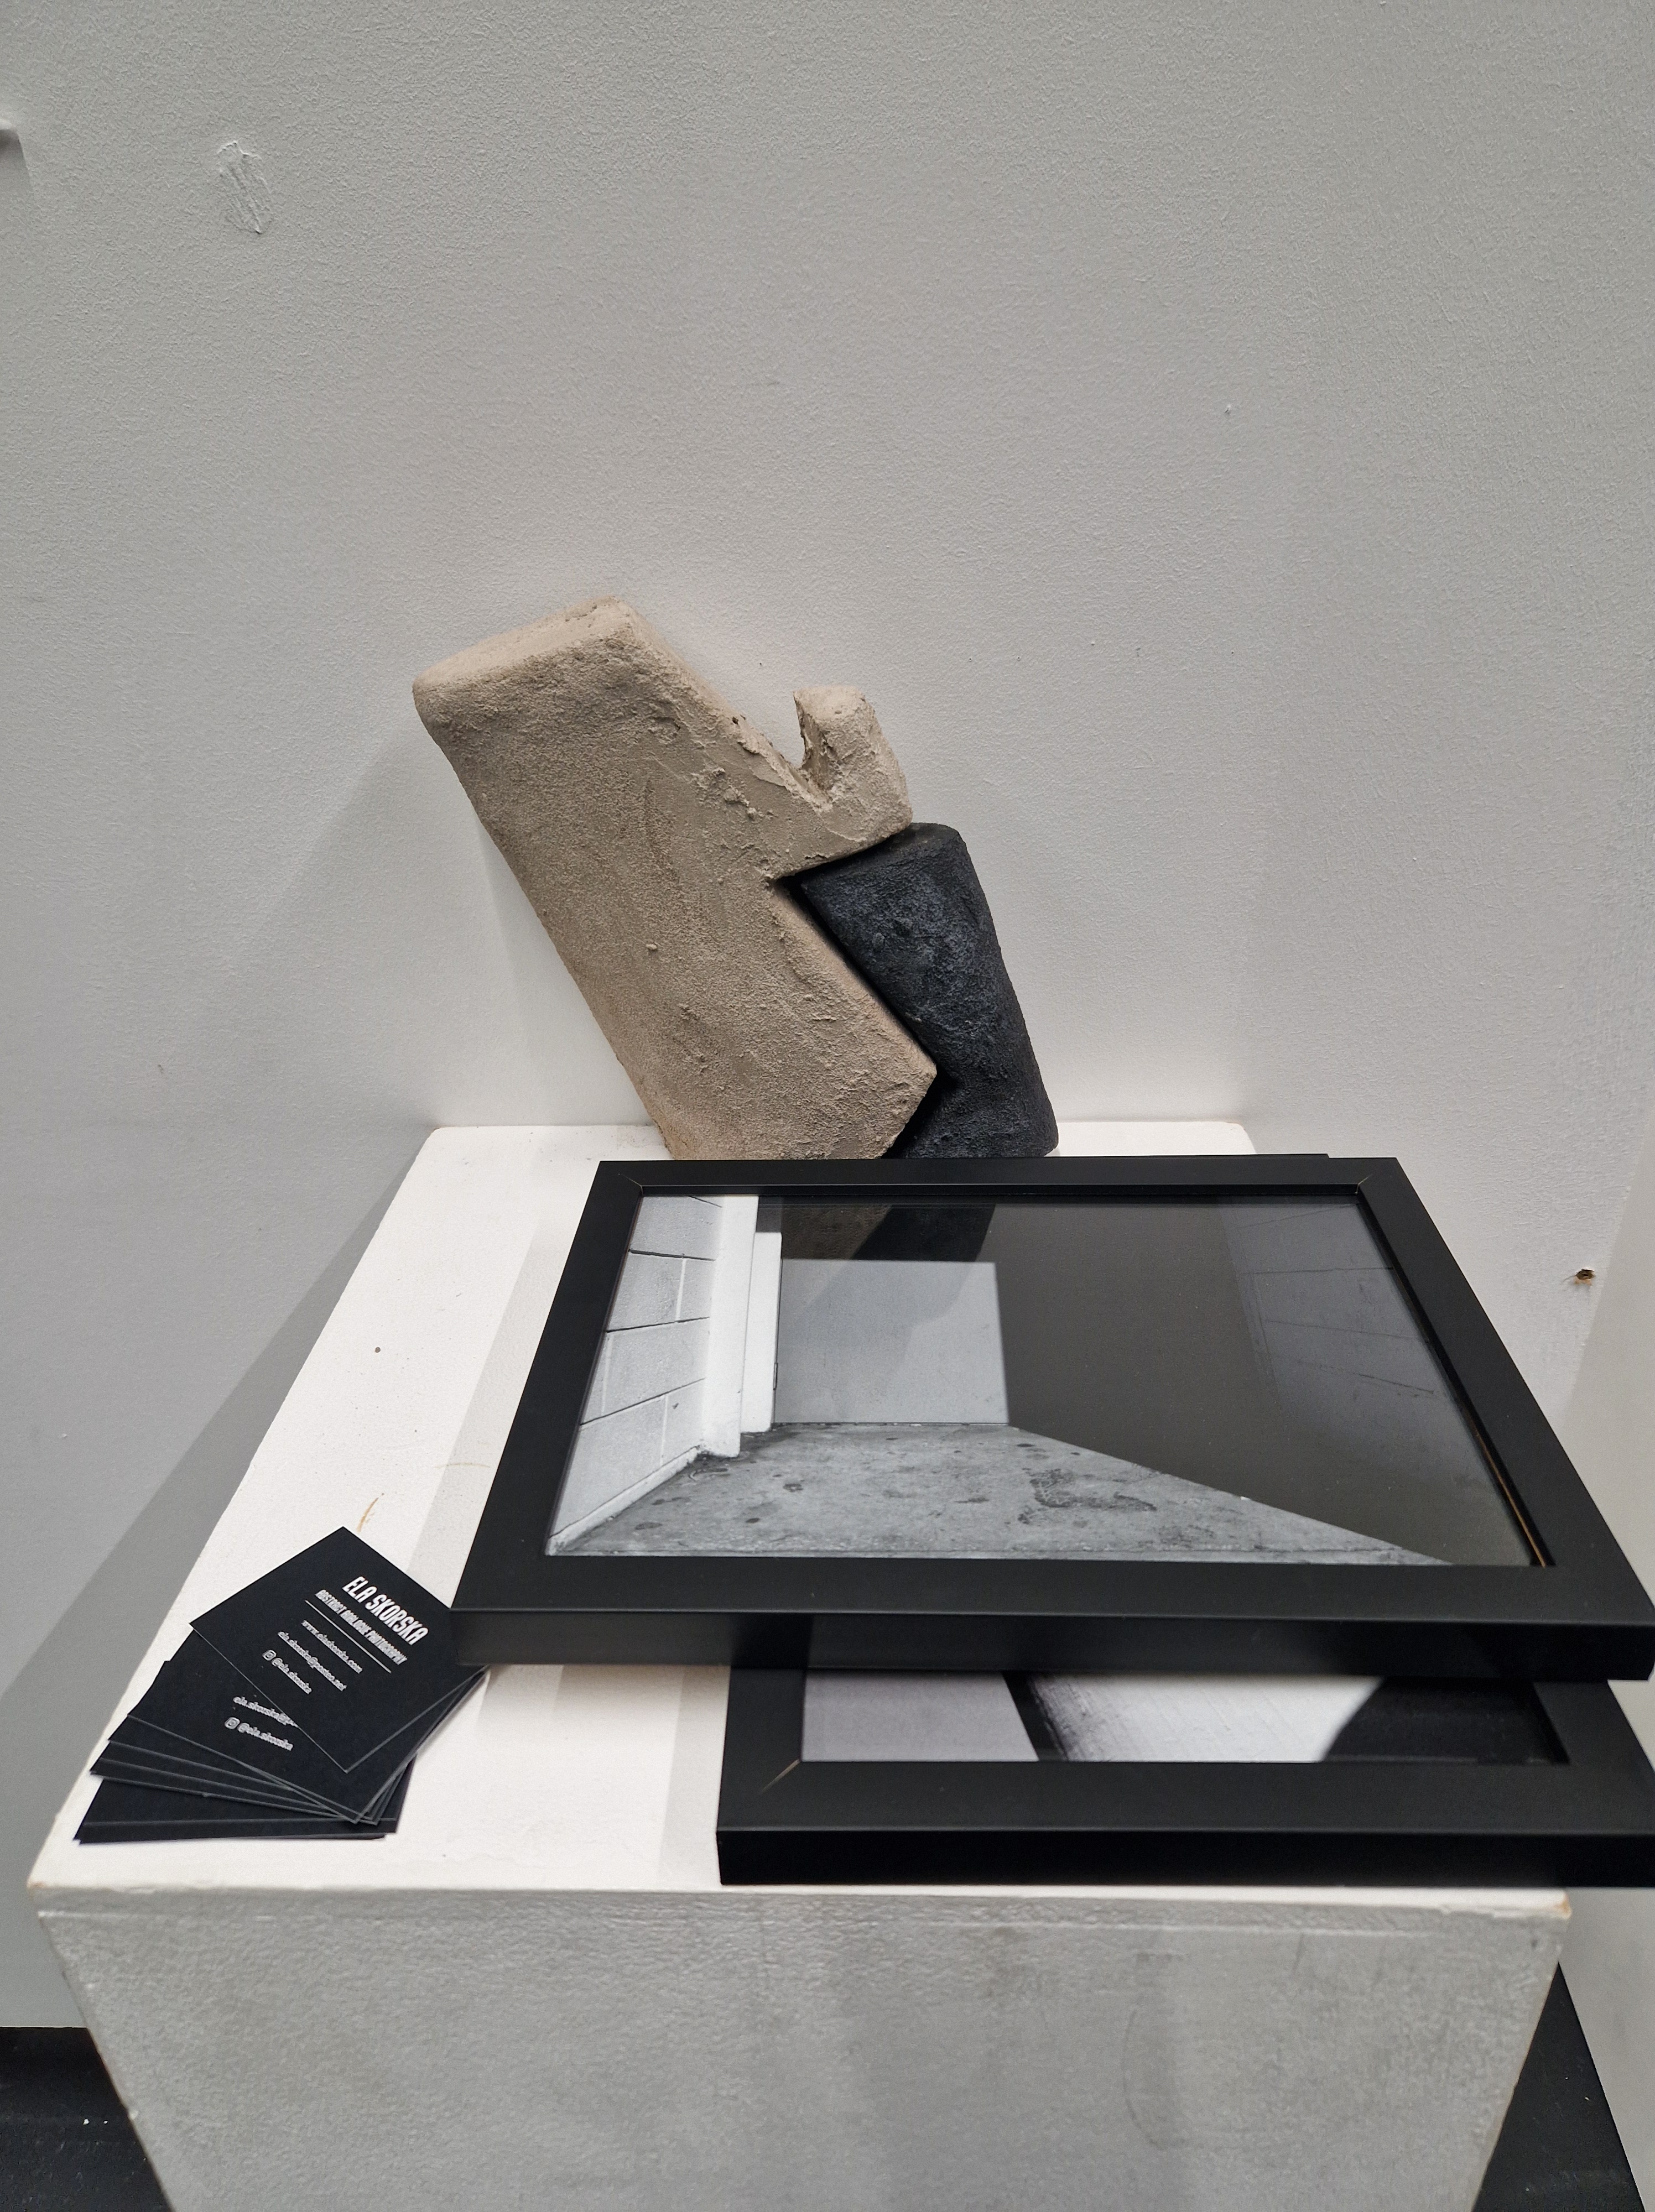
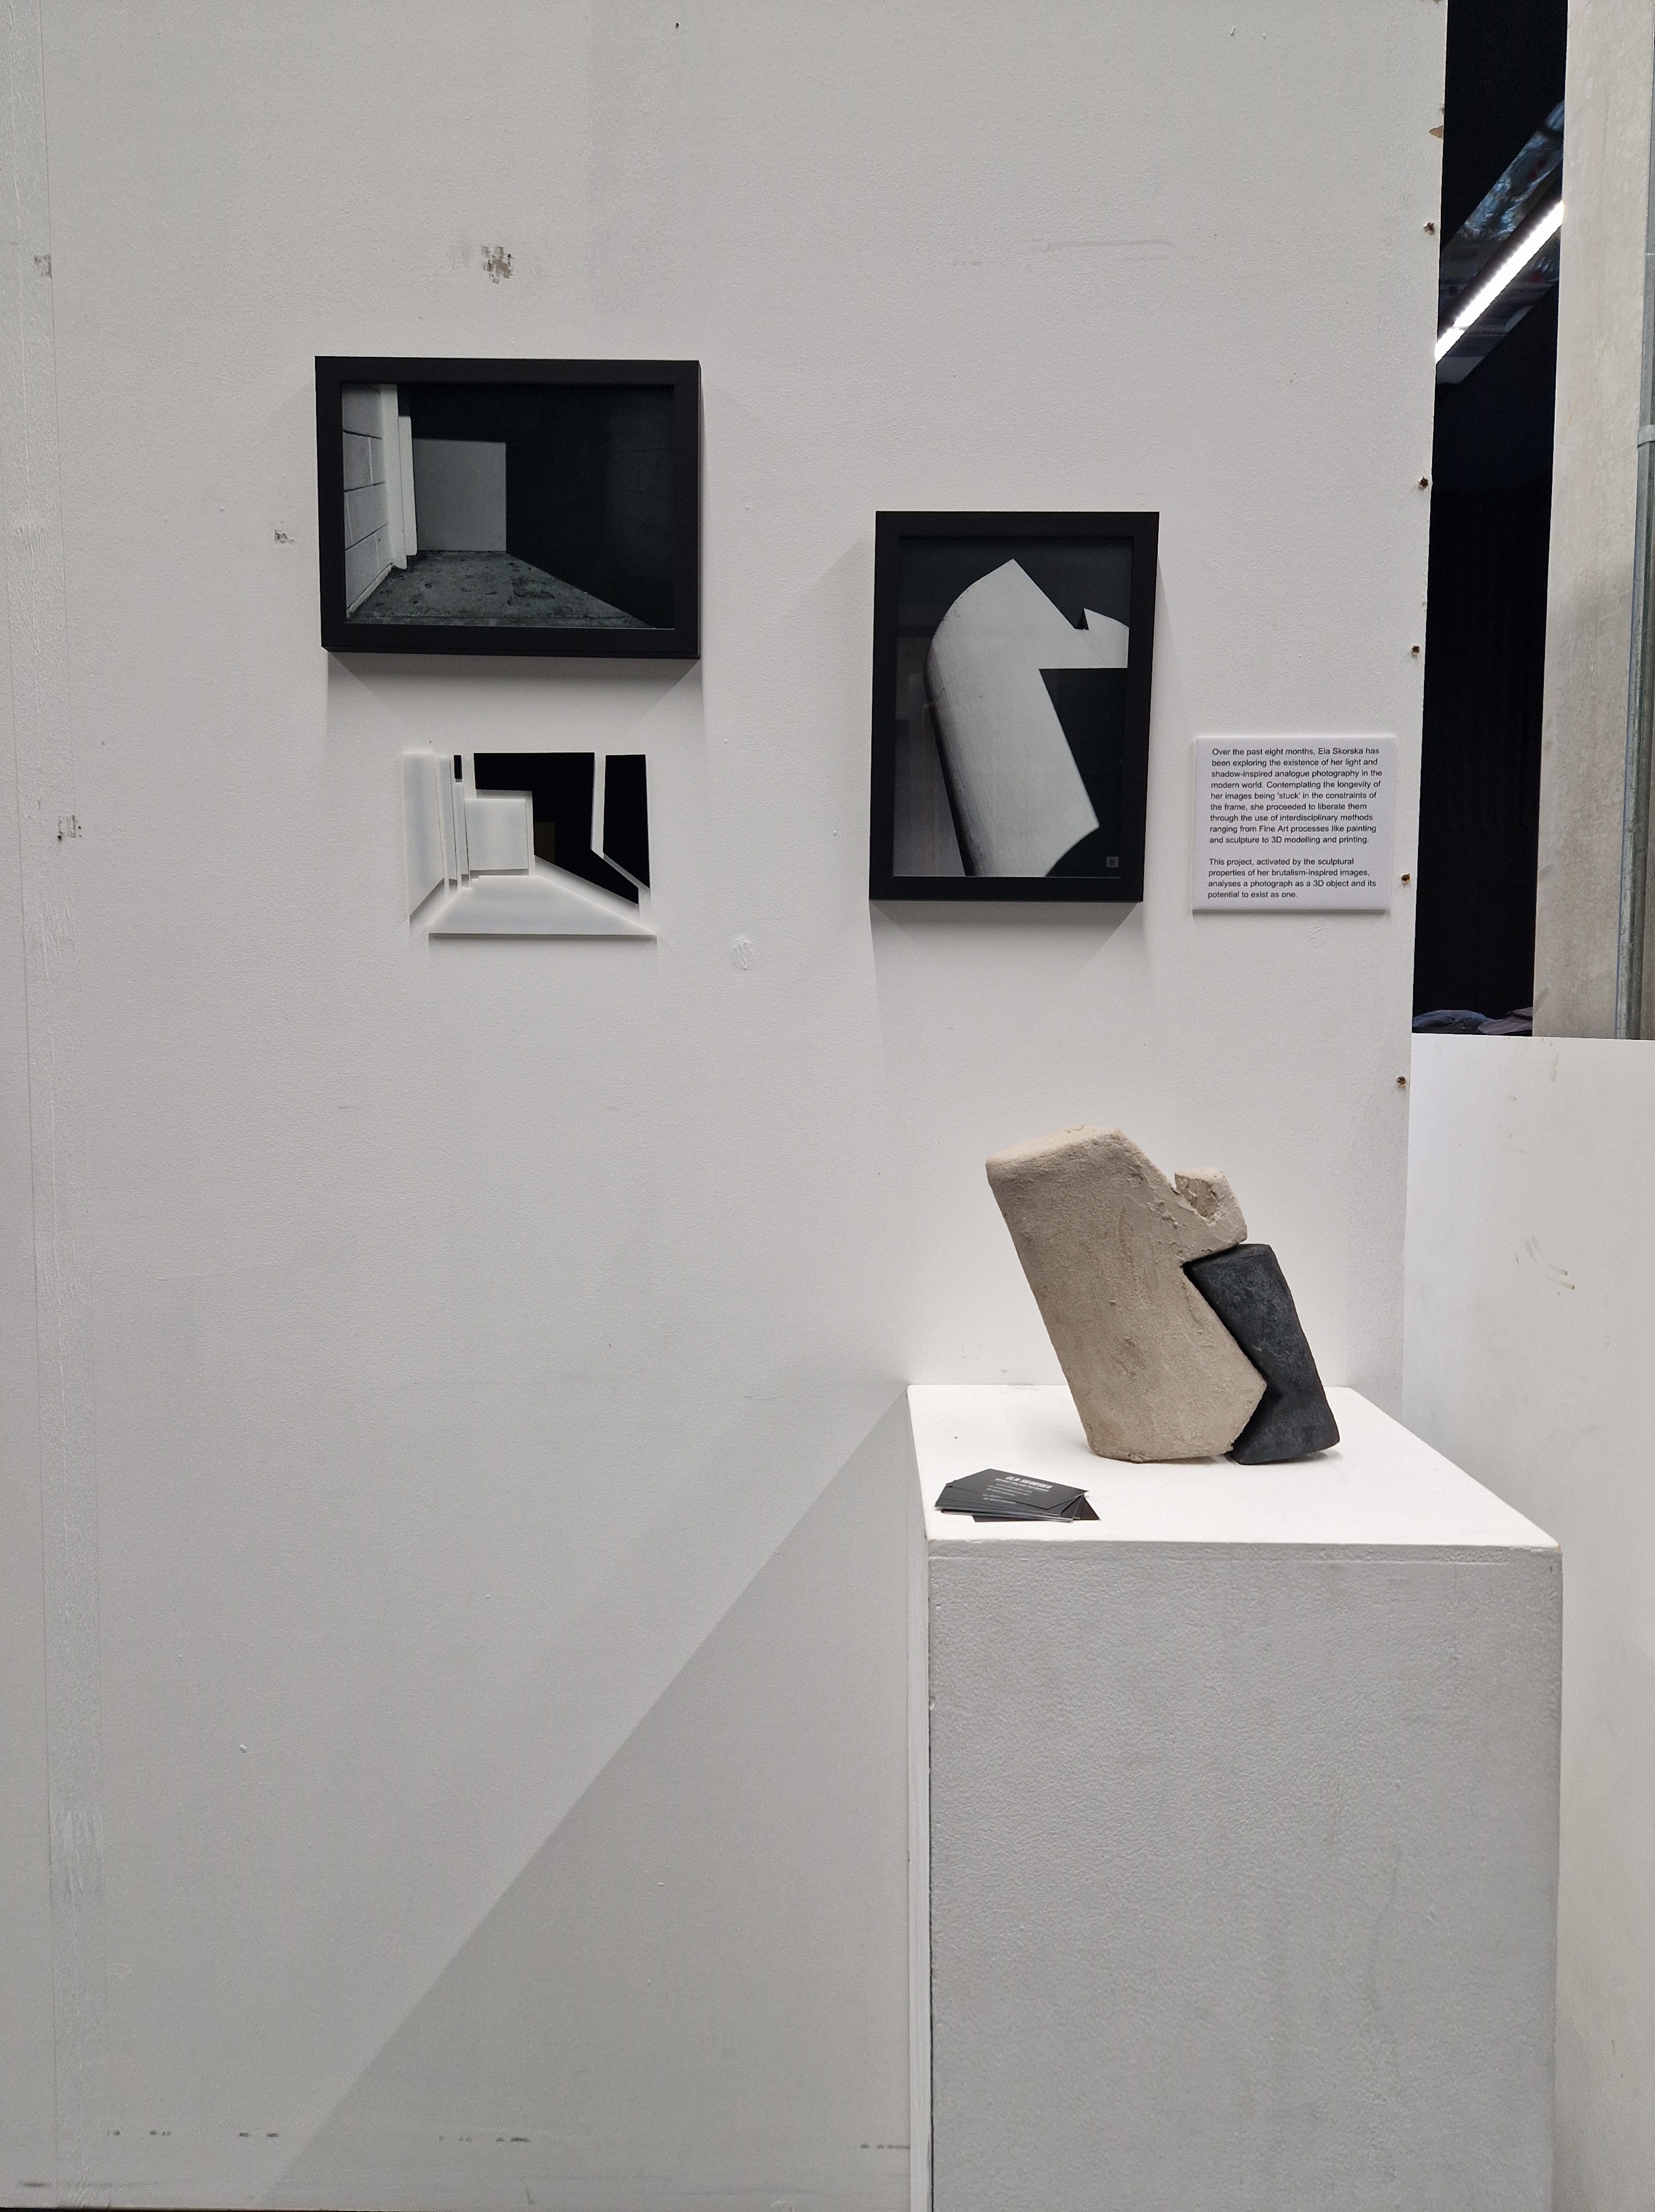
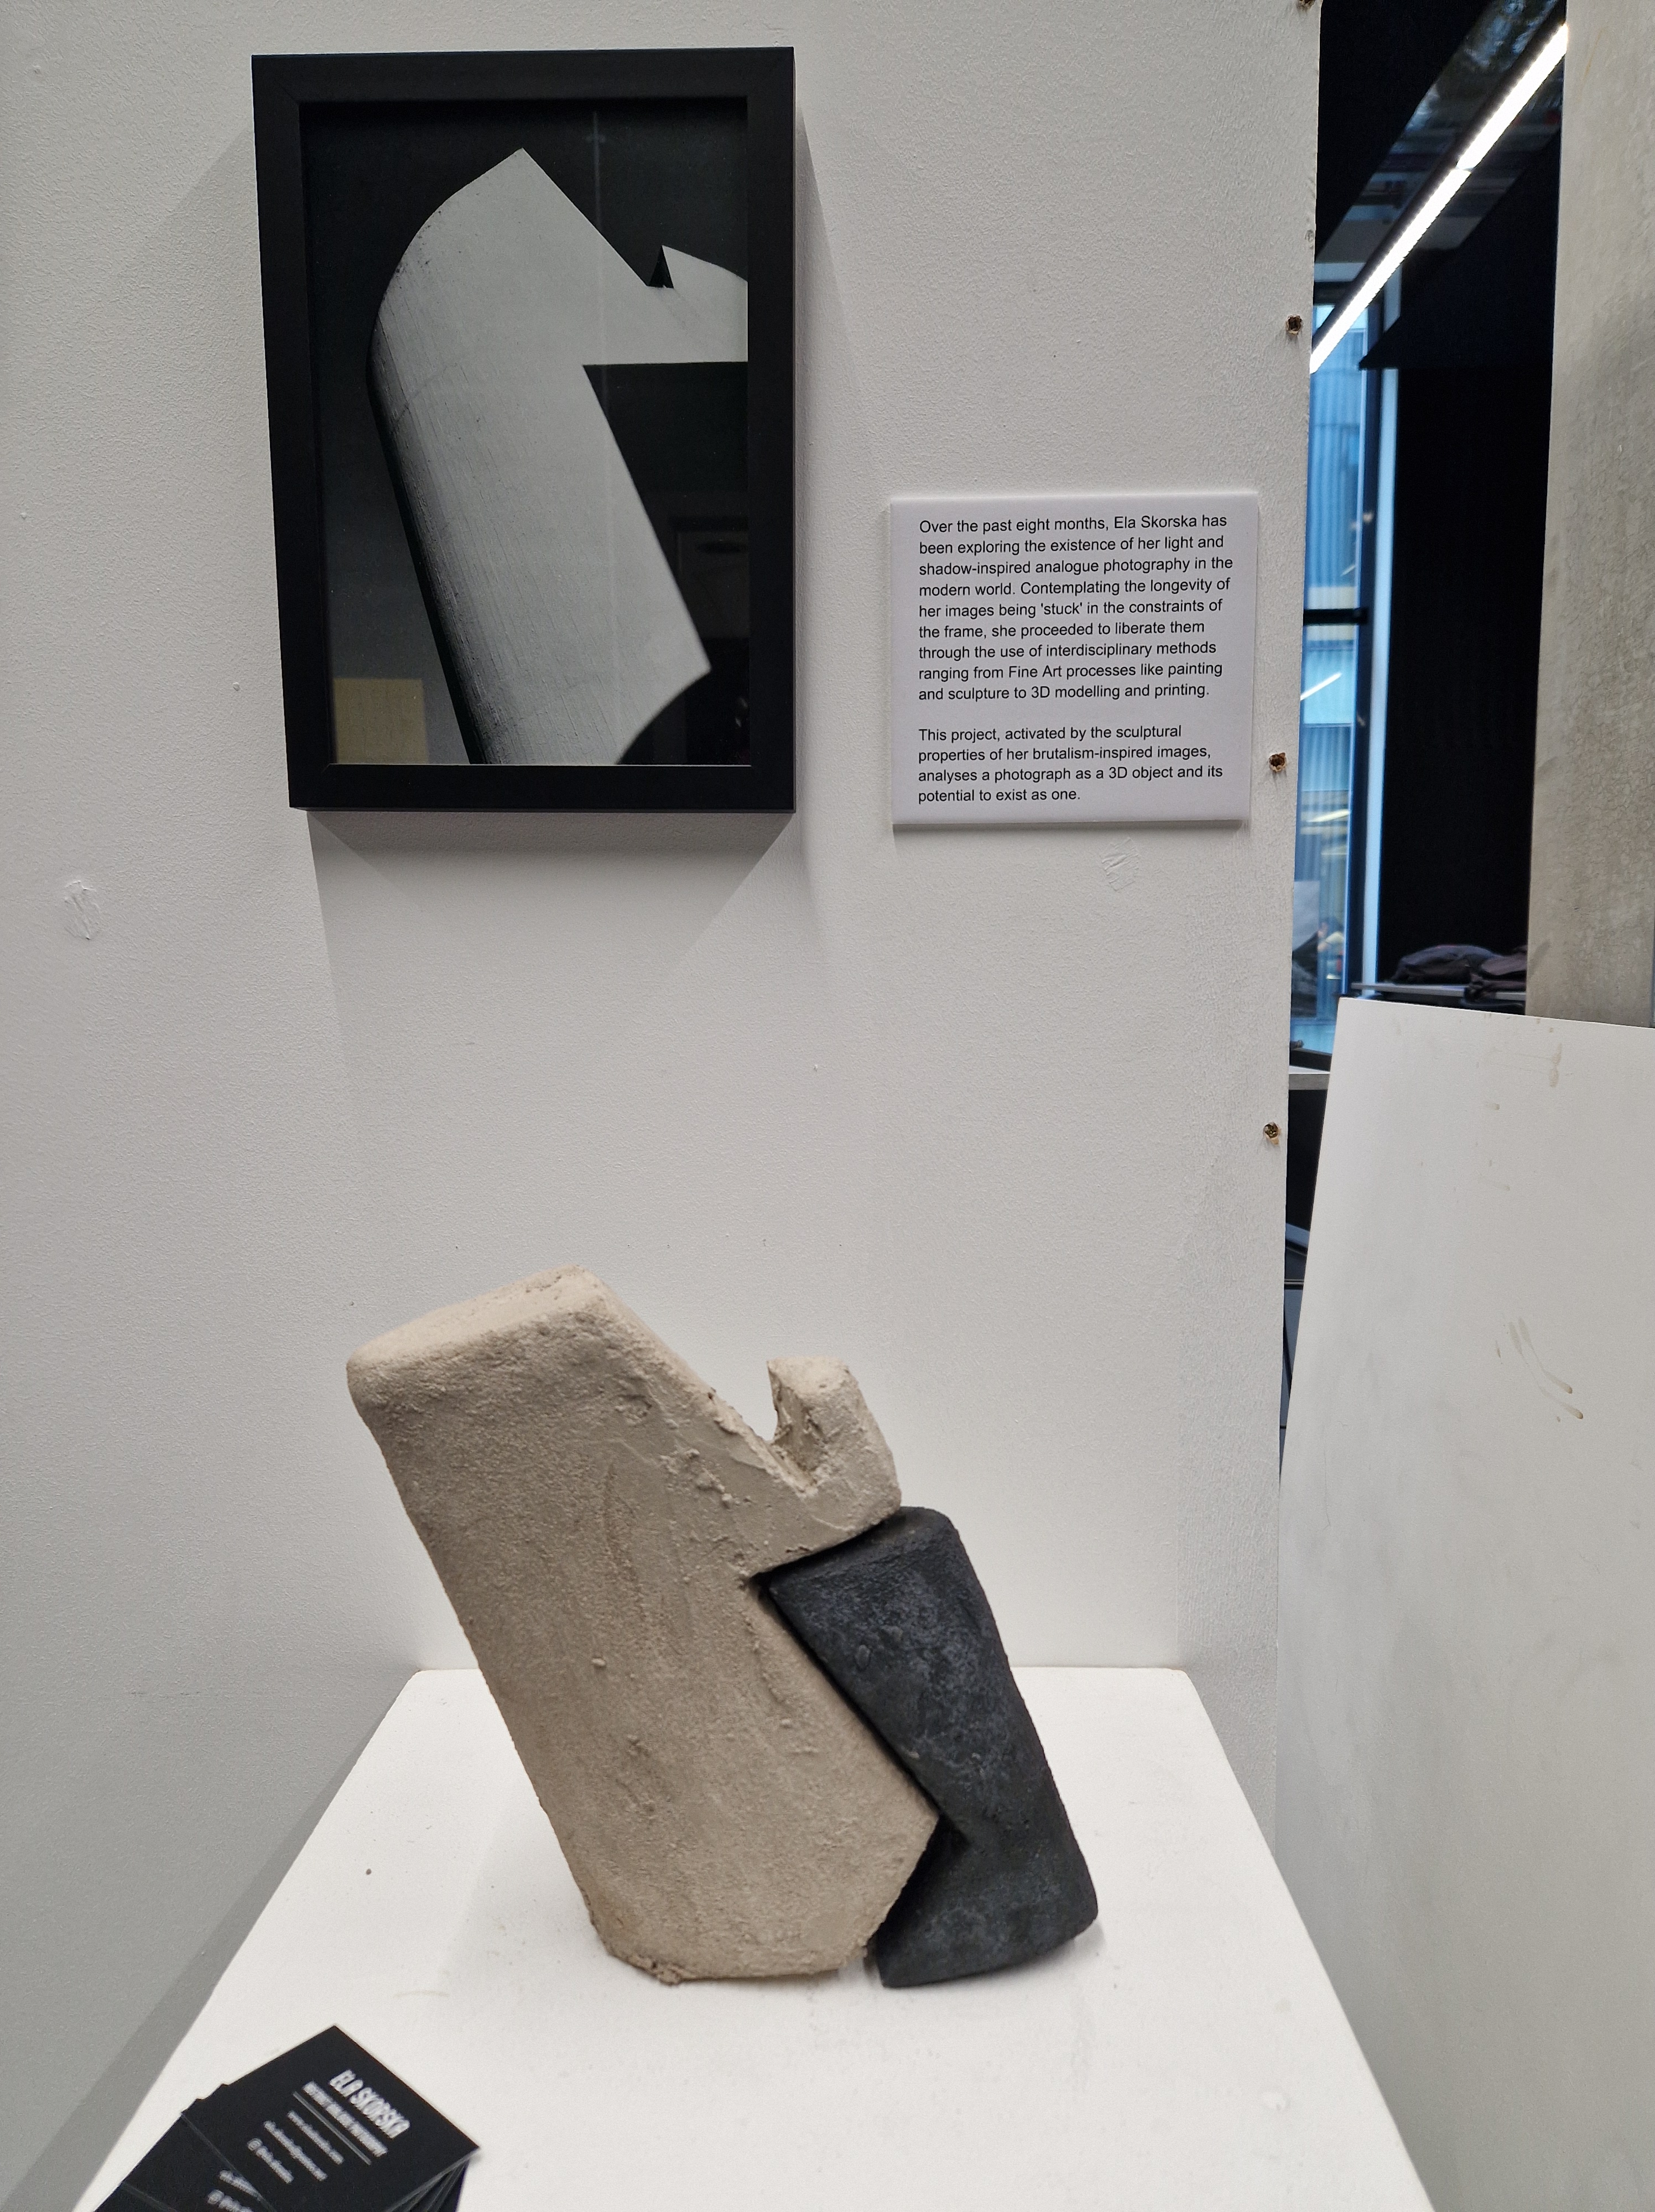
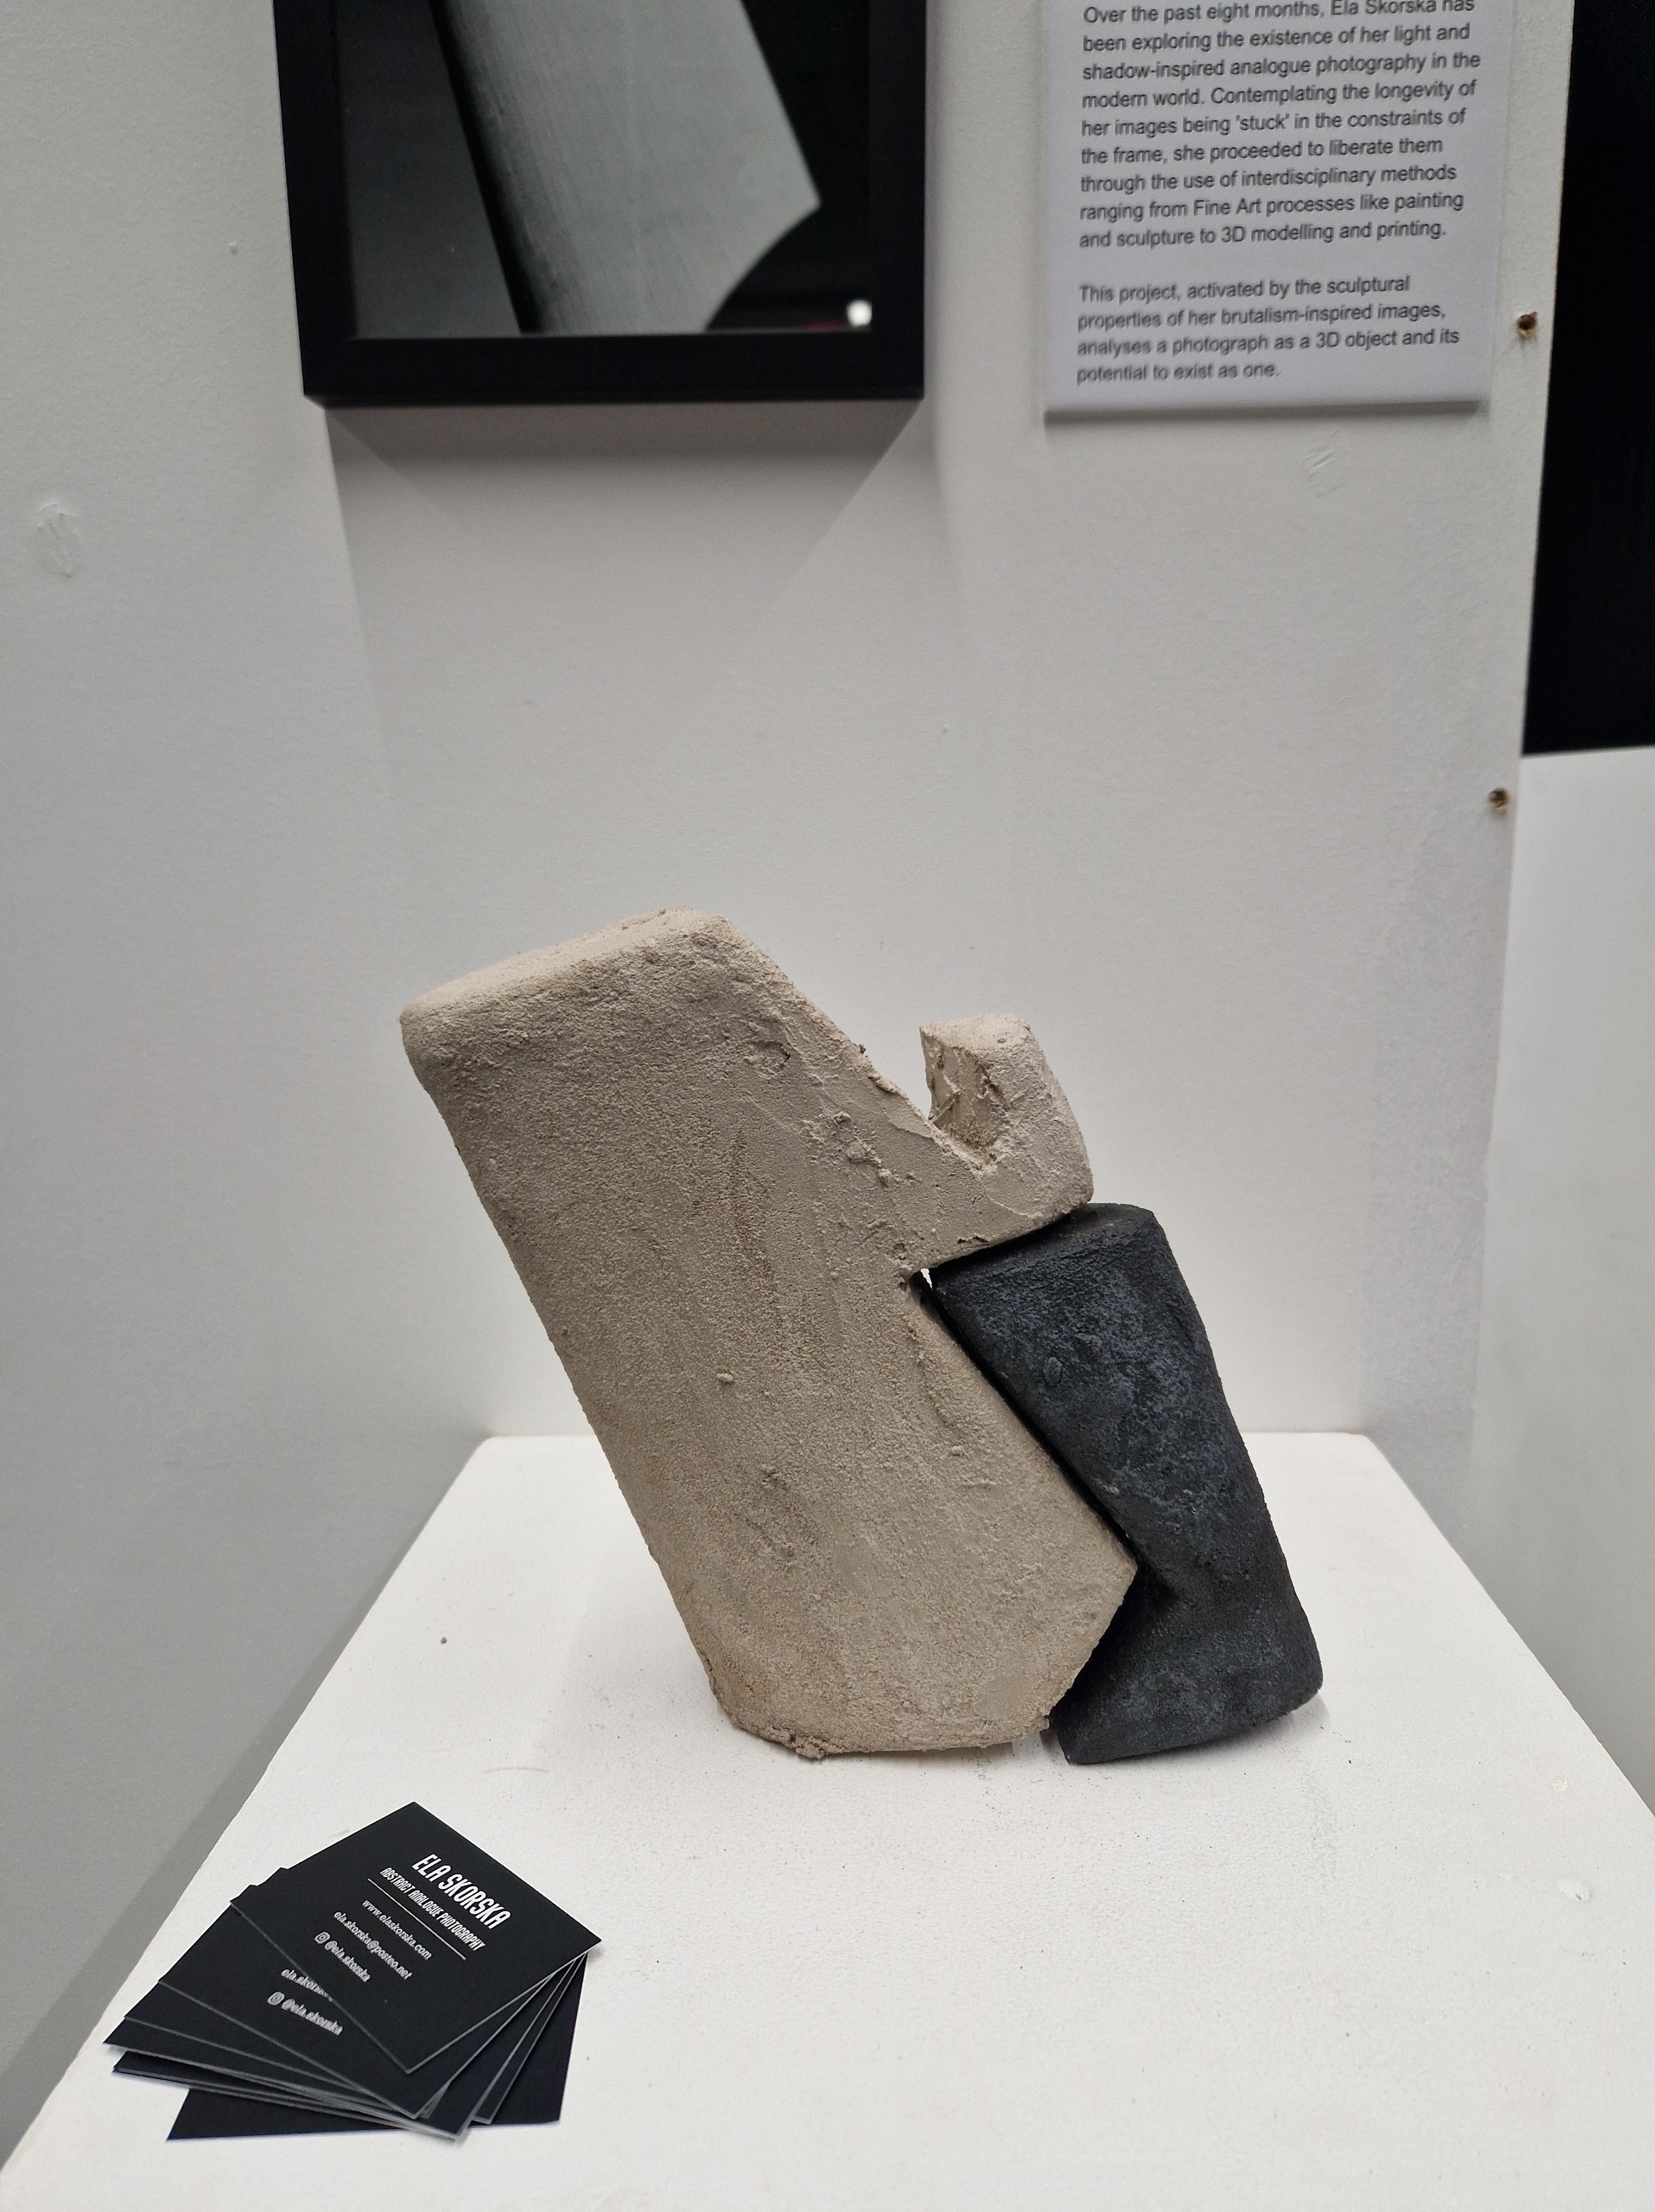
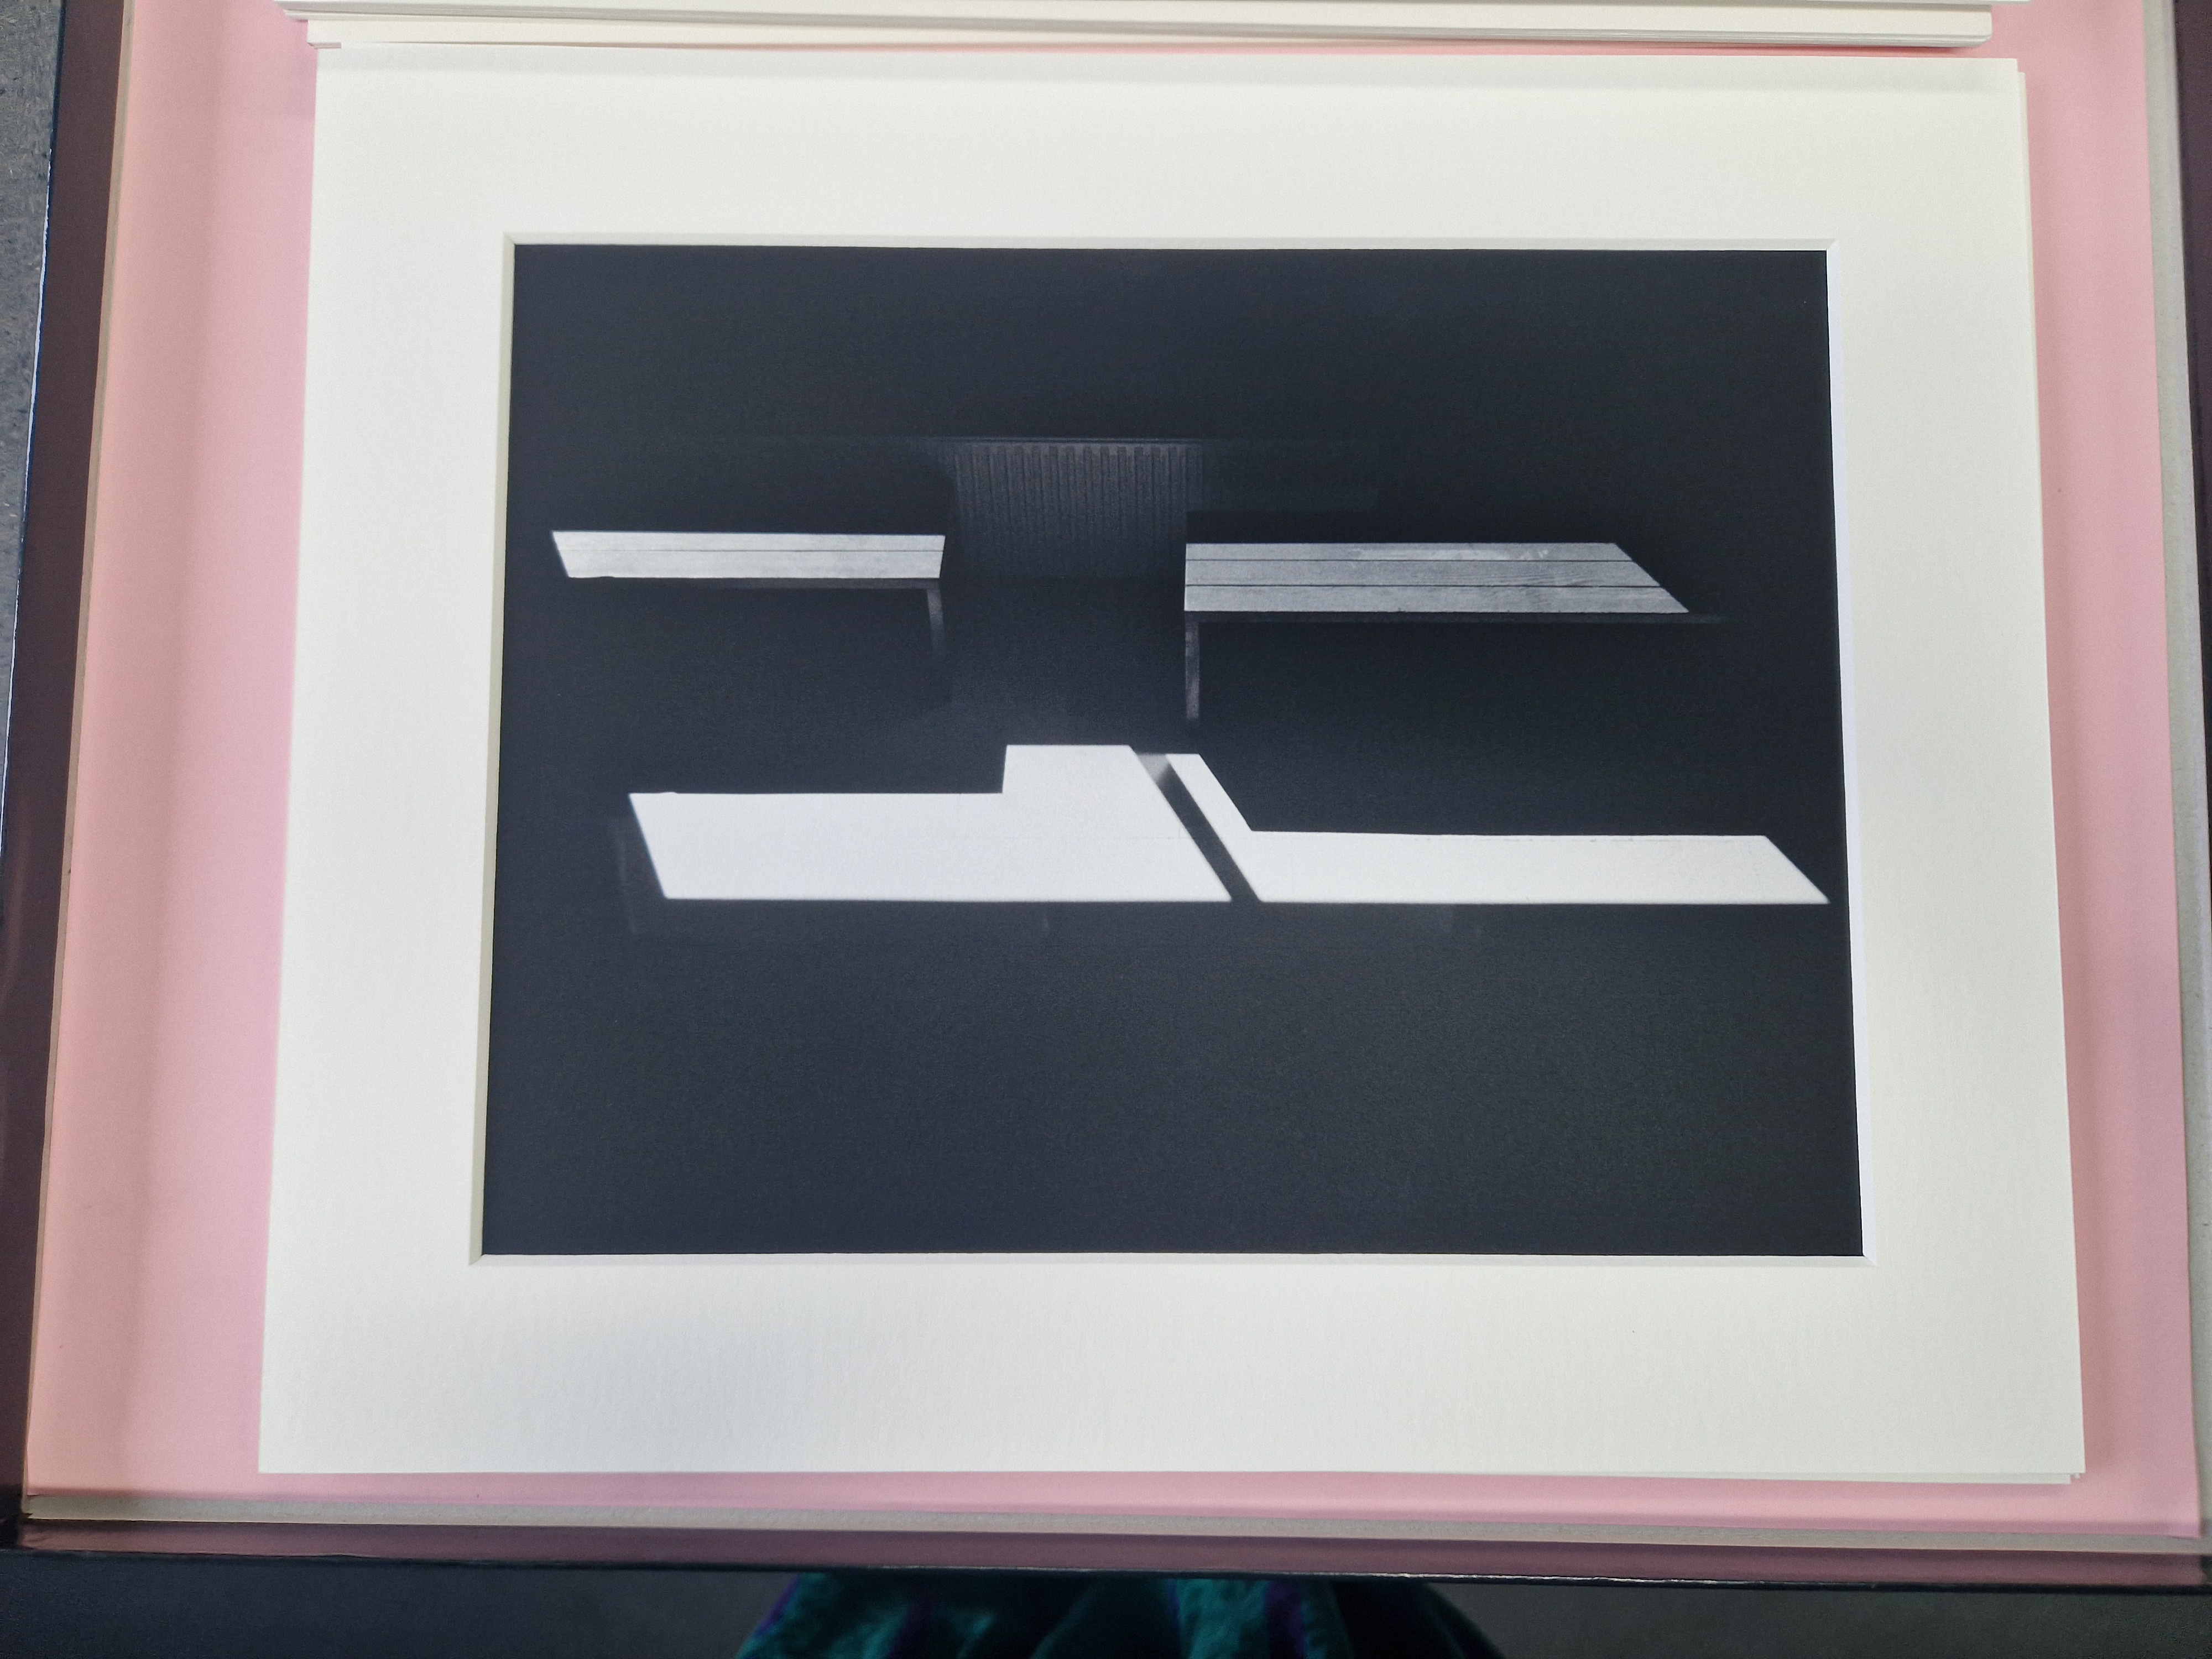
Over the past eight months, Ela Skorska has been exploring the existence of her light and shadow-inspired analogue photography in the modern world. Contemplating the longevity of her images being ‘stuck’ in the constraints of the frame, she proceeded to liberate them through the use of interdisciplinary methods ranging from Fine Art processes like painting and sculpture to 3D modelling and printing.
This project, activated by the sculptural properties of her brutalism-inspired images, analyses a photograph as a 3D object and its potential to exist as one.
FRIDAY
PREP FOR CRIT
WEEK 5: 19 FEB- 24 FEB
MONDAY
CRIT I 19.02
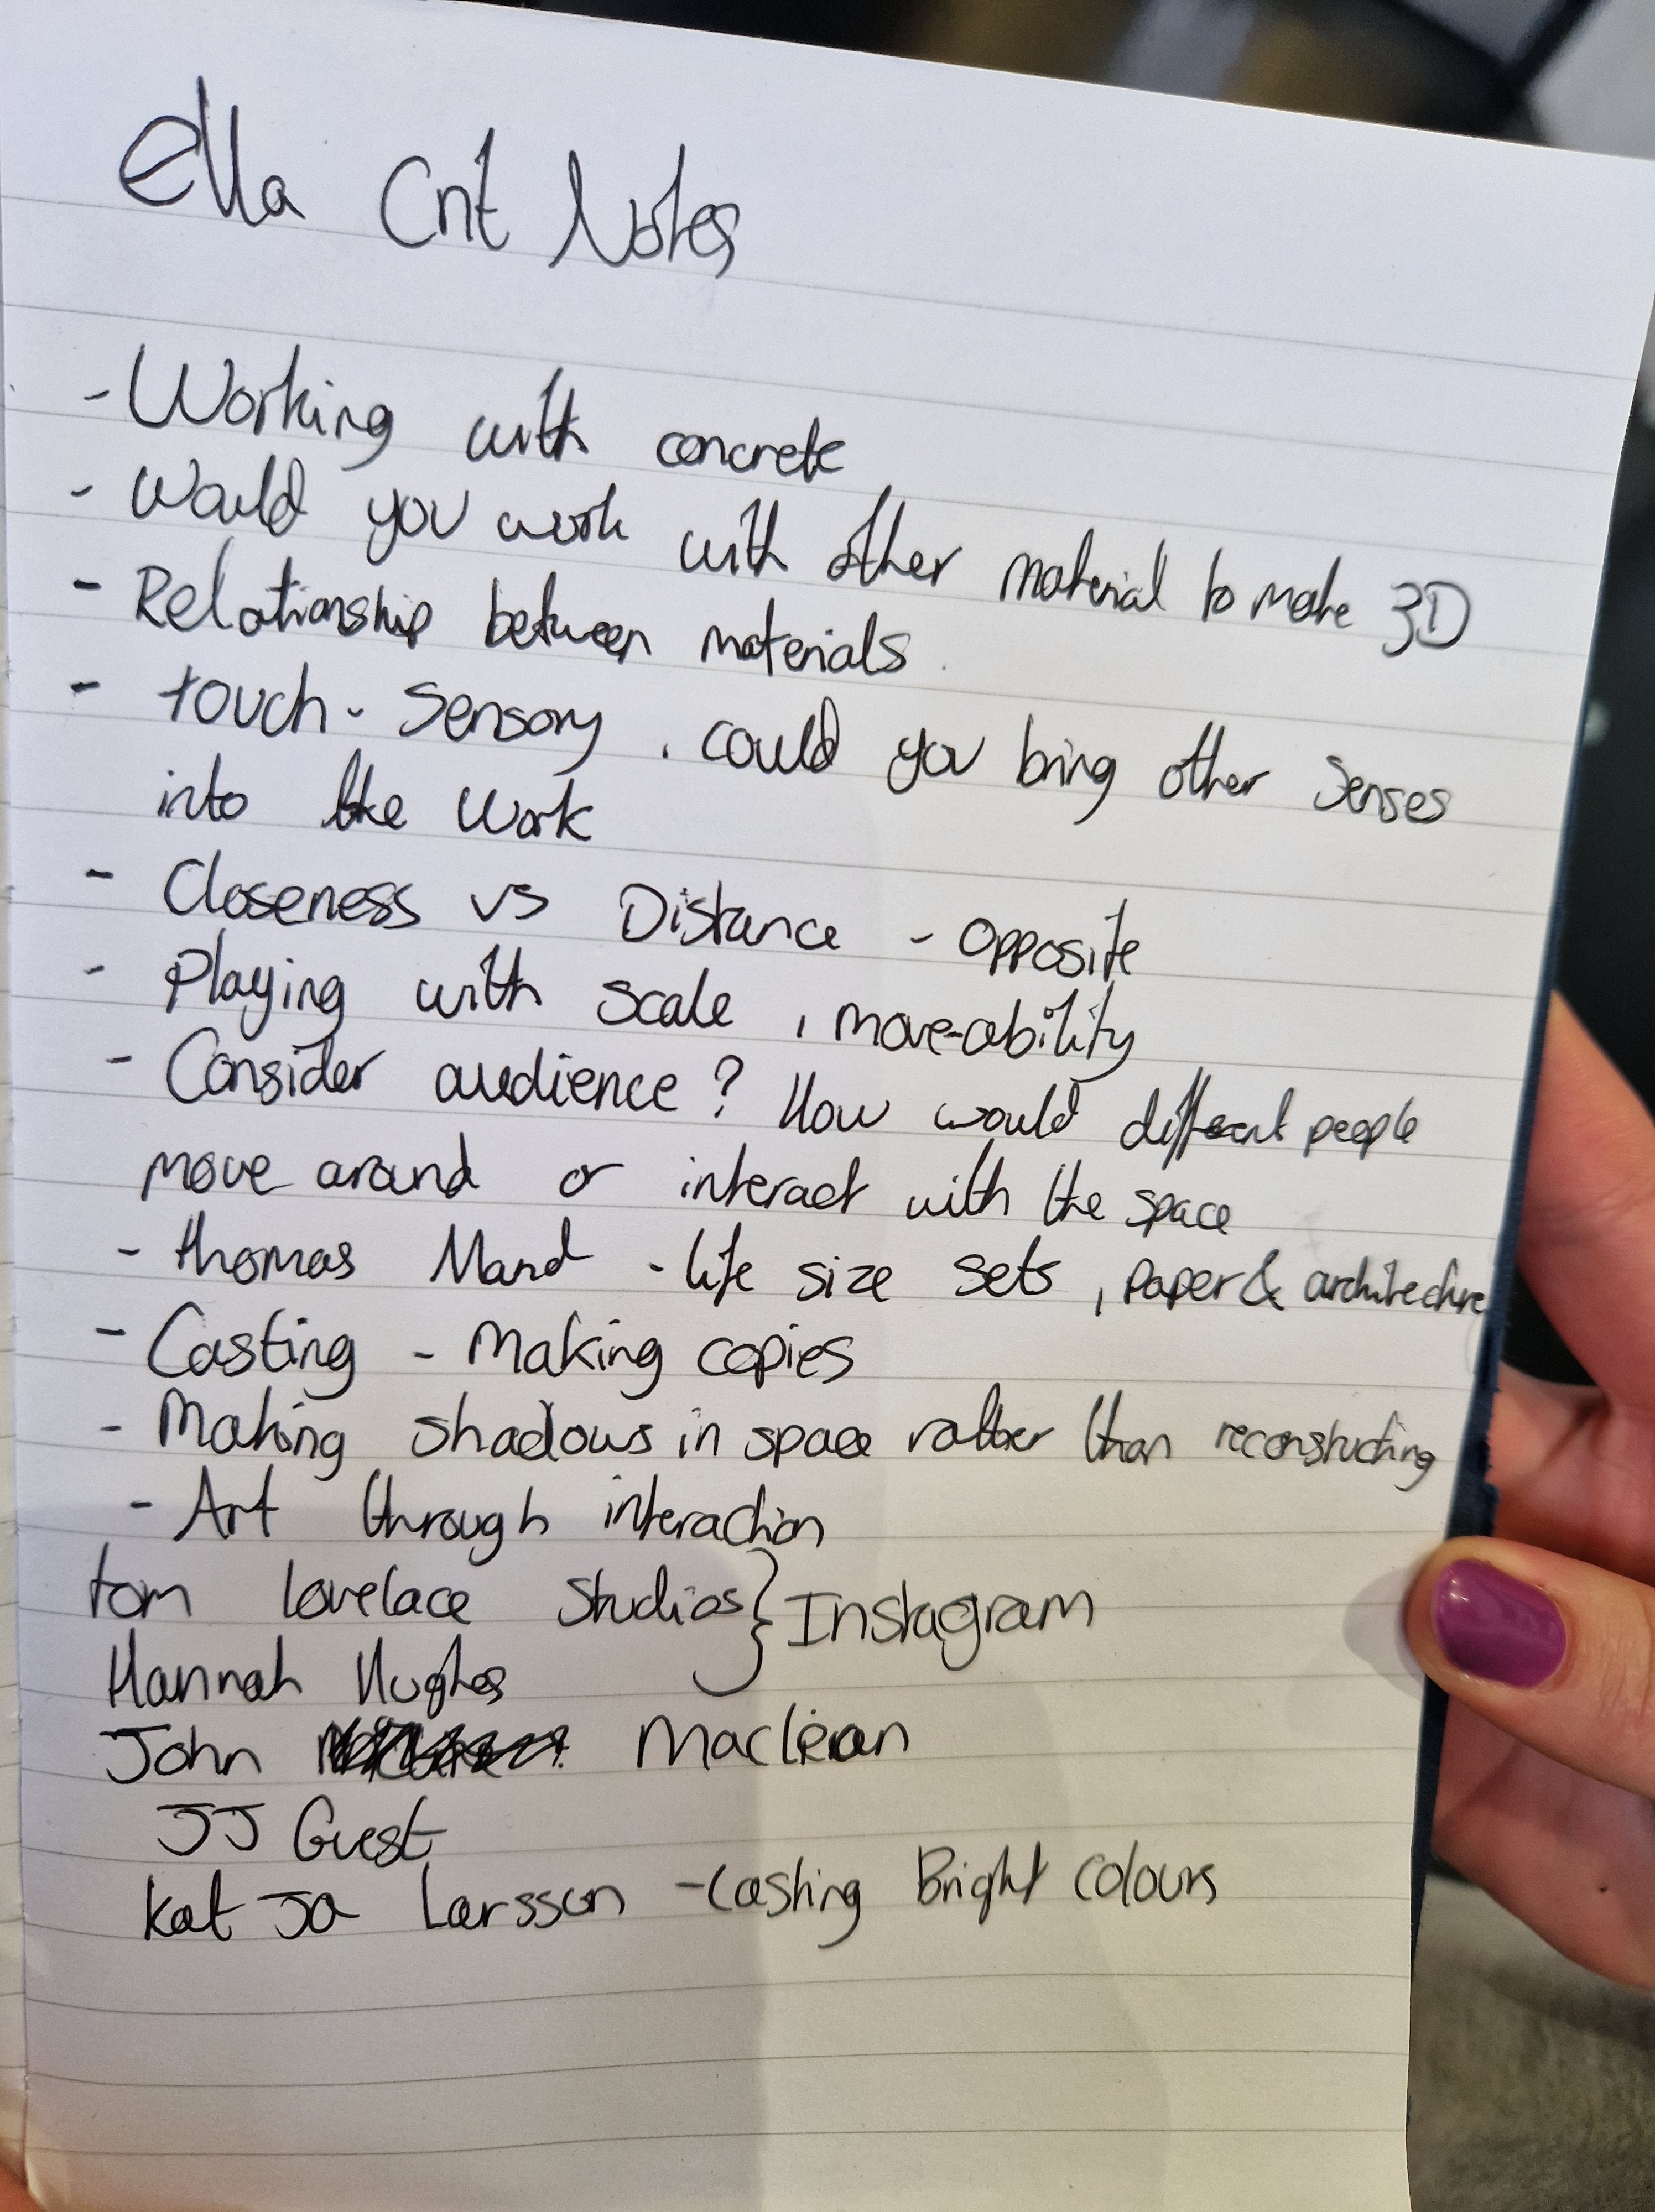
NOTES:
- would you work with other materials to make images into 3D objects
- relationship between materials
- touch-sensory experience, could you bring other senses into work
- closeness vs distance – opposite
- playing with scale – movability
- CONSIDER AUDIENCE – how would different people move around and interact with the space
- Thomas Mann (not sure the name is right) paper and architecture
- casting – making copies
- making shadows in space rather than reconstructing
- ART THROUGH INTERACTION
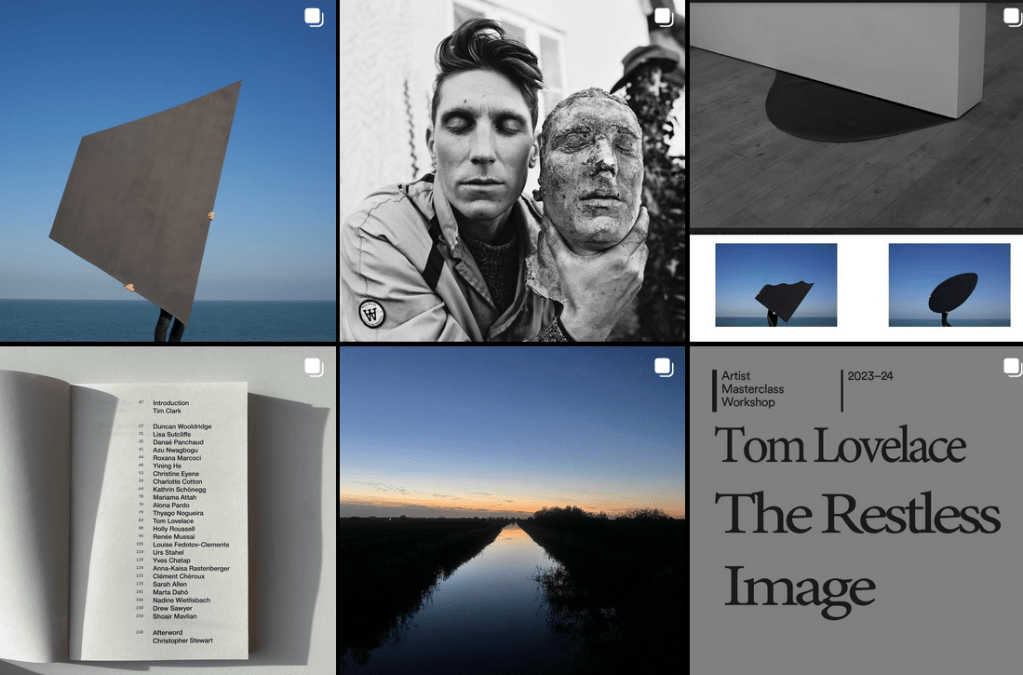
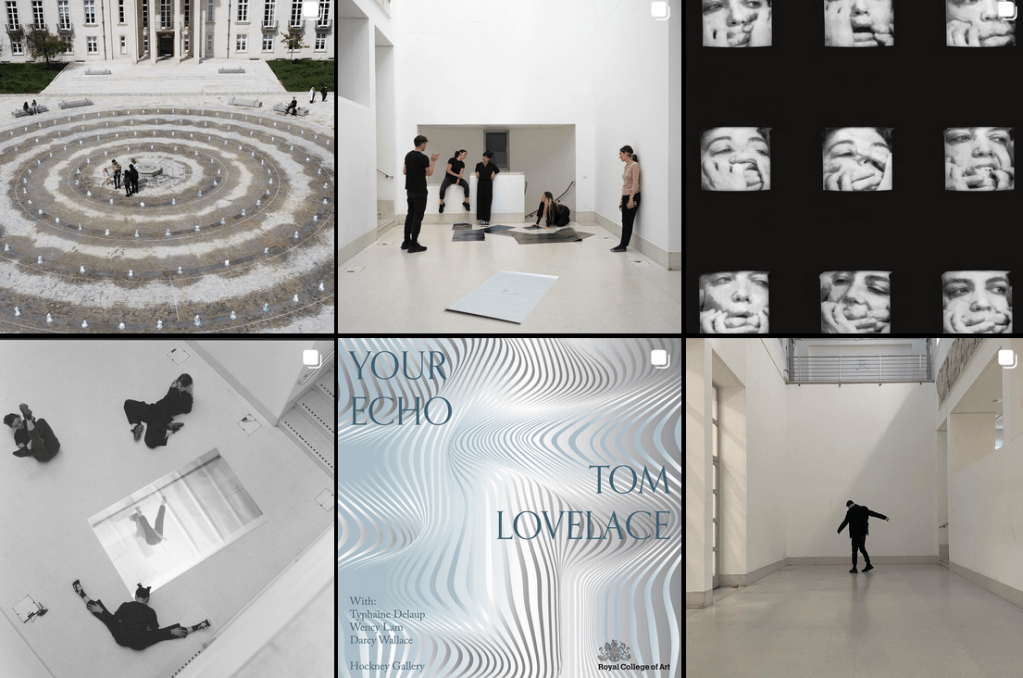
- Tom Lovelace Studios
https://www.instagram.com/tomlovelacestudio/
AS AN ARTIST, TOM LOVELACE ELUDES CLASSIFICATION. PAIRING STYLE AND SUBSTANCE IN EQUAL PARTS, HE WORKS SOMEWHERE BETWEEN PHOTOGRAPHY, SCULPTURE AND PERFORMANCE TO CREATE IMAGES AND OBJECTS WHOSE ELEGANCE AND COMPLEXITY SIT SHOULDER TO SHOULDER.
ALEXANDER HAWKINS / ANOTHER MAGAZINE
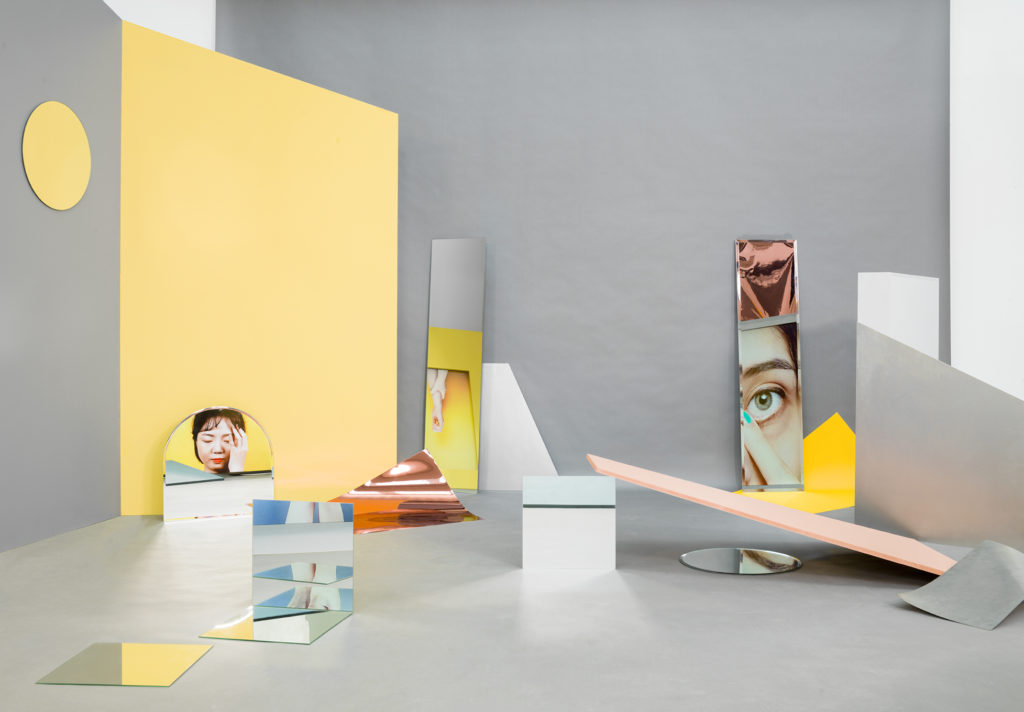
Tom Lovelace is a London based artist, working across photography and performance. Lovelace’s practice is shaped by the collaborative histories of photography, phenomenology, theatre and the languages and legacies of abstraction. Since 2017, Lovelace has been developing the Living Pictures; presenting interactive exhibition spaces, exploring the photographic image, moments in art history and sites of architecture through performance methodologies. Lovelace is currently completing doctoral research, with a focus on the Living Pictures, at the University of Westminster. As a Lecturer he works at the Royal College of Art, London and Glasgow School of Art.
Tom Lovelace frees photography from its traditional role as a realist mode of representation by creating photographs and sculptural installations that become a critical index of themselves. Drawing our attention to the surface, to the physicality of the photograph, through staged and spontaneous interventions in which we become part of a performance, the artist asks us to rethink what it means to witness in an age in which seeing no longer means believing. By disrupting the passive process of viewing photographs, of merely seeing through them, Lovelace challenges us to think with these images, and by bringing us into relation with others, including himself, he makes us aware that there is a politics at stake. Invited to interact with selected works, we are confronted with our own unique preconceptions of what constitutes a photograph and what distinguishes it from a work of art. In the artist’s constructed reflective landscapes and collaborative installations, spectators become actors, and judgment becomes collective experience. Lisa Stein, Mirror Mirror, Bodø Biennale
Tom Lovelace is definitely one of the most prolific and inspiring contemporary artists. I have been following his art for a few years now, and I am so impressed with his creativity and how he thinks.
I have to say I resonate with his outlook in so many ways, as I am also trying to rethink photography, the way it's presented, and how we interact with it - observing him closely.
- Hannah Huges
https://www.hannah-hughes.com/
https://www.instagram.com/_h_annah_hughes
Hannah Hughes (b. 1975) is an artist working primarily with collage, photography and sculpture. She graduated from the University of Brighton in 1997, and has since exhibited in the UK and internationally.
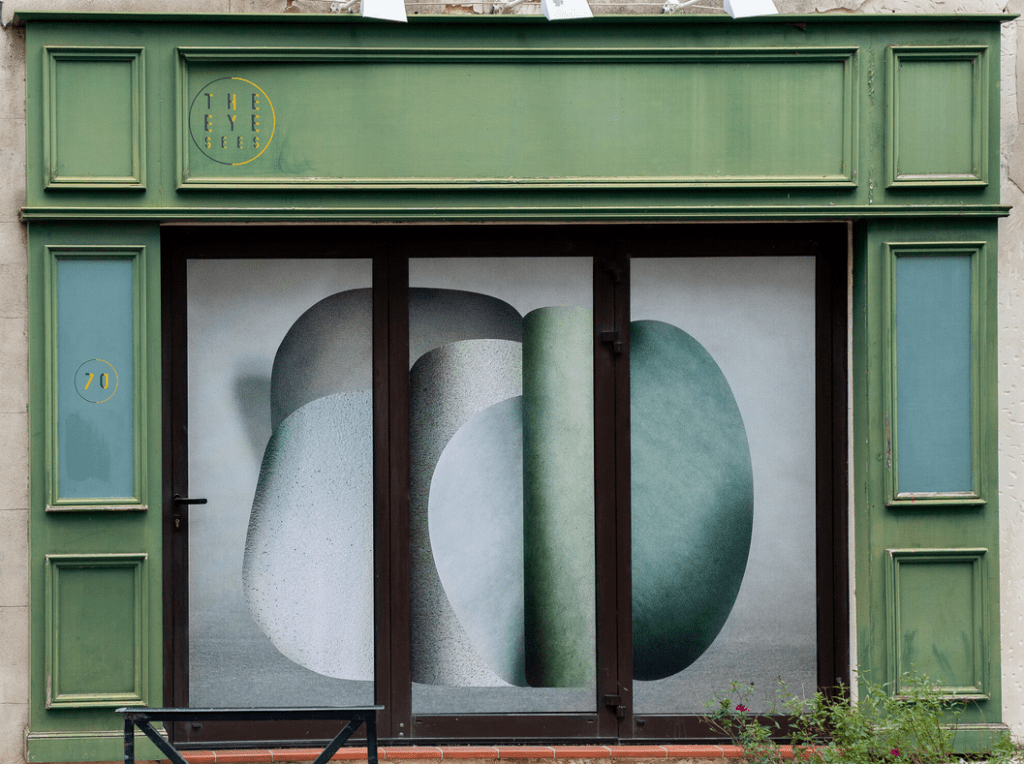
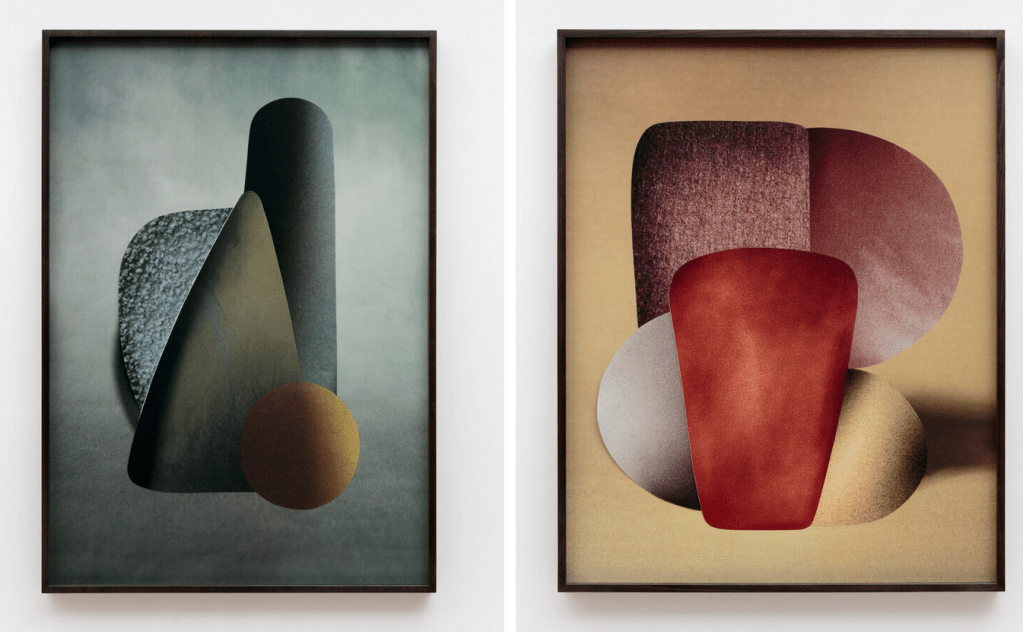
Another fantastic and inspiring artist I was introduced to. Hannah's use of textures really resonates with me, and similarly, as with my photographs, I envision her artwork in a 3D form - it also wants to come out and continue its existence in other realms. I think it's something about the form and materiality that does that, the magic combination of the two.
- John McLean
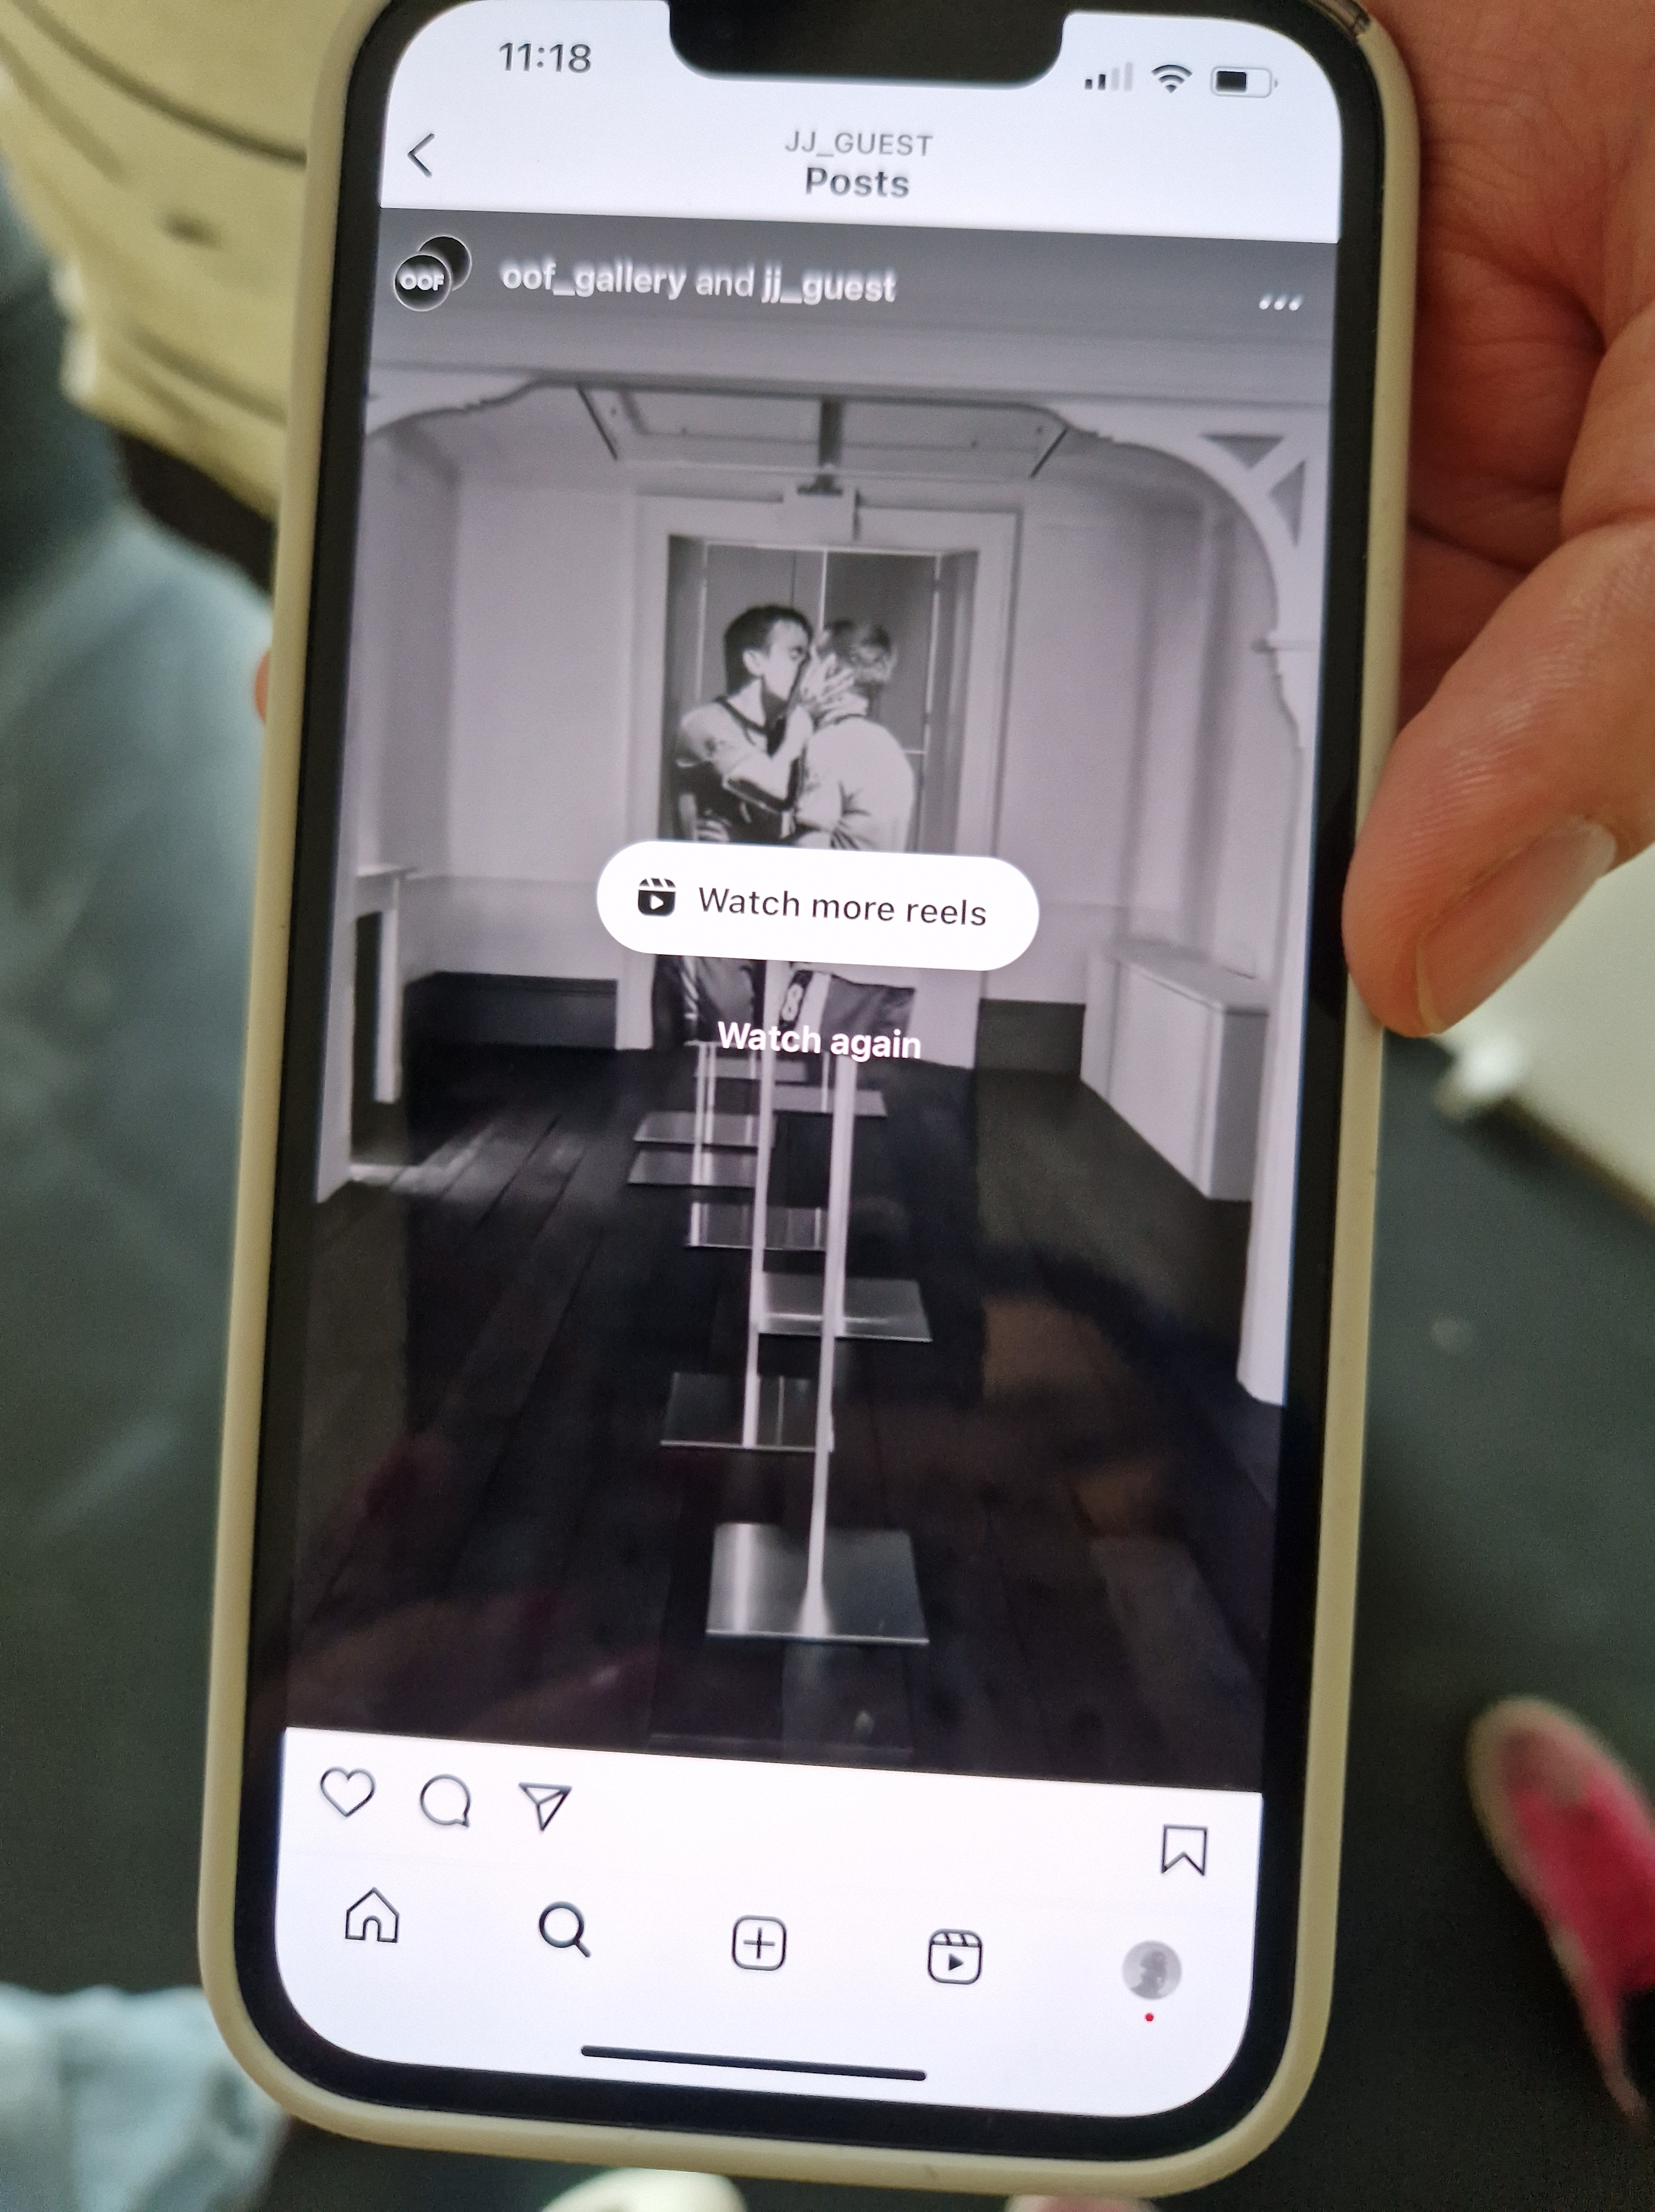
- Katja Larrson
https://www.instagram.com/larsson.katja/?hl=en
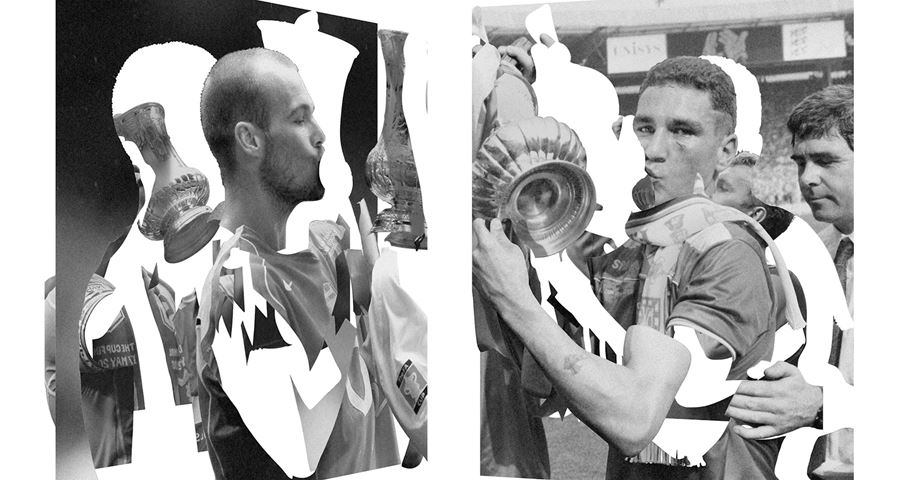
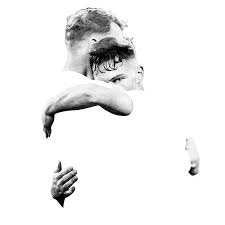
In July 2021, after three years of curating exhibitions across London, we opened our first permanent home in Warmington House, a Grade II-listed Georgian townhouse in the grounds of Tottenham Hotspur Stadium. OOF Gallery is the world’s first cutting-edge art space dedicated to football and the culture that surrounds it. Our exhibition programme presents some of the artworld’s biggest names alongside our pick of the UK’s most exciting young artists, all brought together in a public-facing gallery in the heart of north London. OOF Gallery is free and open to everyone.
OOF Gallery, Warmington House, 744 High Road, London, N17. Access is via The Tottenham Experience. Open Thu-Sat 10-5, Sun 11-4, Mon 10-5, closed Tue & Wed.
Gallery Directors: Eddy Frankel, Jennie Hammond, Justin Hammond
- JJ Guest https://www.jjguest.com/index.htm
JJ GUEST – SHOWREEL
REFLECTIONS: The first critical review was incredibly insightful and inspiring. I think that the most important thing I got out of it is the extensive list of artist names which informed my research and my practice (especially Hannah Hughes and Tom Lovelace).
For now, I will continue developing my concept and throughout the next few months, I will refine the presentation methods as we get closer to the degree show.
TUESDAY
3D PRINTING COURSE THROUGH RISE
NOTES:
- FFF PRINTER
- 3 types of printers, FFF, REISIN – not sustainable, porcelain
- PLA waste
- starch-based plastic
- 3d printing waste company
- reflow working with recycling plastic
- generative design: learn more!
WEDNESDAY
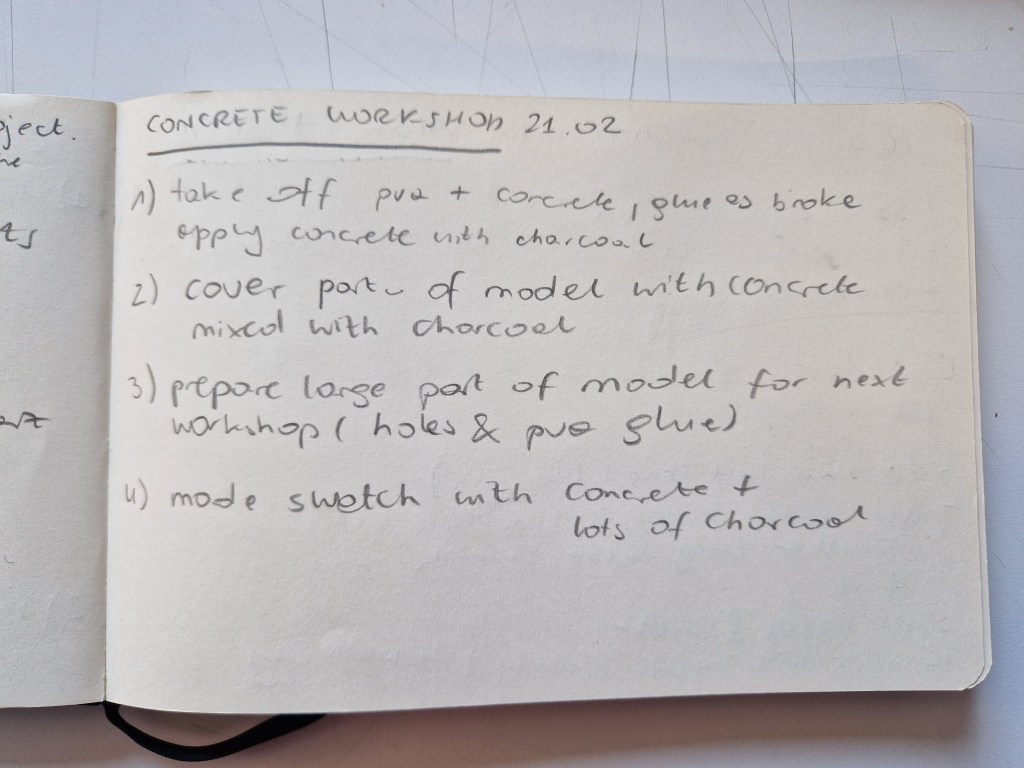
CONCRETE WORKSHOP 2
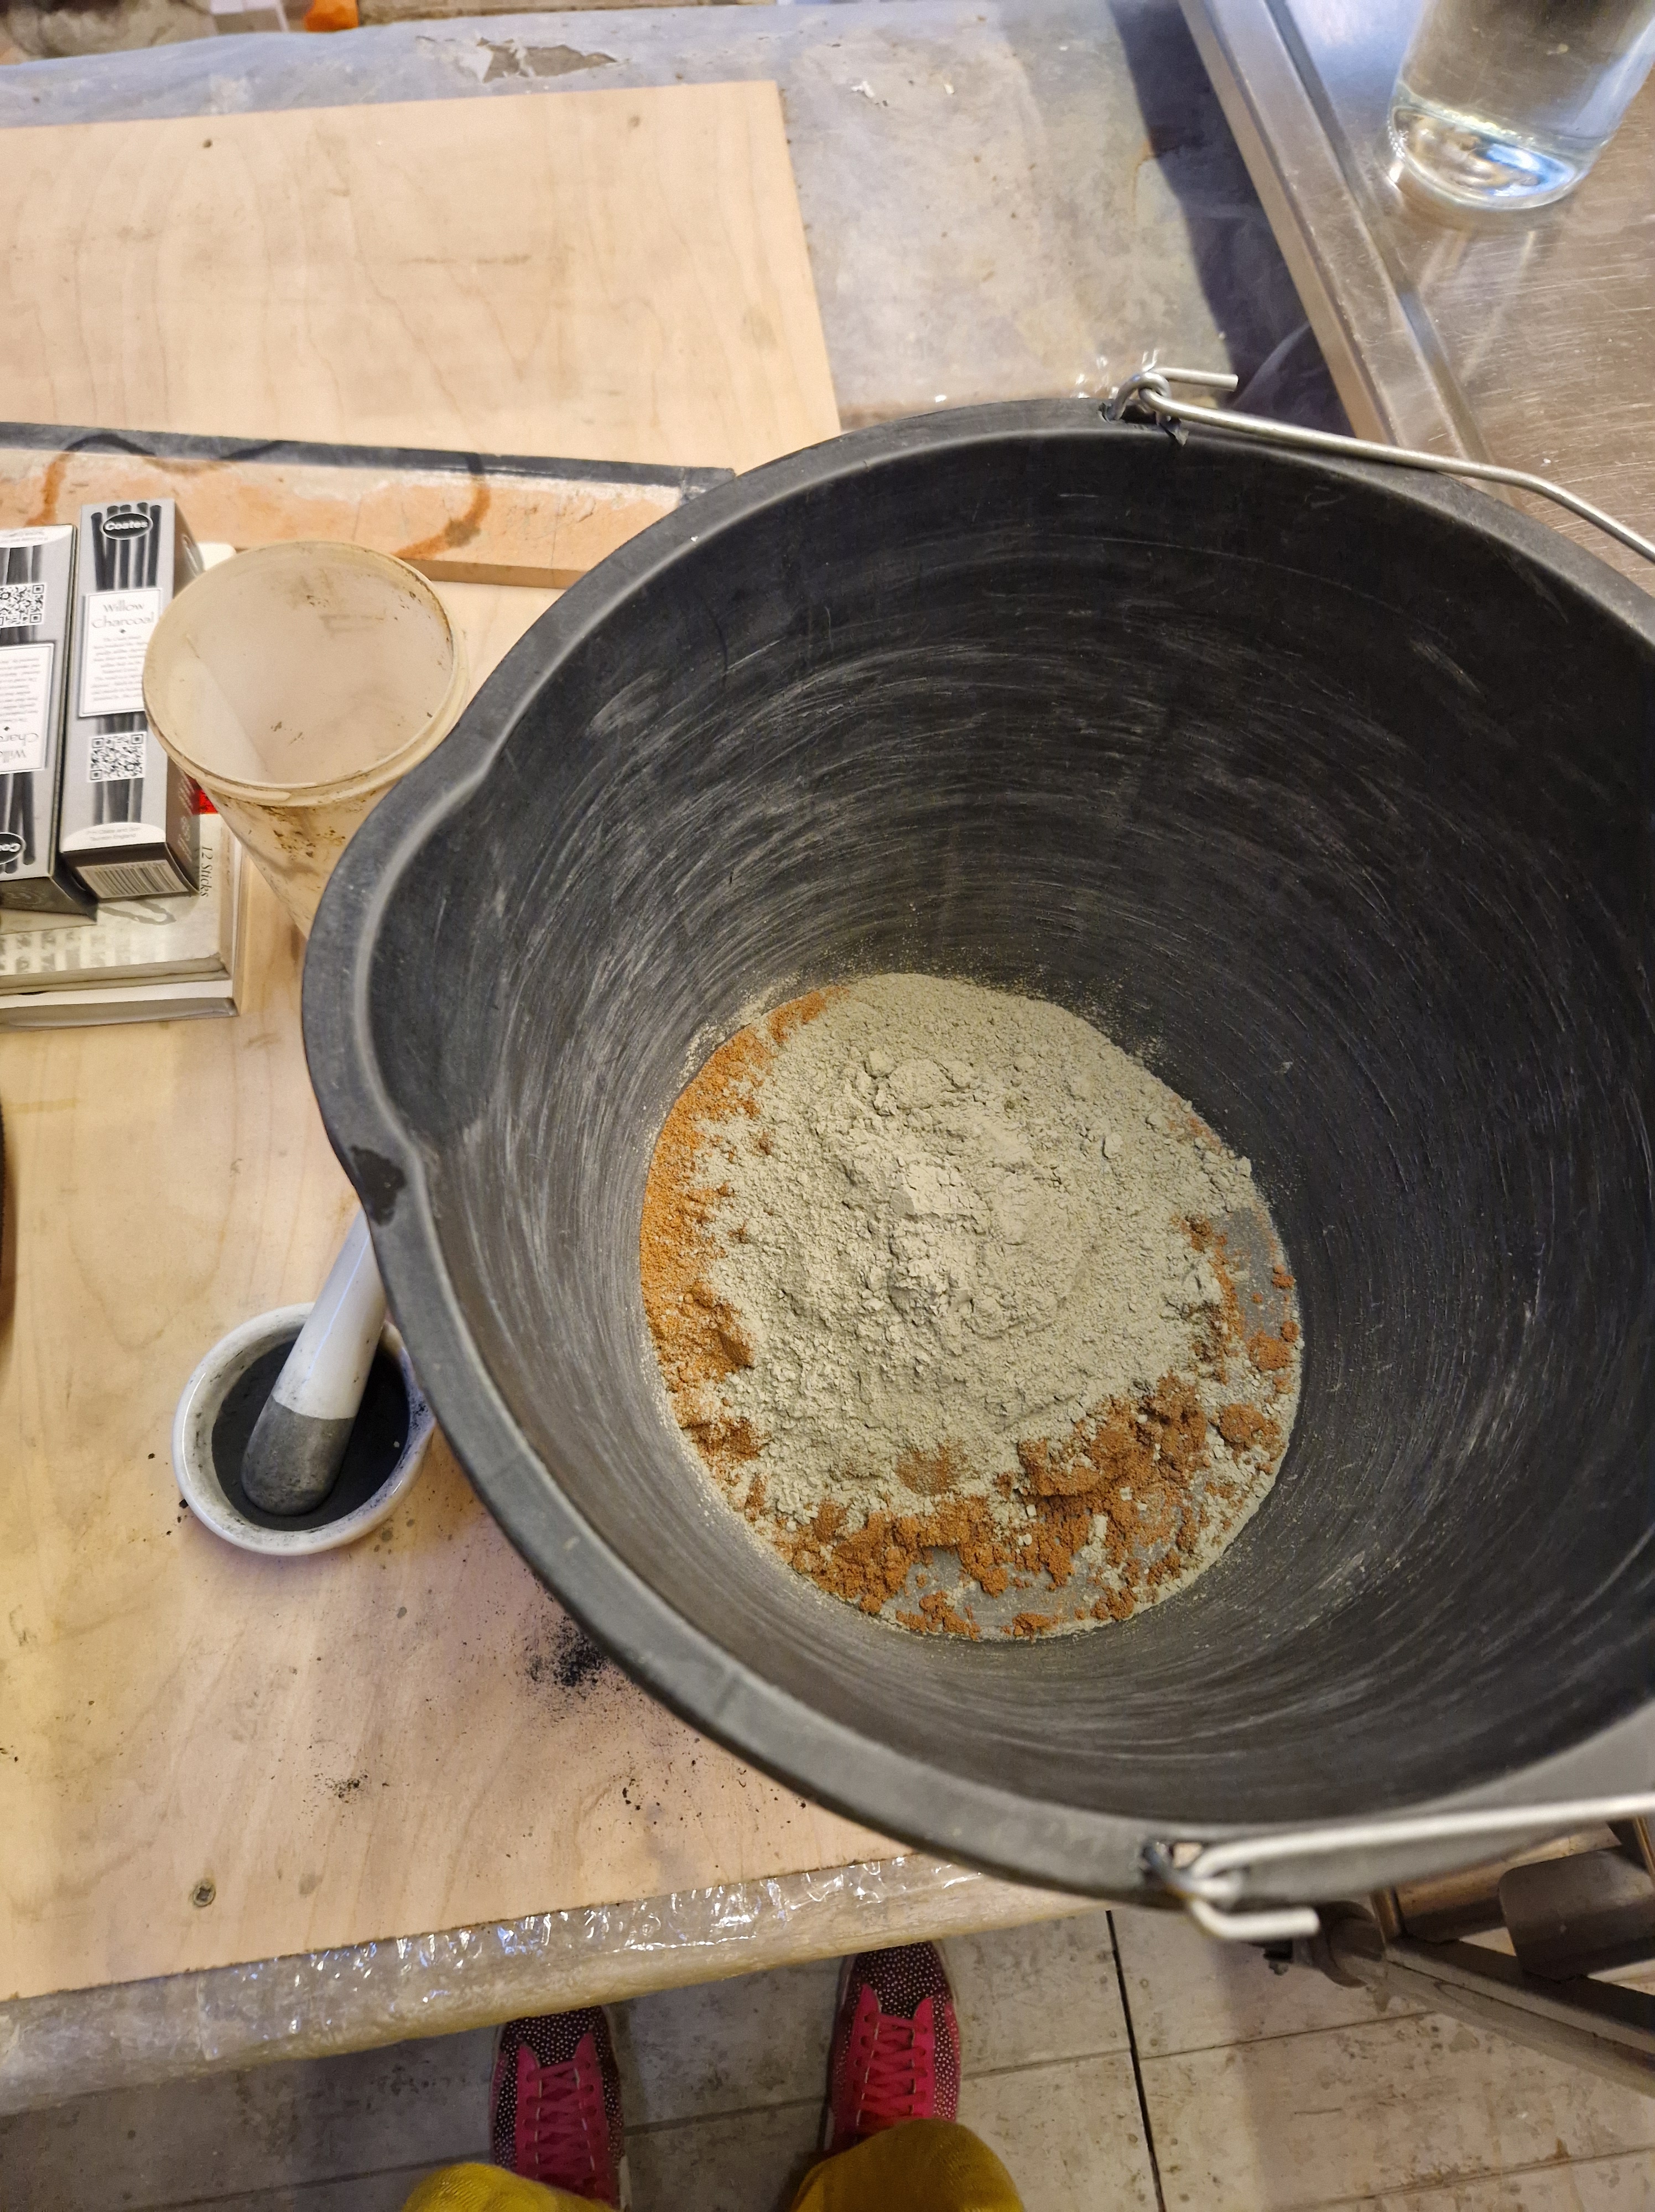
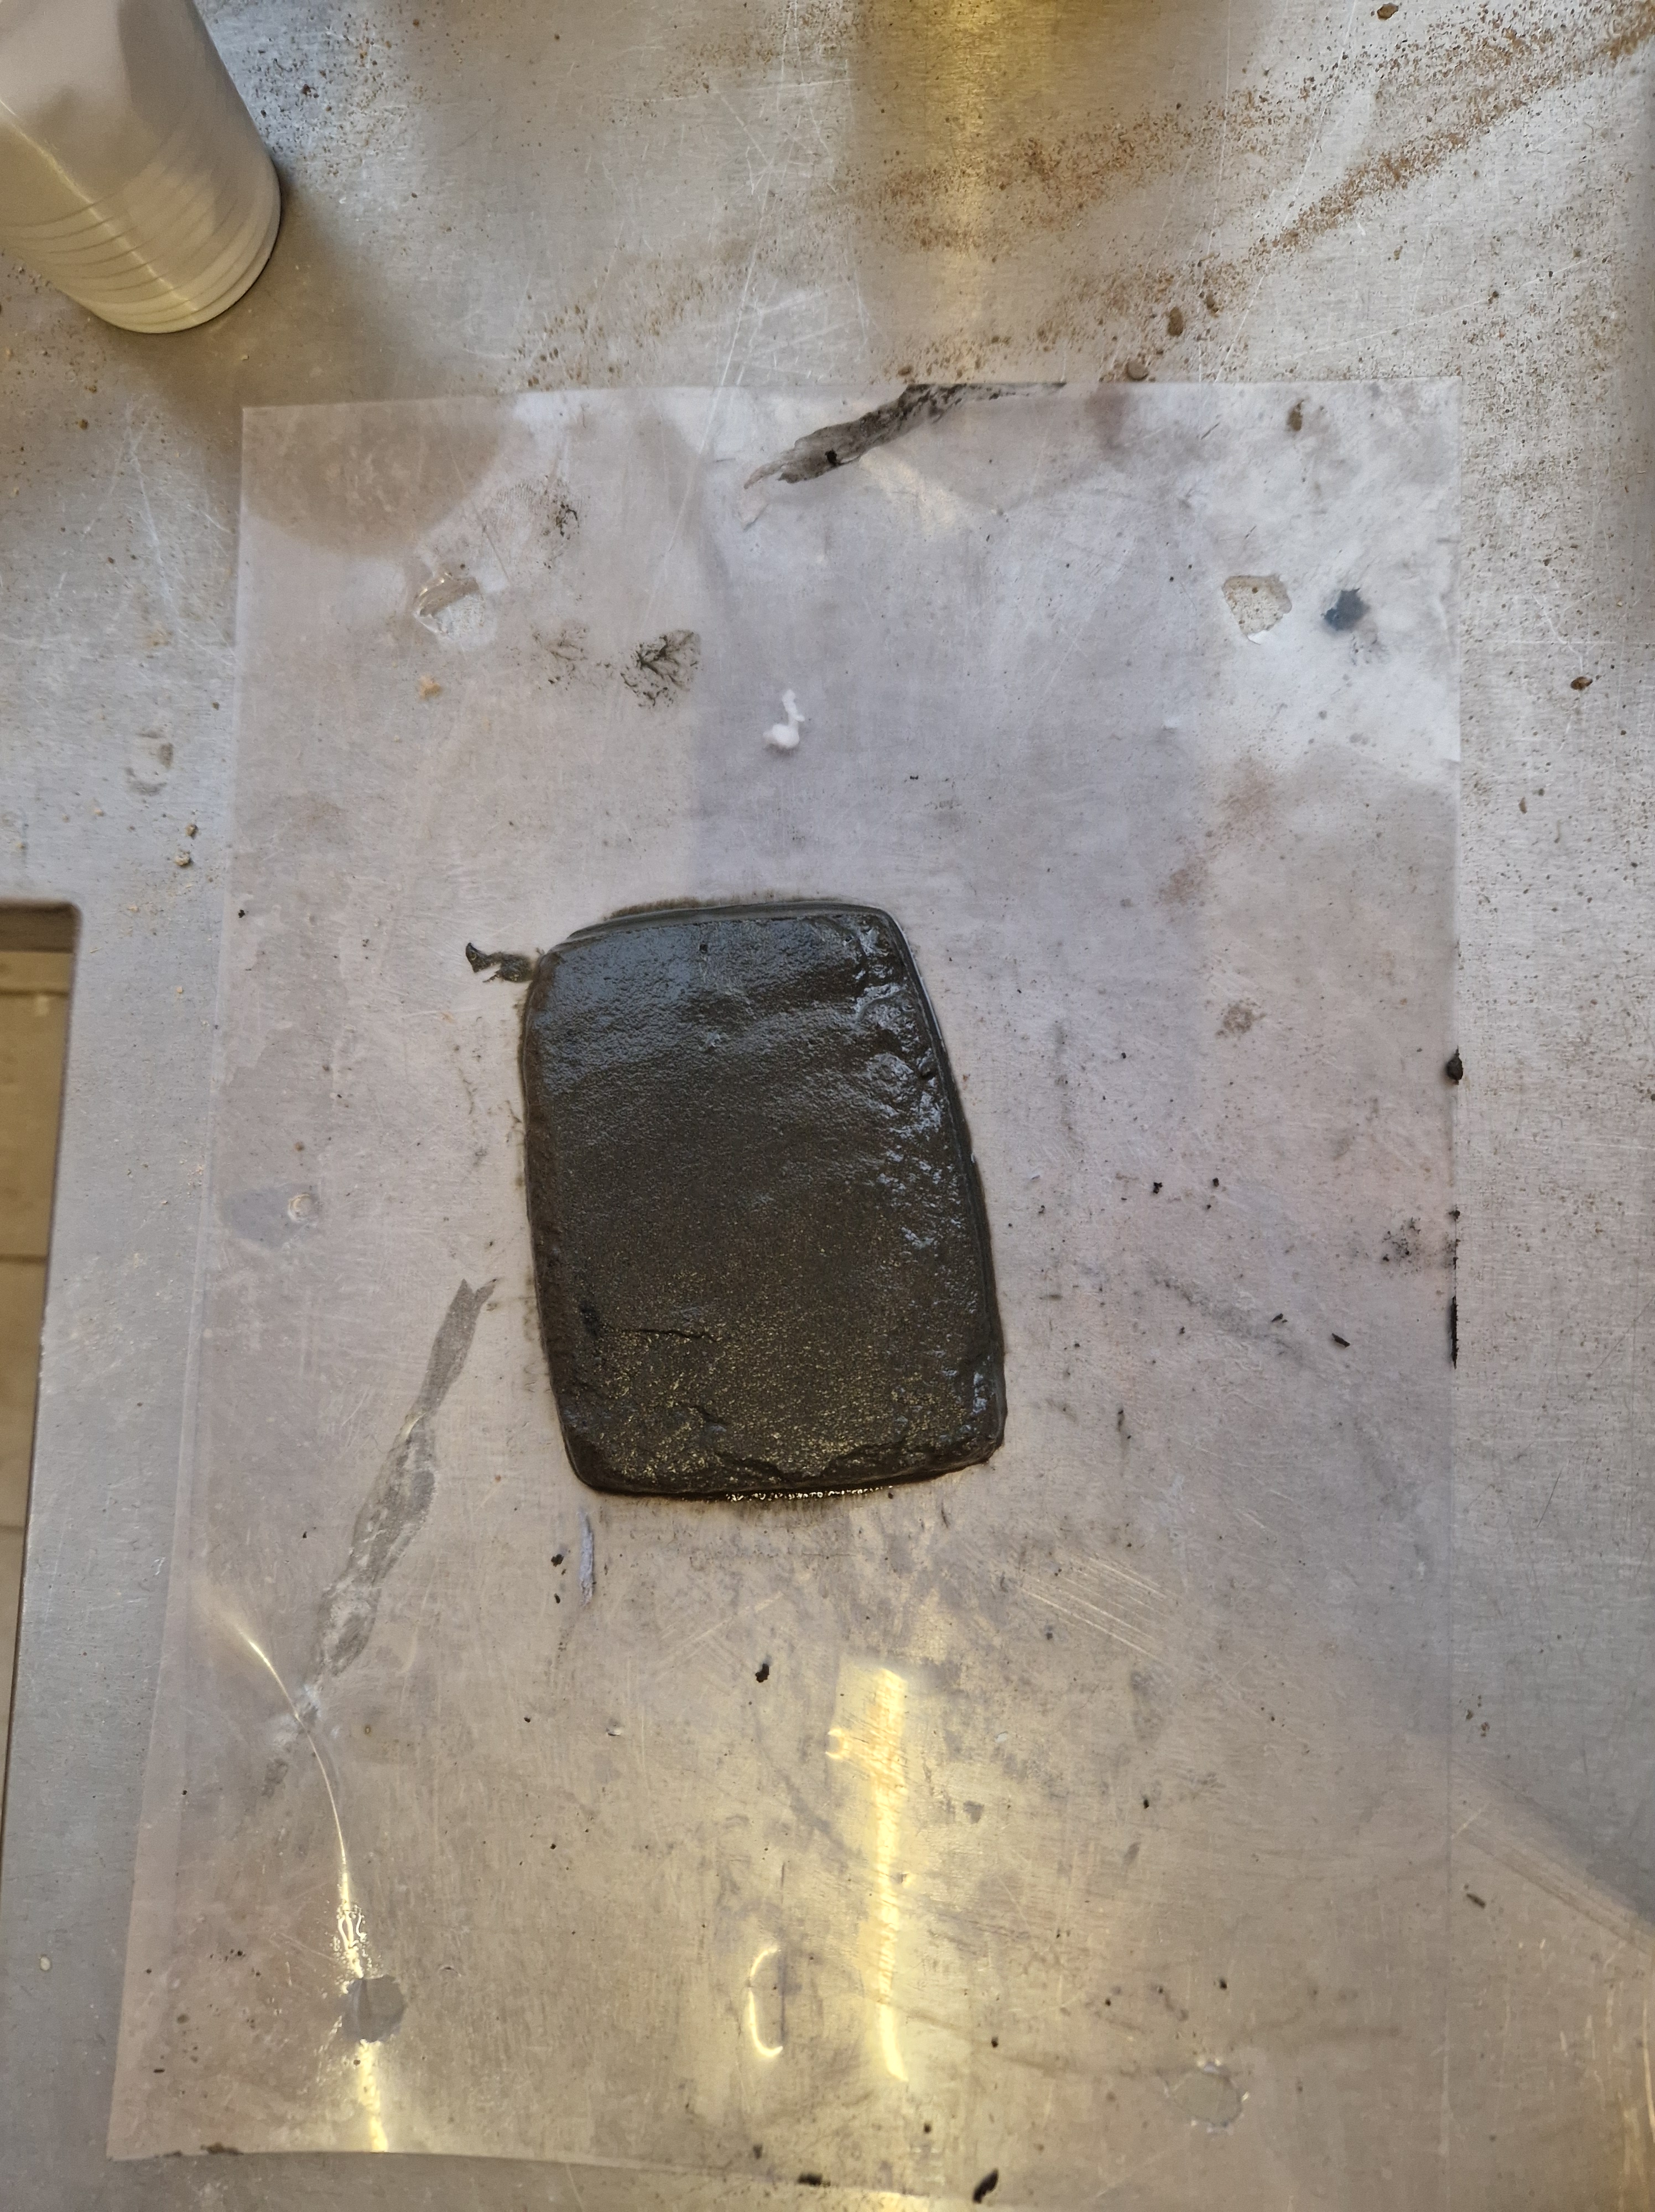
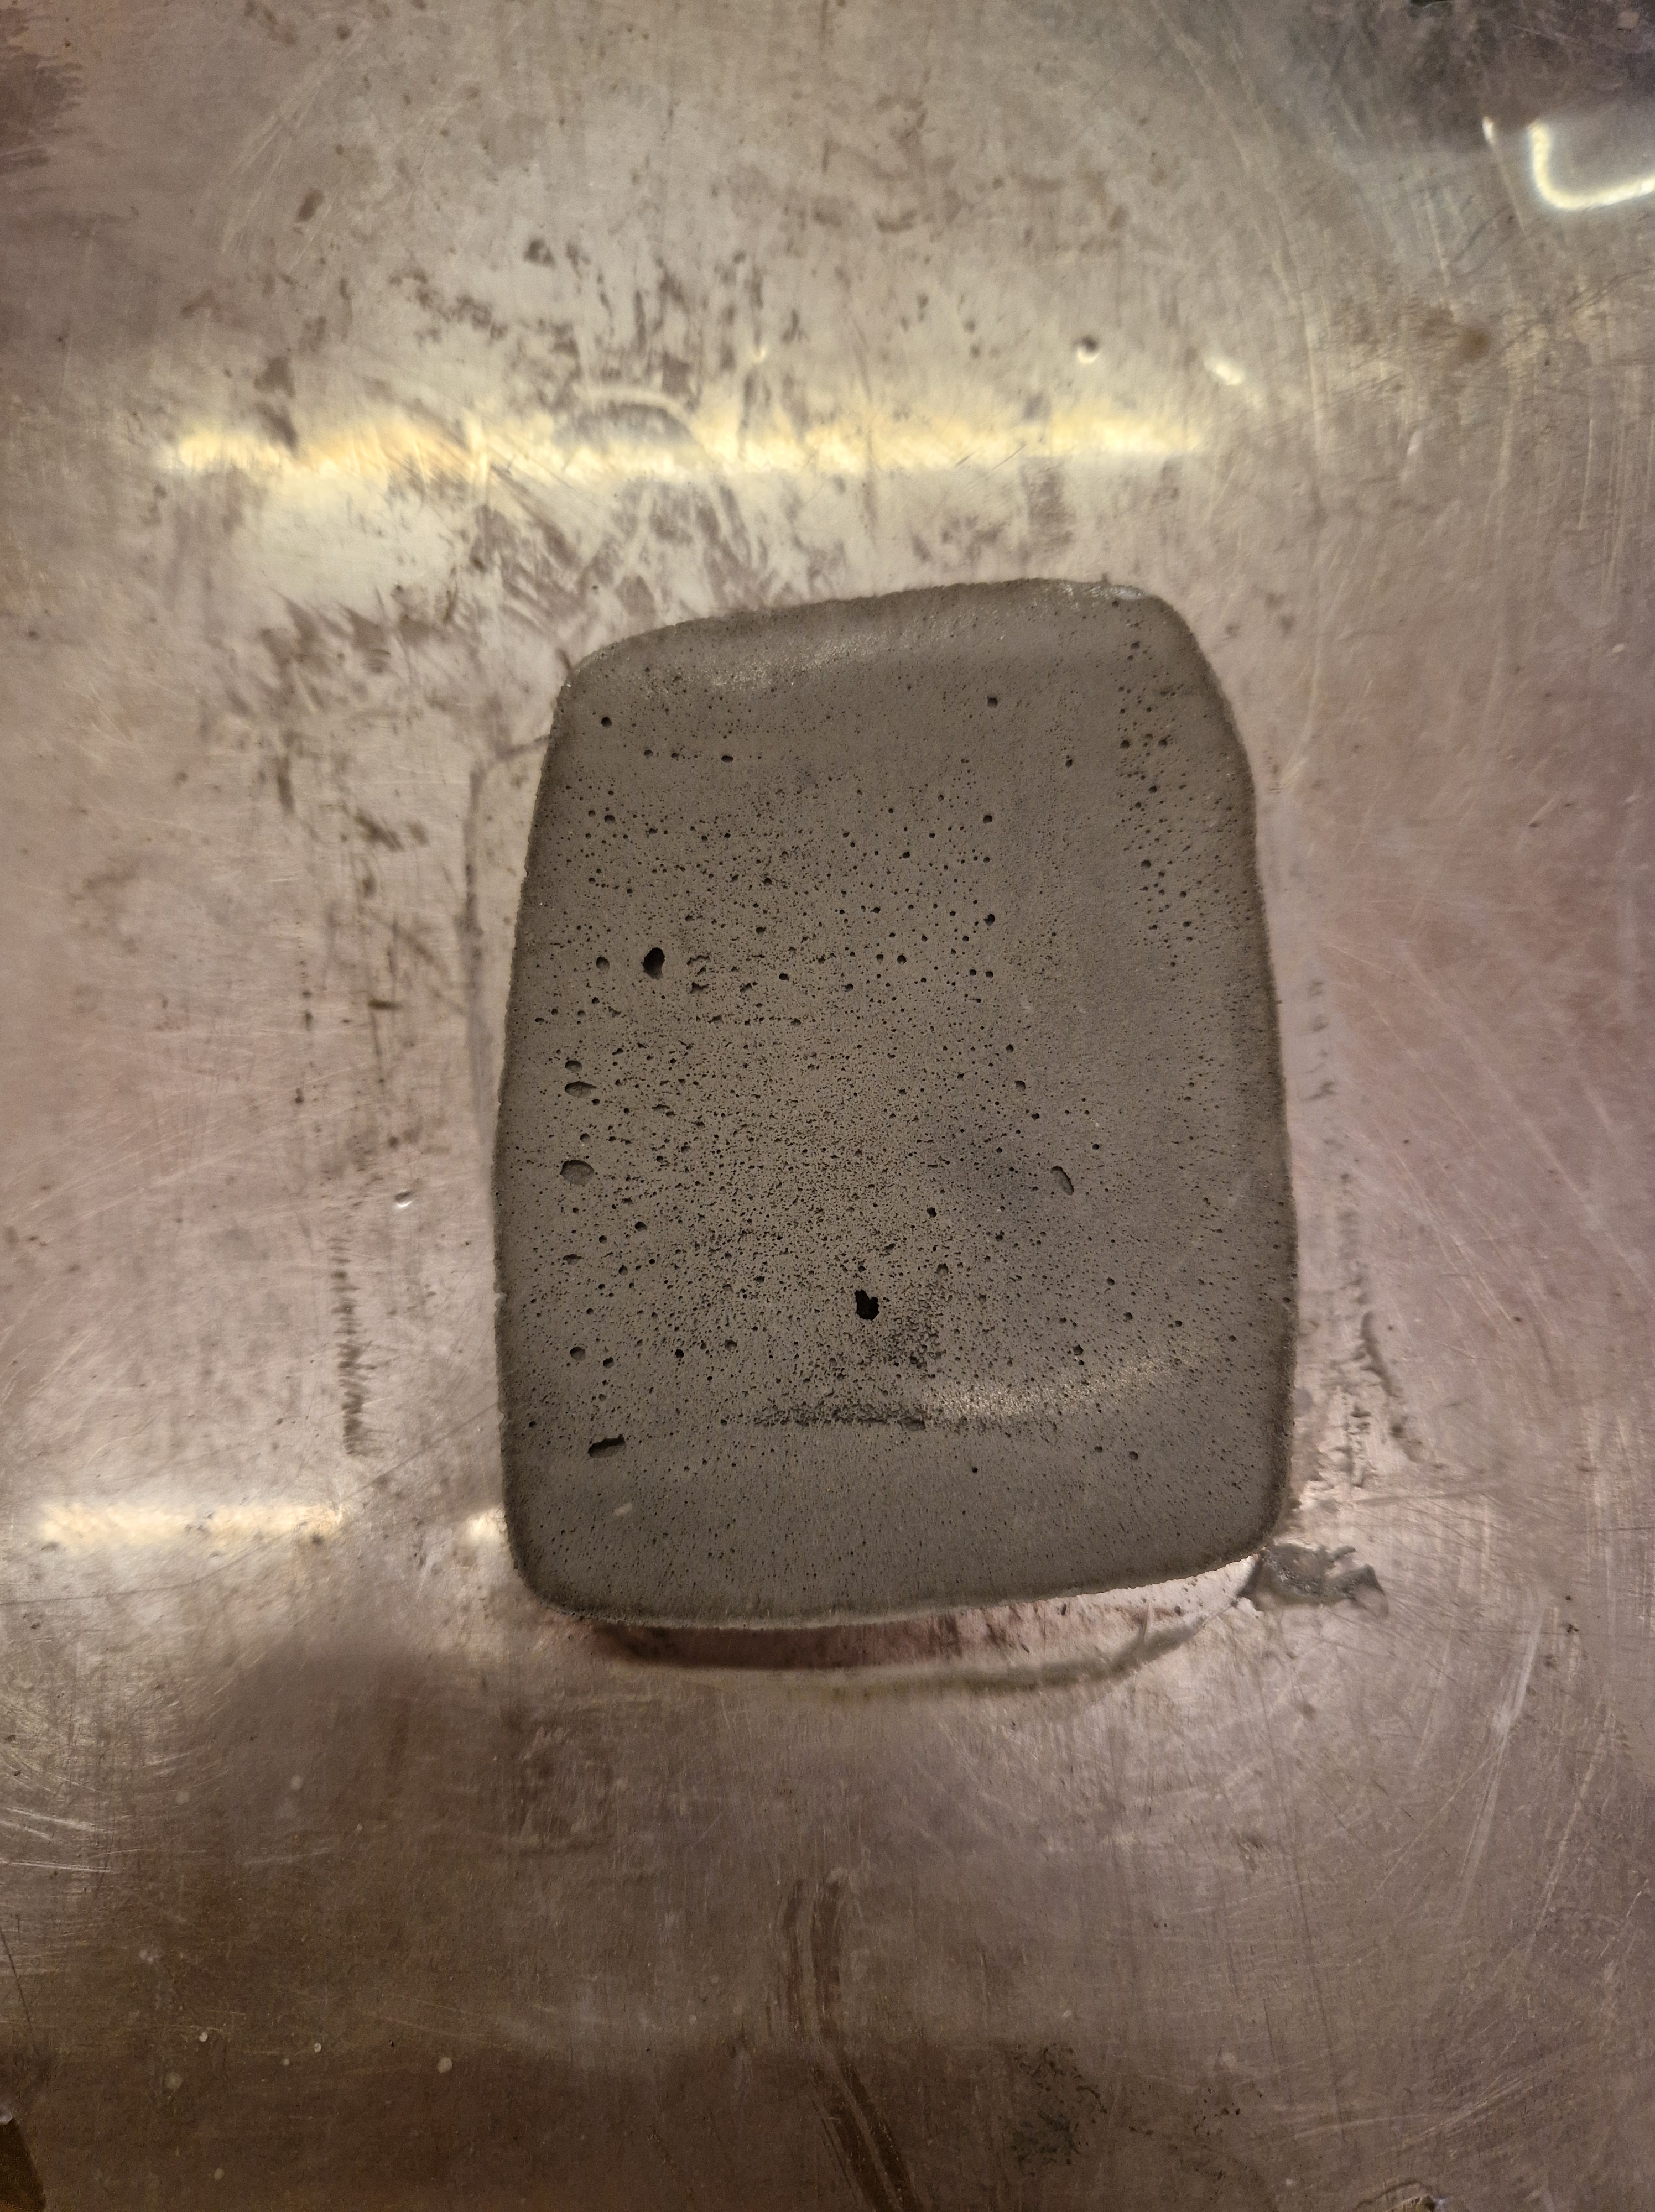
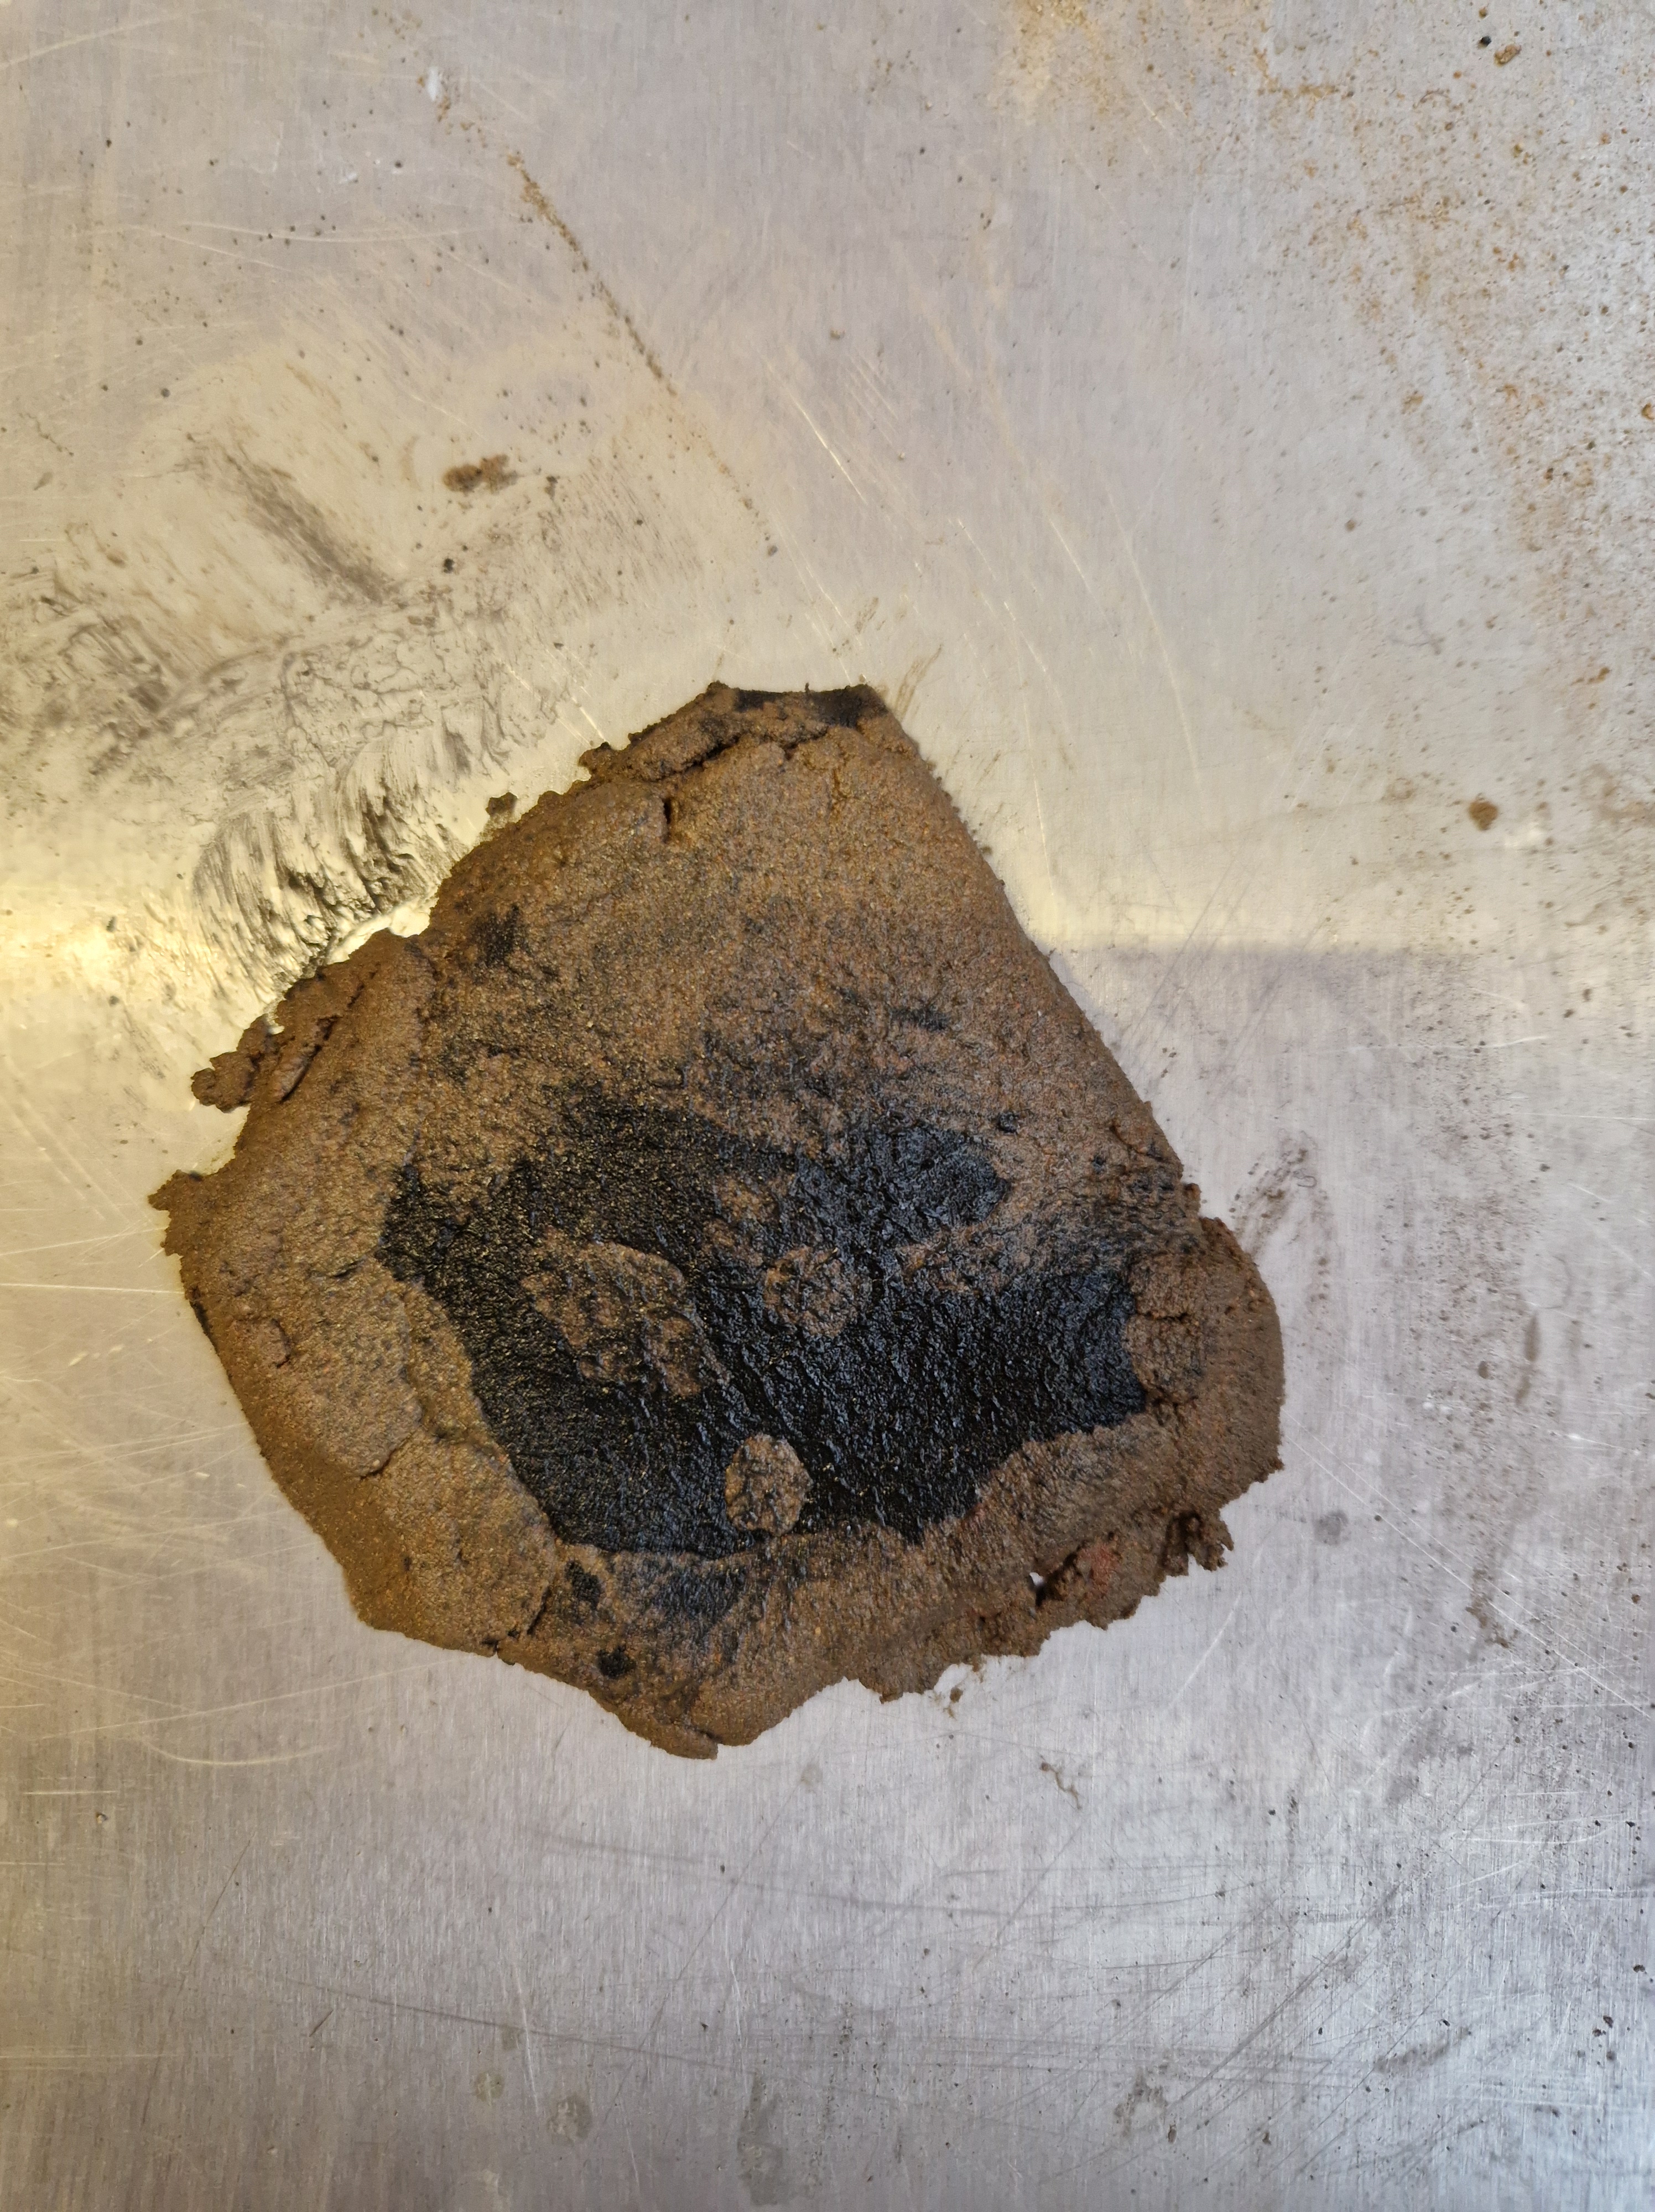
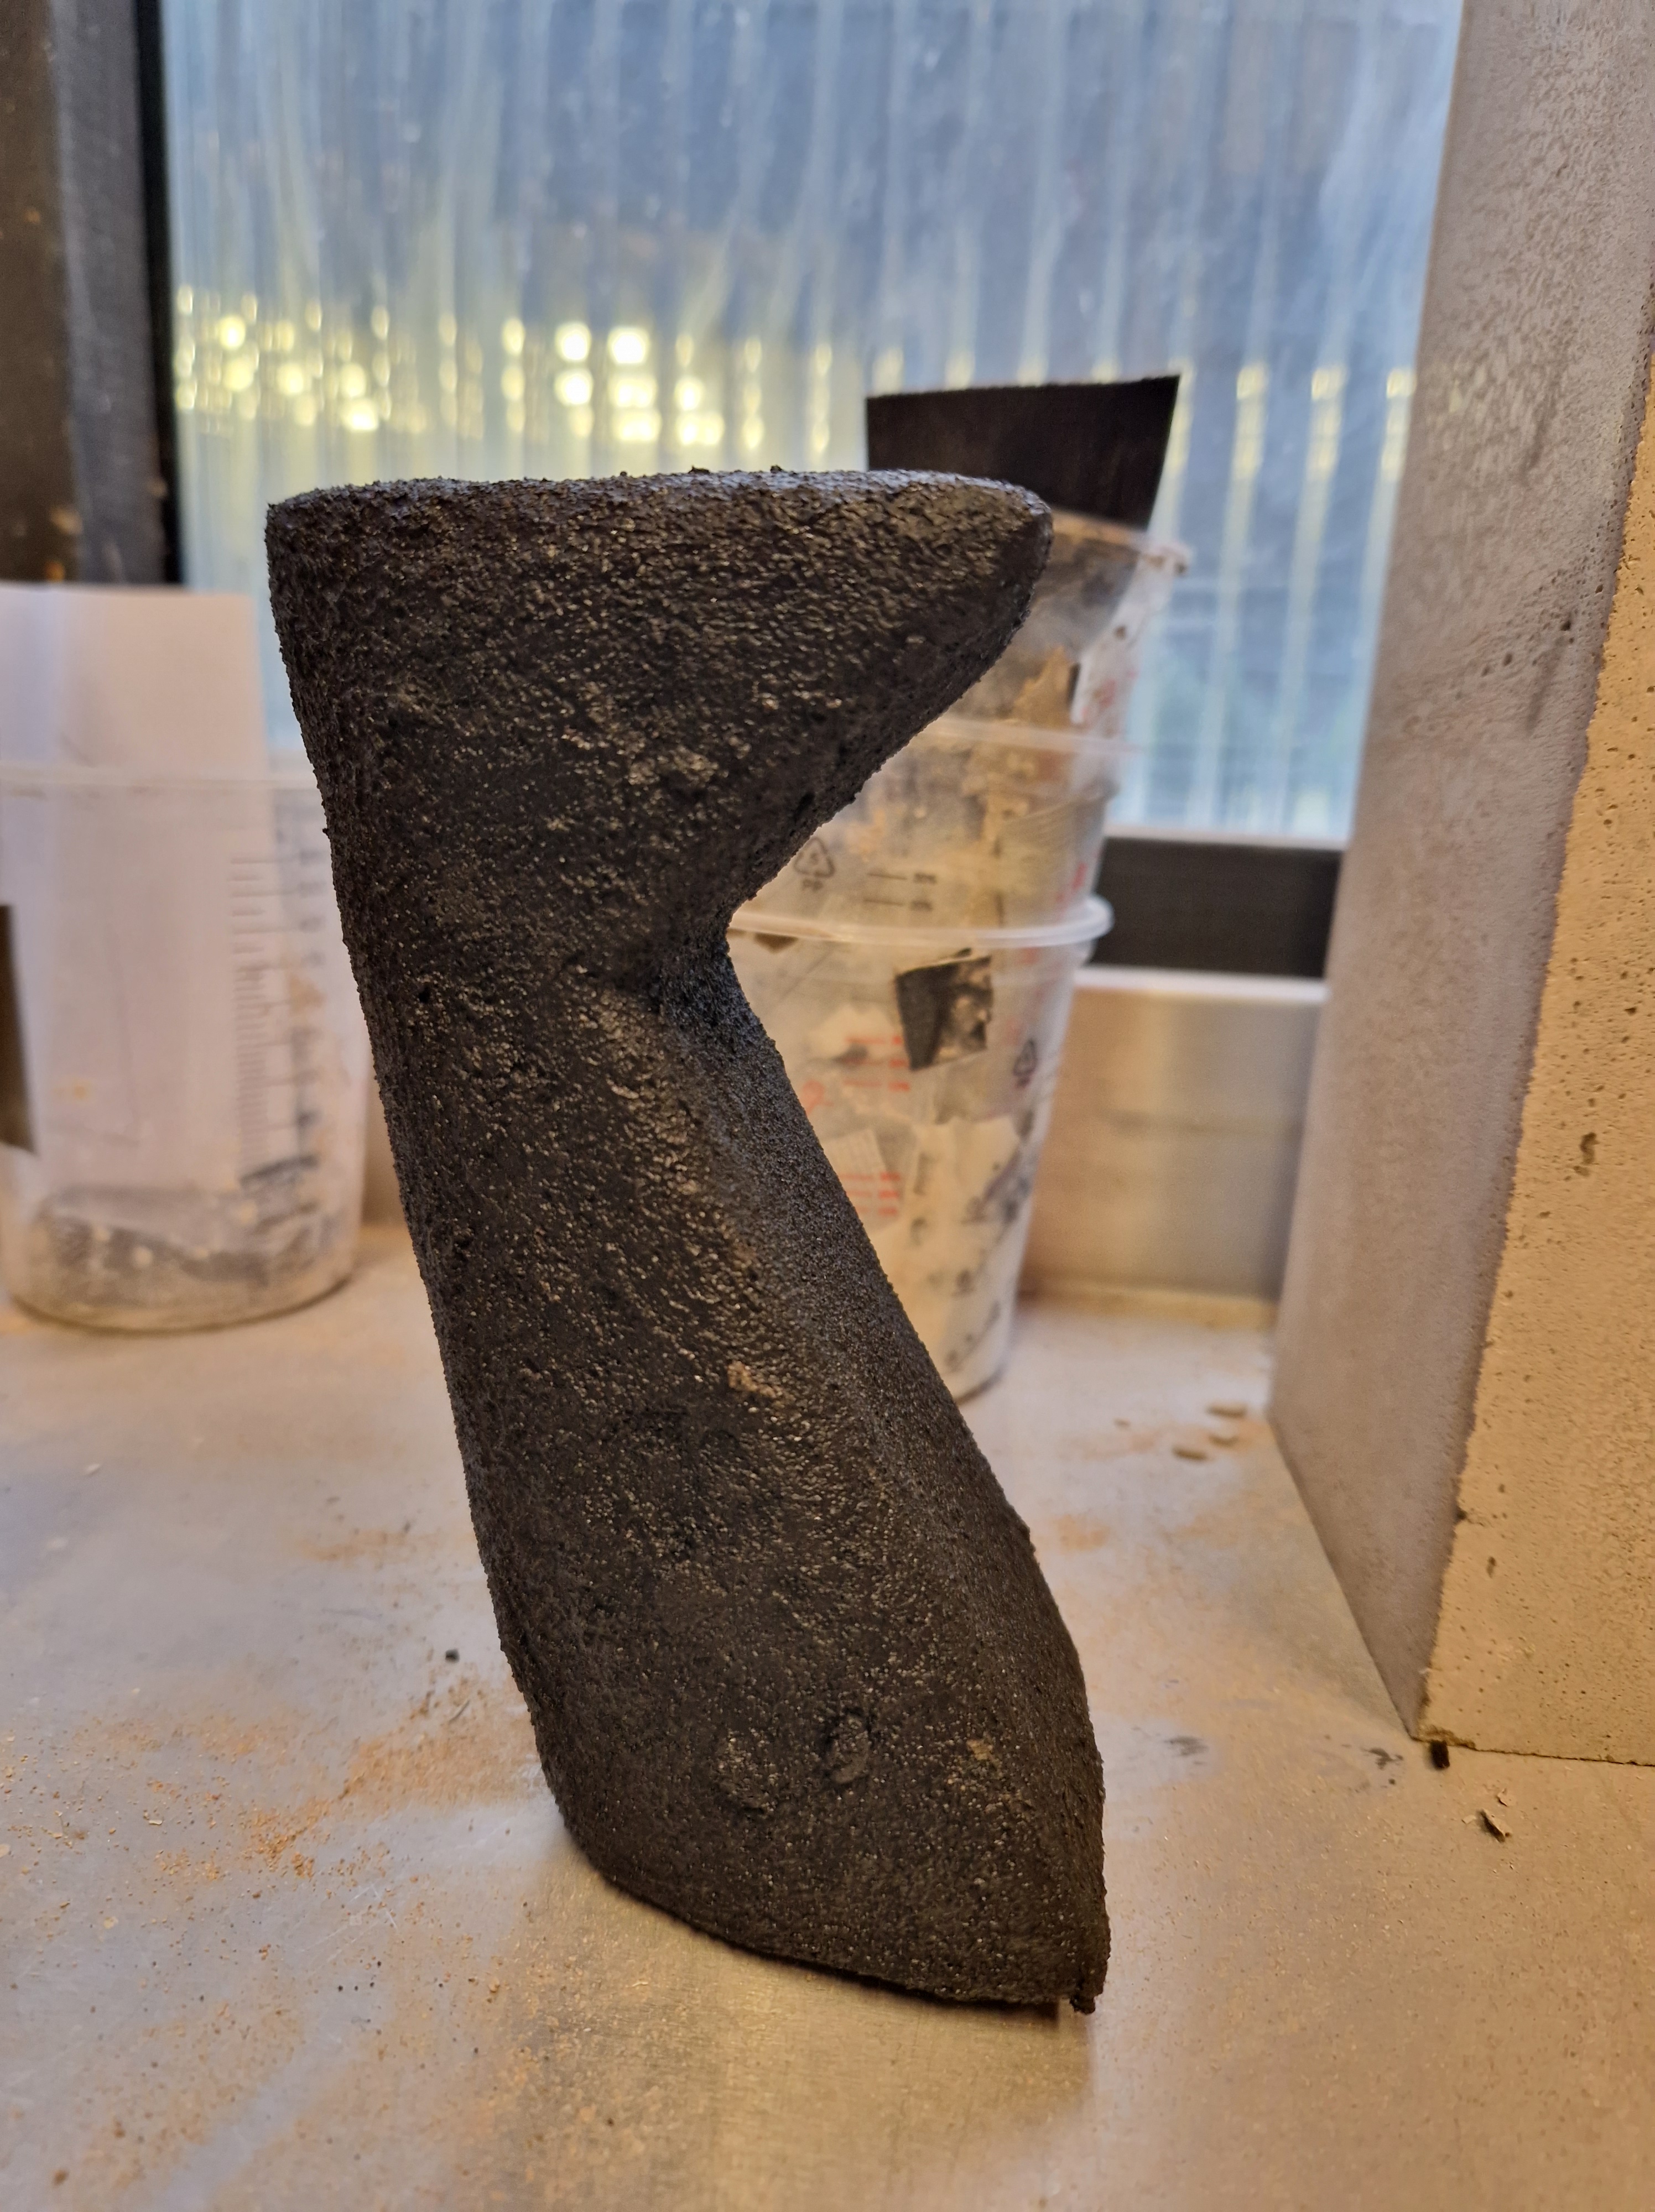
We experimented with adding crushed charcoal to the cement to give it the desired colour – dark grey and applied the mix to one part of the sculpture.
We also prepared a large part of the sculpture for the next session – covered it with PVA glue and drilled holes. During the next session, we plan to cover it with cement.
I also made a concrete swatch with an additional amount of charcoal to see how the colour is affected by it.
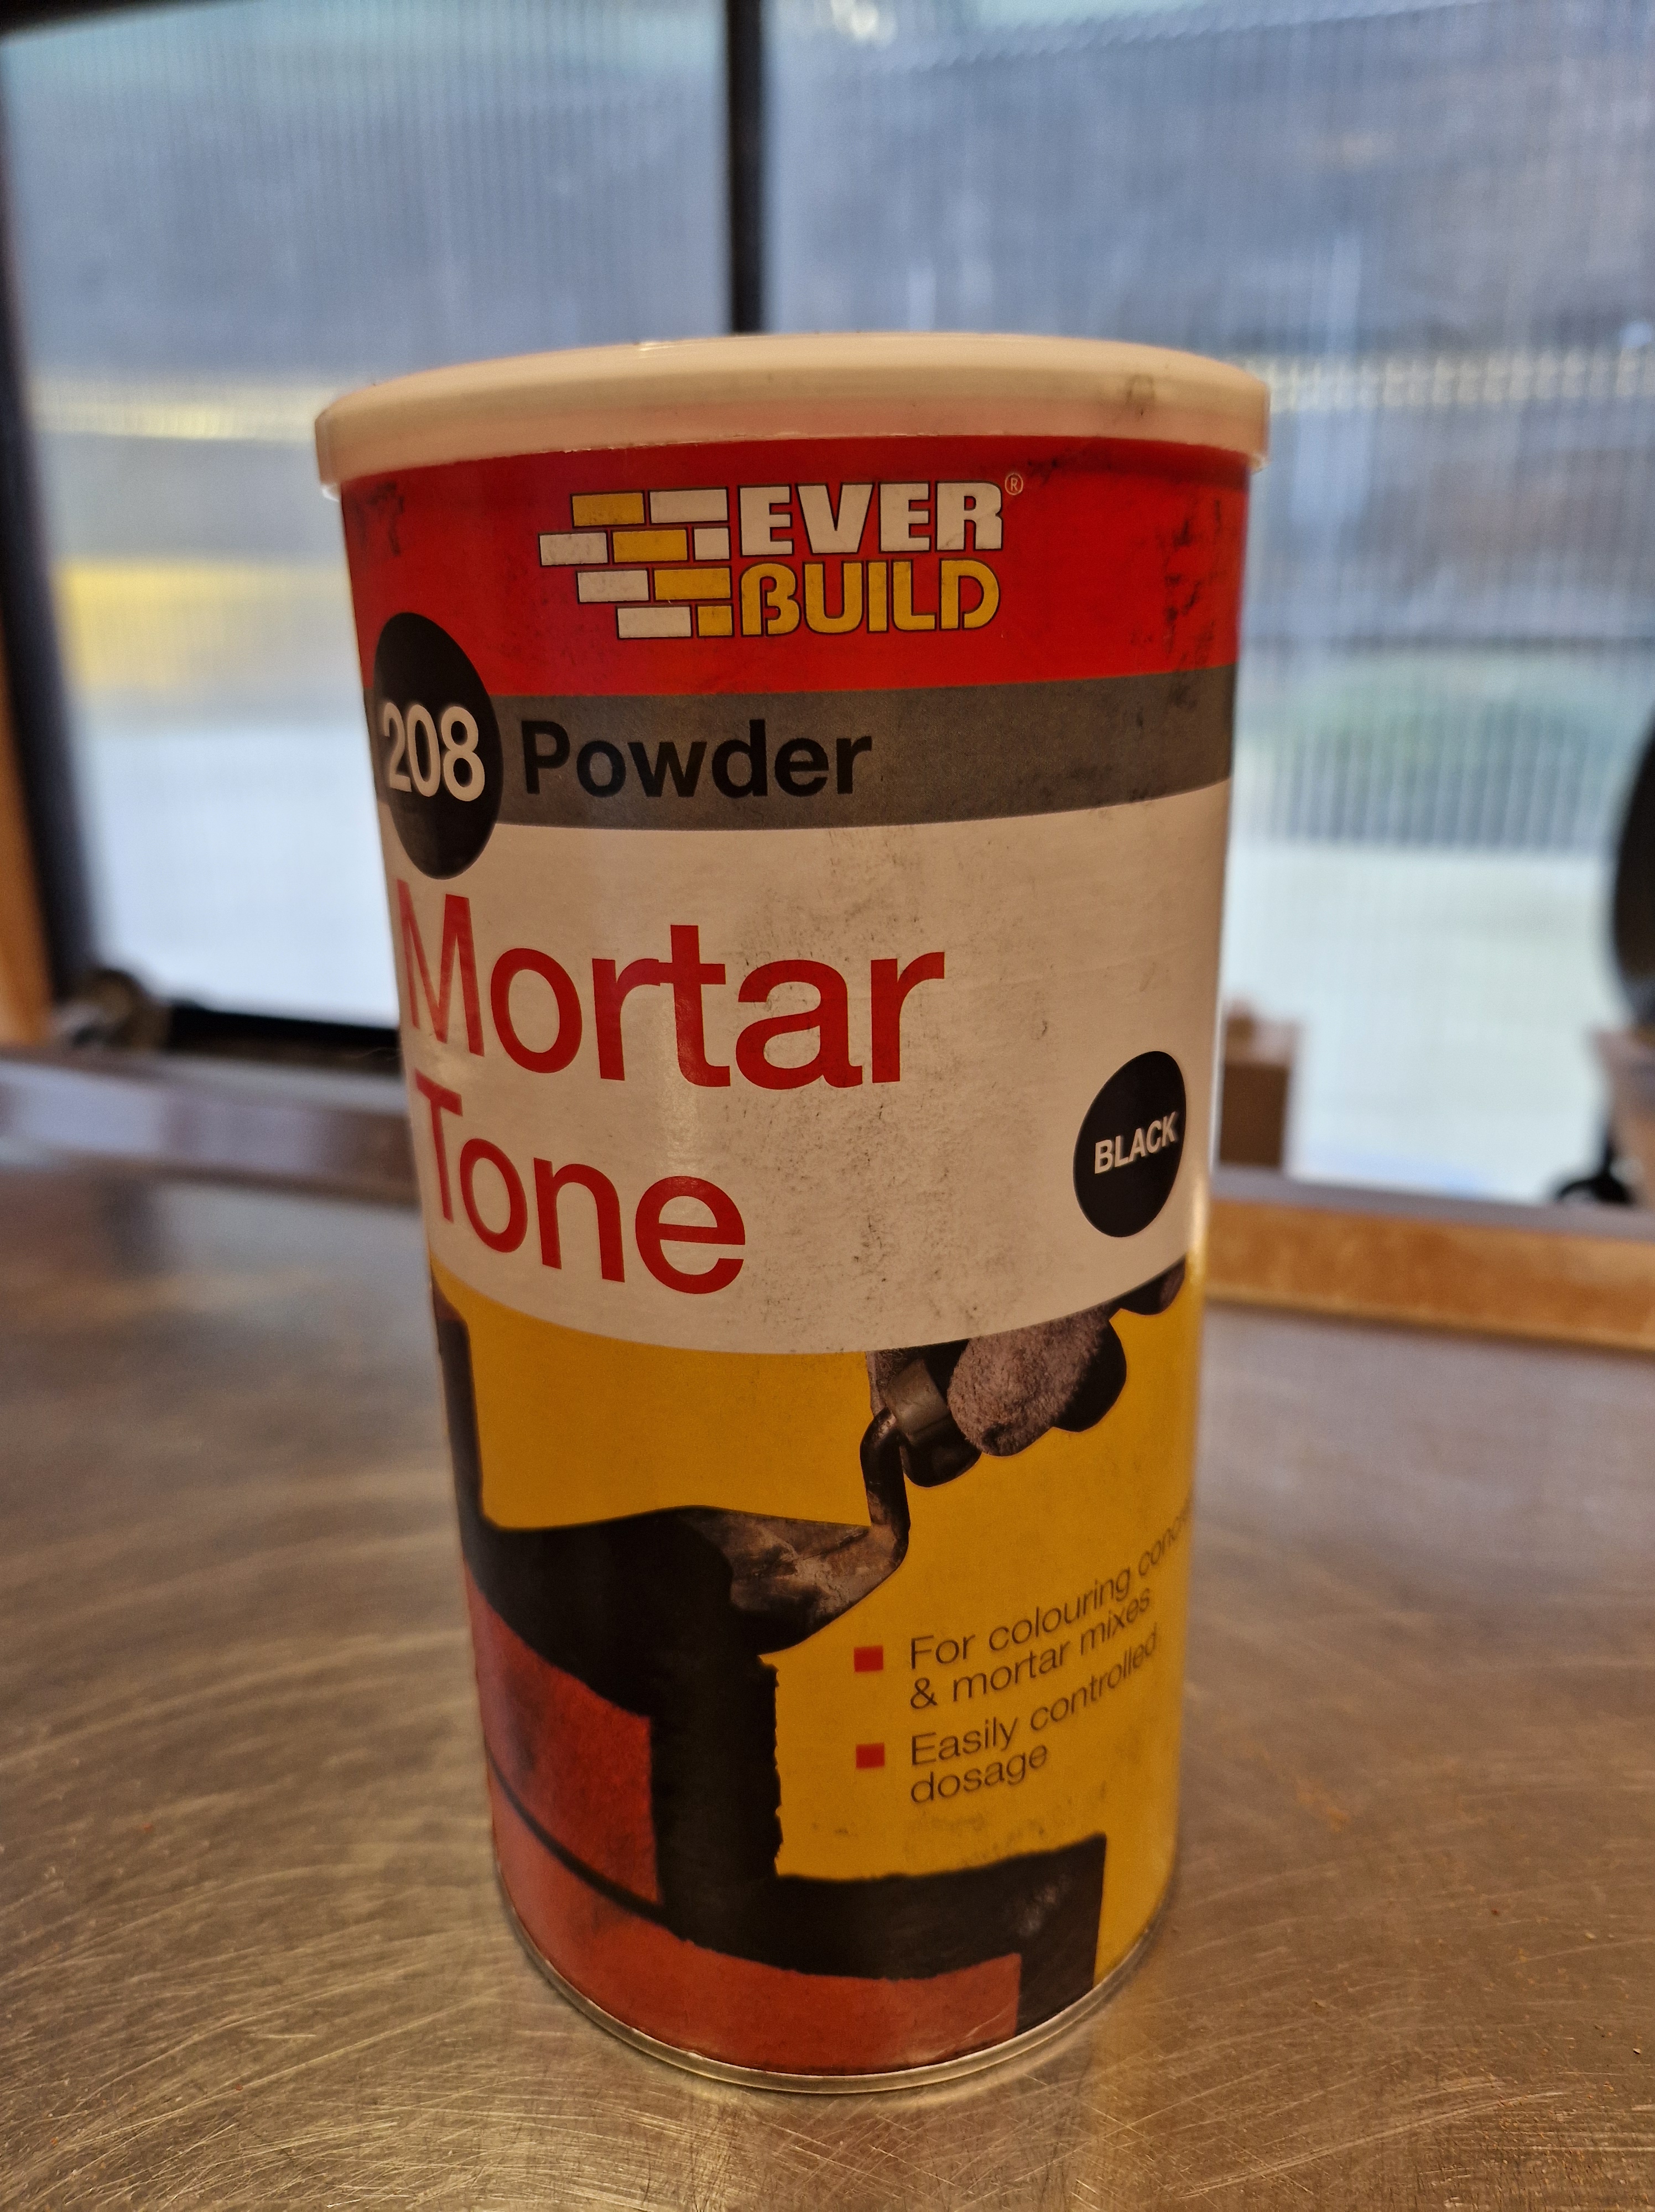
Additionally, I ordered a black concrete colourant aiming to test its possibilities during the next session.
SWATCH WITH EXTRA CHARCOAL (WET AND DRY)
REFLECTIONS: I am being reassured about the value of good planning, testing and experimenting. Every time I work and troubleshoot I learn something new, progress and accelerate my project. This couldn't be done last minute, skipping the testing faze is not an option when working on a project.
A PARTICULAR REALITY
REFLECTIONS: Great session discussing how we feel in the university environment and how things could improve.
FRIDAY
LECTURE WITH DUNCAN
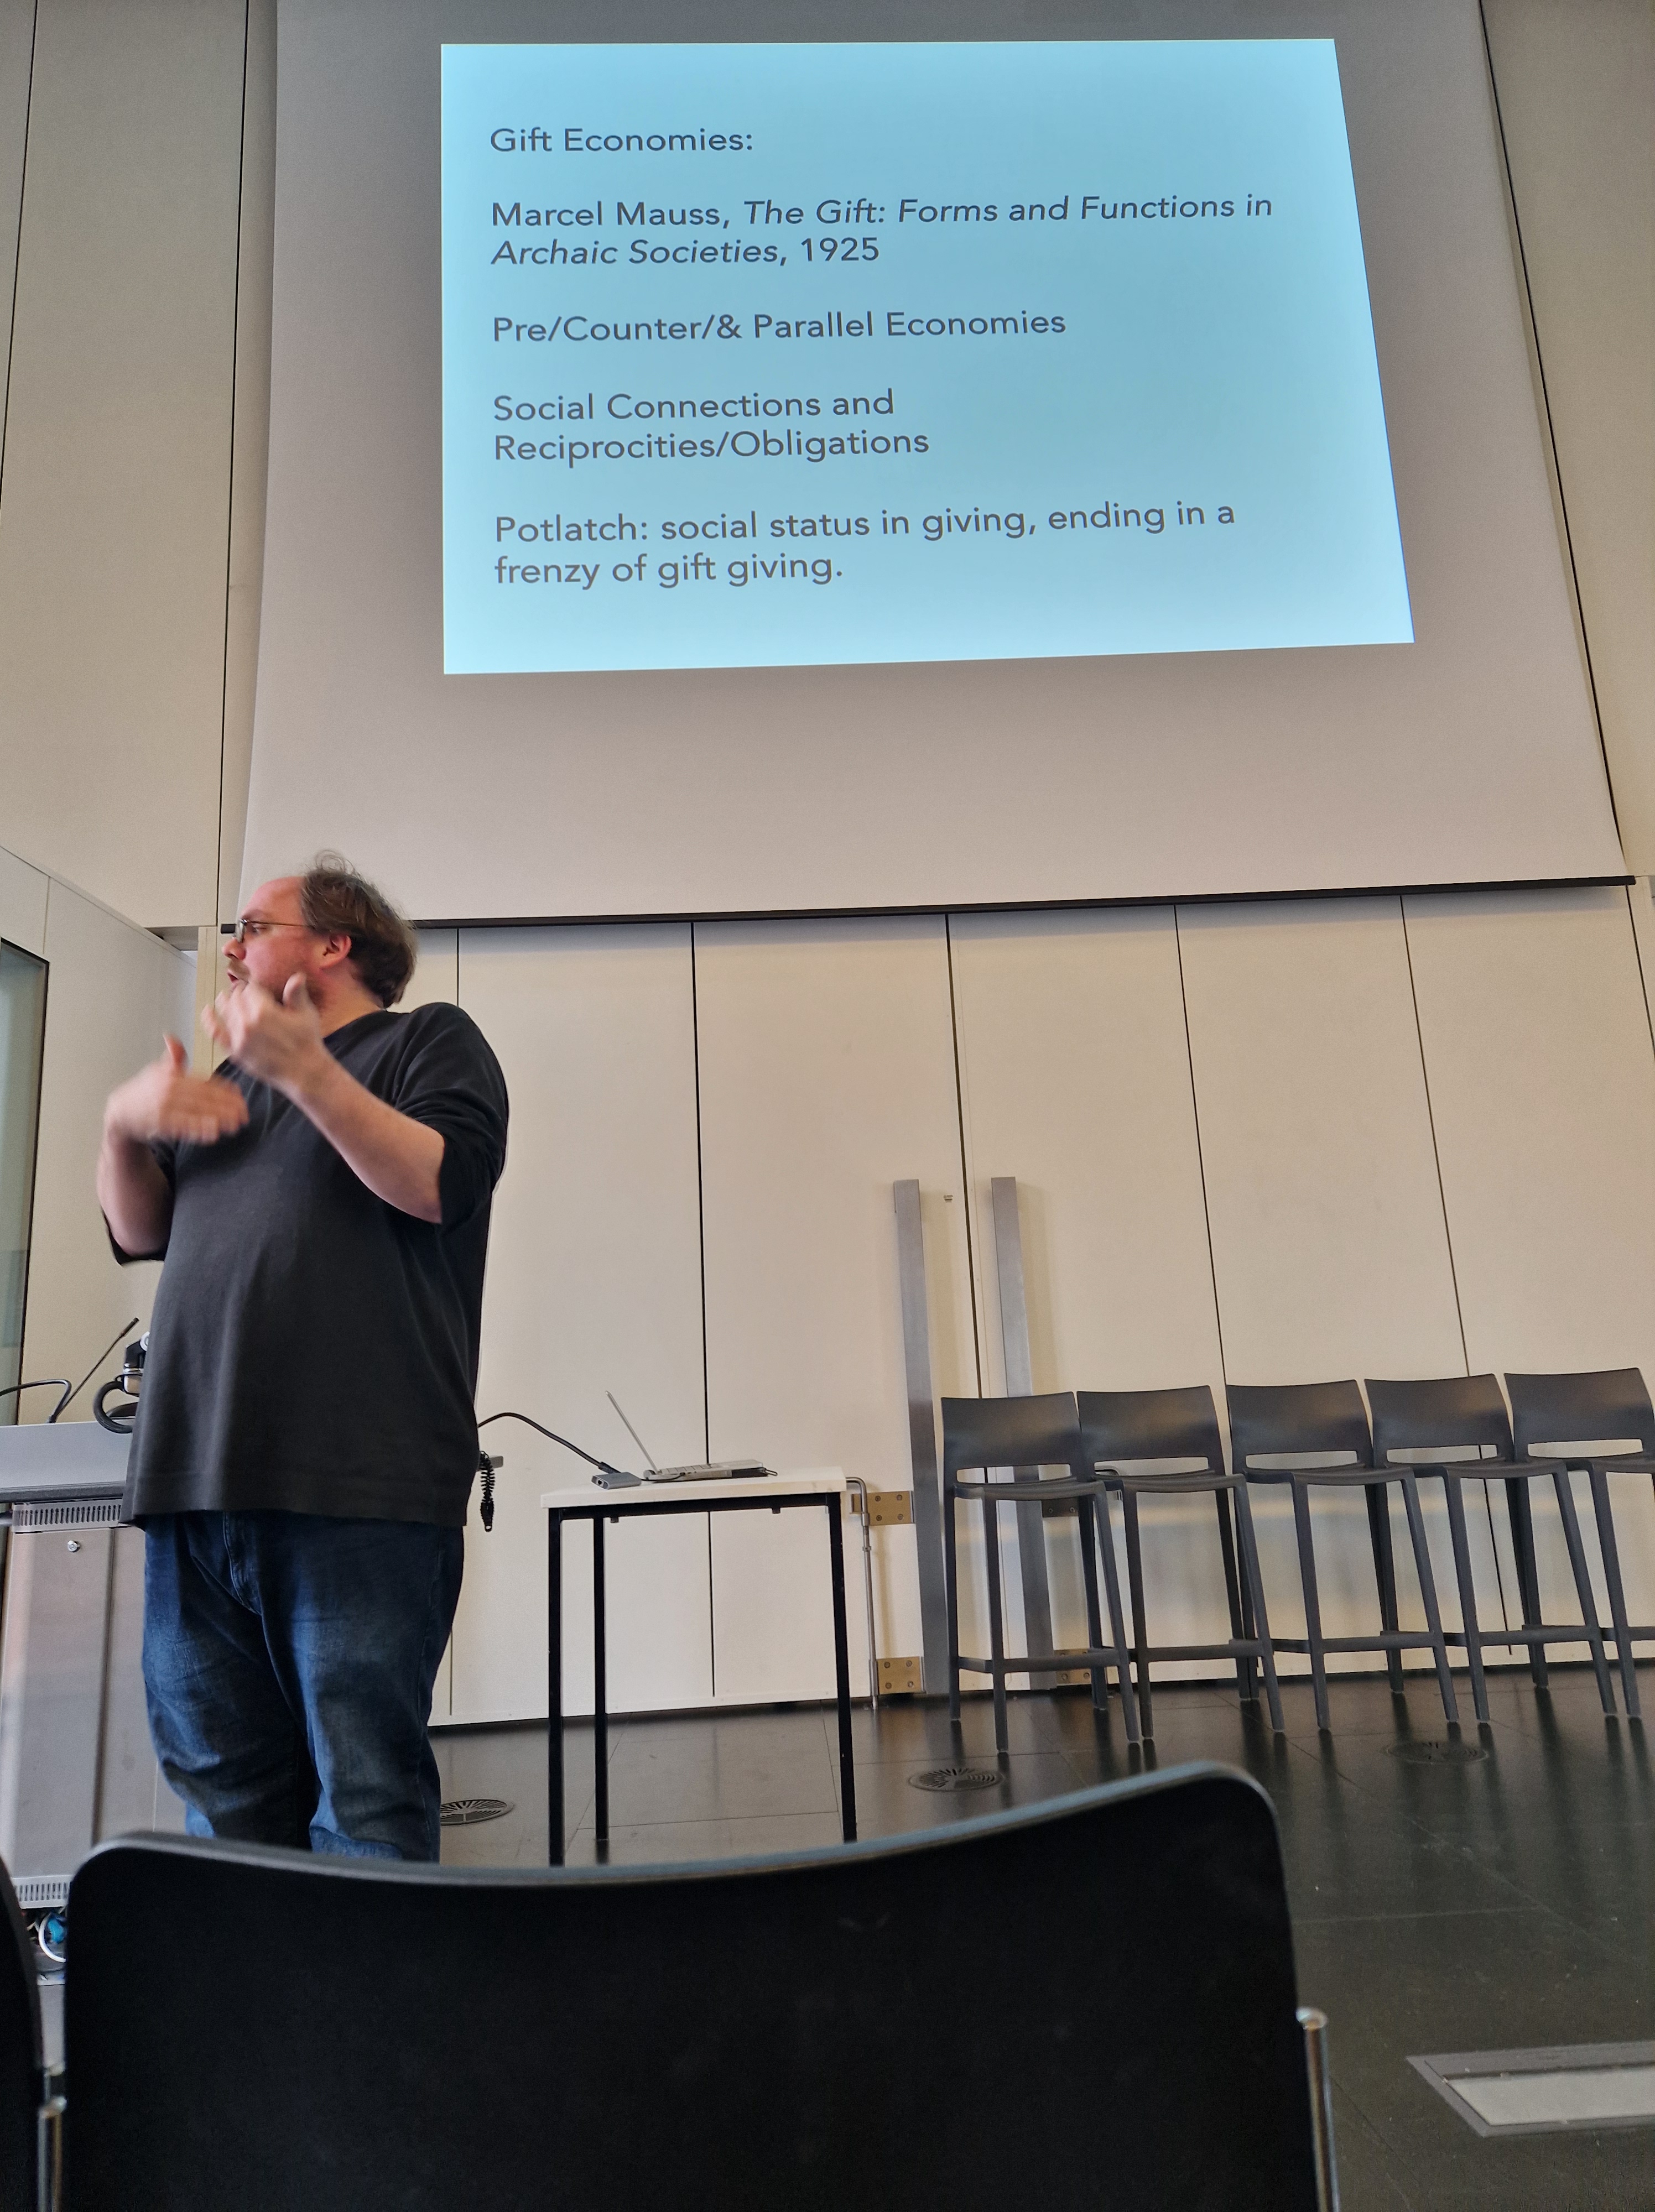
REFLECTIONS: Amazing lecture from Duncan, I especially remember the part in which he discusses gift economy - note this for further research.
TESTING PAPER WORKSHOP – DIGITAL MEDIA BAR
PORTFOLIO PLAN
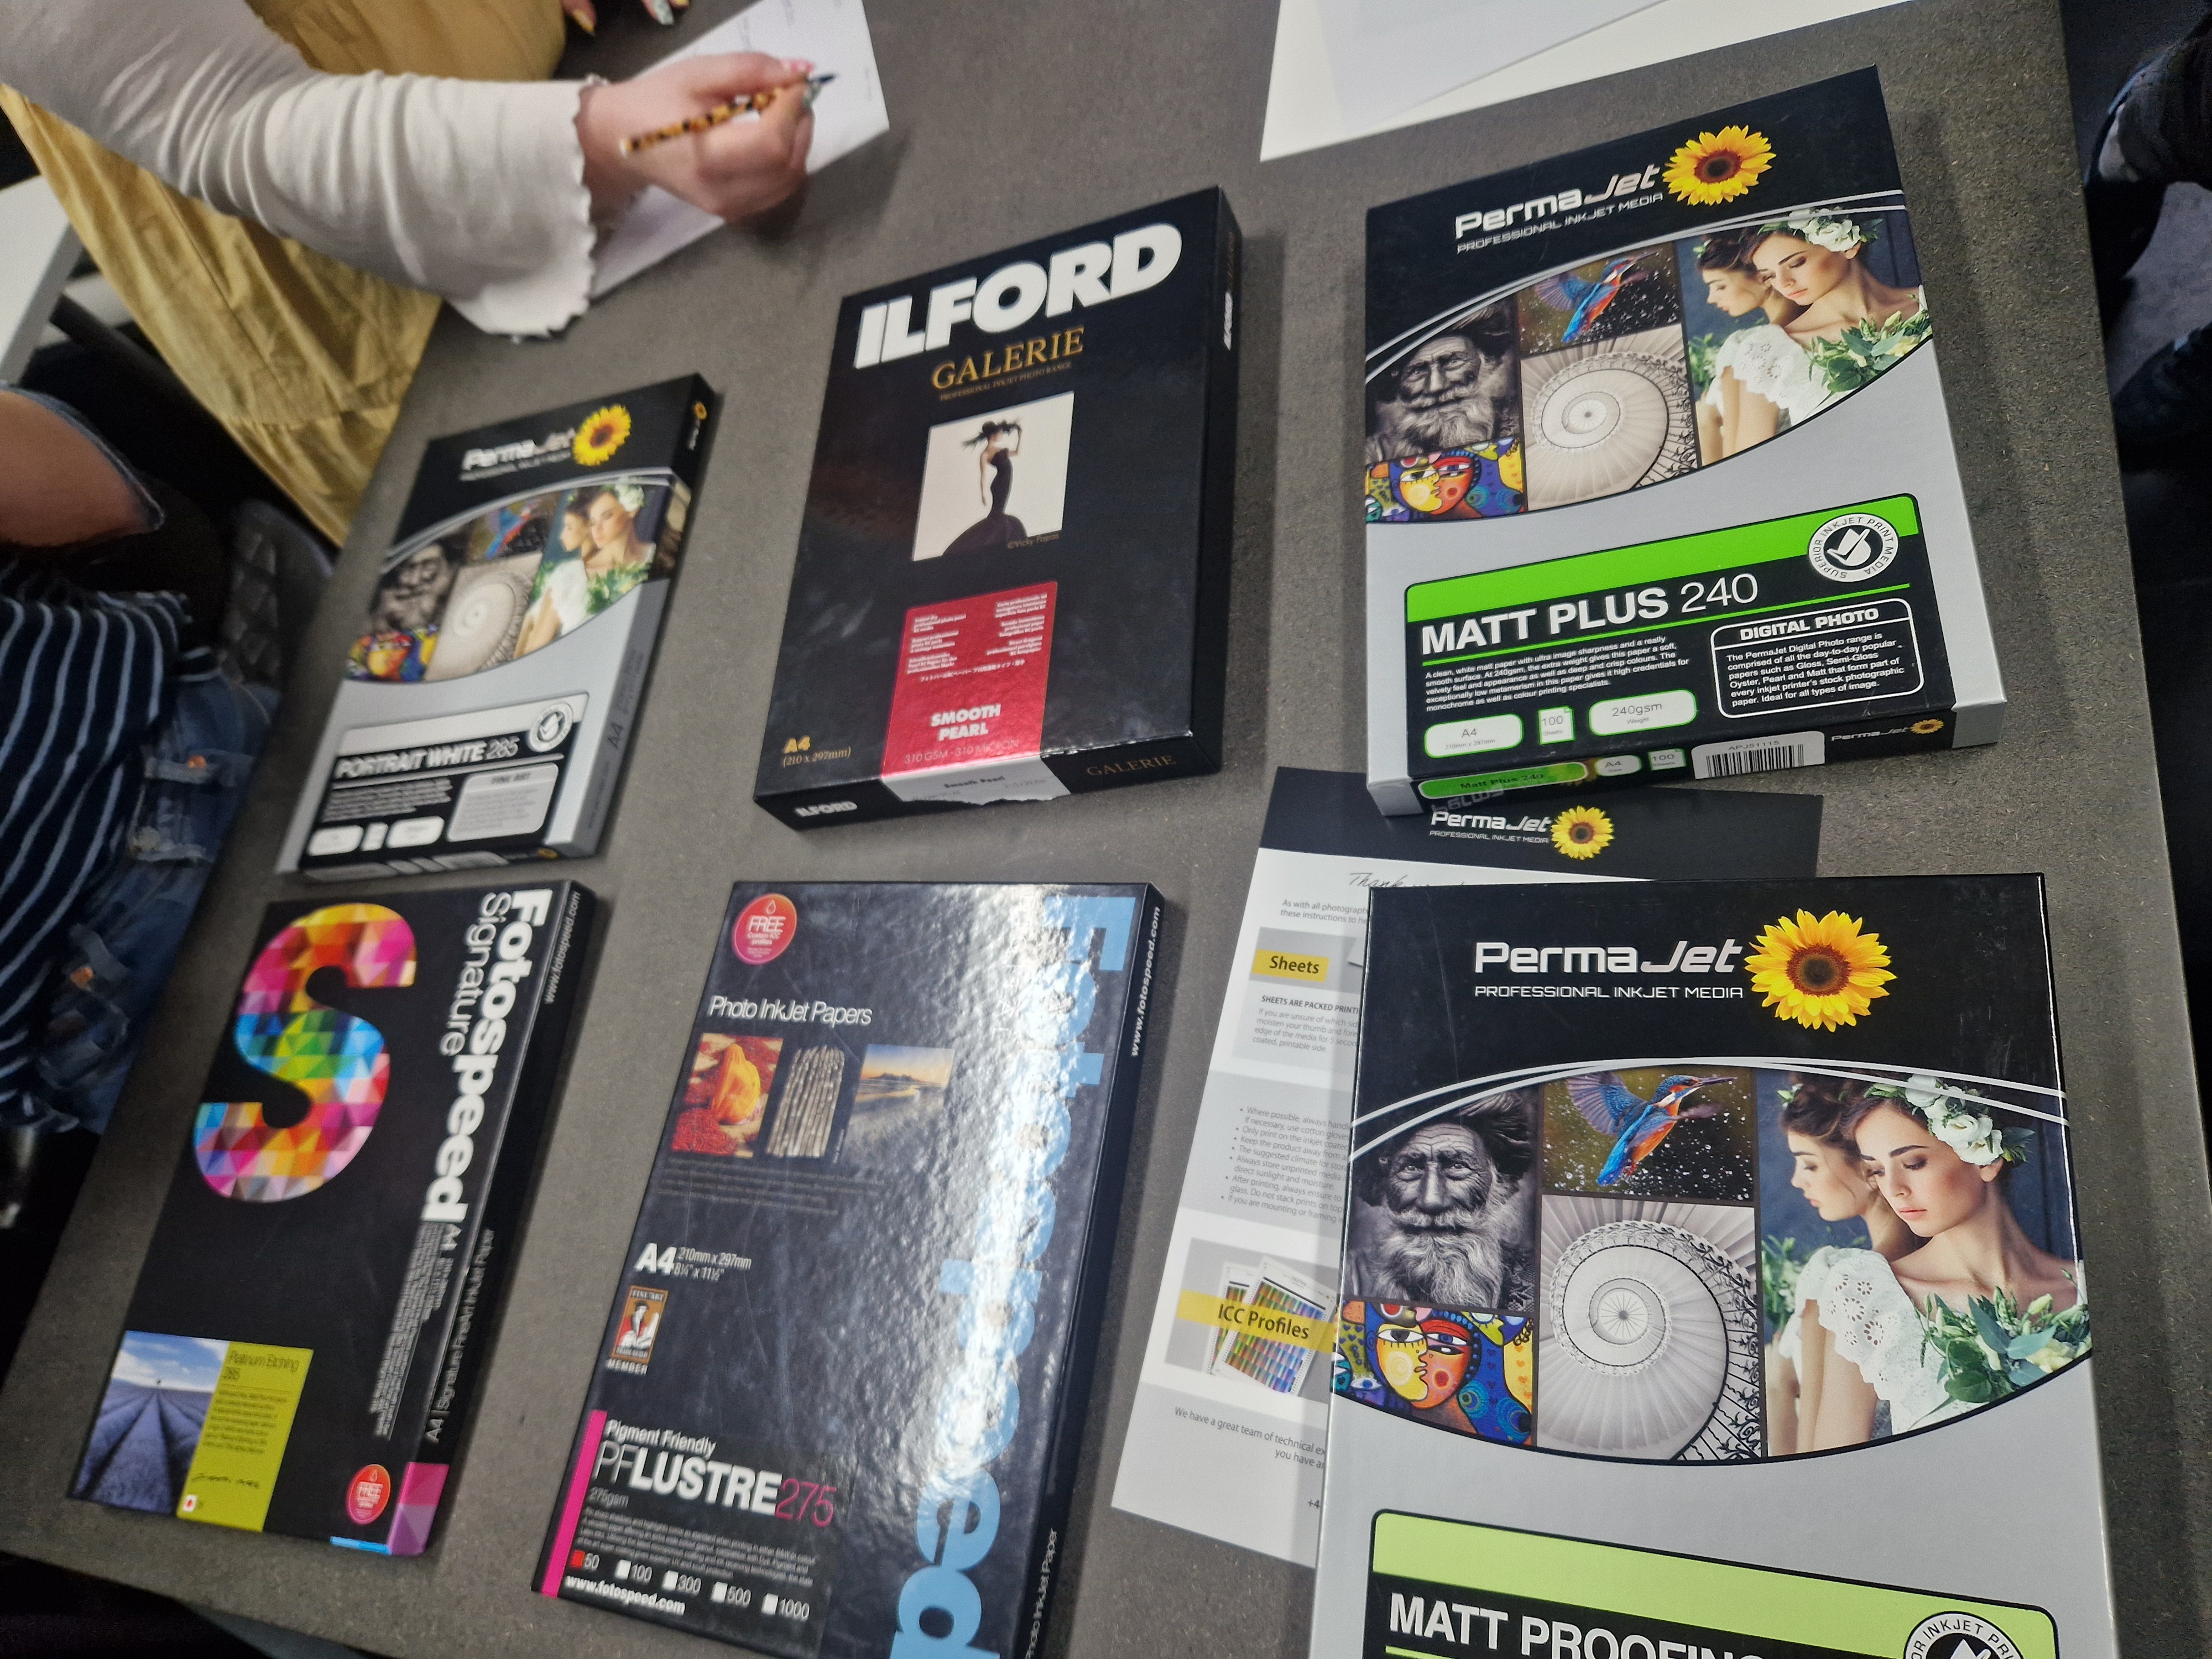
PRINTING IMAGE ON DIFFERENT PAPERS
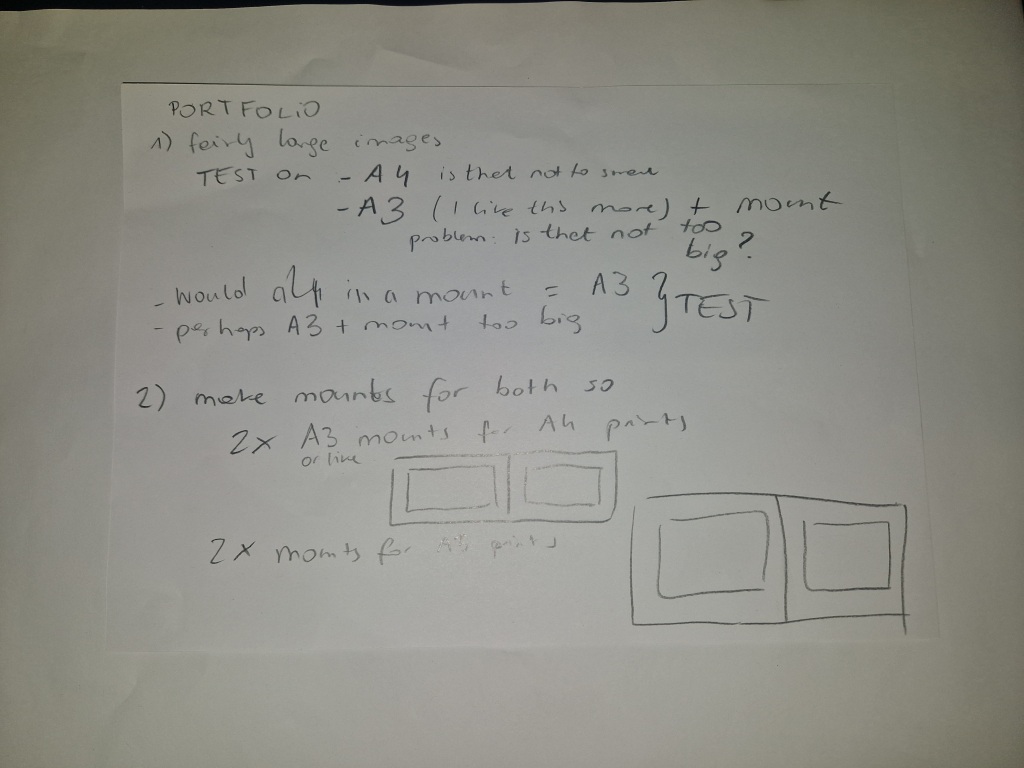
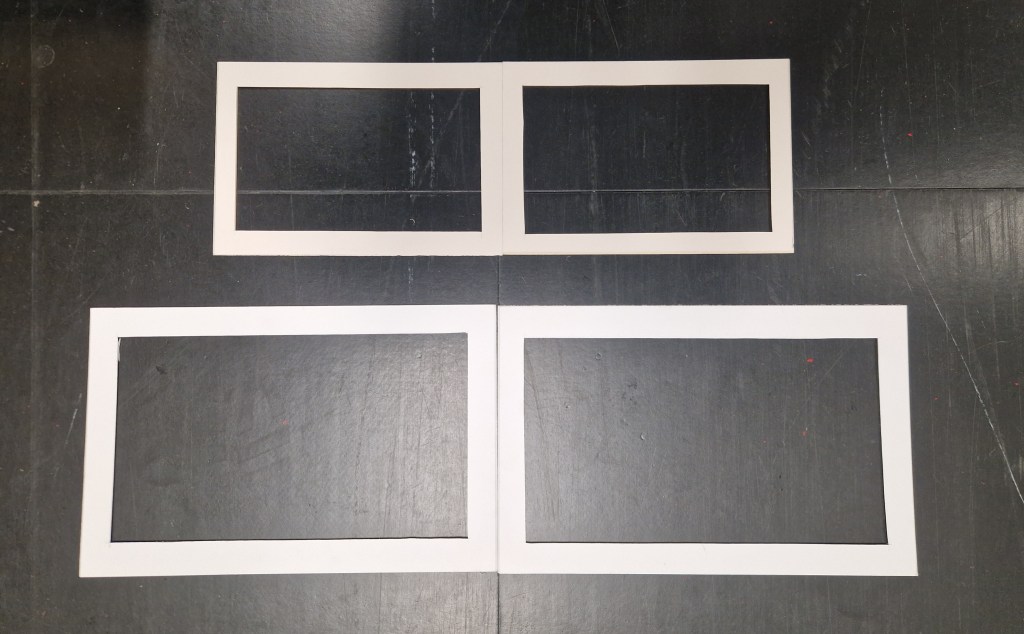
MOCKUP OF MOUNDS FOR MY PORTFOLIO
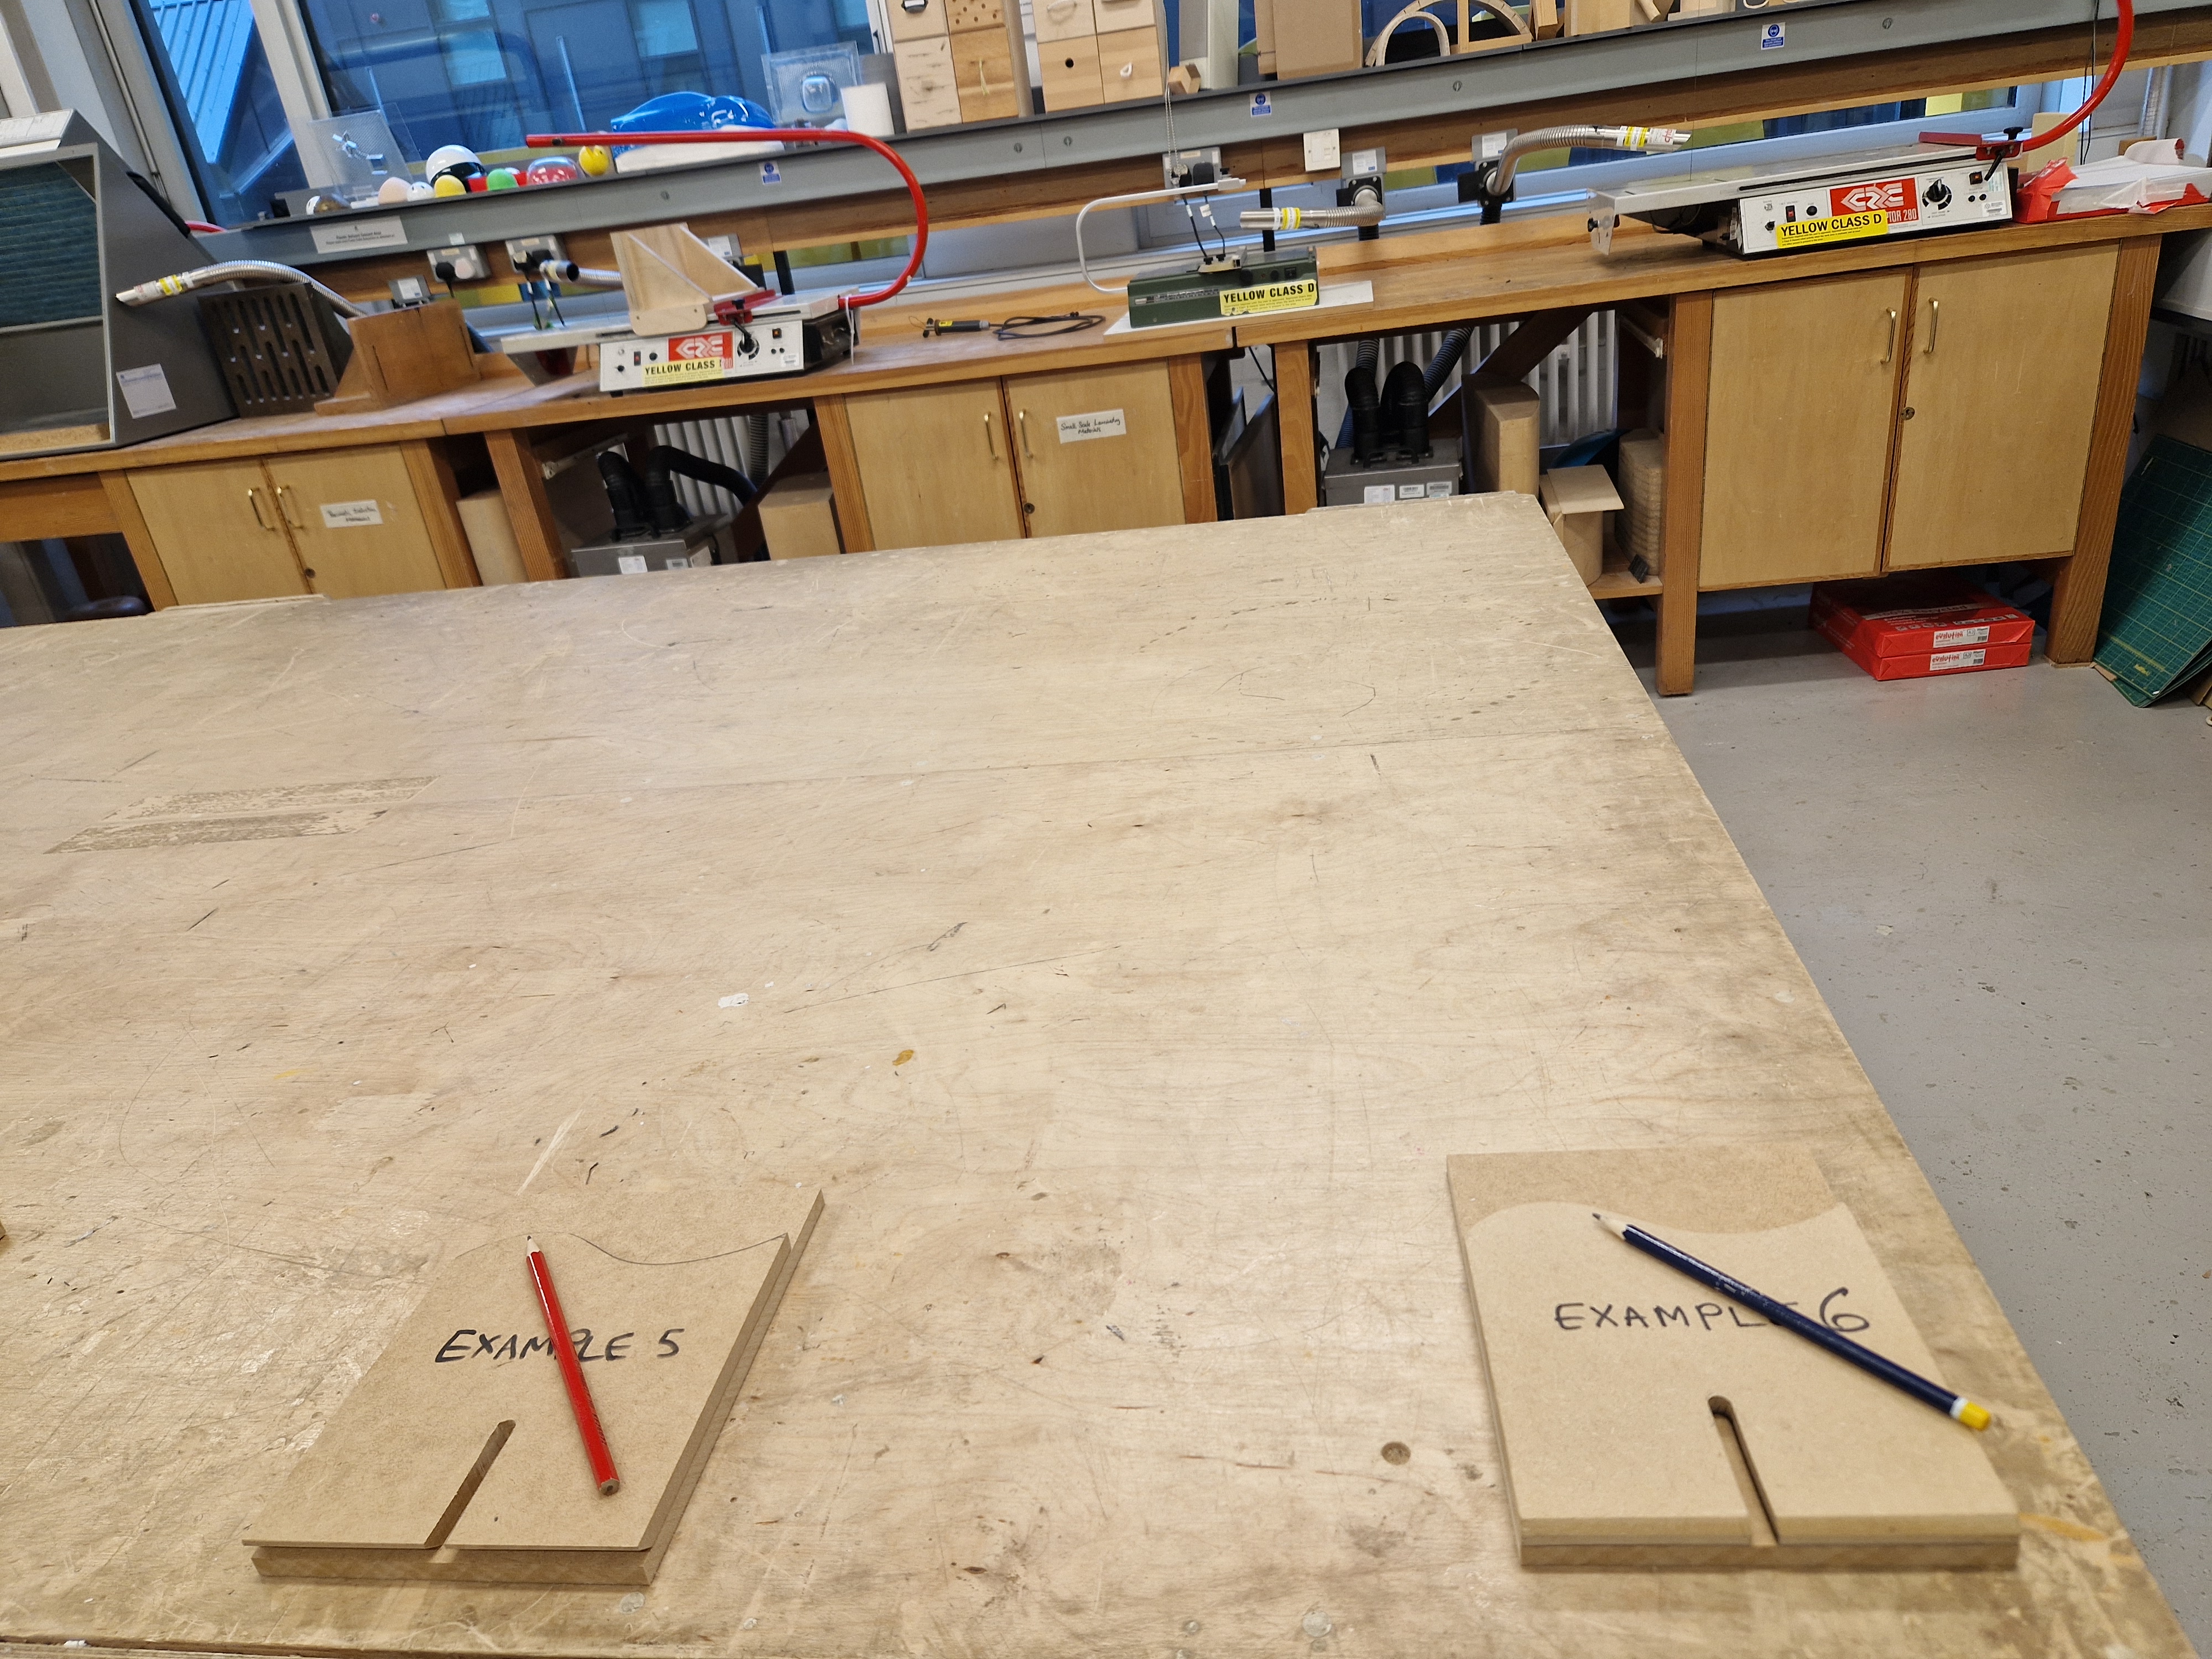
After the workshop, I picked up some scraps from frame making and cut out some basic/example mounds to test the idea for the portfolio presentation.
SATURDAY
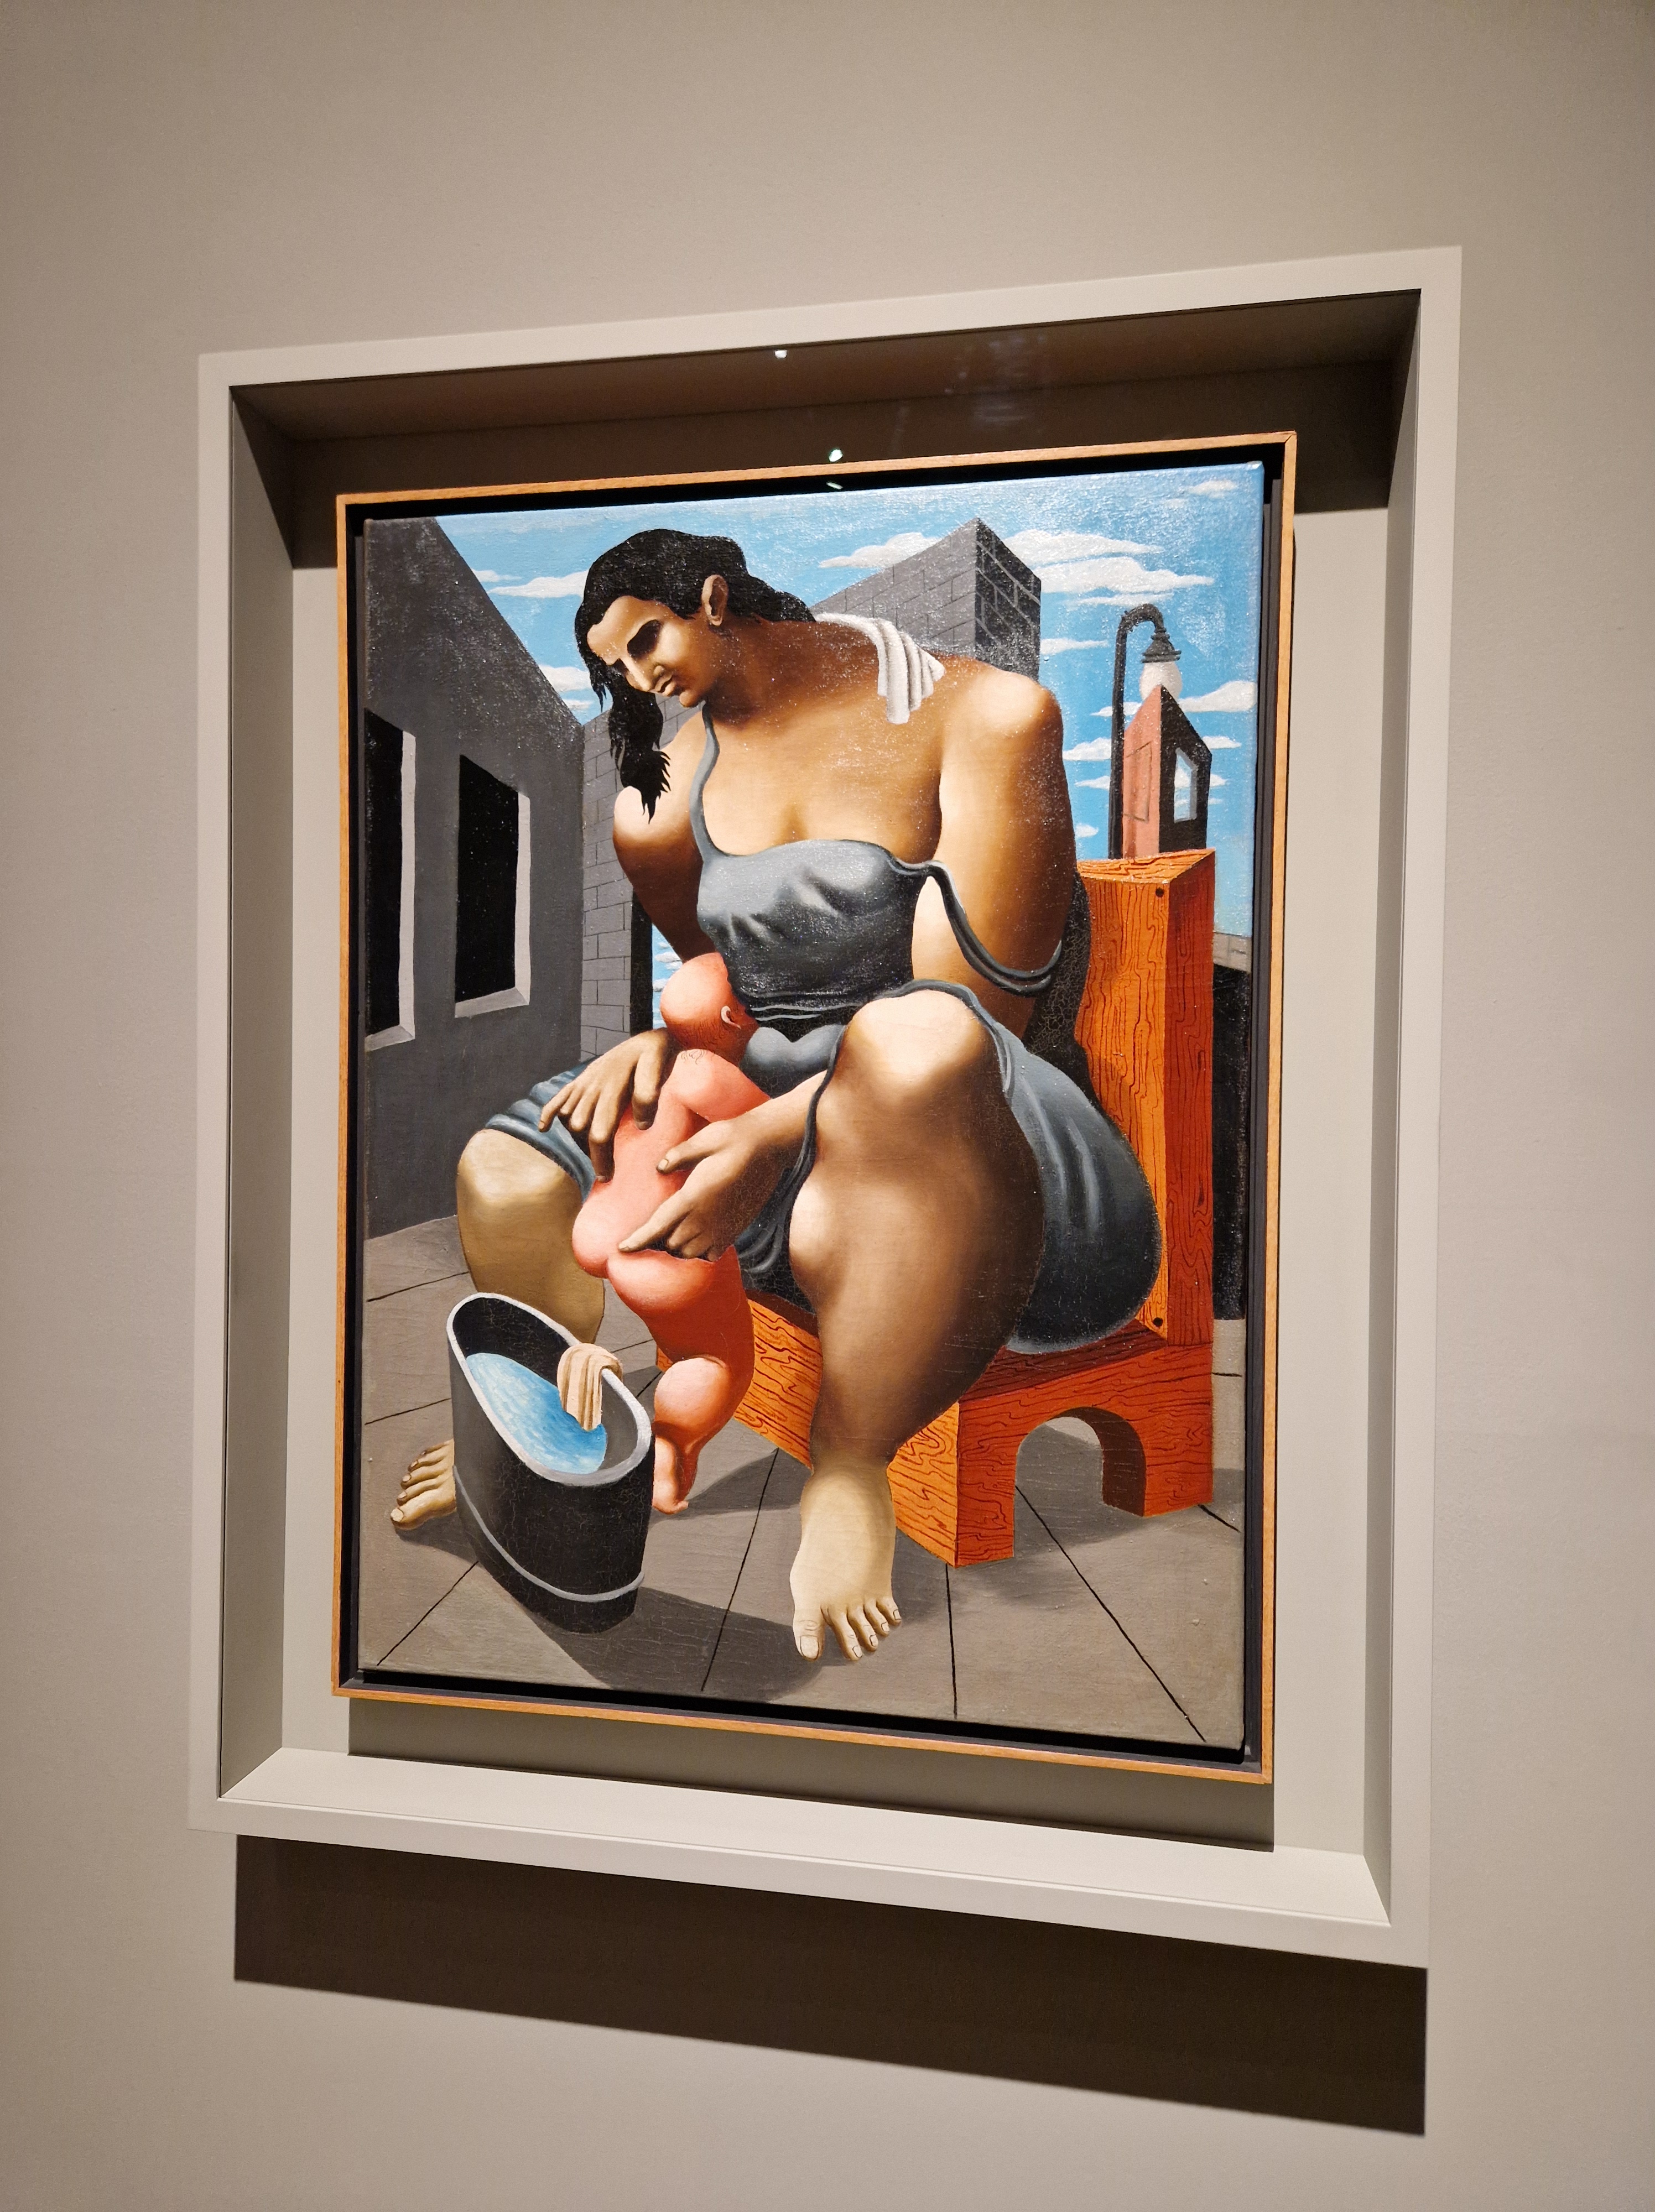
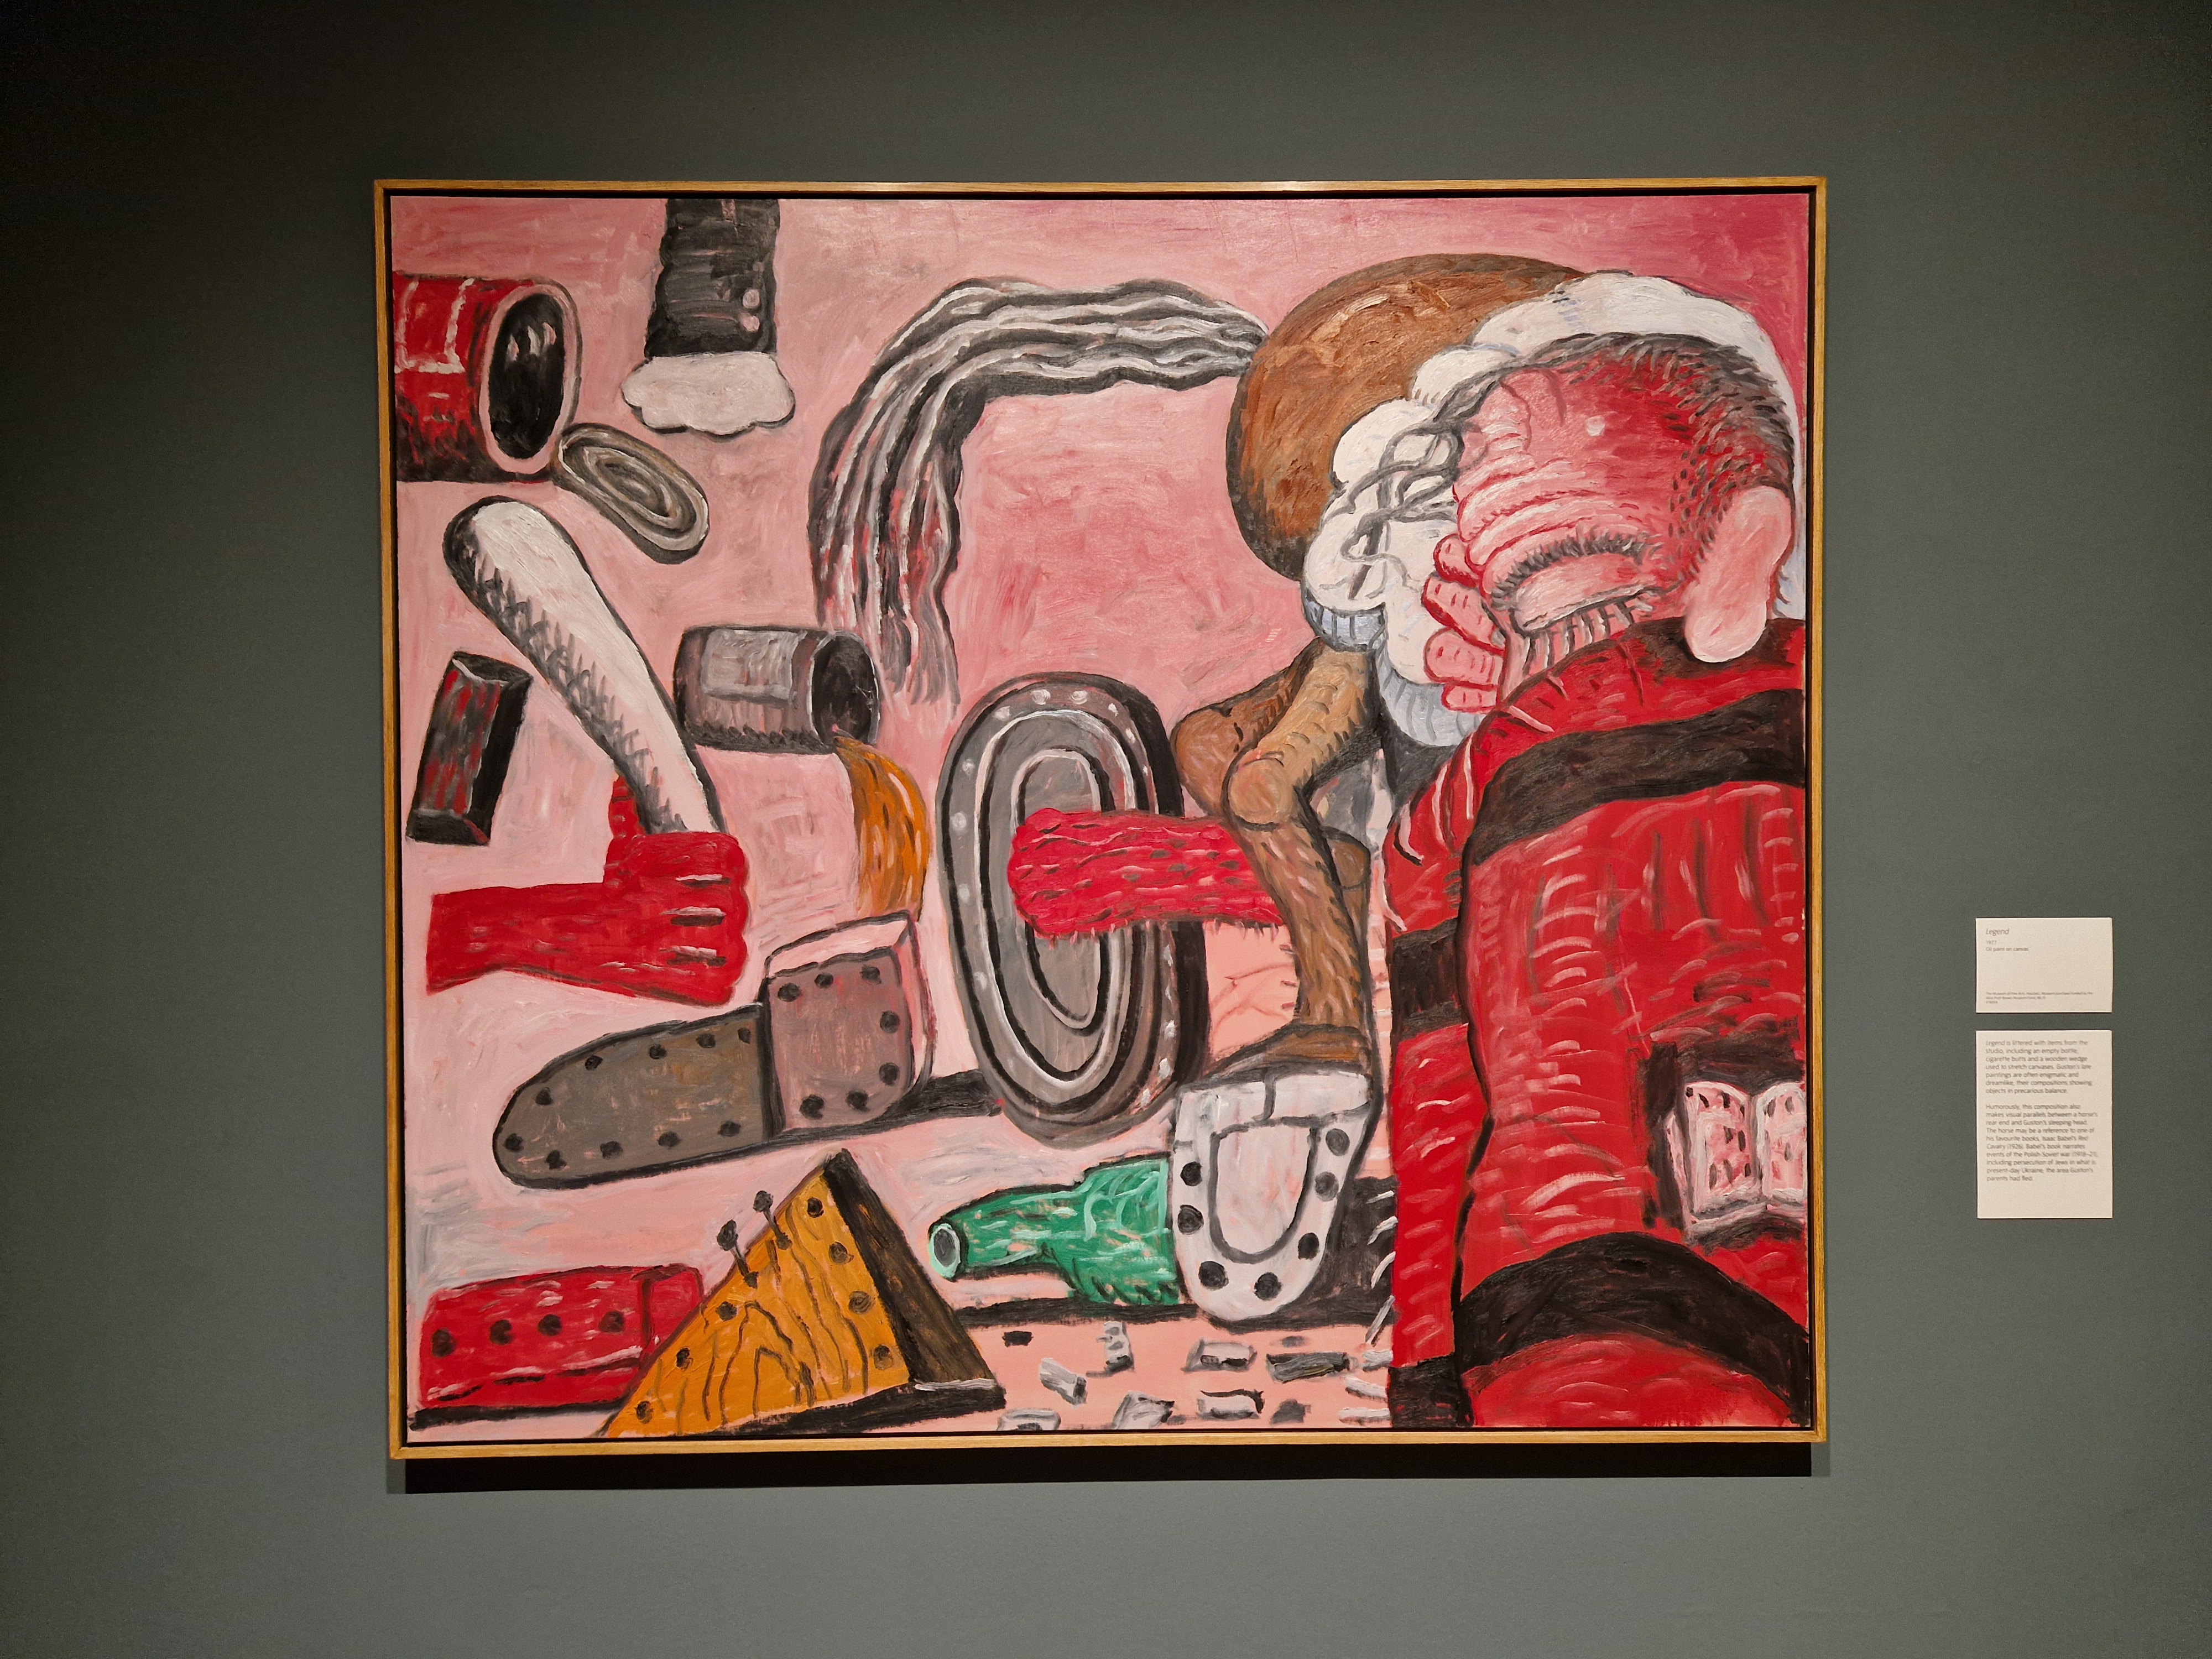
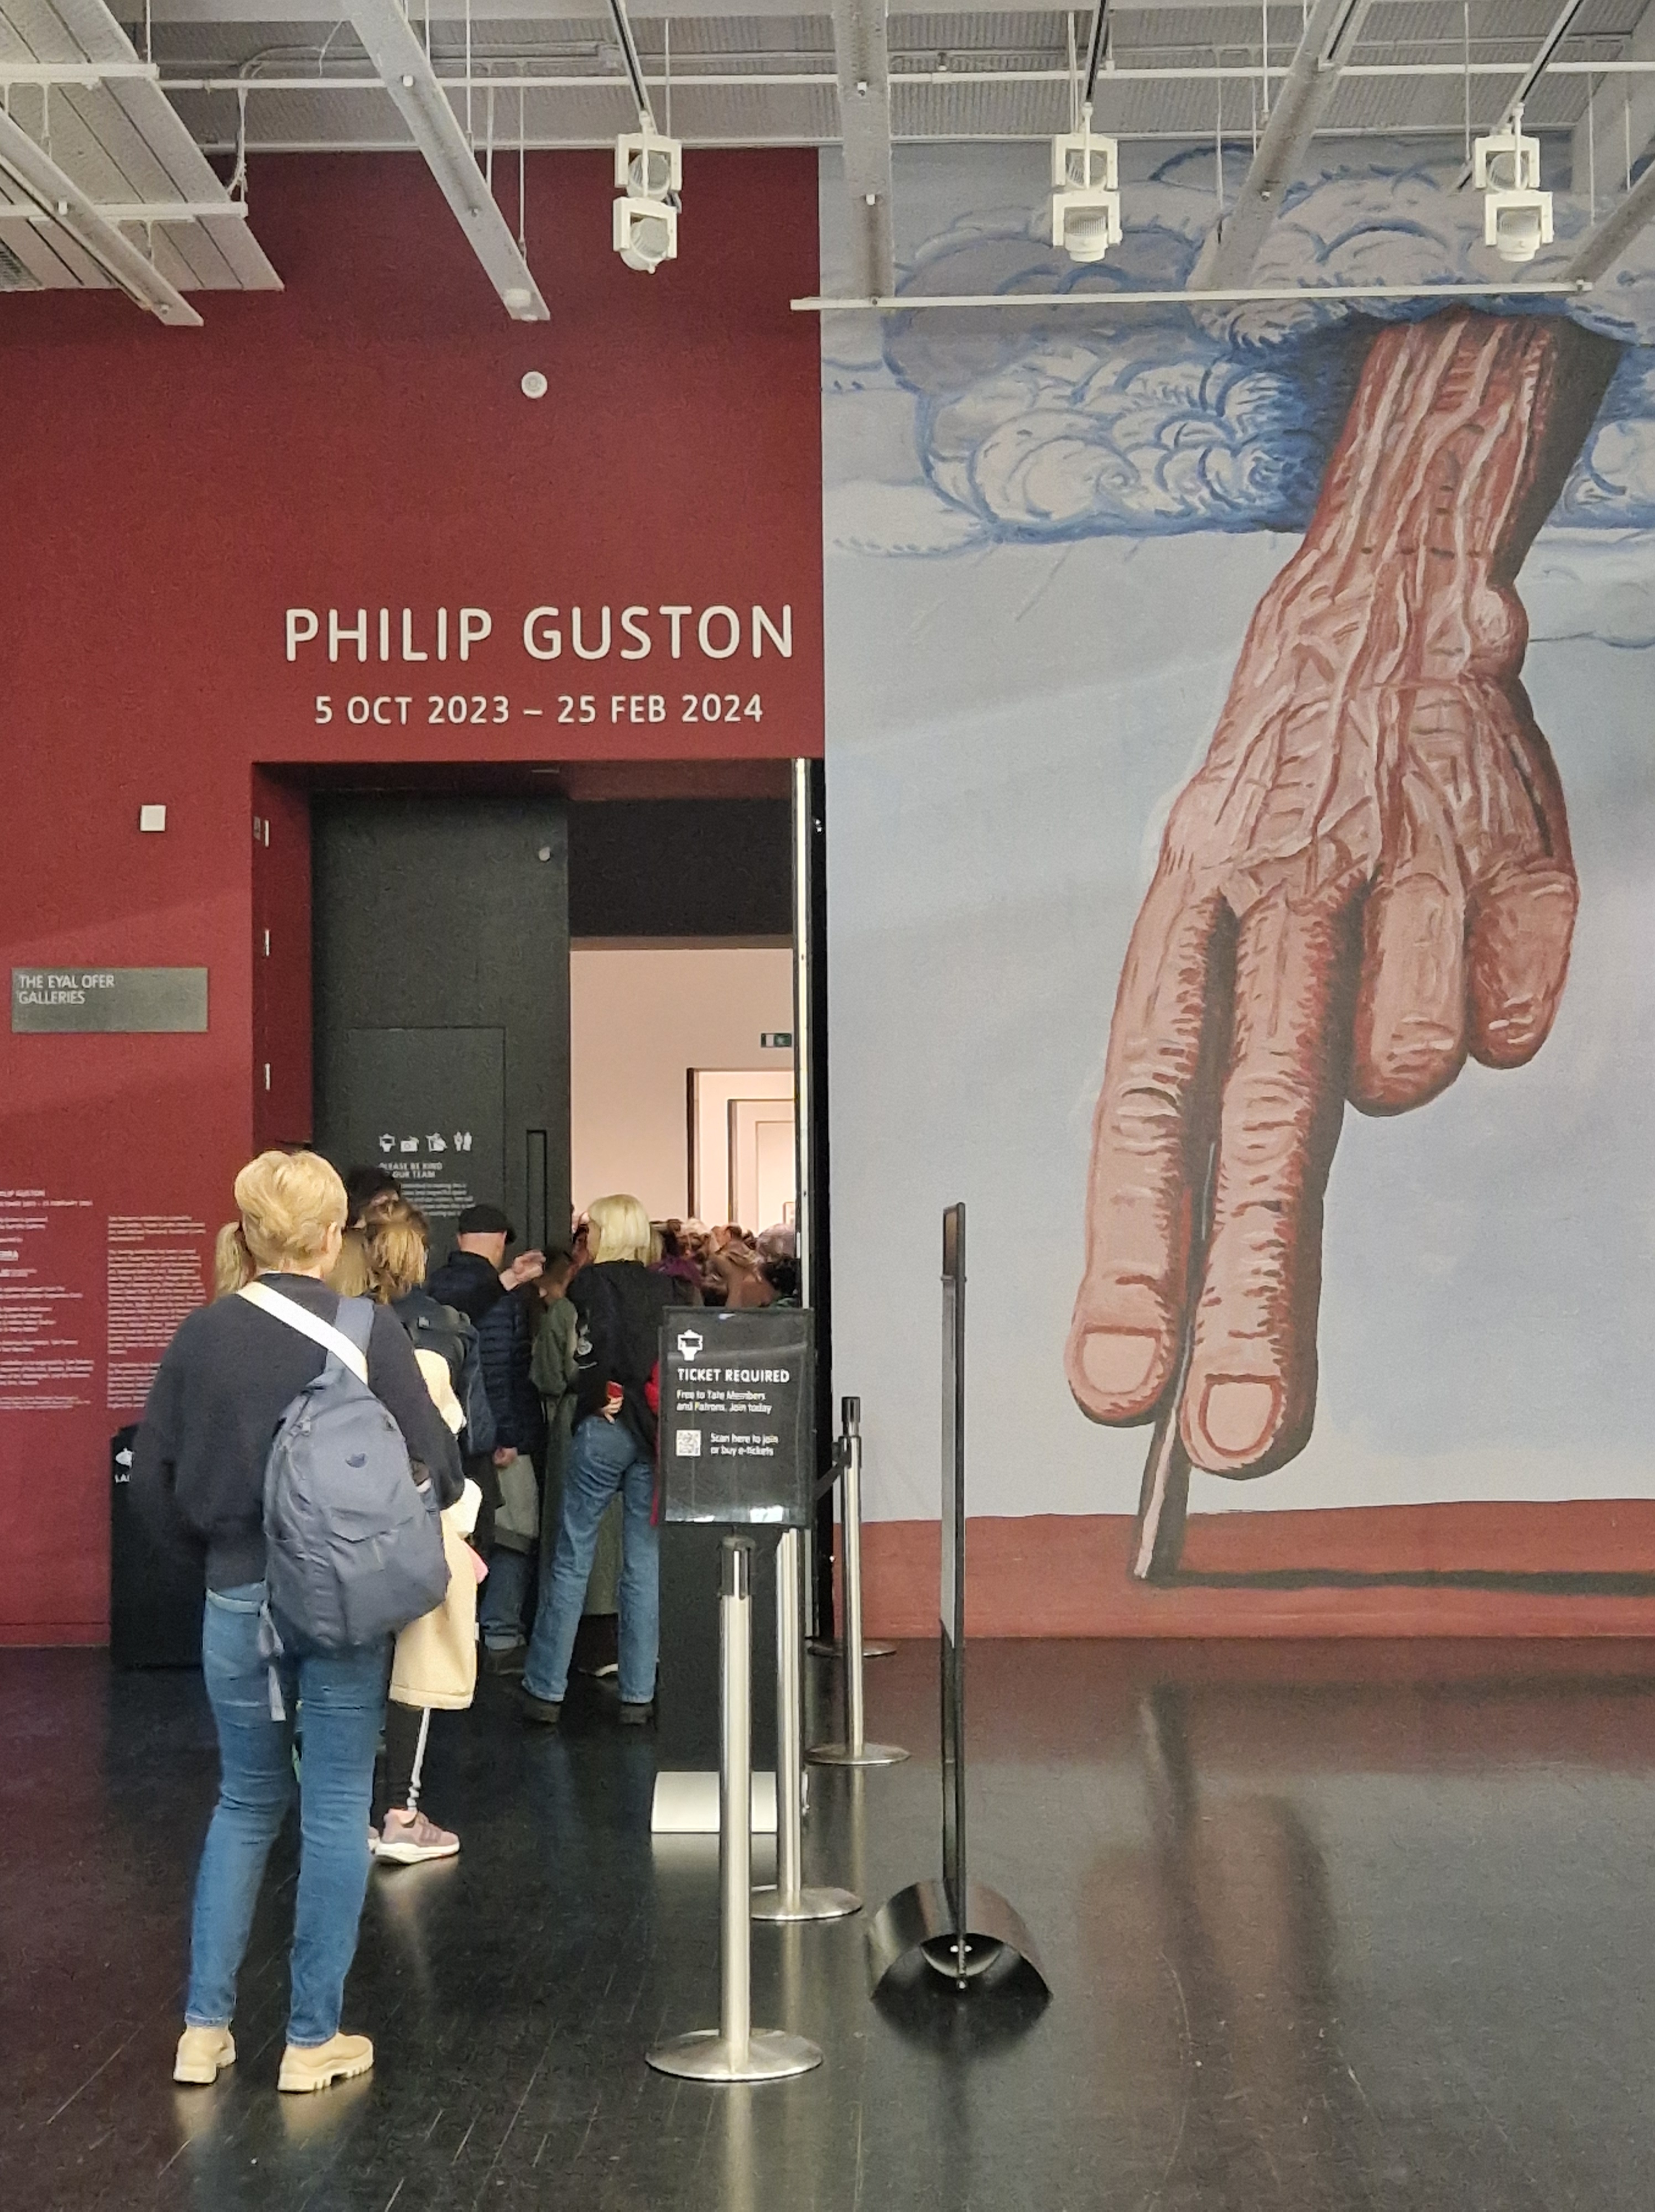
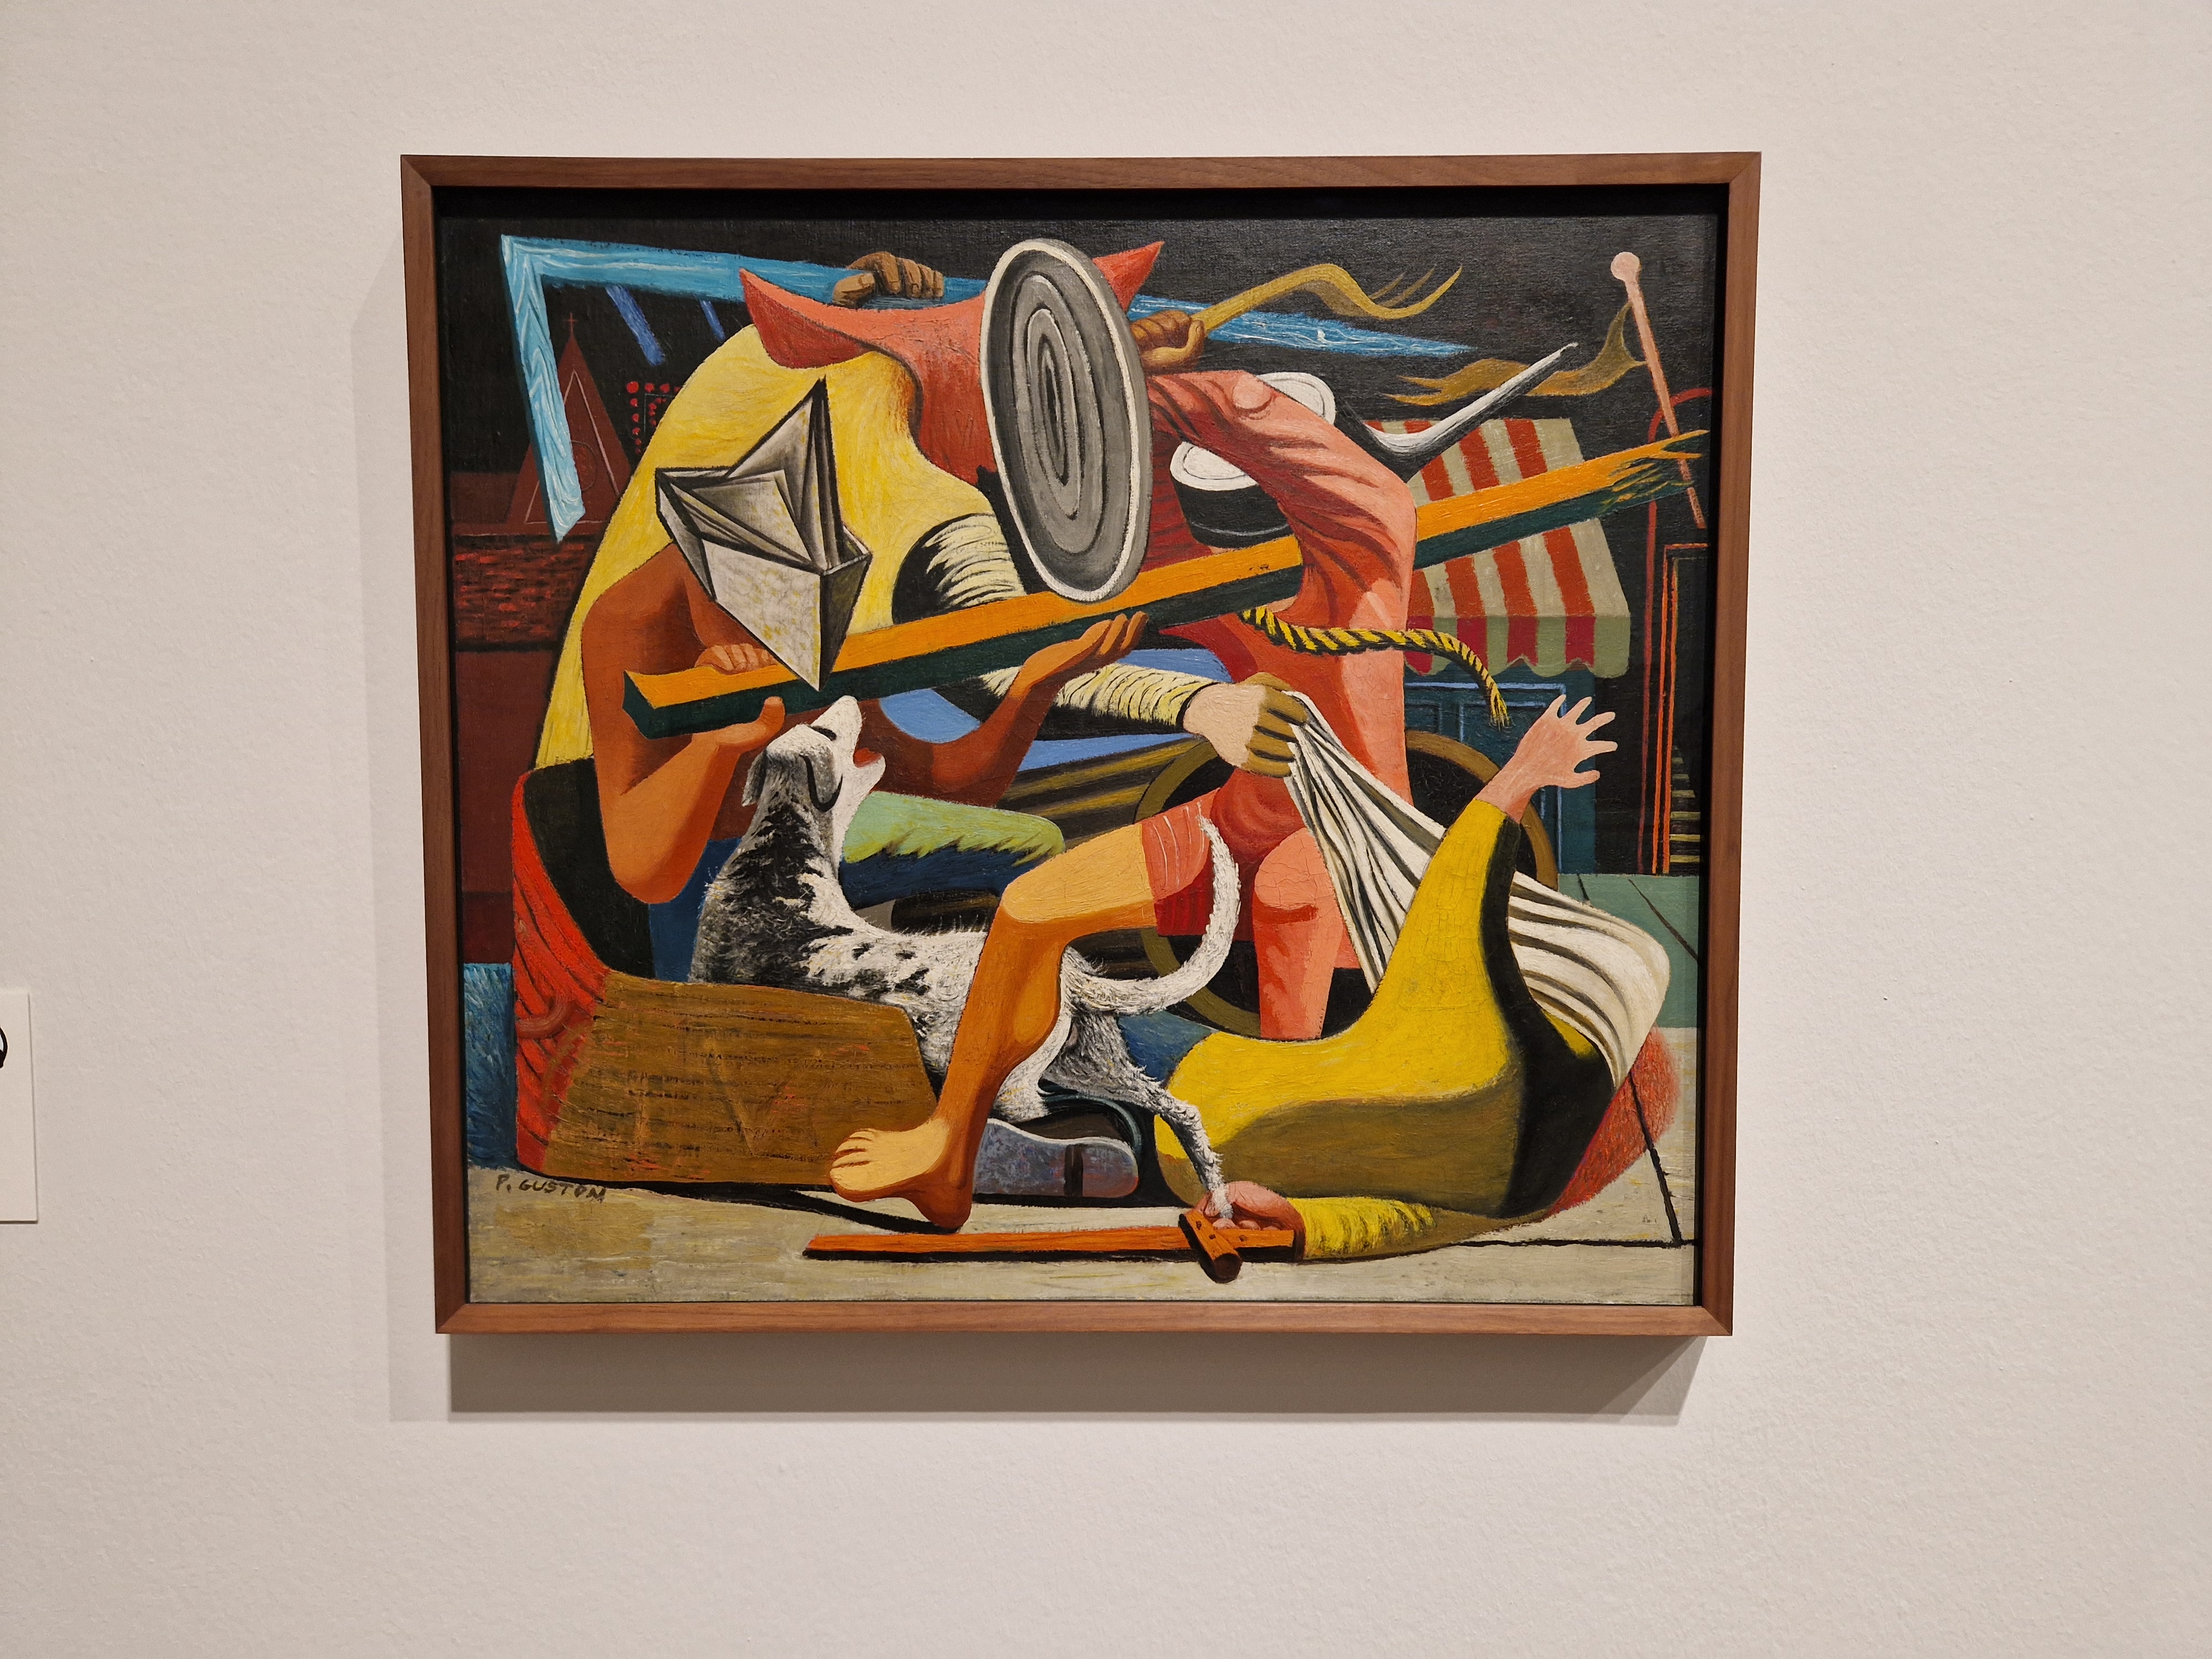
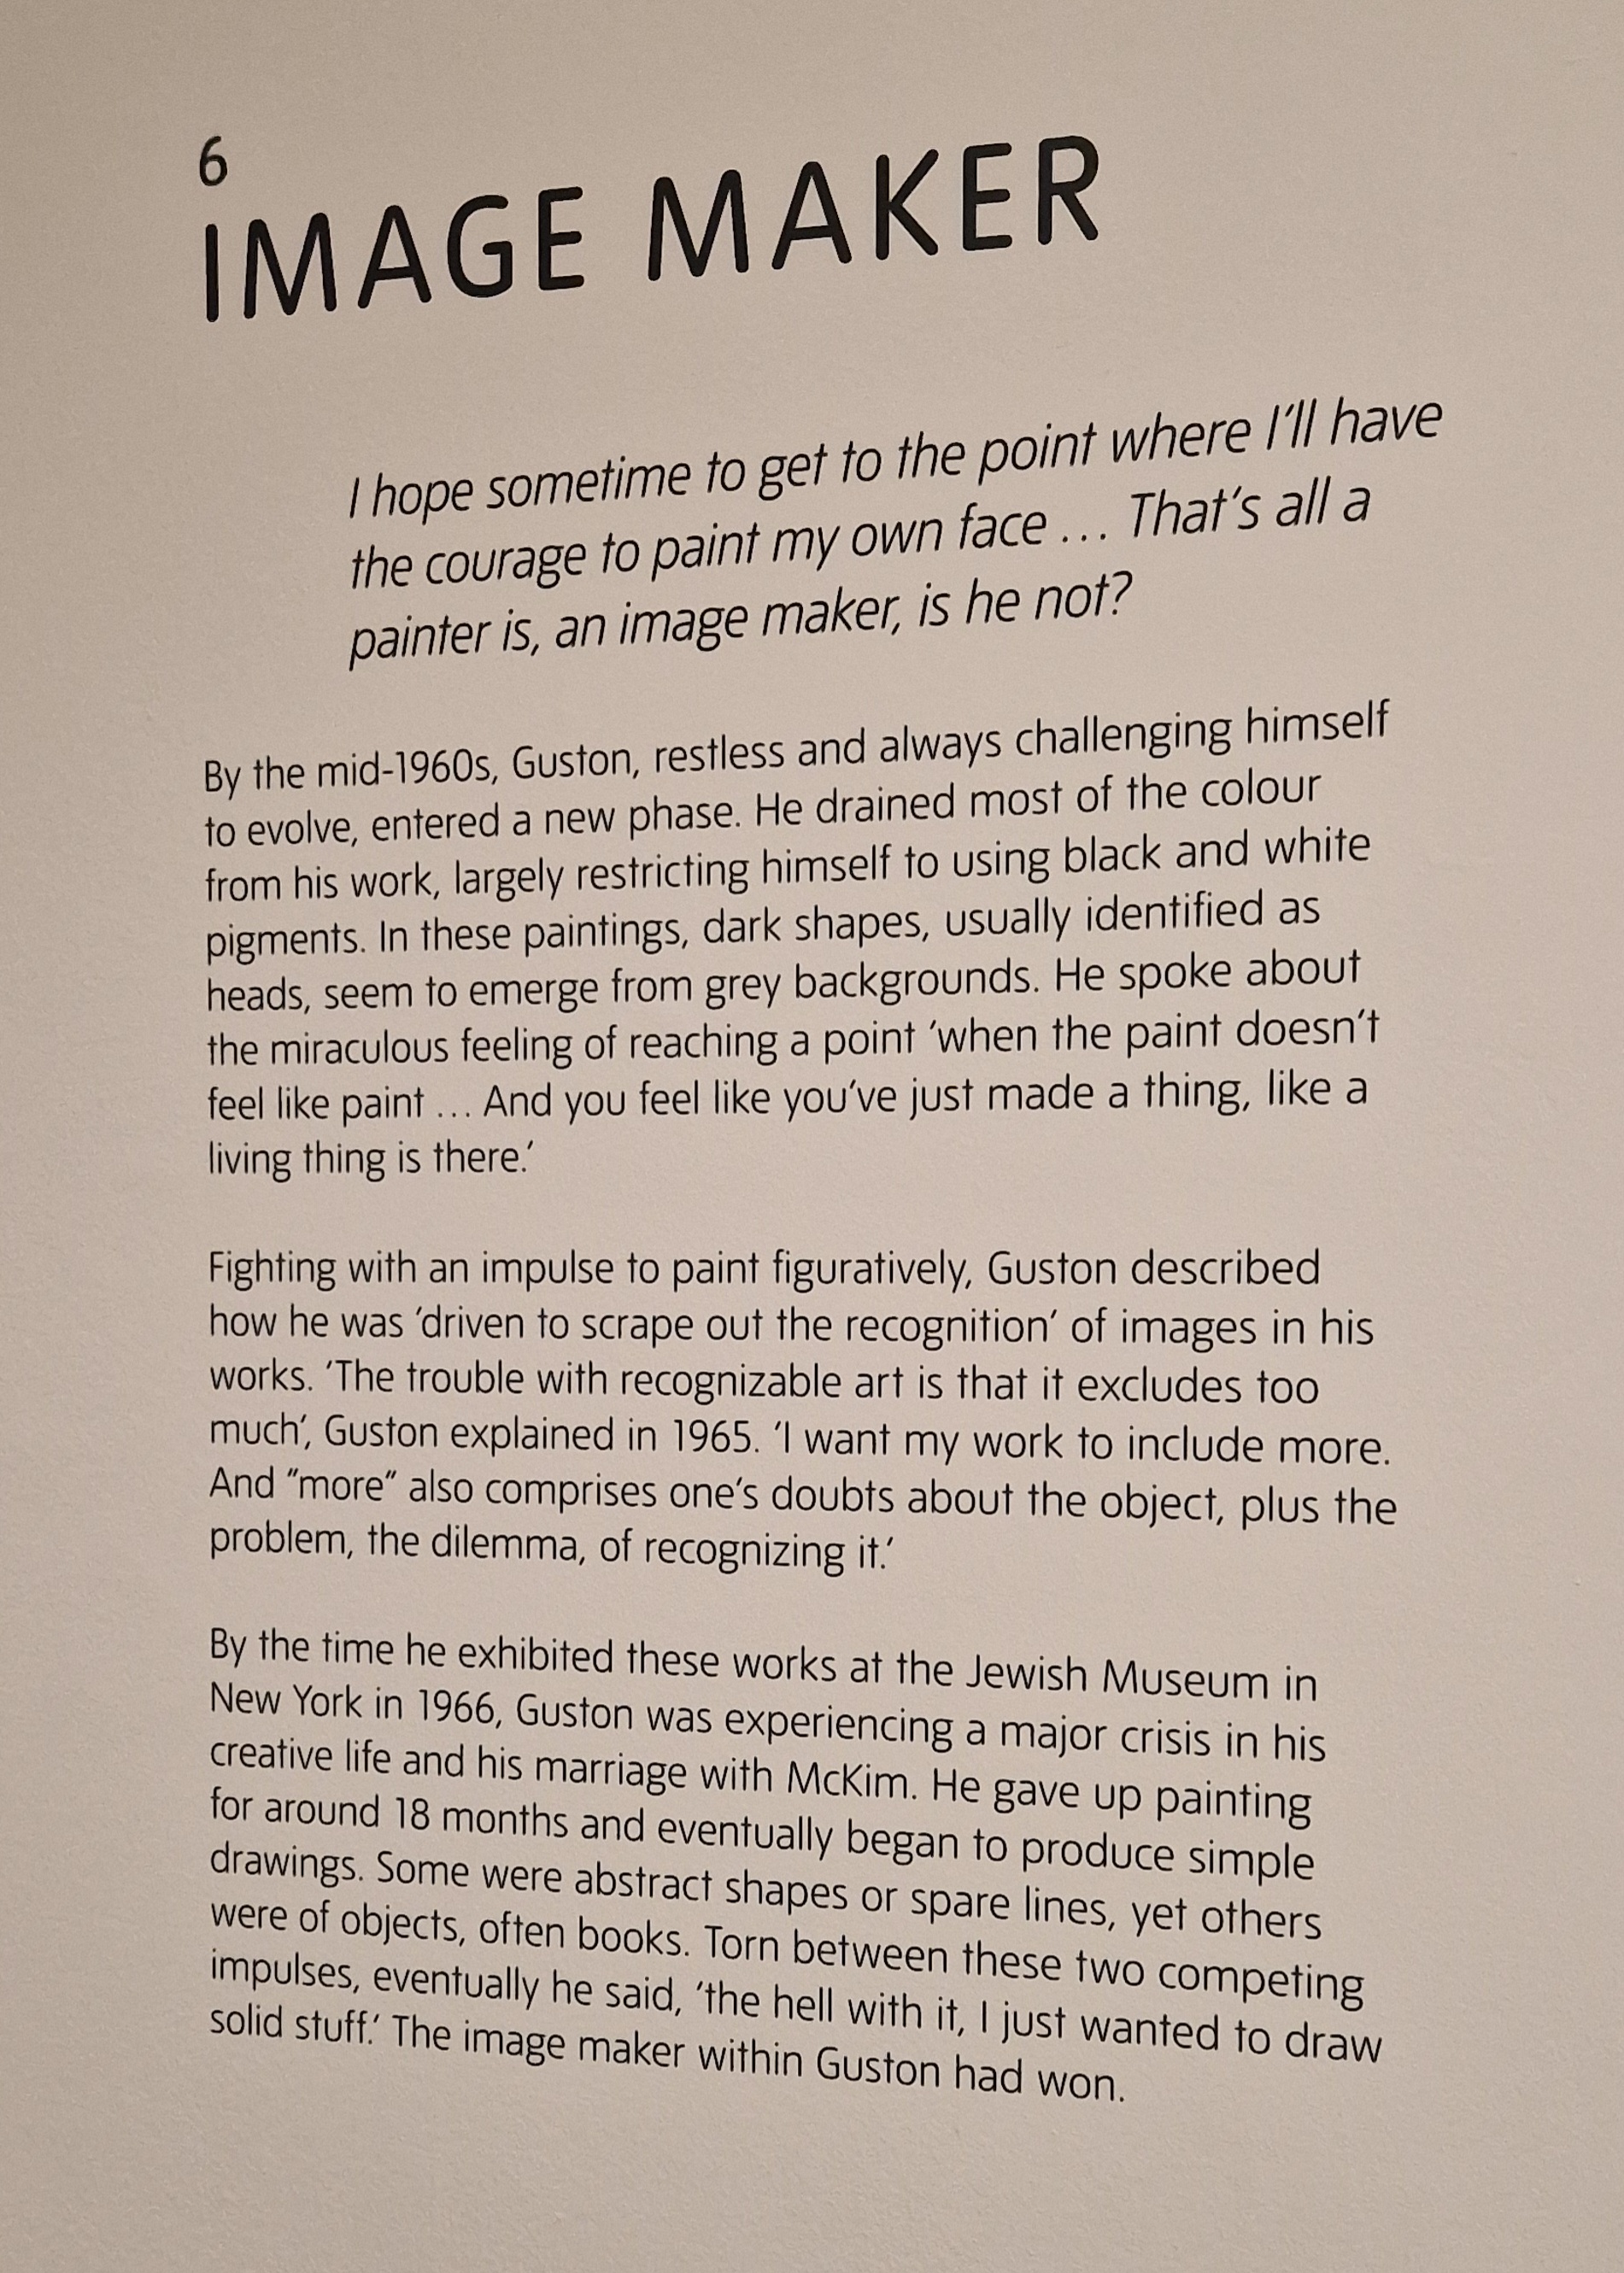
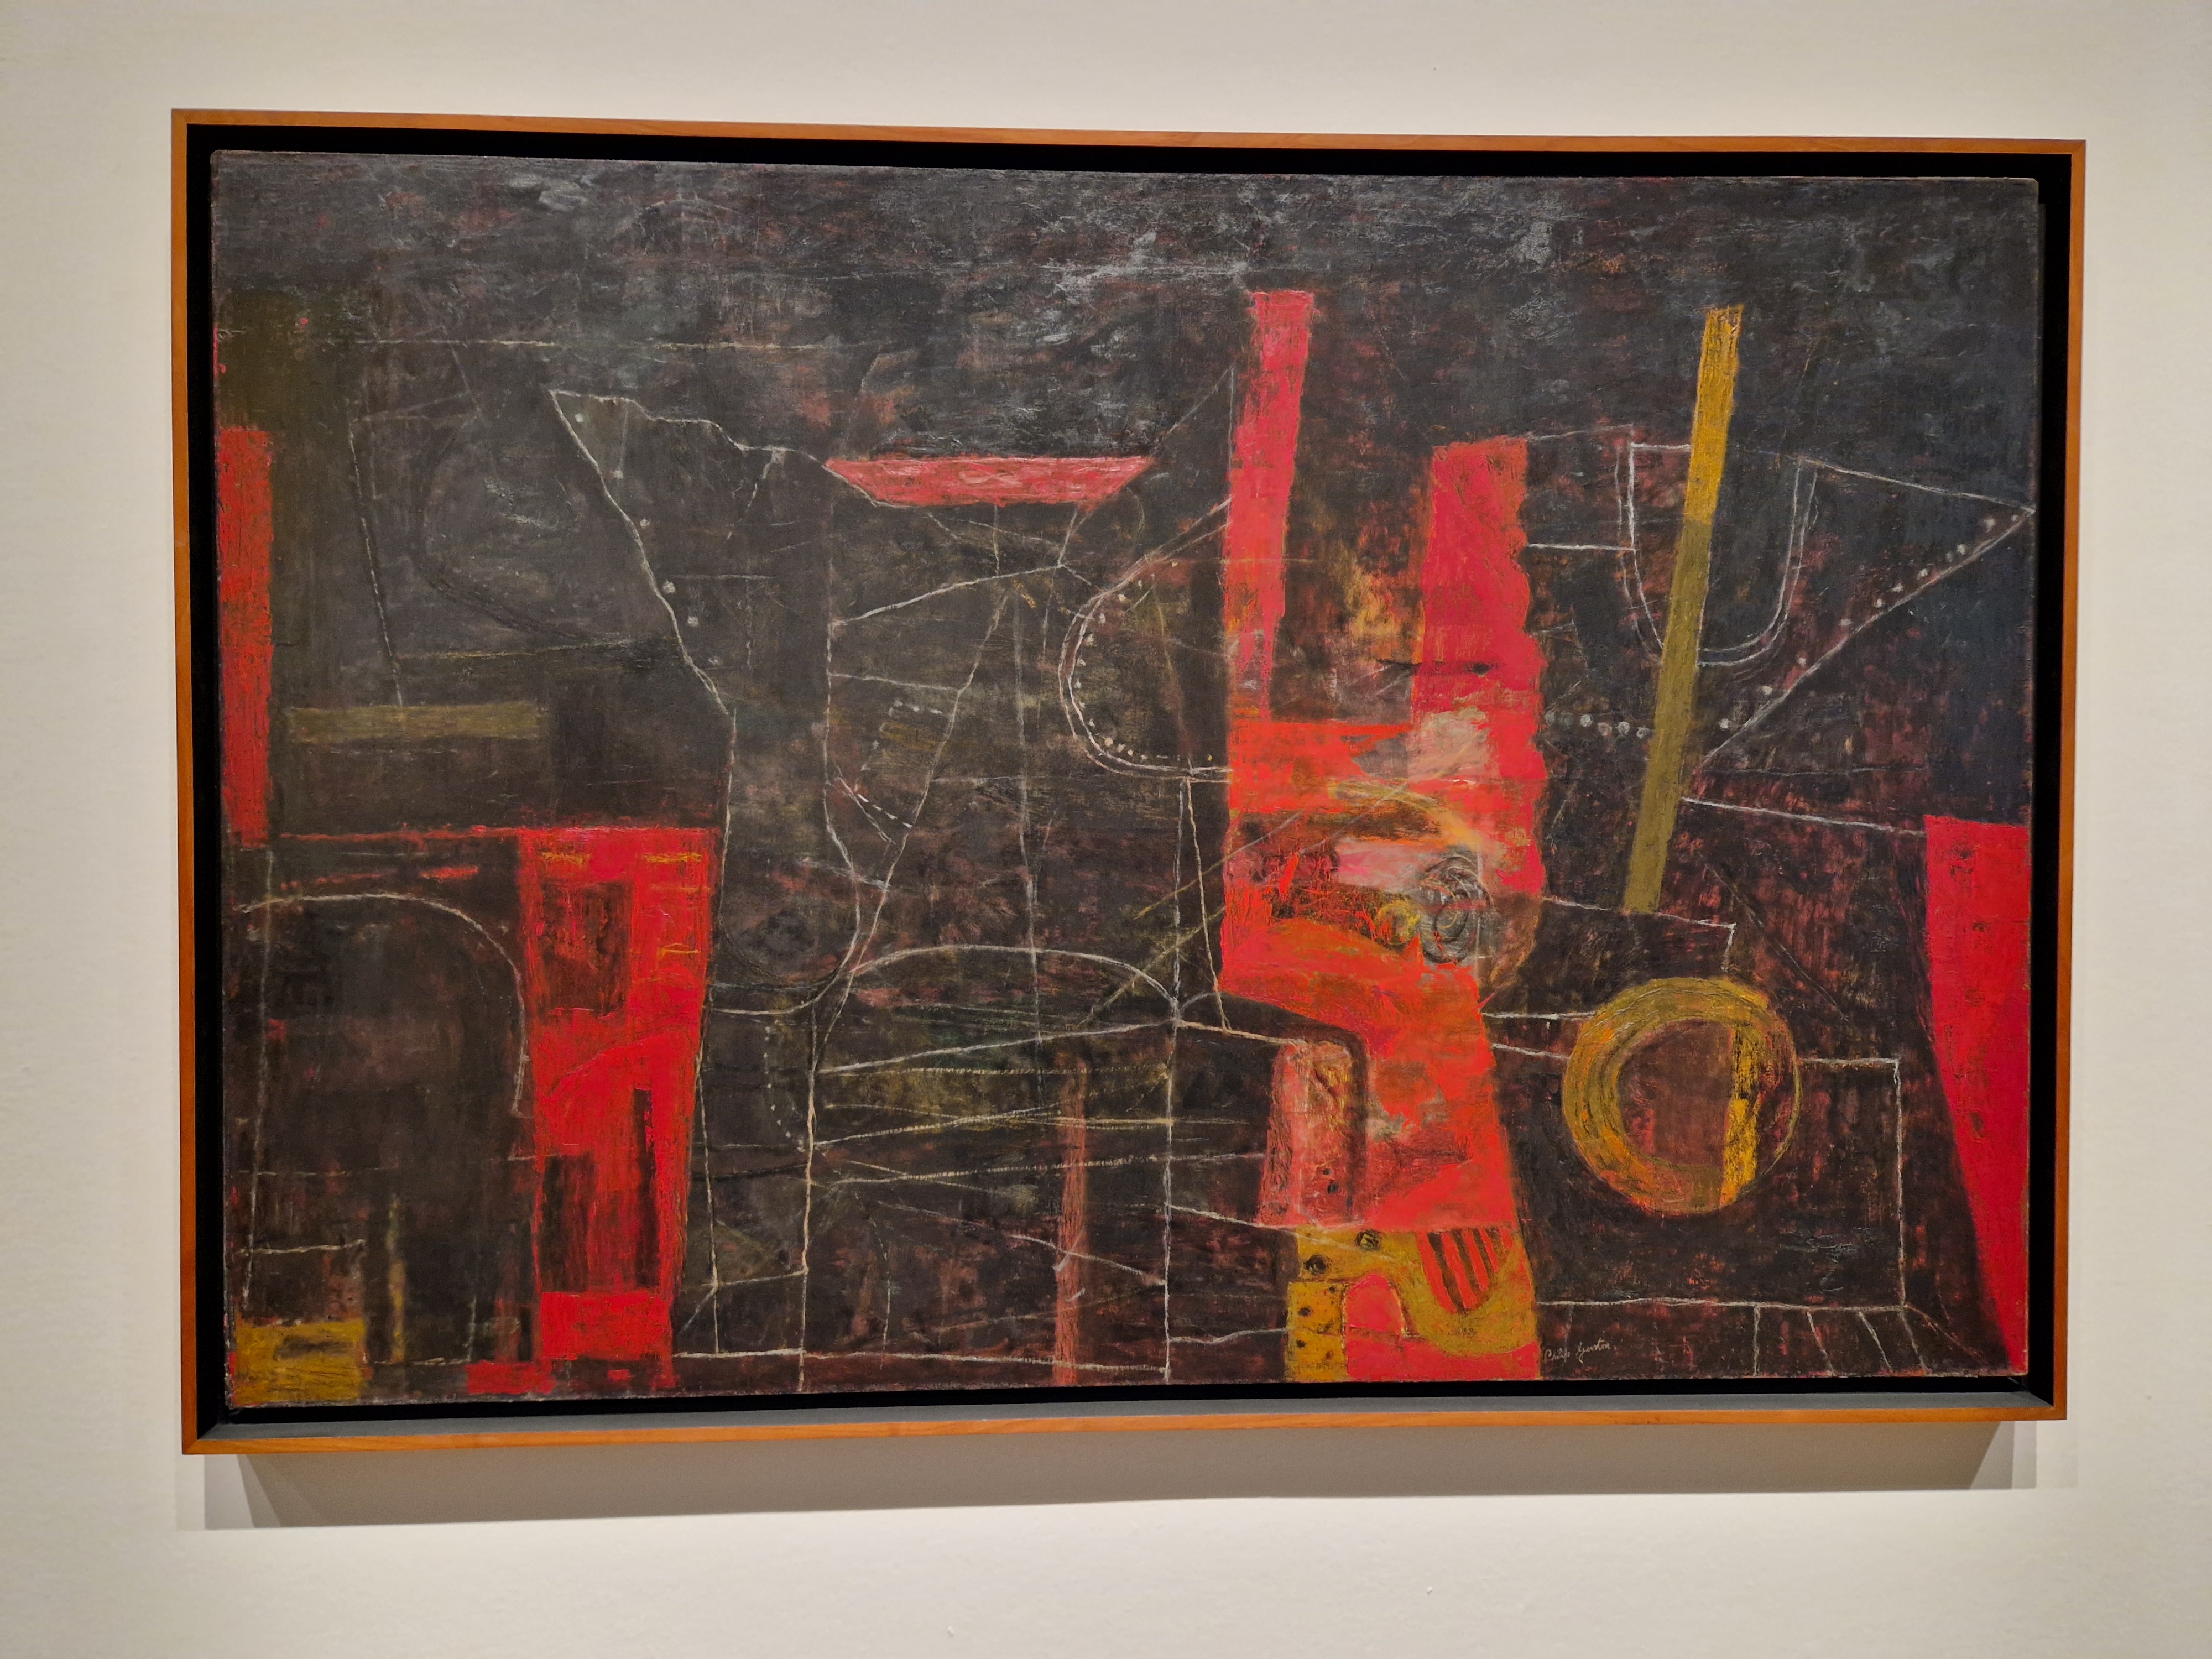
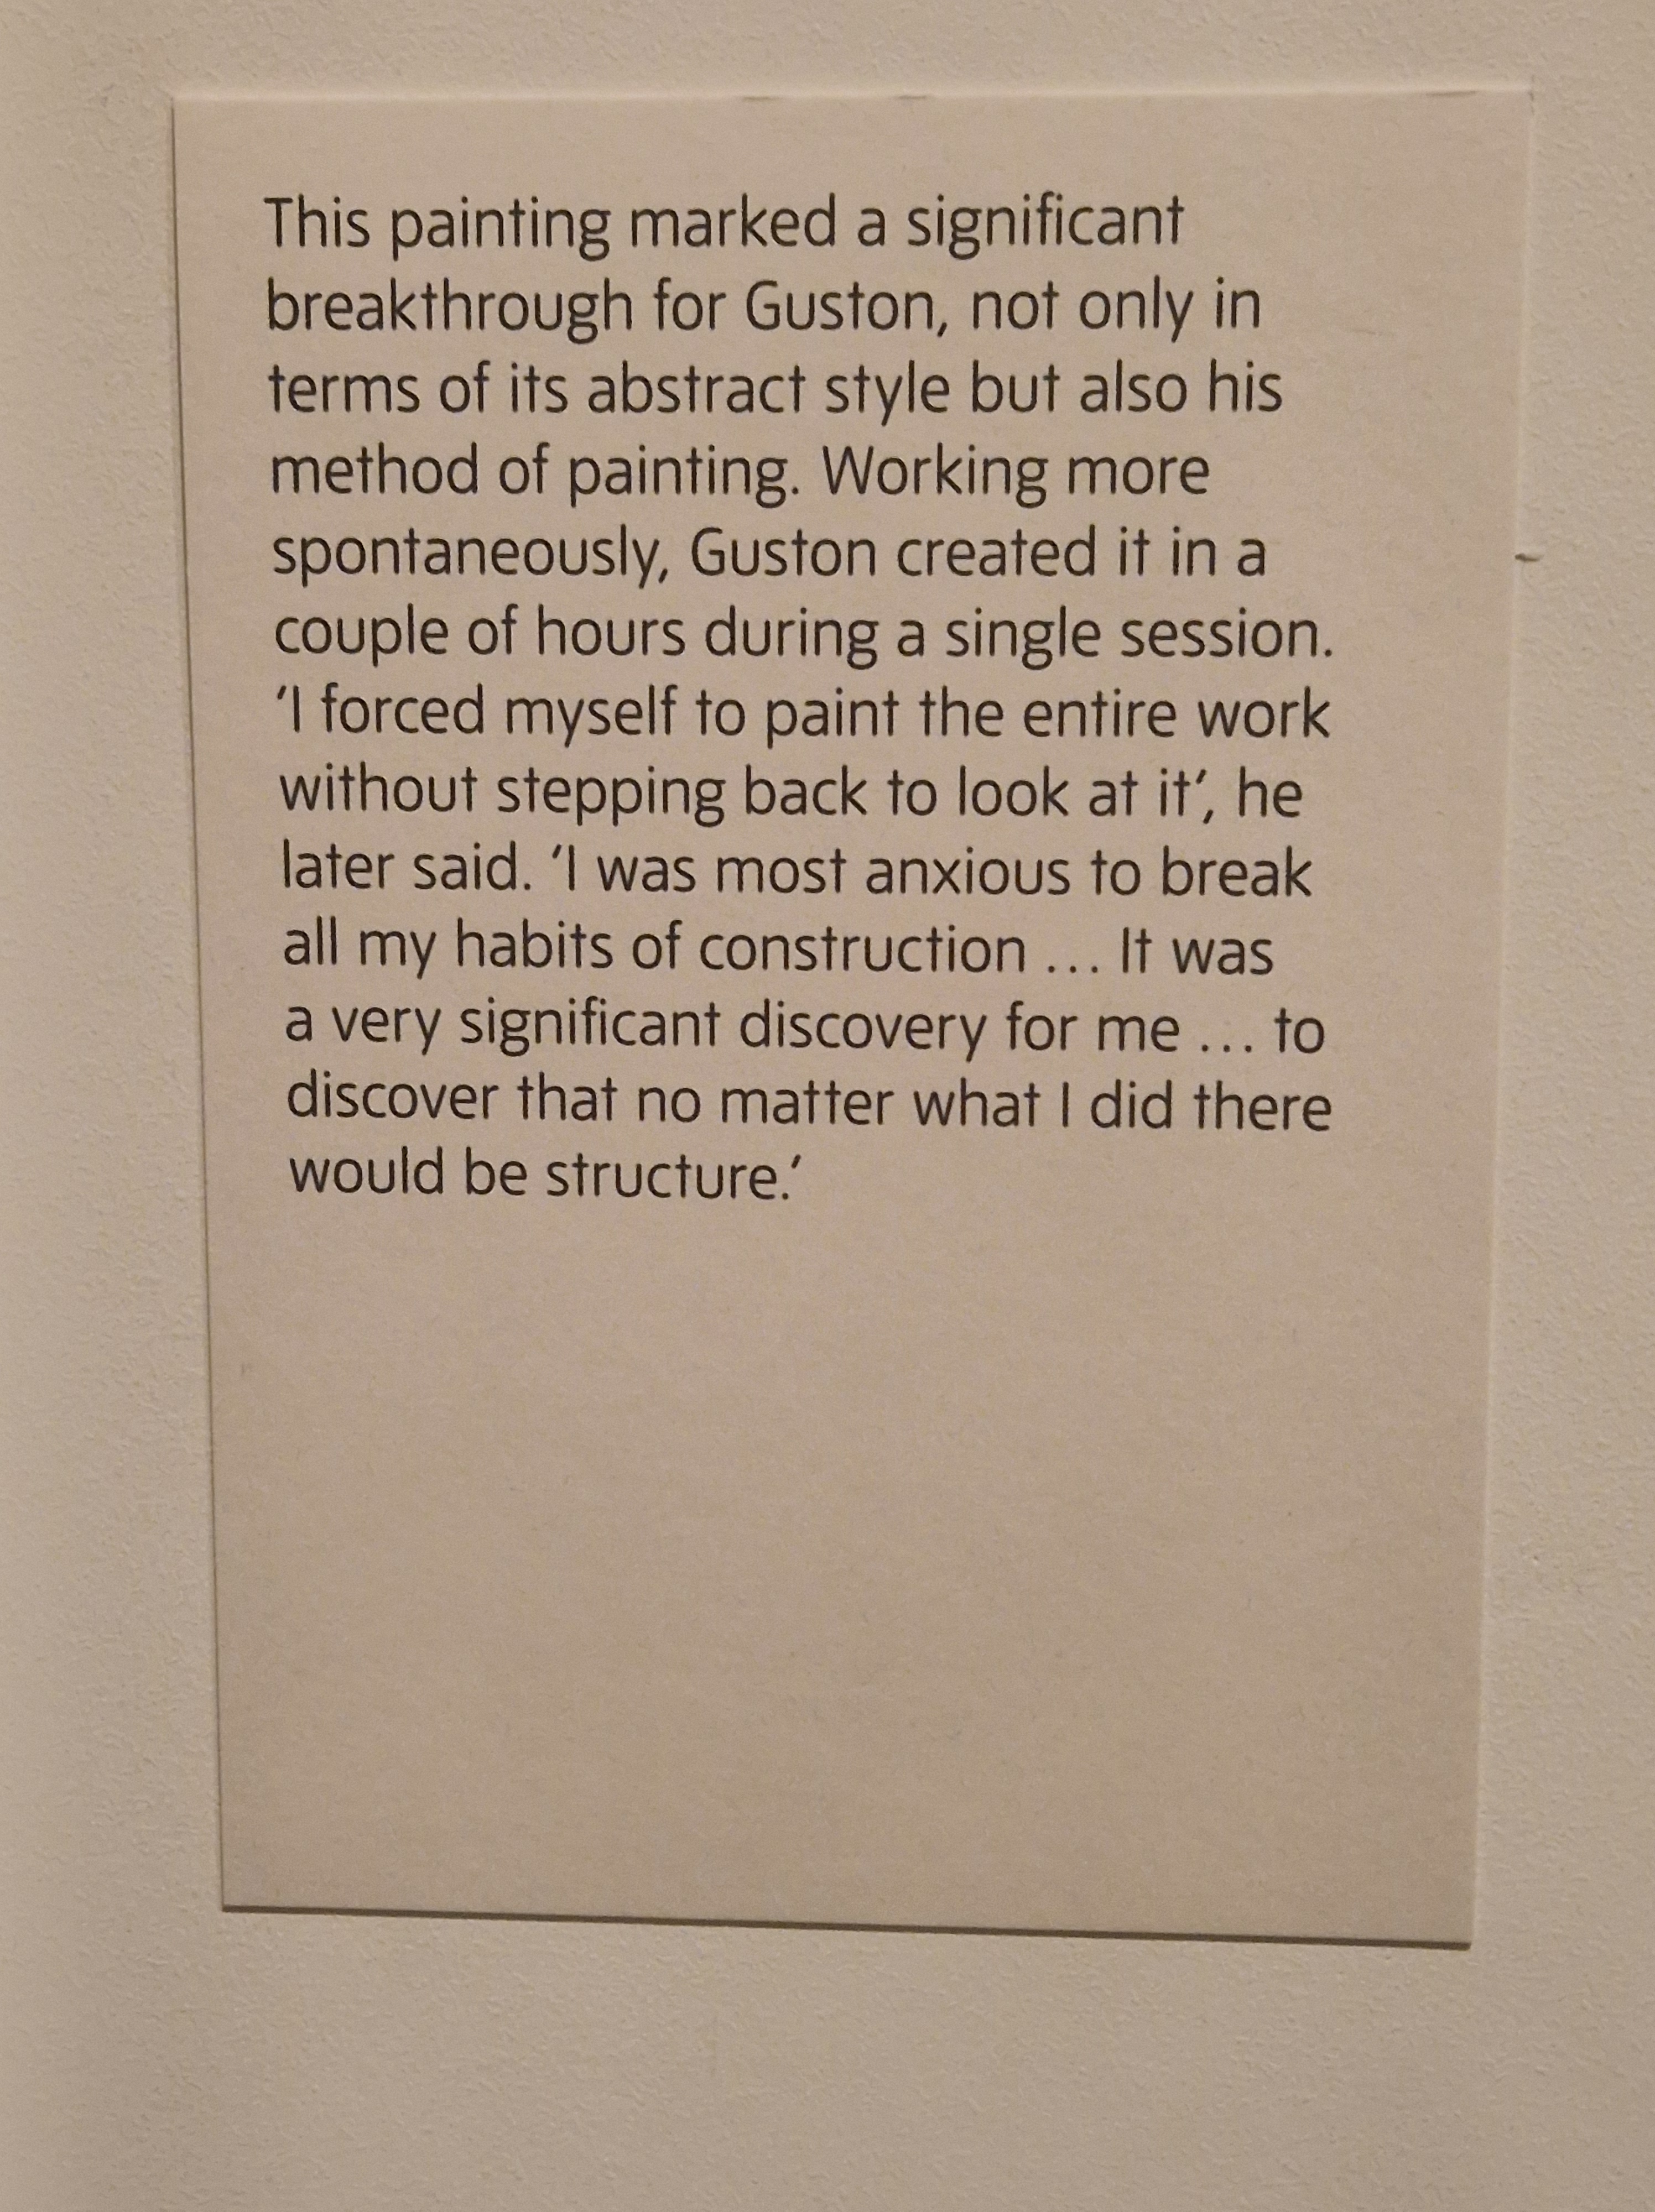
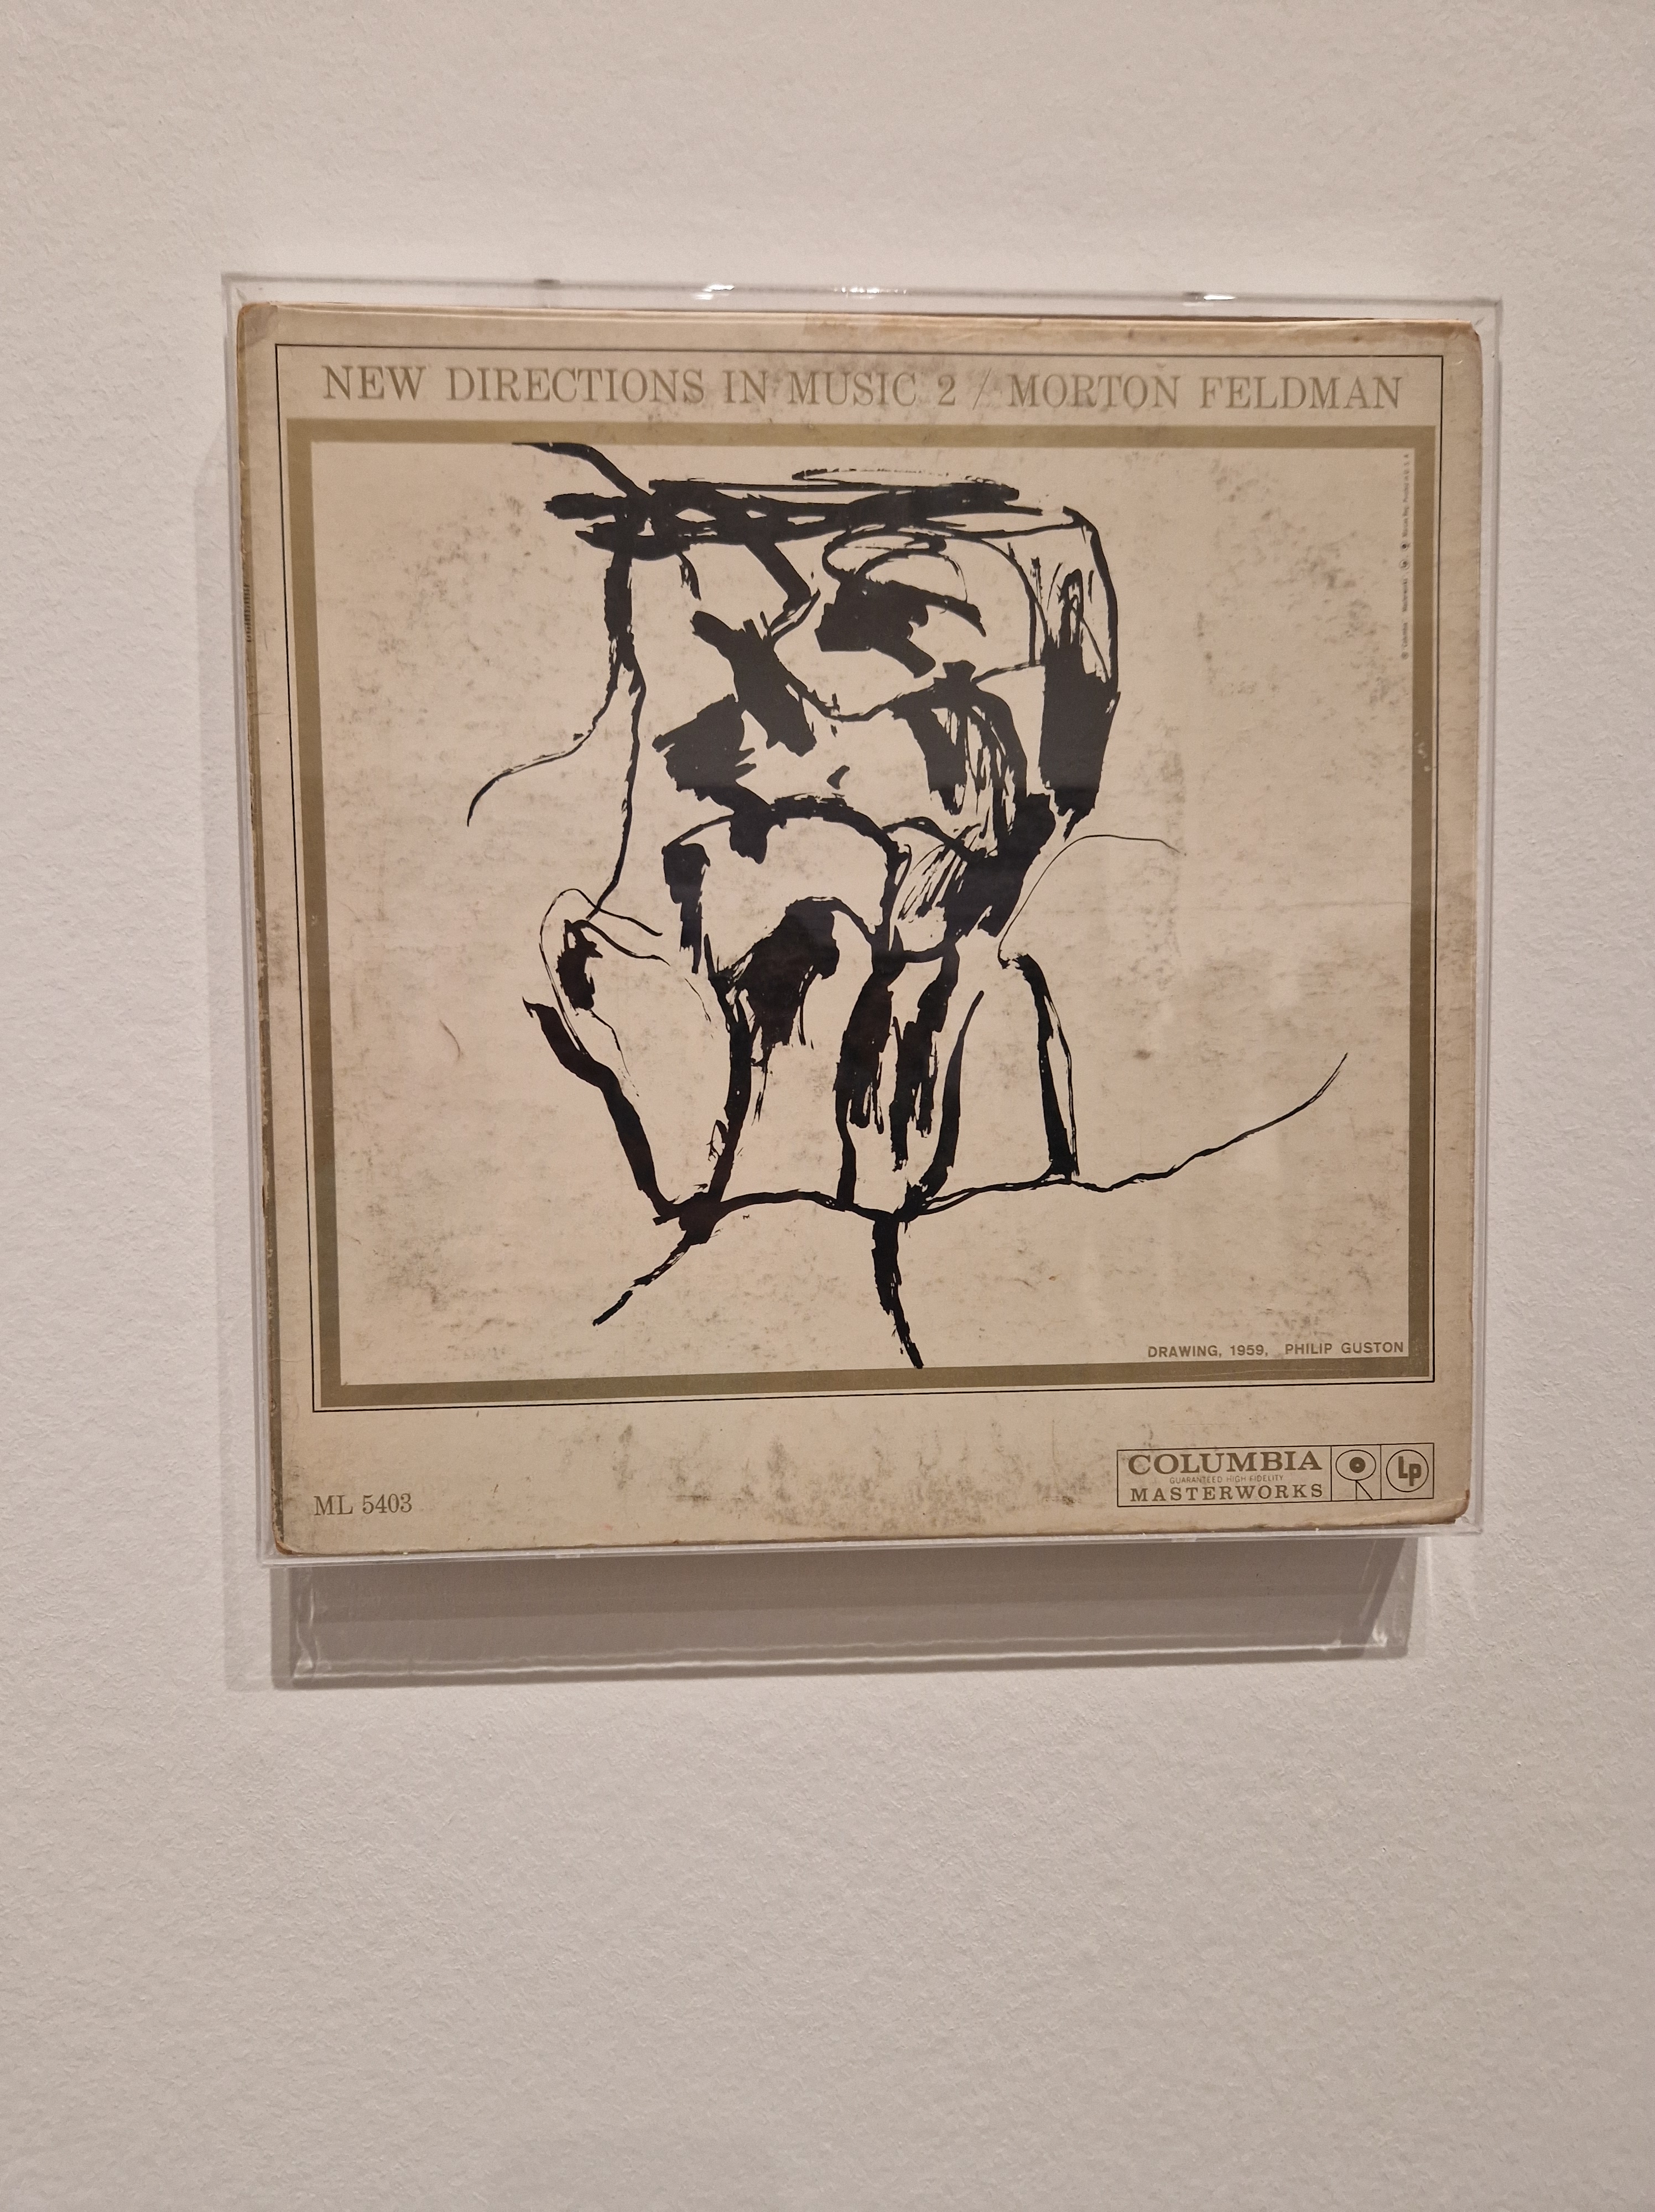
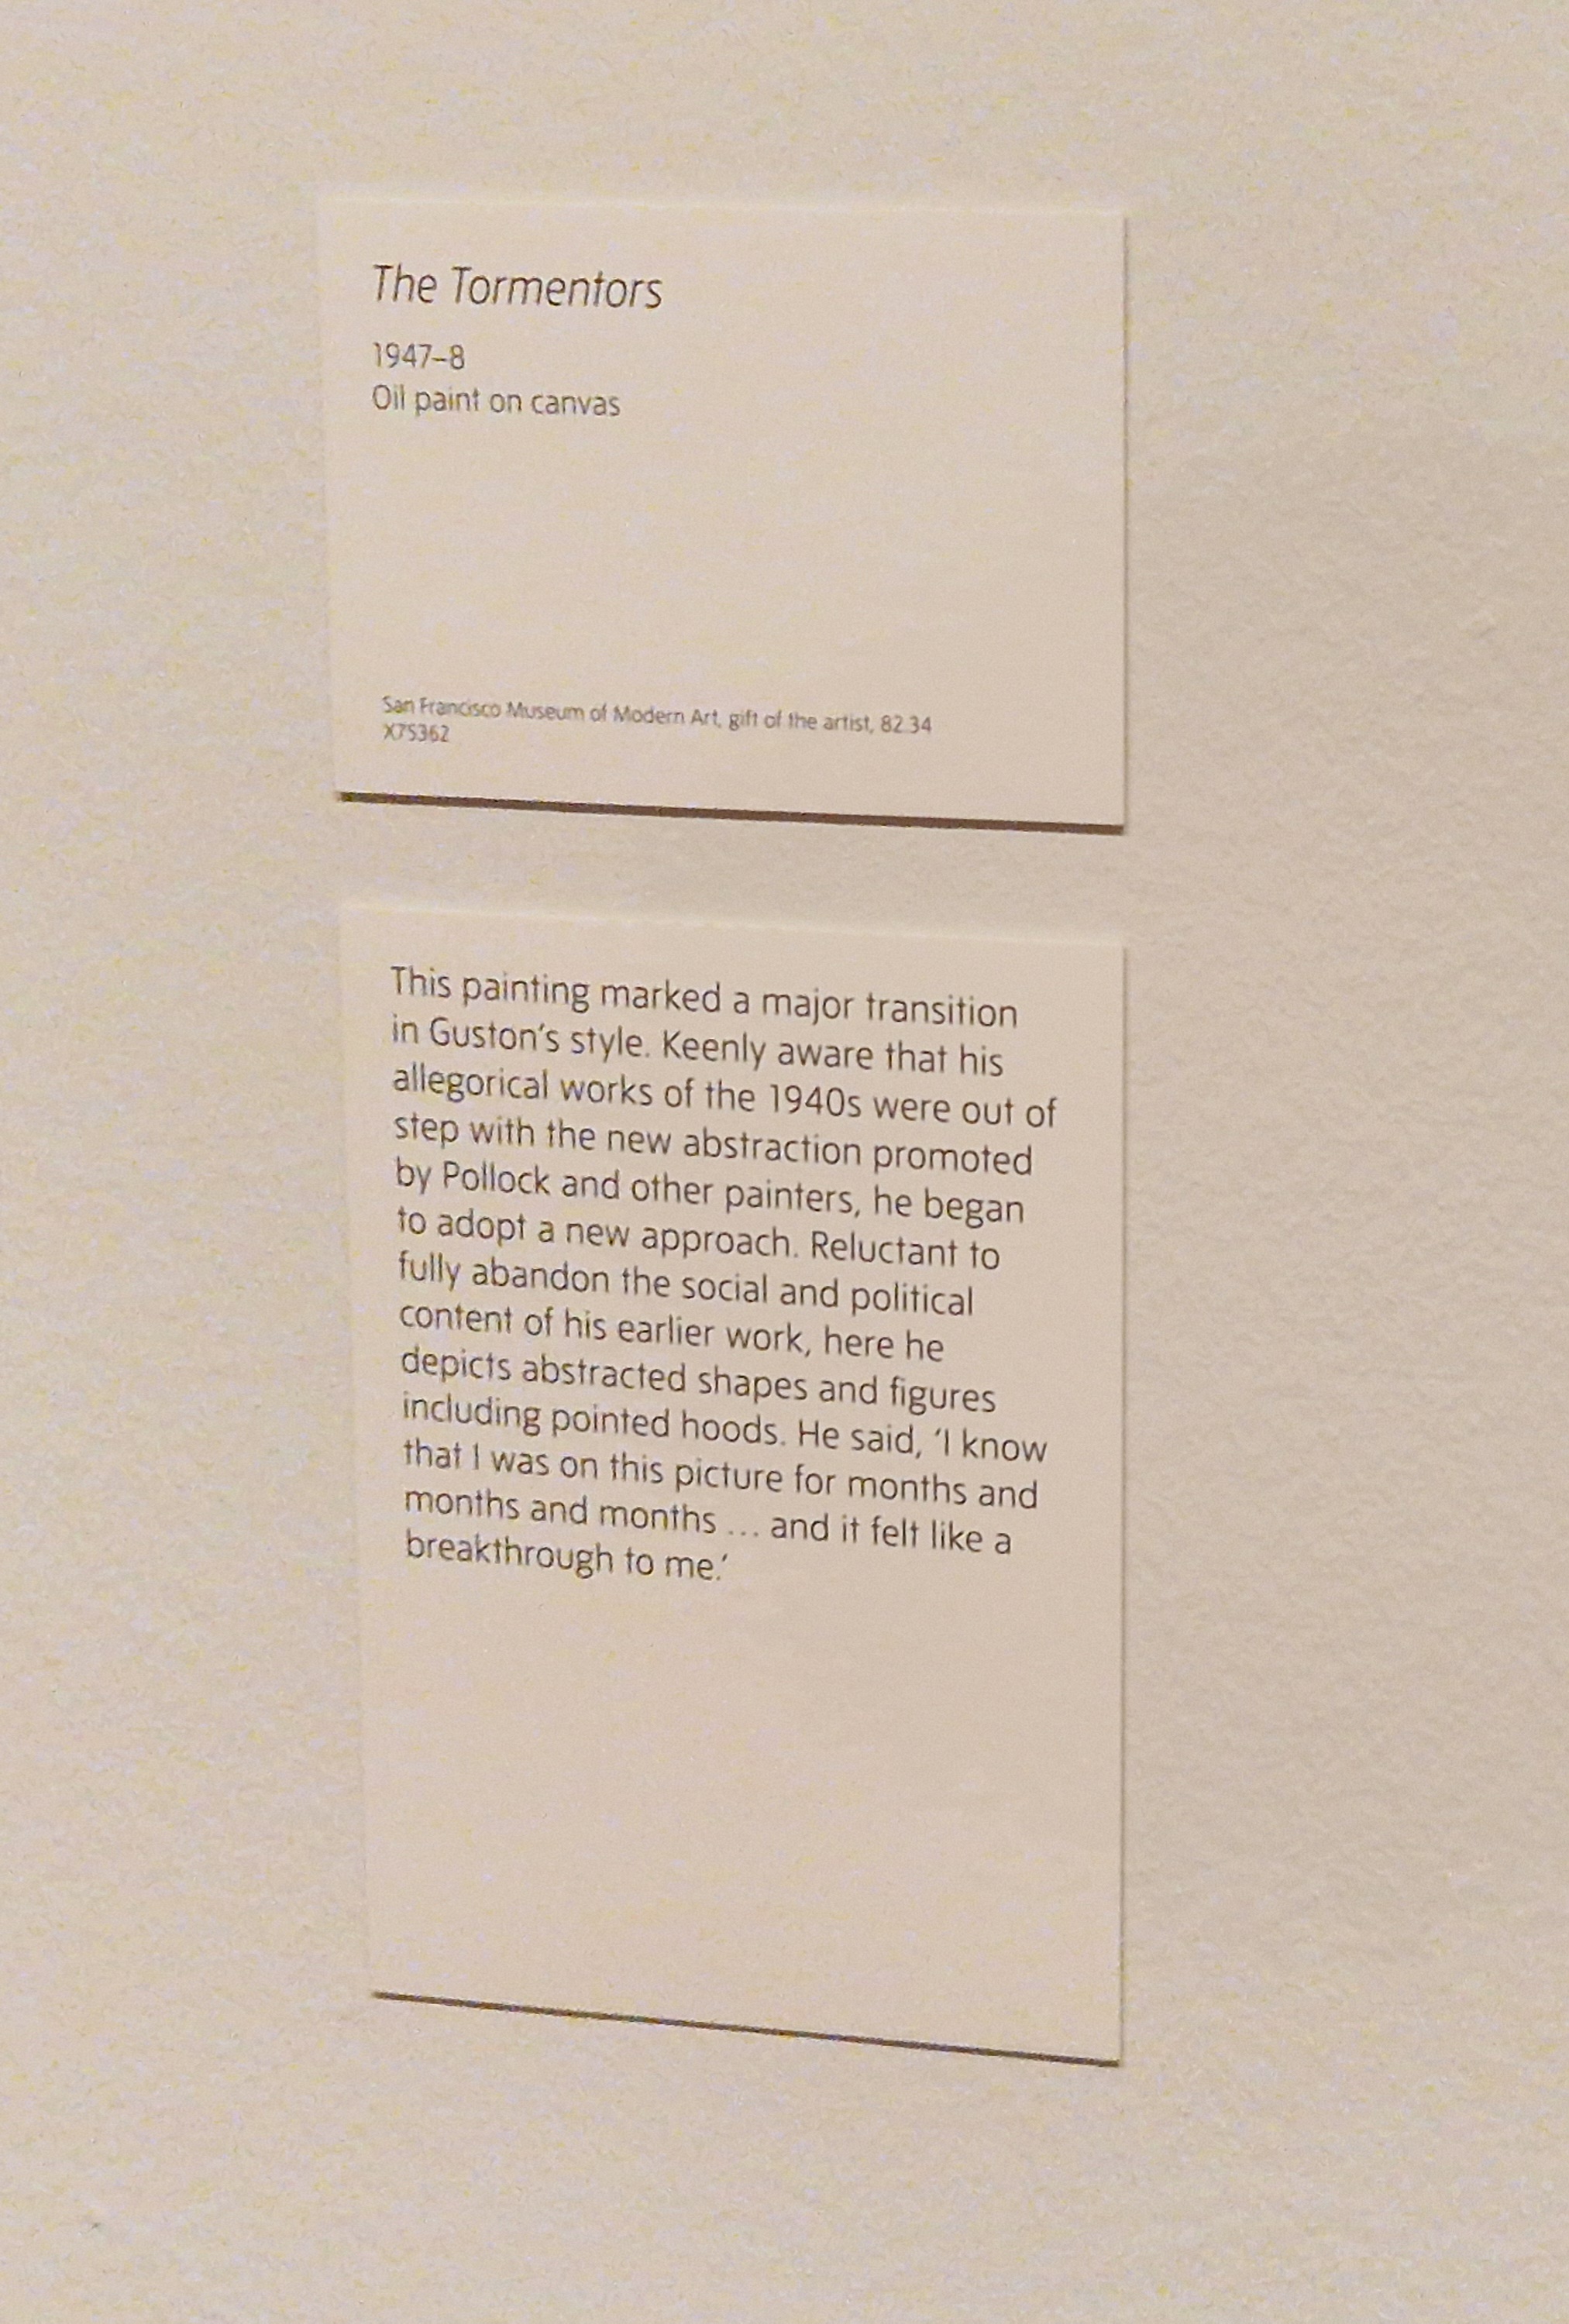
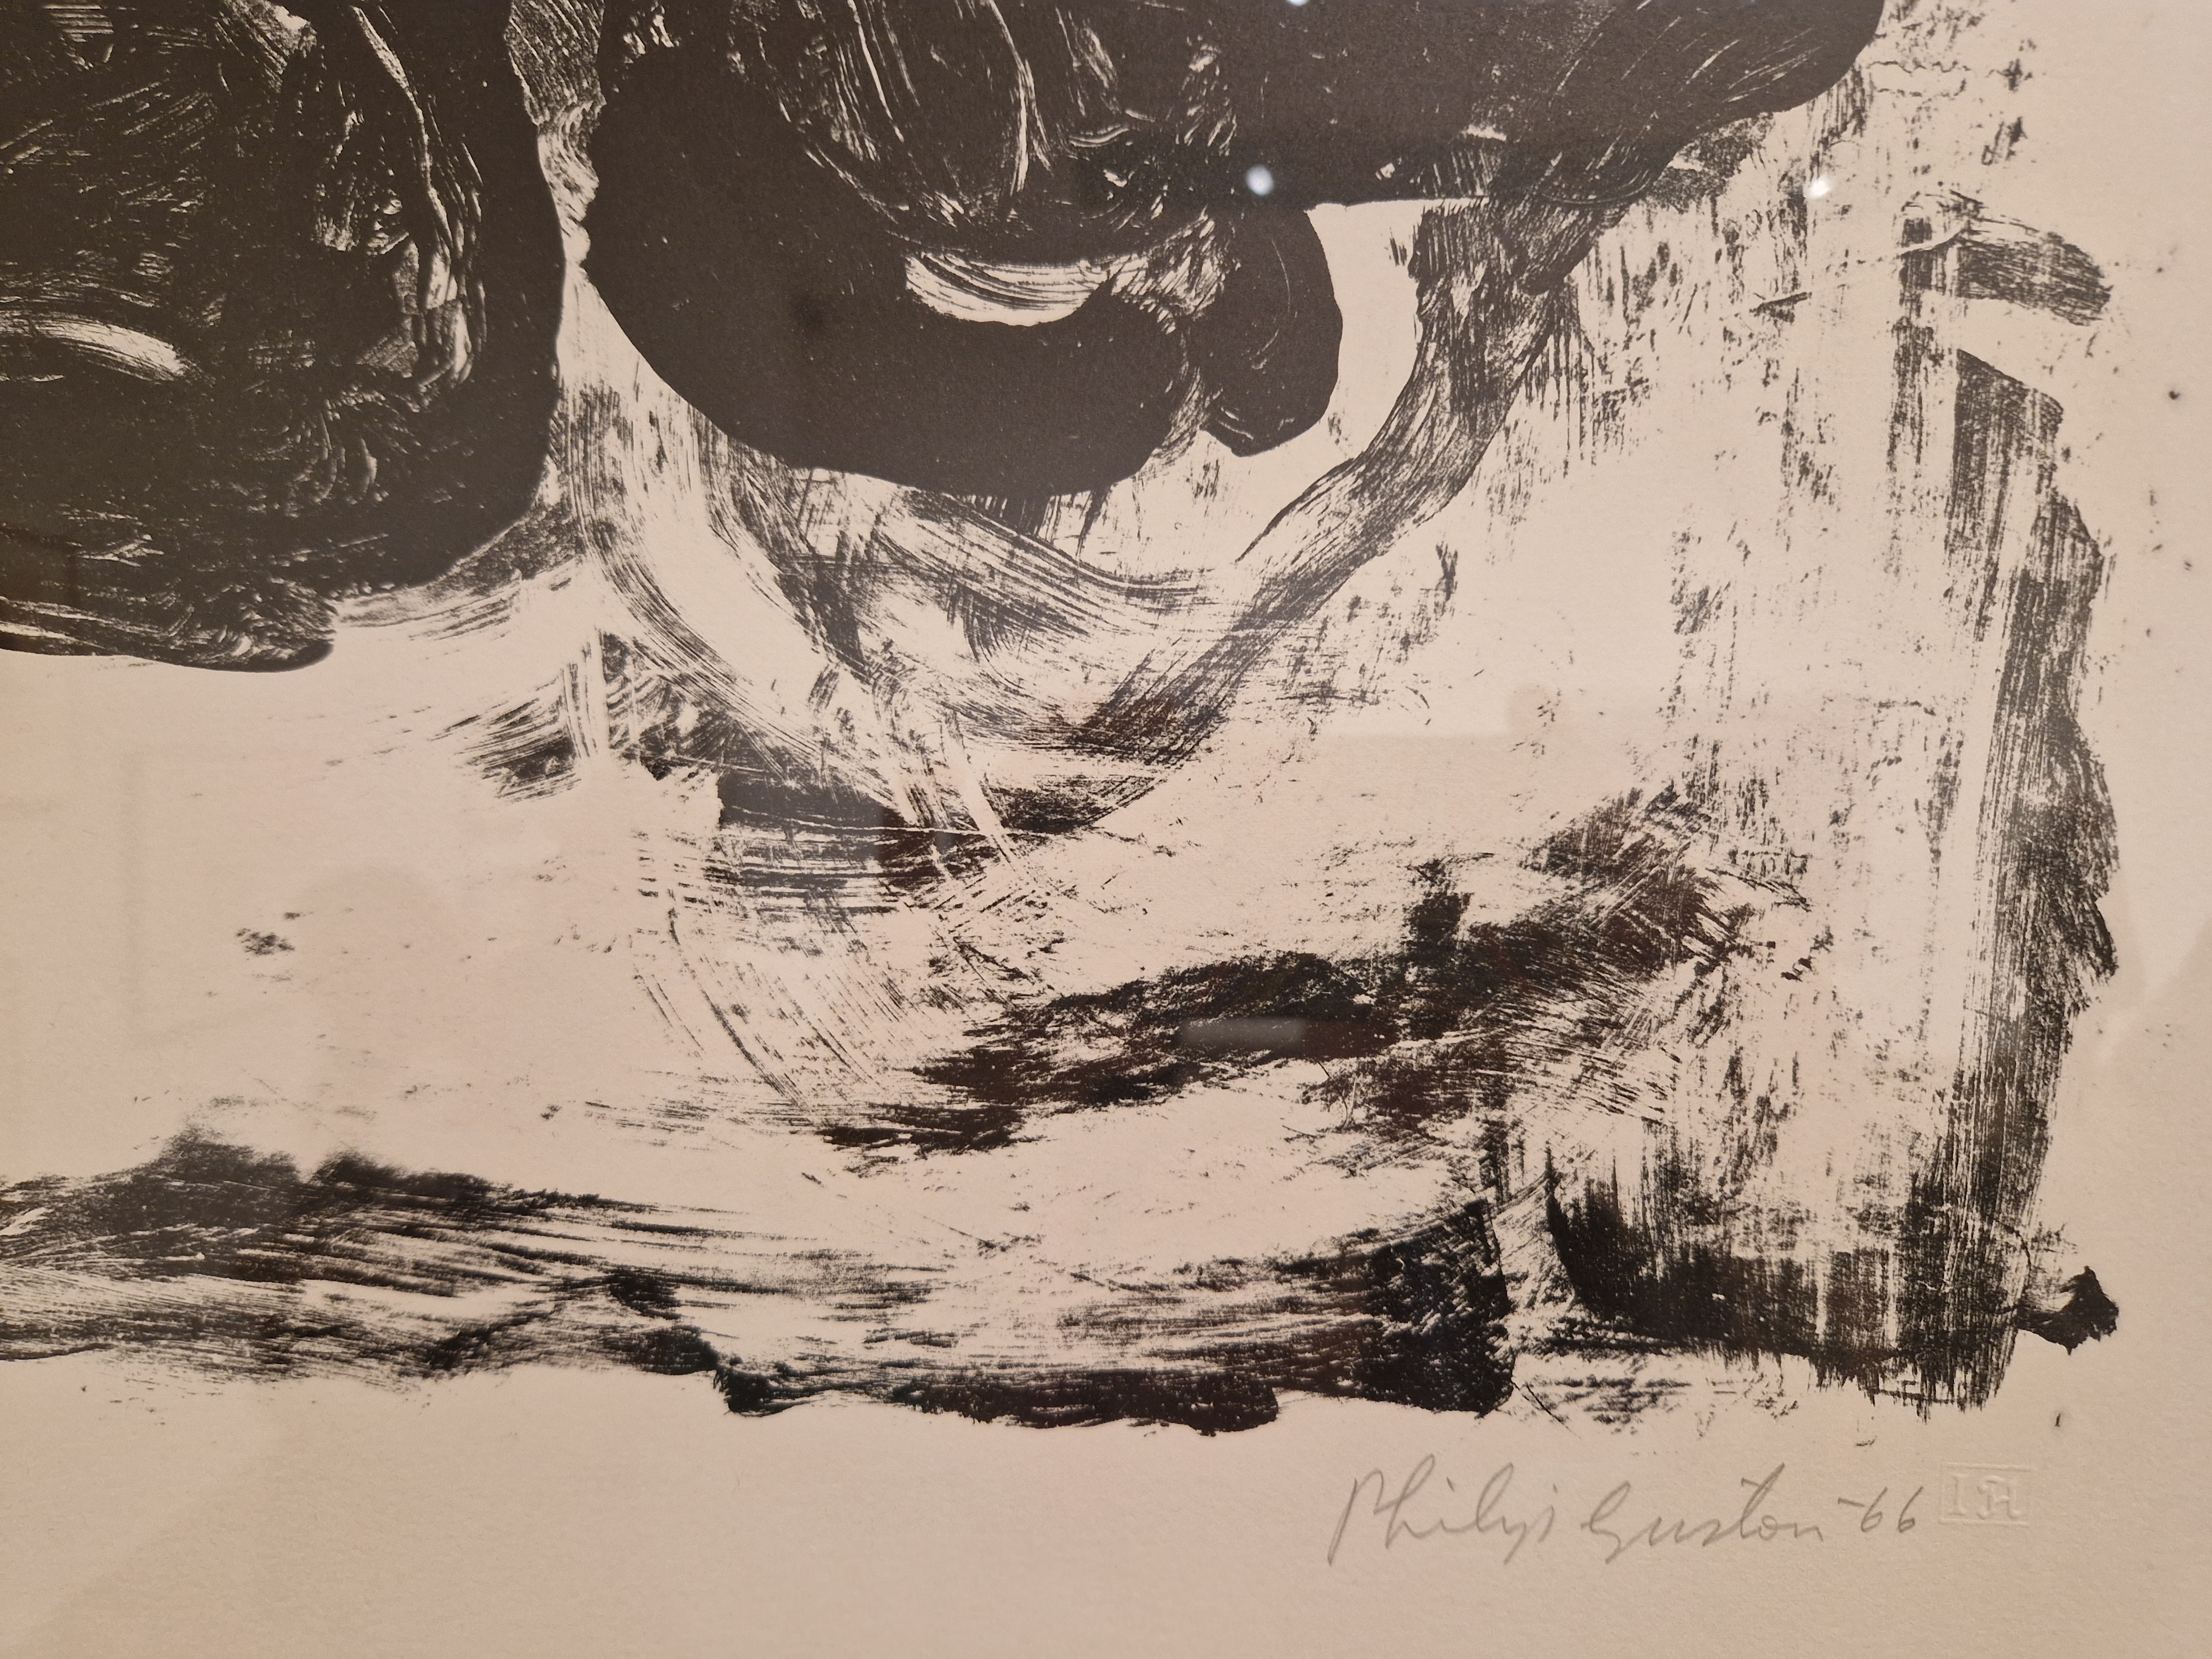
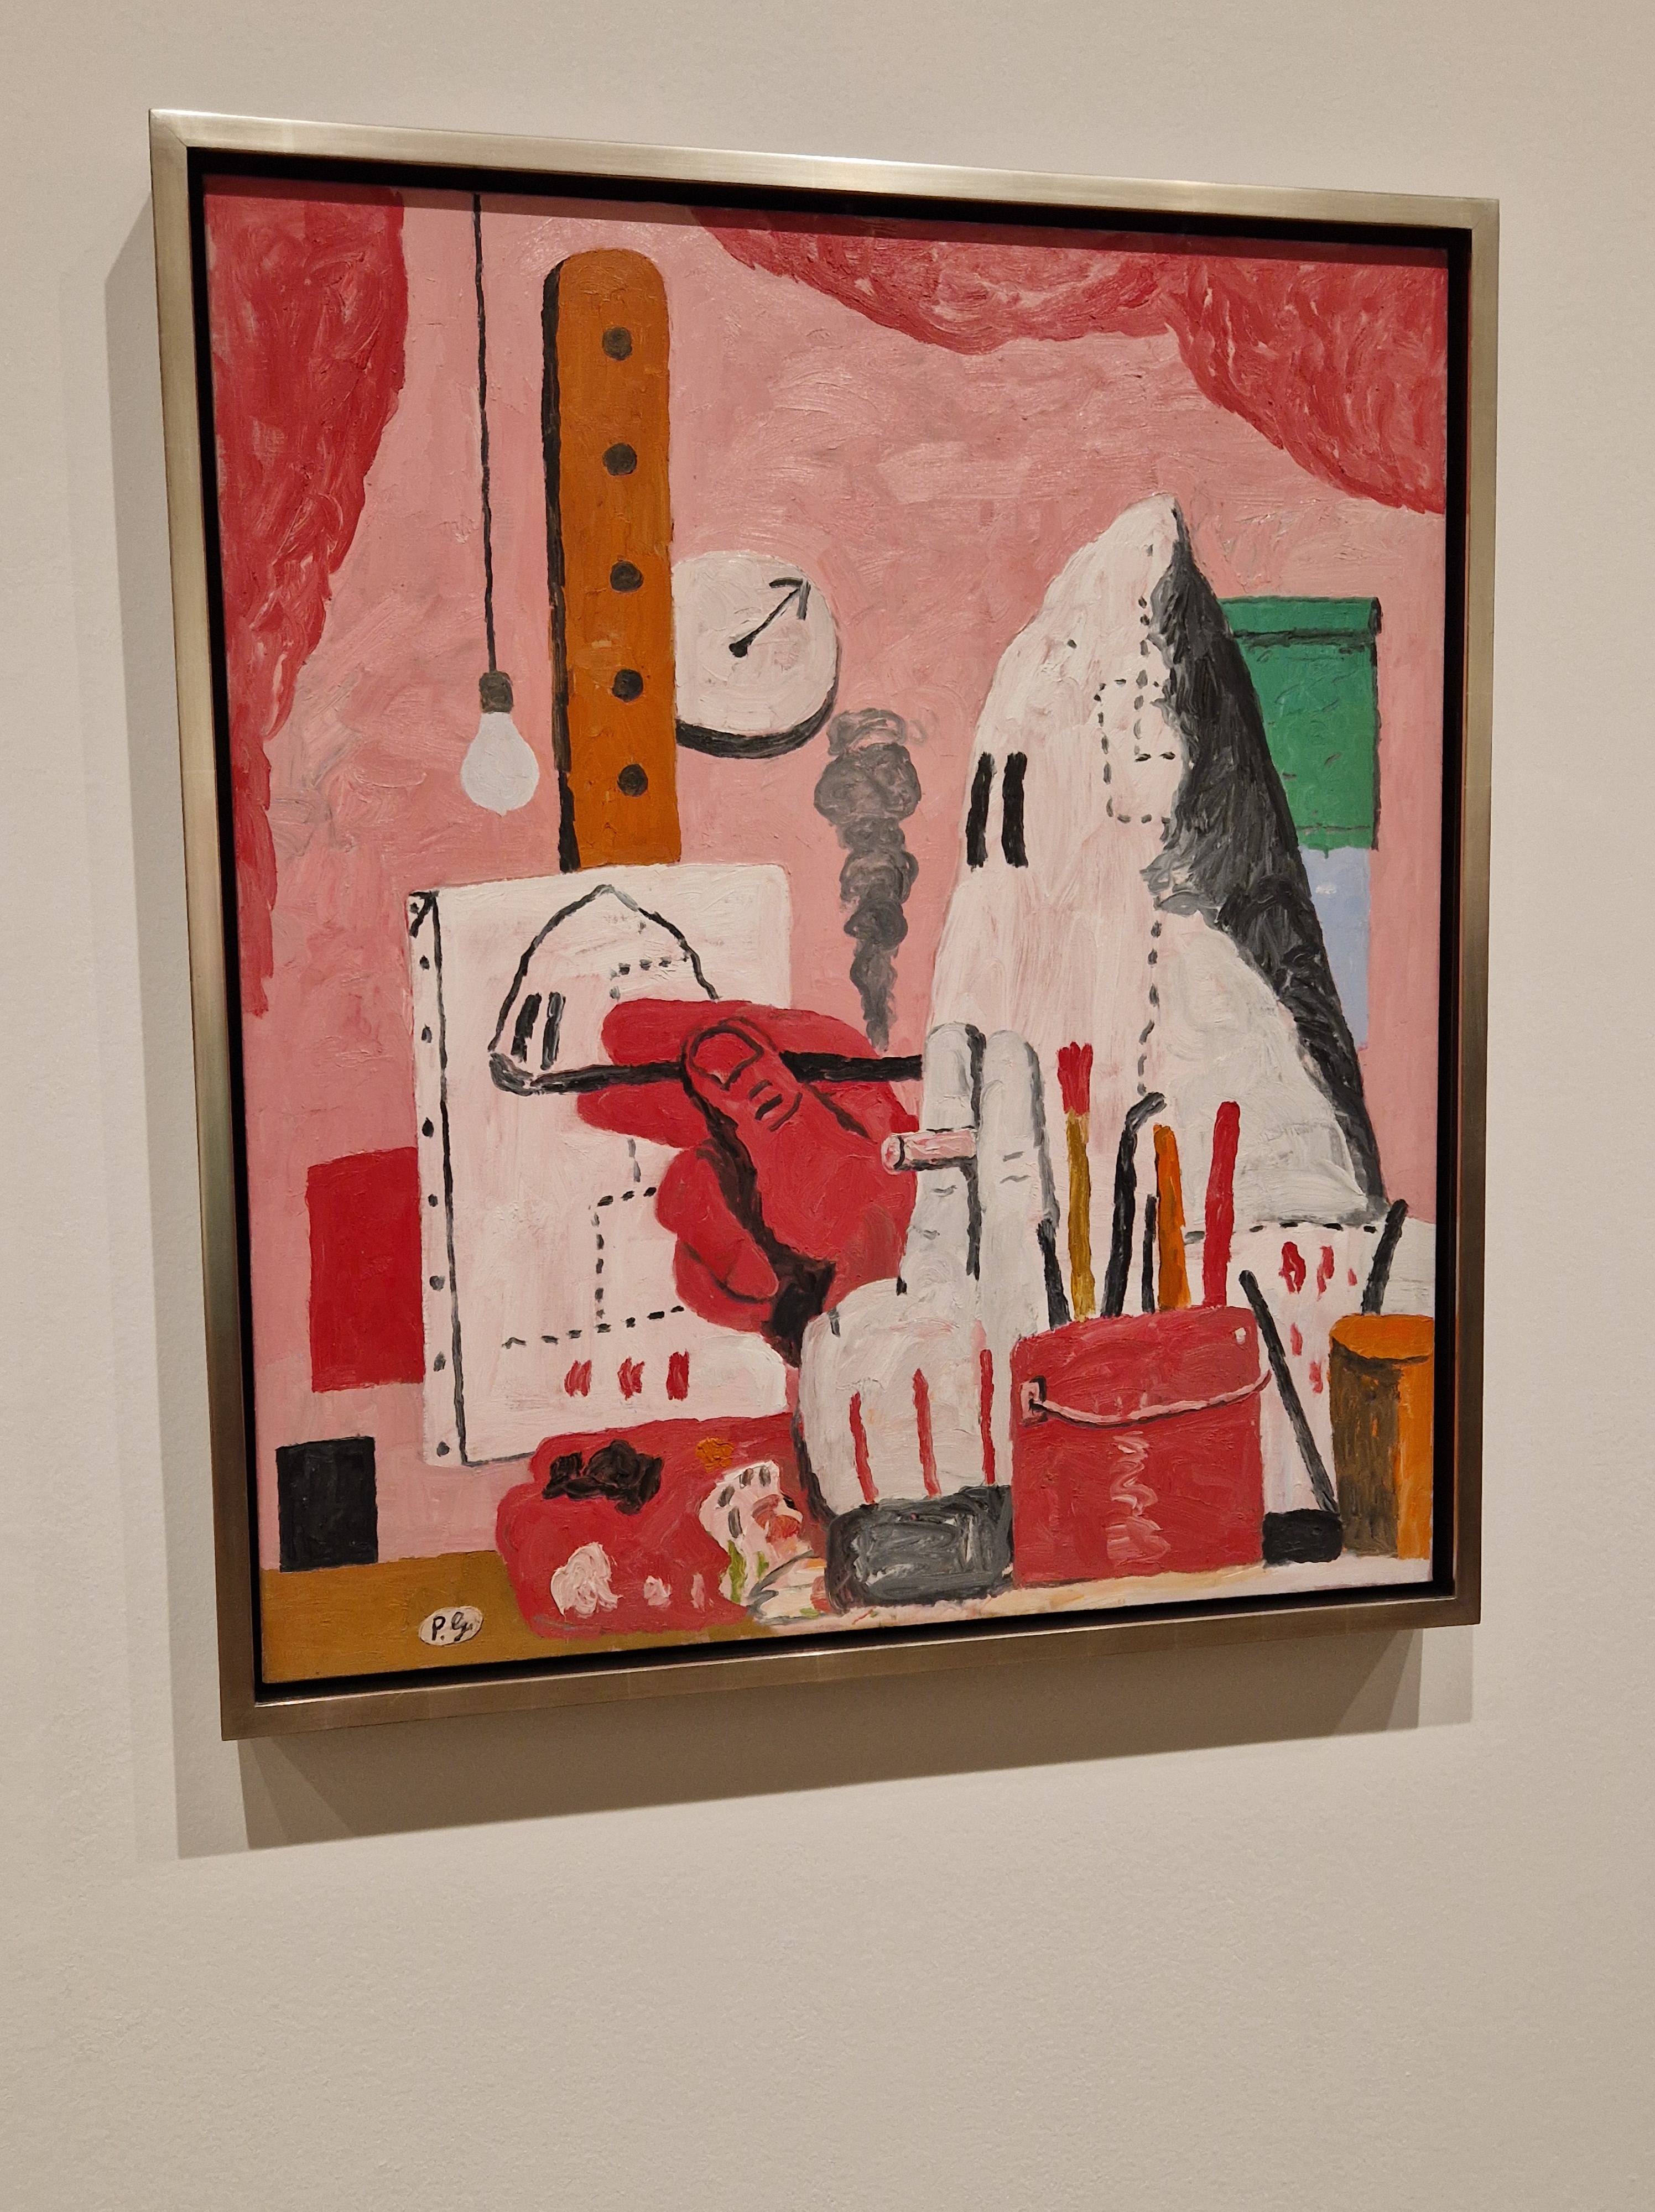
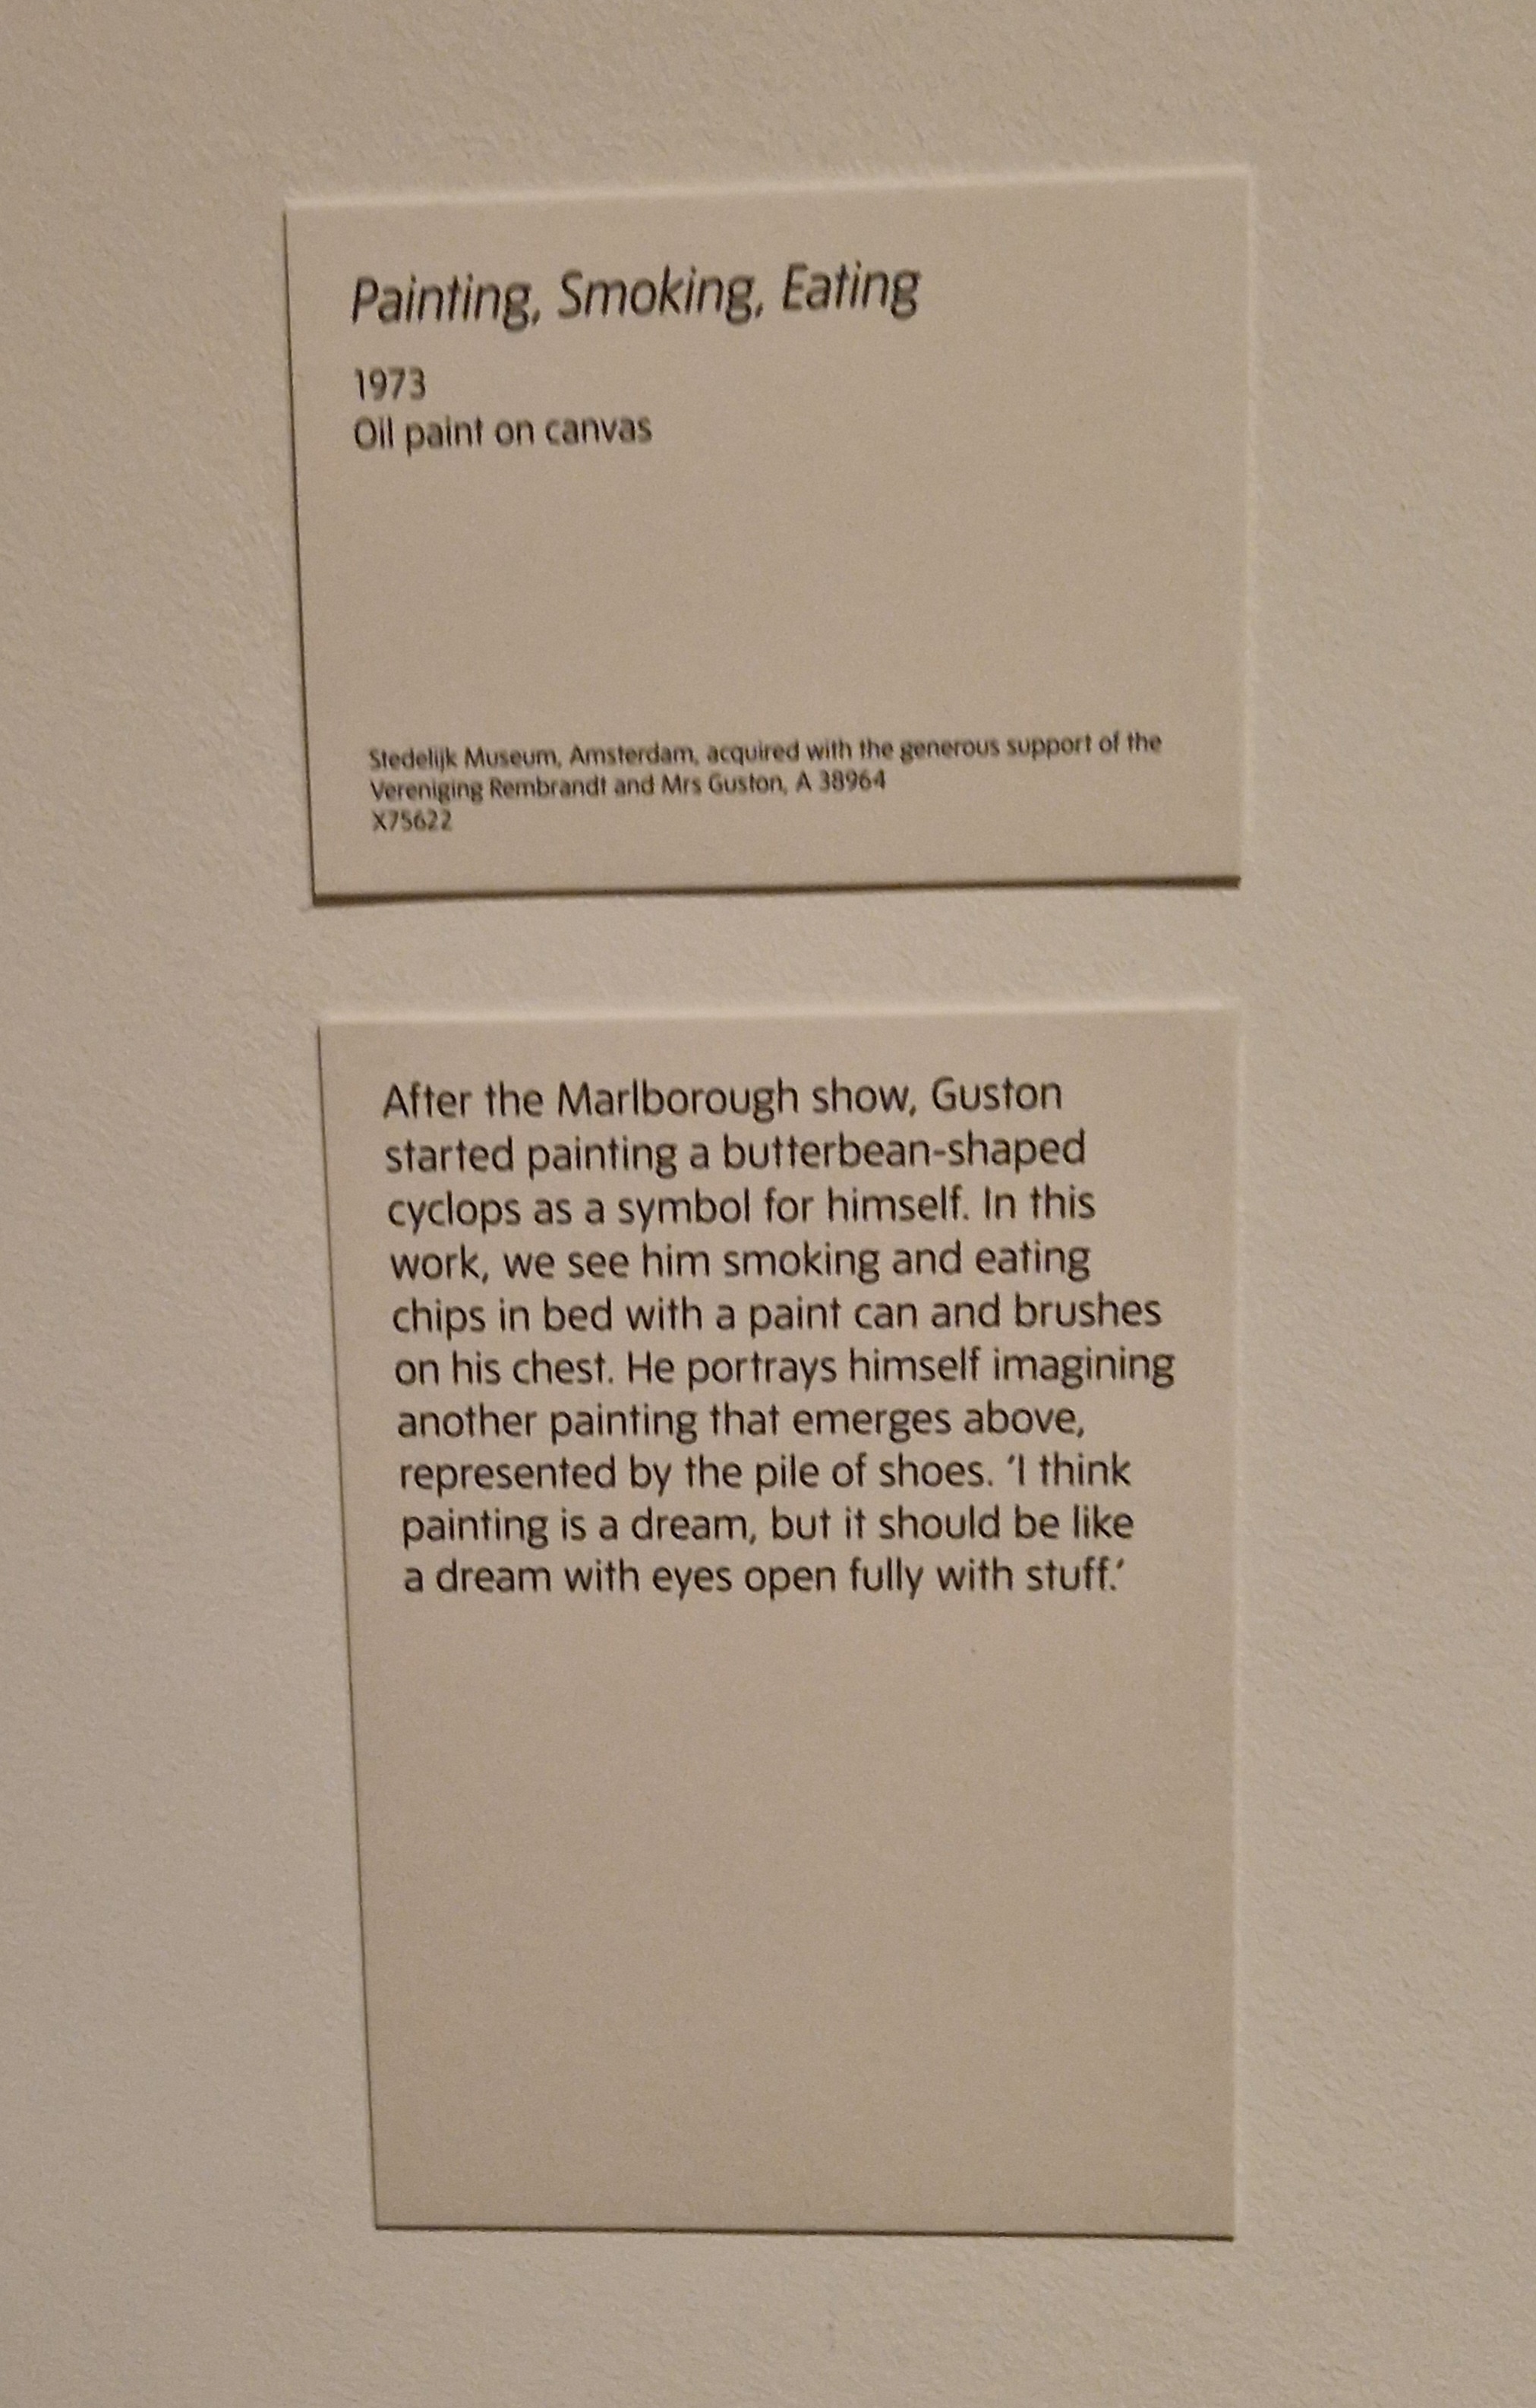
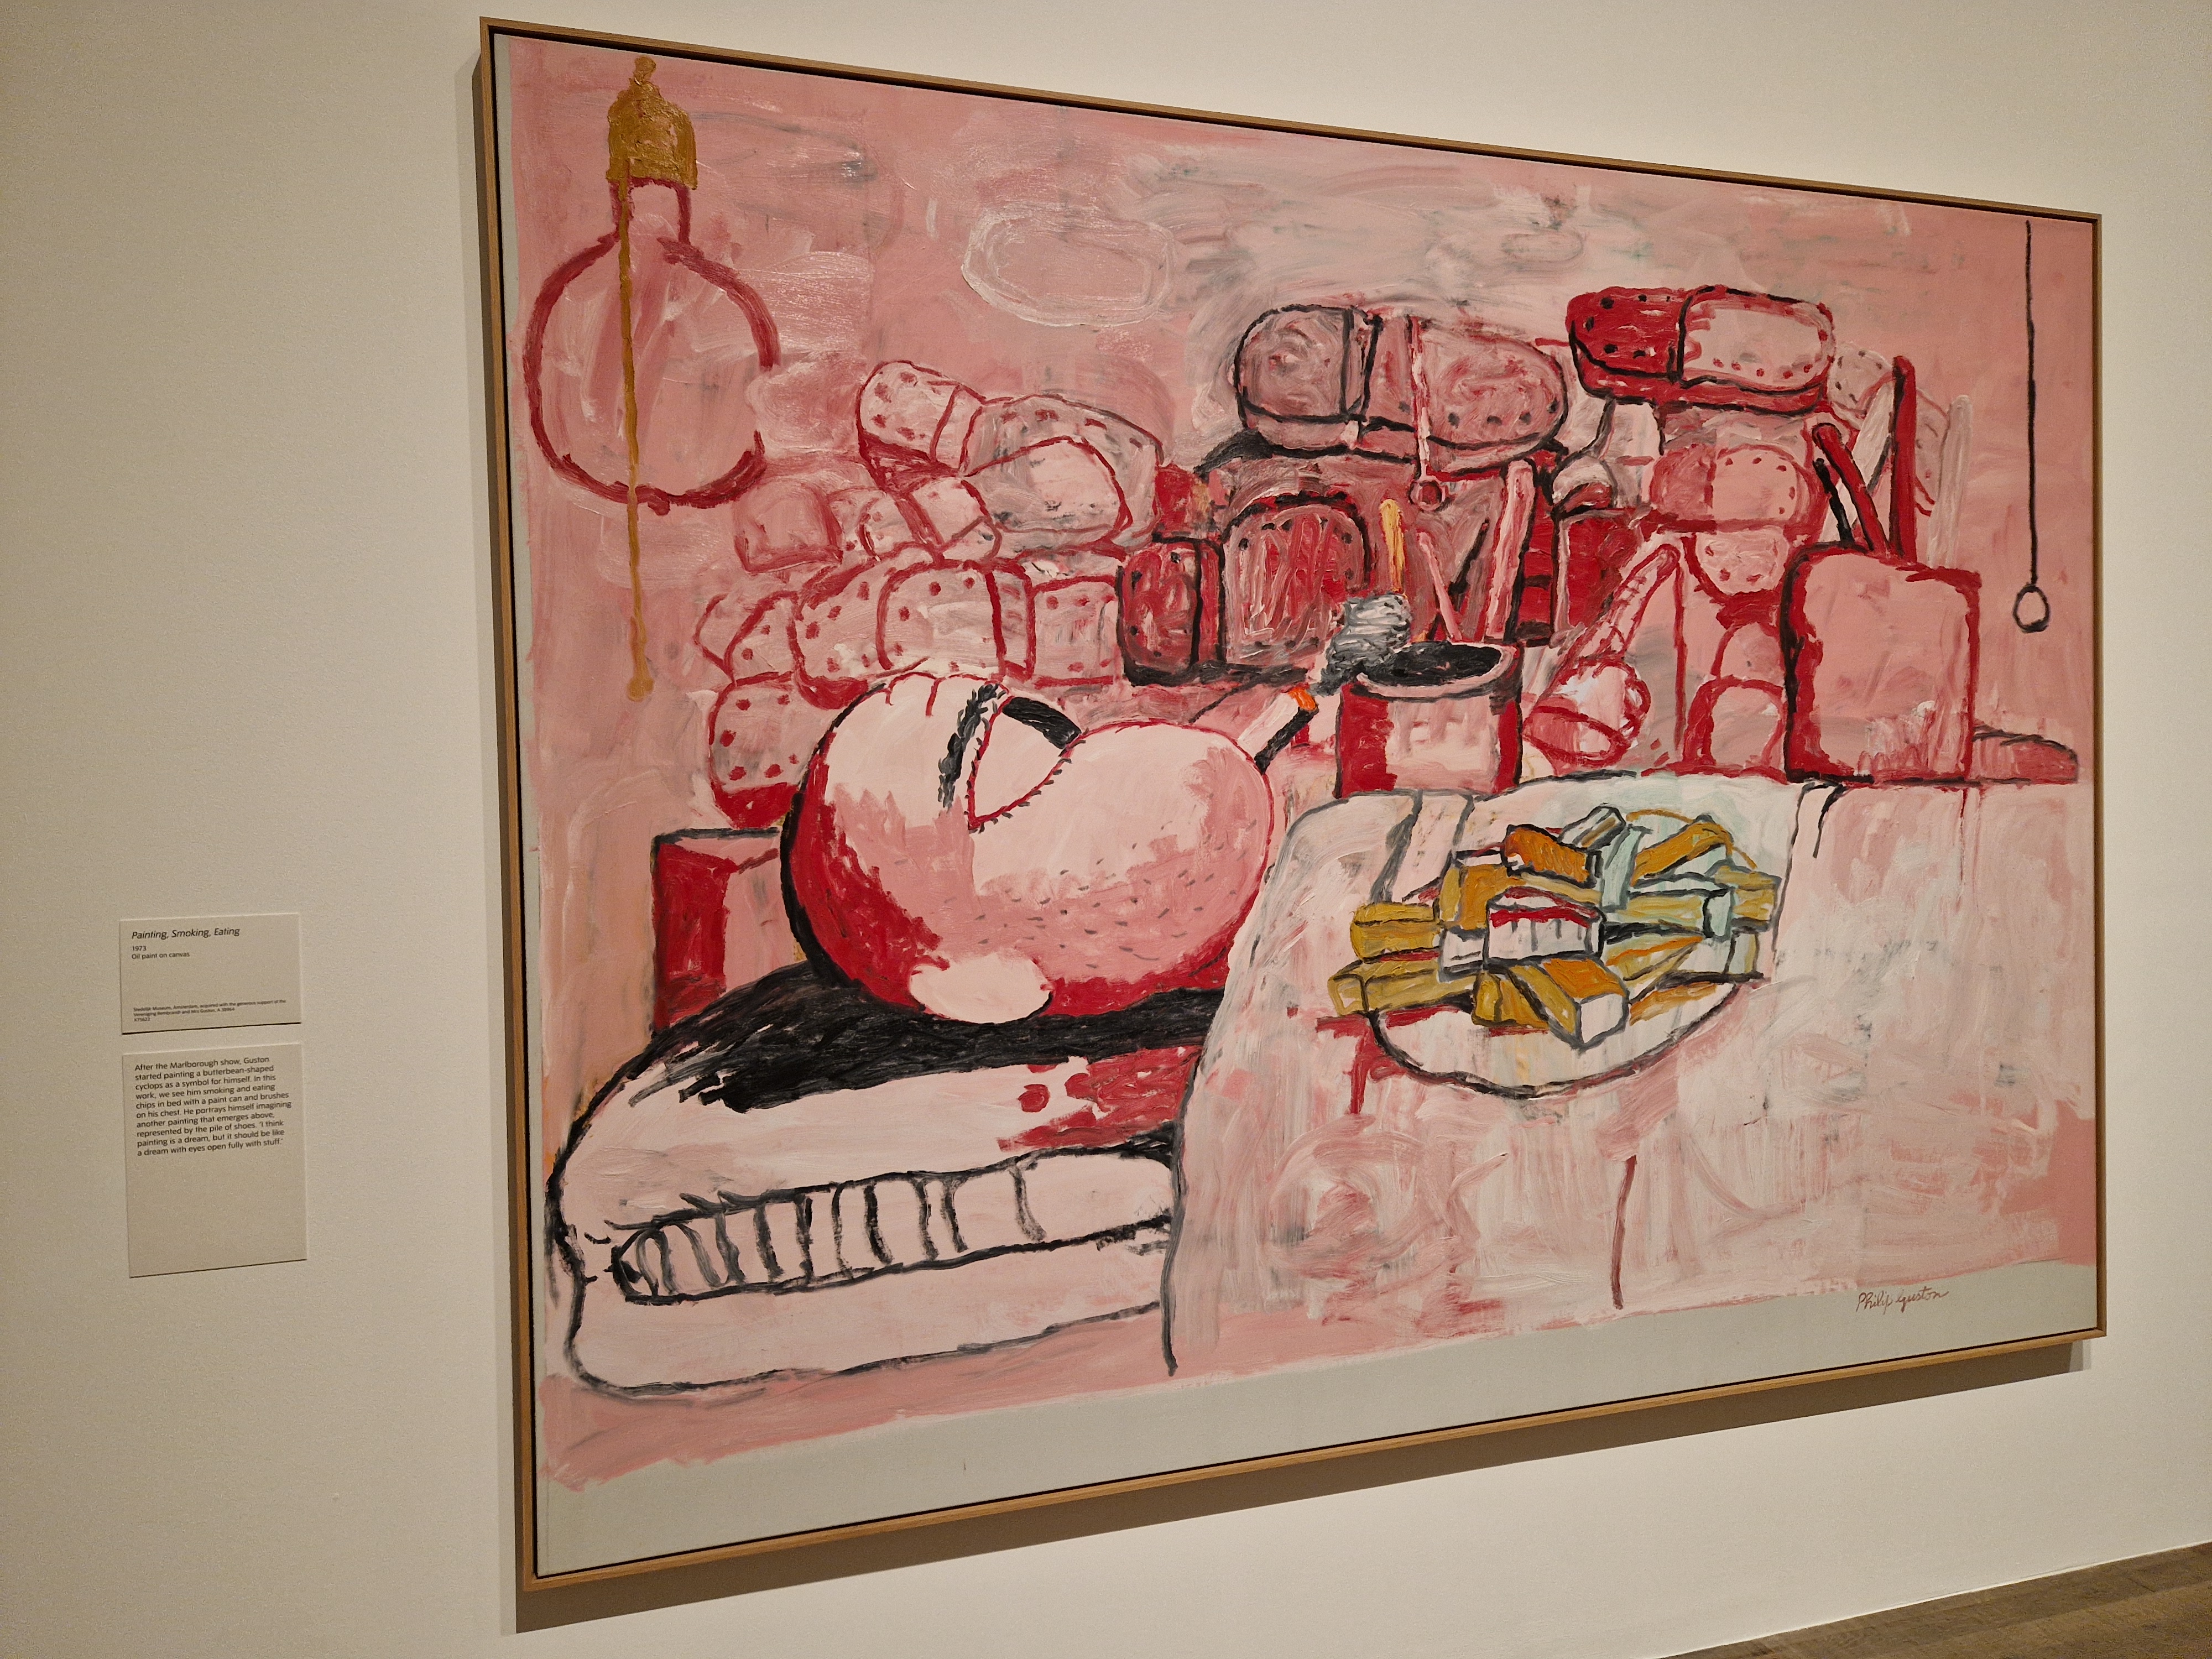
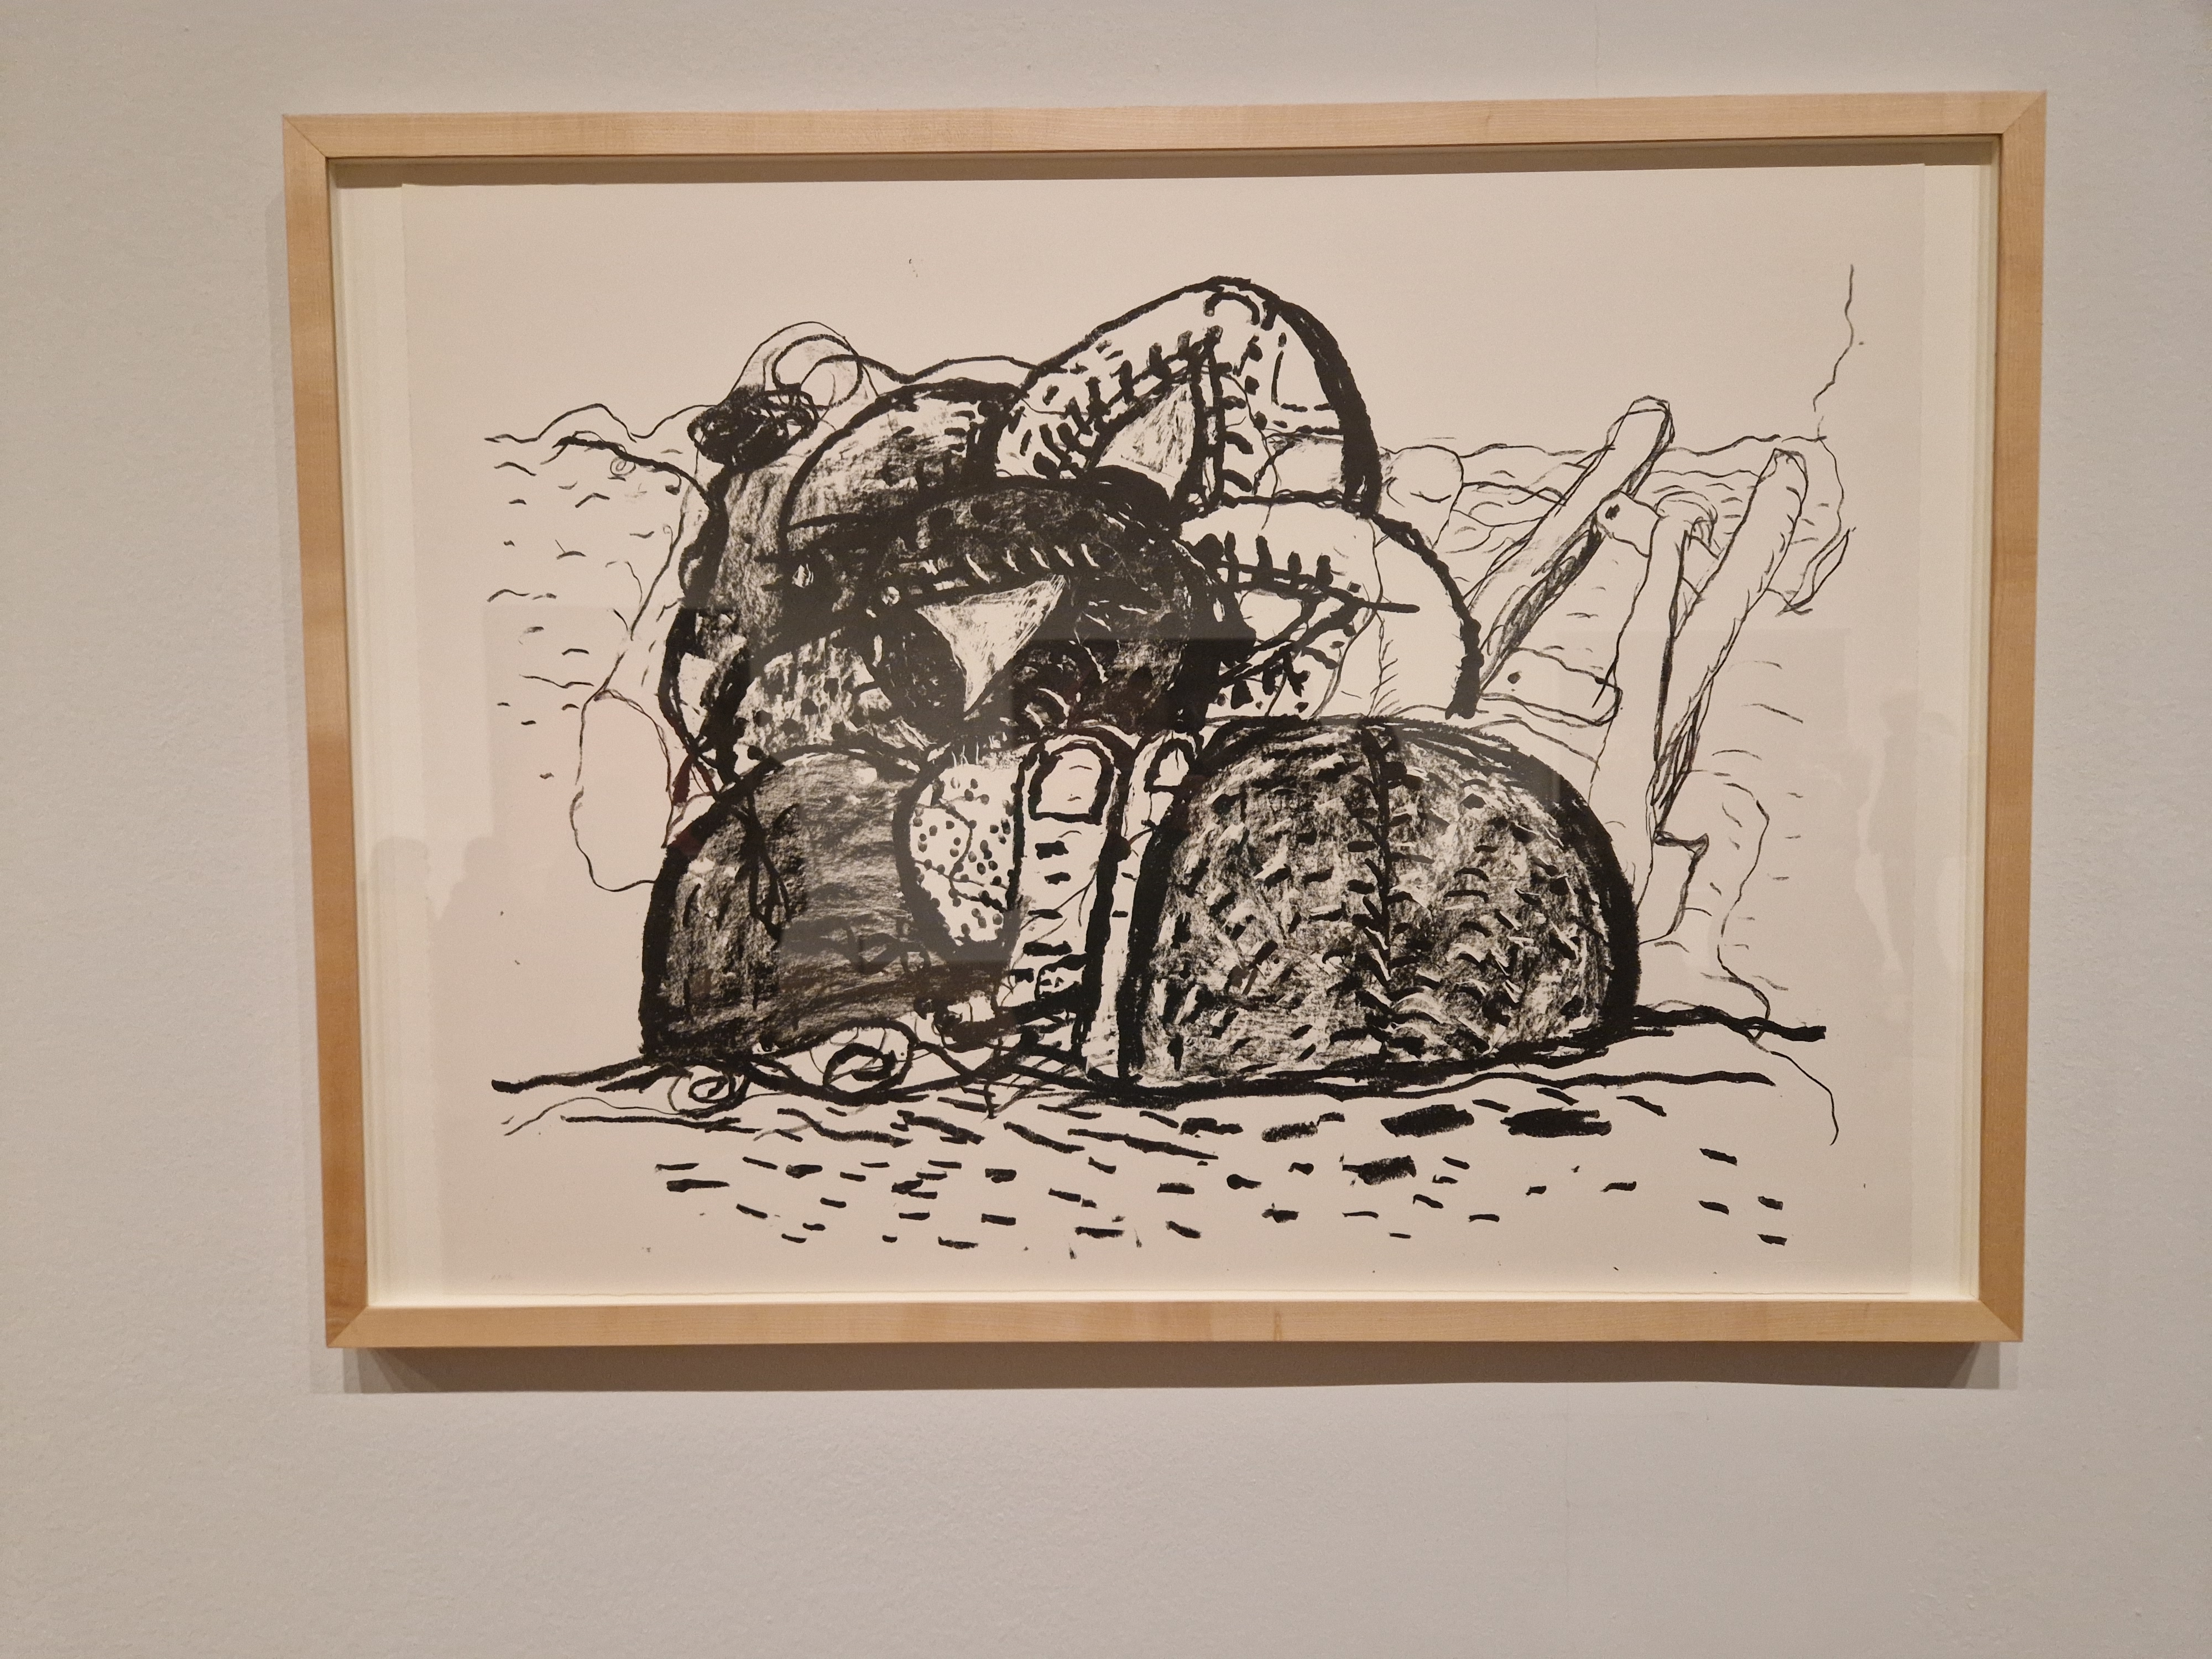
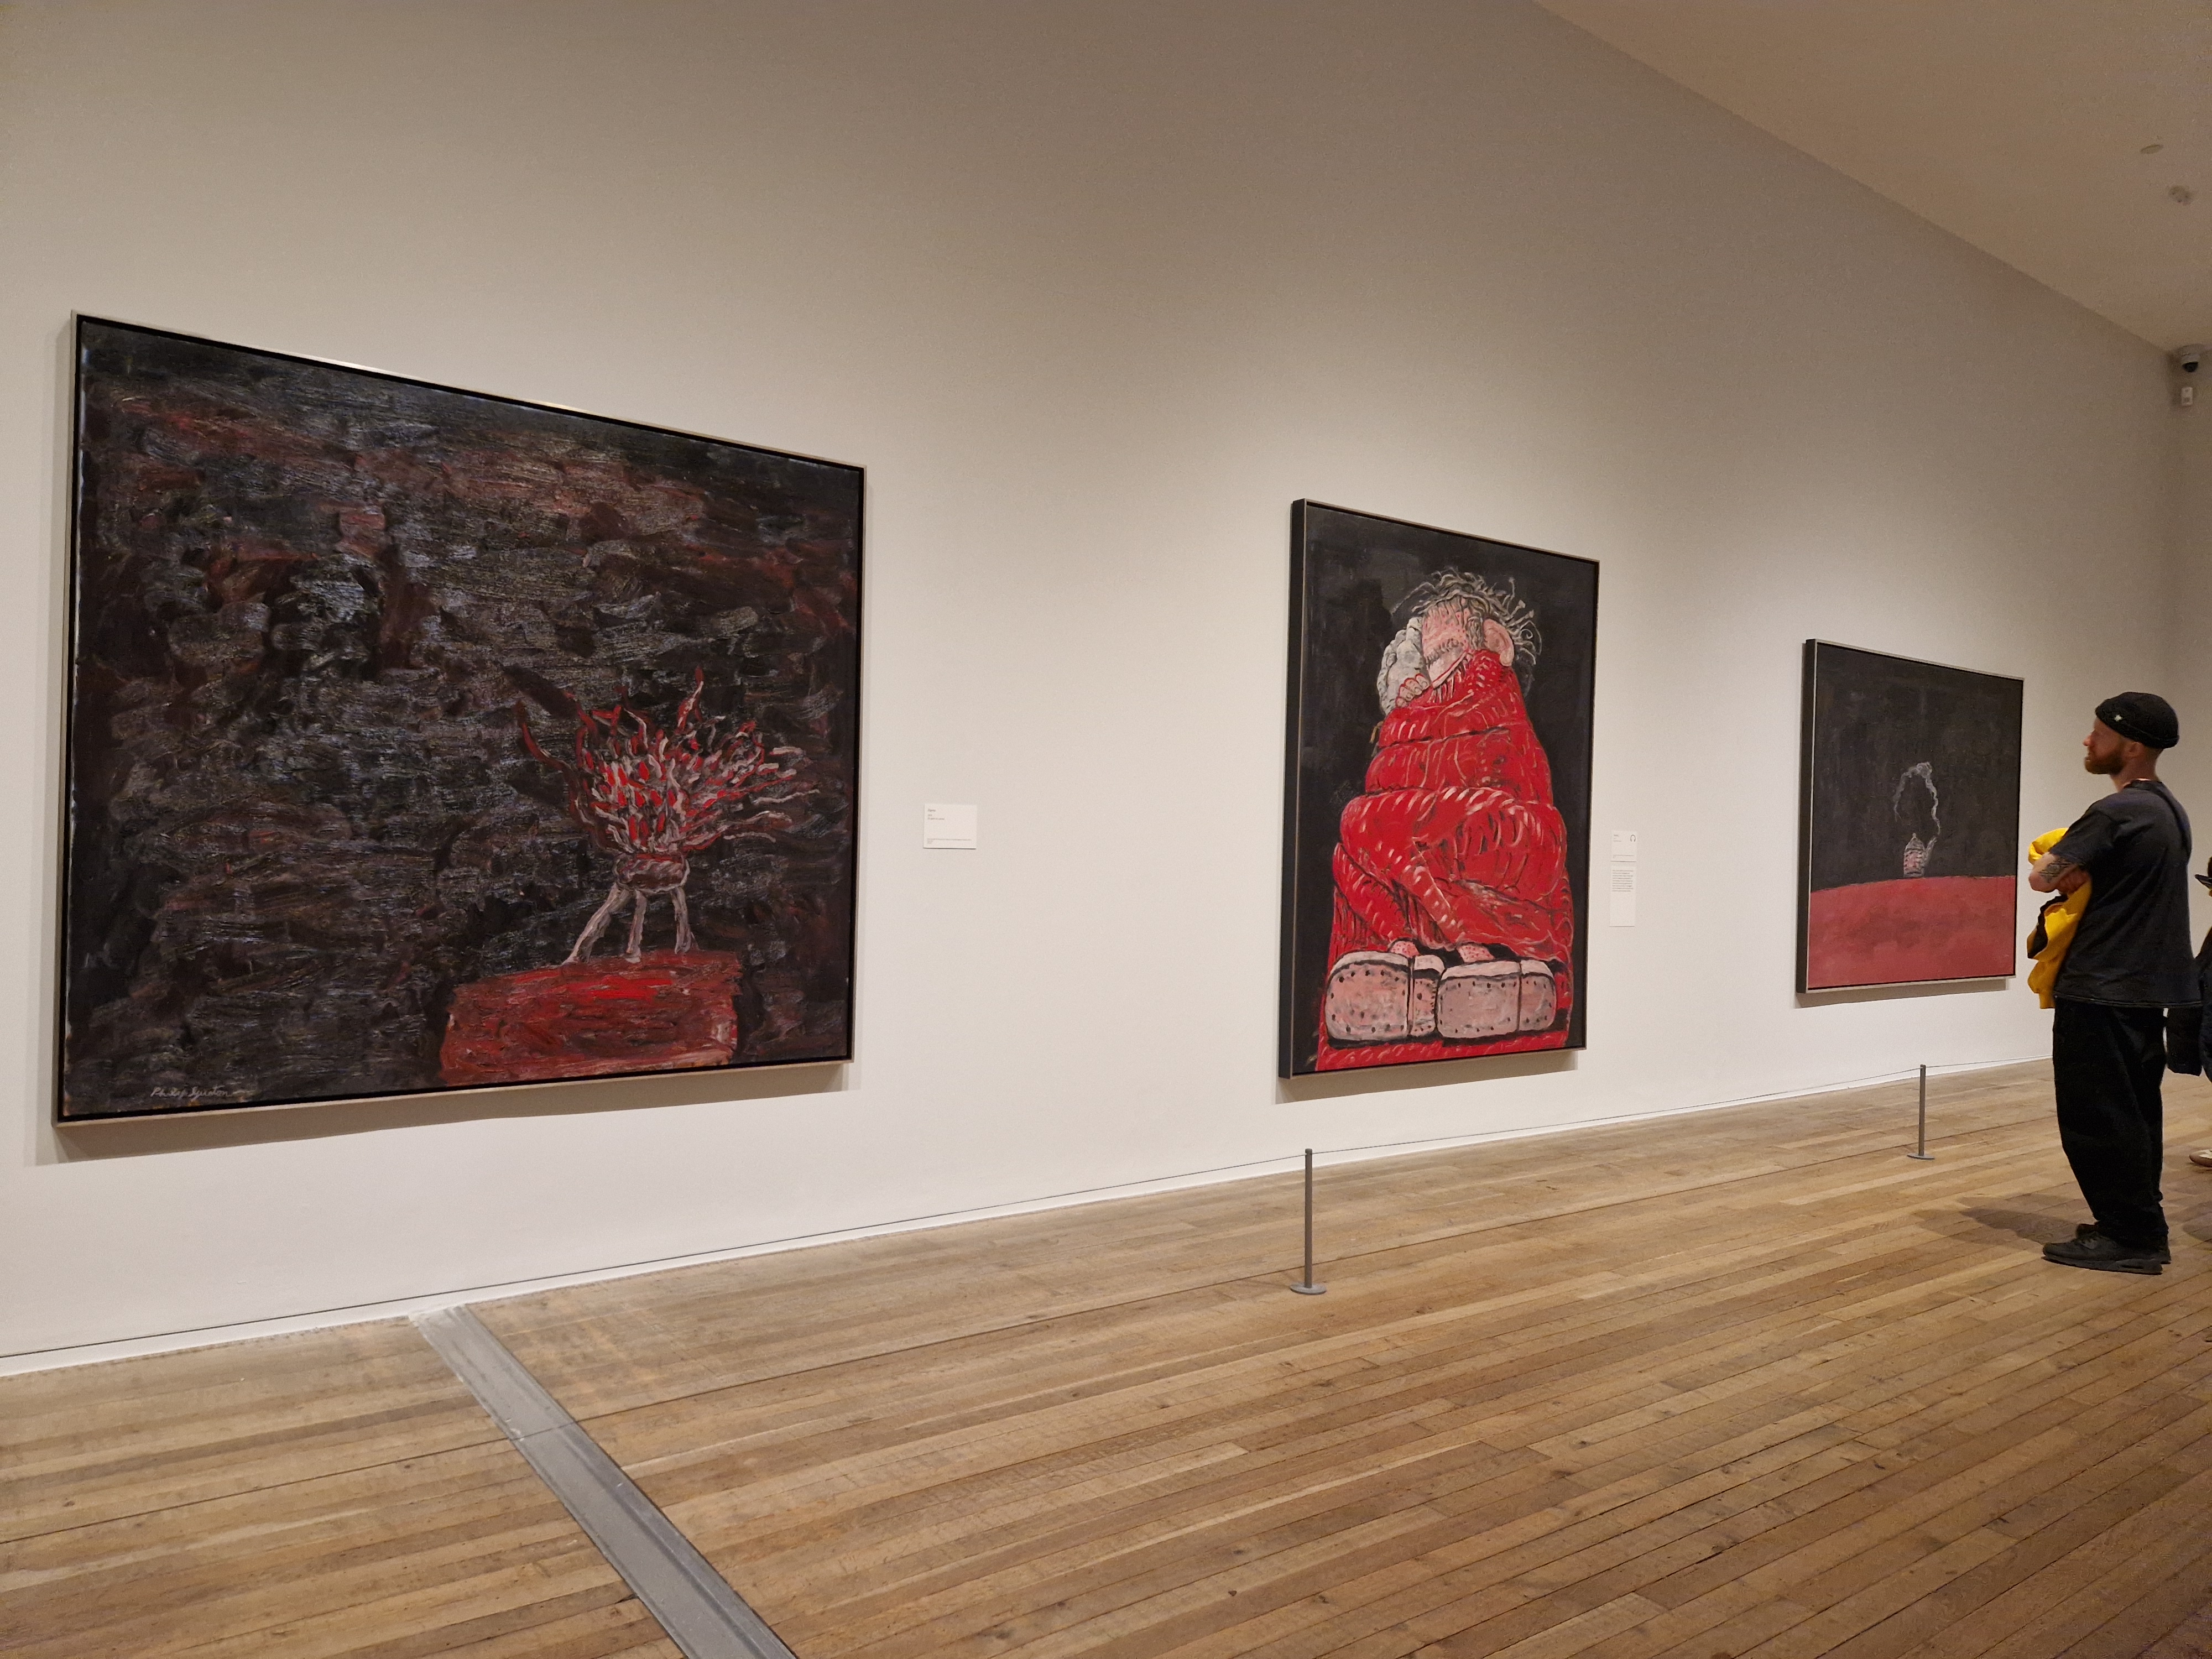
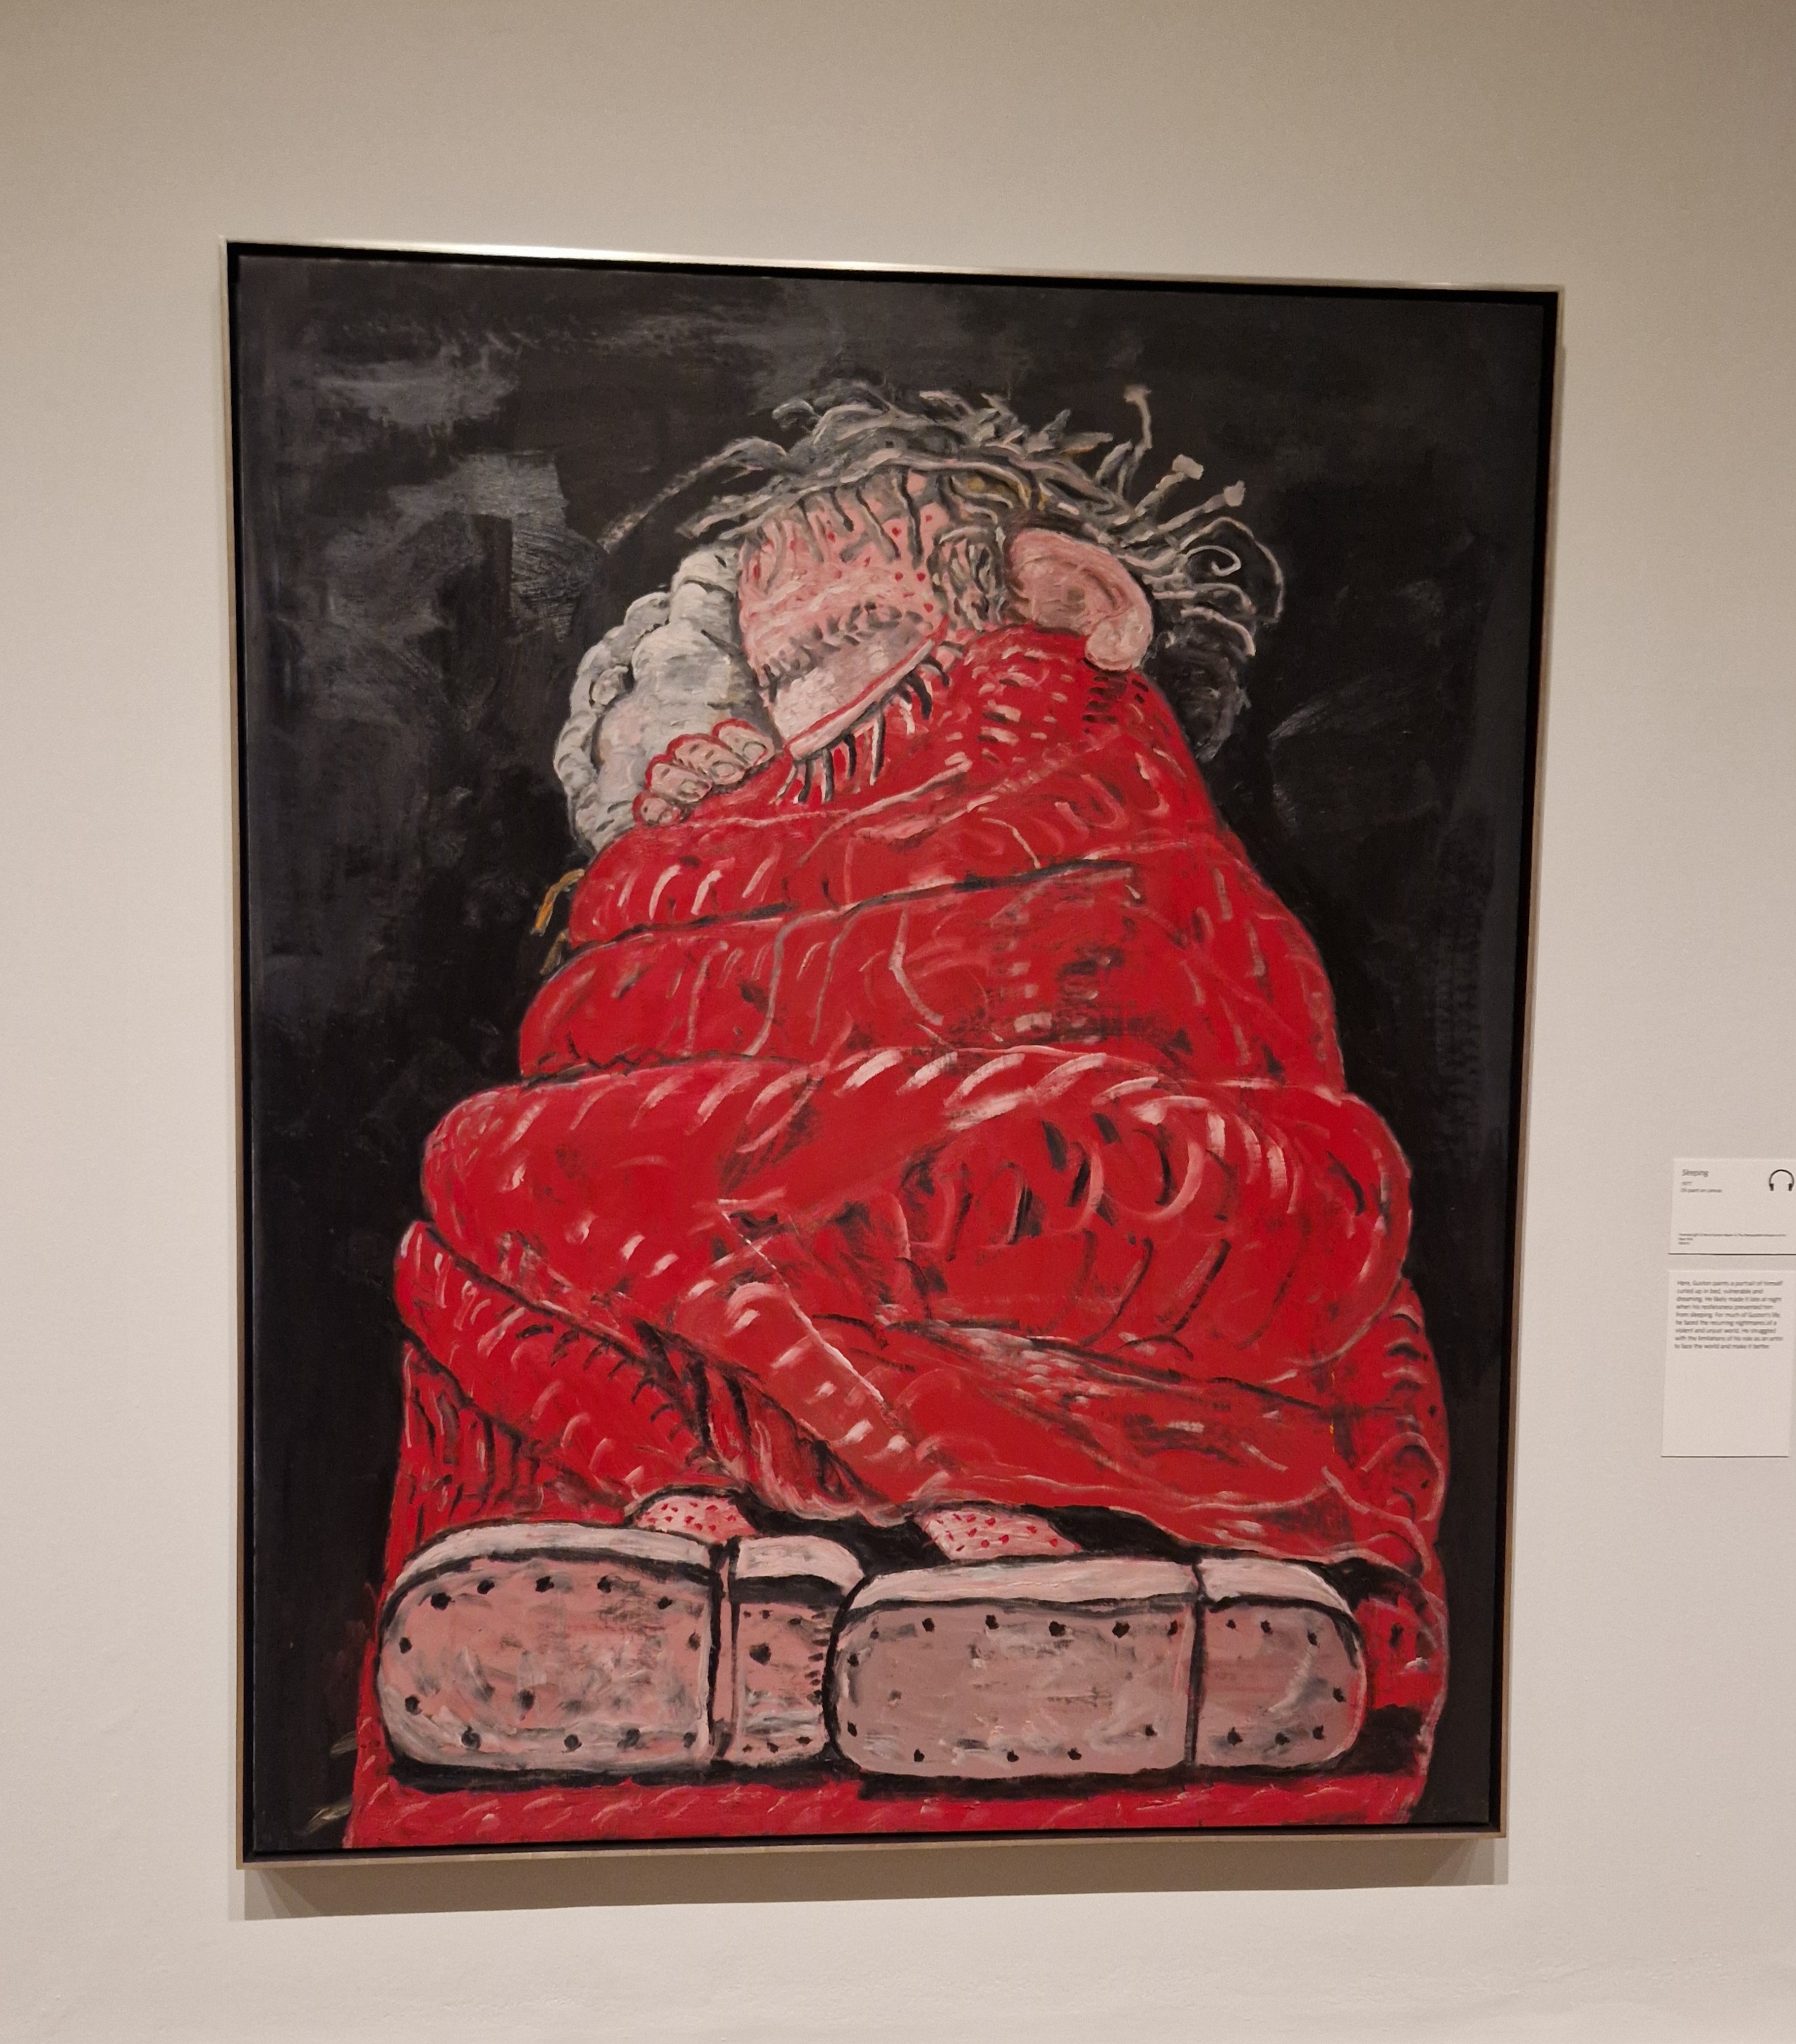
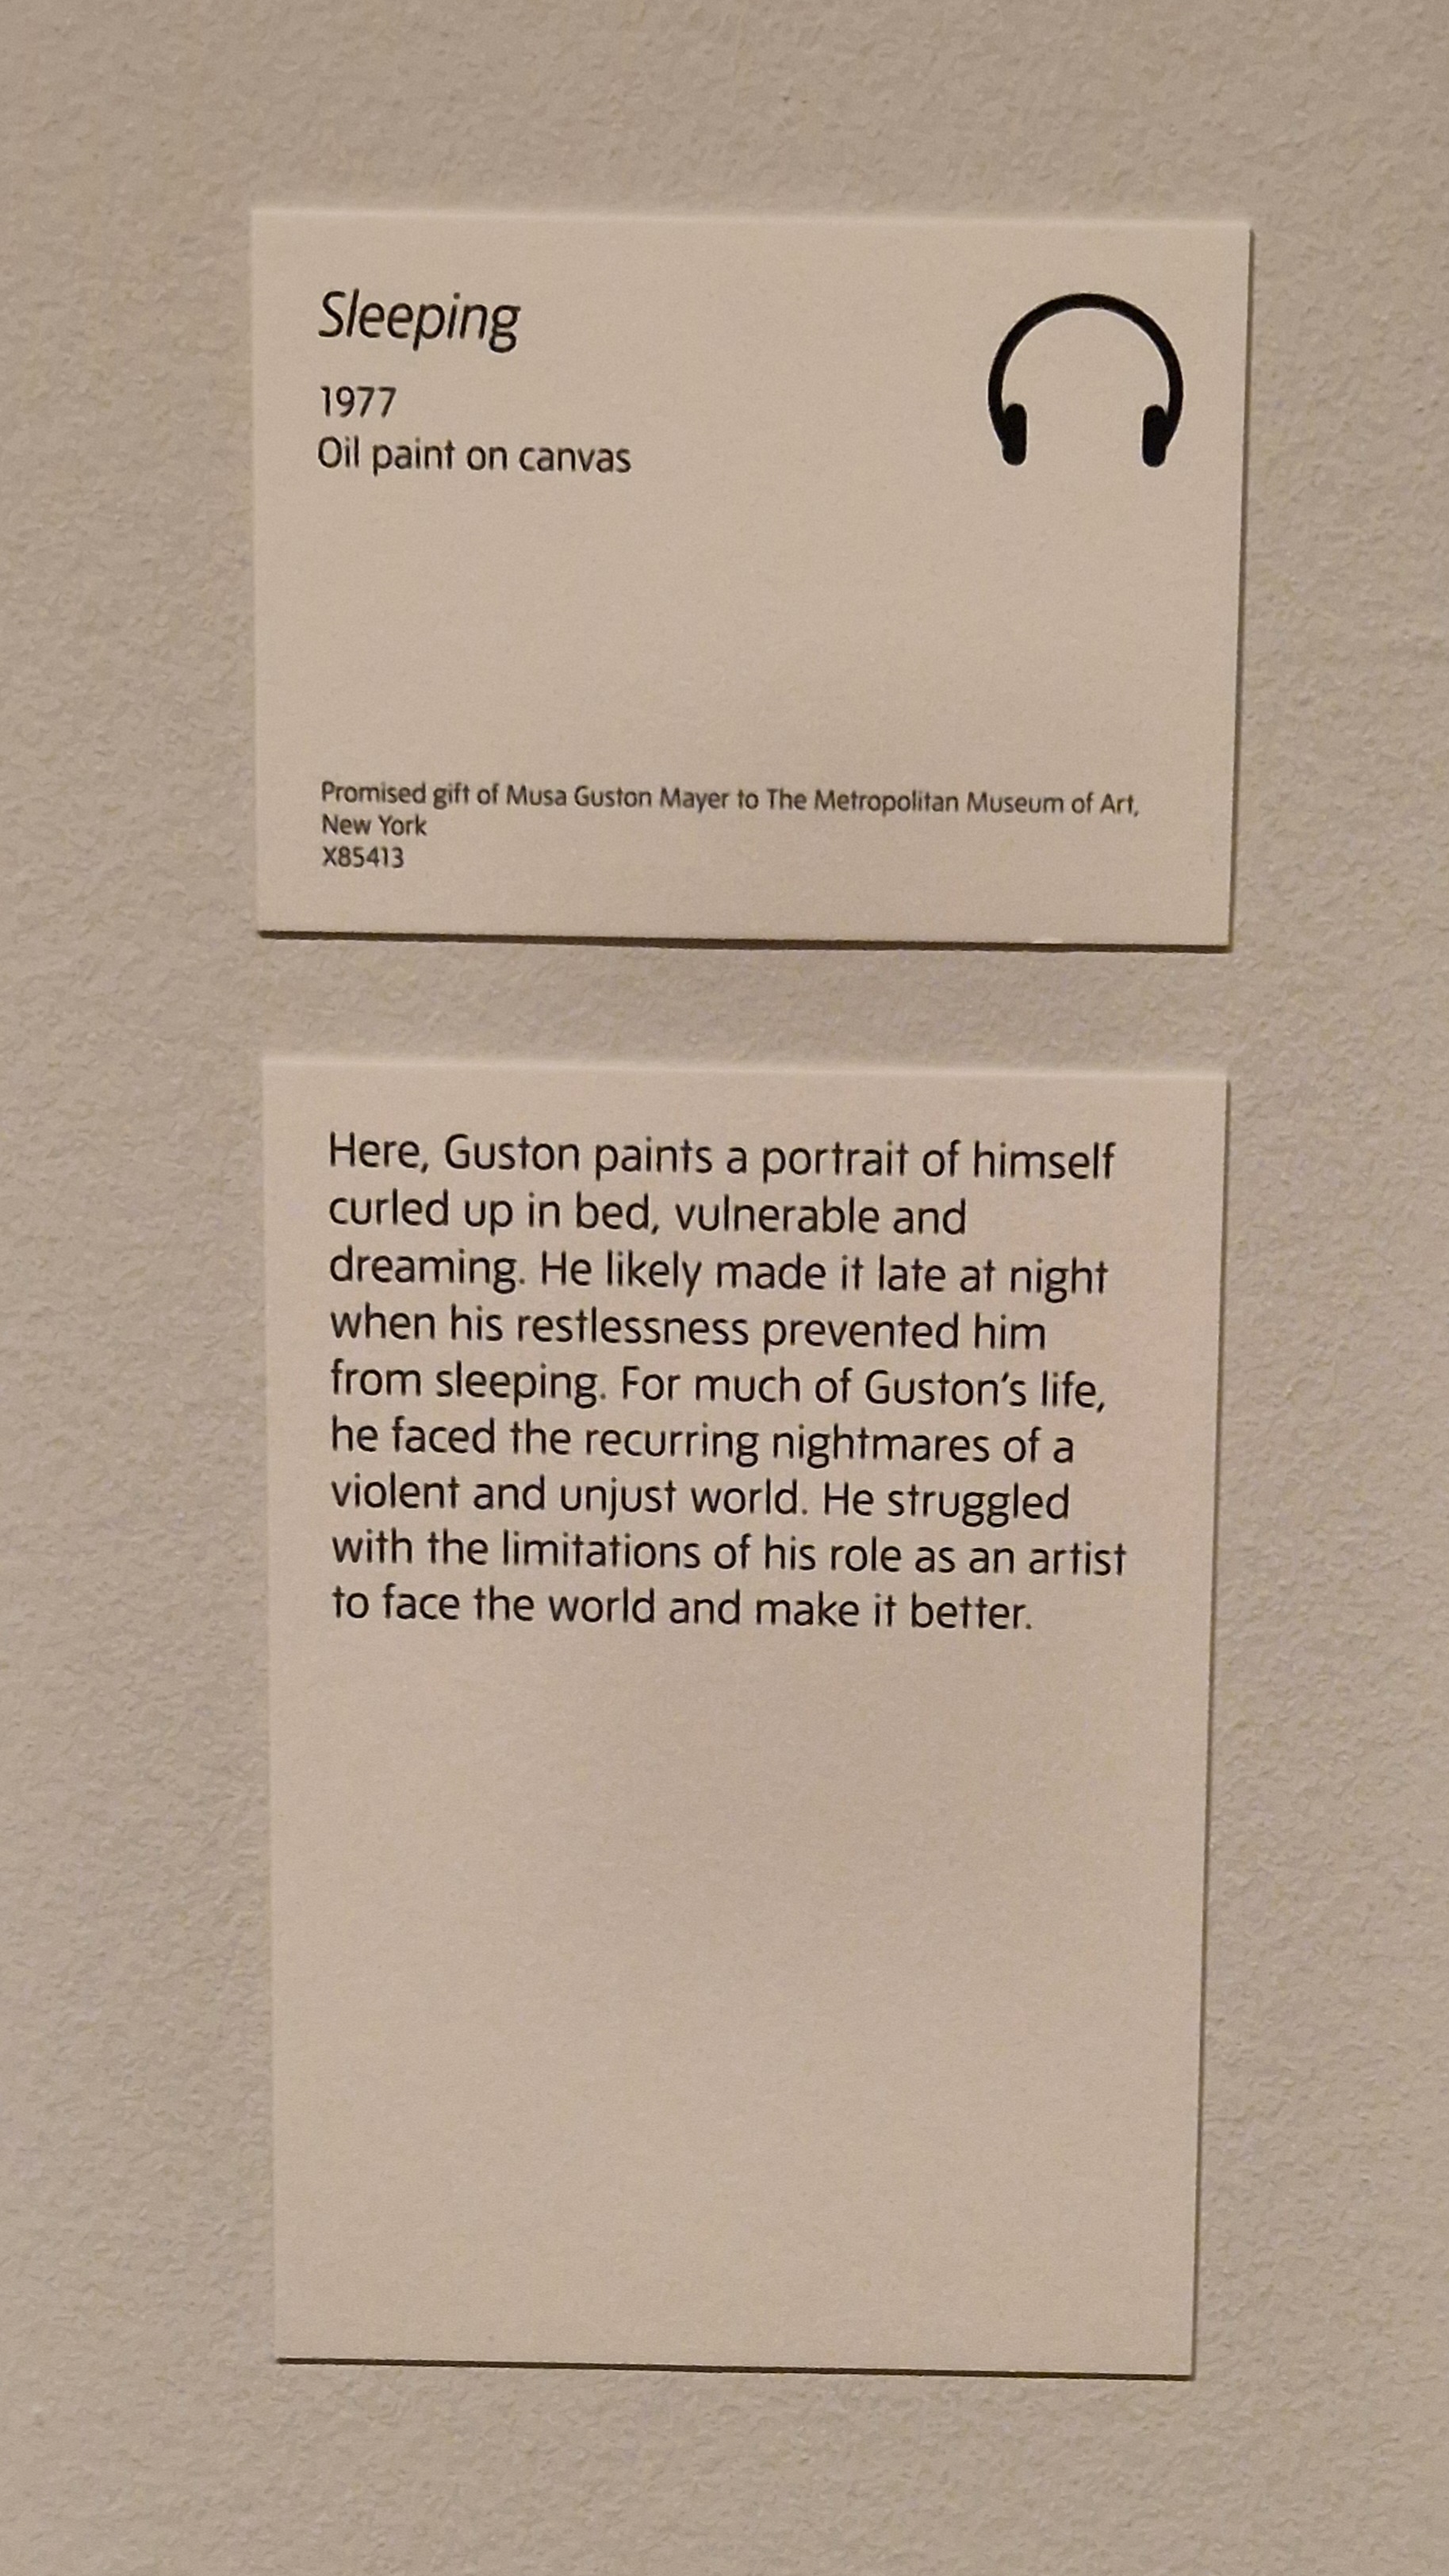
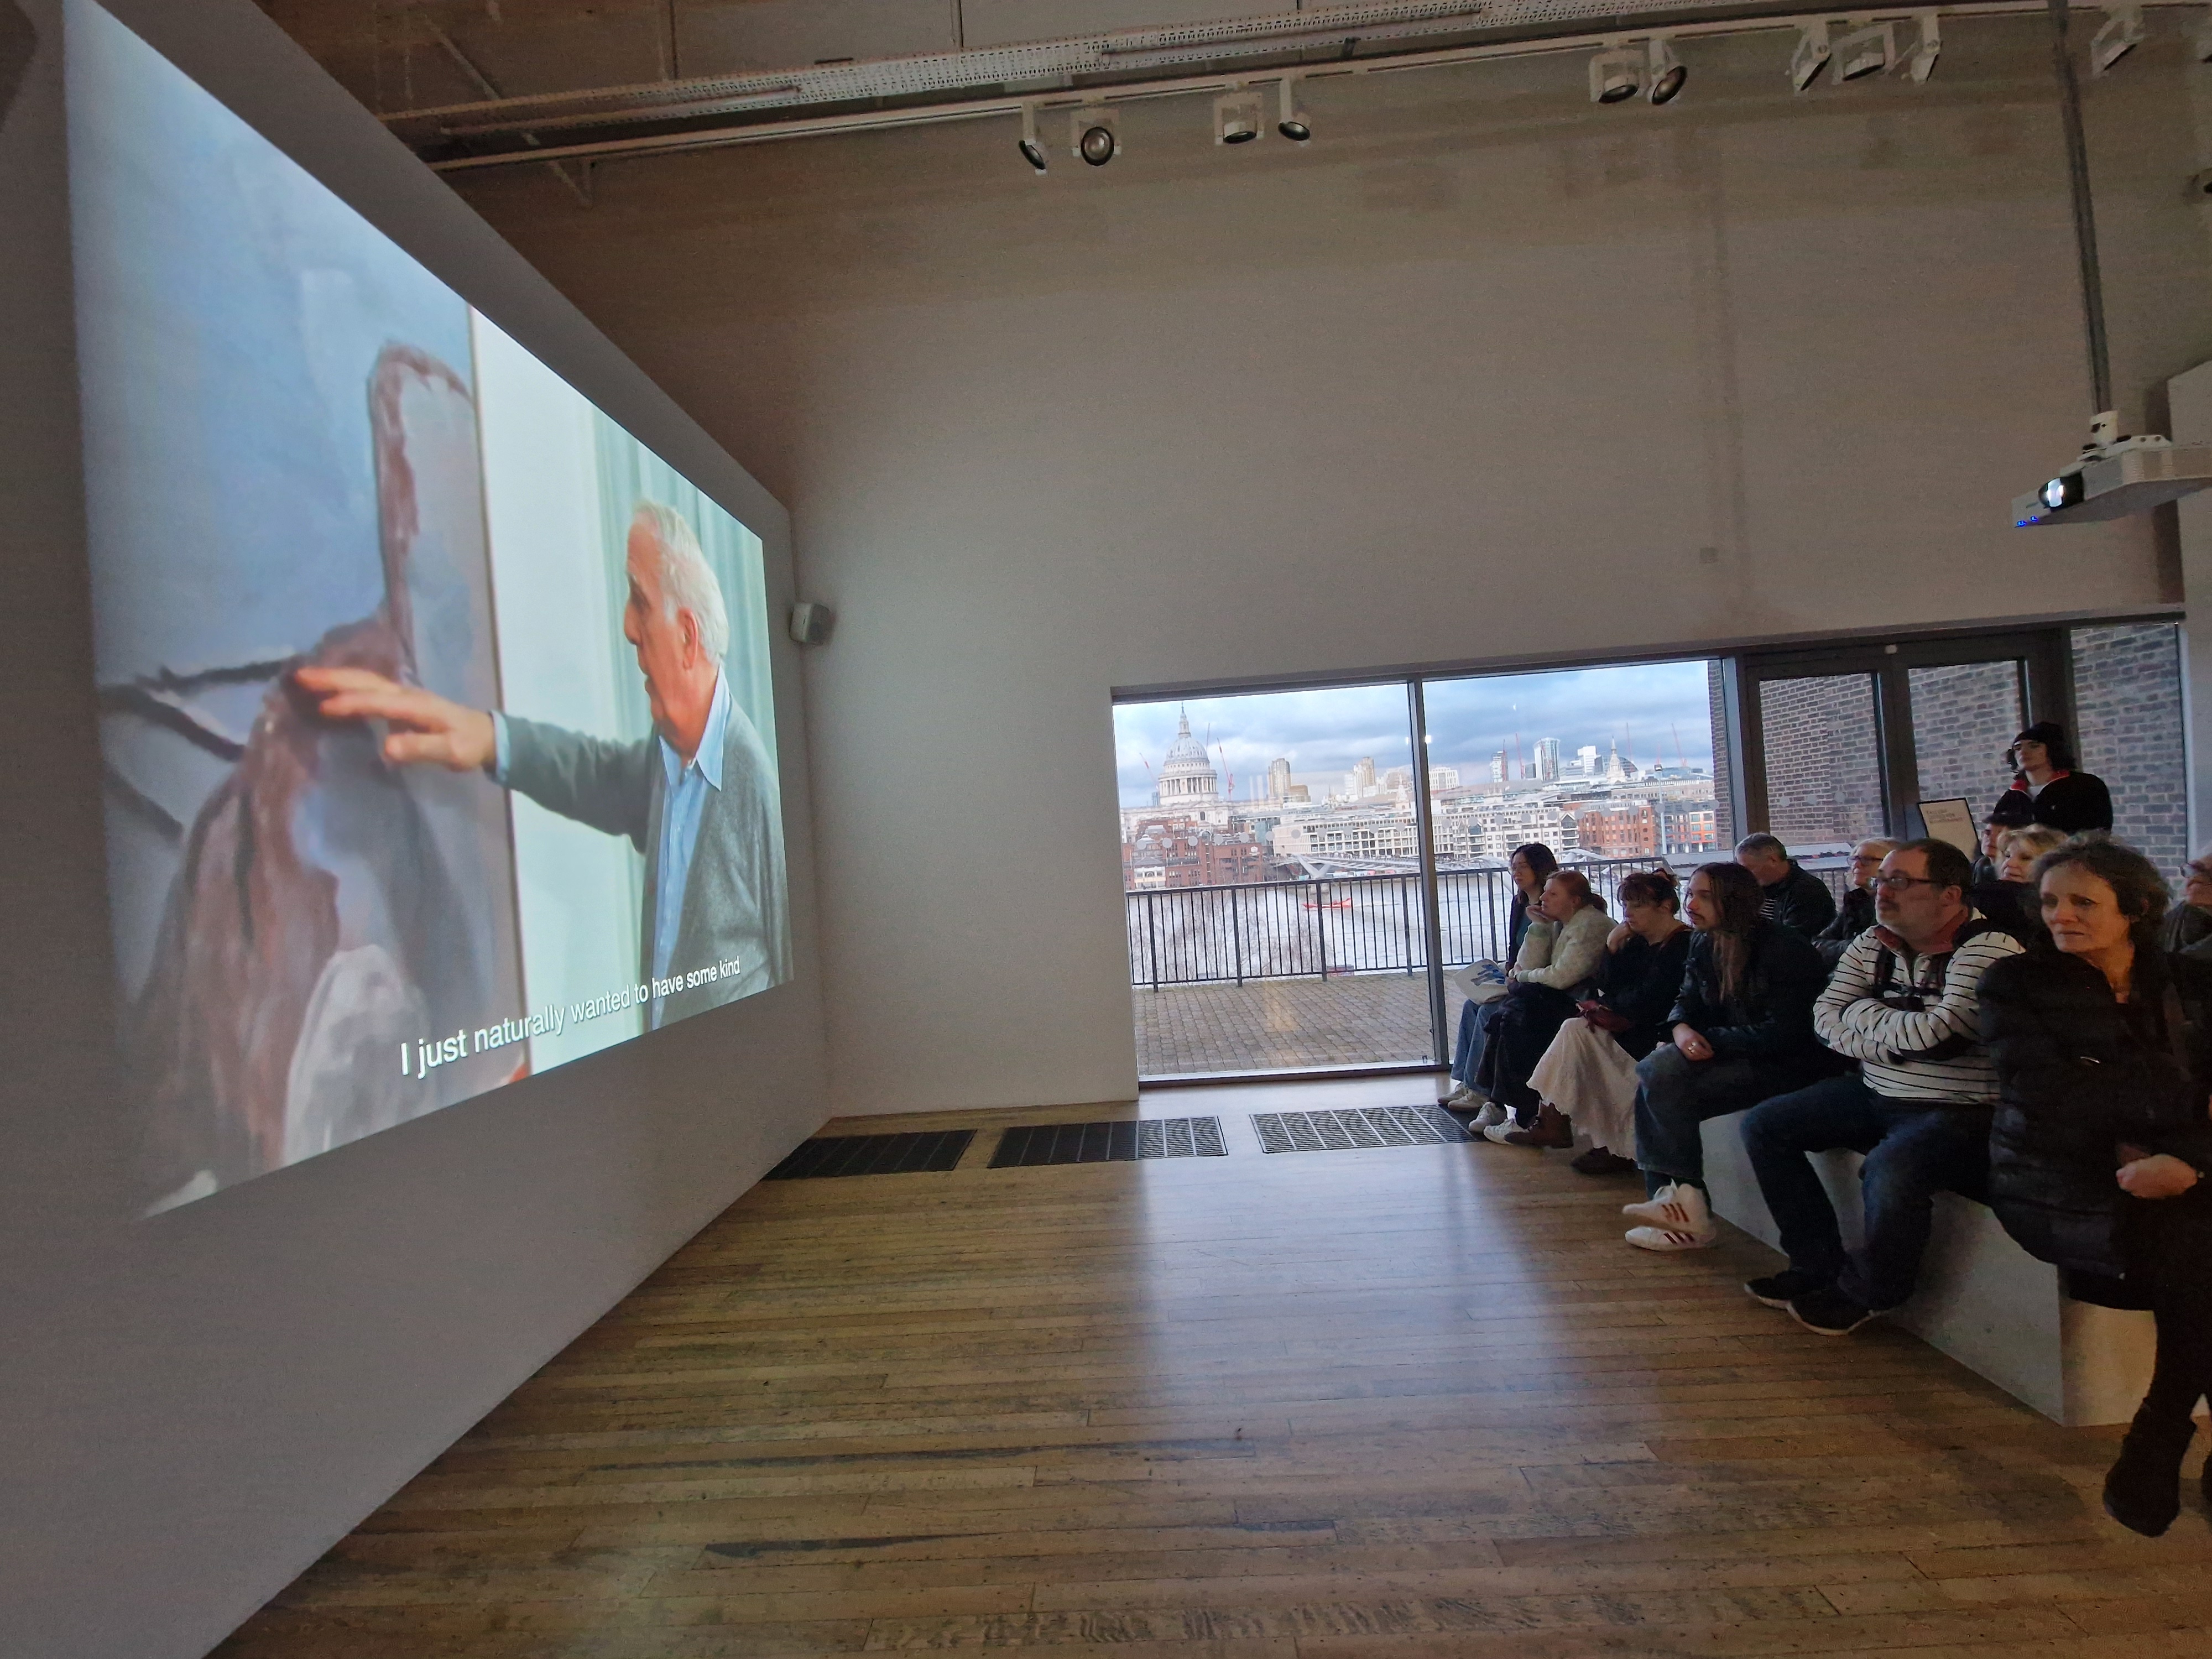
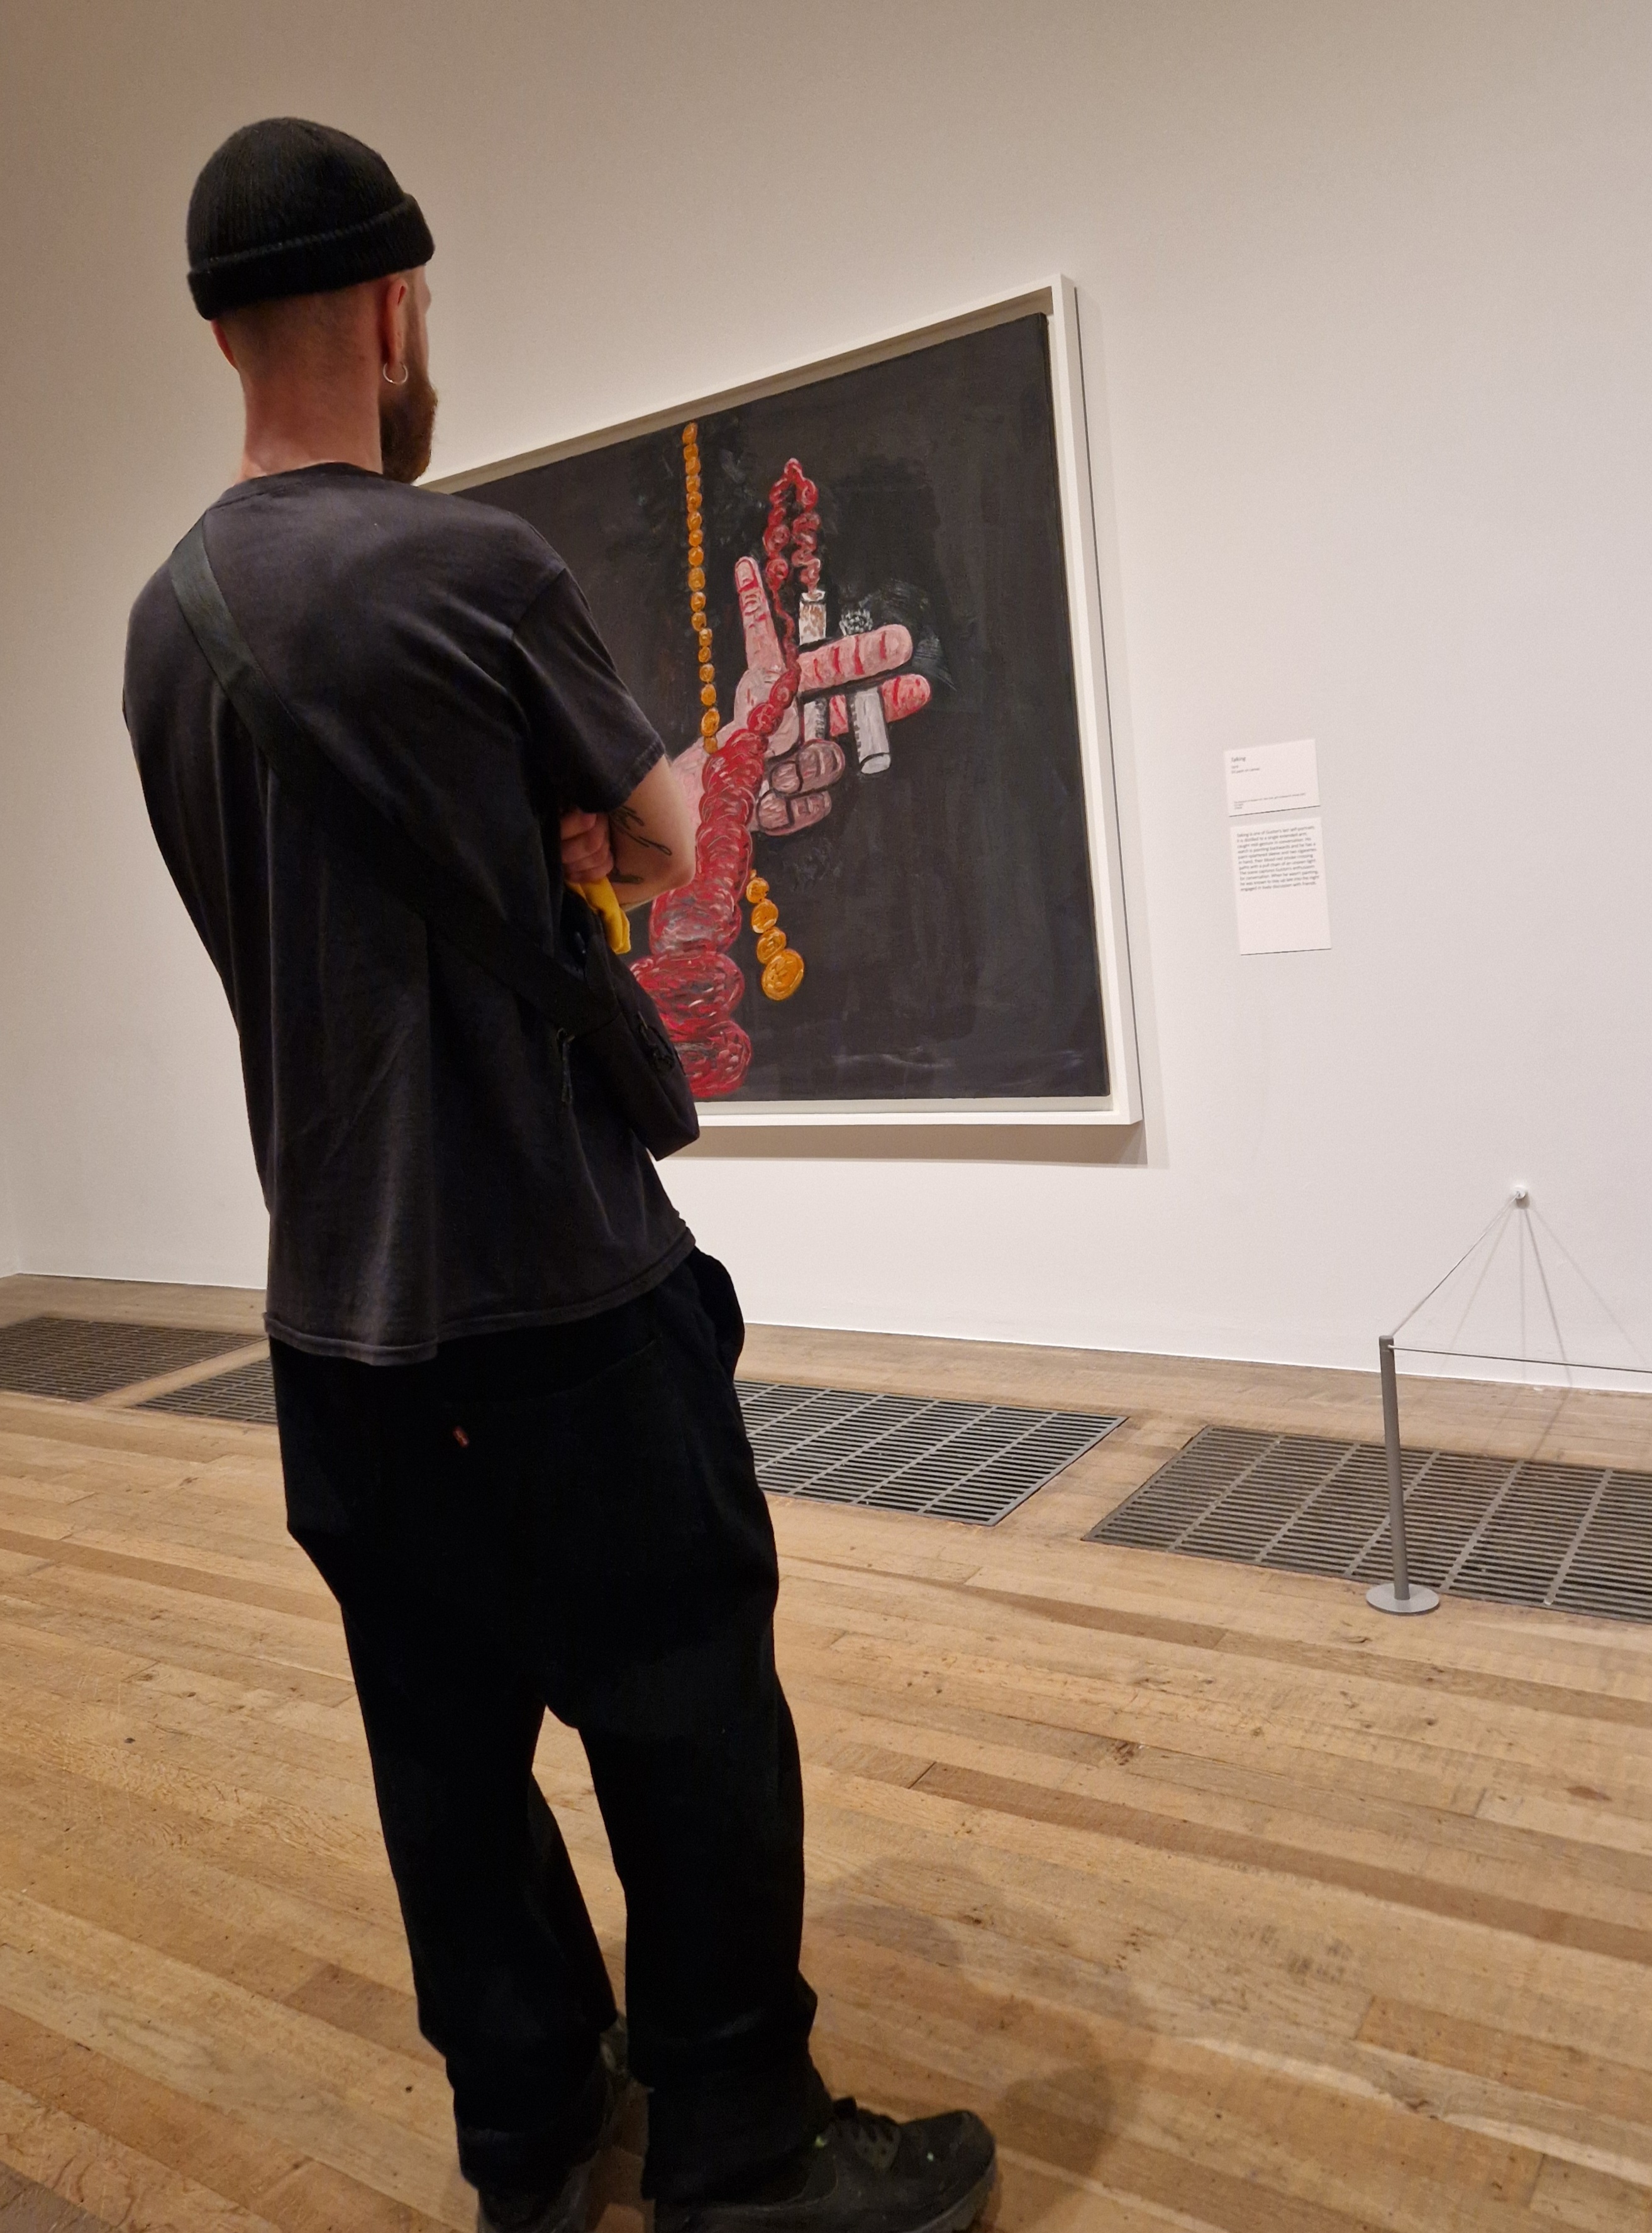
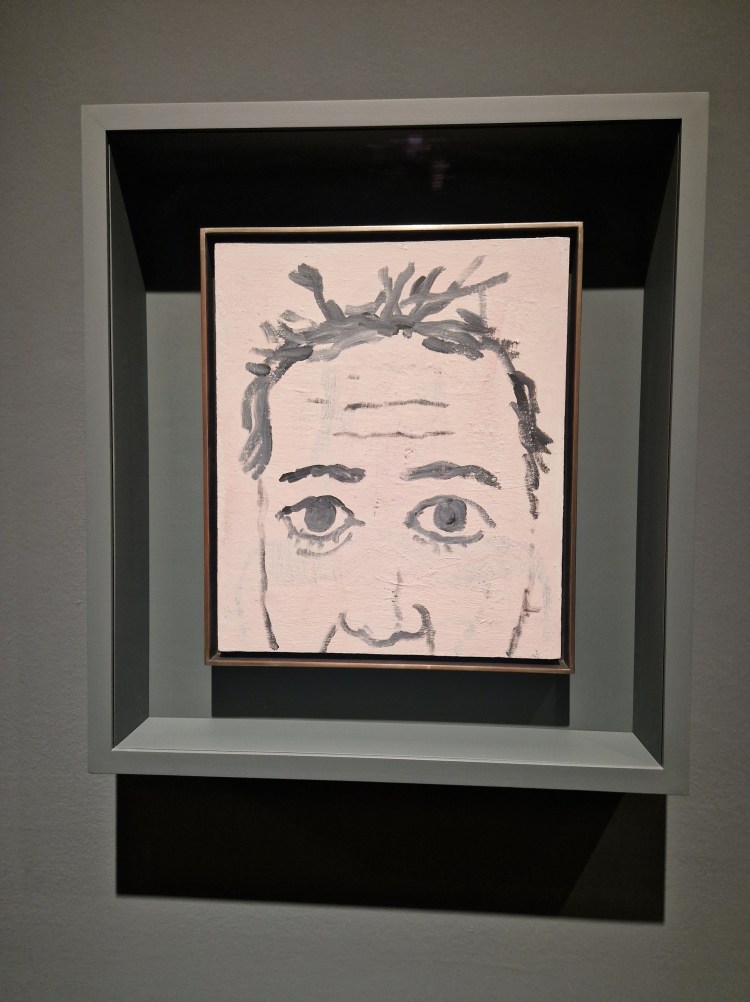
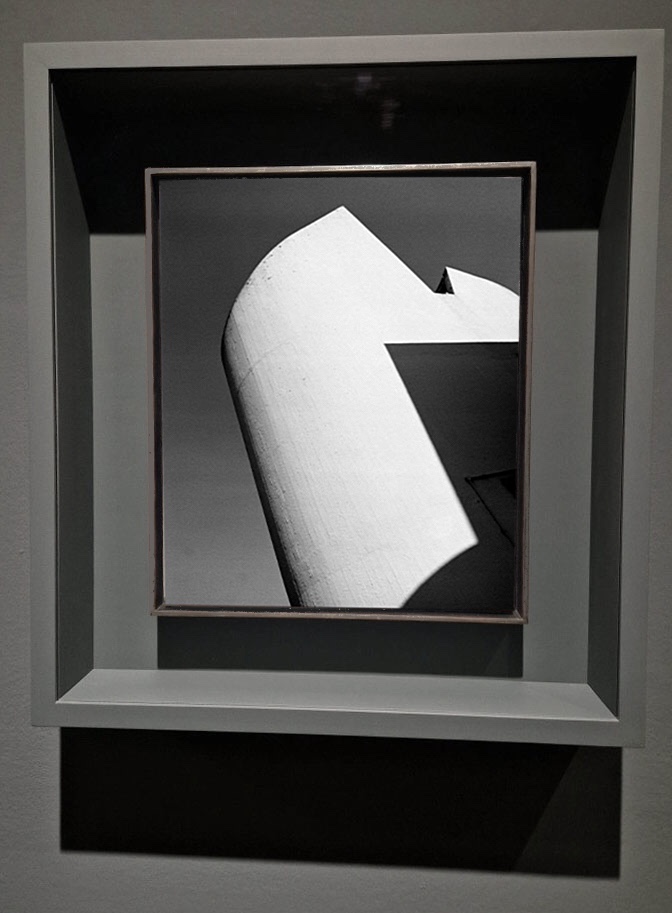
PHILIP GUSTON AT TATE MODERN
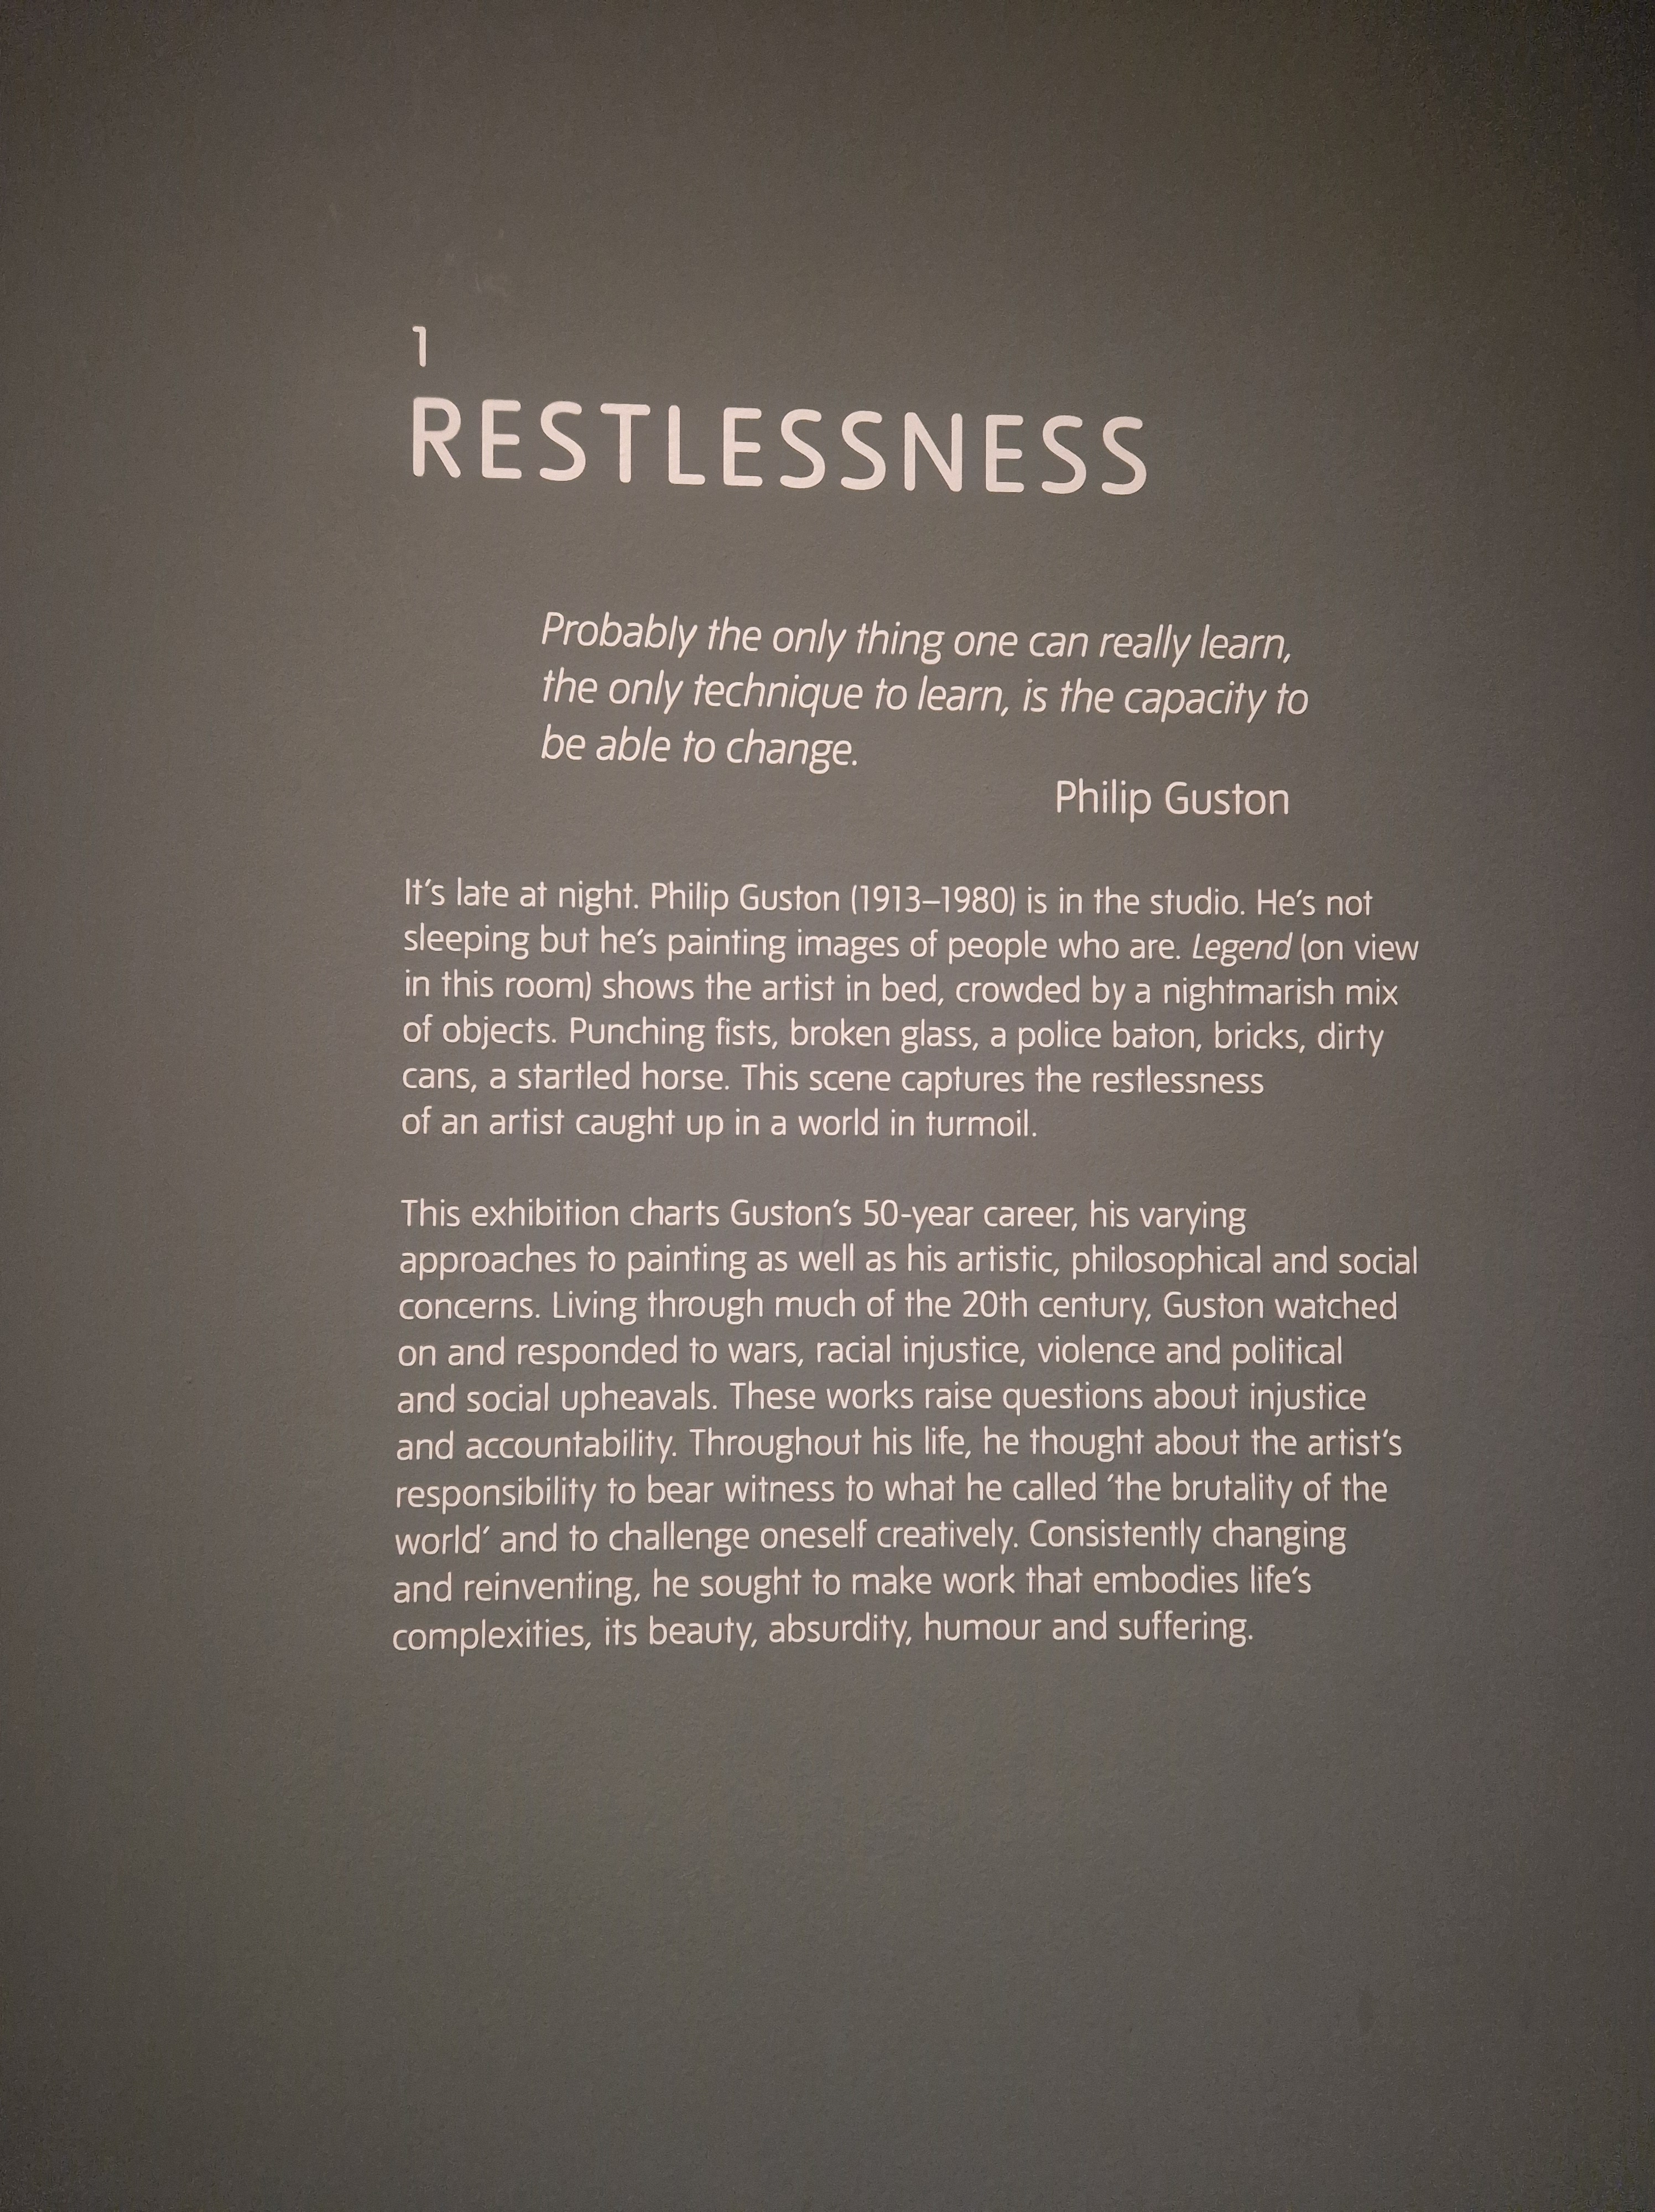
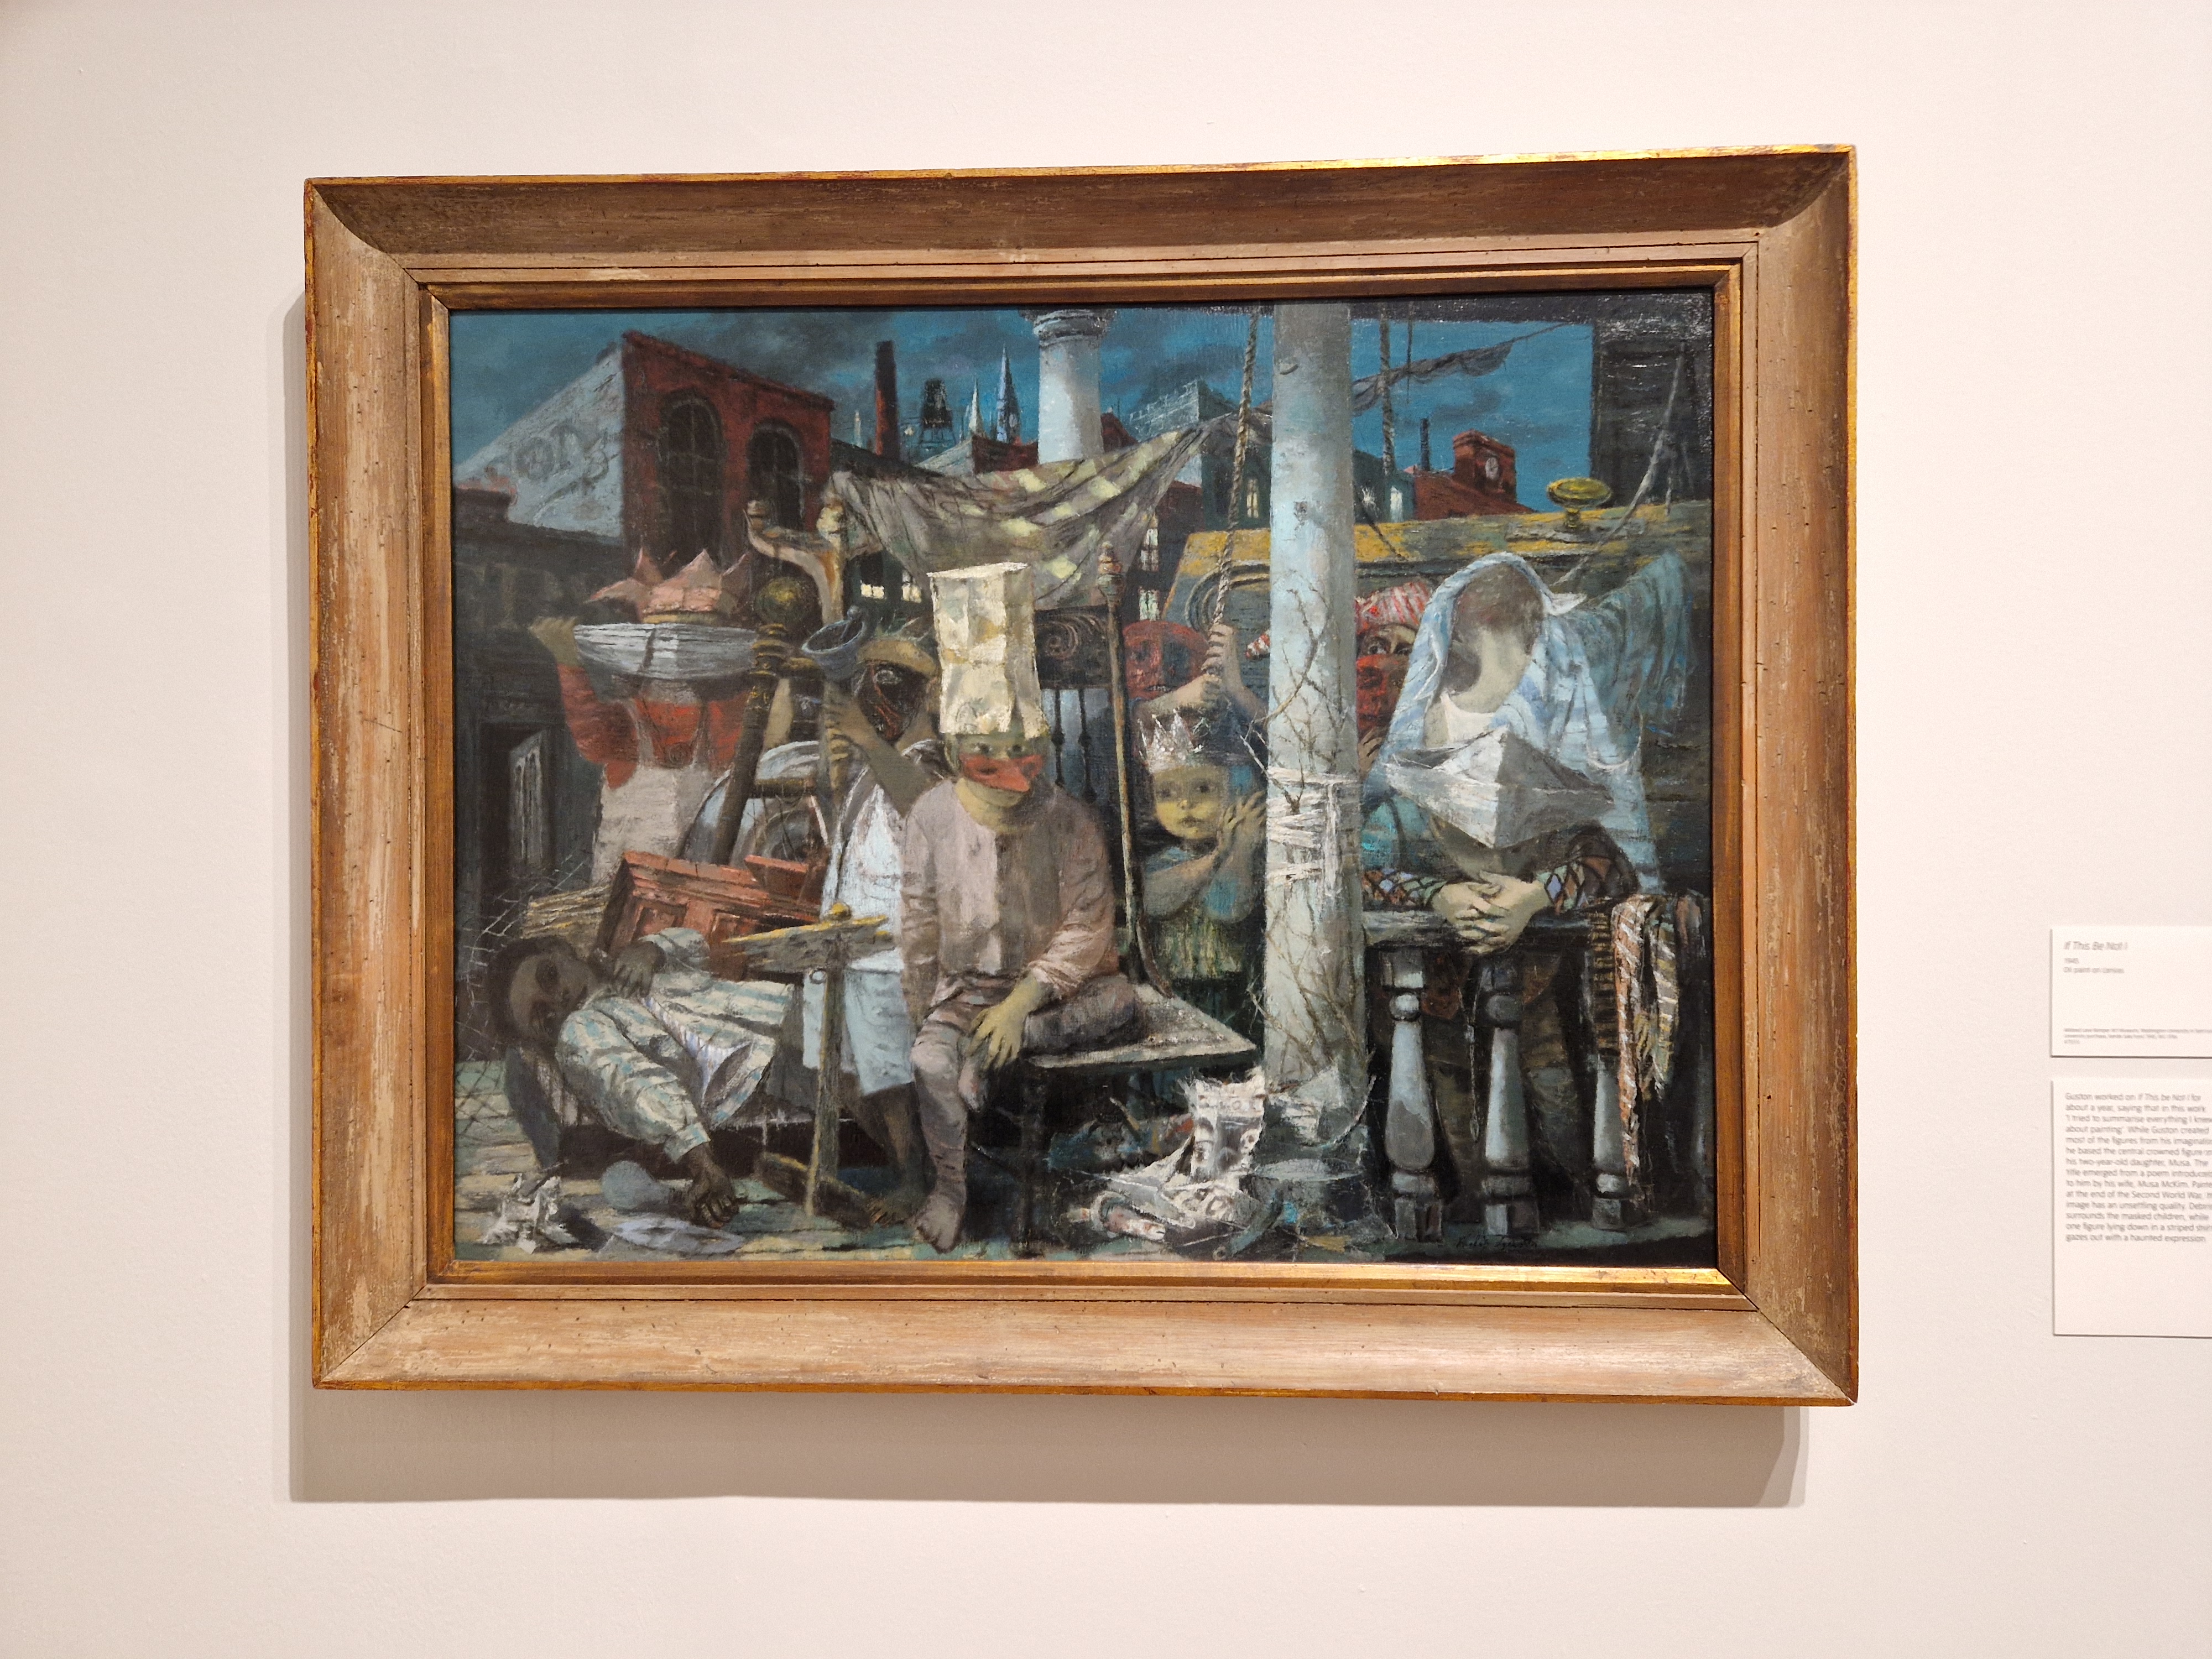
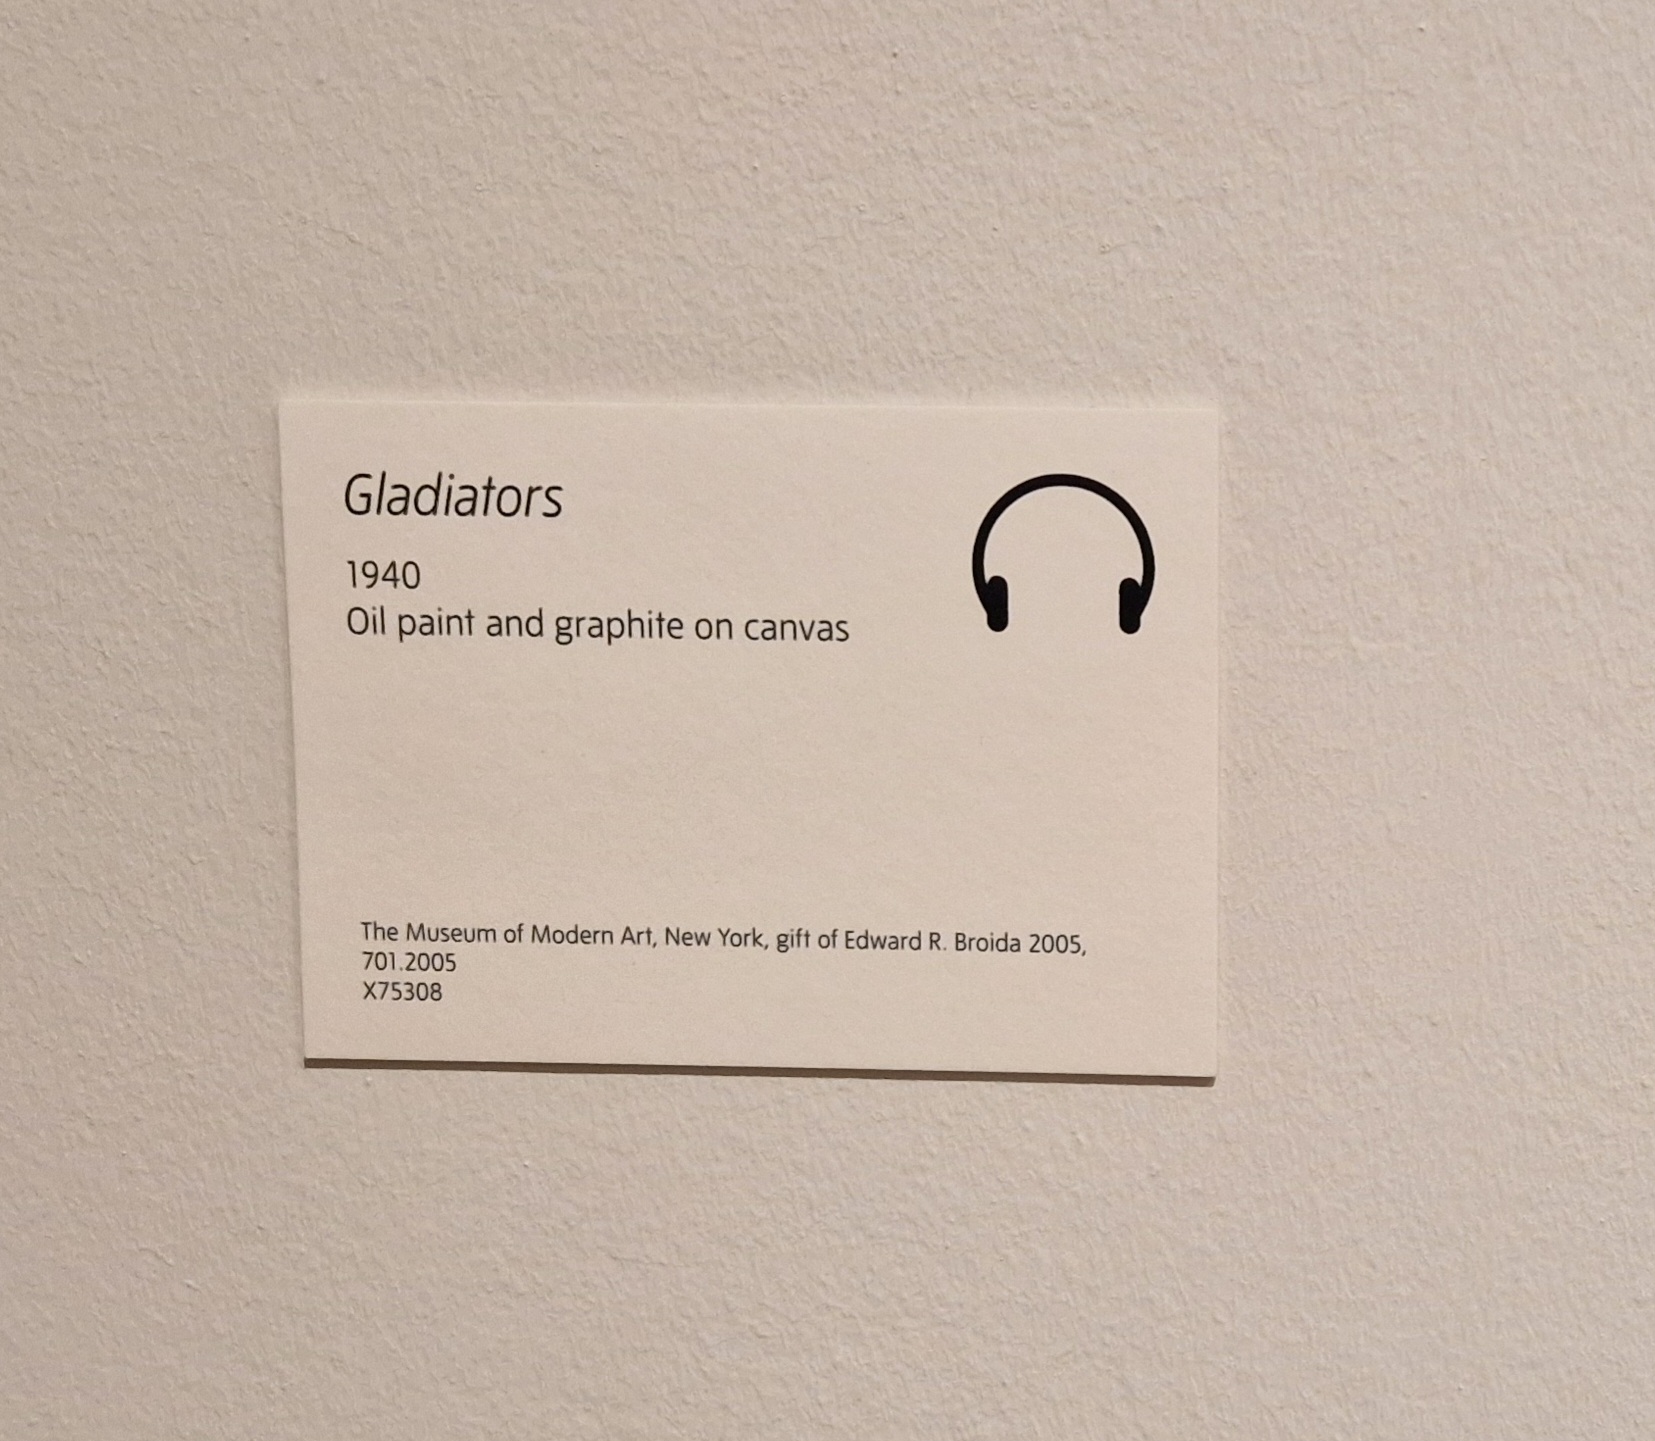

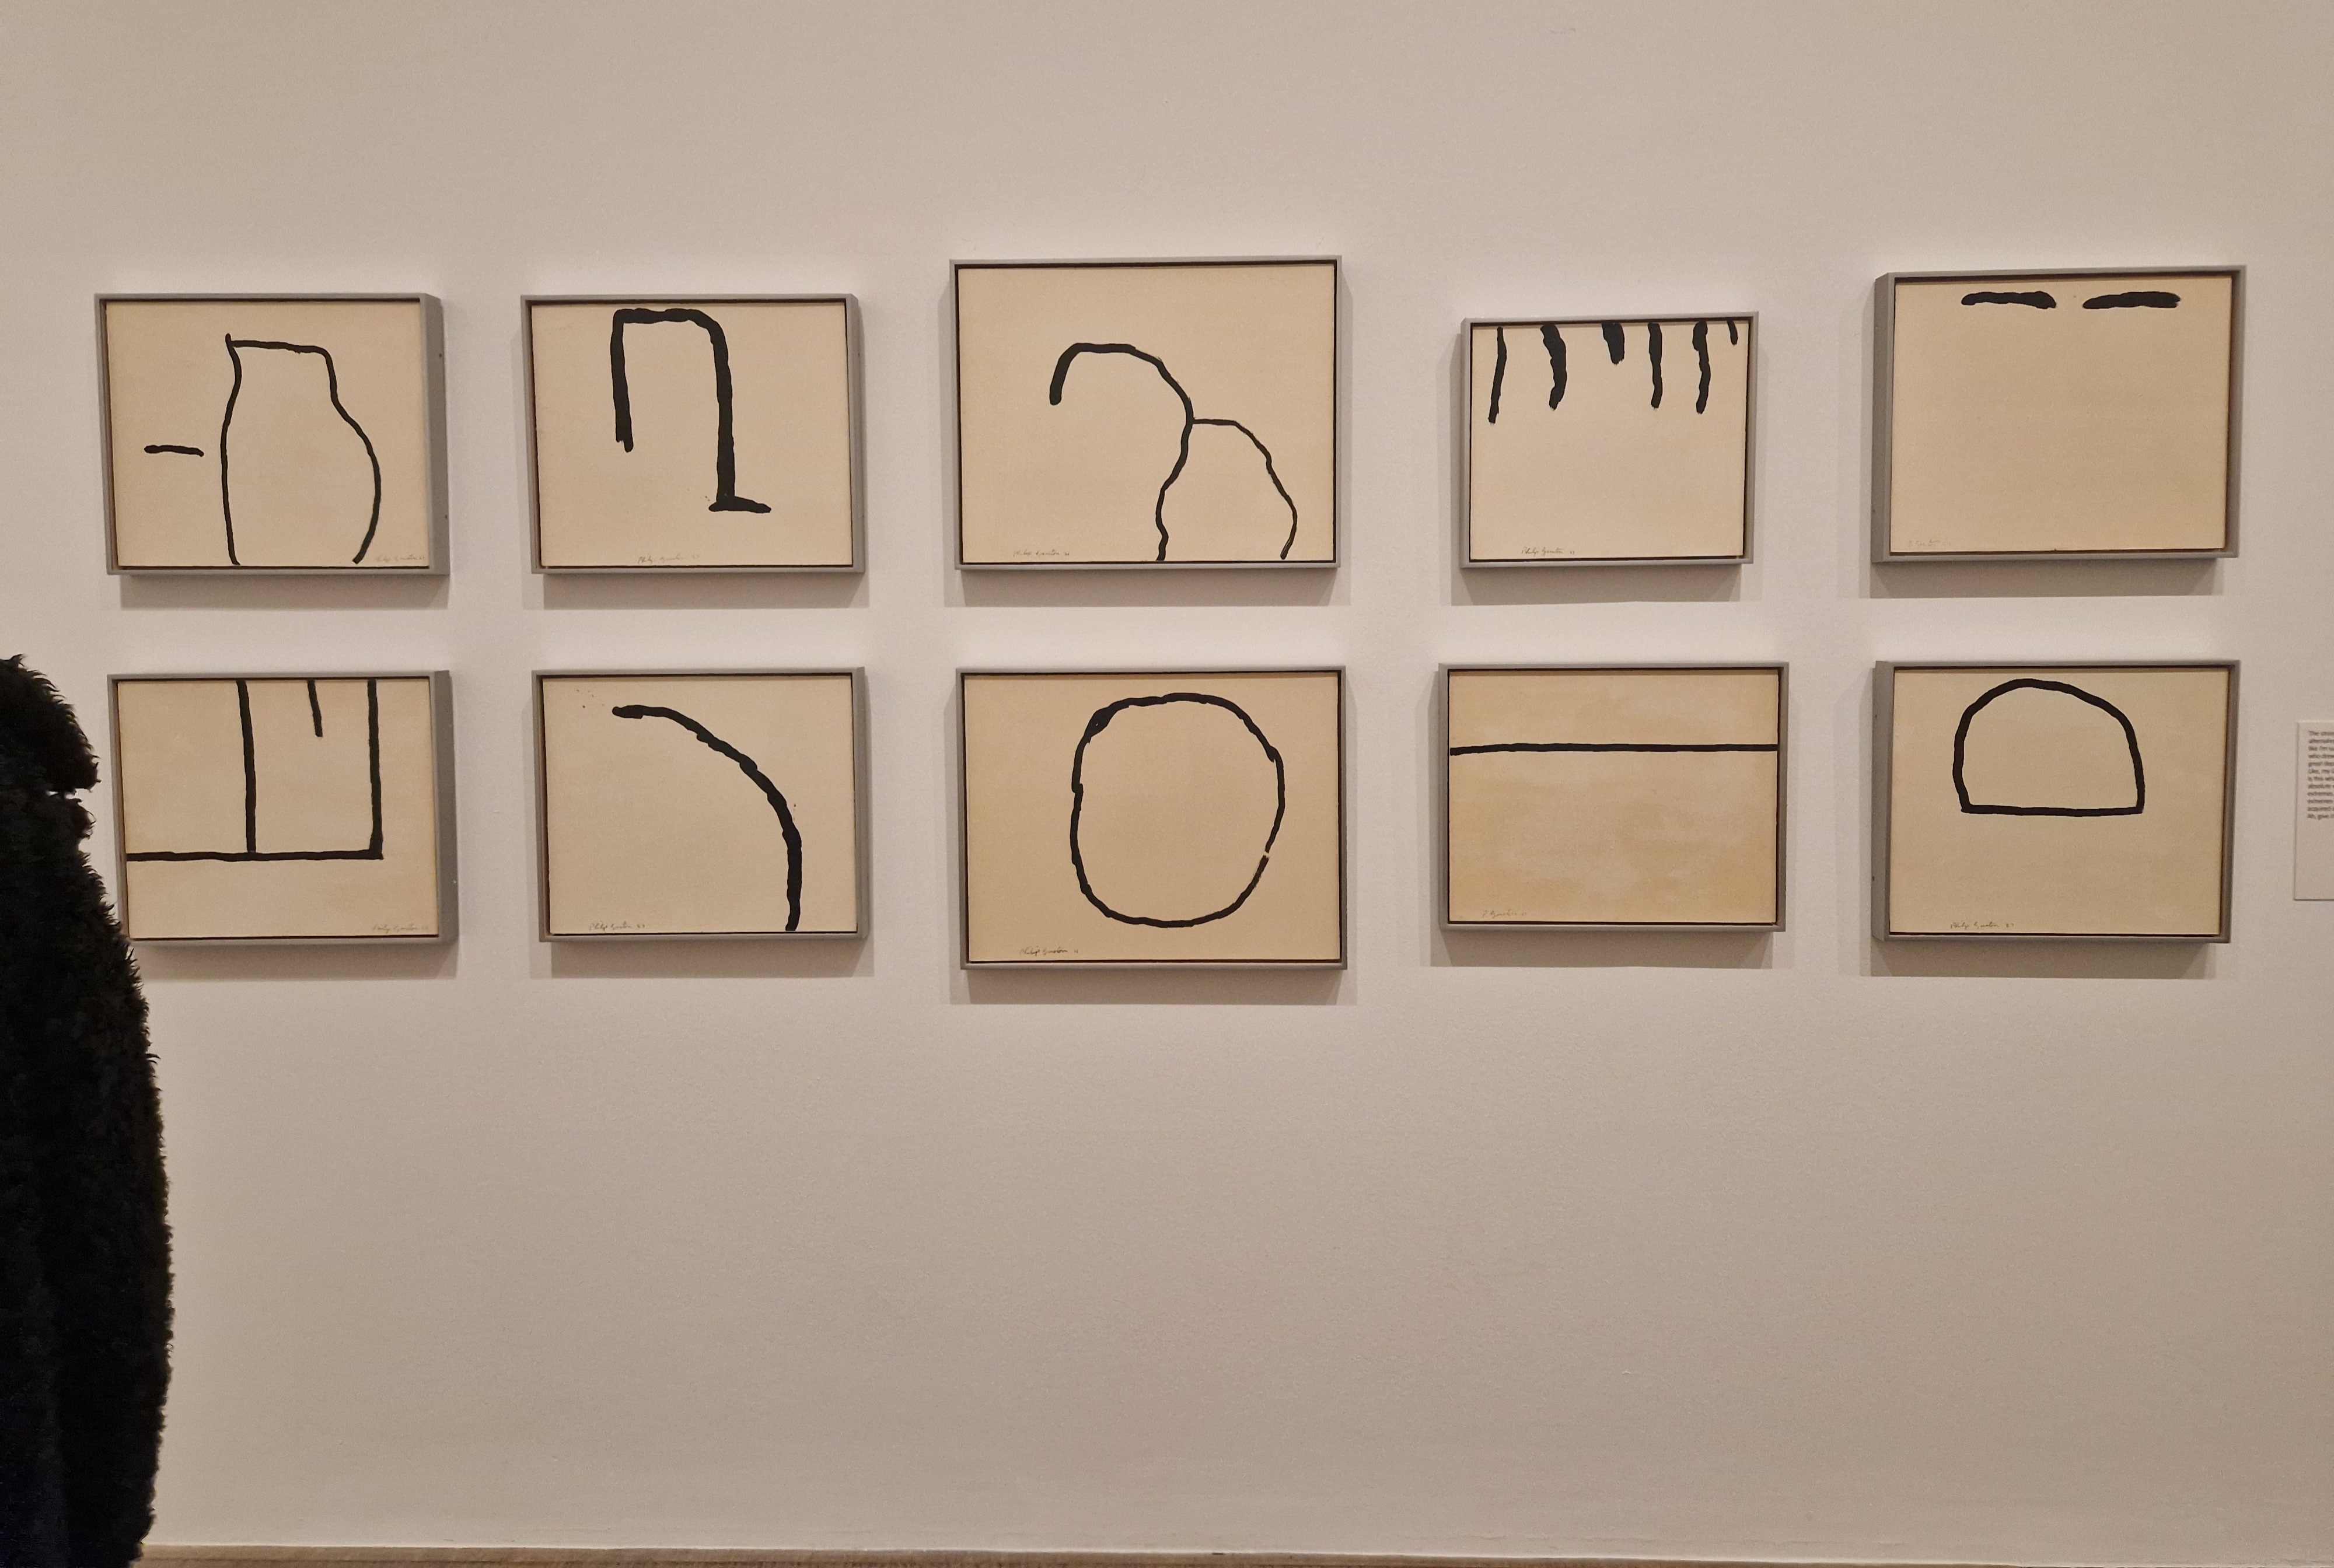
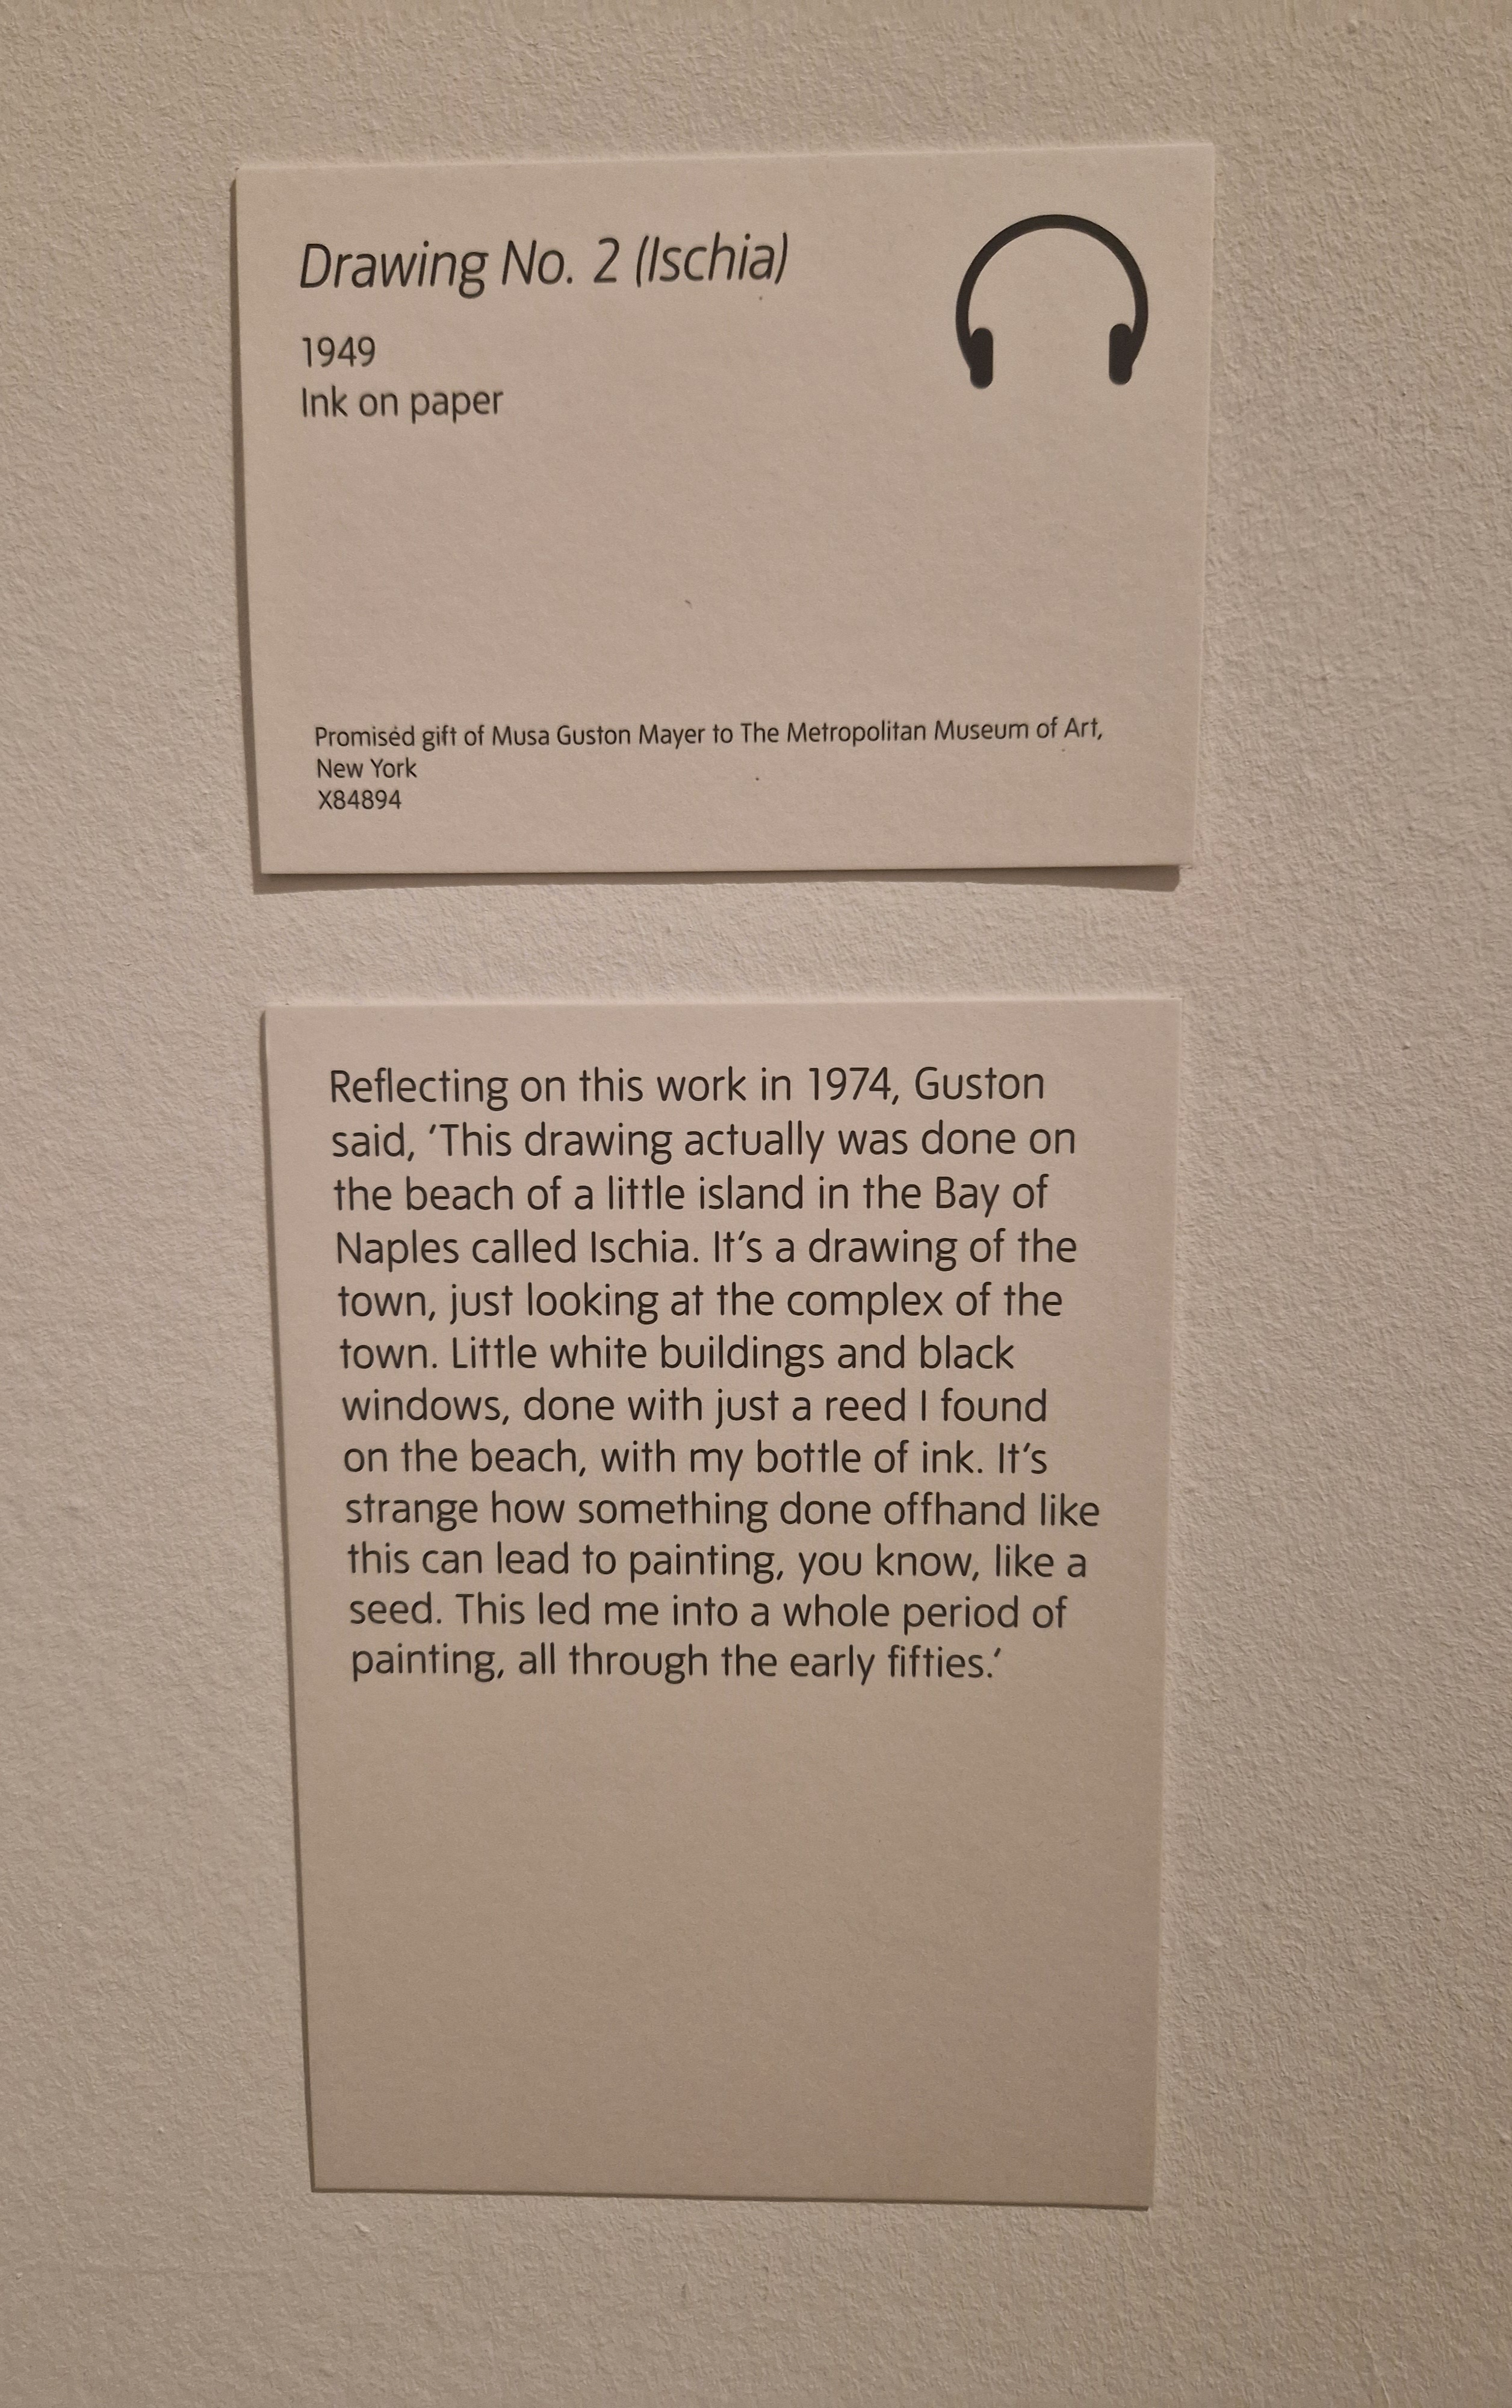

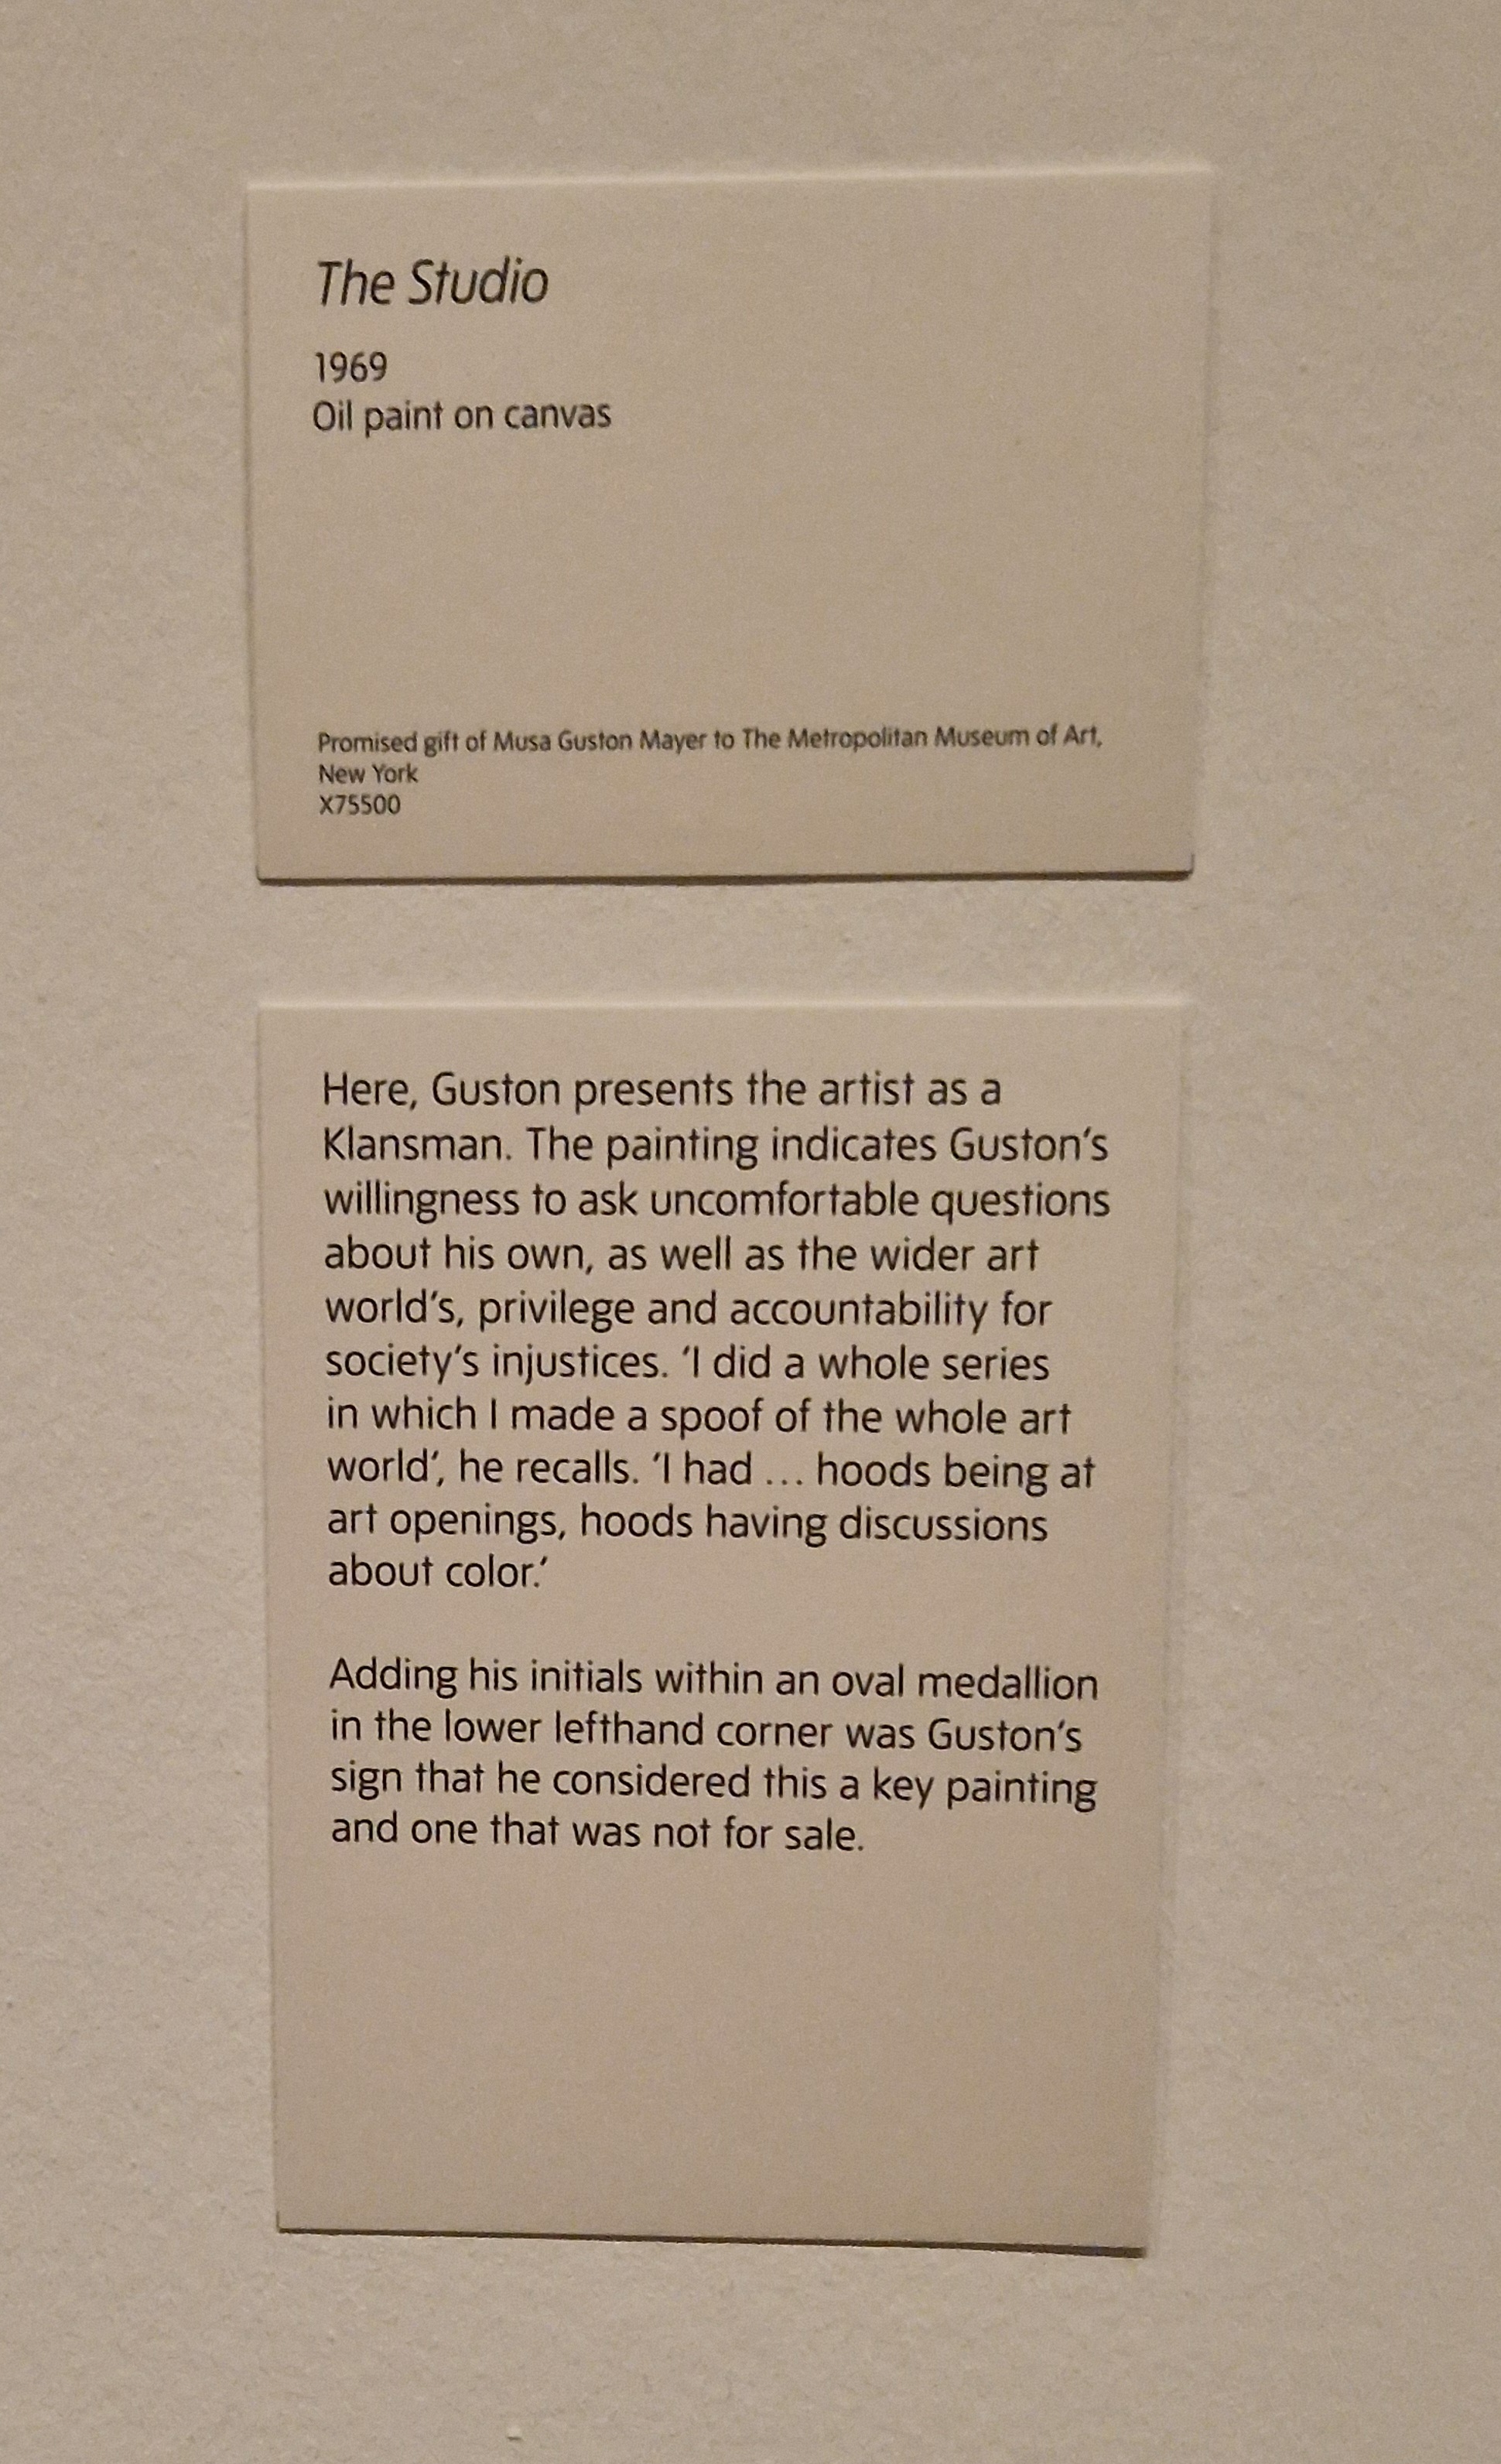
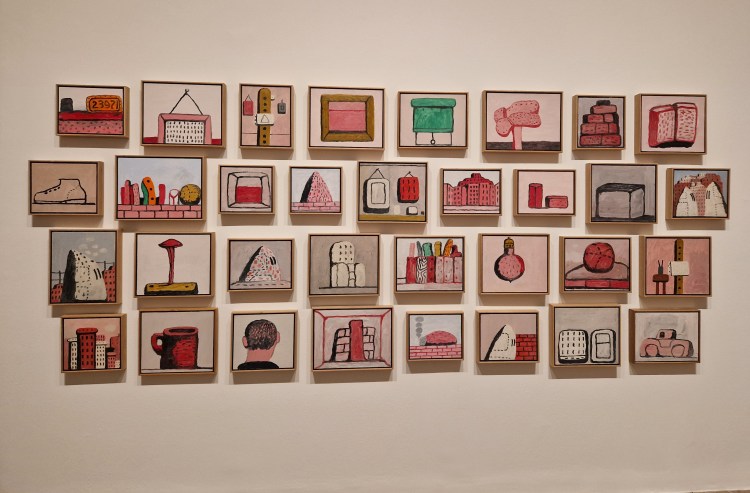
The gallery of objects! Very inspiring!
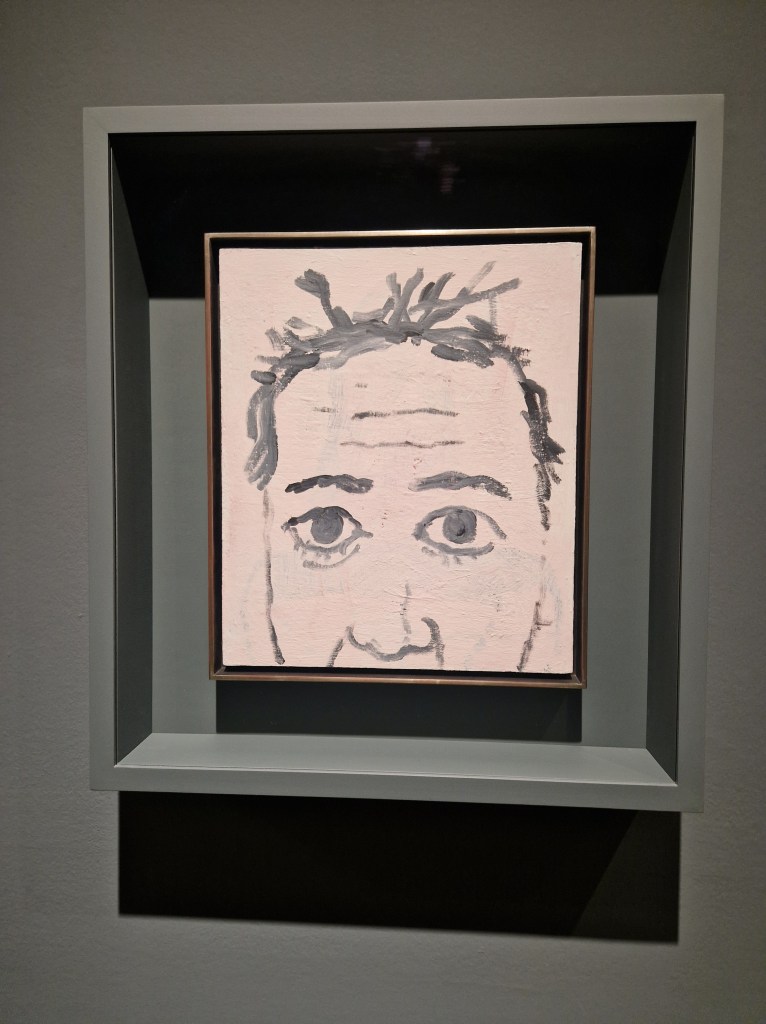
After seeing how this painting is framed, I decided to frame my main image like this.
OTHER EXHIBITIONS
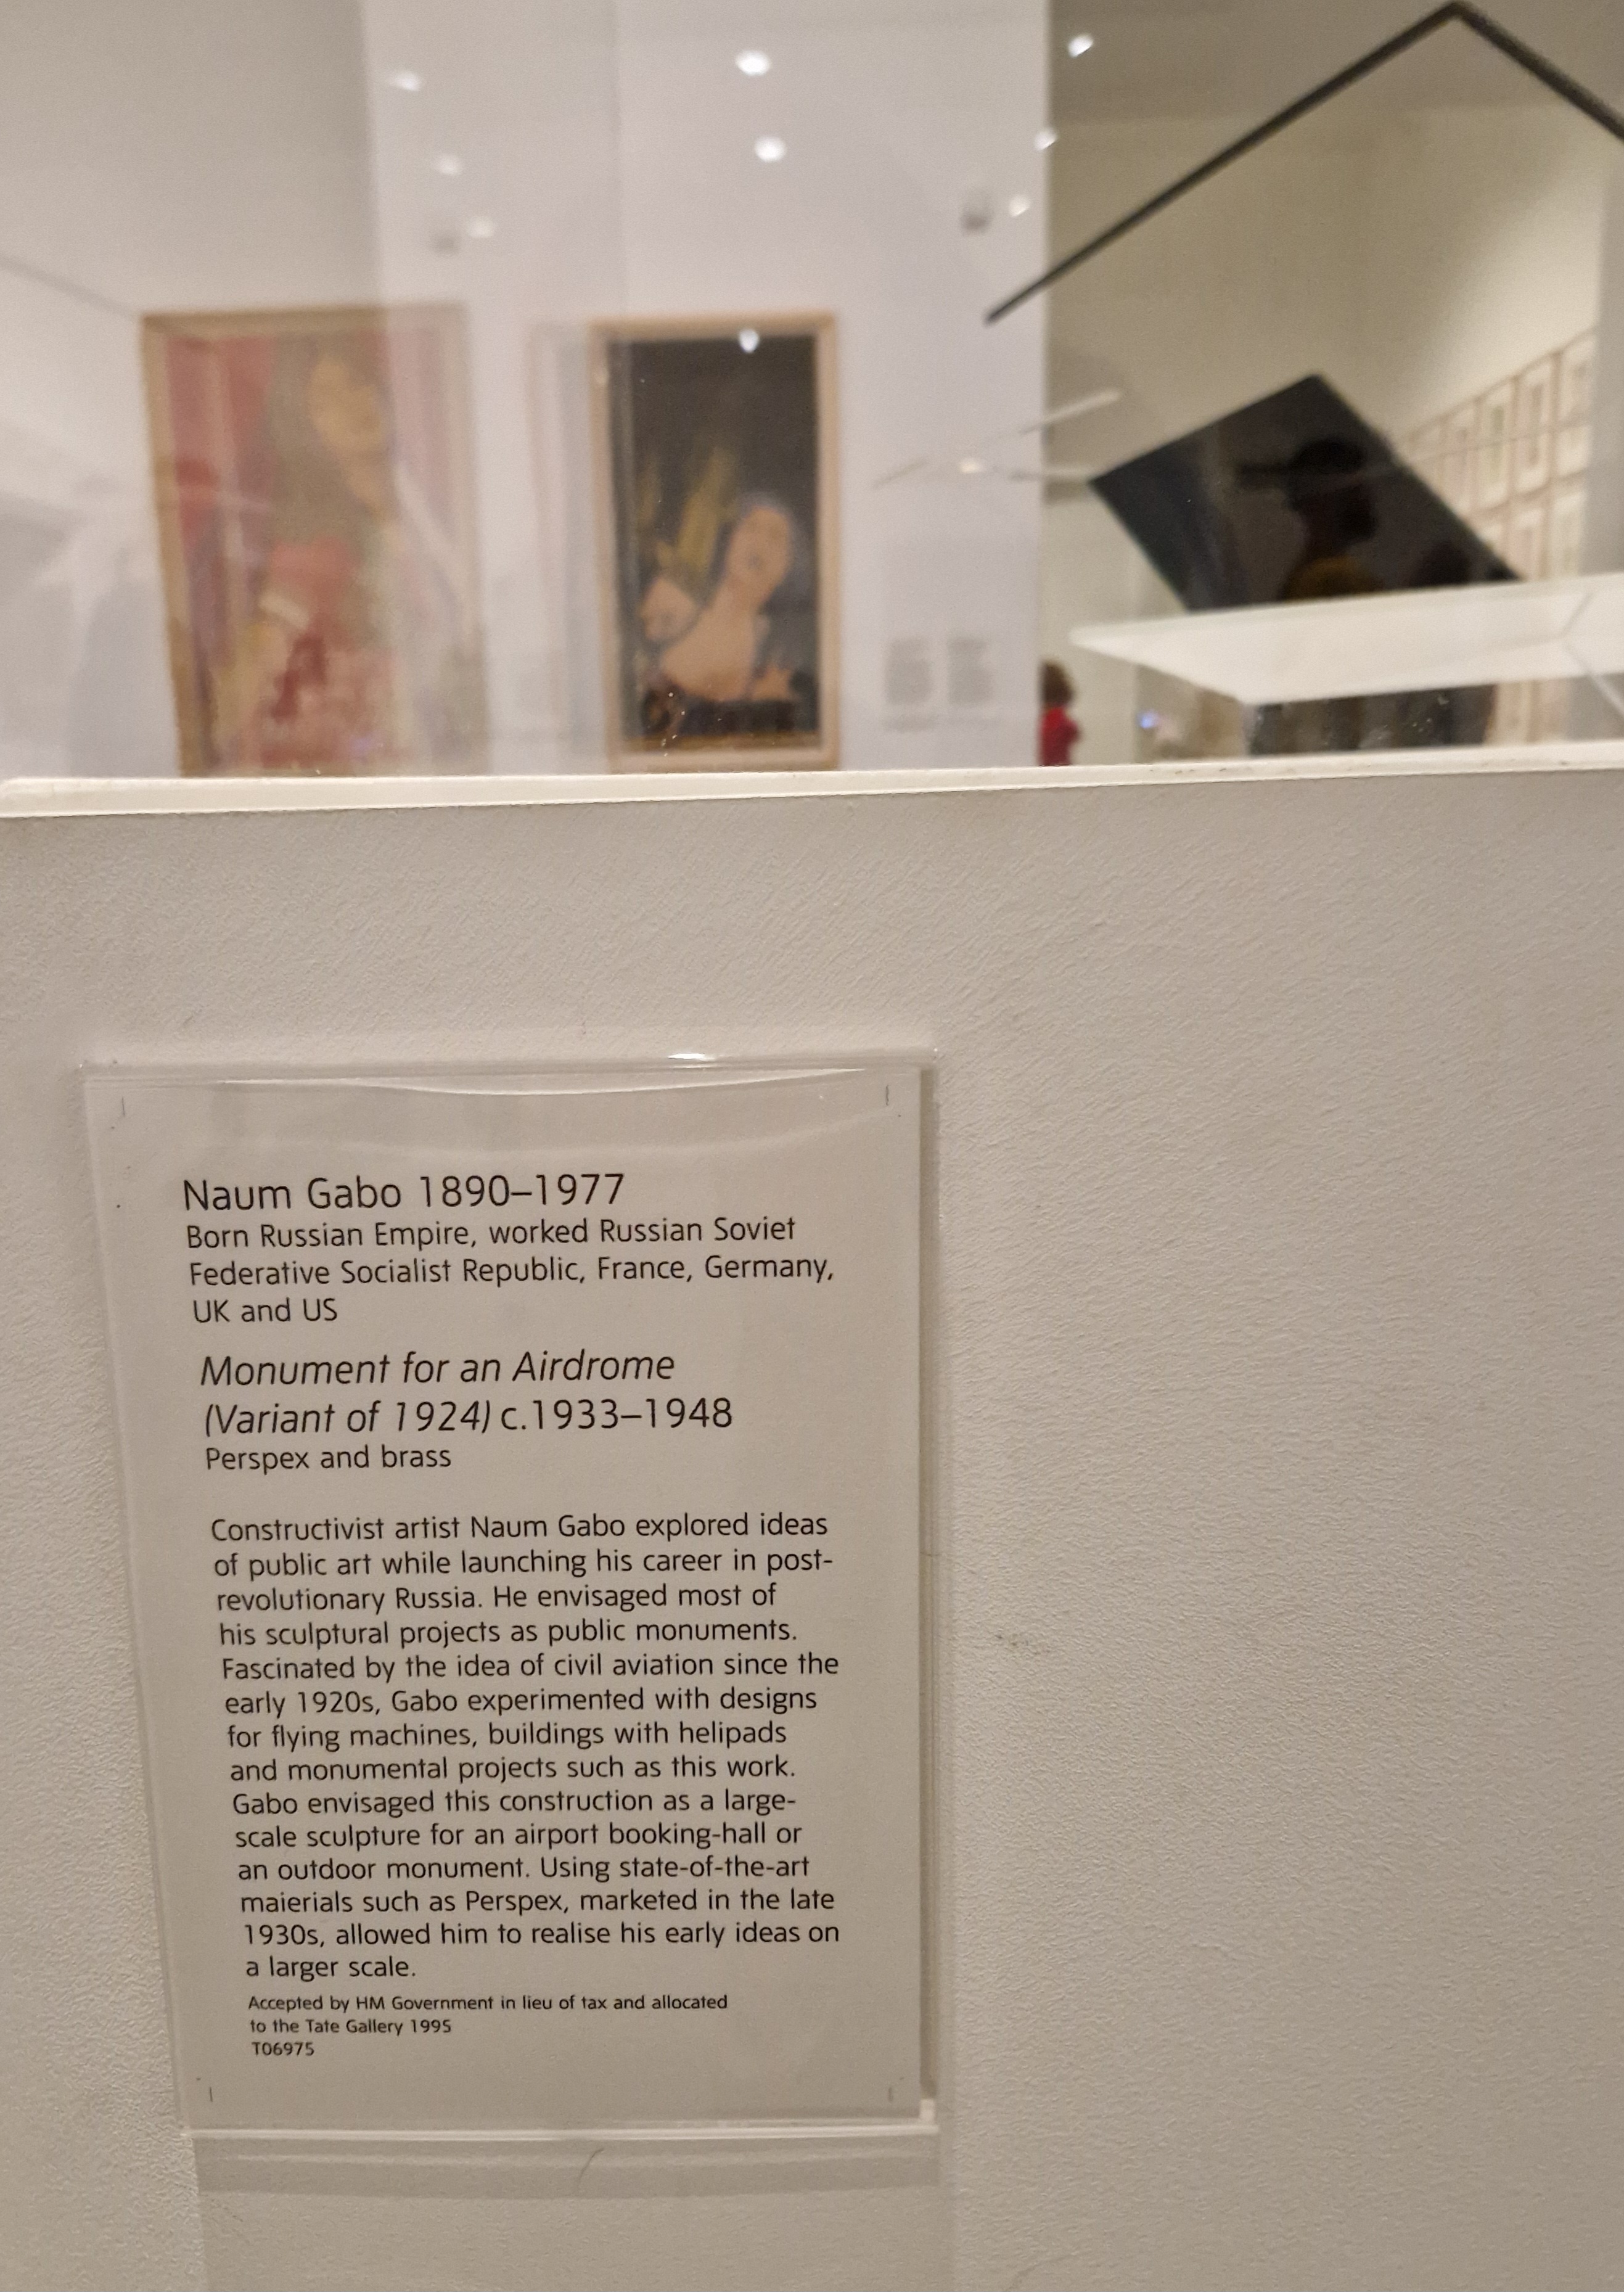
NAUM GABO


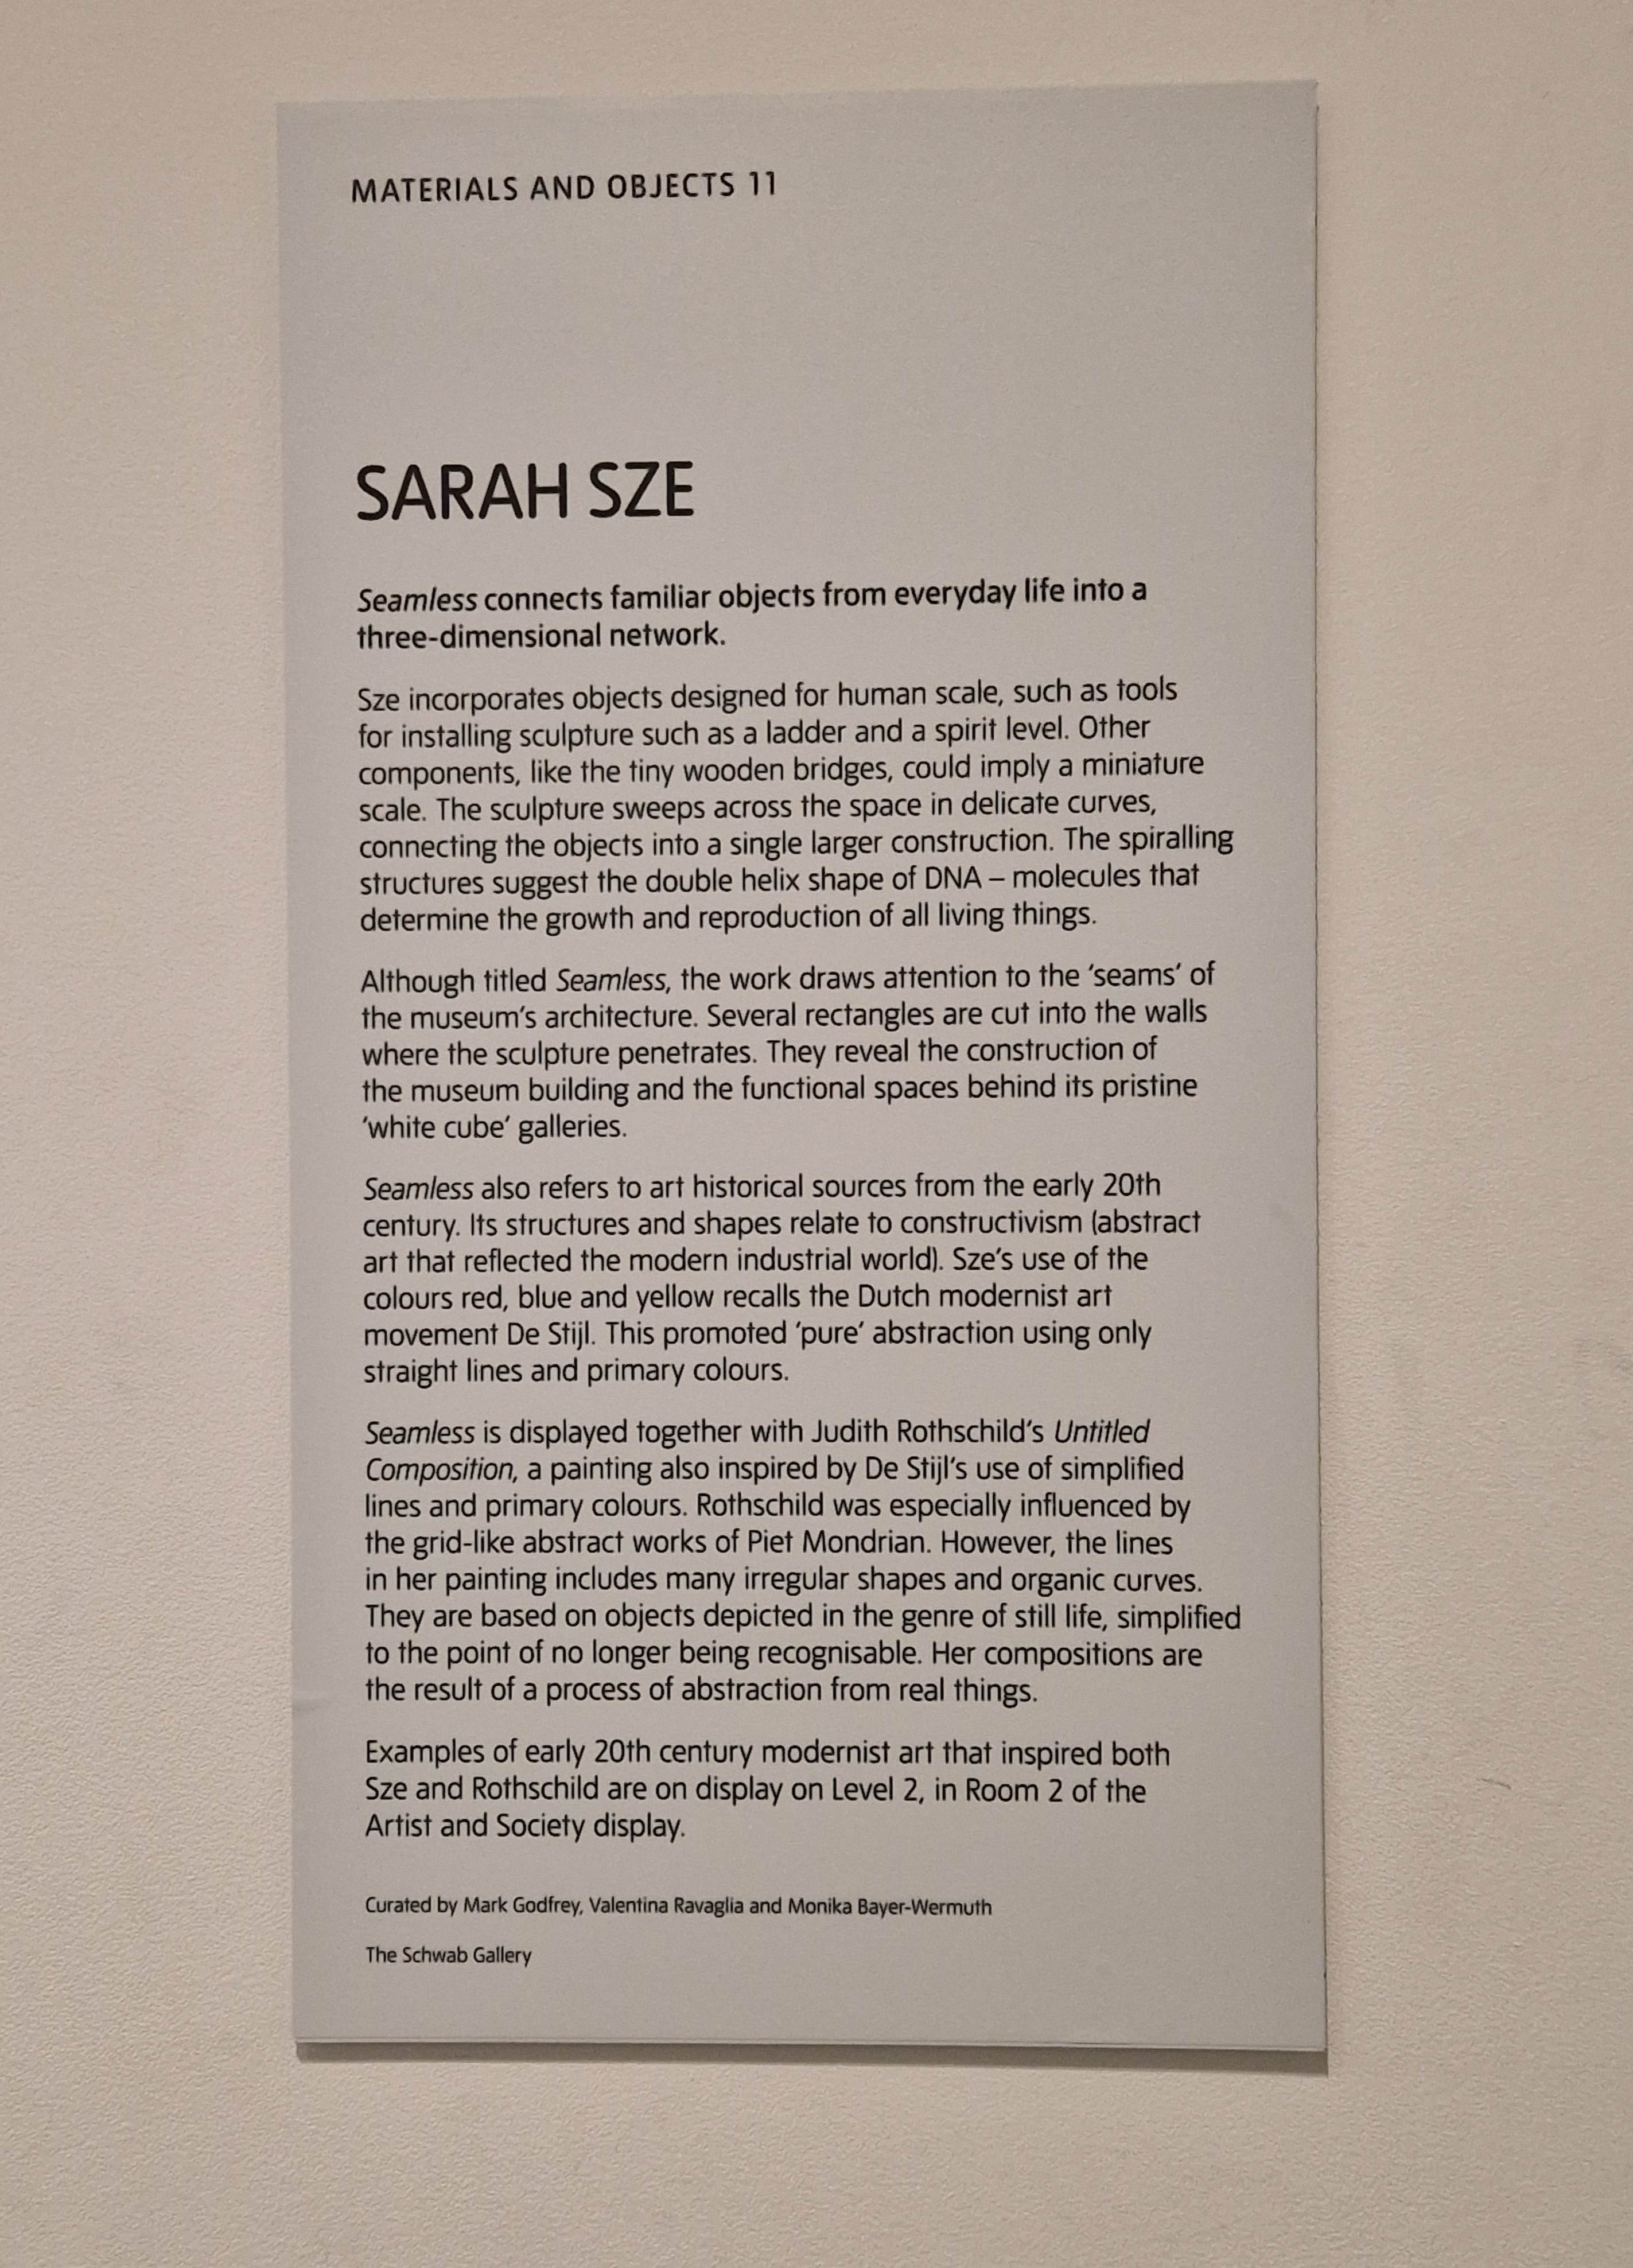
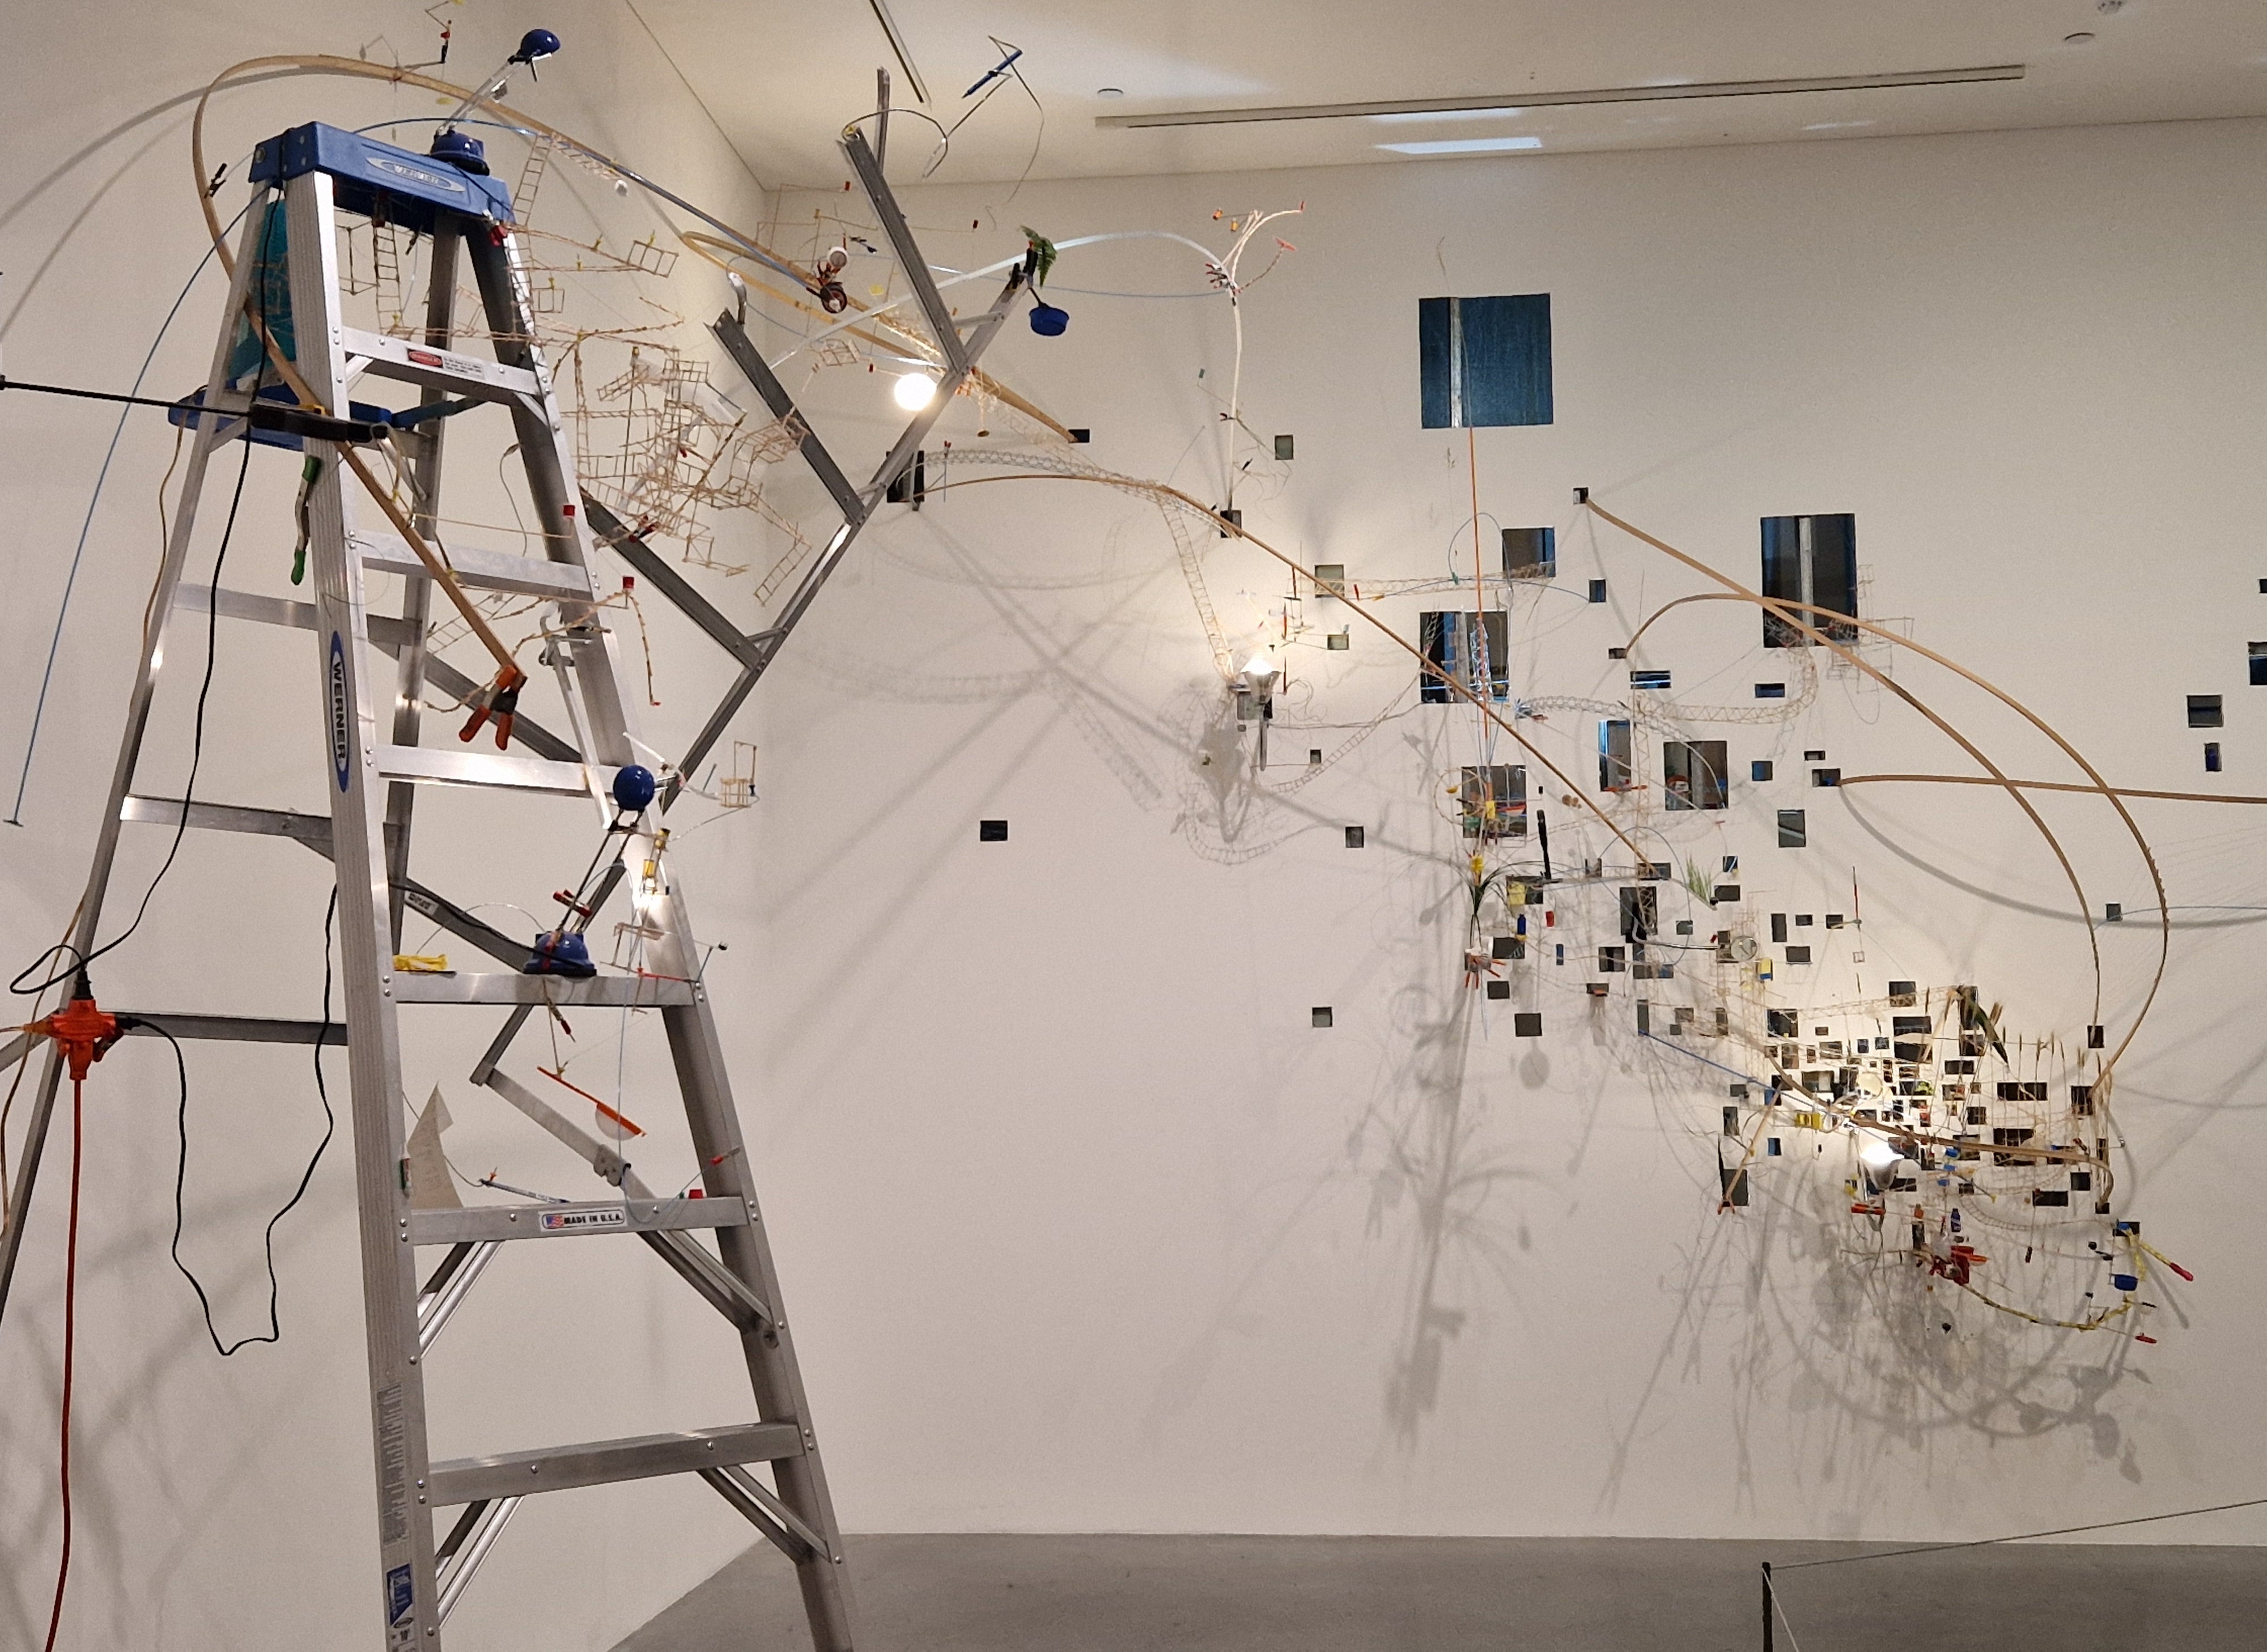
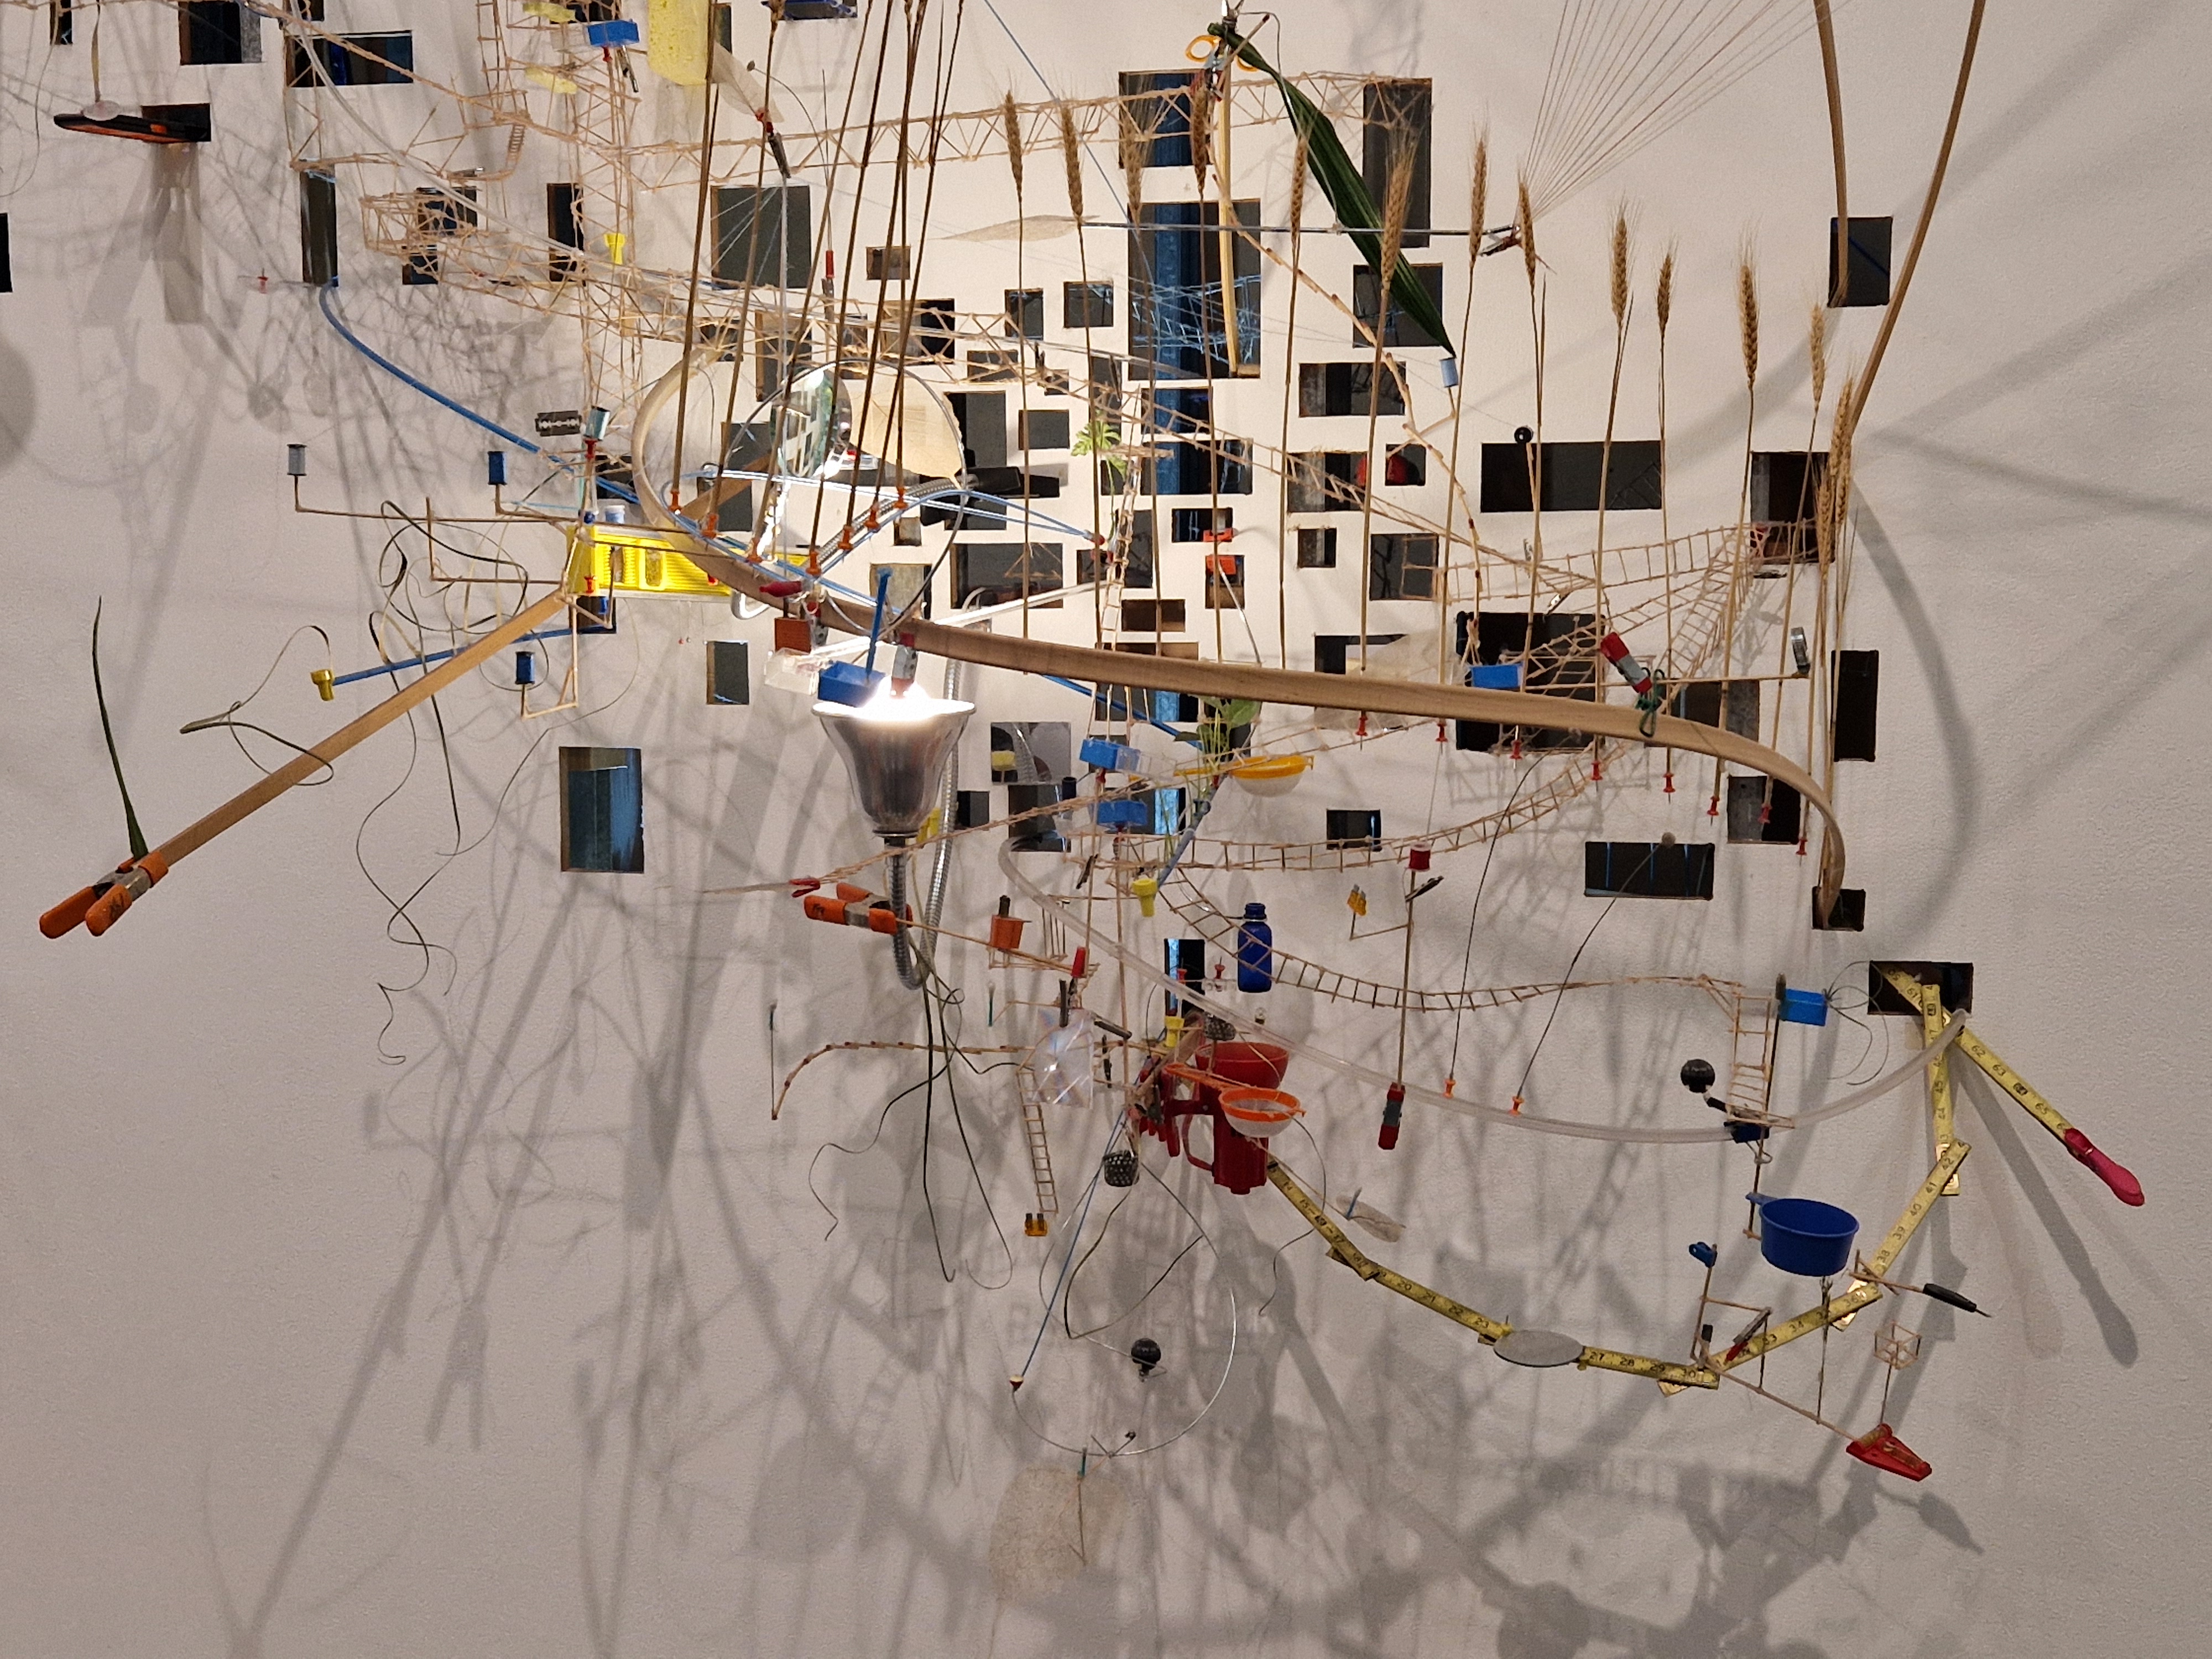
SARAH SZE
REFLECTIONS: One of my favourite exhibitions so far. It was amazing watching Guston’s journey and how he refused to conform and be boxed up to one style. Constantly evolving, fearless, true to his heart.

One thing that especially stayed with me was his ‘gallery of things’ - a series of small paintings of things that he found interesting e.g. a kettle or a chair. It inspired me to create a similar thing in my future studio, where I could take over a wall on which I mount photographs of my gallery of things.

Apart from this fantastic exhibition, I had some time to explore TATE further and discover some new amazing artists as well as stumbling upon my new favourites like Naum Gabo.

Nothing beats a good exhibition for inspiration and awe.
WEEK 6: 26 FEB – 3RD MARCH
MONDAY
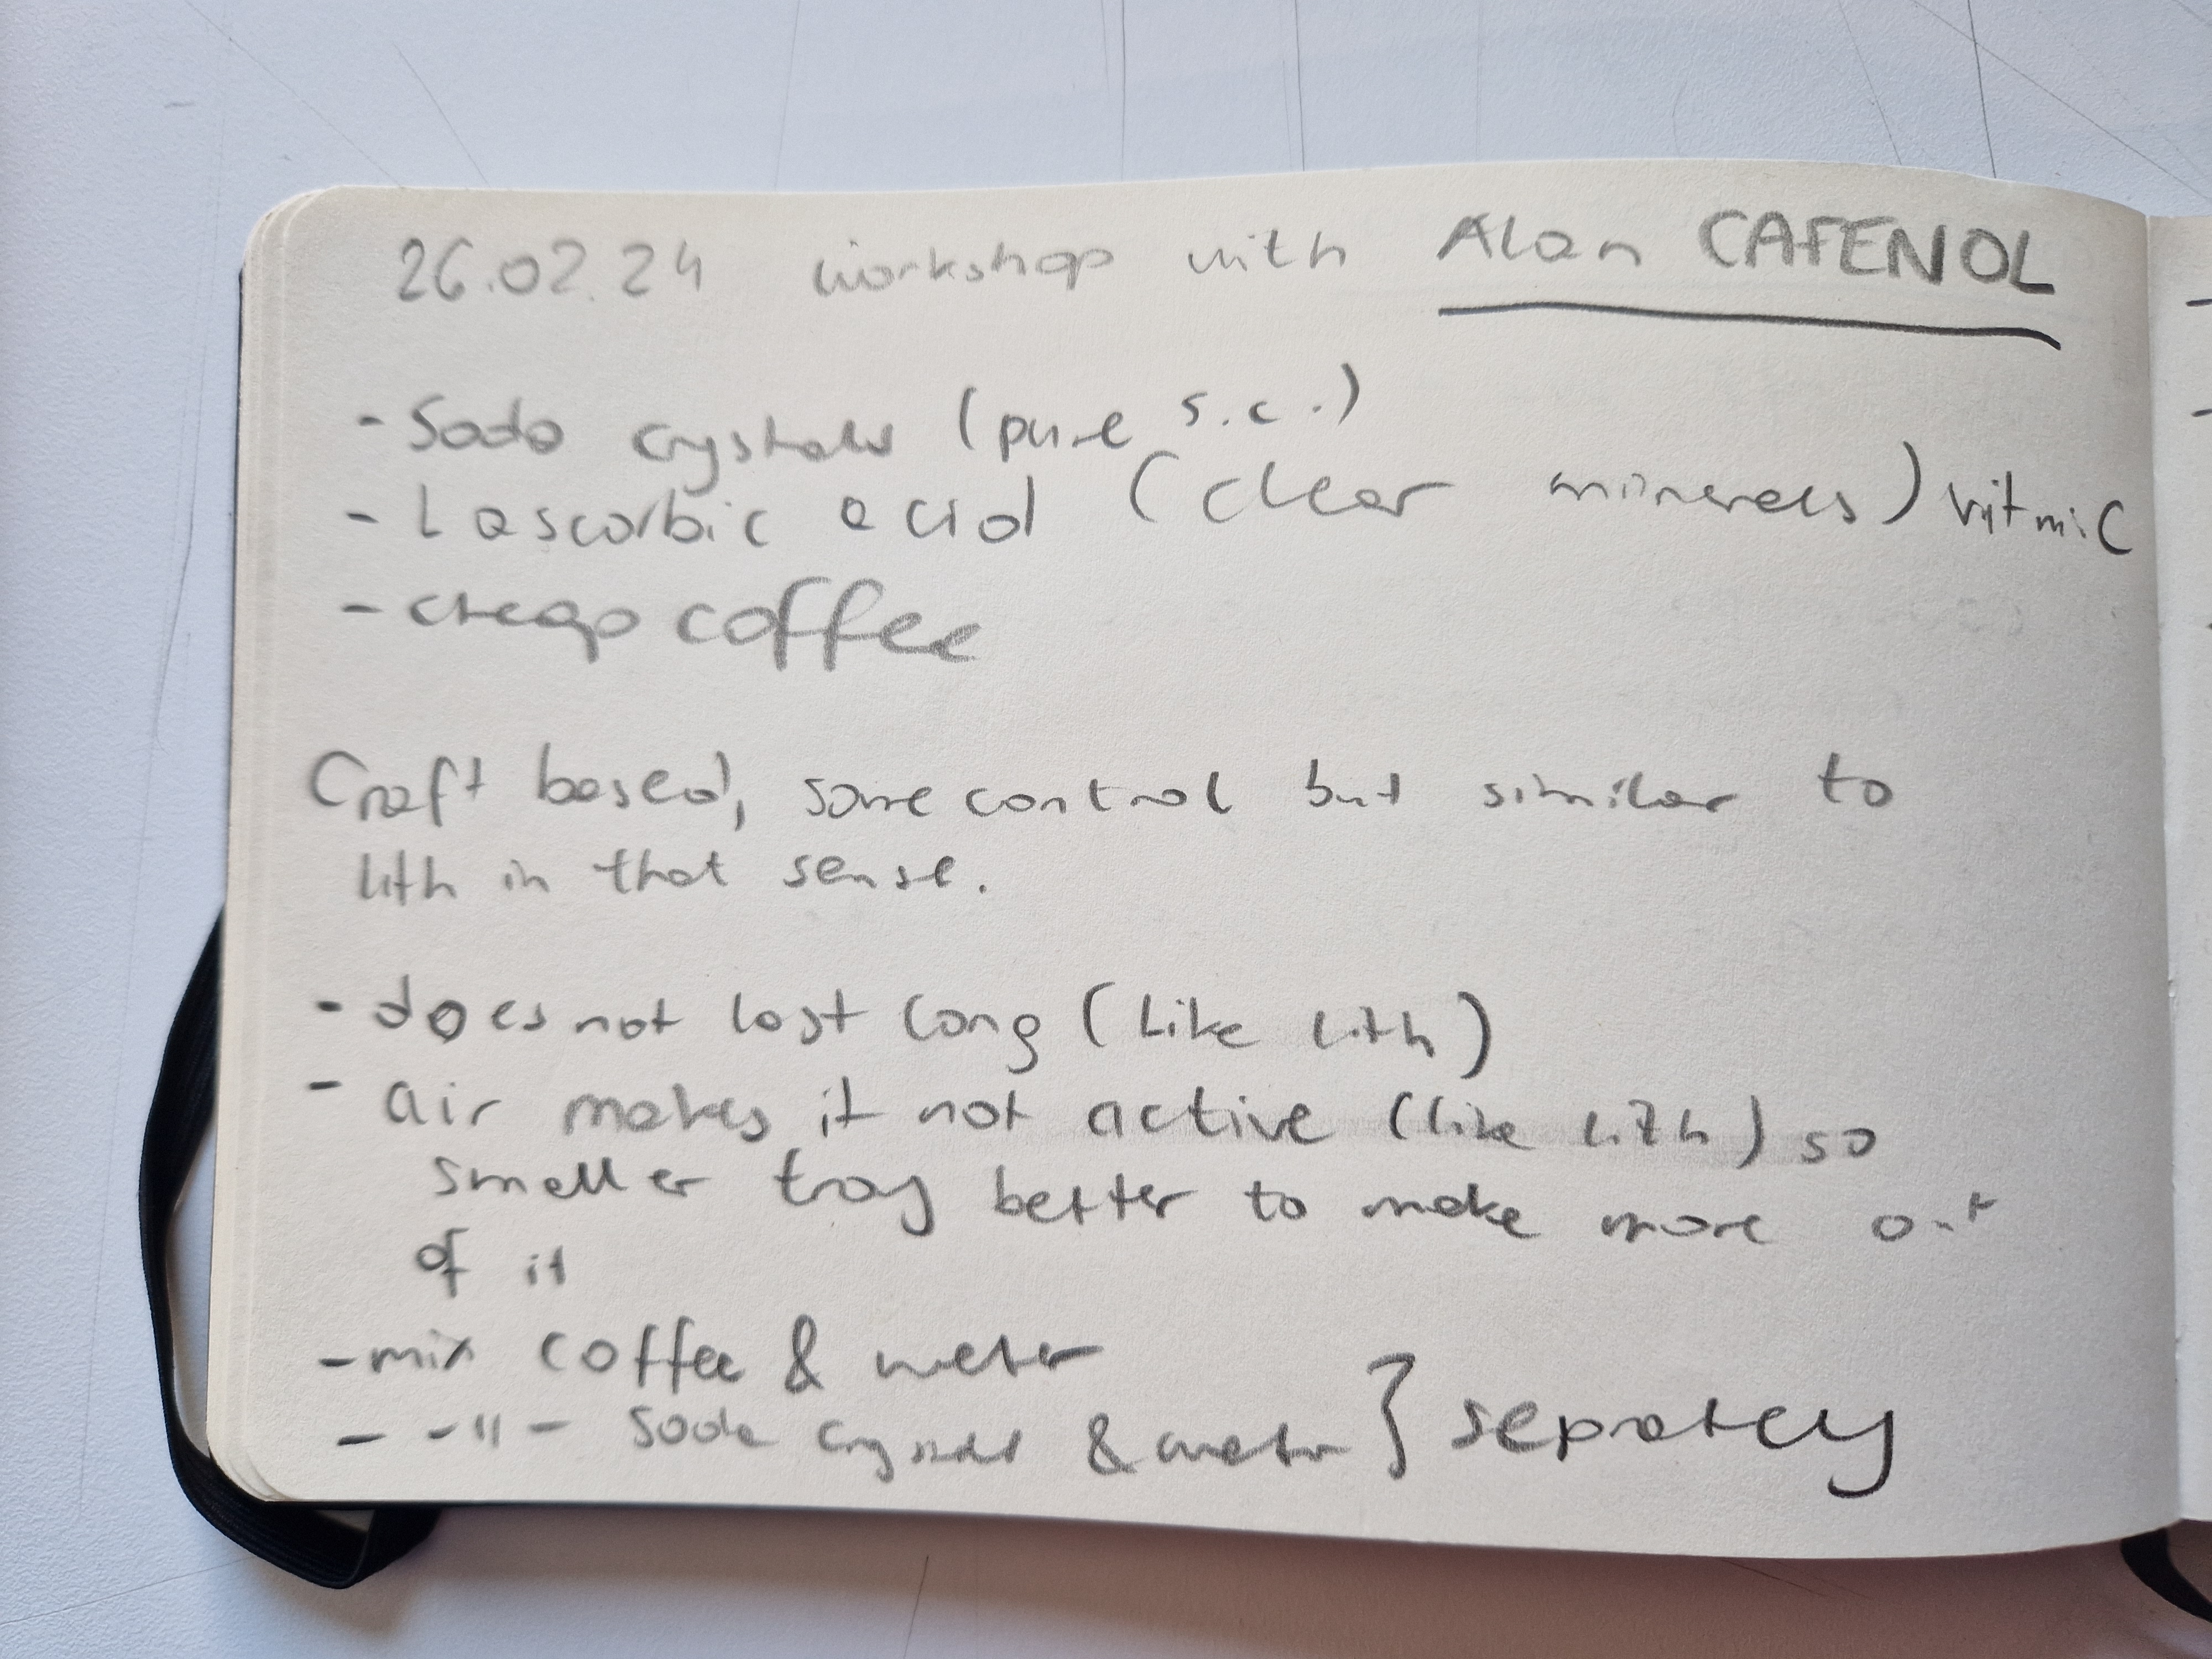
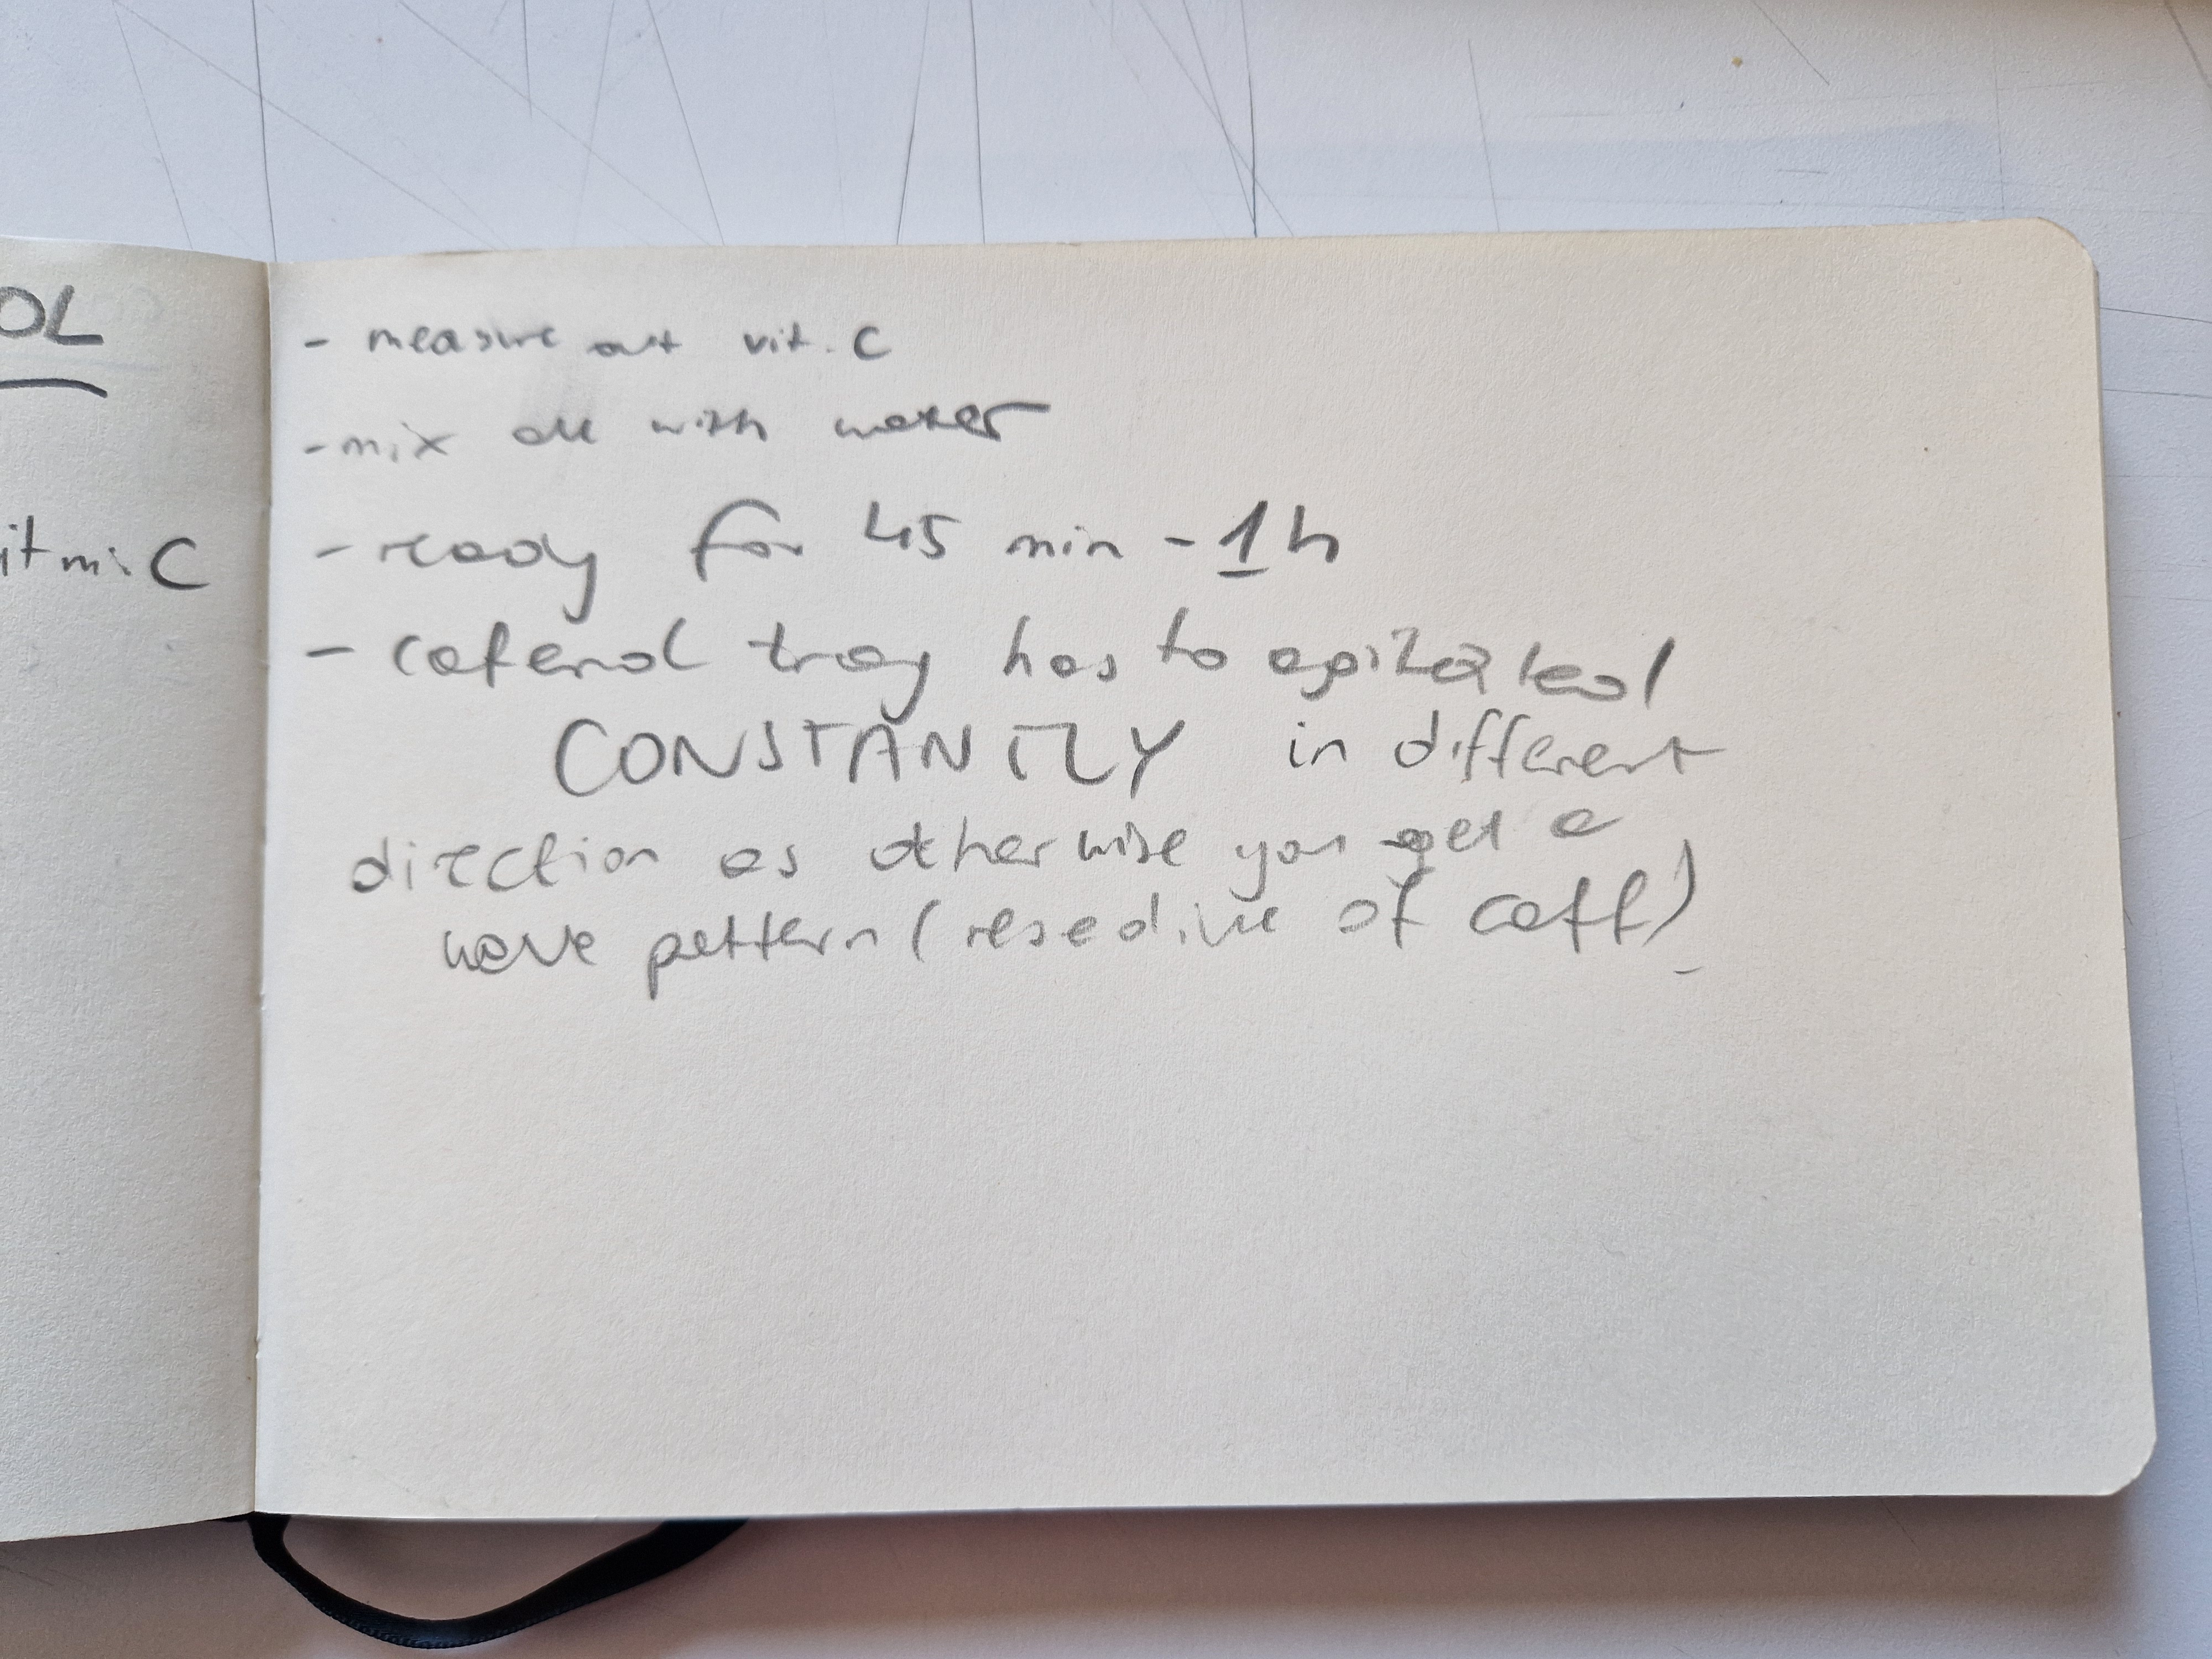
CAFENOL WORKSHOP

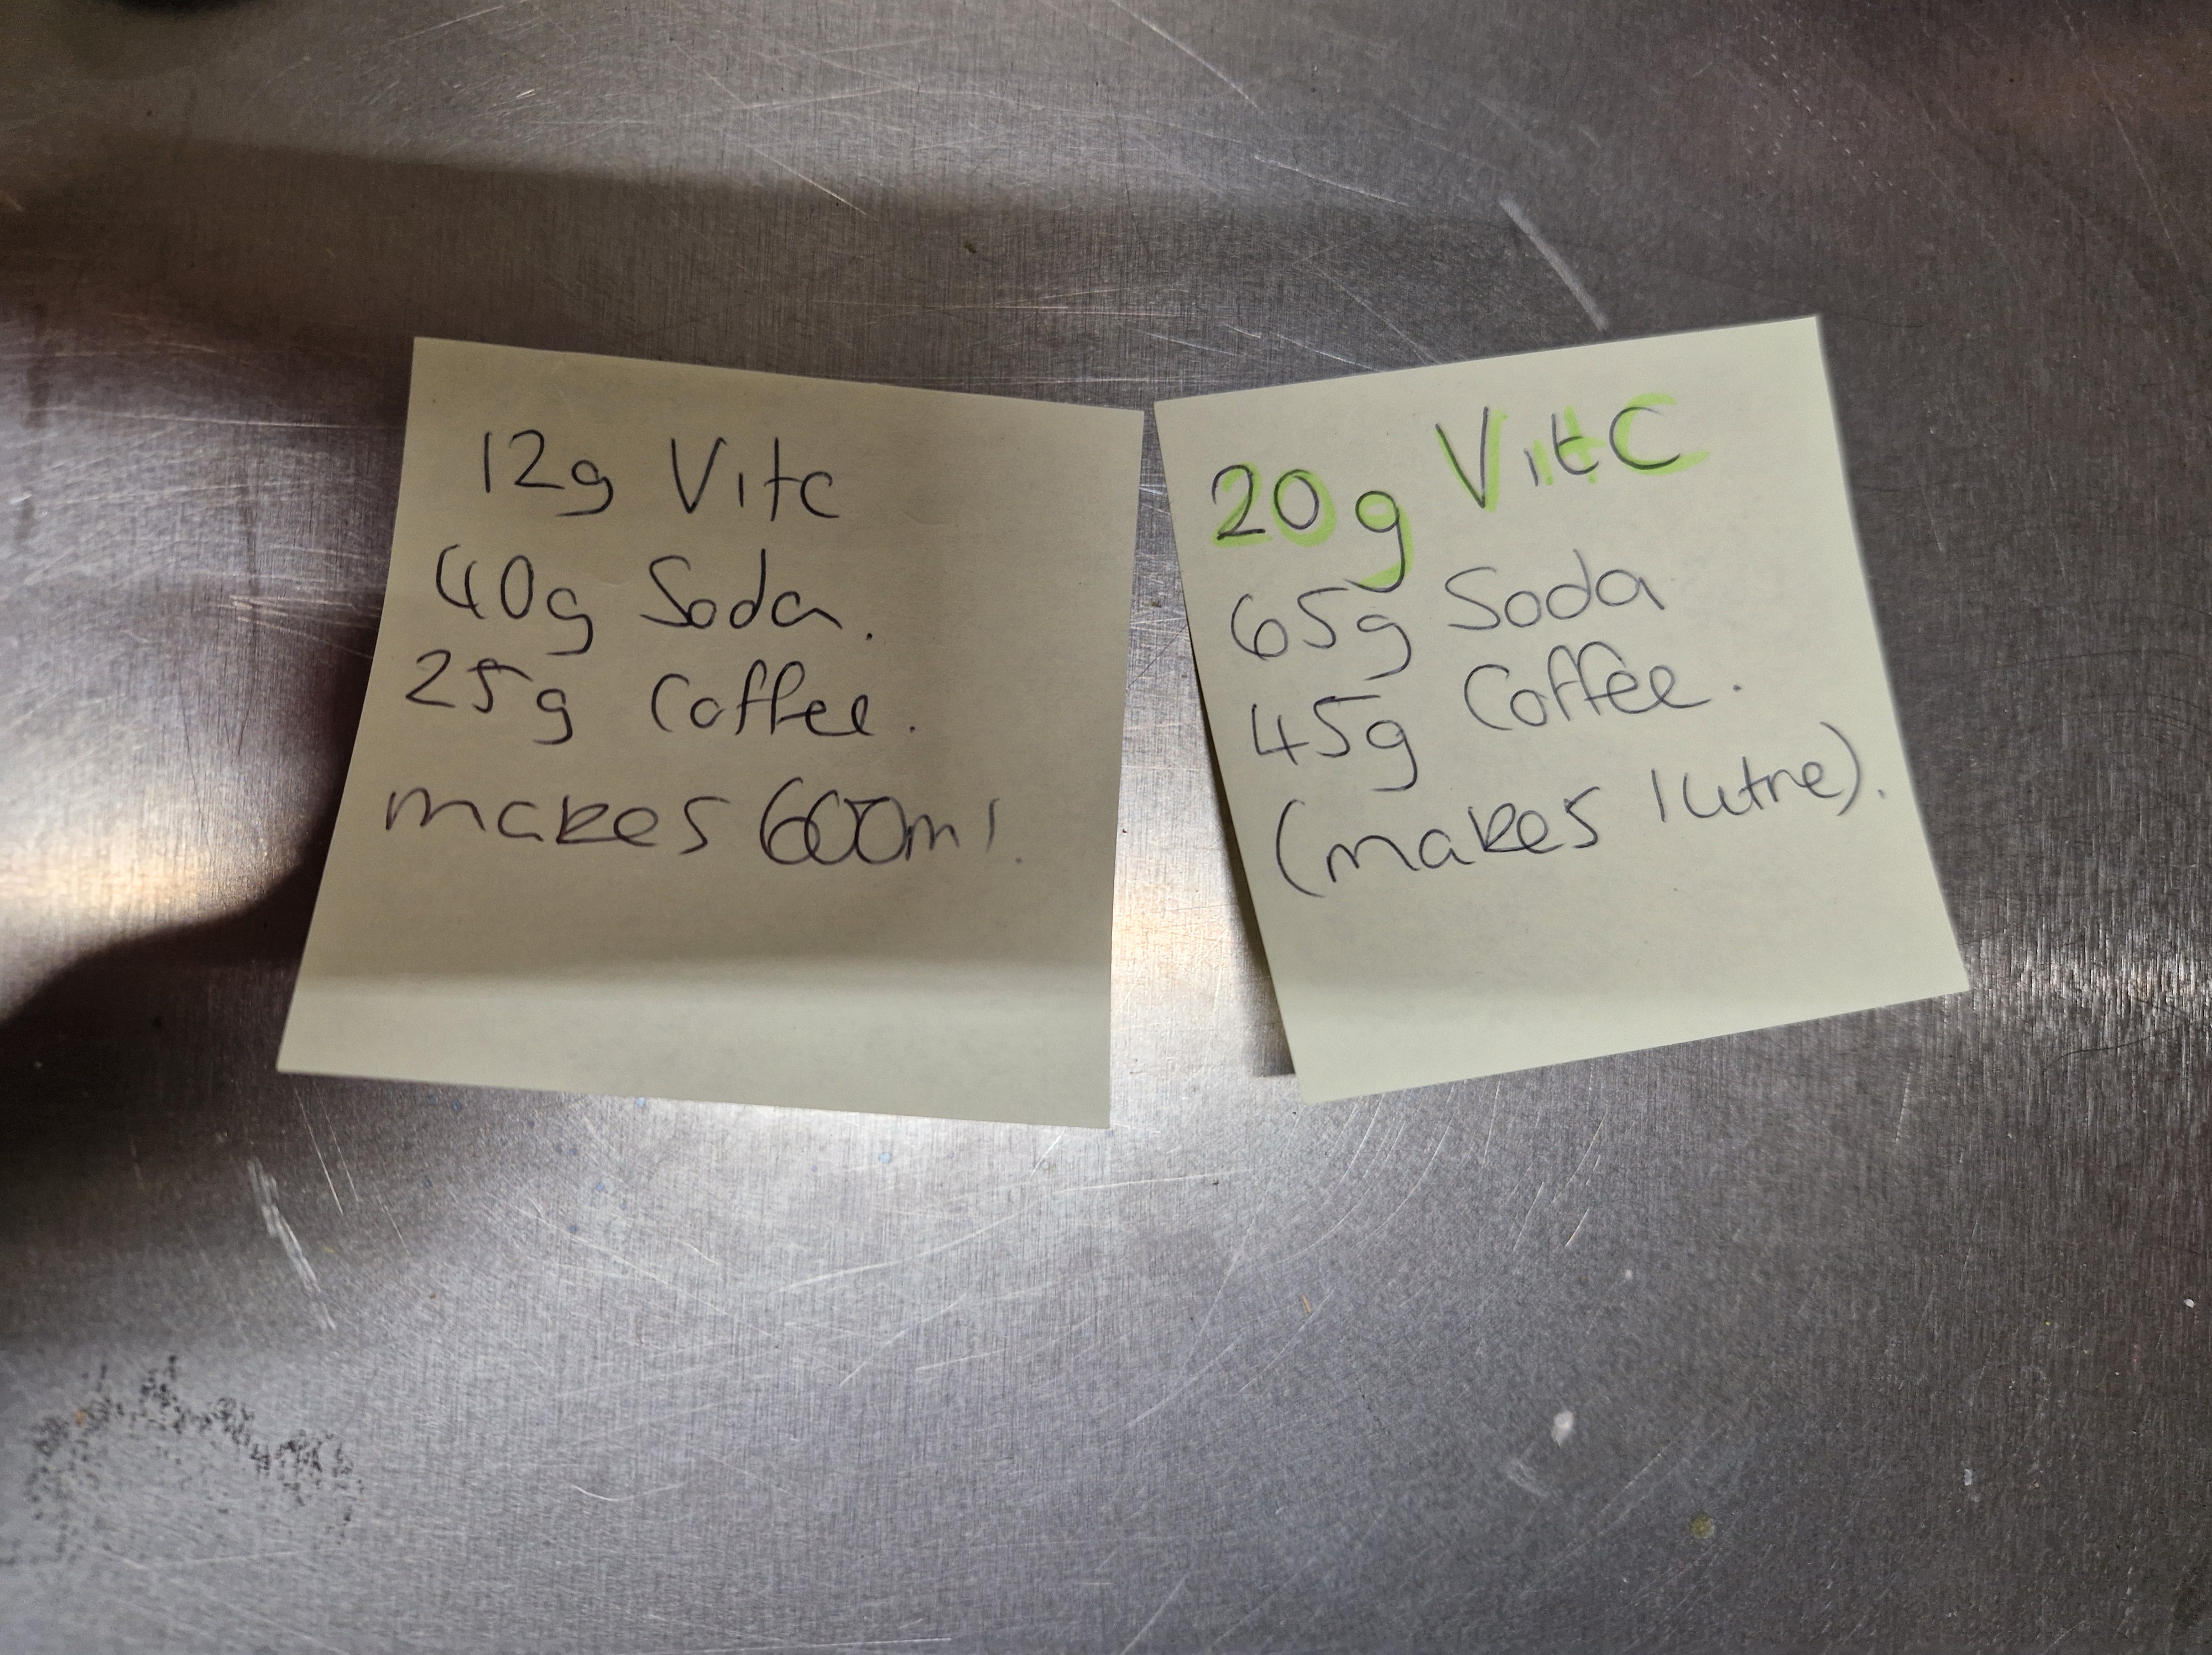
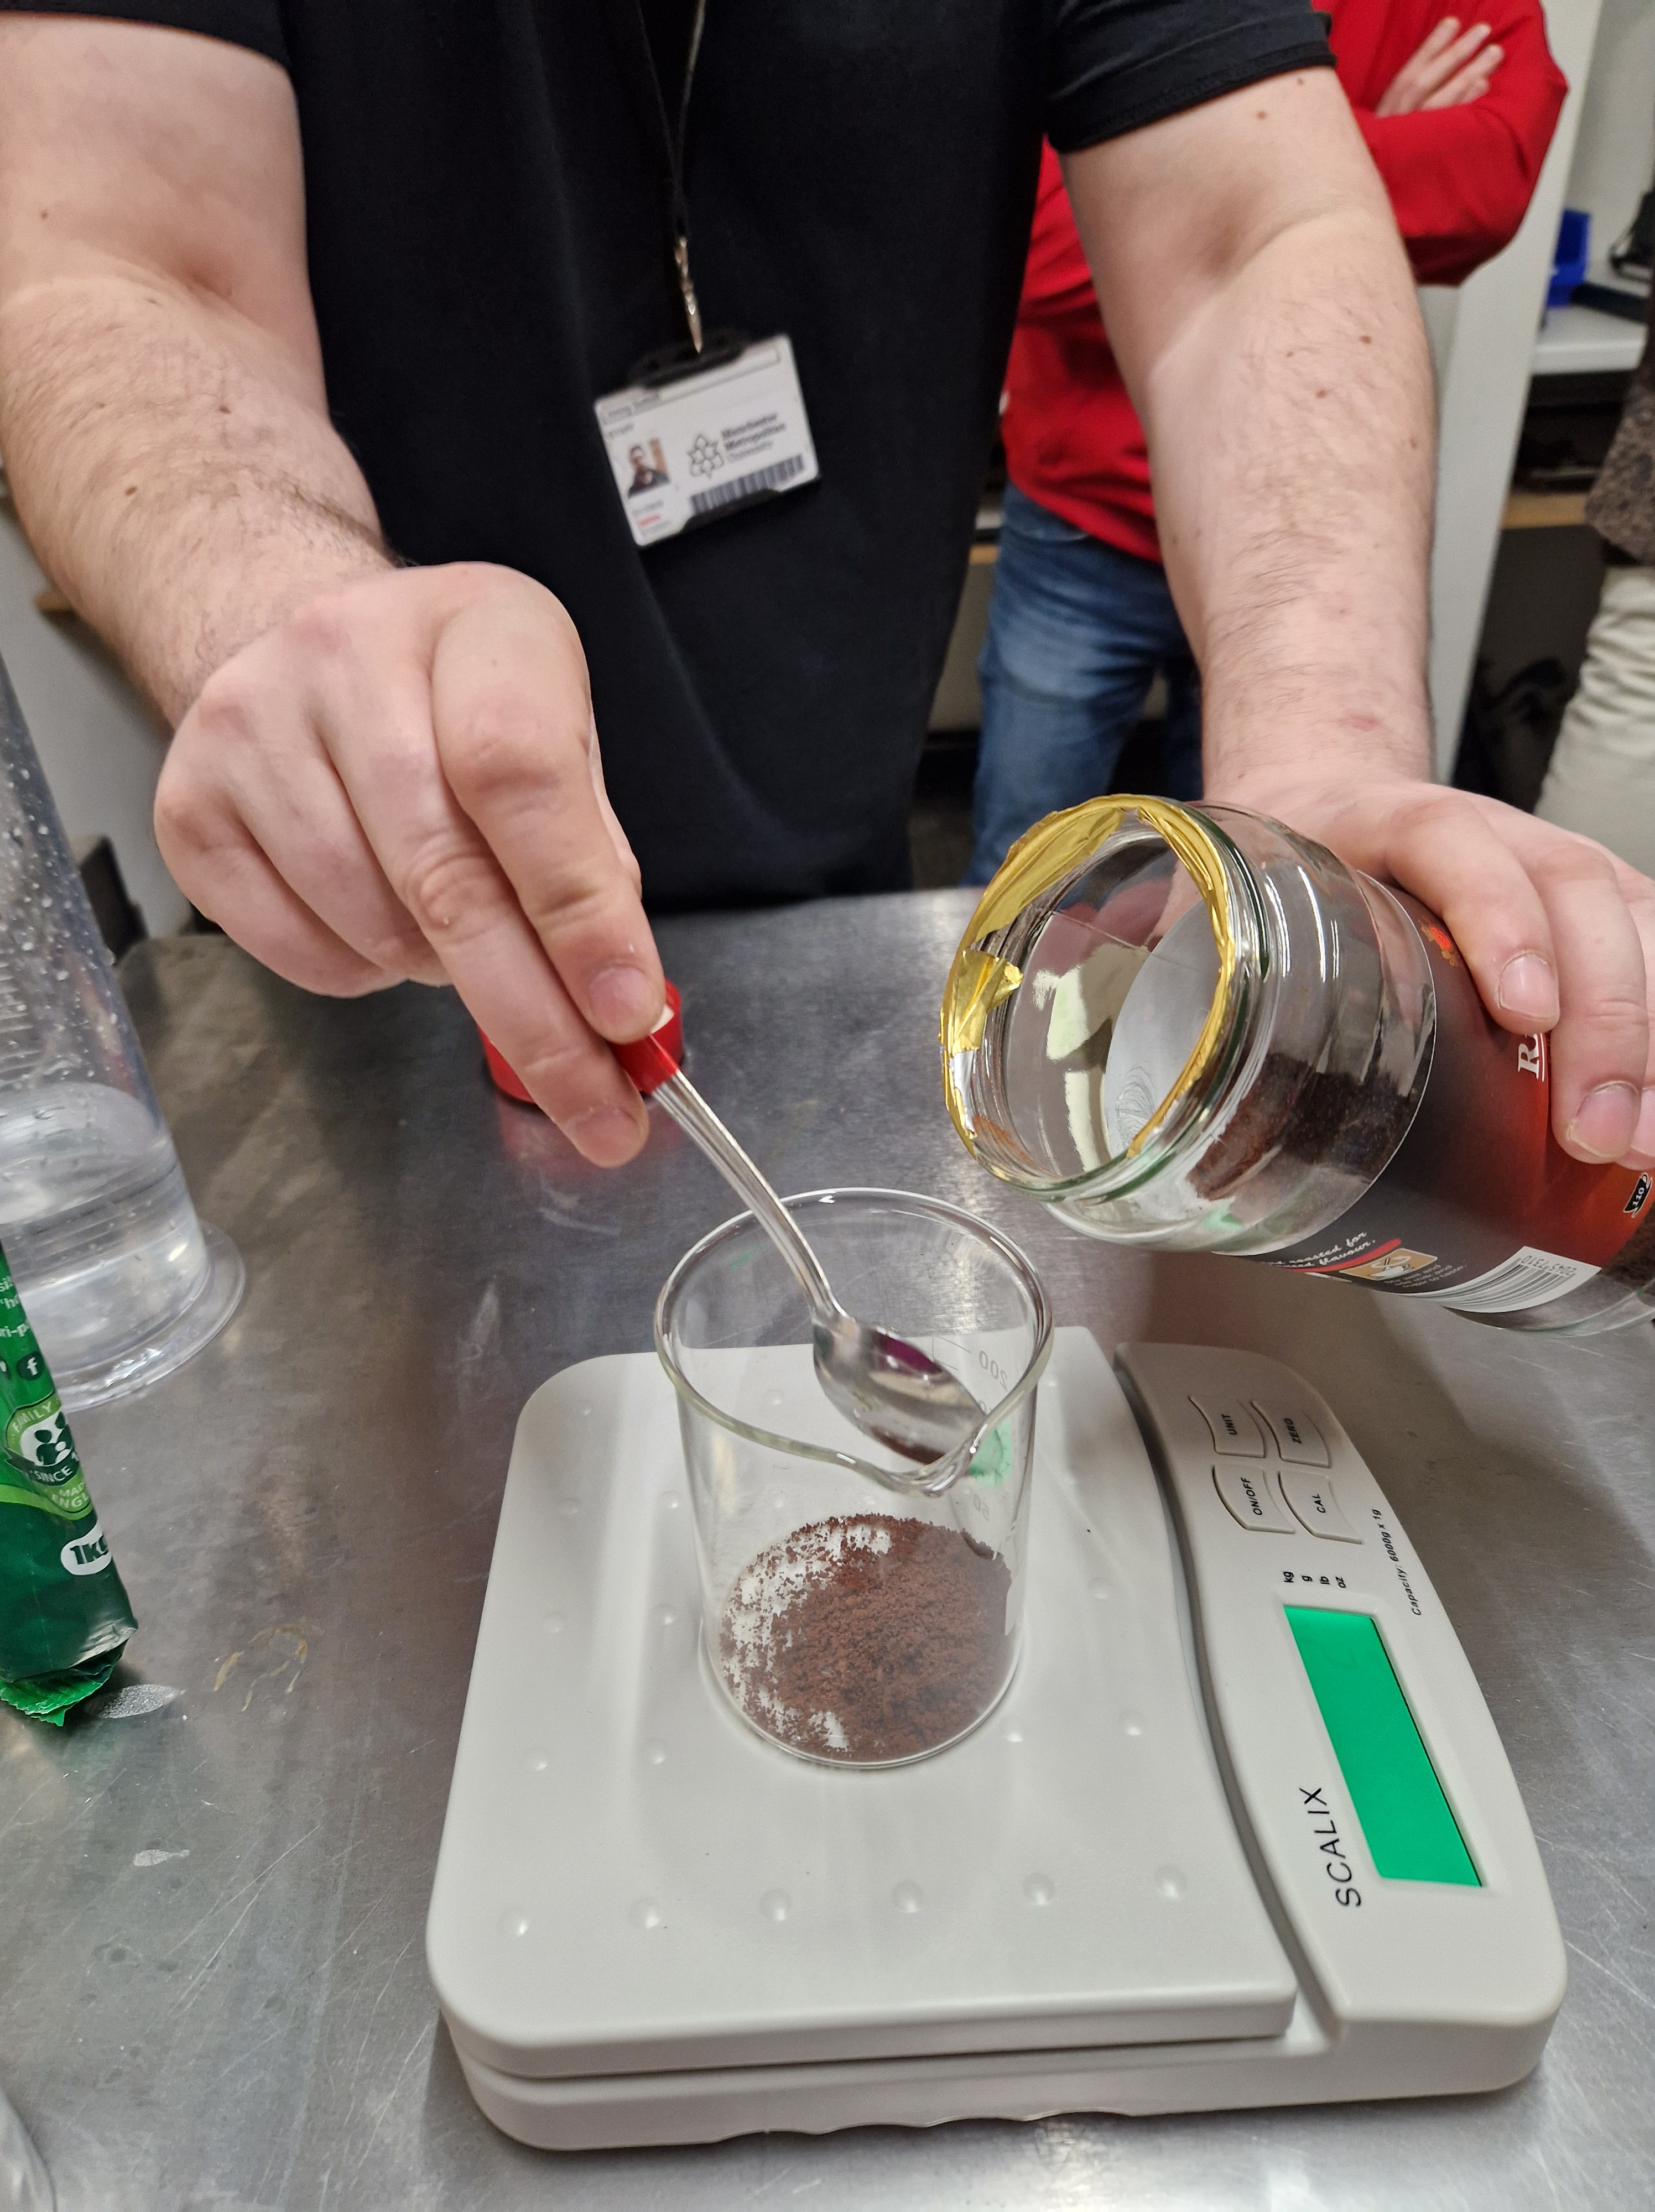
NOTES
RESULTS
REFLECTIONS: It has been a valuable workshop that expanded my thinking about darkroom prints and opened my eyes to the possibilities.
I am very grateful for the nurturing, friendly and educational environment that Alan and Johnny created. I wish to be that person in someone's life one day.
TUESDAY
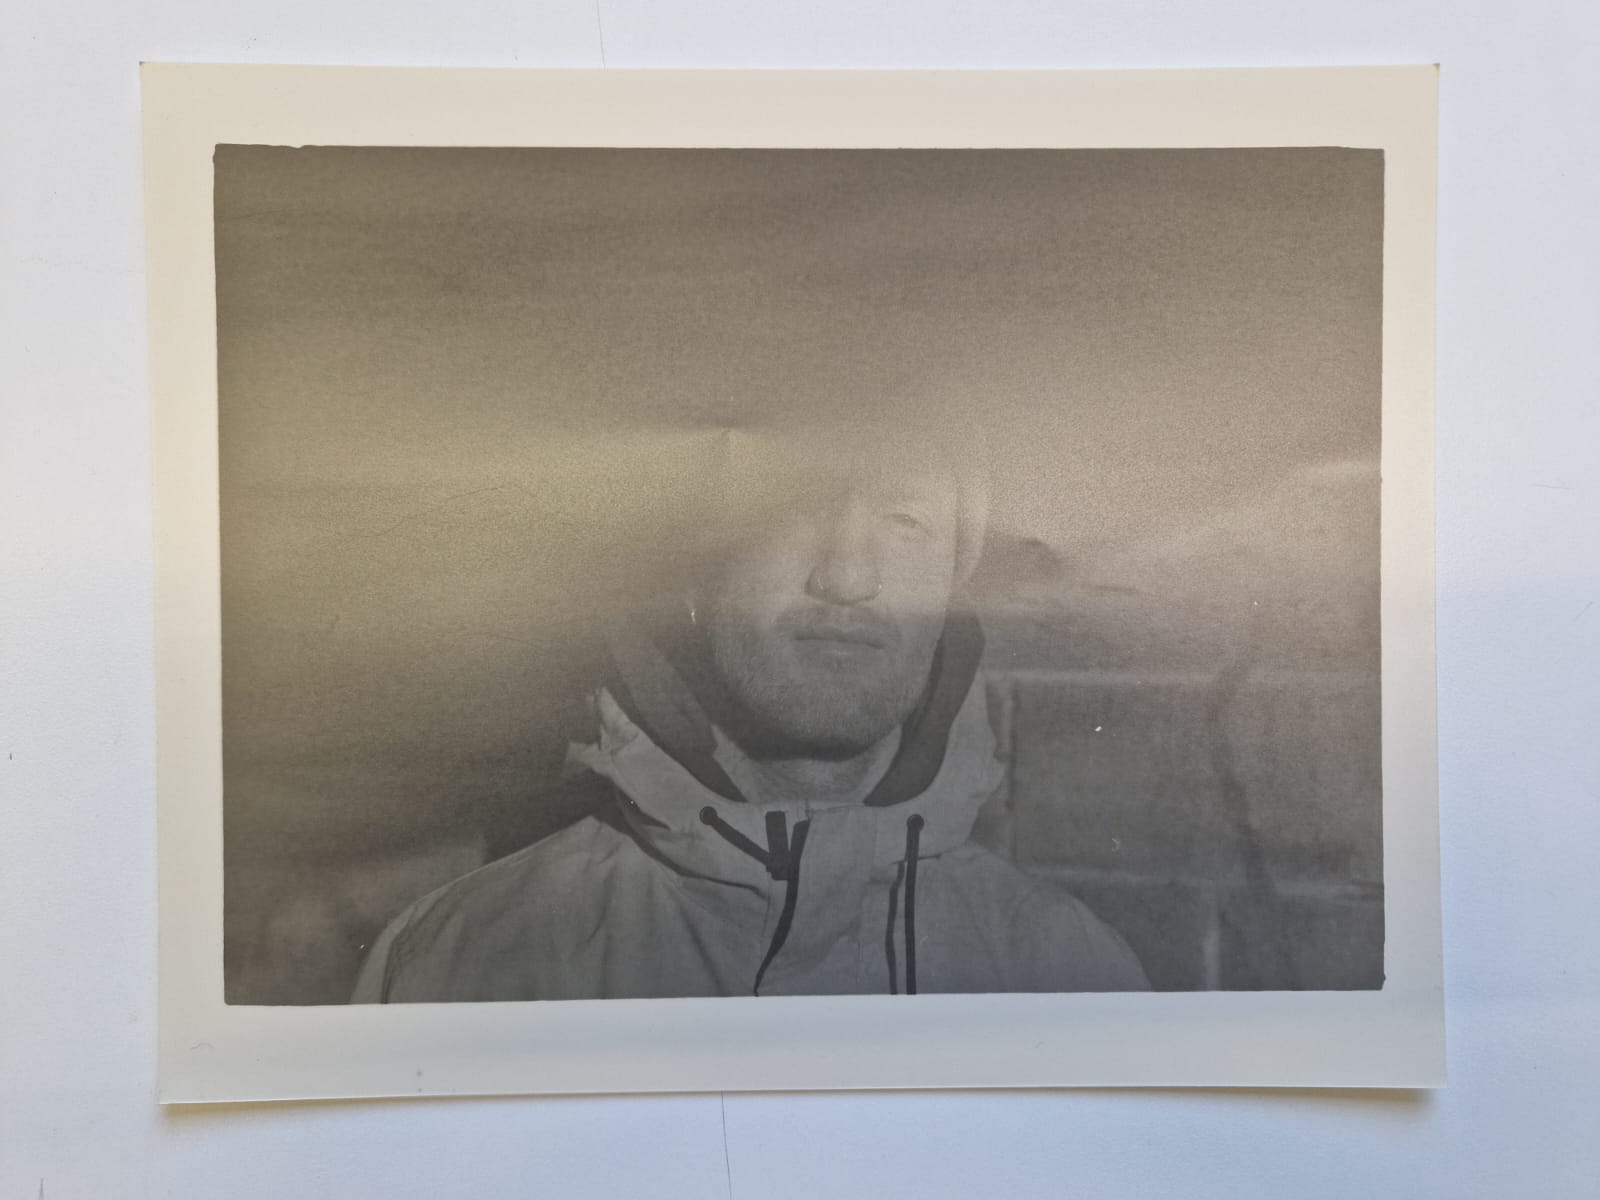
LARGE FORMAT STUDIO PHOTOSHOOT
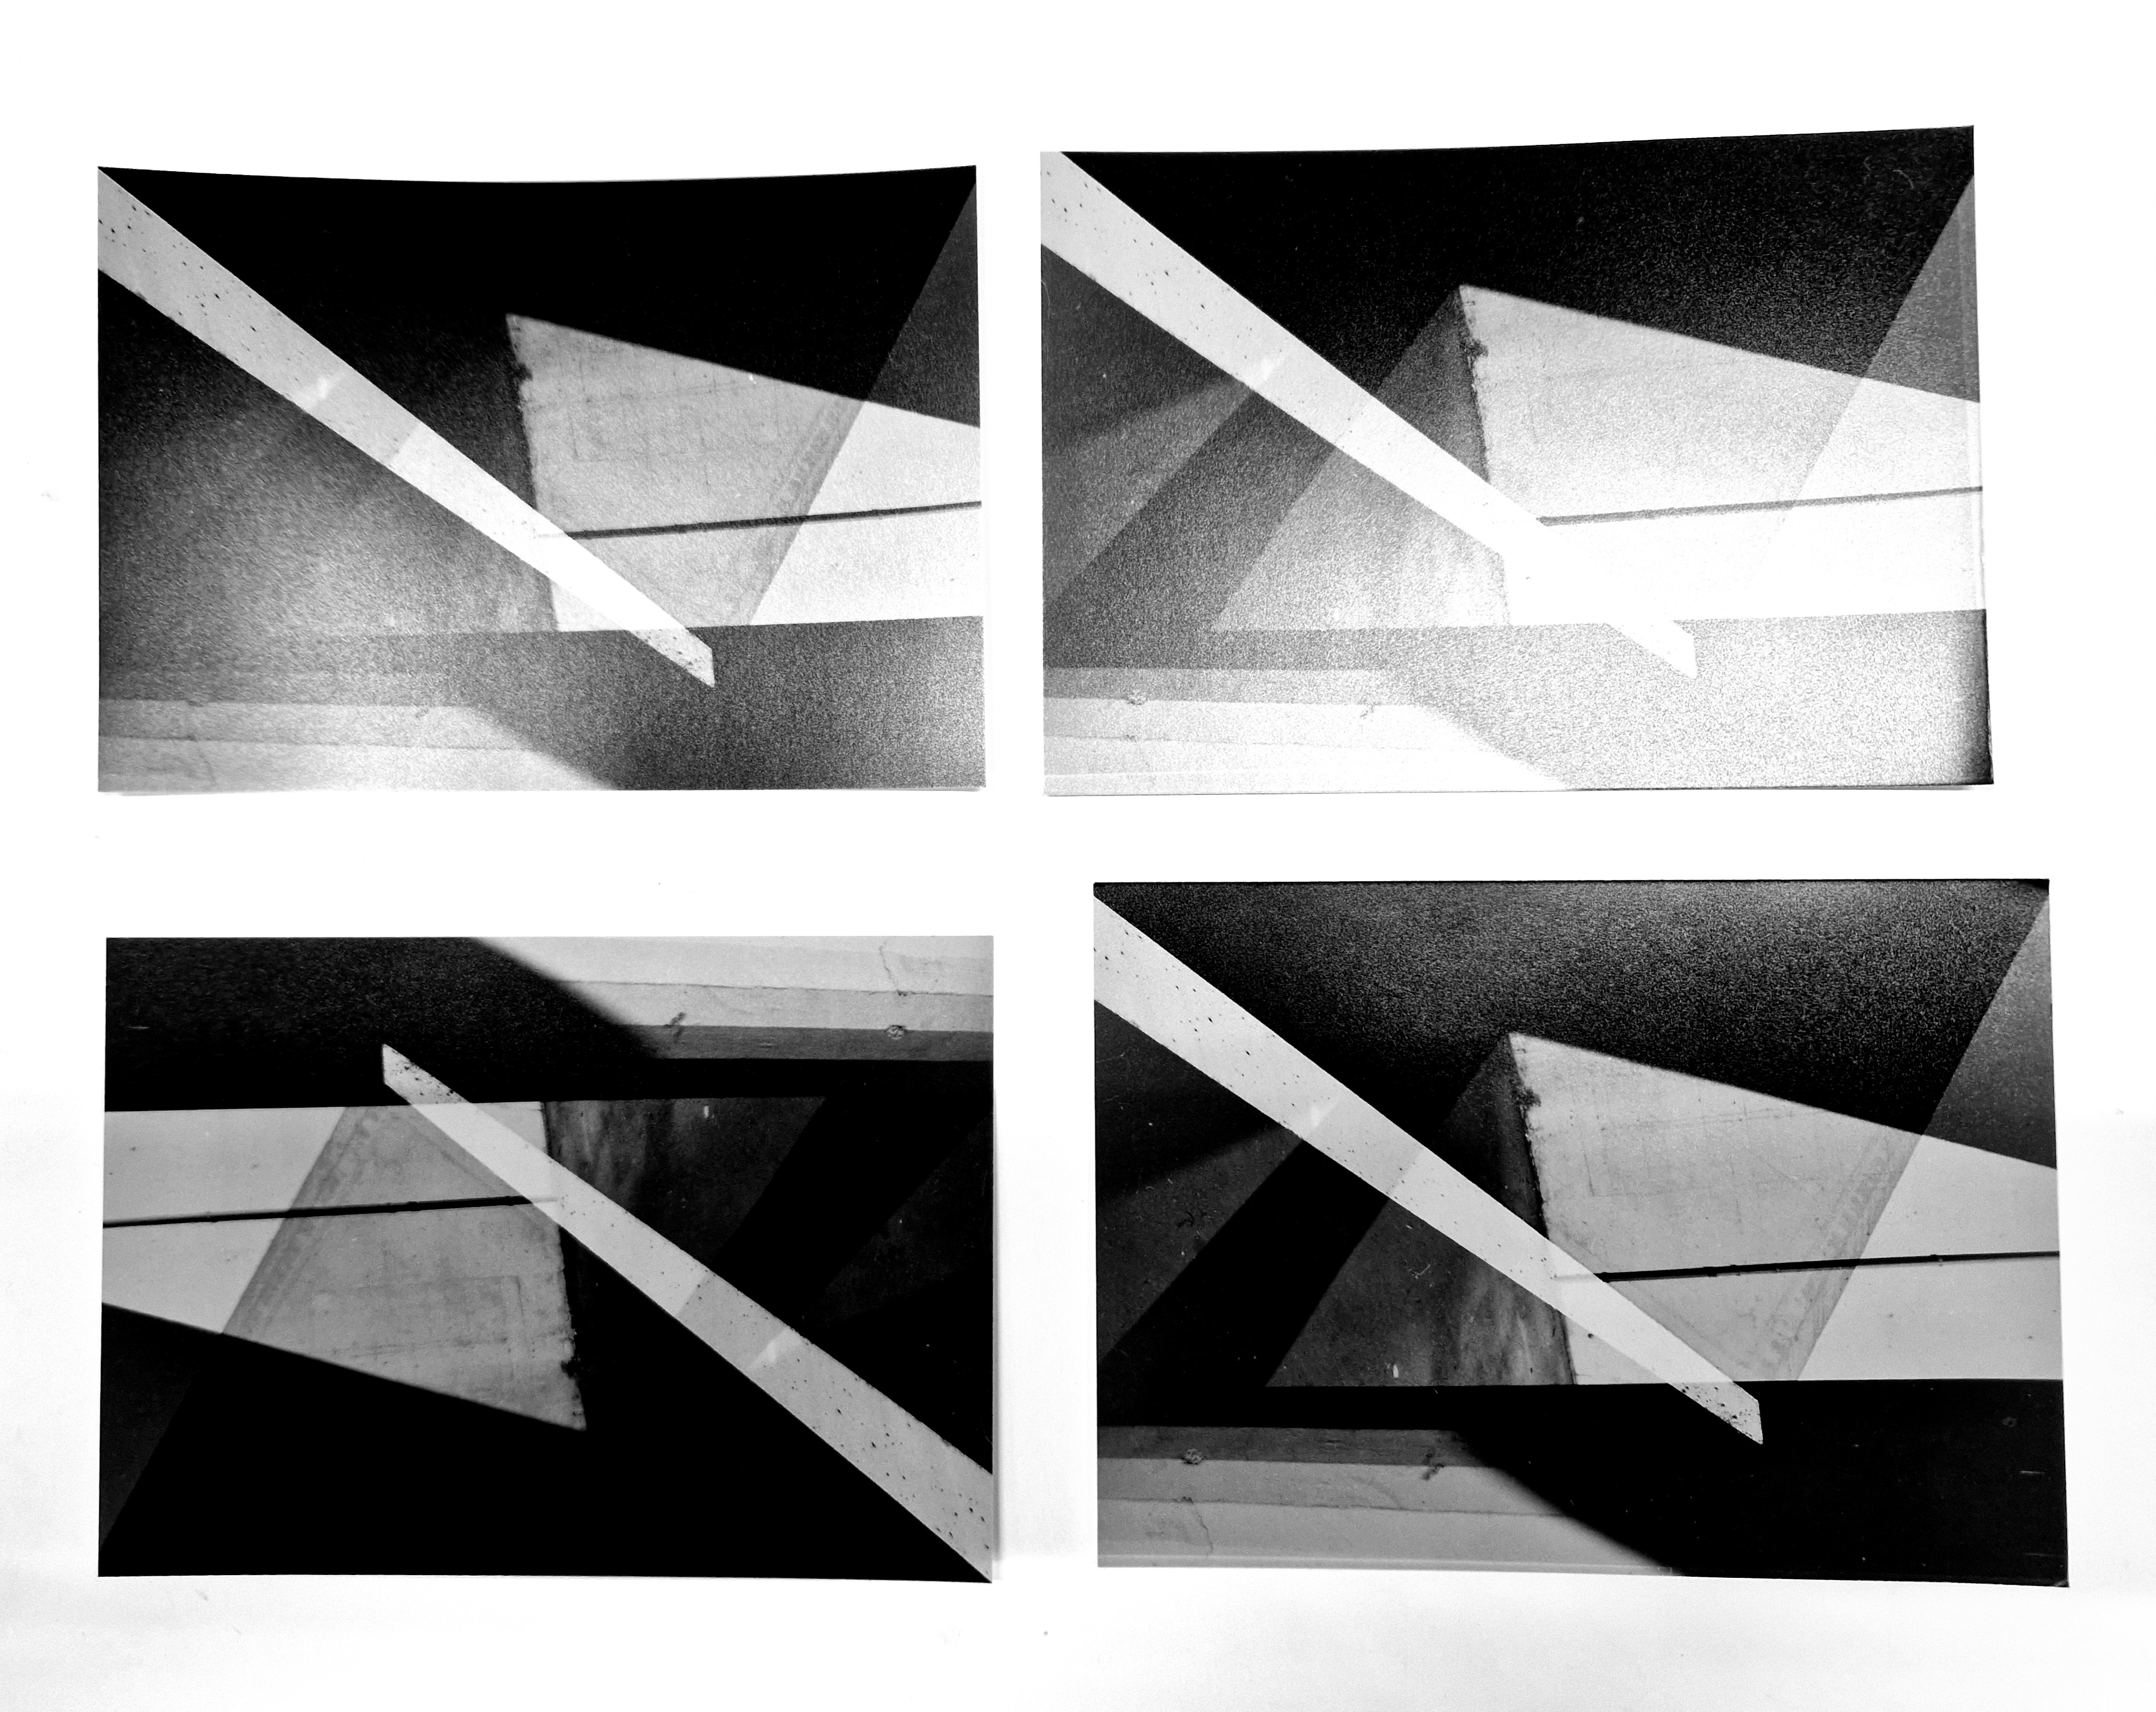
Today I decided to experiment with macro and double exposure on a large format camera.
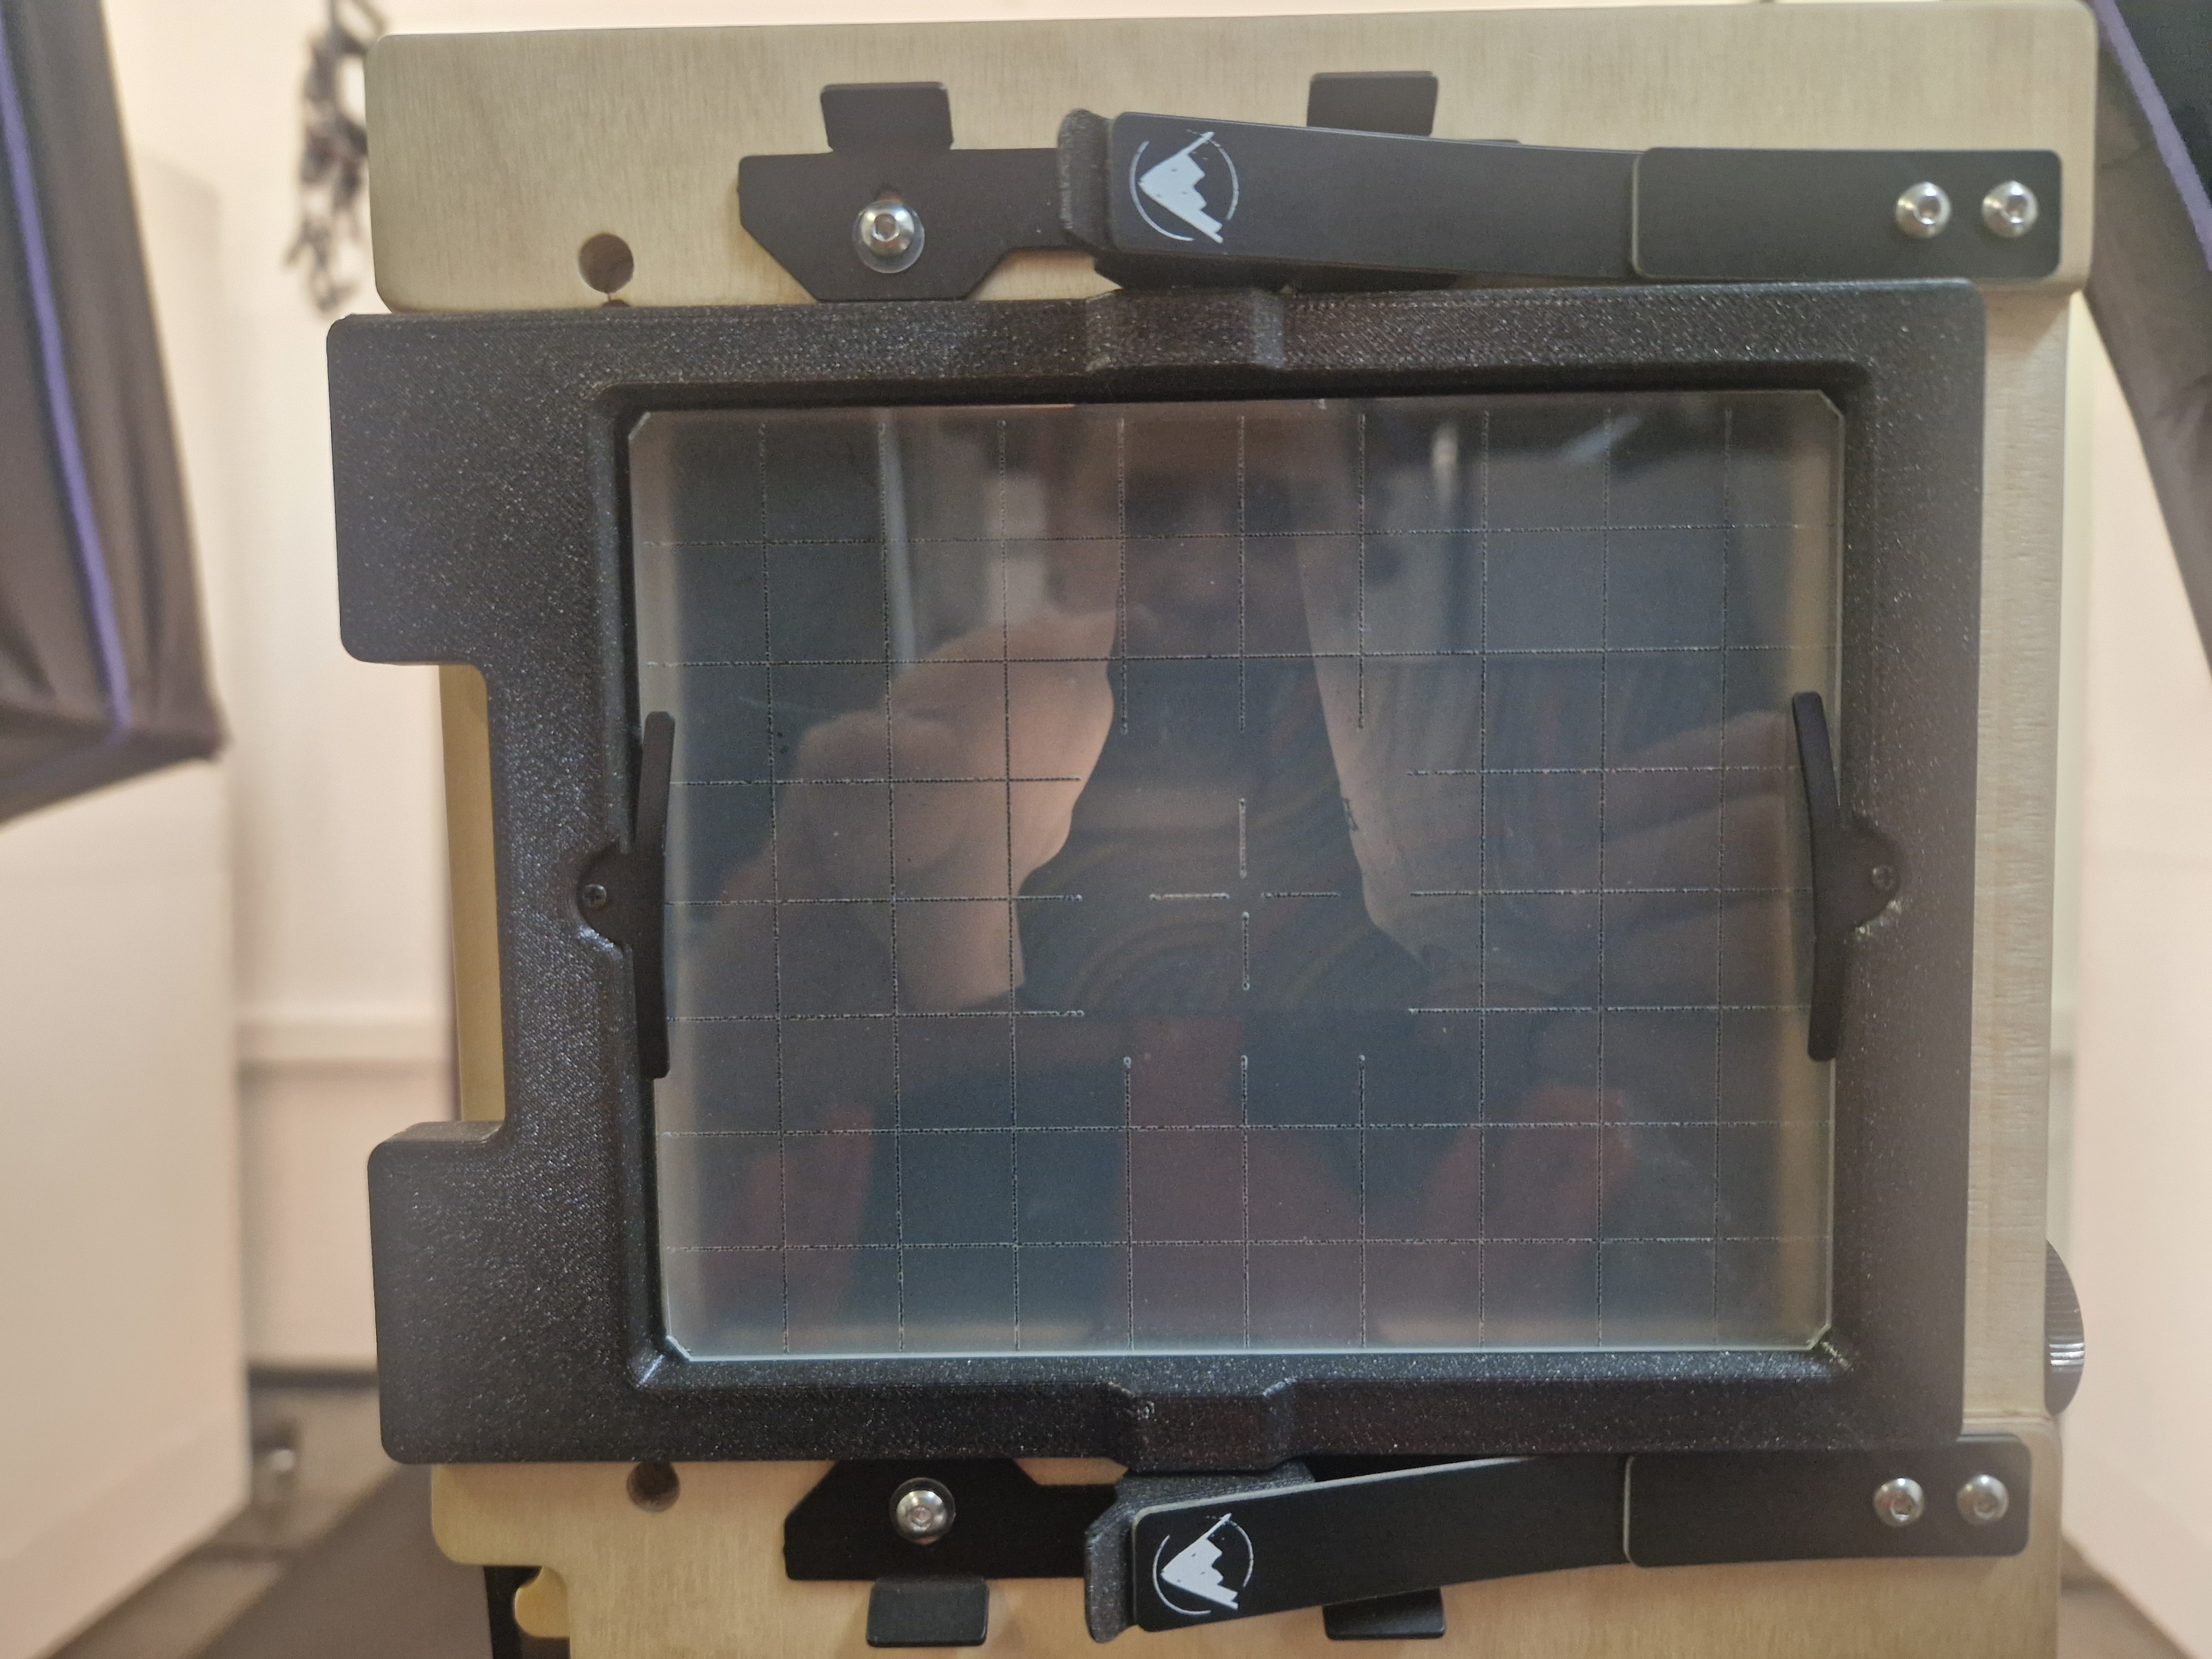

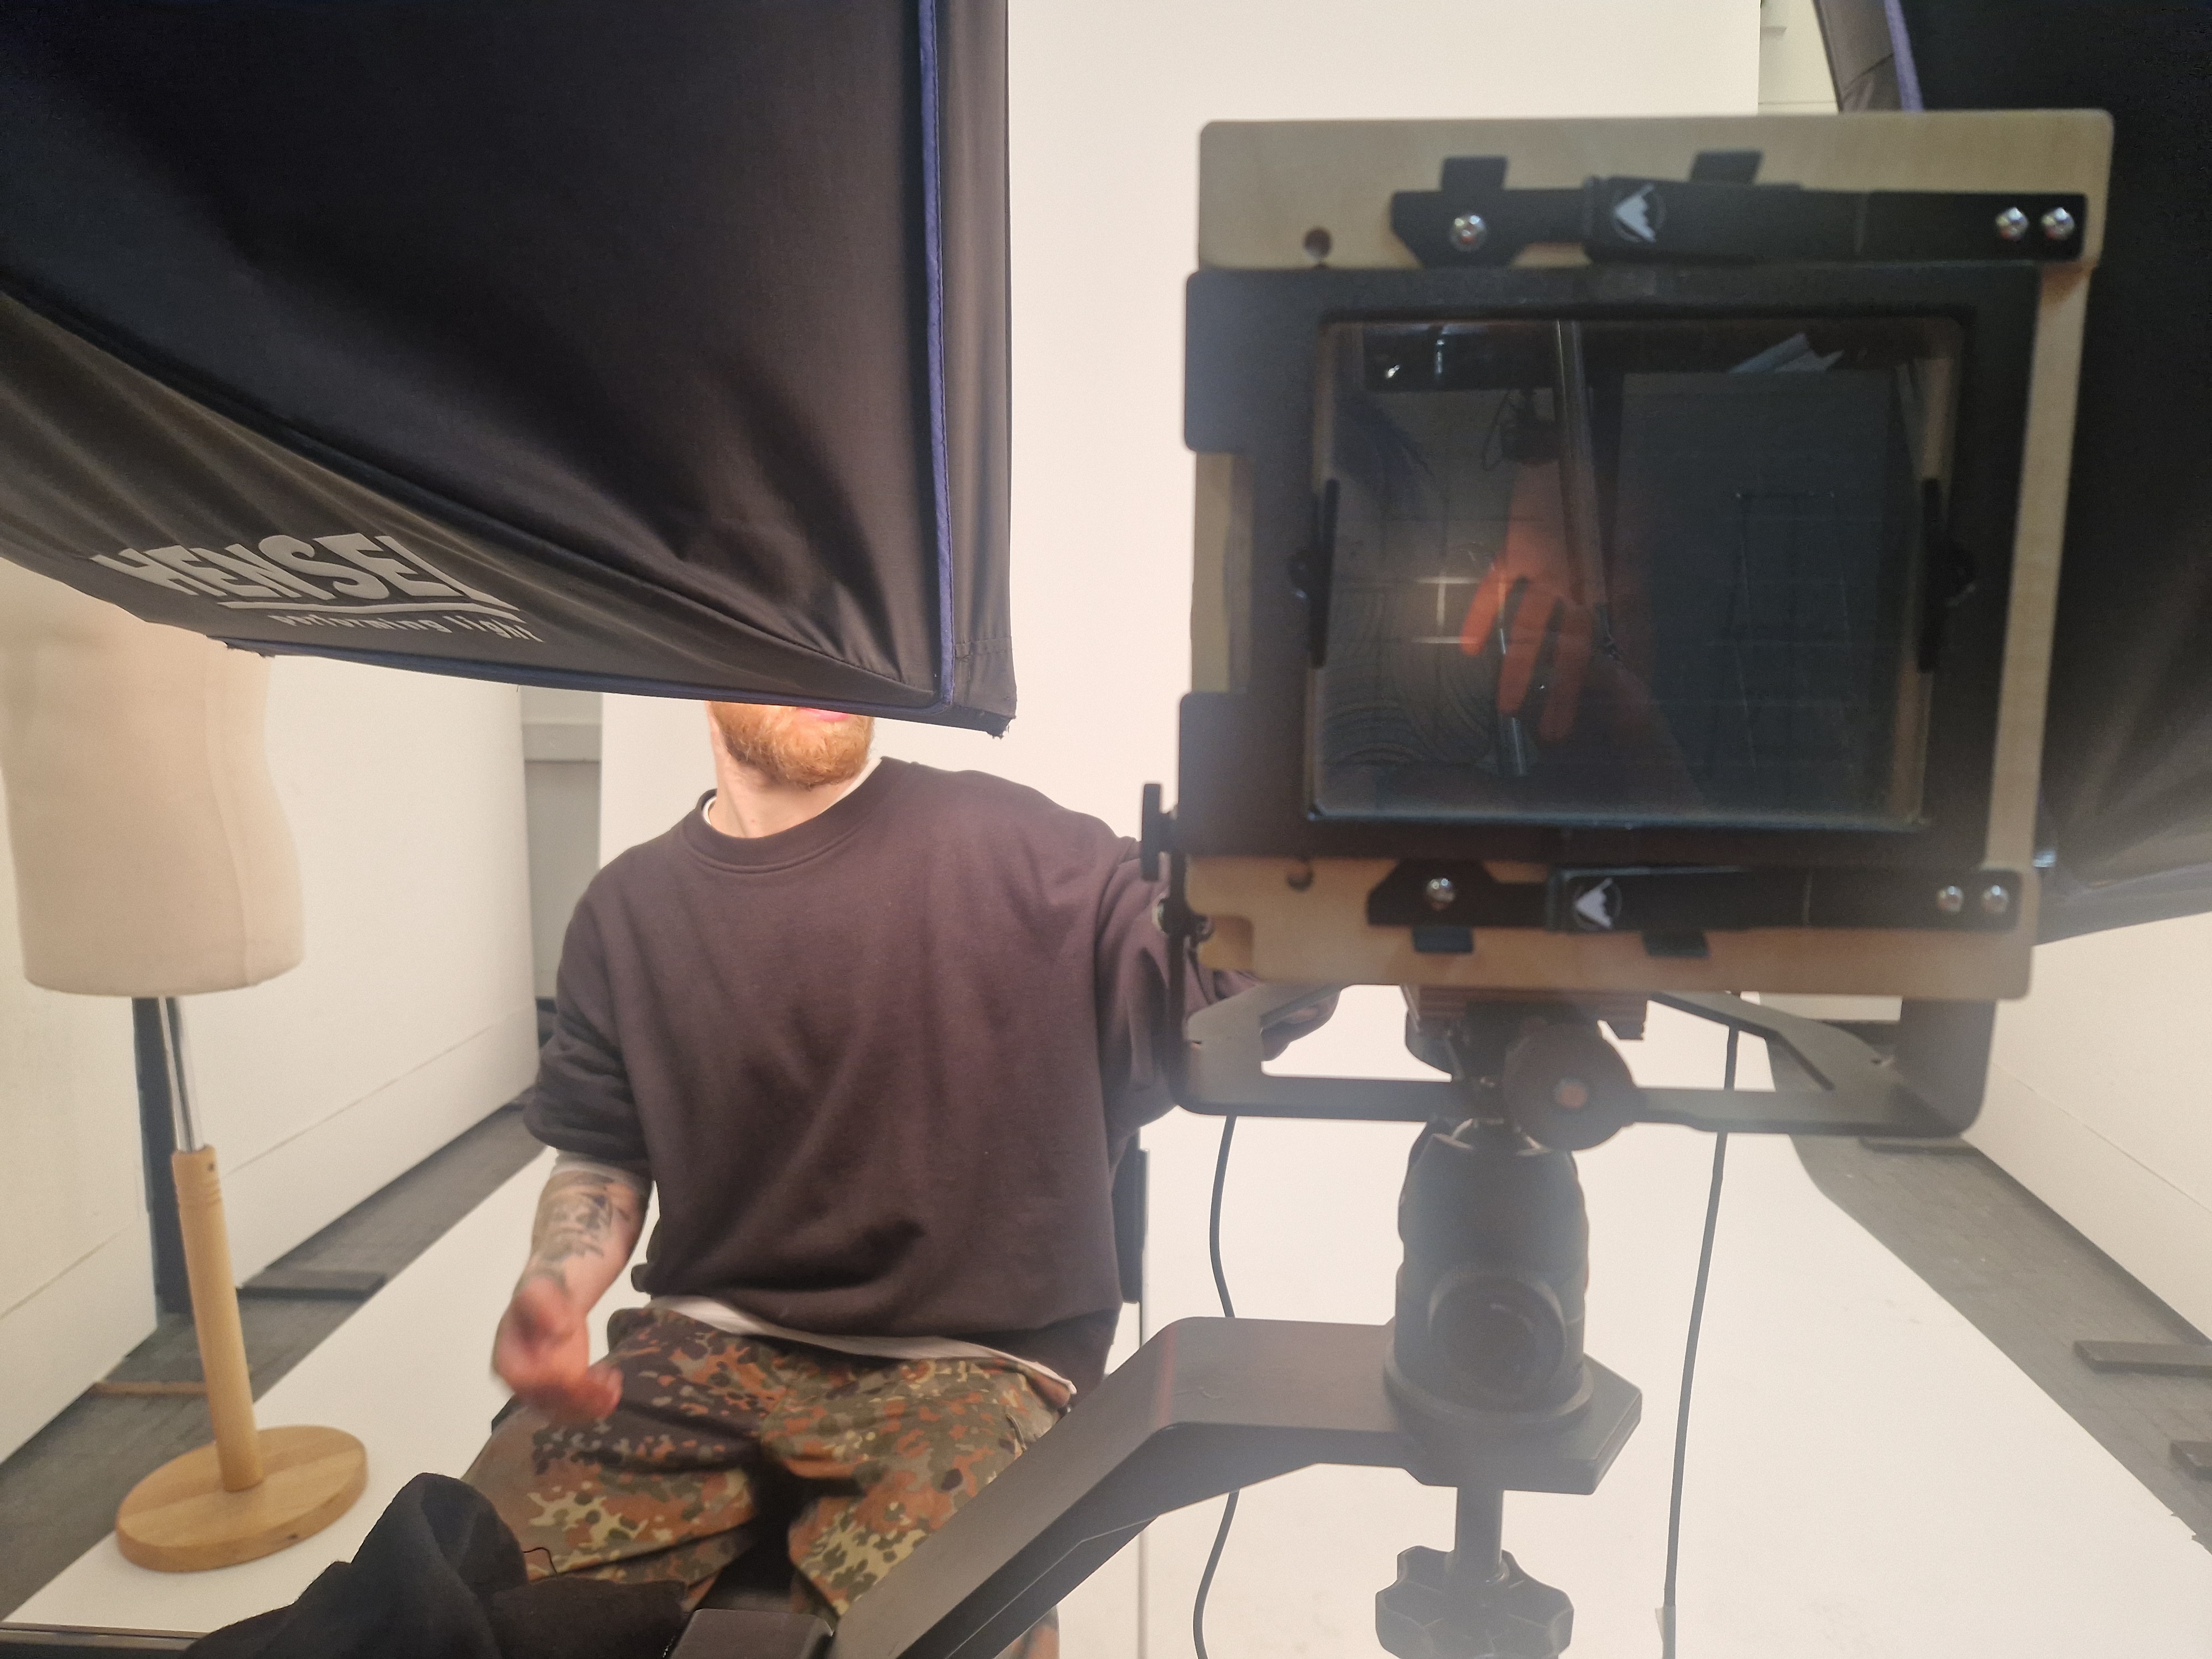
RESULTS
CONTACT SHEET
REFLECTIONS: As a strictly outdoor photographer, over the past four years of studying, I constantly pushed myself to try things outside my preferred way of shooting as a way of exploring possibilities and expanding my skills within the craft. I got to the point that I am quite comfortable in the studio and pretty fluent with a large format camera, which were both prime aims I wanted to achieve within the university time. This studio session was another fantastic opportunity to progress my skills, explore but also be playful and allow improvisation to happen and ideas to flow and even take over some shots. I think it is very important to make space for that playfulness and allow the subconscious and the inner child to have a voice.
DARKROOM CLUB – BLEACHING BACK
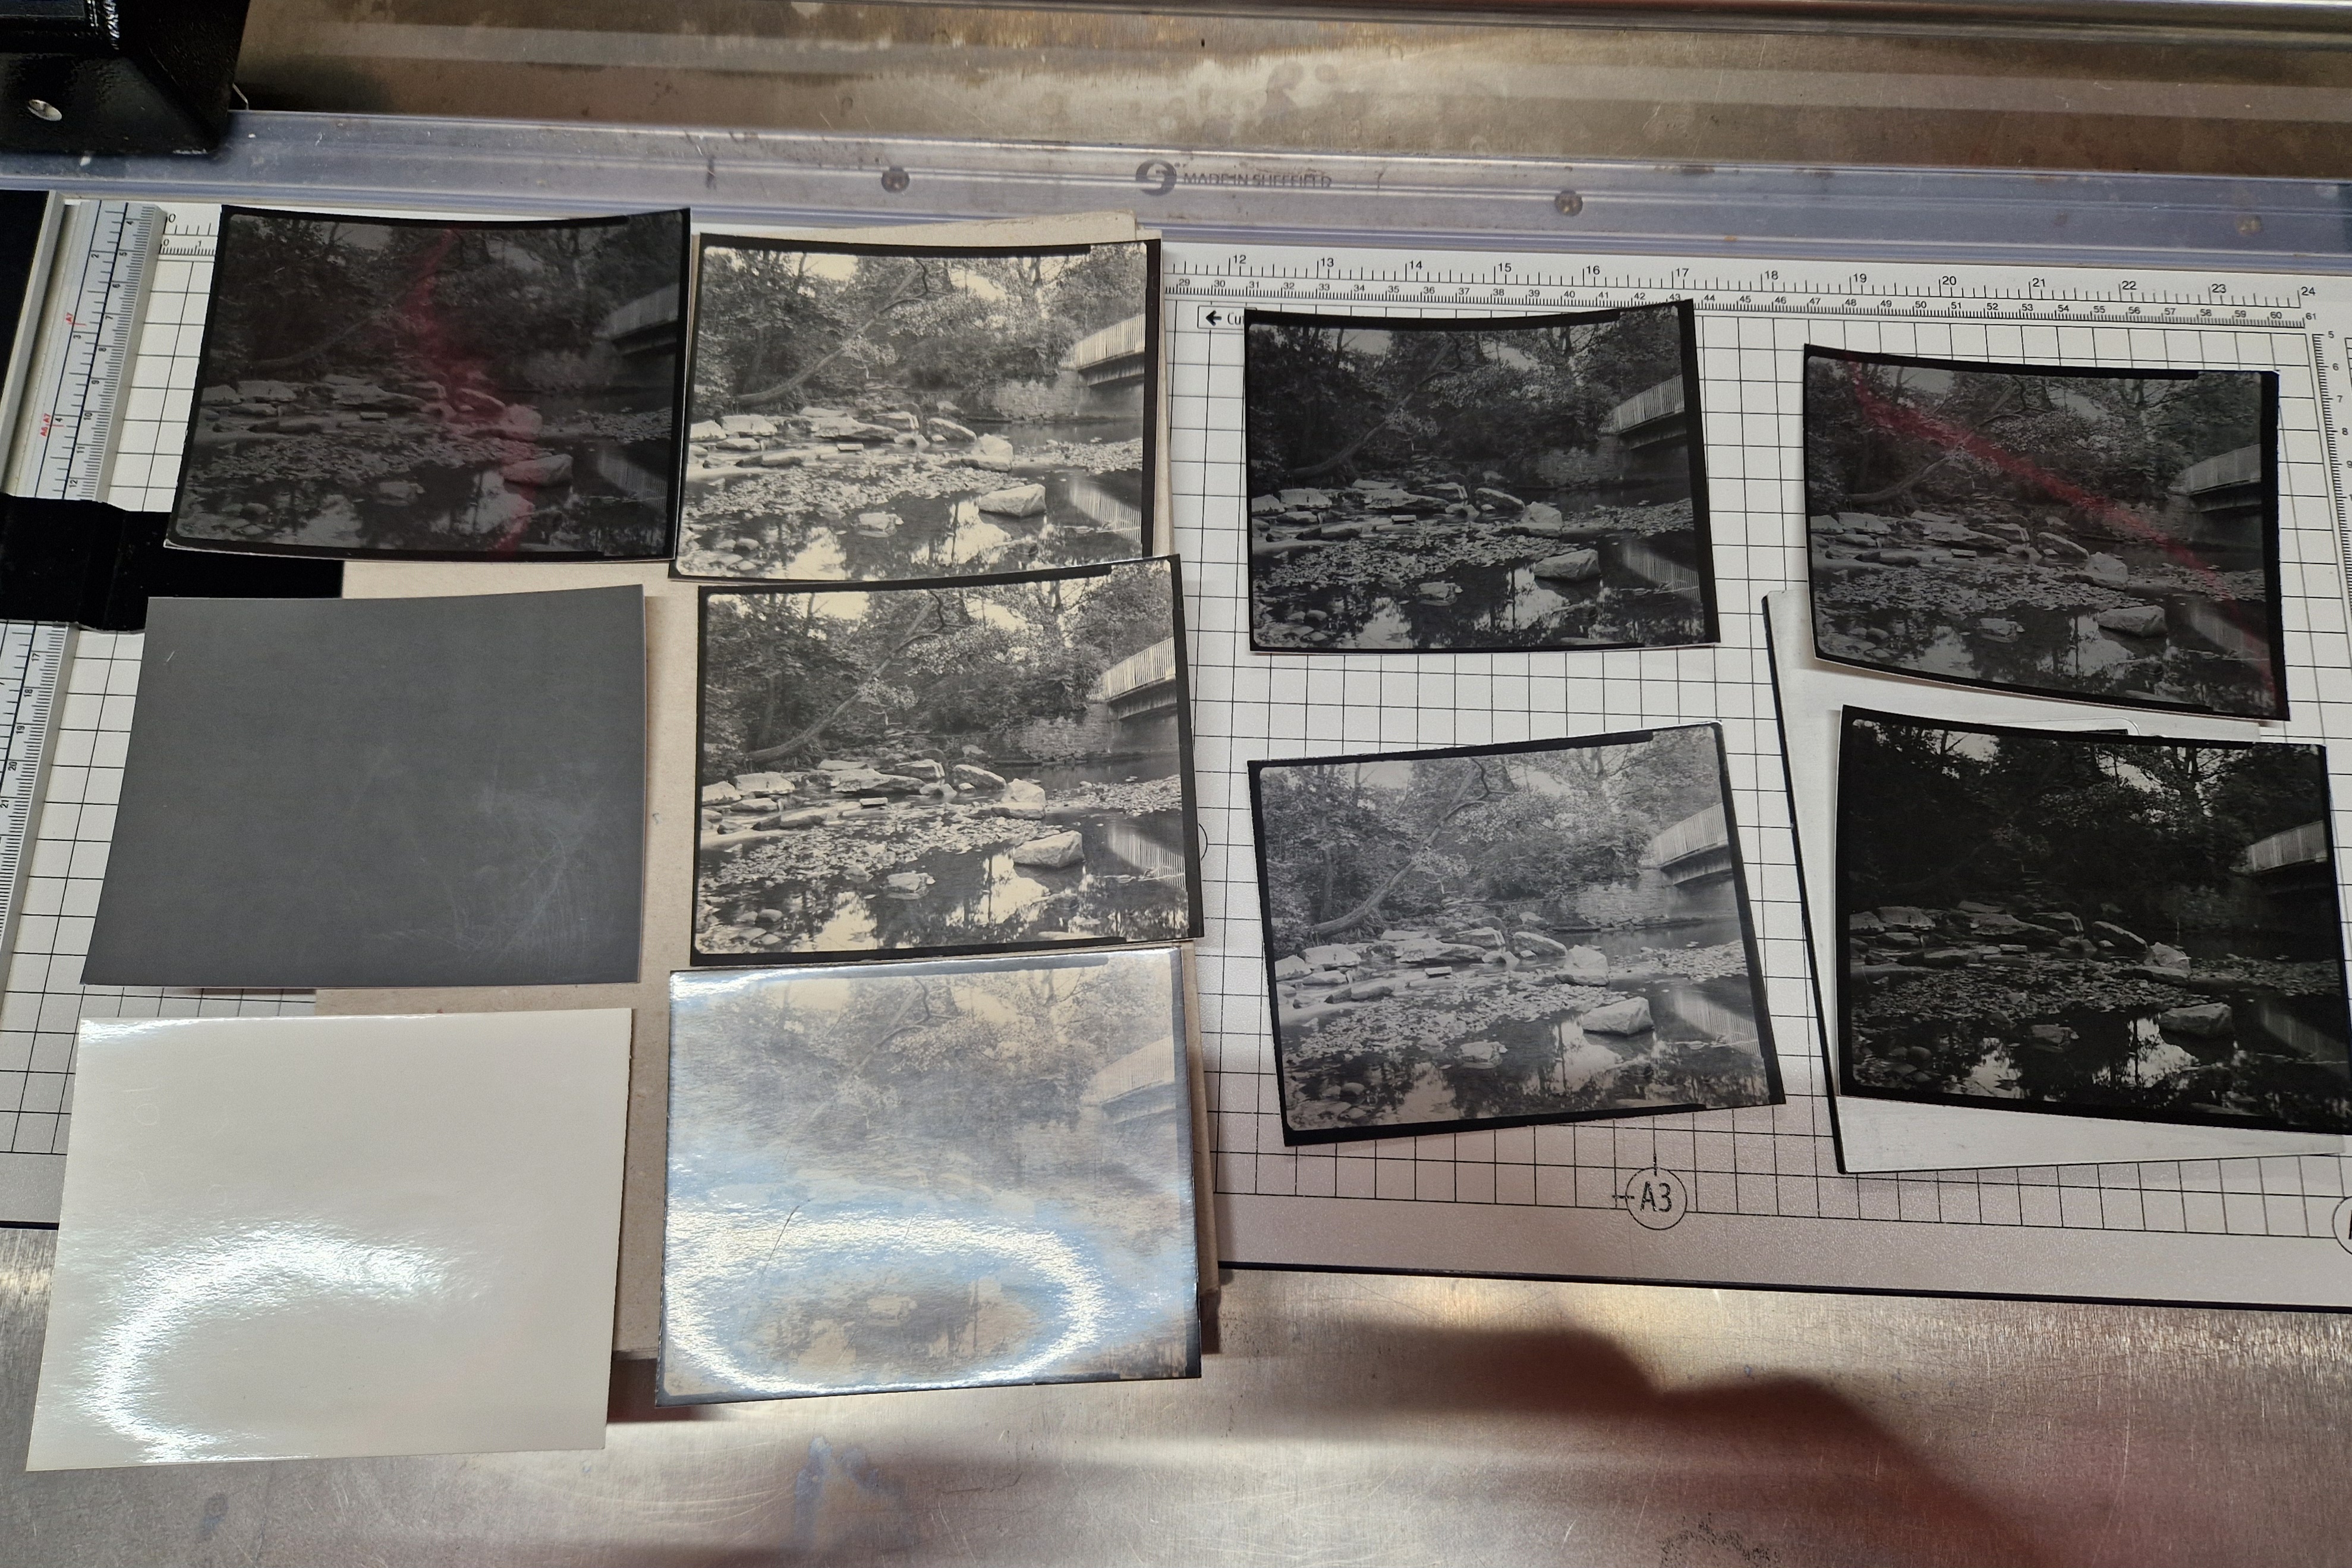
NOTES
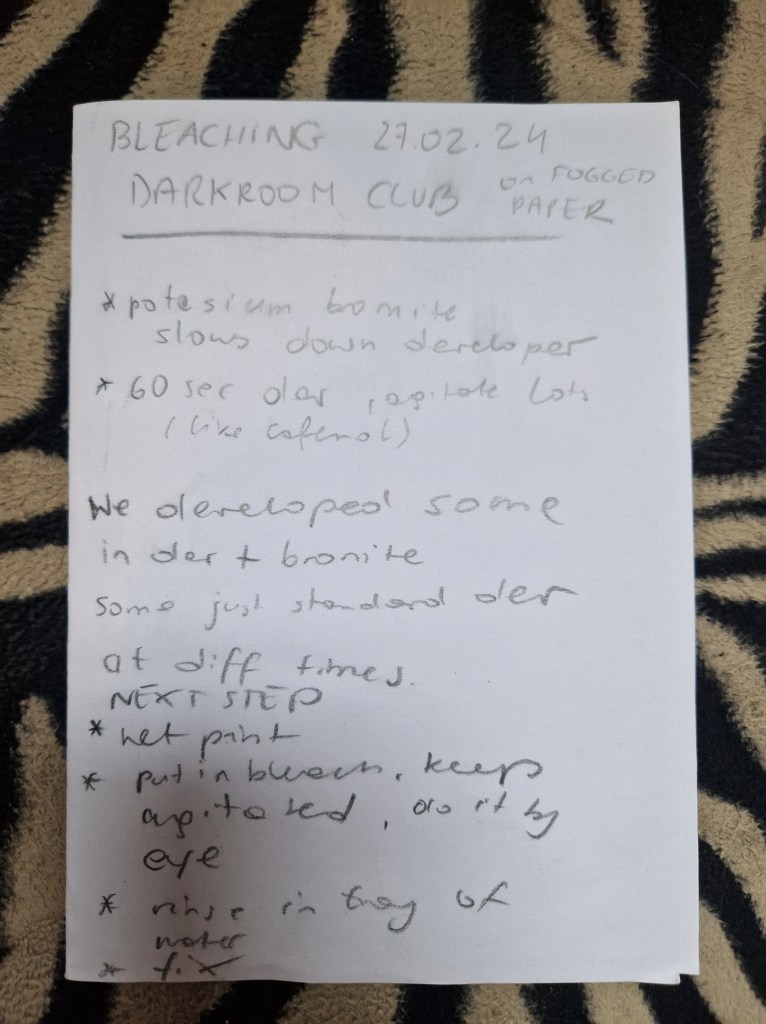
REFLECTIONS: Excellent session learning how to save a slightly light-damaged paper by using bleach. Darkroom Club has been an essential part of my development, and inspired by its activities, I intend to explore more methods and ways of printing and playing with the images and the possibilities of different materials/ingredients.
WEDNESDAY
DARKROOM – OVERLAYING NEGATIVES
I first spent some time looking through my negatives, trying to pre visualise how they could go together. Once I found something that I thought might work I headed to the darkroom to print and play.
RESULTS
OVERLAYING NEGATIVES
Two images from Spain
Two abstract images from Manchester created a new abstract piece
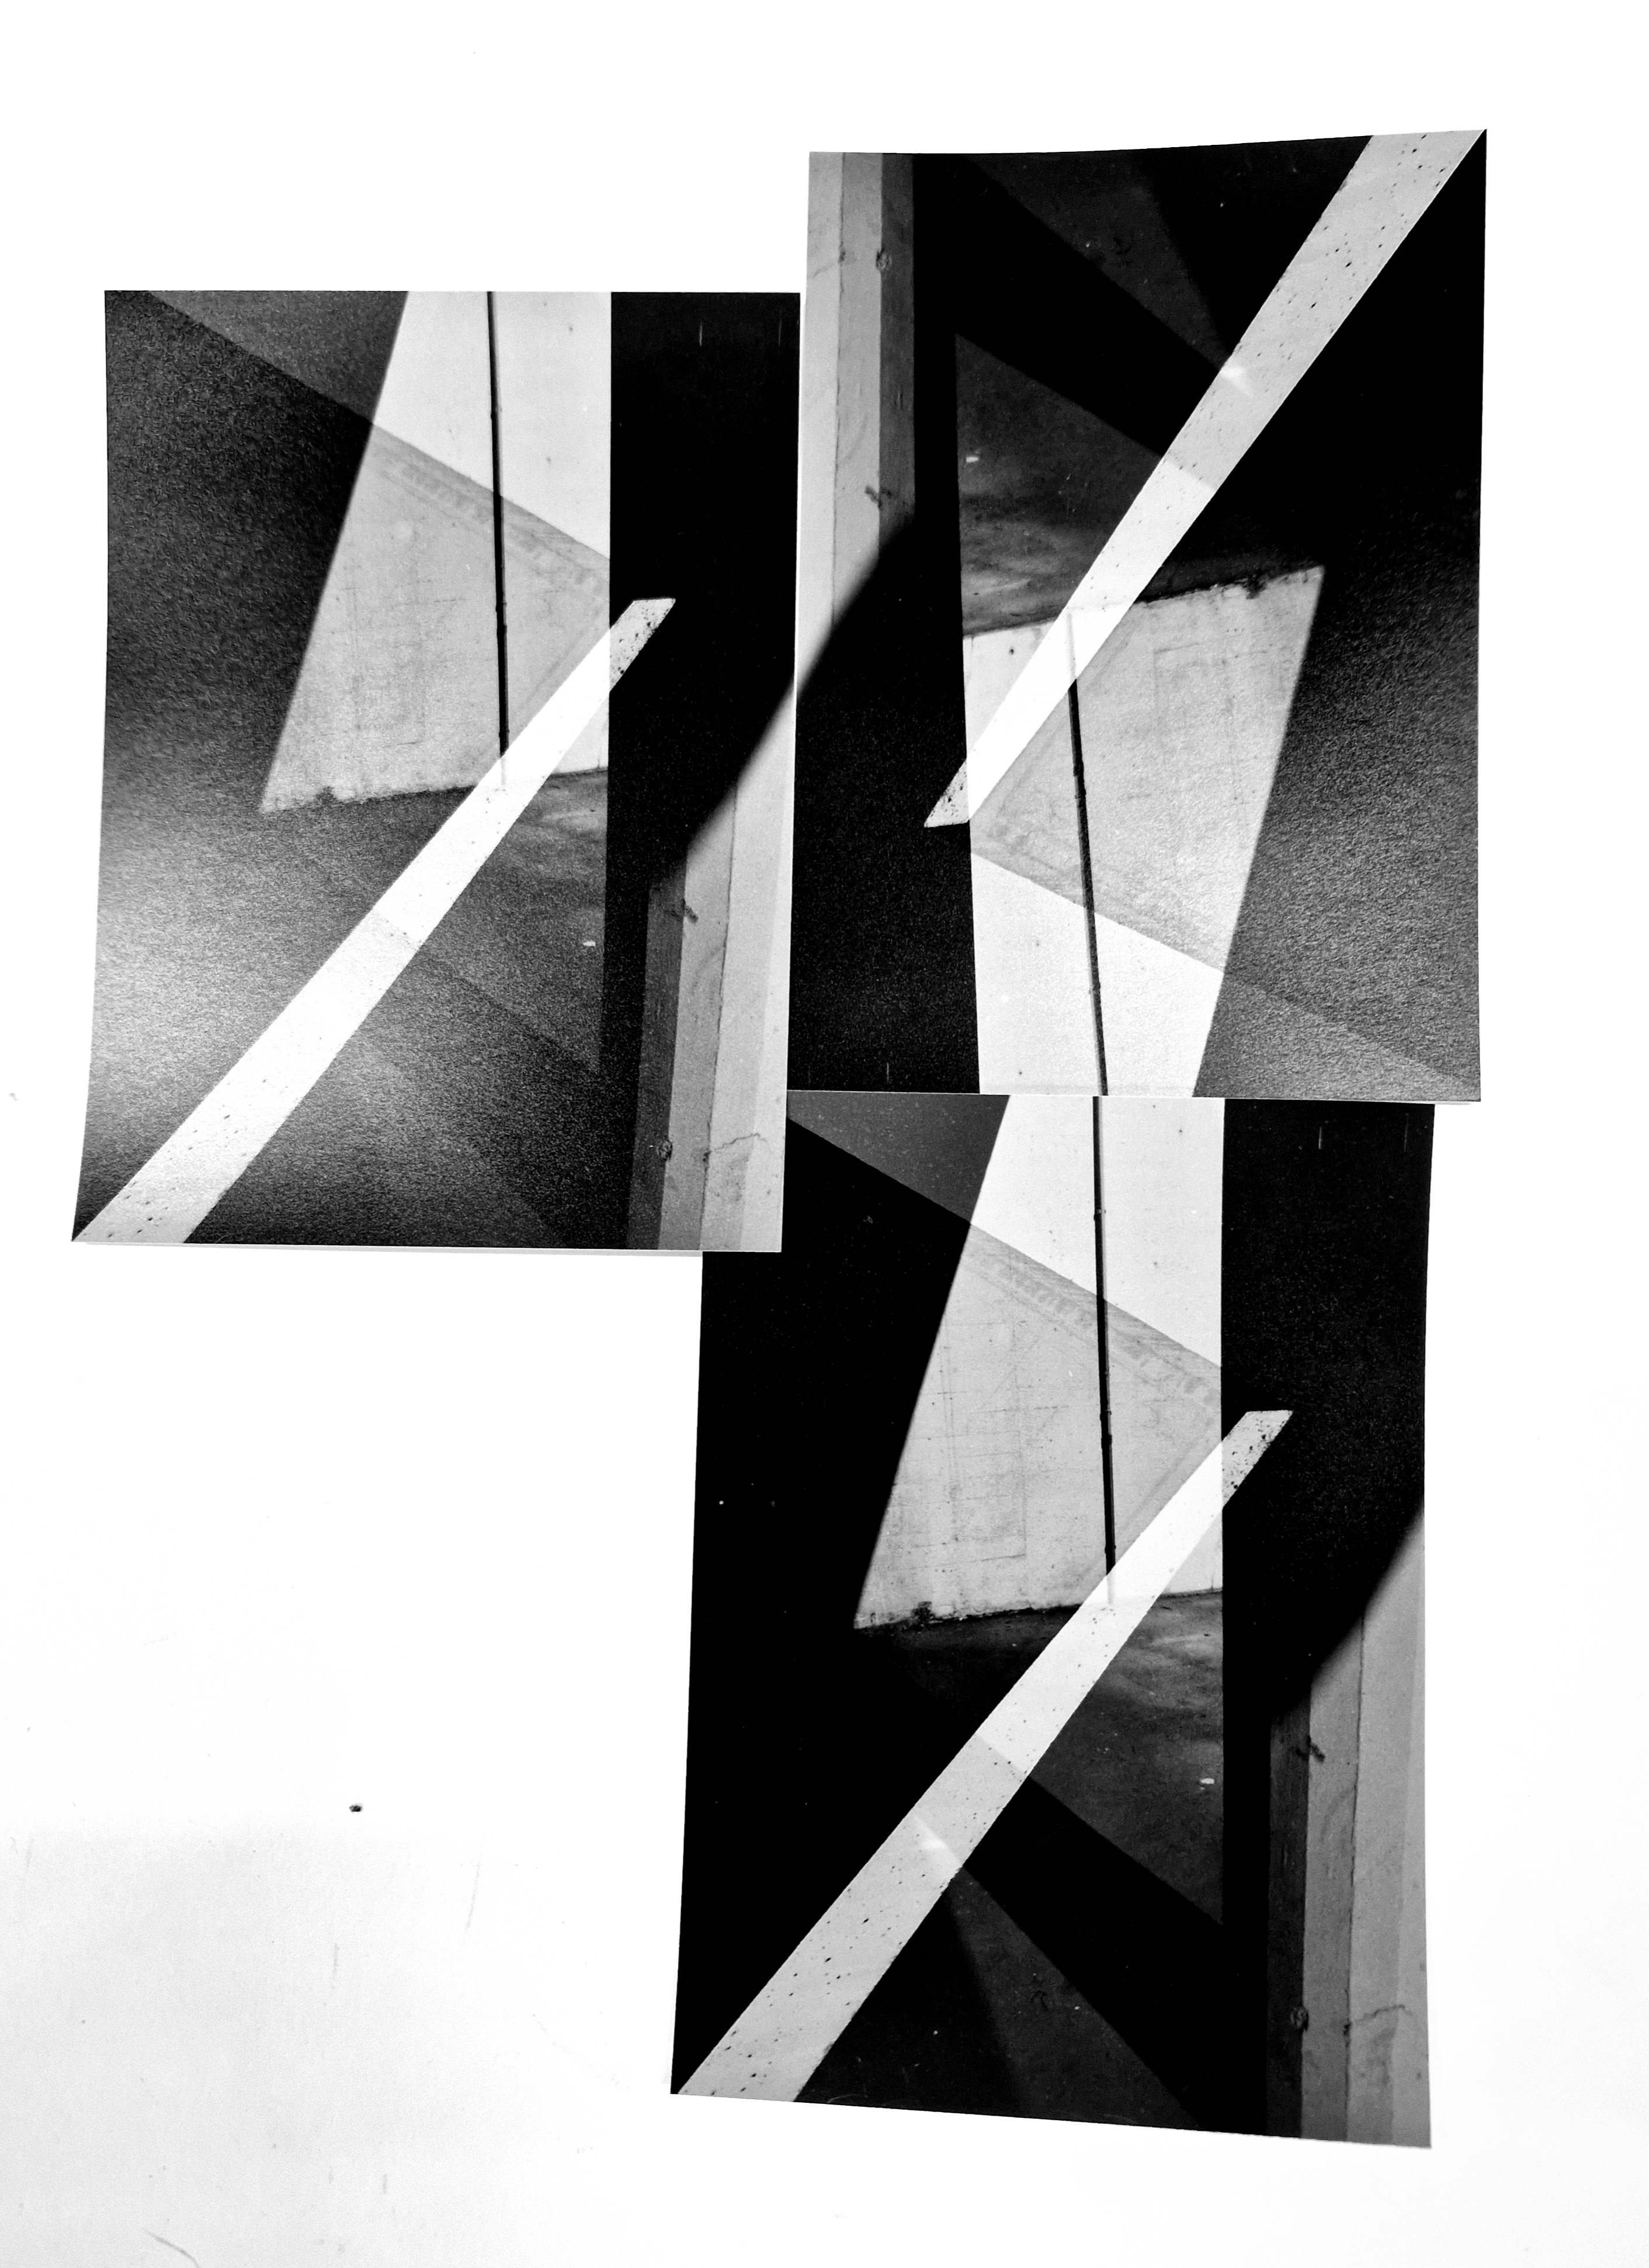
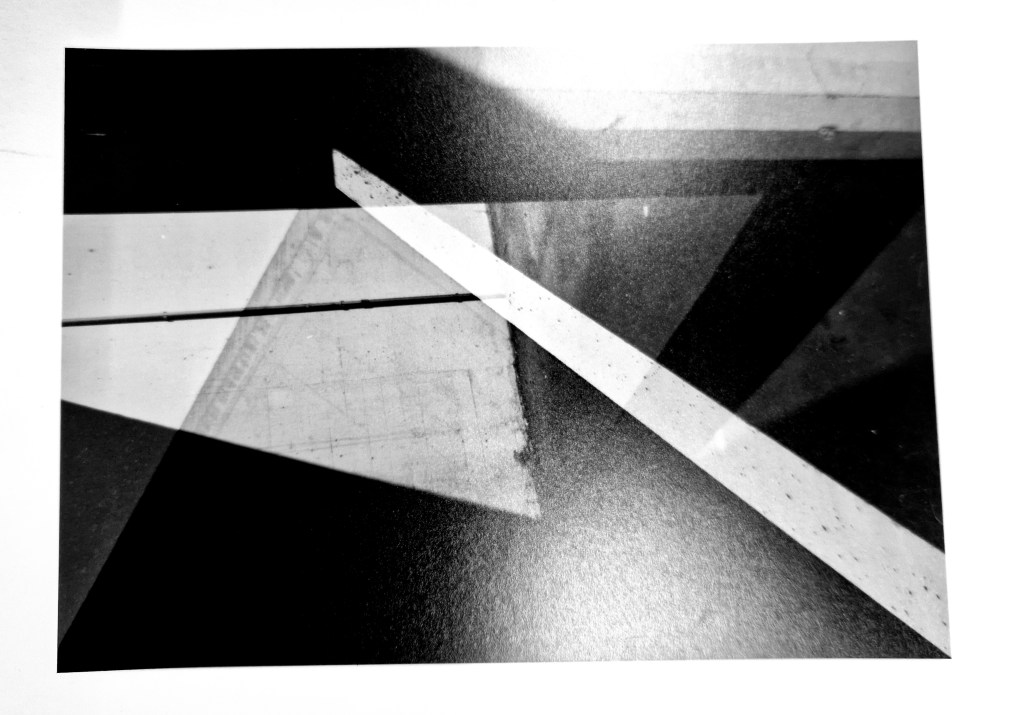
LARGE FORMAT DOUBLE EXPOSURE PRINT
Playing with my most recent images from large format, macro and double exposure photoshoot. I first printed this image the standard way (shiny side up) but then began wondering what would happen if I printed it shiny side down.
REFLECTIONS: I absolutely loved every minute of my time in the darkroom. I only wish I had more time to put into this practice as it’s one of the things that makes me the happiest in the world, especially when not just printing something specific but playing around being loose and free, seeing what happens, explore, be in a moment, being deep in the process.
FEBRUARY SUMMARY
REFLECTIONS: A good plan is the key to success, and February is proof of that. With precise aims, I was able to allocate time to reach my goals. I am feeling very satisfied and like I am on top of things, which is a good place to be. Hard work pays.
THURSDAY AND FRIDAY – RESEARCH AND WORK ON REFLECTIVE JOURNALS
WEEK 7: 4-10 MARCH
MONDAY
GROUP TUTORIAL
During the tutorial, I discussed my plans for March and the next steps I need to take to realise my project regarding framing, portfolio and progress. I got some positive feedback and advice and headed to the workshop.
OBJECT-PHOTOGRAPH II WORKSHOP WITH DAVID PENNY
During this amazing workshop, we played around with incorporating photographs and objects into a built-by-us set that we photographed and disassembled to build another one.
NOTES:
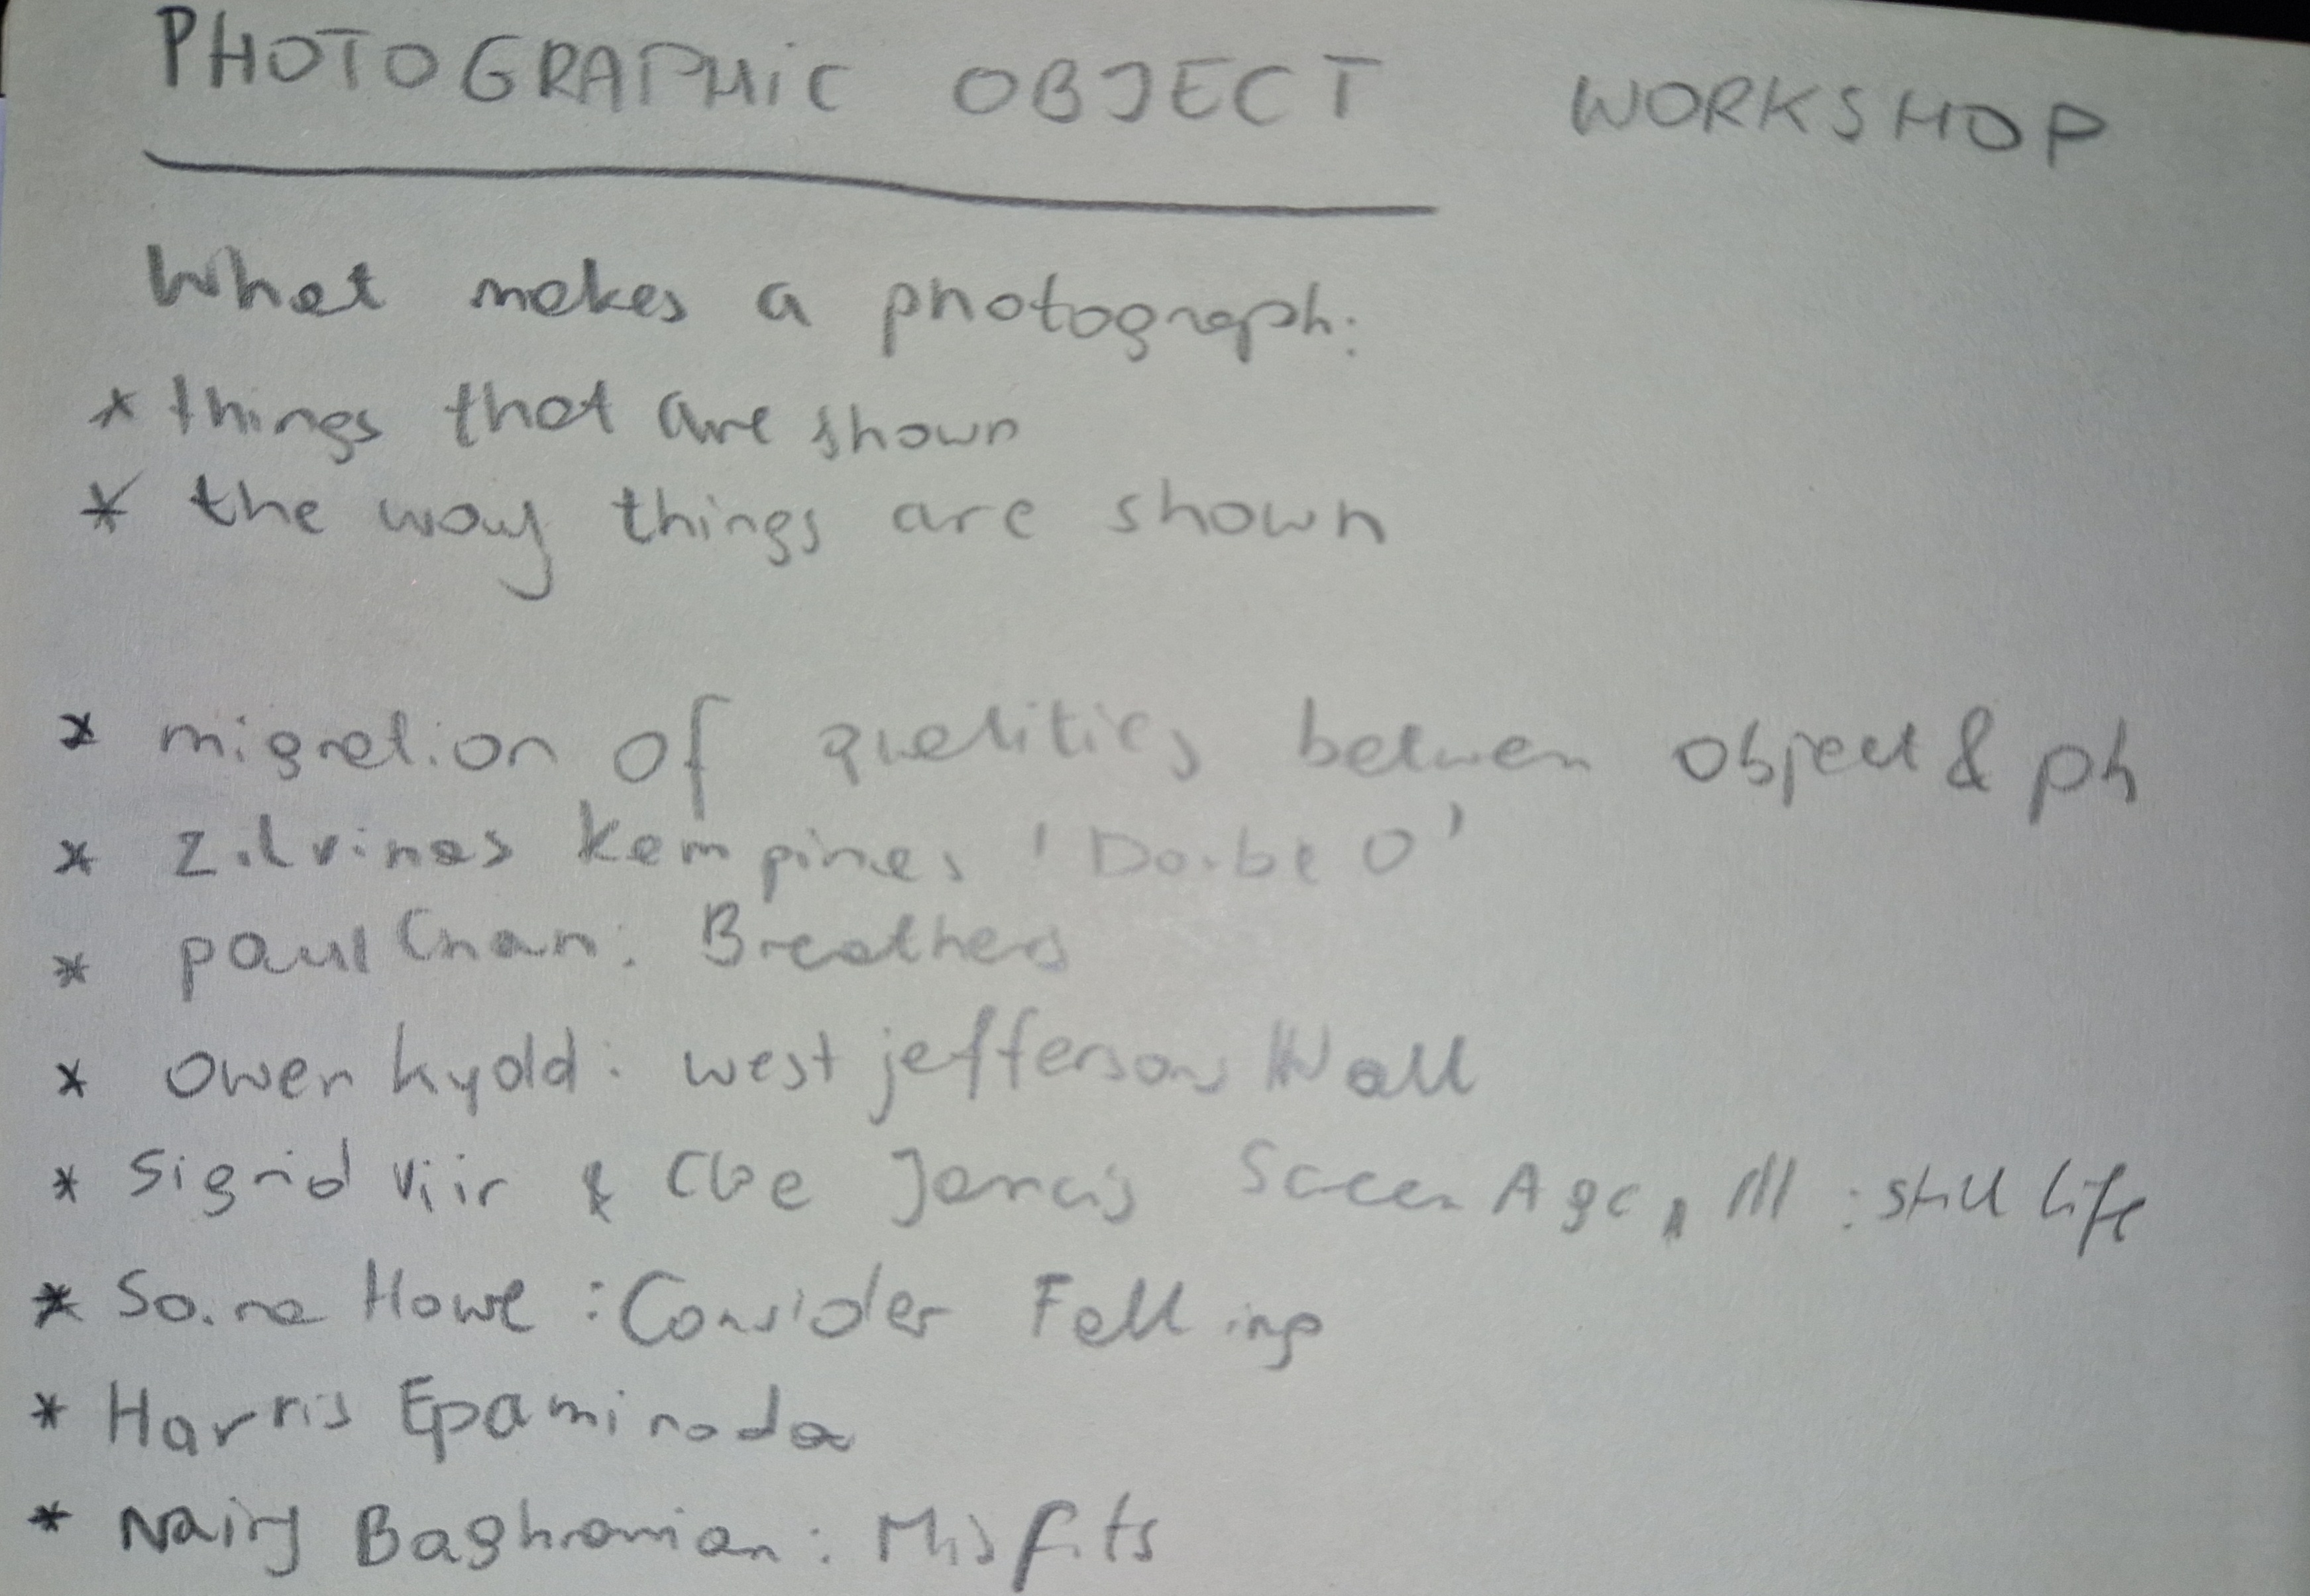
- WHAT MAKES A PHOTOGRAPH?
– Things that are shown
-The way things are shown
- migration of qualities between object and photograph
NOTES
RESEARCH
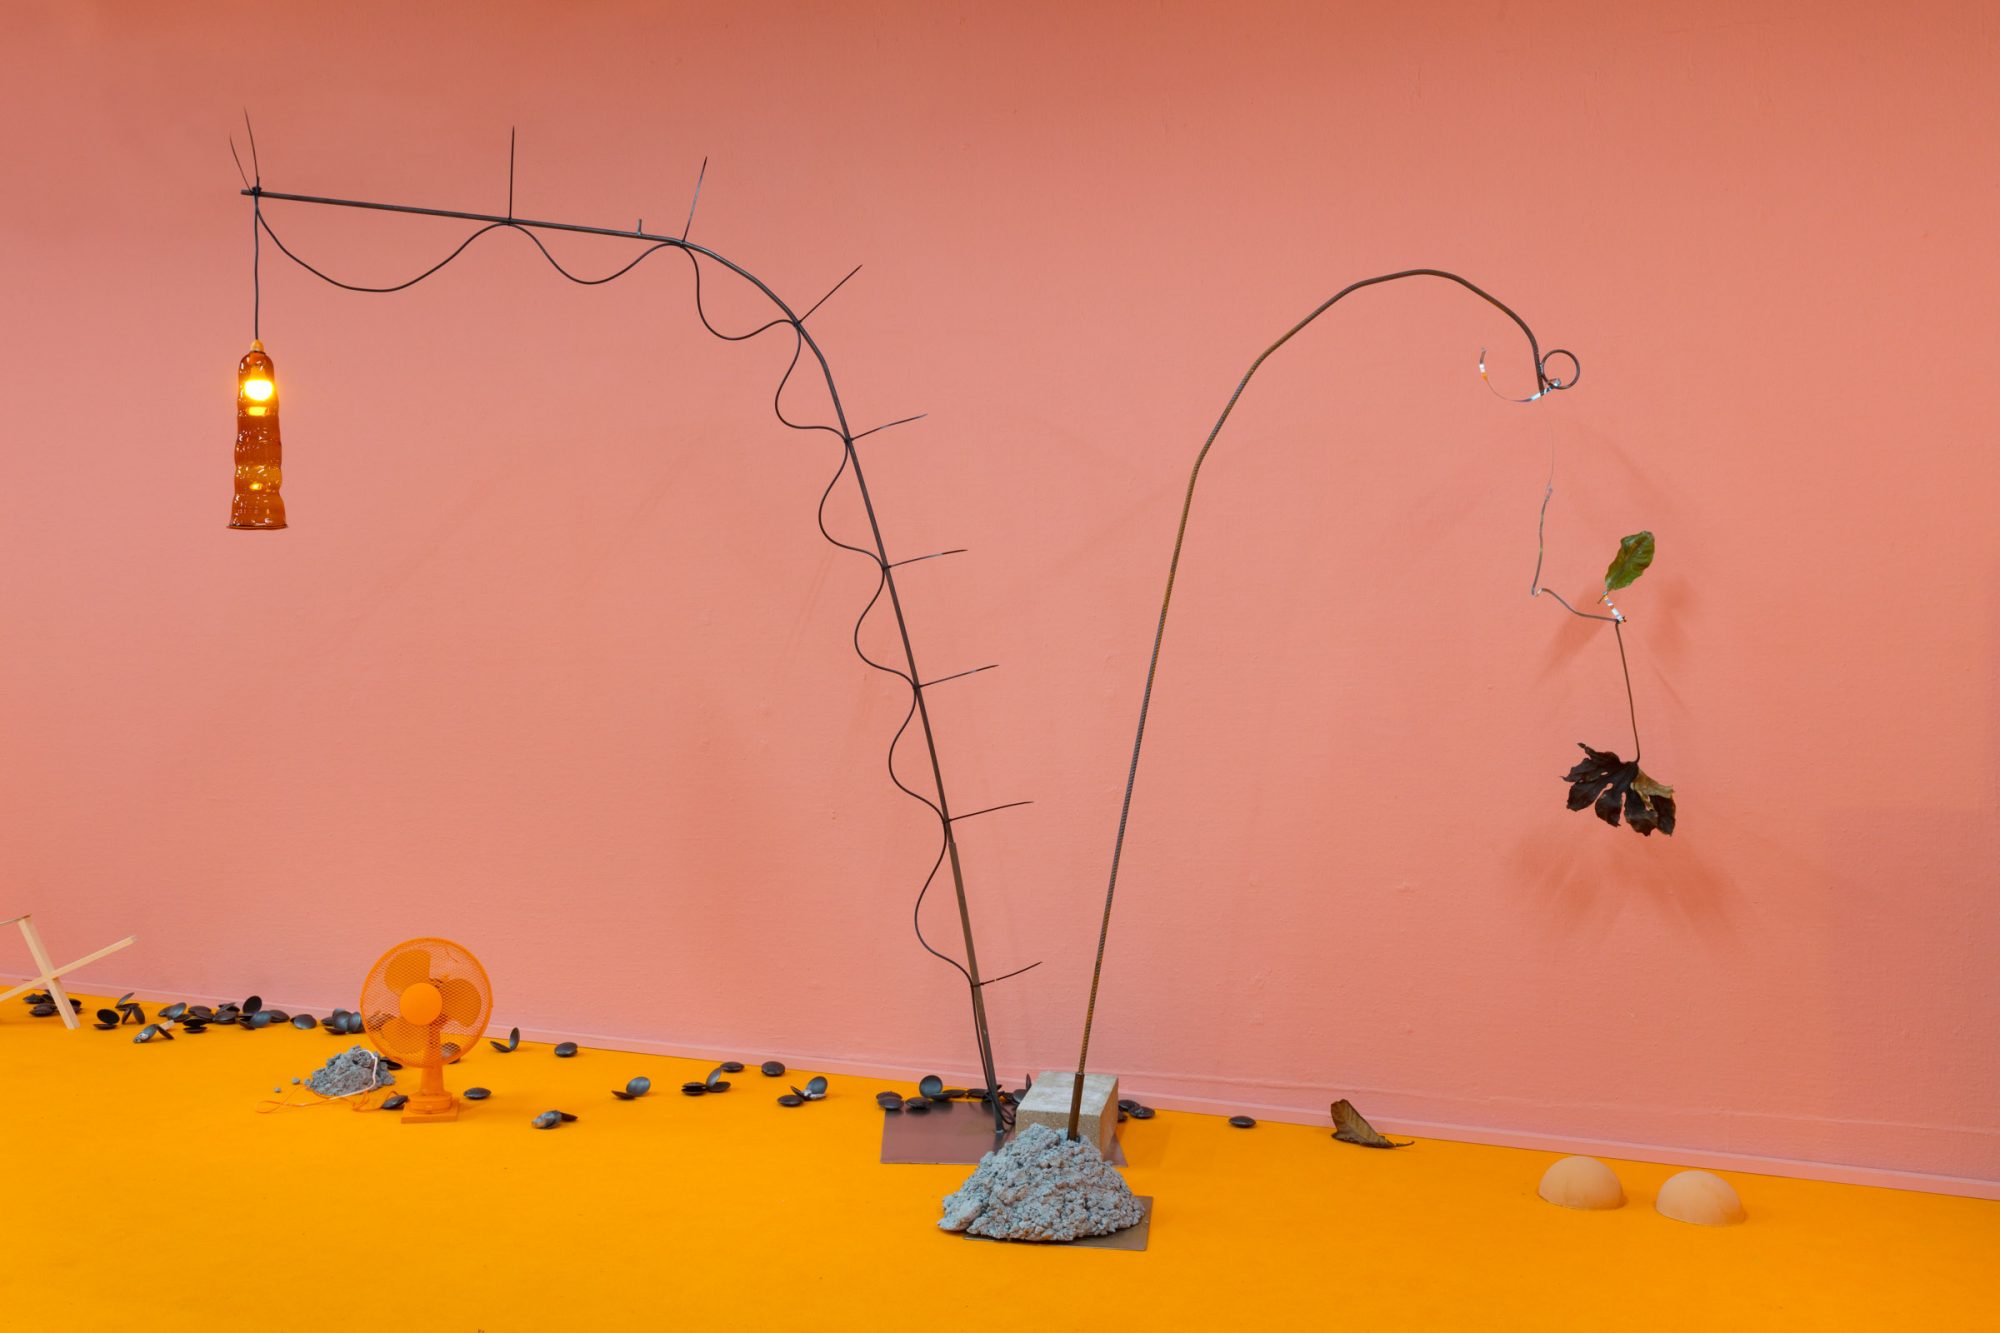
ANNE HARDY – Liquid Landscape
sculptural installation with audio 10’12” (looped) with 2 min pause, programmed light and wind Approx
1000 x 1500 x 350 cm 2018

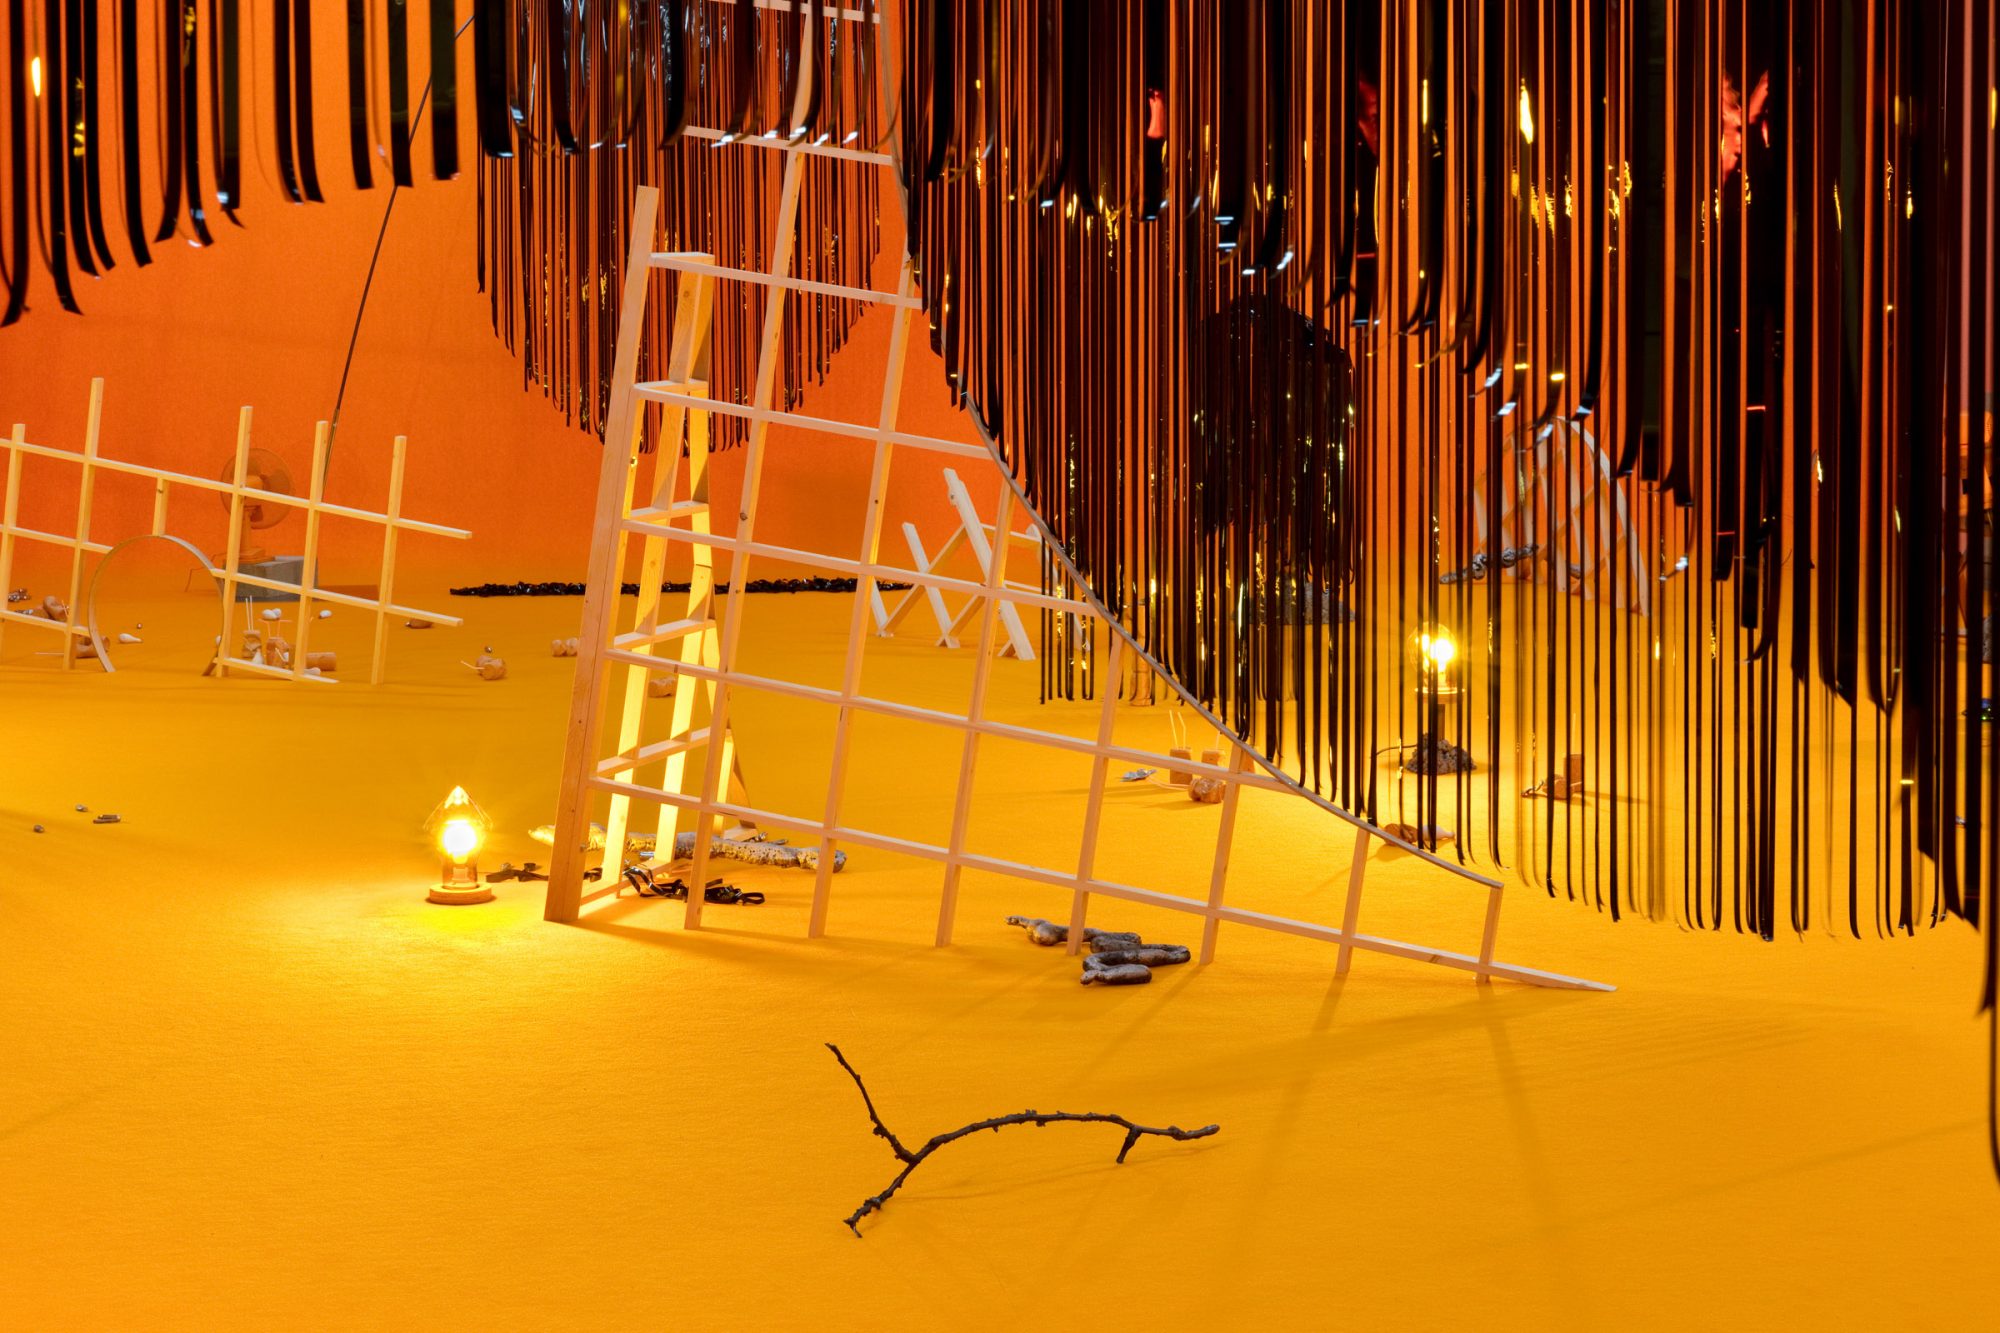
ZILVINAS KEPMINAS – Double 0

Zilvinas Kempinas ‘Double O’
Zilvinas Kempinas’s sculptures are magic. Somehow, the air currents created by two industrial-strength fans turn the two loops of videotape in Double O into a living, dancing sculpture, performing tirelessly for hours in MoMA’s Agnes Gund Garden Lobby.
Zilvinas Kempinas. Double O. 2008. Installation view at MoMA as part of On Line: Drawing Through the Twentieth Century. Photo by Jason Mandella
This work is presented as part of the exhibition On Line: Drawing Through the Twentieth Century, currently on view on the Museum’s sixth floor, and its inclusion in this context encourages us to reconsider what makes a work a drawing. Kempinas isn’t working with pencil, pen, or paper, but Double O is very much a drawing in space, a mass of lines activating the real world rather than a two-dimensional surface. The work recalls that of many other artists included in the exhibition—for example, Alexander Calder, whose mobile sculptures also respond to the air currents created by the movement of viewers, and Vasily Kandinsky, whose black ink lines dance across the page.
In the video above, the artist talks about his choice of materials and why he is drawn to them. Have a look, and then come by the Museum to see Double O in action. You’ll never see the same work twice.
Video of the artist talking about this work: https://www.moma.org/explore/inside_out/2010/12/21/drawing-in-motion-zilvinas-kempinass-double-o-at-moma/
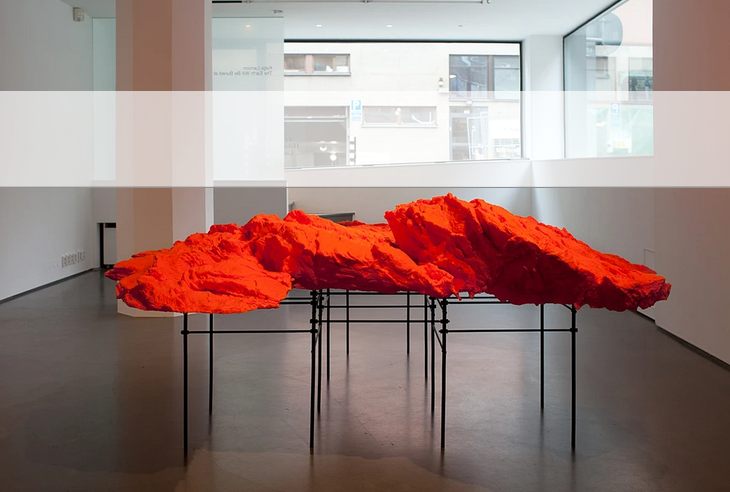
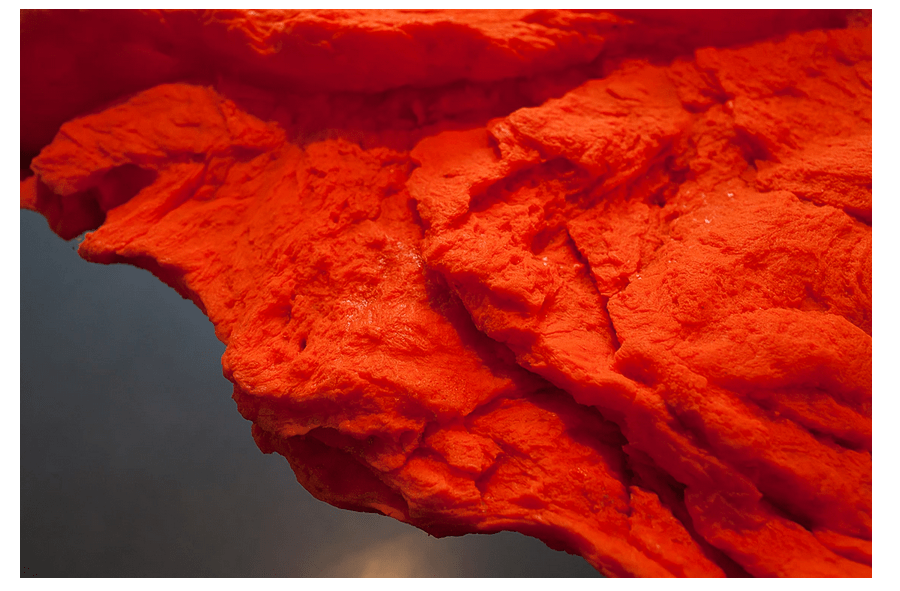
PAUL CHAN – Breathers
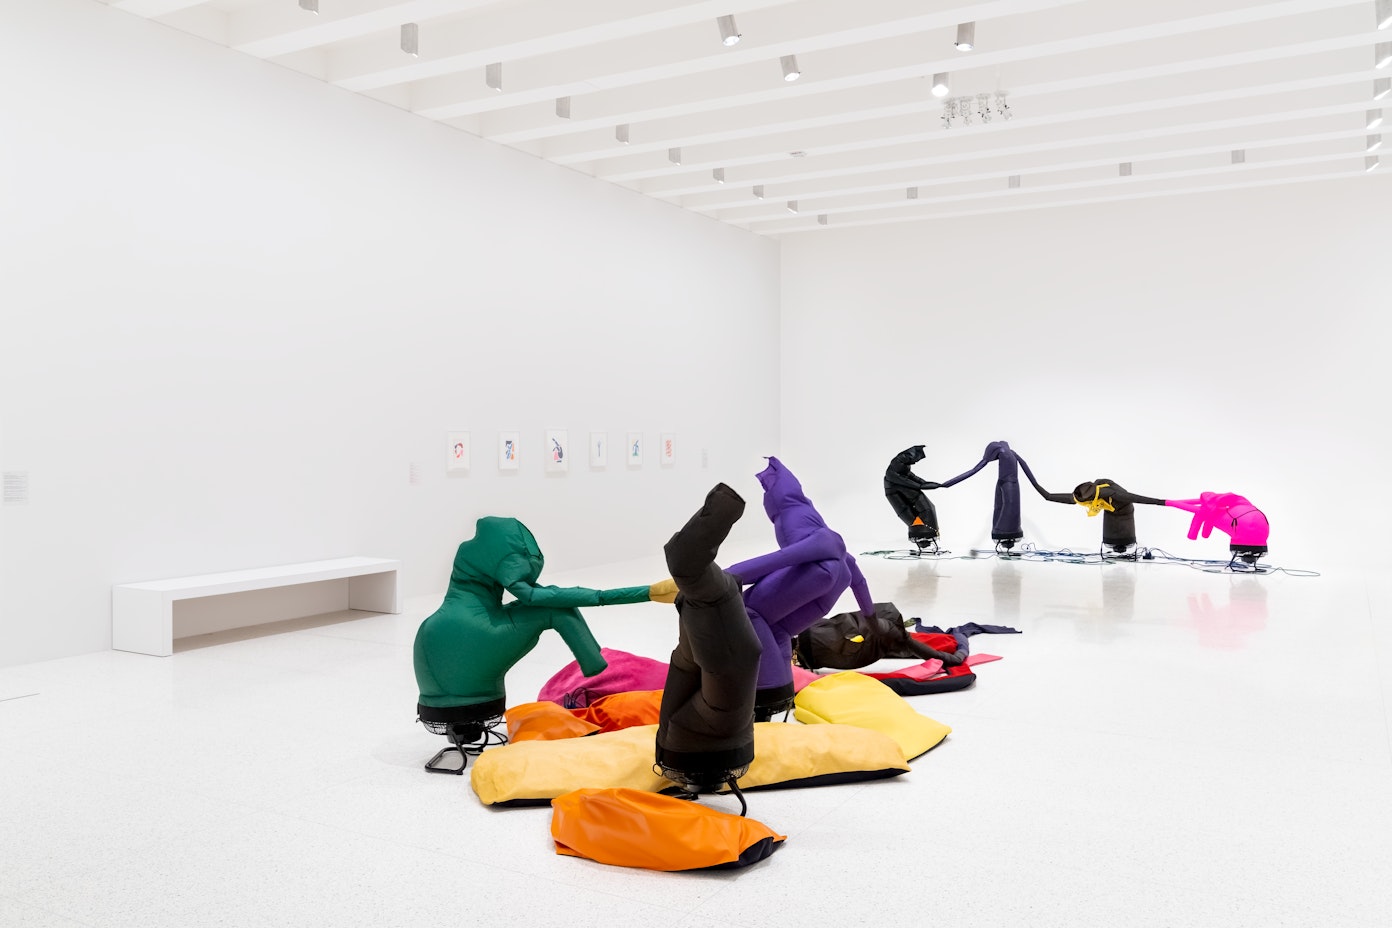
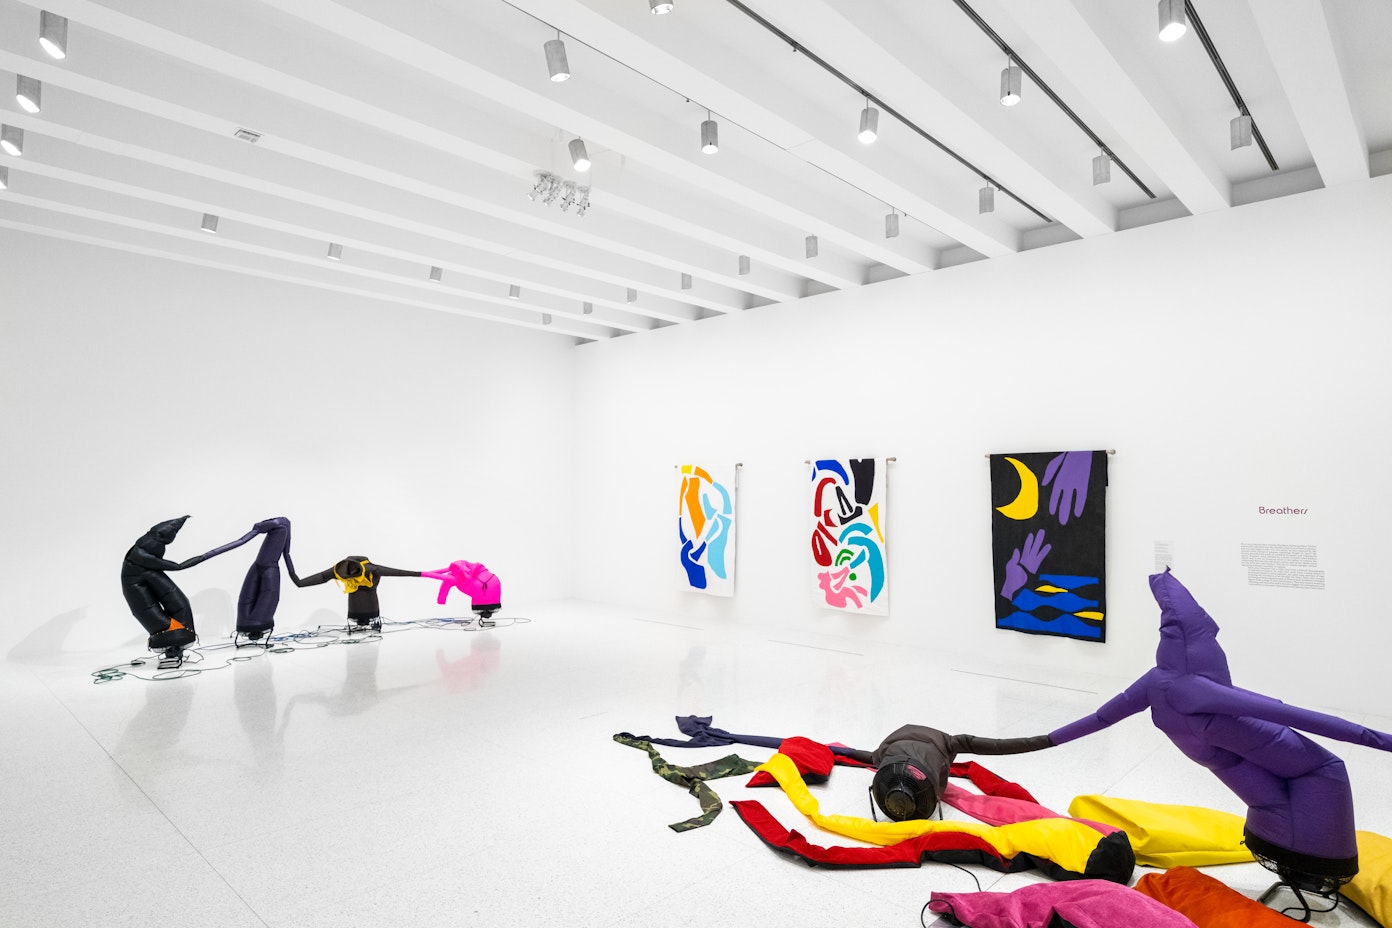
Paul Chan: Breathers is the first major US-based museum exhibition of works by artist, writer, and publisher Paul Chan (US, b. Hong Kong, 1973) in 15 years. Chan, who was recently awarded the prestigious 2022 MacArthur Fellowship, came to prominence in the early 2000s with vibrant moving image works that touched on aspects of war, religion, pleasure, and politics. Around 2009, Chan embarked on what he described as a “breather” from the art world, turning his attention to experimental publishing by founding the press Badlands Unlimited. This exhibition traces the artist’s return to art-making through approximately 40 works and suites of objects, including a new installation made especially for the Walker. Together, the featured works capture Chan’s creative and conceptual innovations, from his publishing through to his current experimentations with the boundless possibilities of the moving image.
Organized in three chapters, the presentation features radical publications produced by Badlands Unlimited, including selections of paperbacks, e-books, zines, GIFs, protest signs, and books on stone tablets across such genres as erotic fiction, artists’ writings, philosophy, and poetry. Badlands Unlimited was established in 2010 with the vision to challenge and expand the possibilities of publishing through experimentation with language, technology, design, and networks of circulation.
In 2012 Chan began considering the possibilities that could result from freeing the moving image from the screen and the confines of the frame more broadly. Works in his Arguments series (2012–2013) feature electrical cords plugged into a spectrum of objects and surfaces, from walls and doors to furniture to concrete-filled shoes. These gave way to the Nonprojections (2013), which separated the working projector—its lights flickering—from any surface onto which it could illuminate an image. These works, which broke the natural processes of projection and animation, laid the groundwork for his newest explorations.
The exhibition also showcases a new series of works titled Breathers, which explore animation through sculptural forms. These billowing, fan-powered fabric bodies, described by Chan as “animated by breath,” suggest notions of friendship, vulnerability, dependency, and conflict. The works shift the action of the moving image into real space and in connection with the people in it. Chan has taken the same precision to the choreography of motion with these kinetic installations as with the intricate animations of his early career.
At the same time, the Breathers’ billowing forms convey a sense of openness and breath—a notion central to Chan’s life and career since 2009 and one that is amazingly astute in its relationship to our contemporary climate, as we all grapple with the ramifications of the pandemic, the proliferation of digital screens, and the profound and pervasive communal sense of burnout.
“In 2009, I was questioning my work, my motivations, and what art really meant to me. I needed to take a breather—something I believe is critical to how we renew our capacity for new thoughts and feelings. What I learned from that break has become central to my practice now,” said Chan. “My newest work is a kind of choreography animated by breath, and it is providing me with the means to imagine movement and the moving image way beyond the screen. I could not have foreseen how significant these ideas would become during these hard and mean times, as our lives become increasingly mediated by digital screens. It feels important to break art and ourselves from those frames, to be present and breathing in the moment.”
OWEN KYDD – West Jefferson Wall
Owen Kydd: West Jefferson Wall
For those curious enough to stop and look, the images of LA-based Canadian artist Kydd come alive in a deceptive play of reflected light and drifting motion—in one, a plastic palm tree offers a fractured mirror view of coursing street traffic; in another, a paper ornament and string subtly shift and turn on gentle gusts of wind. It’s an effect that is as poetic as it is pointed, revealing as much about how we perceive the world us around as it does about the value lost in the heedless momentum of modern life.
SIGRID VIRR and CLOE JANCIS – Screen Age III: Still Life
Riga Photography Biennial, Riga Art Space, 22.04 -12.06.2022
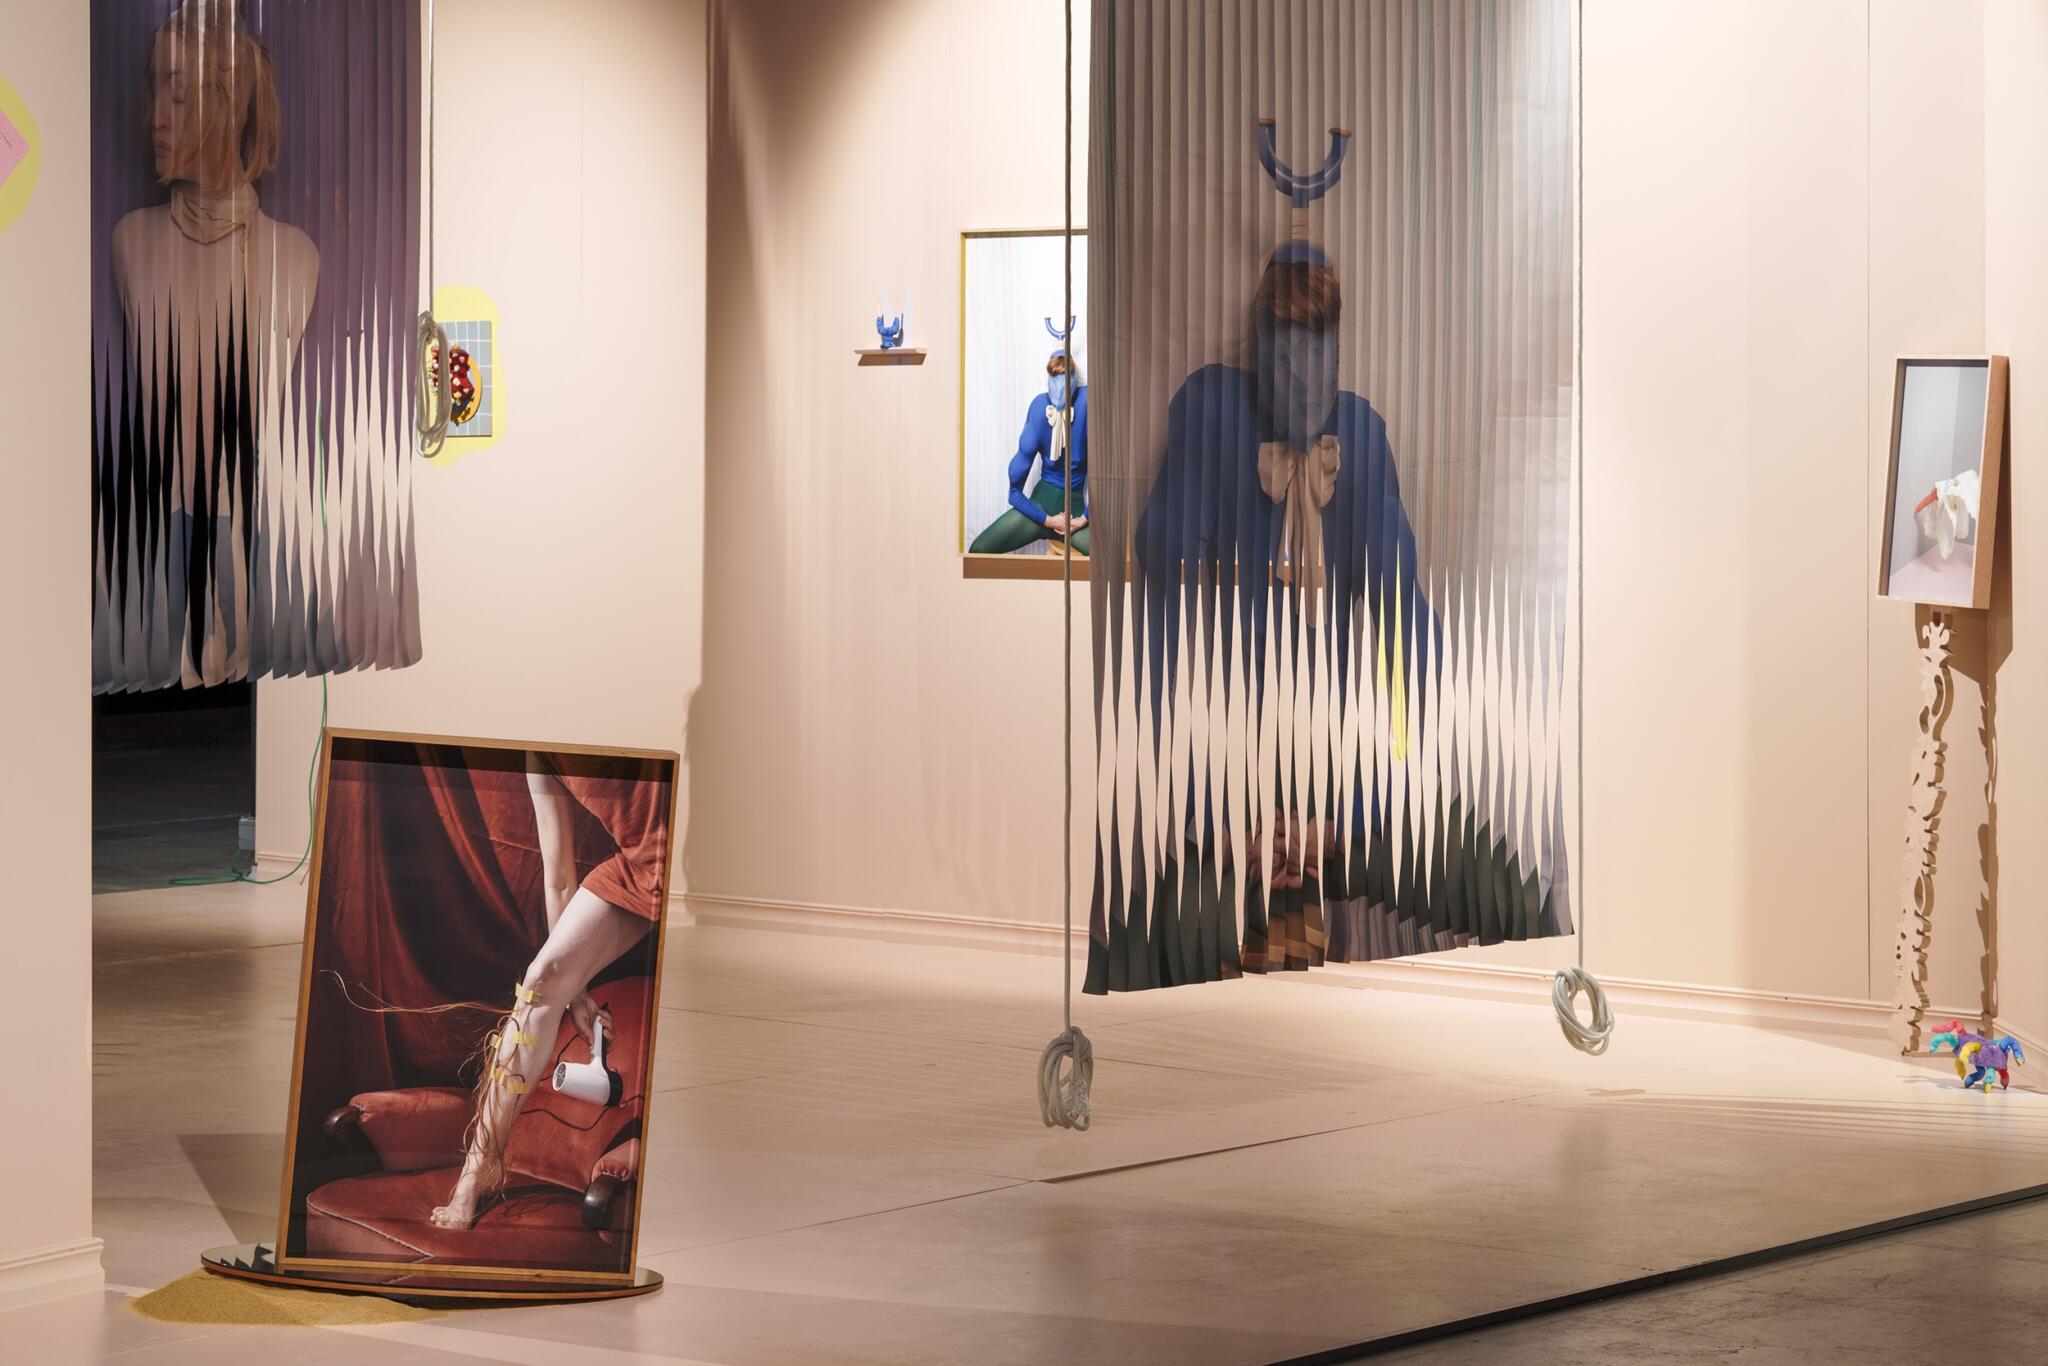
The exhibition Screen Age III: Still Life continues a series from 2018 that poses existentially pressing questions through observing the way technology is slowly changing people today. How deeply has human consciousness become inseparable from the technological solutions that grow increasingly useful and convenient with each day? Are we the same individuals that we were when we didn’t have smartphones and smart watches that serve us so well in monitoring the world? What are the ways in which our attitudes have shifted in respect to seemingly eternal things and ethical values centuries in the making? What testimony will there remain after our time is past? We invite you to pursue this line of thought by employing the coordinate system used throughout art history – that is, the traditional genres of portraiture, landscape, and still life. These have changed beyond recognition in the new epoch, the screen era.
The first exhibition of the series, Screen Age I: Self-Portrait, examined our relationship with ourselves using tools exclusive to art to observe and reveal the following: 1) models of speaking with and about oneself that were unknown to previous eras; 2) new, convenient, and freely available constructions for creating one’s self-image. The findings confirmed the suspicion that our society has assumed new outward characteristics and radically changed its habits over the past twenty years due to technological innovations rapidly making their way into everyday life. Nevertheless, human nature, as well as human desires, longings, and other motivators have remained unchanged since time immemorial. The second exhibition in the series, Screen Age II: Landscape, took place in 2020. Like the first, it was held in Rīga Art Space. This exhibition analysed changes in the relationship that people have with landscape art today. In short, since we have succumbed to the temptation to set our eyes upon whatever our hearts desire in the virtual world without having to put down our smartphones, the experience of a landscape seems to have lost its original and imposing impression, namely, to engage all our senses. It has, instead, taken on the form of a more rational analysis of units differentiated by the mind.
The thematic focus of the third exhibition, Screen Age III: Still Life, is on the interpretation of the still life in the digital age. It allows for the fact that every genre of photography functions as a routine element of digital culture and a part of an incessant stream of data that reflects itself into different contexts and can be put to use in many different ways (from advertising to iconography). It is interesting to ask whether or not compositions with fruit, flowers, games, wares, musical instruments, household objects, and skulls are outdated. If not, what is it that they are saying today?
SARAH HOWE – Consider Falling (2017)
Sarah Howe is a UK based artist whose installations situate still and moving image within sculptural space. Her work stands in the crossing between a material and psychological landscape, in a reach to illustrate heightened inner states.
Her installation ‘Consider Falling’ is rooted in research into derealisation (the condition of feeling that reality is unreal) and depersonalisation (a feeling of detachment from oneself, or that oneself is unreal) collectively referred to as DPD.

HARIS EPAMINONDA
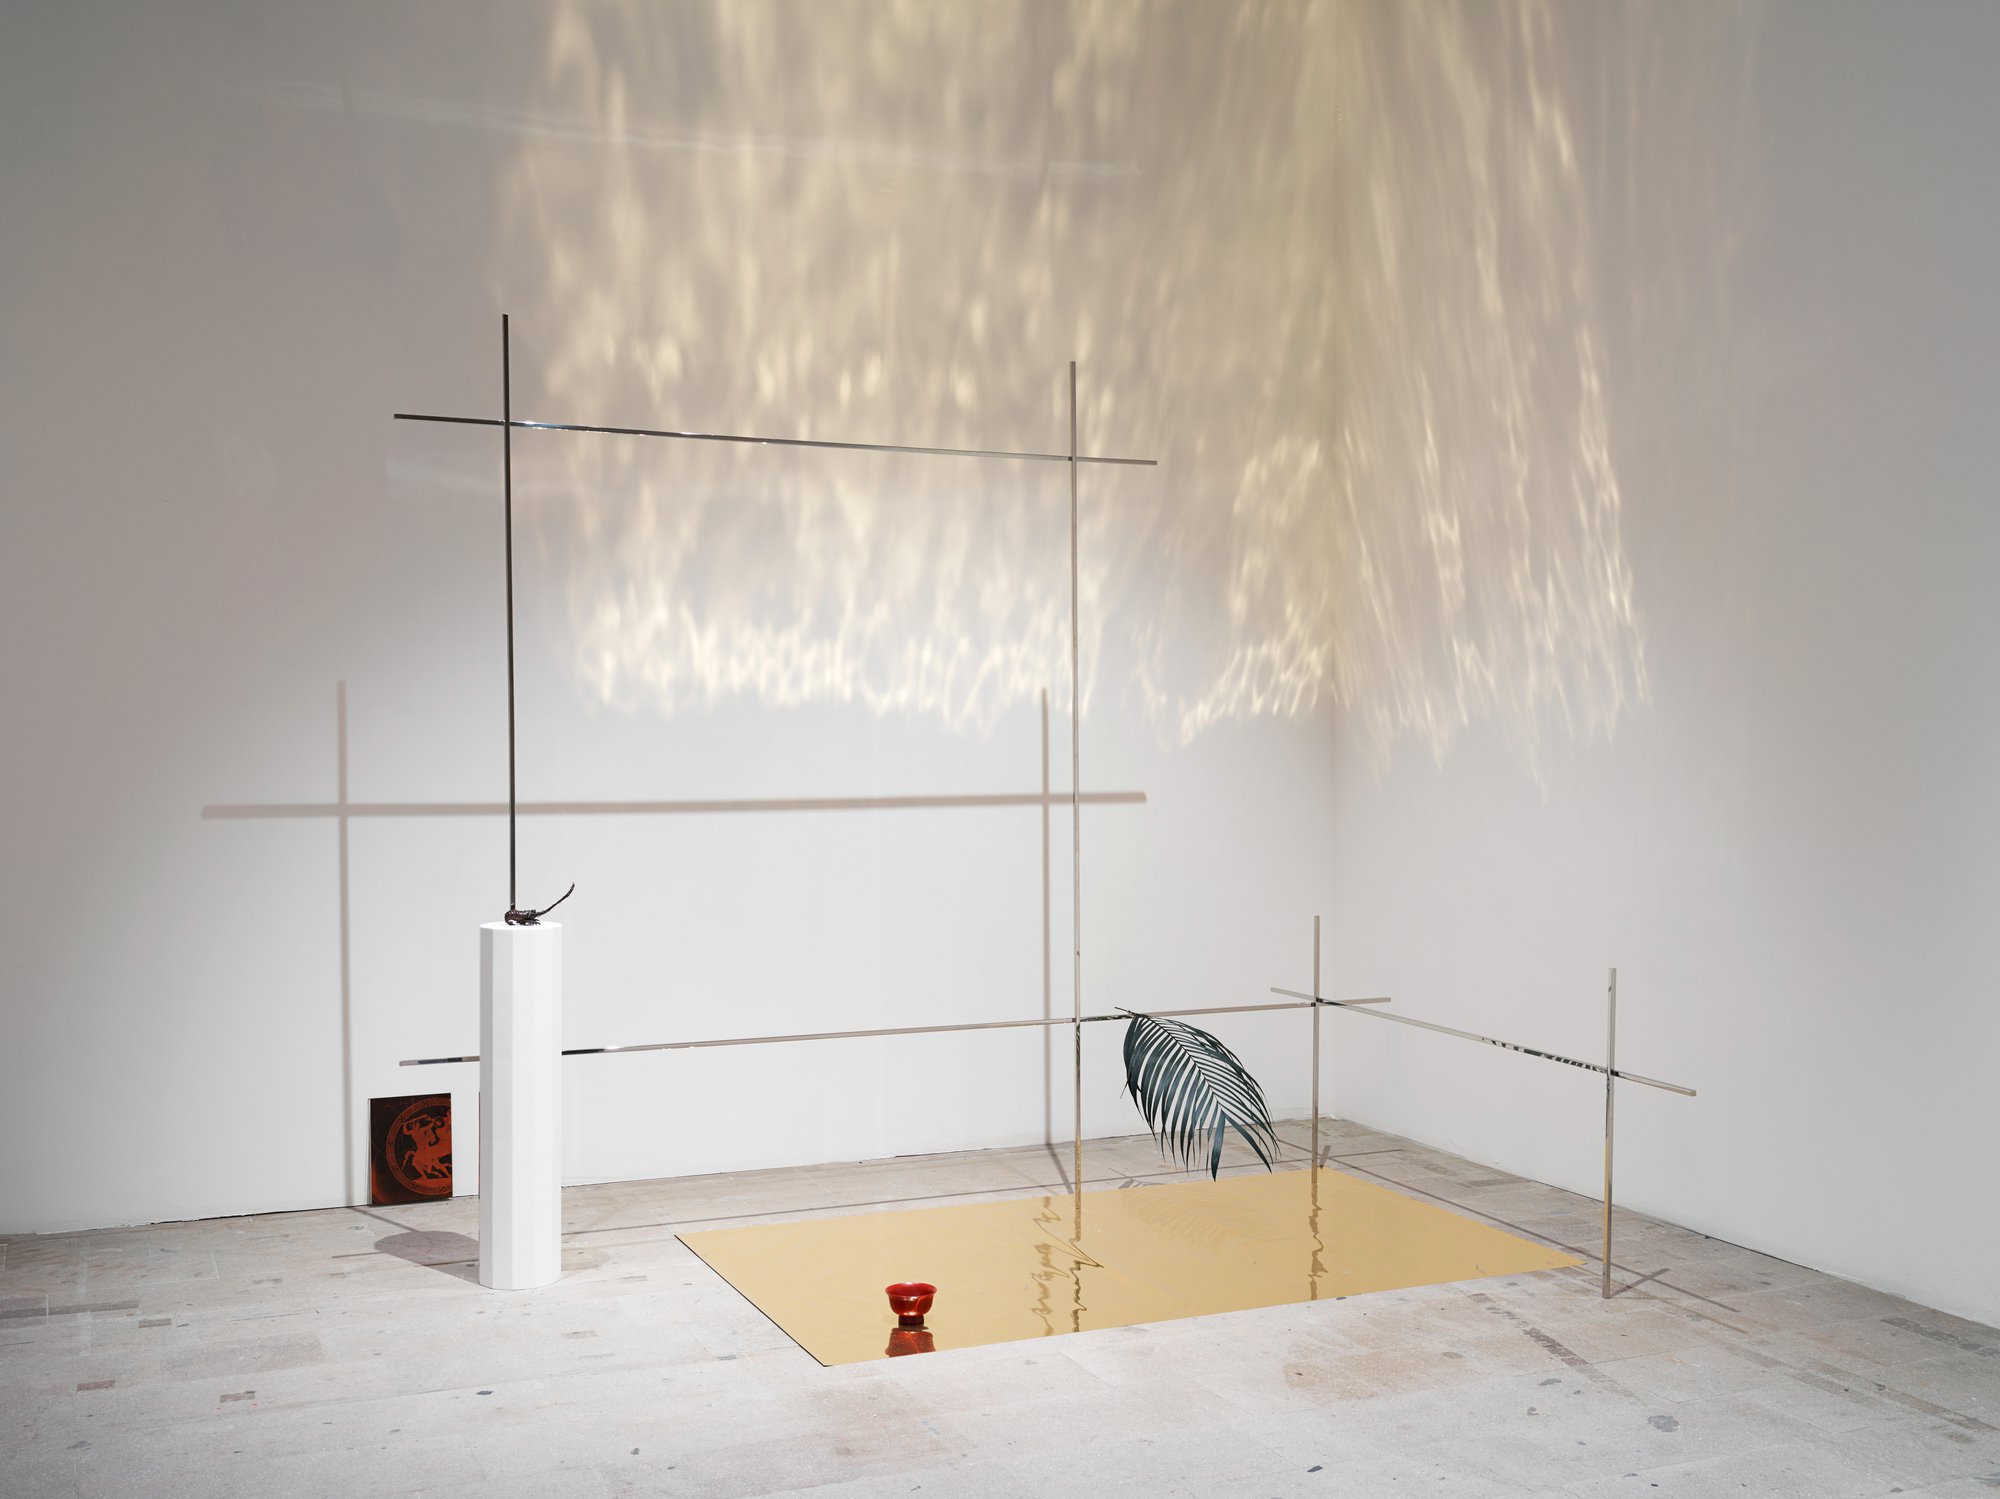
Haris Epaminonda often uses existing materials such as photographs sourced from books and found objects, sculpture, text and collage, assembled and assembled with structures and supports has designed herself. Her installations conjure up visual puzzles that suggest a symbol of of meaning.
Her language often tends to abstraction, evoking mysterious atmospheres that defy precise classification. Many of her shows surprise the viewer with the fragmentary way that, scattered units are reassembled into something only at the end of the exhibition. Everything is on the borders, at the edges, hidden in the corners, until … suspended, as one proceeds, the space redefines and reshapes it itself, like the syllables of a gradually phrase release.
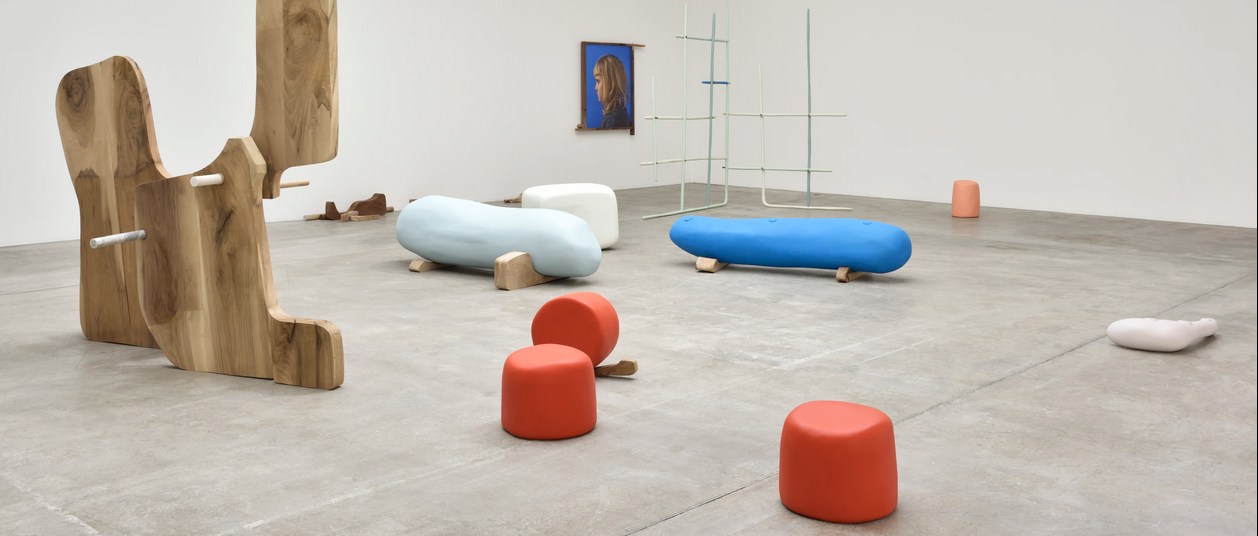
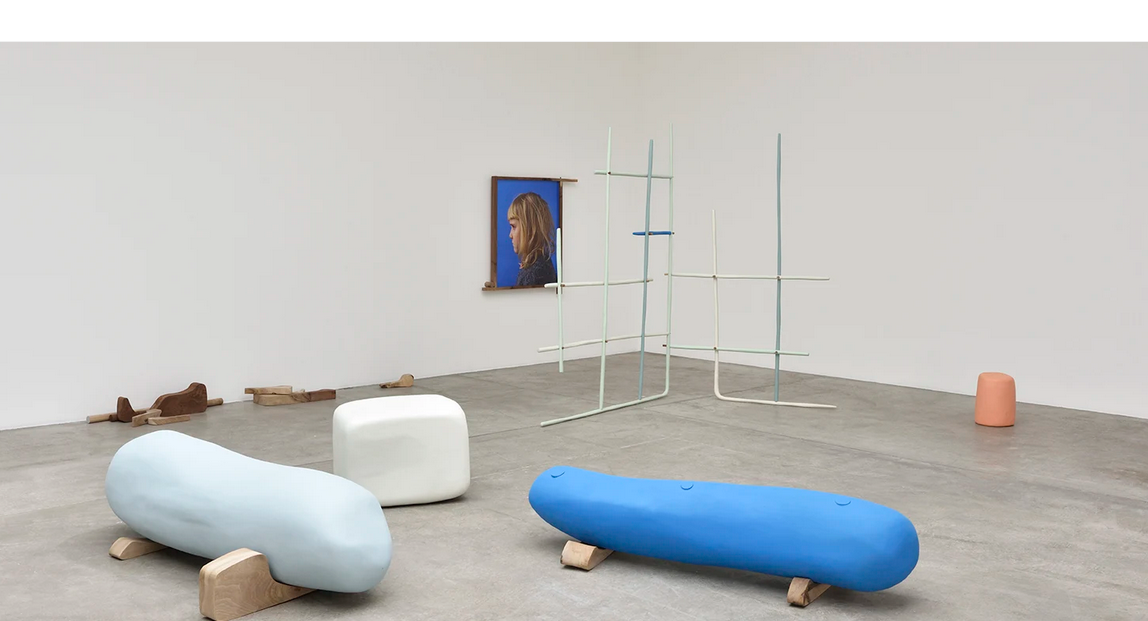
NAIRY BAGHRAMIAN – Misfits
Nairy Baghramian has been conducting rigorous formal and conceptual research, investigating the relationship between architecture, object and the human body. In her reflection on the political potential of the sculptural form, she focuses on the importance of the physicality of the work, which embodies ideas and theoretical assumptions through its specific formal, material and presentational features.
The new sculptures were inspired by assembly-building toys designed for young children: at first glance the two parts of each sculpture appear to fit together when in reality they do not. This evokes disappointment, frustration, and the feeling of failure experienced by playing with a toy that does not function. Baghramian argues that, within the framework of educational, social constructs and the reading of sculptural forms, the handling of the dysfunctional should be appreciated. The moment of the supposed final comprehension should be given space and not be determined as a transitional state in favor of harmony and the functional. With visual and playful trickery typical in her work, Baghramian makes a connection with the notion of “misfits,” those who fail to adapt to their social environment and remain marginal, a concept that could apply to her artistic practice in general, in which her works often do not turn up where expected, but inhabit more unpredictable spaces at thresholds or walkthroughs.
REFLECTIONS: Fantastic collection of artists, so different, yet visually having a lot in common. Perfect starting point for our workshop today but also a very useful and inspiring source to look more into in the future
SET 1
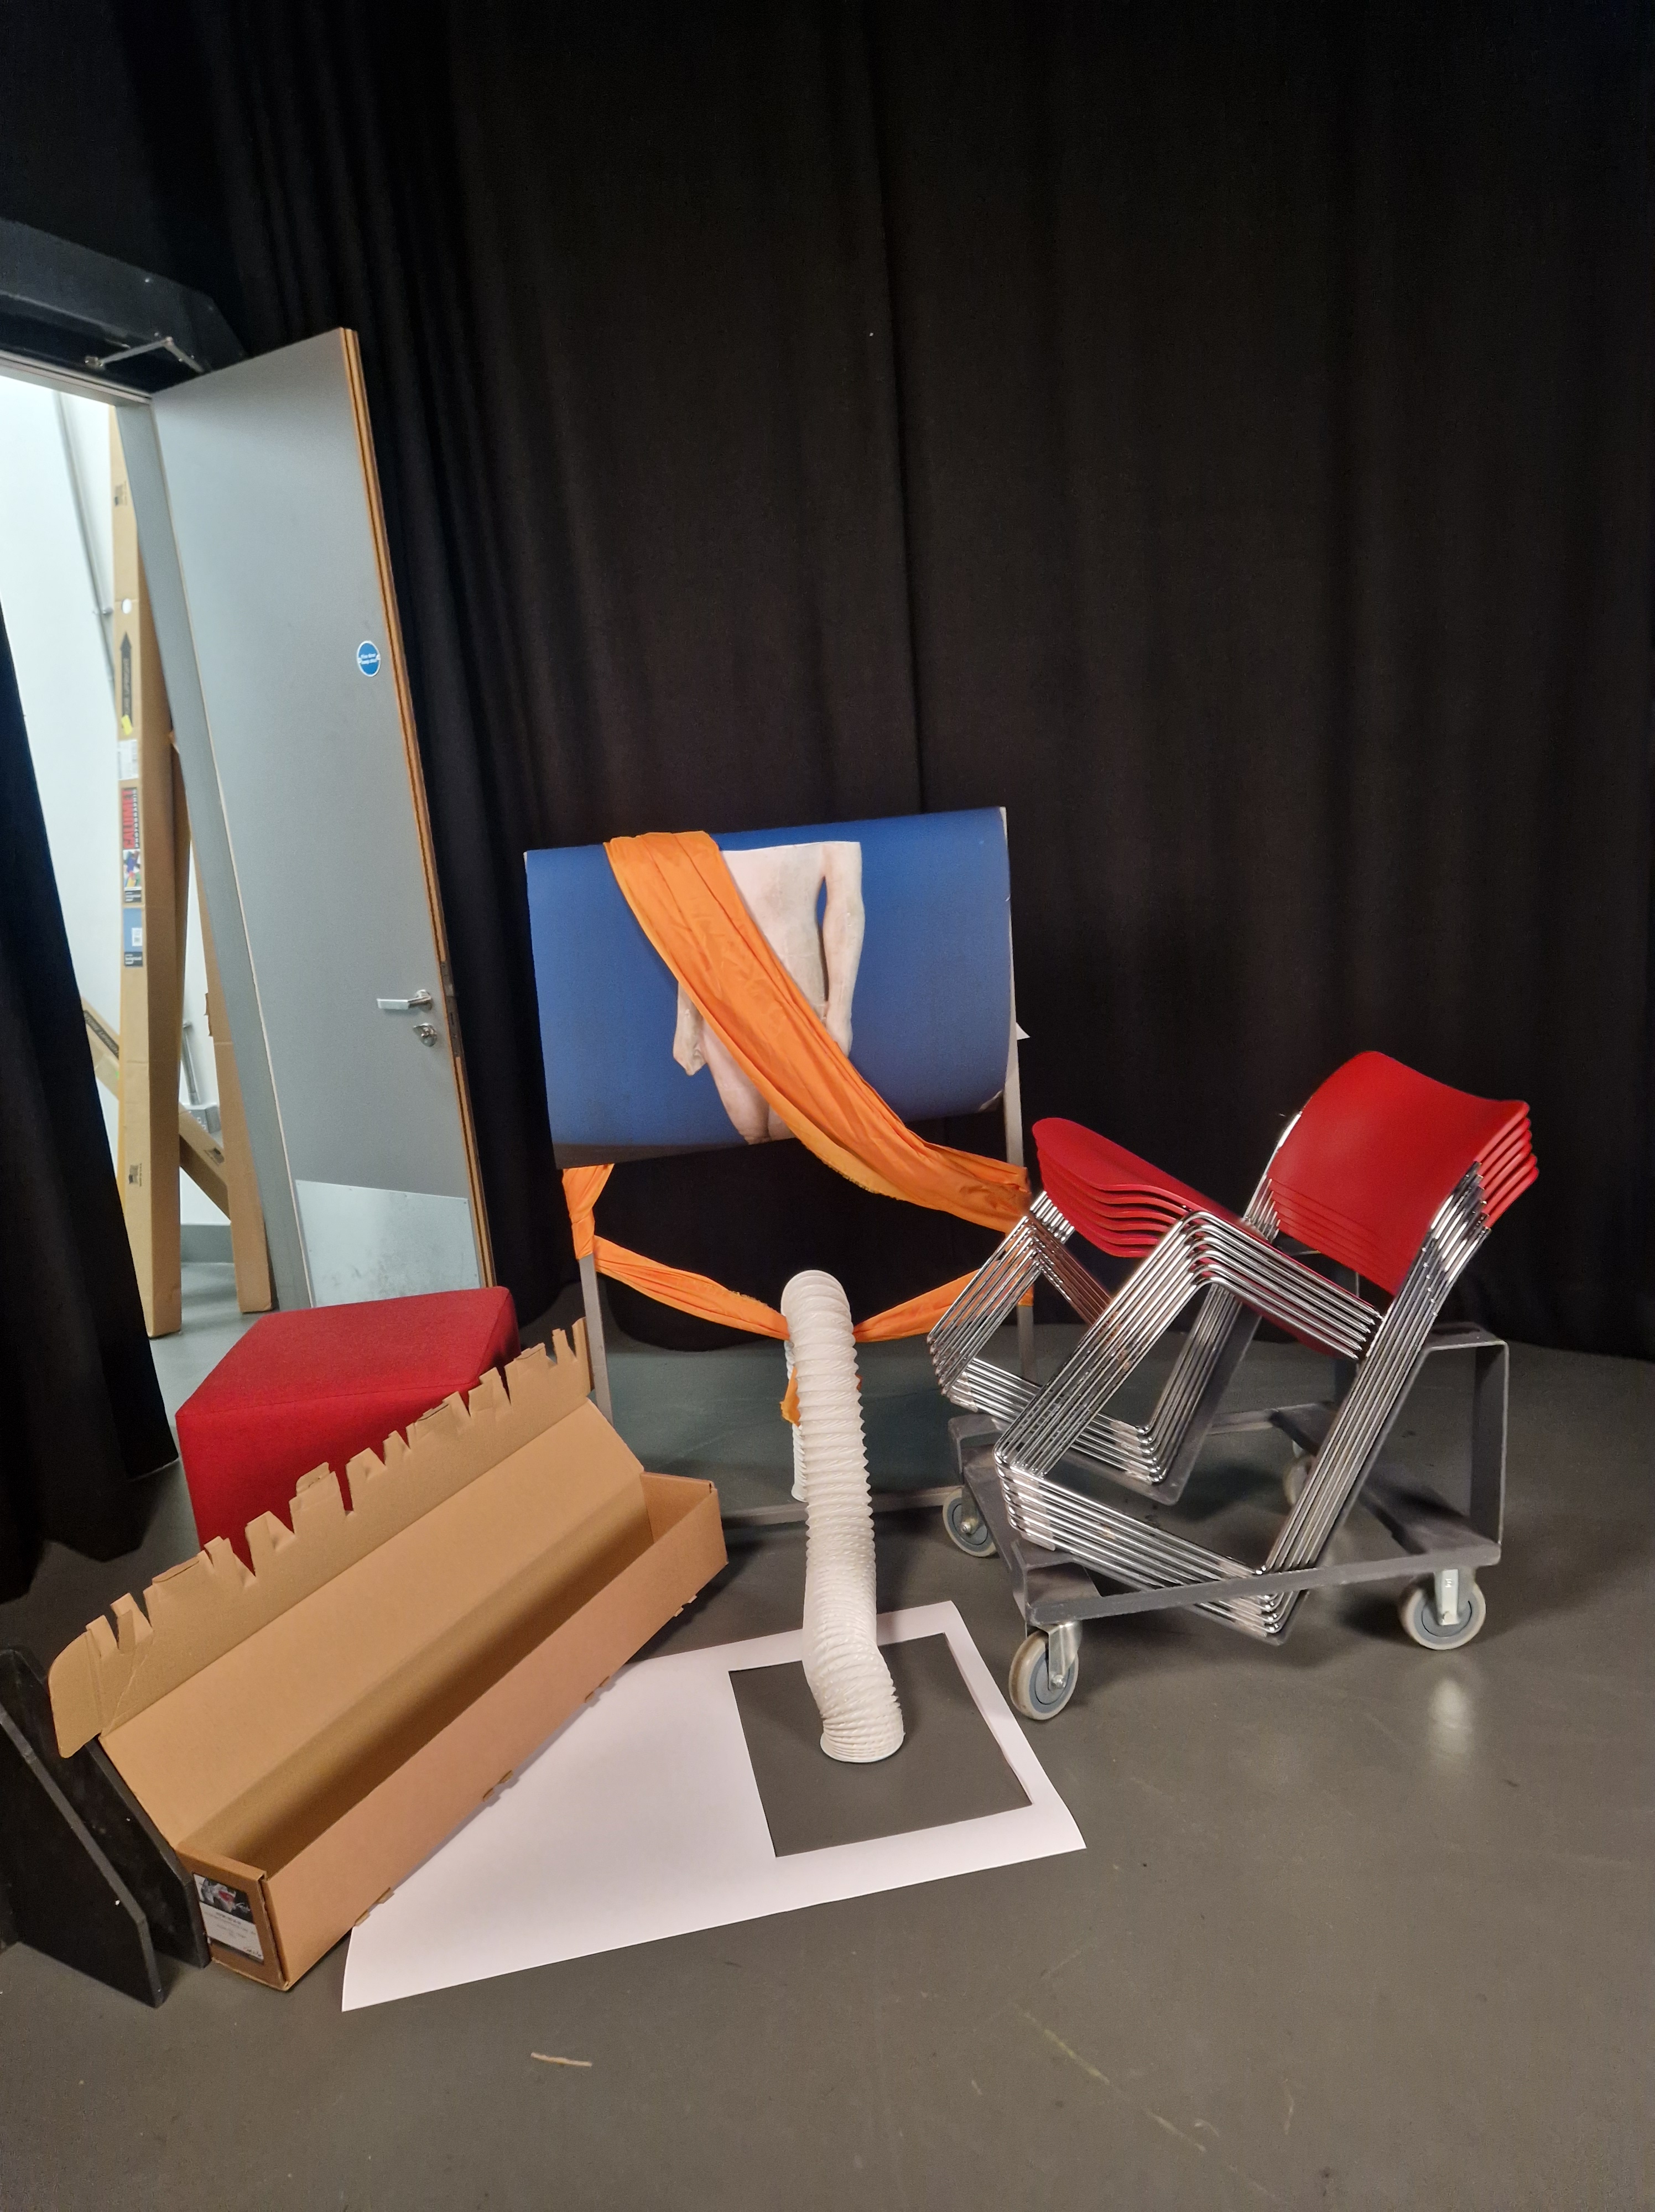
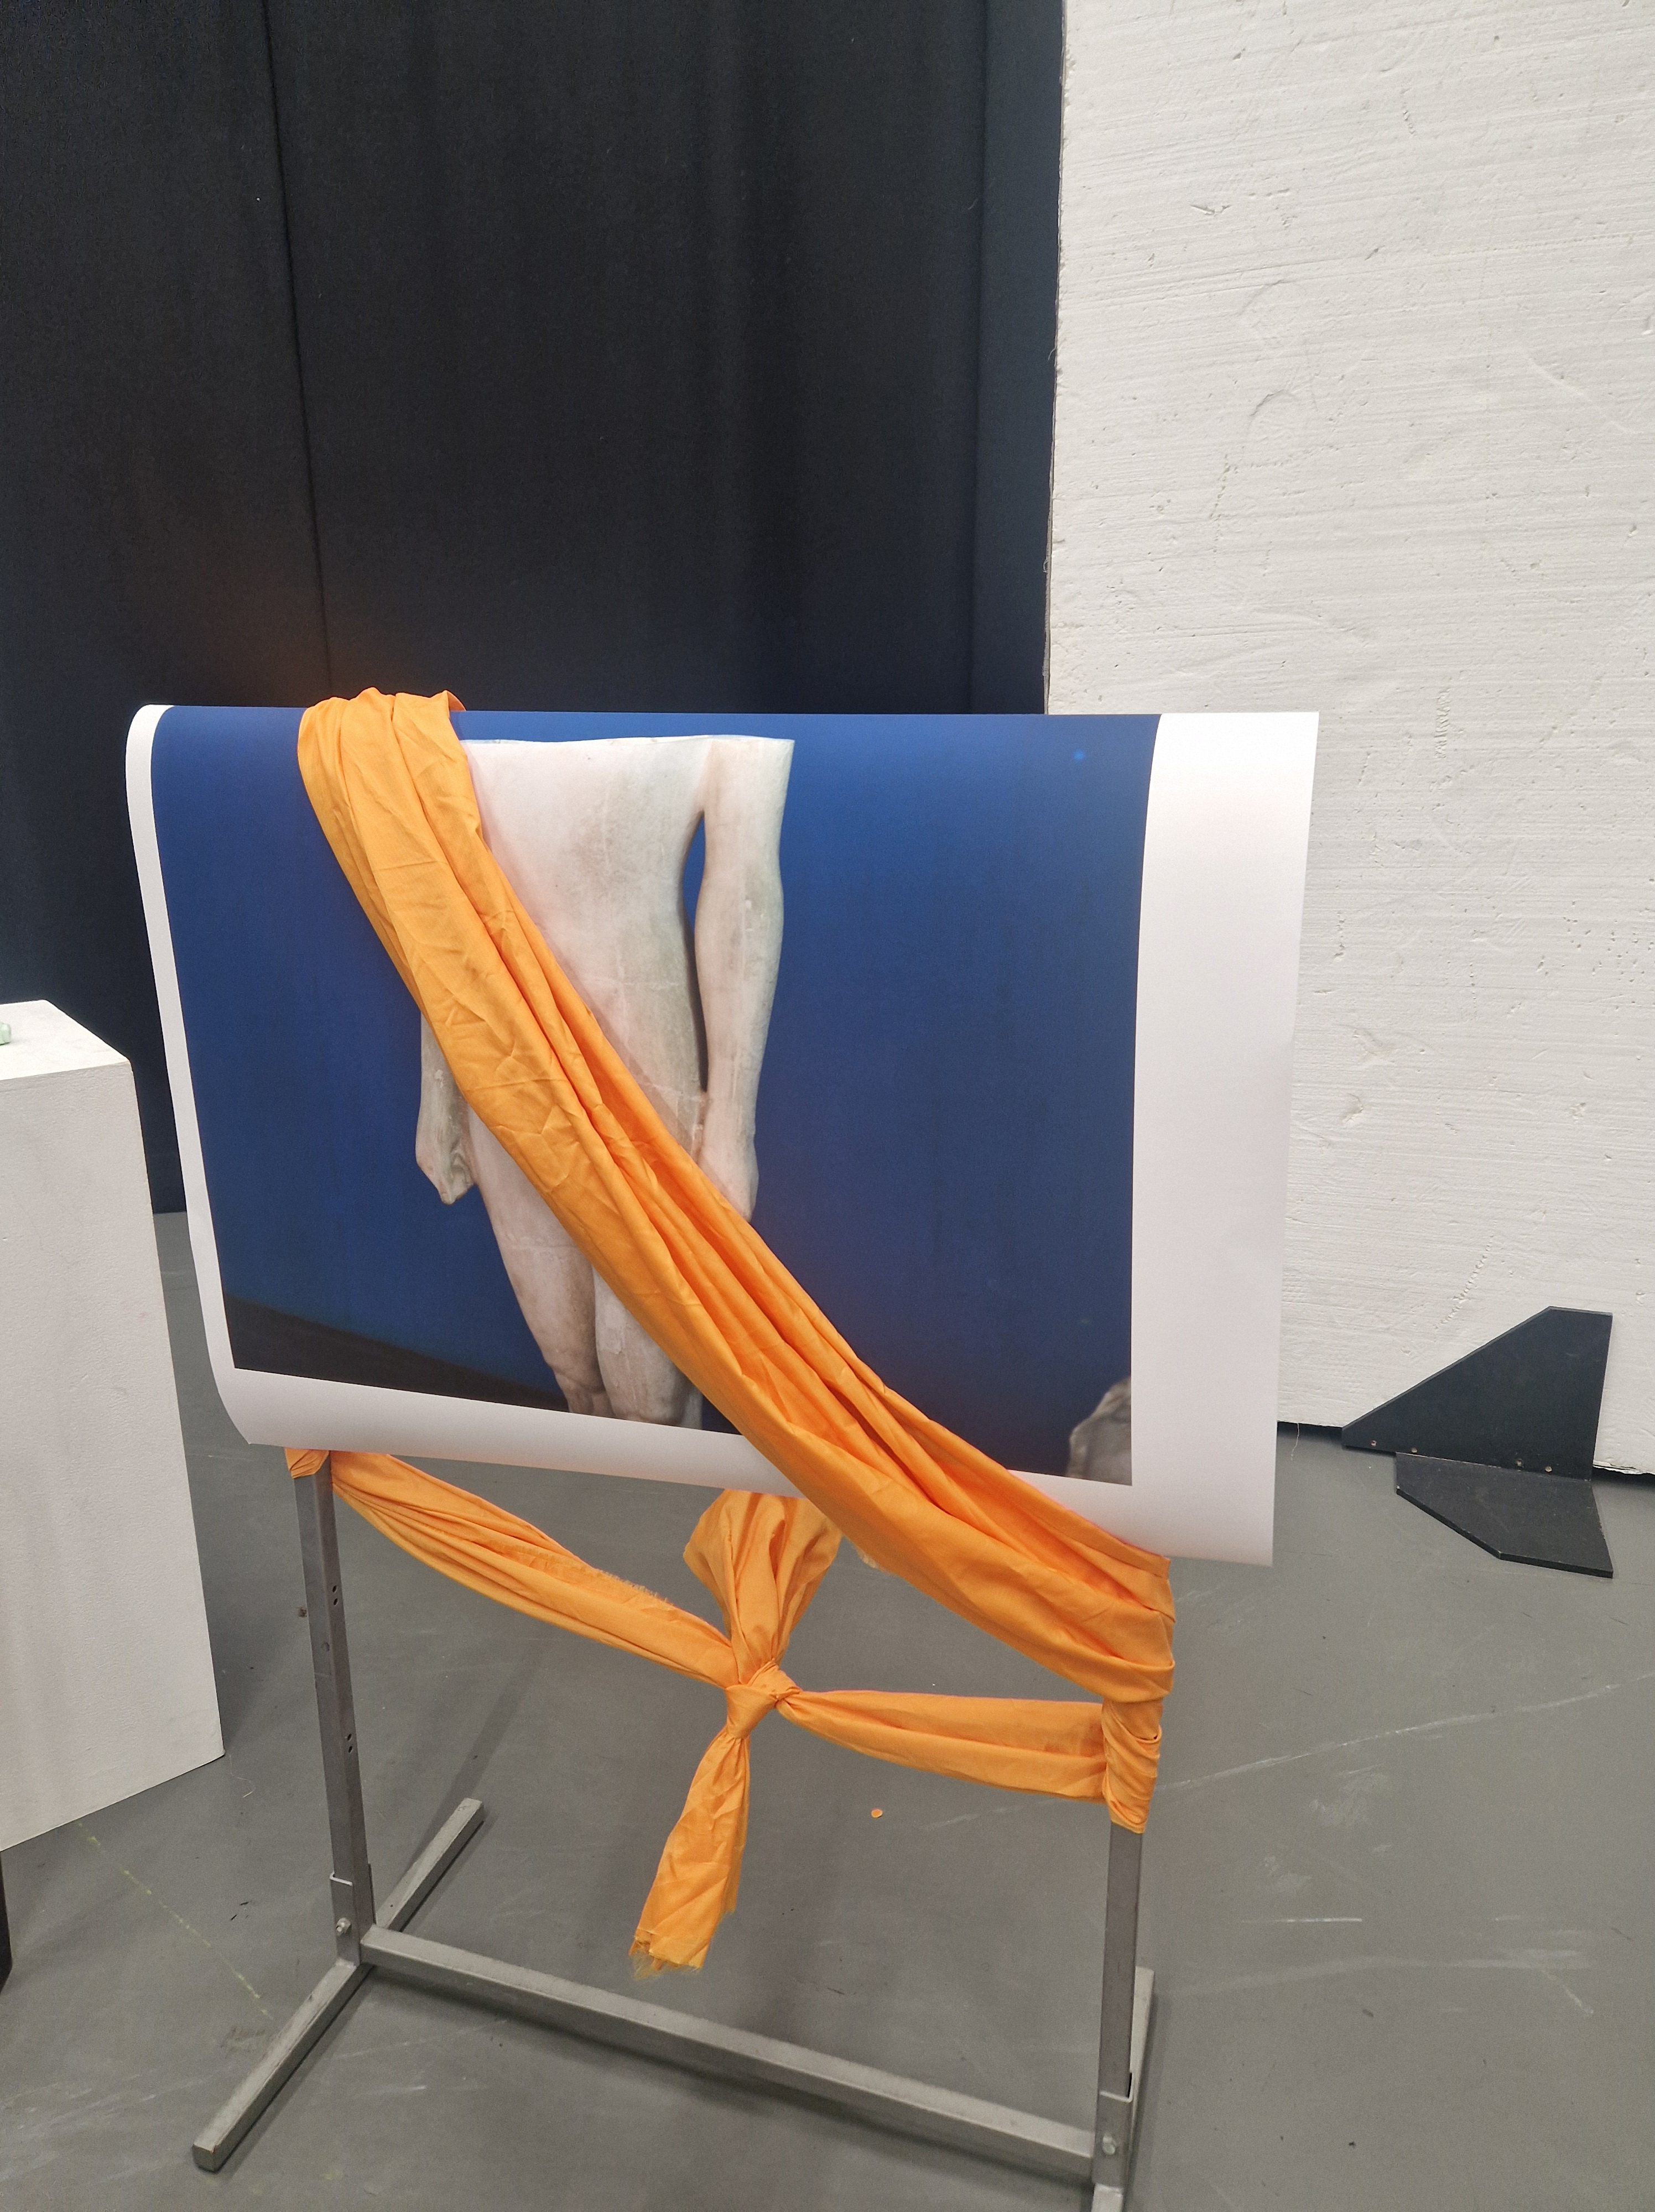
SET 2
REFLECTIONS: Another great workshop by David made me rethink what photography is and might be. I loved the revolution of arrangements and how one wouldn’t exist without the other - the starting point is as important as the final result.
TUESDAY
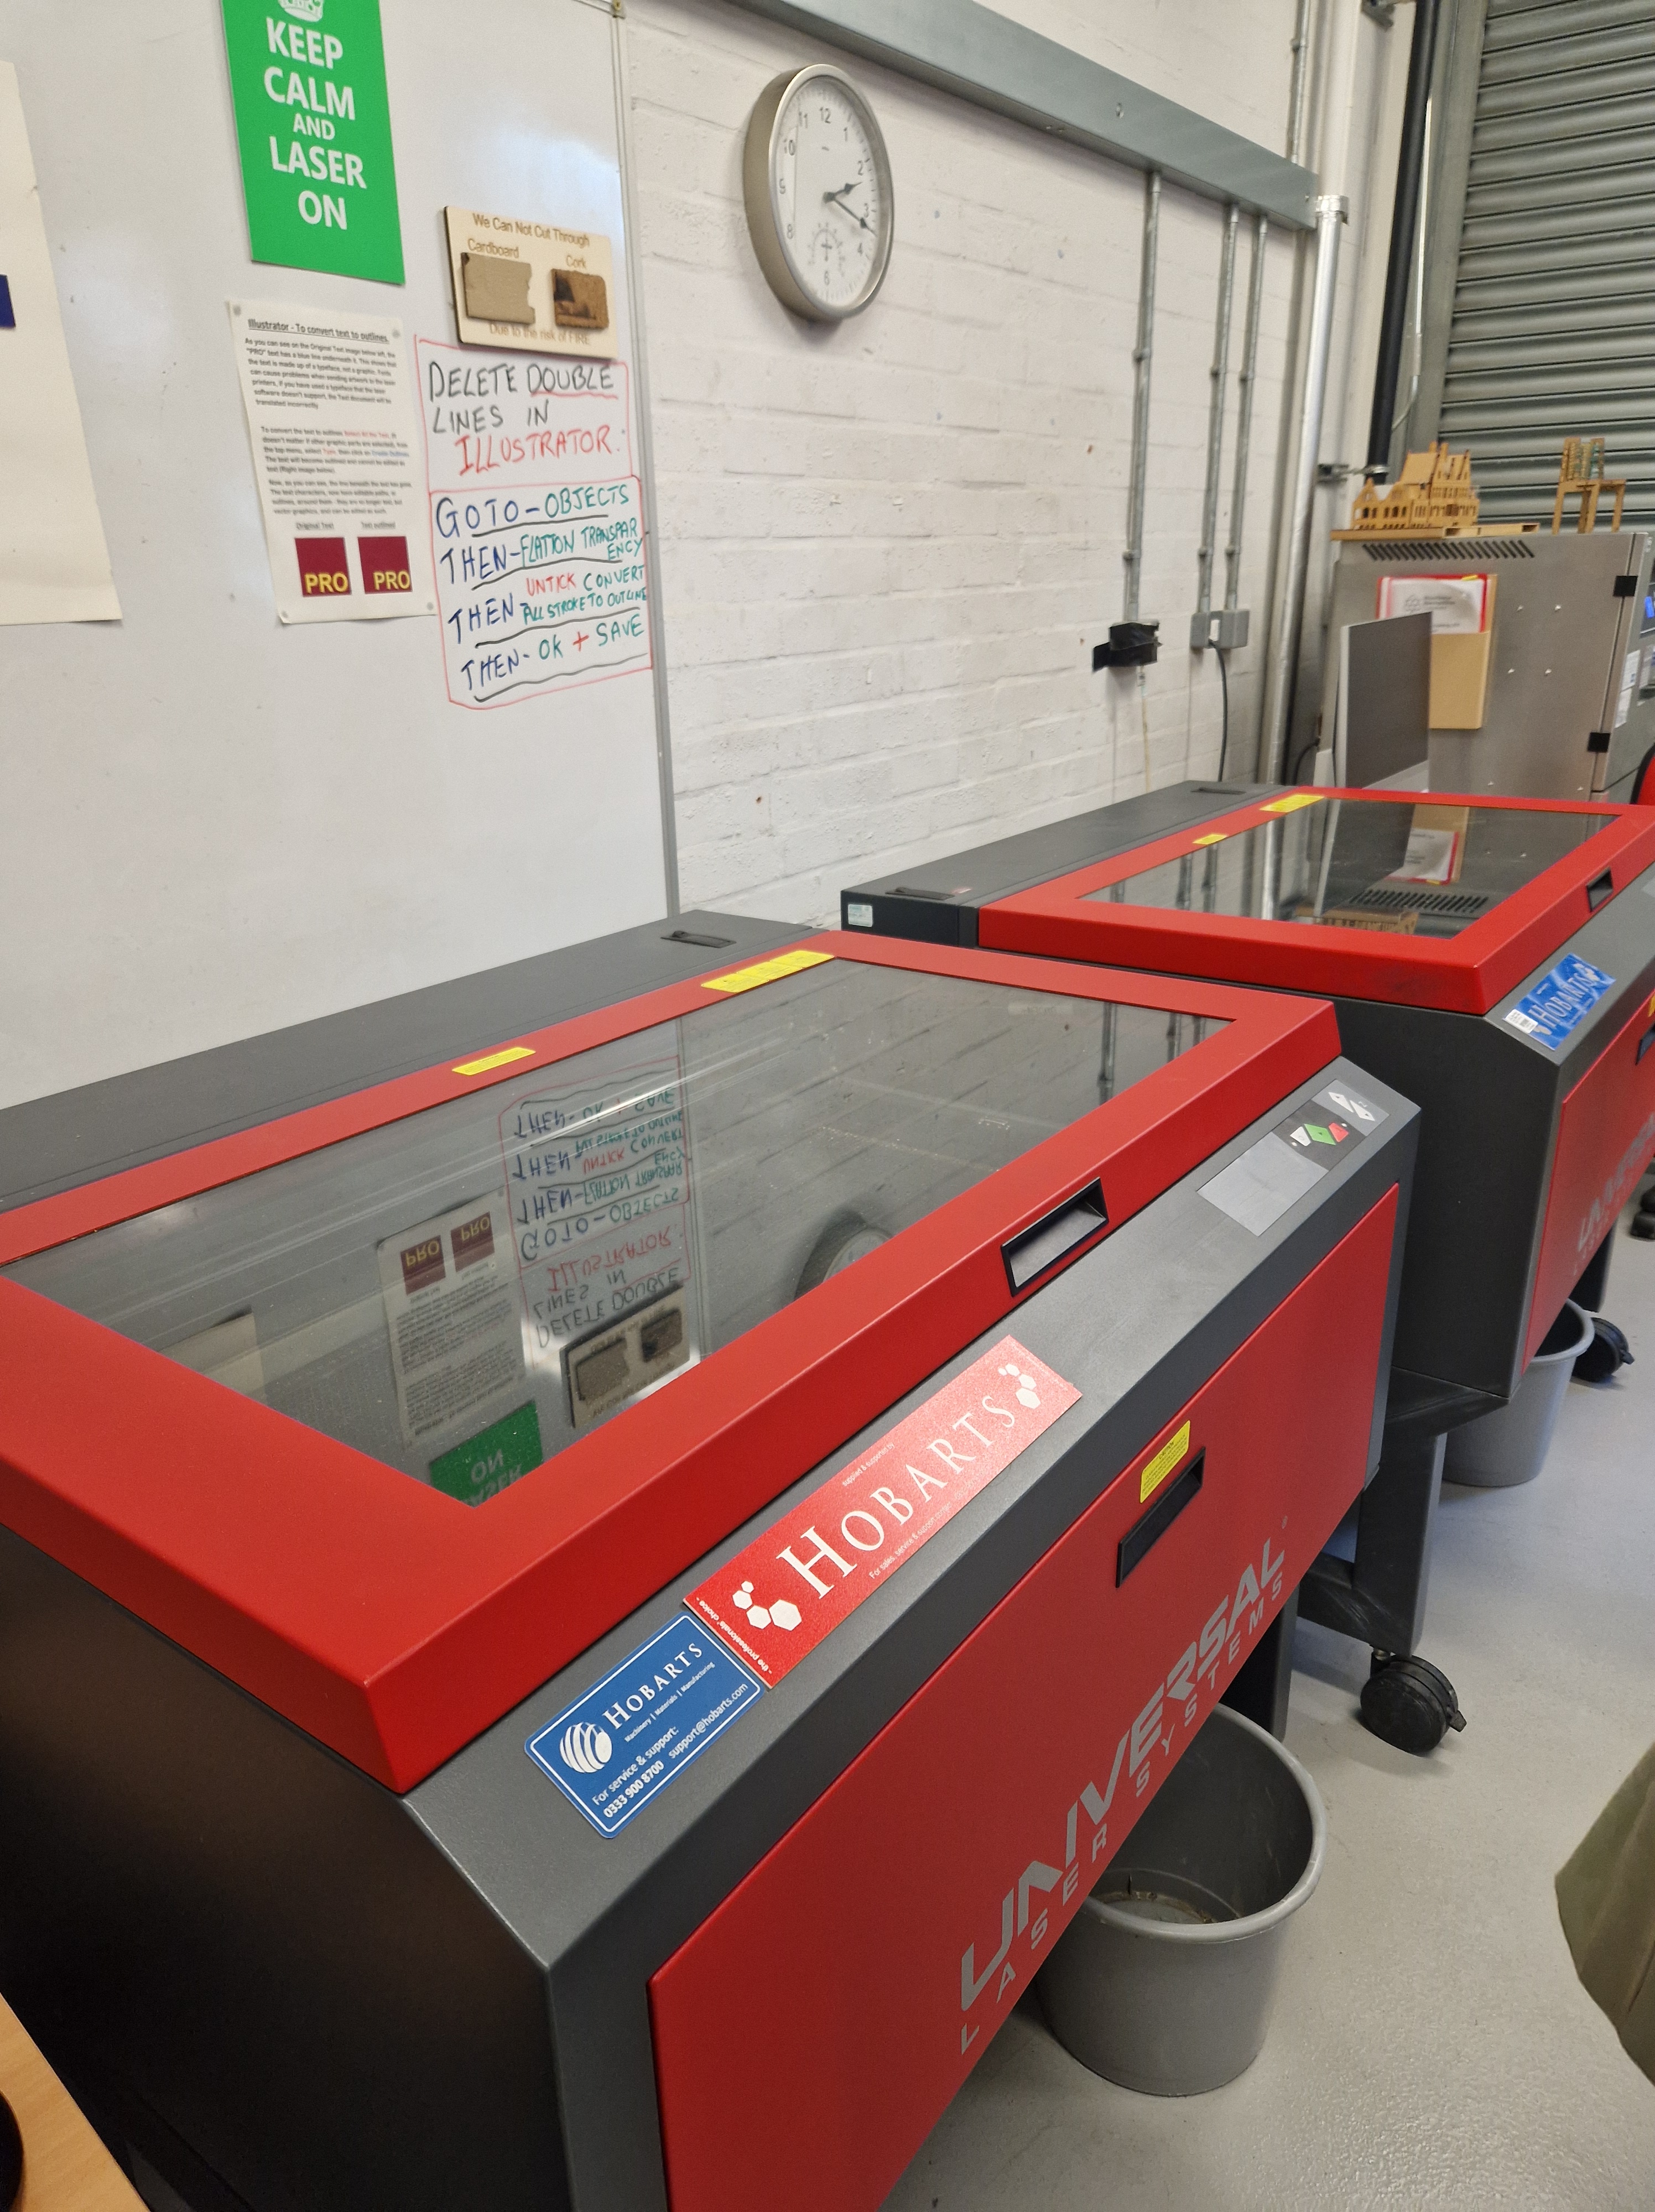
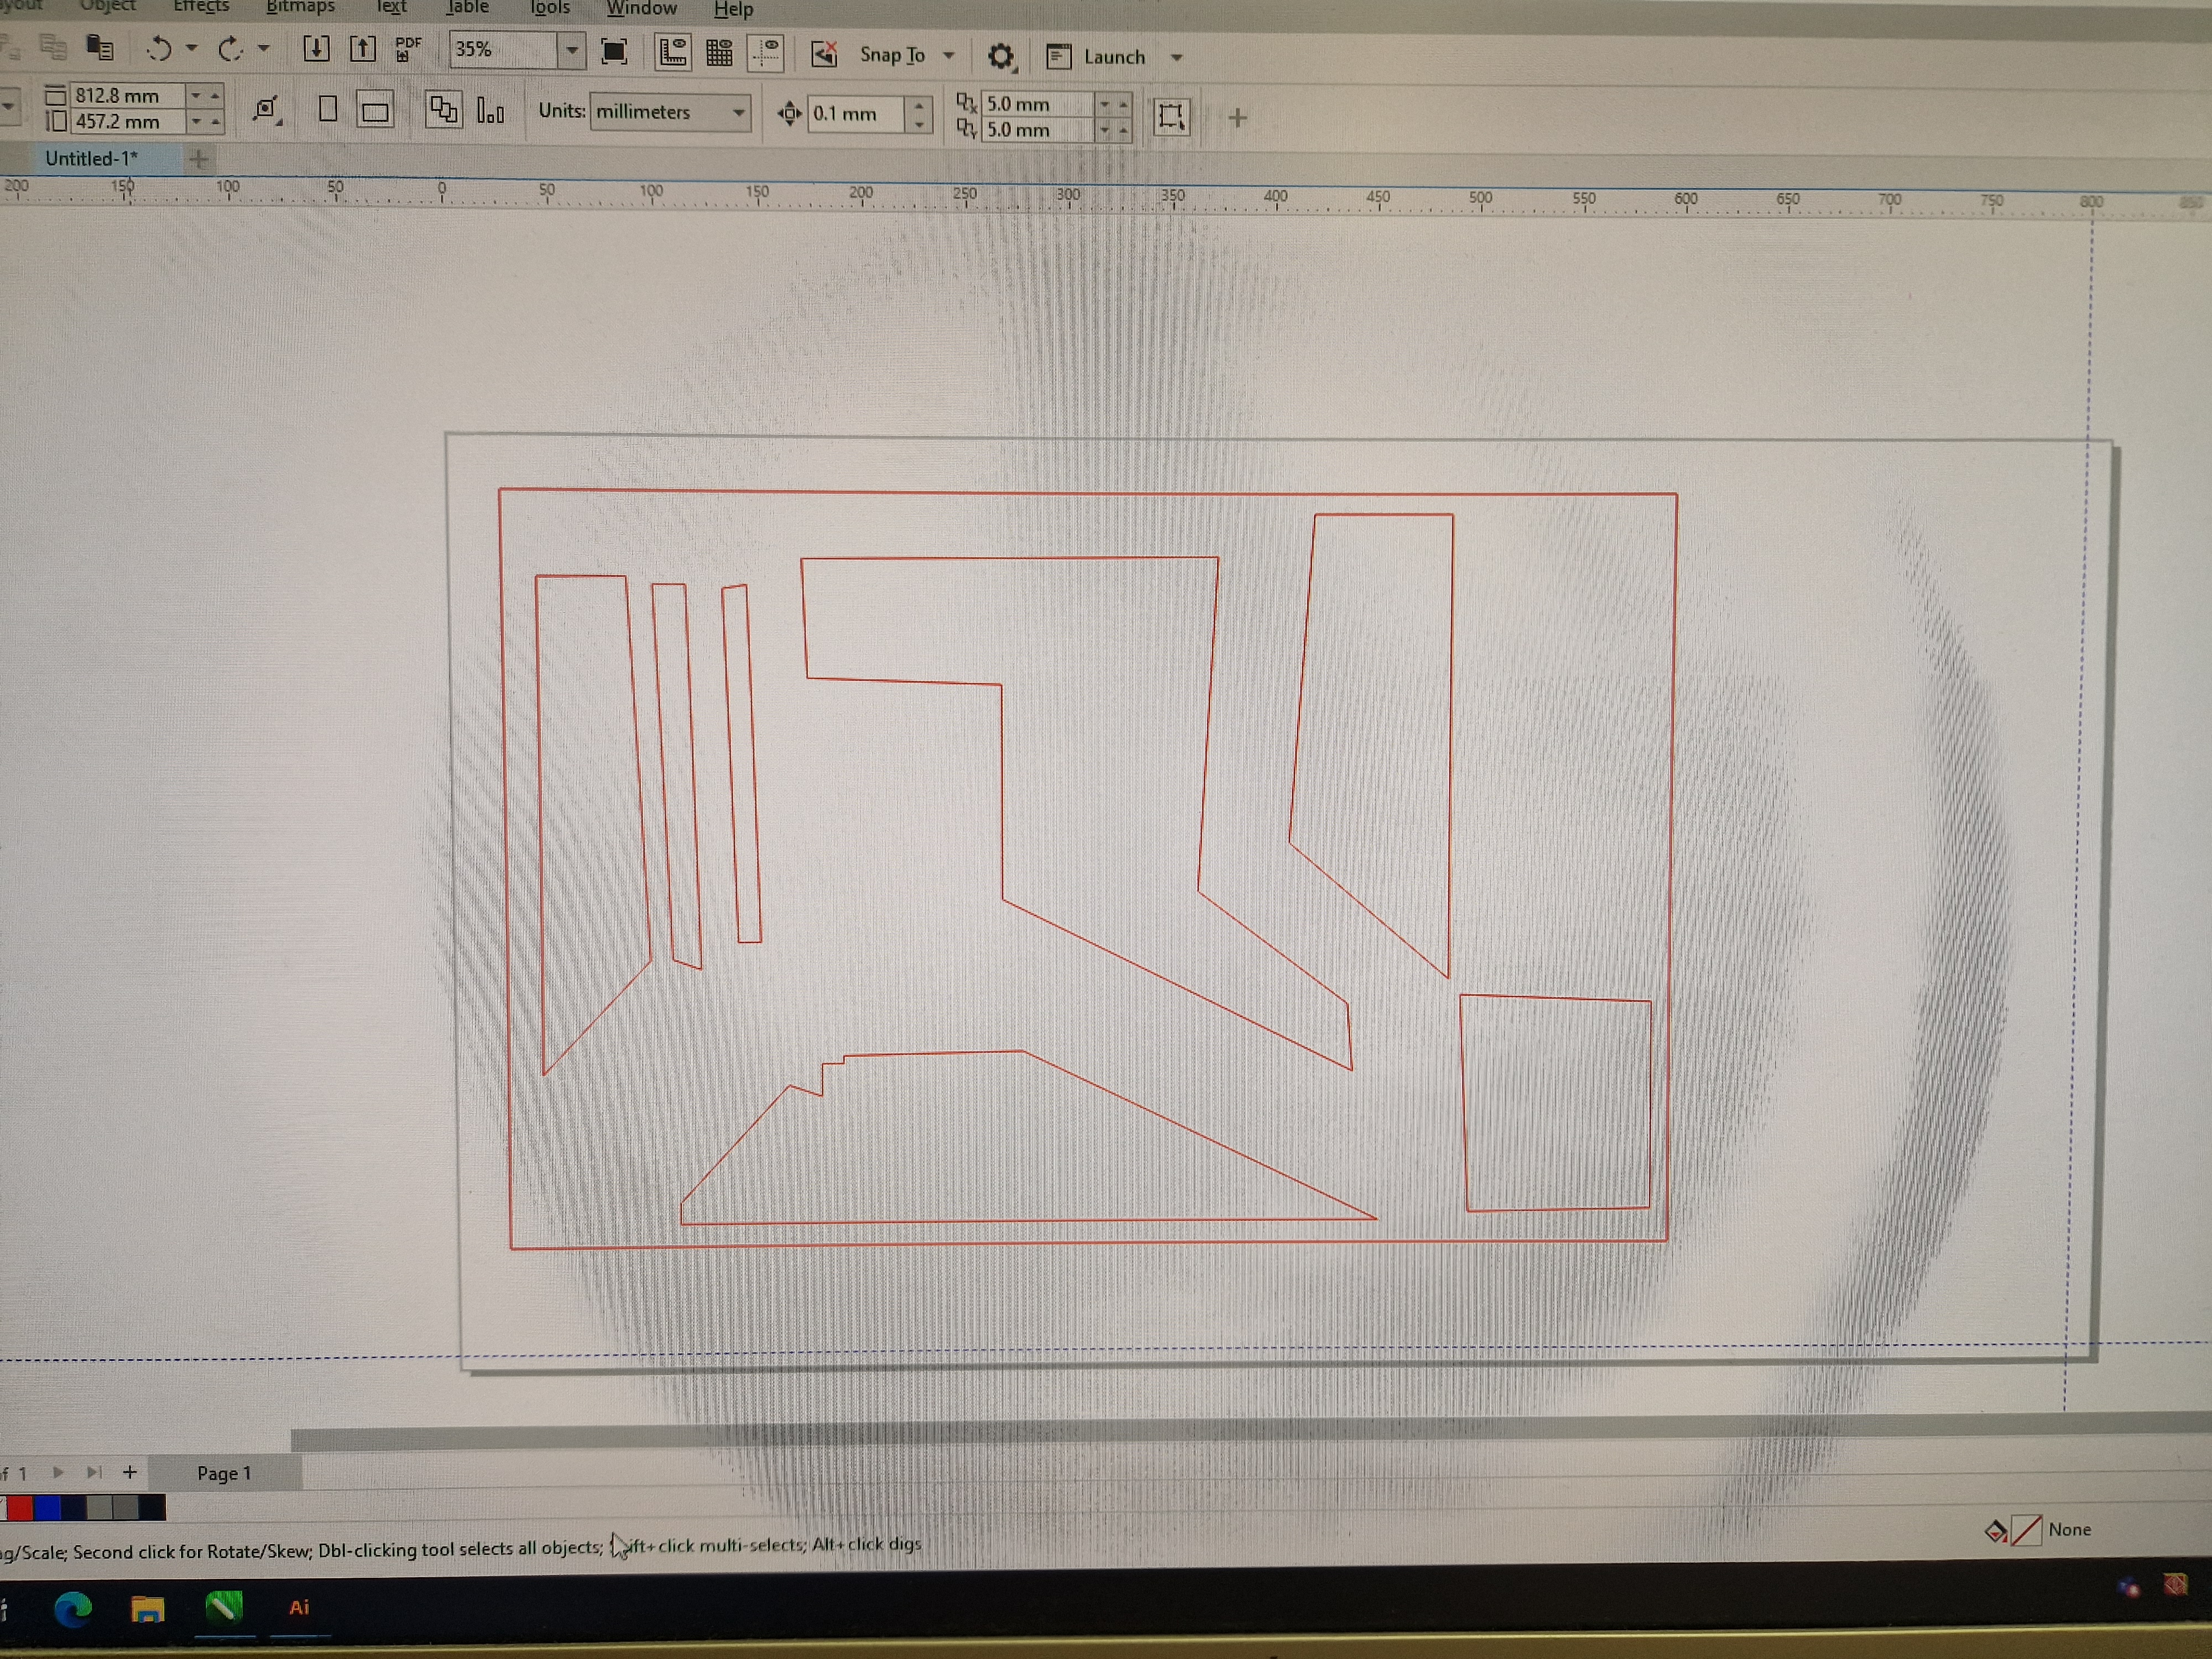
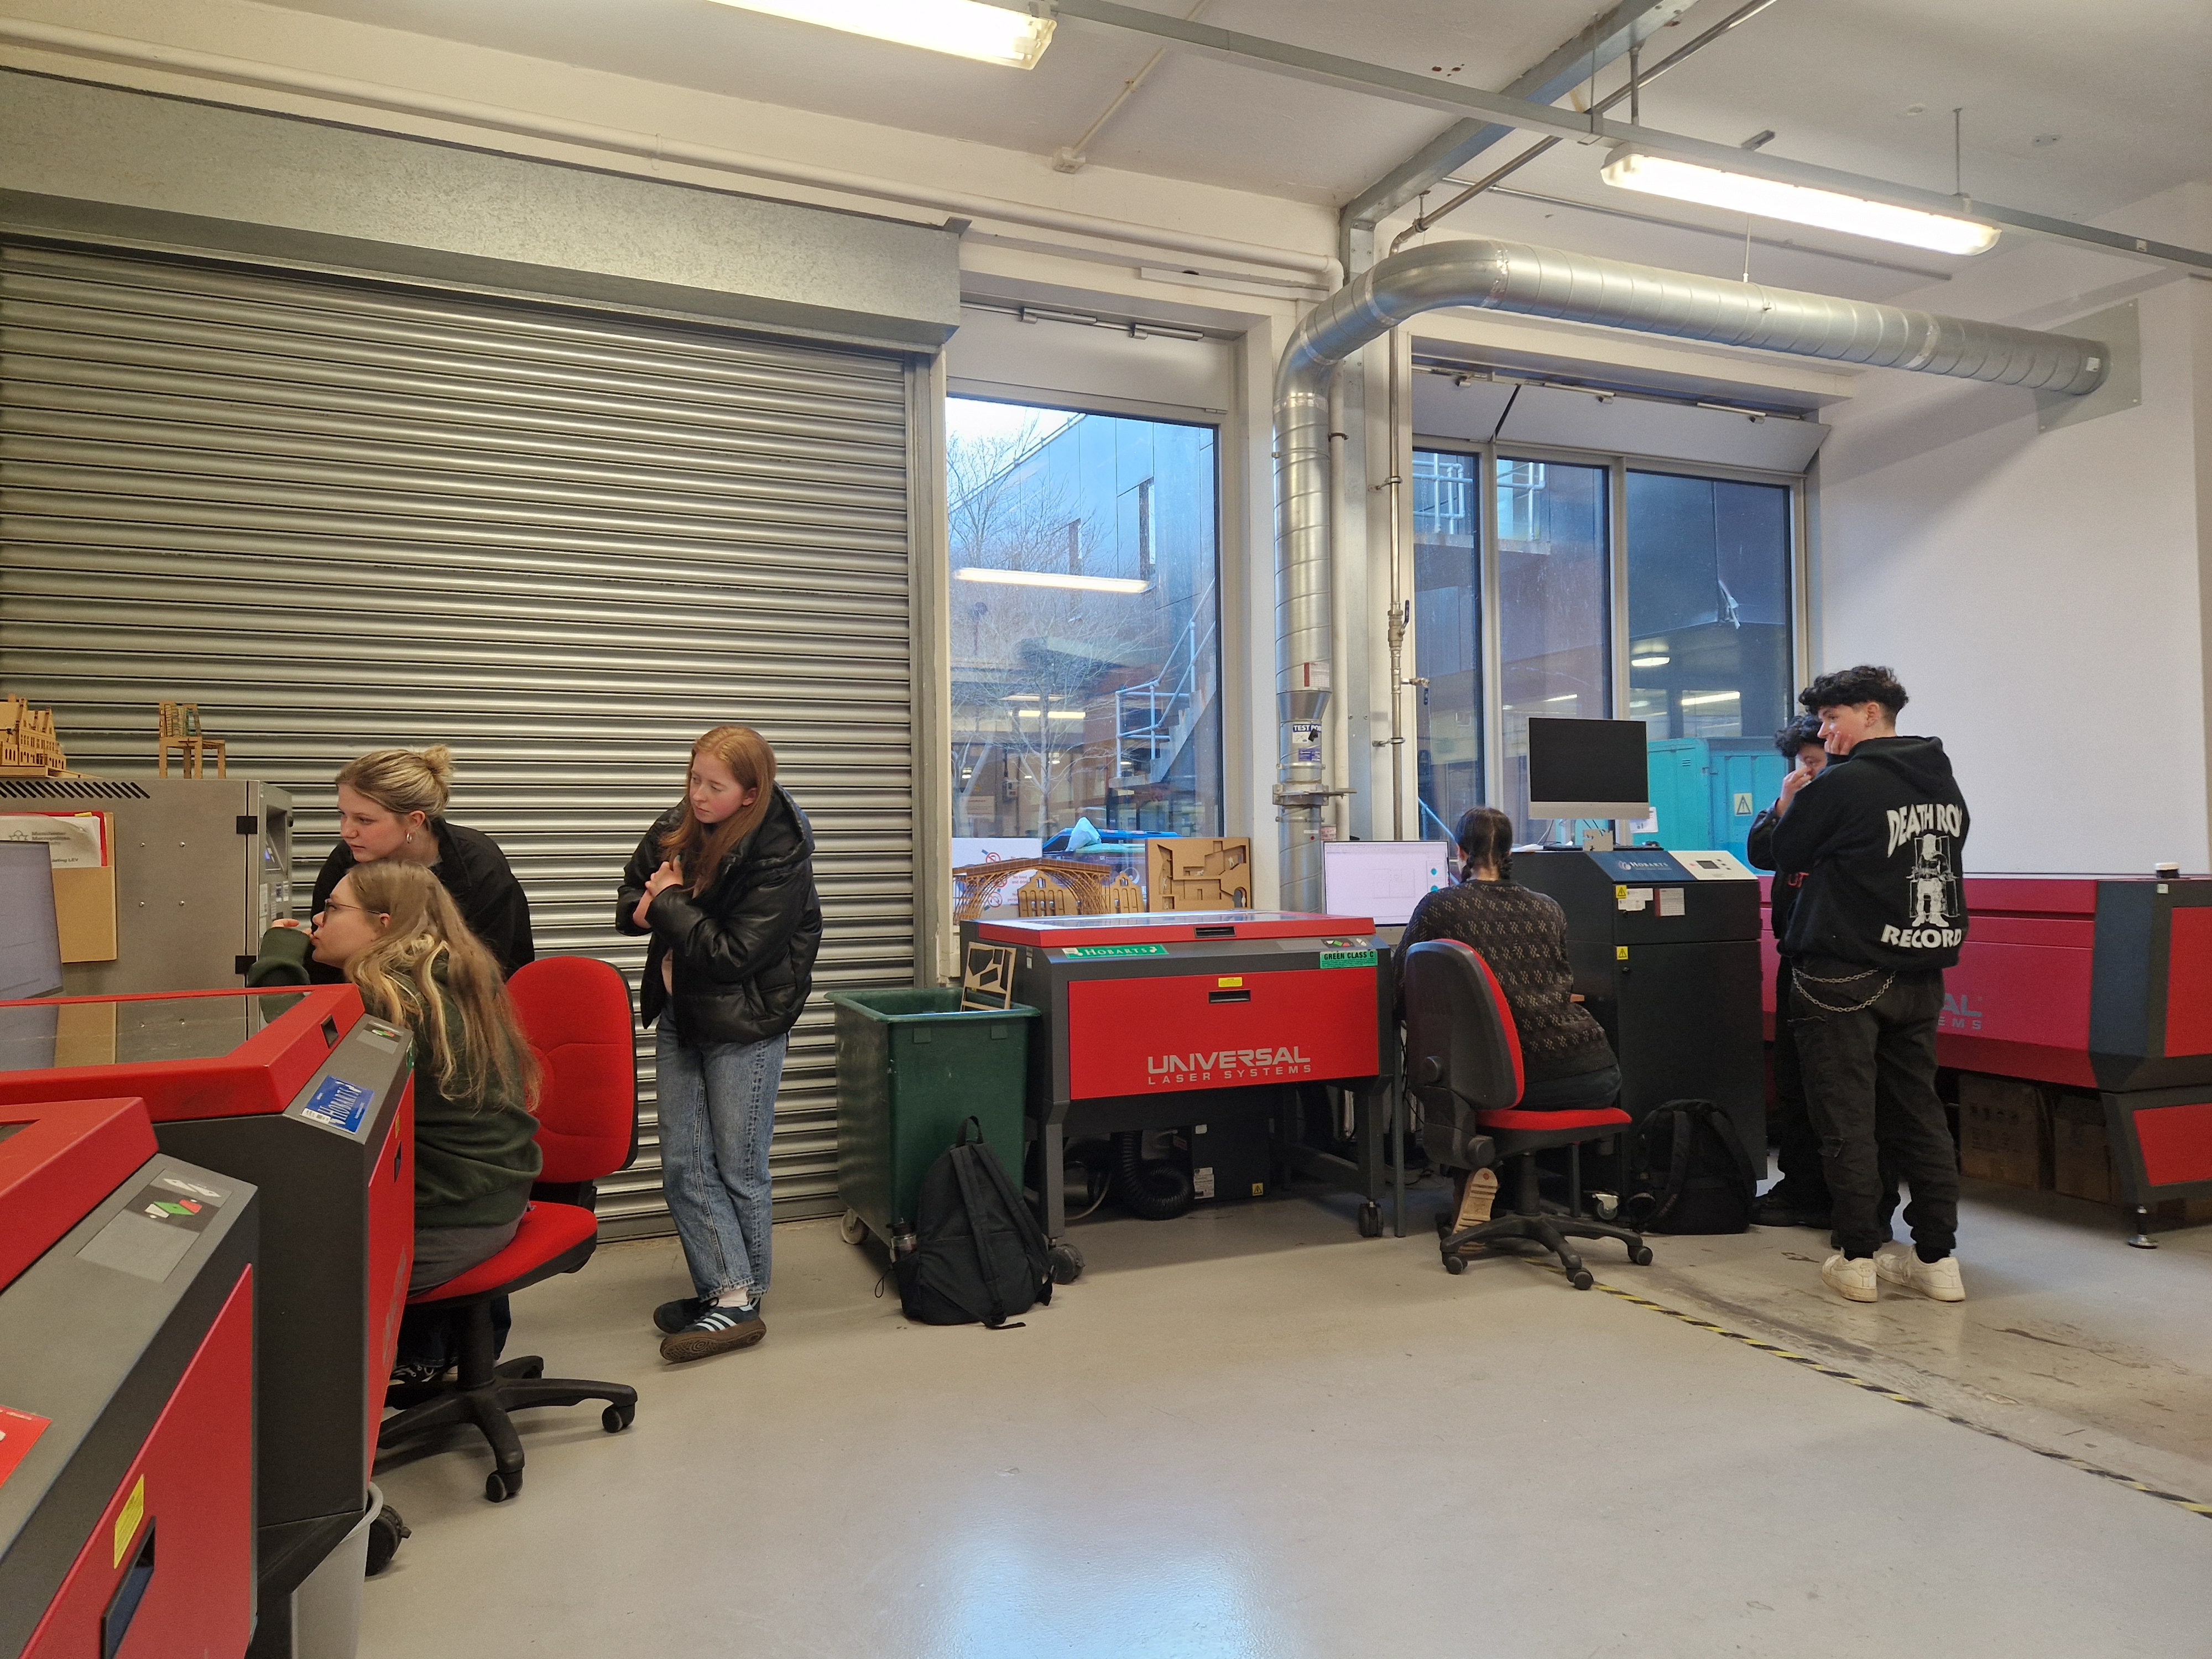
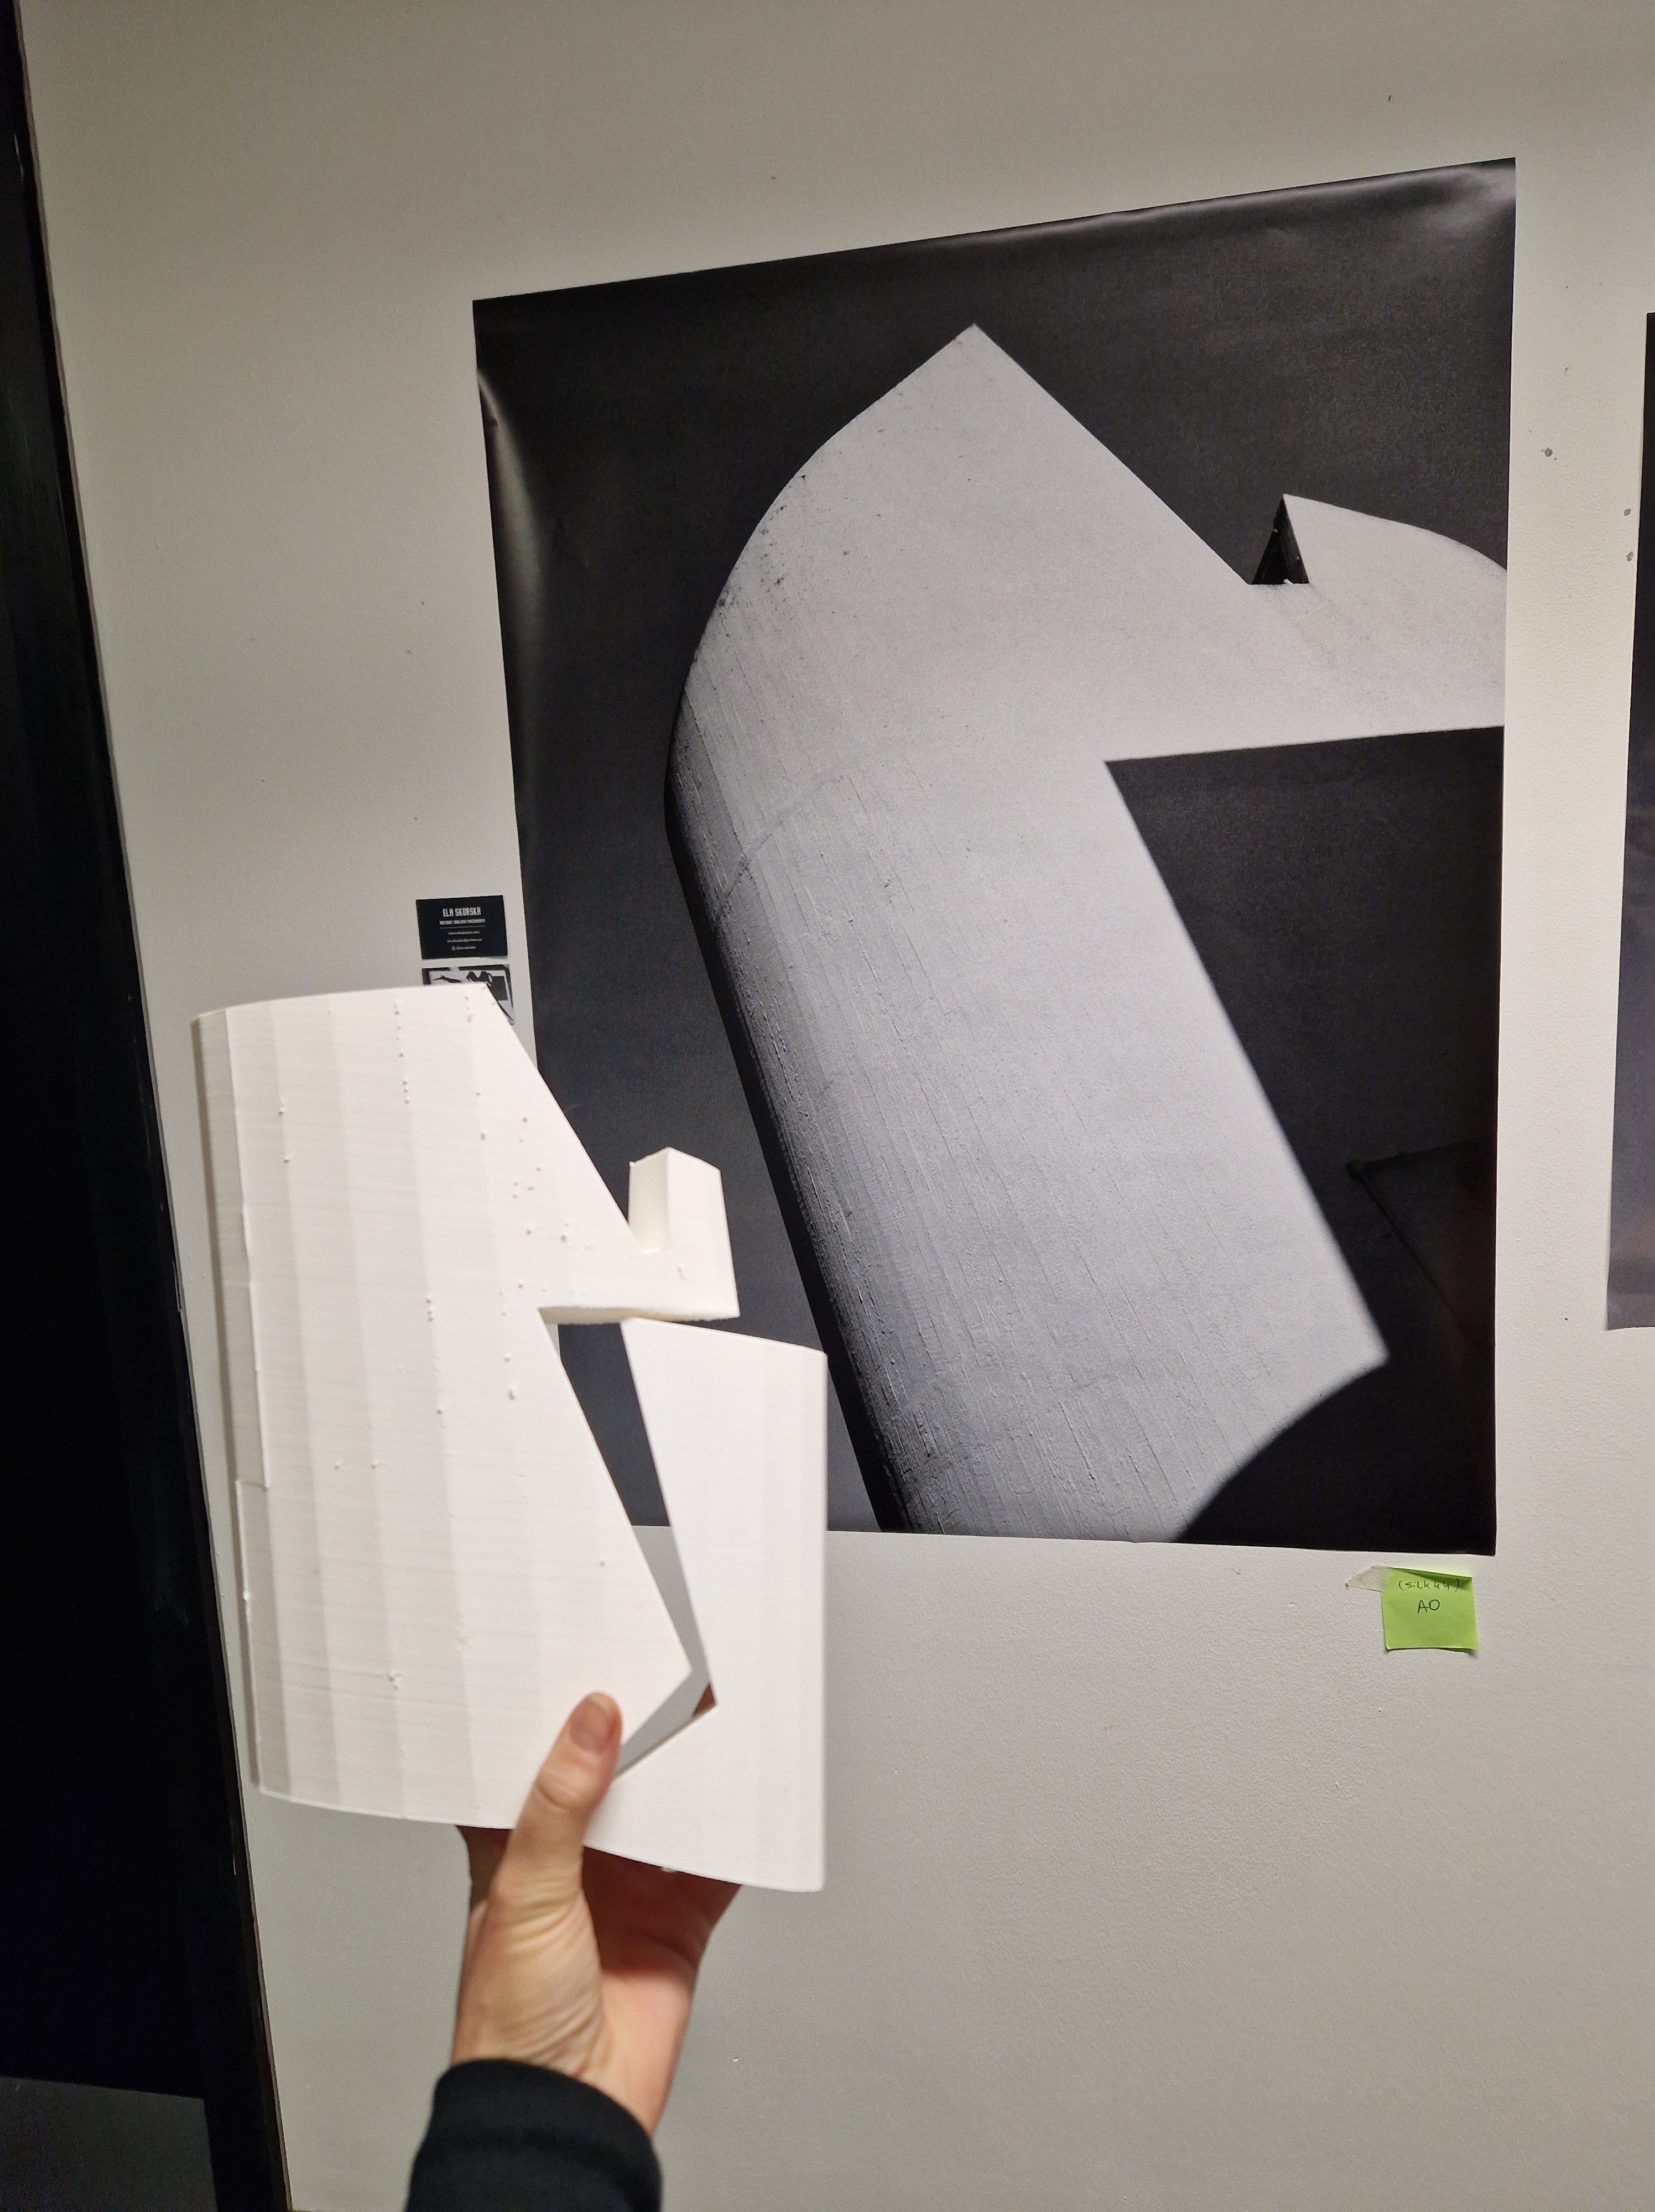
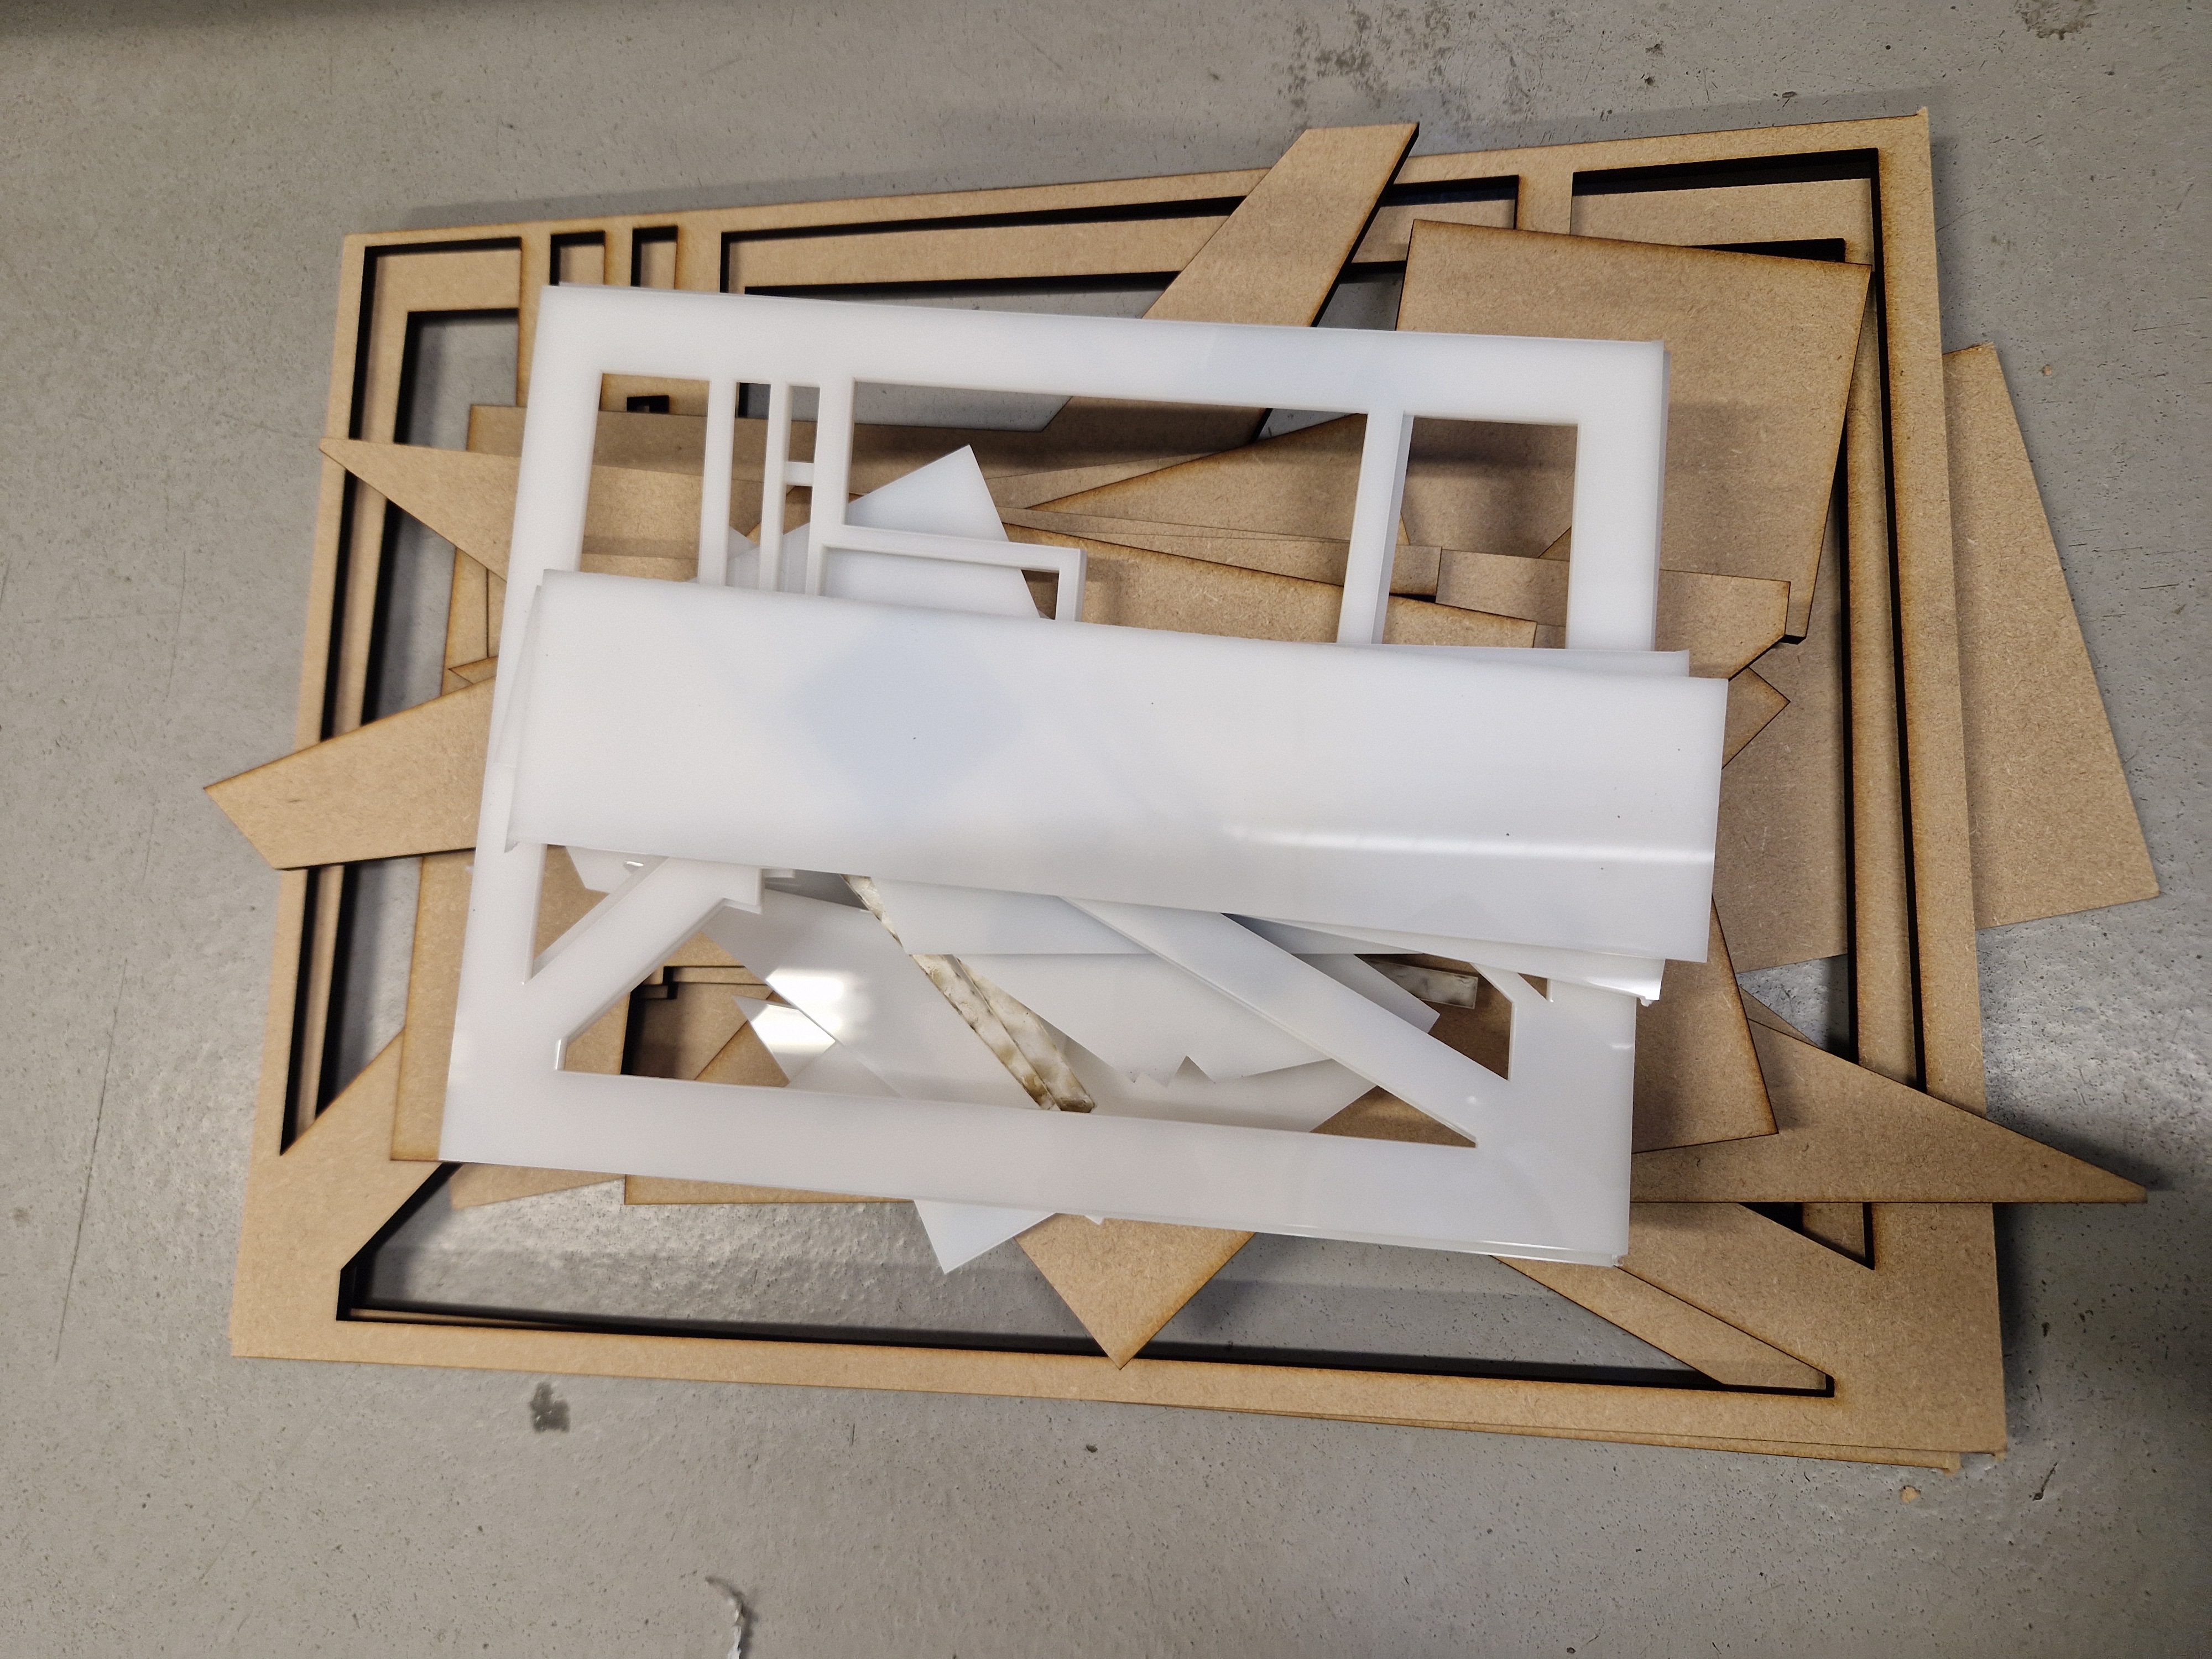
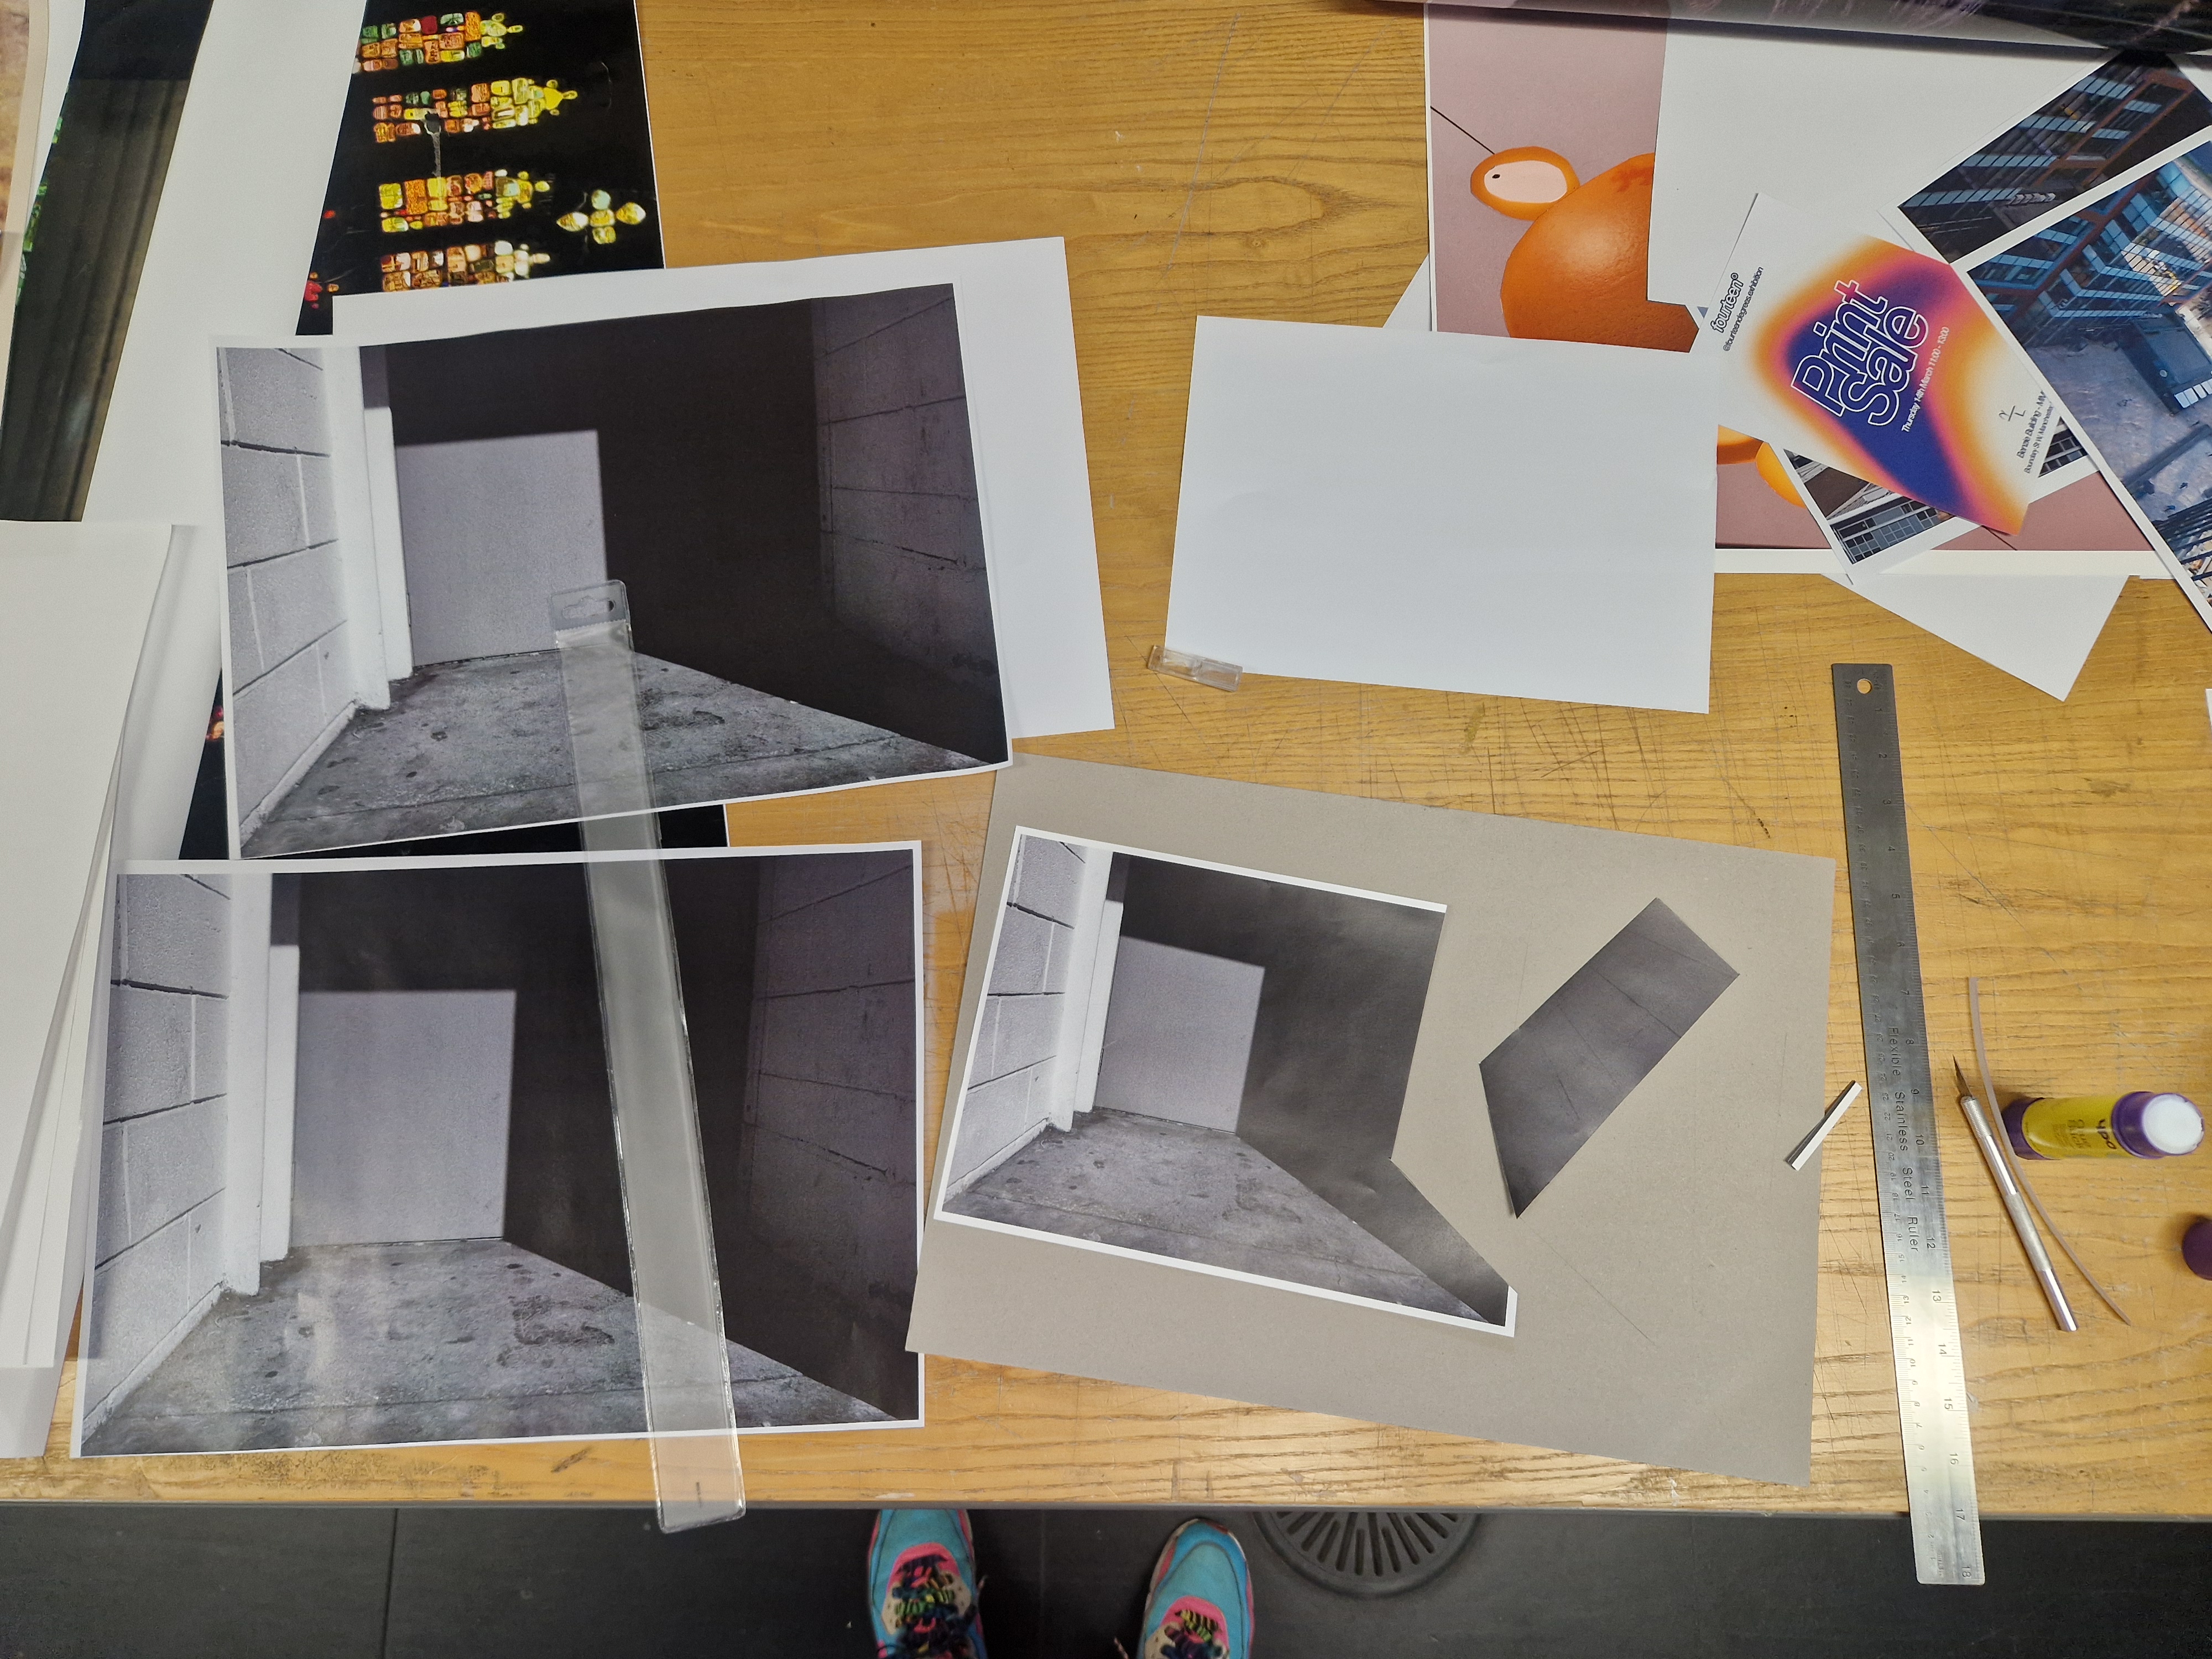
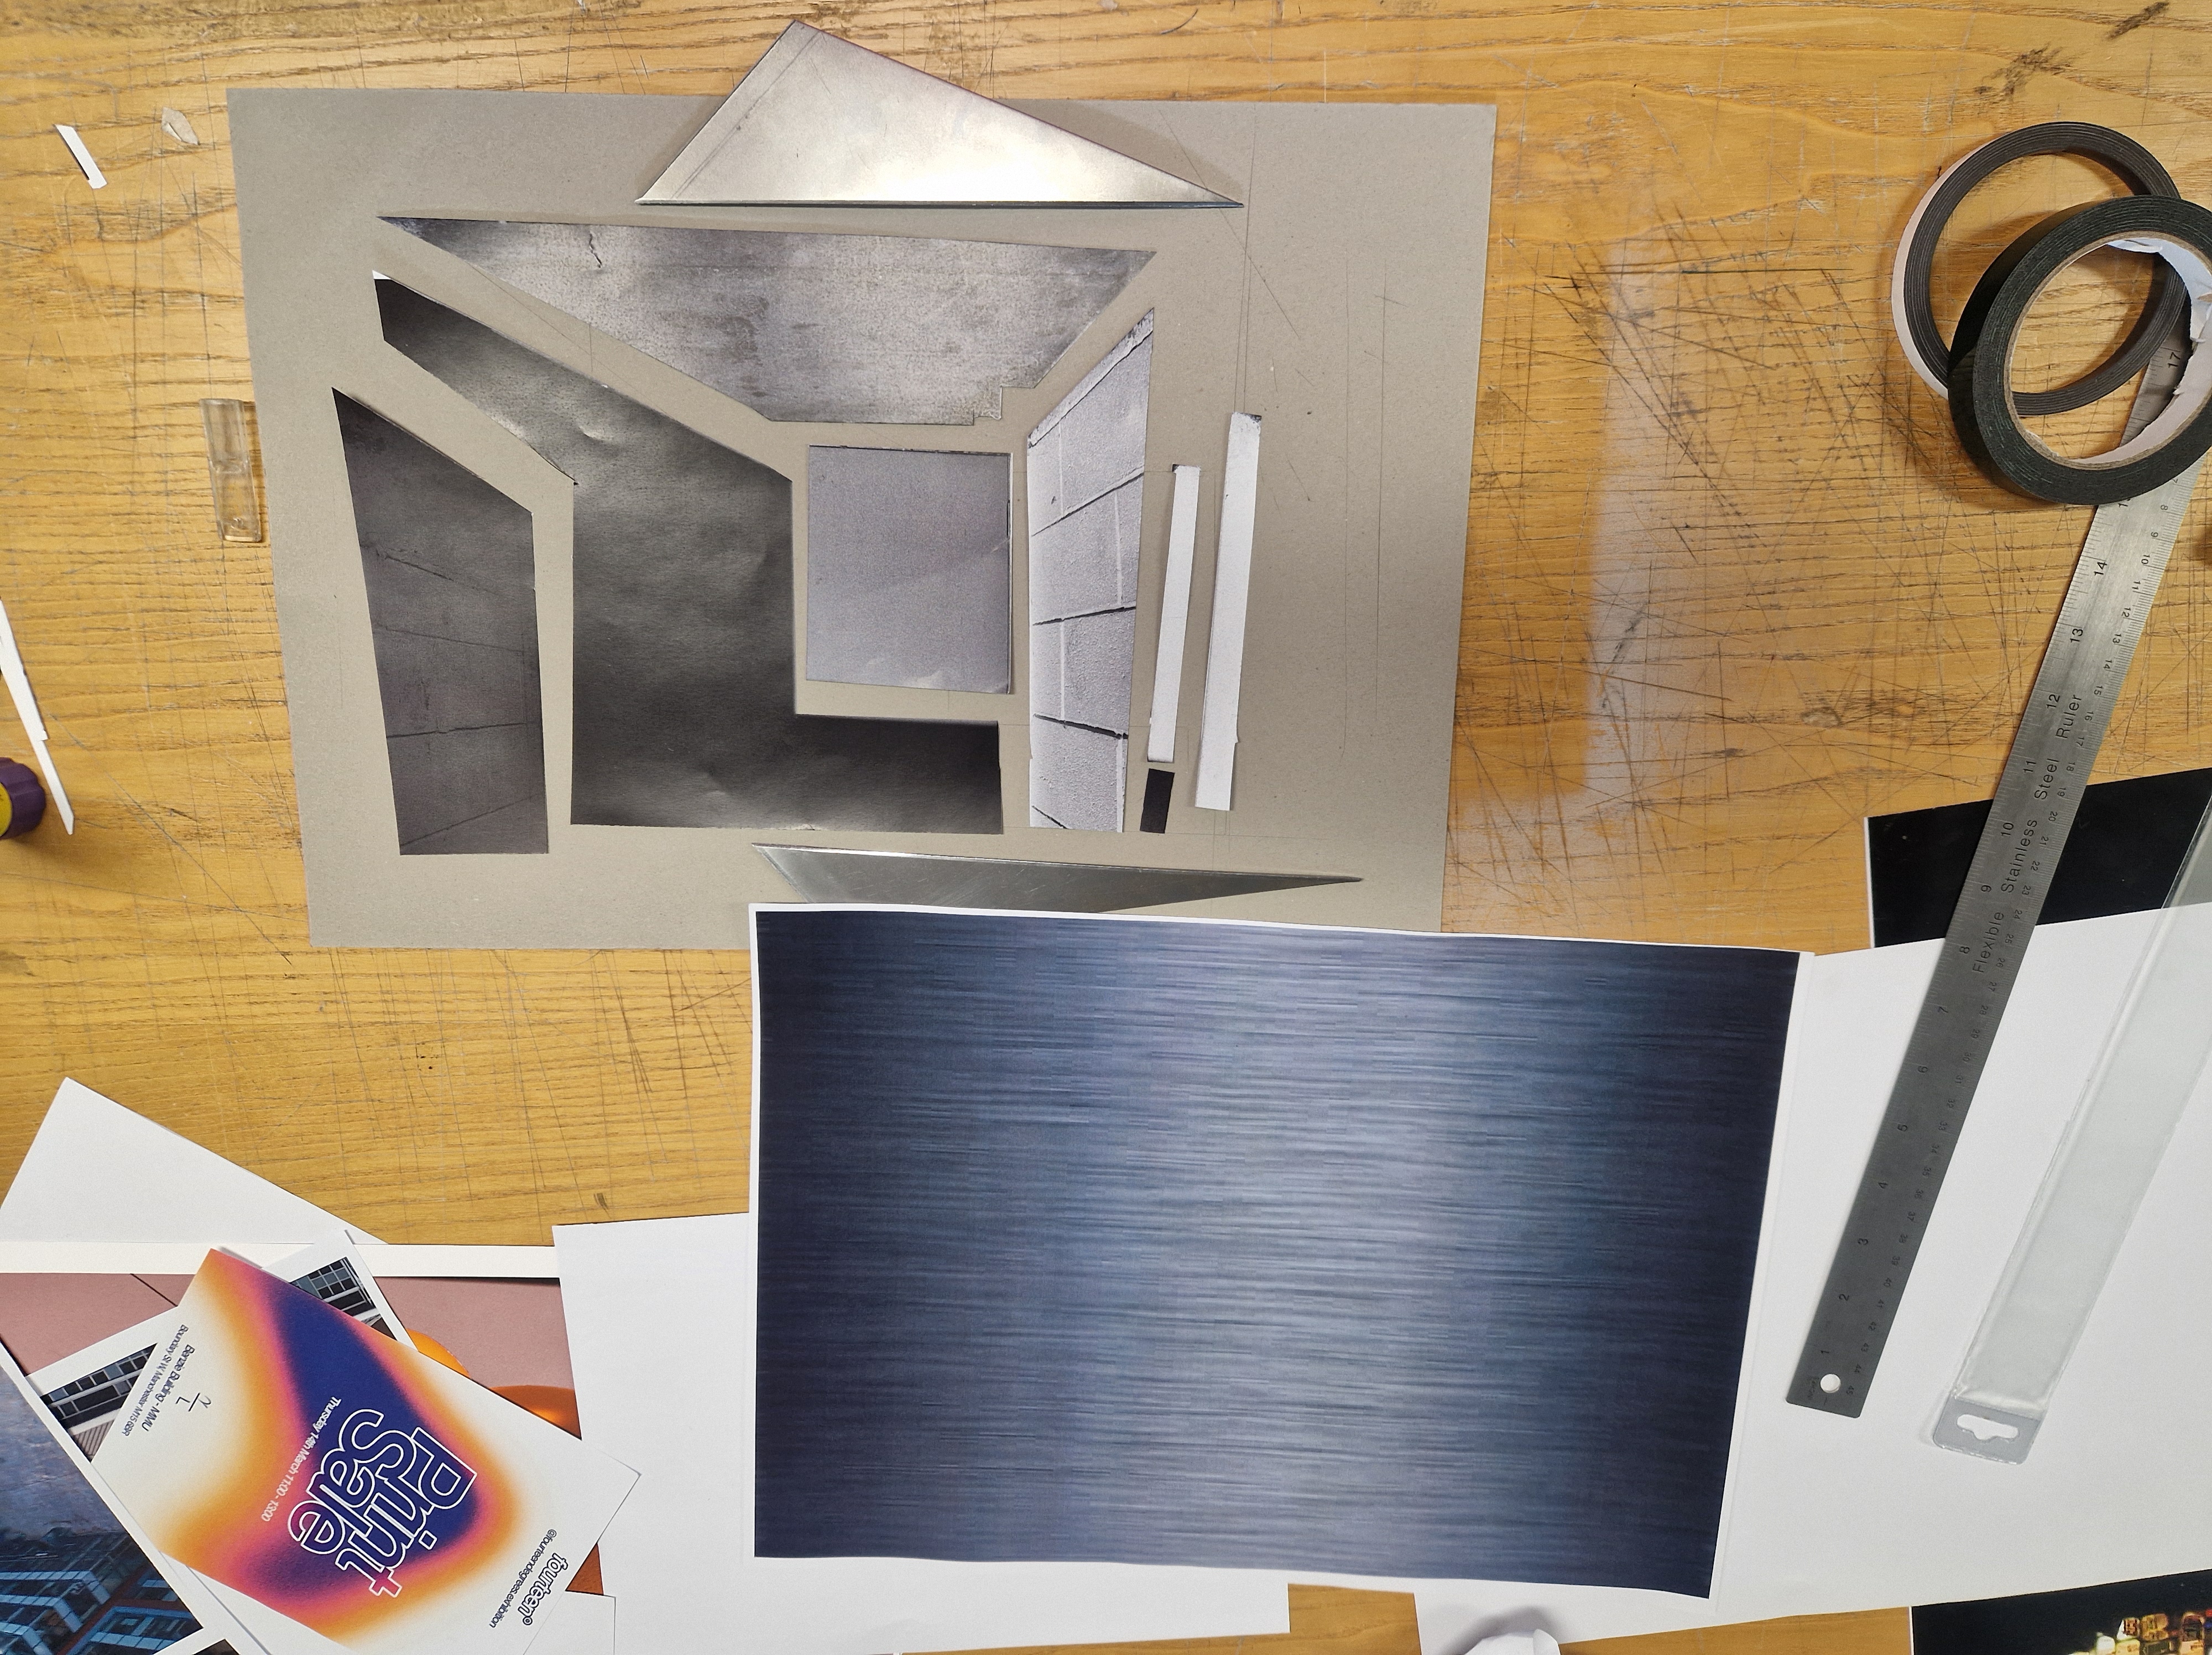
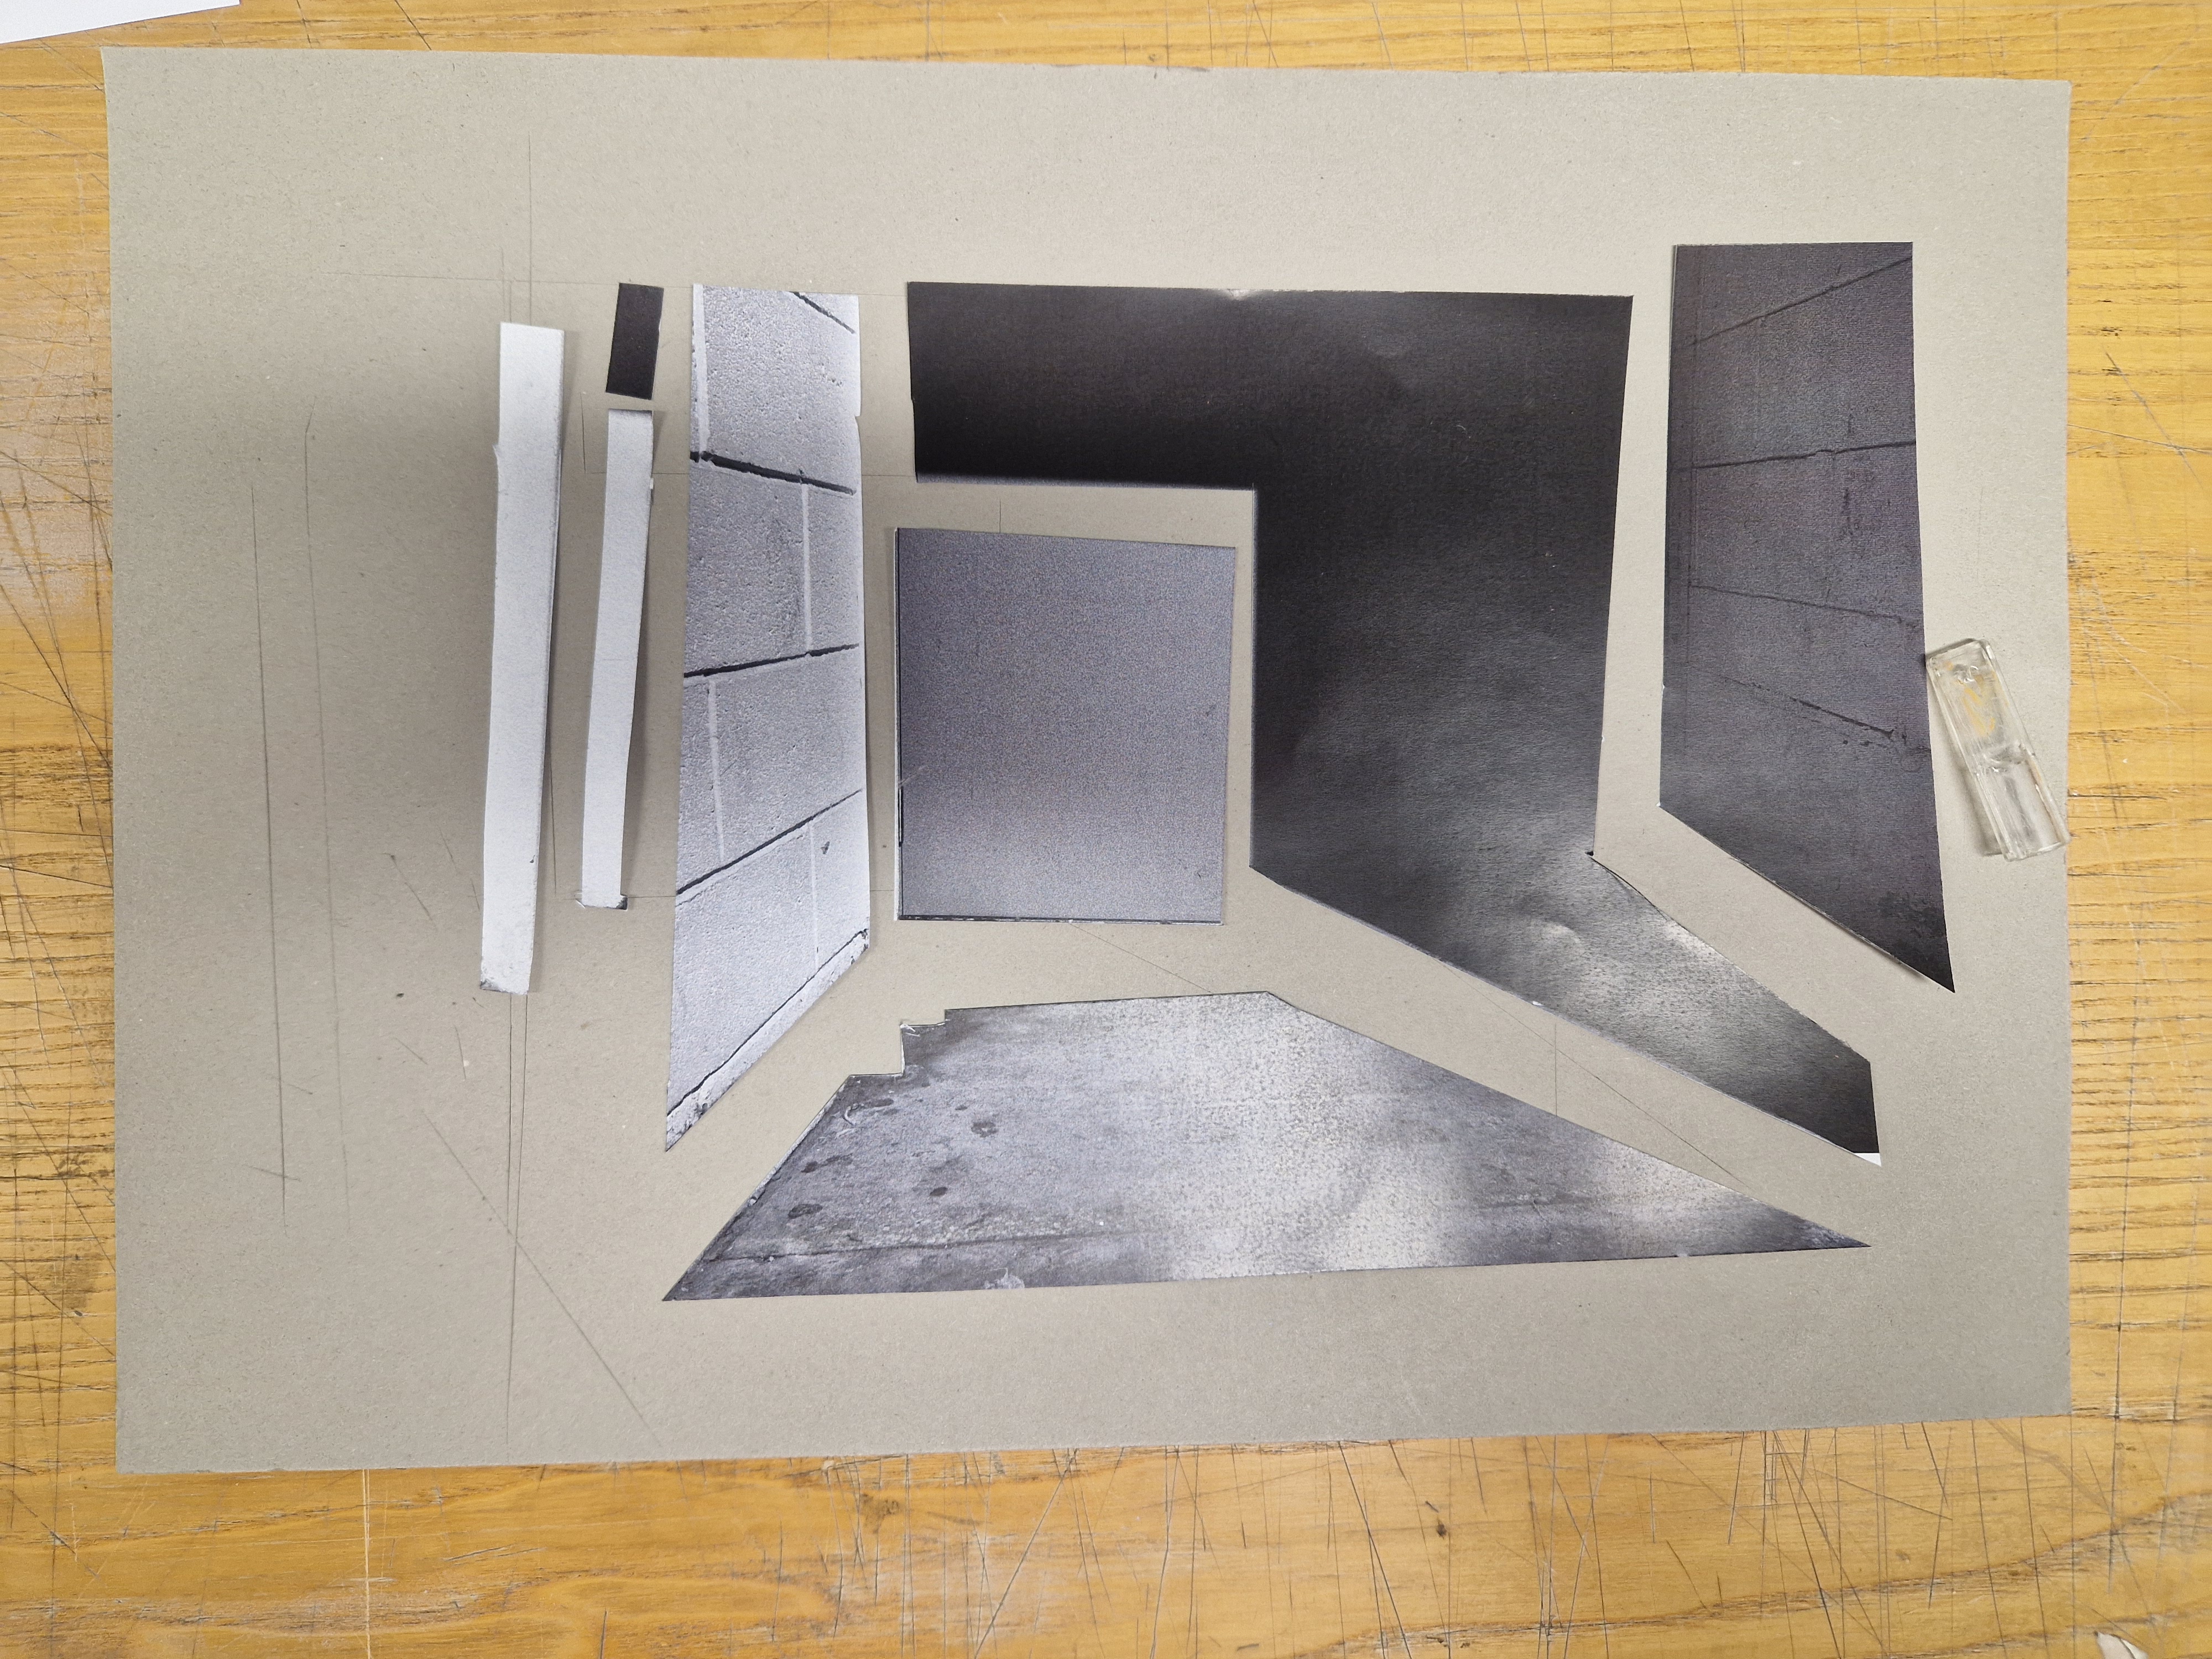
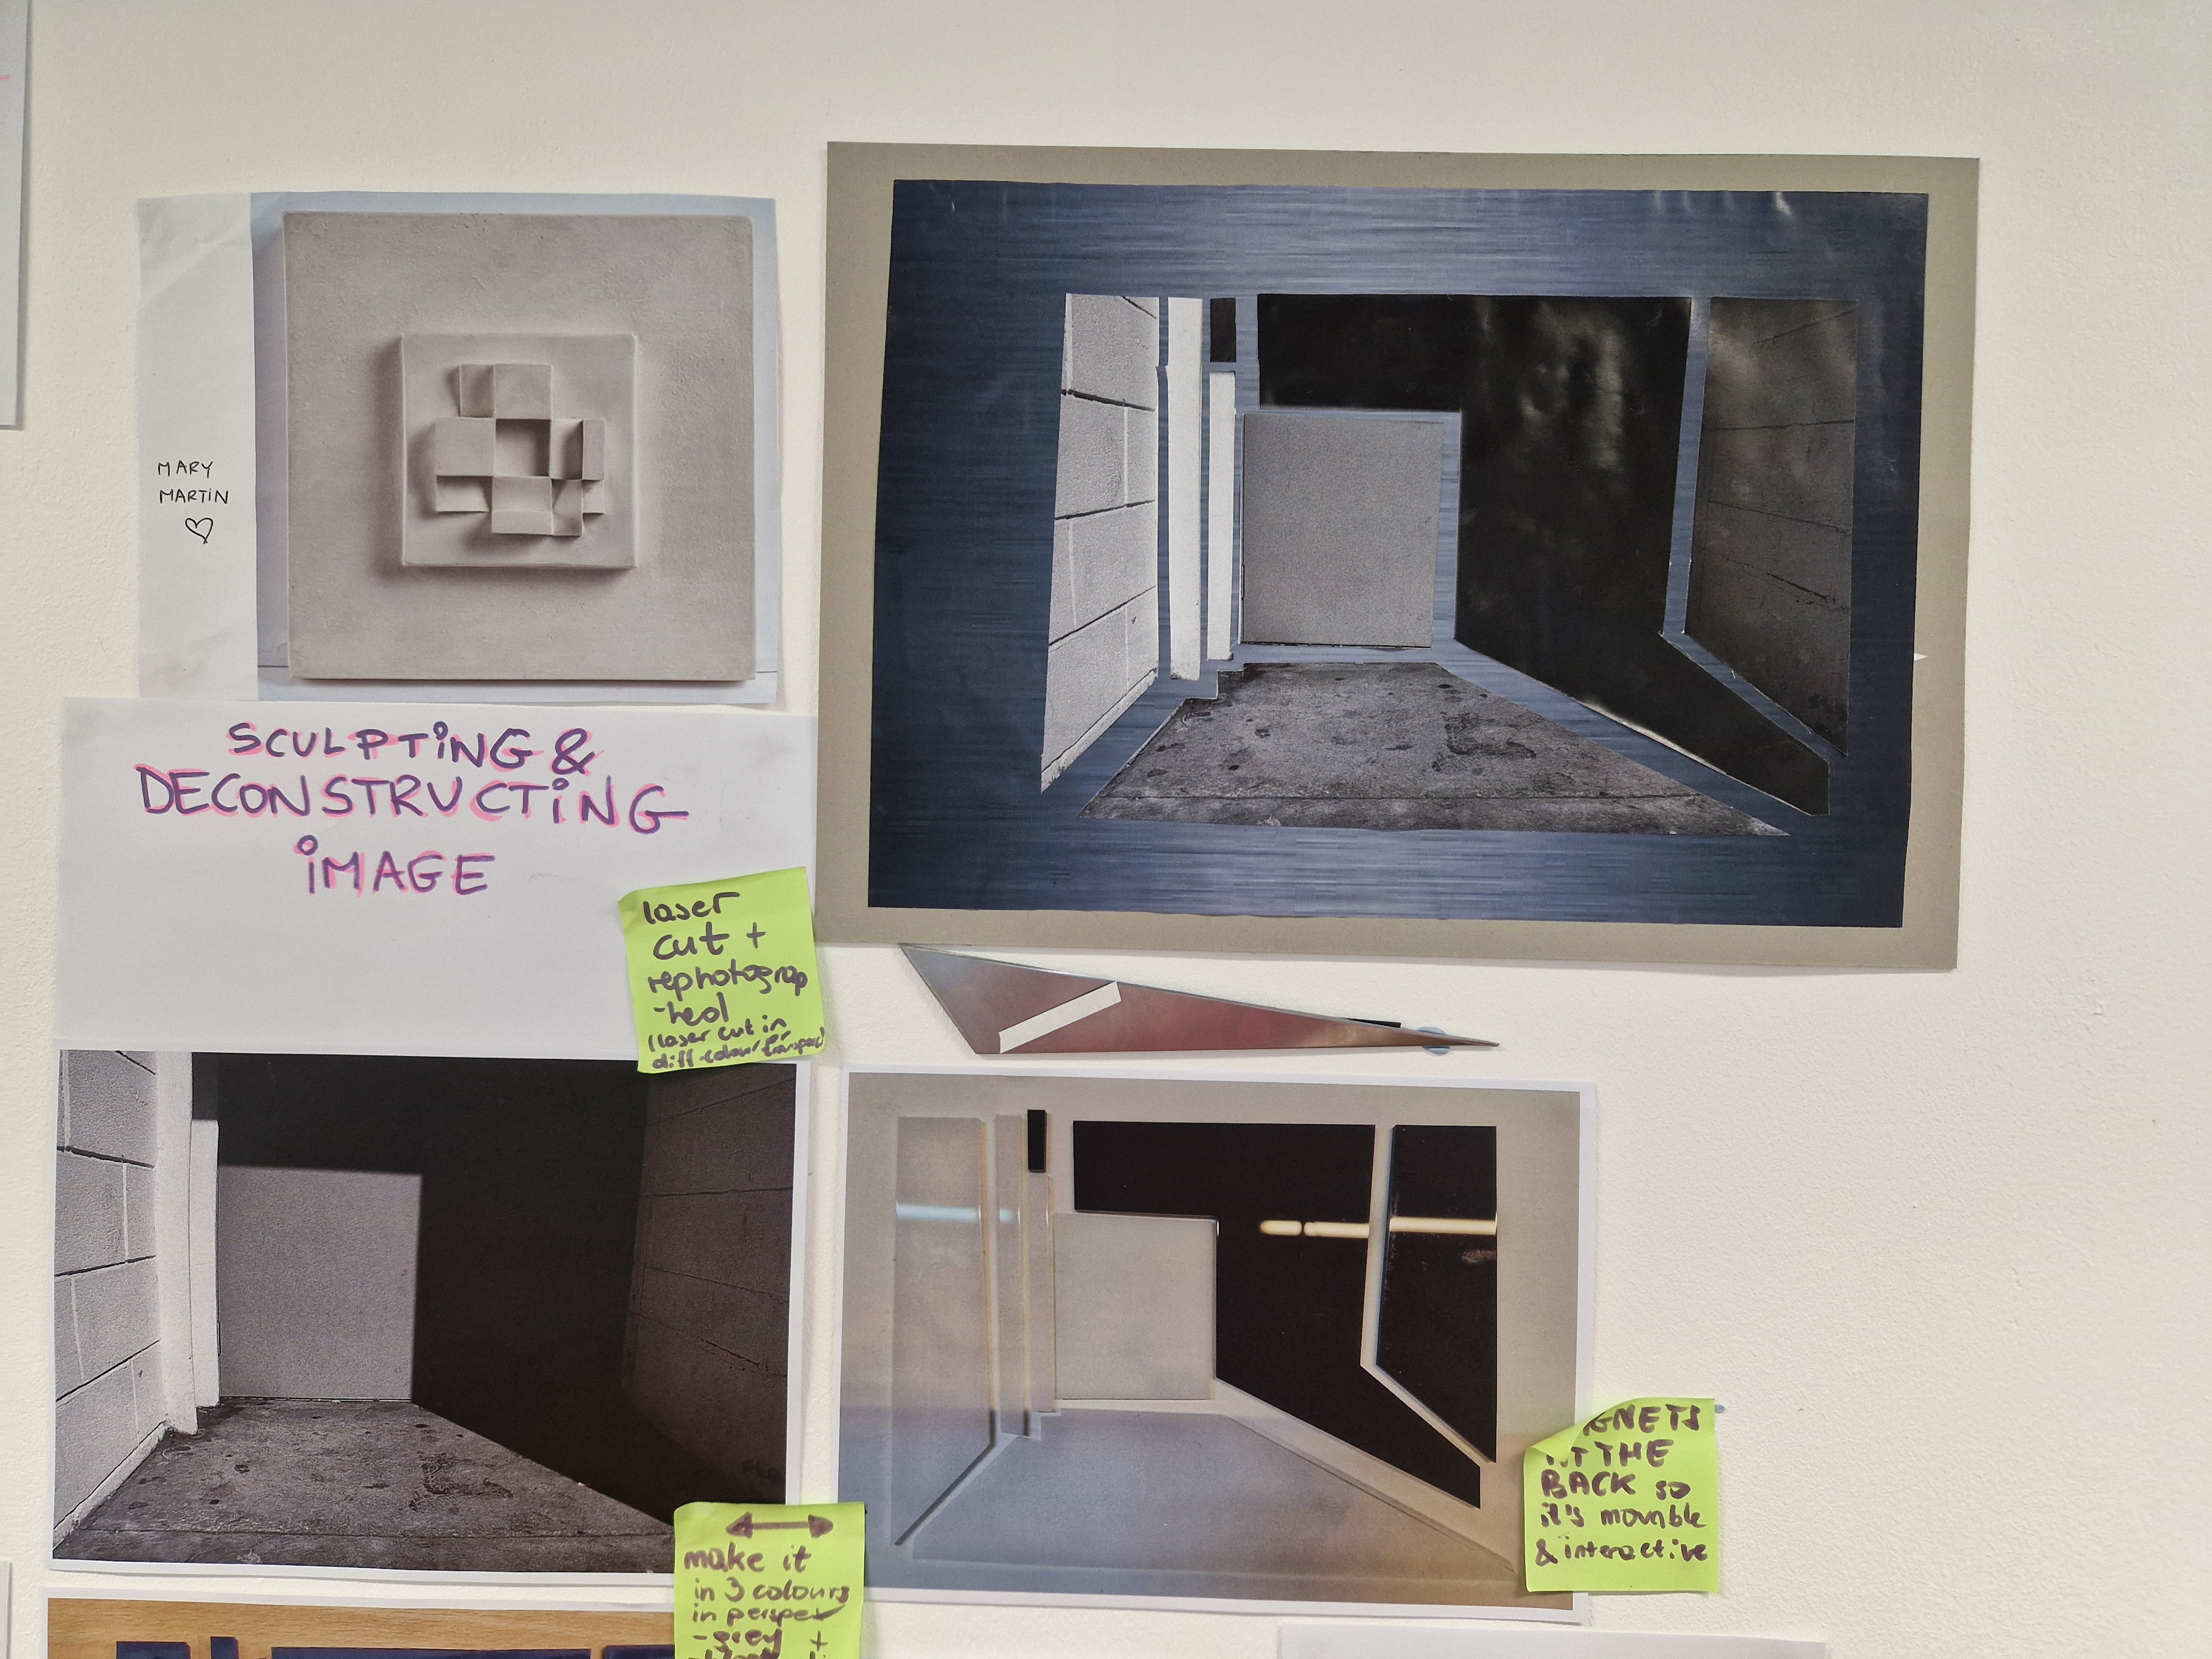
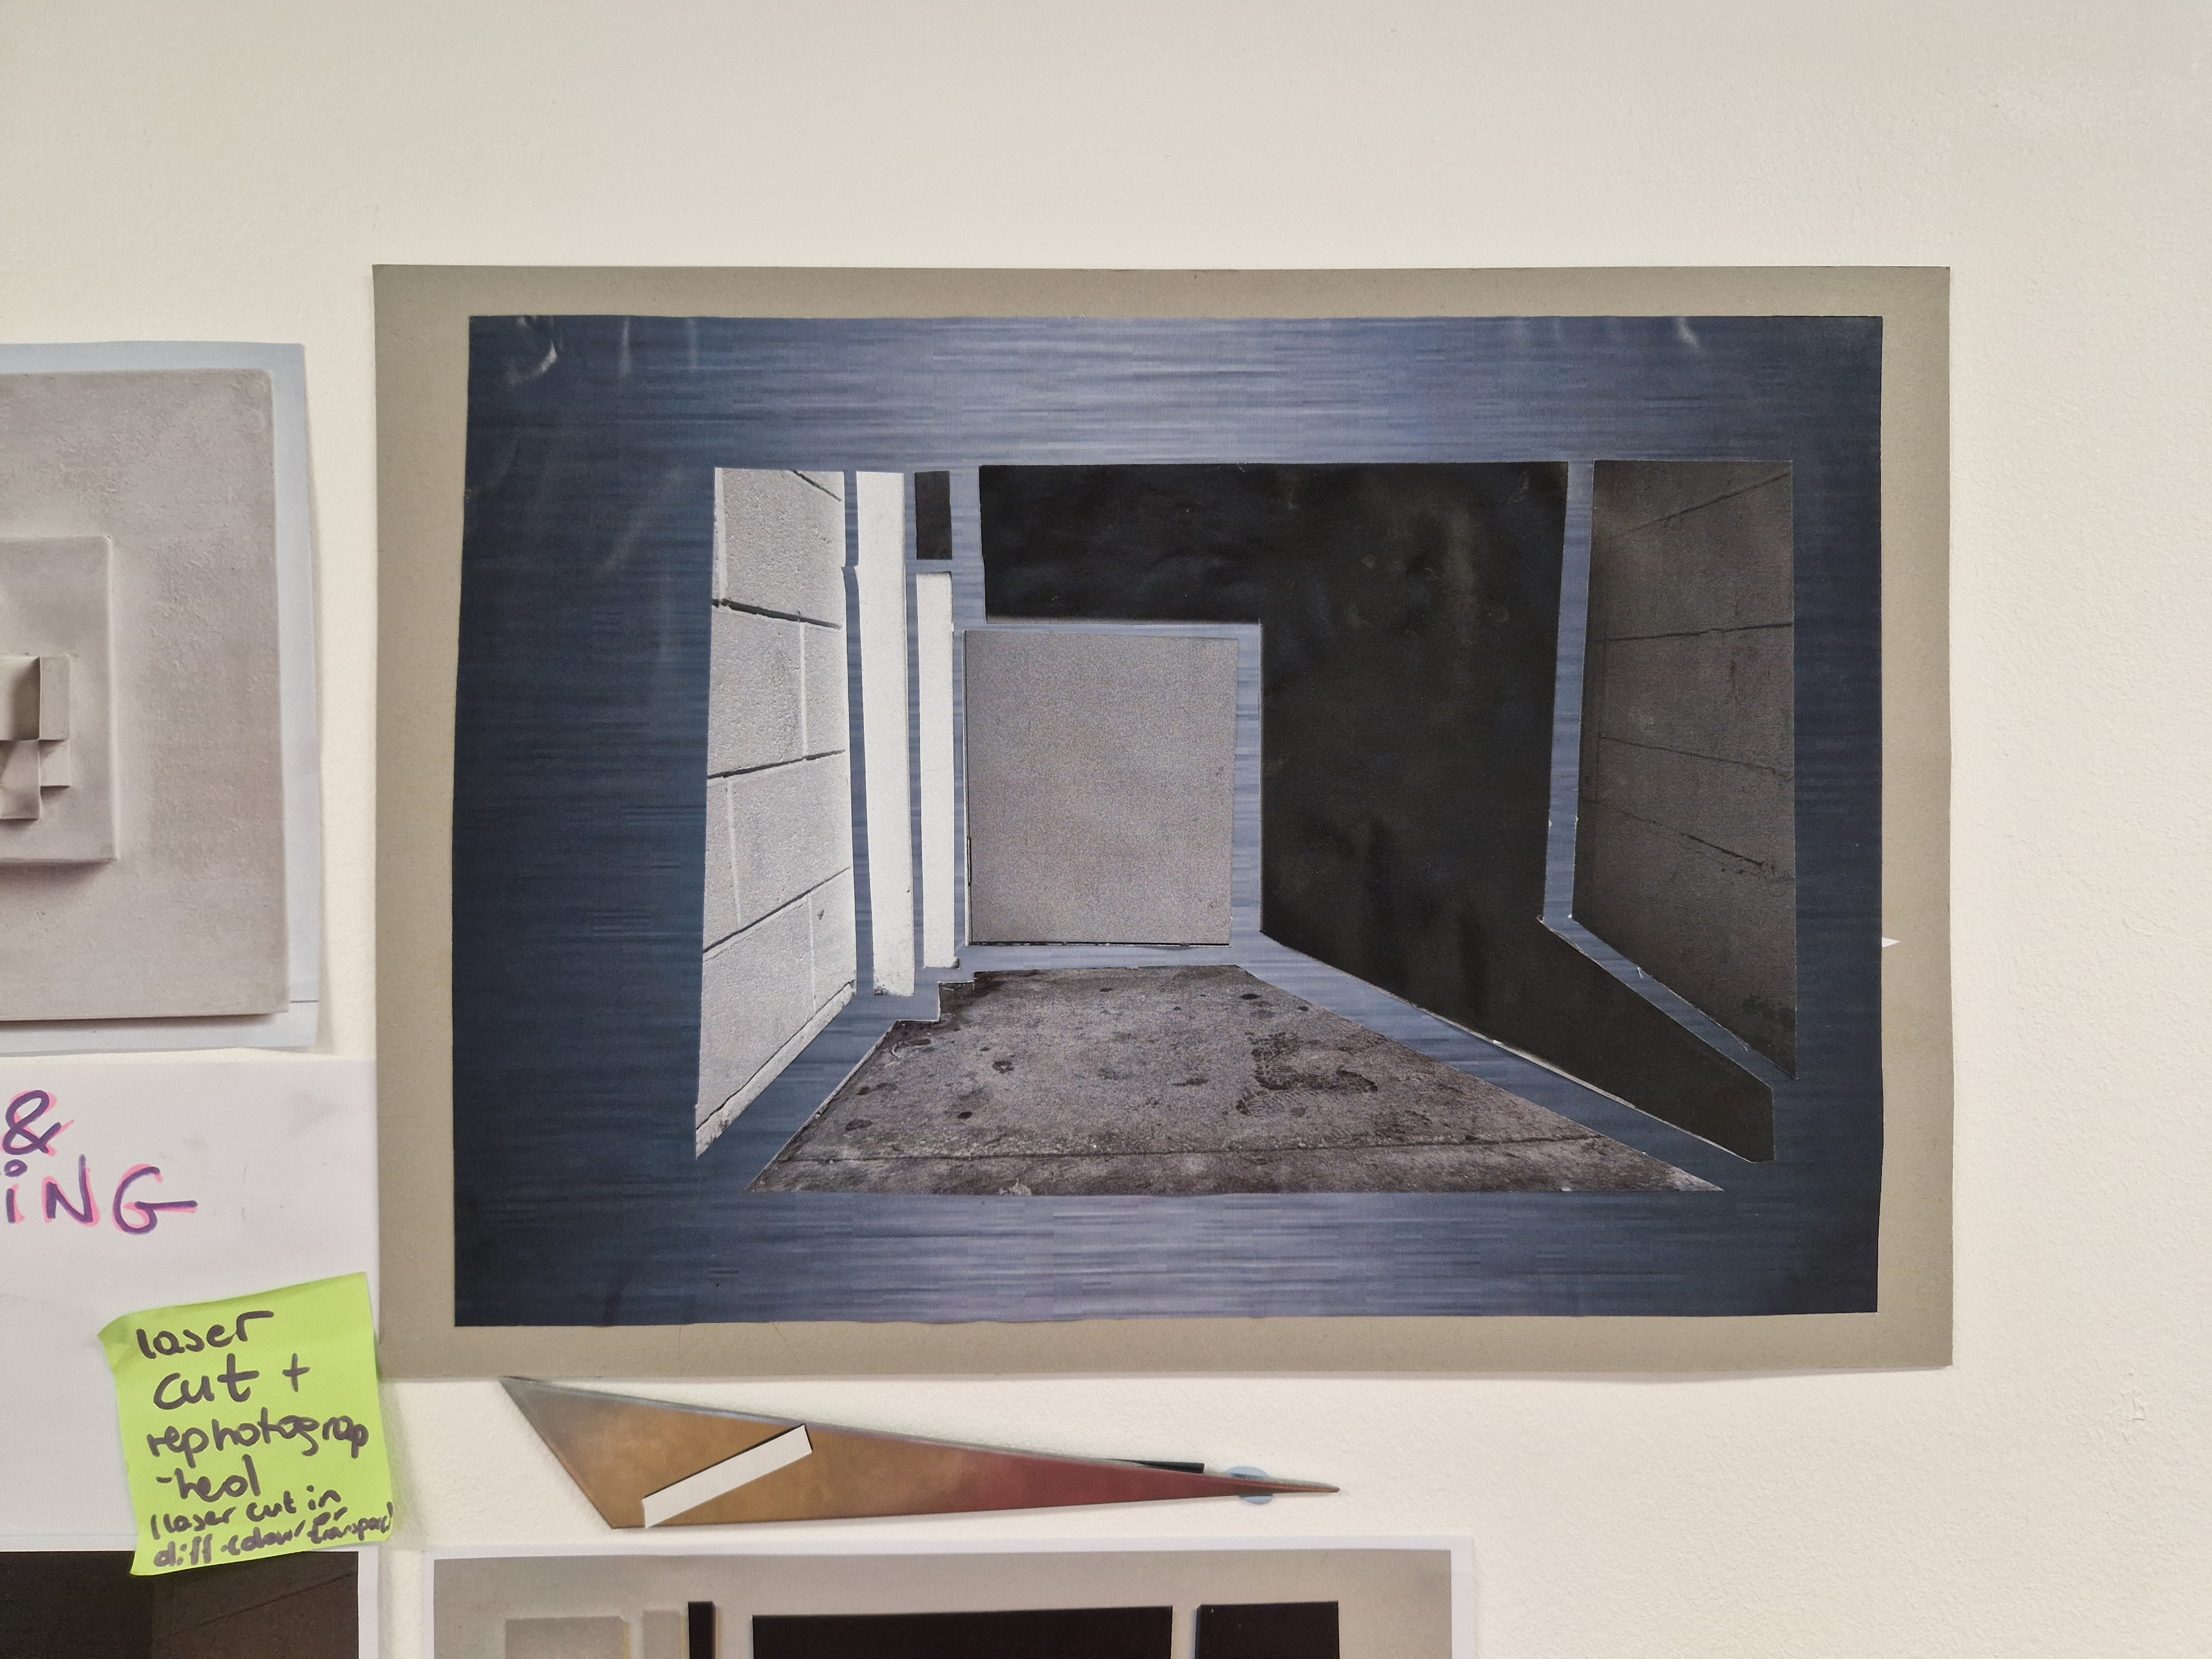
LASER CUTTING WORKING FROM THIS IMAGE
After the workshop where we used a laser cutter, I became fascinated with the possibilities of this method and began developing a laser-cut sculpture as a part of my project and portfolio, developing my concept of photography as a sculpture.
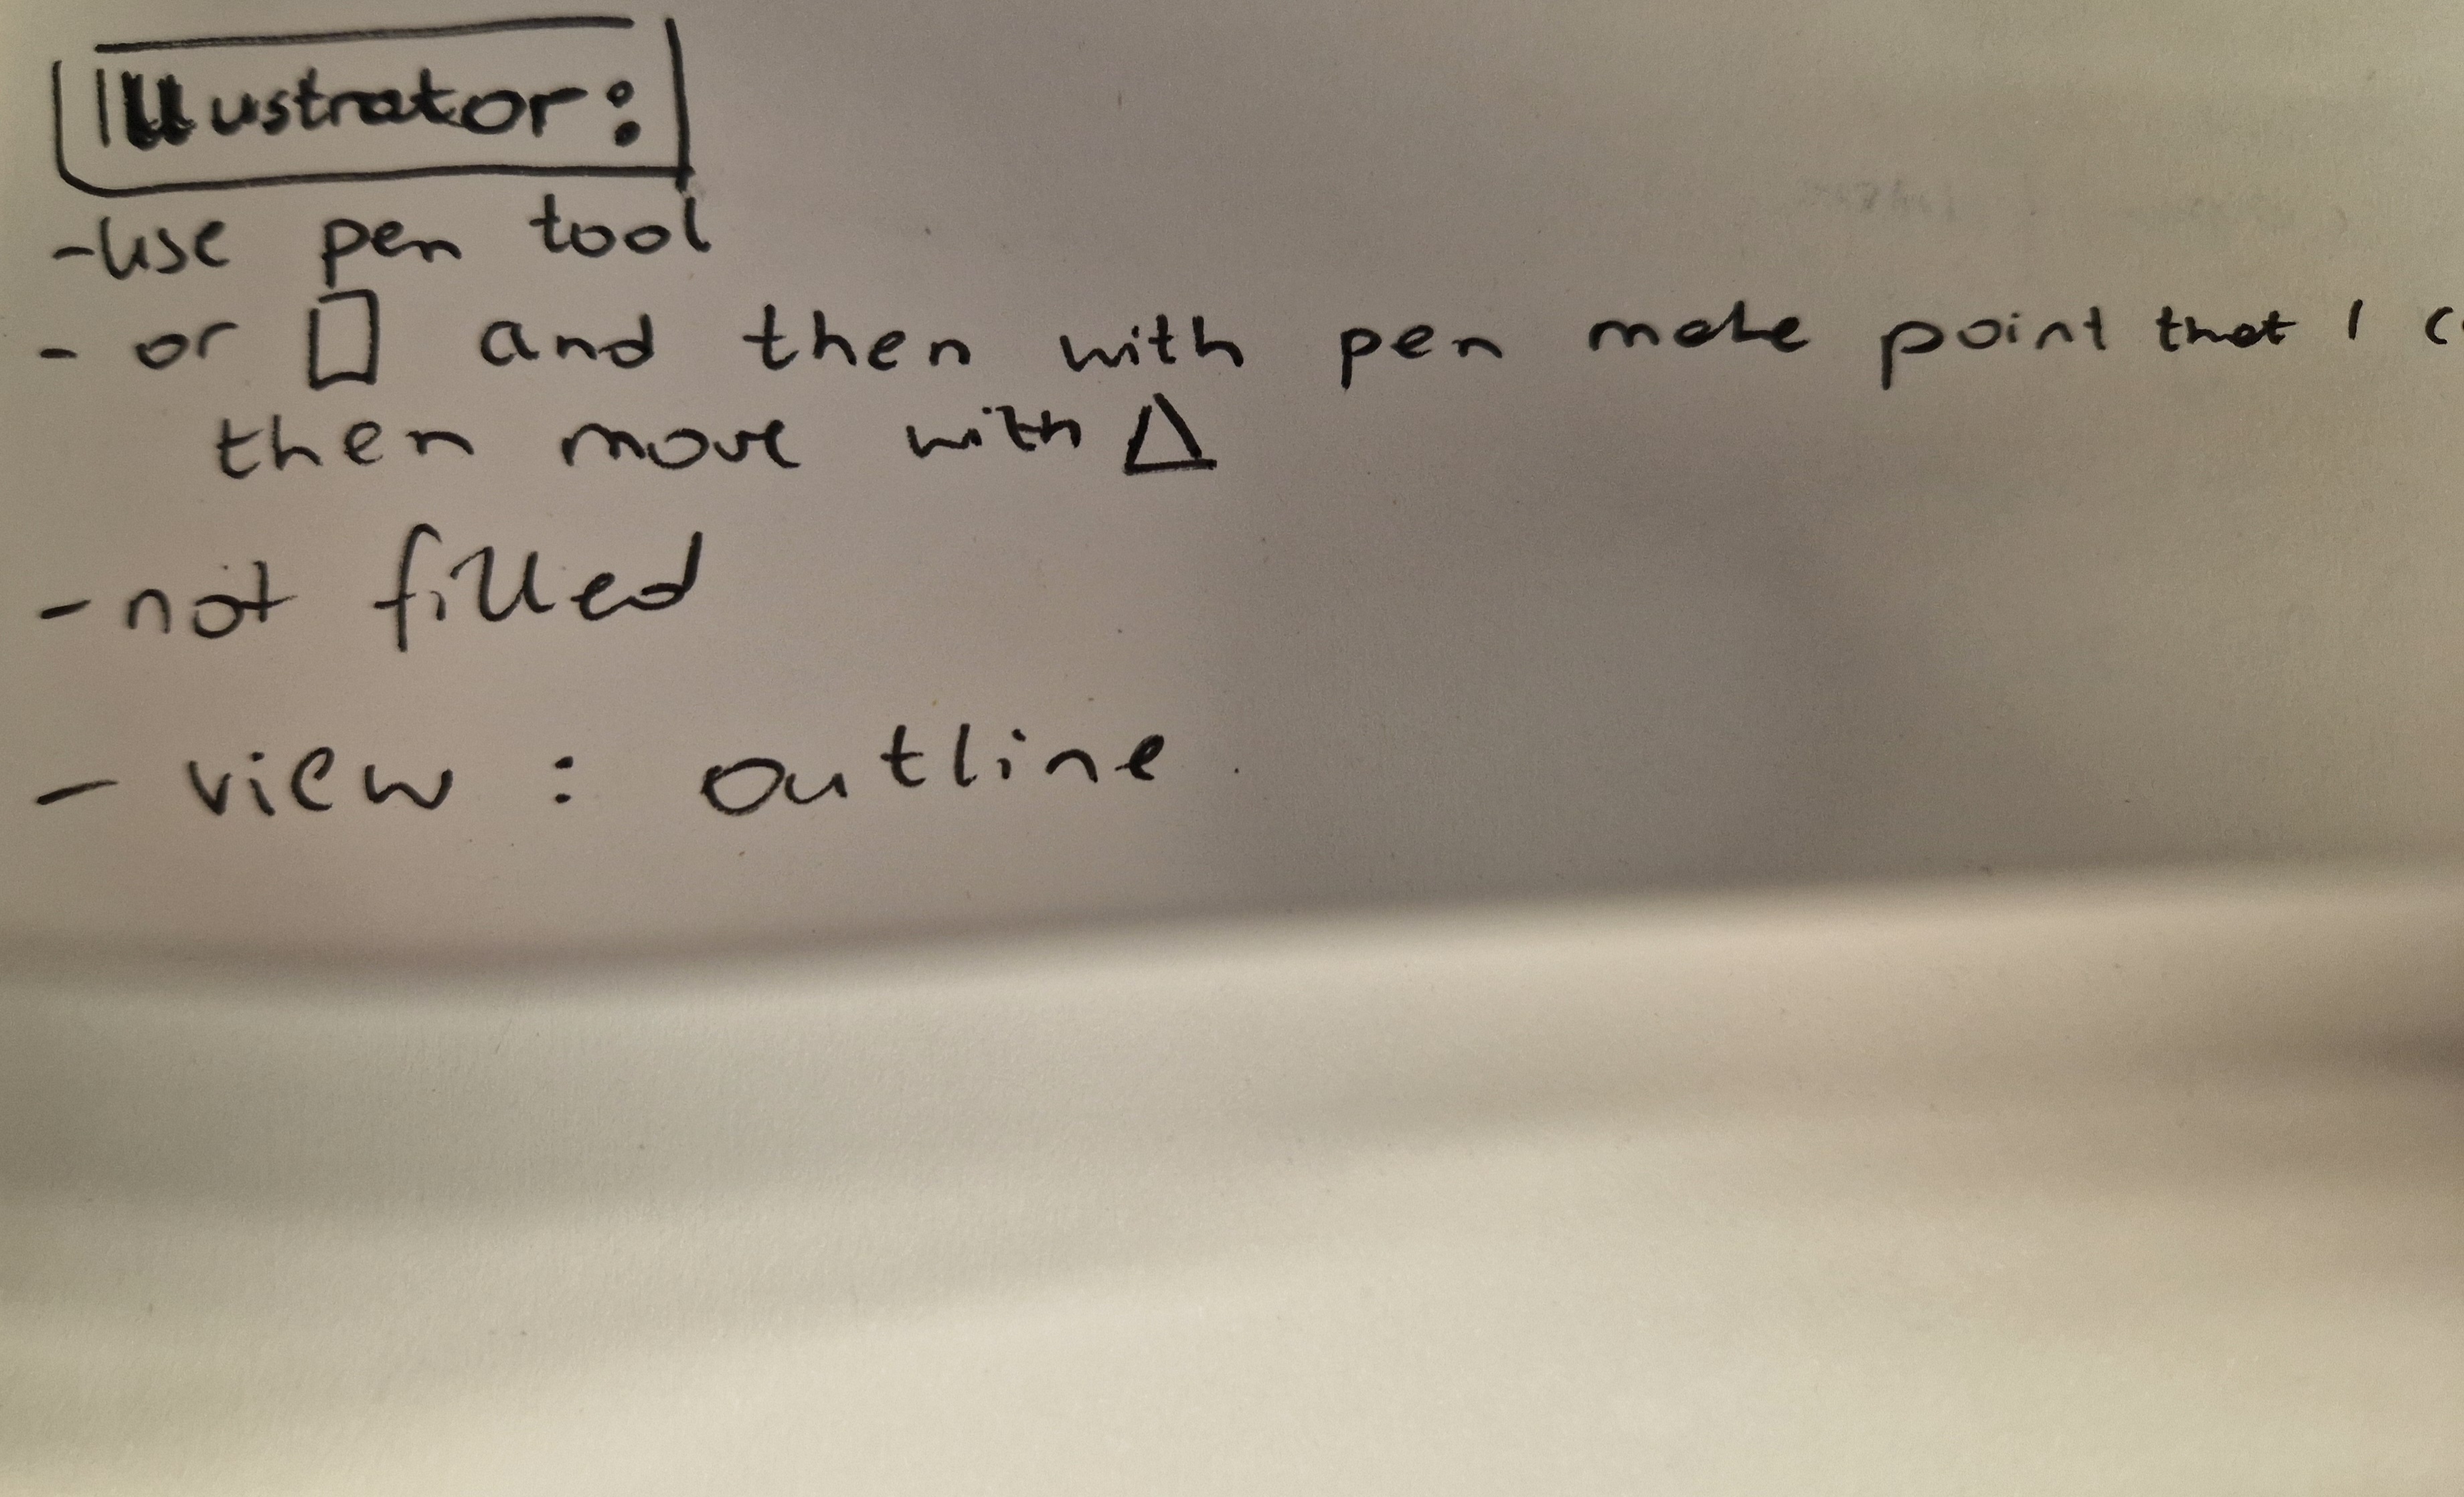
I redid the design I originally worked on in David’s workshop in Illustrator and headed to the laser cut workshop, where I printed two slightly different designs using MDF and Perspex in black and white, testing both materials and sizes.


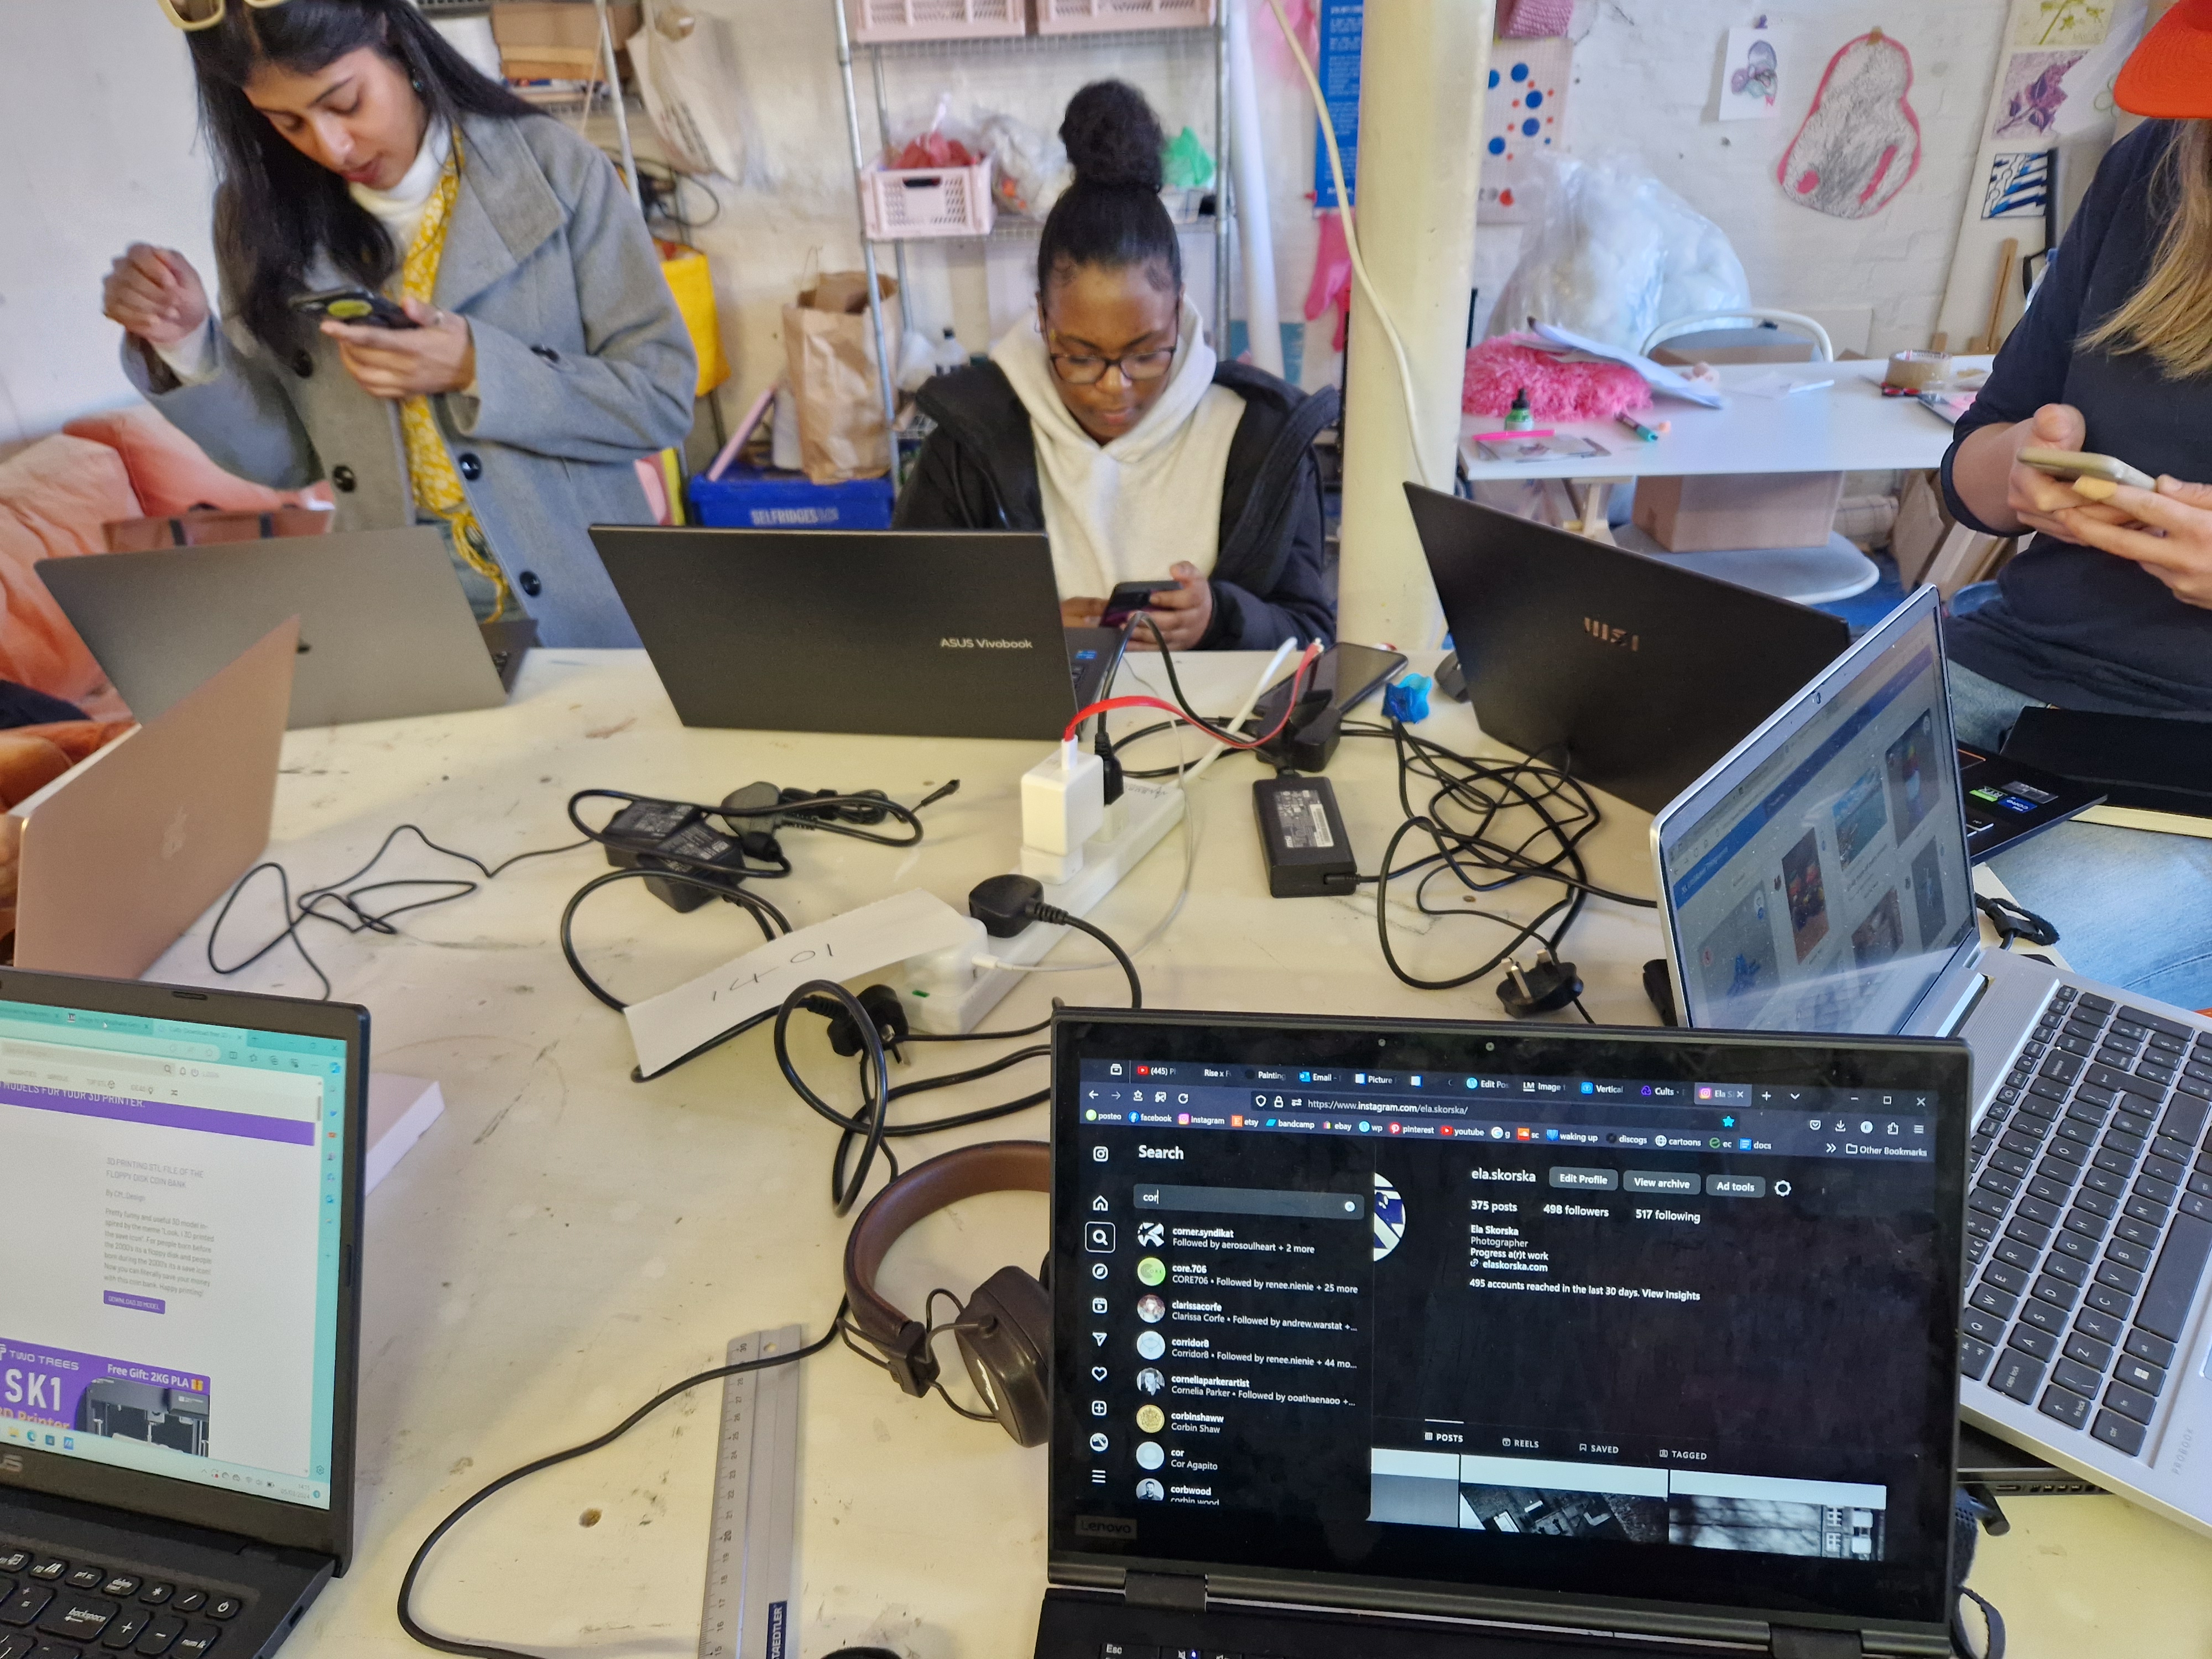
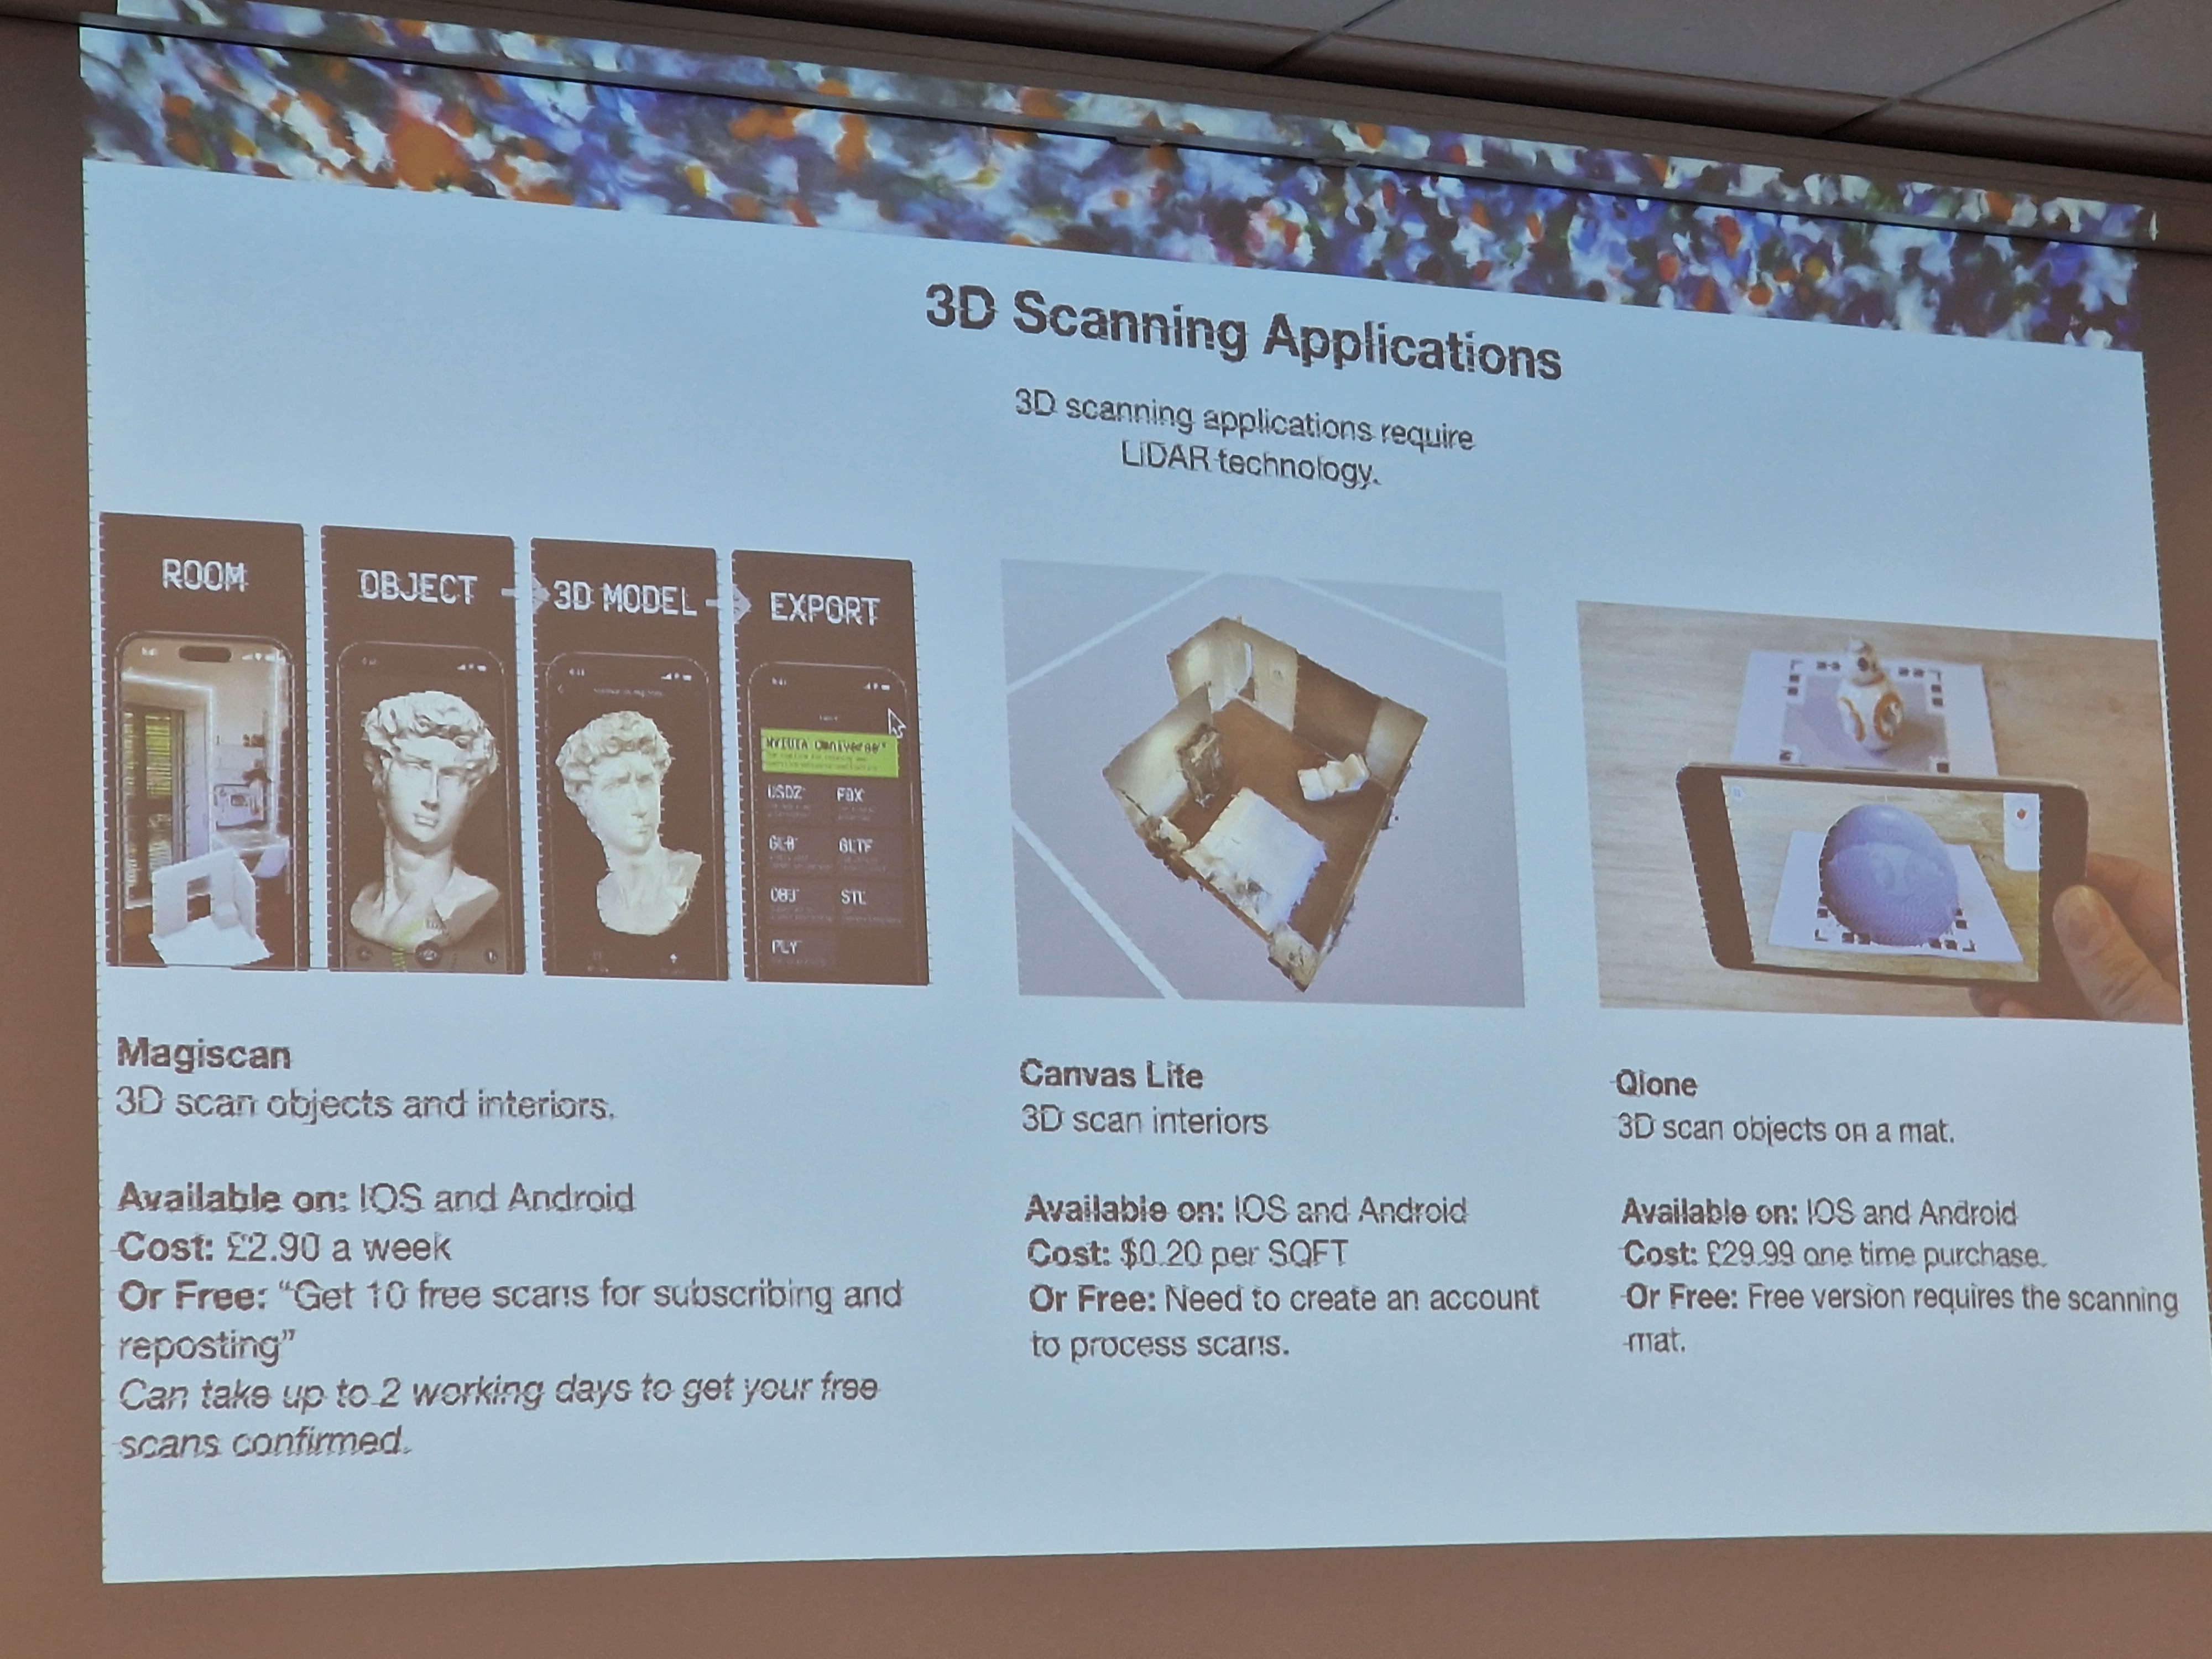
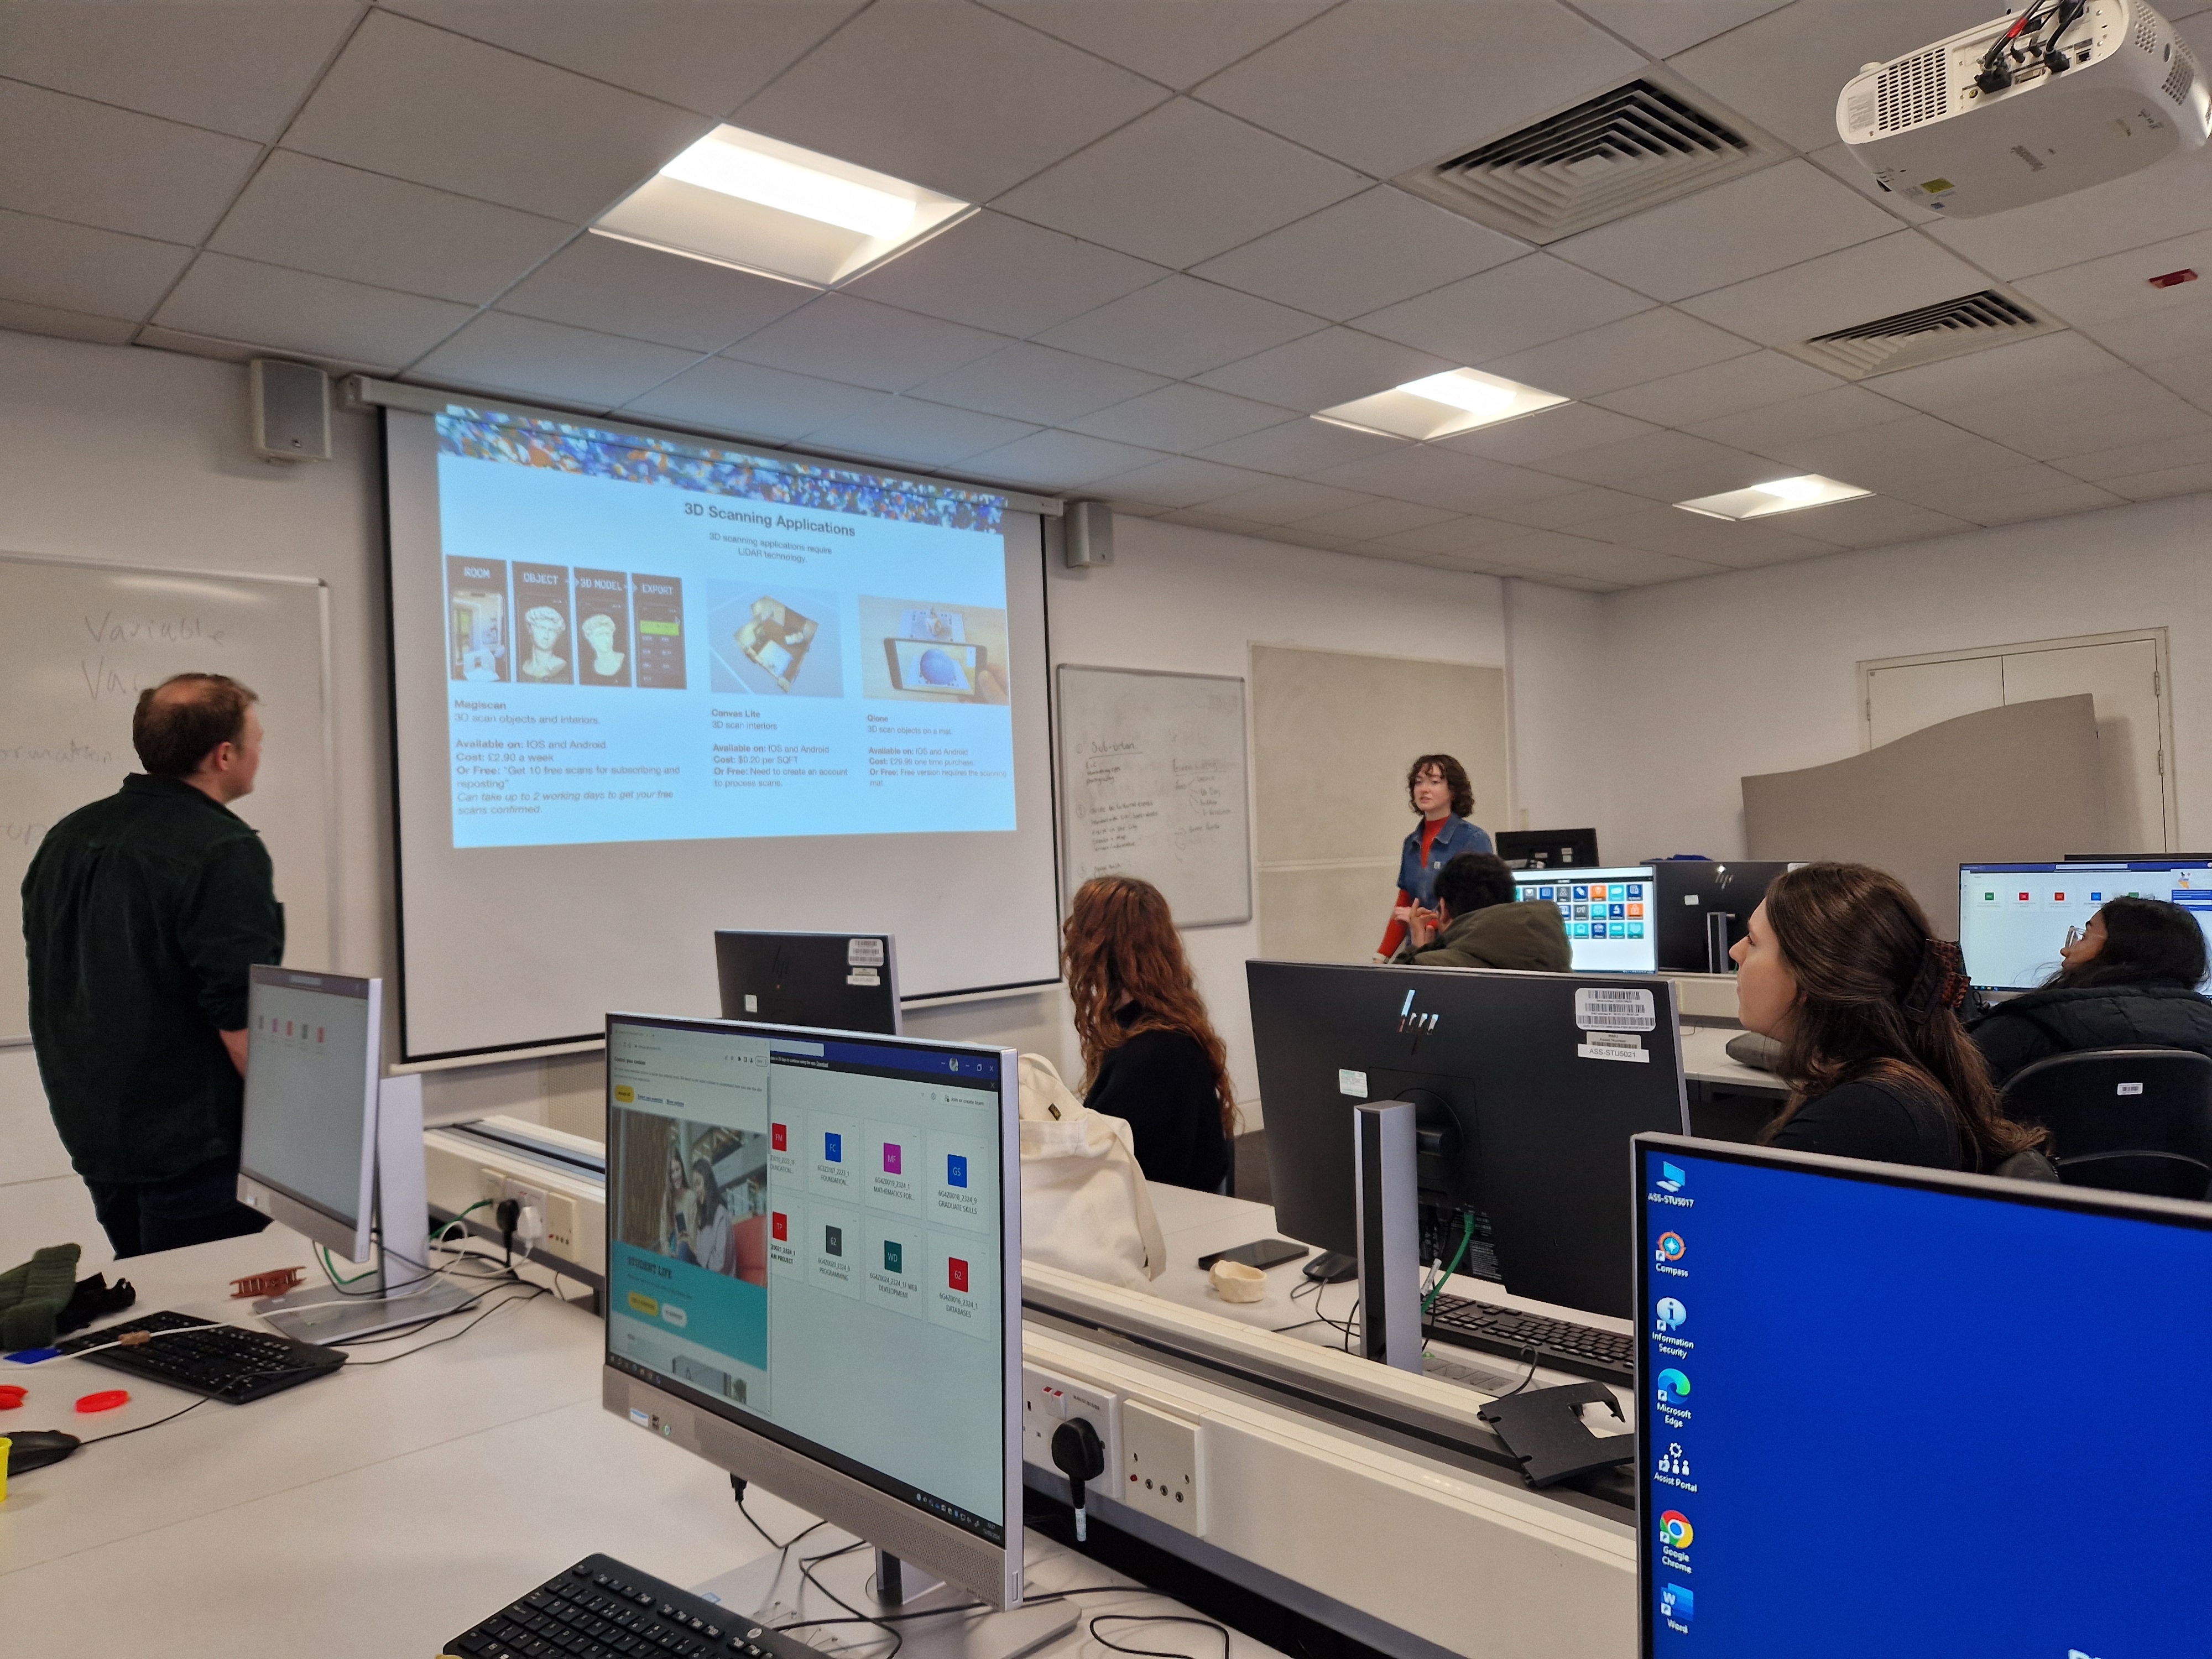
3D PRINTING COURSE AT ISLINGTON MILL
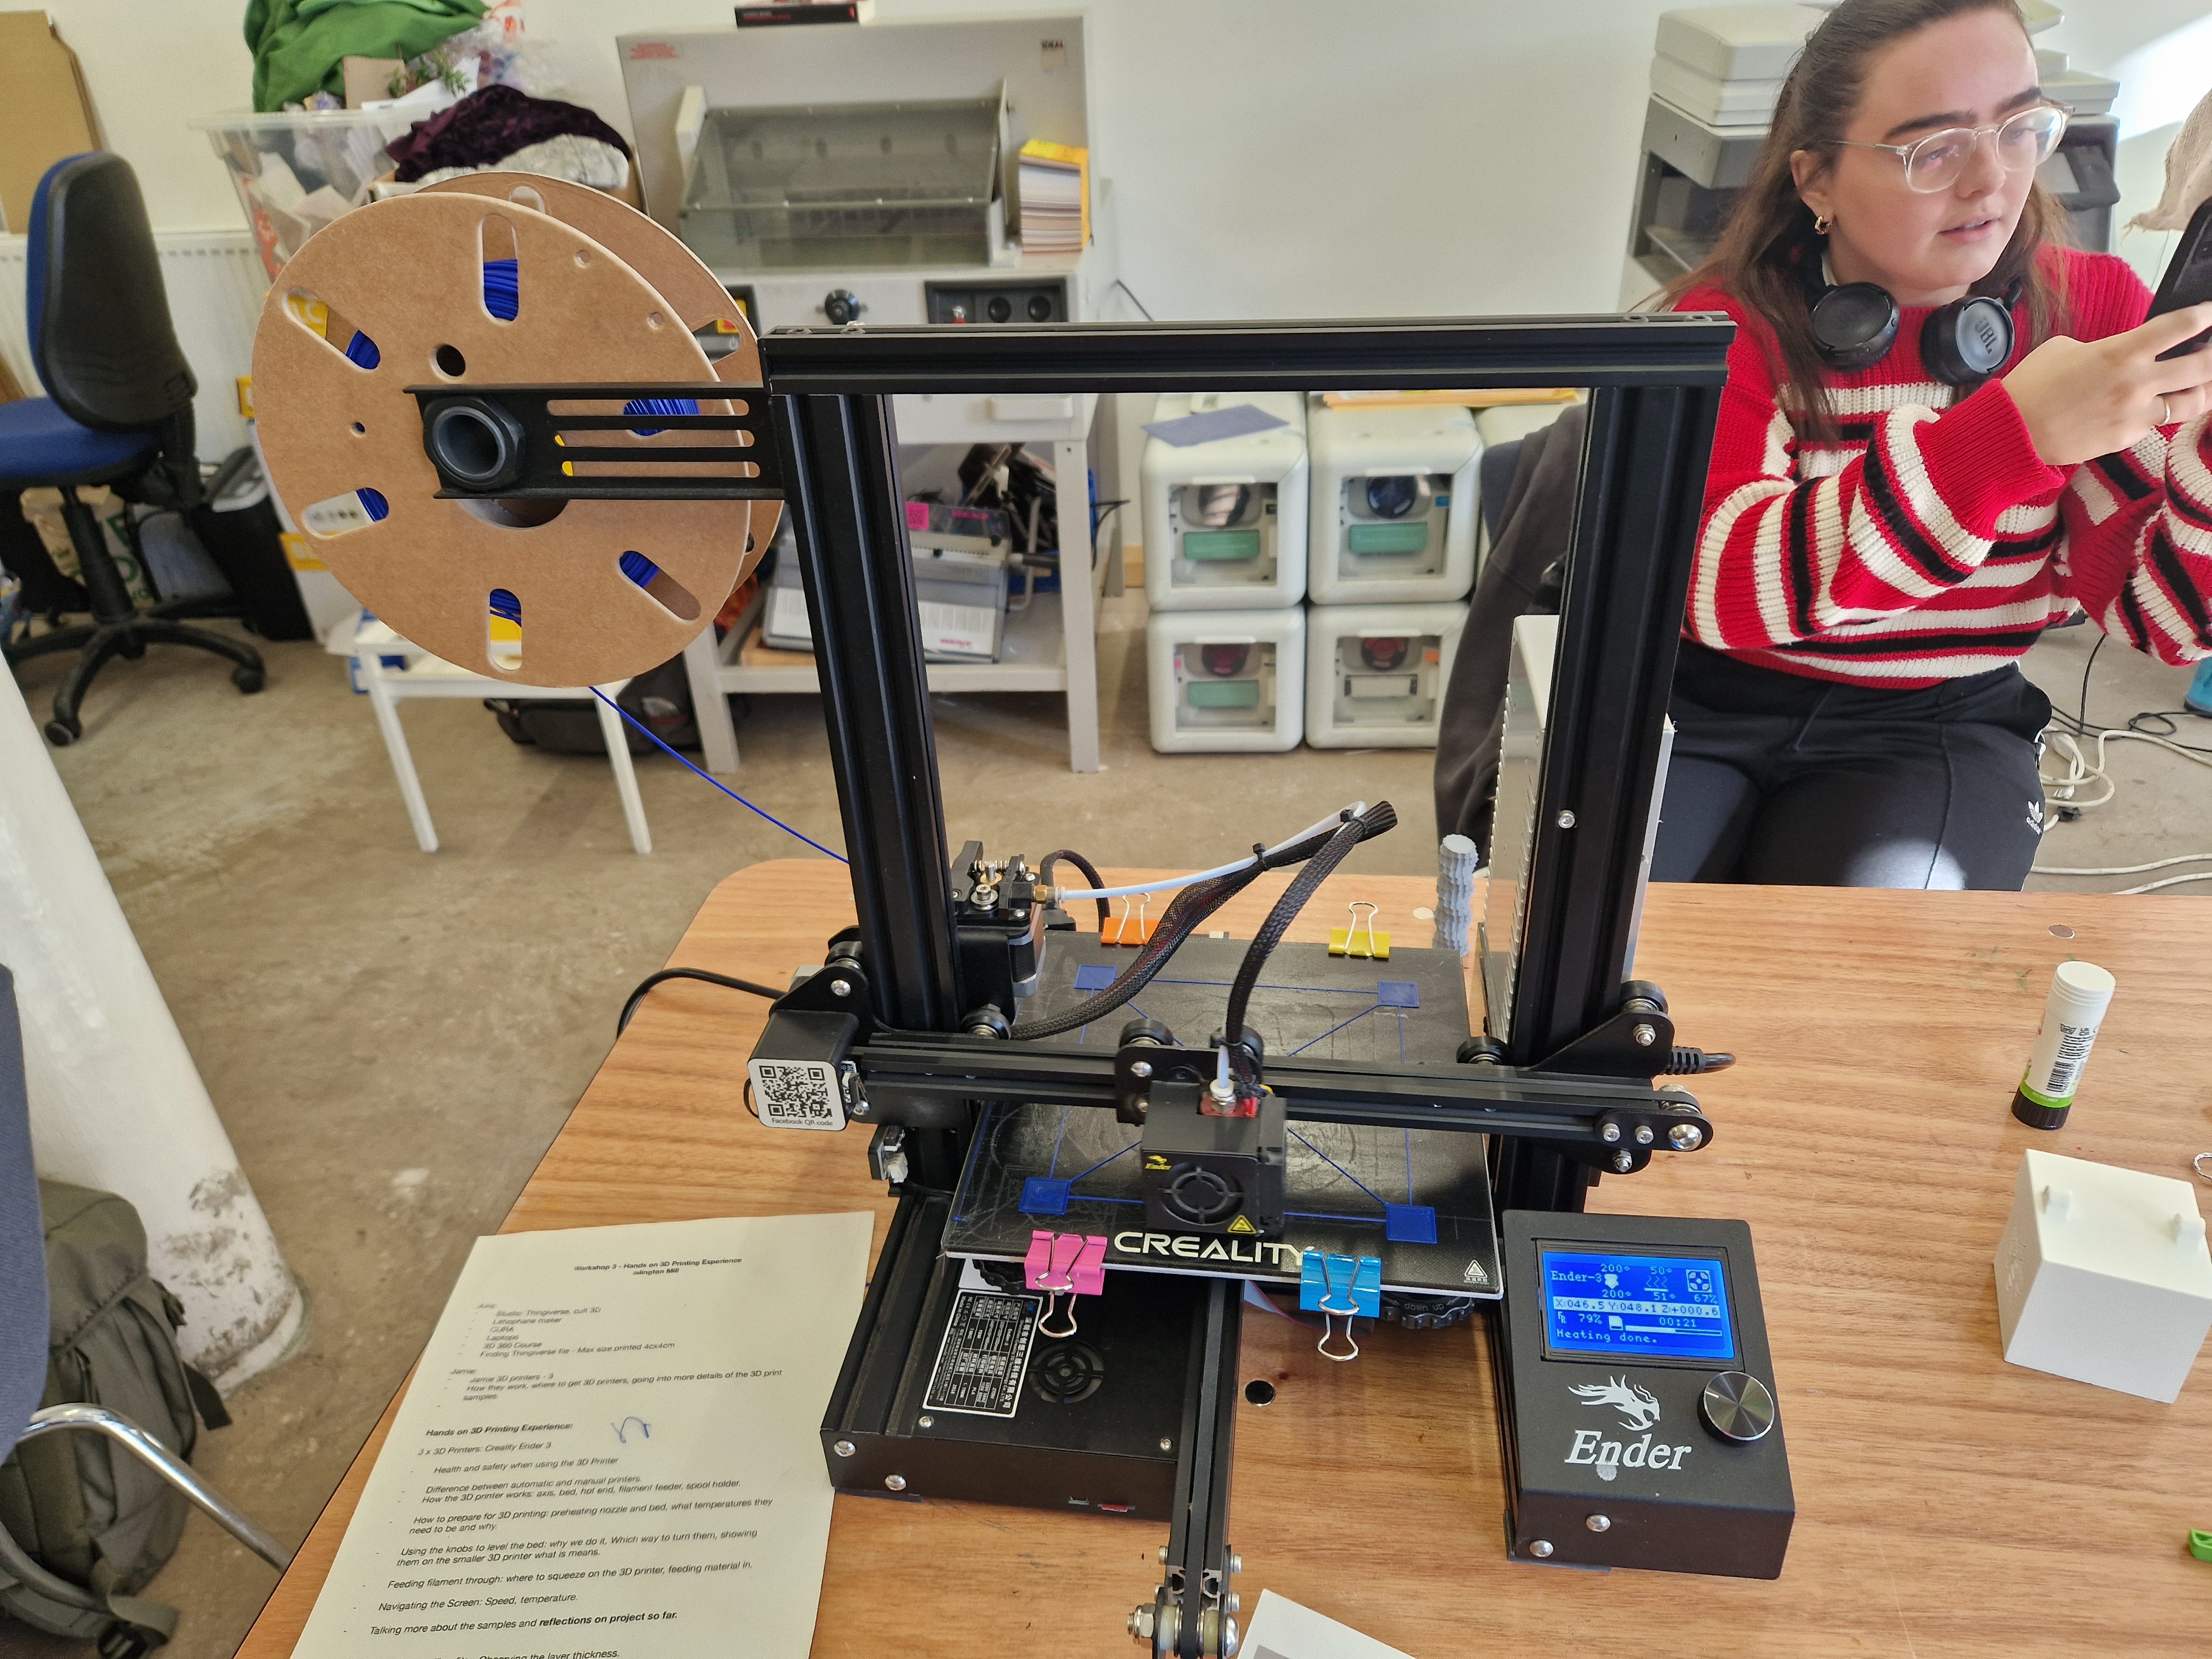
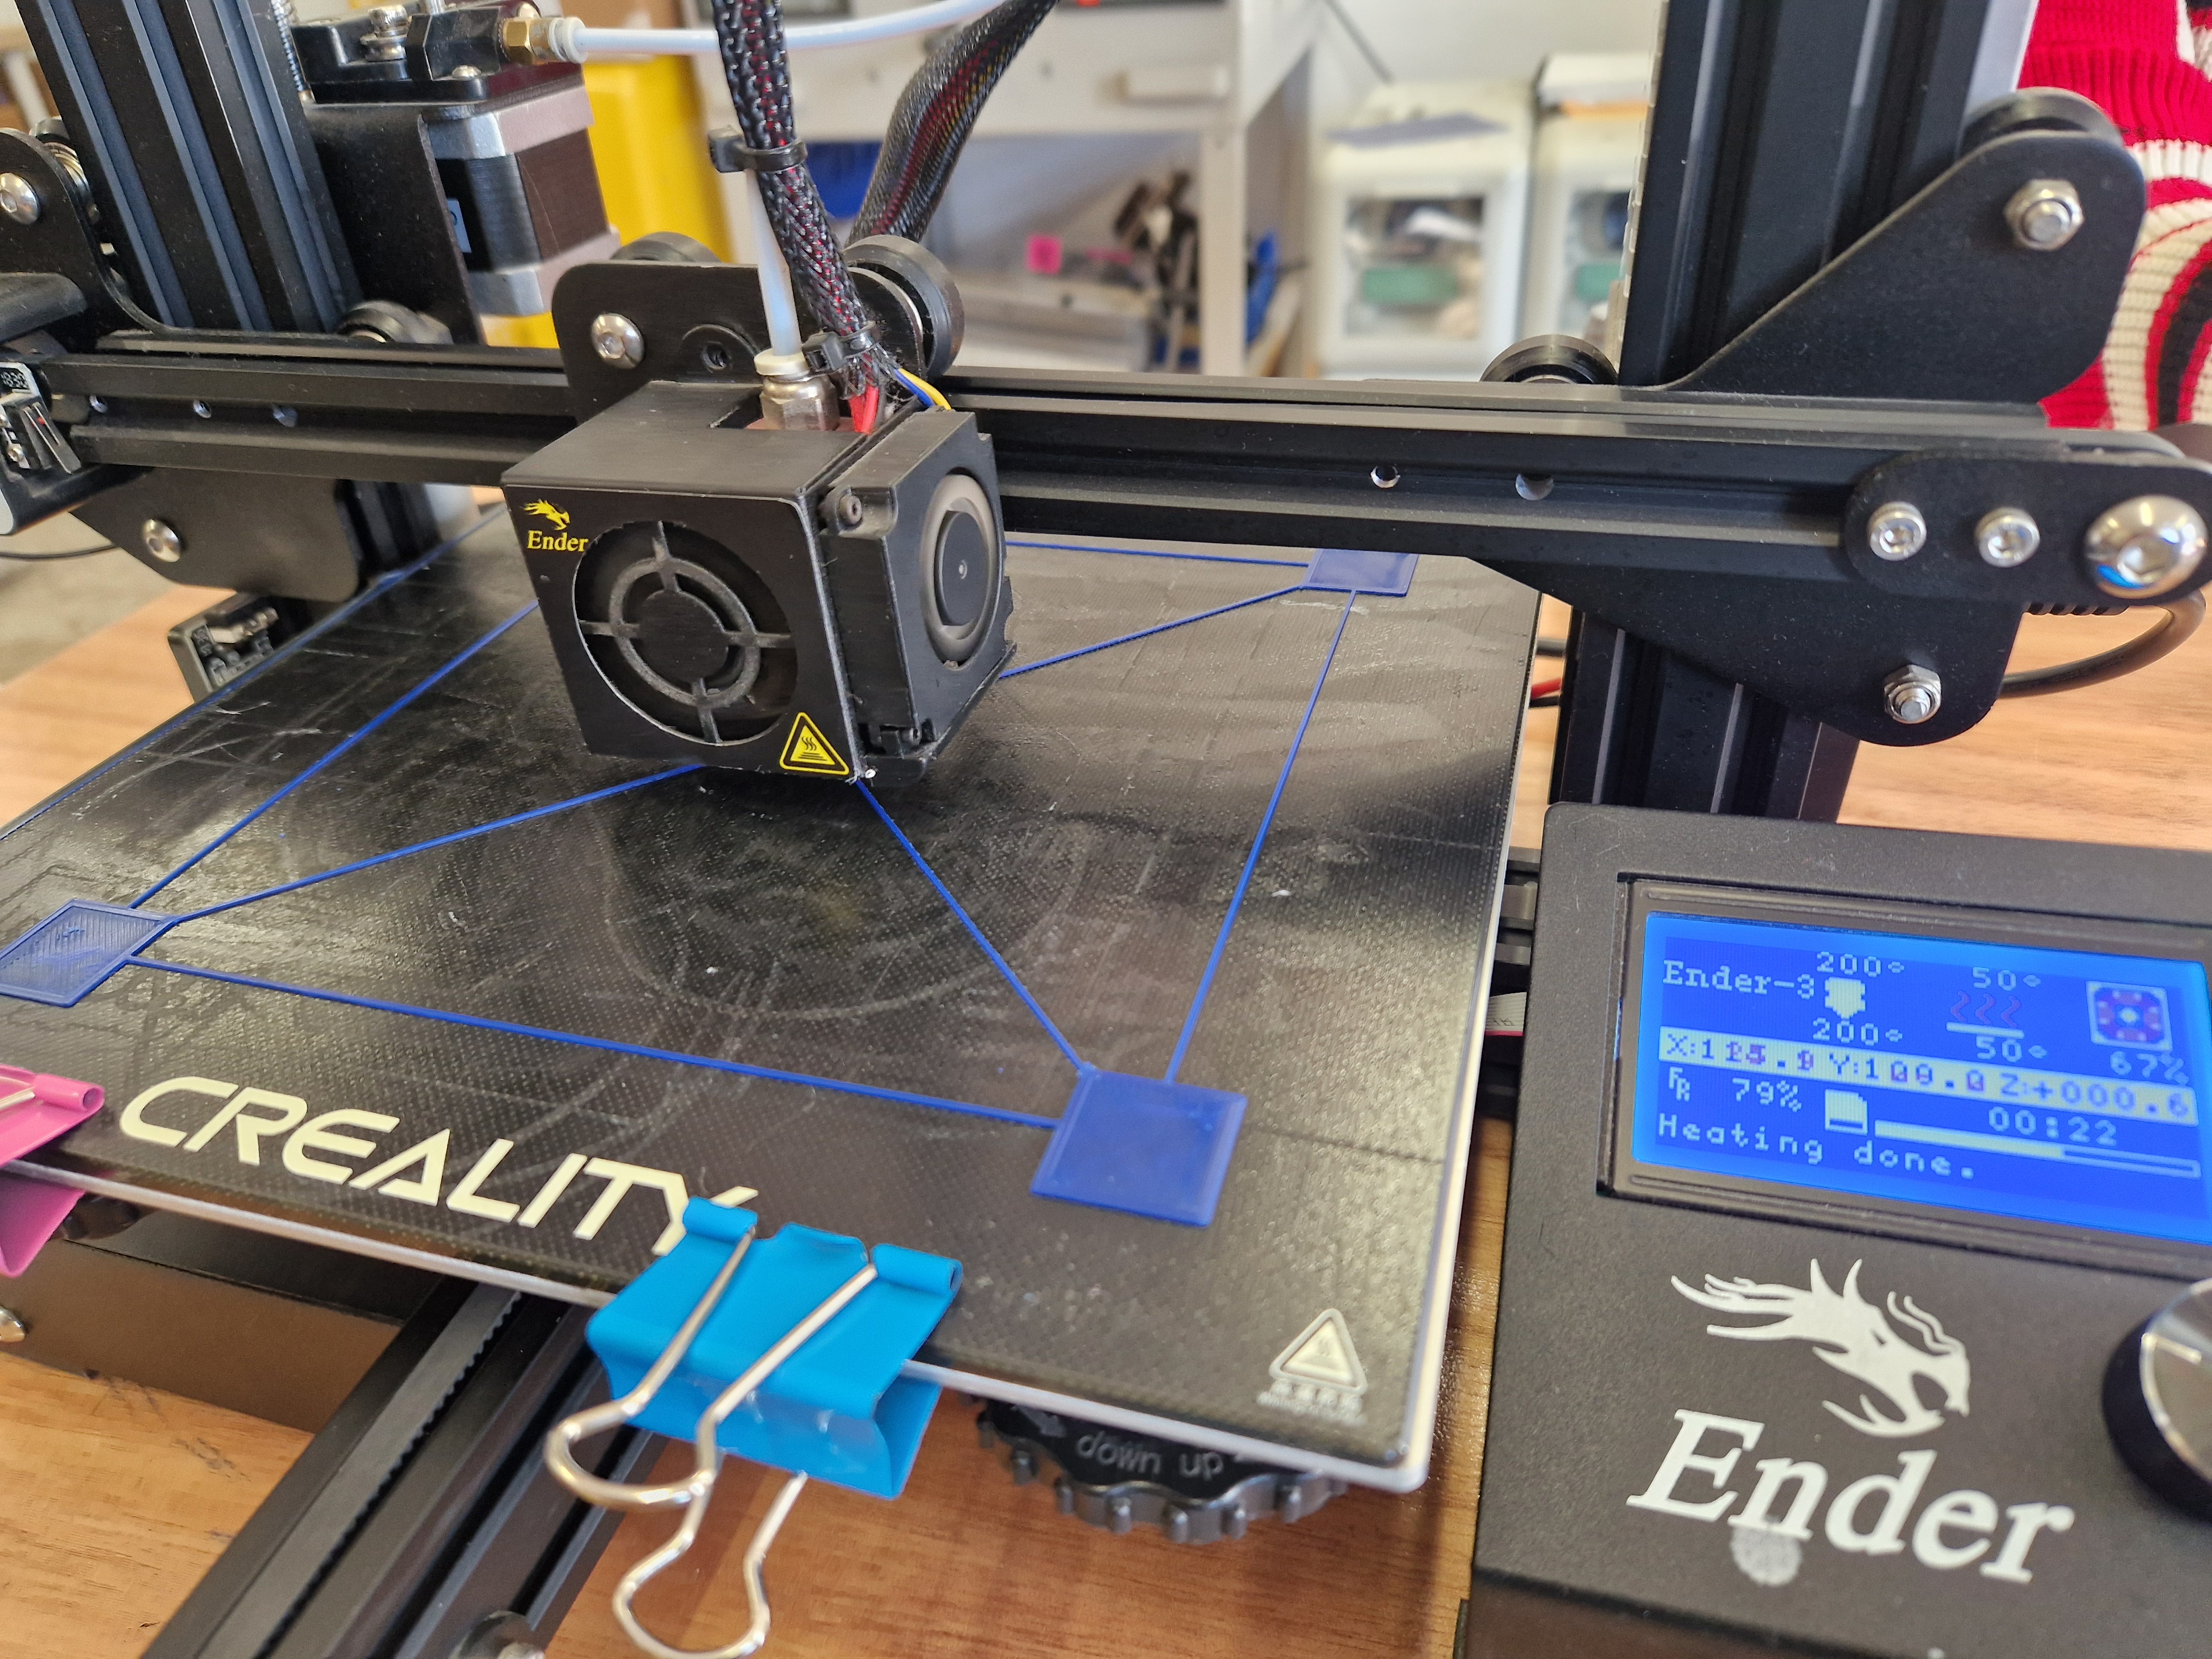
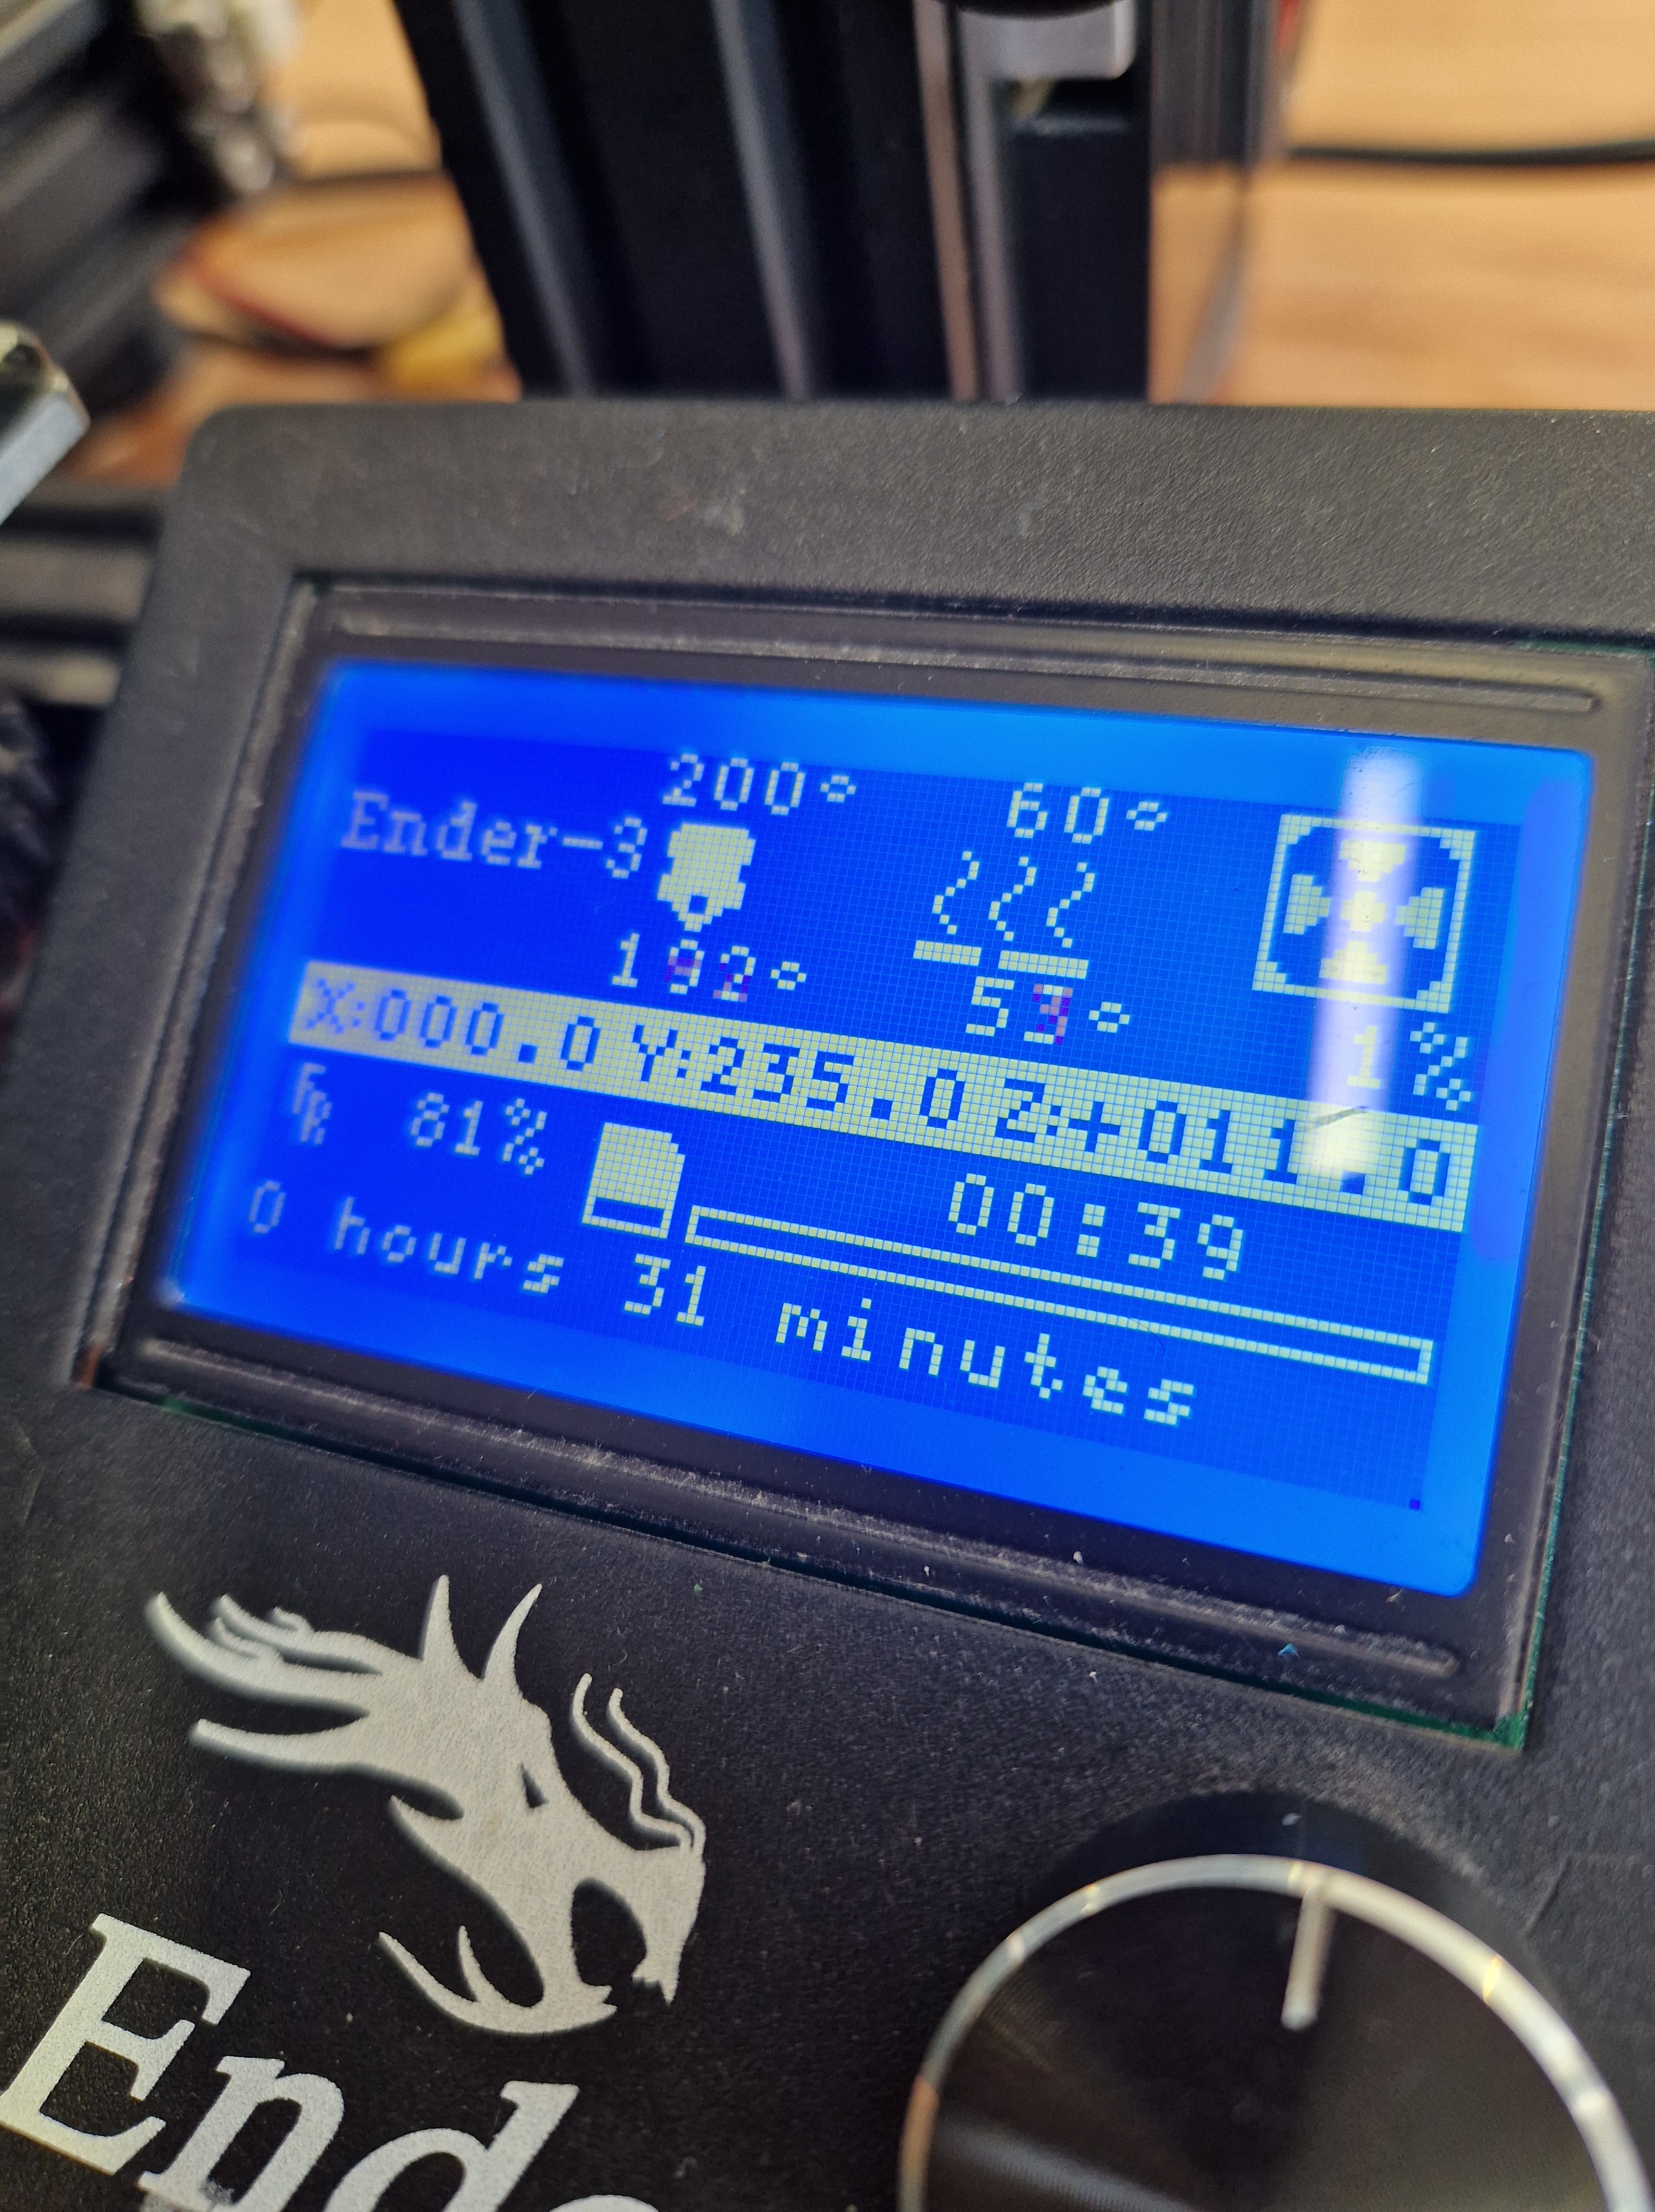
After the laser cutting, I headed to Islington Mill for a hands-on session on 3D printers.
First, we spoke about different software and websites facilitating 3D modelling, and then we moved to a room with several different 3D printers.
We were taught how to set up a printer and adjust manually the height to produce a successful print.

NOTES:
- Website to make lithophane: https://lithophanemaker.com
- choose a file/photo that will be printed at 4×4 cm
- Cura free program (you need it to prepare files) STL files
- https://www.thingiverse.com/
- https://cults3d.com/en
- 3D jewellery maker: Carina Shoshtary carinashoshtary.com
- send an image to: j.roy-williams@salford.ac.uk
- 3D 360 f to free postgrad courses and free 3D printer: https://www.3d360printer.co.uk/
REFLECTIONS: Incredible day getting to know the ins and outs of 3D printing, and most importantly getting accustomed with the process and the machines themselves, which definitely breaks the ice when it comes to being a bit overwhelmed.
WEDNESDAY
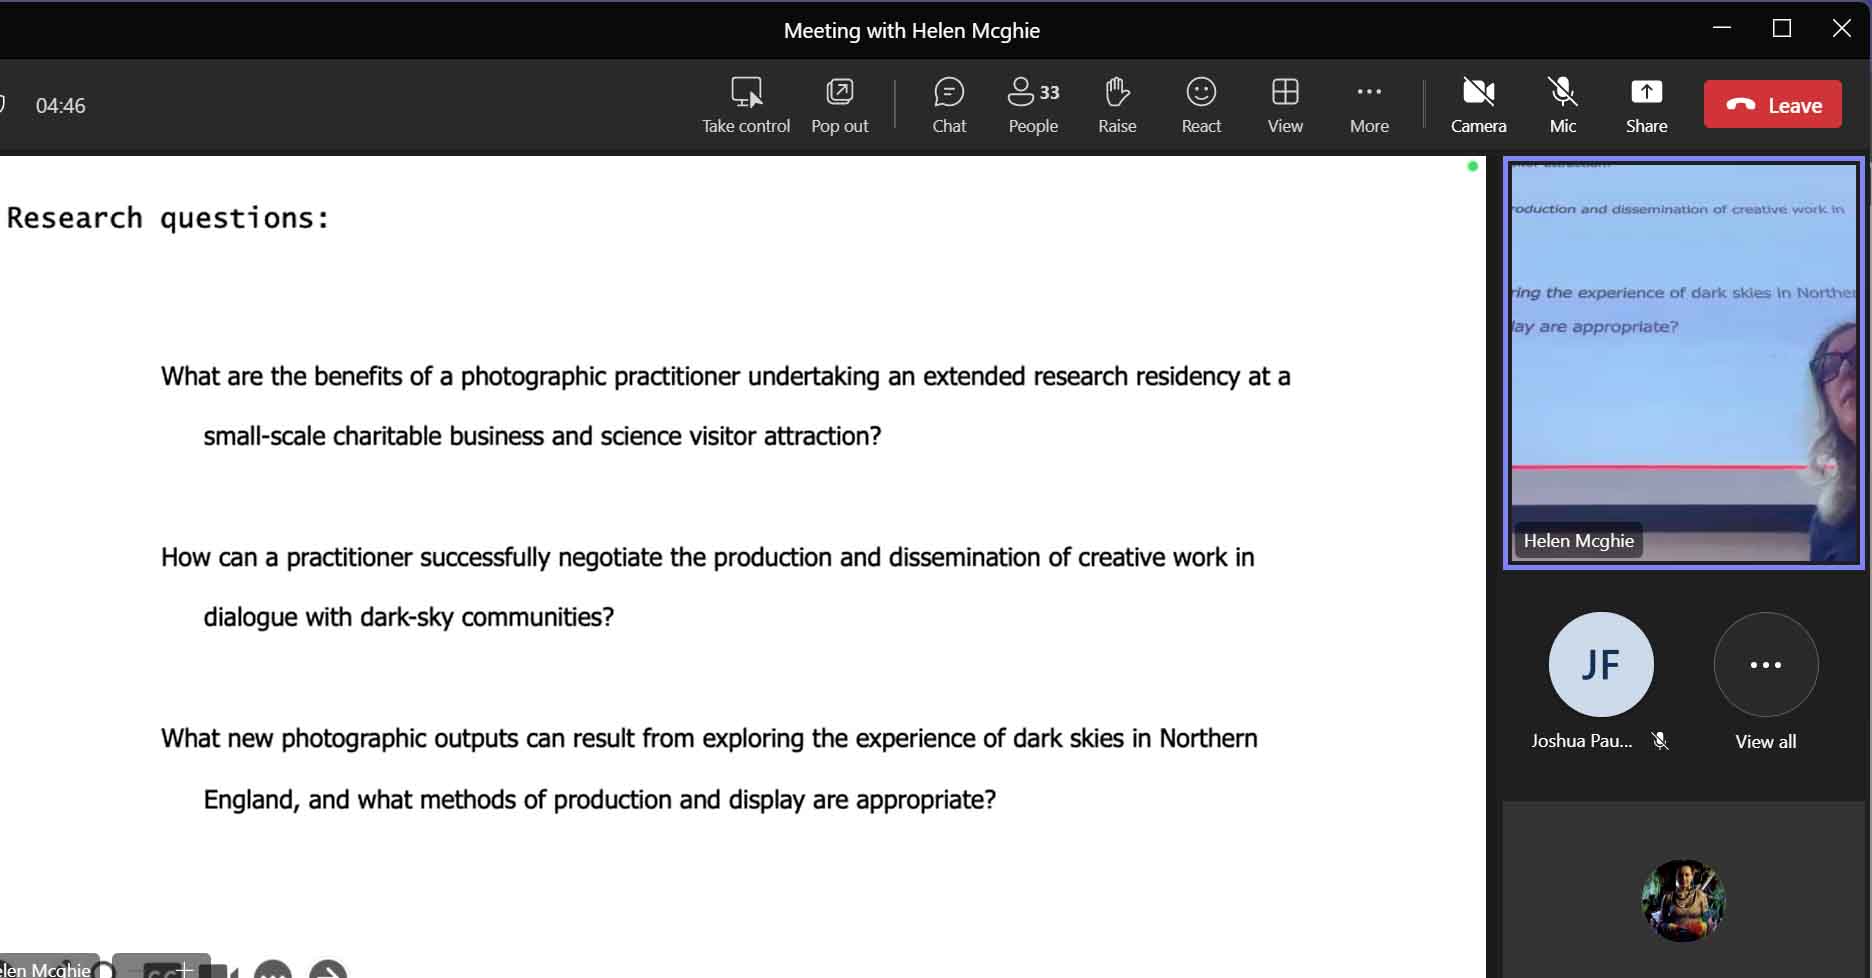
VILLAGE GREEN WITH HELEN MCGHIE
NOTES:
- Helen spoke about her journey as a practitioner: apply for competitions but also keep making work
- very important to keep the conversation going as it is a source of discovery and progress
BOOKBINDING – FINDING SOLUTIONS FOR PORTFOLIO PRESENTATION
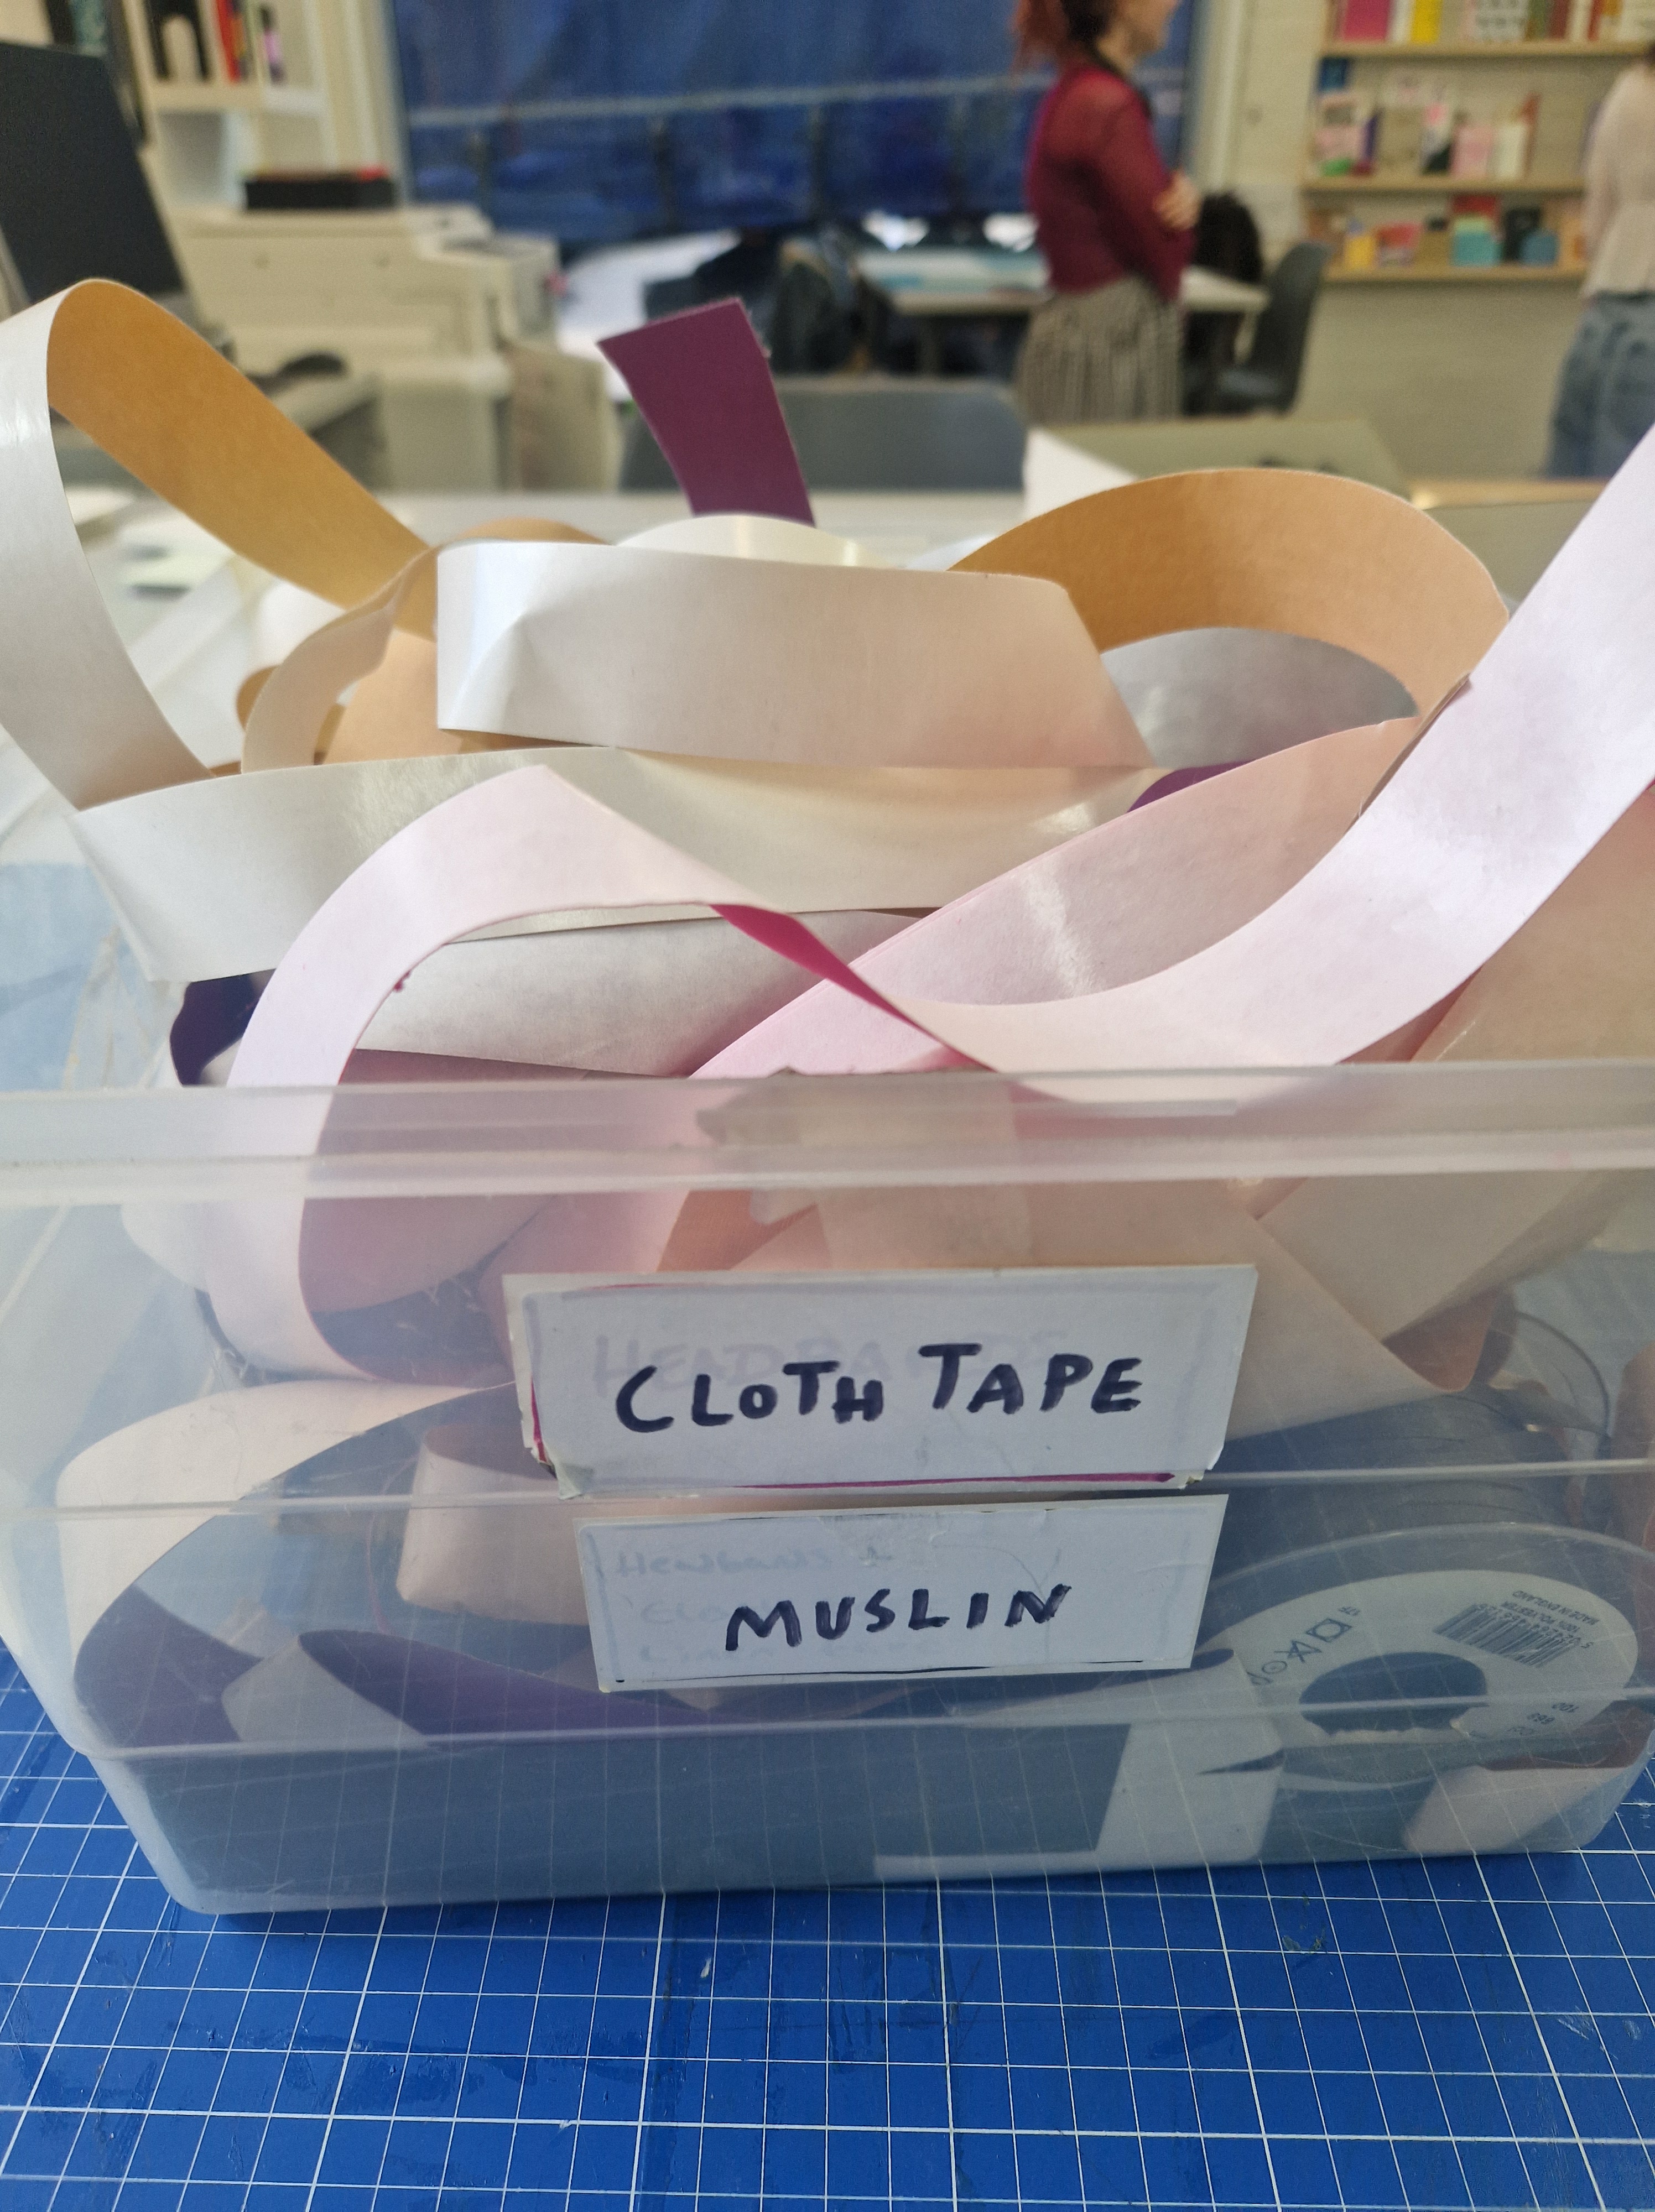
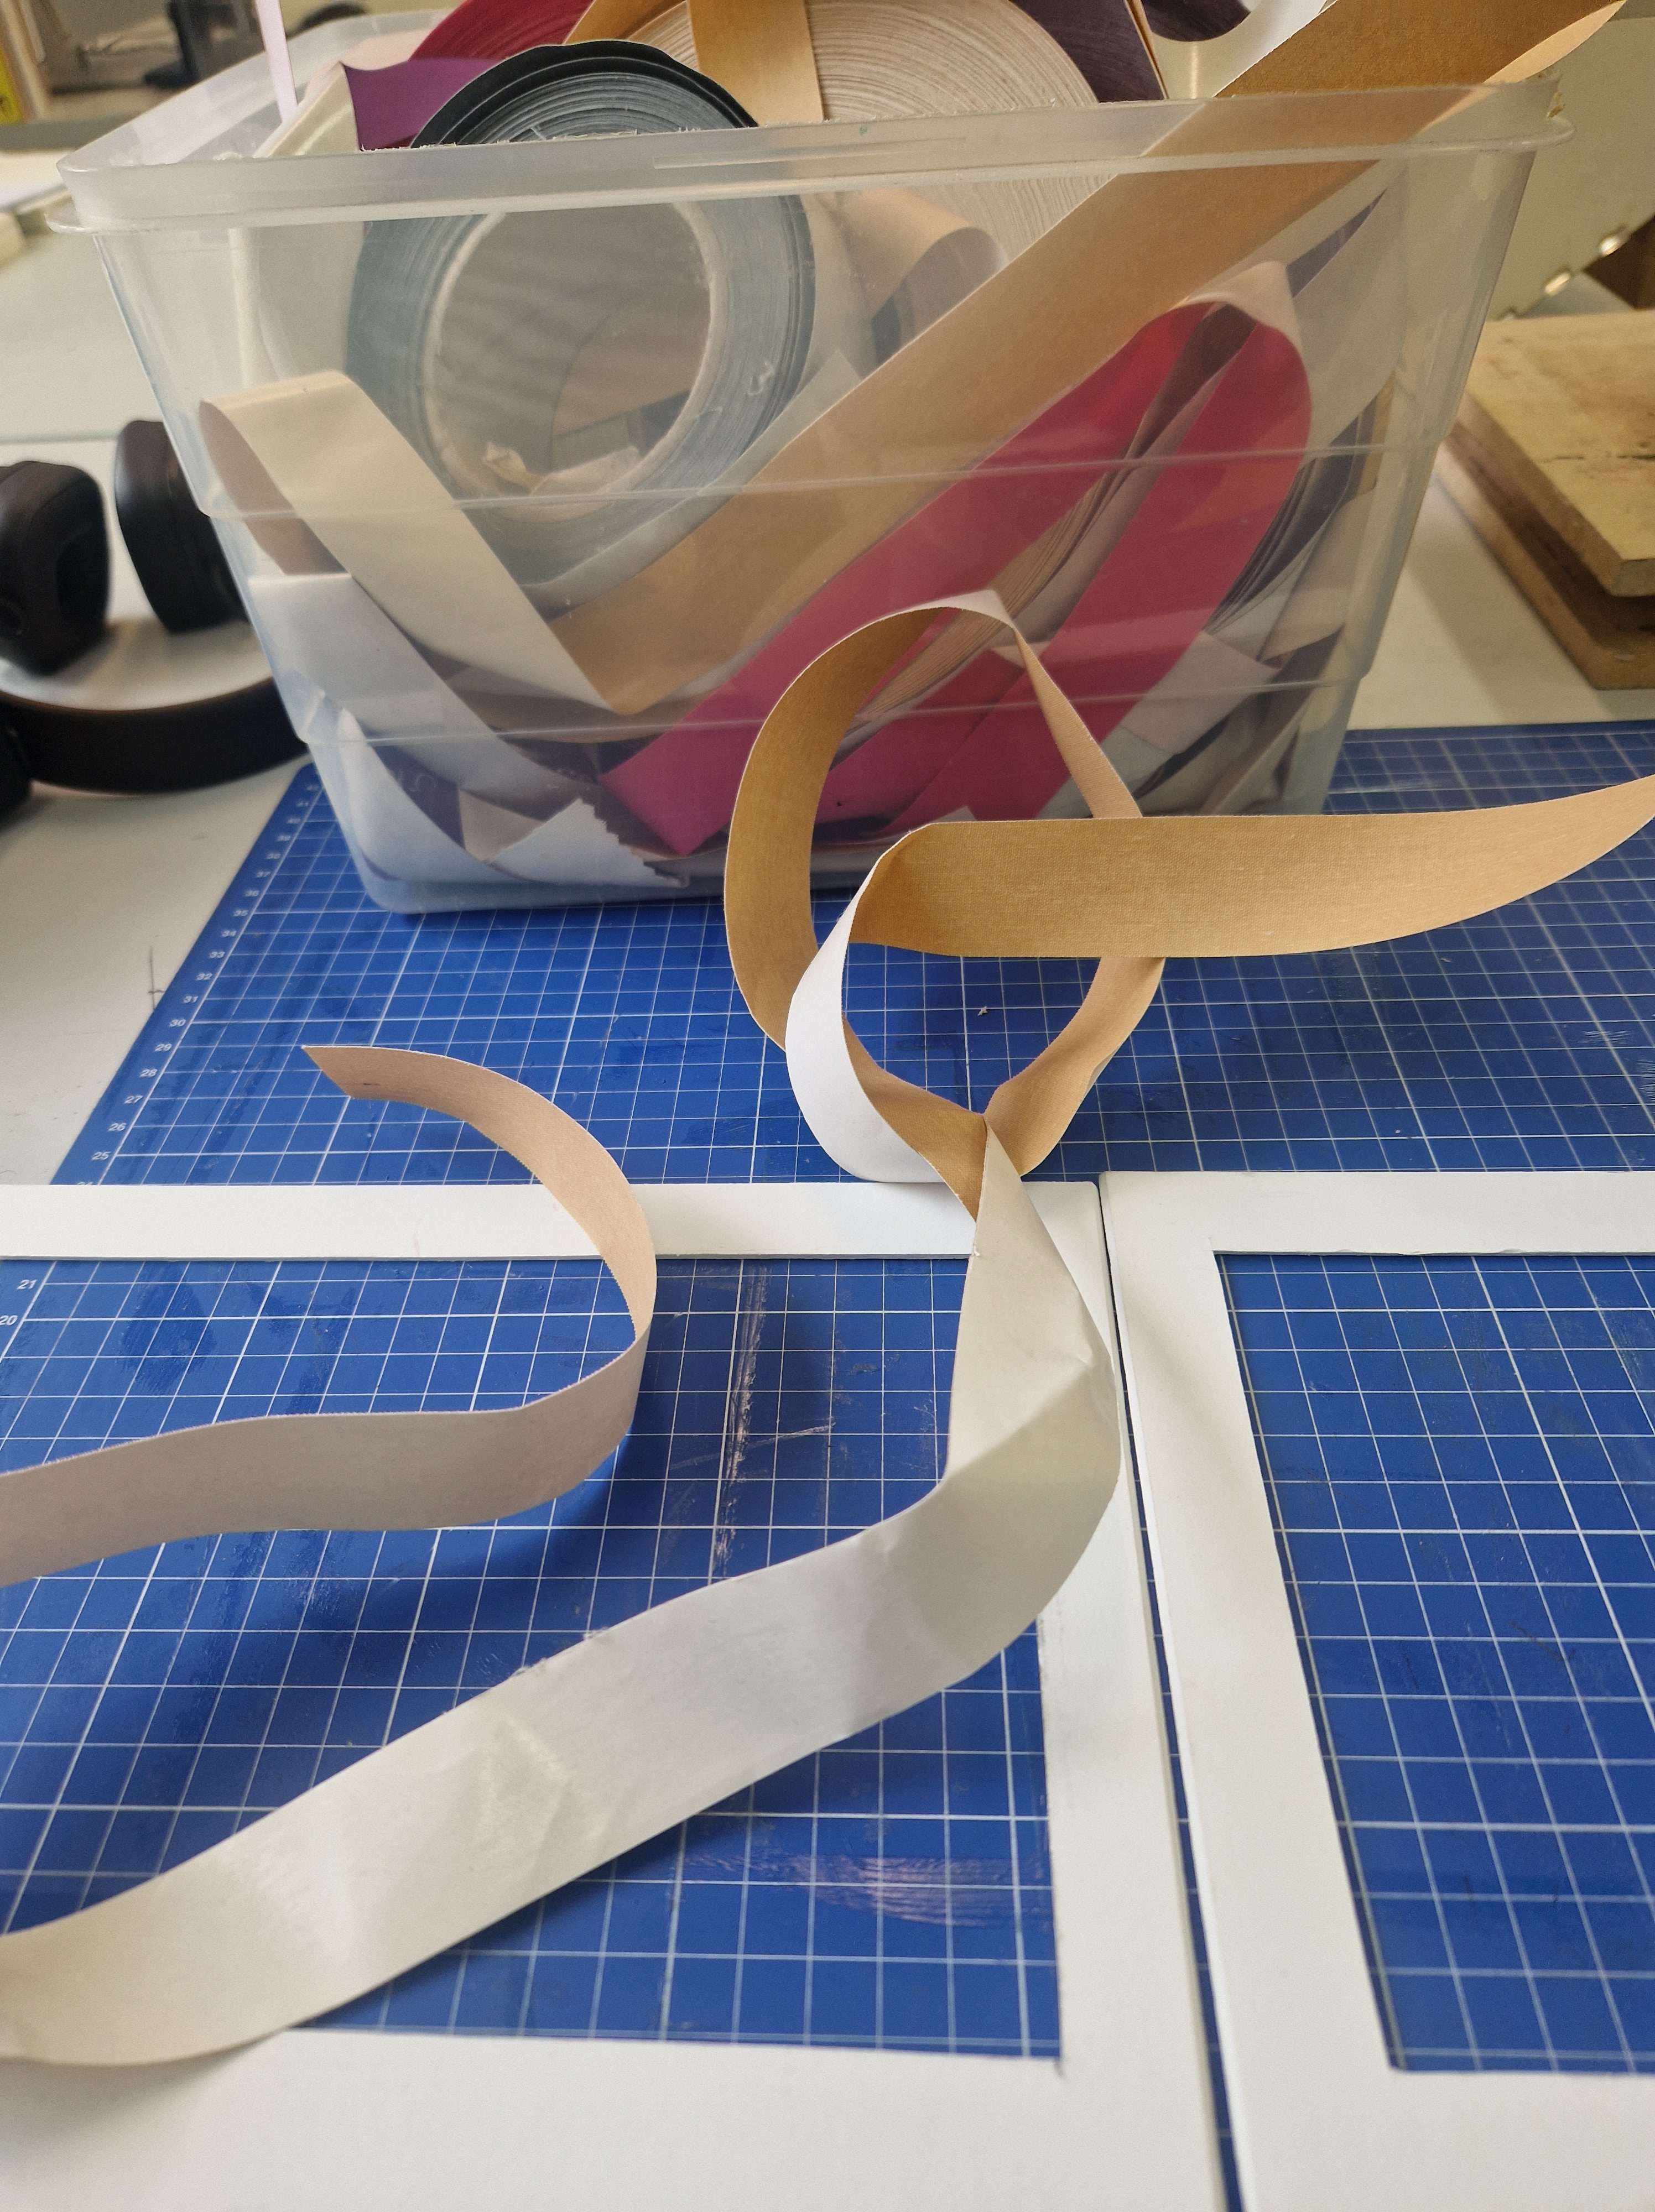
REFLECTIONS: I wanted to bind images together, so they open like a book. I asked around and discovered that I can achieve that with book cloth available in book binding.
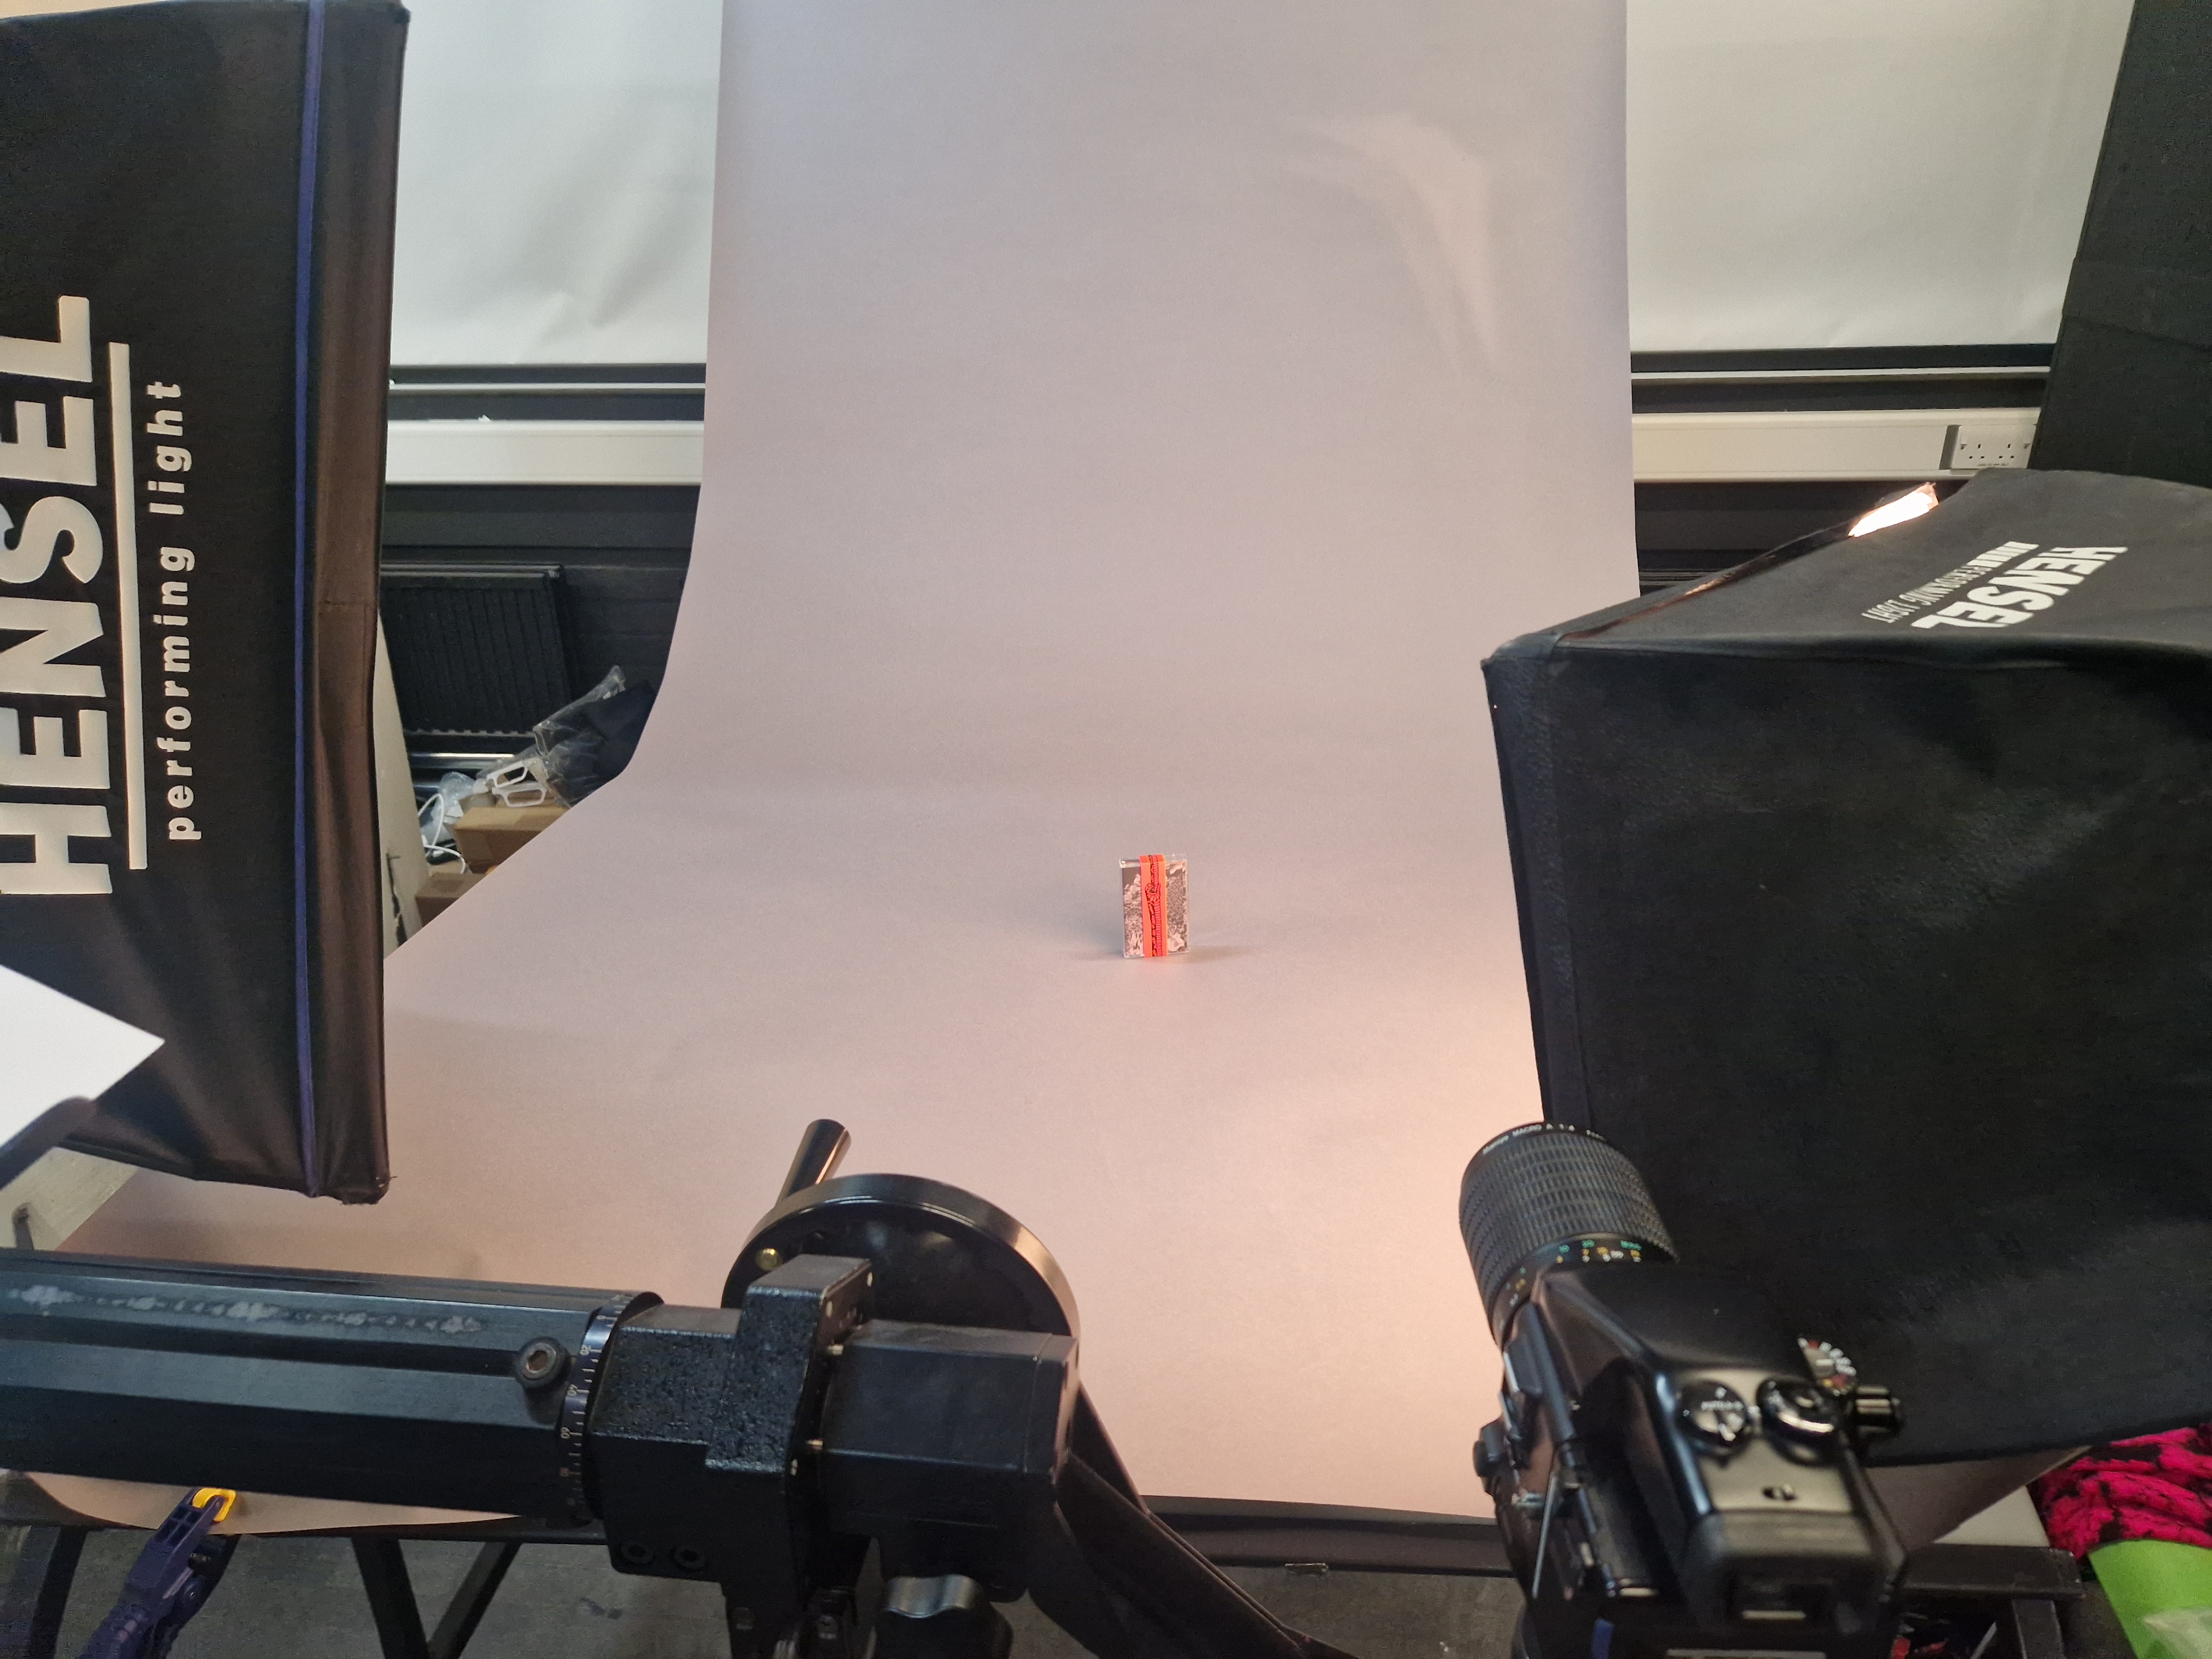
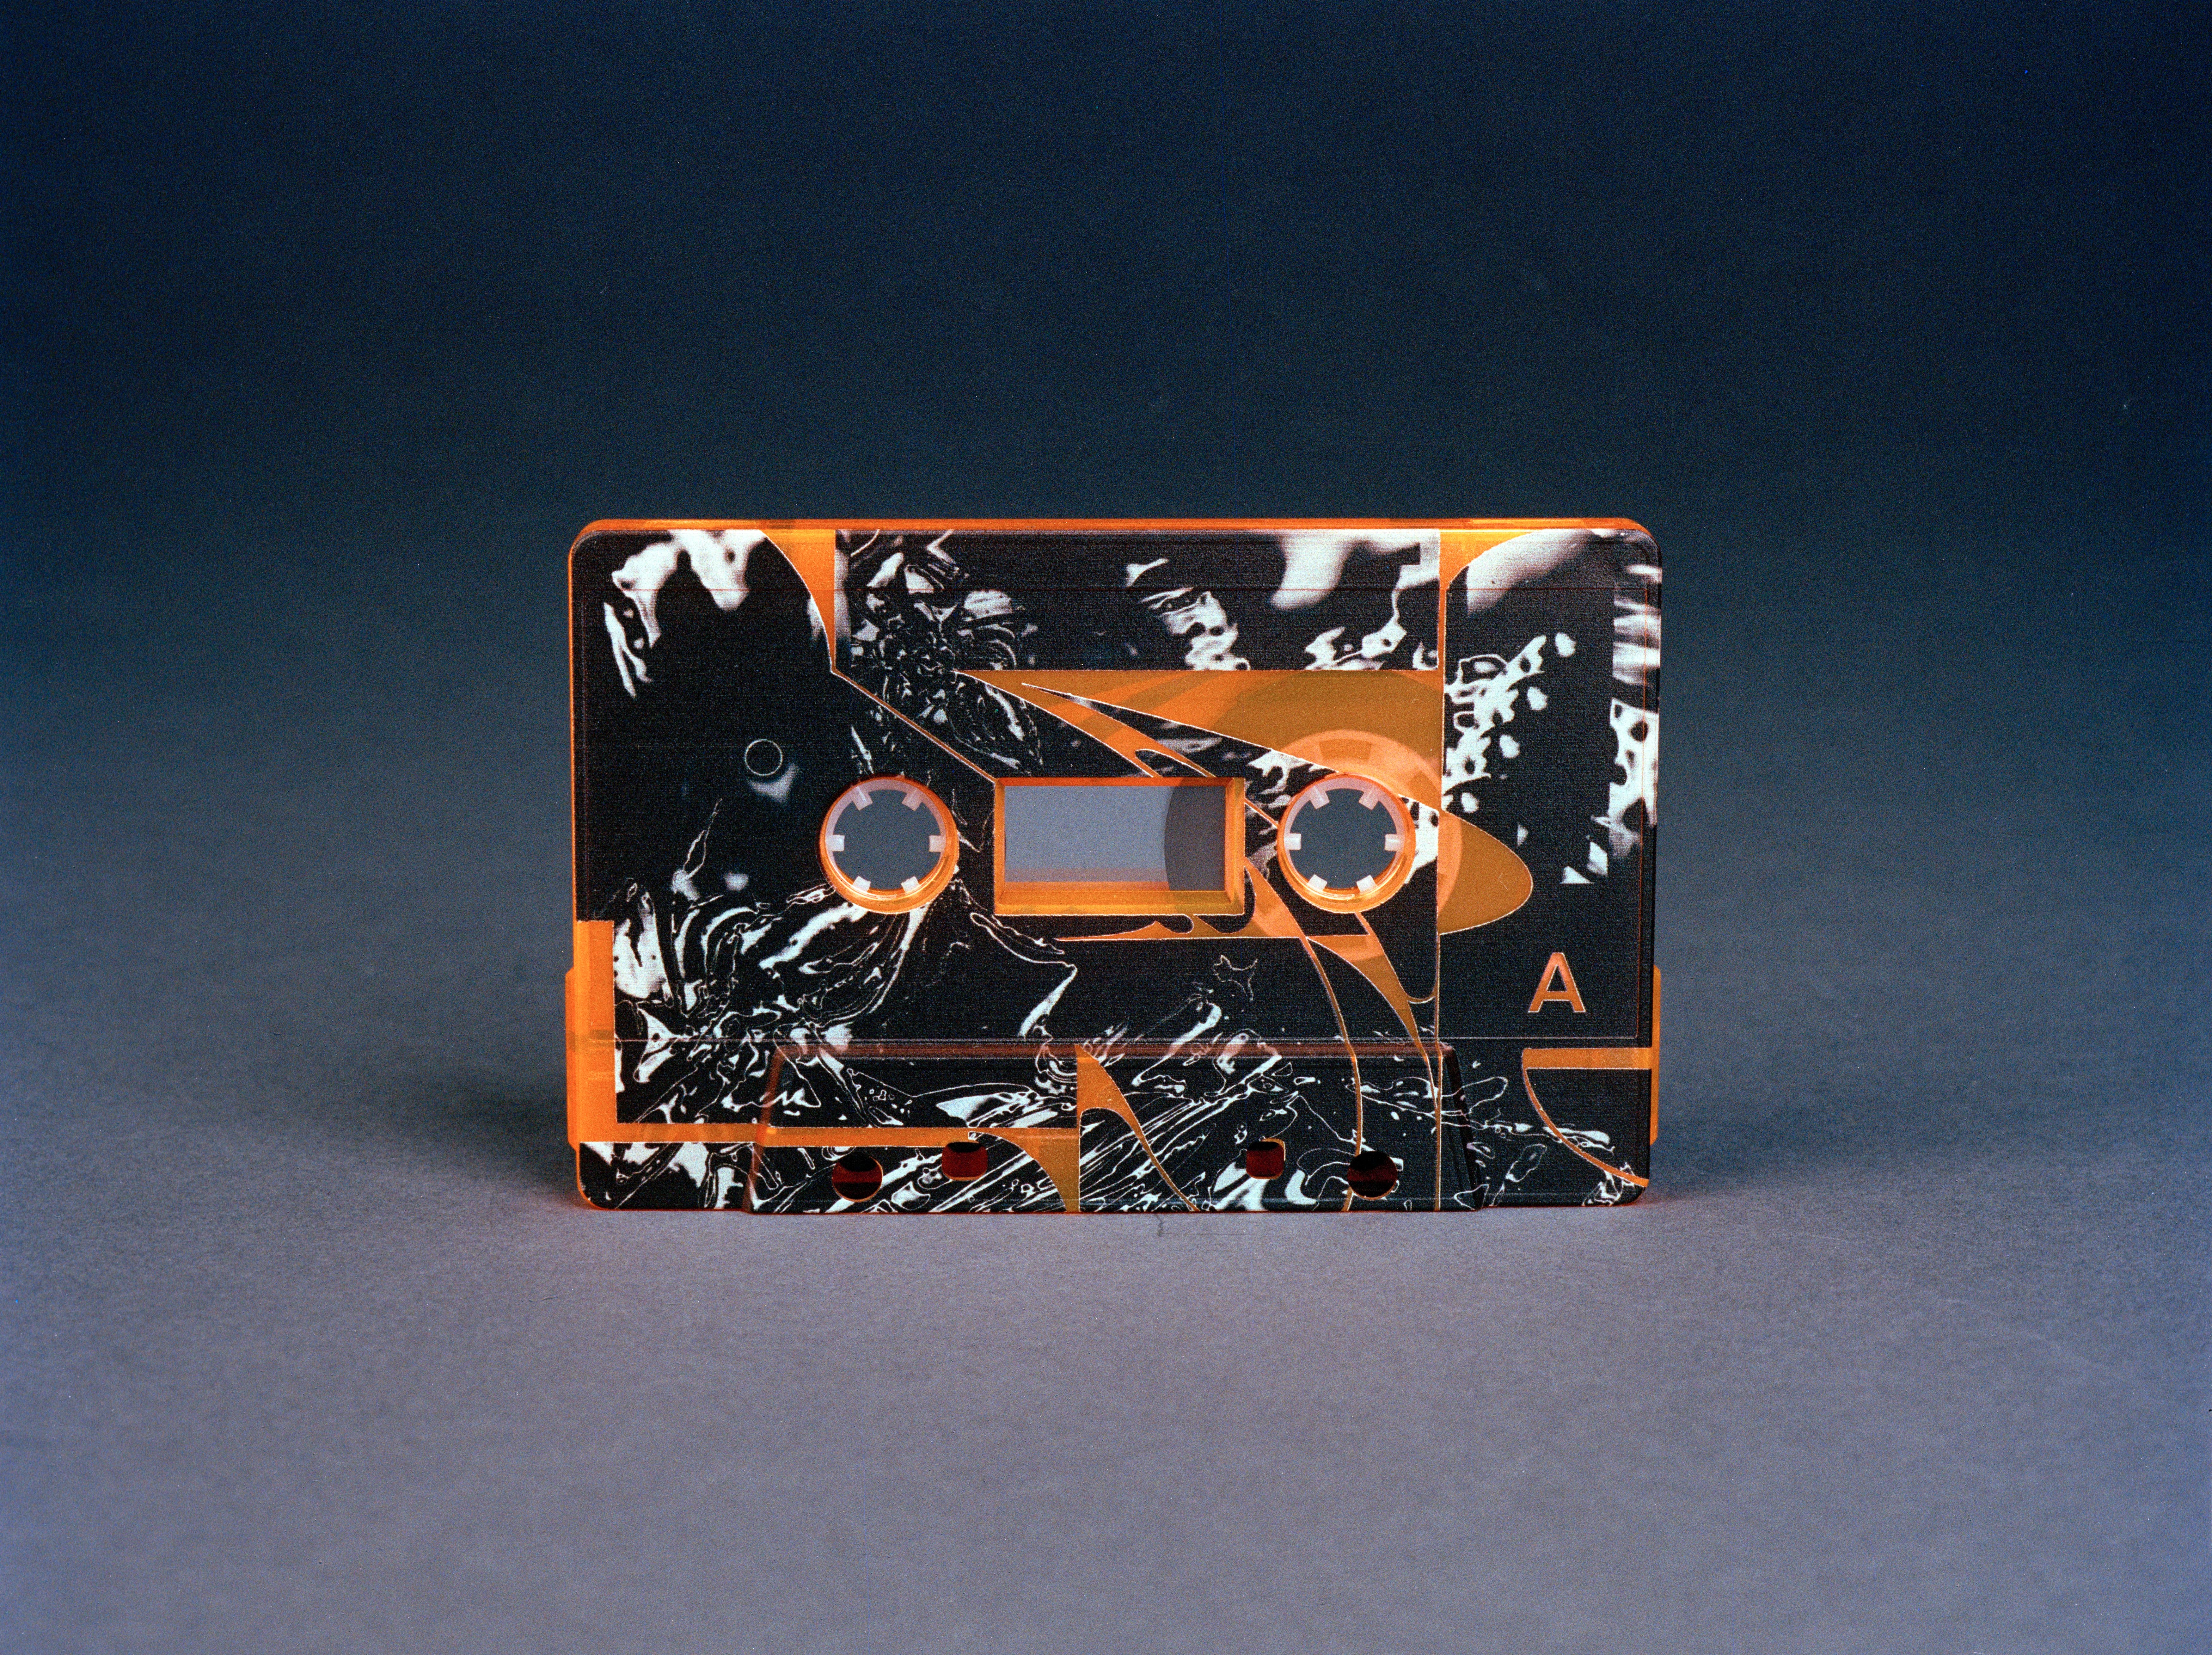
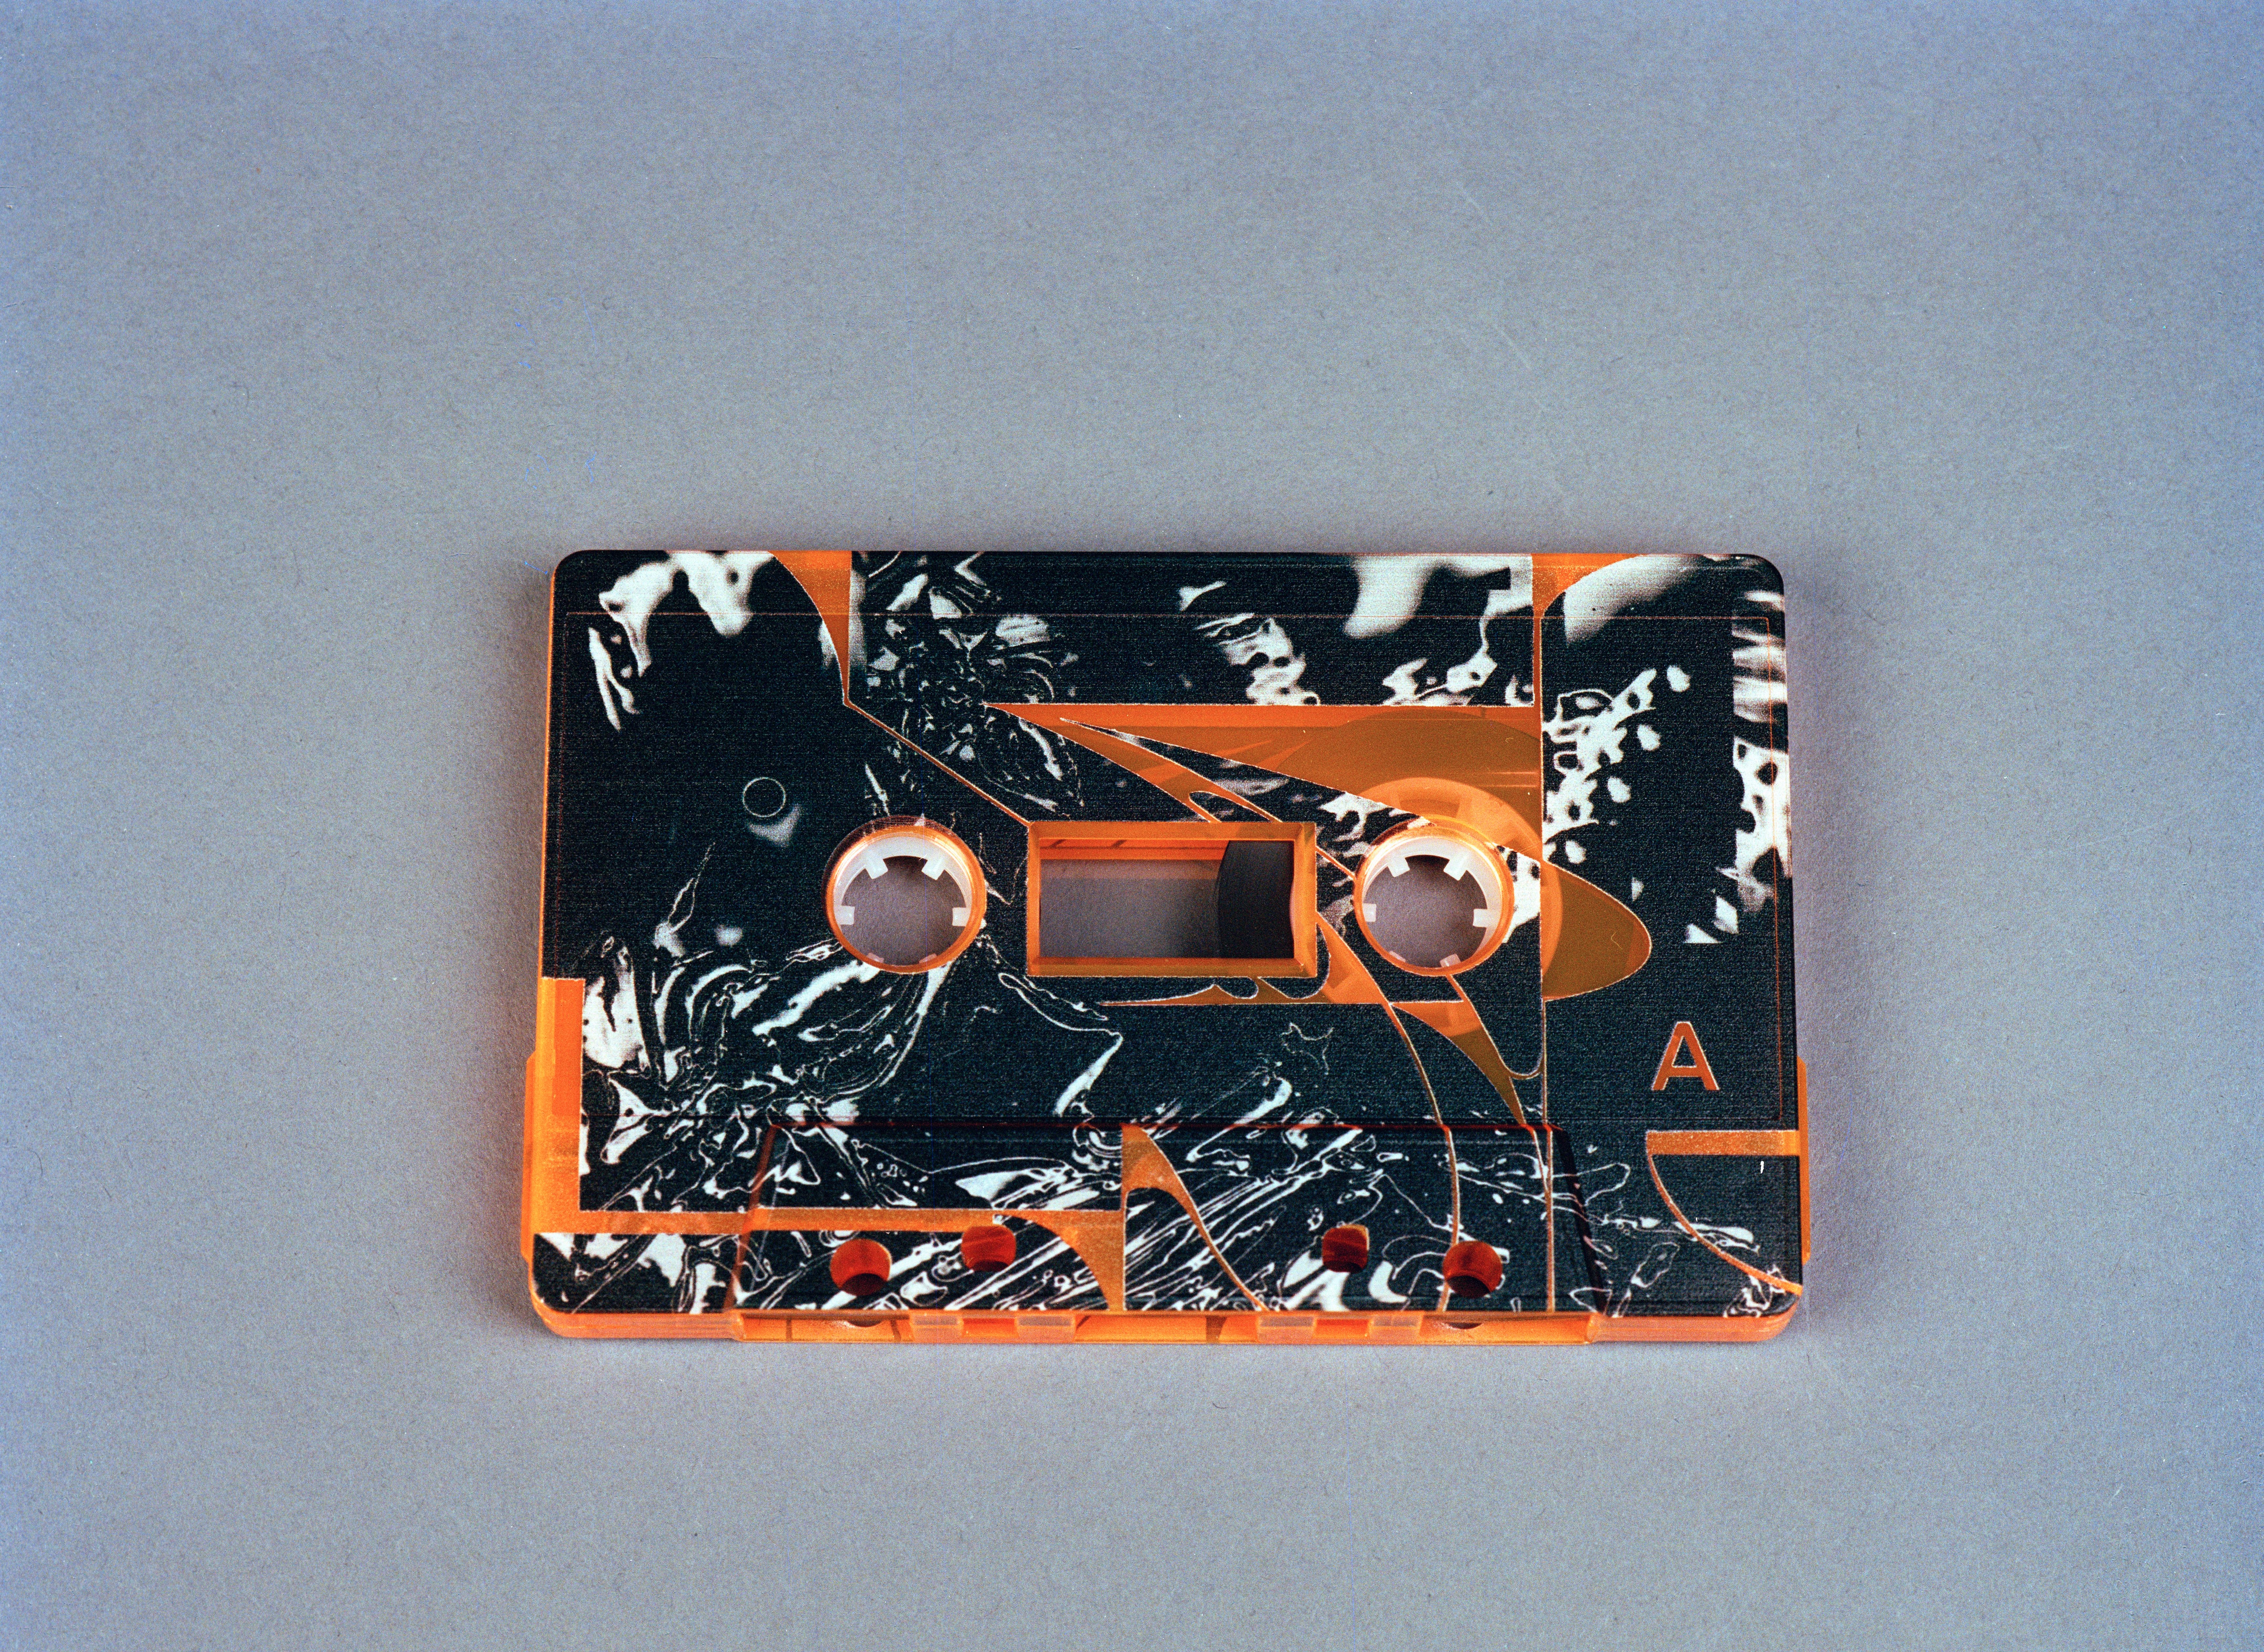
STUDIO PHOTOSHOOT – PRODUCT PHOTOGRAPHY
I was commissioned to do product photography for a record label GREY META, so I spent a few hours on this task.
I took some pictures on a Fuji digital camera that comes with the studio as a backup, but as always, what I want is to shoot on film – and that’s what I did, and of course loving the results!
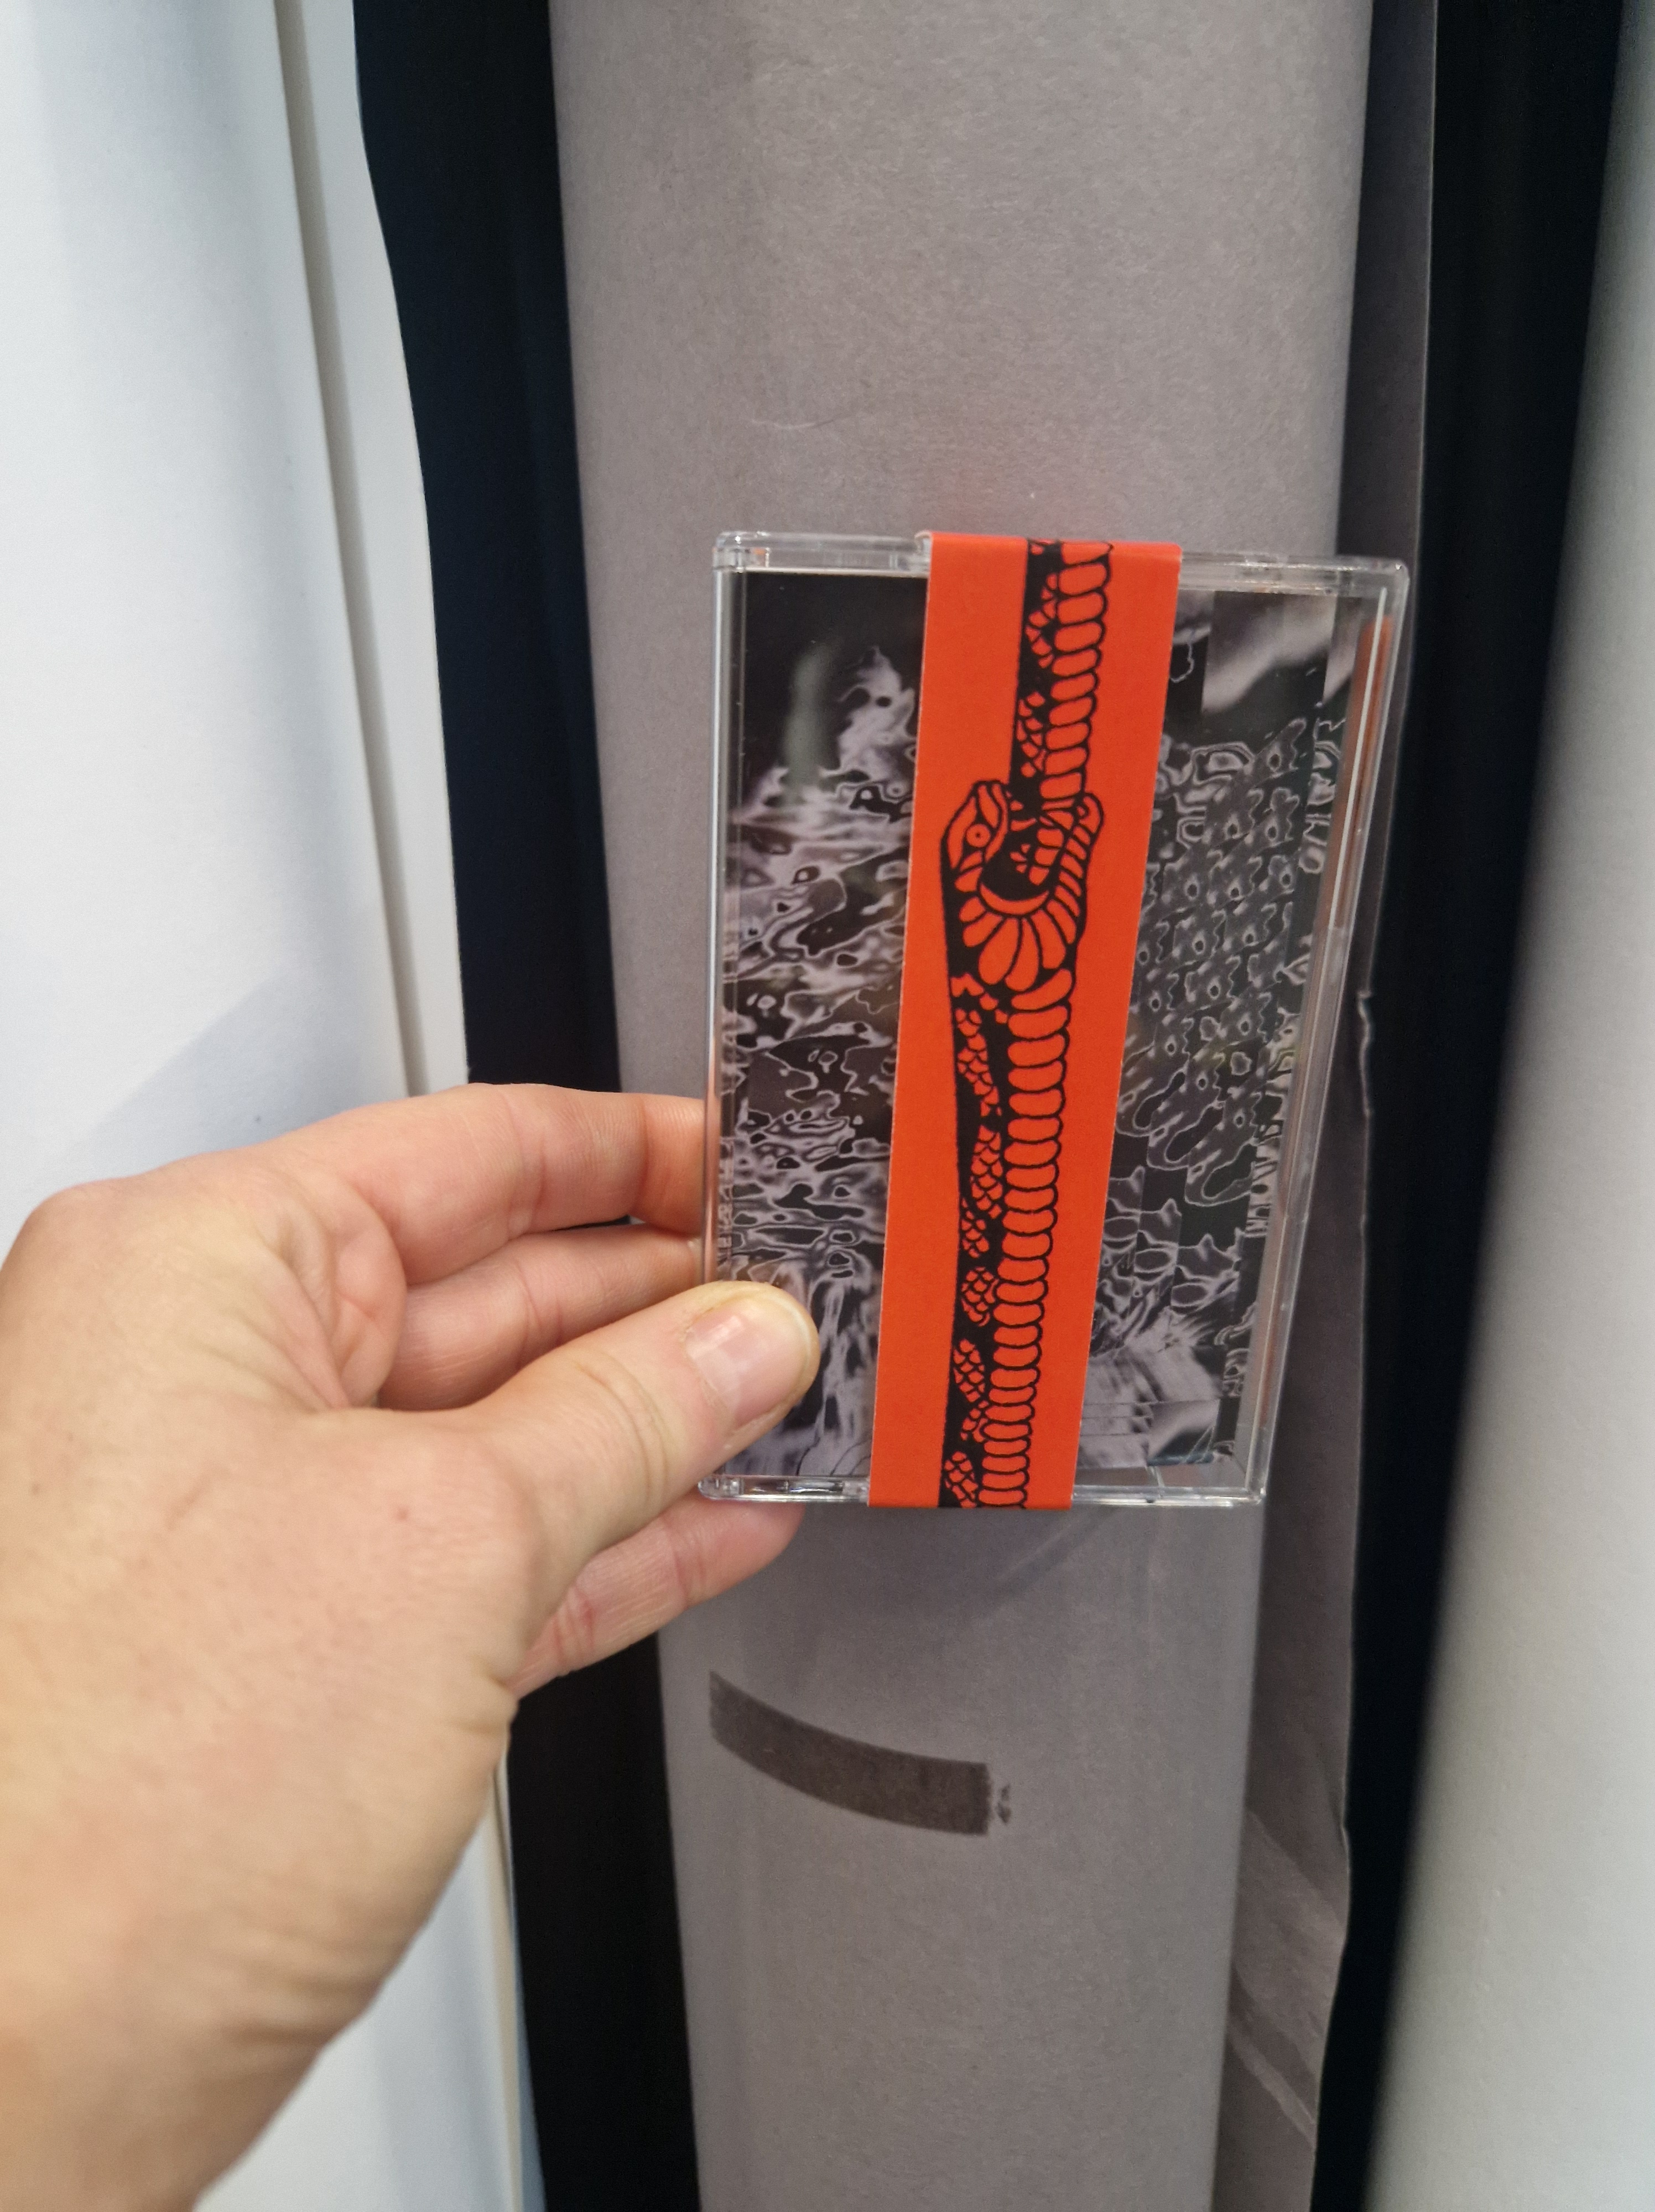
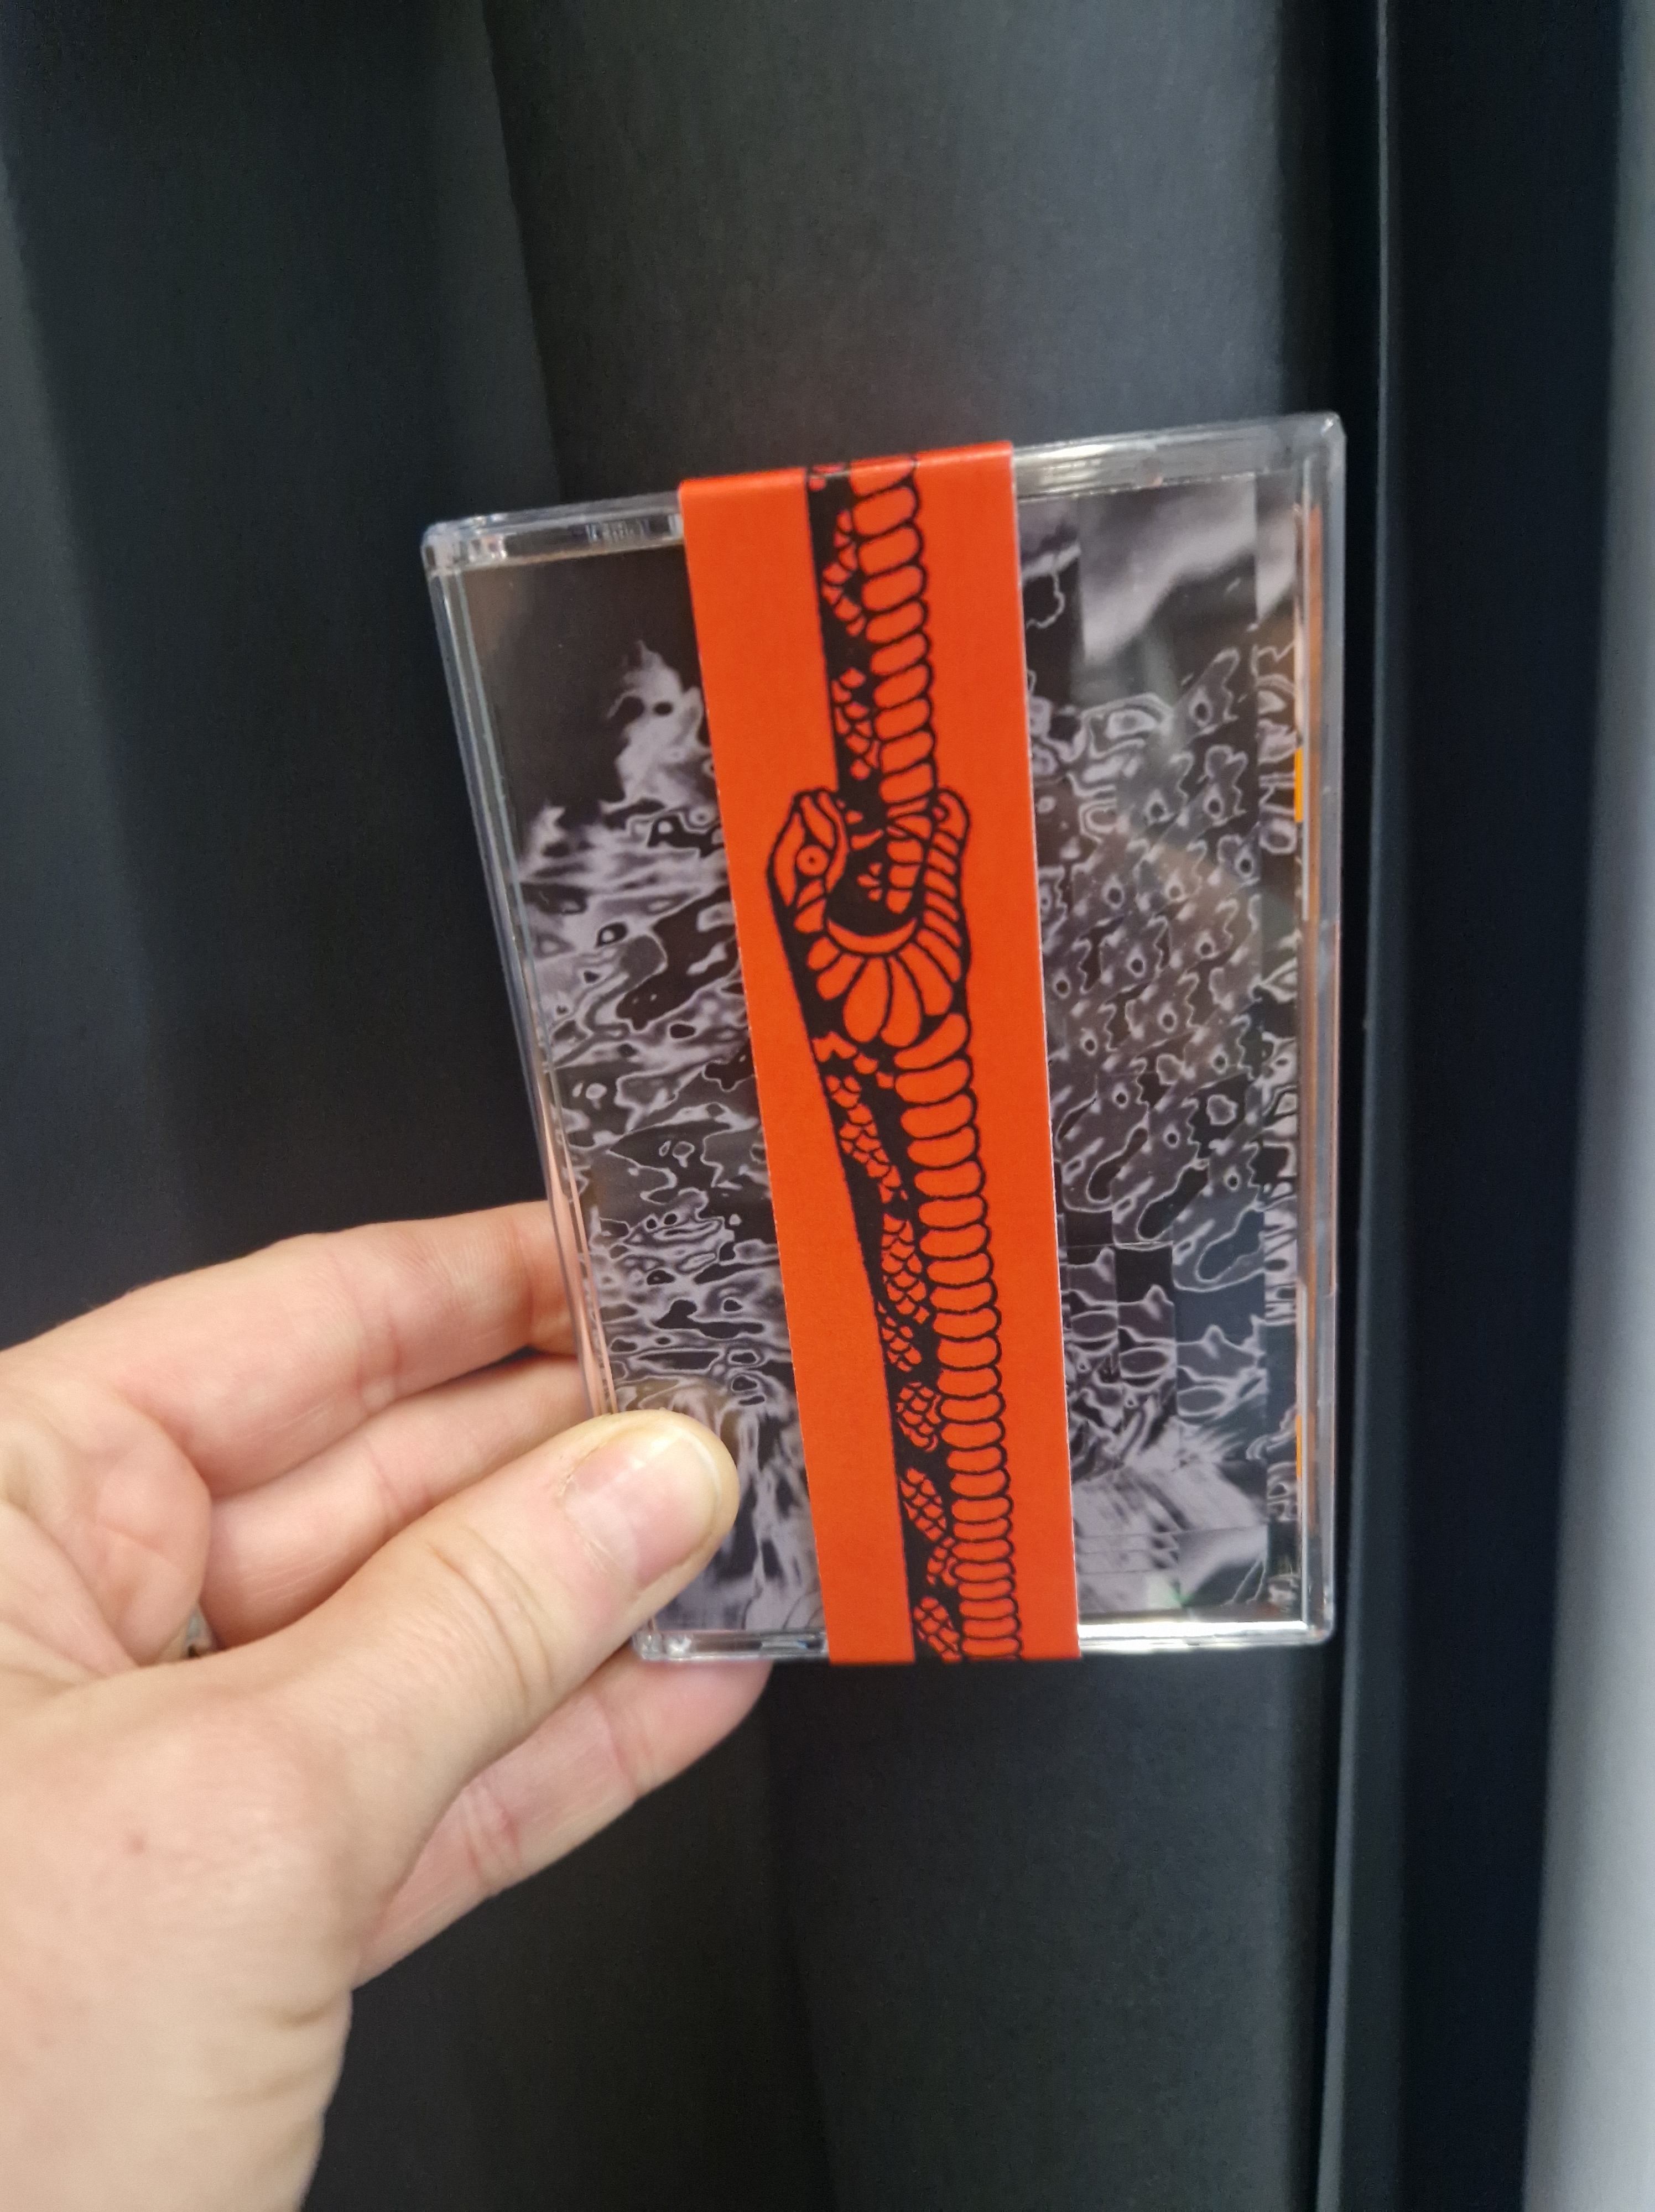
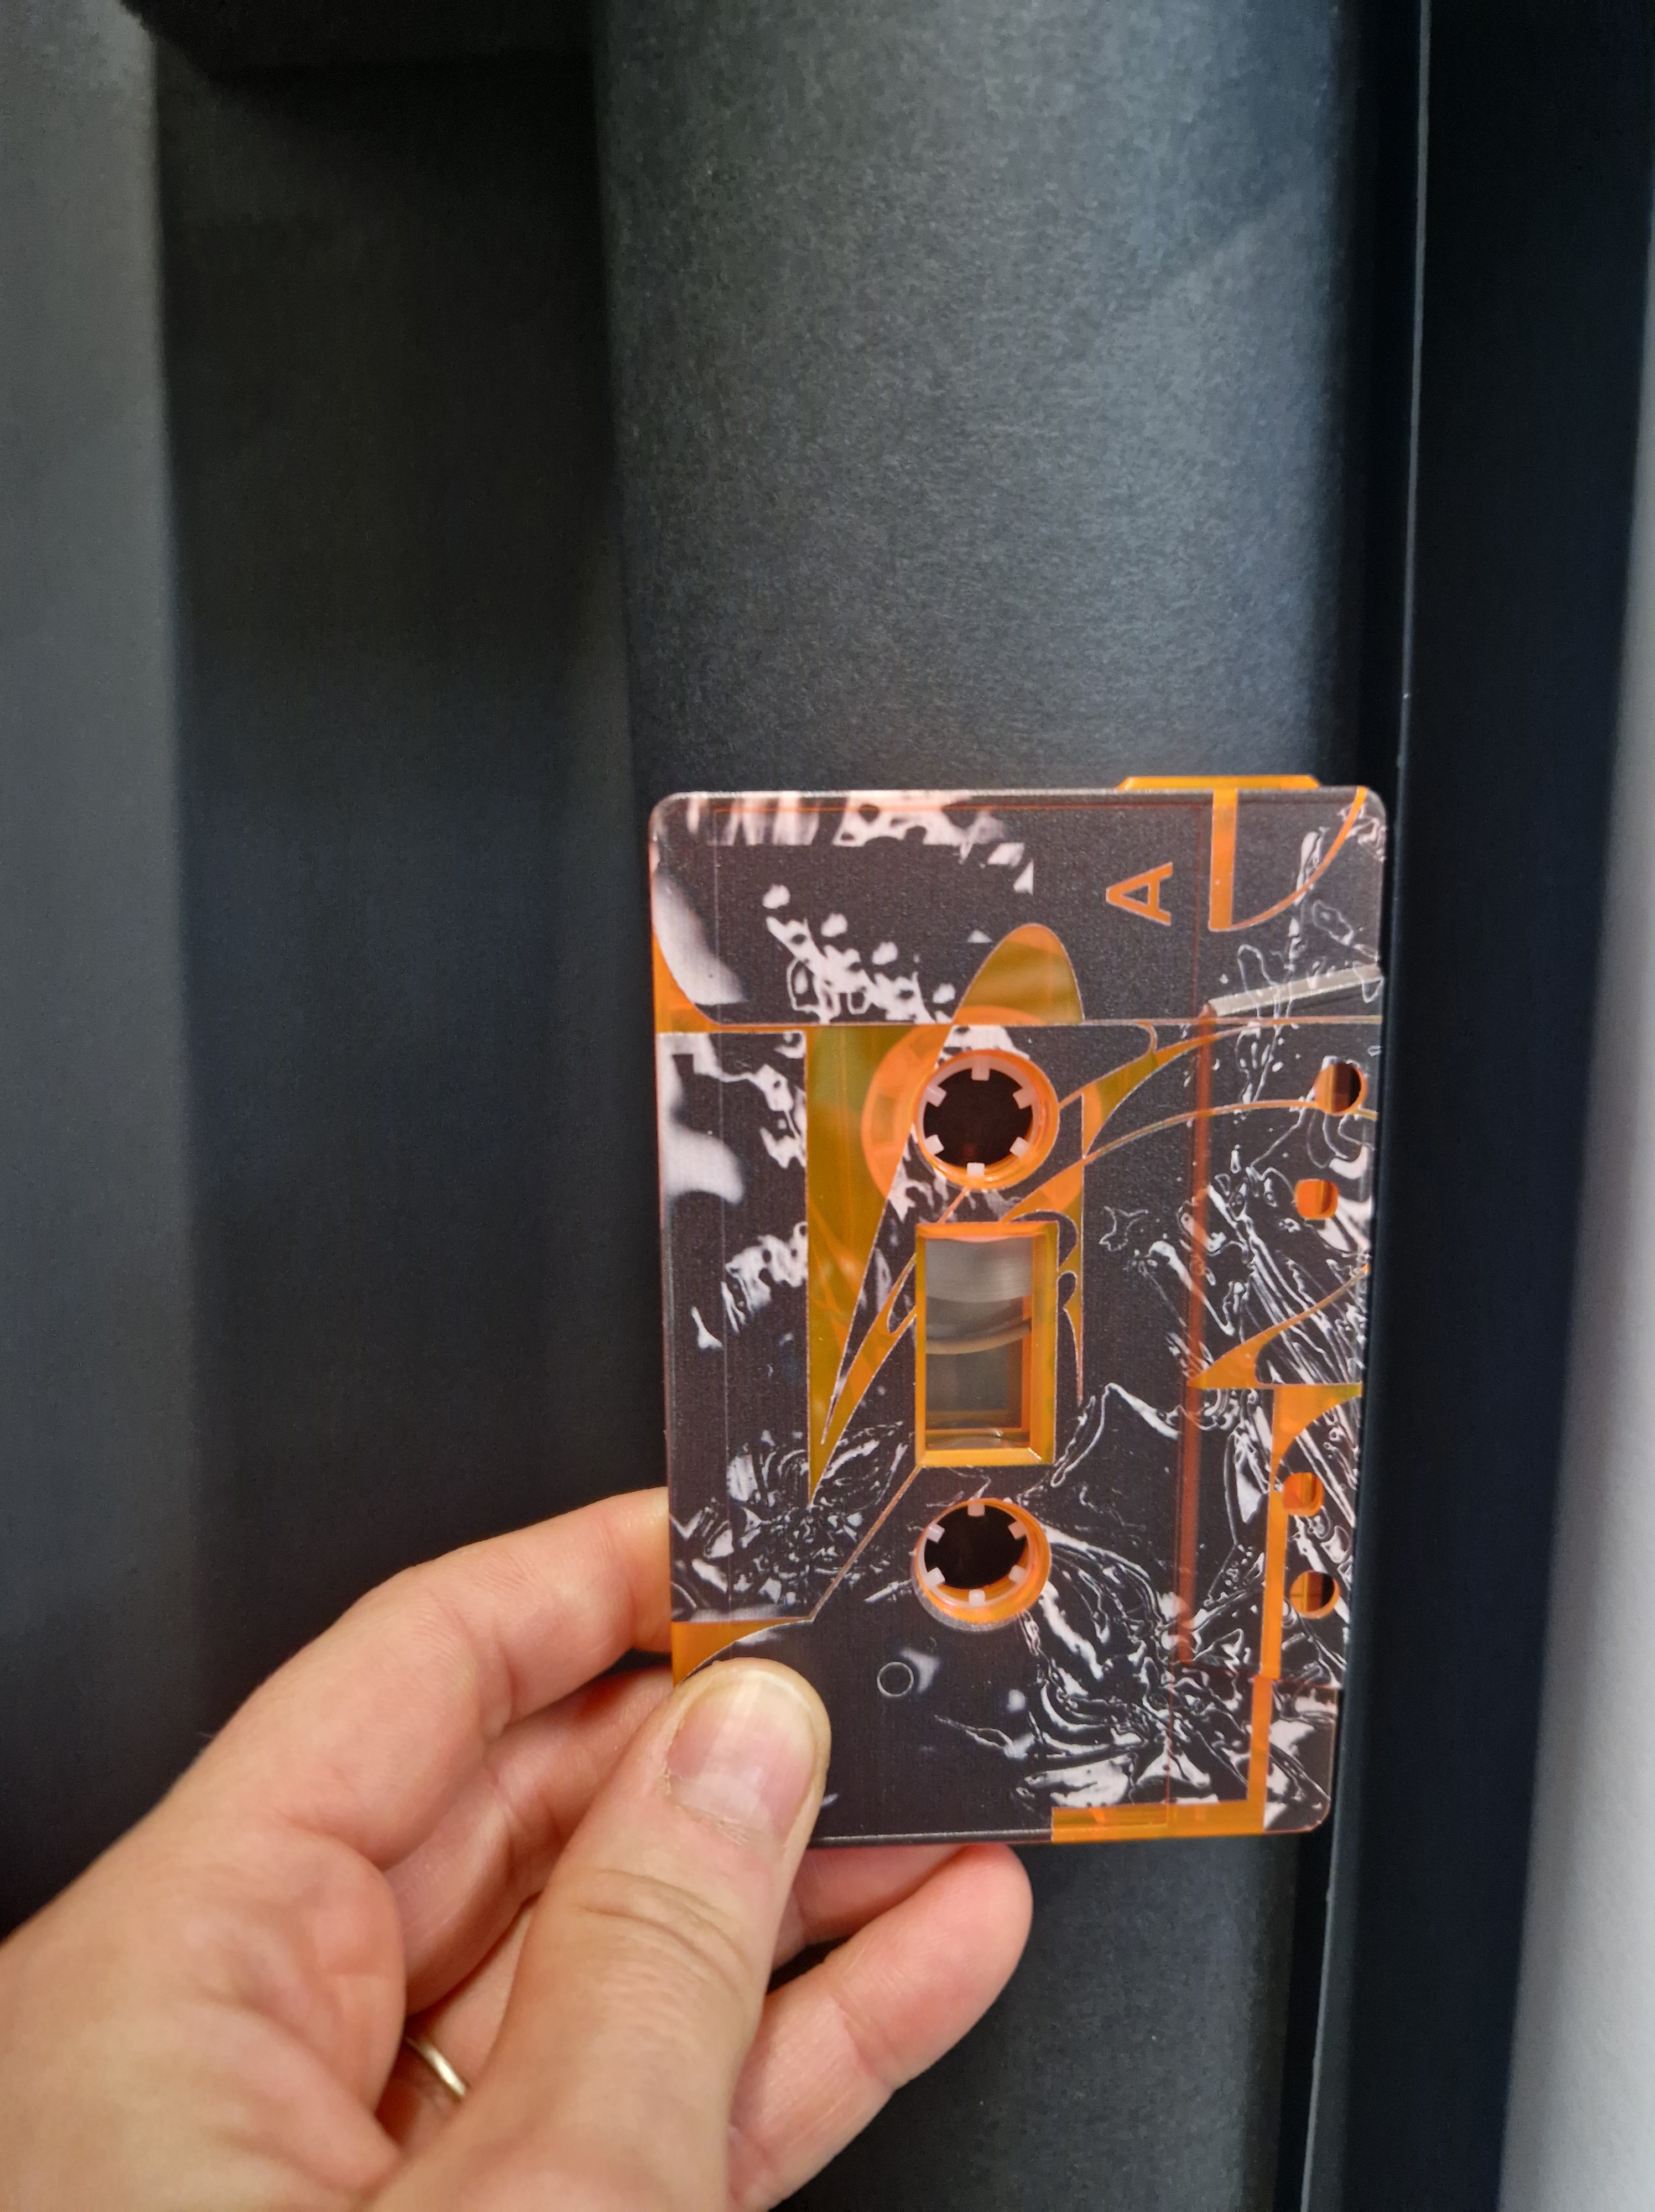
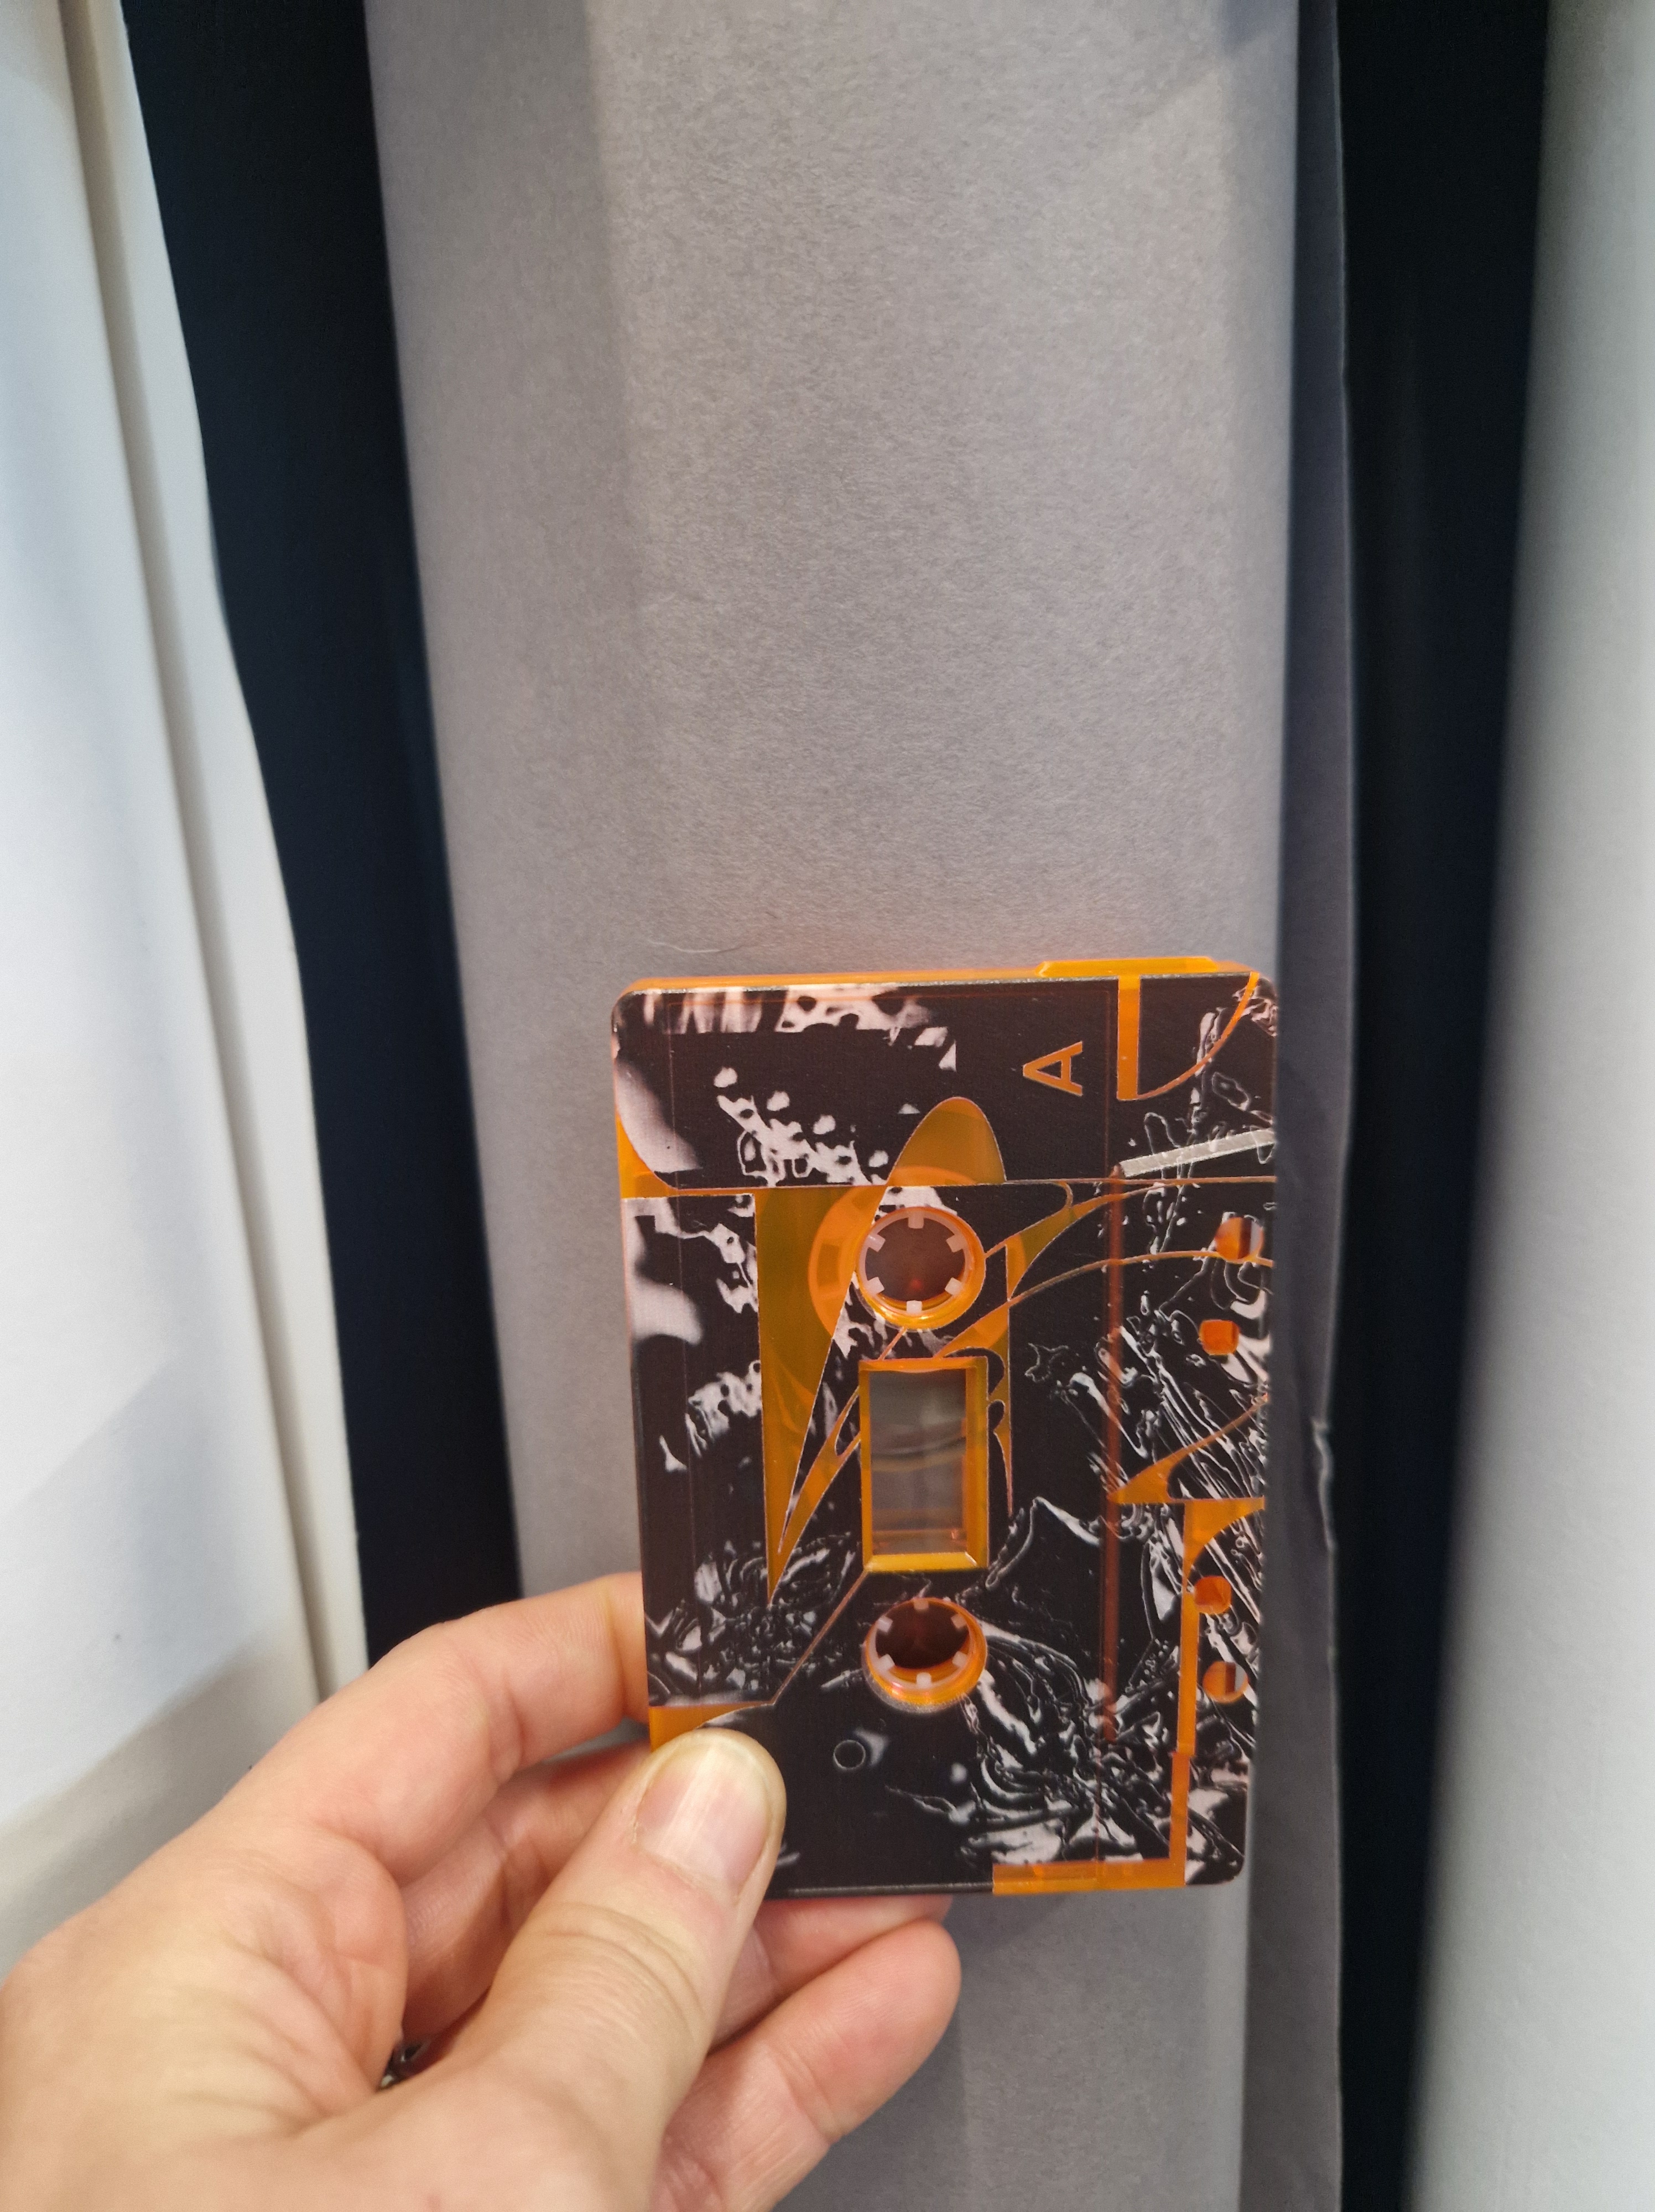
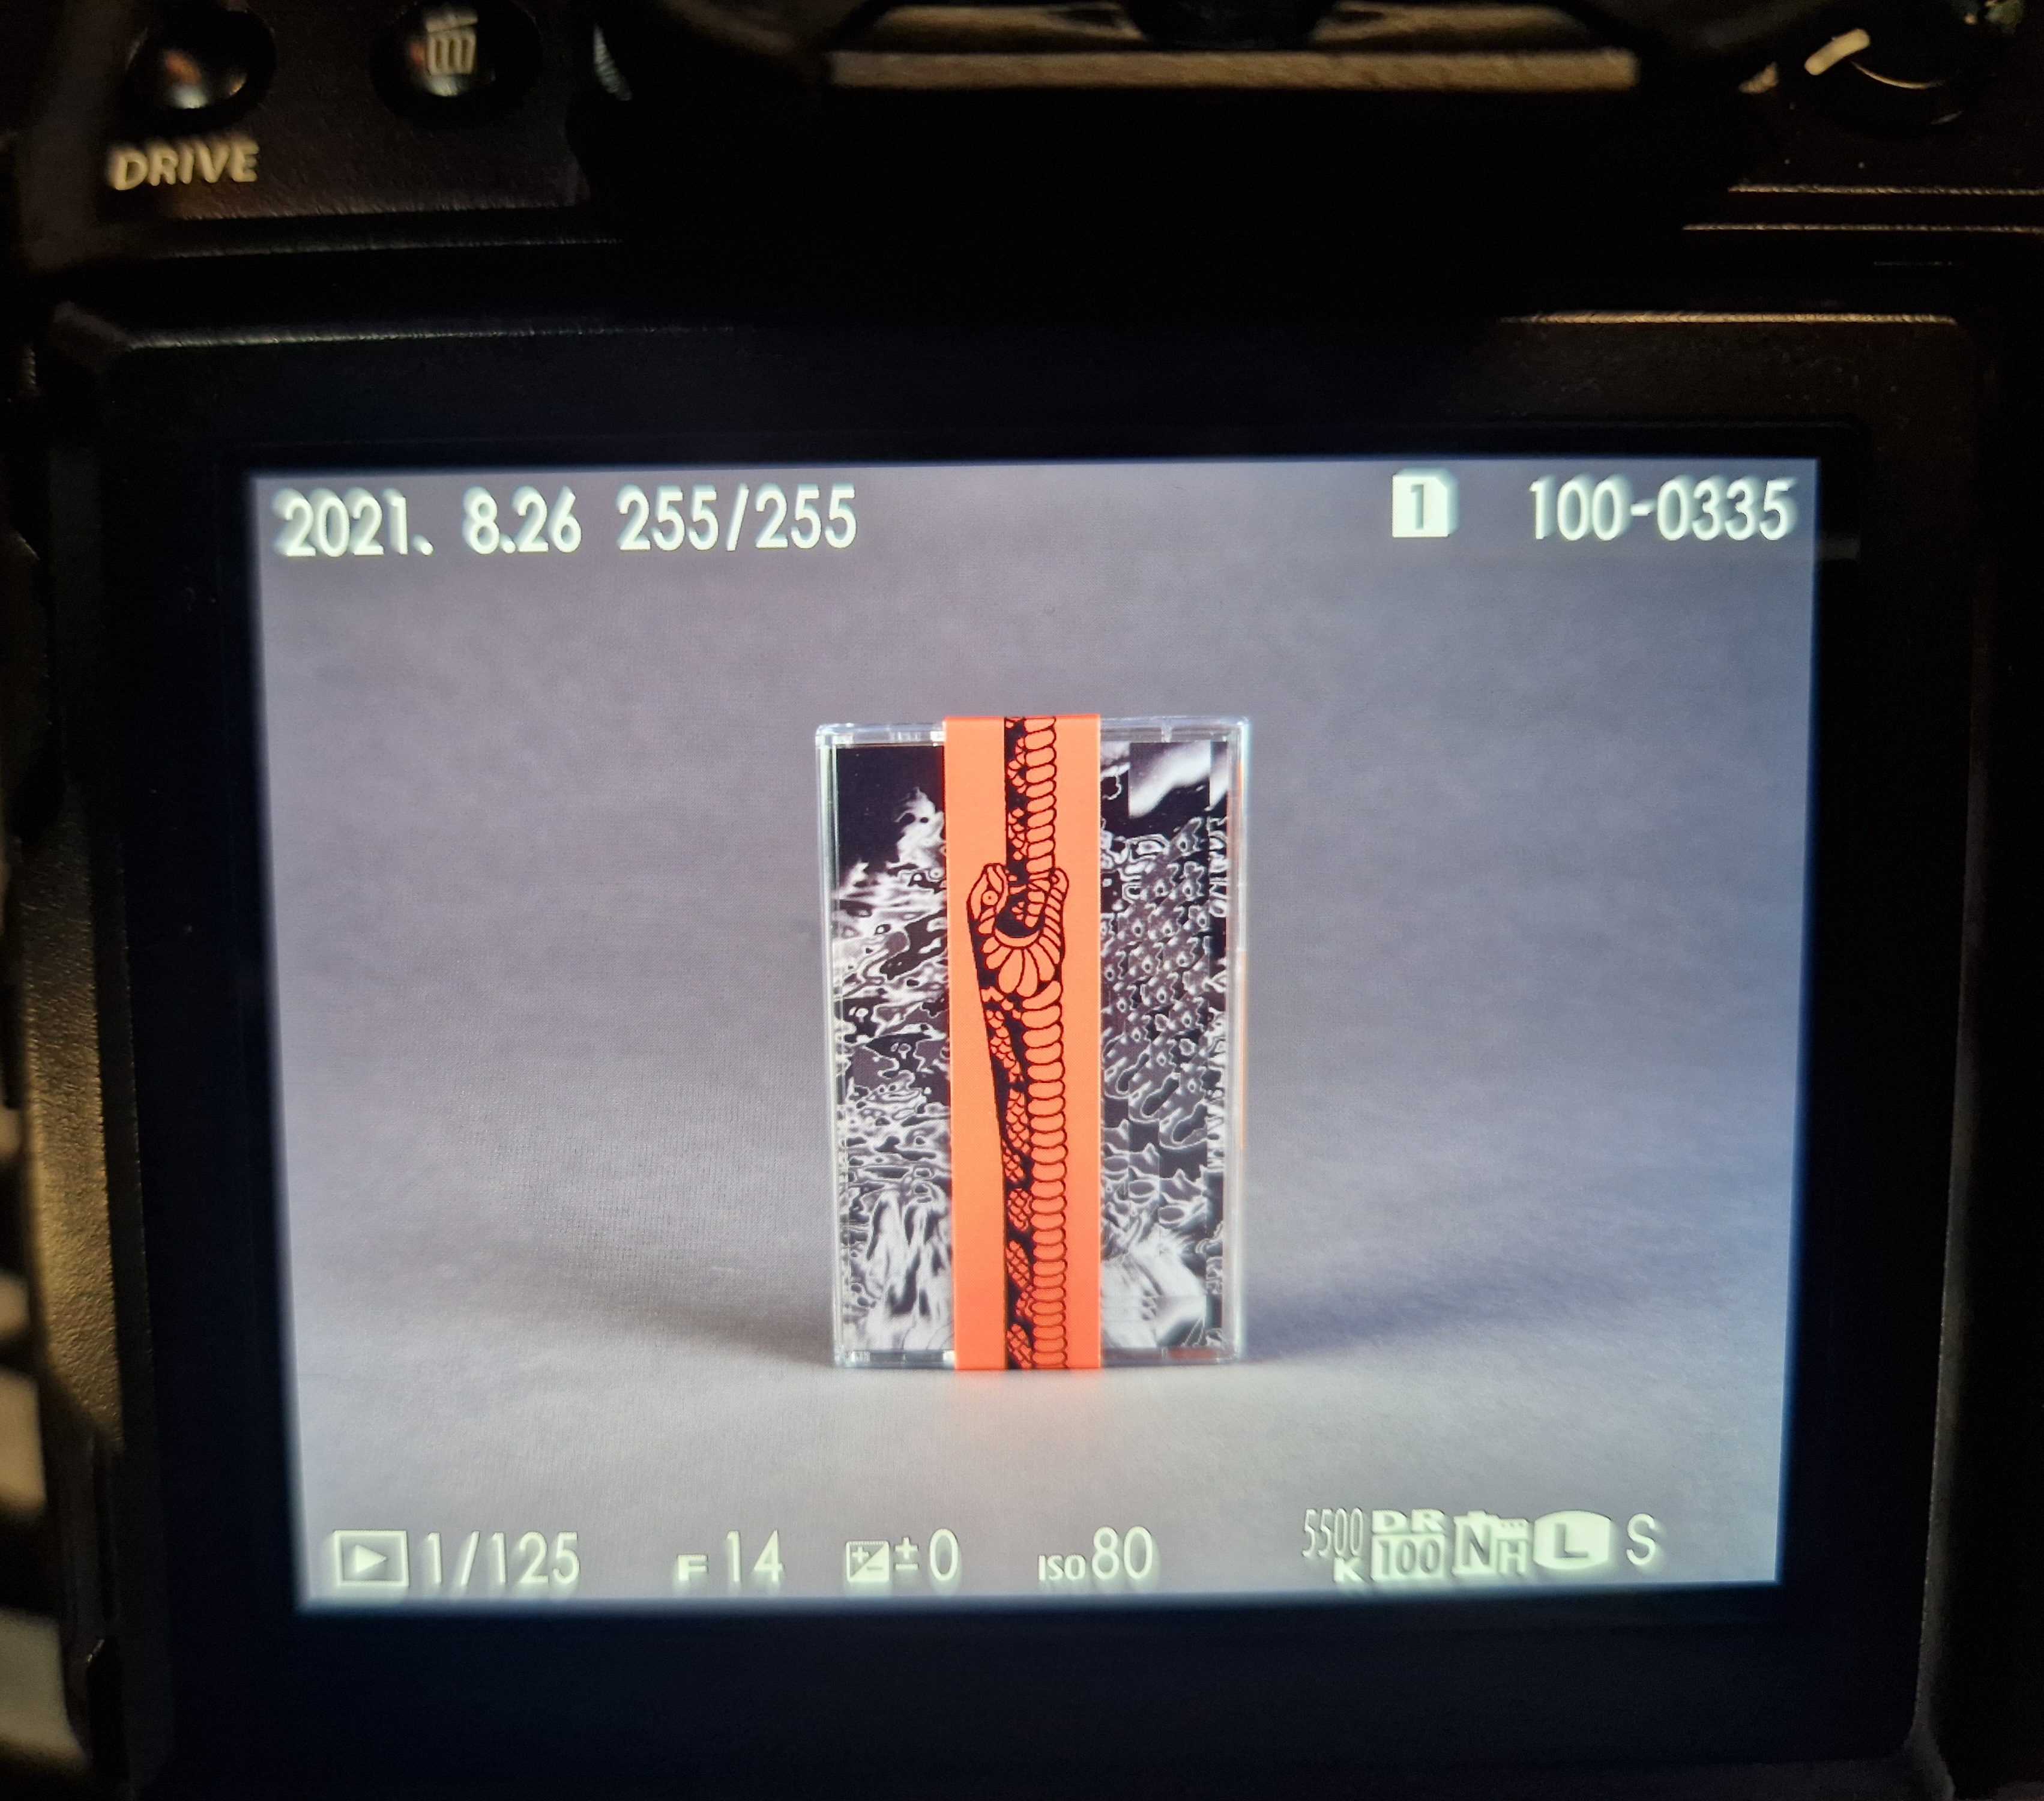

RESULTS ON MAMIYA AND KODAK PORTA 400
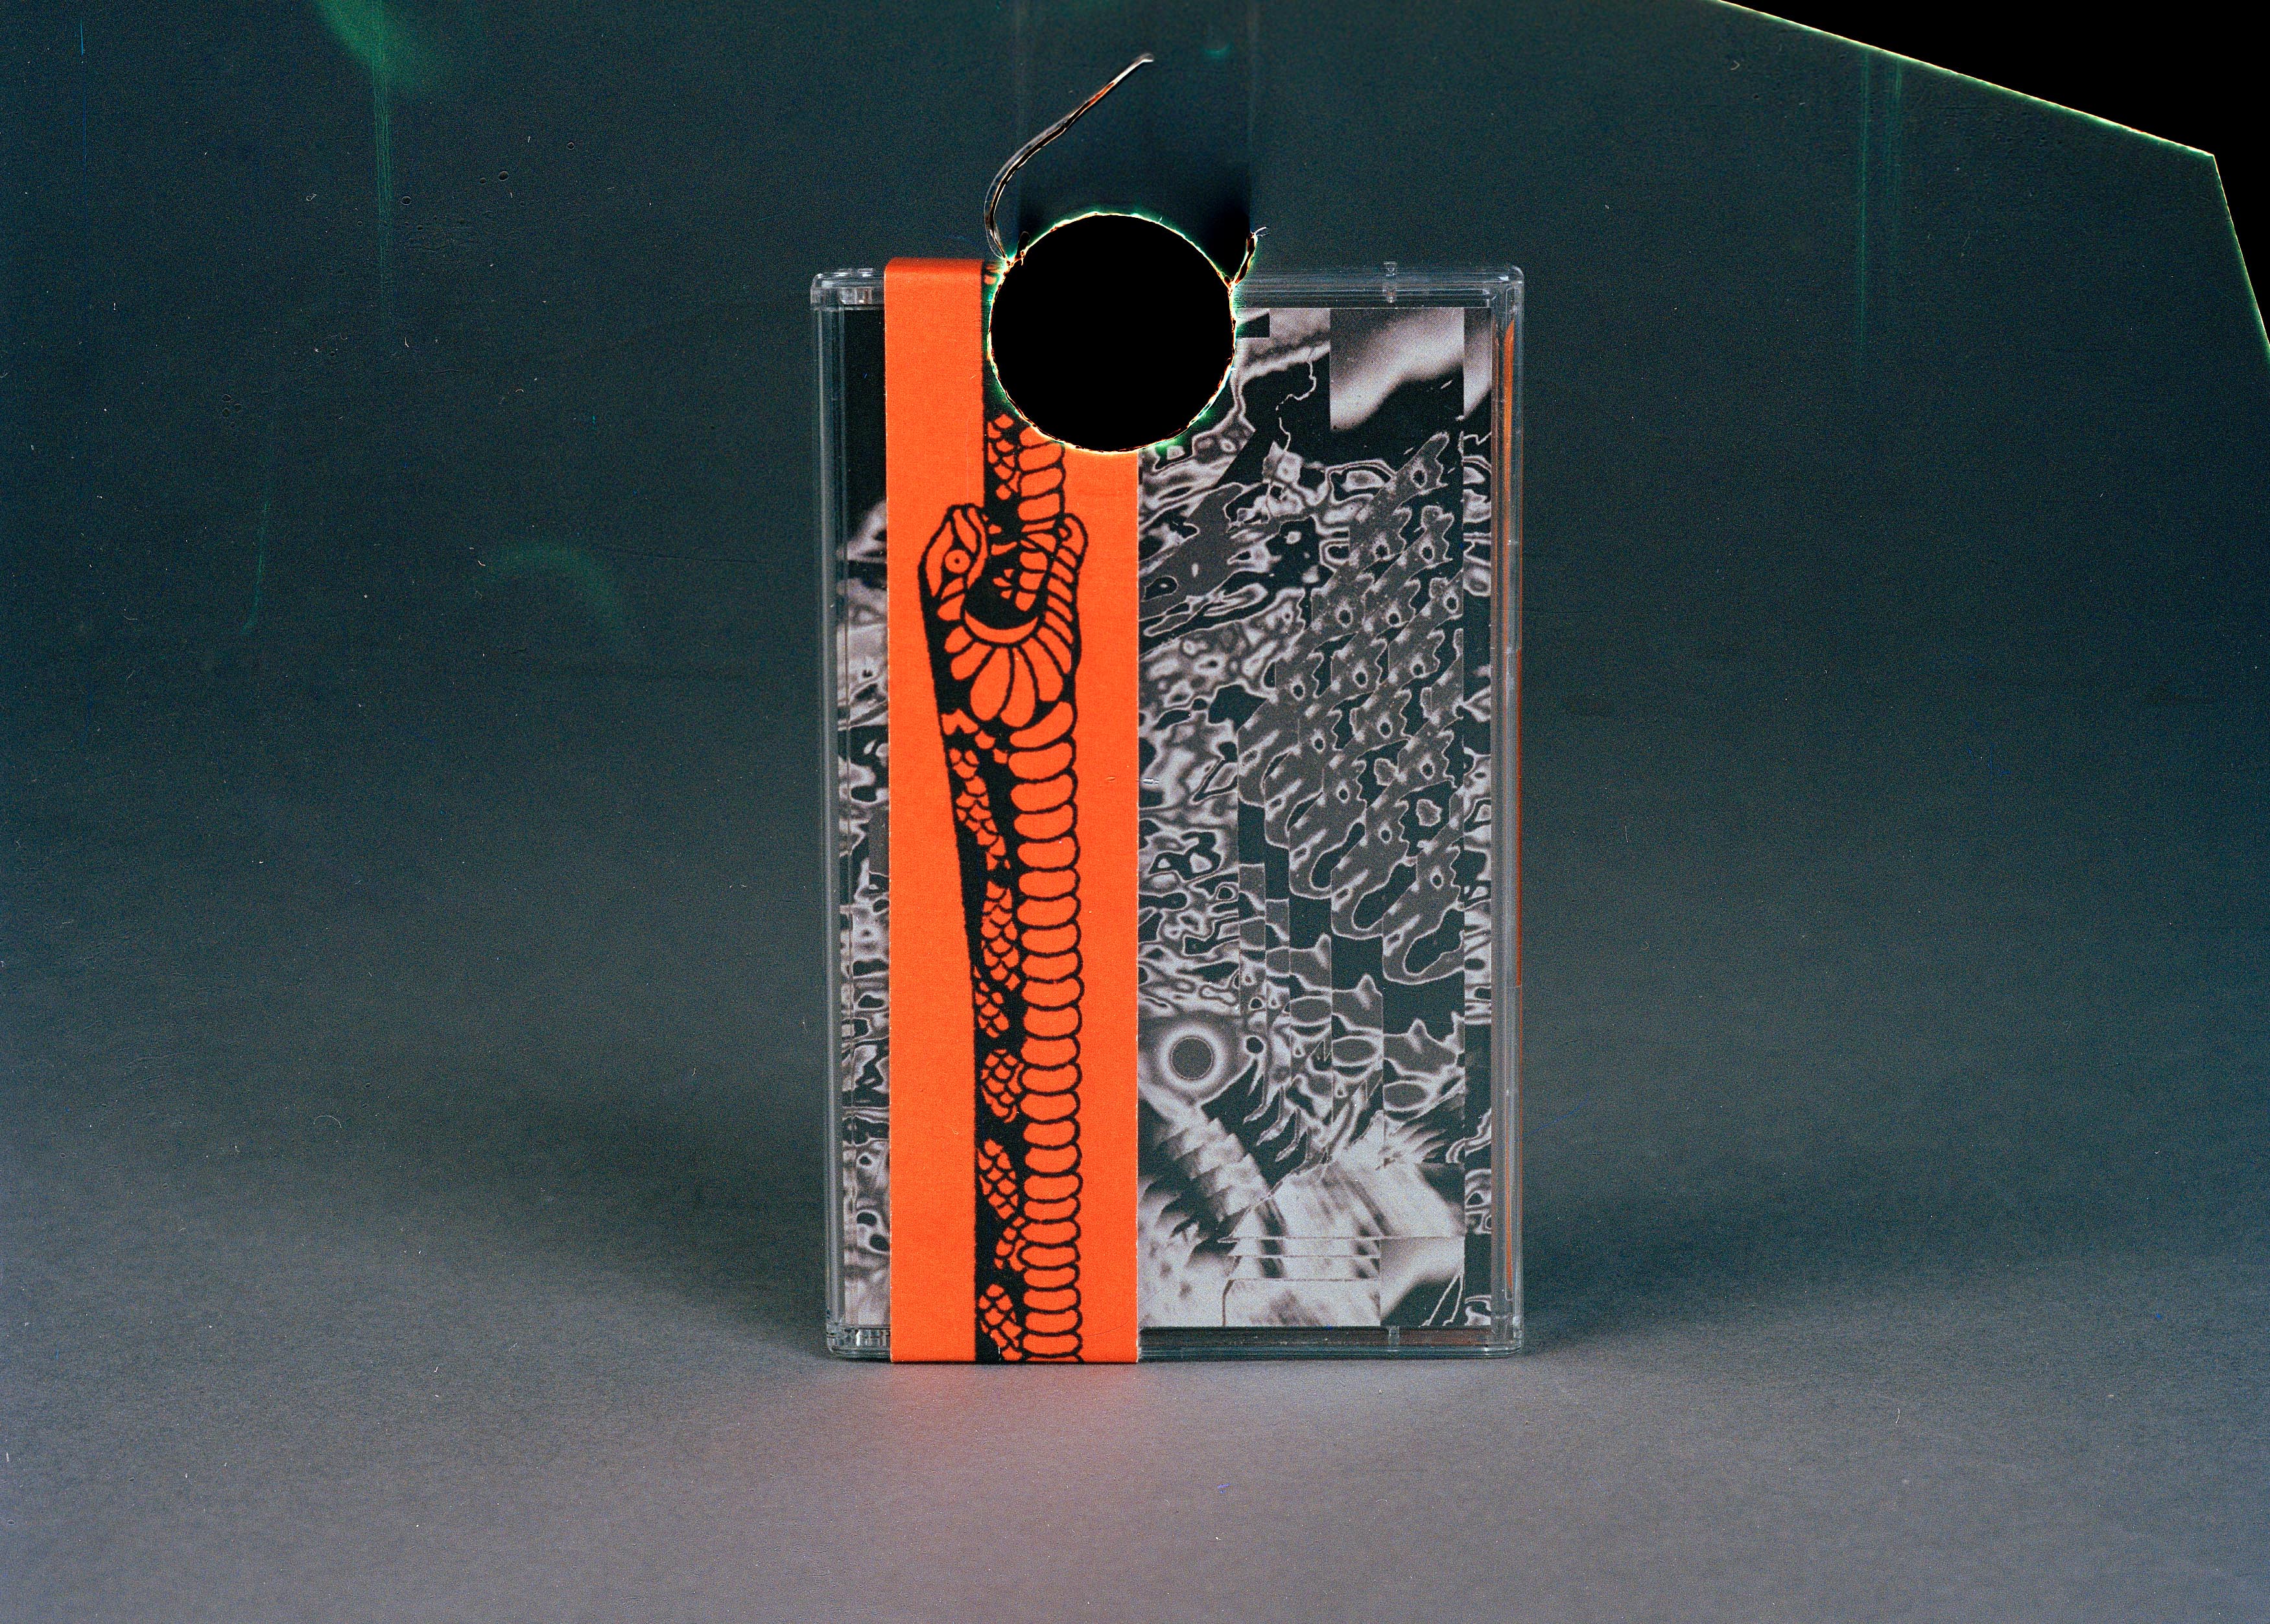


CONTACT SHEET
REFLECTIONS: Great day of studio work, made me realise how difficult product photography is (especially when you are determined to perfect it). It was a very good practice for me, and gave me lots to think about.
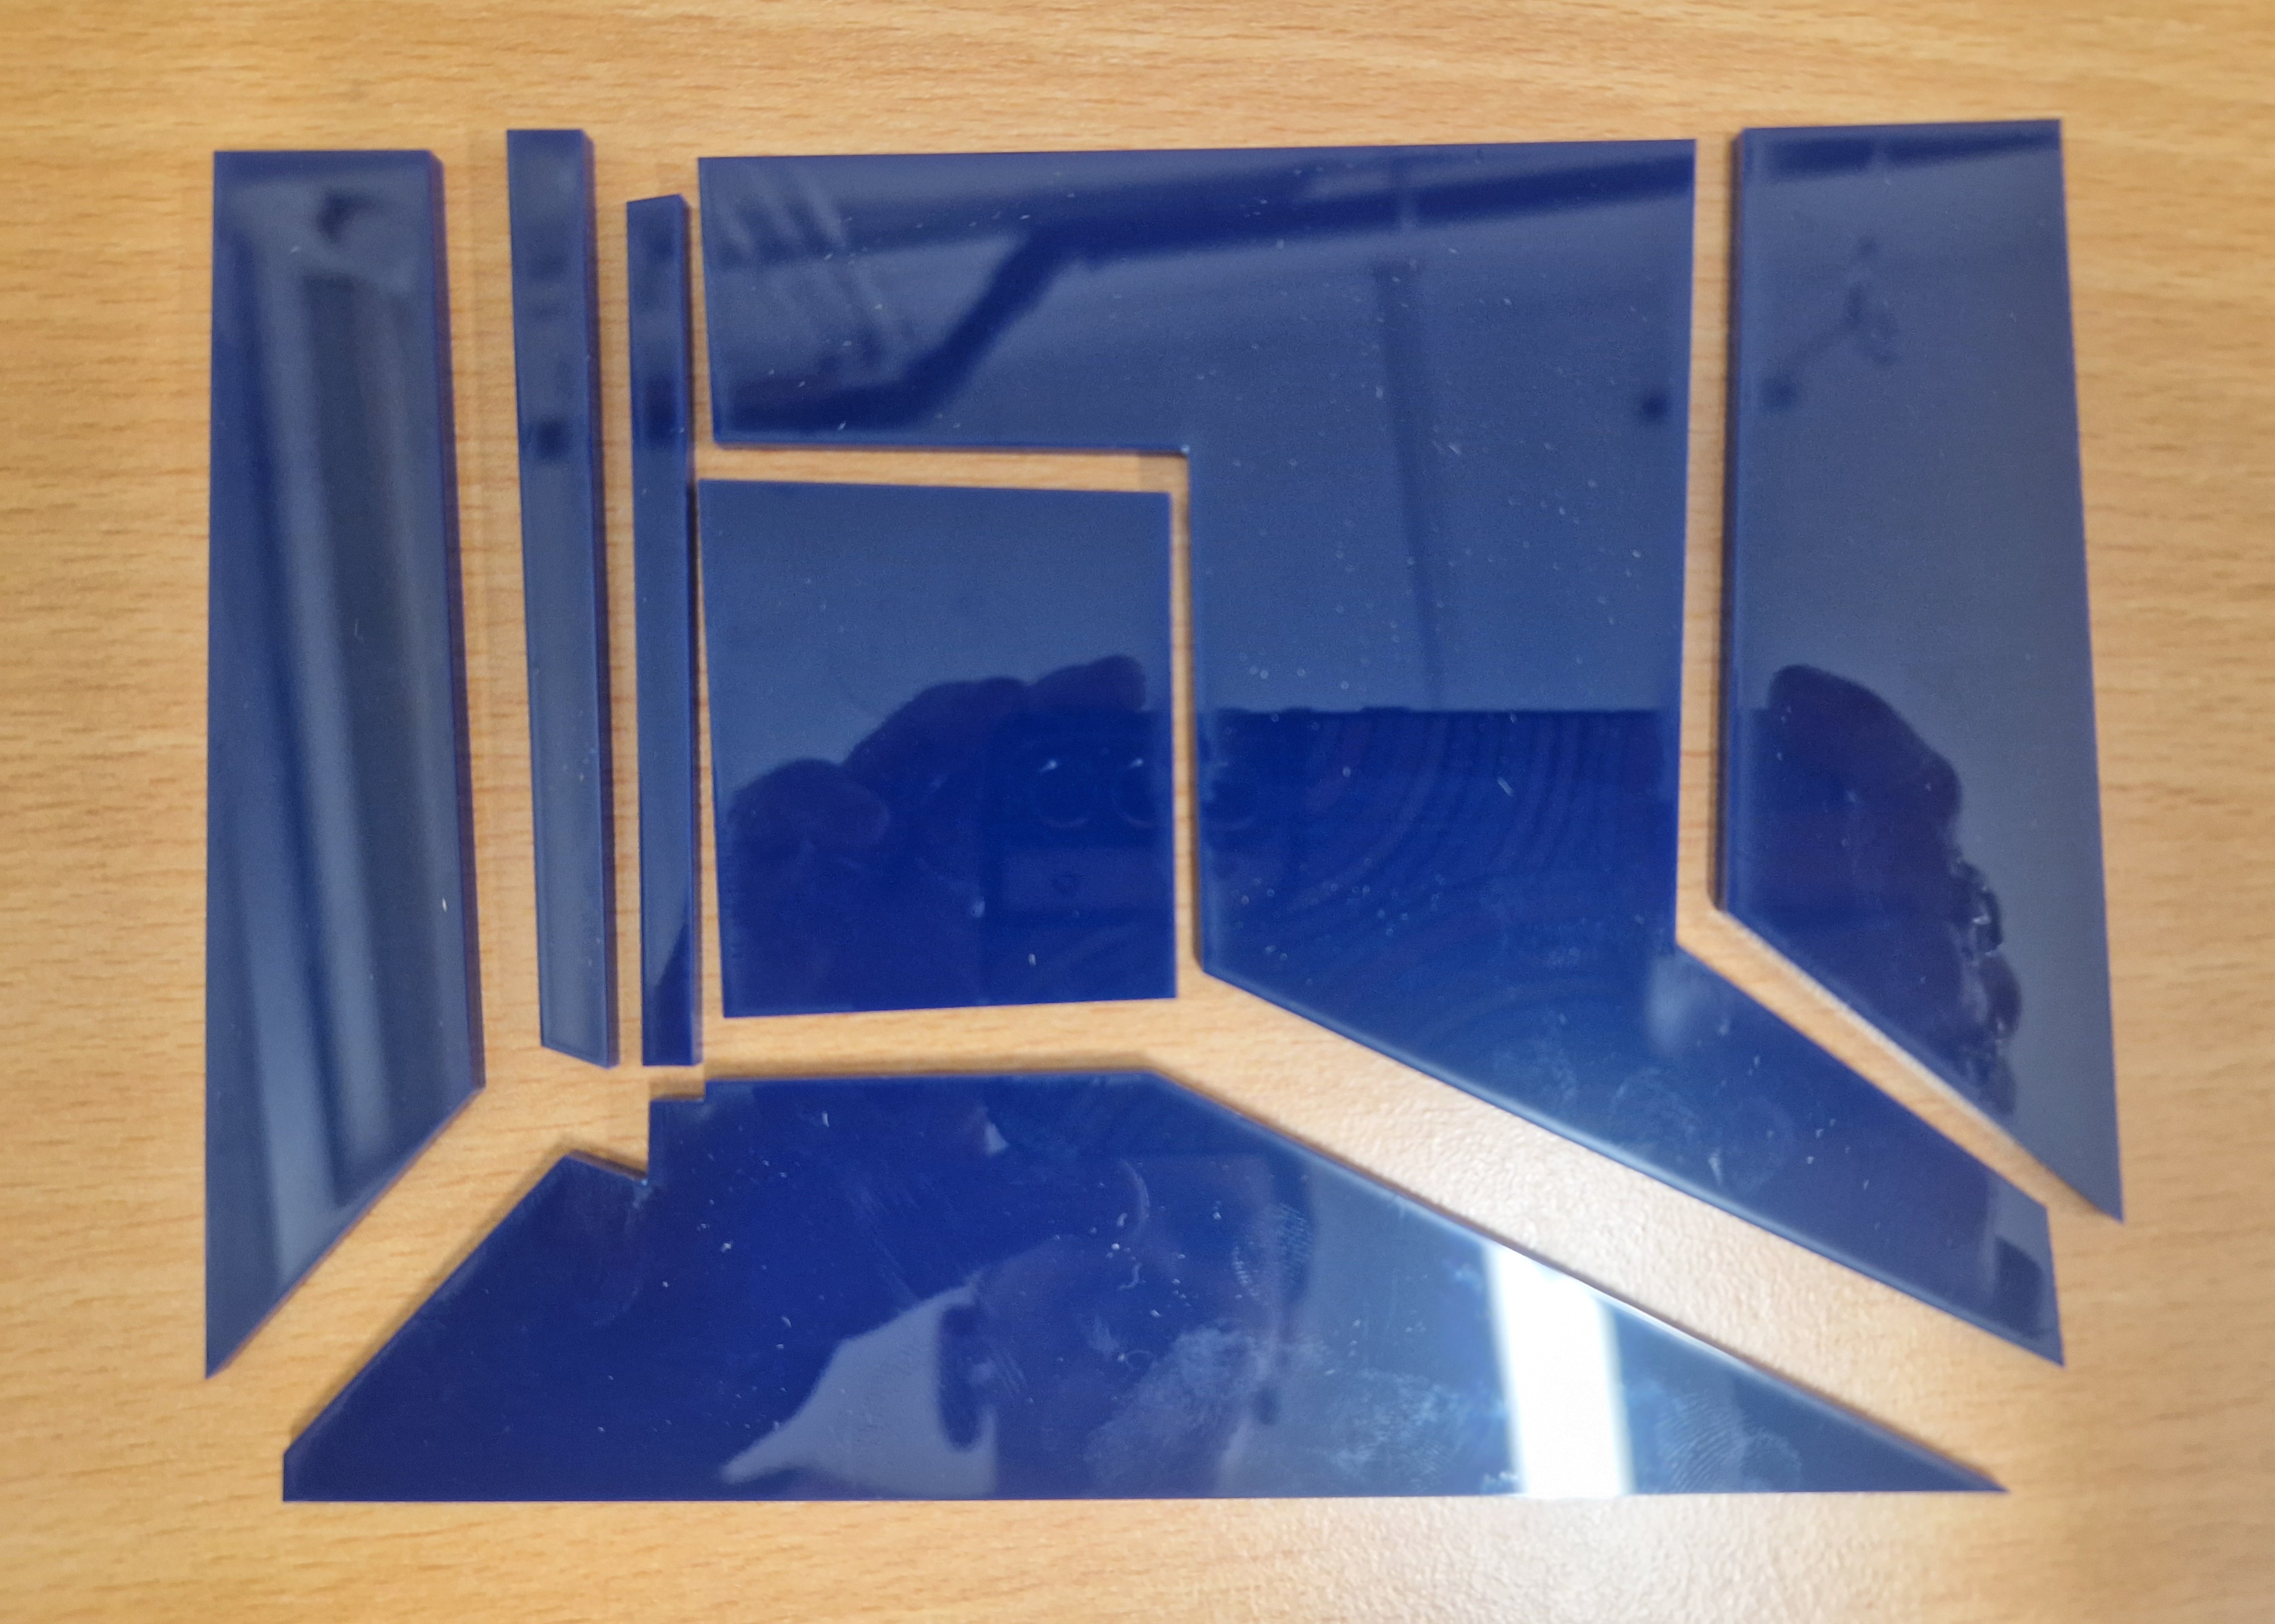
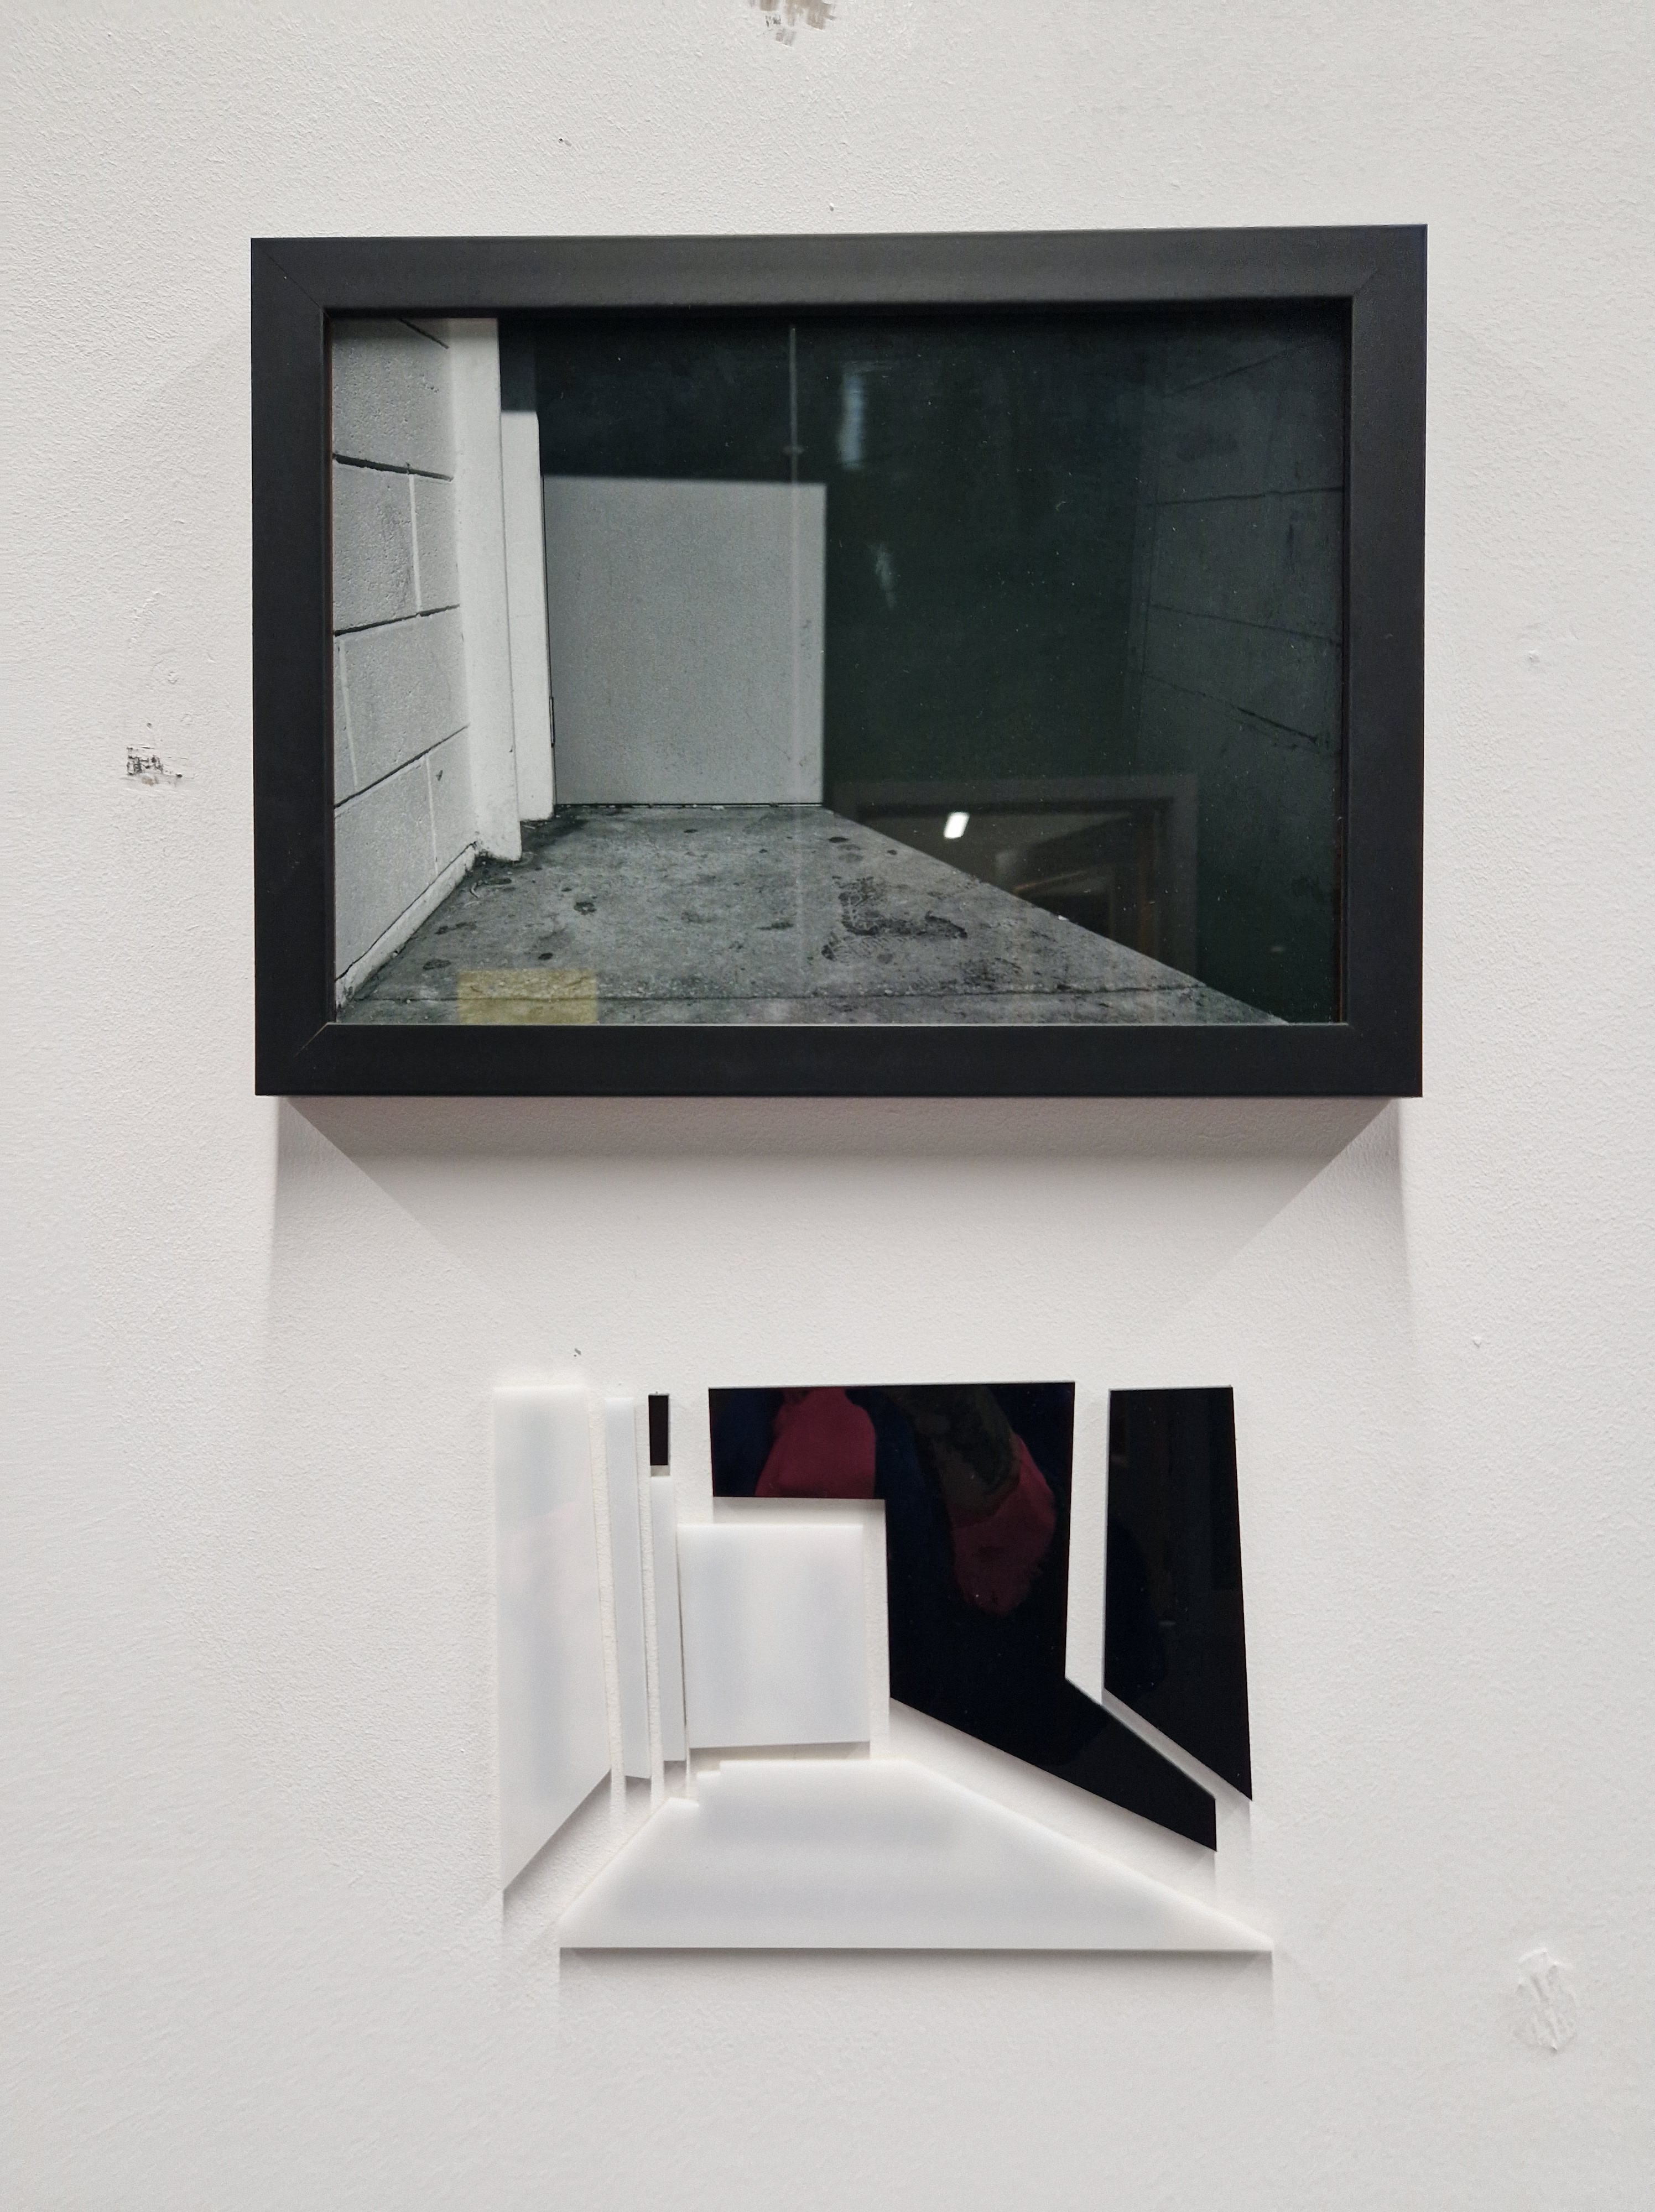
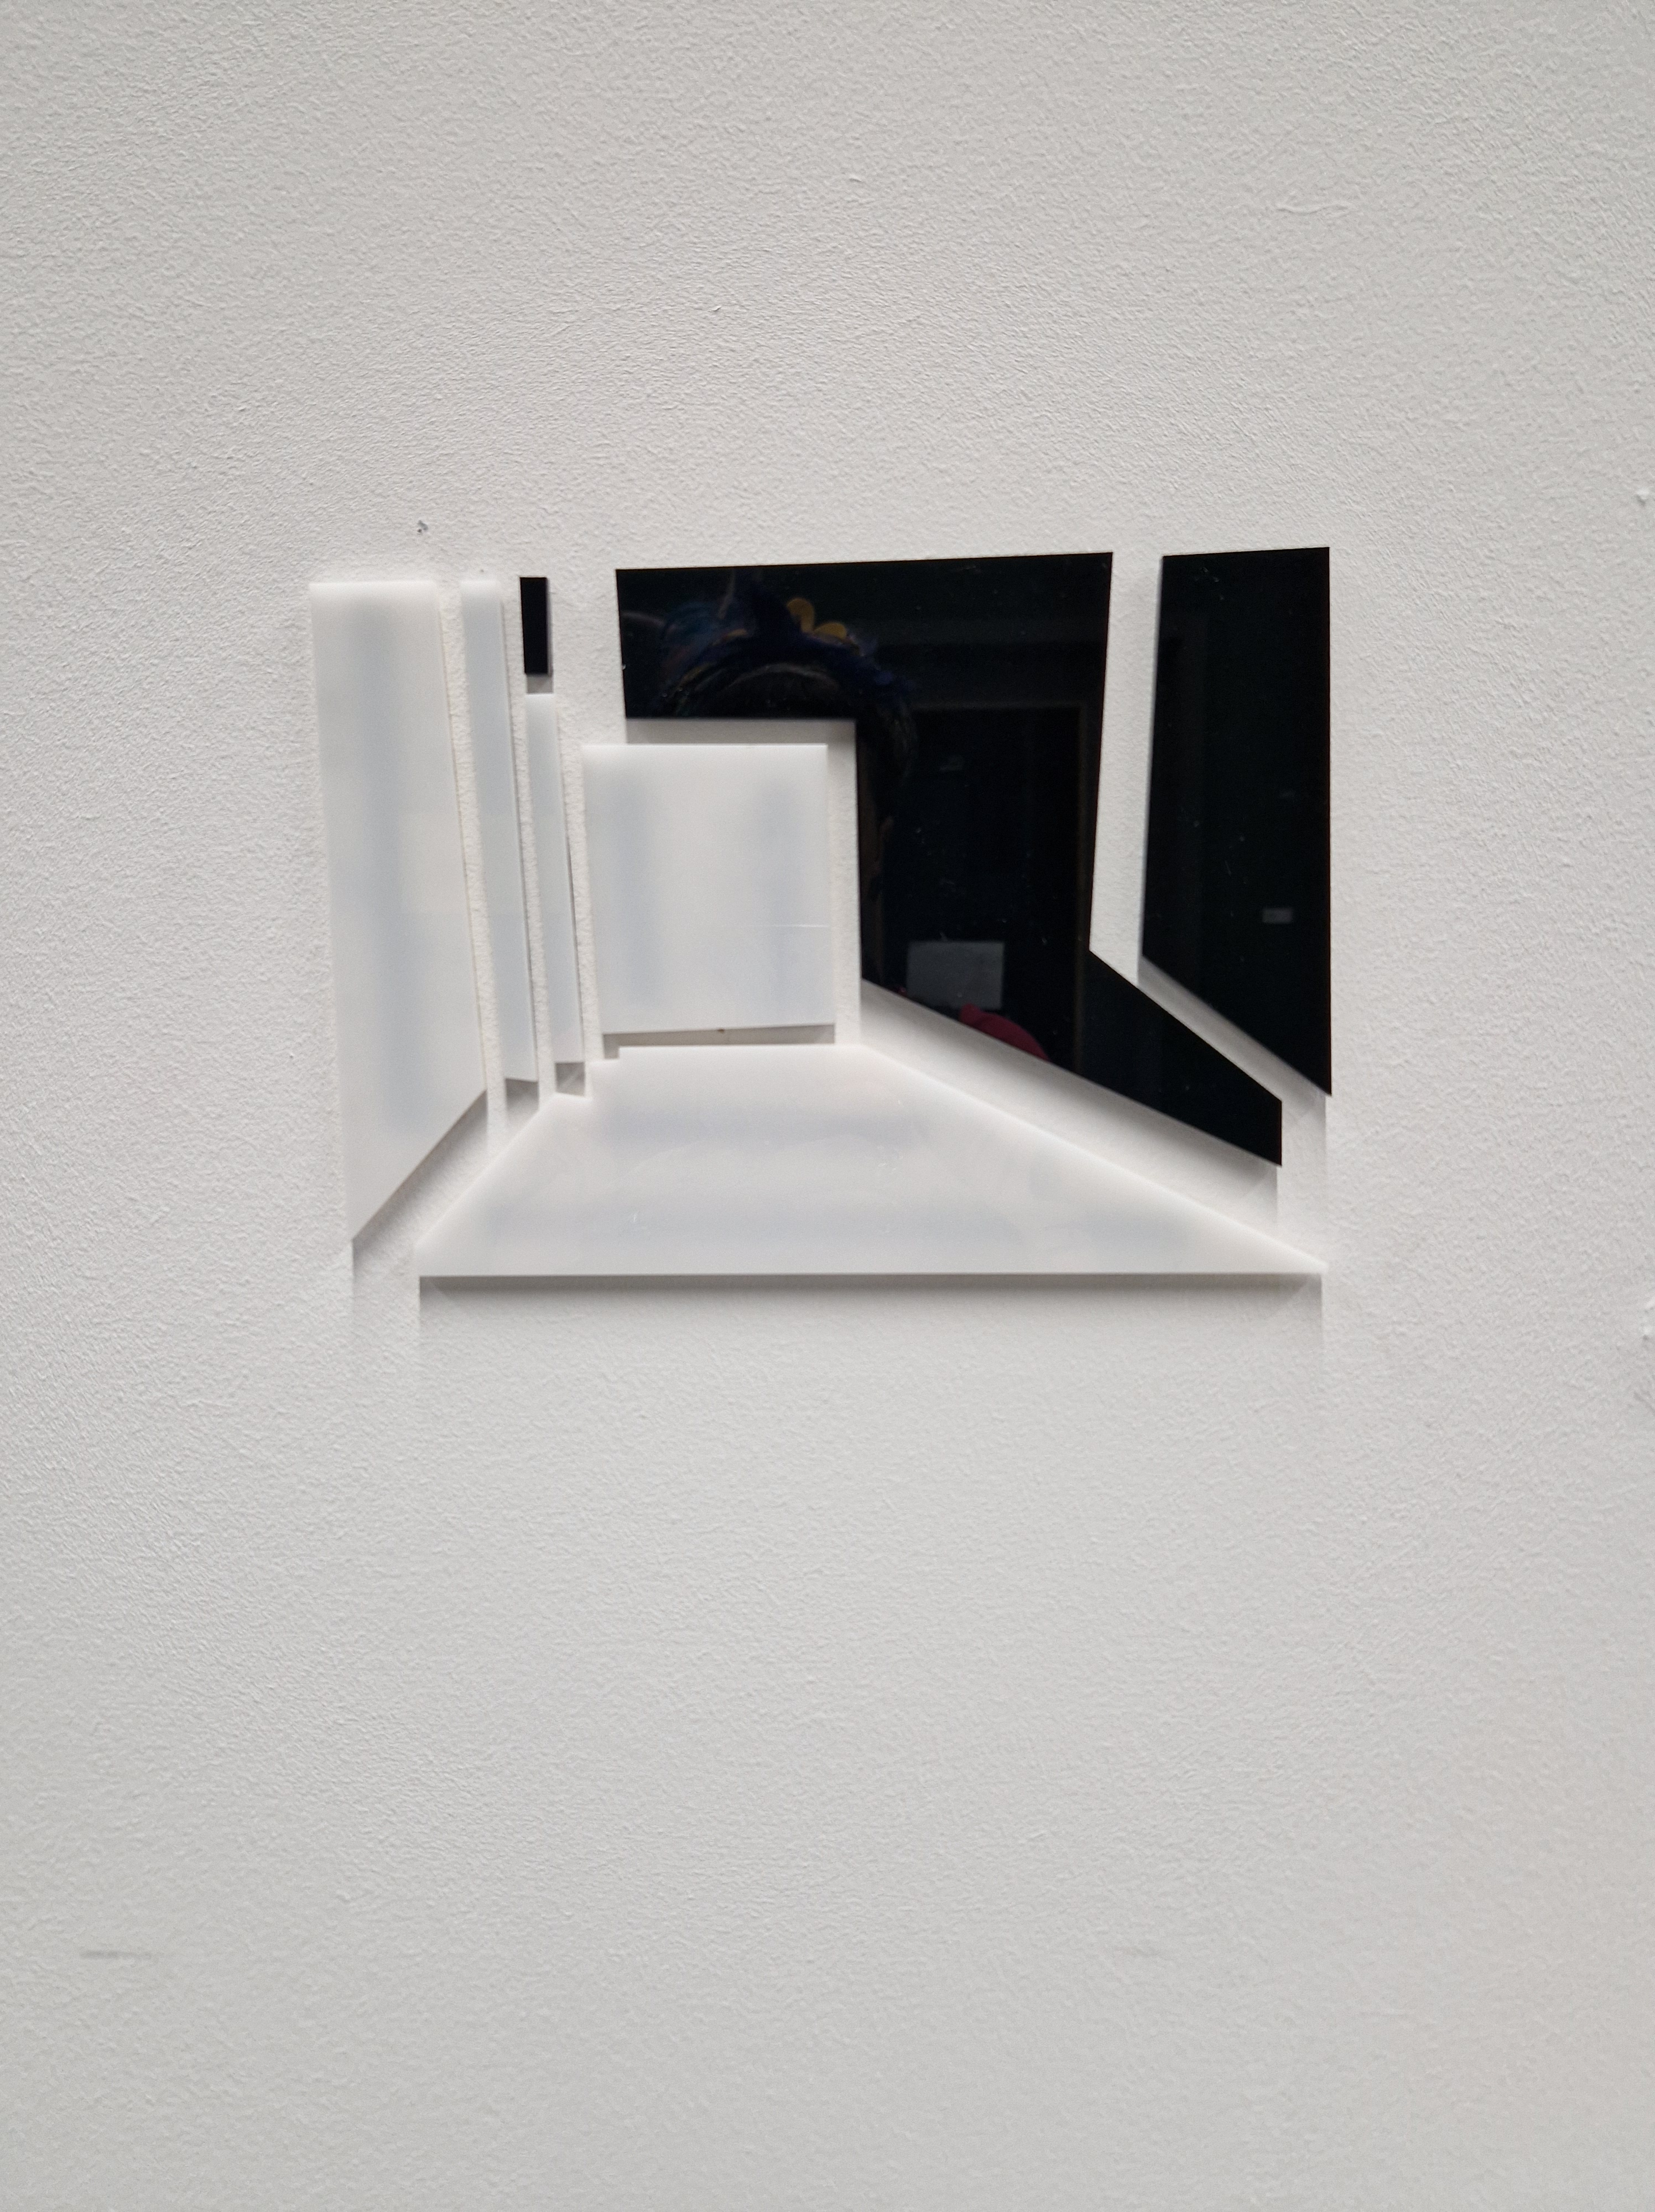
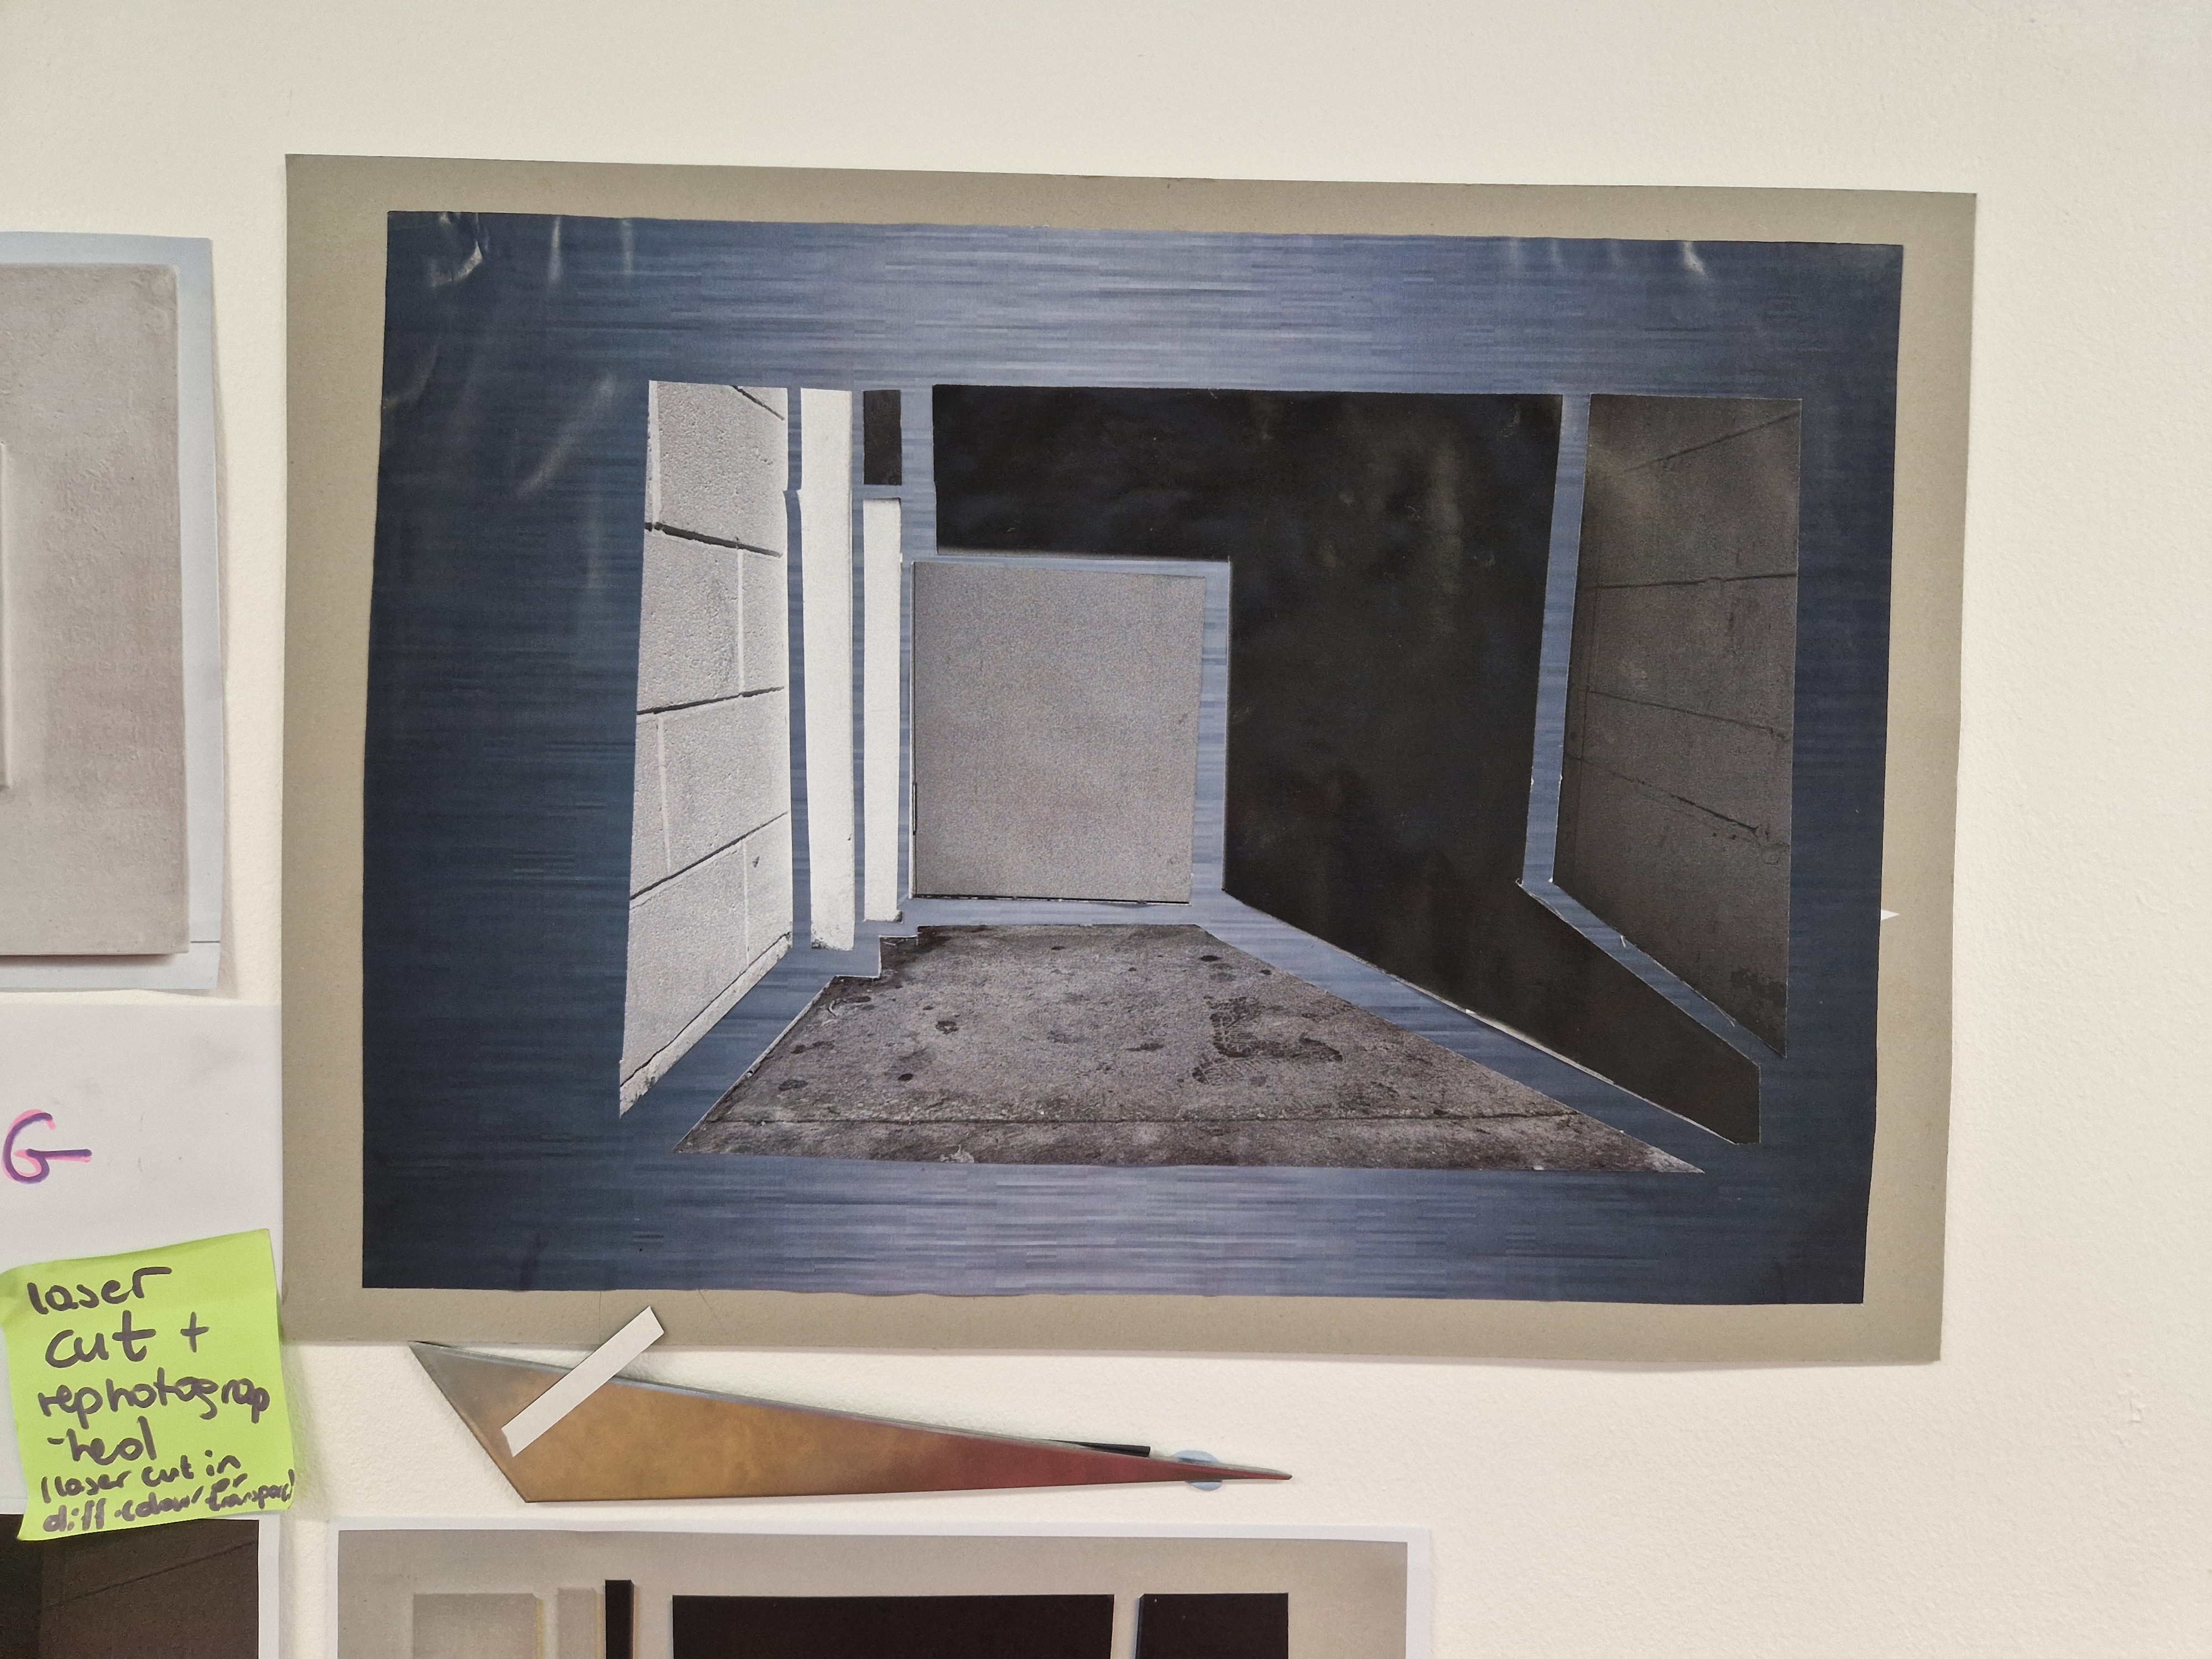
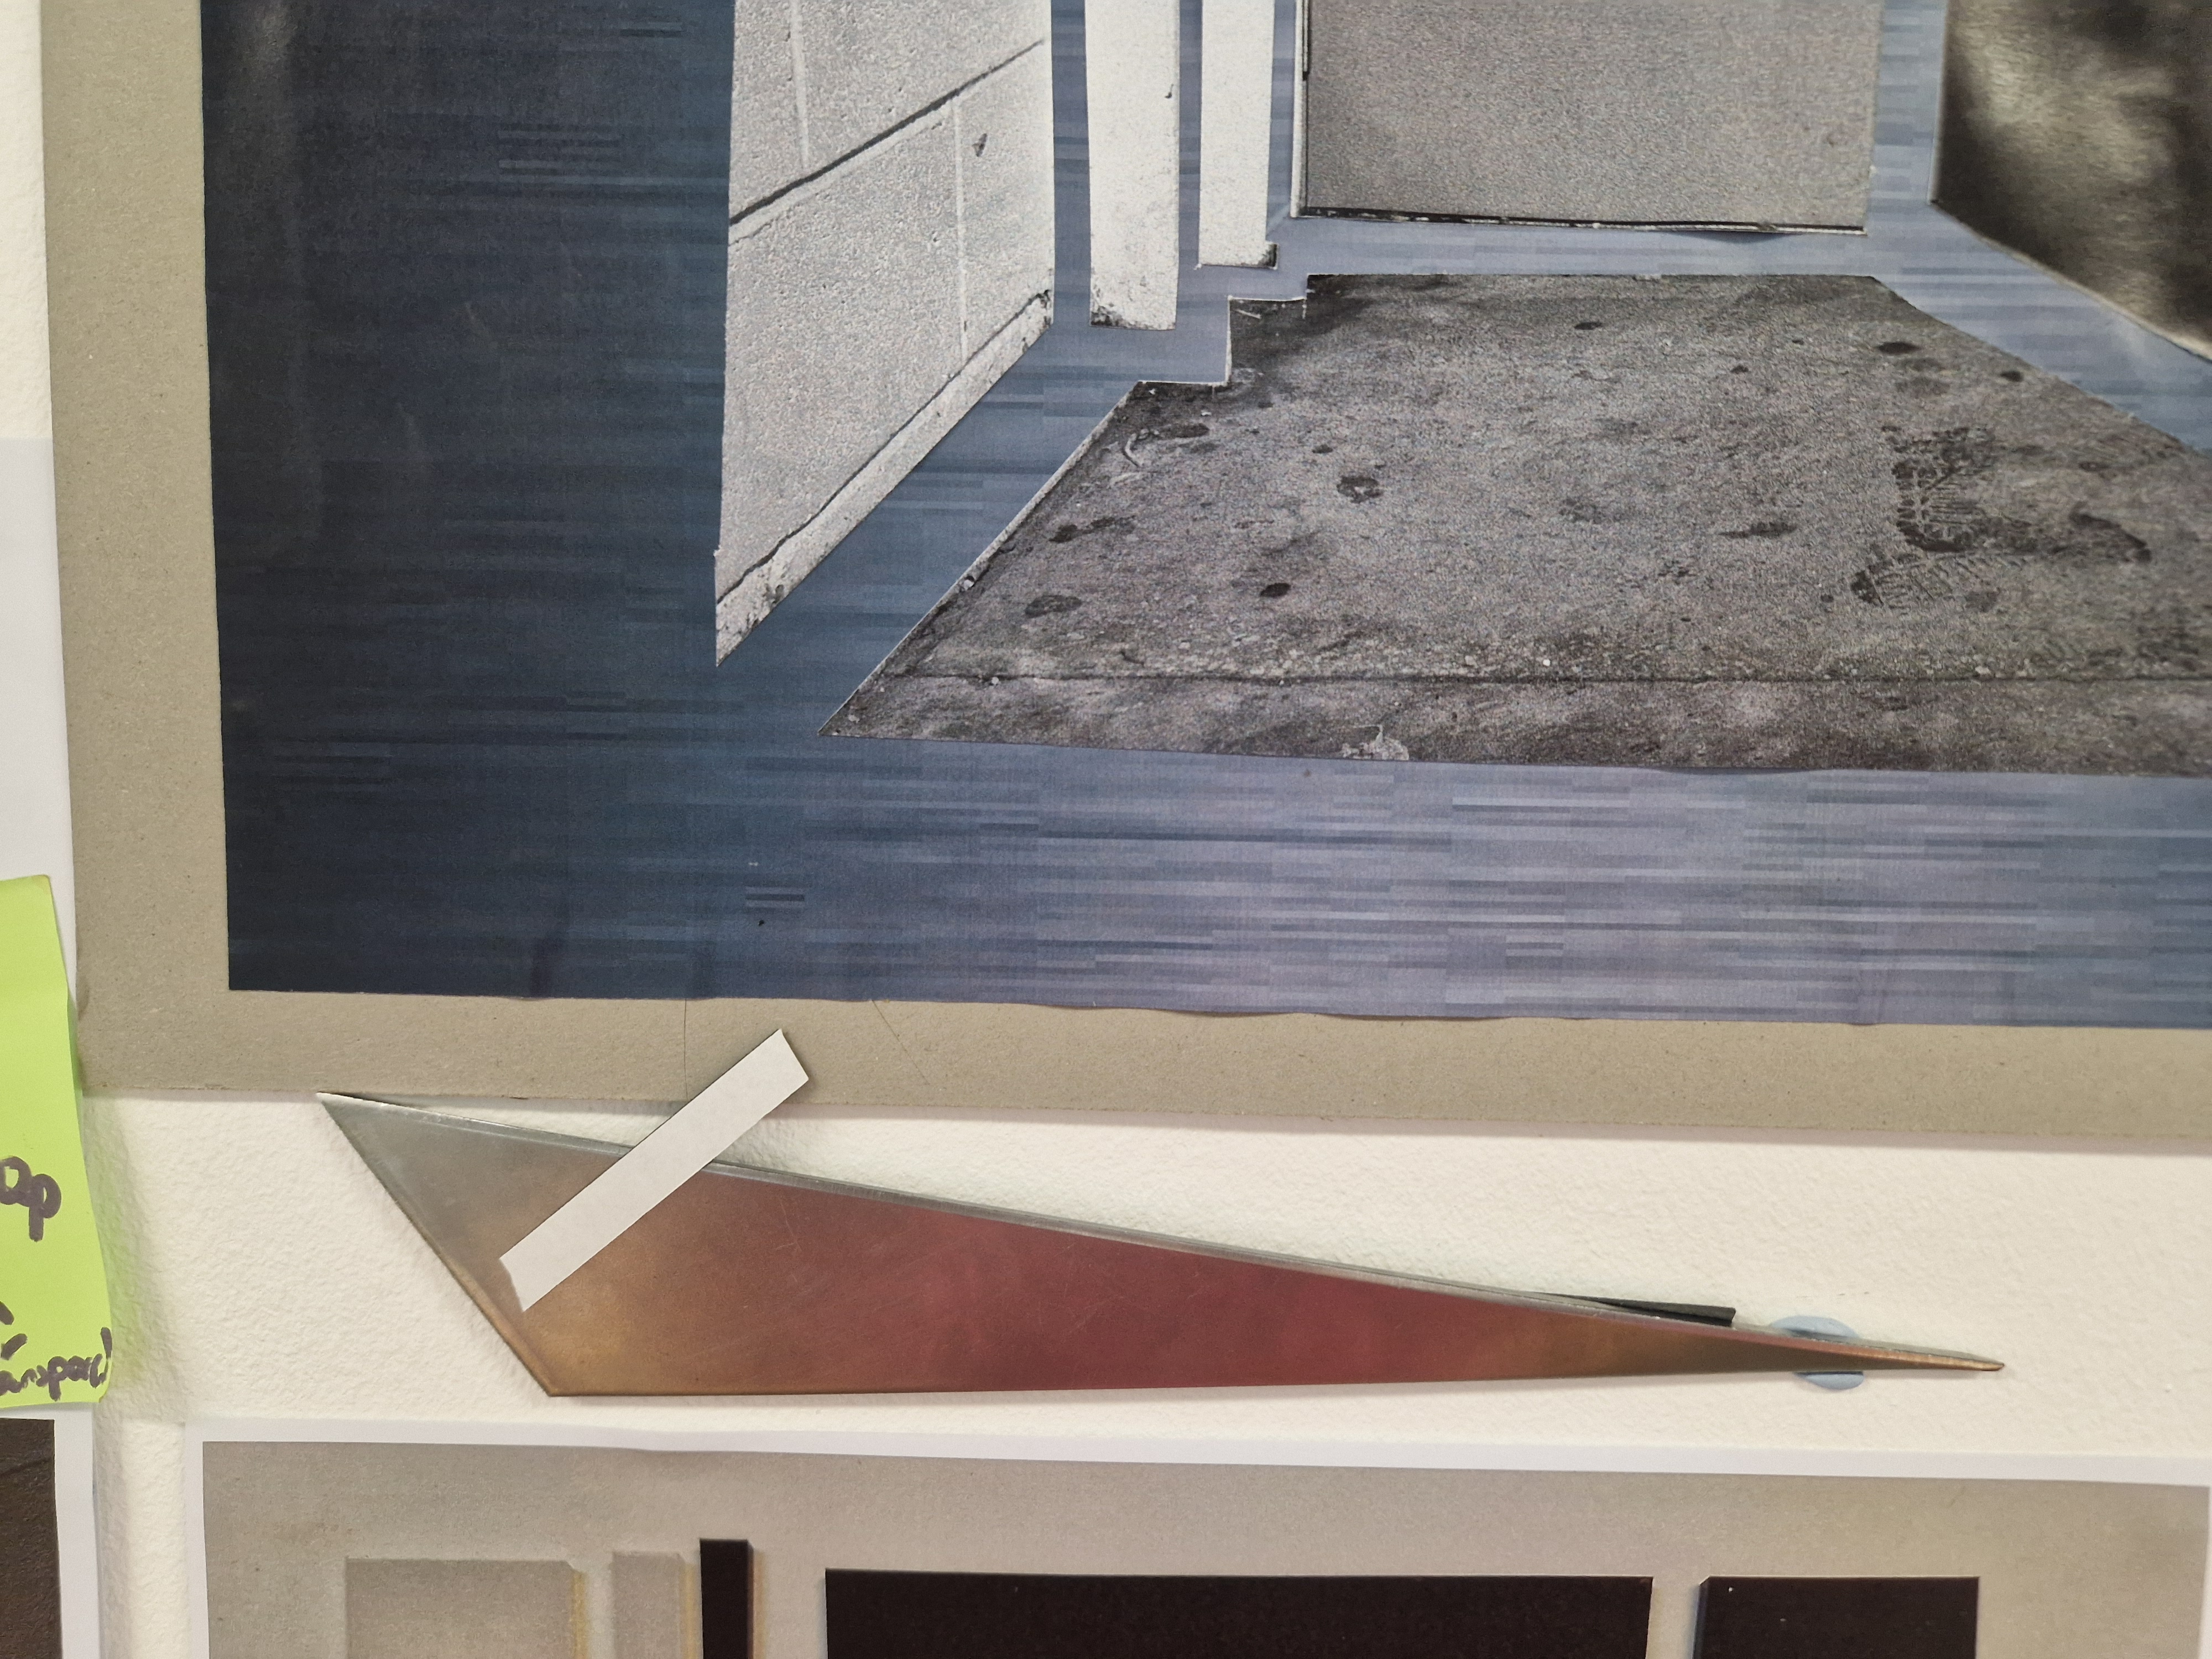
WORKING ON LASER CUT SCULPTURE – TESTING ARRANGEMENTS
After the product photoshoot, I utilised the product table in the studio to test a variety of arrangements using my newly cut designs.
I considered using only the inside or the outside of the cut but also both combined.
After some testing and photographing, I resolved to laser cut it again in three colours corresponding to the original image.
I will then apply magnets to the back of each part and mount it on a metal background that I will then frame. The result will be a sculptural piece that will be a deconstruction of the image, an interactive piece that will invite the viewer to further deconstruct the image by rearranging the pieces.
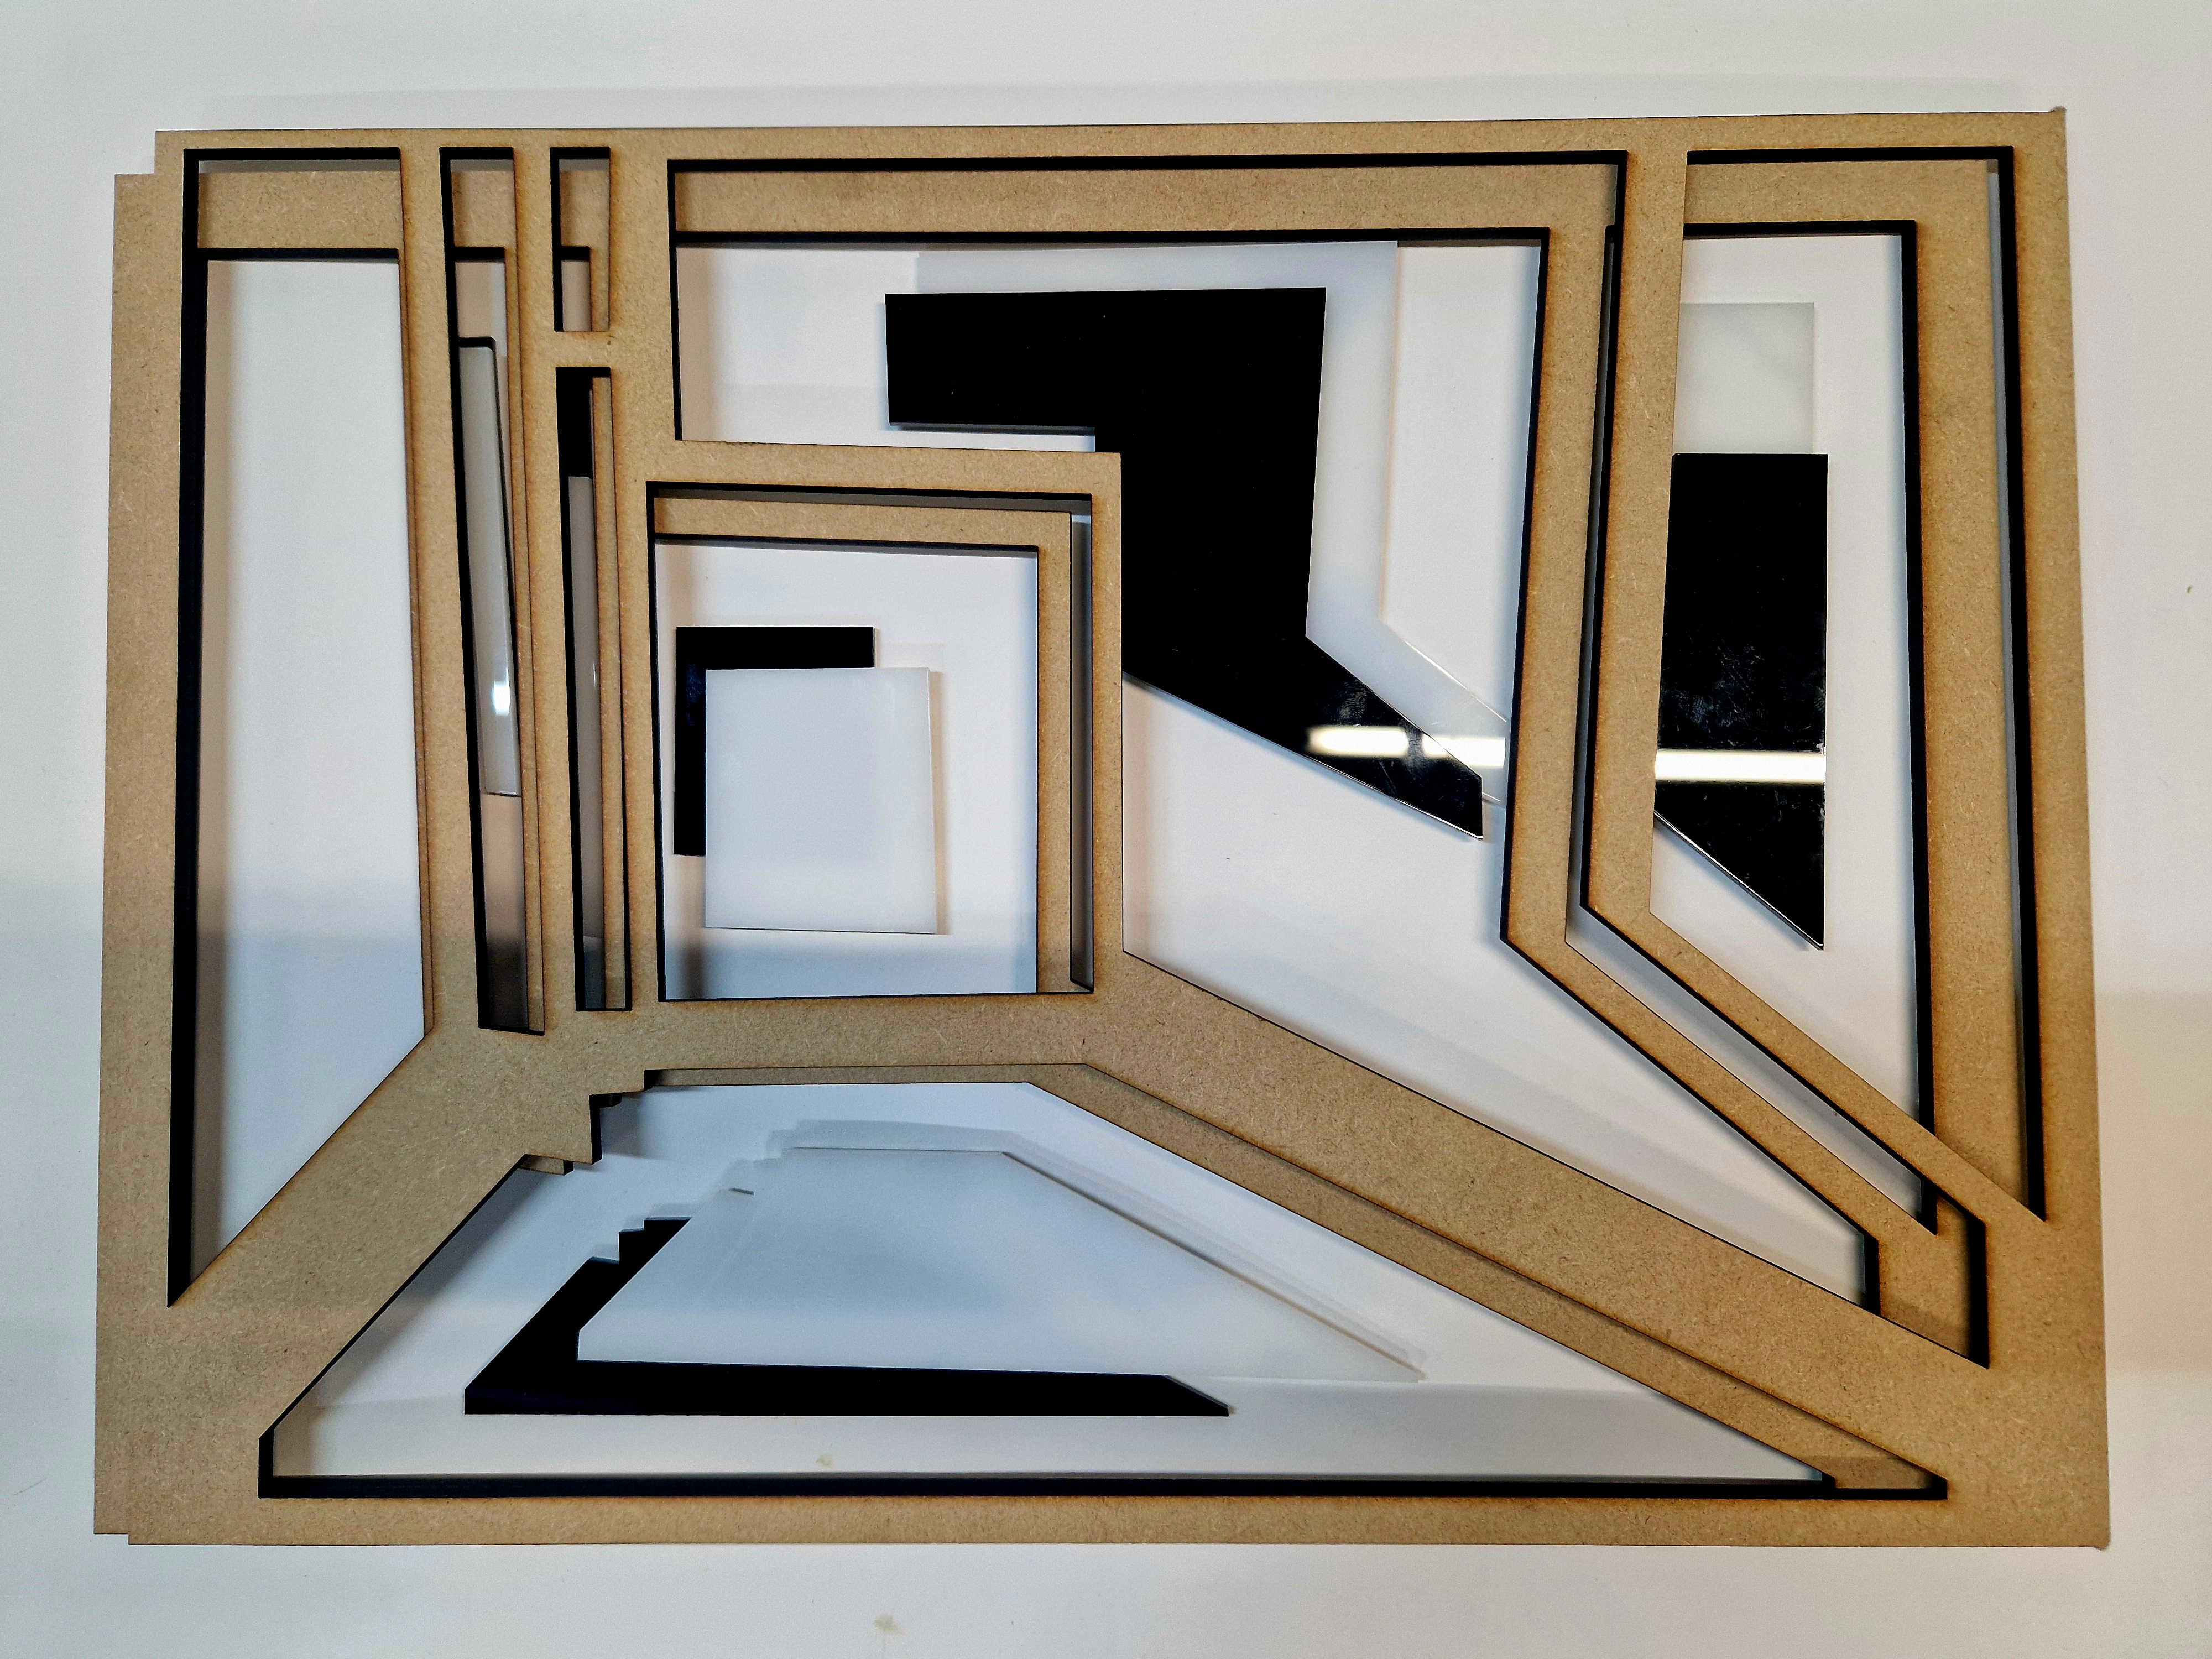
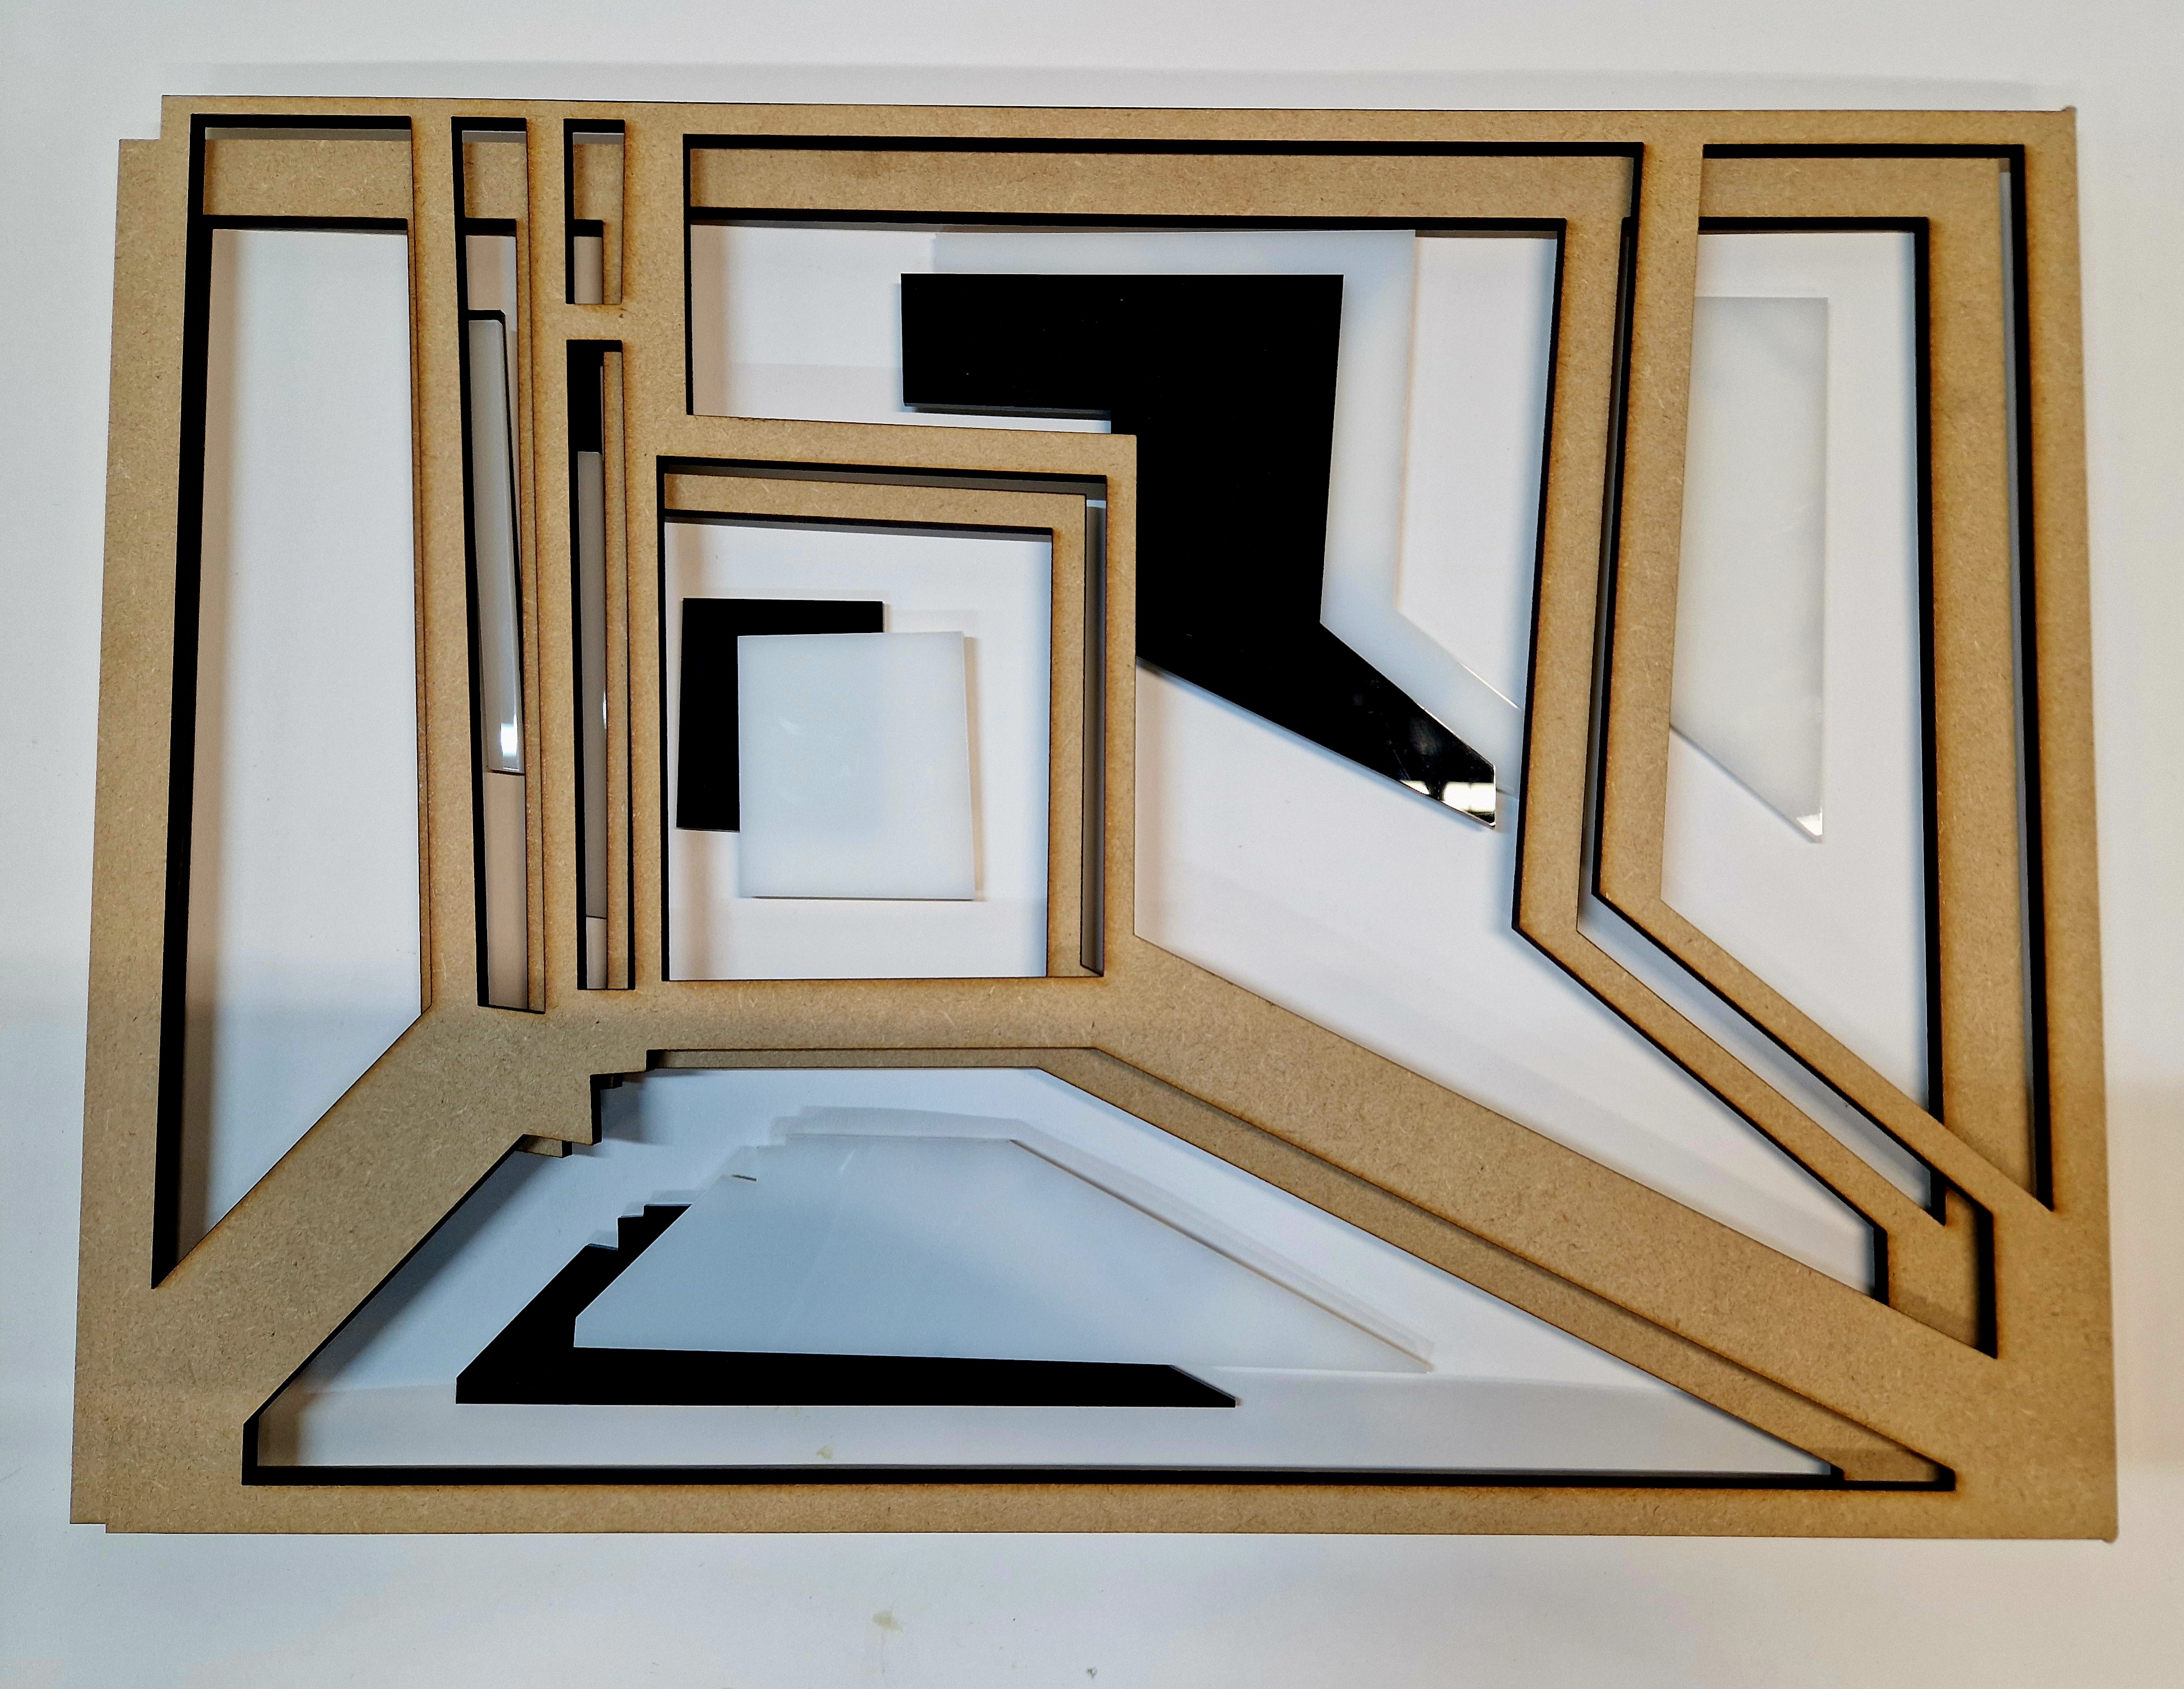
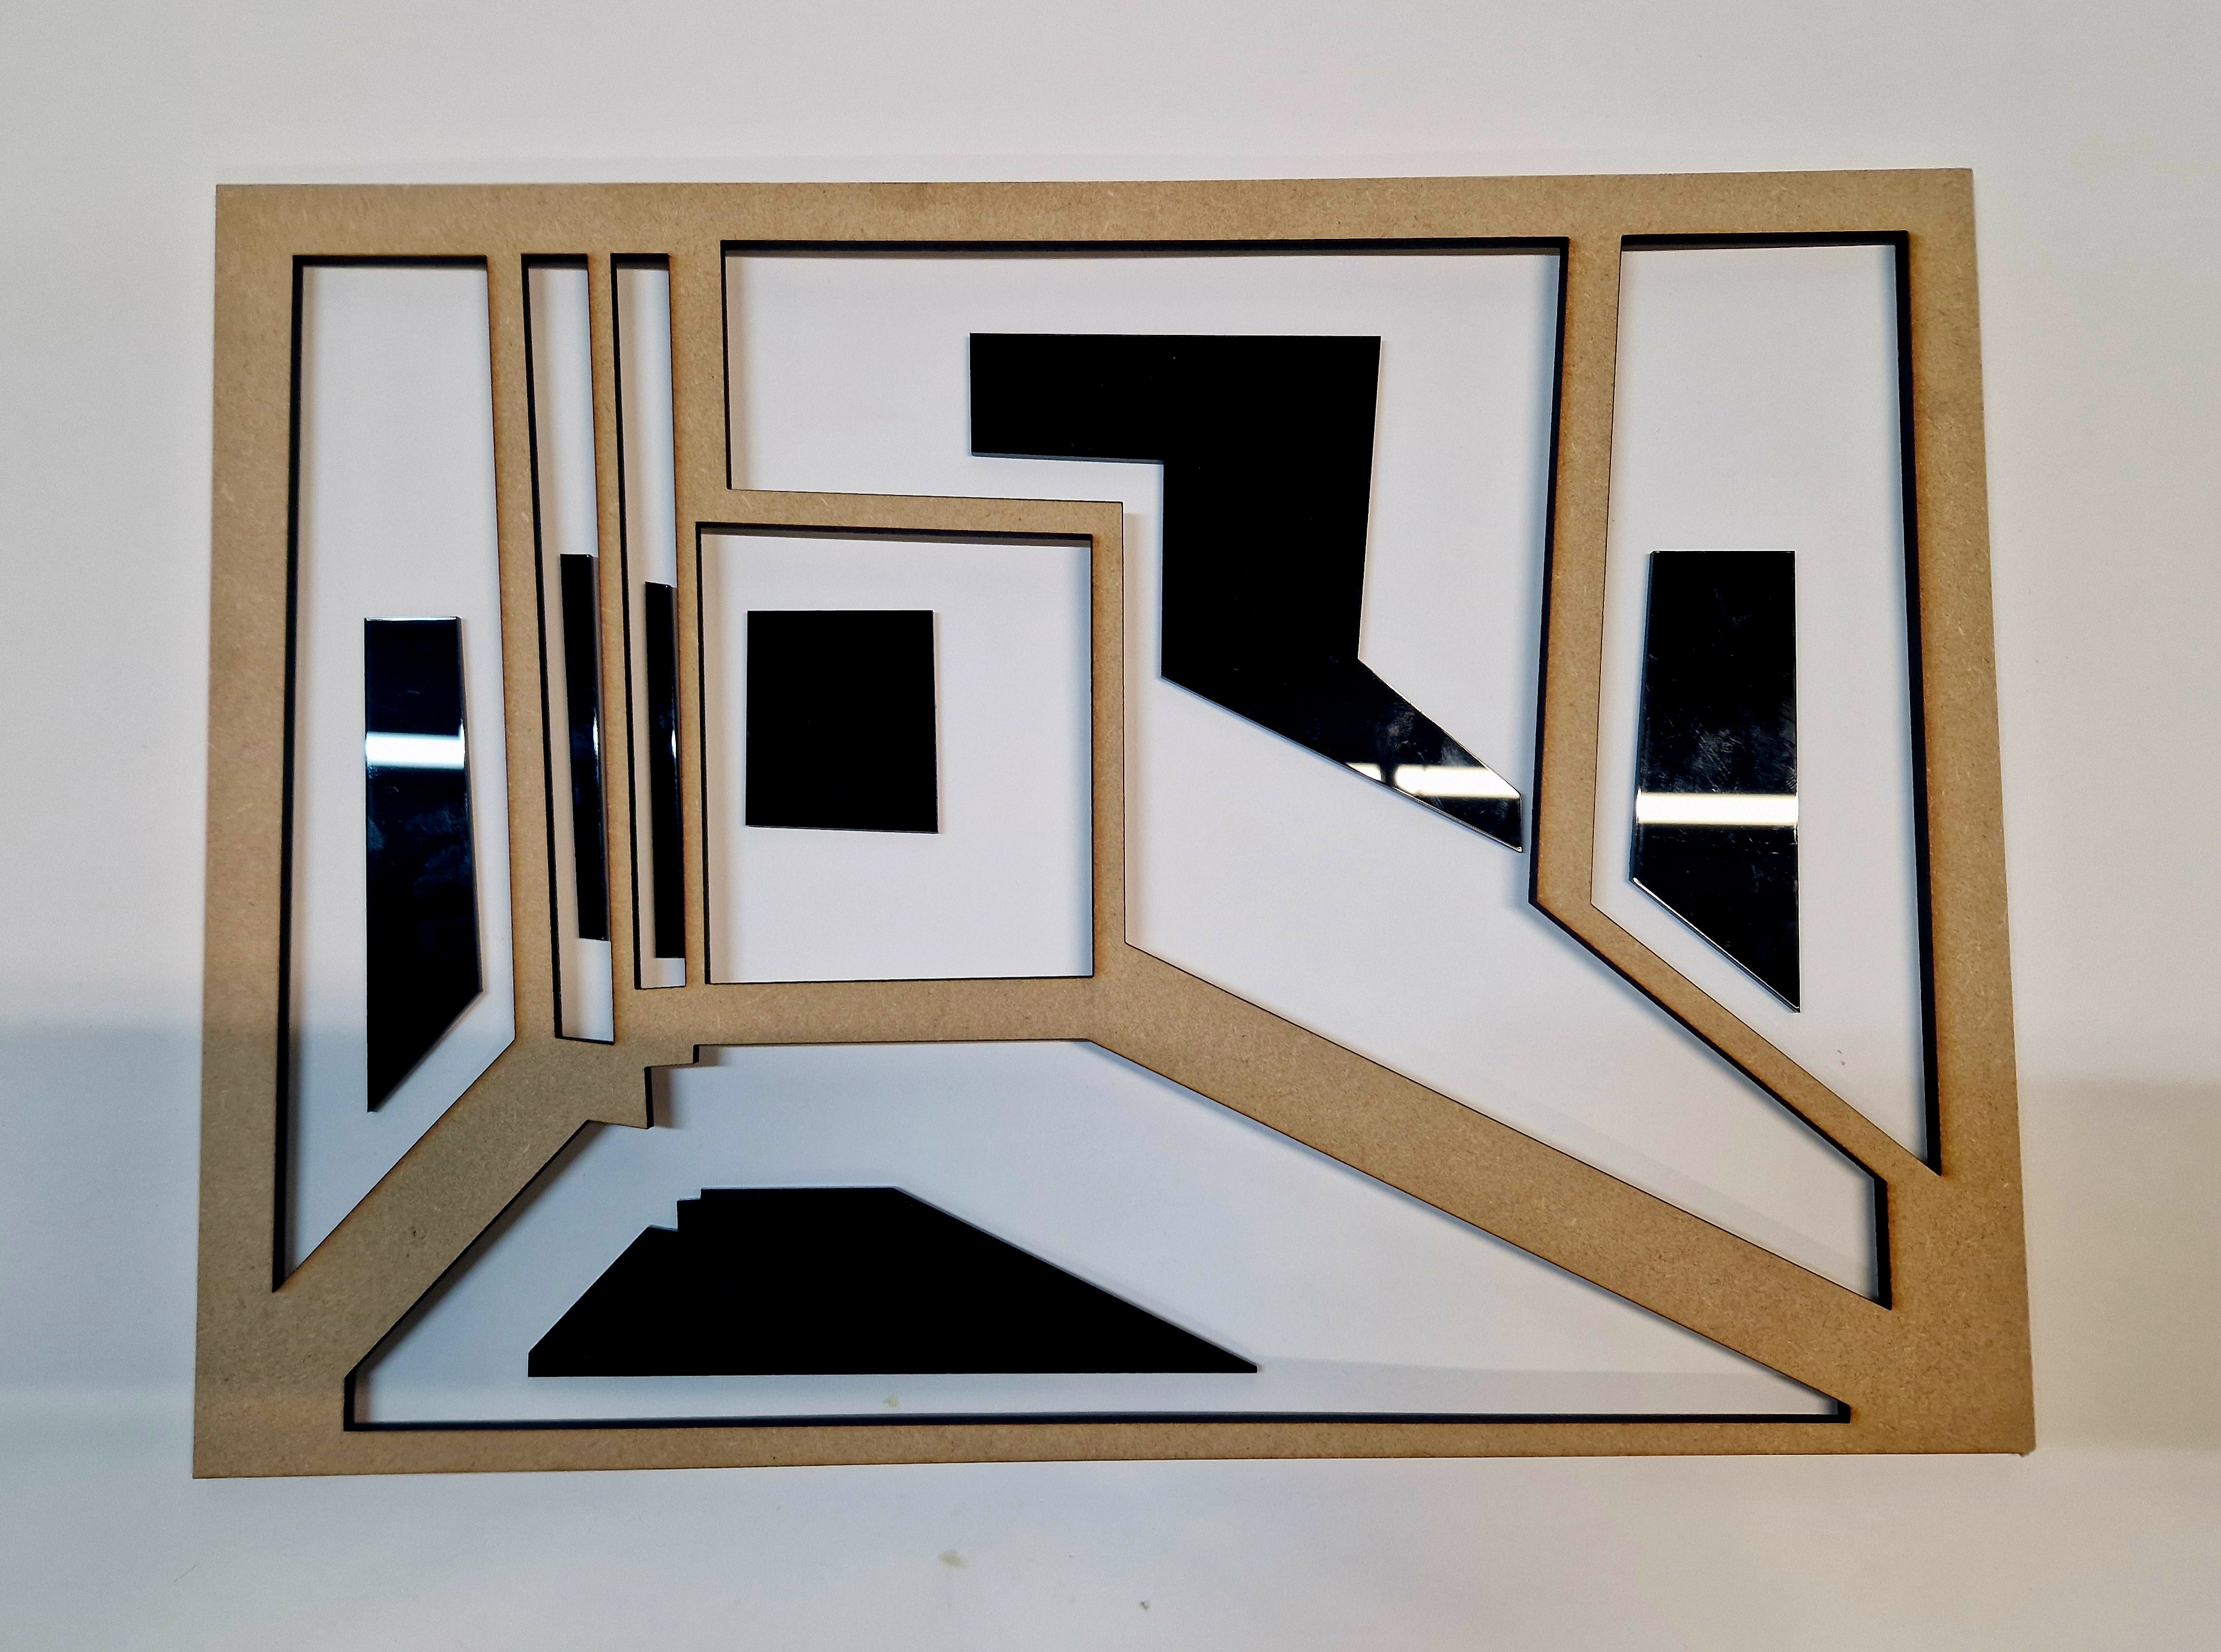
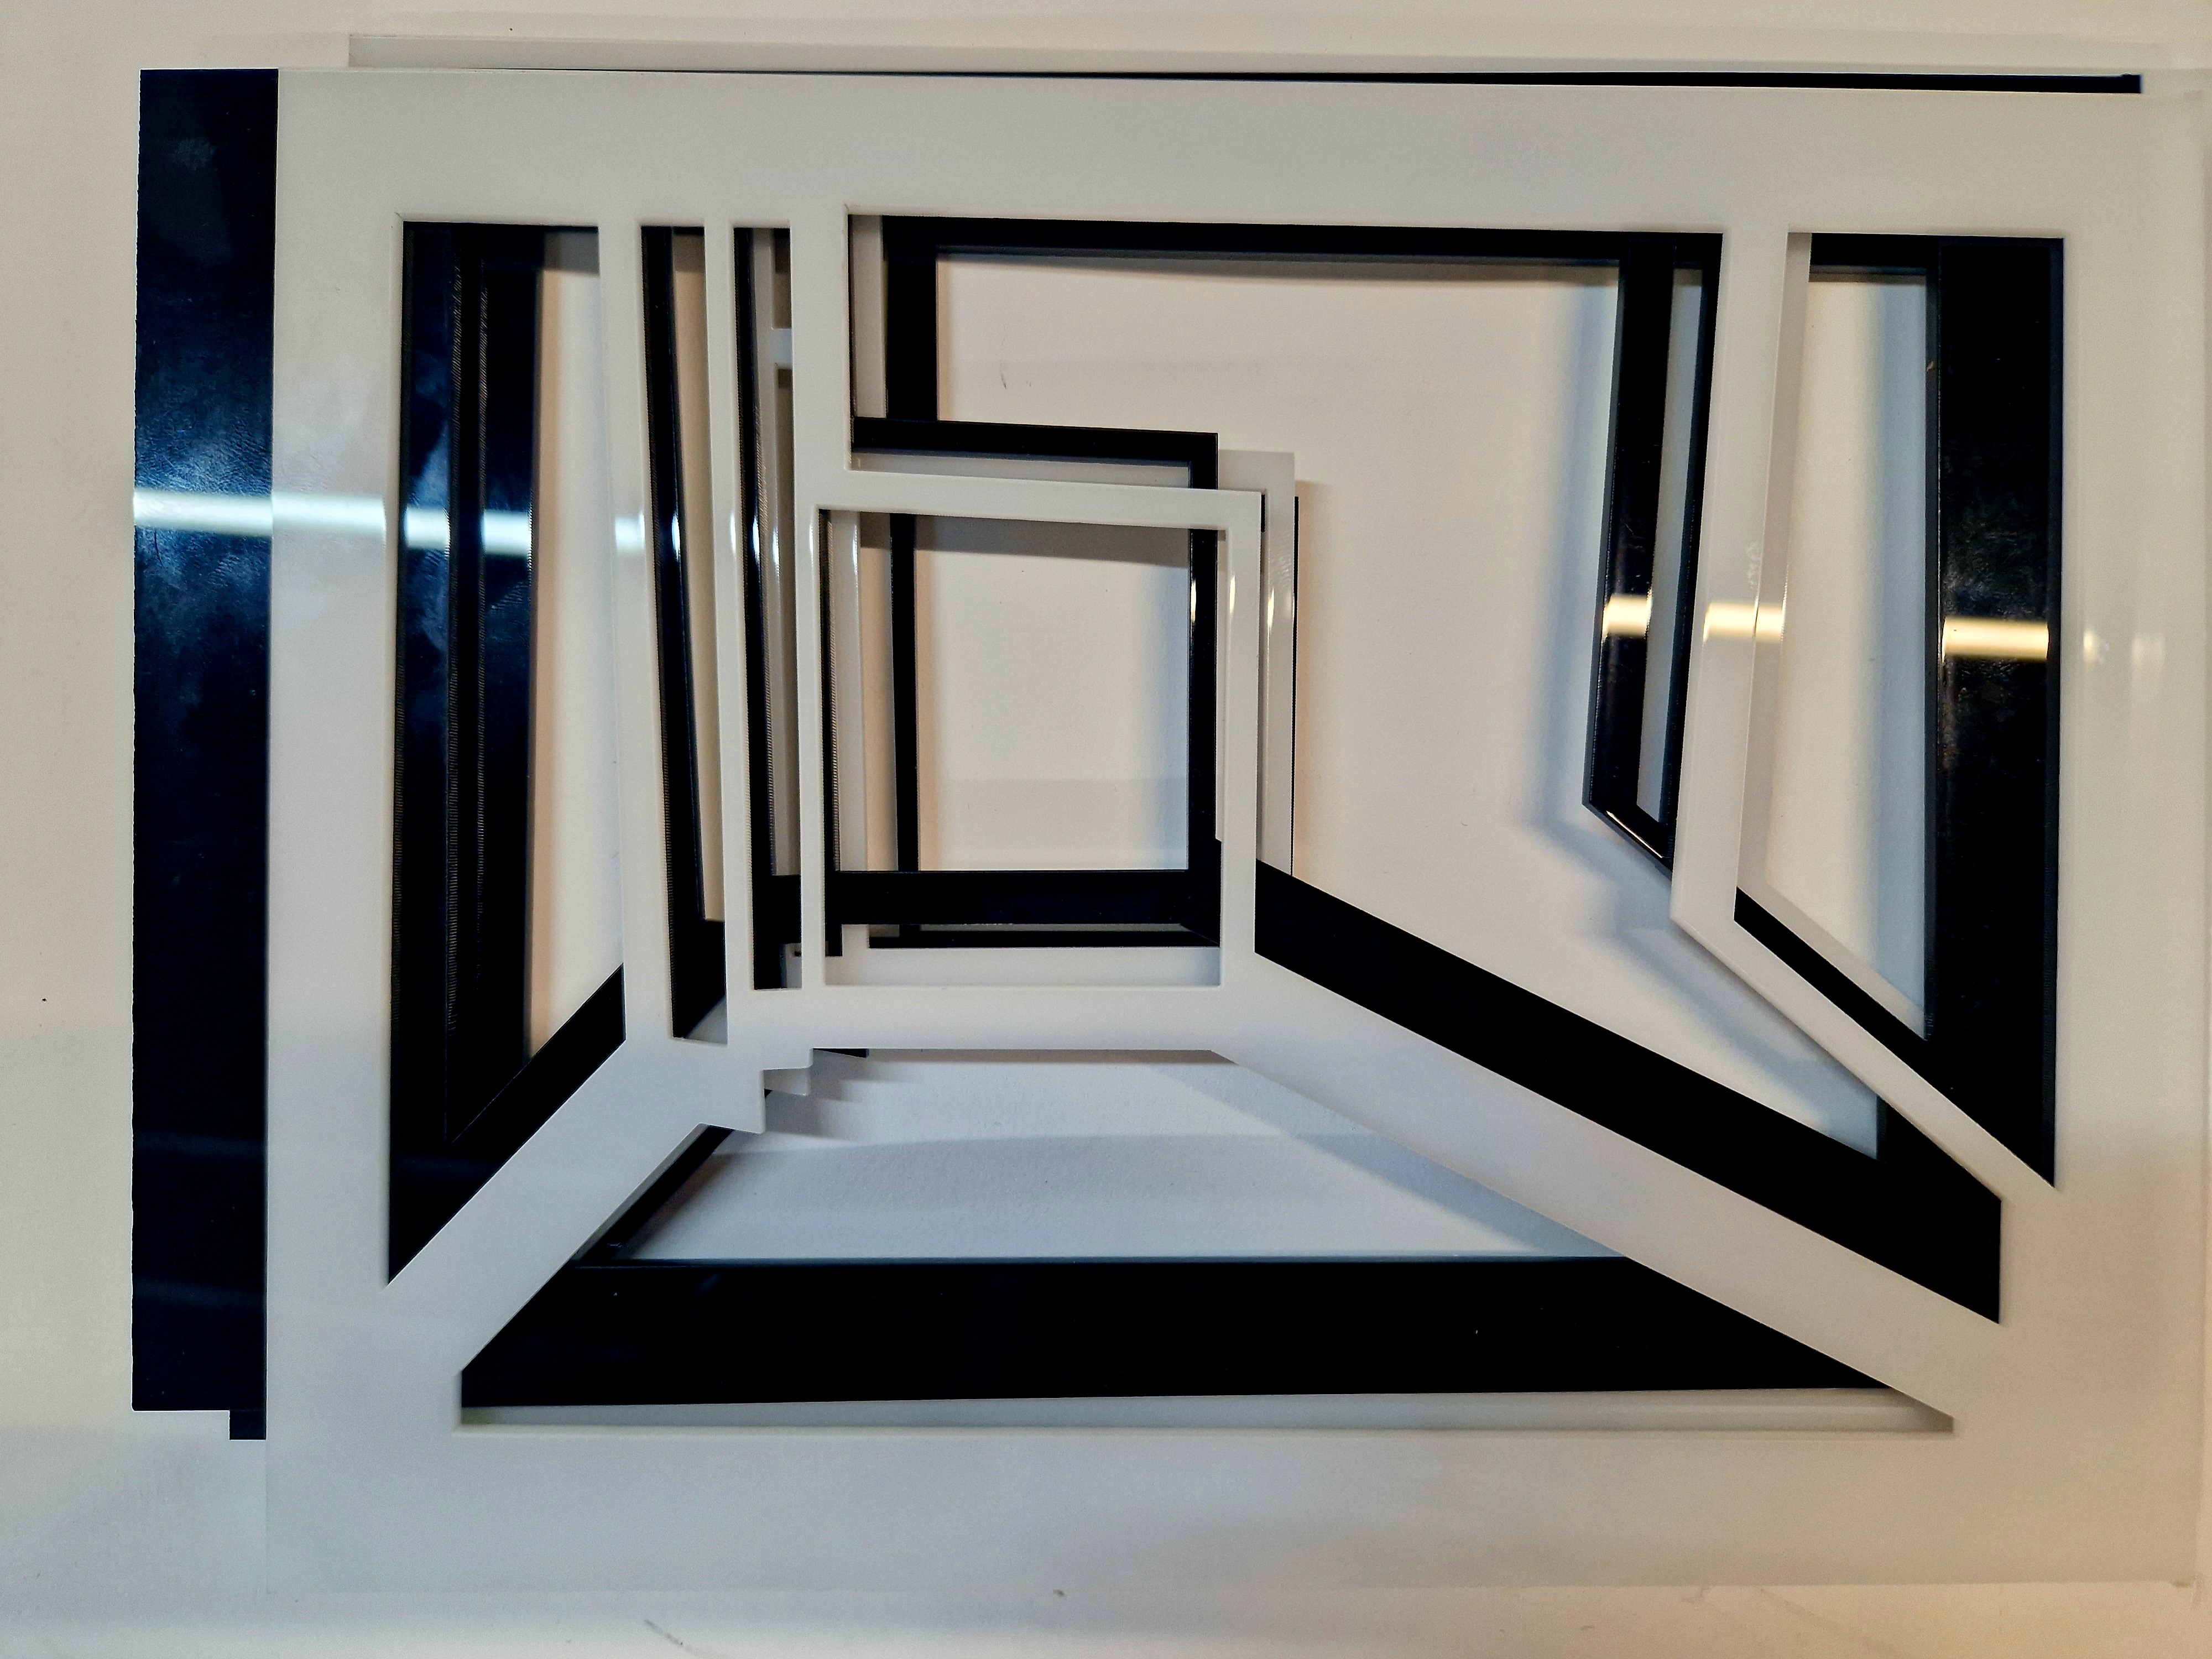
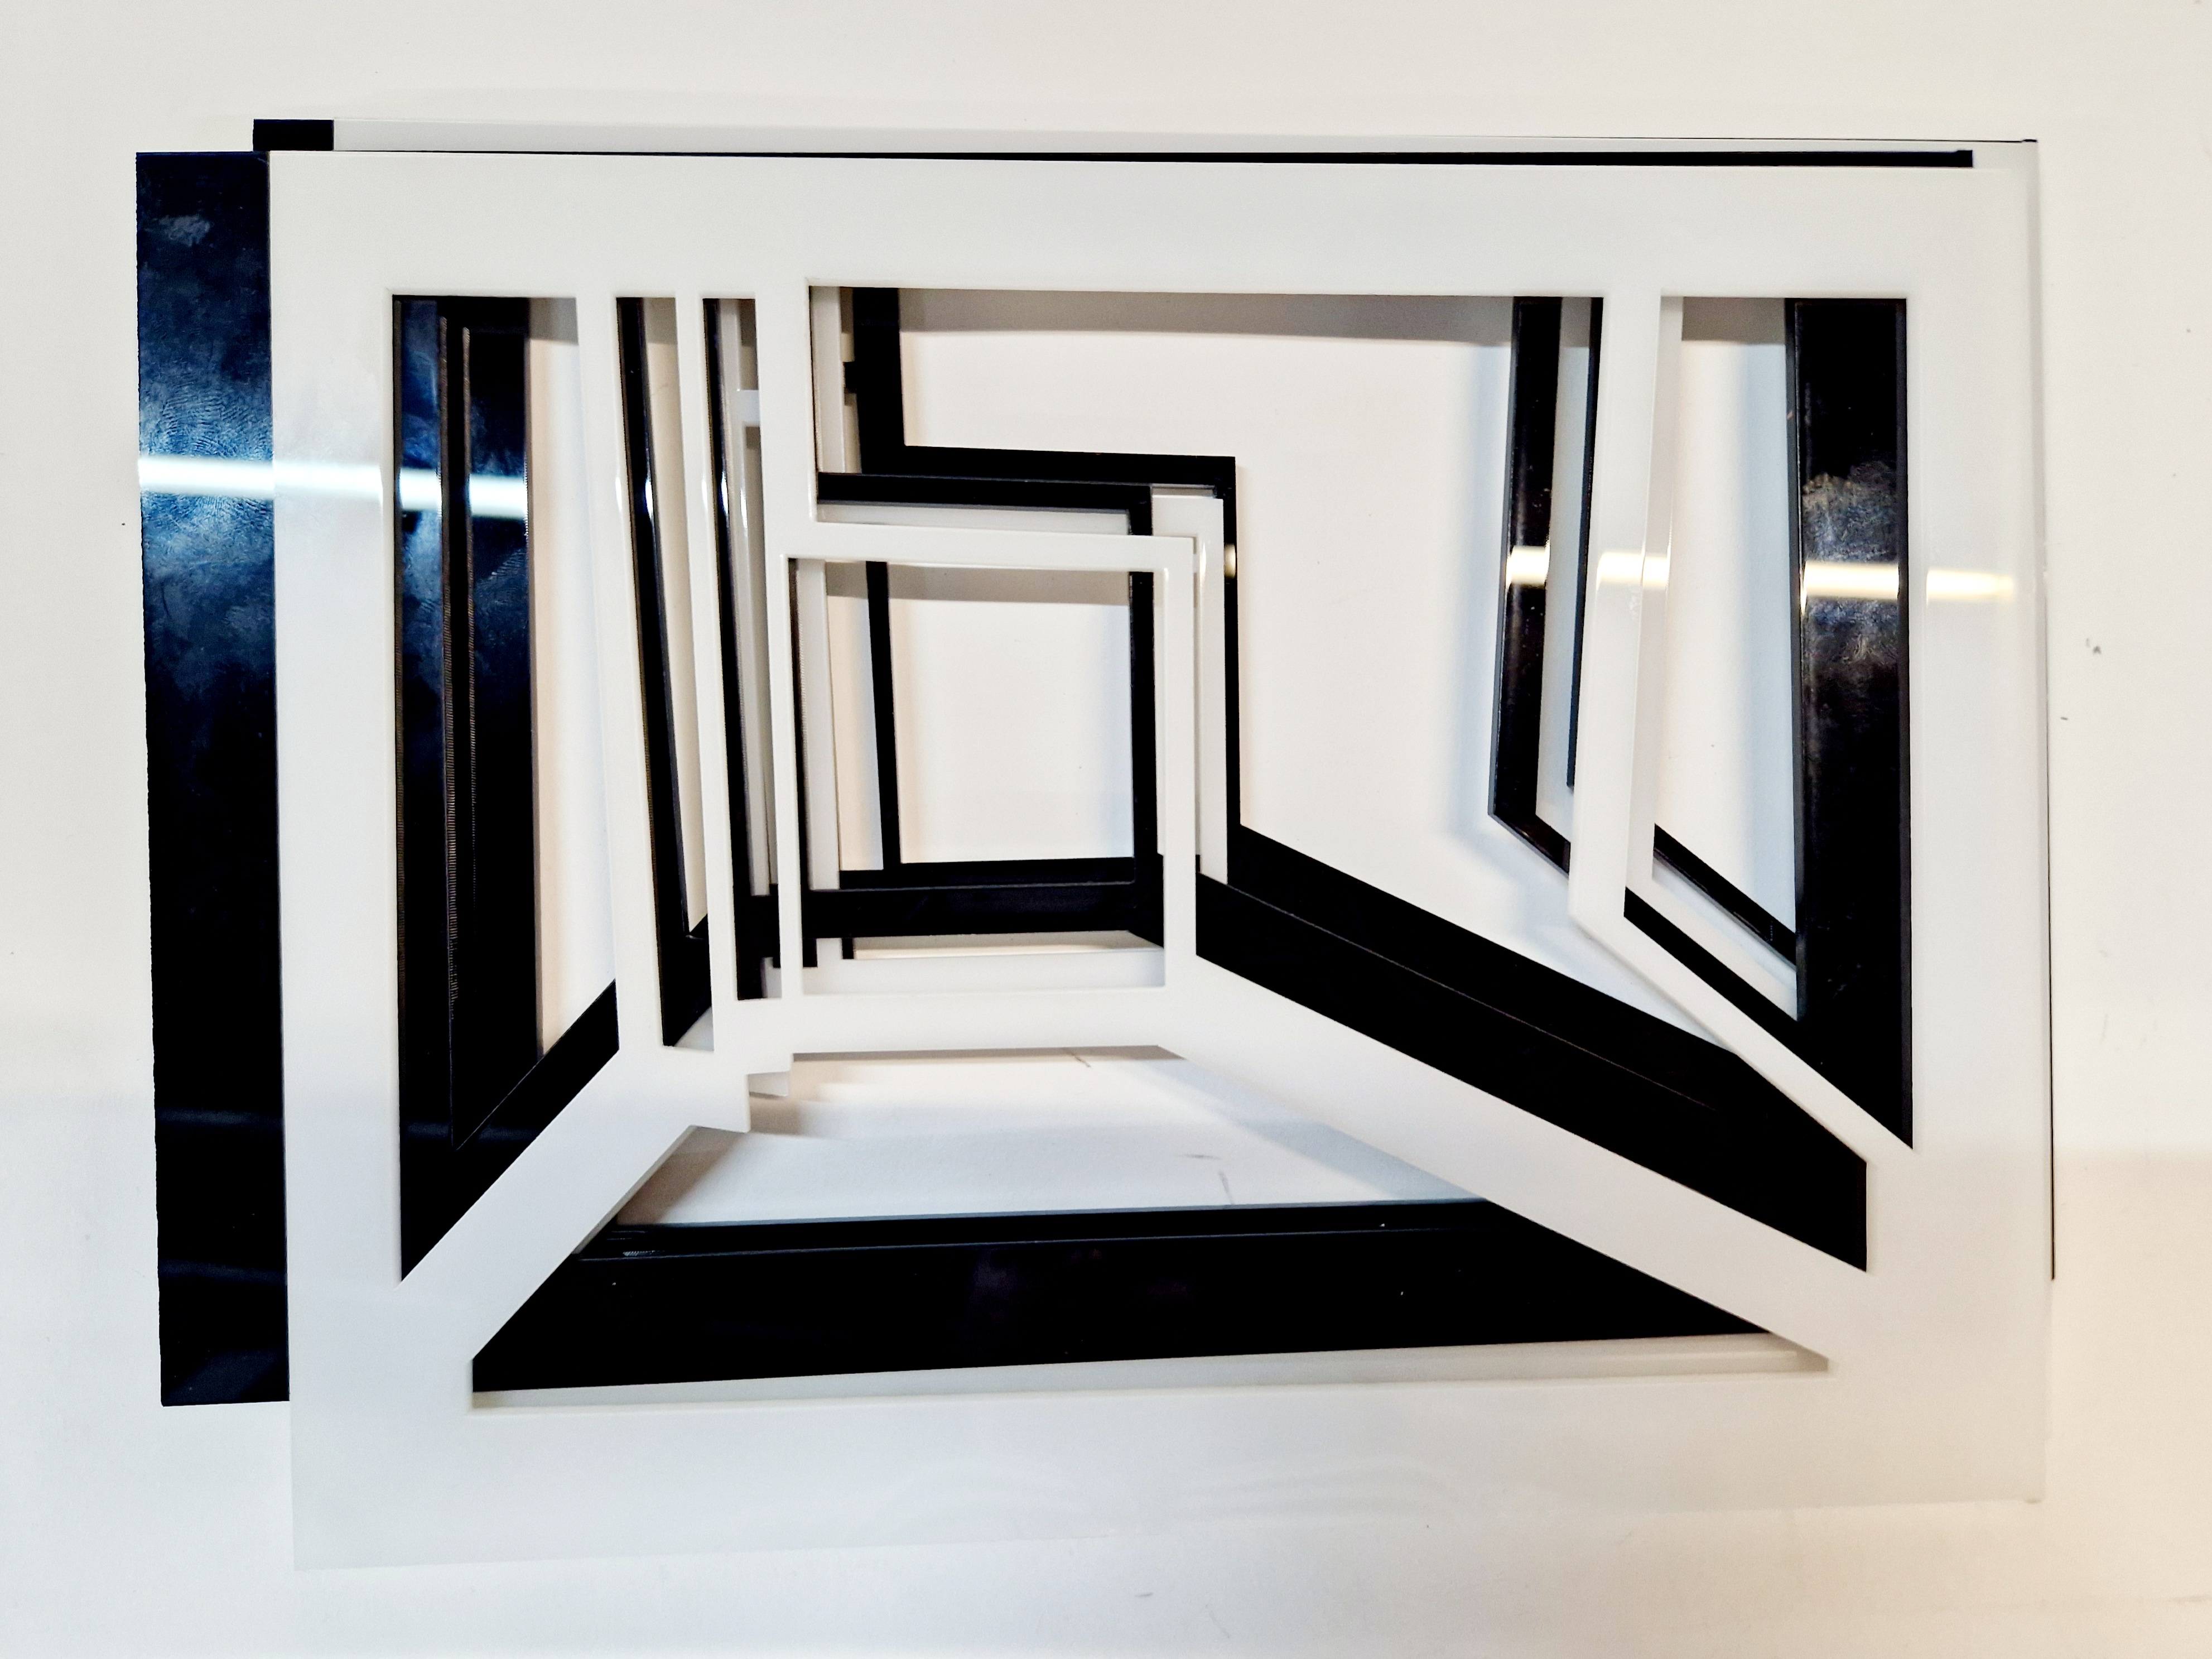
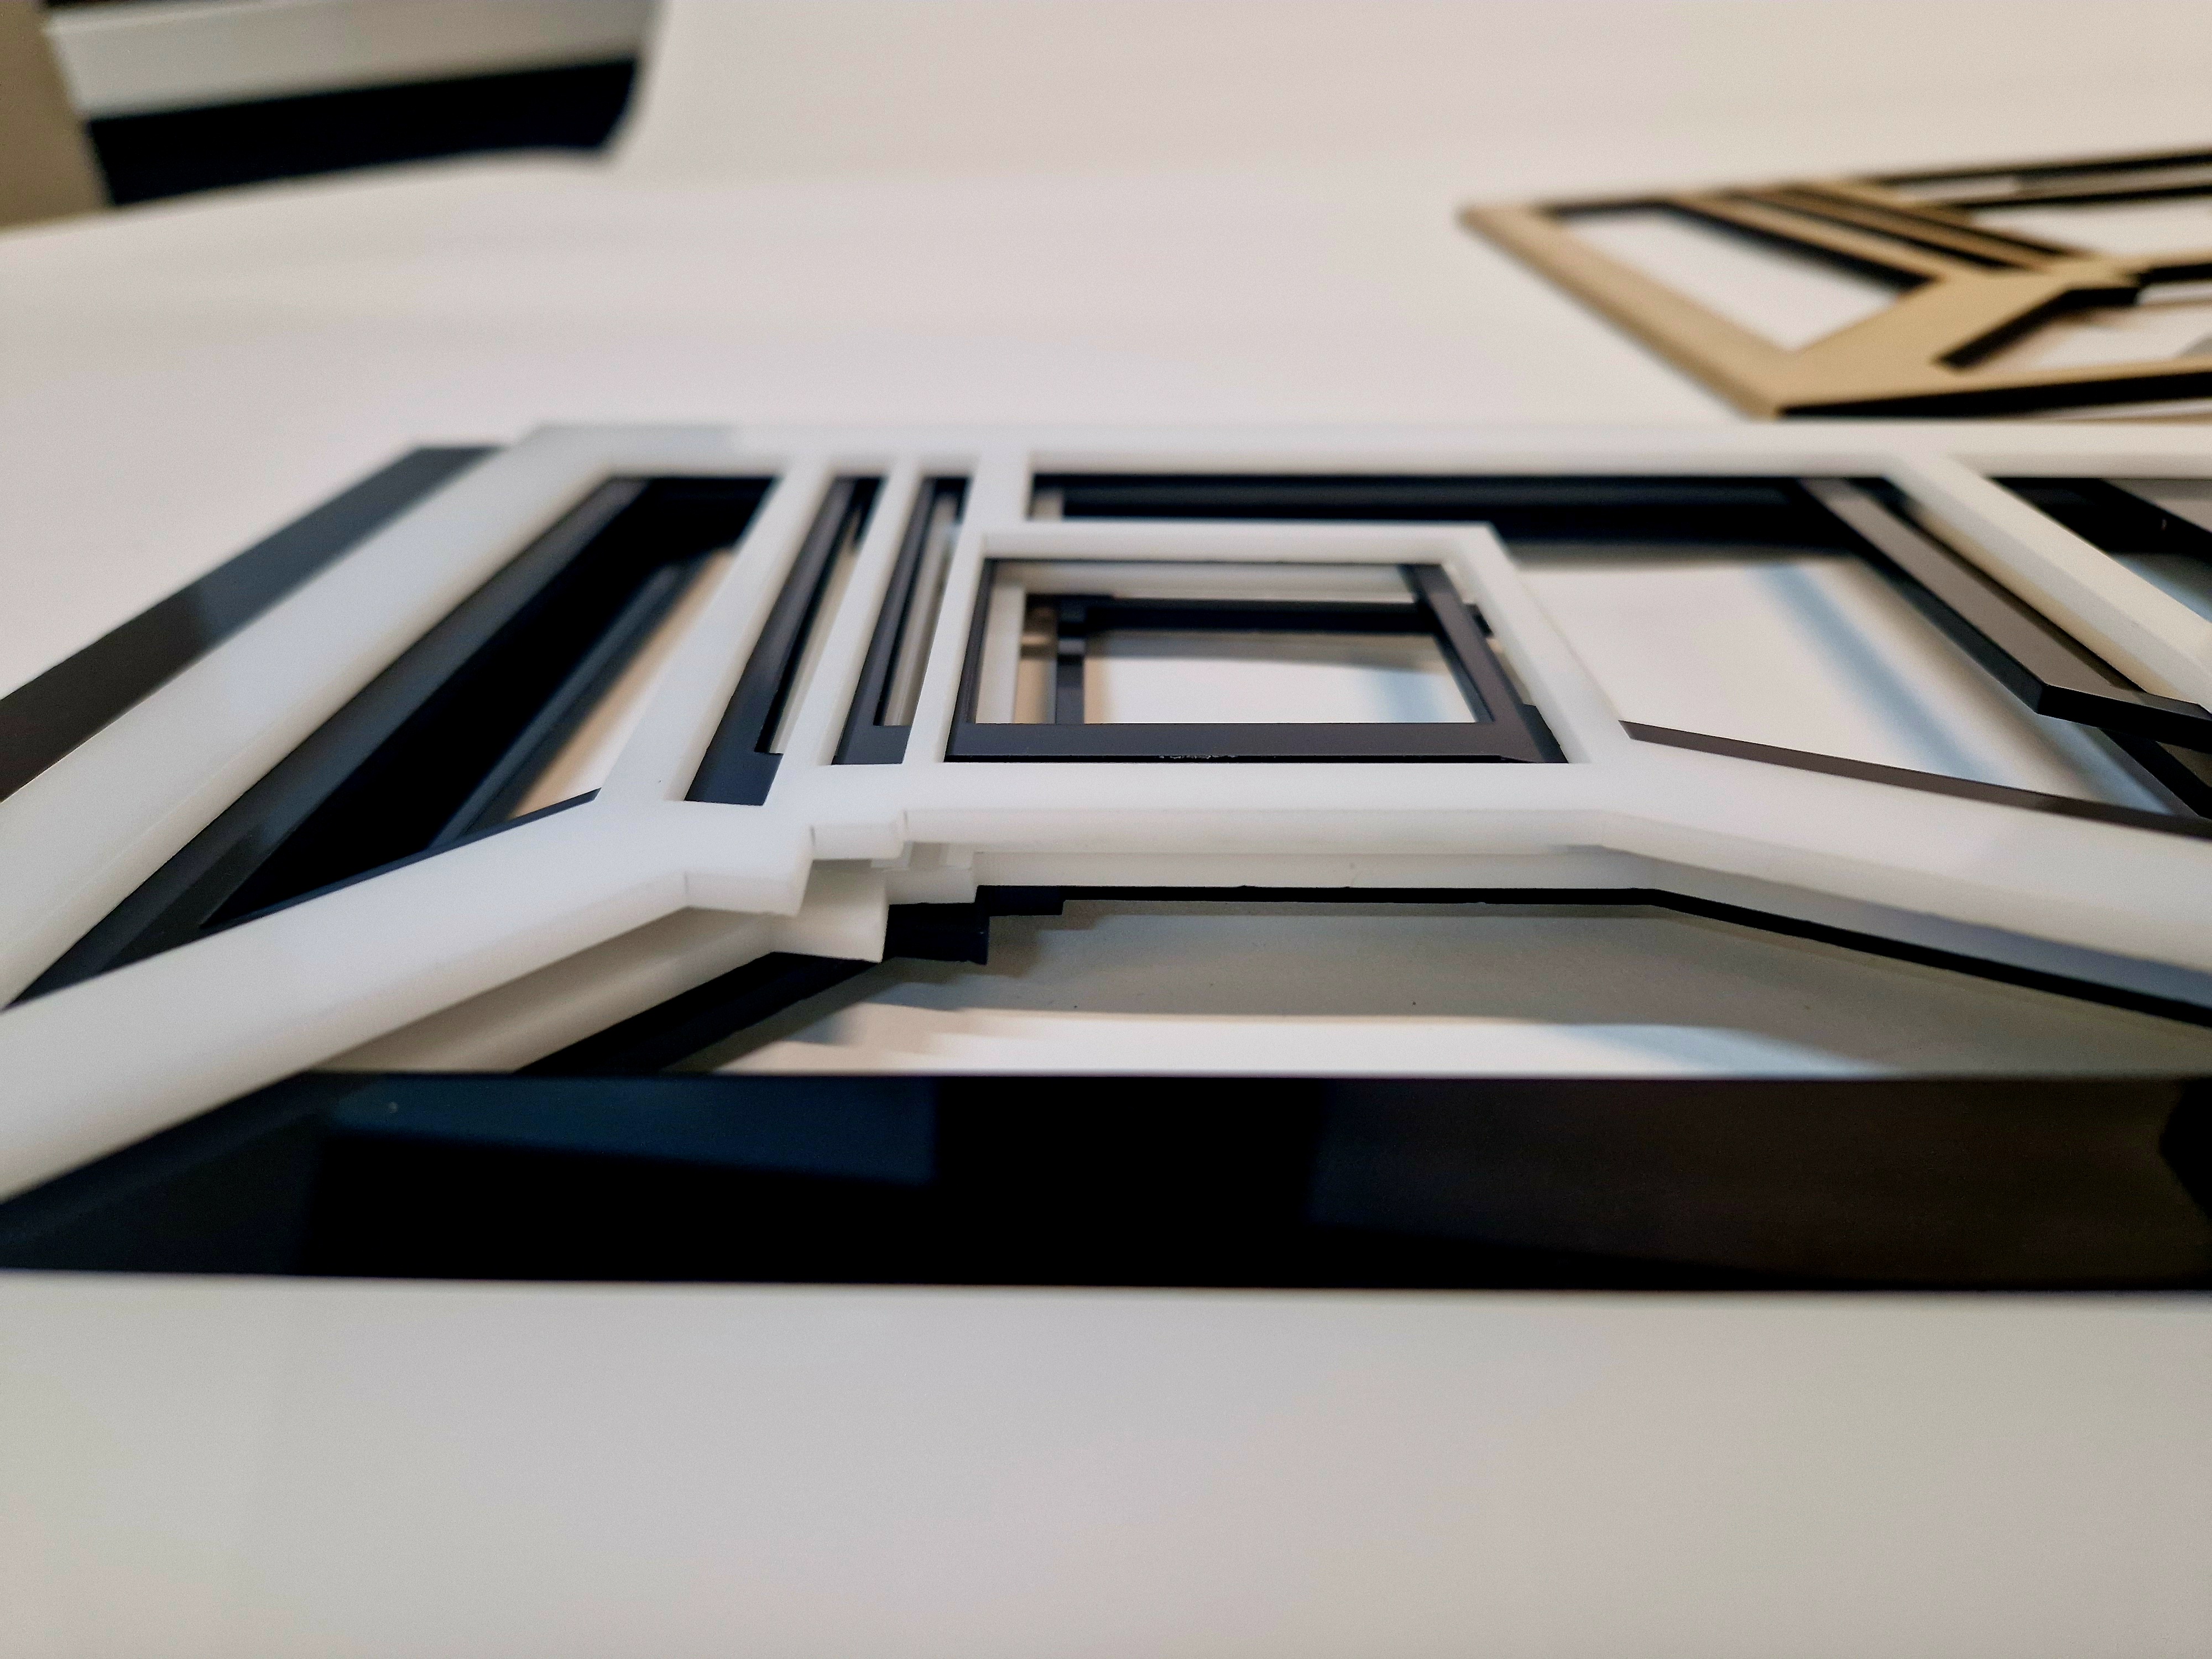
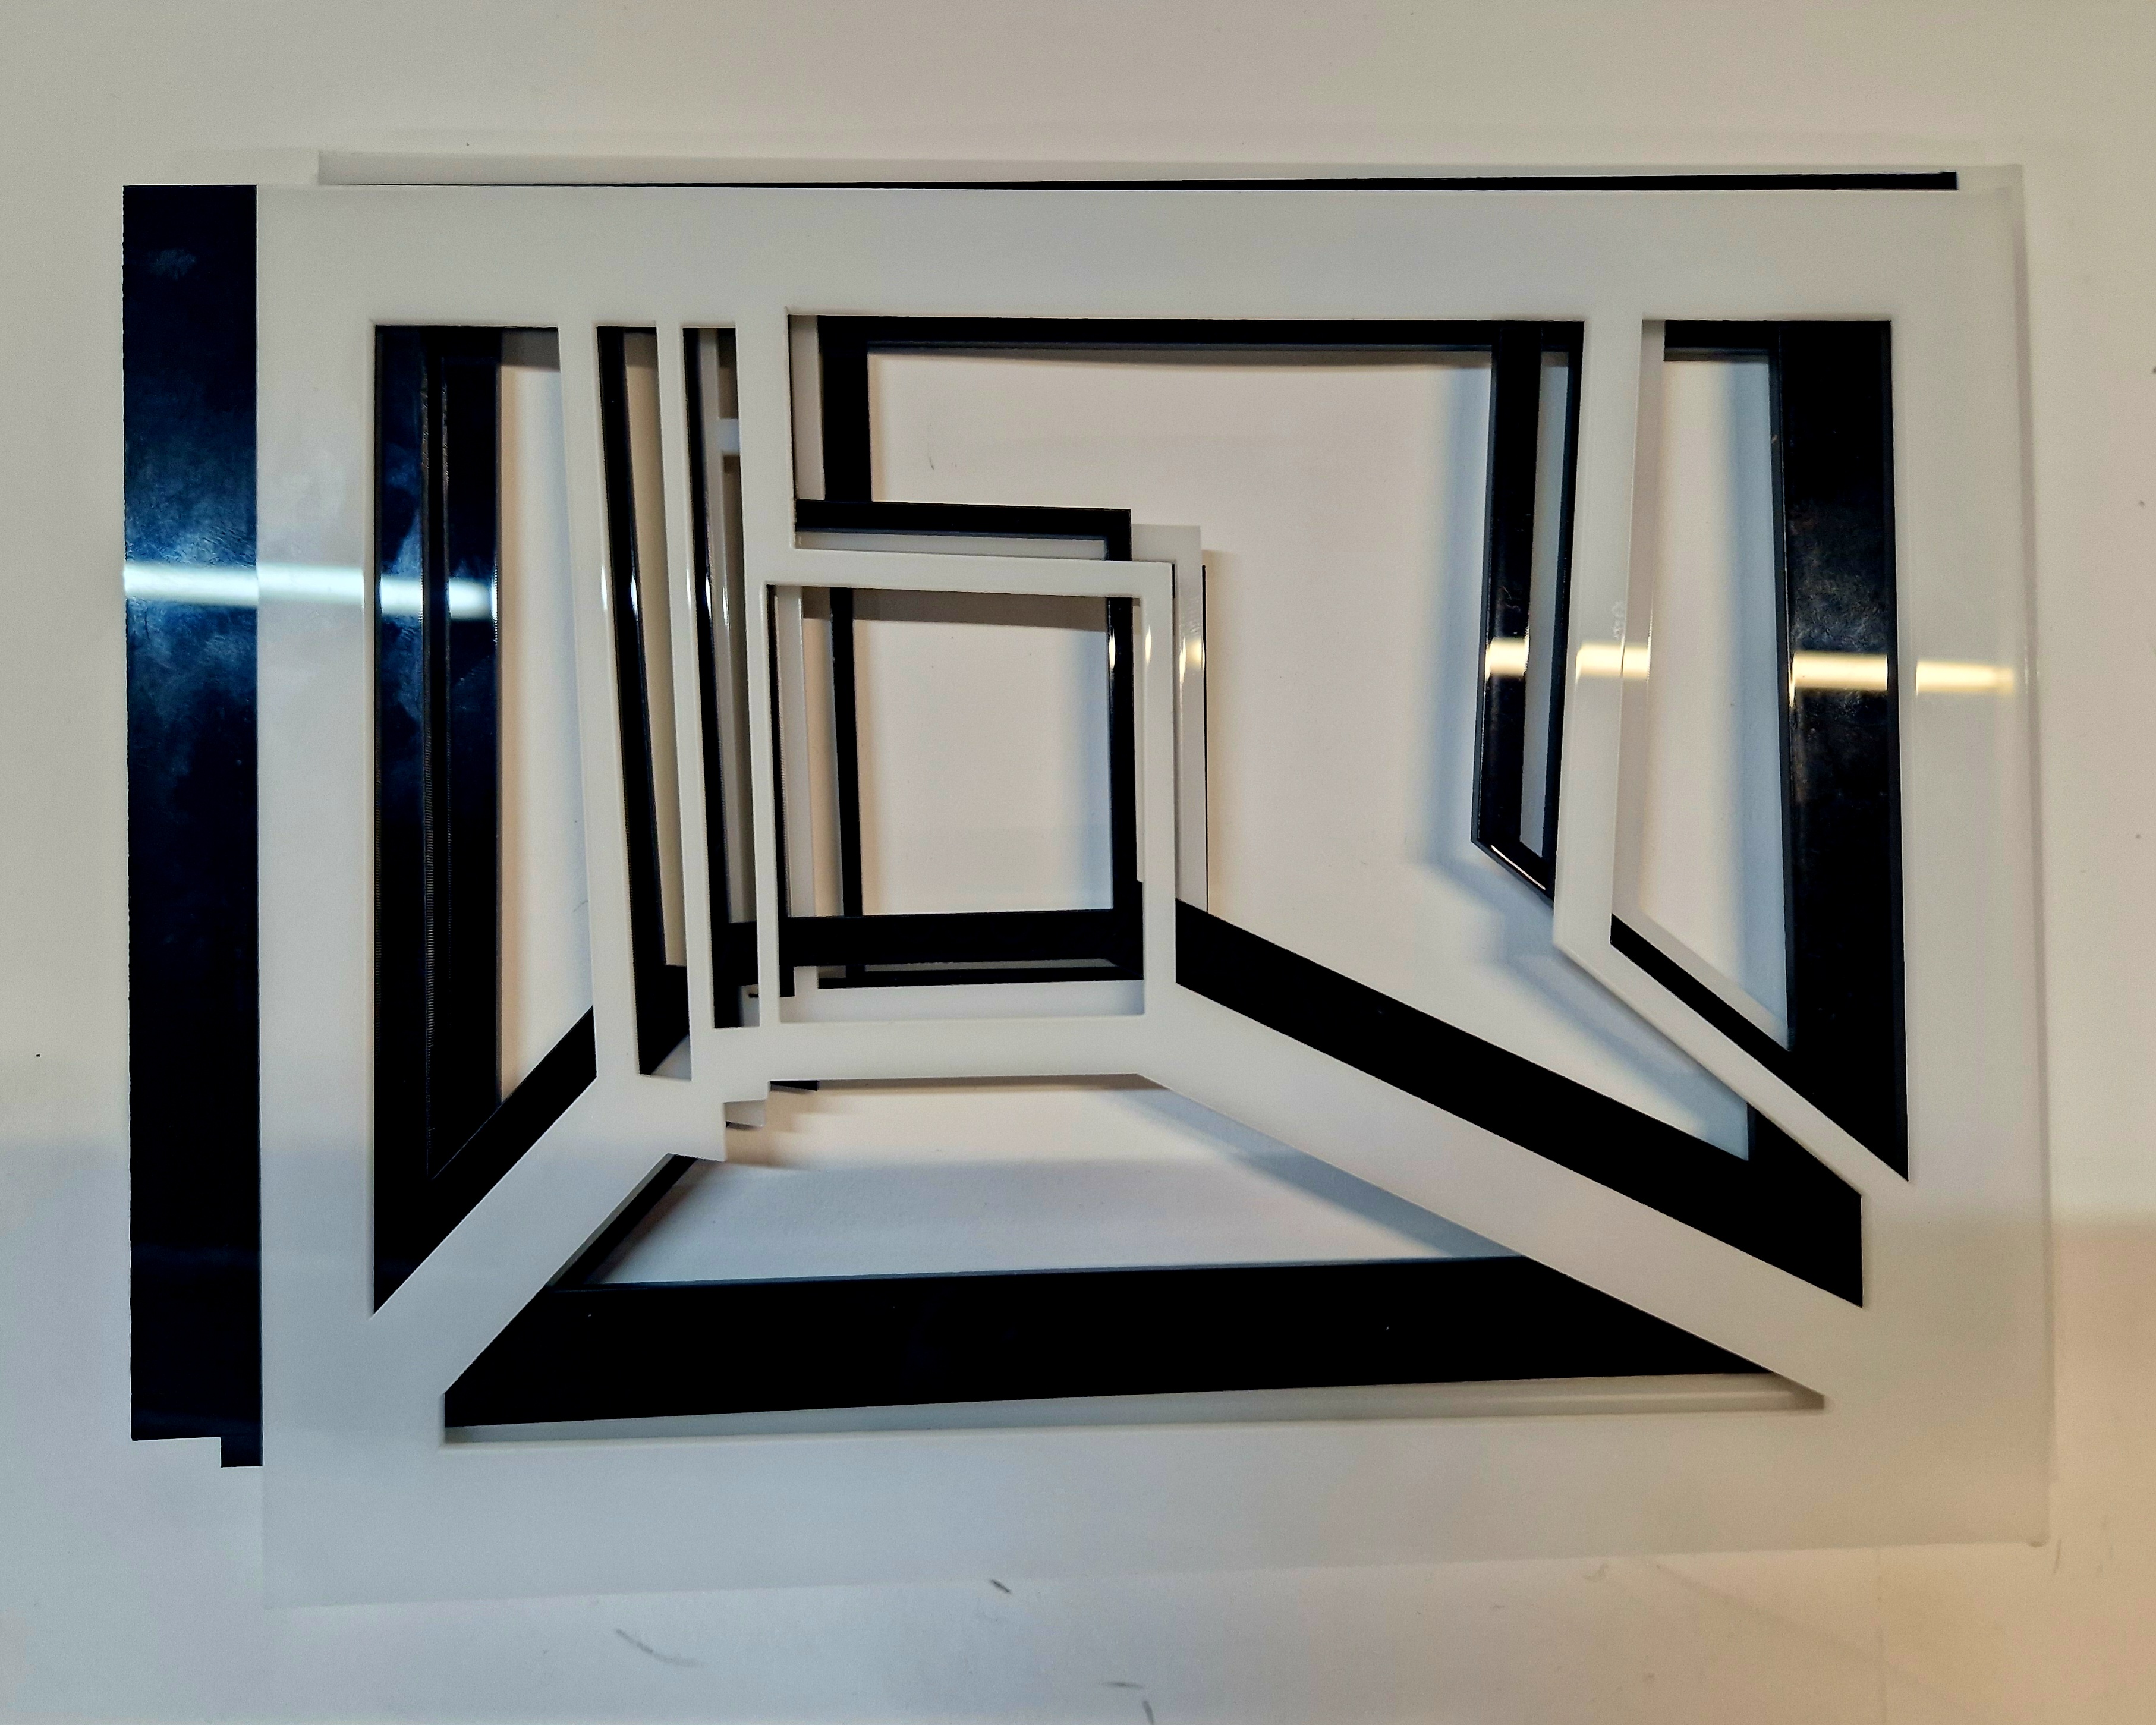
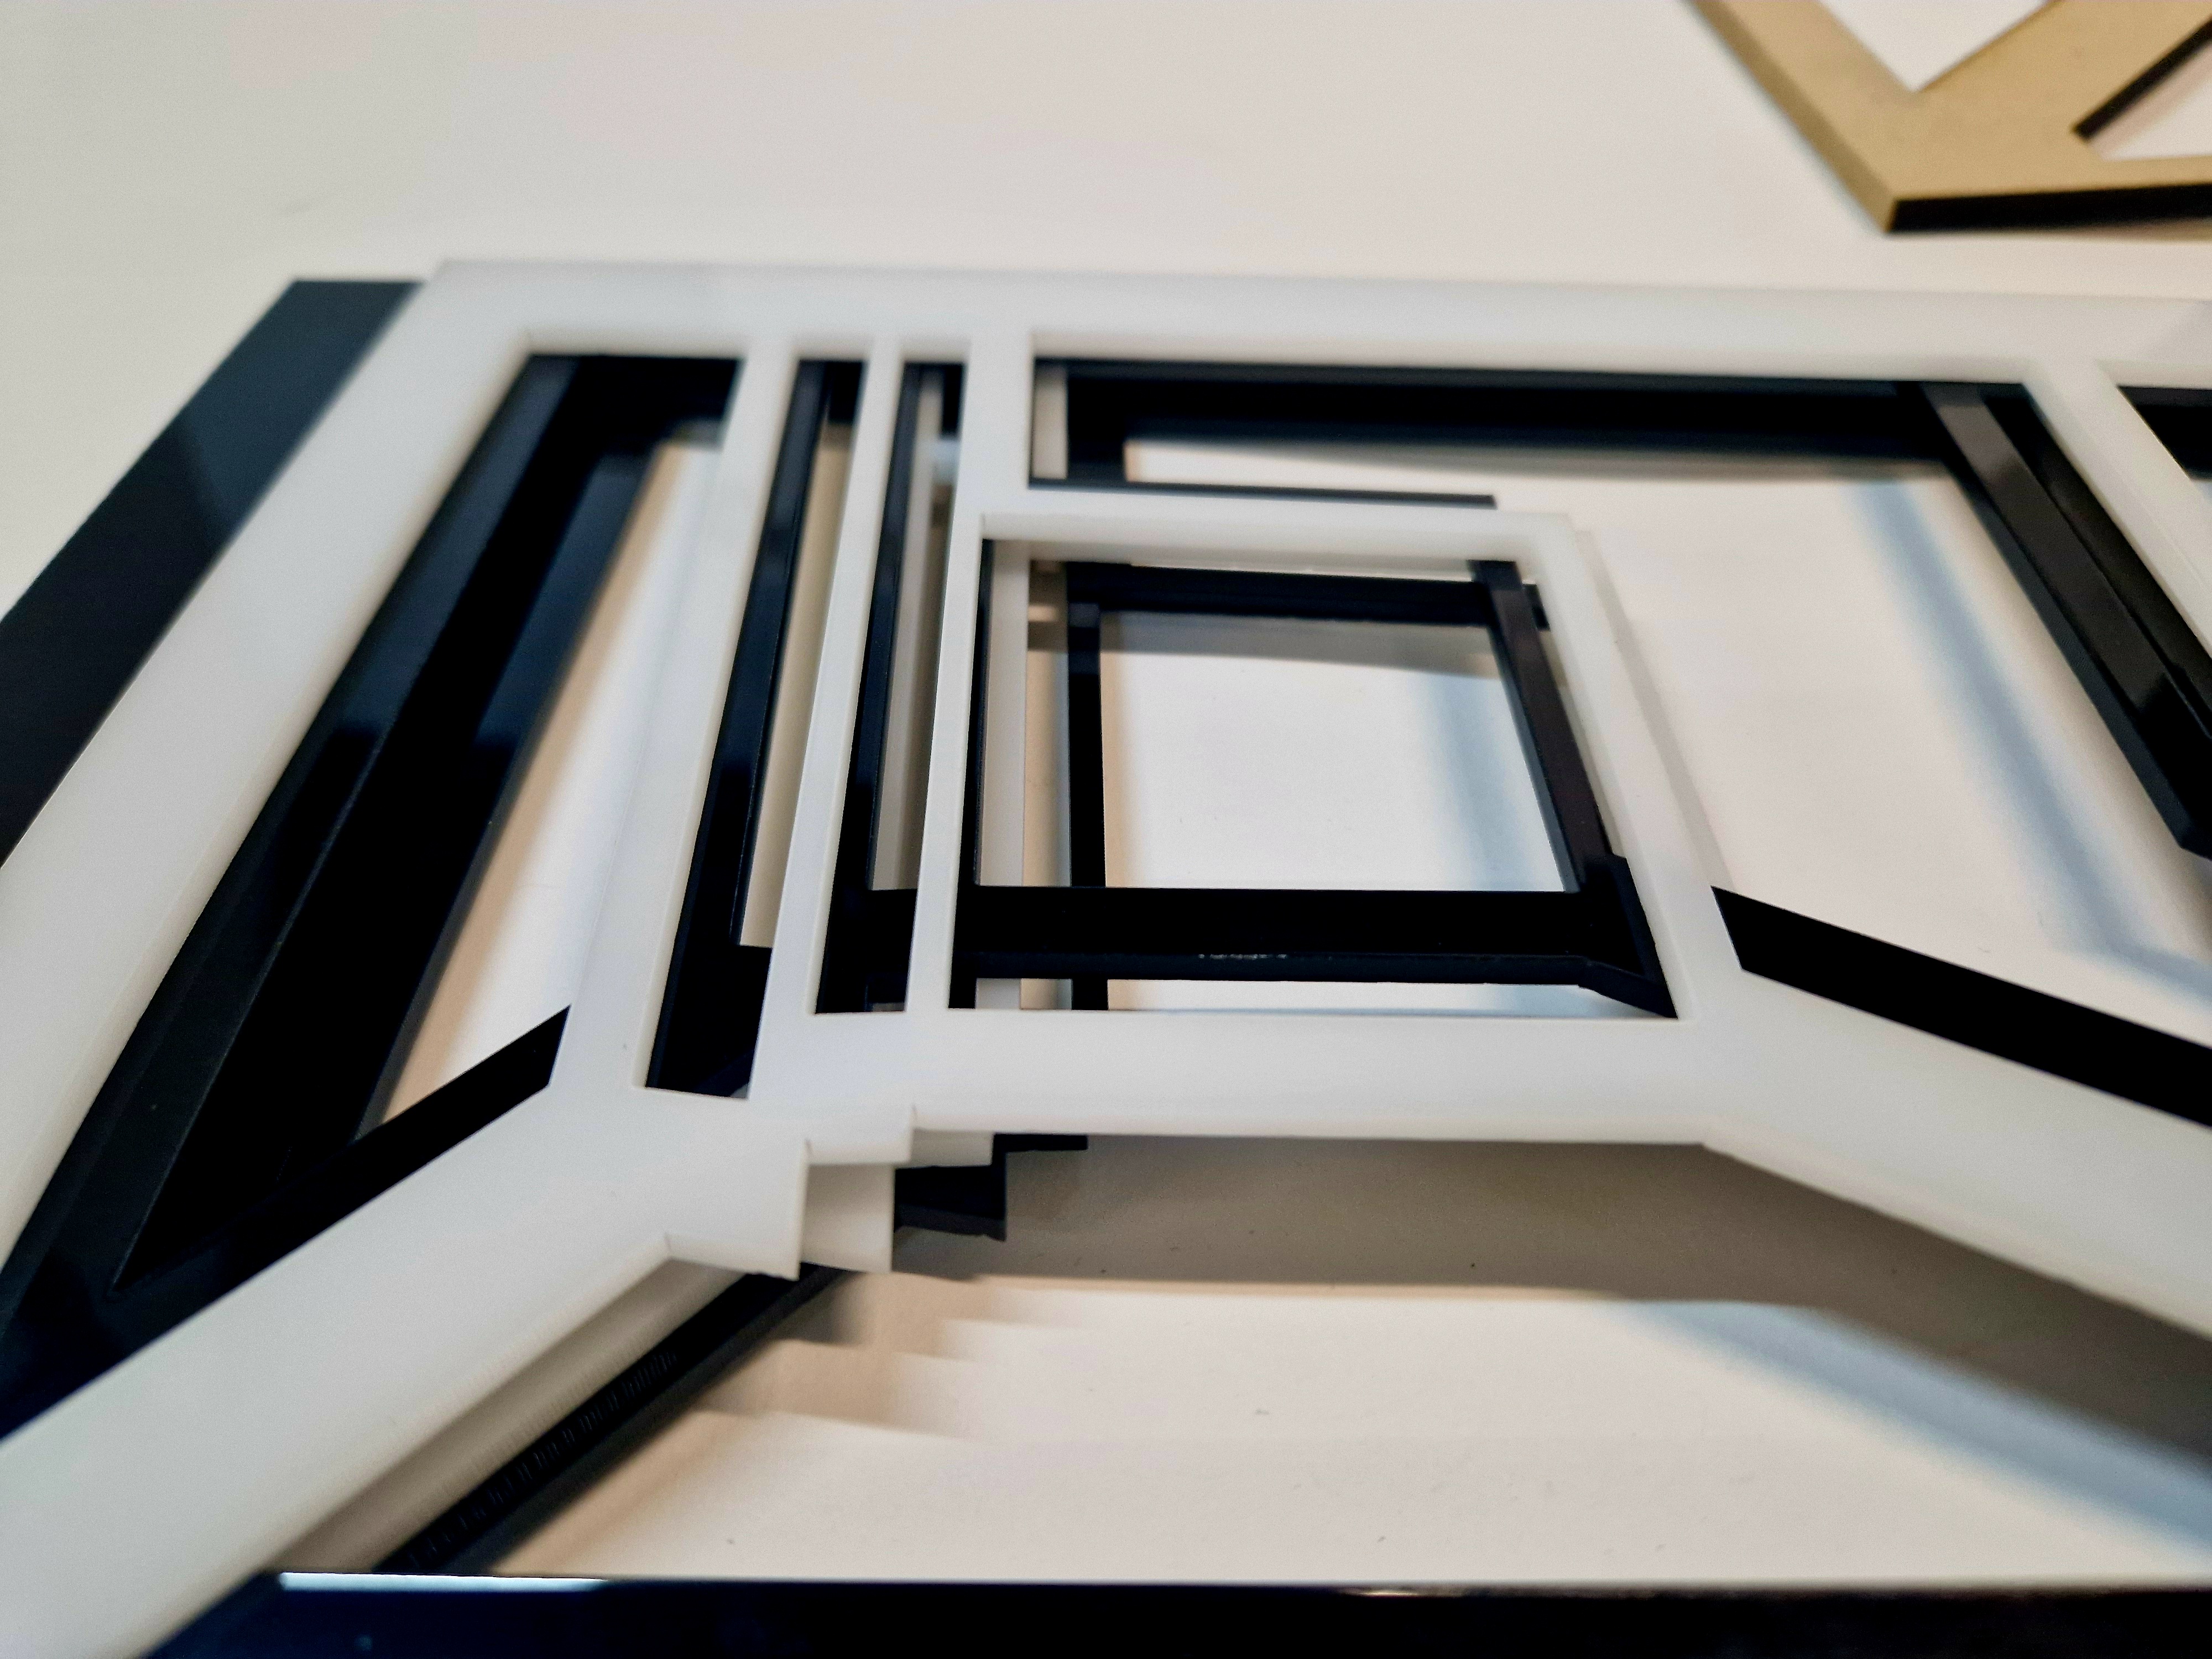
REFLECTIONS: Testing, testing and more testing. Through trial and error, this sculpture is finally coming together. After trying different materials I resolved to go with Perspex, and after this session, I have decided that this is it and to purchase sheets of Perspex in various shades of grey to finalise my project - very exciting! Then it will be just the sizing and magnets to do.
THURSDAY
WALL UPDATE
Continuously working on my wall to refine ideas, think and create. I am now 100% sure that I need such wall in my life, and a wall I will have in my new studio!
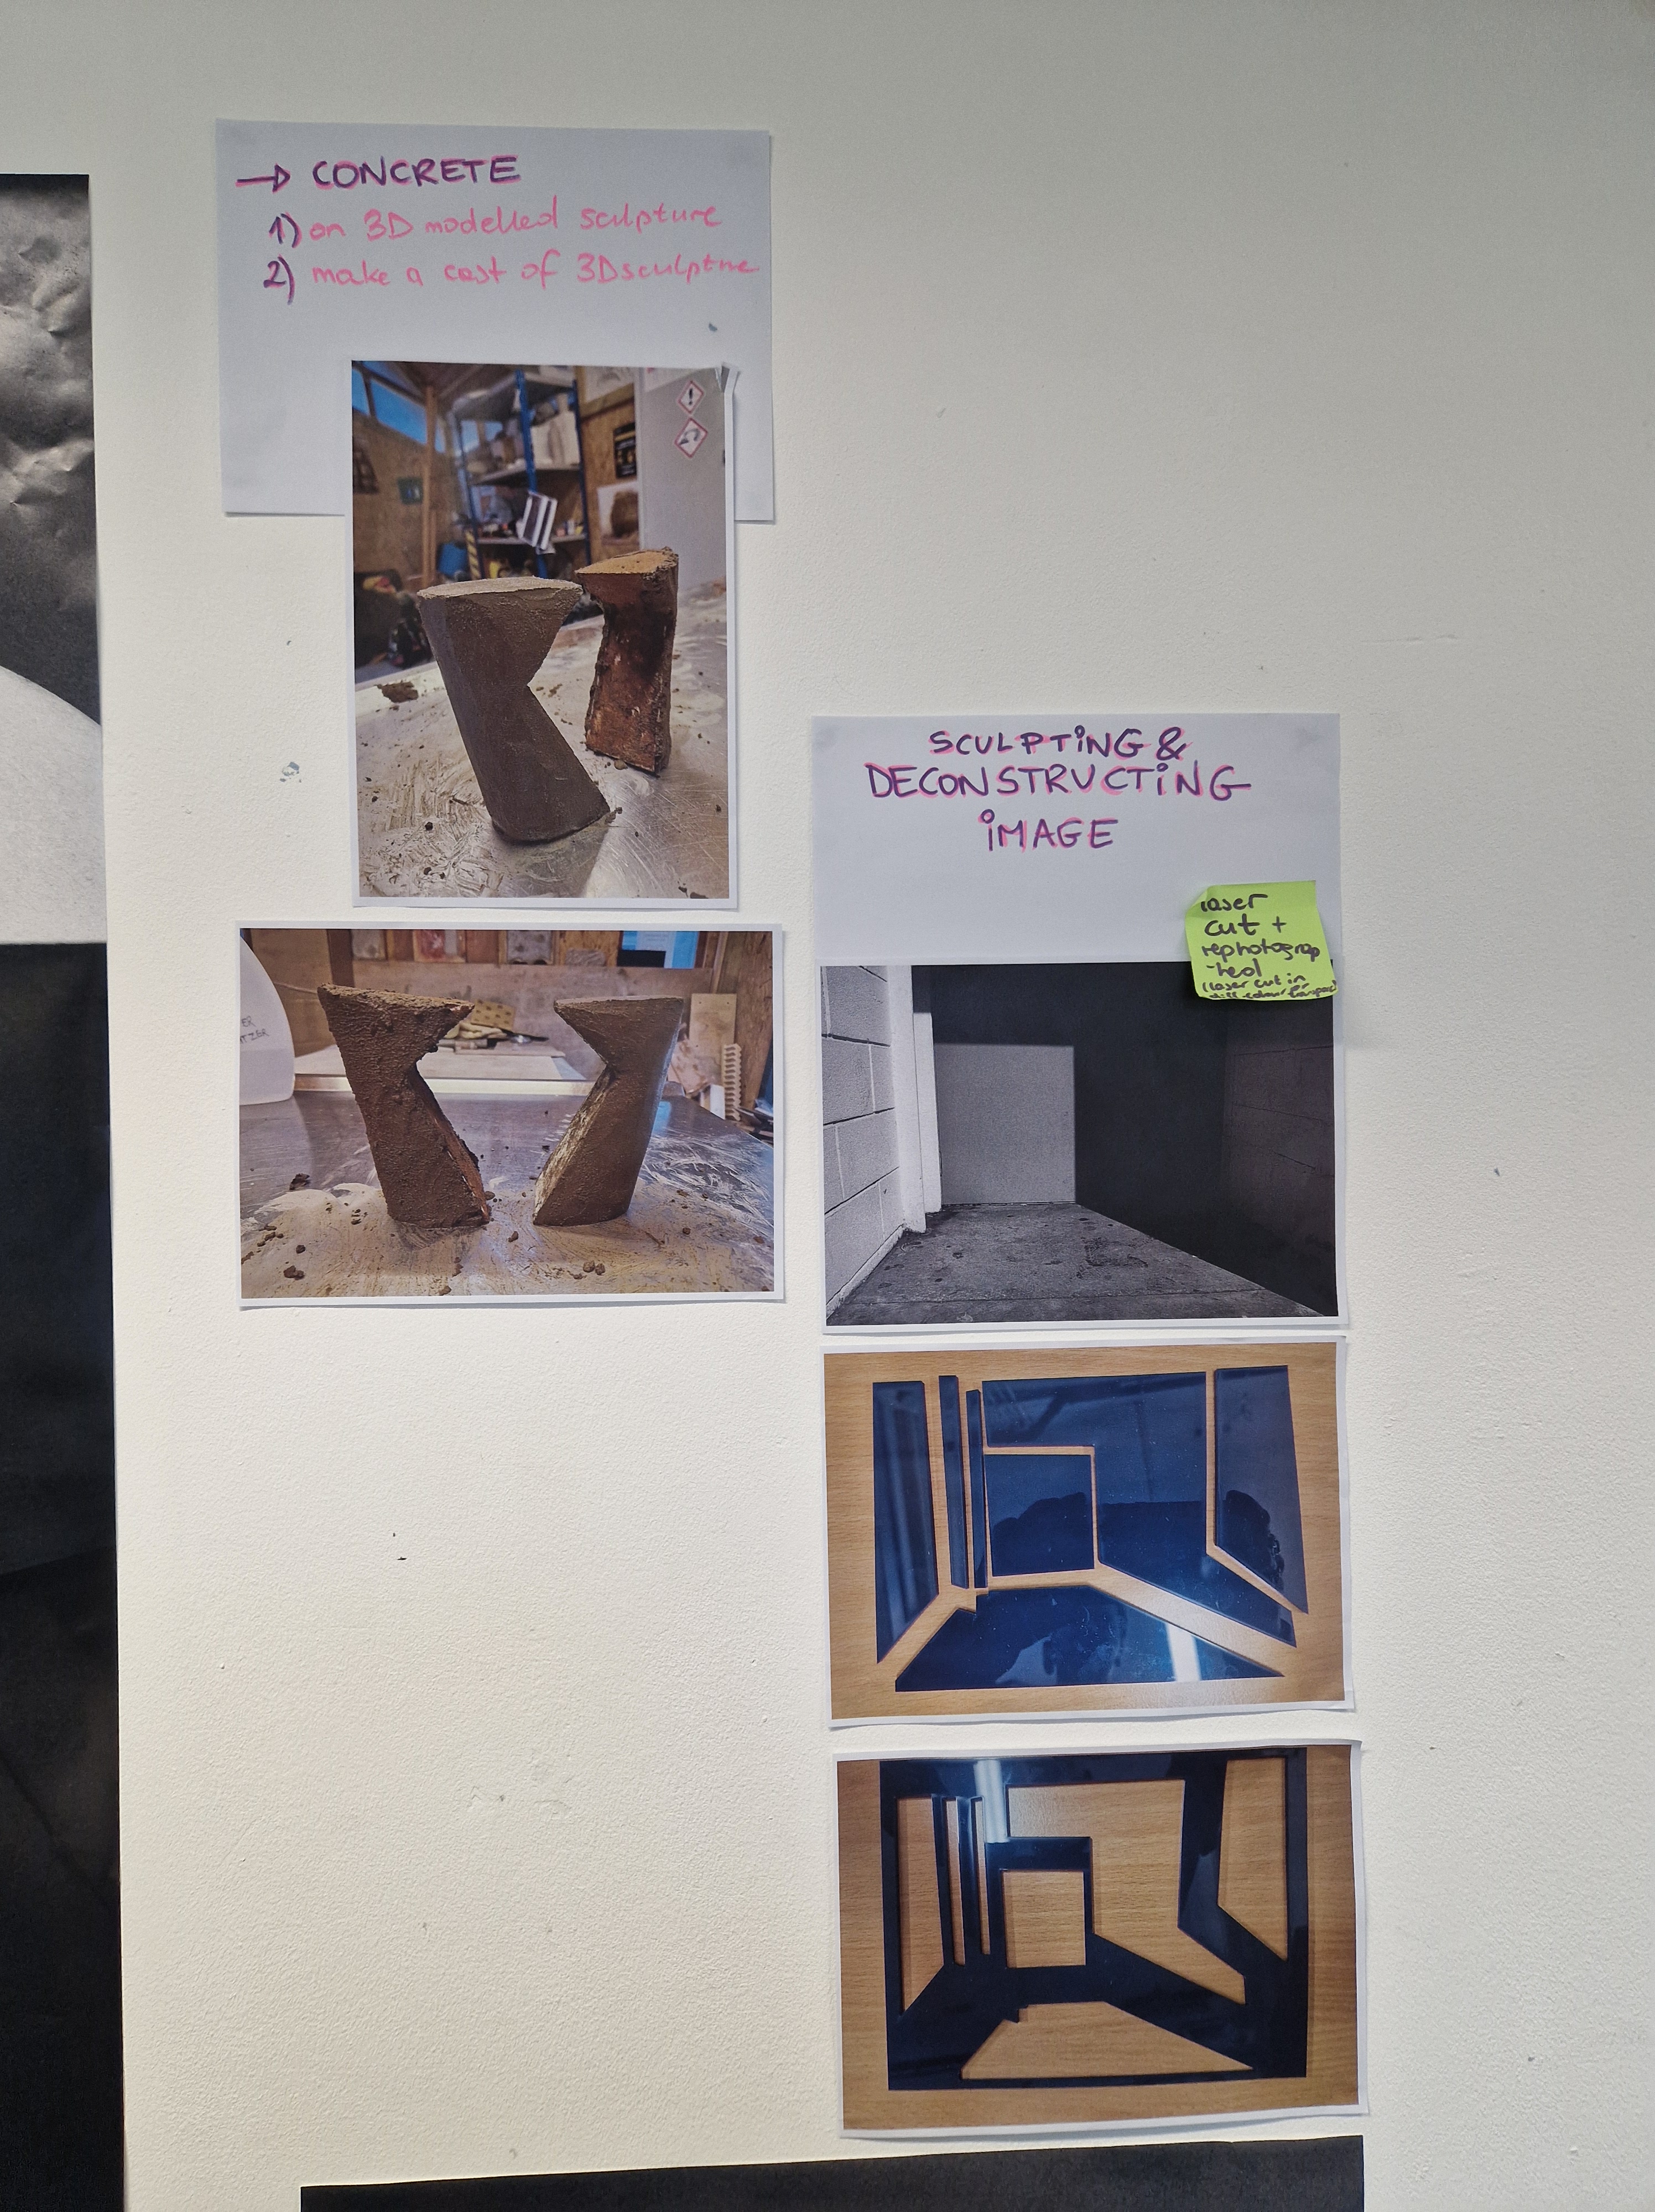


CONCRETE WORKSHOP 3
Progressing the work, we assessed the previous tests and made a plan for the day.
The main tasks today were to:
- make and test a mix with black pigment
- make a classic mix and cover the large part with concrete (which we haven’t done yet as we worked with smaller parts)

REFLECTIONS: Another great session moving the project forward, mixing in the colourant seems like a much better idea than charcoal if I want to achieve the desired effect. Now I wait for them to dry so I can sand them.
FRIDAY
TALK WITH THEO SIMPSON
Theo Simpson (b. 1986) lives and works in Lincolnshire, England and studied at the Sheffield Institute of Arts. His work has recently featured in the group show A Green and Pleasant Land, Towner Art Gallery, Eastbourne and in February 2017 his solo exhibition The land of the day beforewas shown at Webber Gallery, London. Simpson´s work is held in various international public collections including the V&A National Art Library, Fotomuseum Winterthur, Royal Institute of British Architects and the Tate Artists’ Book Library. His work will feature in the upcoming issue of Foam Magazine #49: Back to the Future. Theo Simpson is represented by Webber Gallery, London.
https://www.foam.org/events/theo-simpson /
https://www.theosimpson.co.uk/
NOTES:
- consider how do you sustain your practice after uni
- photography as an exploration method
- question the role of photography in society
- ask yourself basic questions: what is your work, what are you trying to do etc.
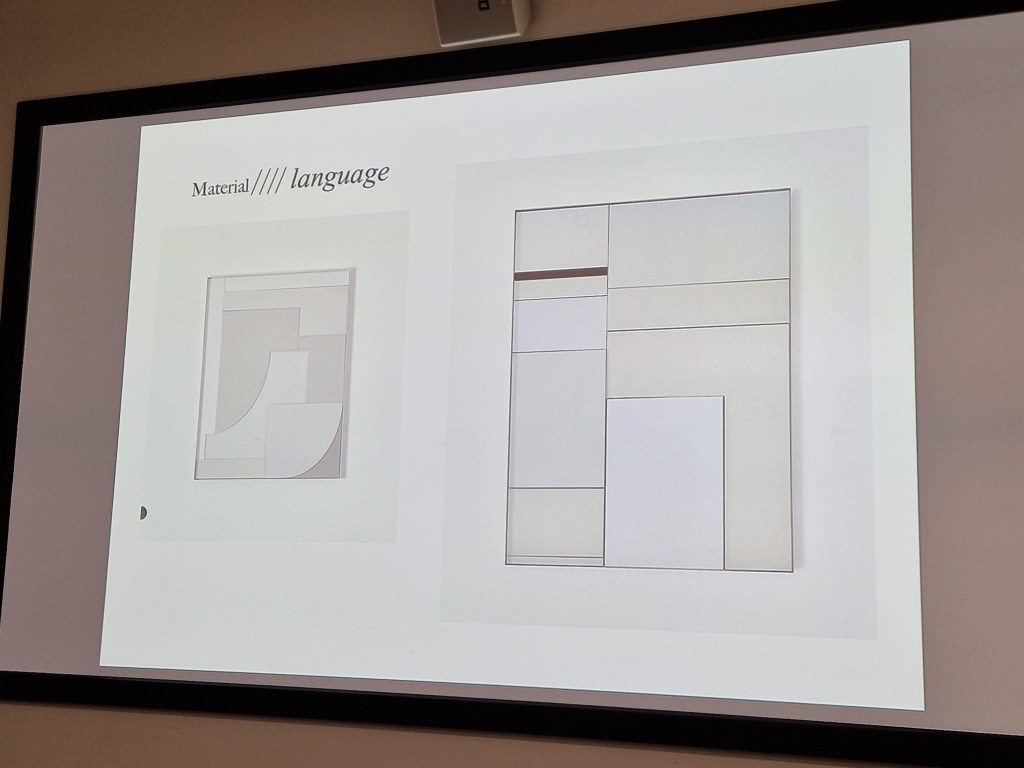
- think about the materials that you are using and what language they are speaking
- think about the process as a language
- repeat, rebuild, reimagine, re-construct, de-construct, recycle
- how does your portfolio reflect your practice
- Marcel Duchamp’s travel box gallery
- of course, the obvious and most important thing is to look outside photography for inspiration
- Theo Simpson – Toward the metal
WEEK 8: 11-17 MARCH
MONDAY
HOUSEKEEPING
NOTES:
- plans for crit to be discussed with Thom
- project statements updated
- print/scale/fabrication
- moving work forward
- talk about research/contextual
- next week crit 18th of March, 2nd floor soda, install on Friday 15th
TUTORIAL WITH THOM
- https://science.nasa.gov/missions/hubble/hubble-images-become-tactile-3-d-experience-for-the-blind/
- https://www.google.co.uk/search?sca_esv=0fc881ea15ce3ce4&sxsrf=ACQVn08rcoEZ6obzPIw3O_qQ3DFkijD4DA:1710162134798&q=Hubble+3-D+printing+tactile+images&tbm=isch&source=lnms&sa=X&ved=2ahUKEwjw7bW0ouyEAxVJX0EAHUAVA3AQ0pQJegQIBhAB&biw=1366&bih=615&dpr=1#imgrc=rCi0GLMeBOOuzM
- https://gerhard-richter.com/en/art/atlas
- https://sis.modernamuseet.se/objects/2022/en-annan-rorelse
- jason evans in exhibition with https://www.jolonghurst.com/exhibitions-list/the-grange-prize-art-gallery-of-toronto
- https://jasonevans.info/
WALL UPDATE
Today I spent some time printing new images of my work in progress, hanging them up on my wall and thinking about the development of my concept, materials, time management and other options.
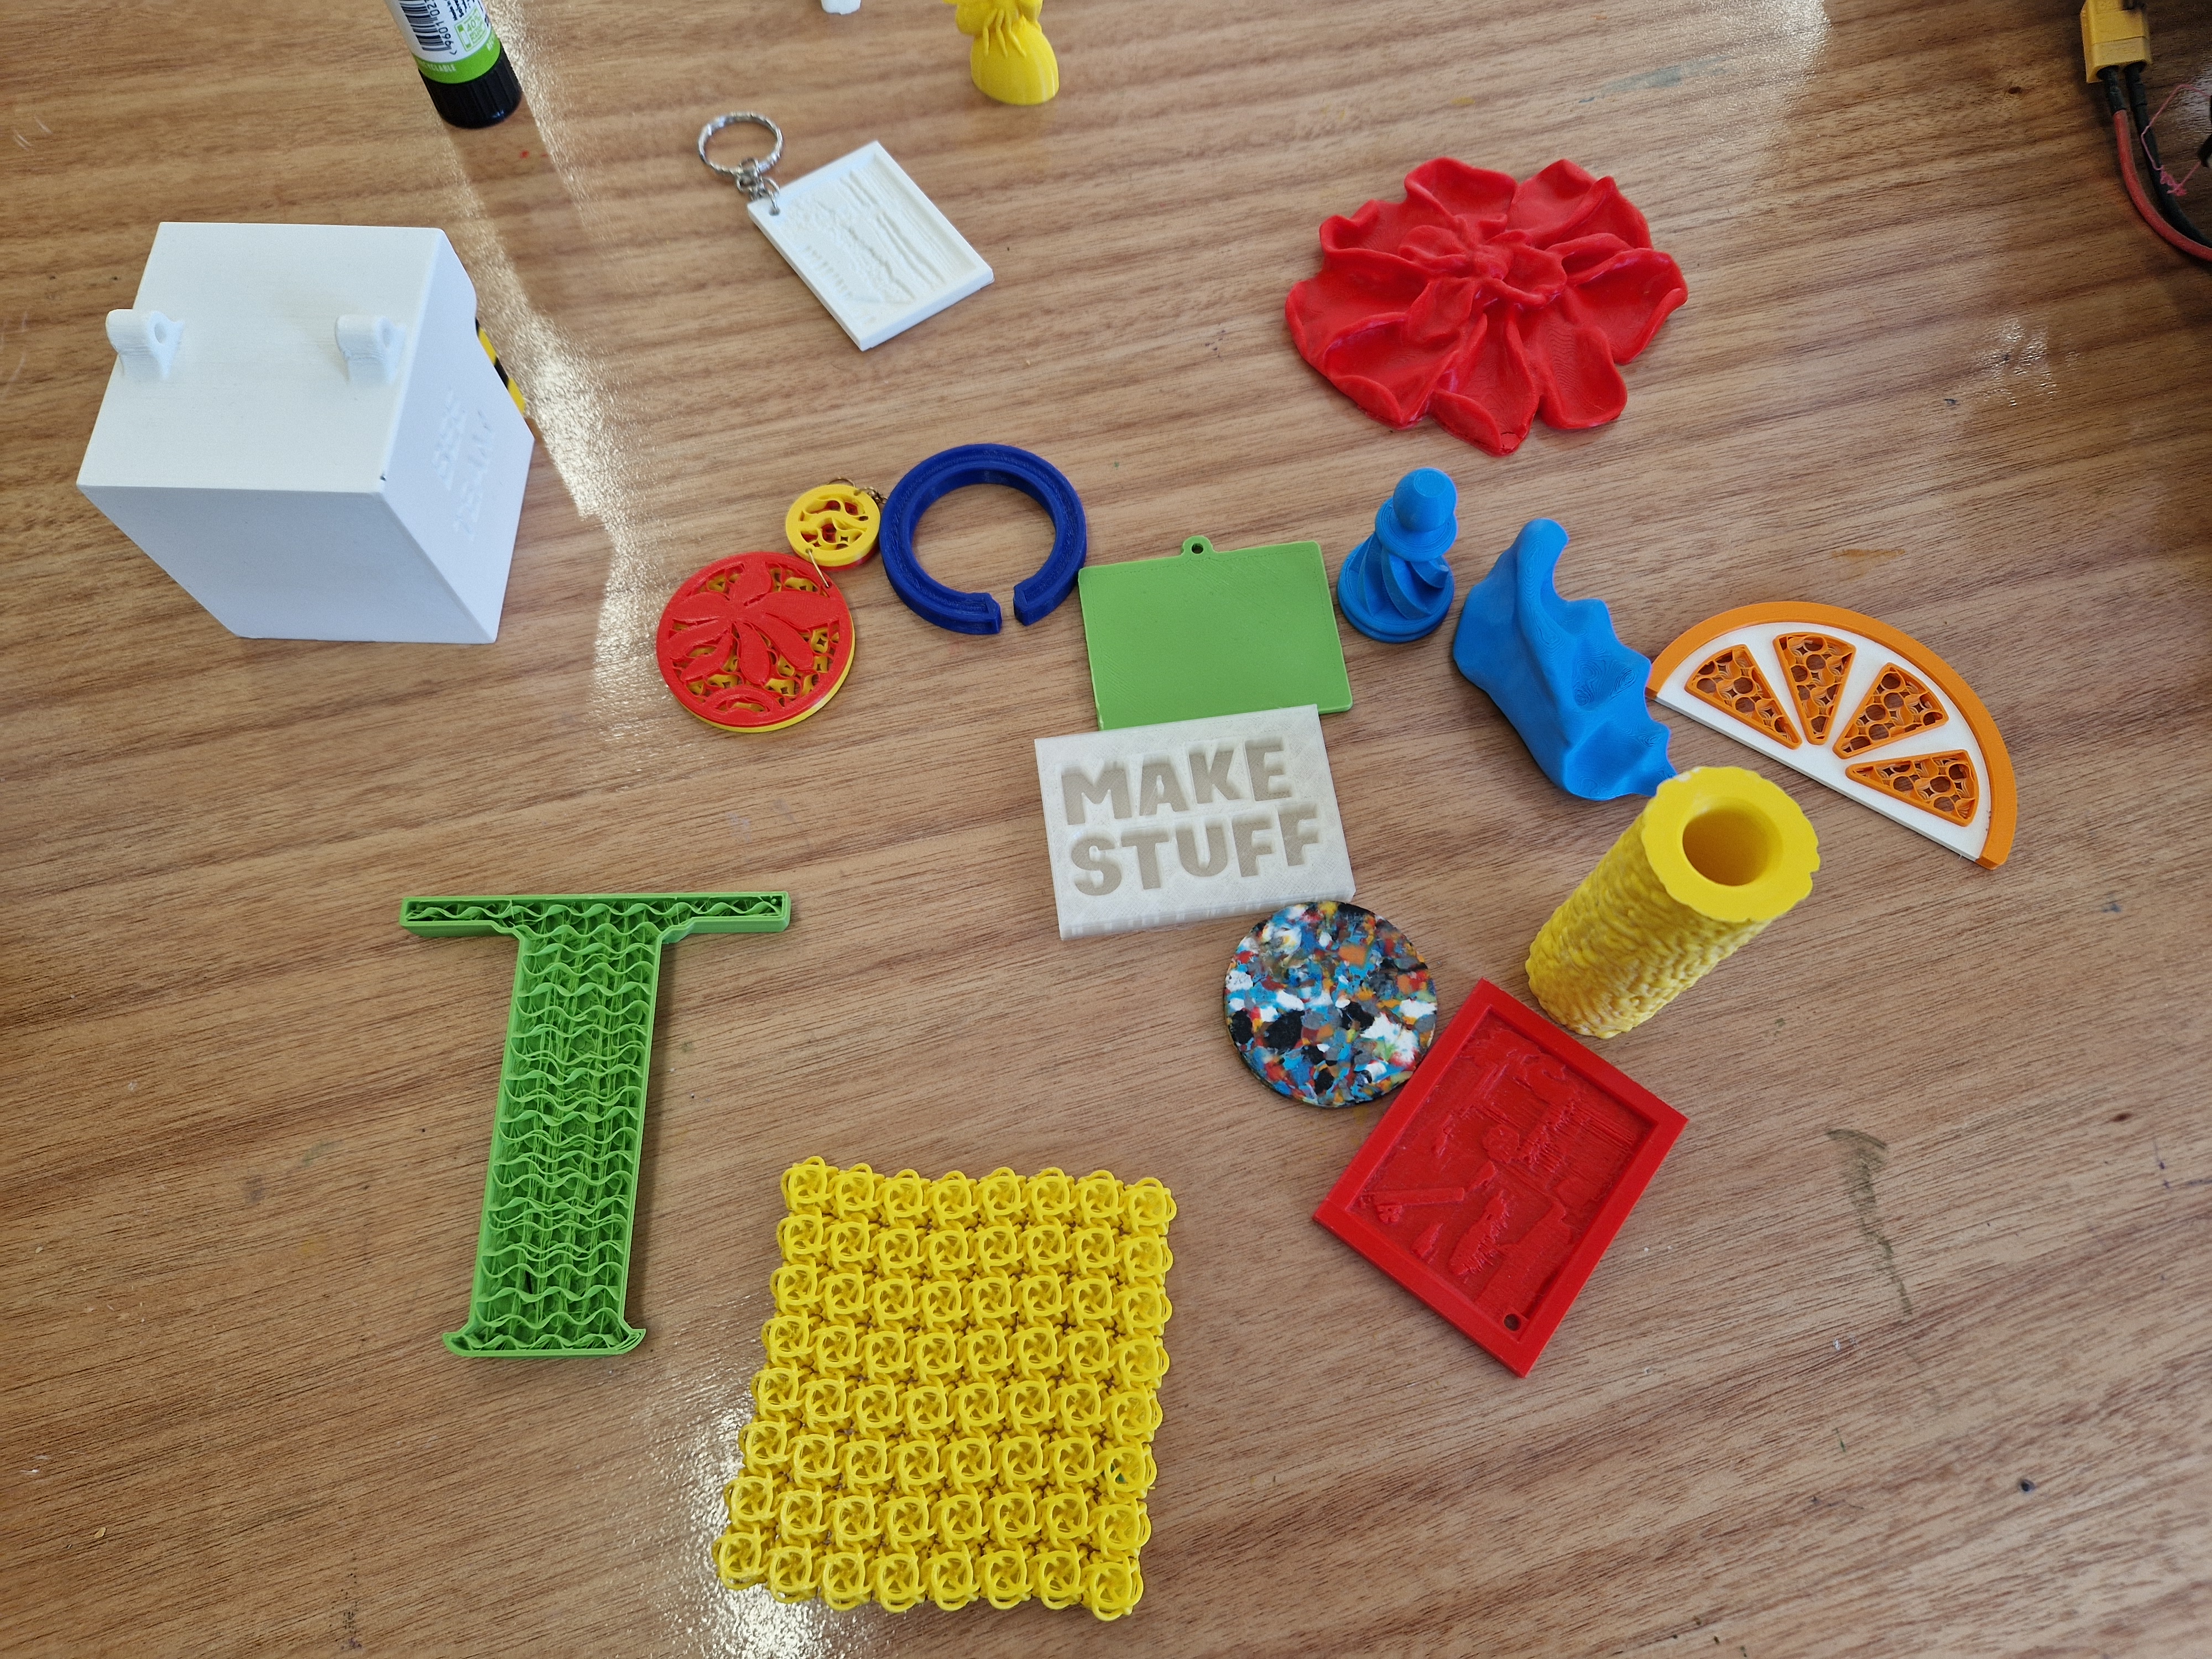
3D PRINTING COURSE
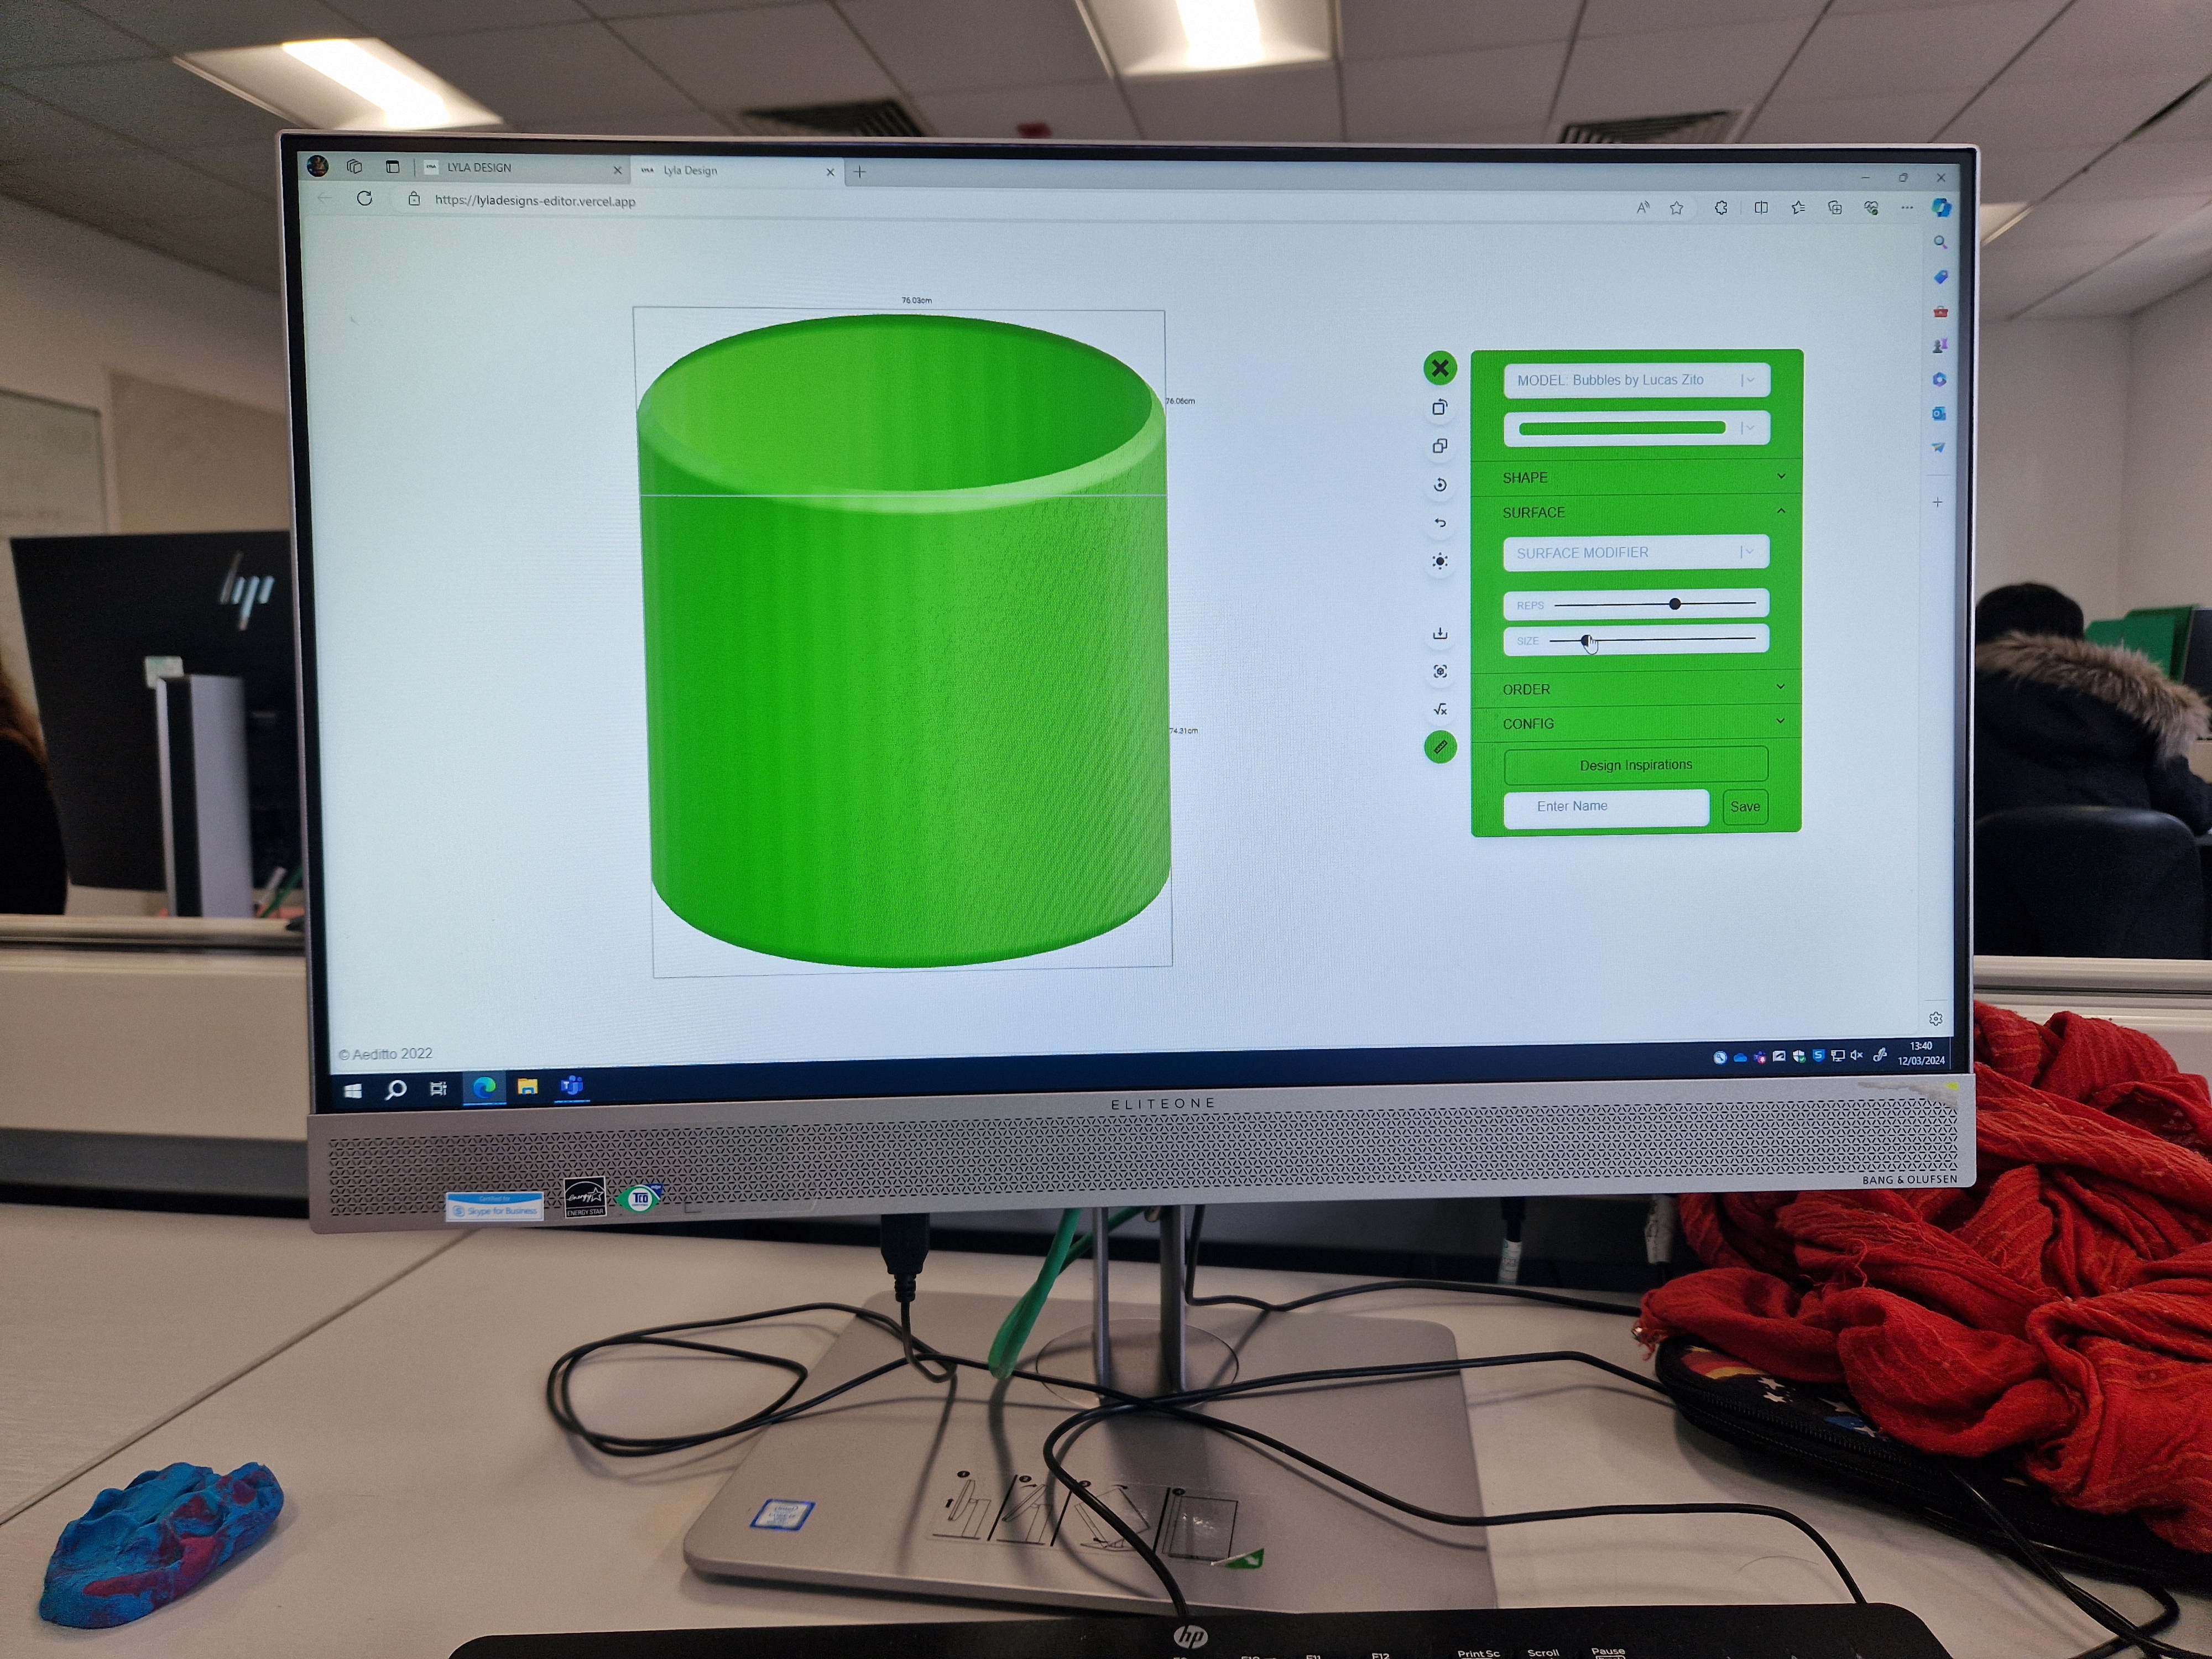
Exploring options, making a small model as a way of learning to shape and apply textures.
DARKROOM CLUB – CYANOTYPE
Cyanotype session in a darkroom club.
EXAMPLE
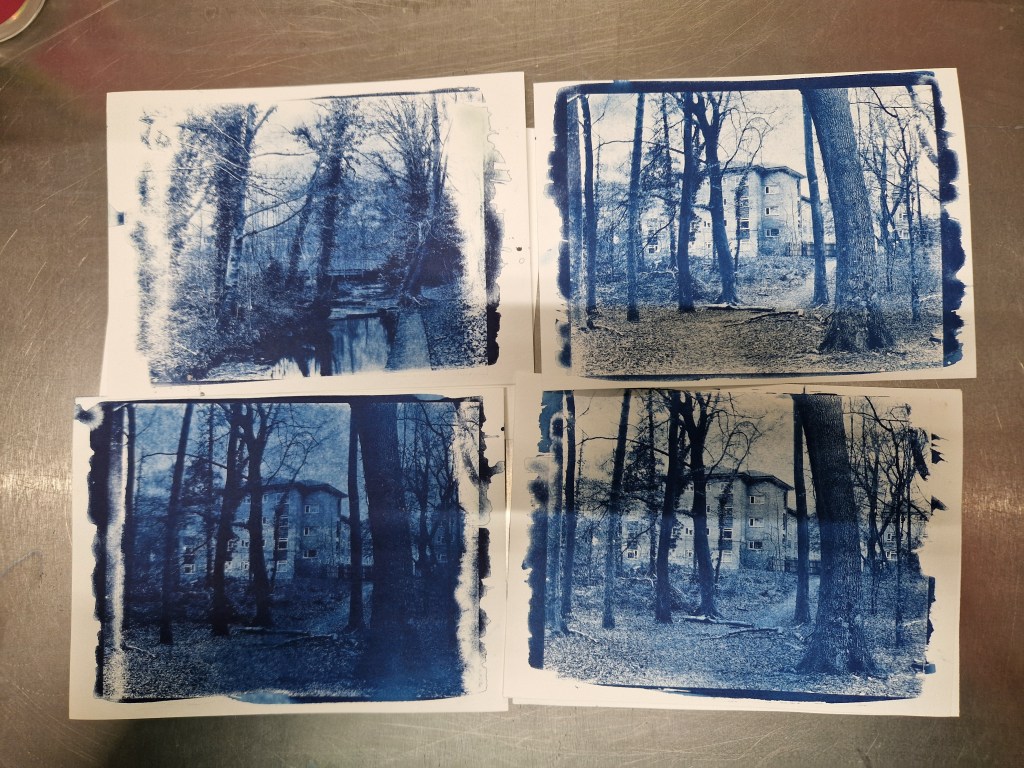
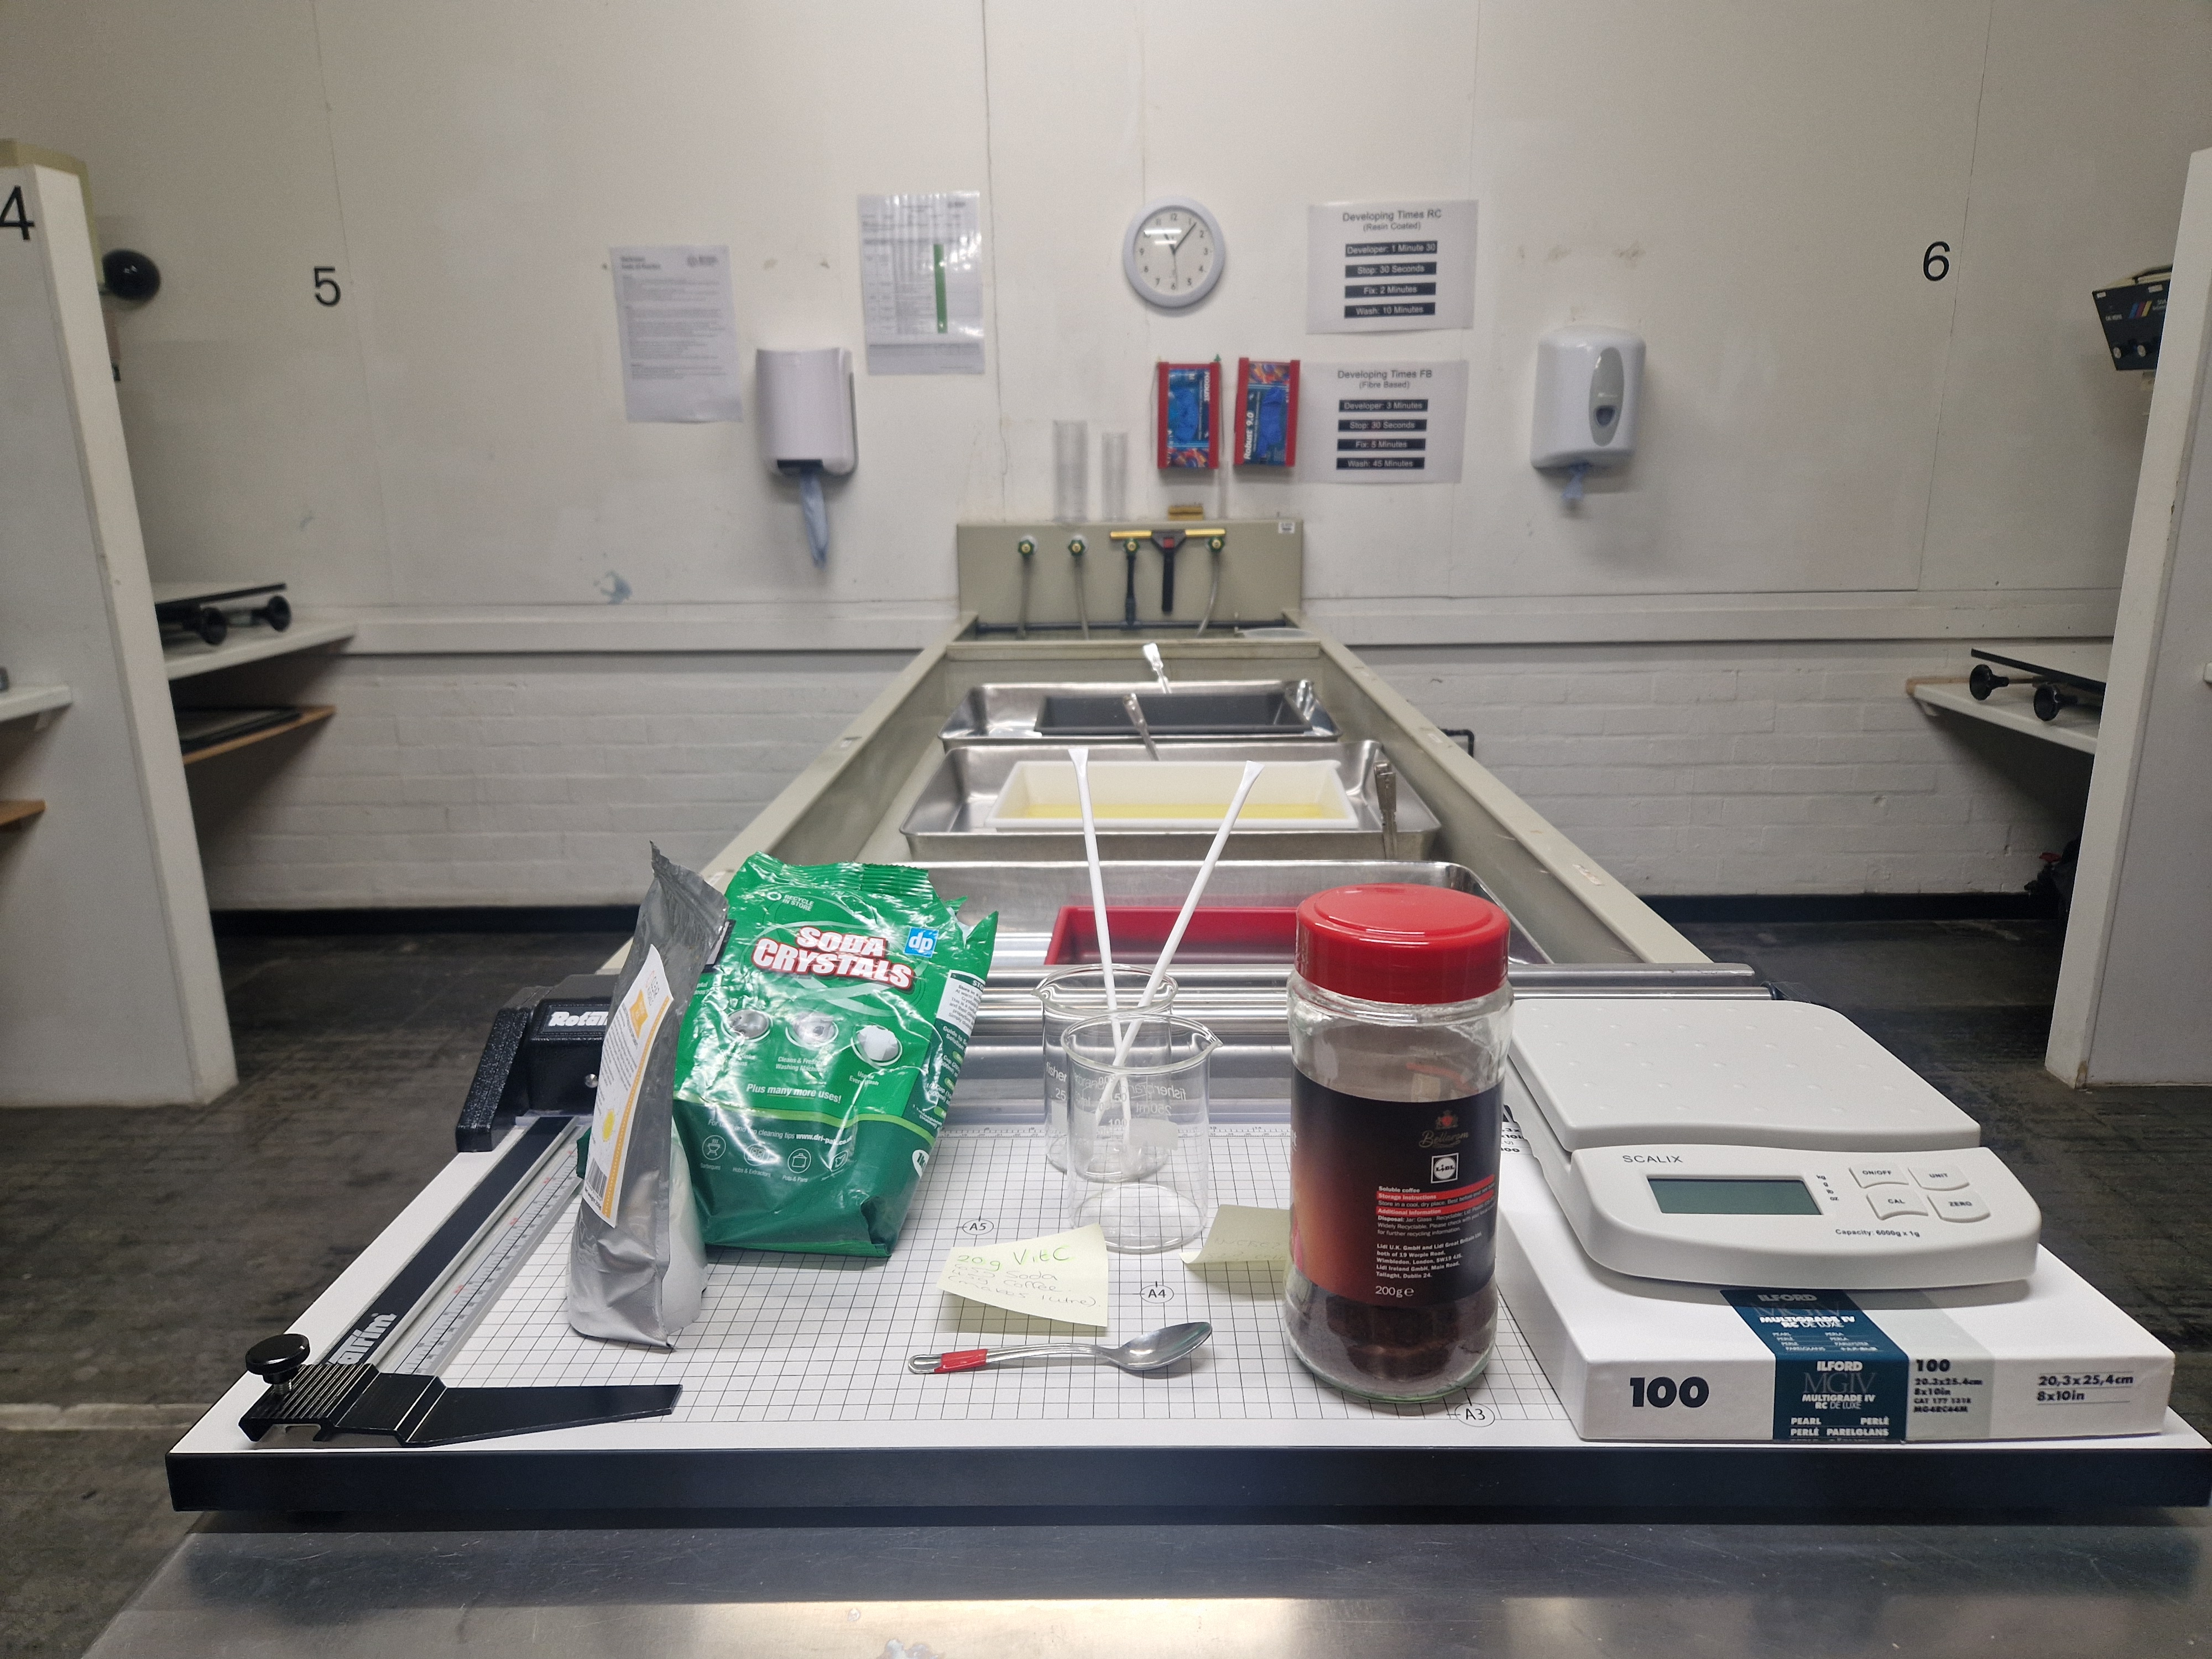
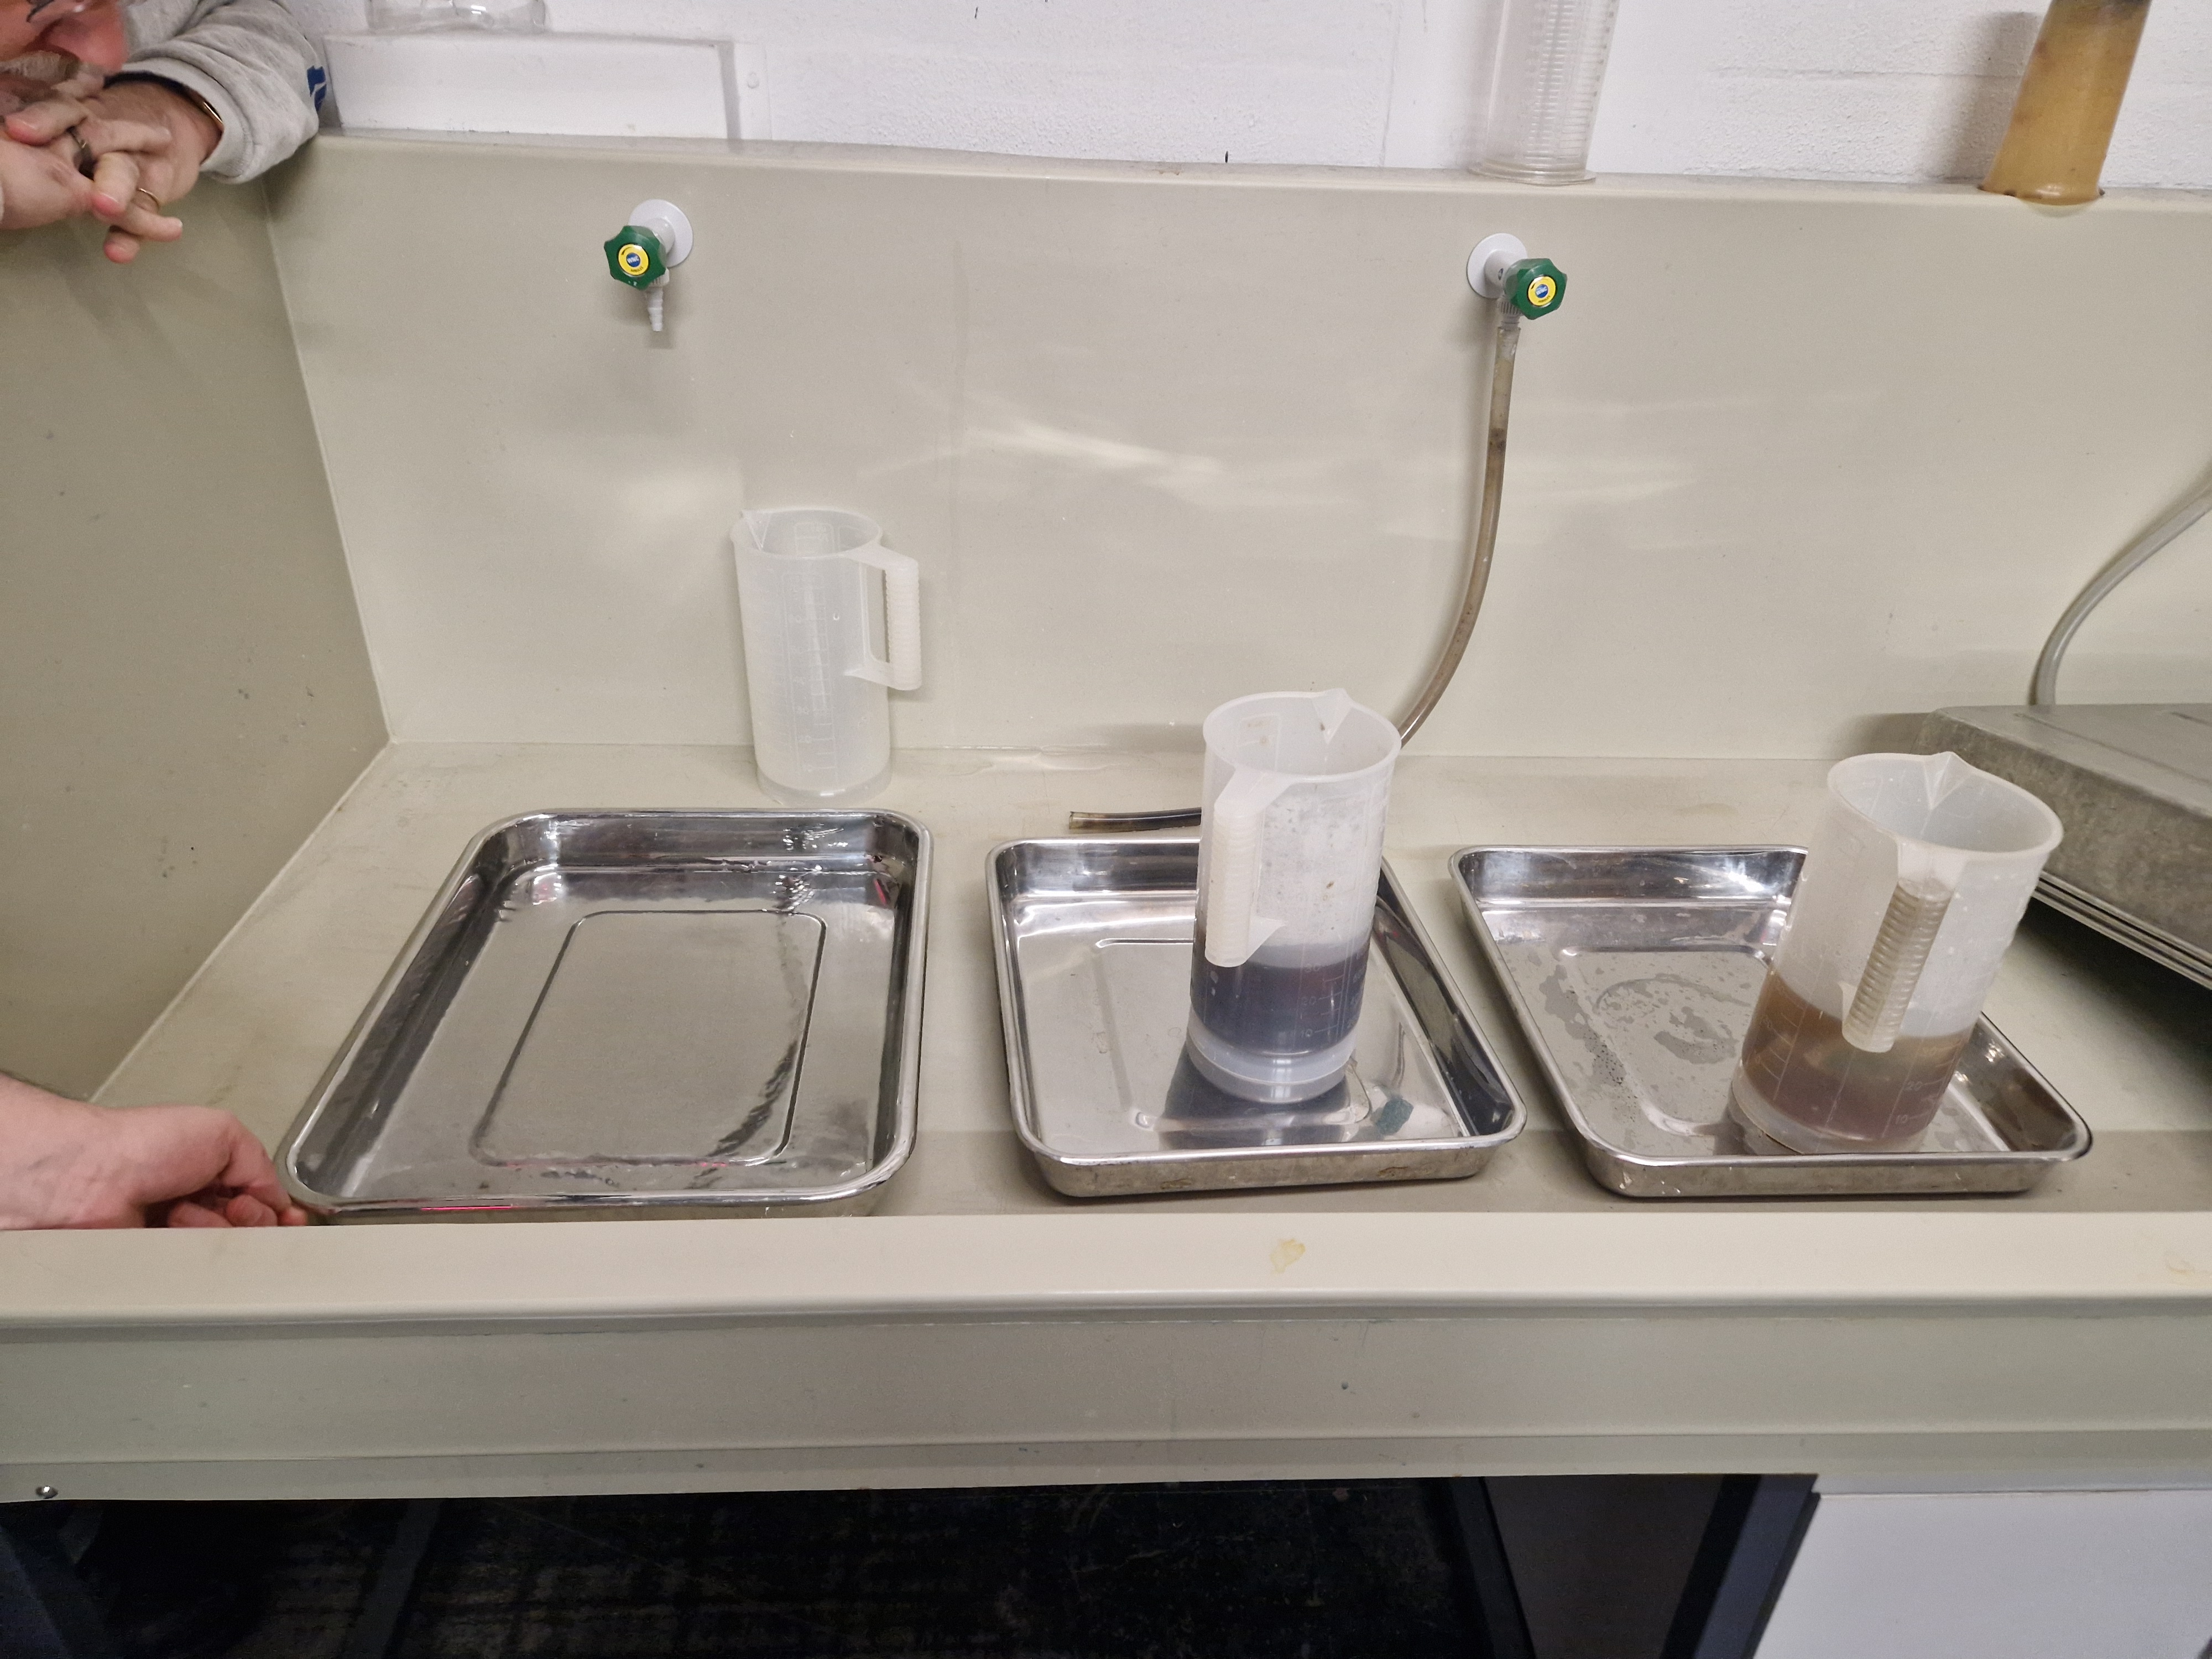
EQUIPMENT AND INGREDIENTS
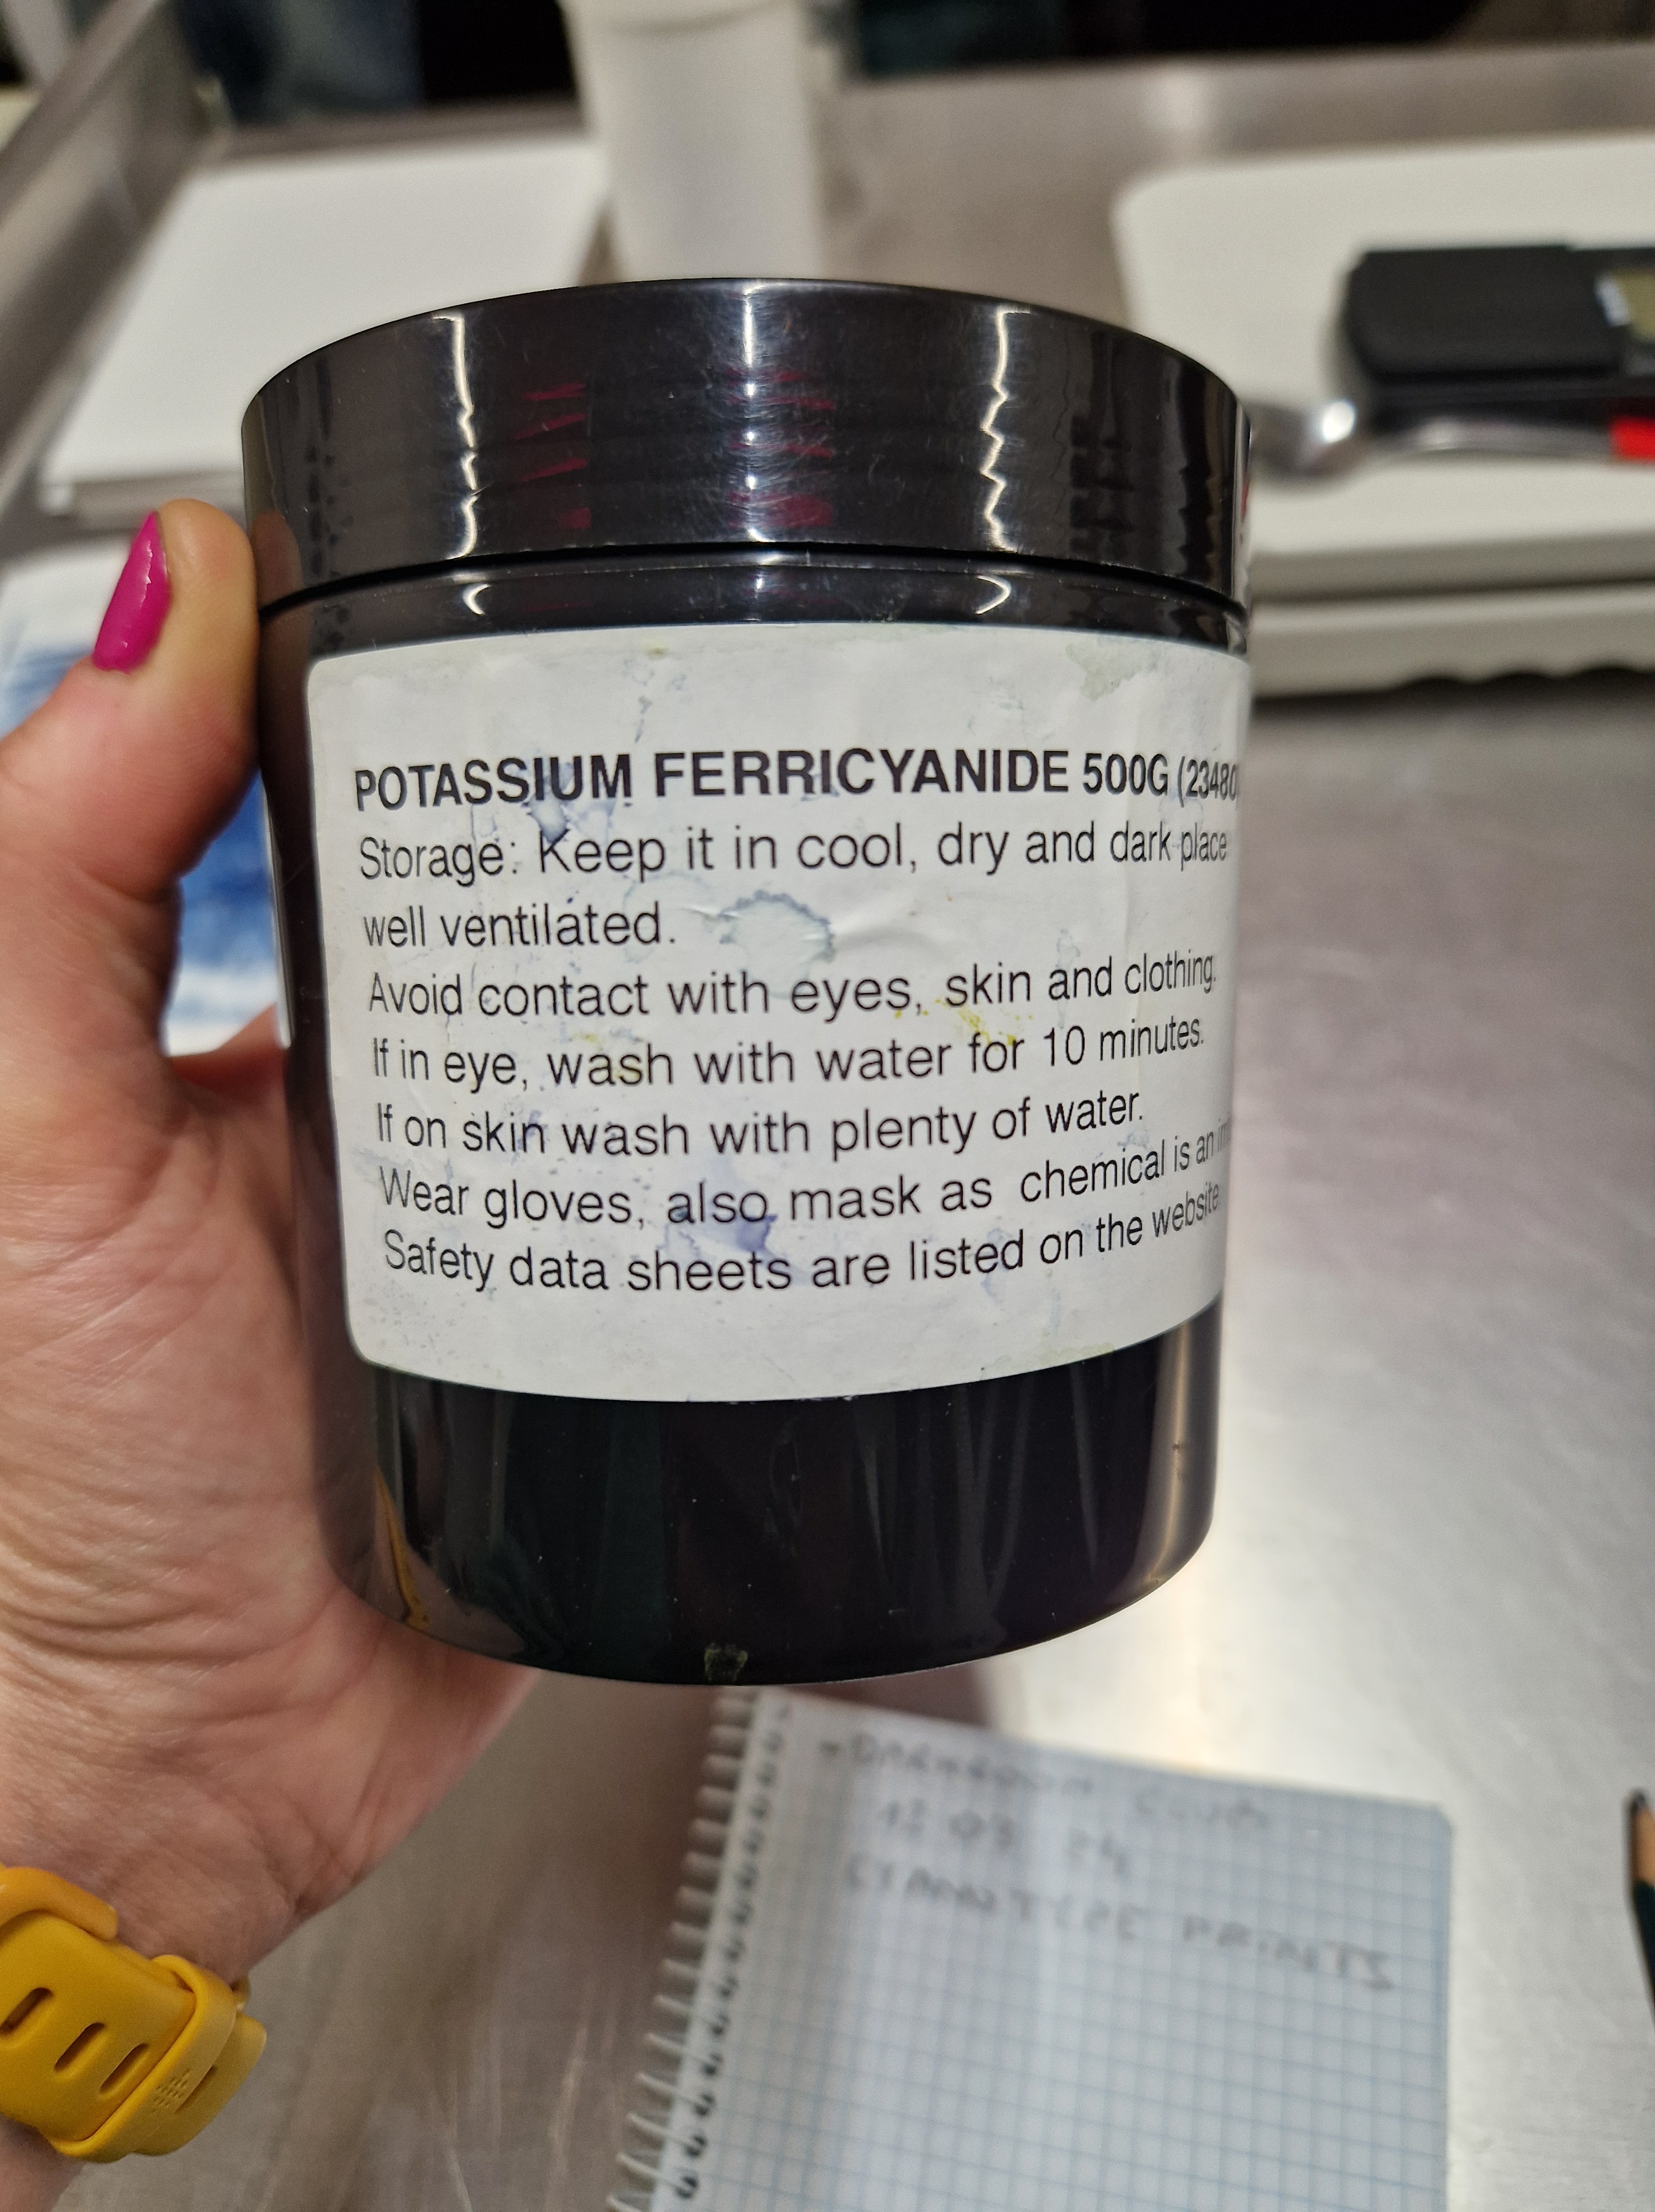
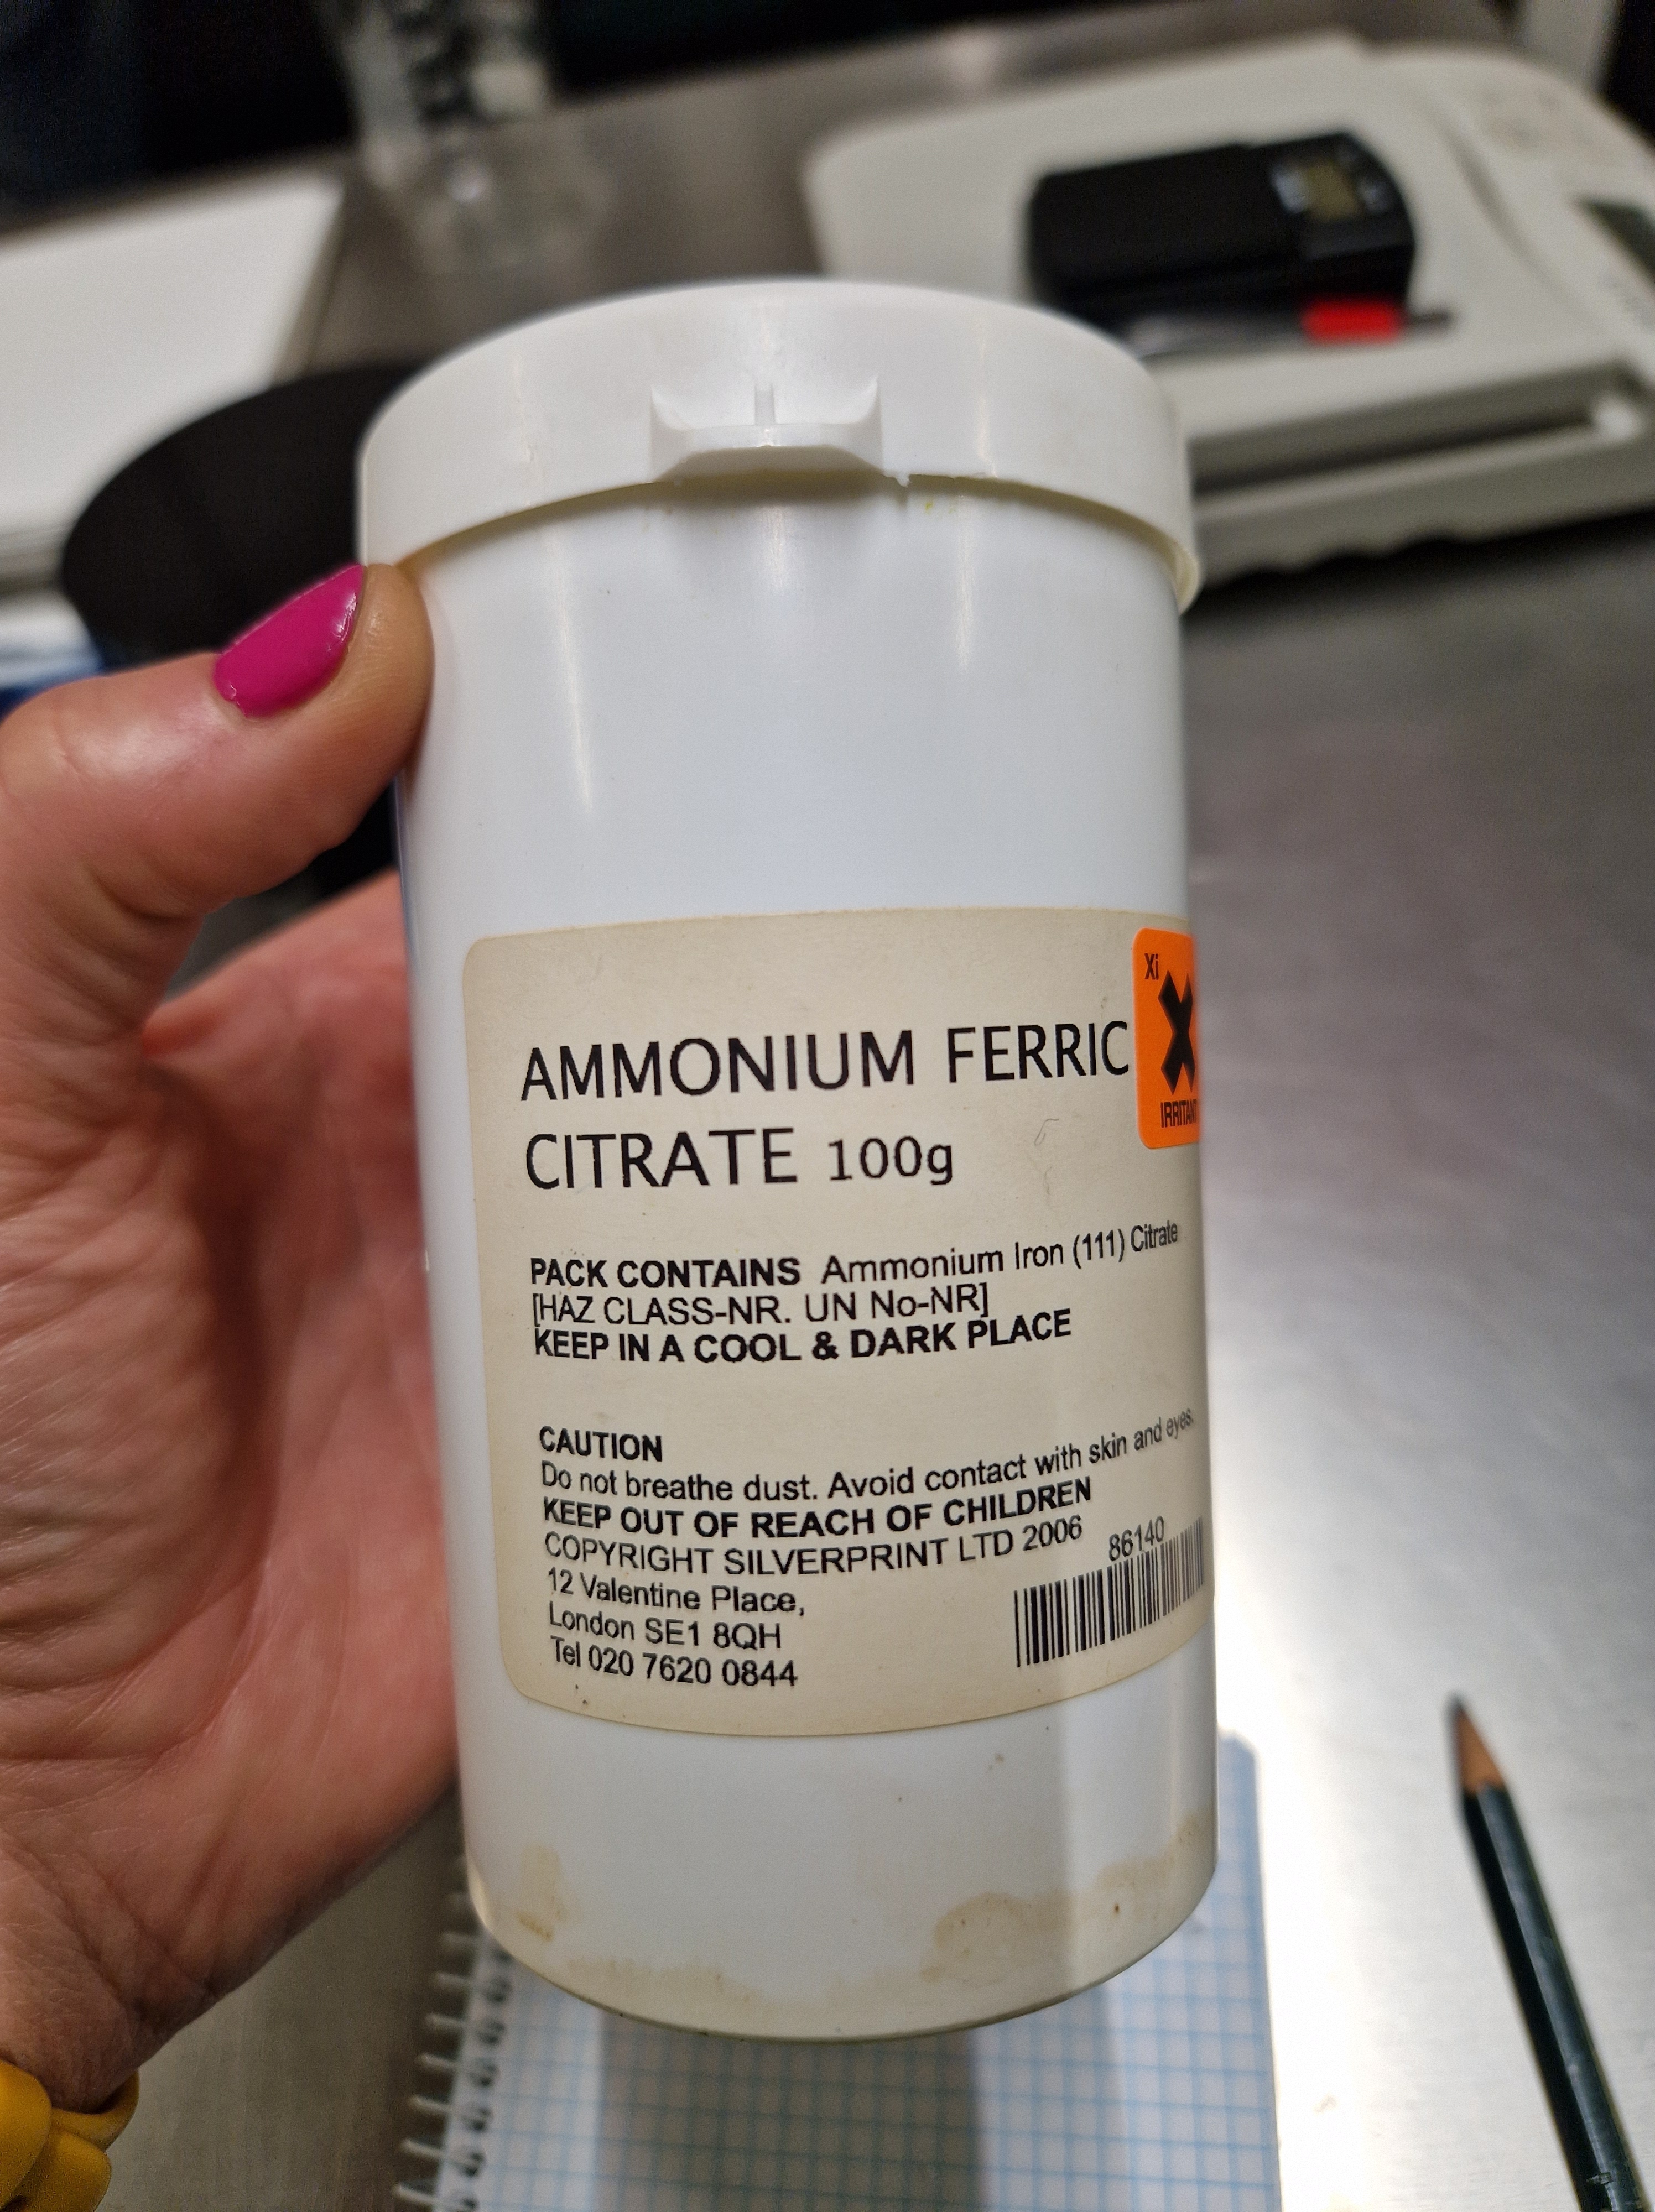
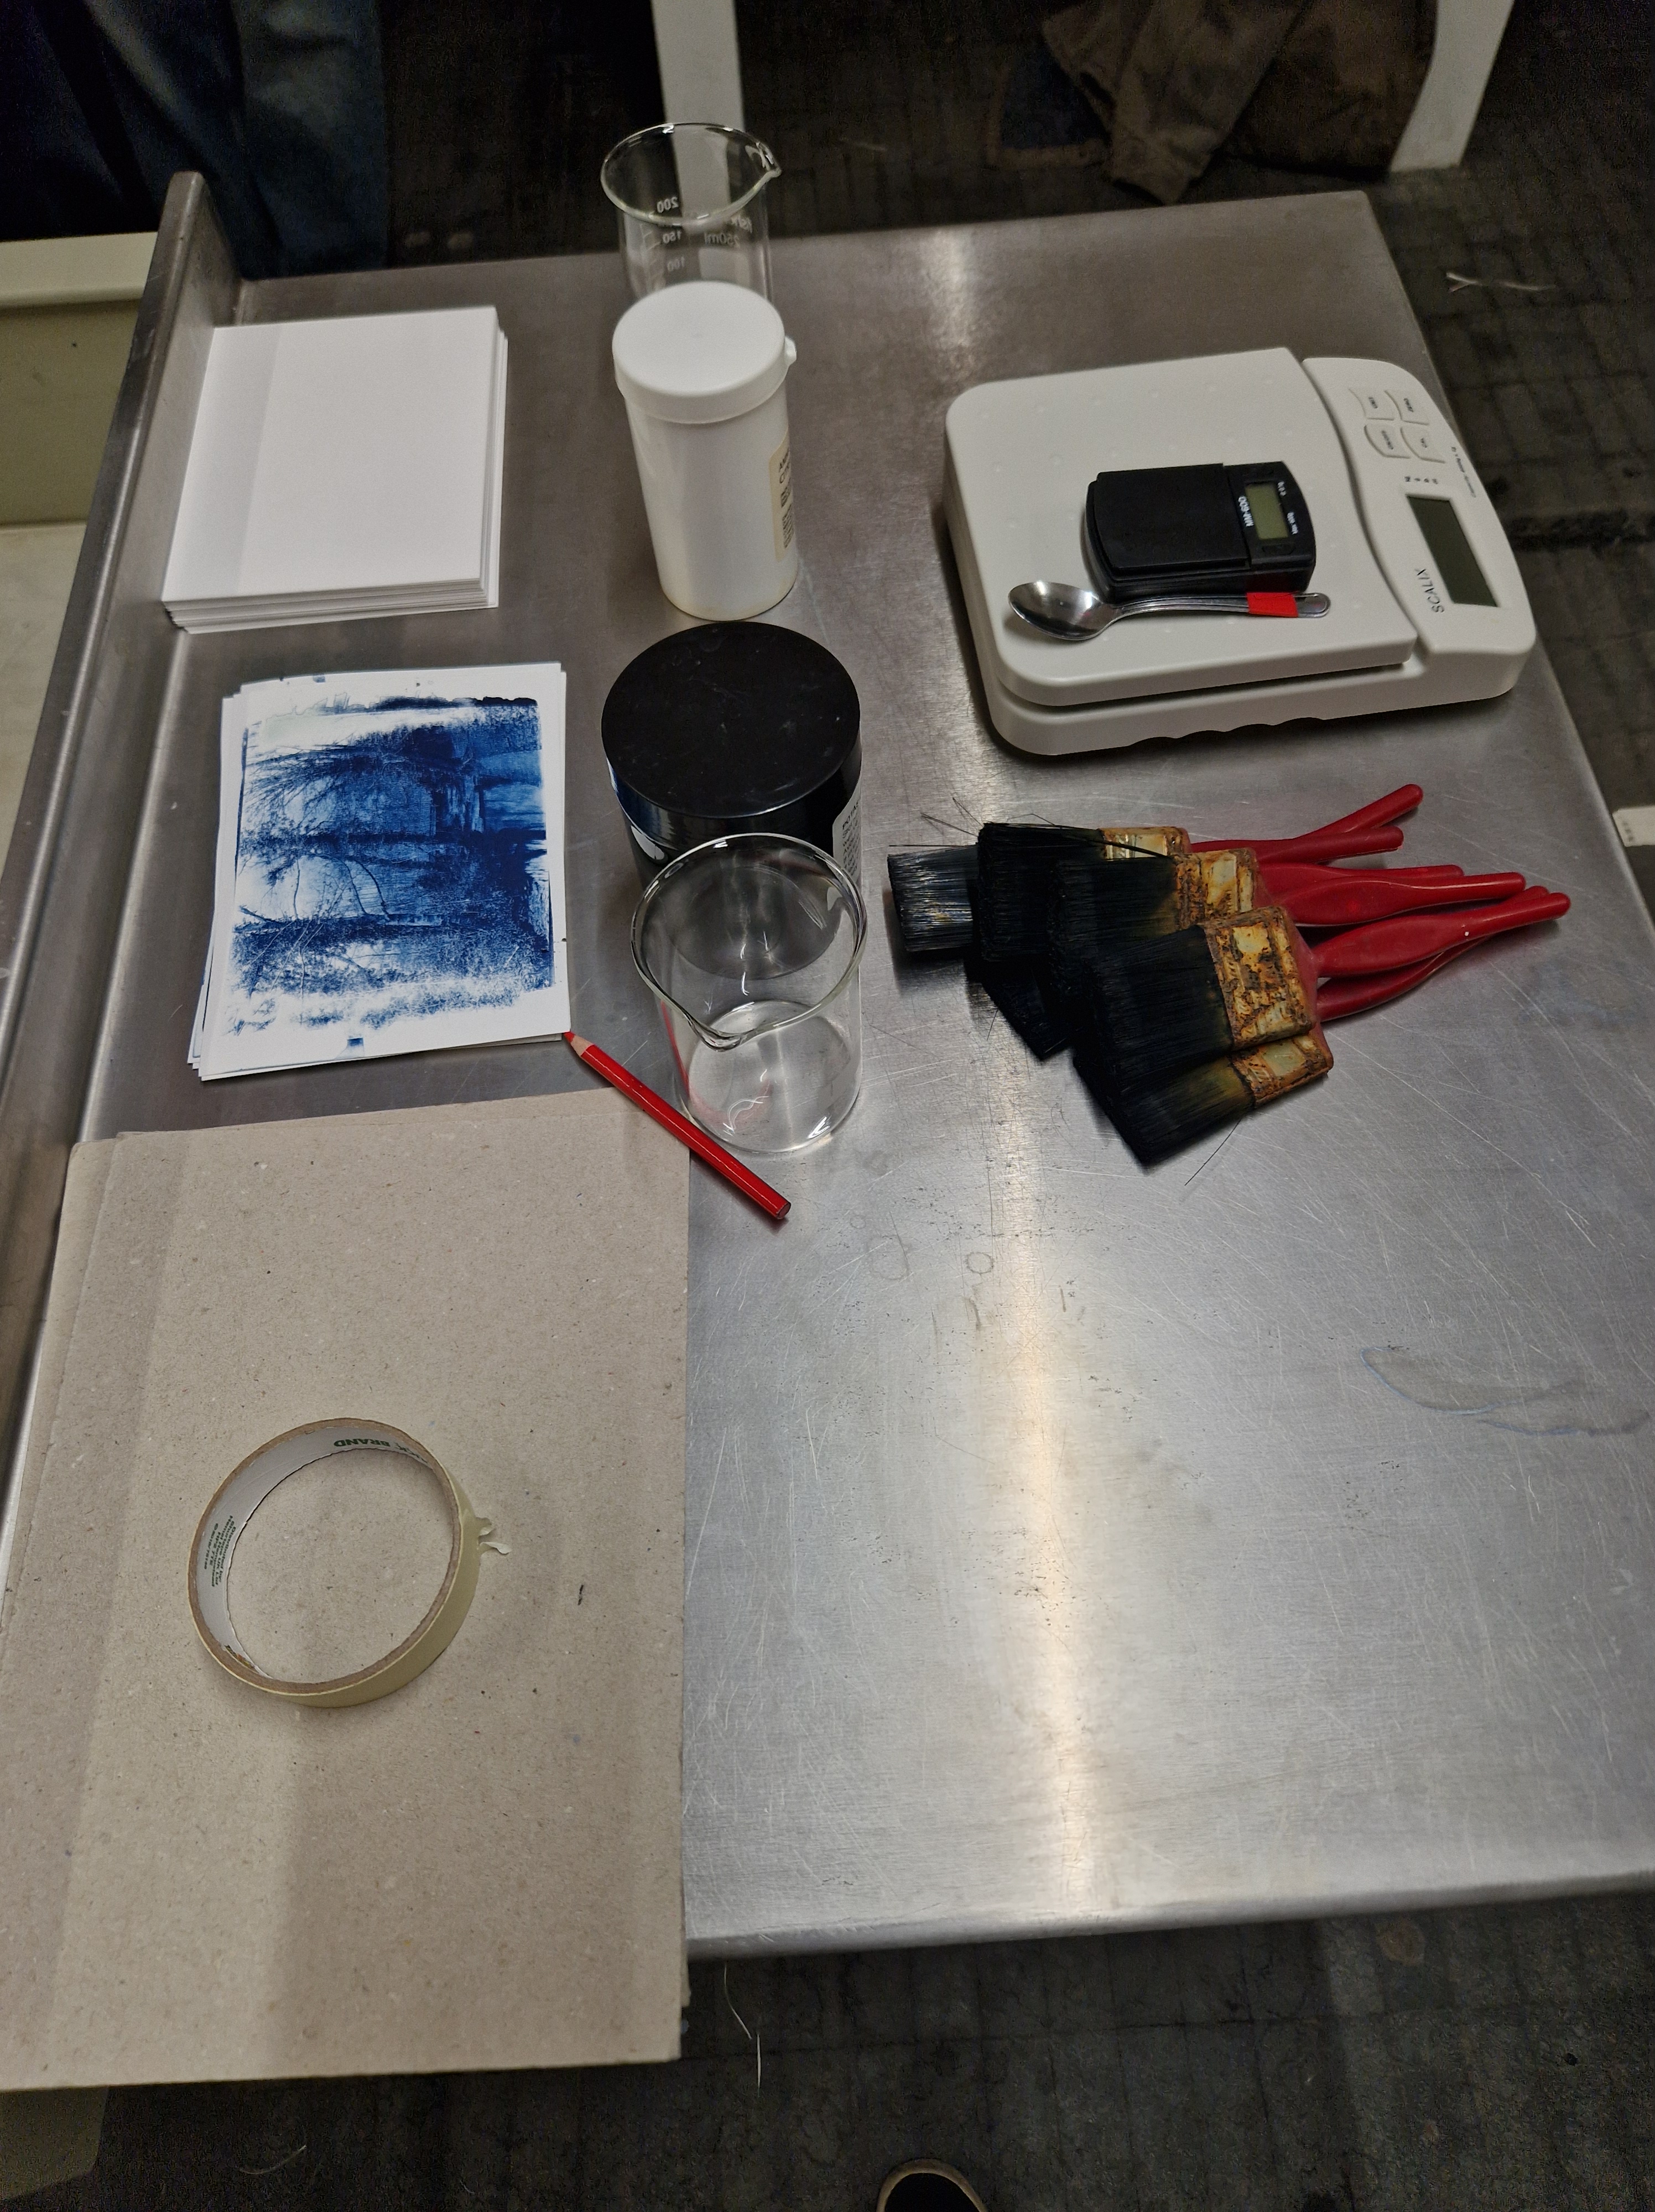
PREPARING PAPER AND TEST STRIP
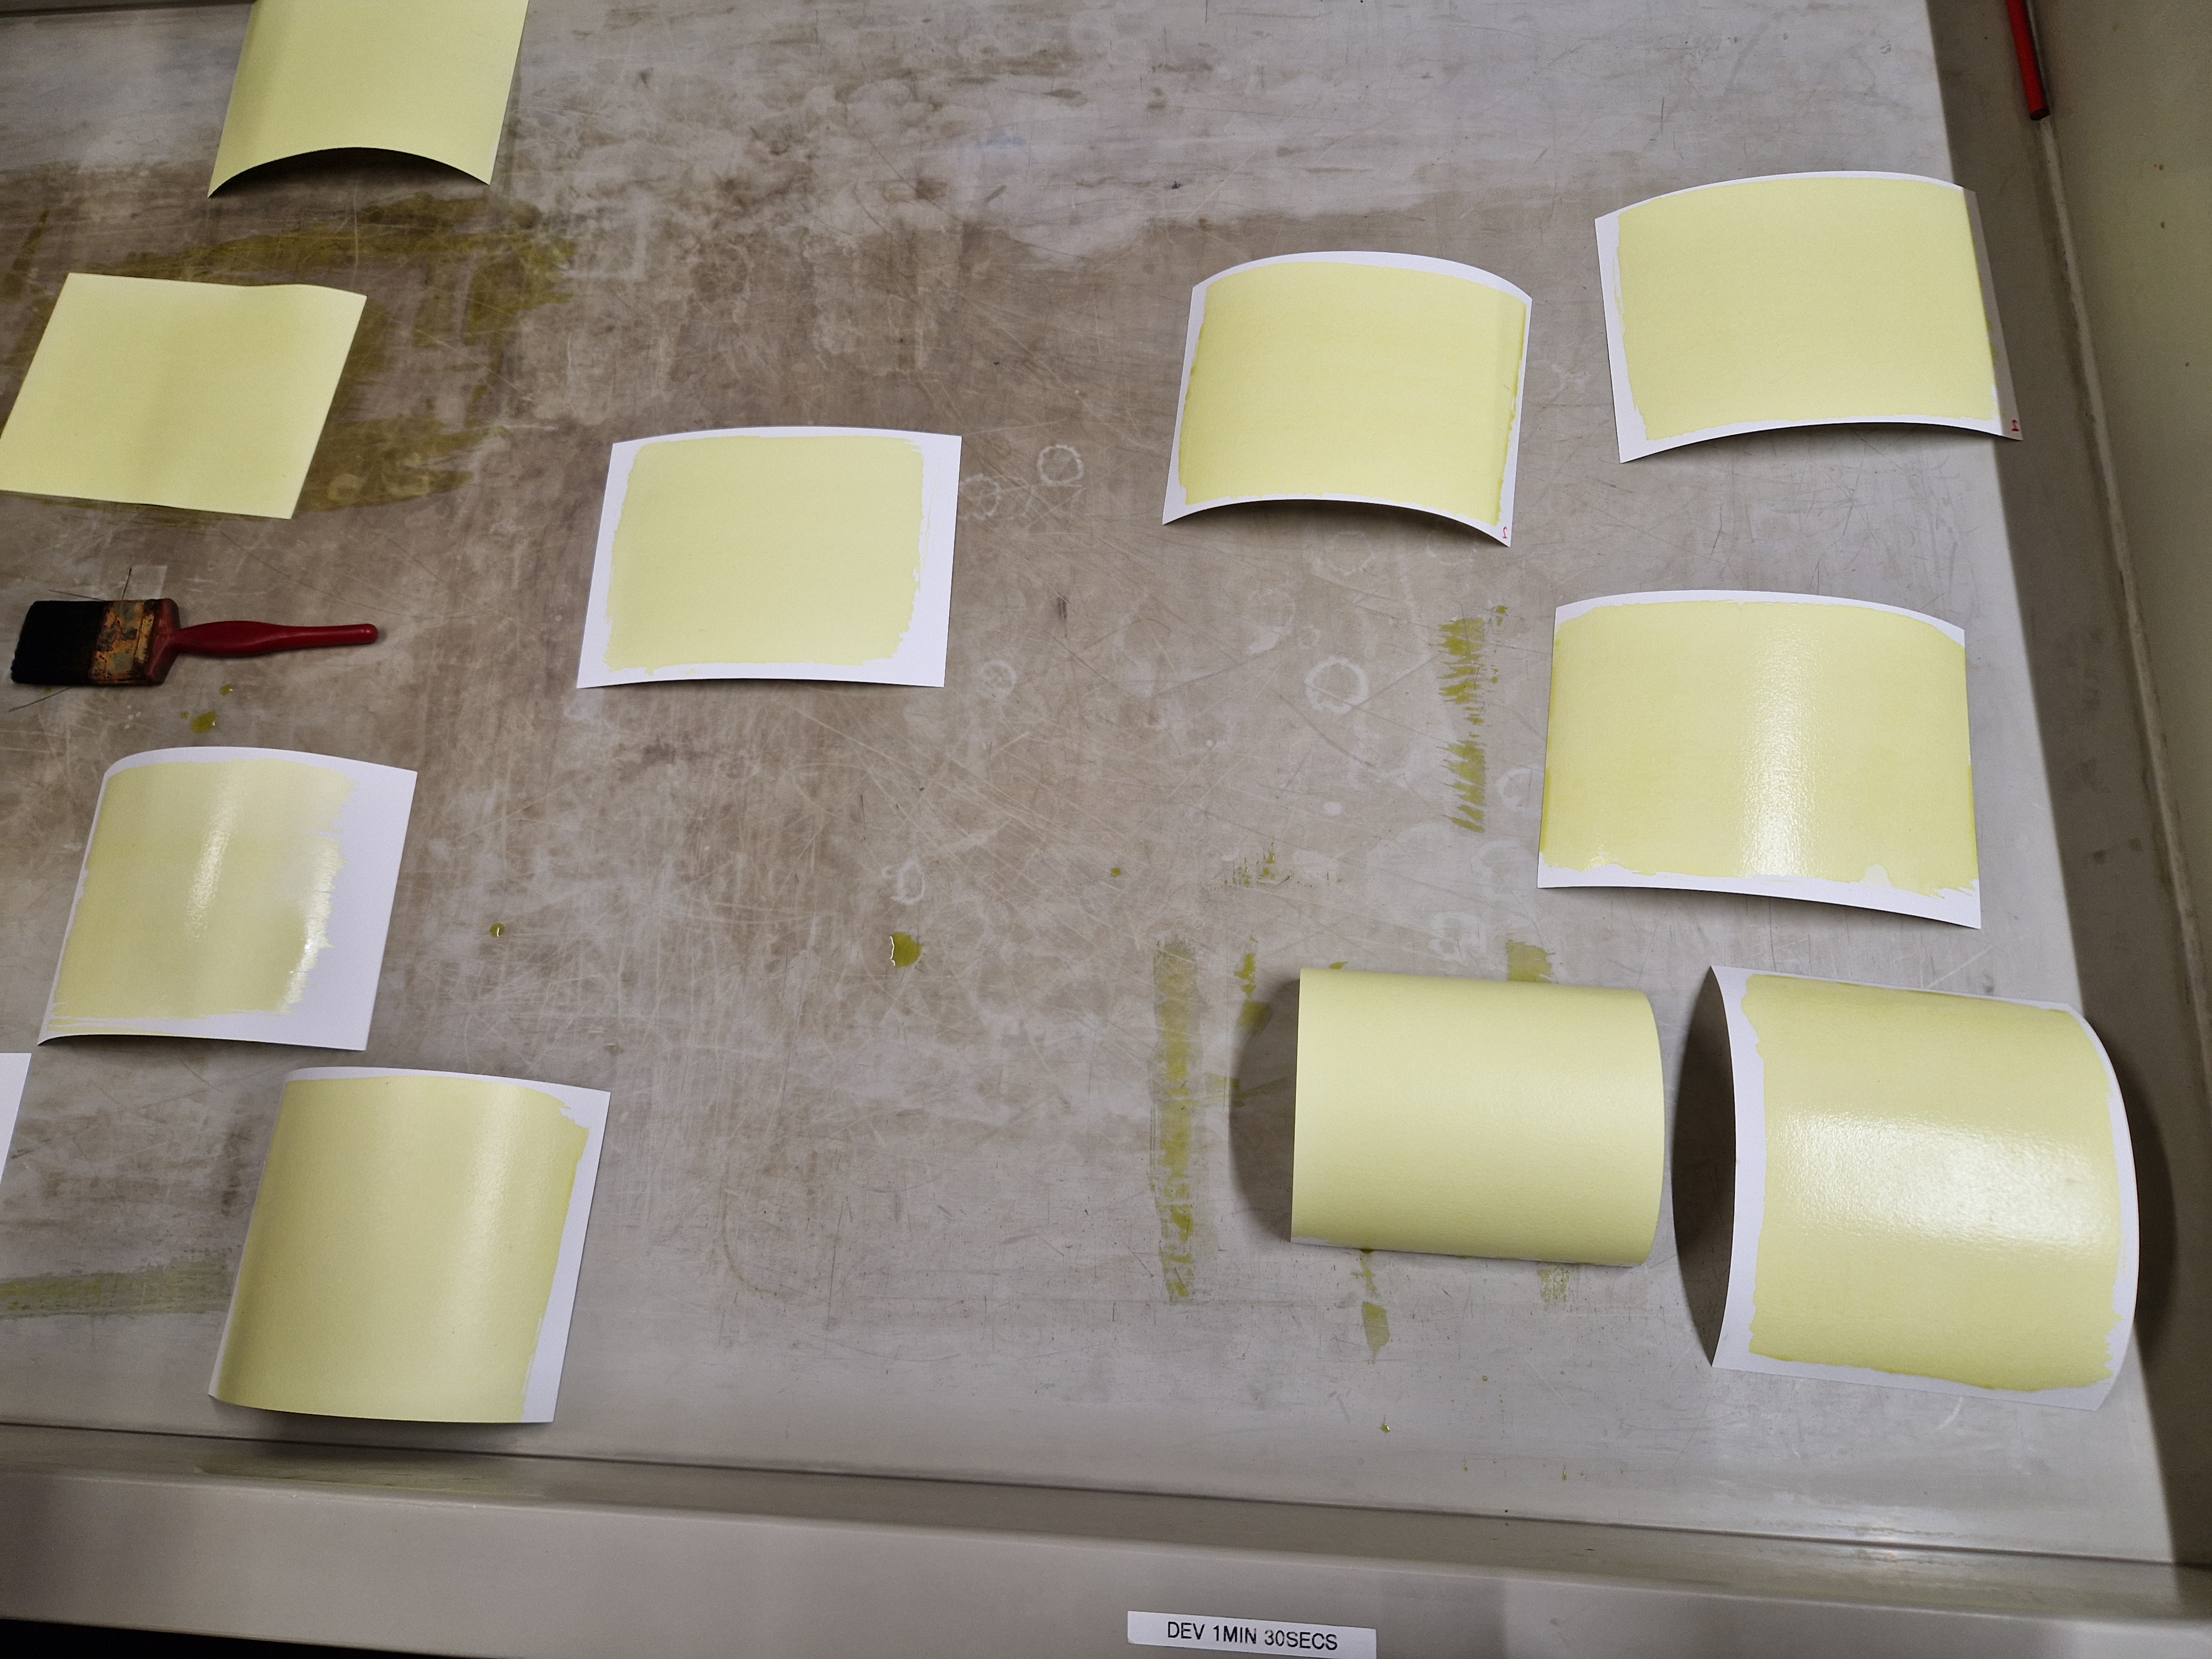

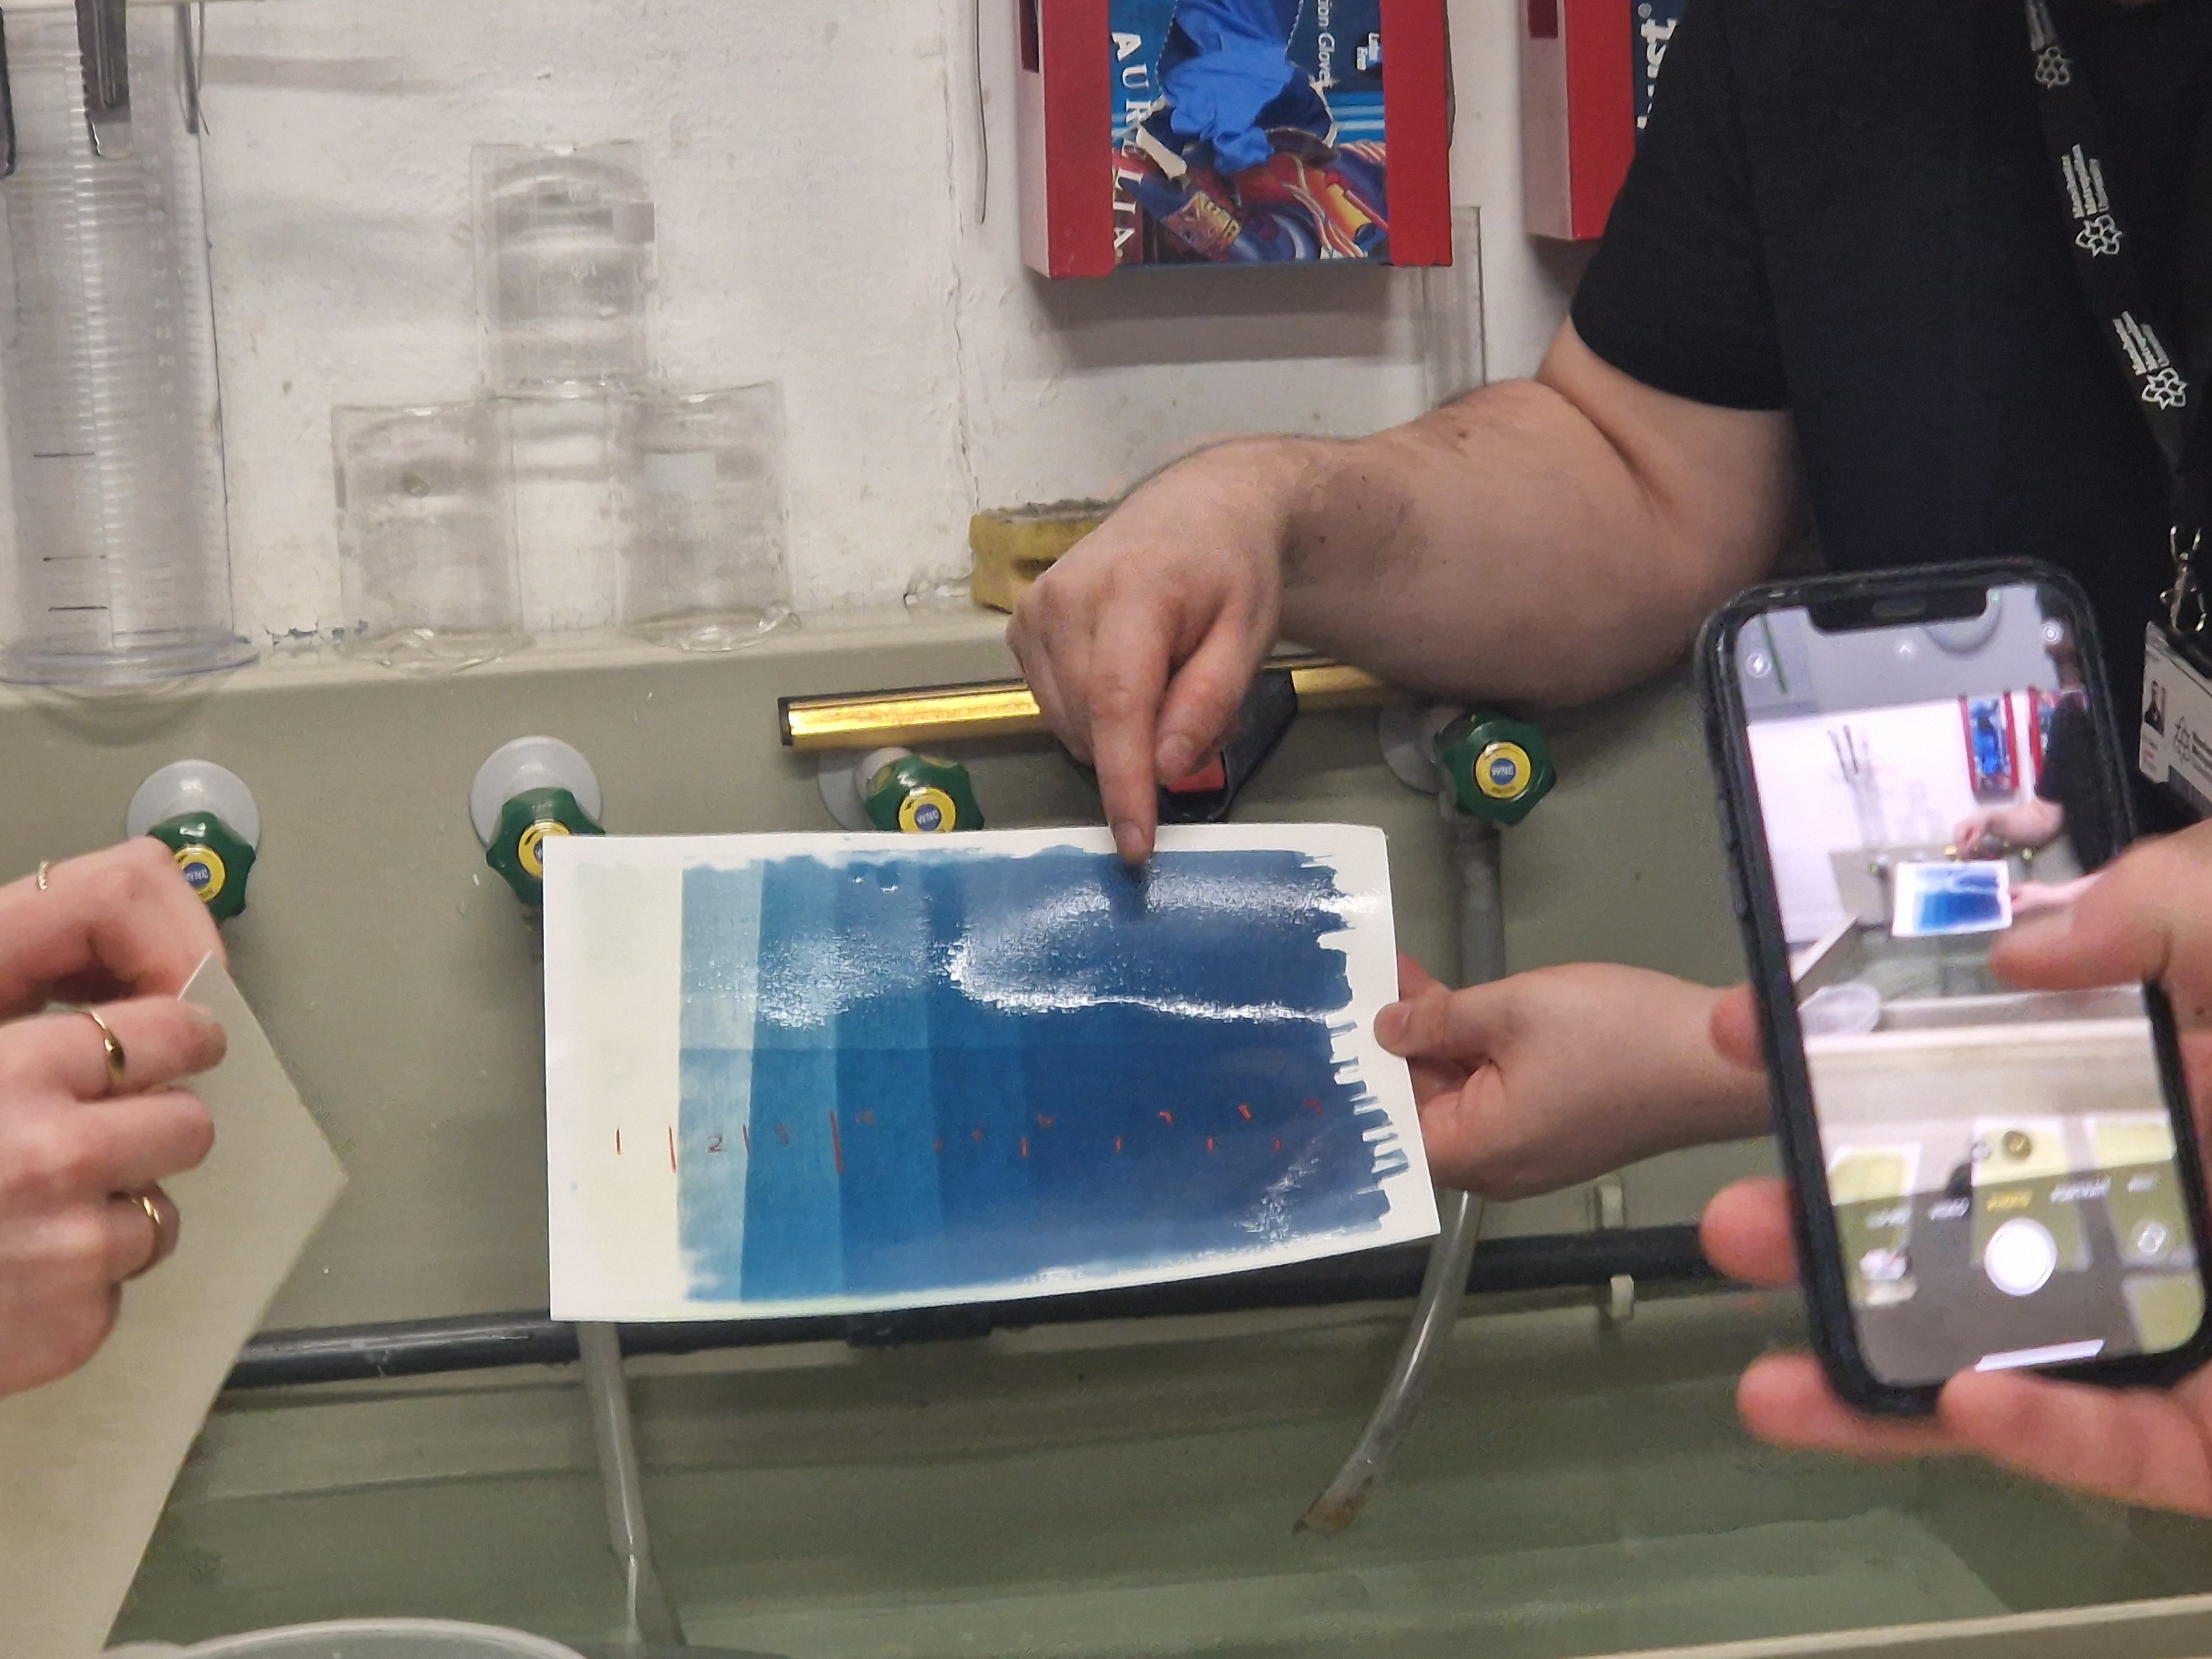
TONING
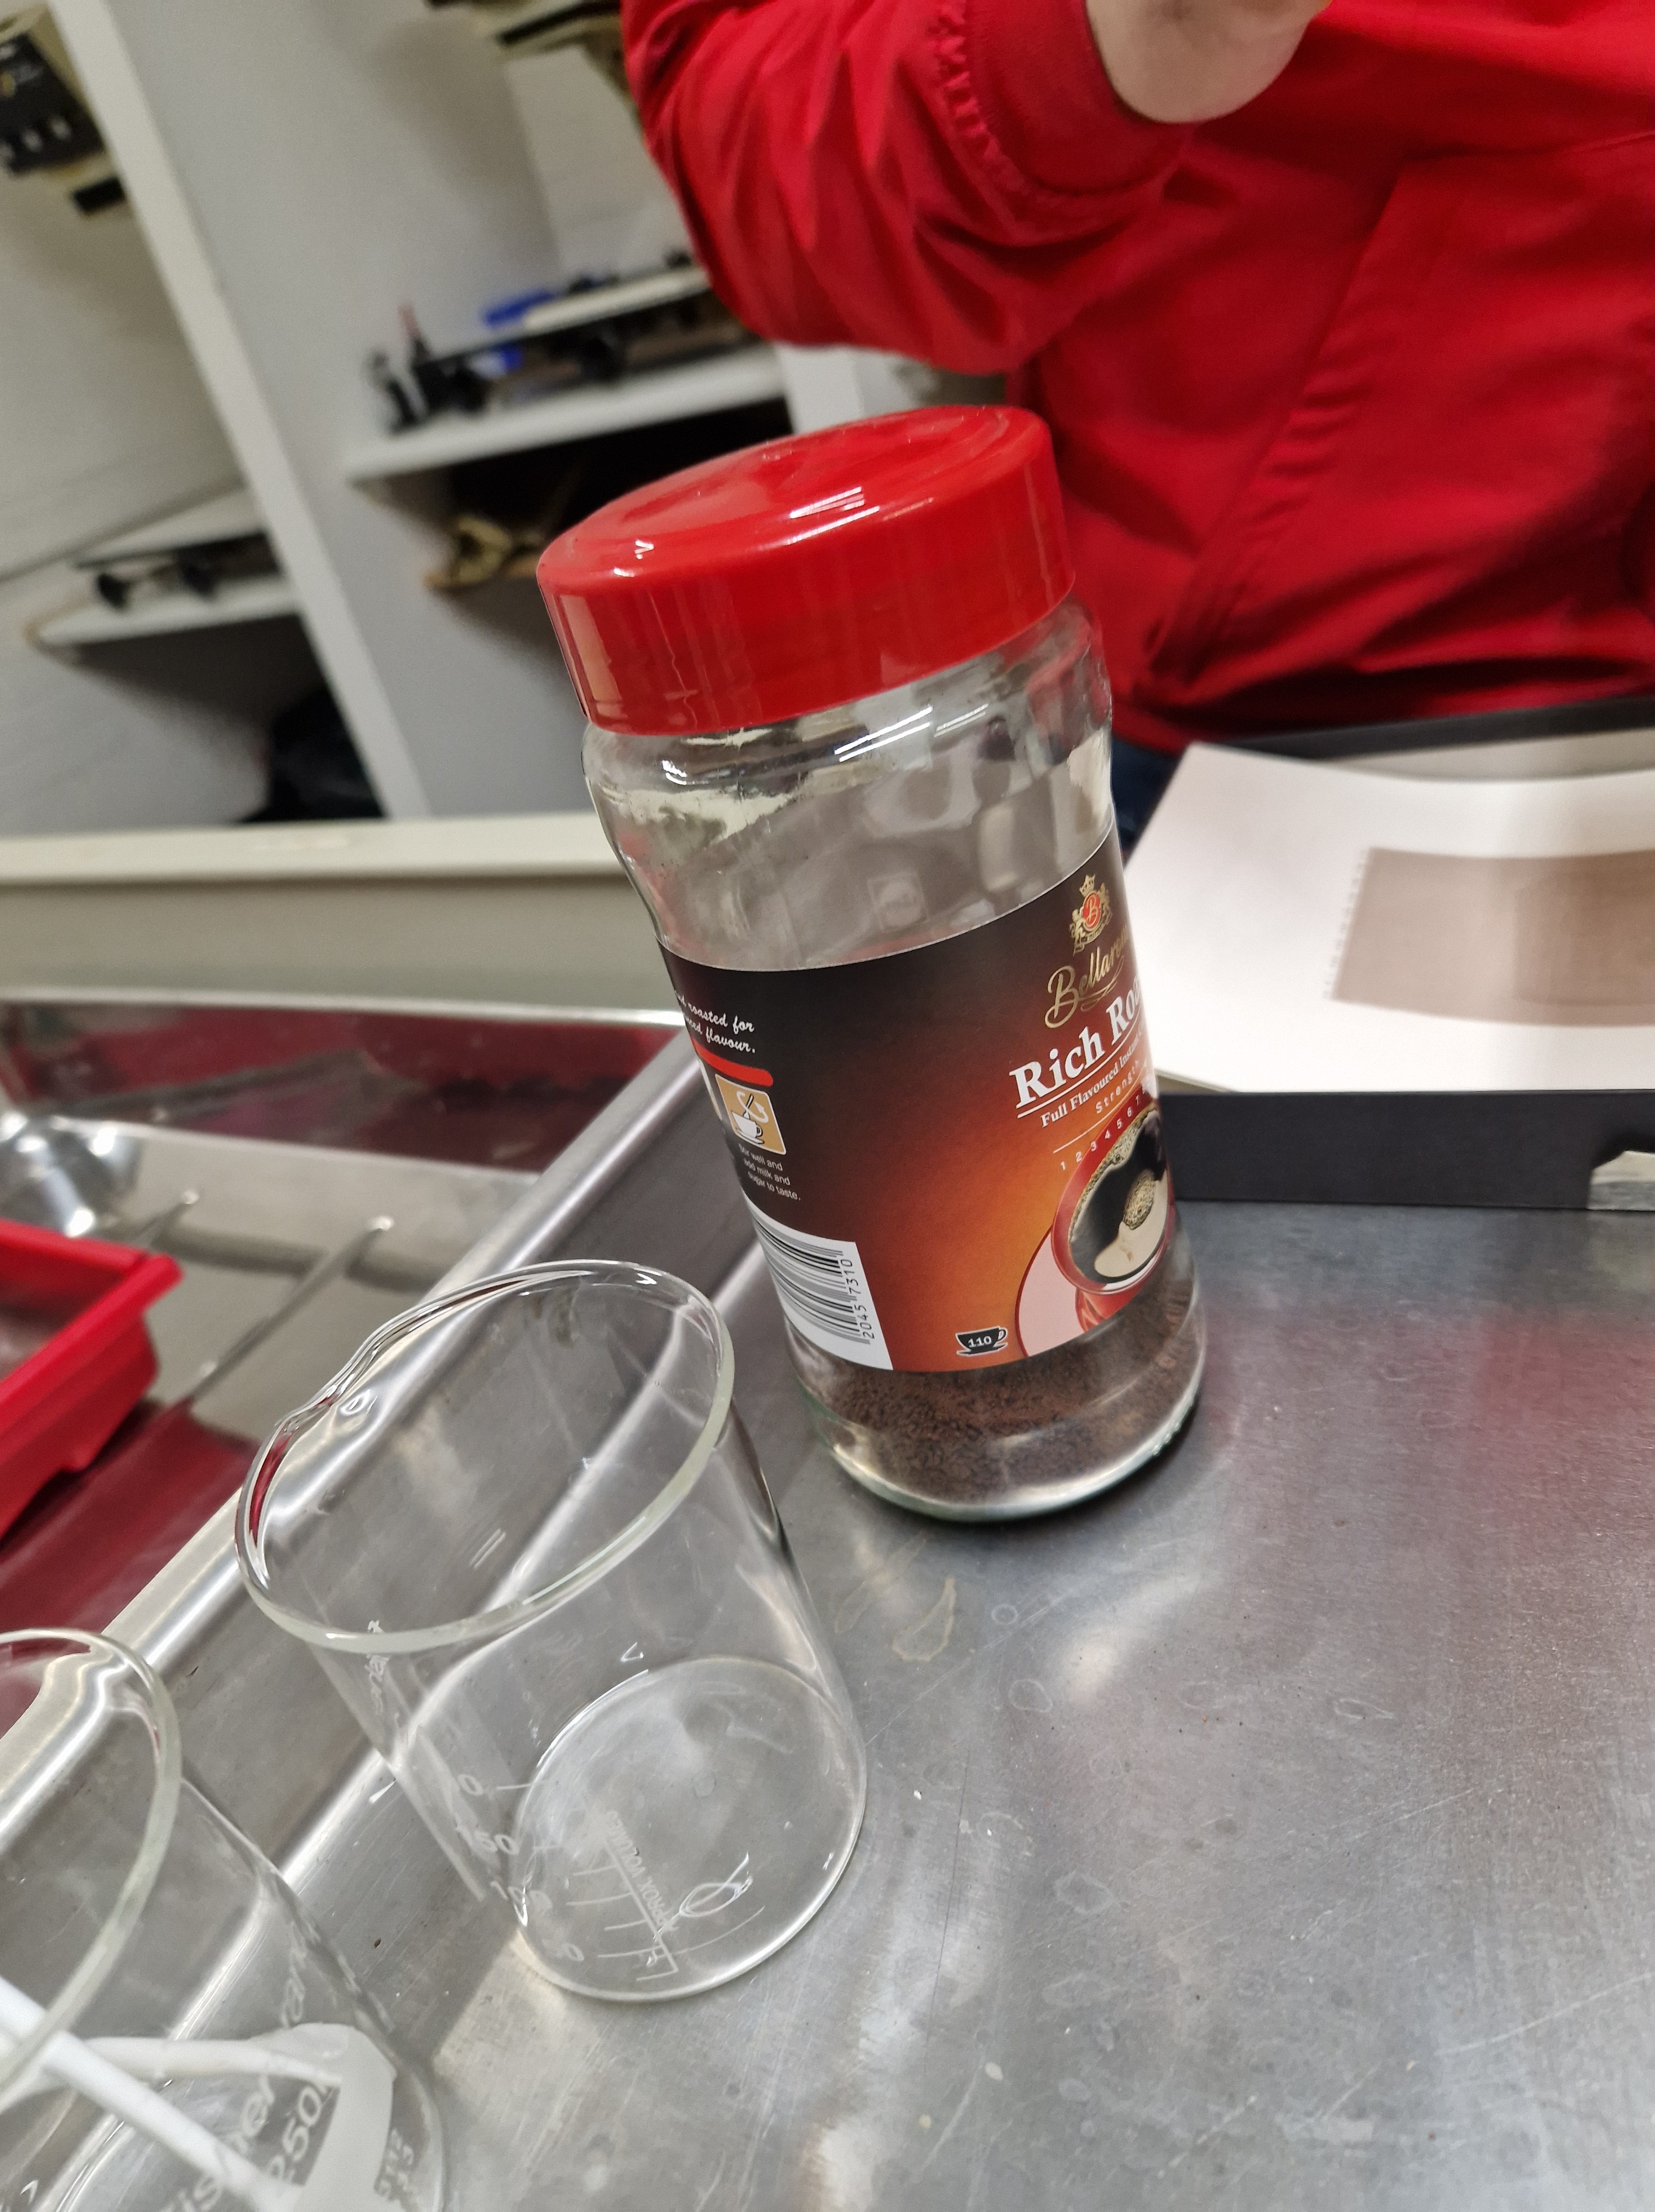
We toned the example images by bleaching them for a little bit with soda crystals and water and then submerging them in black and green tea
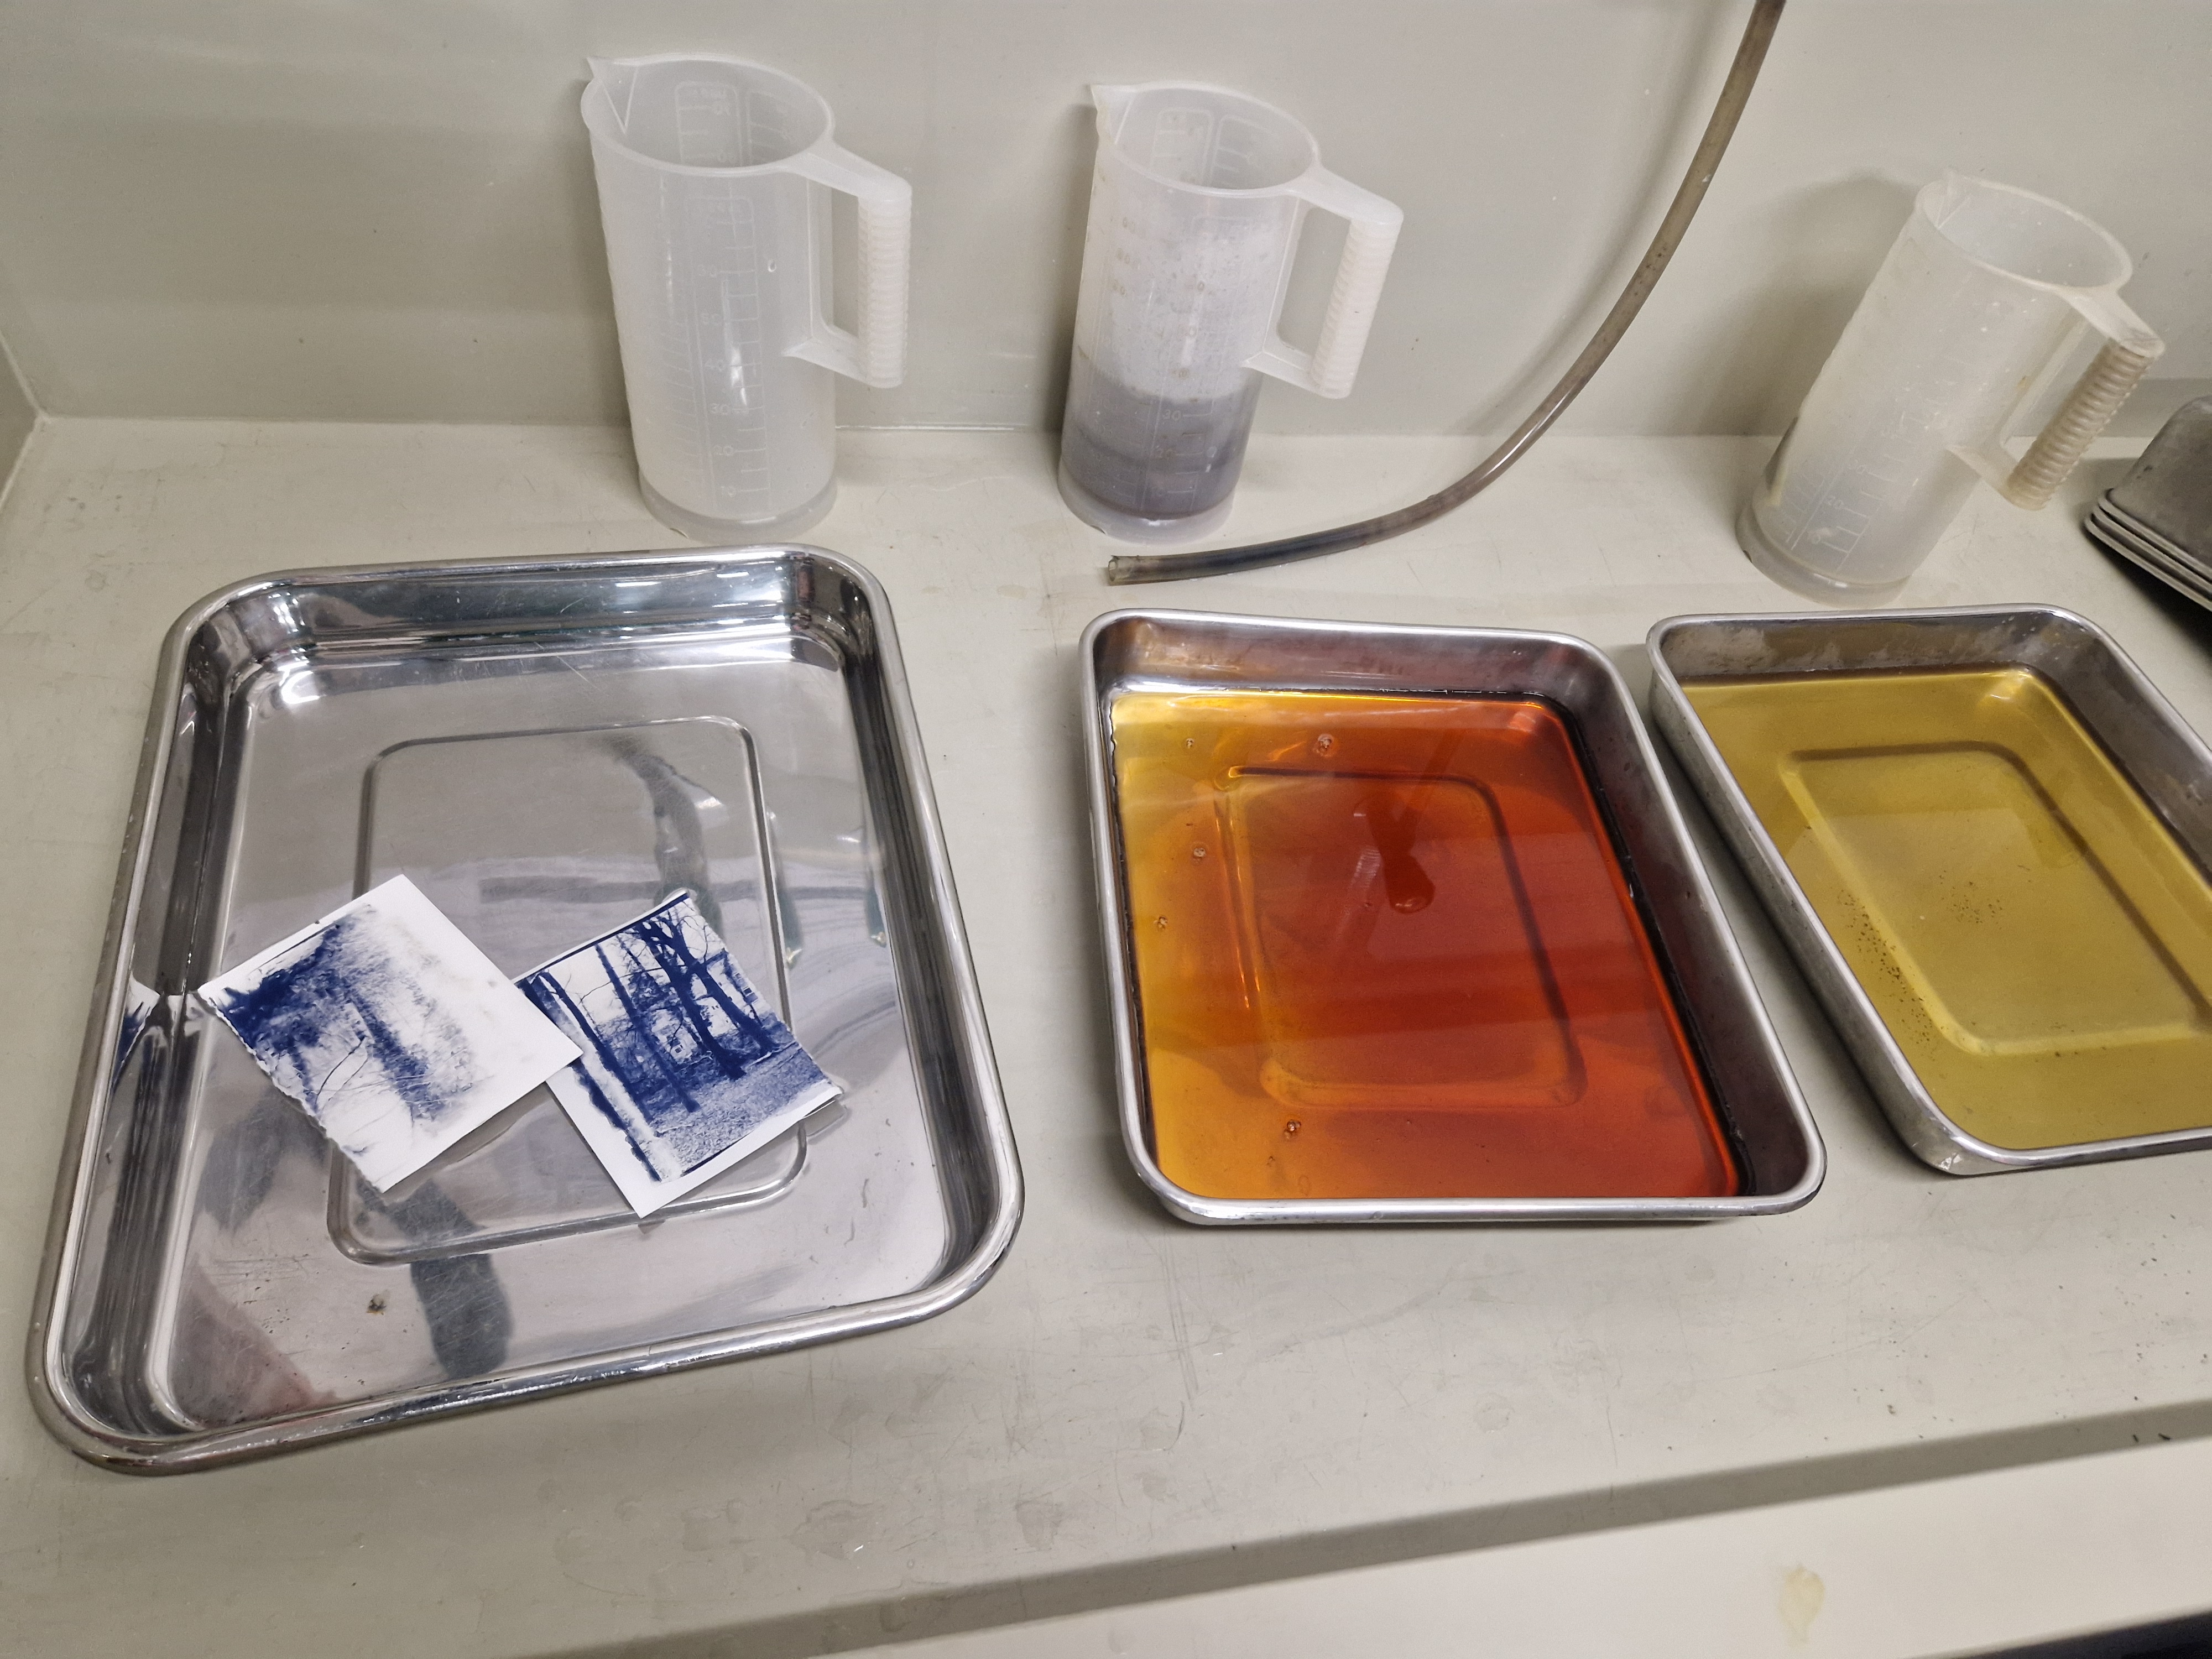
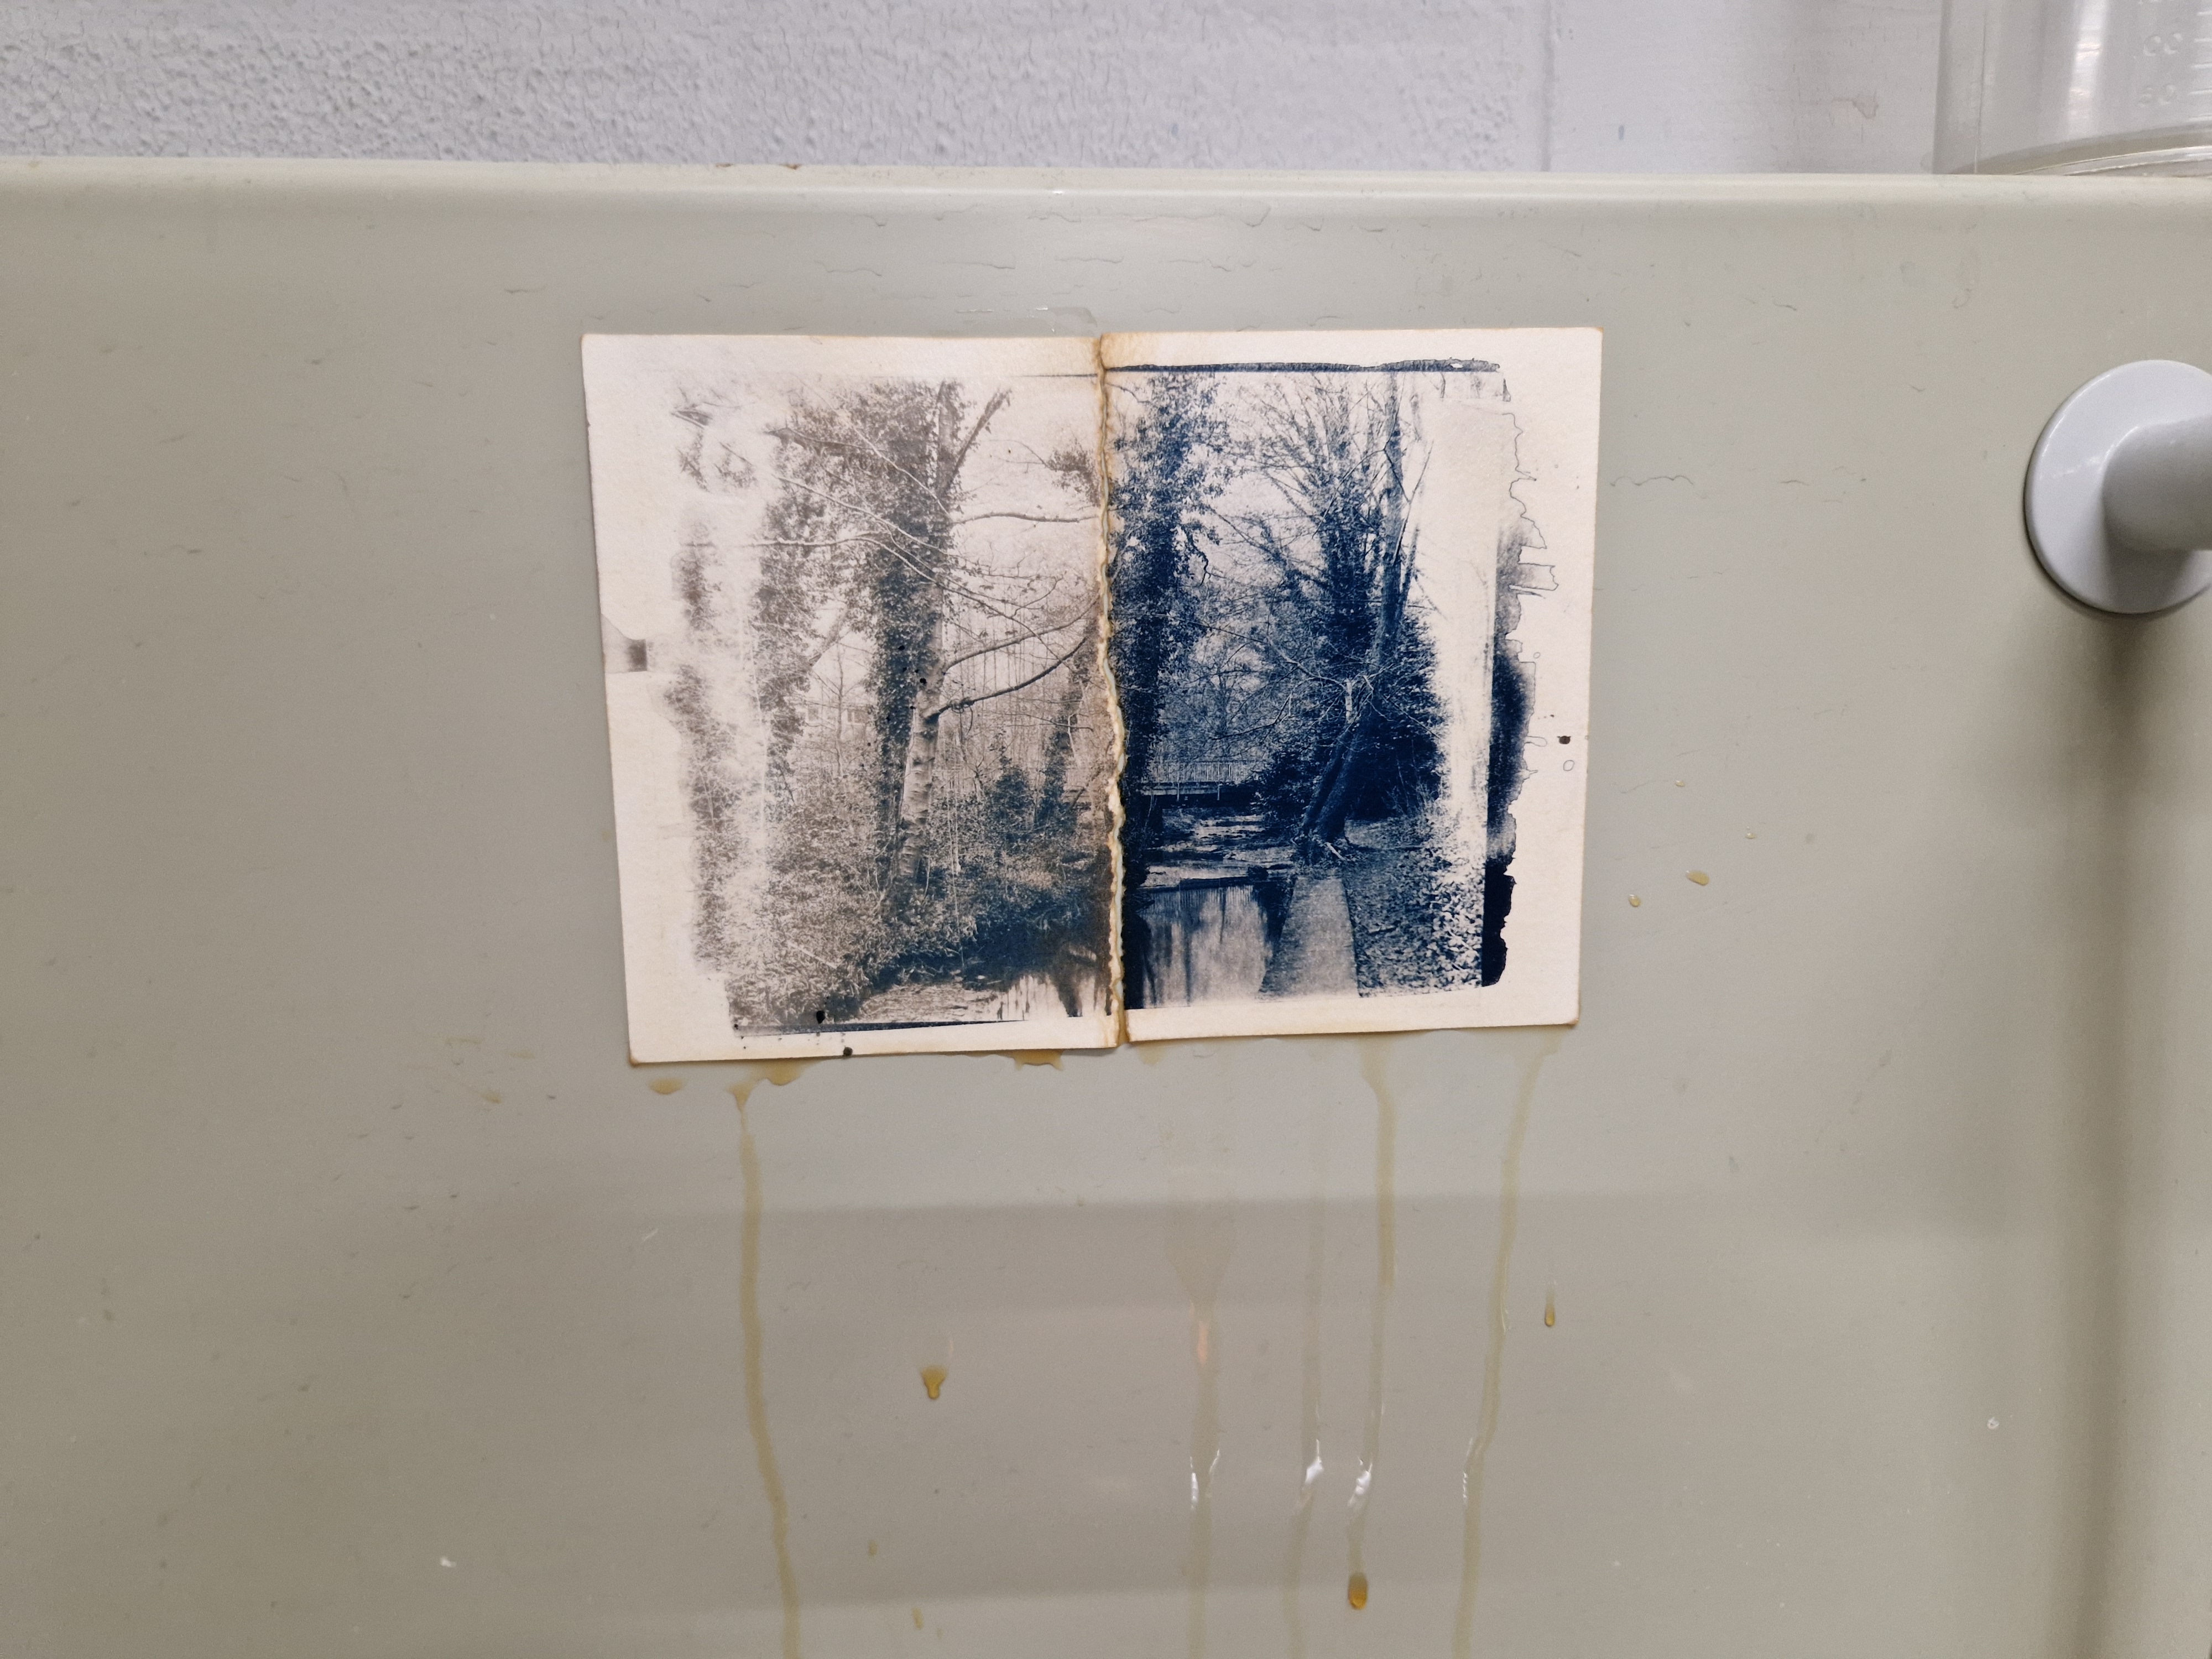
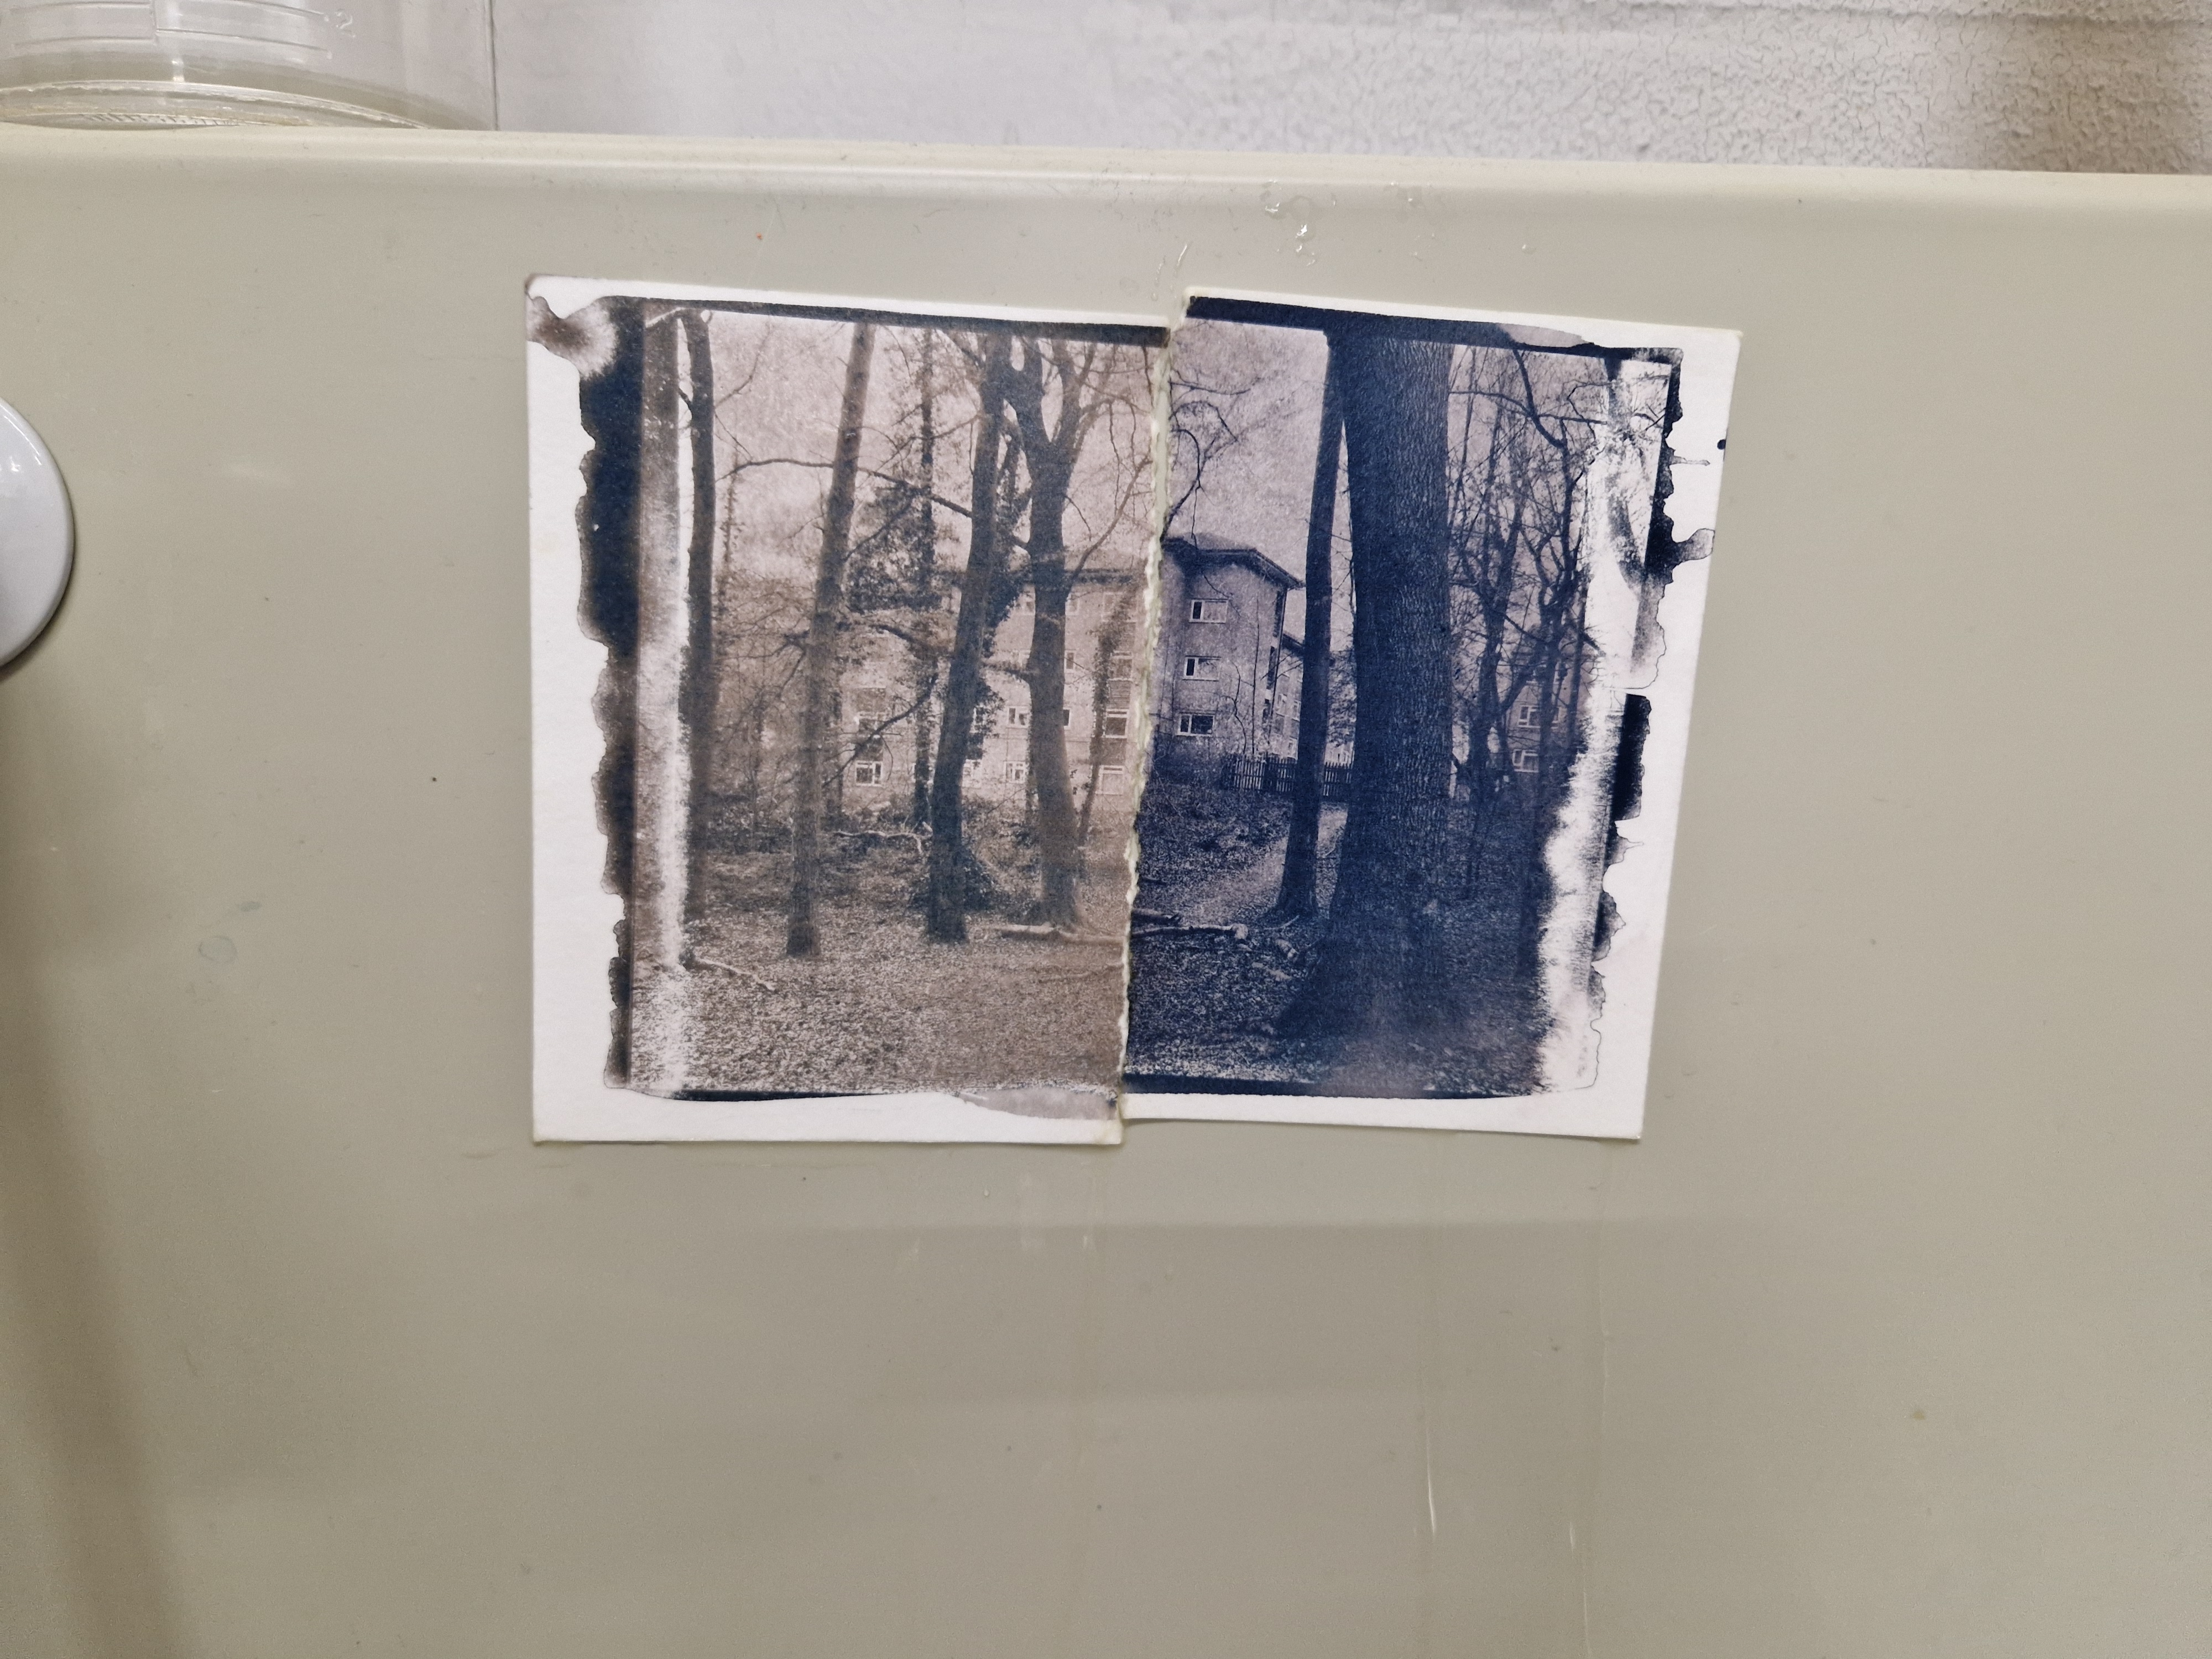
RESULTS
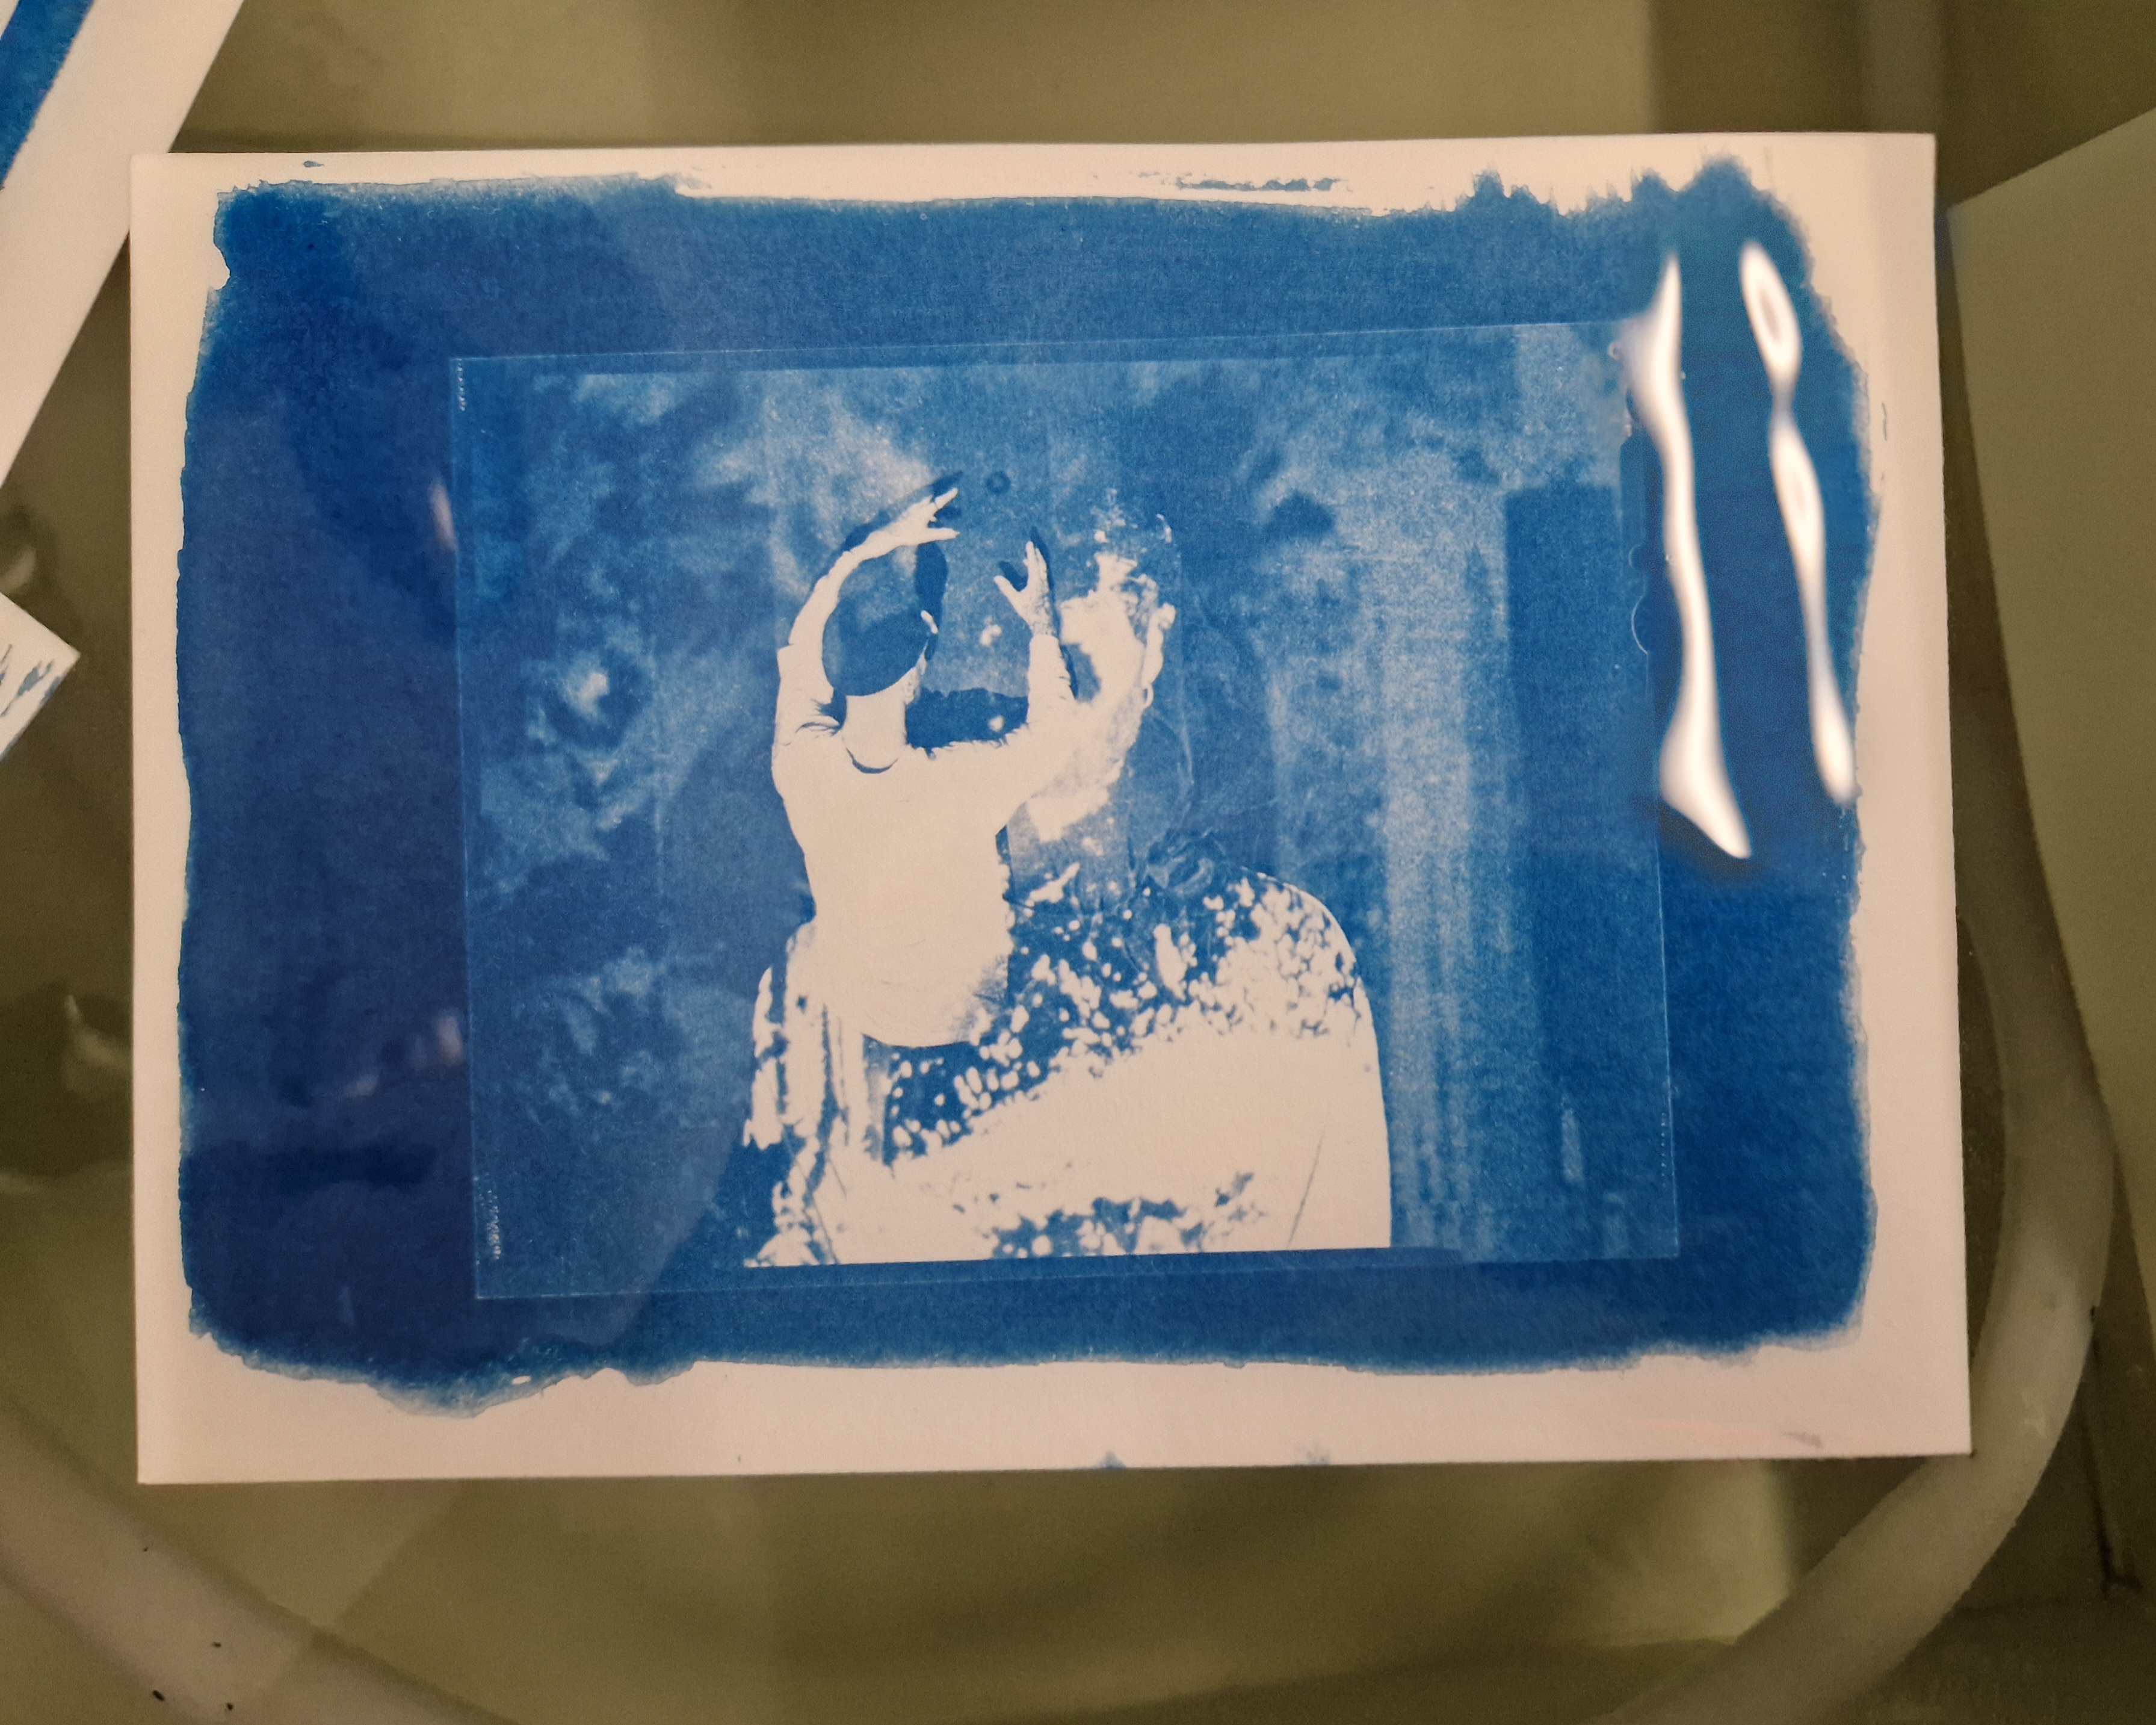
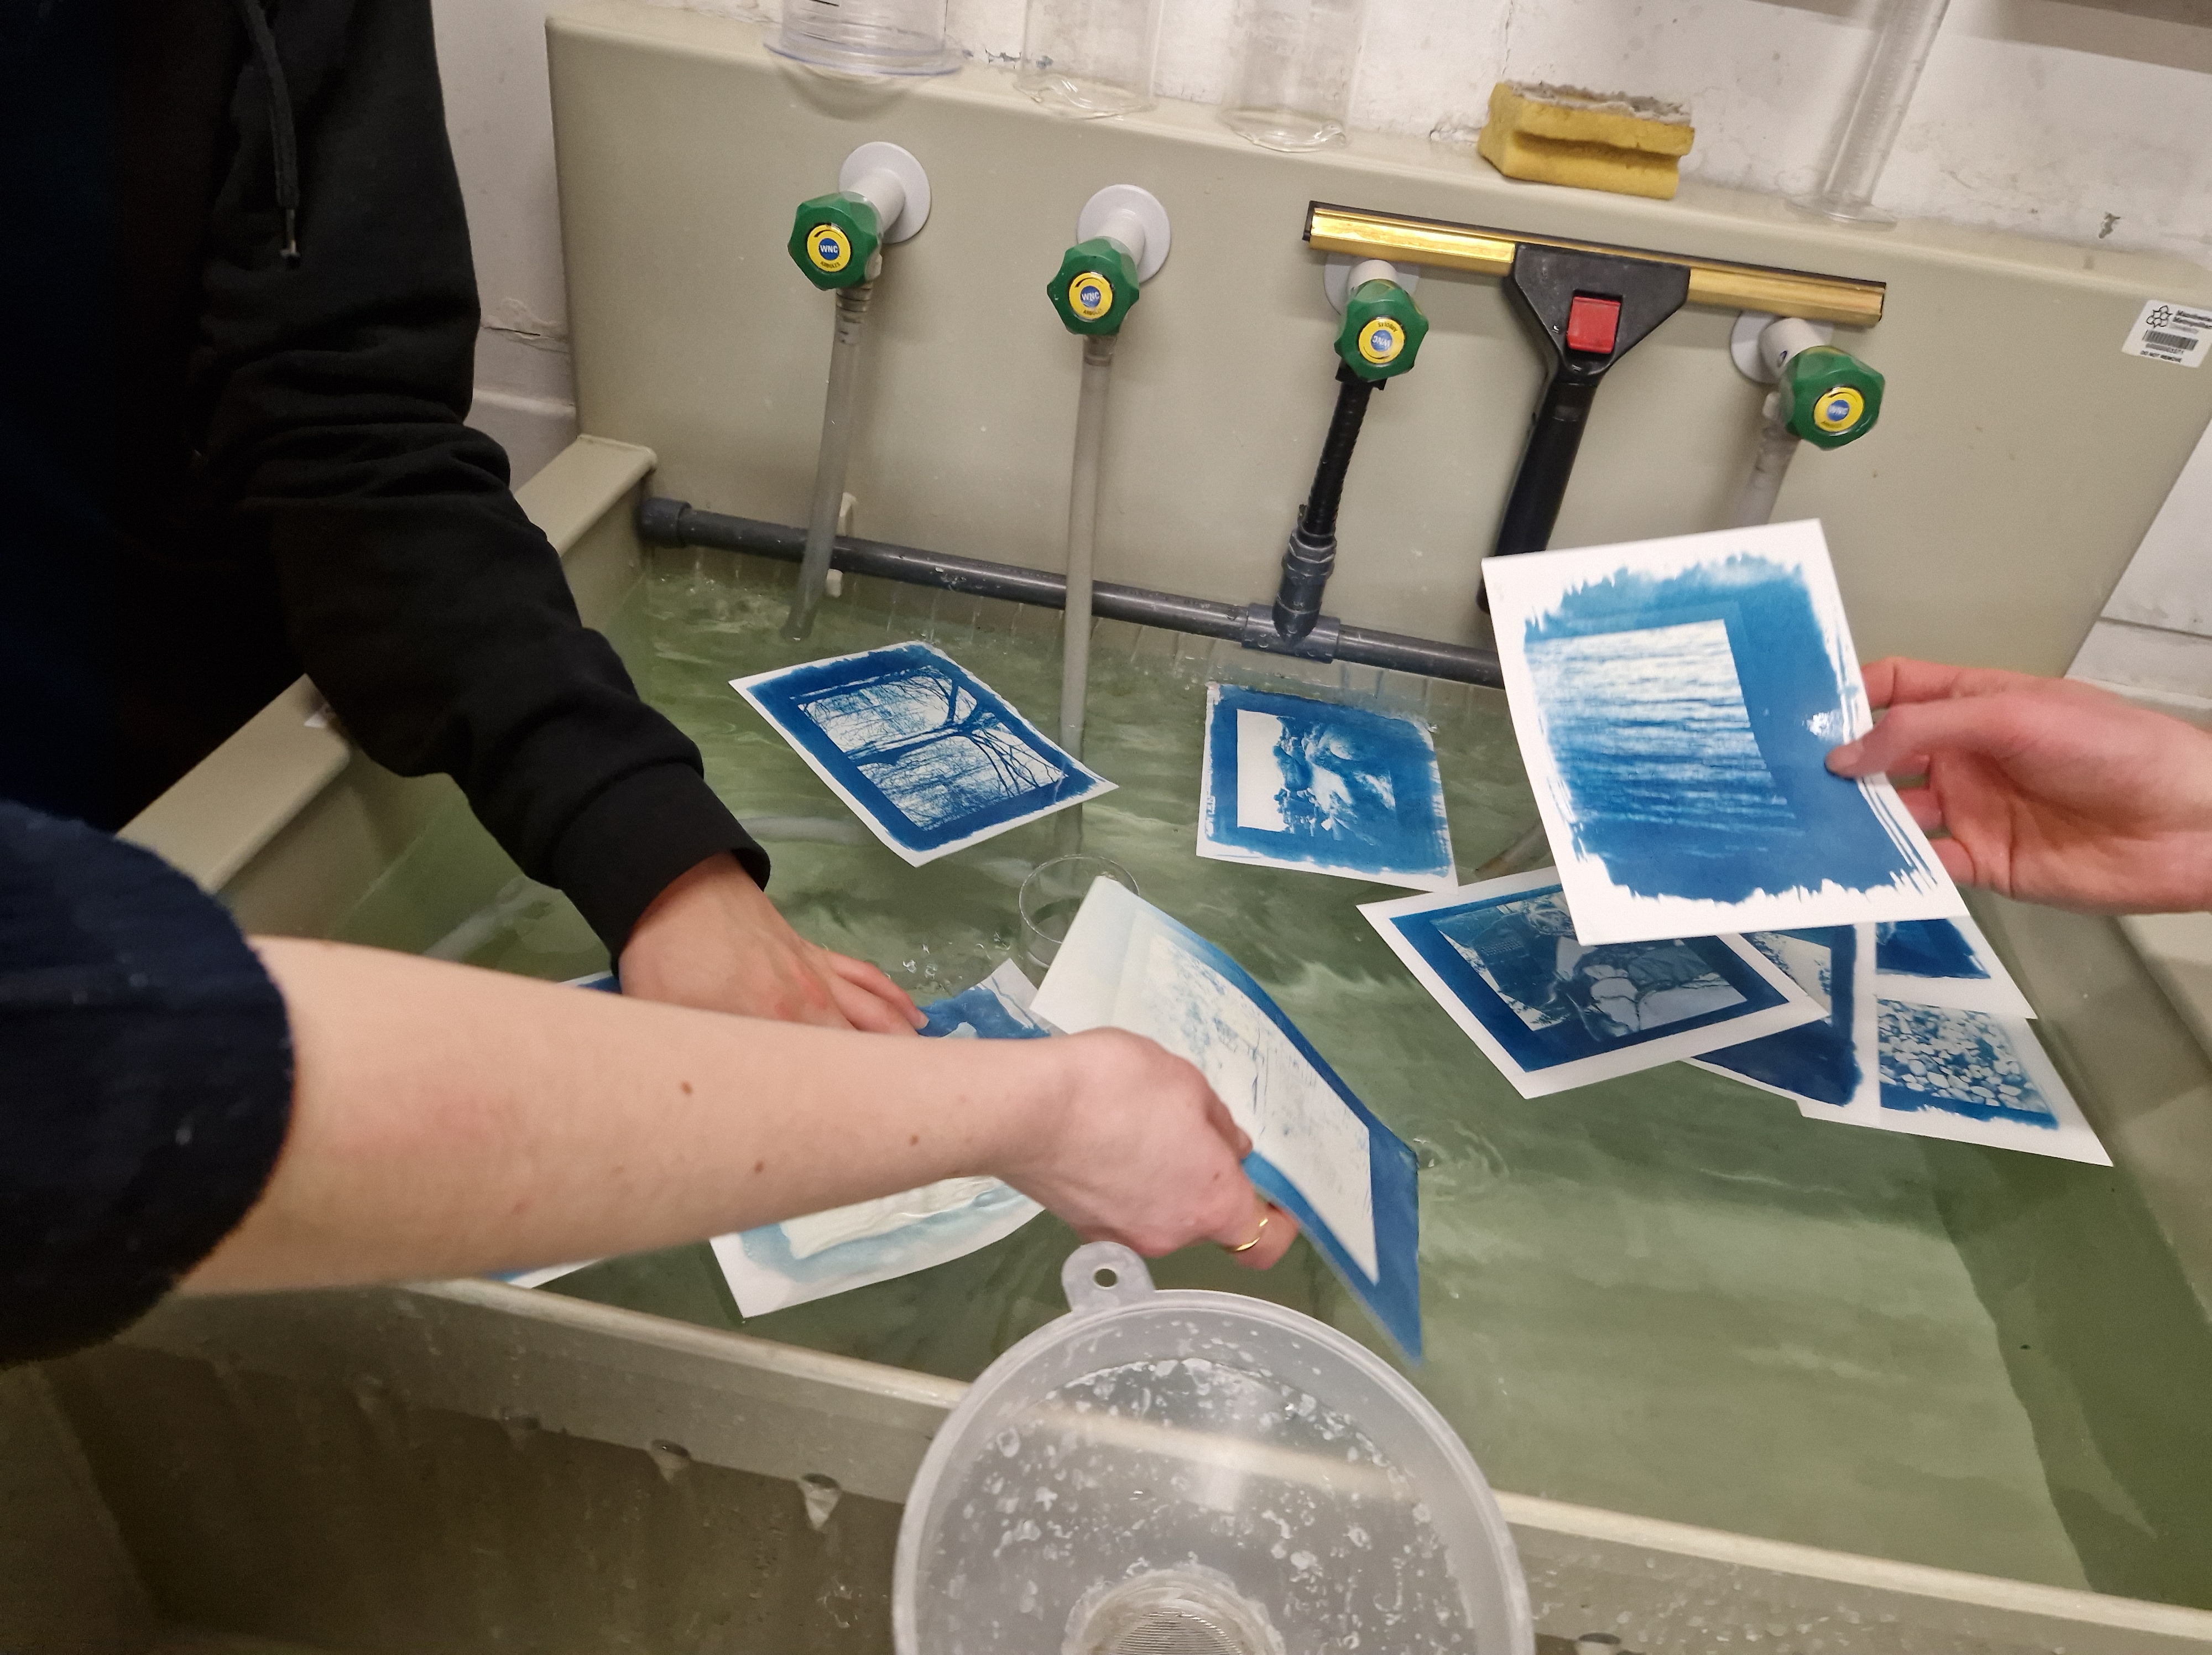
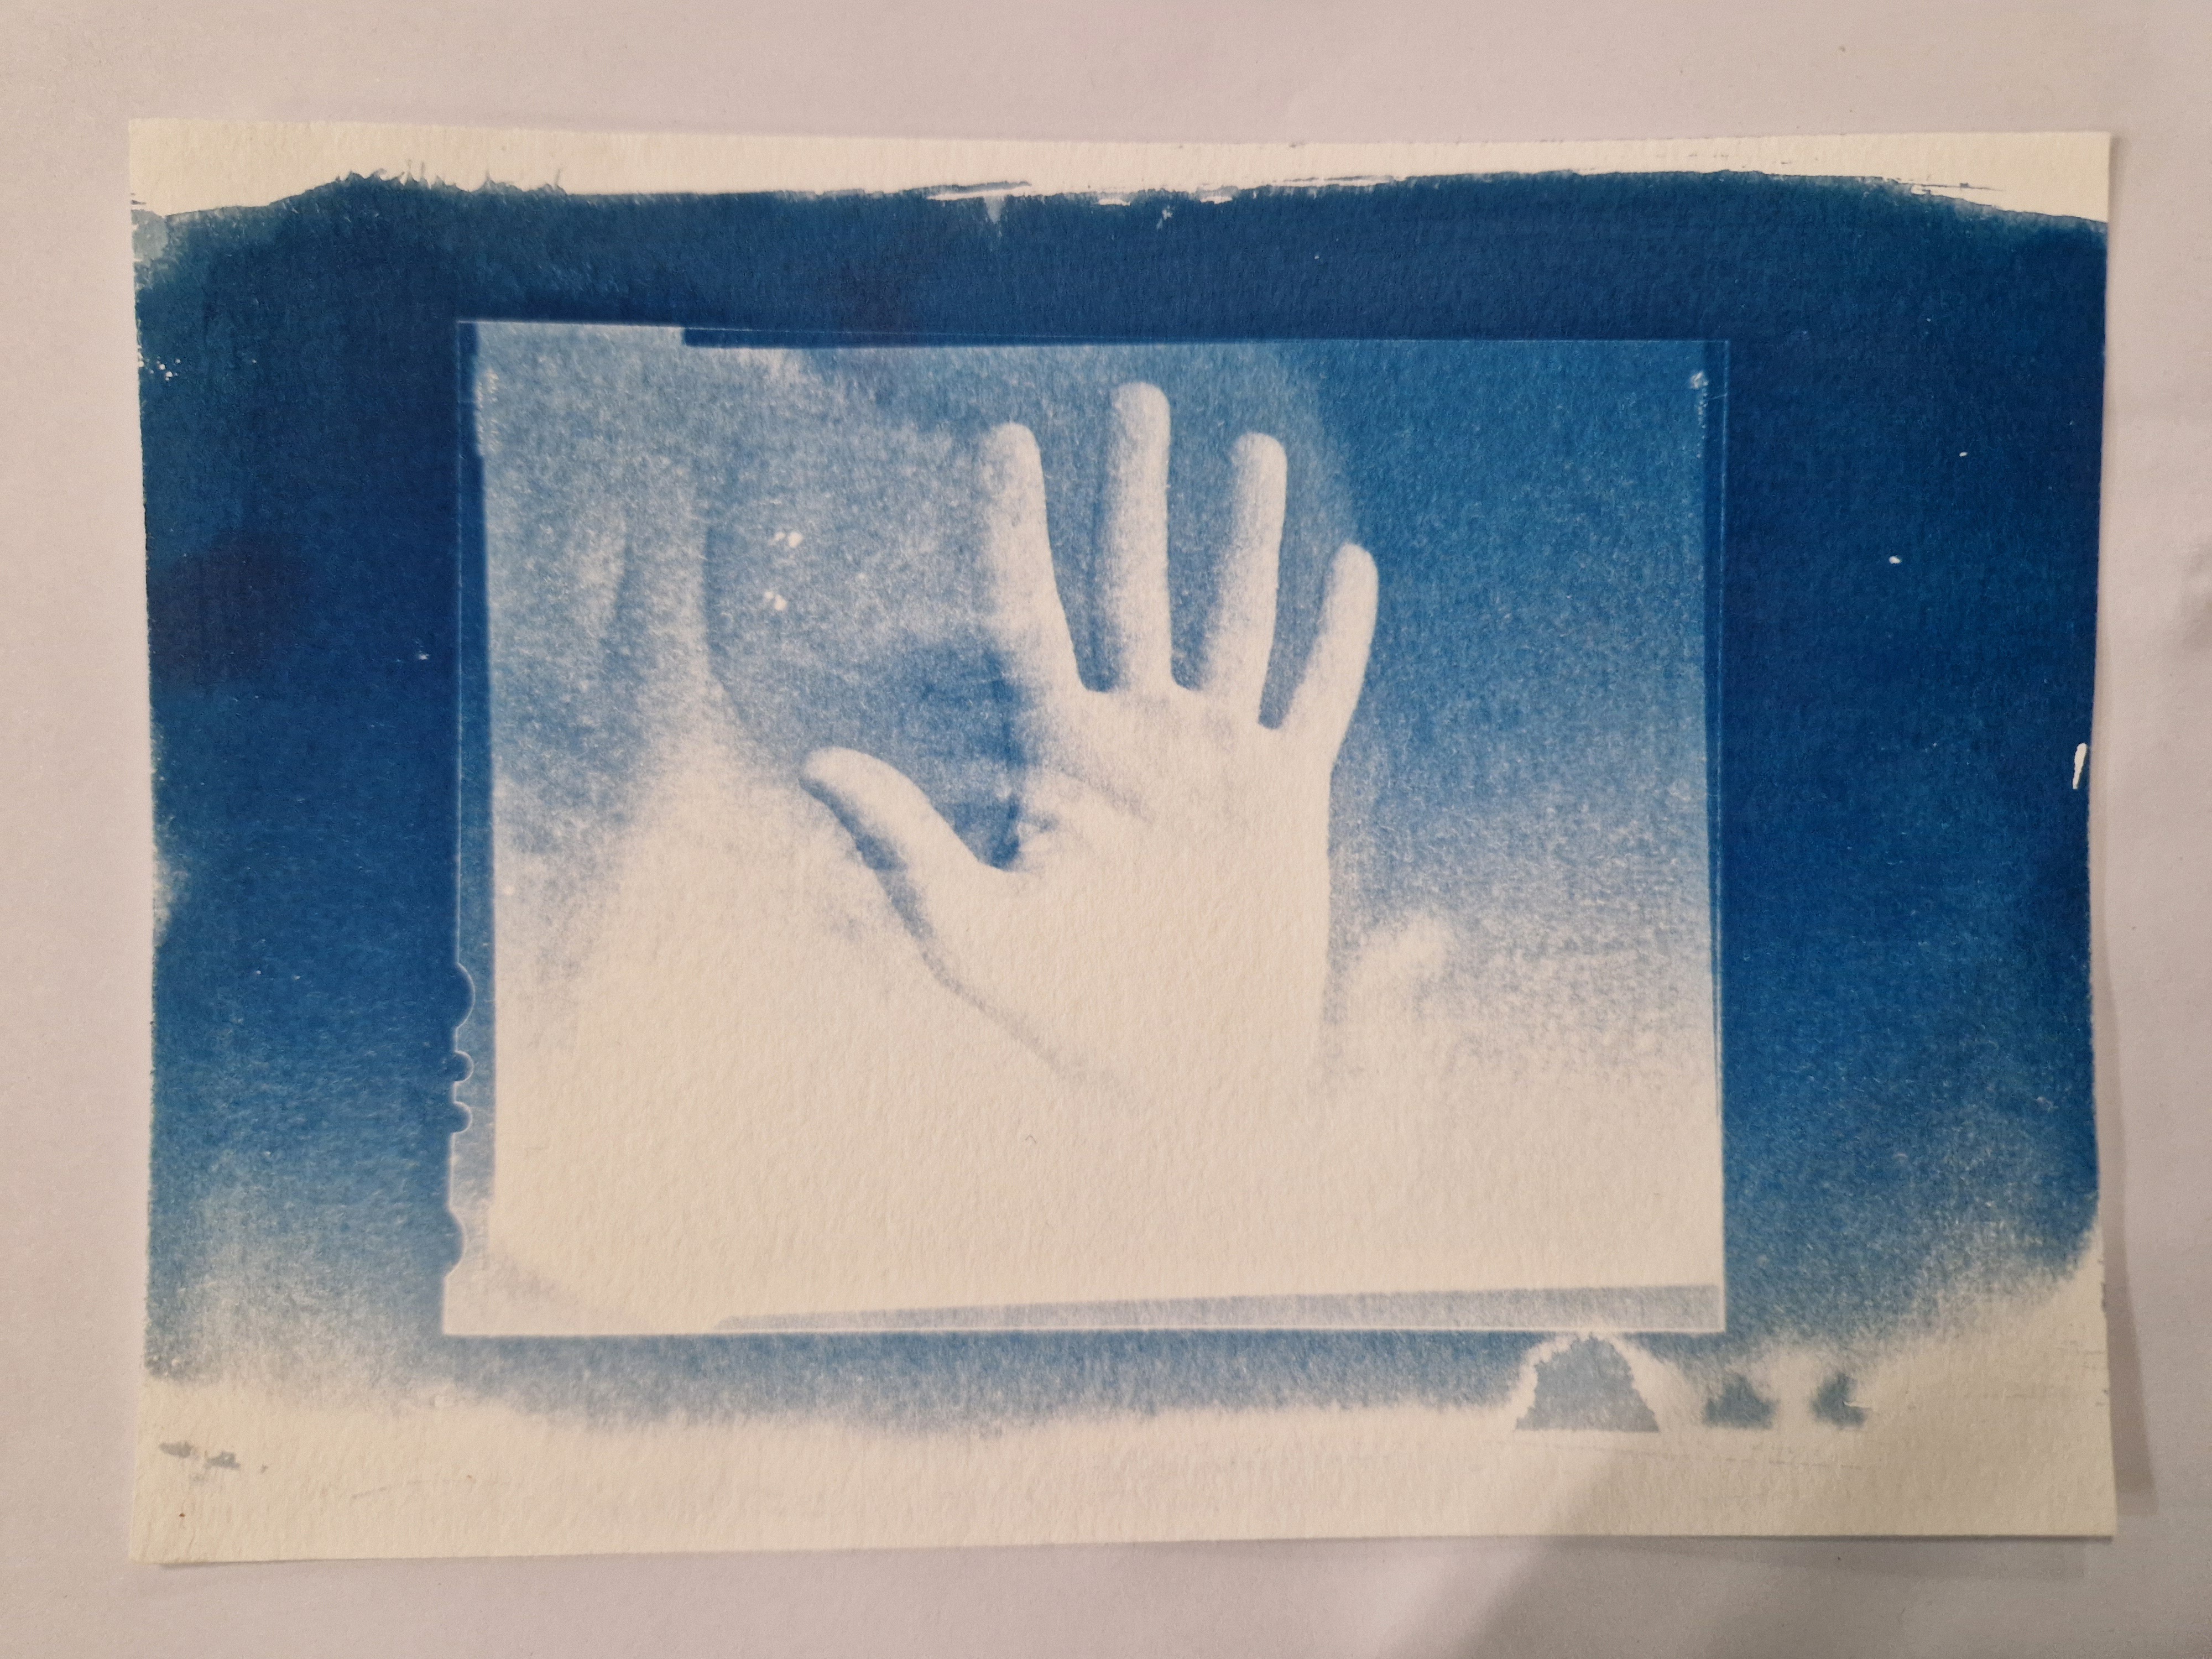
REFLECTIONS: Amazing session taking cyanotype to another level. Another inspiring option was to tone images after with black and green tea and coffee. I learned so much that day and would love to continue working with this process.
WEDNESDAY AND THURSDAY – WORK FROM HOME ON REFLECTIVE JOURNAL
FRIDAY
PREPARING FOR CRIT
WEEK 9: 18-24 MARCH
MONDAY
CRIT II
NOTES:
- Paloma proud foot
- Certain images have potential for sculpture
- Liberating images
- Photography as sculpture
- Photo as object – pairs
- Shadows – forms of spaces, gaps and shadows, how the photo renders the situation
- What does that mean about the image, they way it’s observed
- Be ambitious – consider spacing between objects
- Scale-imposing-building
- Fleeing – immortalising the light
- Dialogue about composition in order for it to have a potential to be made into sculpture
- Rephotograph the sculptural elements – can the photograph become more sculptural?
REFLECTIONS: Consistently valuable session that allowed me to deepen my understanding of the impact my work has on the viewer. From the discussion and presenting my work, the conclusion was that I should perhaps present more than one sculpture.  I left with the task of finishing up my laser-cut sculpture and creating another one - to have three sculptures for the degree show.
It is an unexpected turn of events for me, however, one I welcome with enthusiasm and excitement.

Additionally, the notes taken are food for thought, something important to me not just for the degree show but post-university life when I will continue to develop the concept of photography as sculpture.

The main outtakes are to think about immortalising light, considering how the image is observed, how a photograph renders a situation, and photographing with sculpture in mind.
TUESDAY
TUTORIAL WITH DAVID
NOTES:
- you want your portfolio to be simple but interesting
- maybe not bind them but introduce the concept as a sequence, think of the pacing and pauses, introduce material
- books to look at :
-the original copy photography of the sculpture library
-Rodin’s work eg. in Rodin’s studio
-found sculpture and photography library
-forms in light: photography and sculpture
-2d23d photography and sculpture
-sculpture and photography: envisaging the third dimension!
-cross reference: sculpture into photography
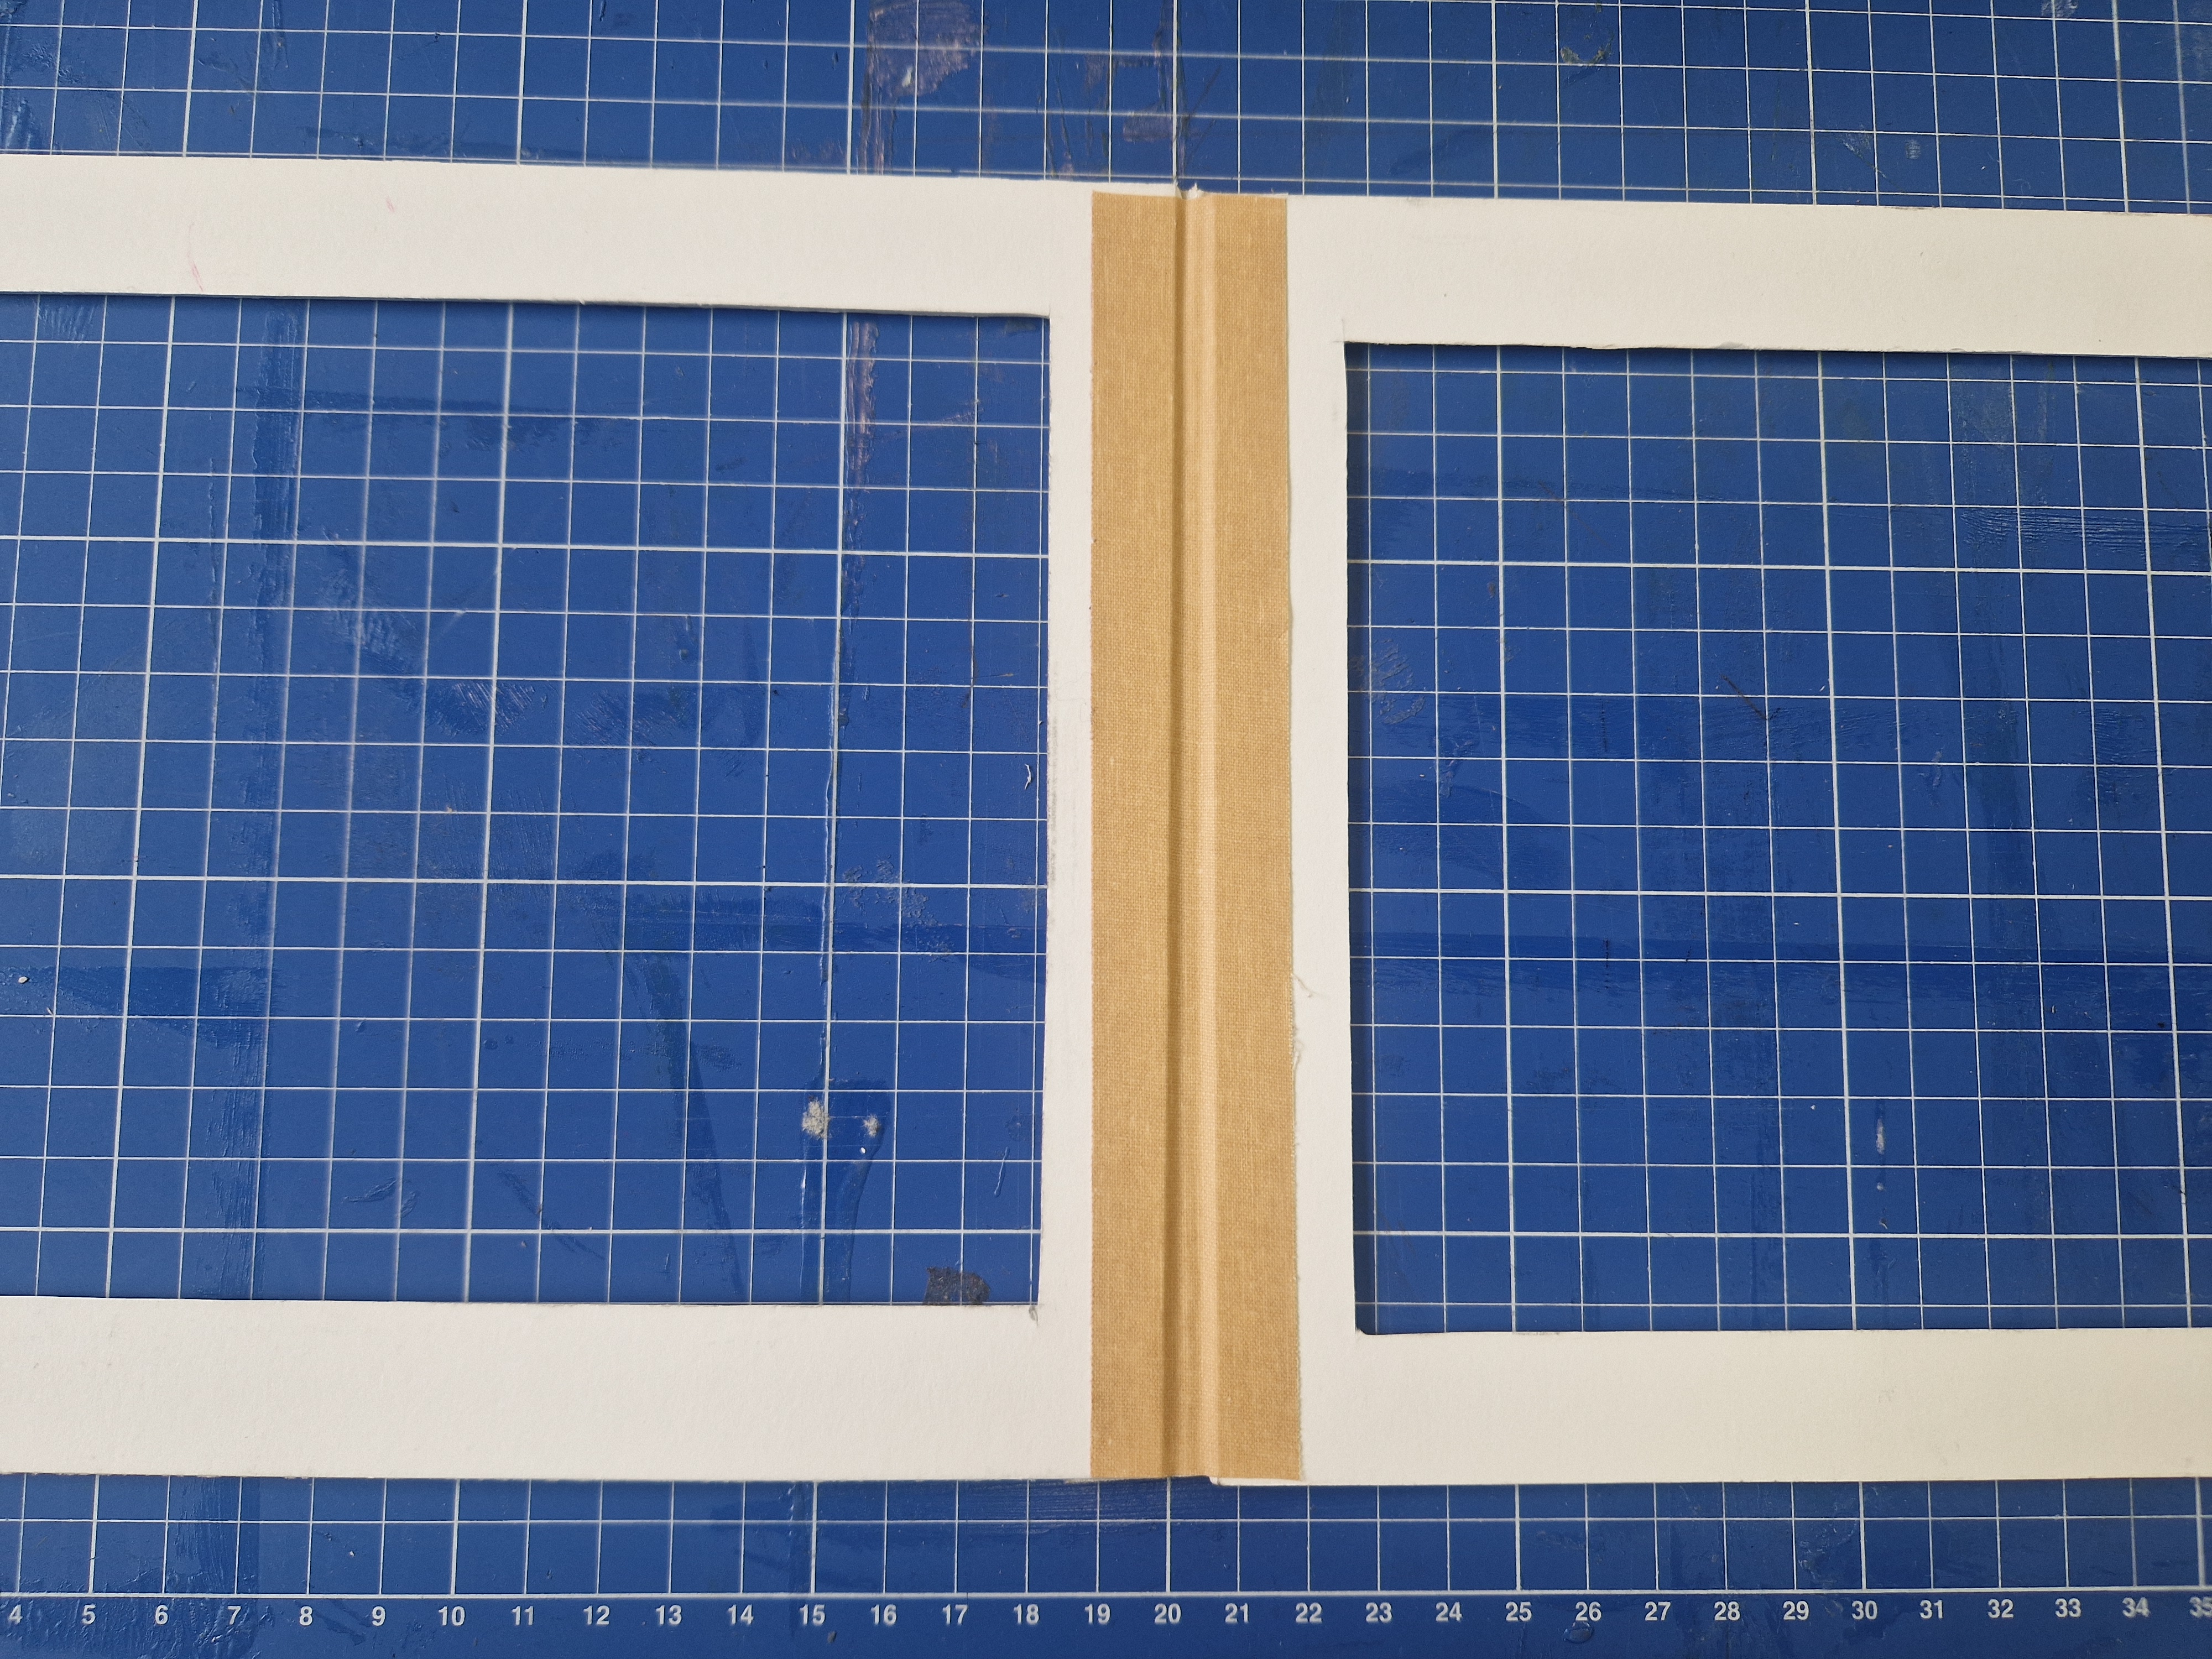
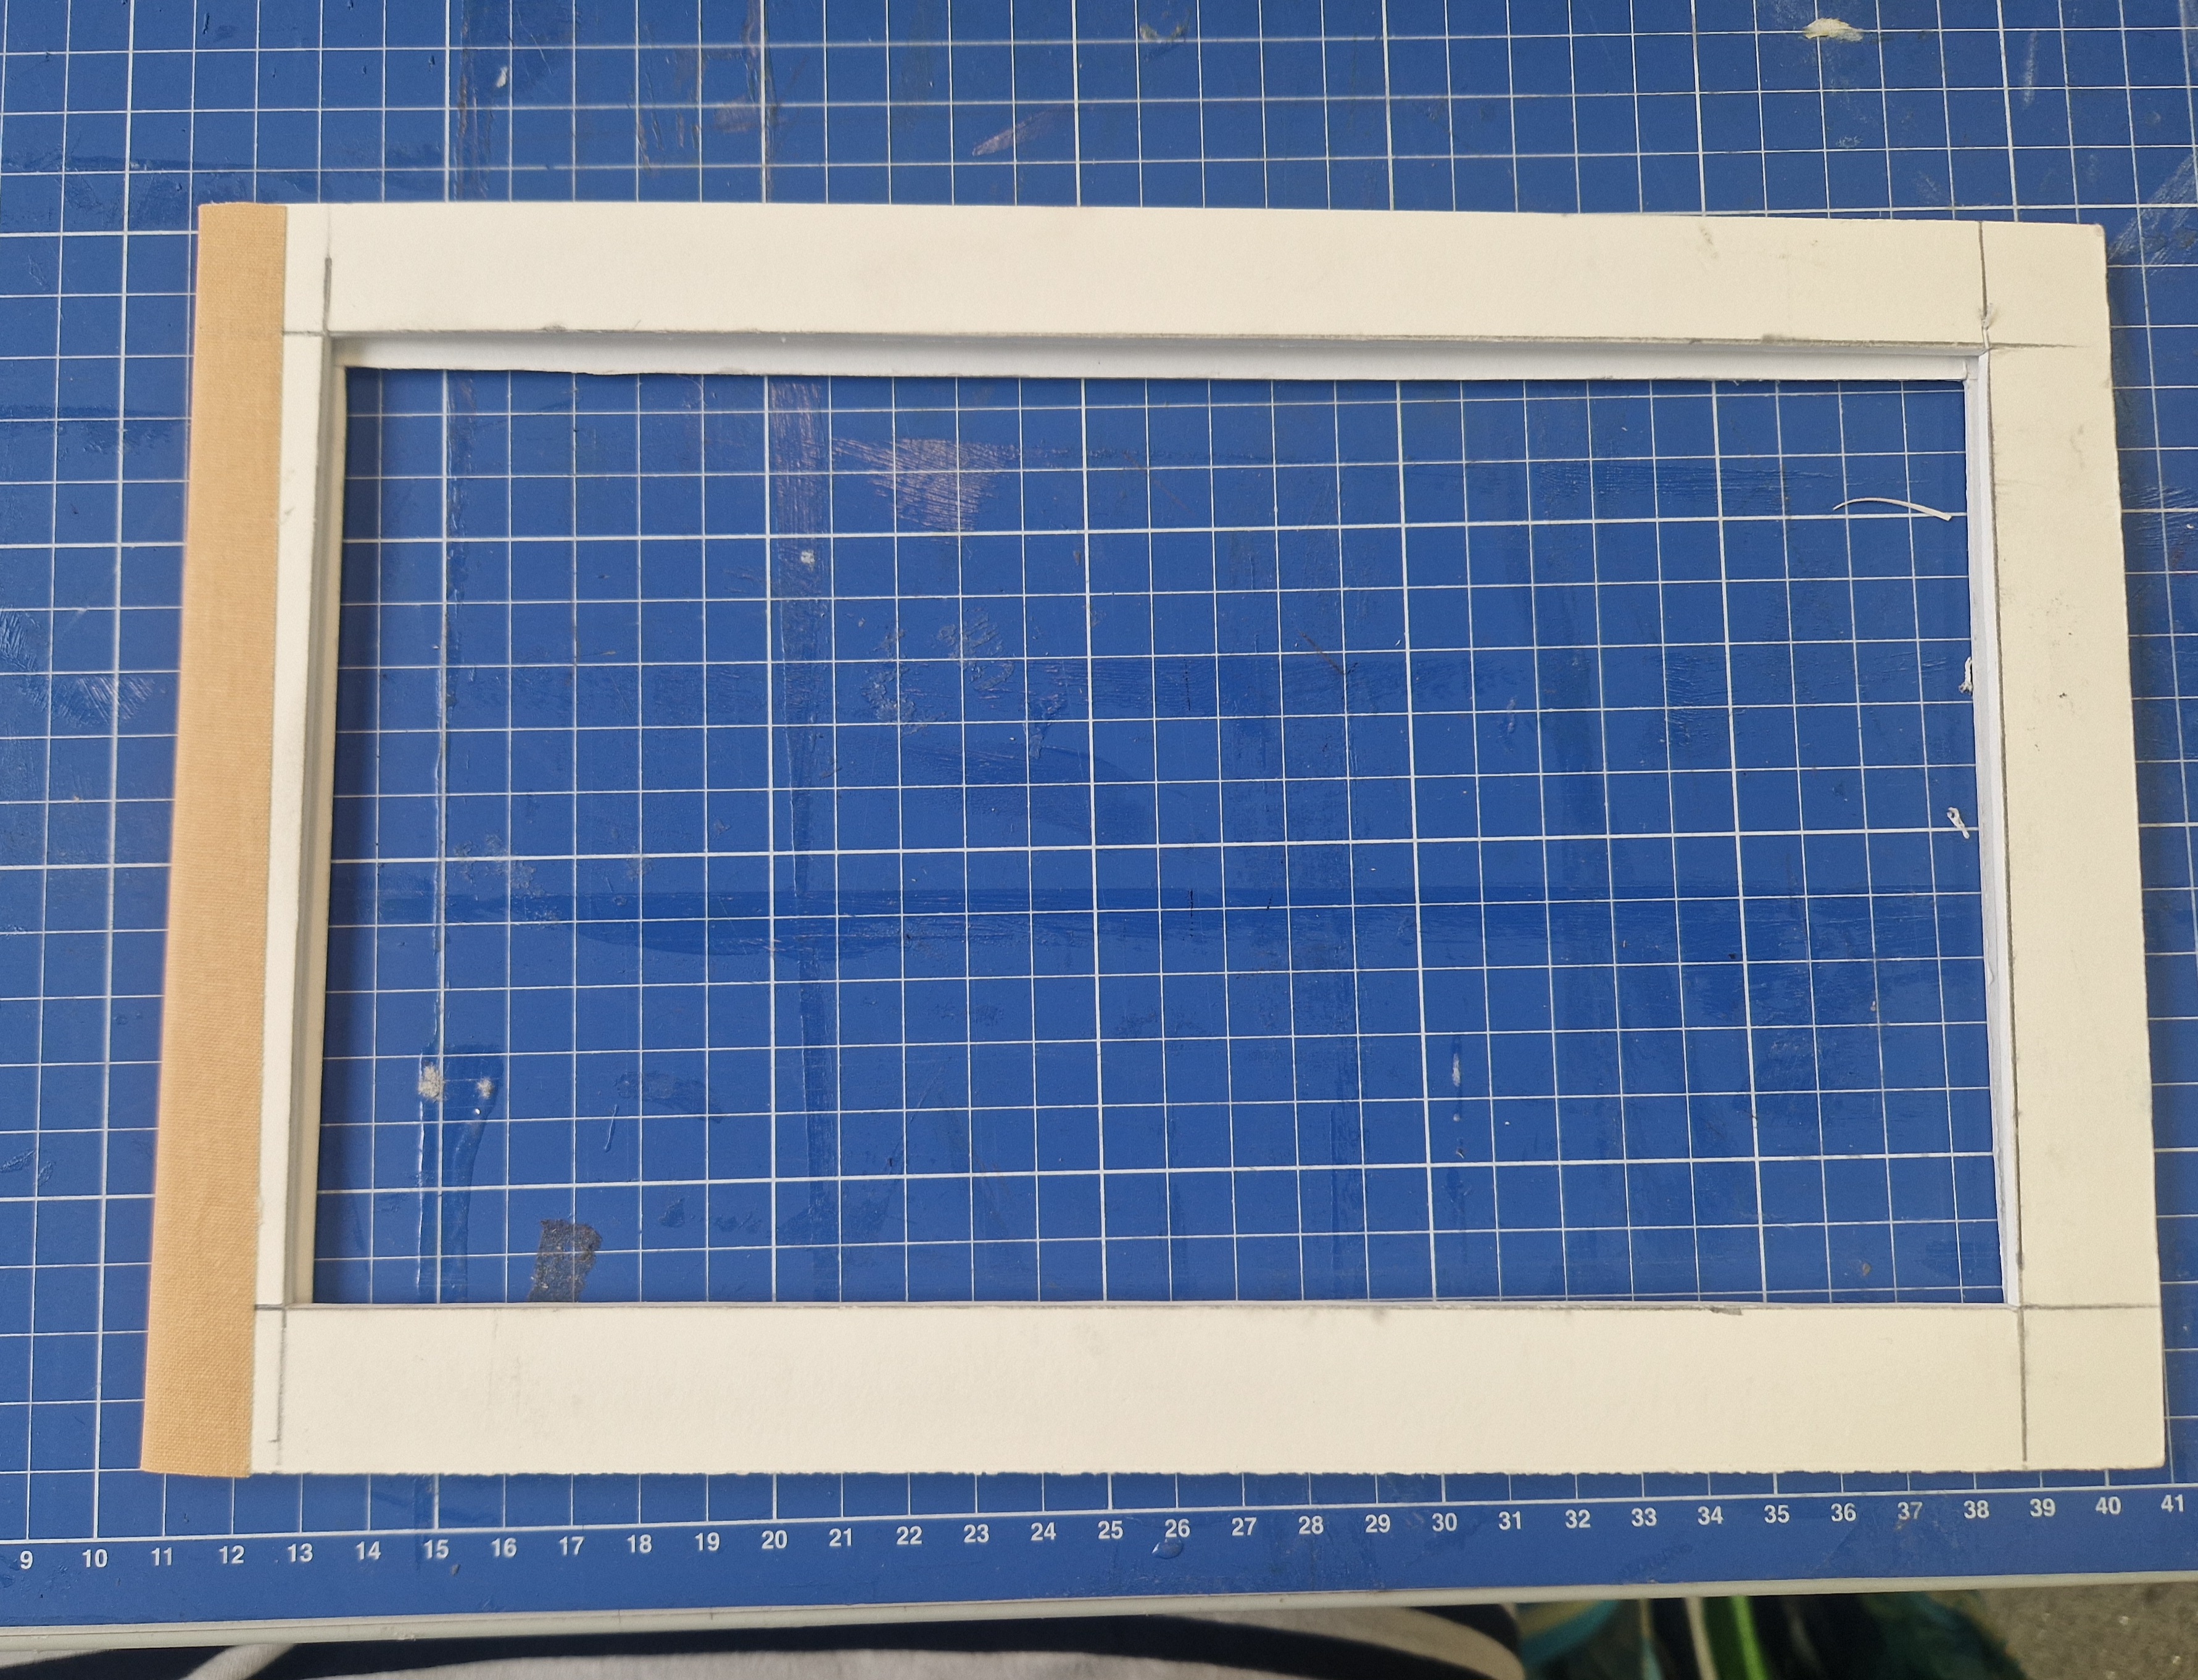
WOOD WORKSHOP INDUCTION
I needed to do a woodwork induction to build a box frame for my image. On this day I spent two hours learning about each wood machine and some other available options like Perspex oven.
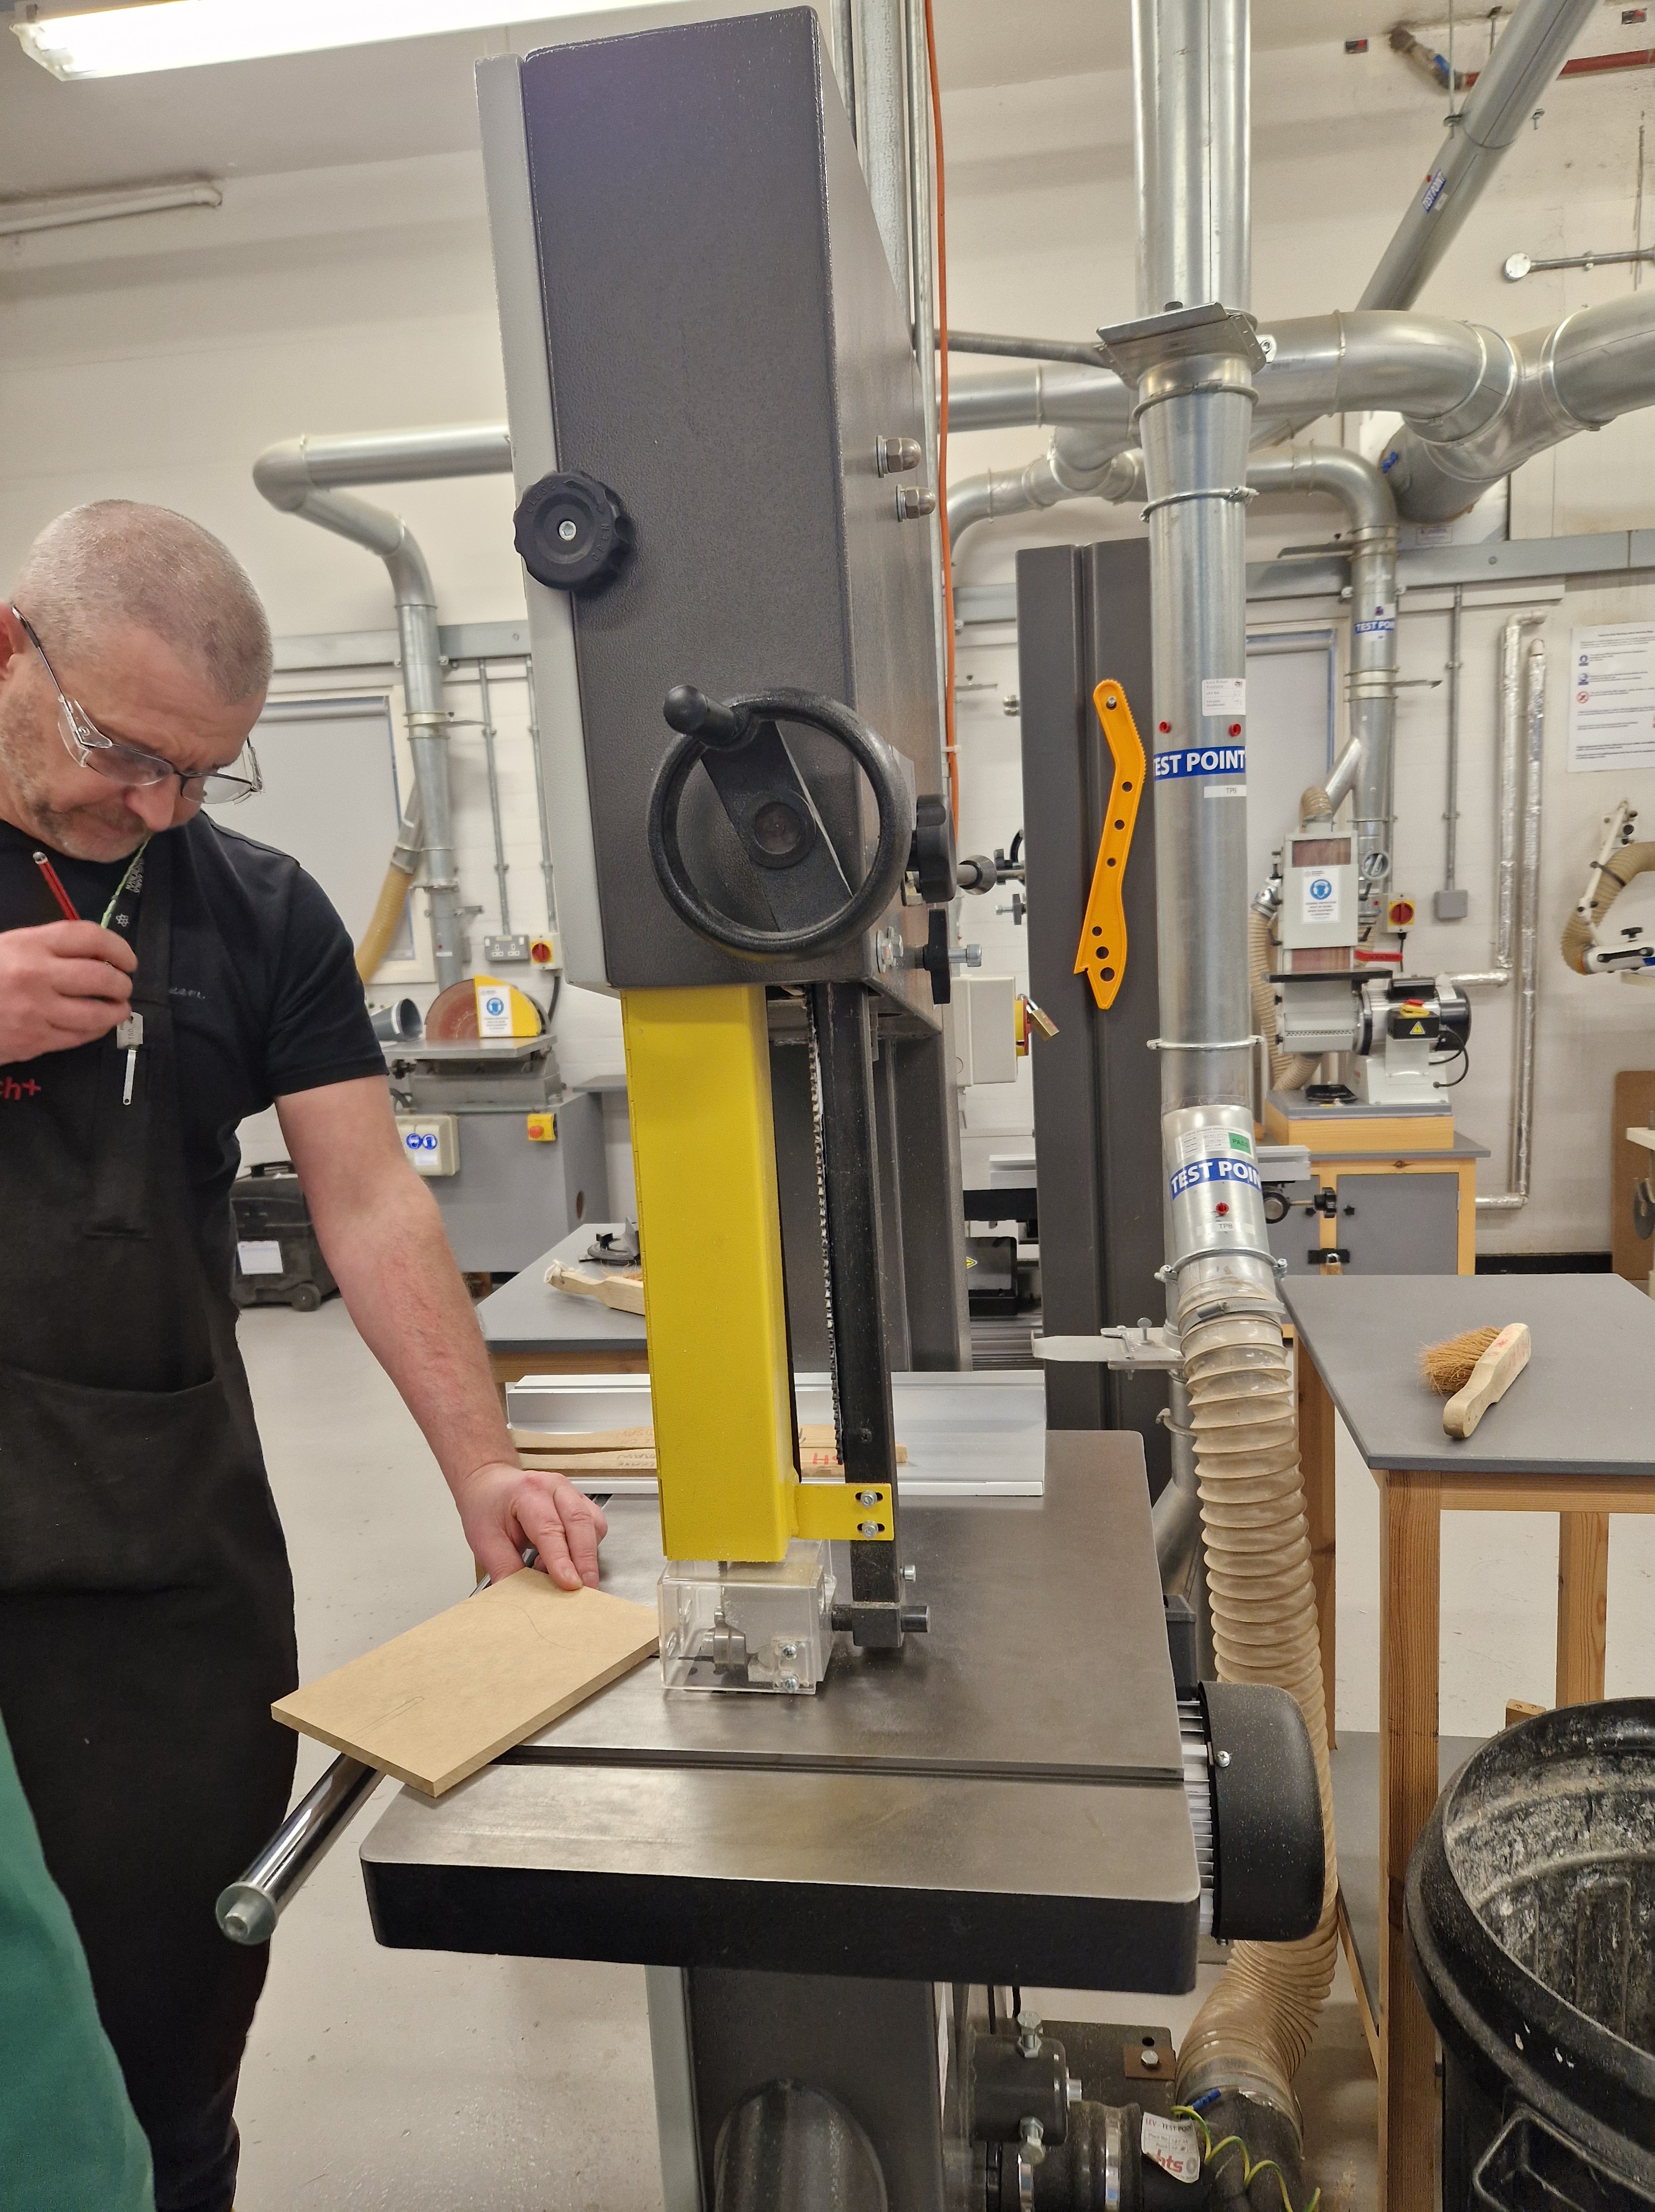
REFLECTIONS: Working with new materials and machines felt very inspiring and stimulating a lot of ideas on what I could do. Lesson here is to continuously explore the materials and contemplate how I can use them in my photography and sculptures.
WEDNESDAY
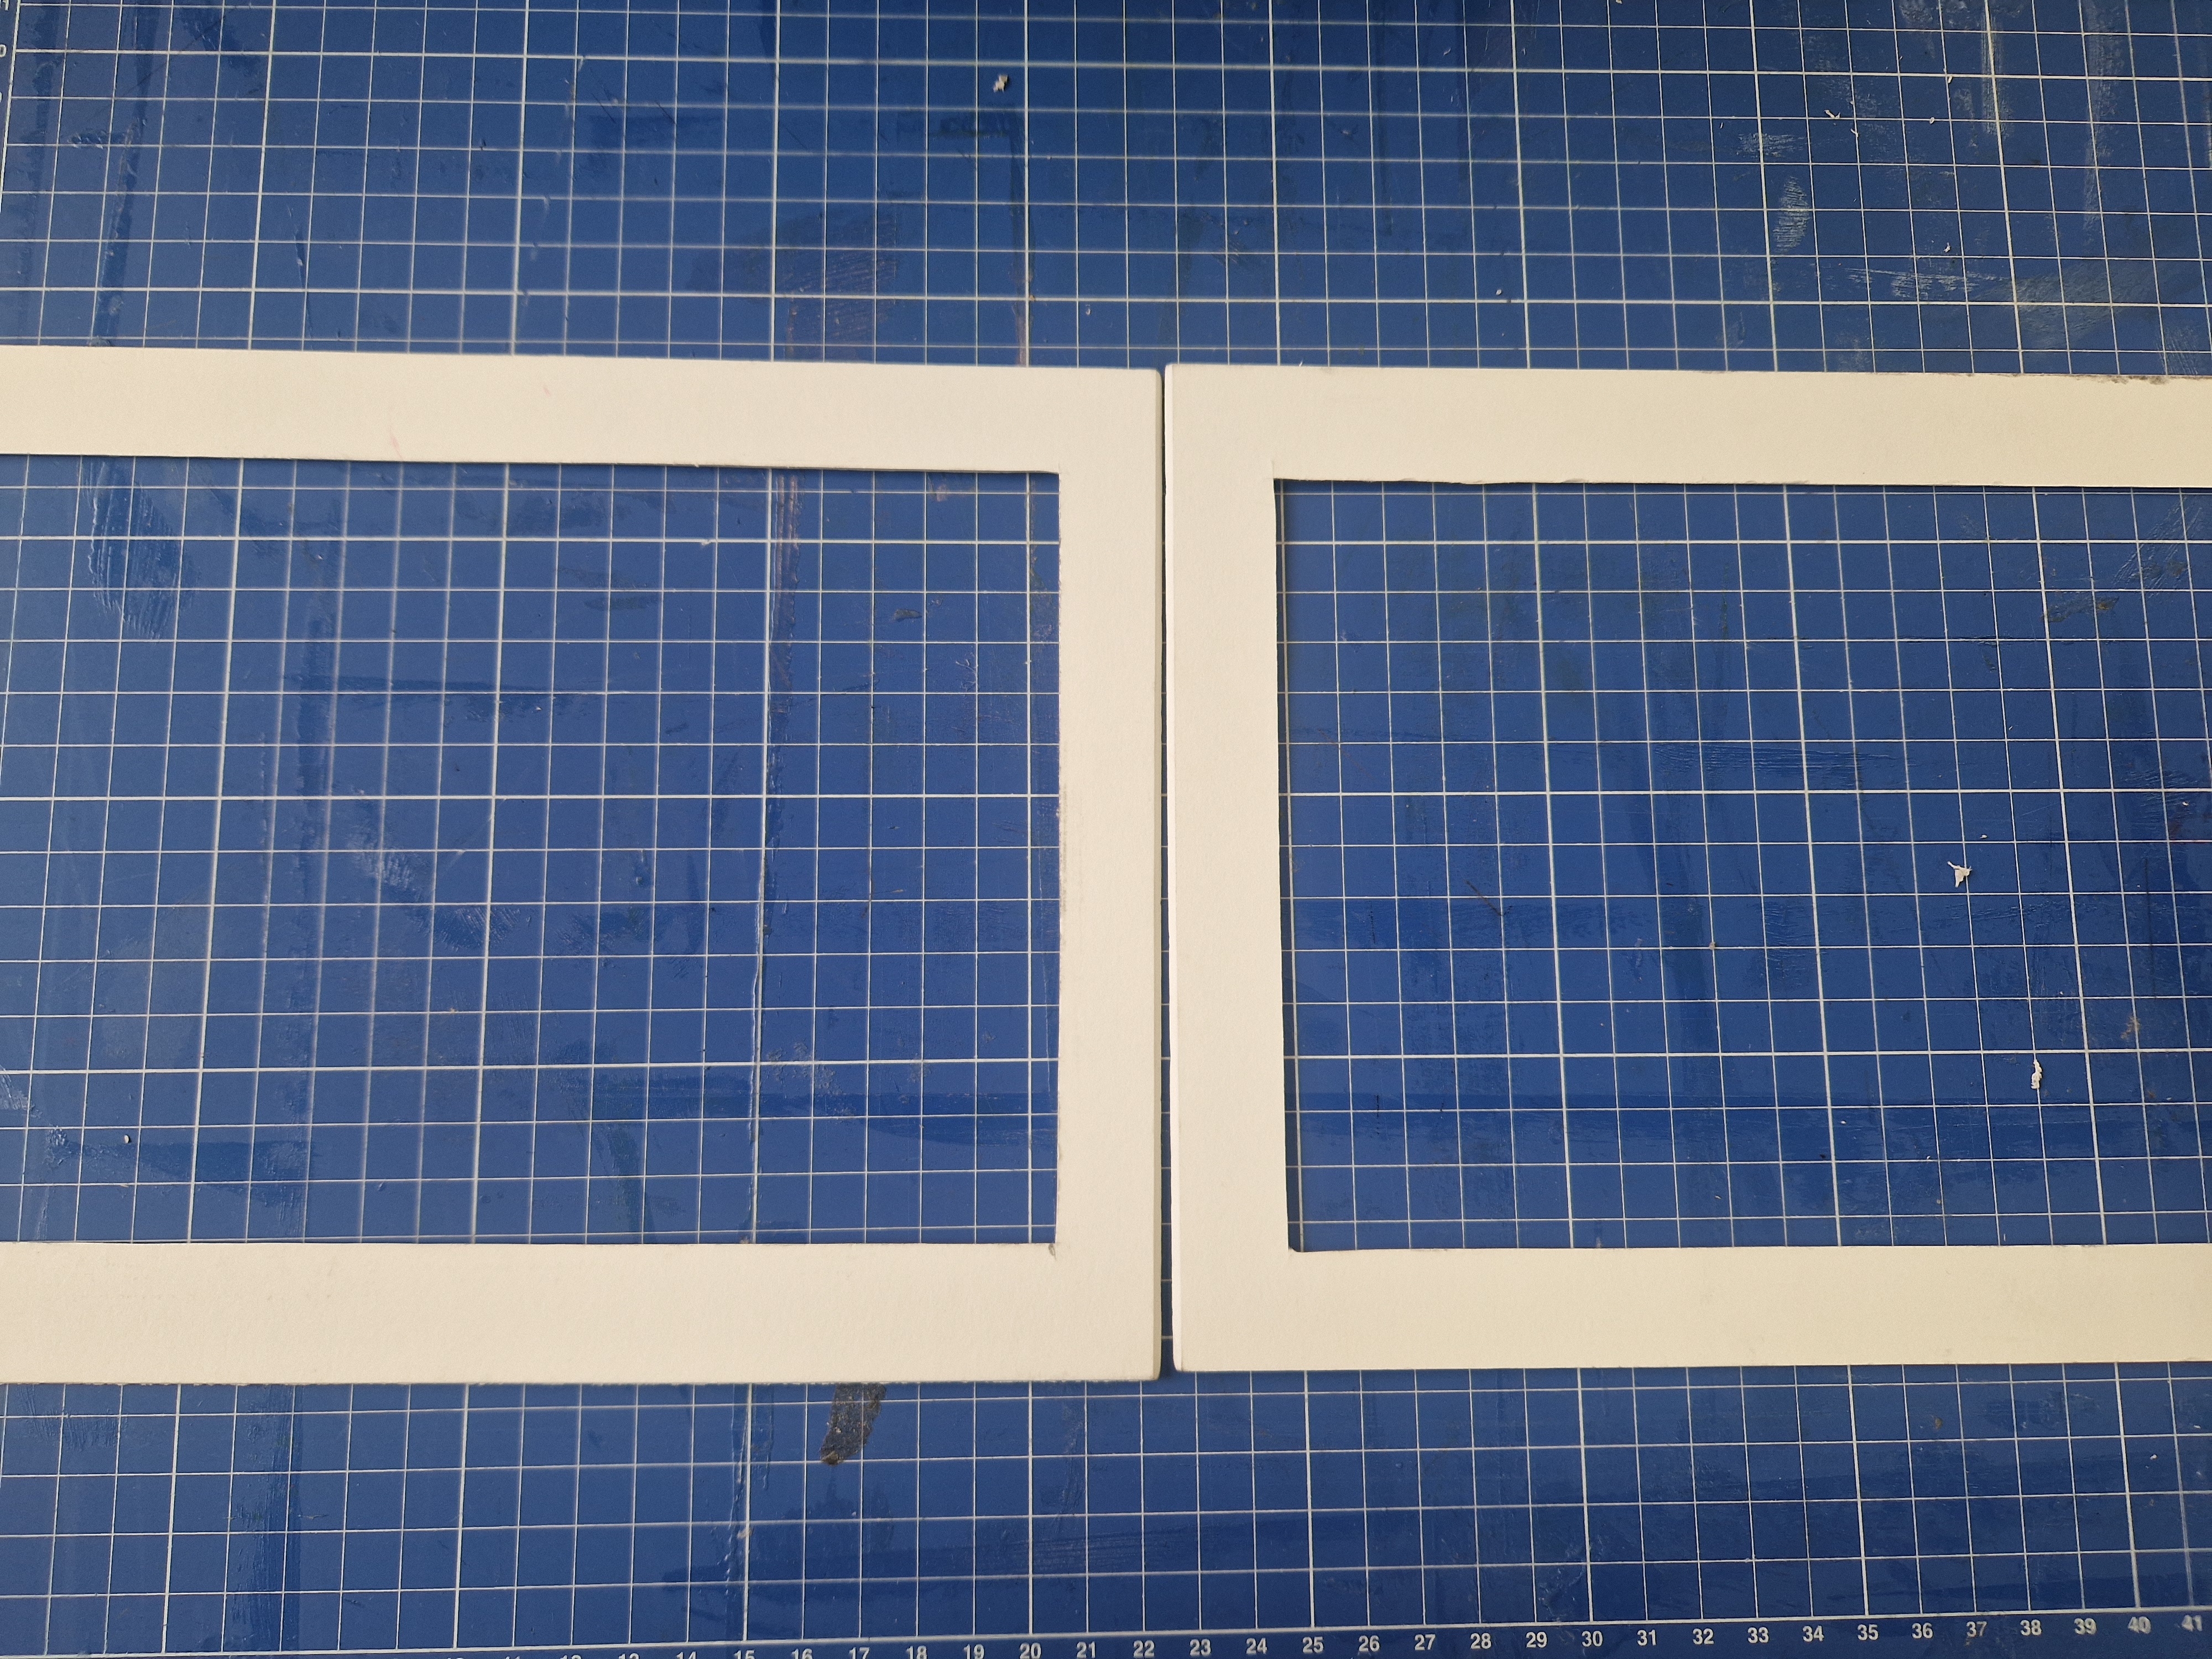
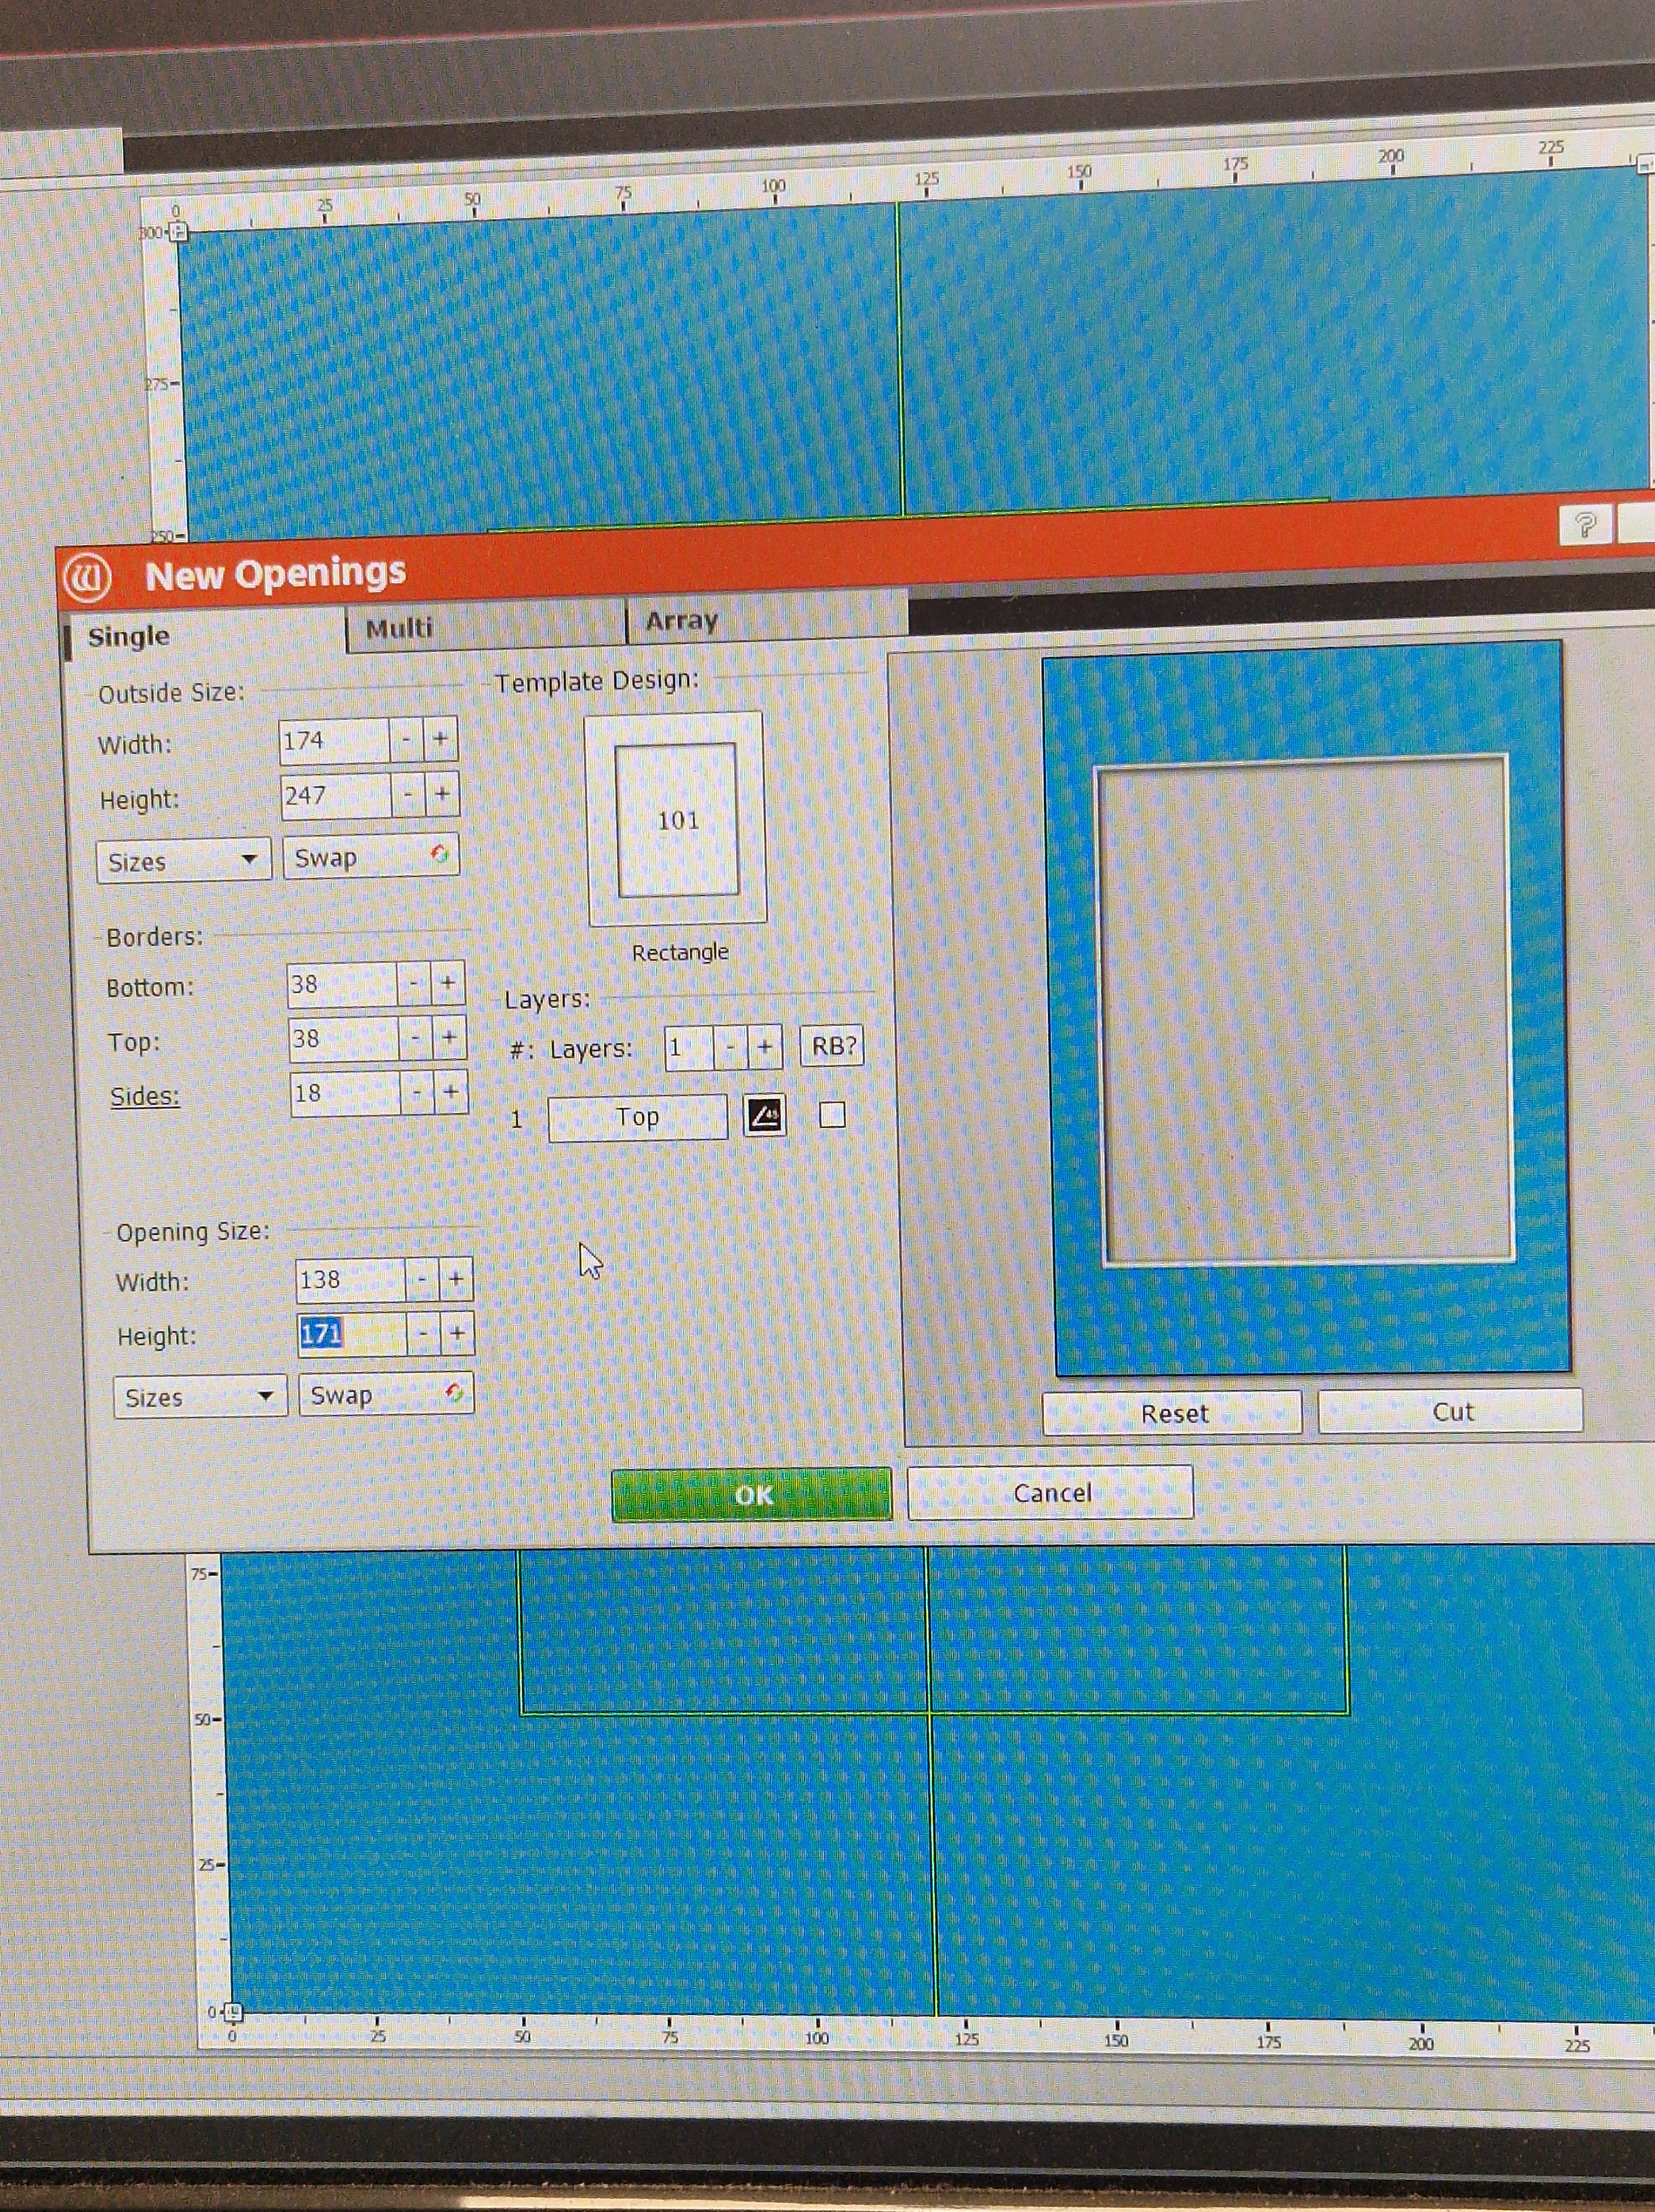
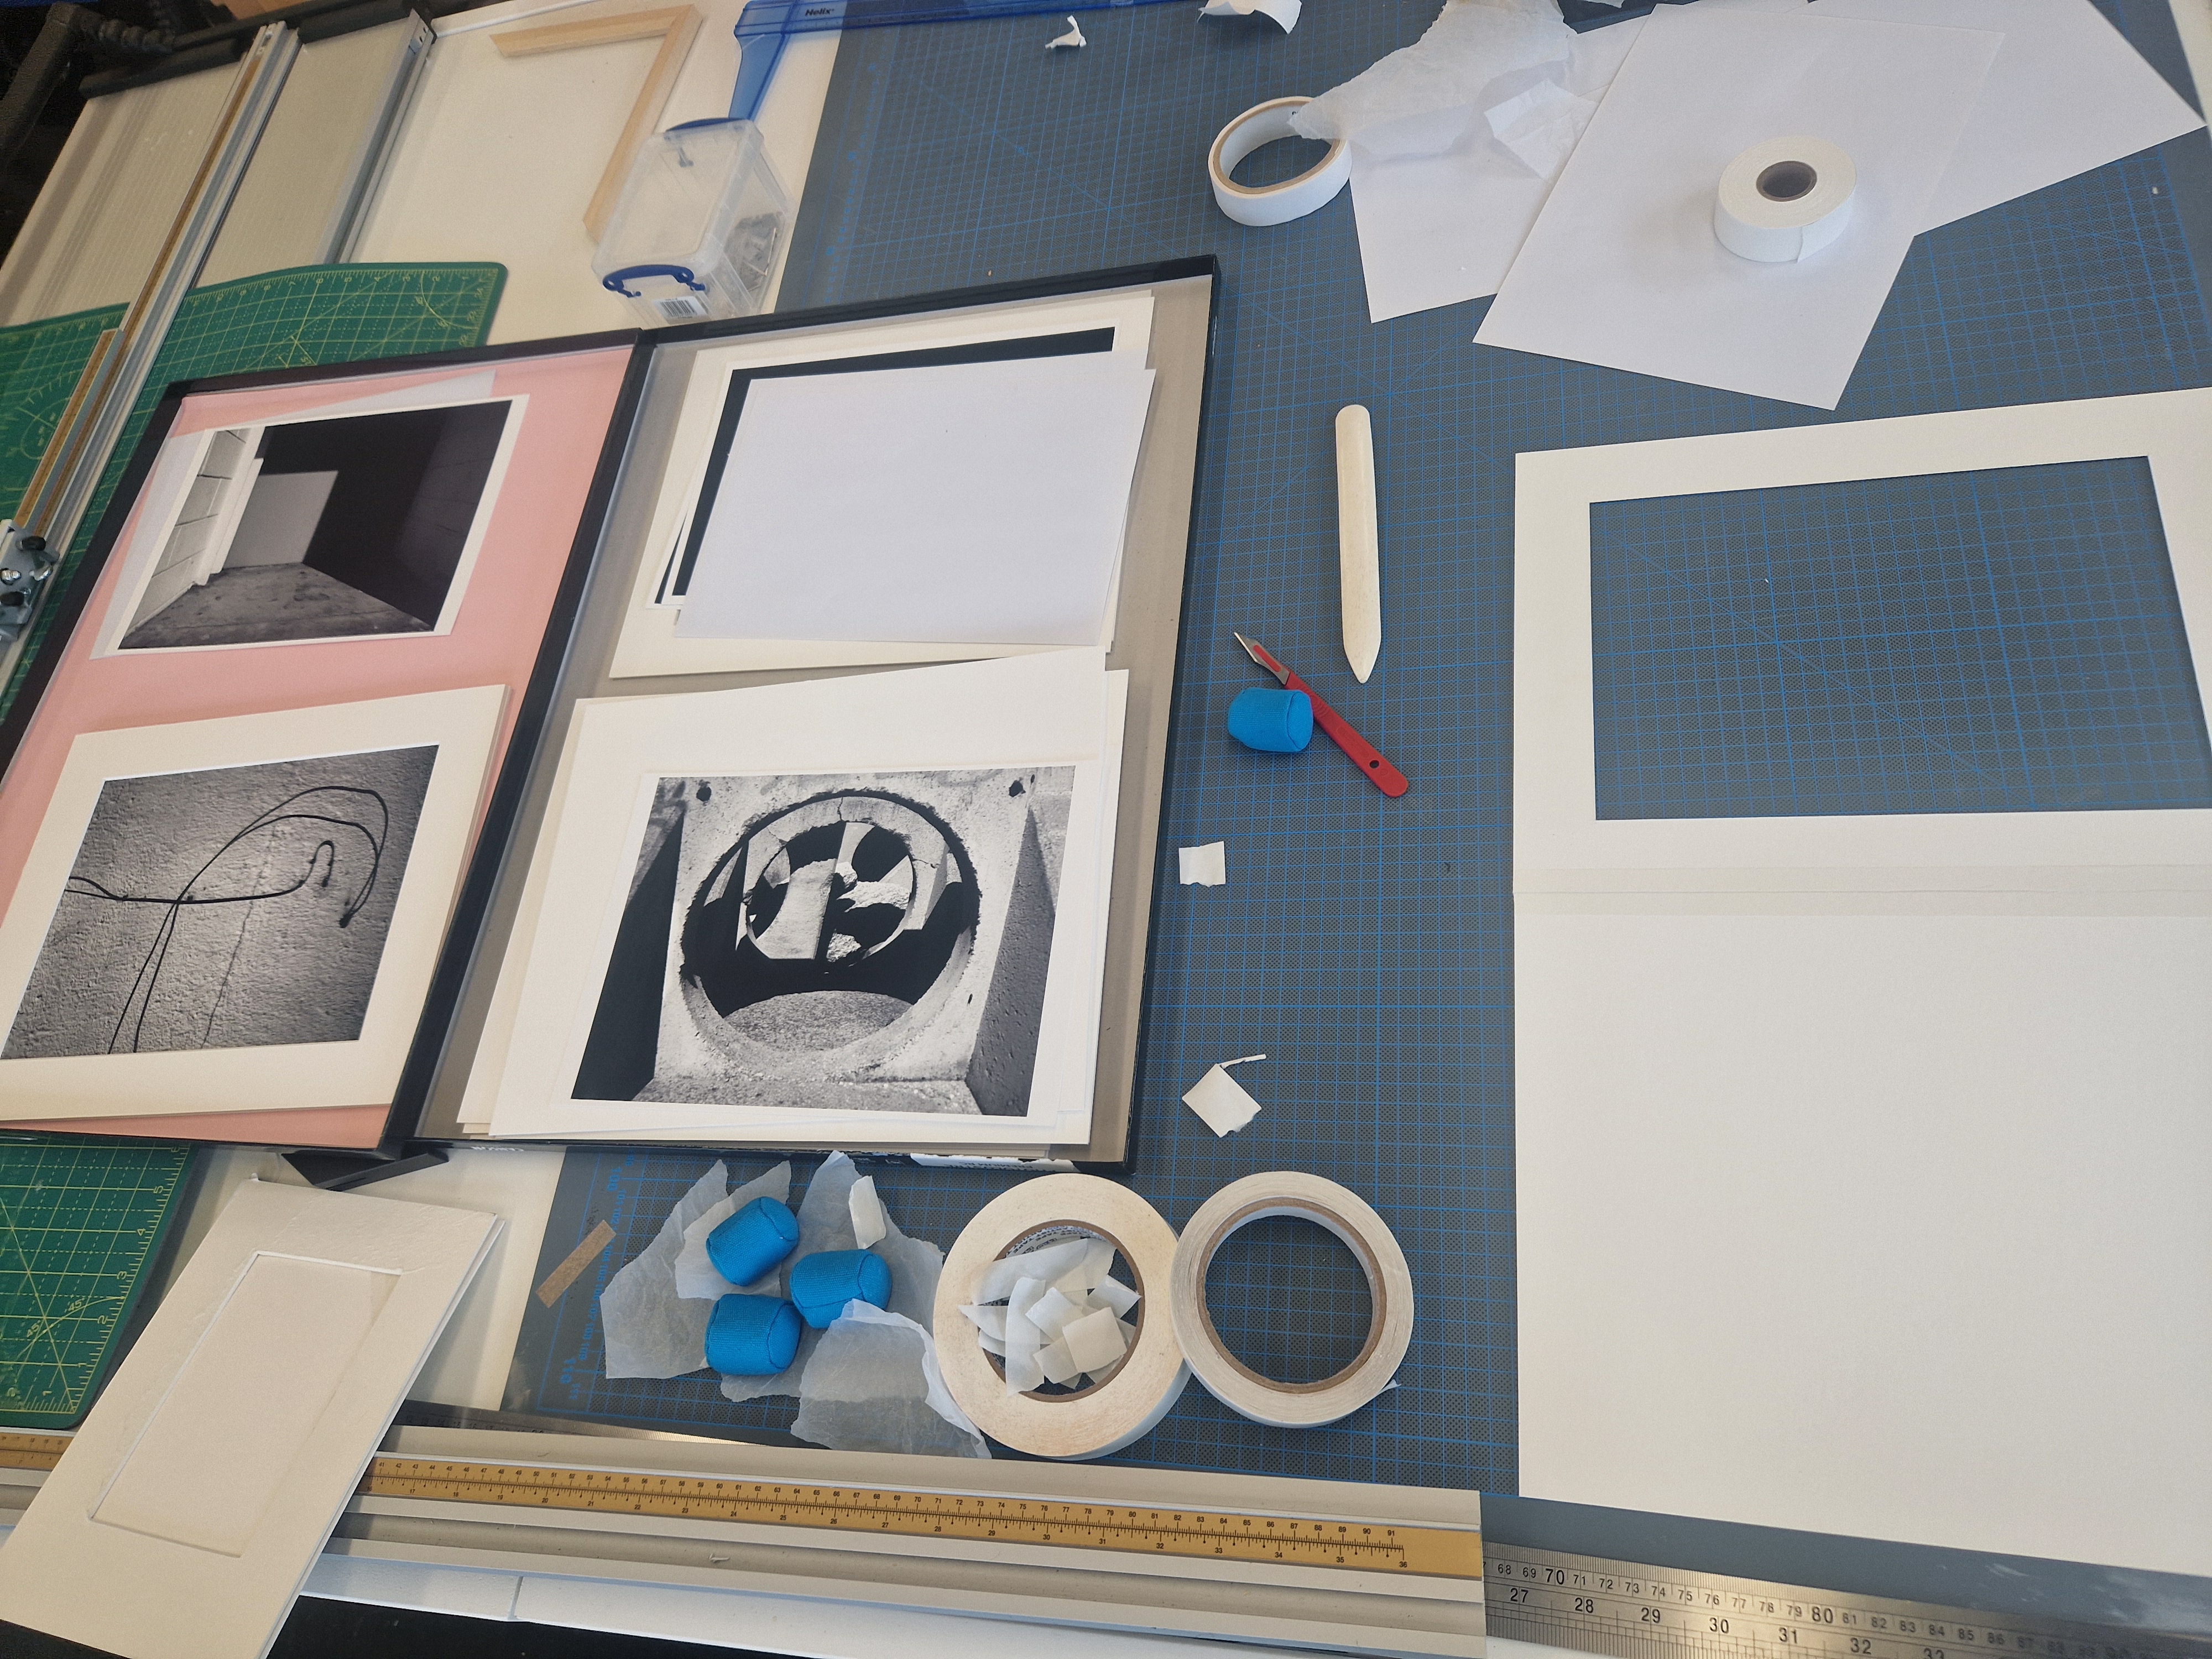
CUTTING MOUNTS FOR PORTFOLIO
With the use of a robot I cut perfect mounts, then spent some time placing pictures carefully in them, ready for portfolio.
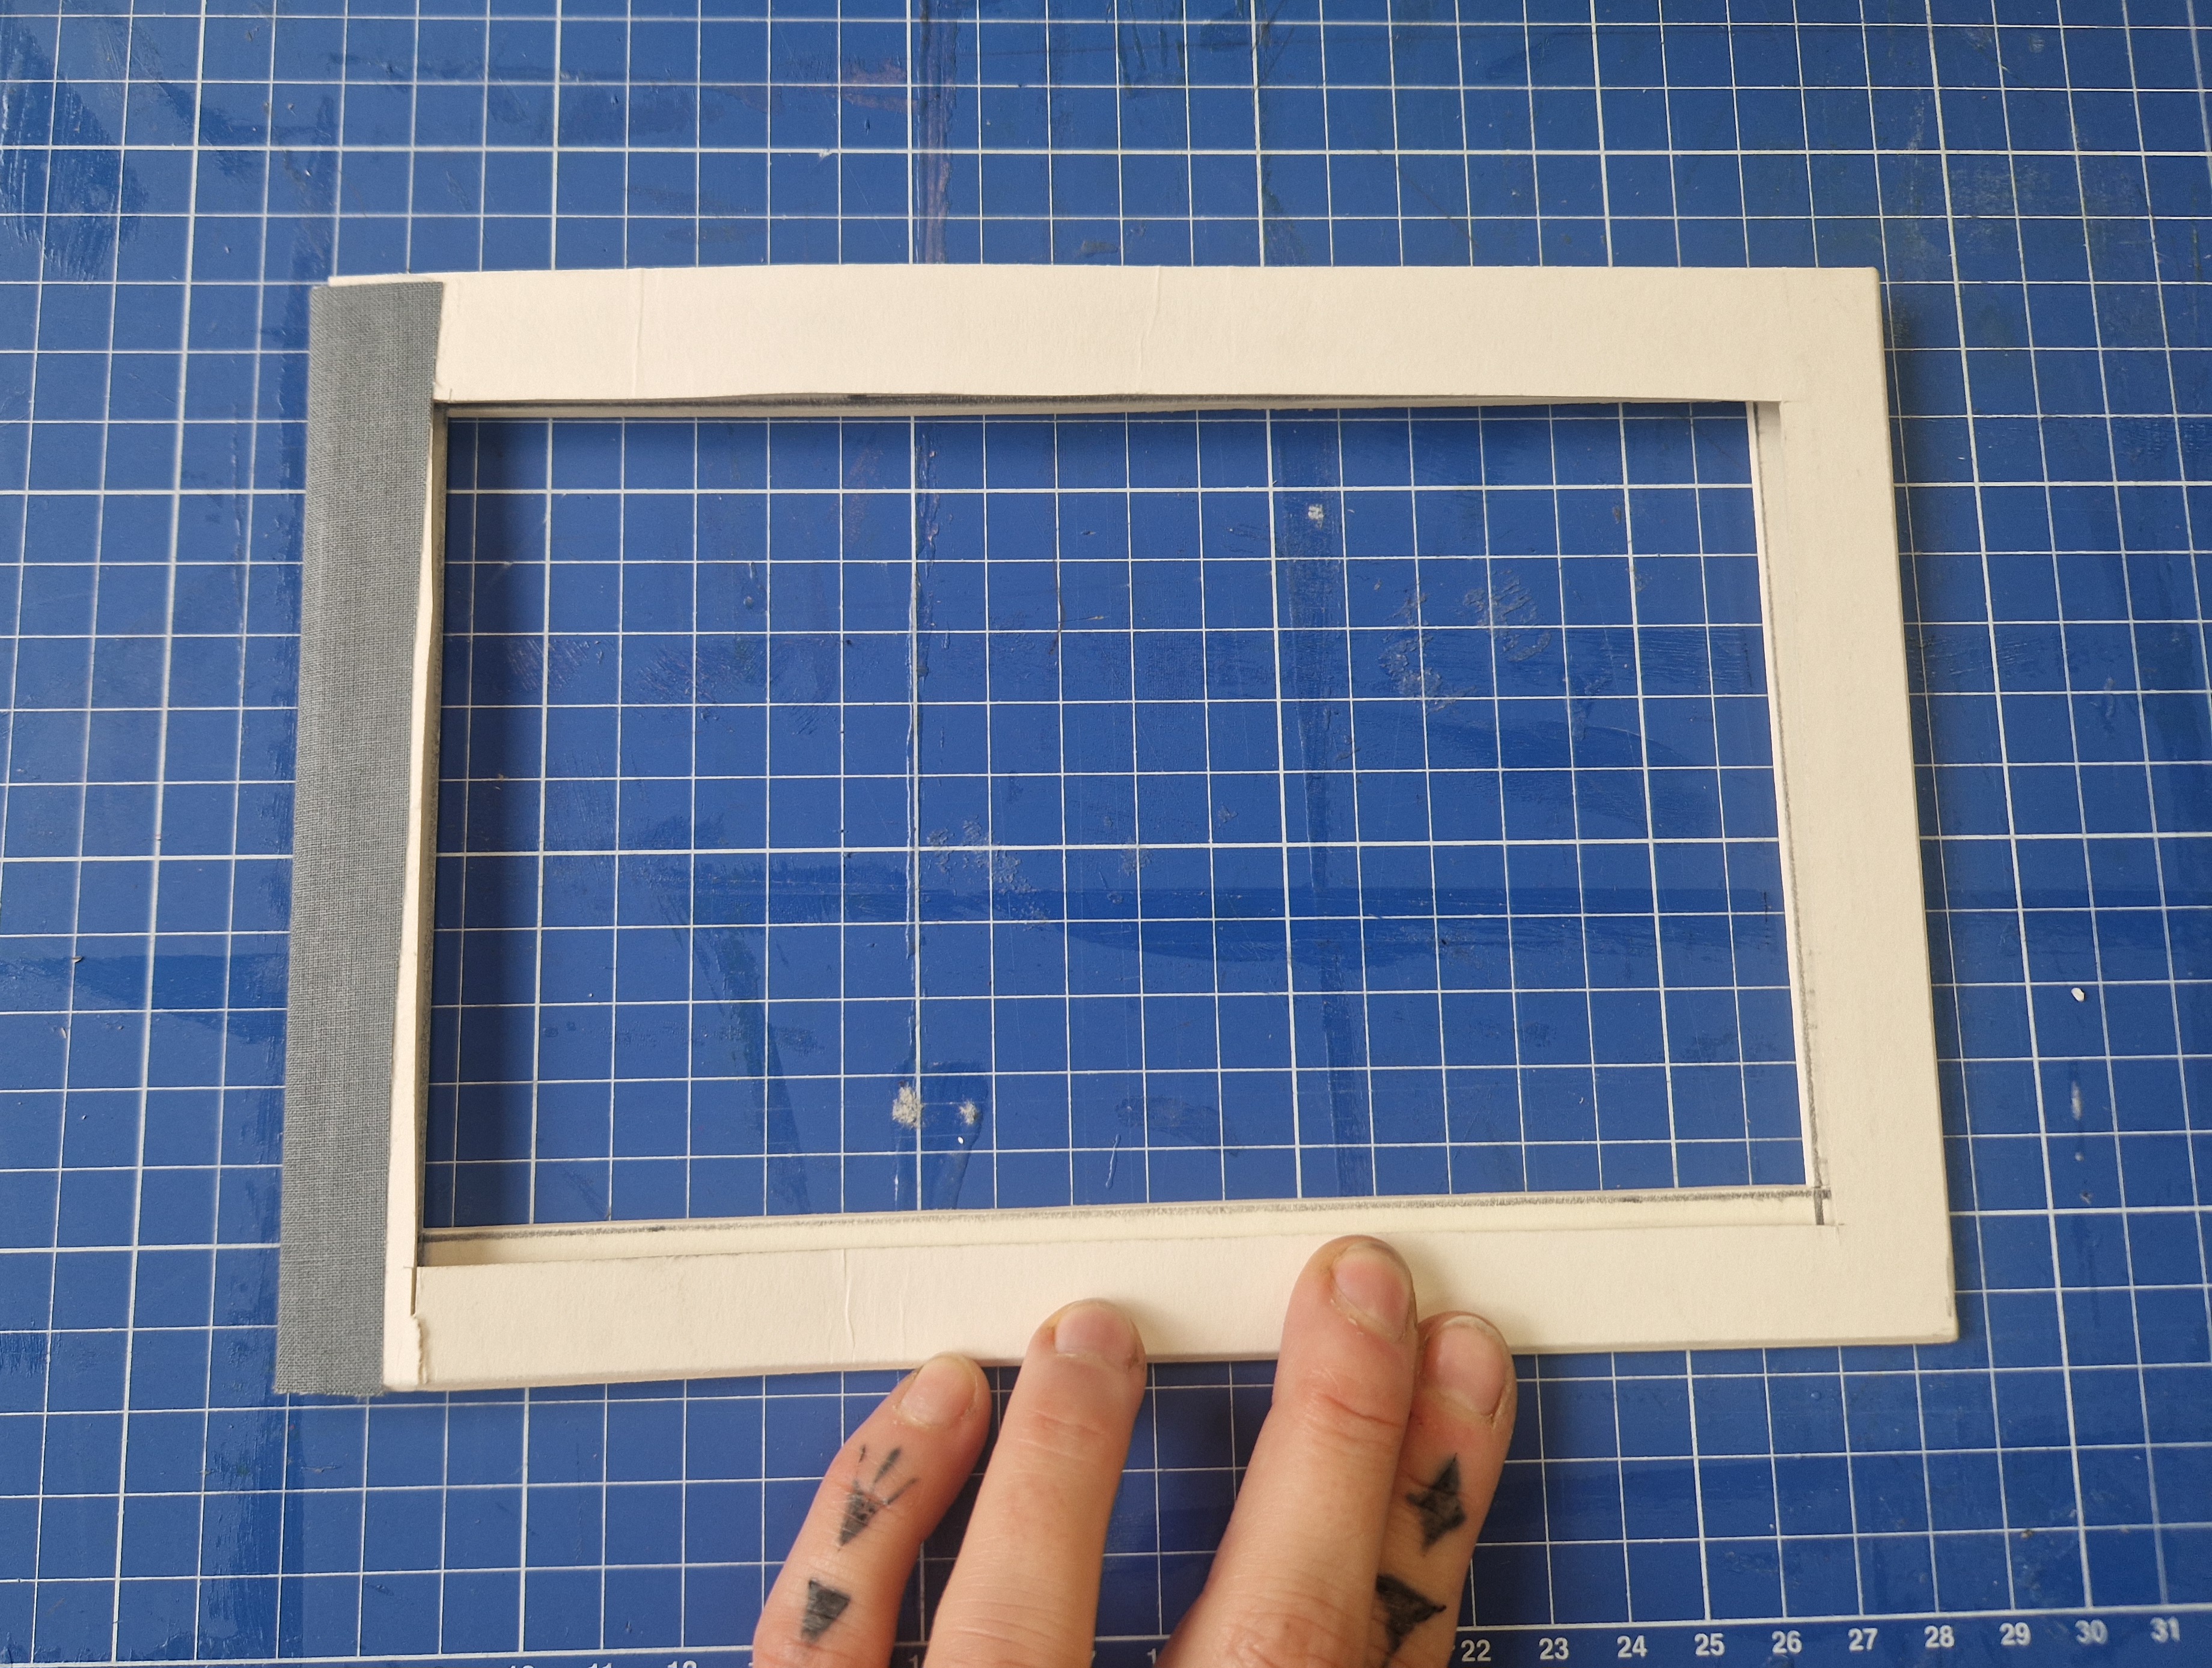
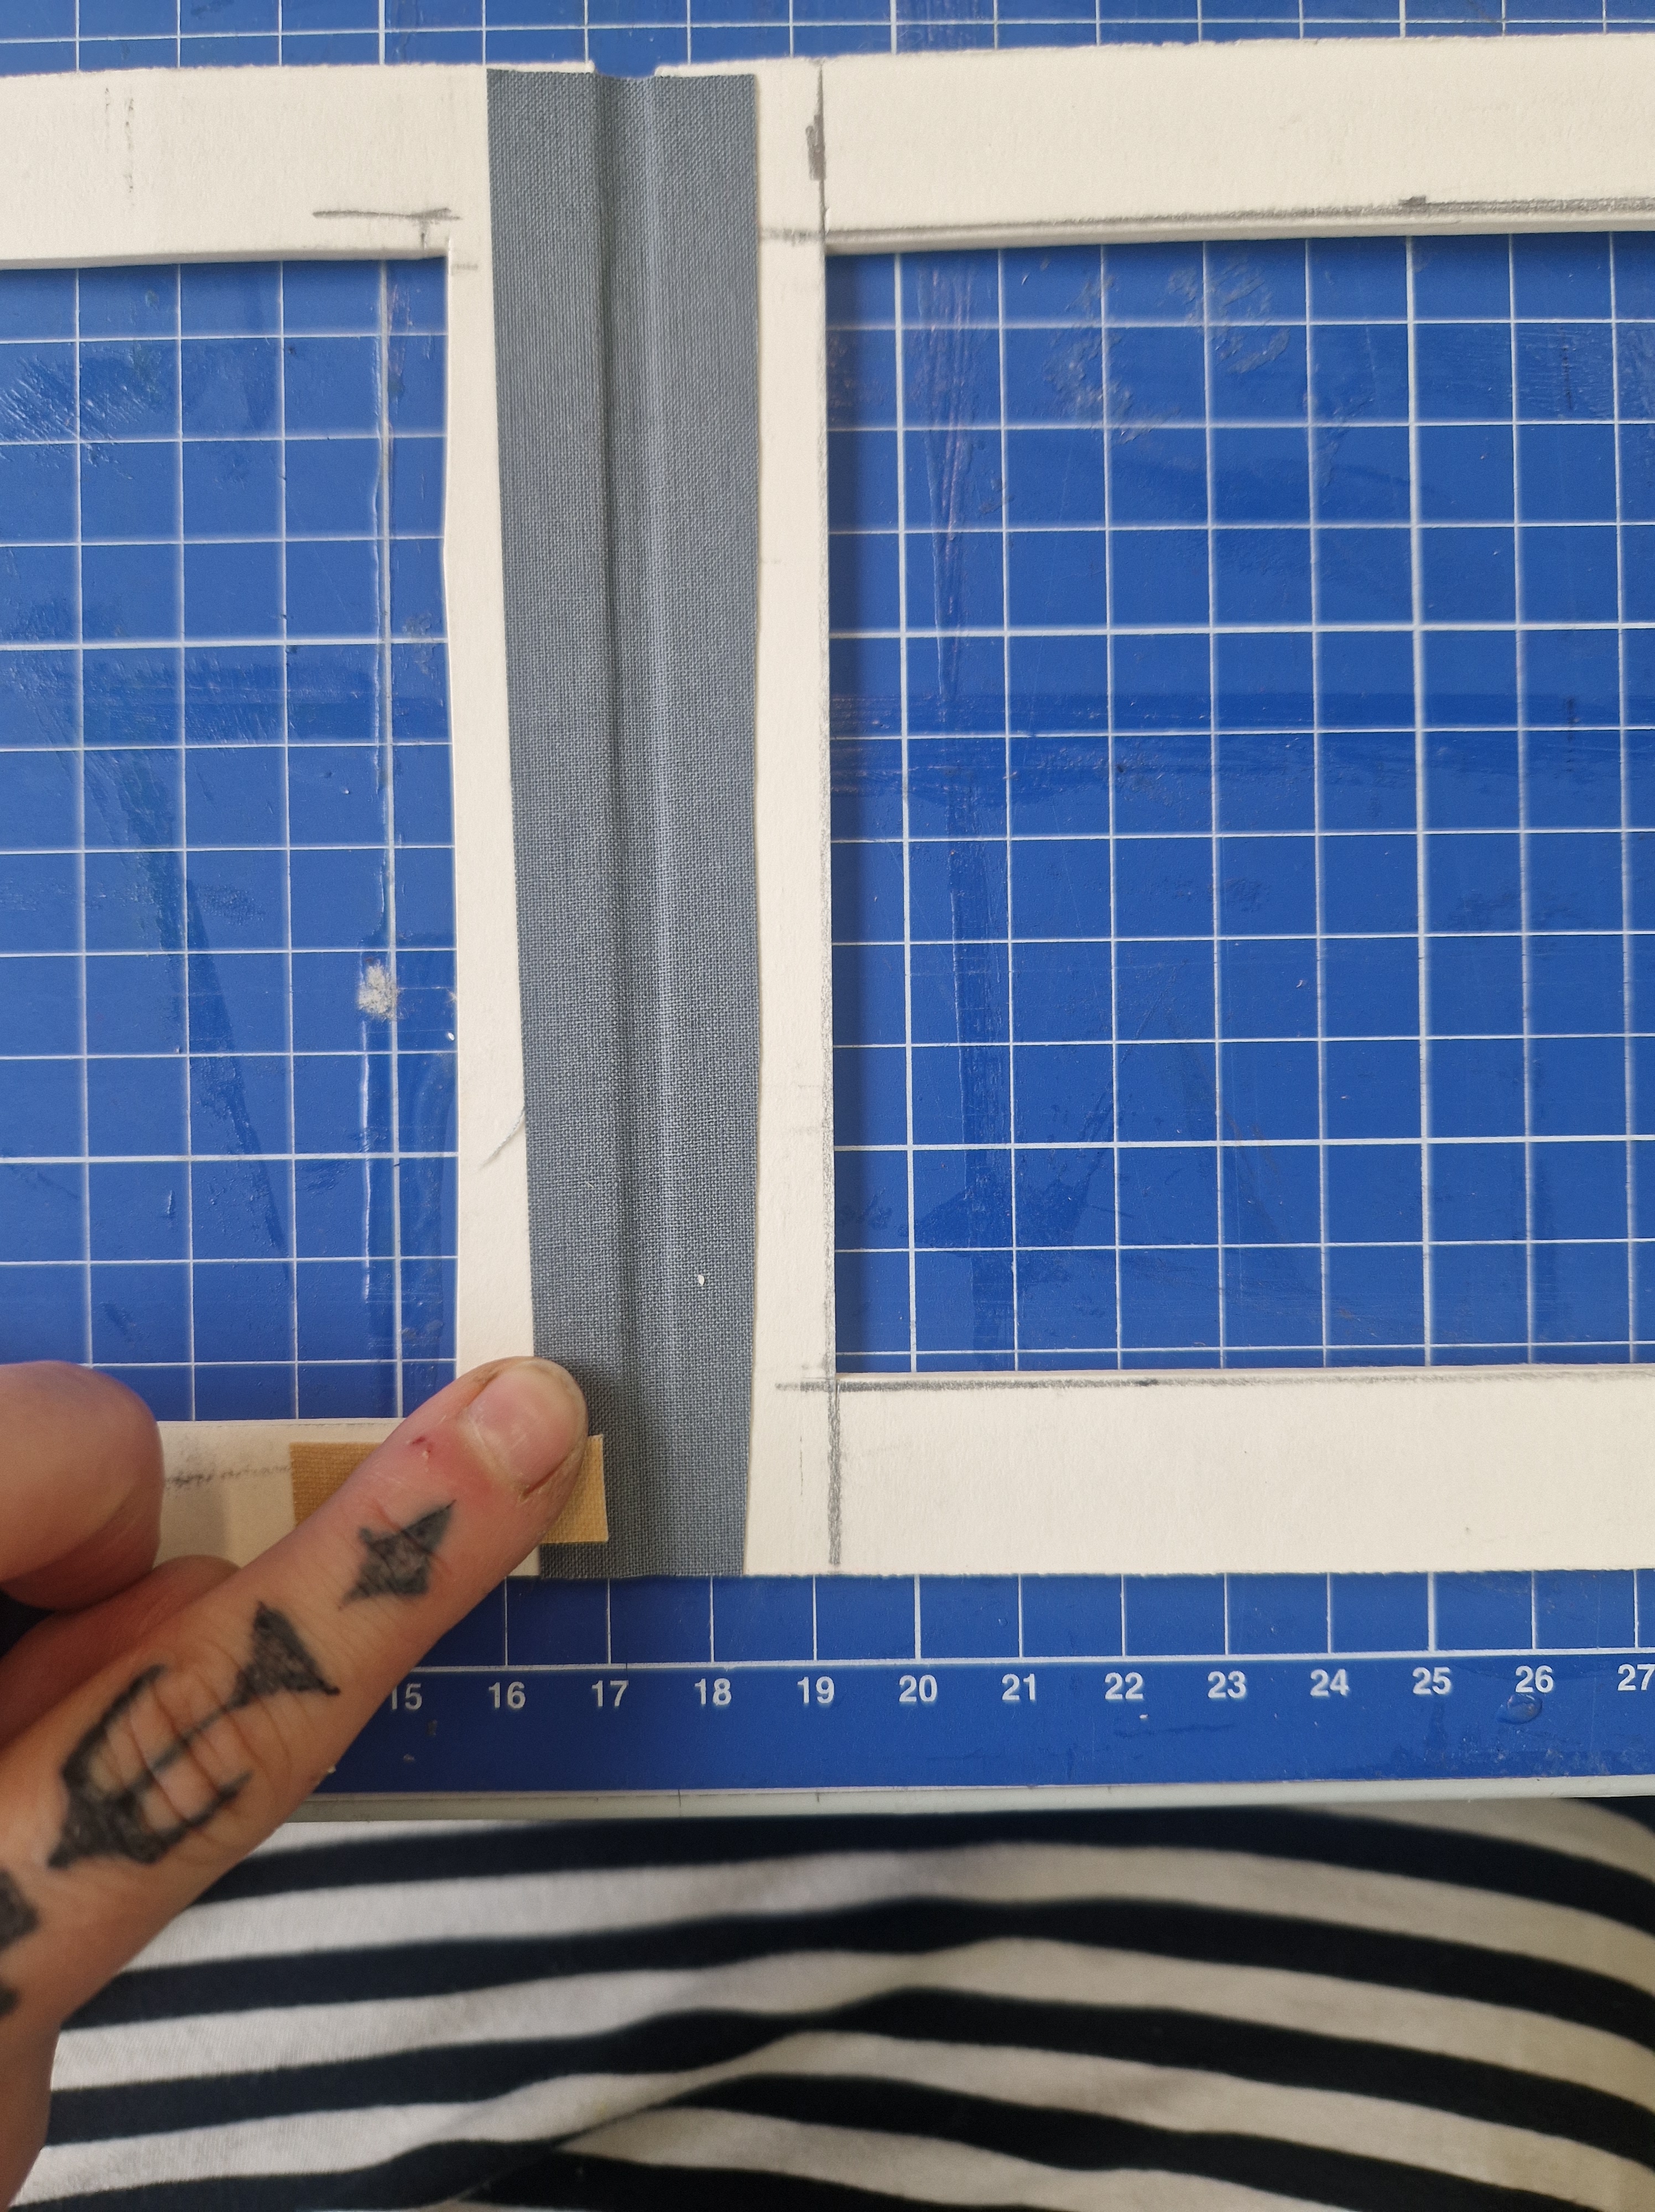
DEGREE SHOW PRESENTATION (FRAME AND TABLE)
After seeing this painting framed this way at Phillip Guston’s exhibition, I fell in love with the idea of framing my work this way. I made a mock-up of how it would look with my main image.
HOW I WANT MY IMAGE FRAMED
PREVISUALISATION
After a few months of being set on this idea, I decided to quit due to the unhelpfulness of the staff in the woodwork workshop. I am very disappointed with how I have been treated by the staff there, whose job is to help students, not to put them down.
NOTES FROM THE TUTORIAL DISCUSSING THIS IDEA:
- https://abliss.co.uk is the framer in London who makes the frames for the person I work for. They are quite expensive and do a frame for Karen where the print is mounted to aluminium and then that floats inside a frame without any glazing. You can see some images here (the colour ones towards the top of the page): https://karenknorr.com/photography/installations/
- For printing on aluminium, have a look at https://genesisimaging.co.uk in London. They’ve been really generous and made a few samples for me in the past, I think it was Mark there that I spoke with.
- and this is the Di-Bond material – aluminium printing?
- ACRYLIC or ALUMINIUM prints? Watch before deciding! https://www.youtube.com/watch?v=Co-lU2M6Xl
FRIDAY
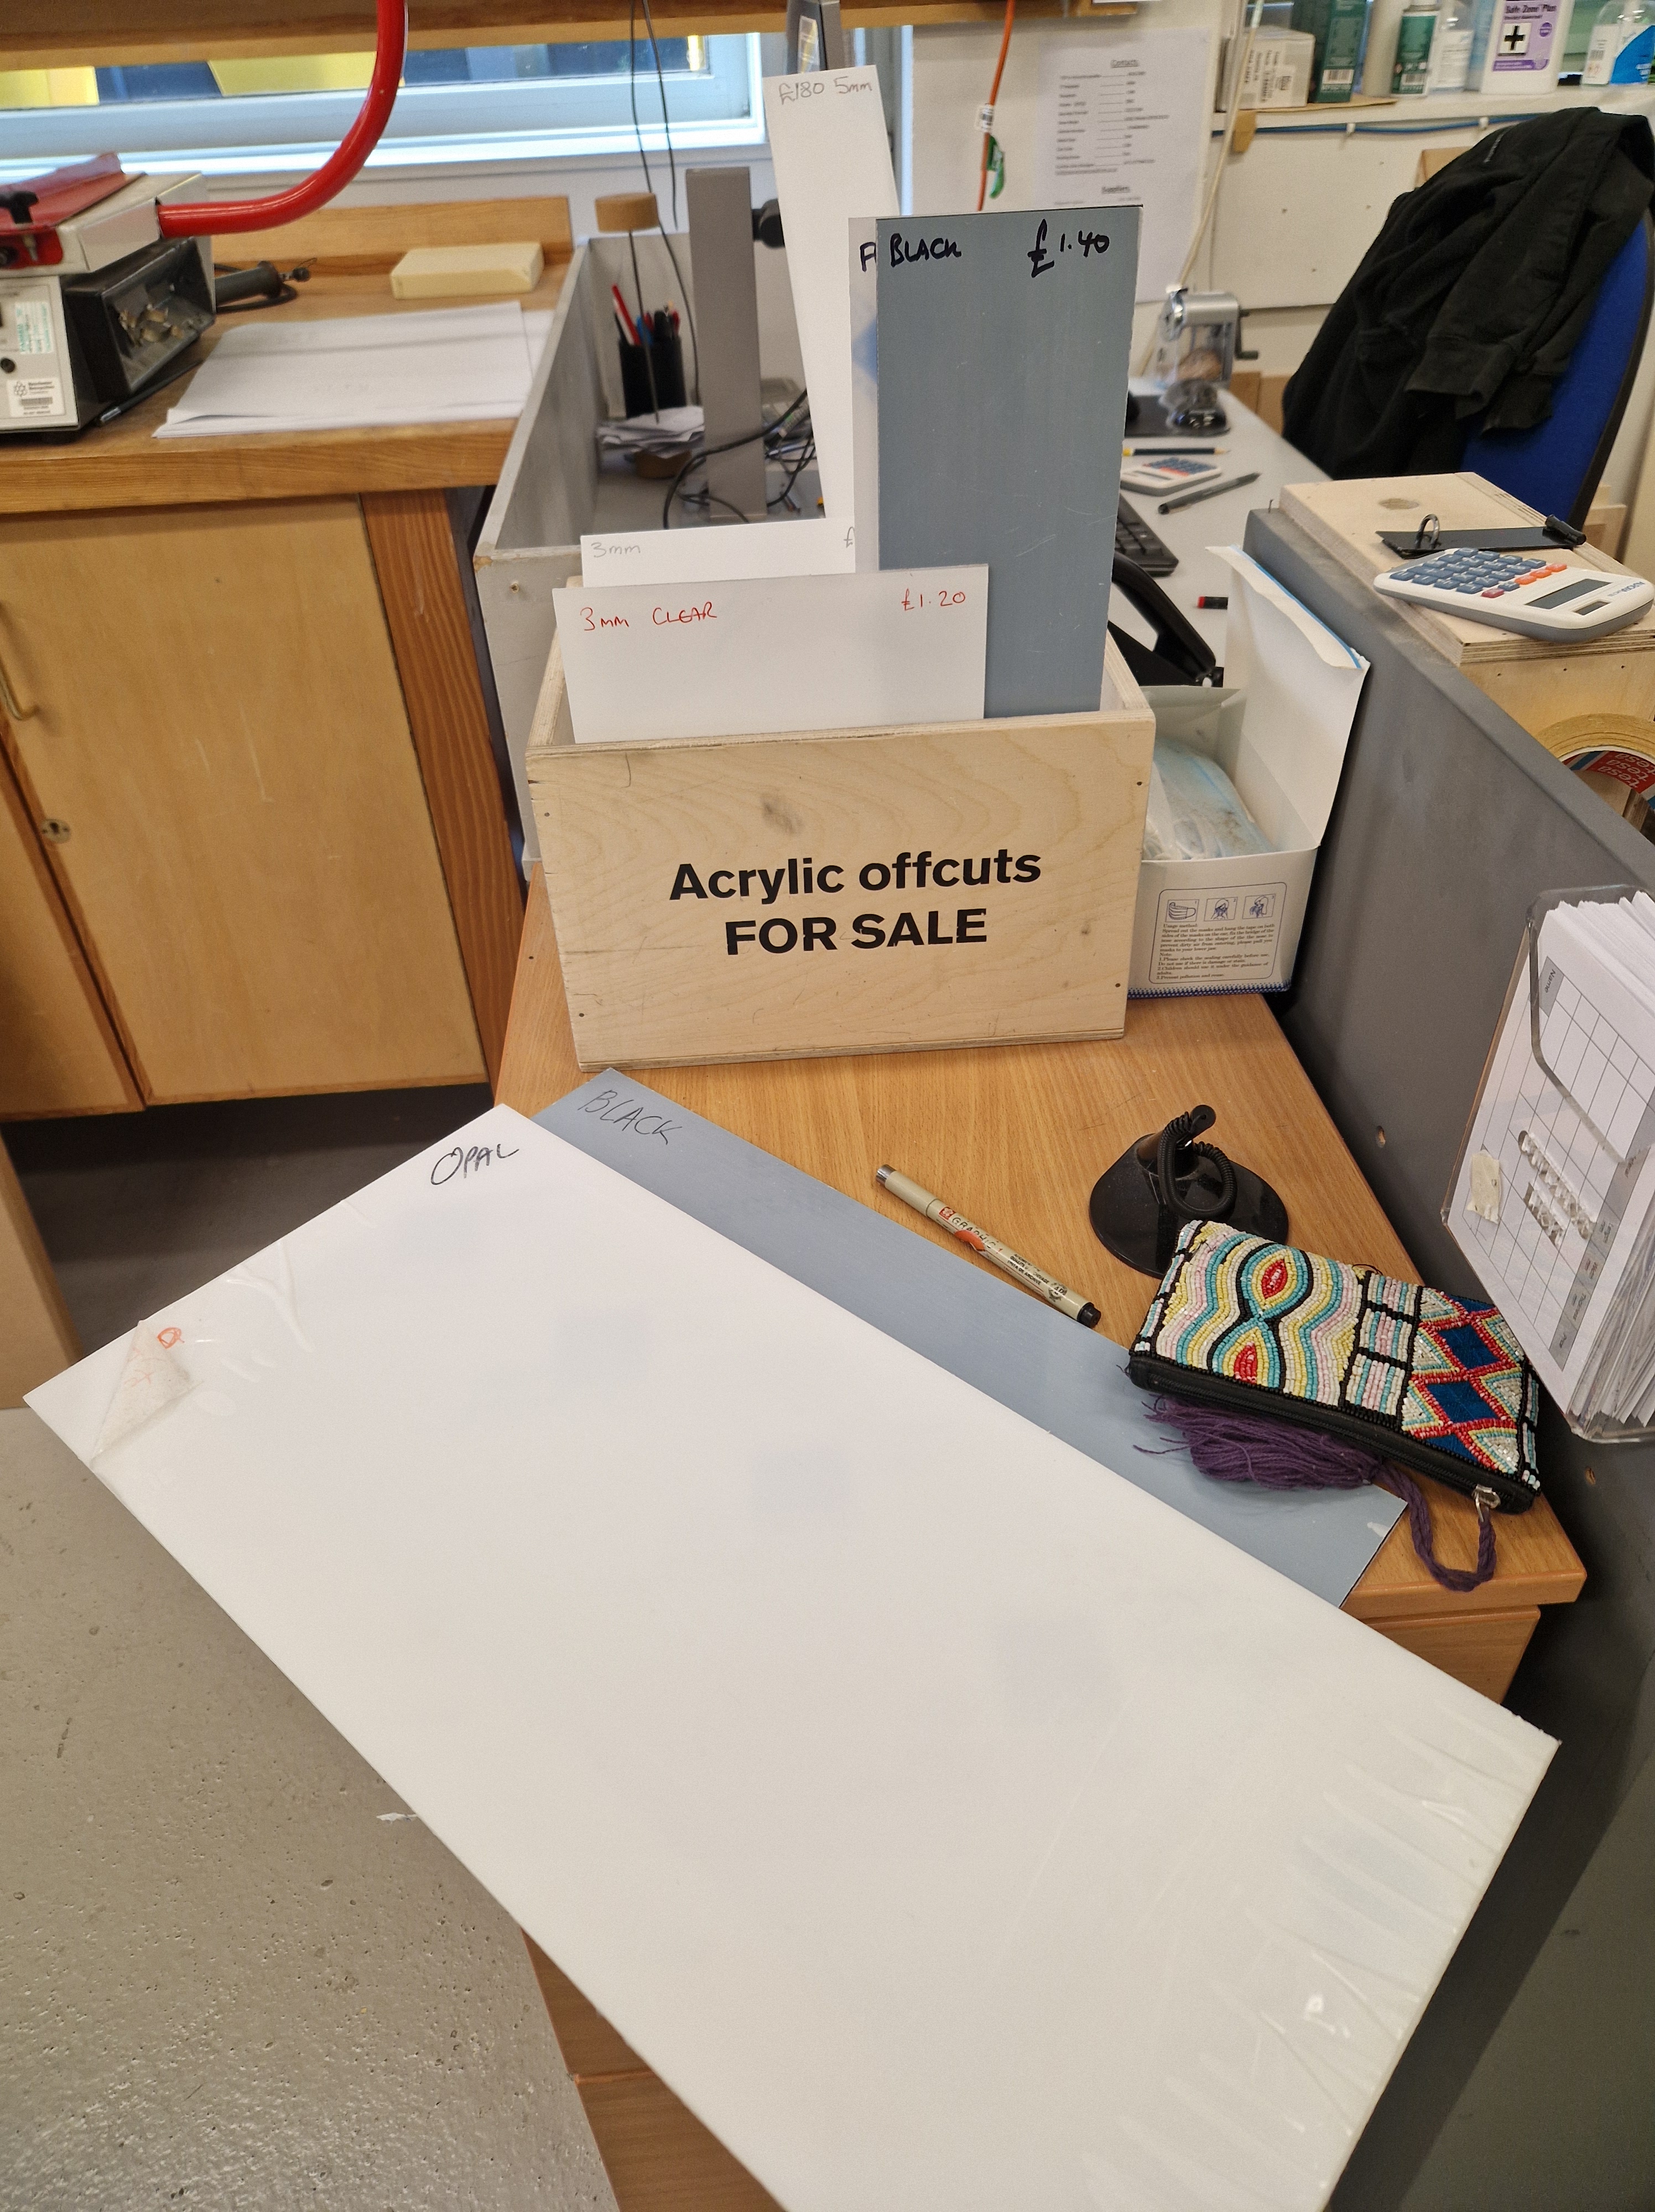
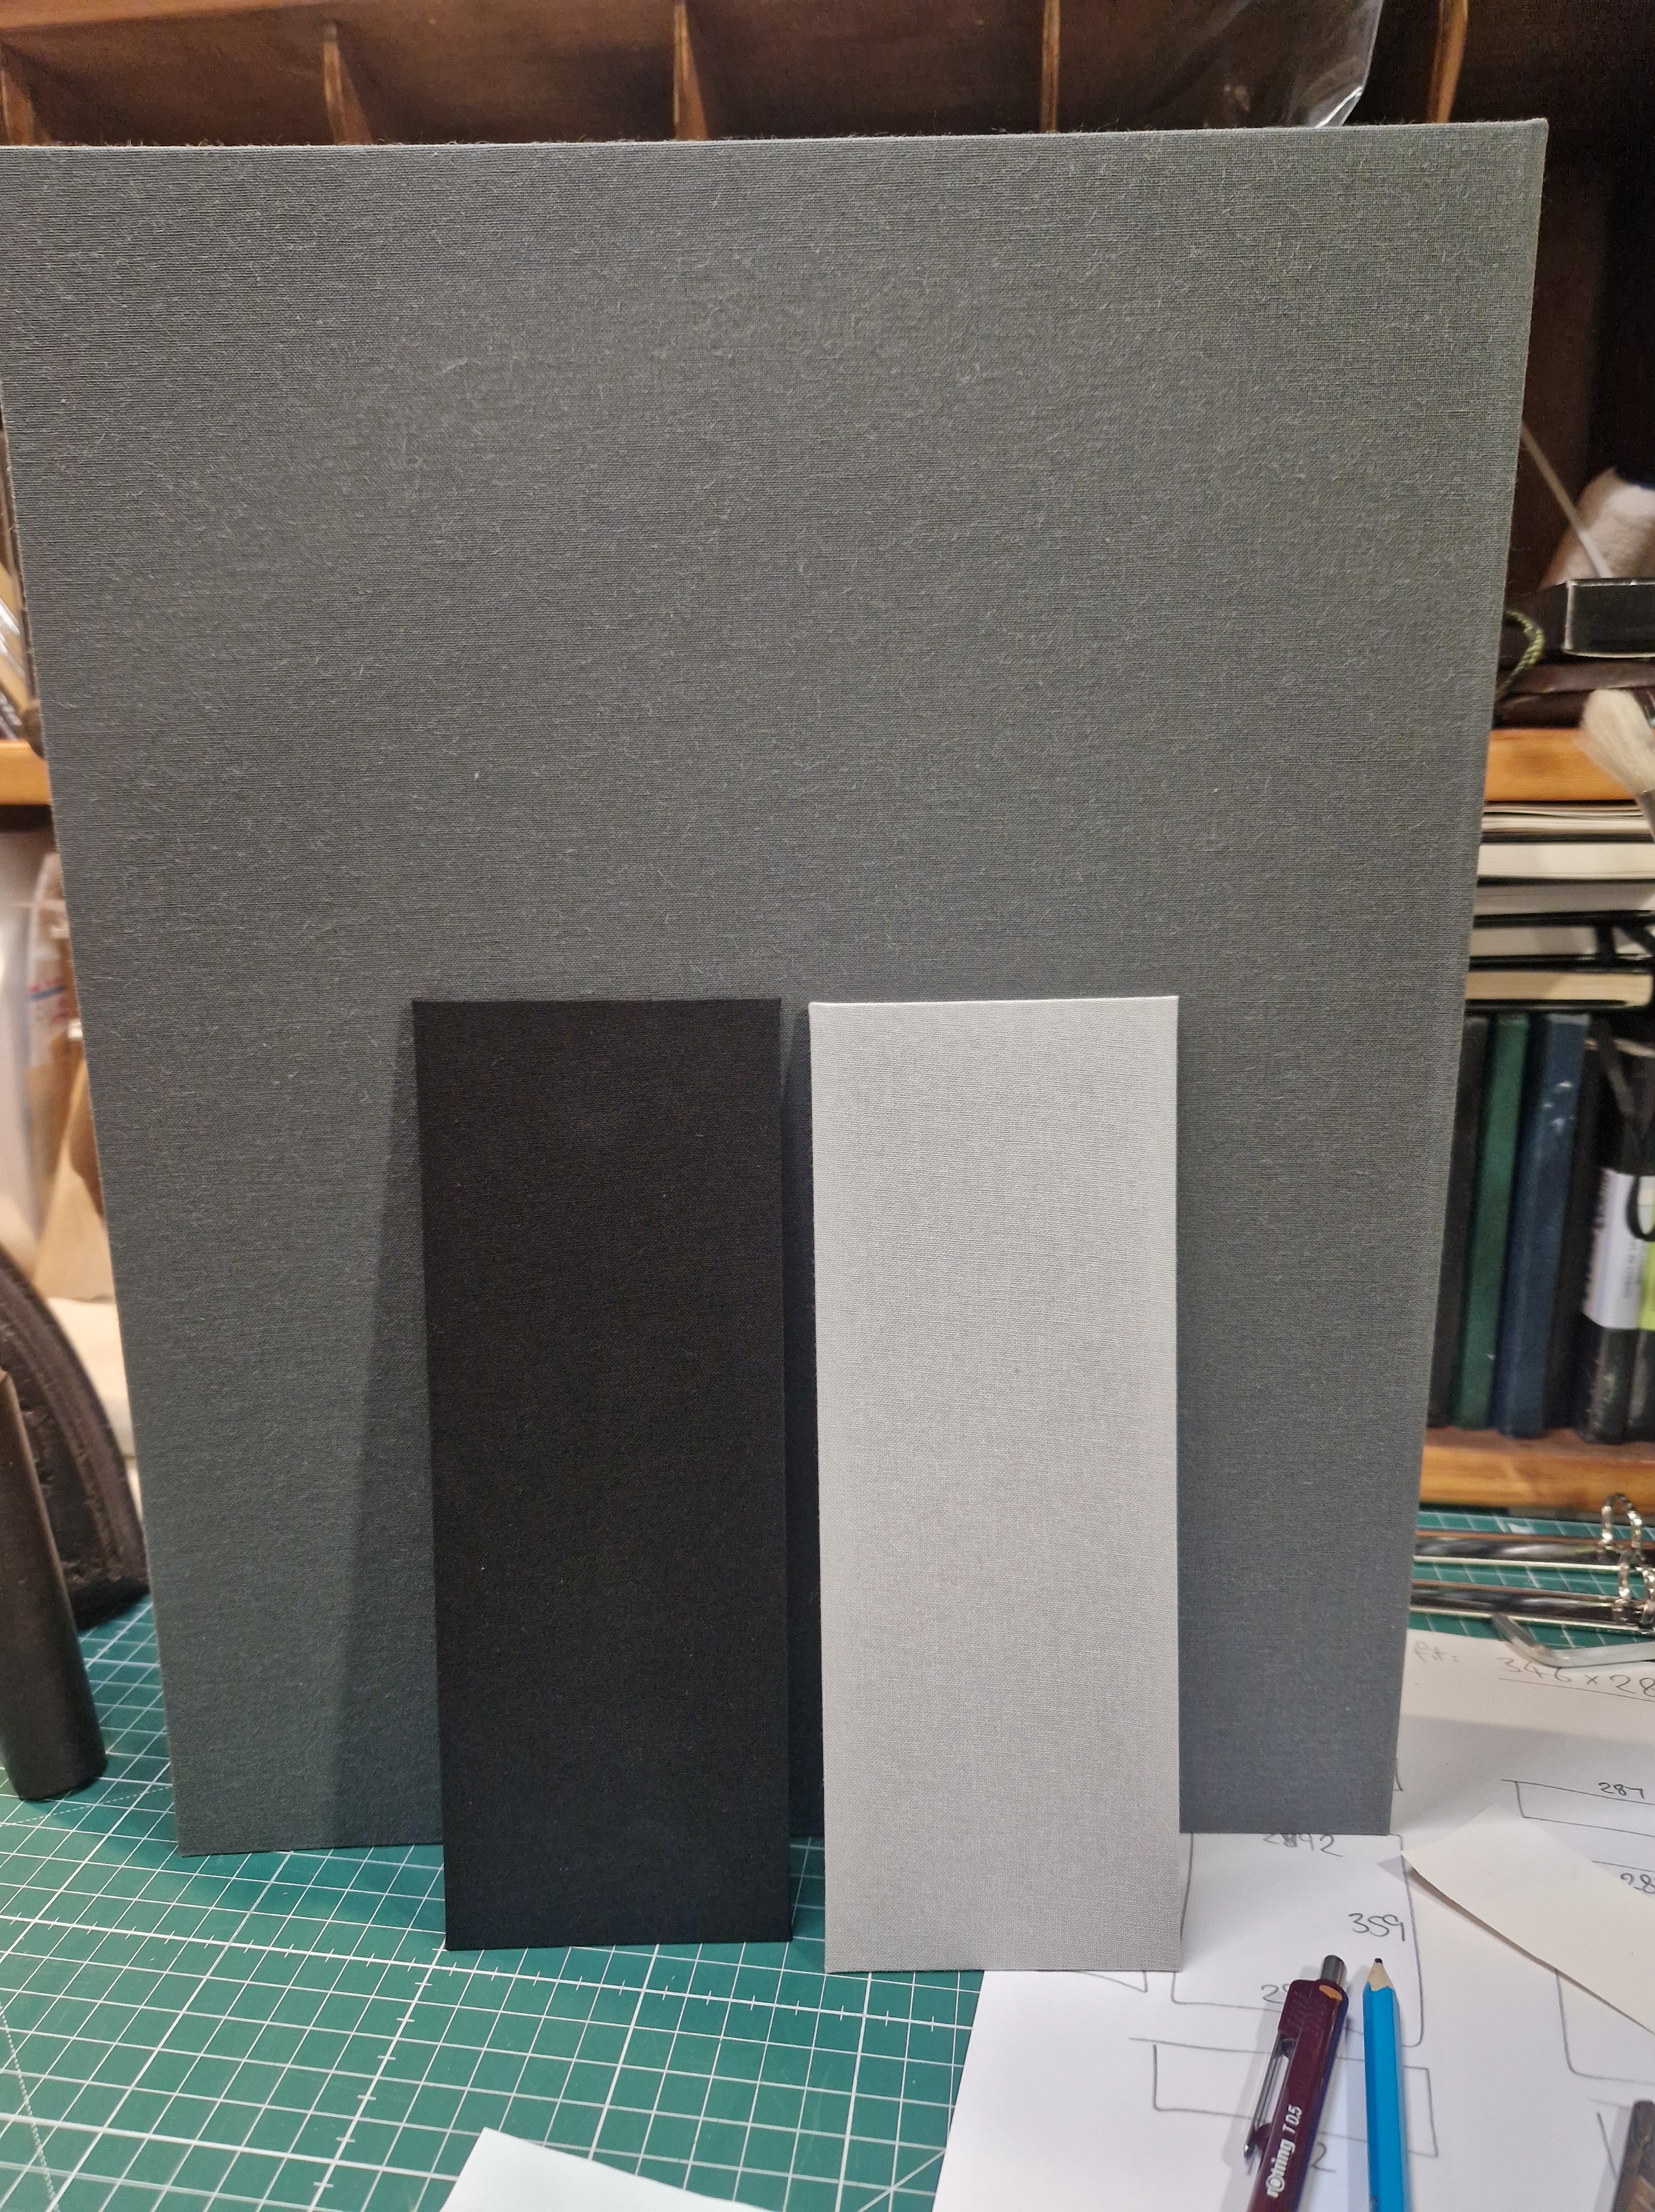
WORKING ON PERSPEX SCULPTURE
Printed A4 and A3 images of future later cut sculptures and measured how much perspex I needed of each colour, decided which size, then ordered white, black and different shades of grey perspex sheets in 5mm thickness.
WEEK 10: 25-31 MARCH
THIS WEEK’S FOCUS:
- Printing images for portfolio
- Framing work I sold (two photographs and a painting)
- Working on APR2 submission and presentation
WEEK 11: 1-7 APRIL
WEDNESDAY
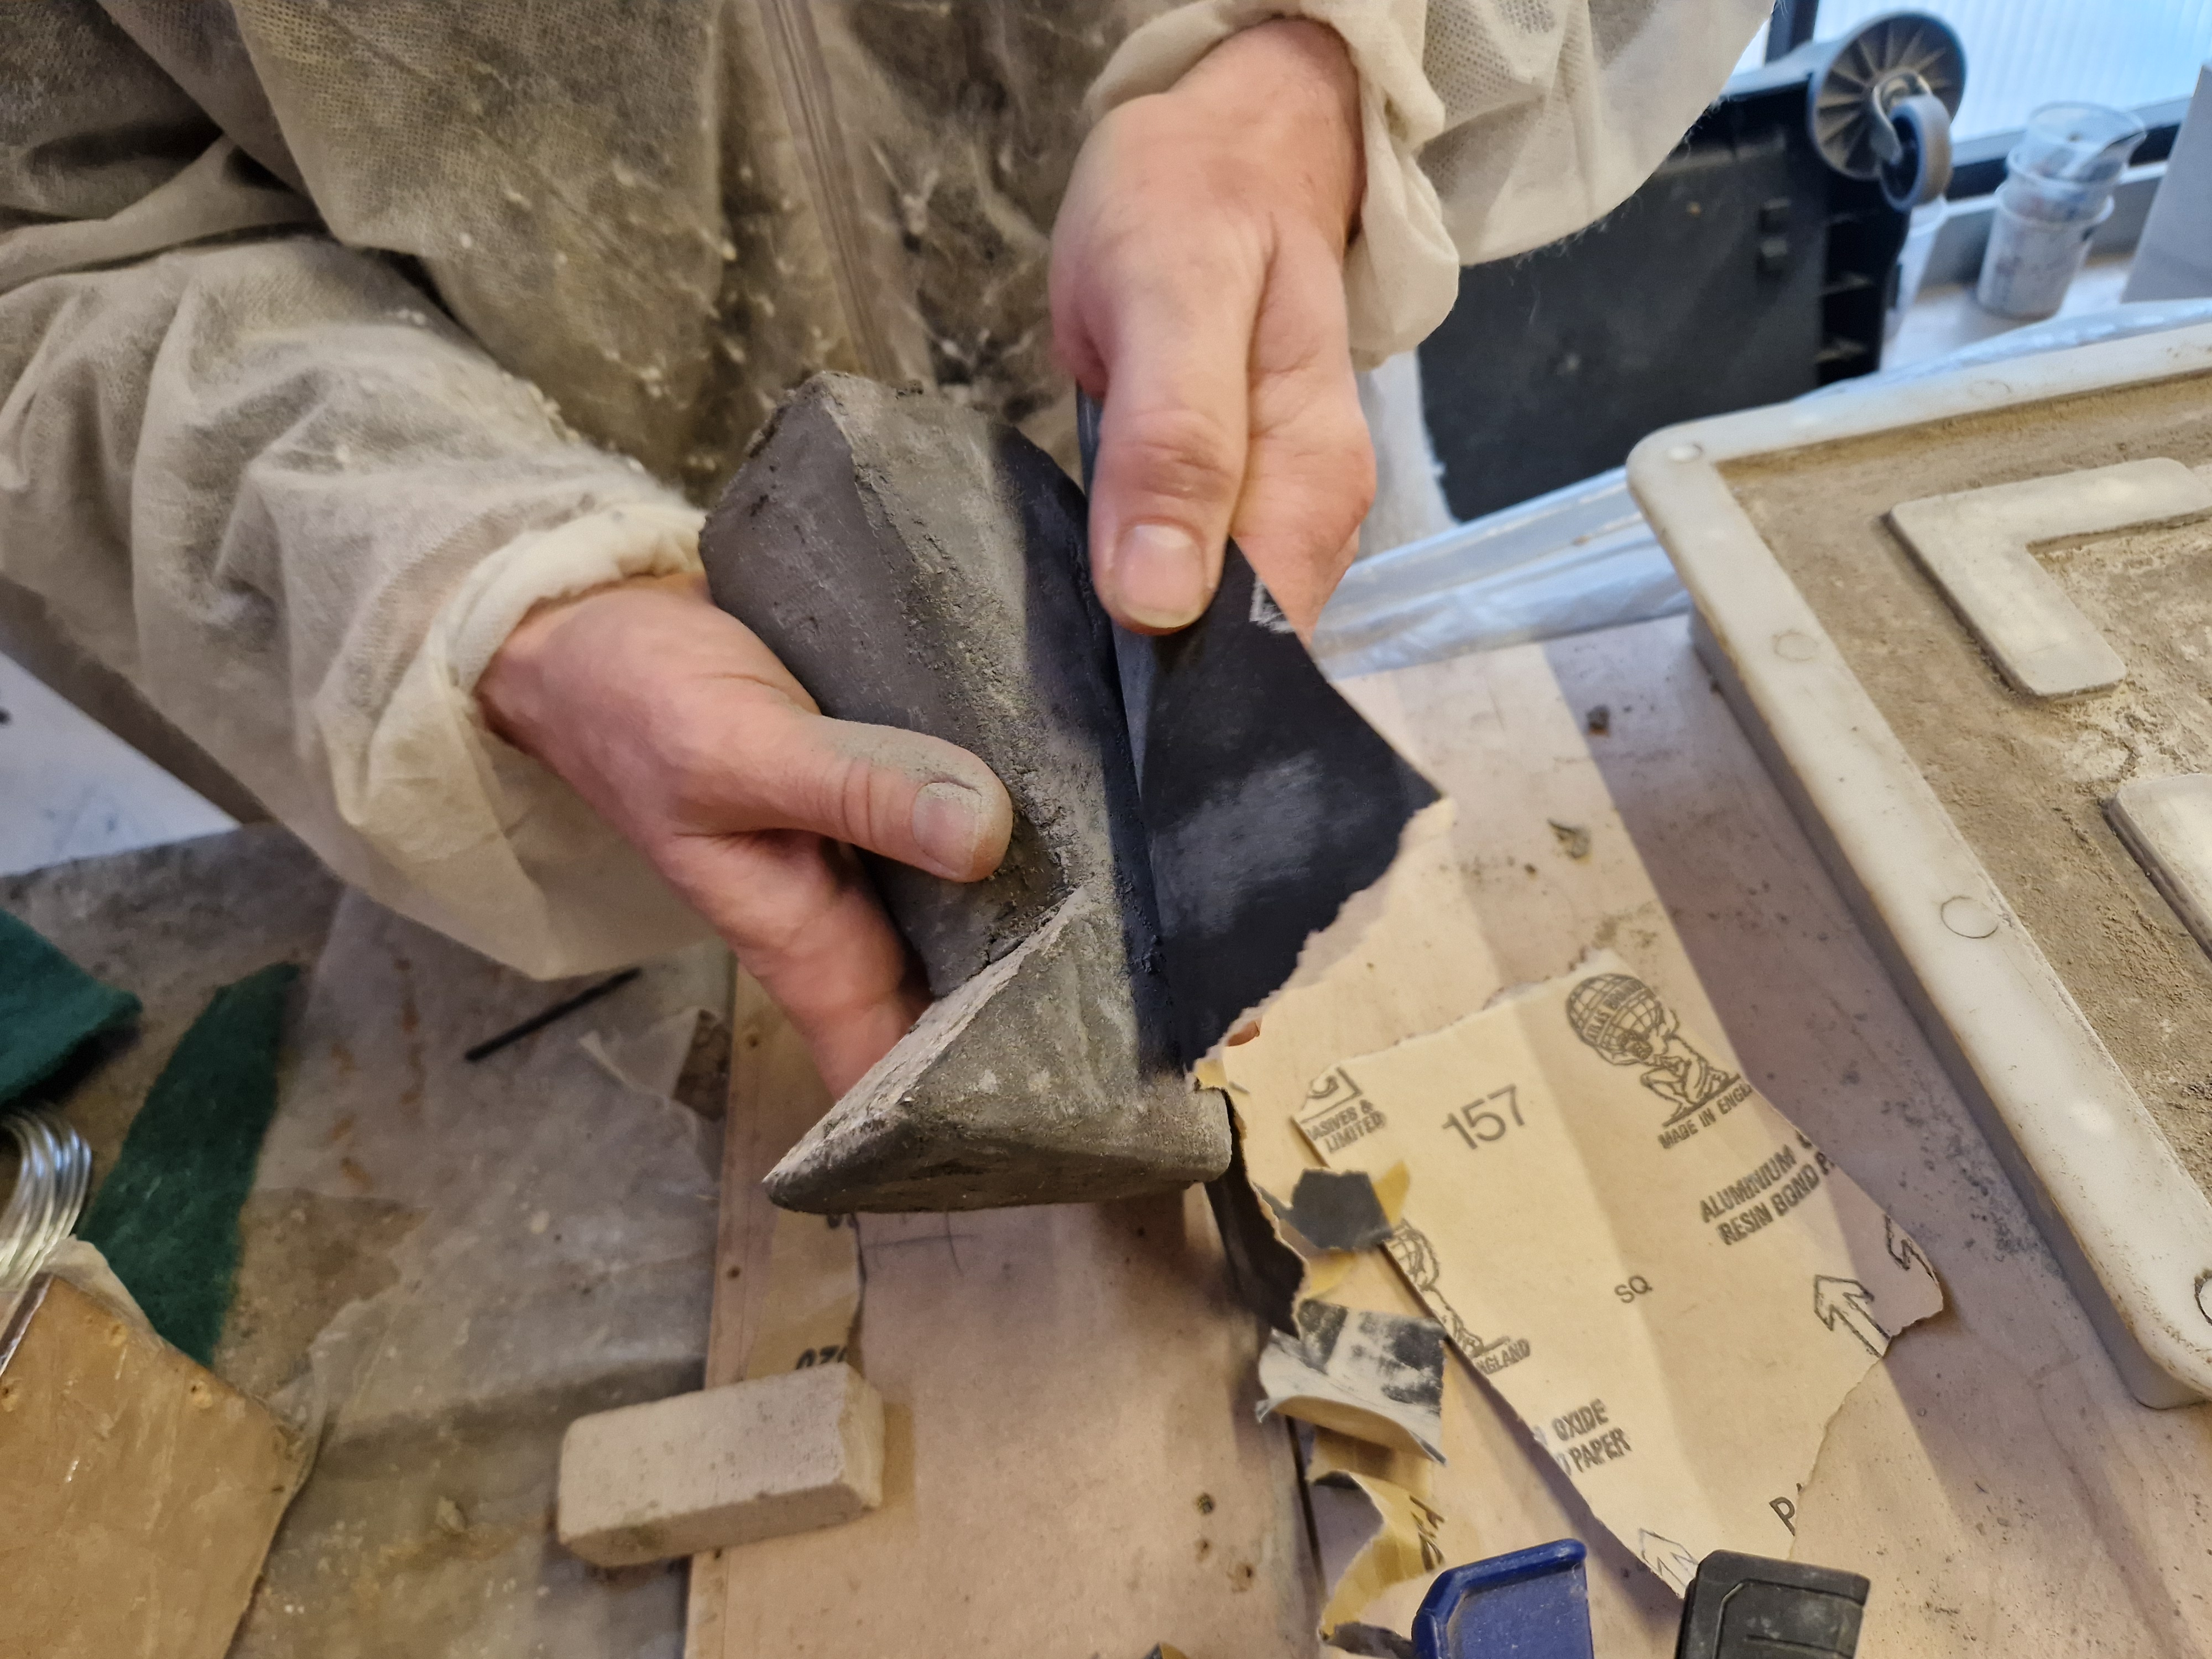
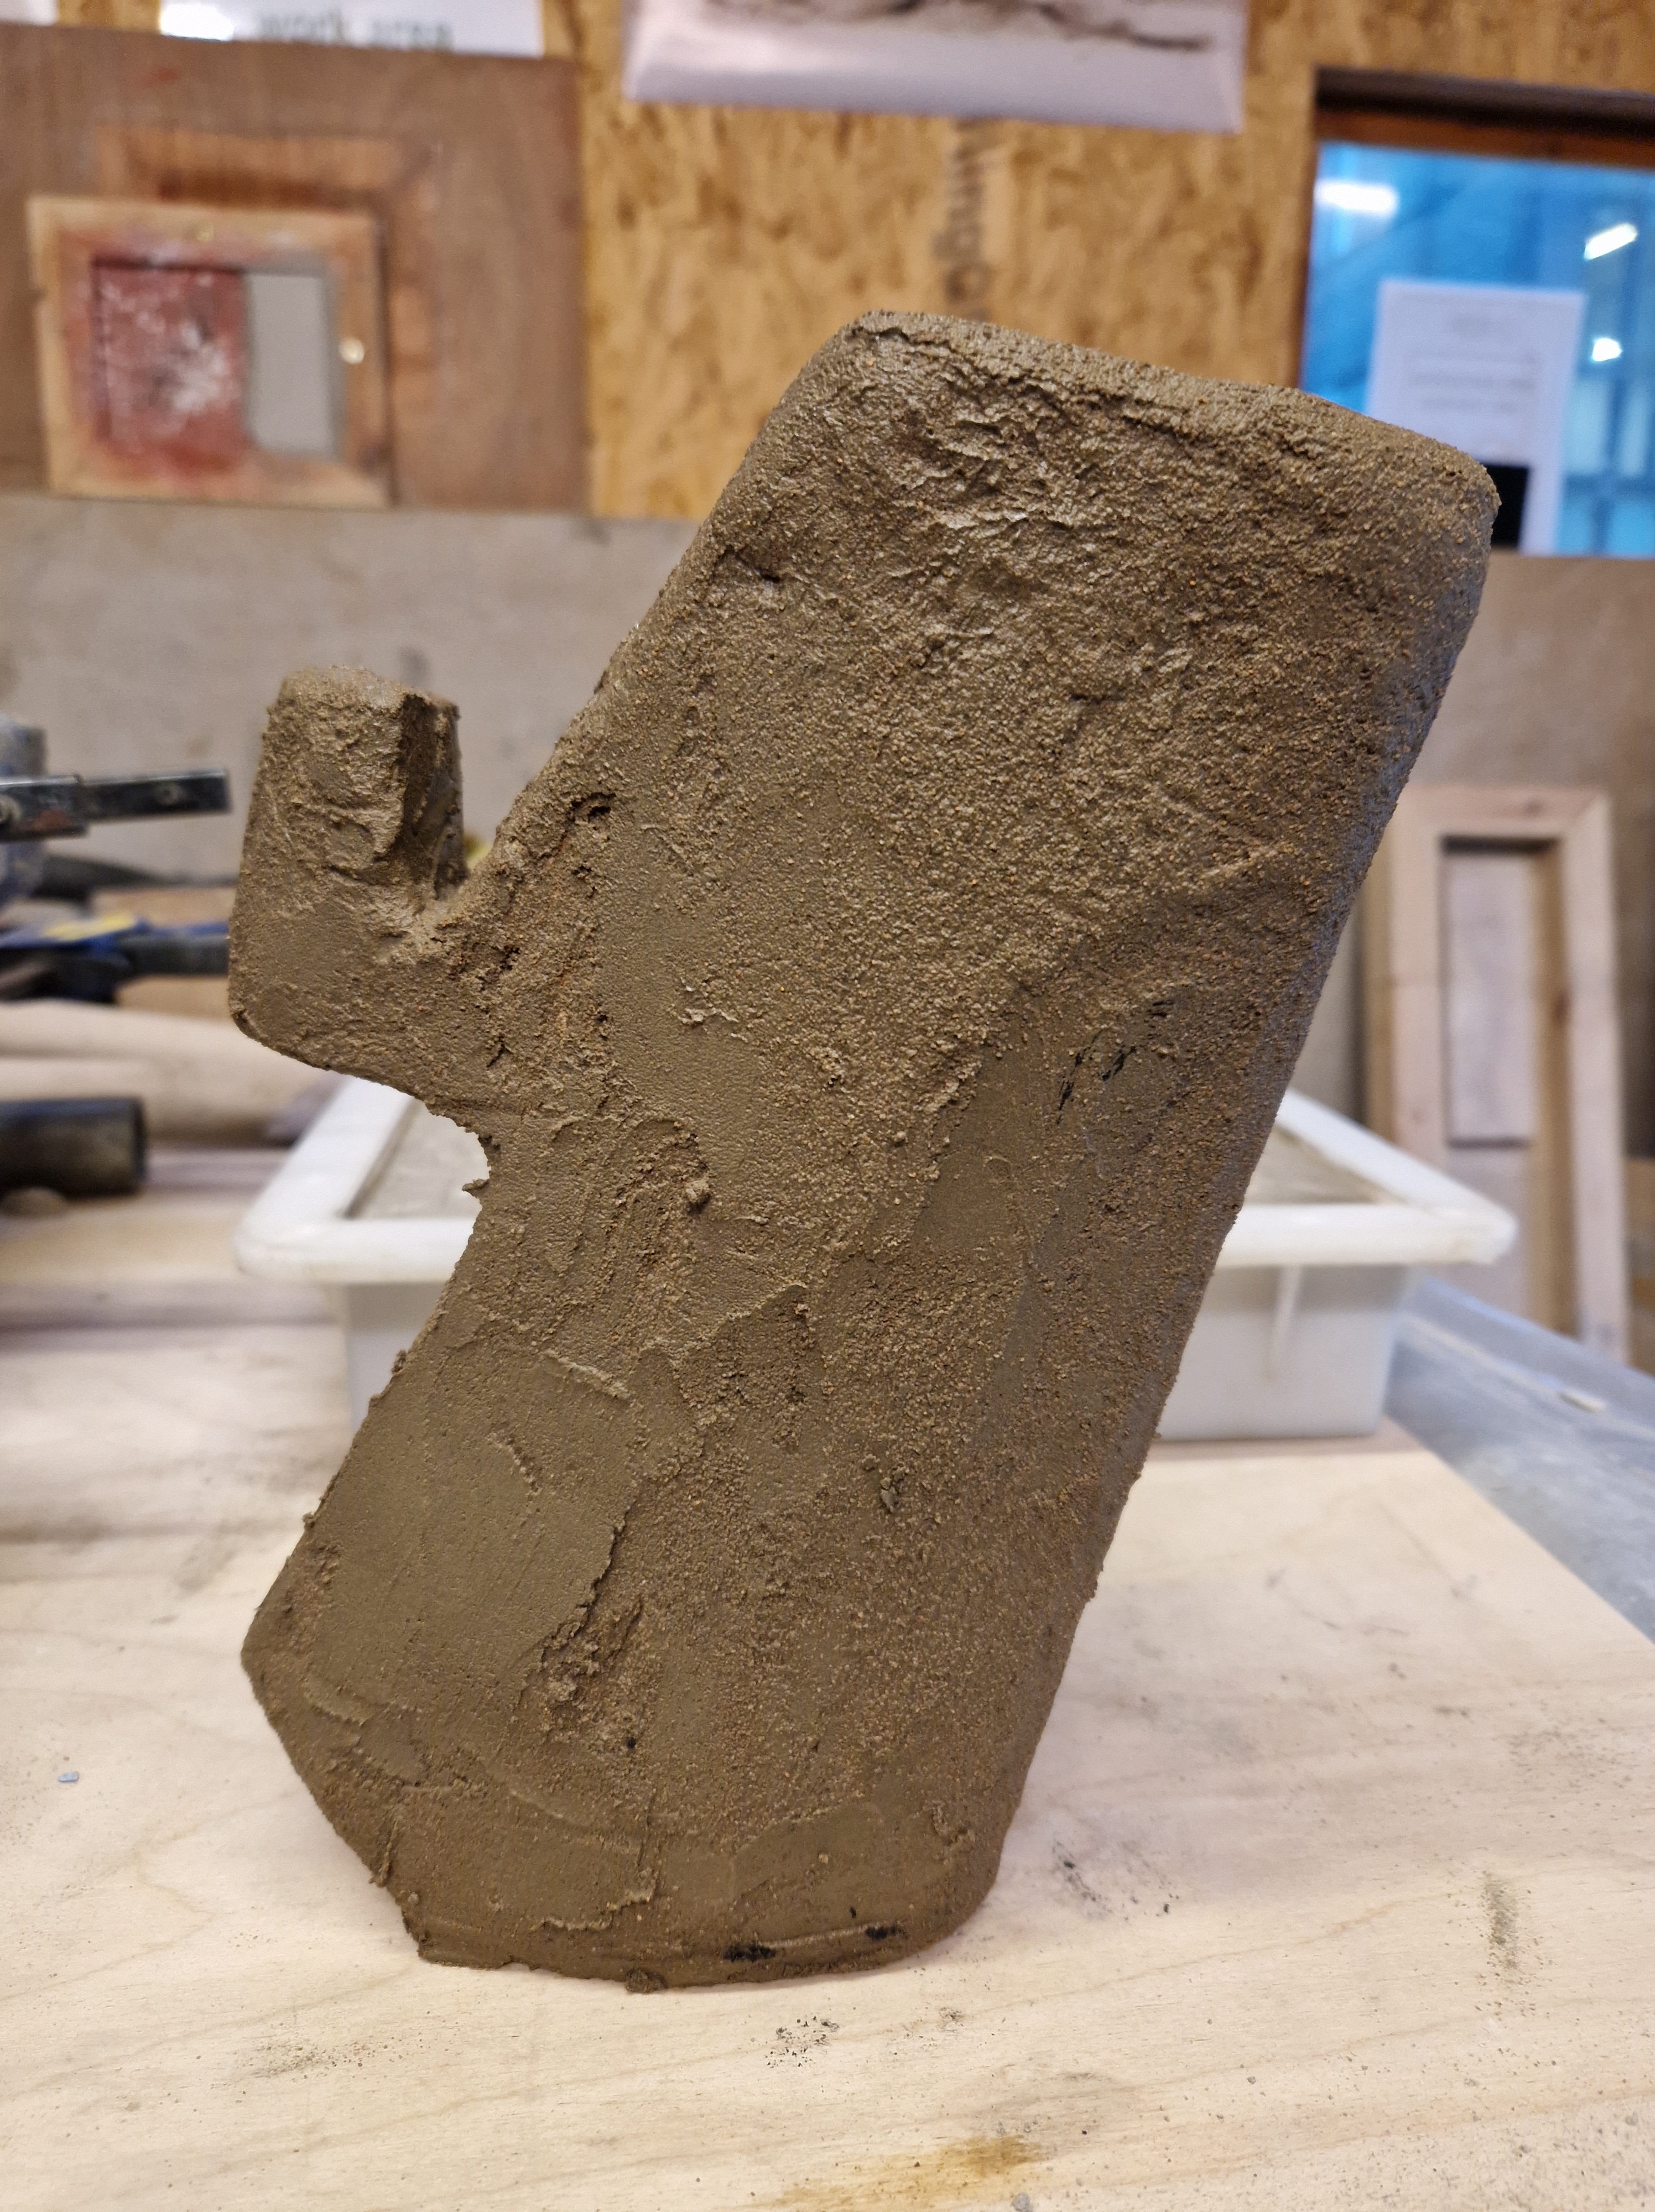
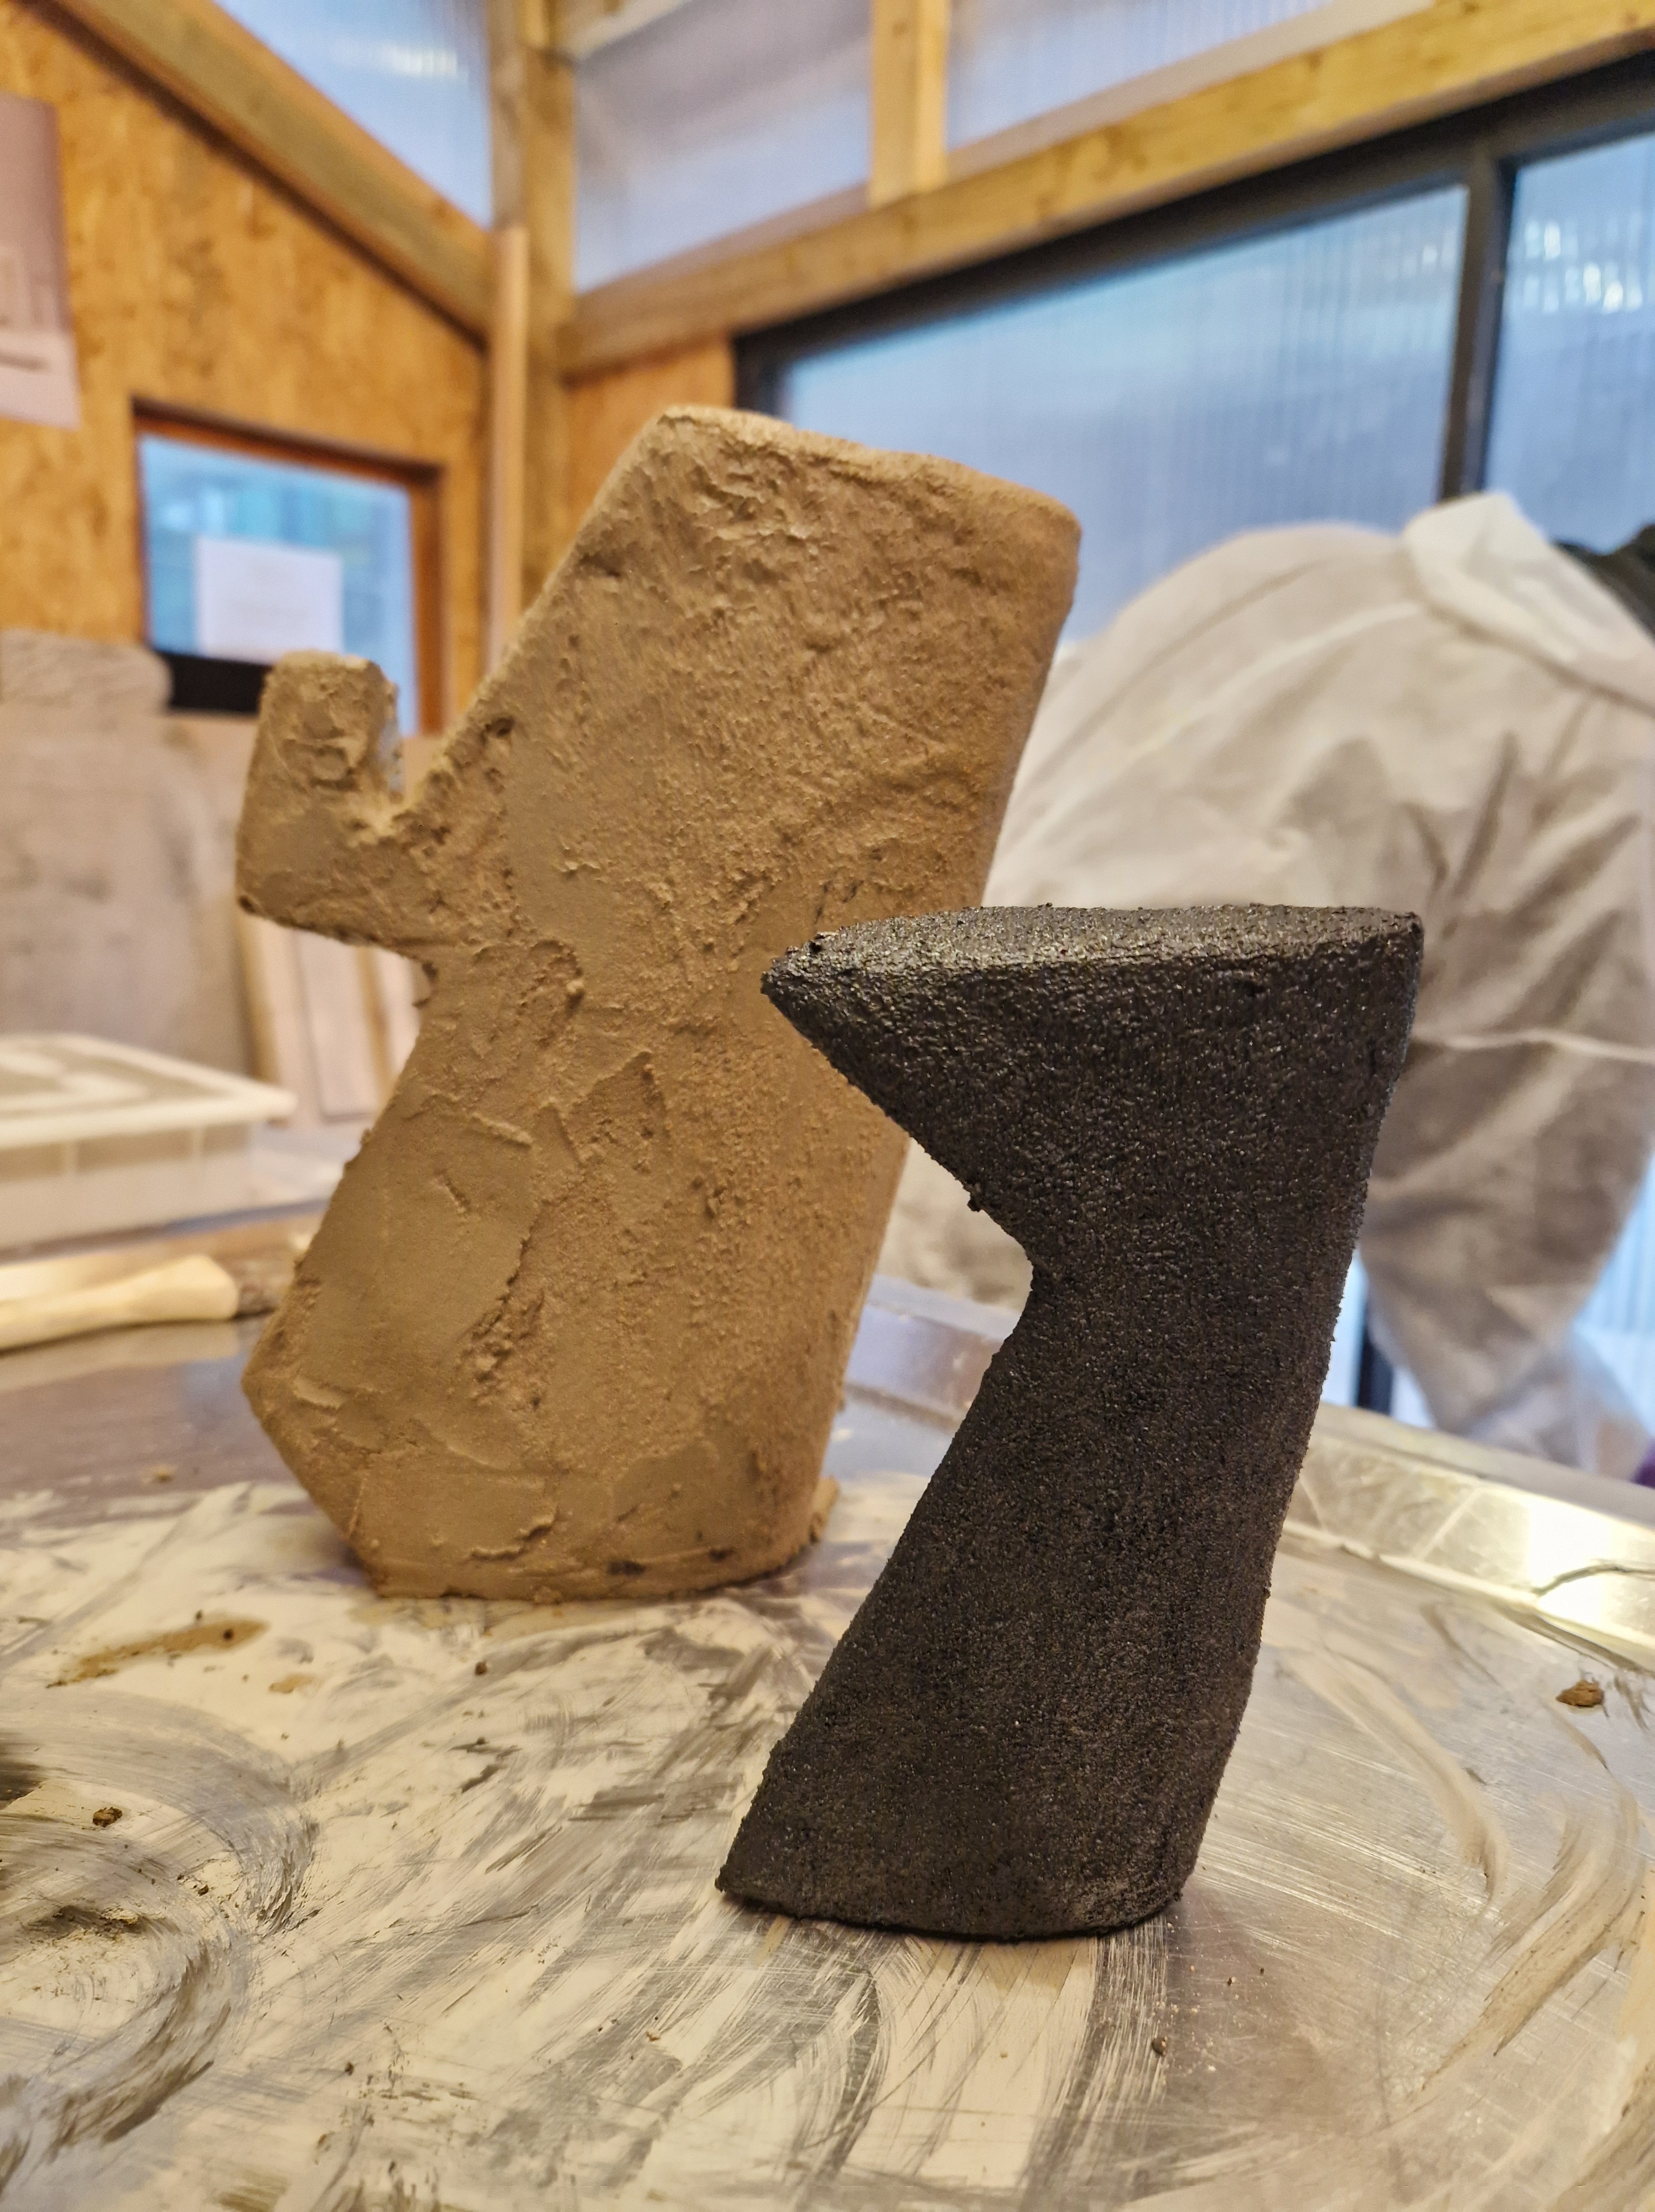
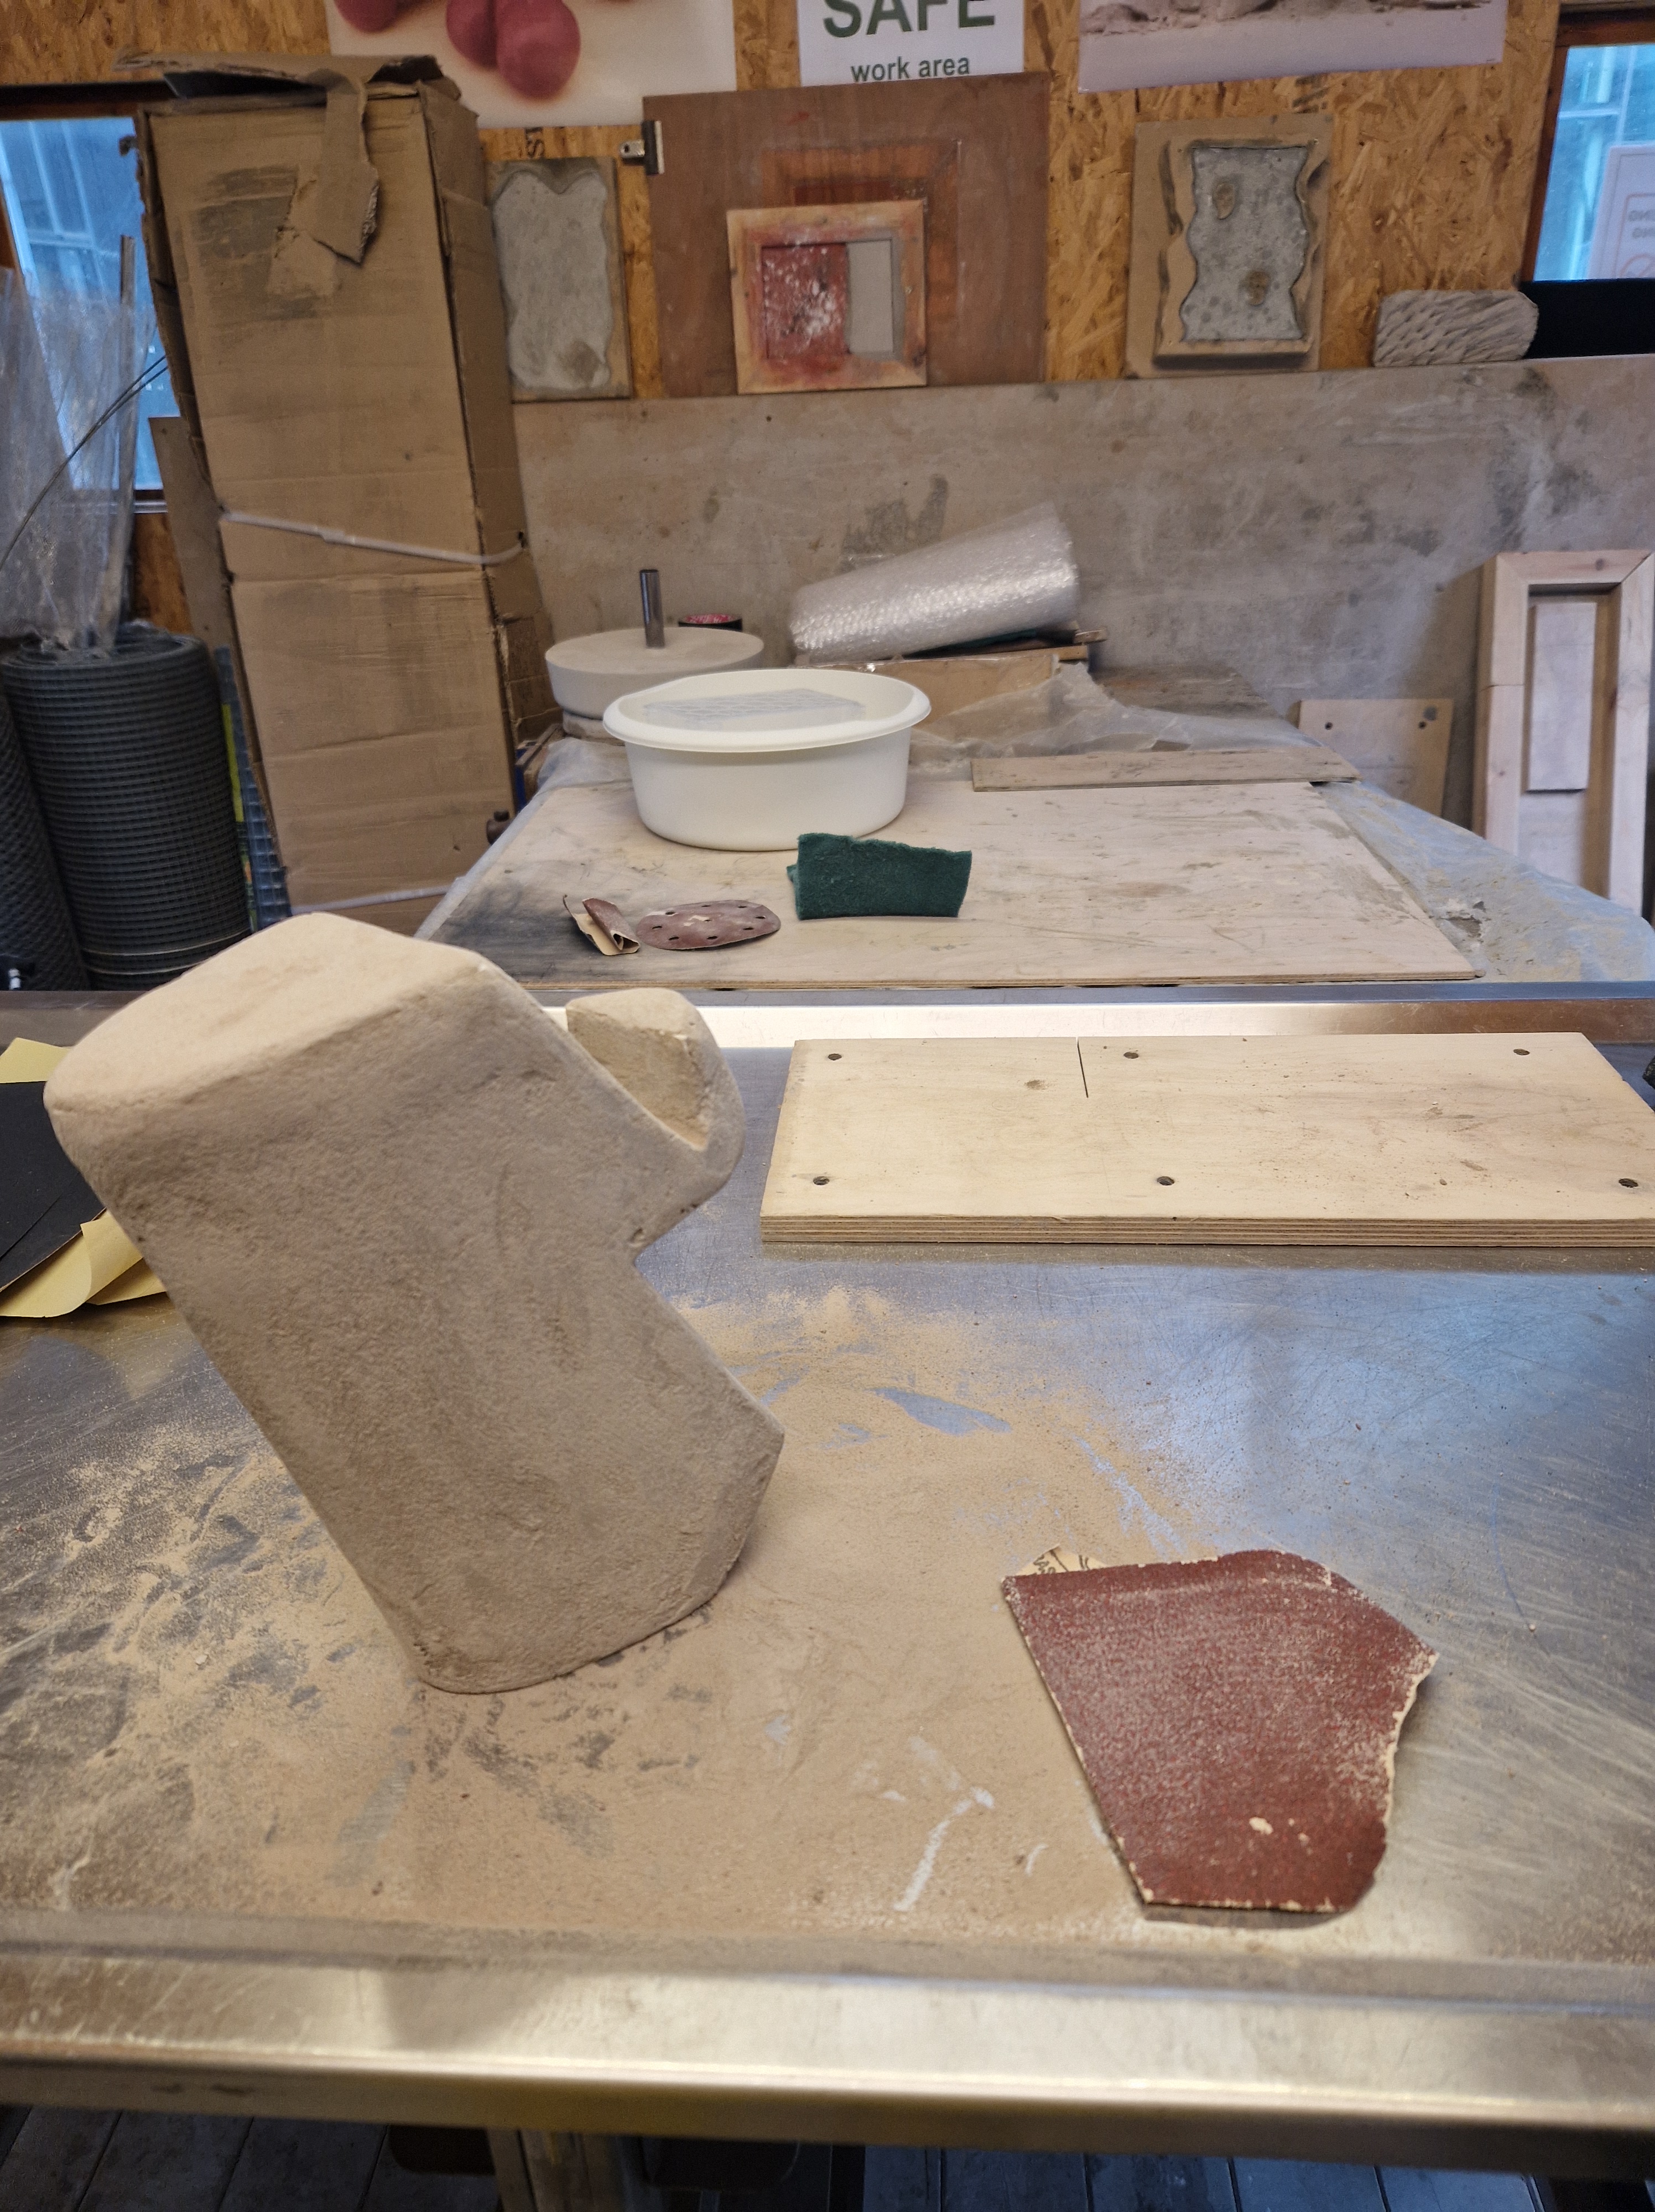
SAND 3D PRINTED SCULPTURE
I finally got to the stage when I could sand my sculpture and what a difference it made!
It shaped so nicely and I could finally see the fruit of my labour and really visualise how the sculpture will look like in the final stage. Now to resize it on MAYA!
PRINT IMAGES FOR PORTFOLIO – Second Session
A final session printing the last of my portfolio images.

THURSDAY
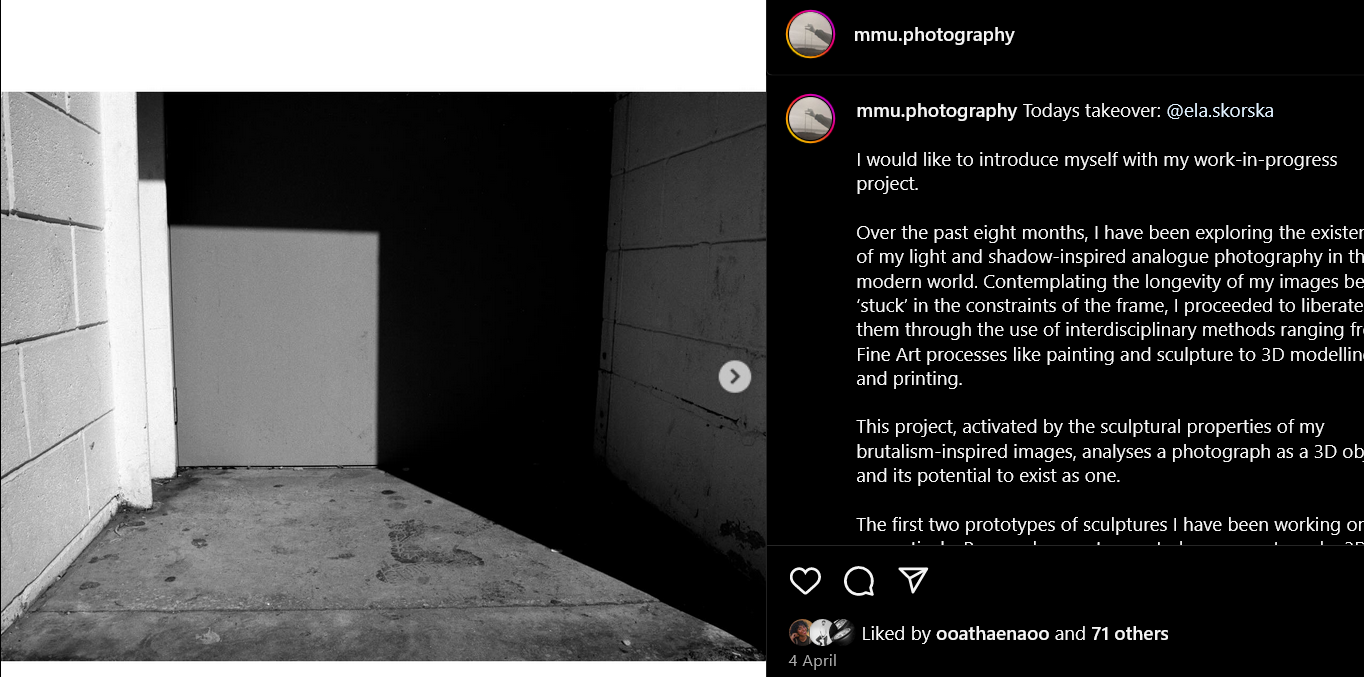
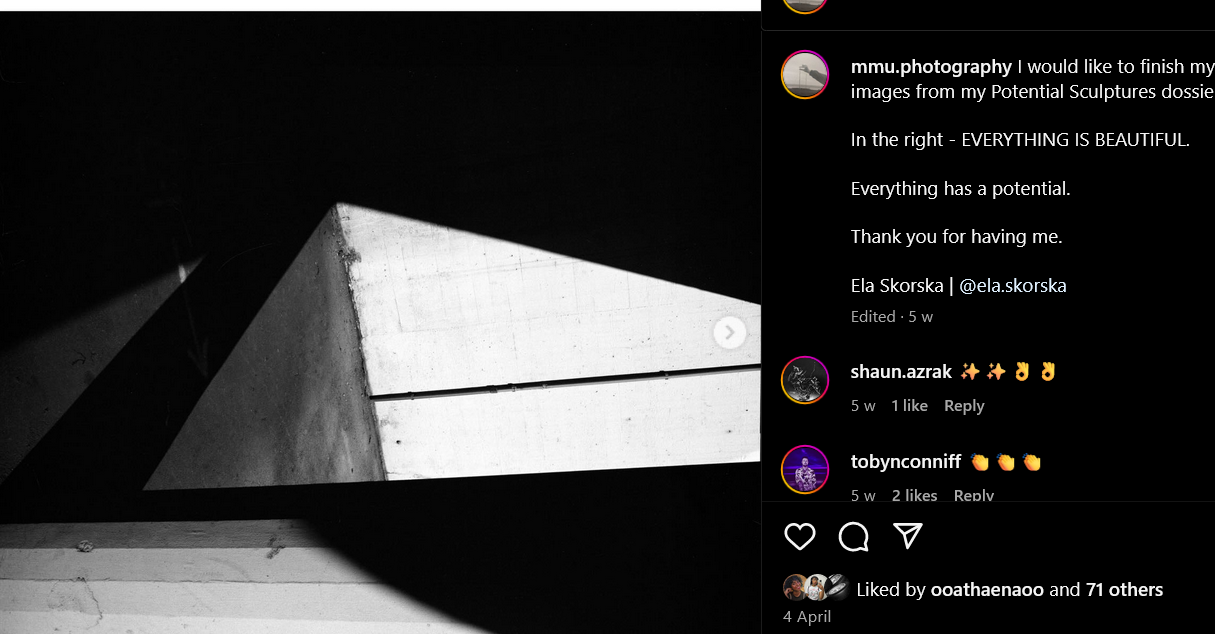
MMU PHOTOGRAPHY INSTAGRAM TAKEOVER
This week I took an opportunity offered by MMU Photography Instagram and participated in a student takeover. It was great to share my work with others, additionally, it gave me a chance to reflect on my work and practise talking about it.
WEEK 12: 8-14 APRIL
MONDAY
TRAVEL TO SHEFFIELD TO MEET WITH PORTFOLIO BOOKMAKER
After a few days of email exchange, we decided it would be best if I were to visit Martin in Sheffield to discuss all the details in person.
And indeed it was a great decision!
Together we looked at all kinds of clothes, finishes and fonts, and made some initial decisions.
We then continued to communicate via email to agree on final touches.
Nothing beats a face to face interaction, especially when it comes to decision-making.

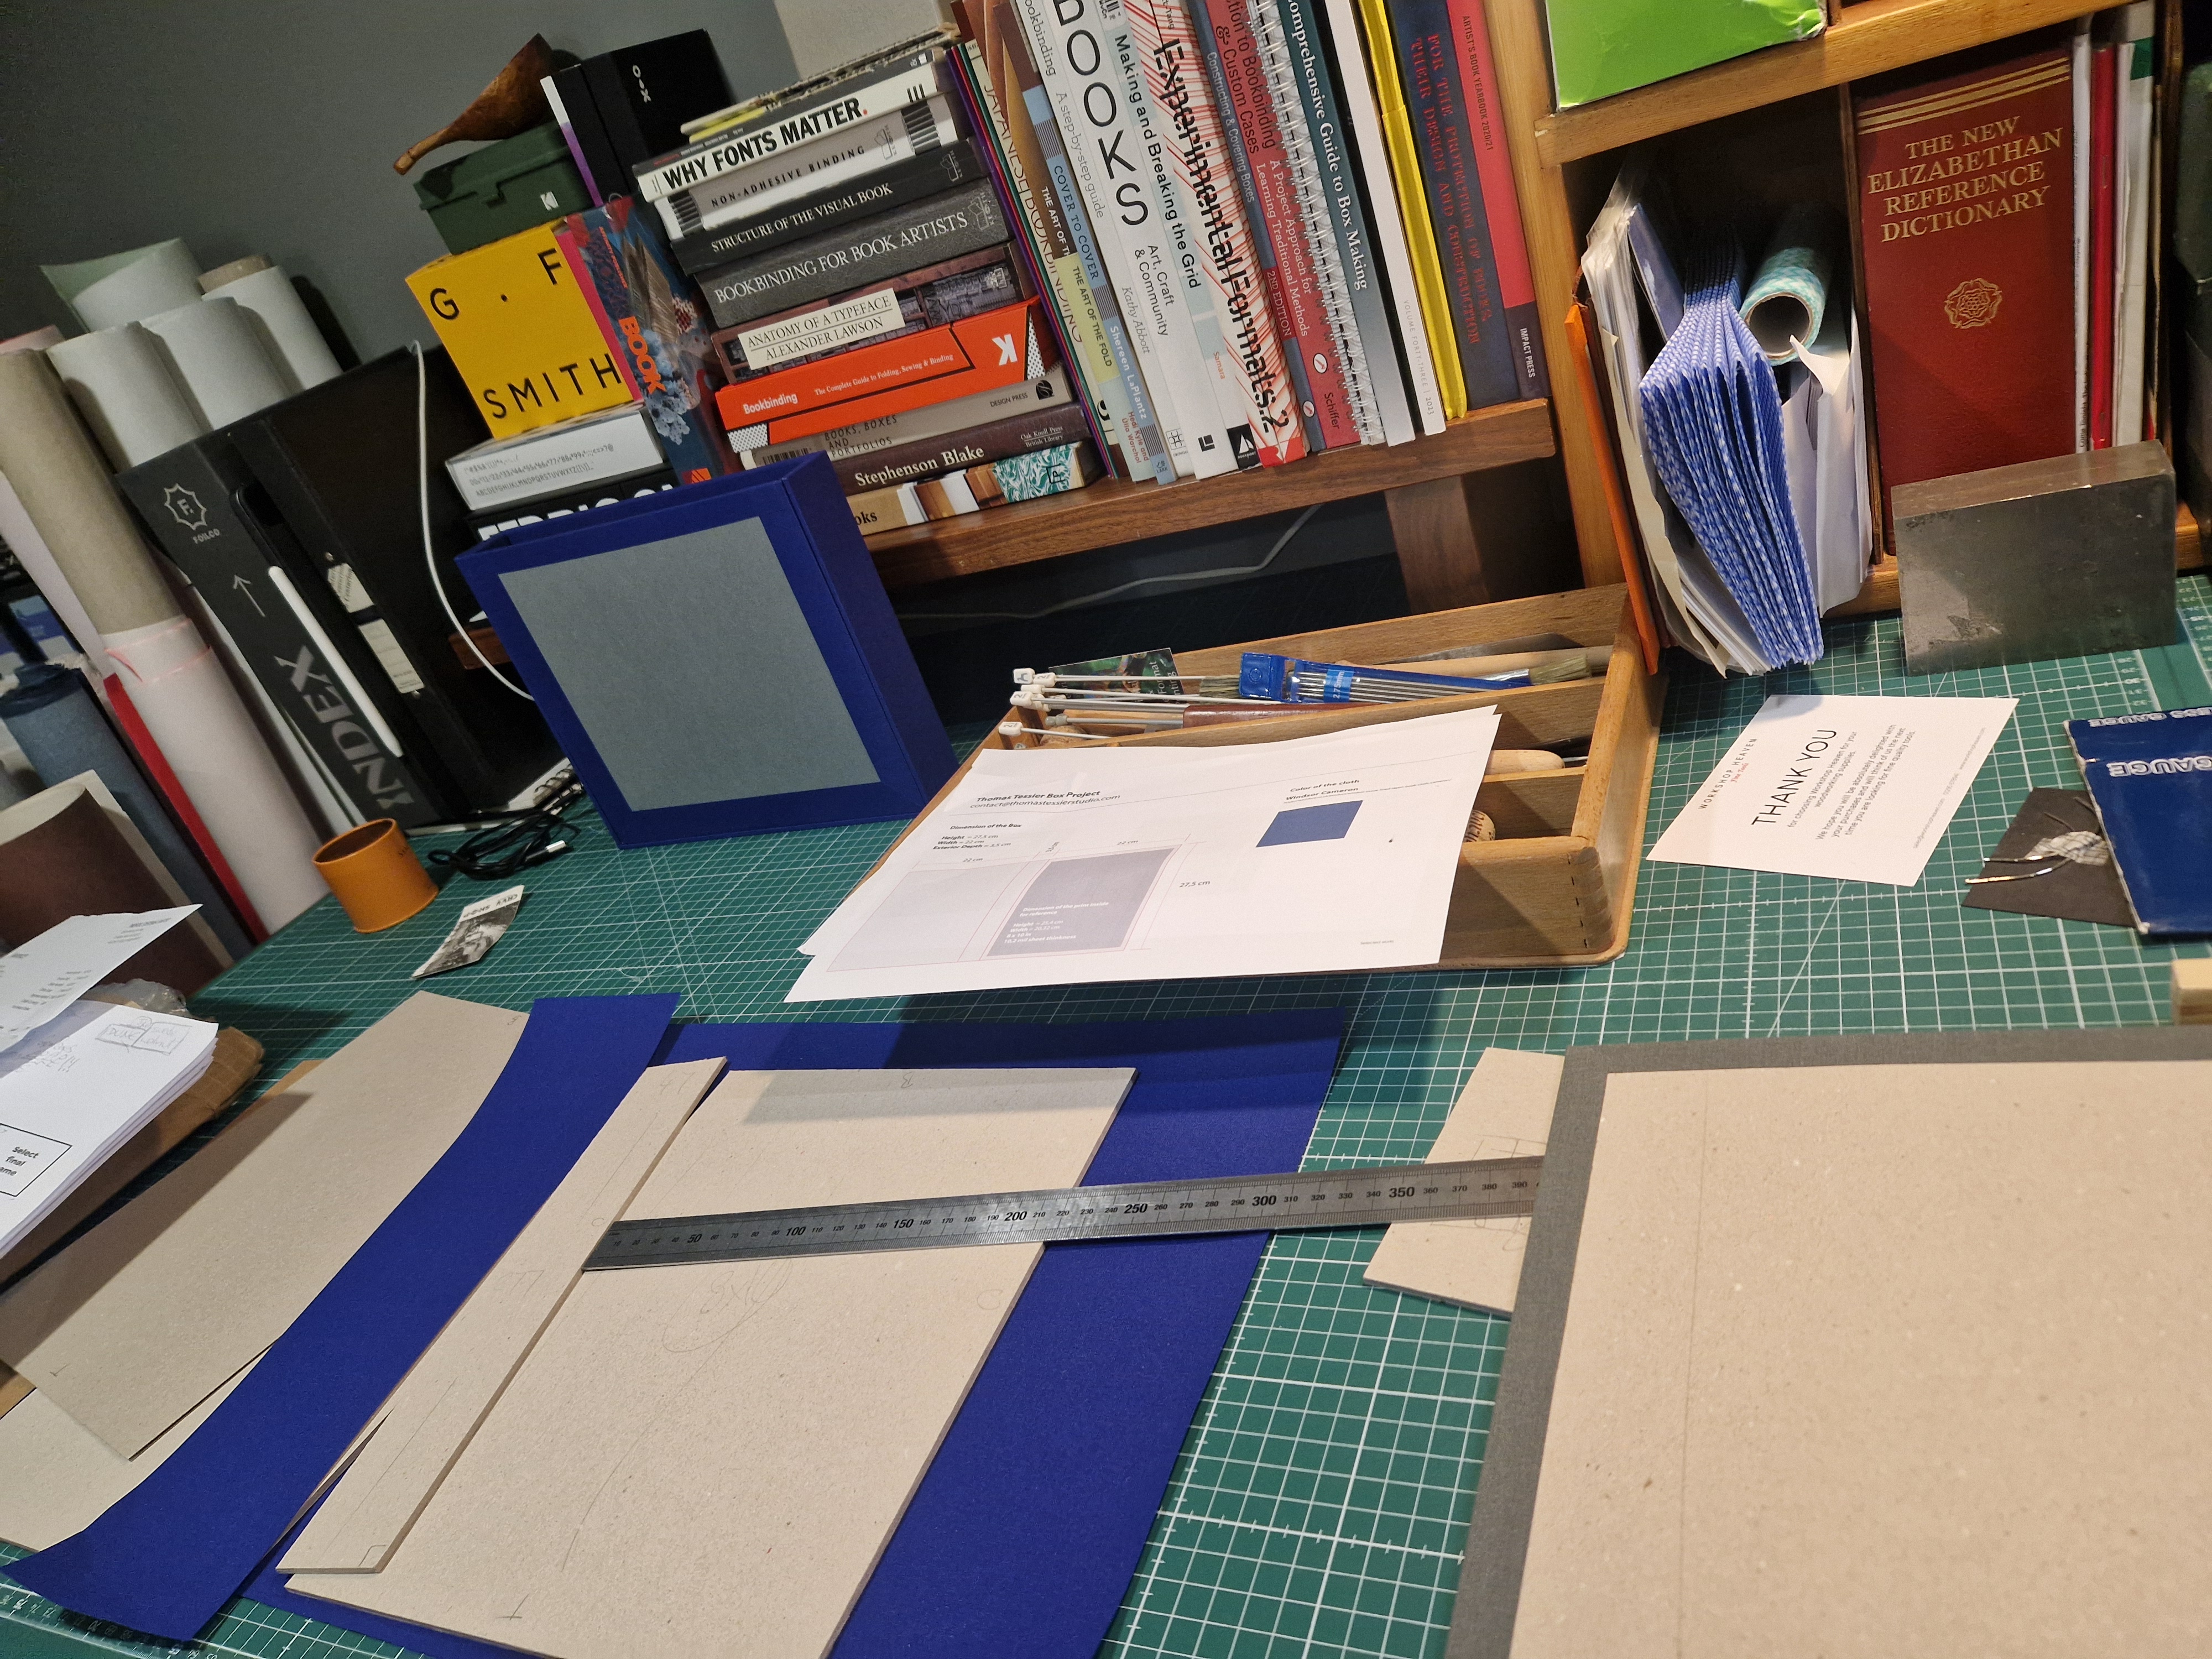
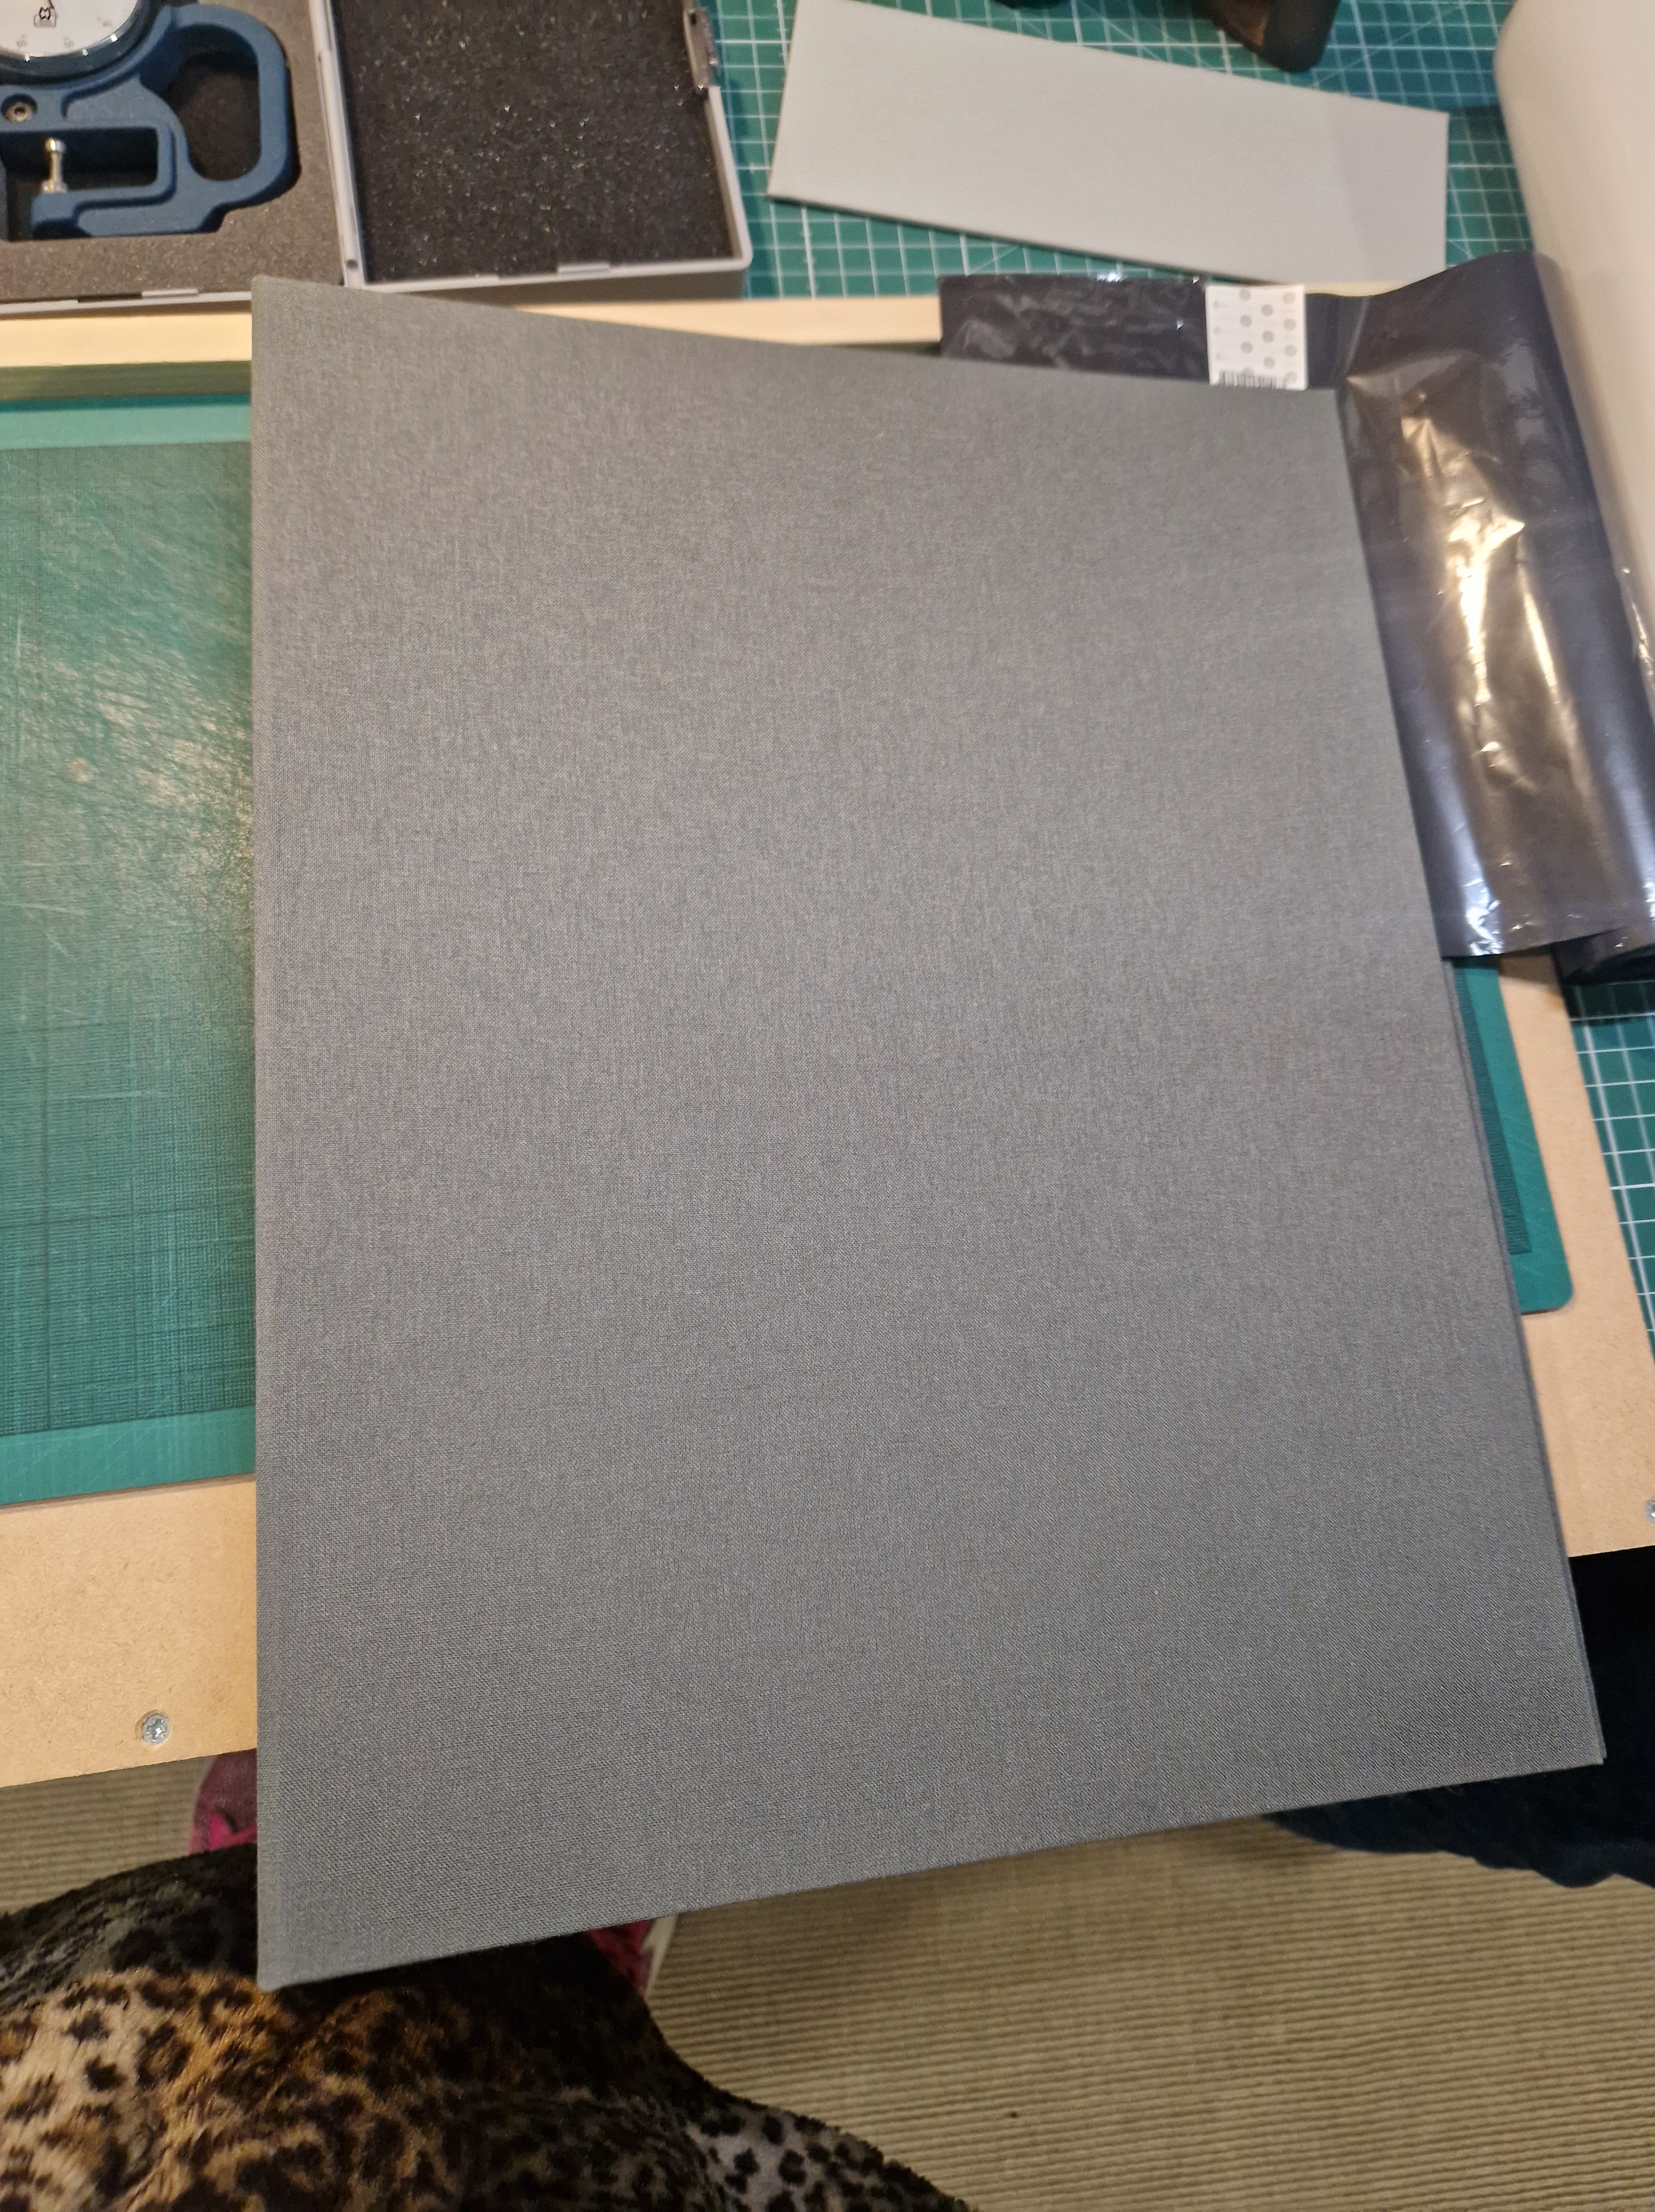
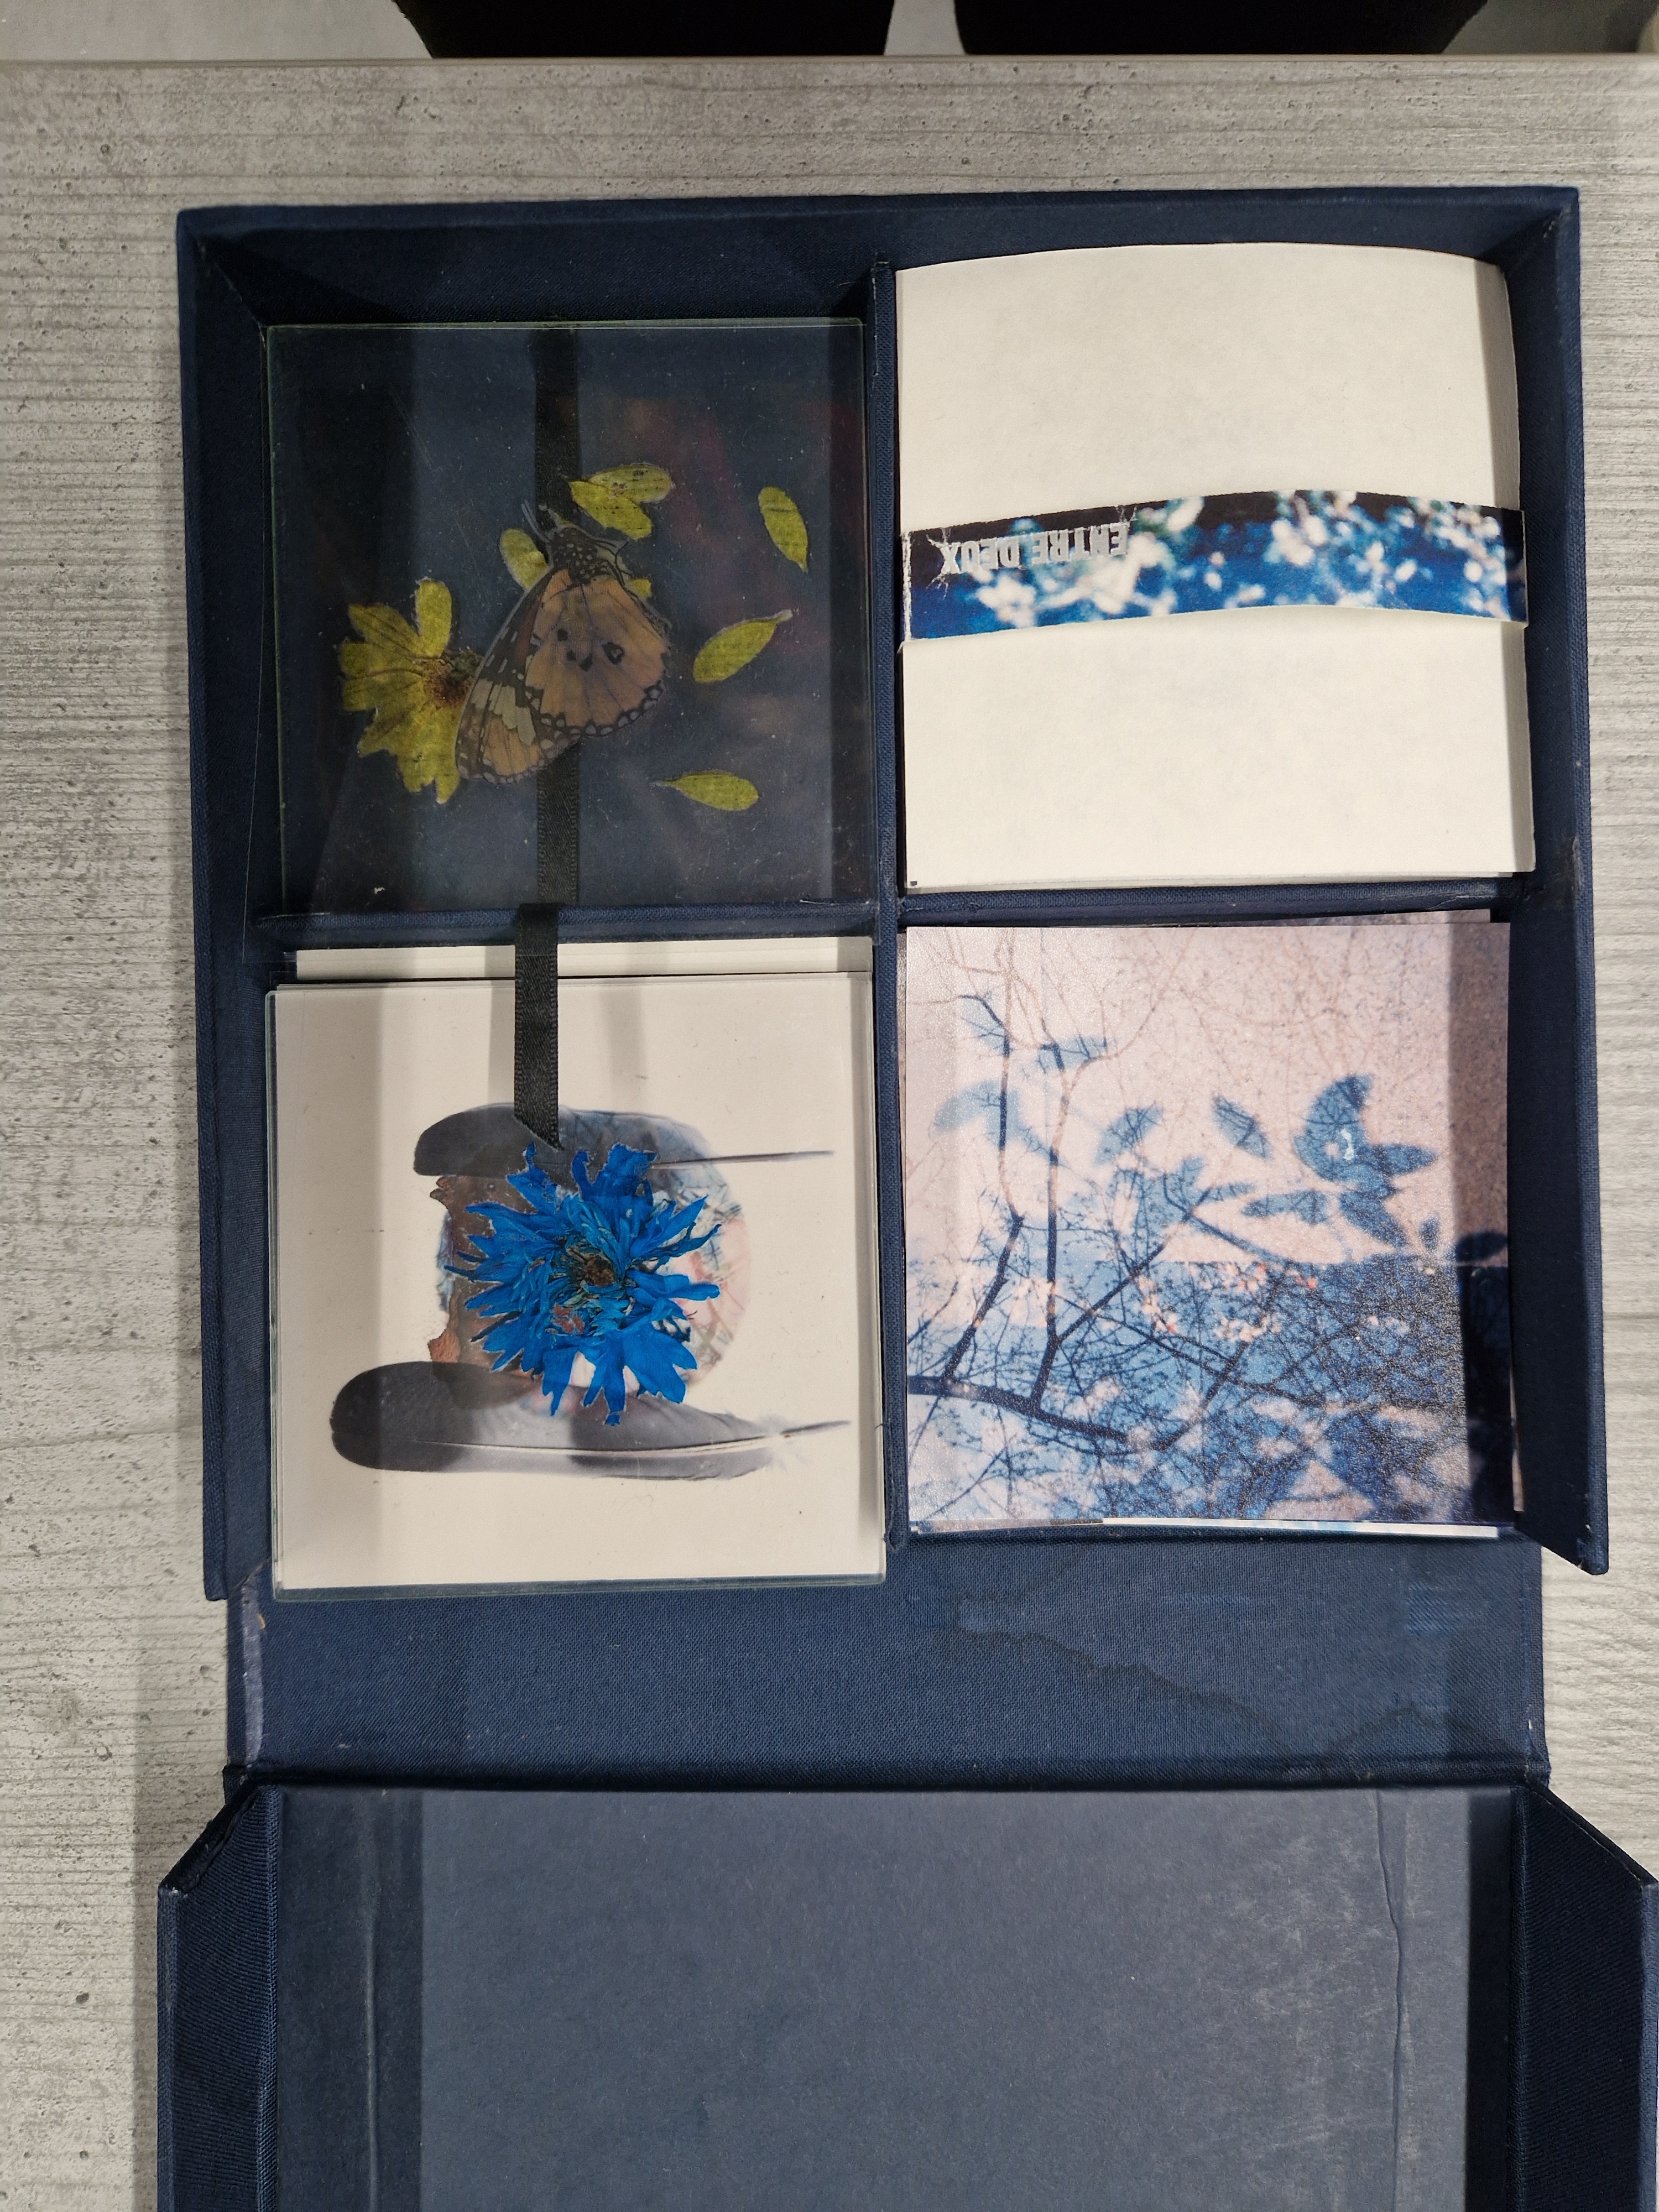
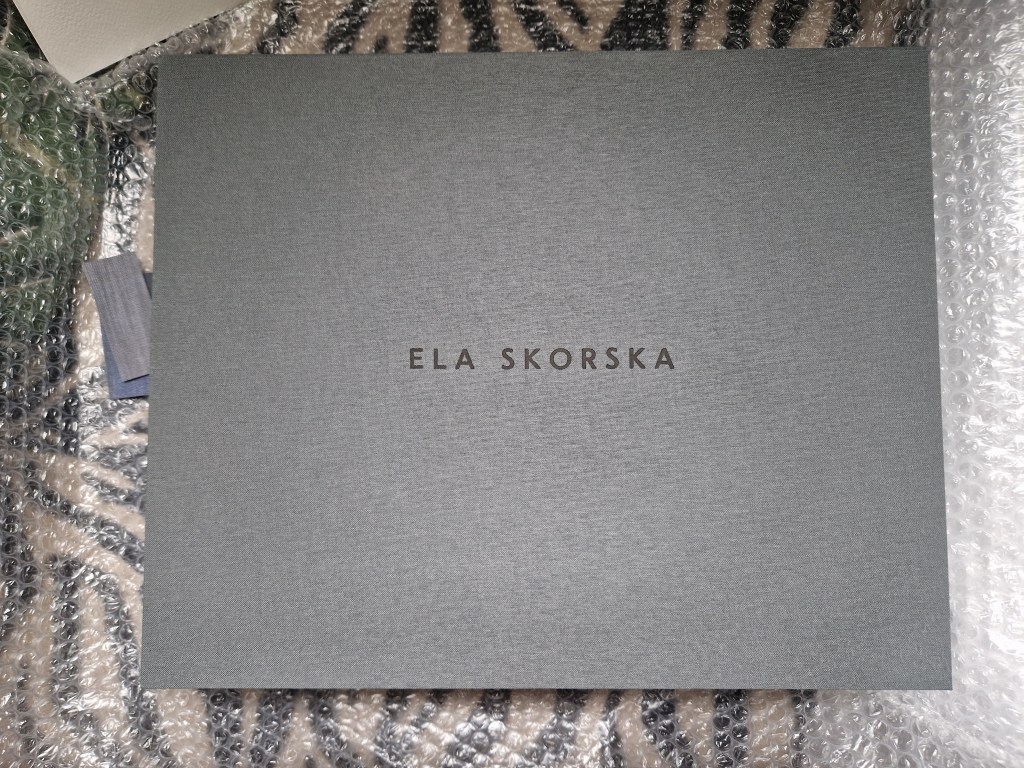
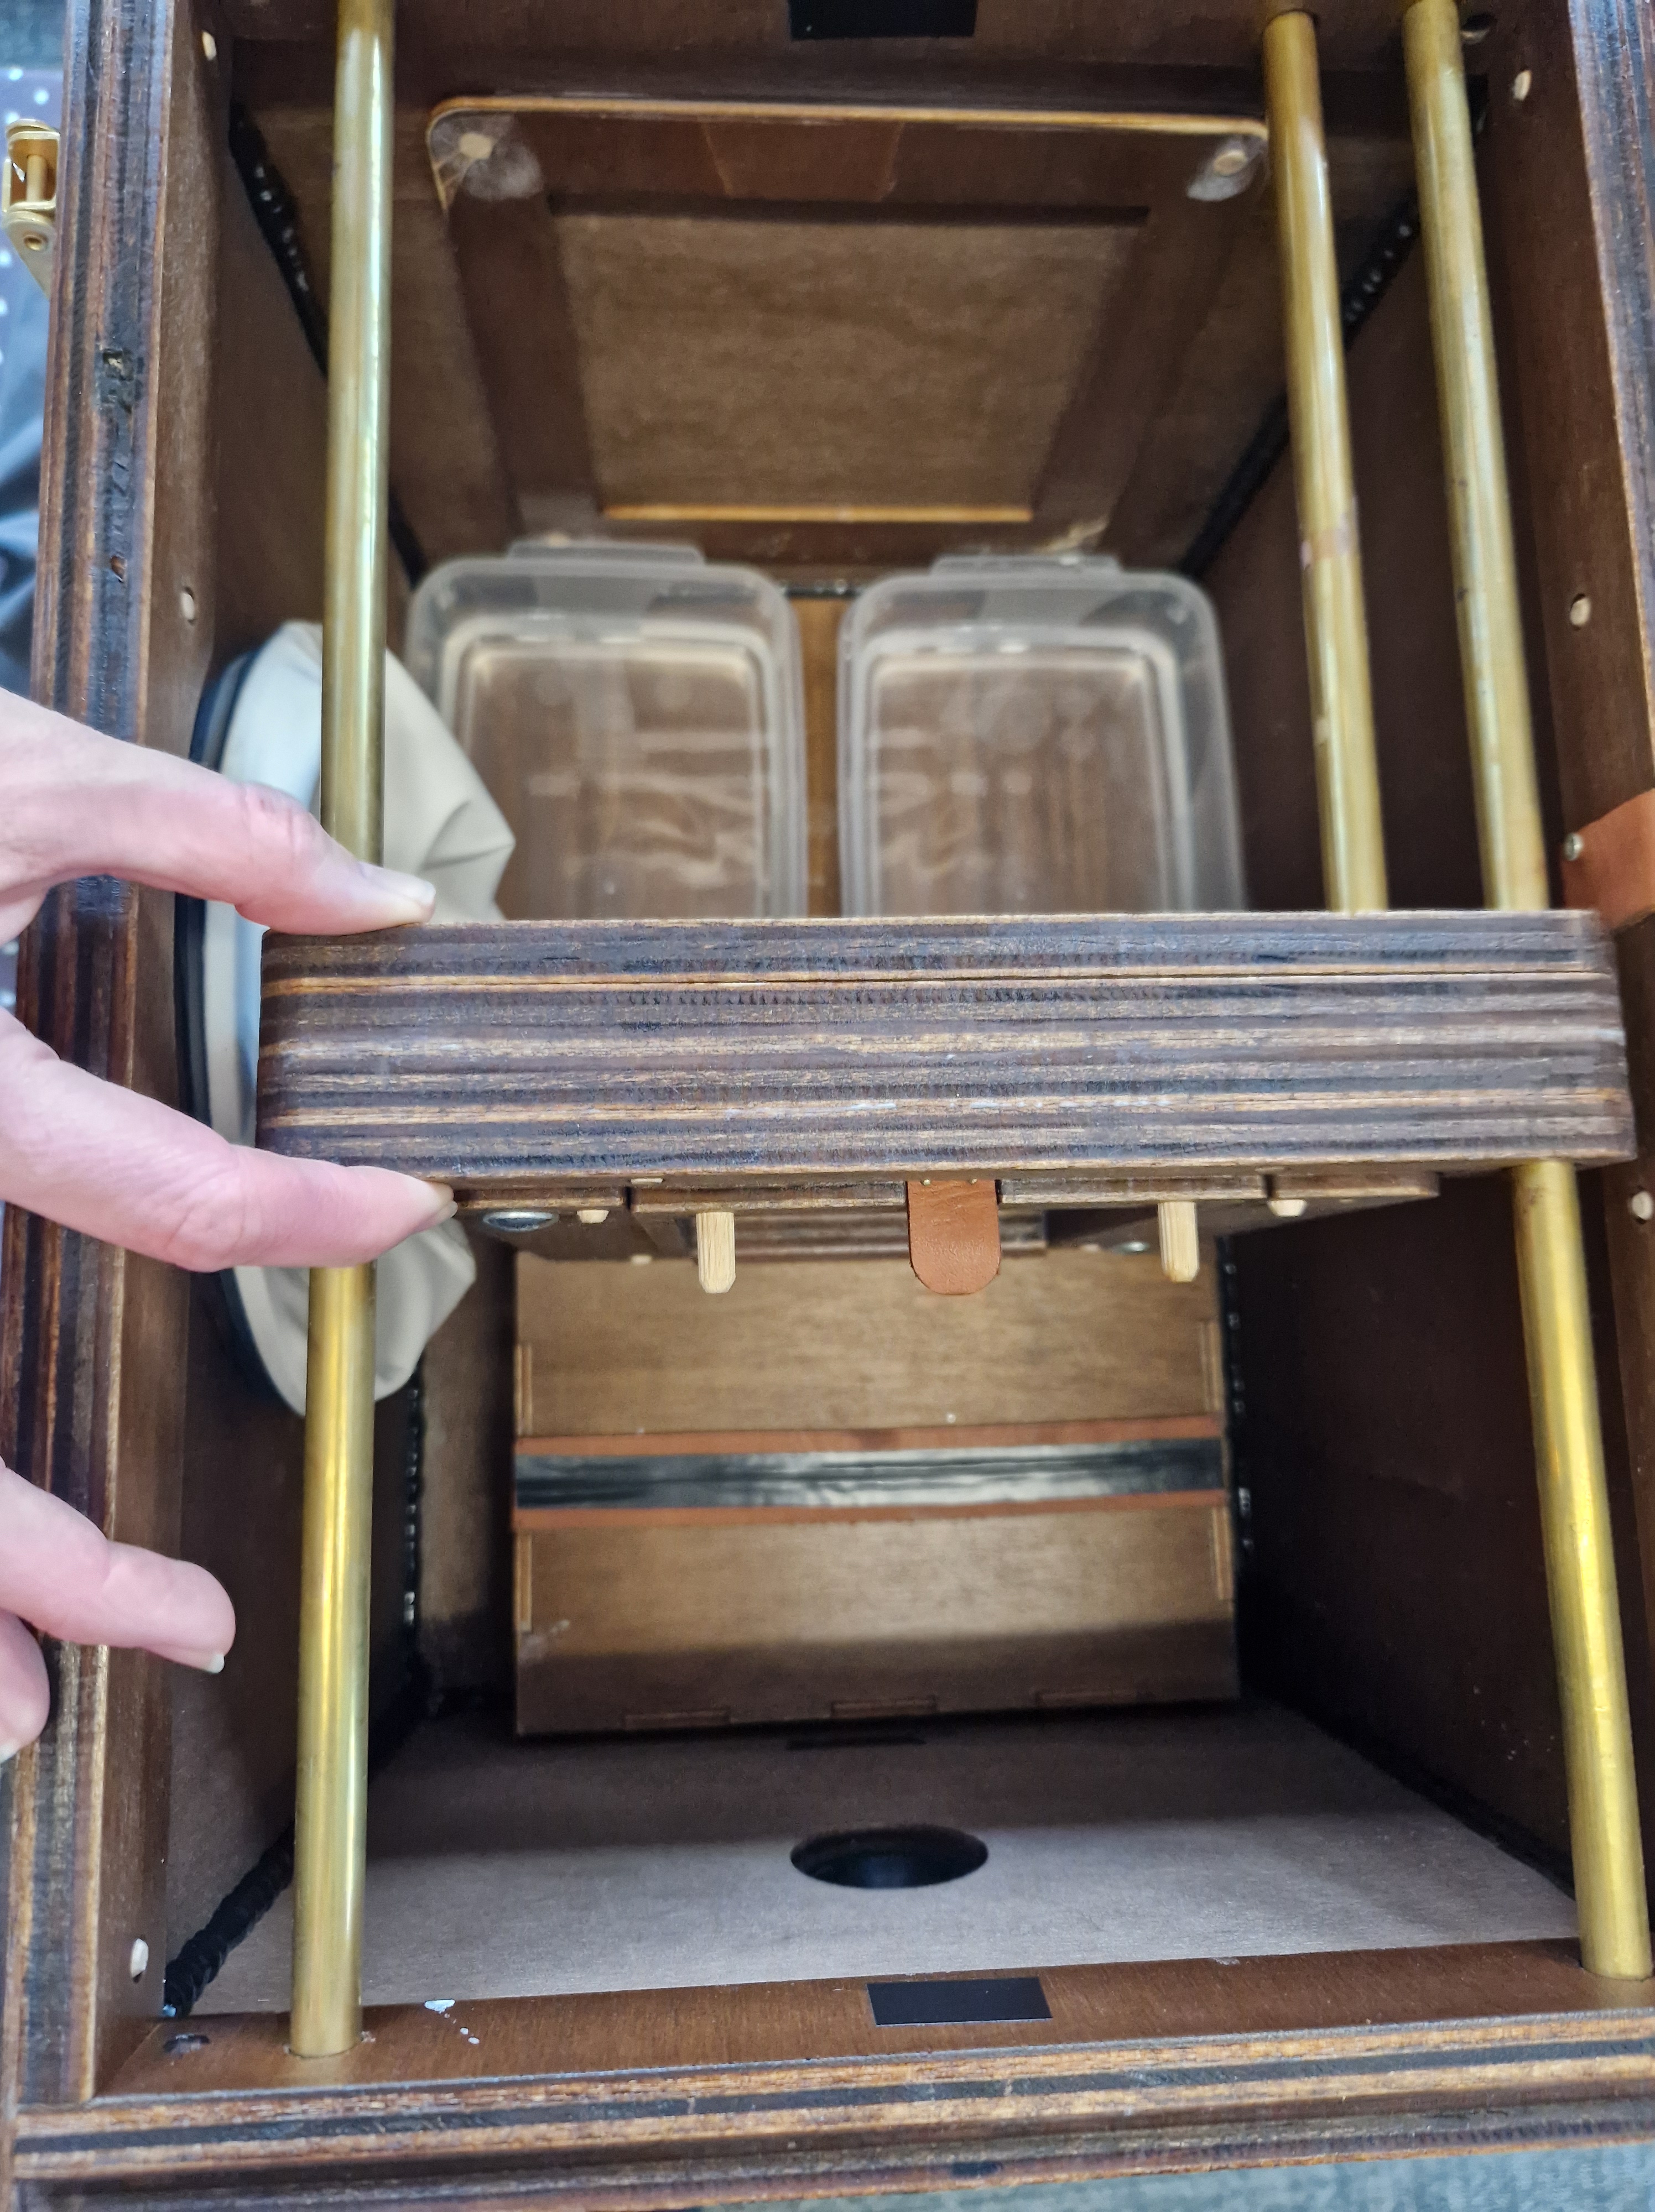
PORTFOLIO BOX ARRIVED
A few days later, my beautiful portfolio box arrived!
TUESDAY
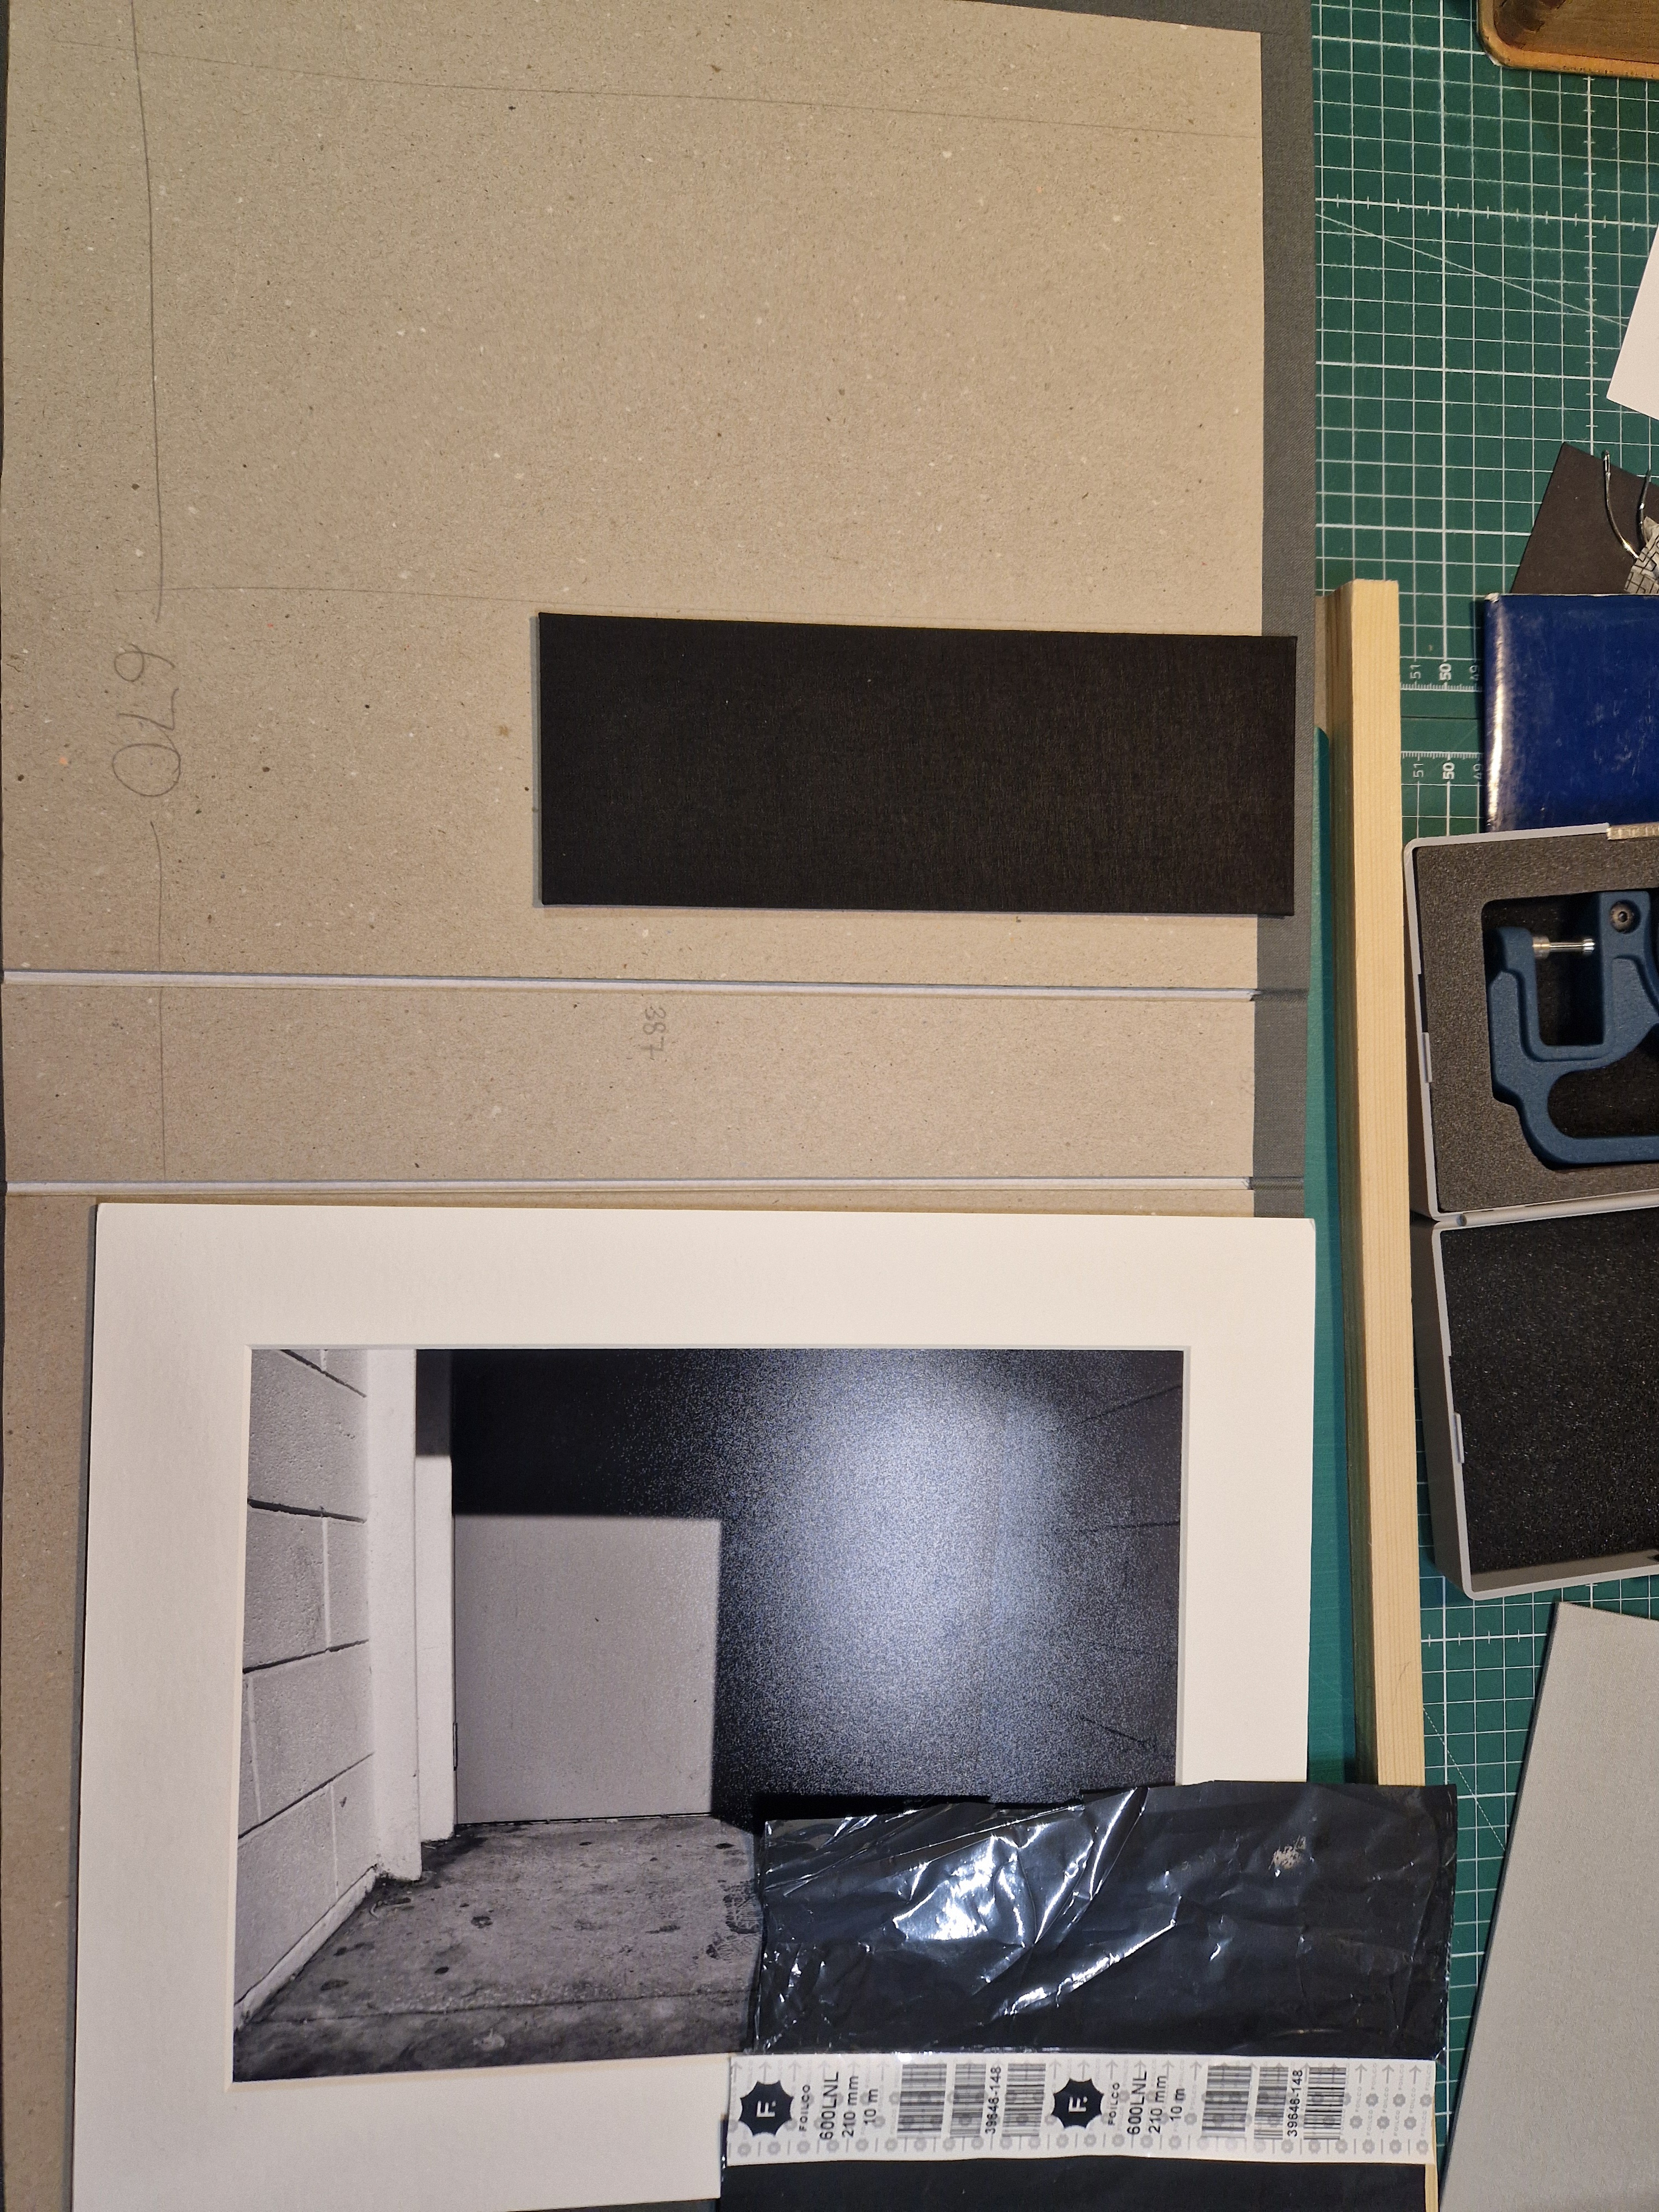
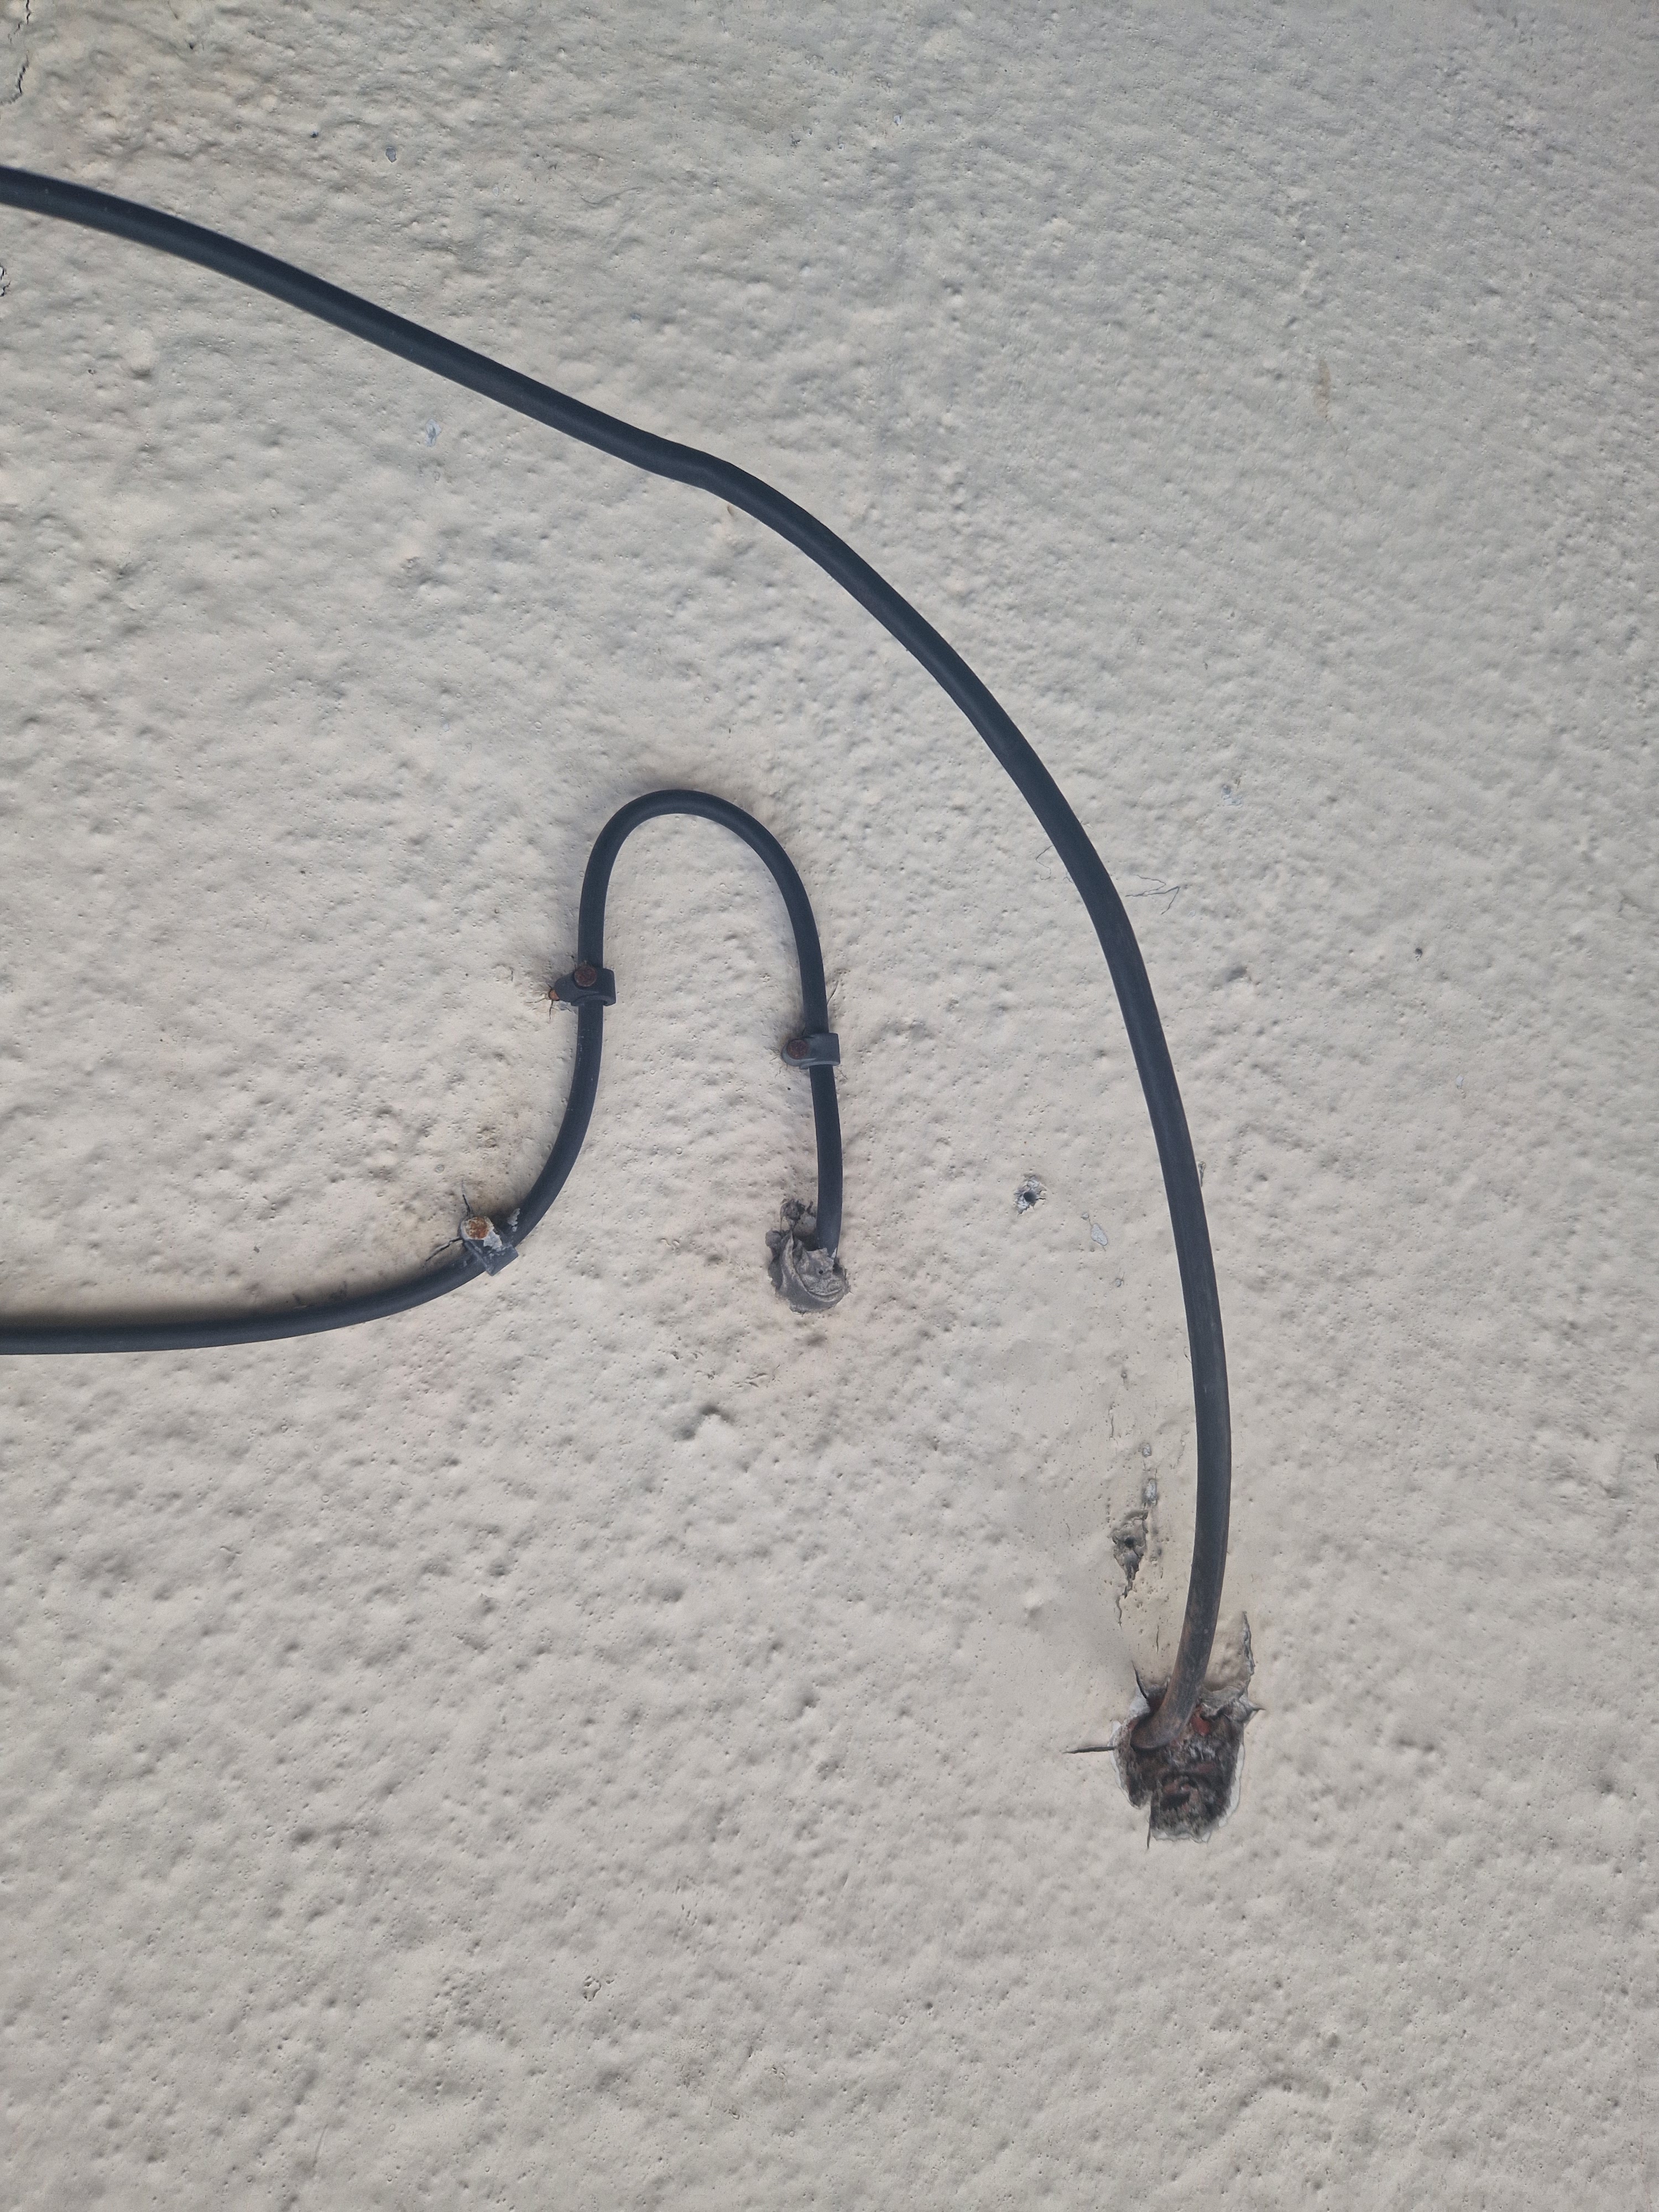
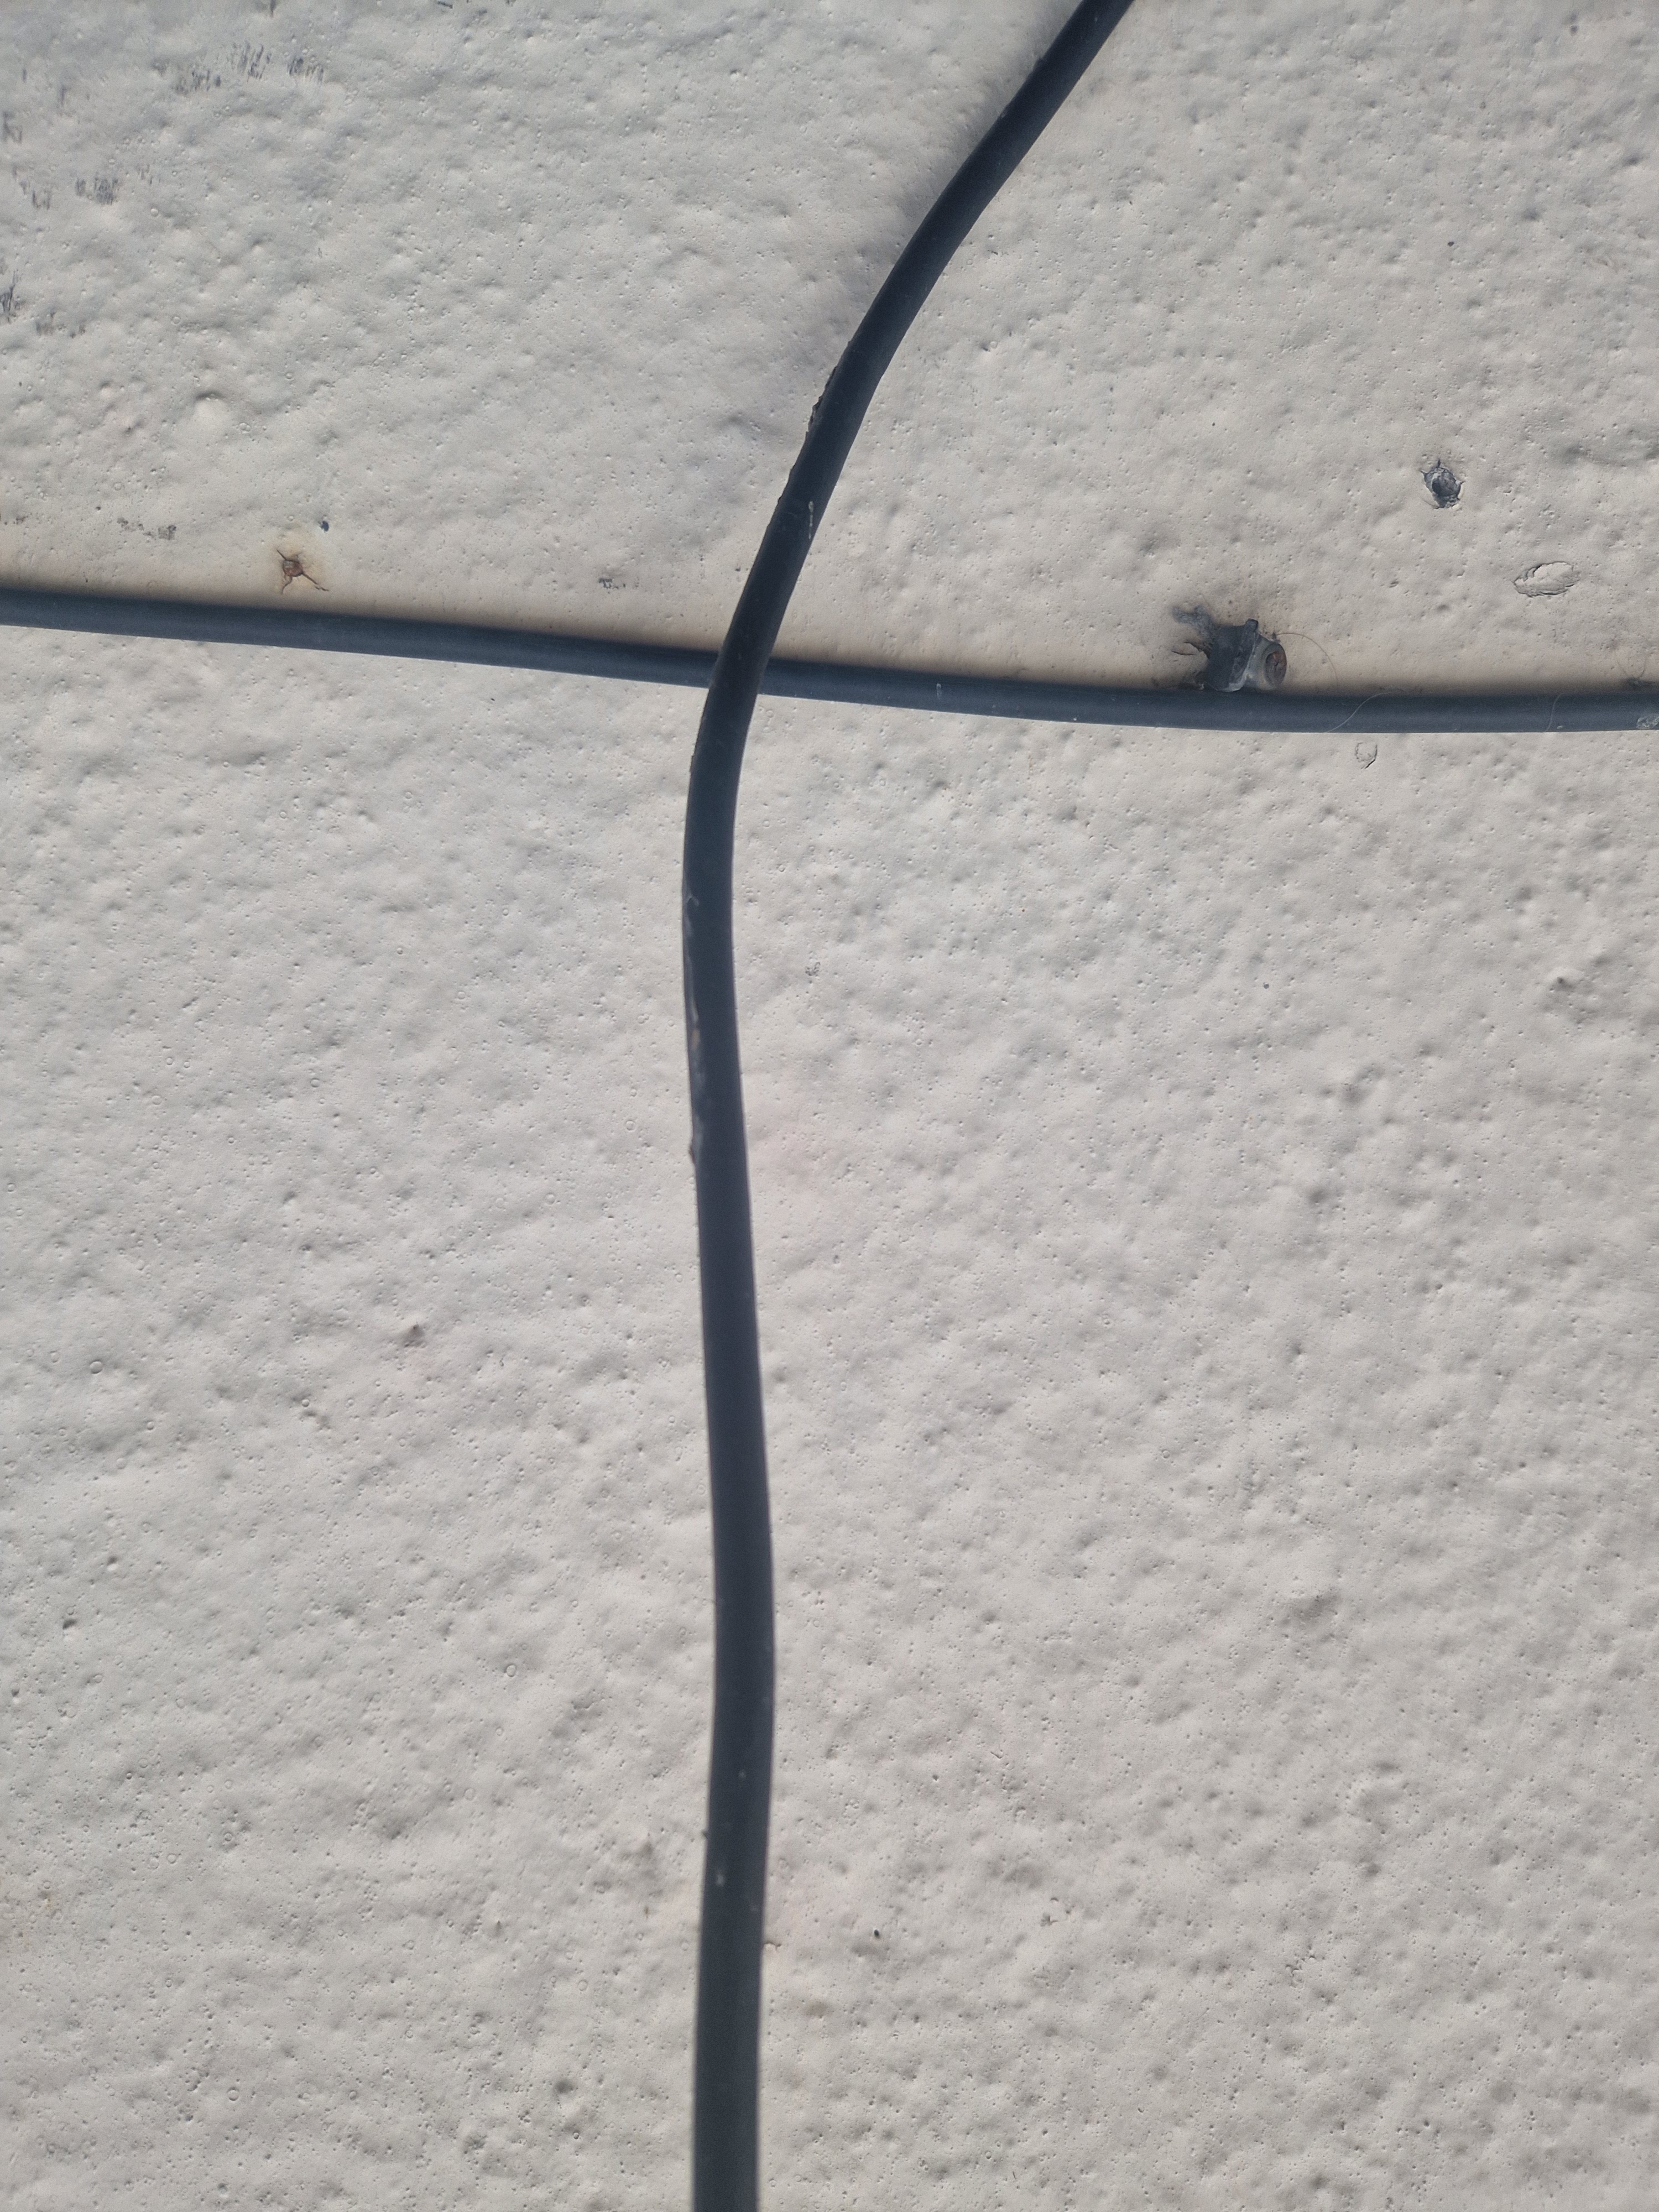
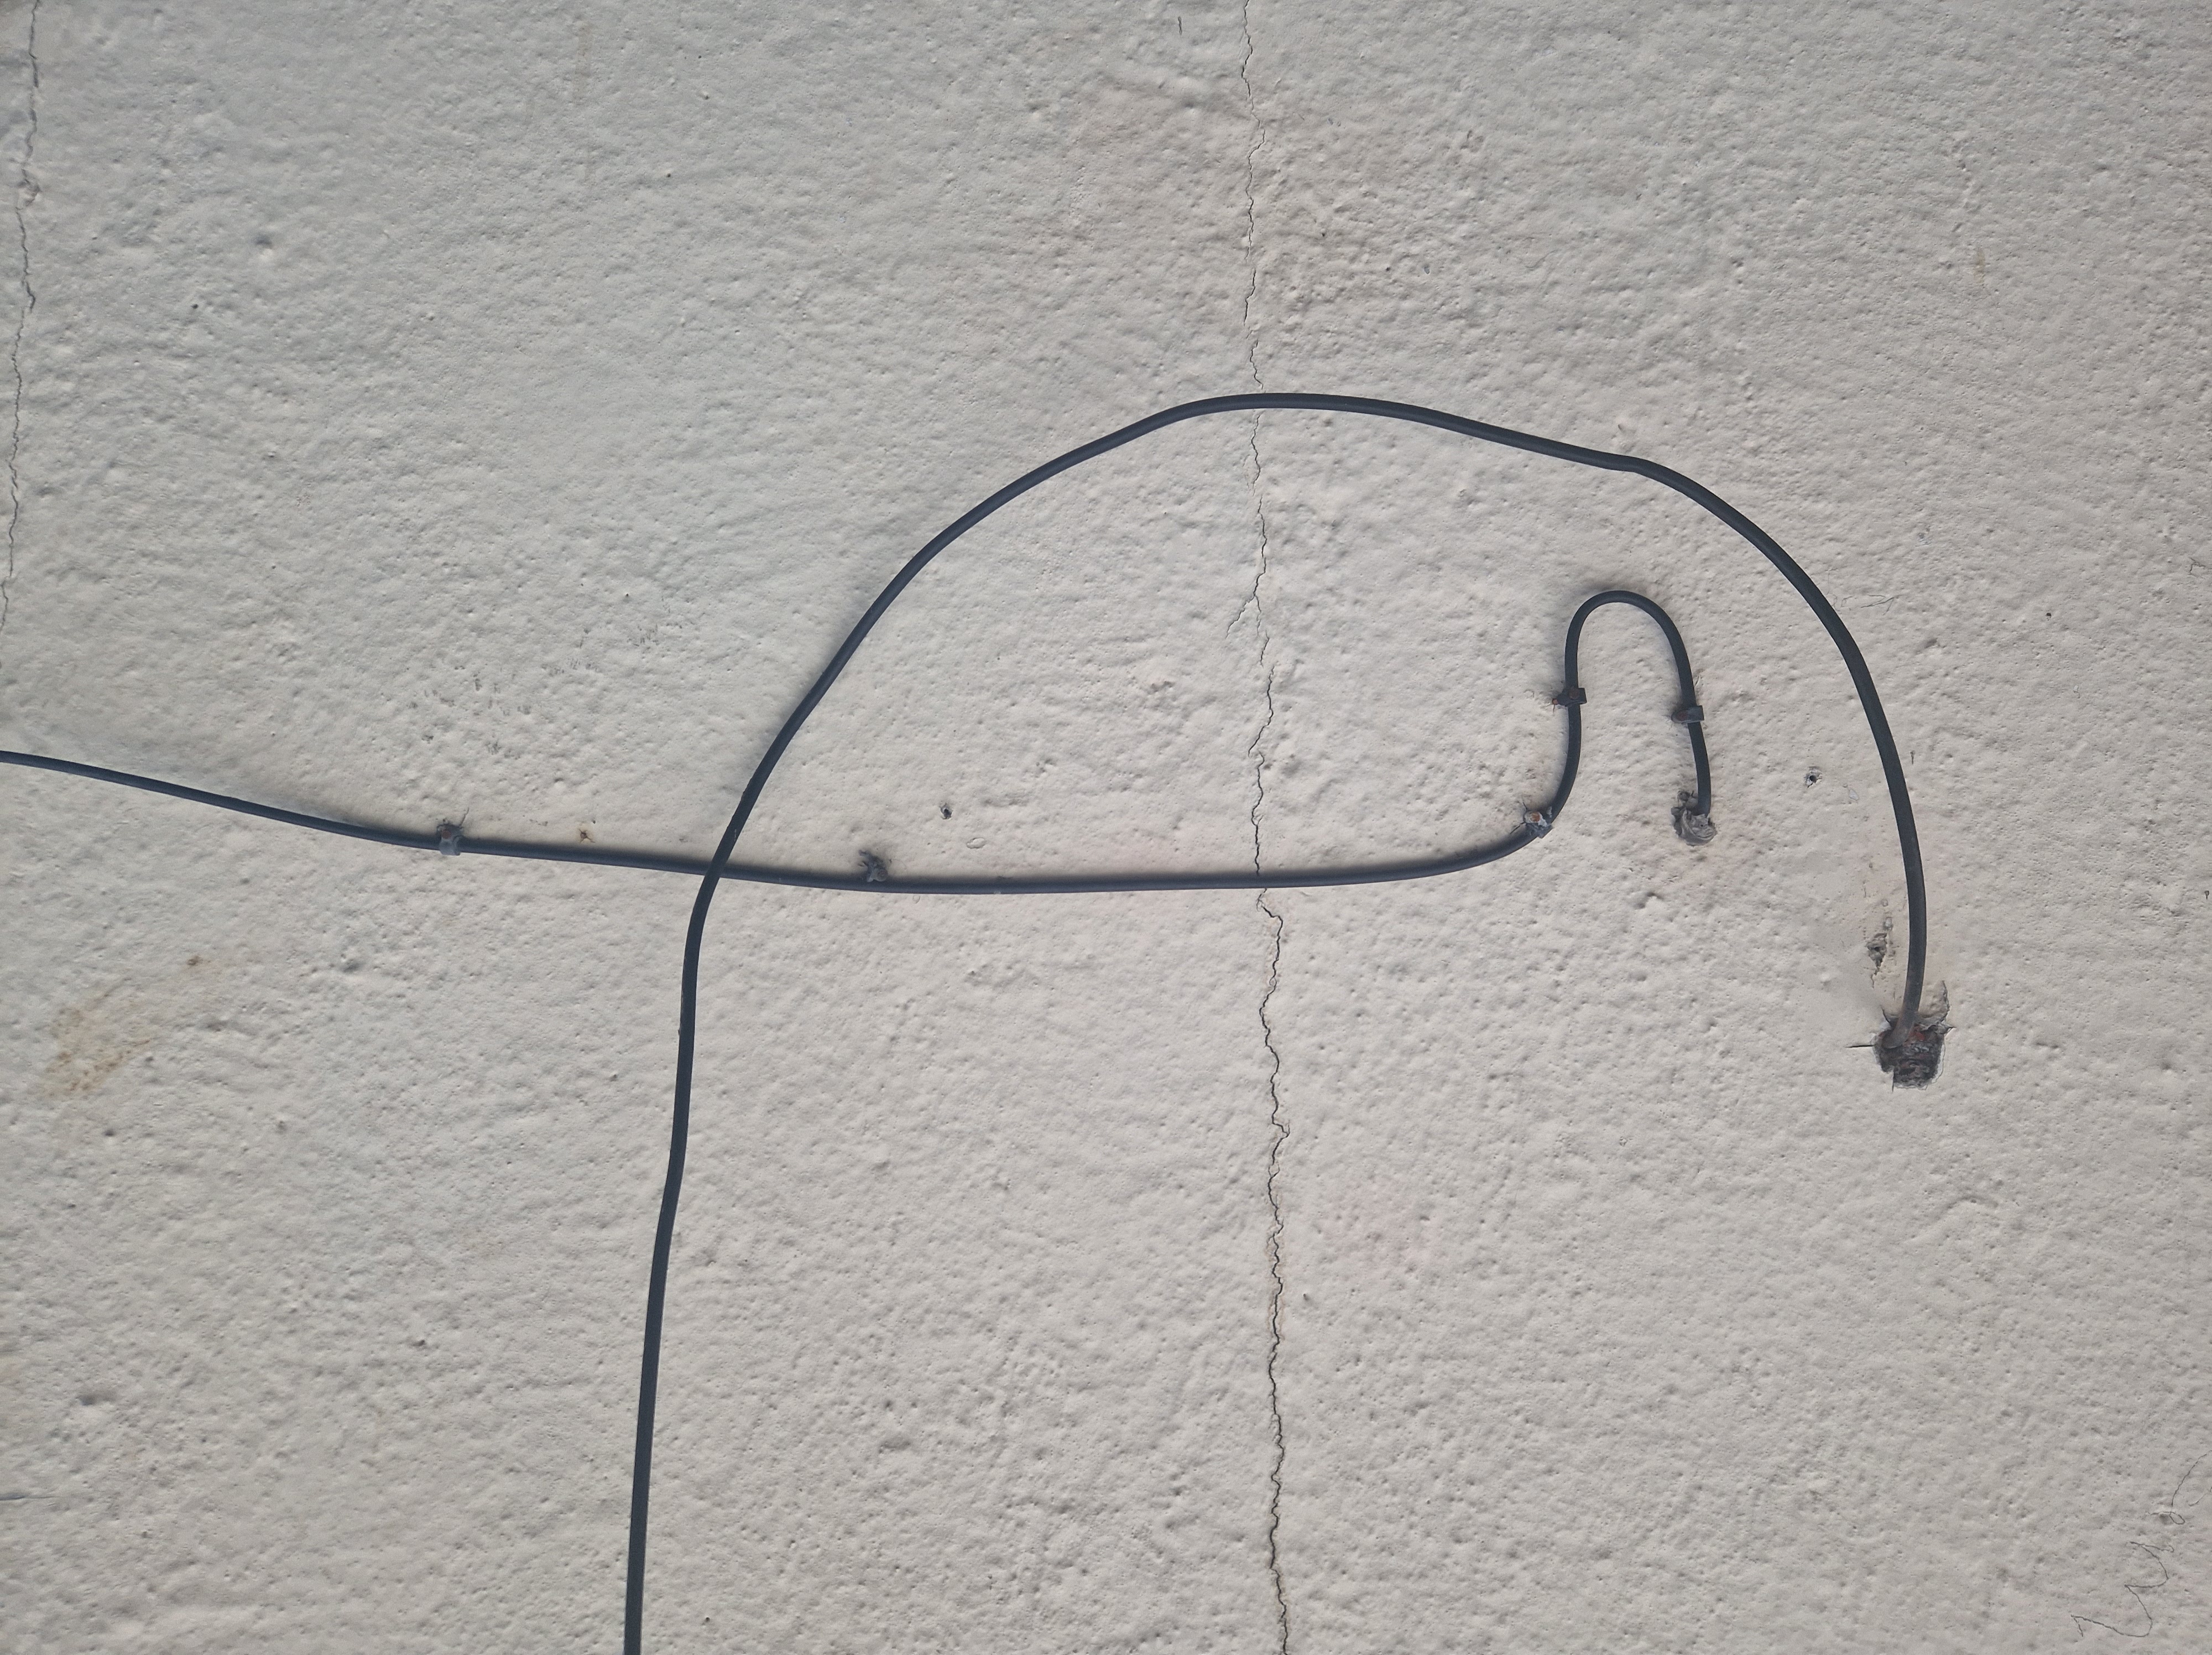
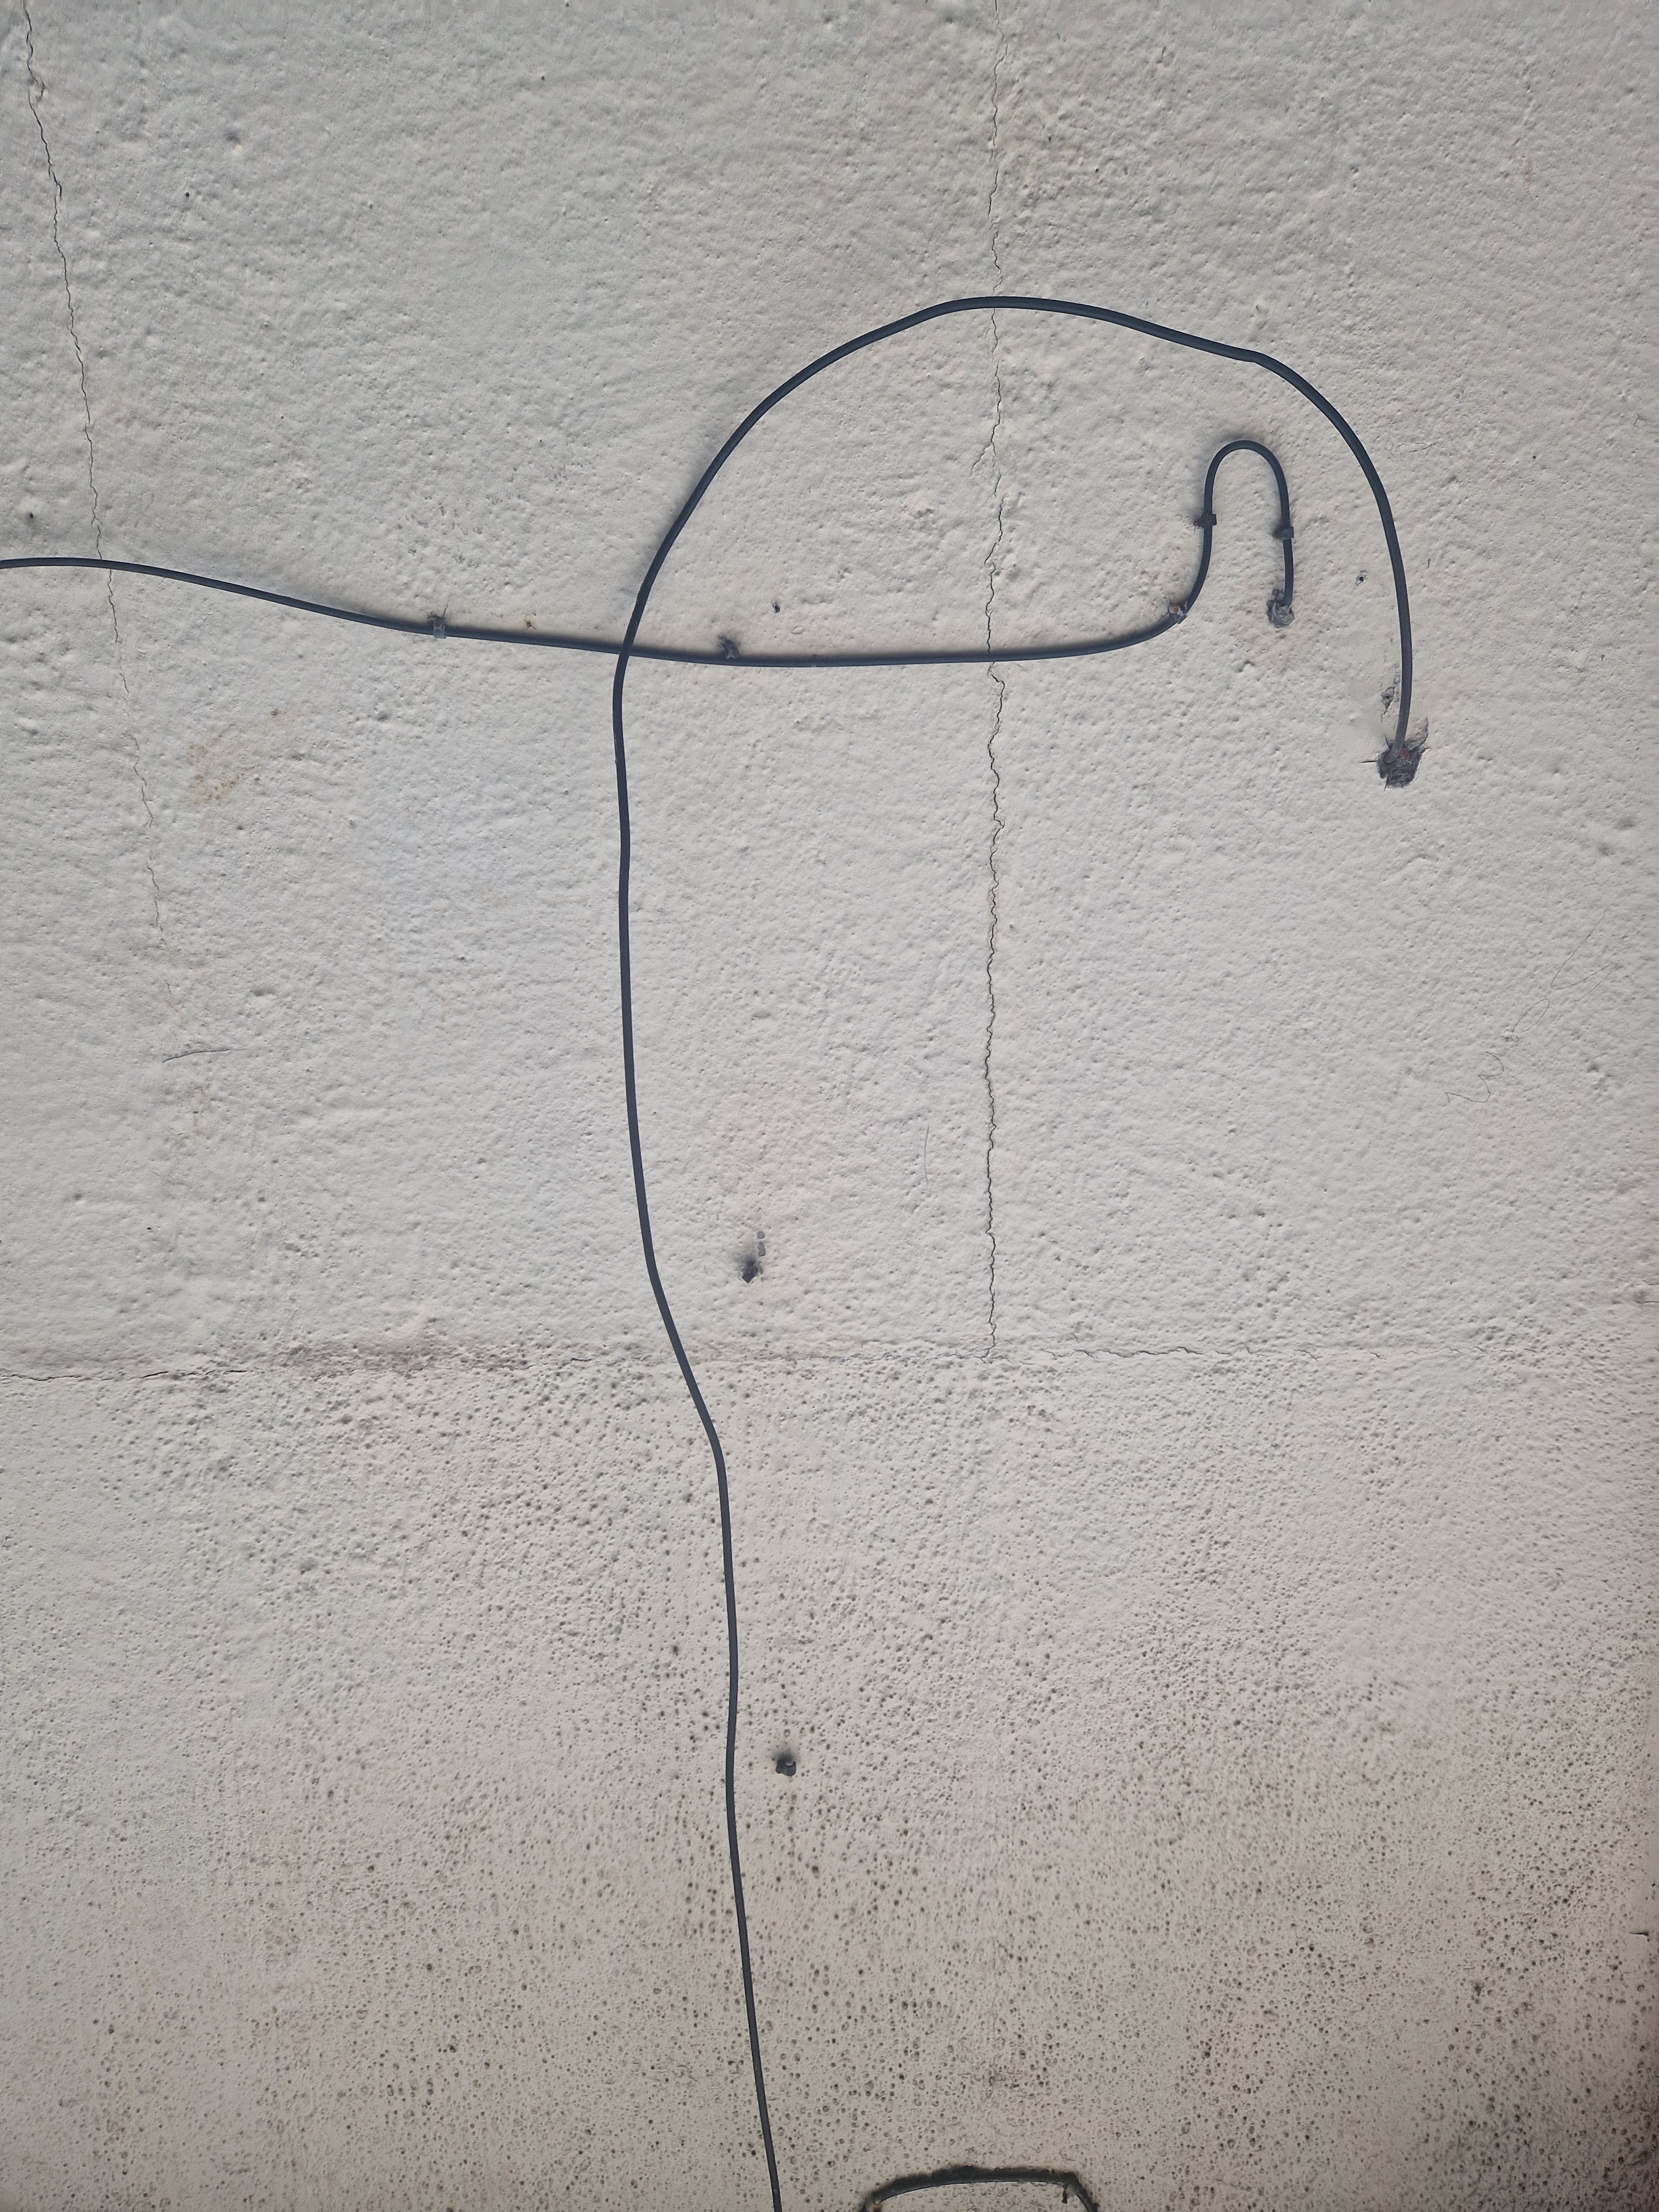
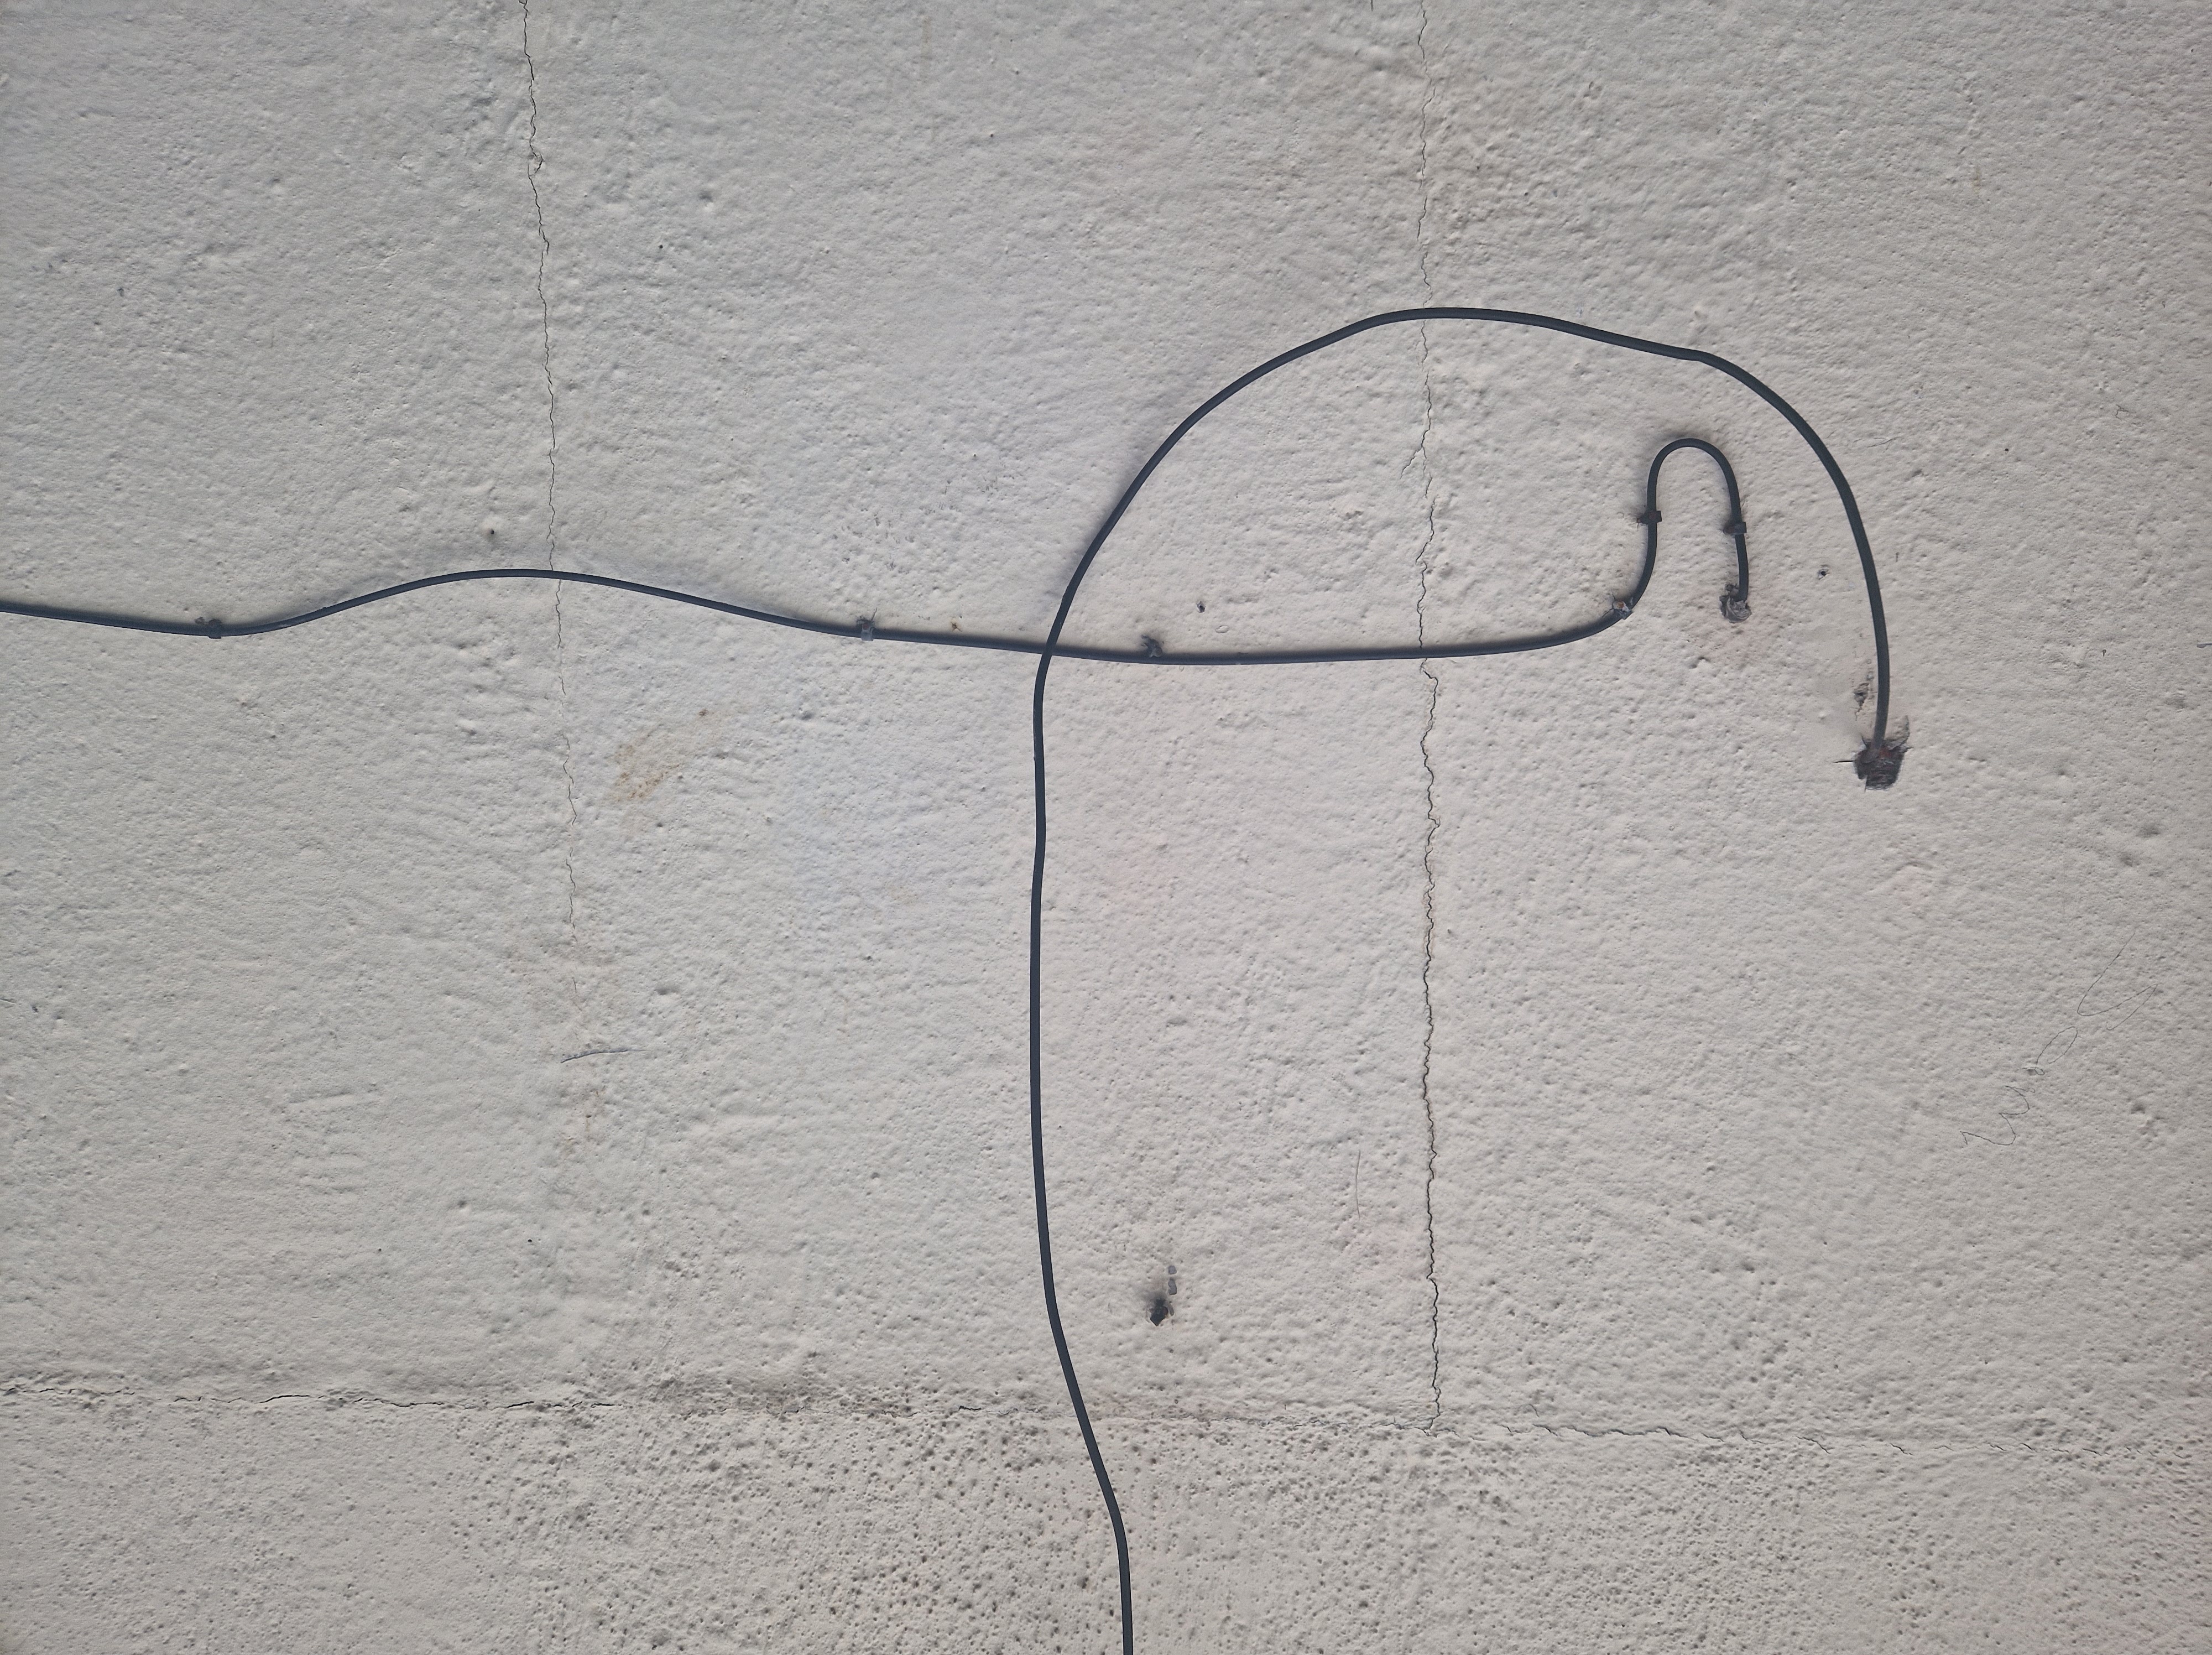
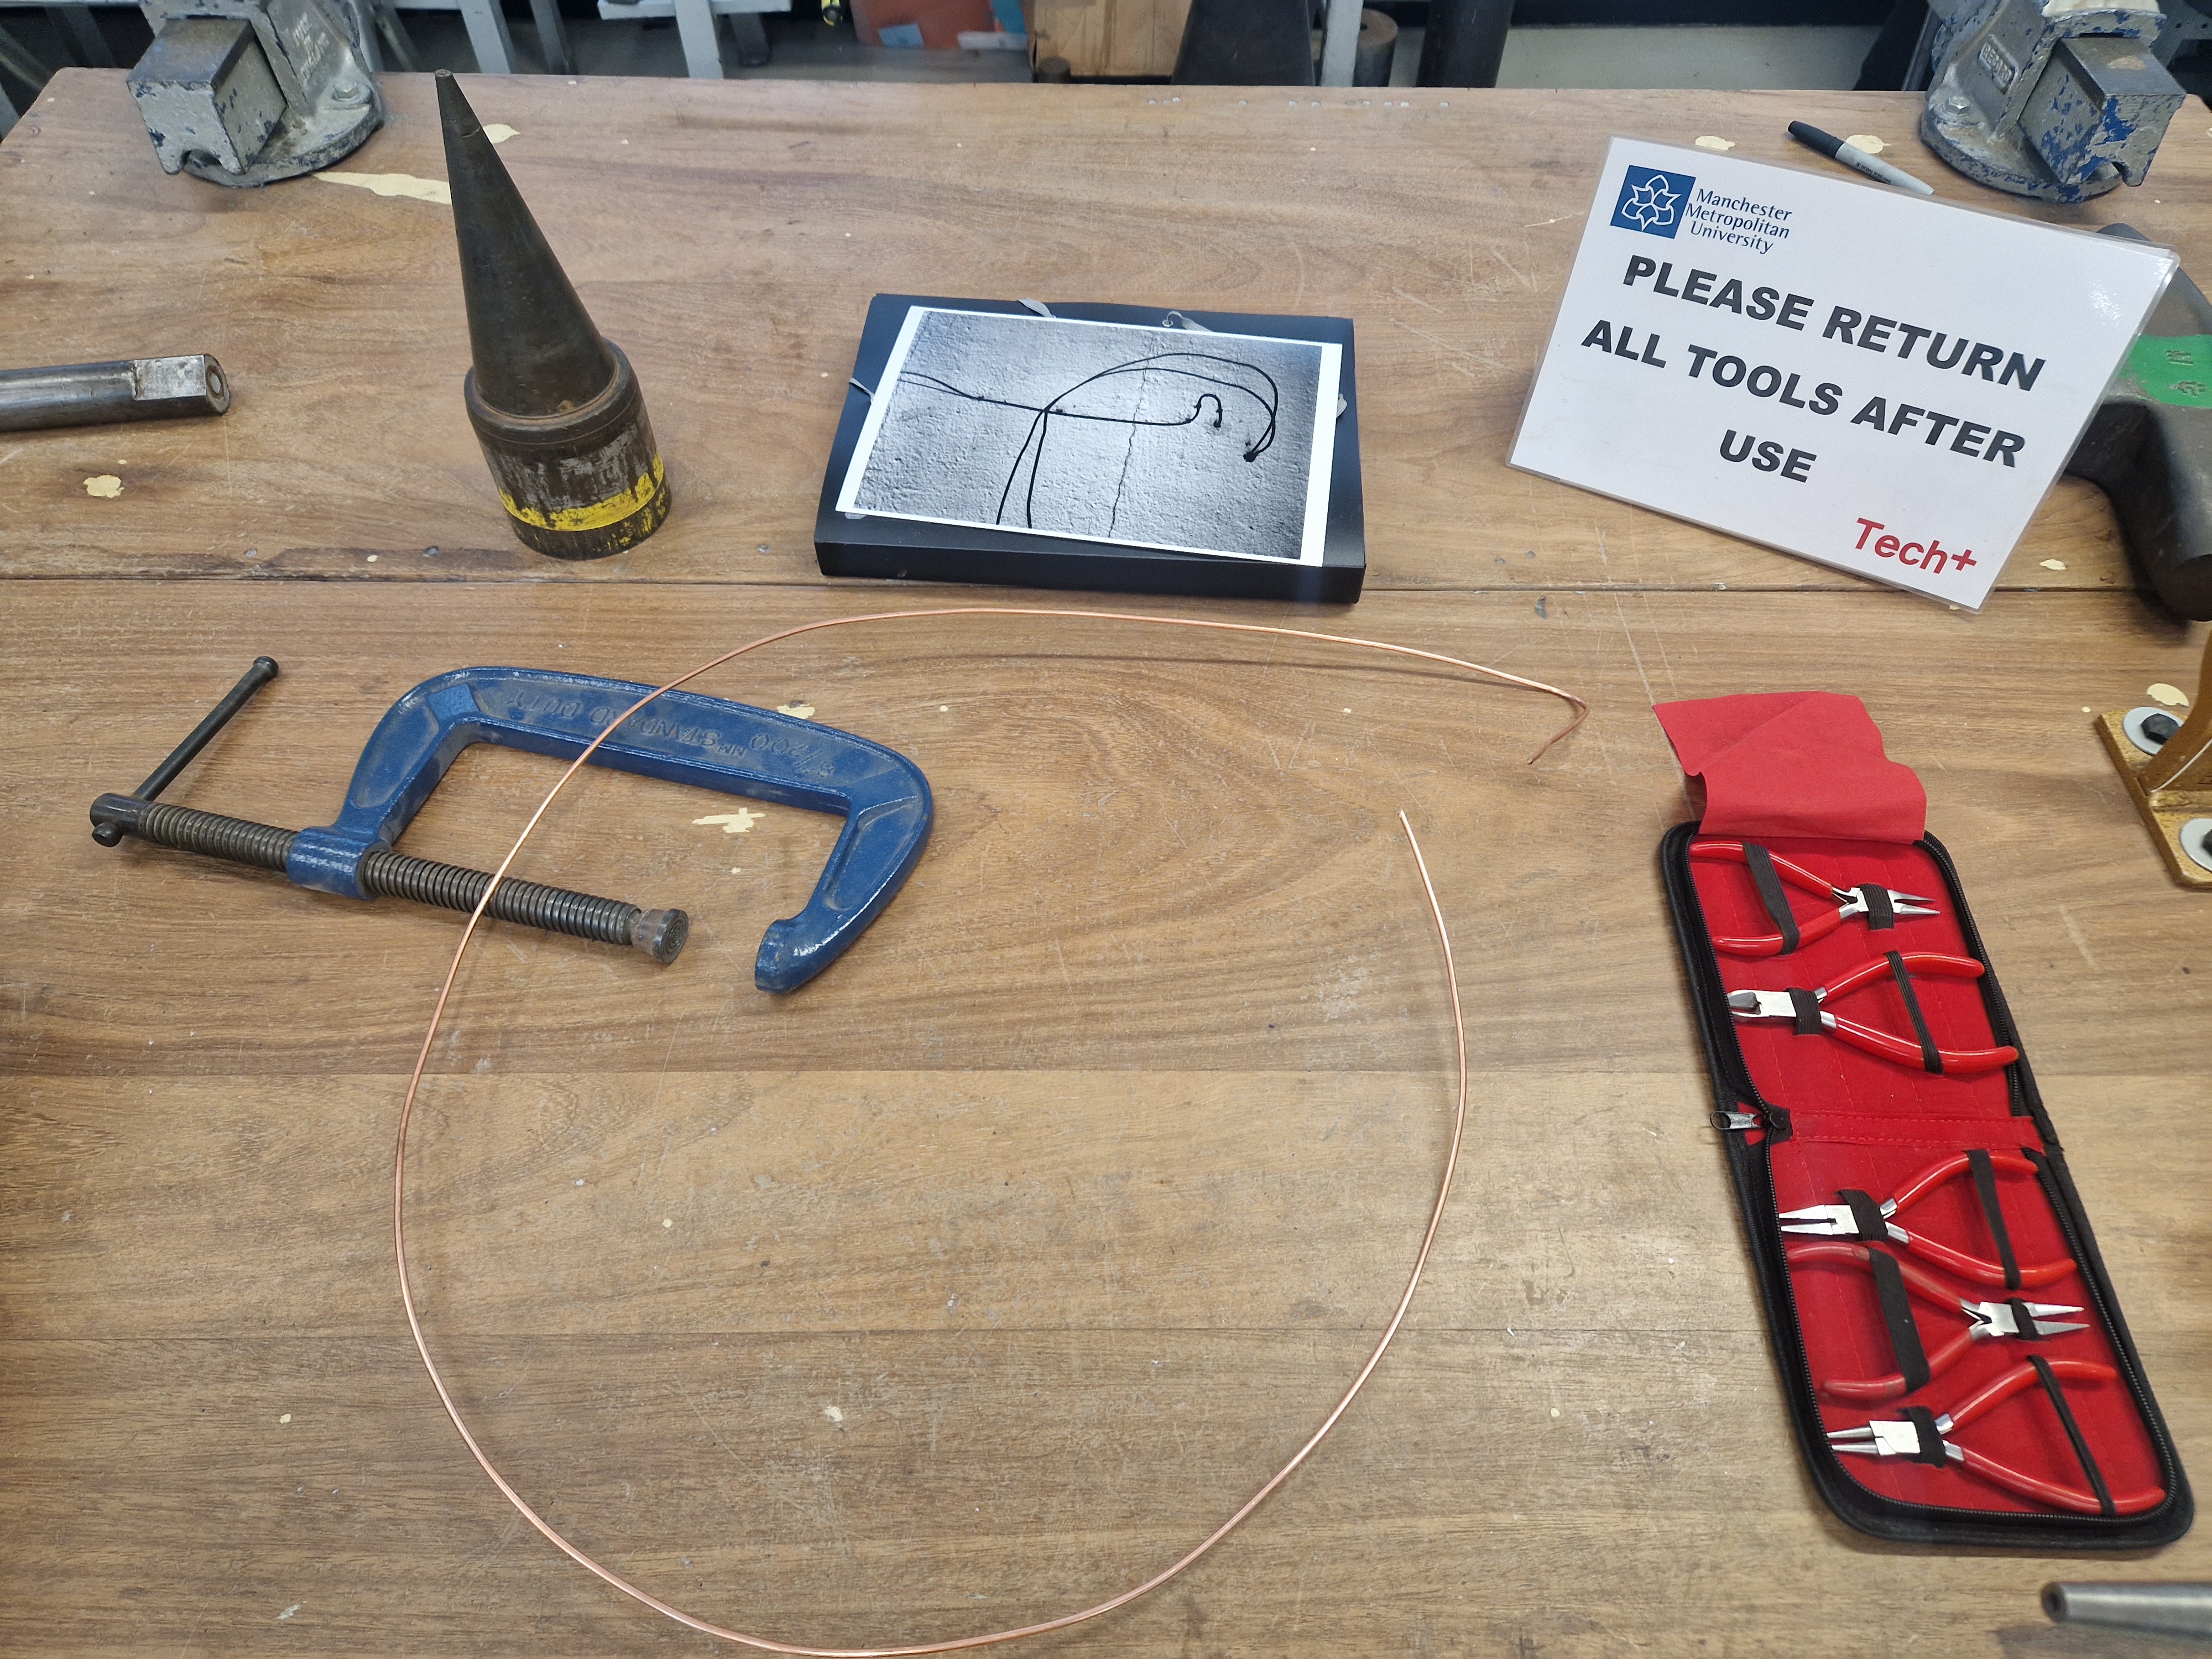
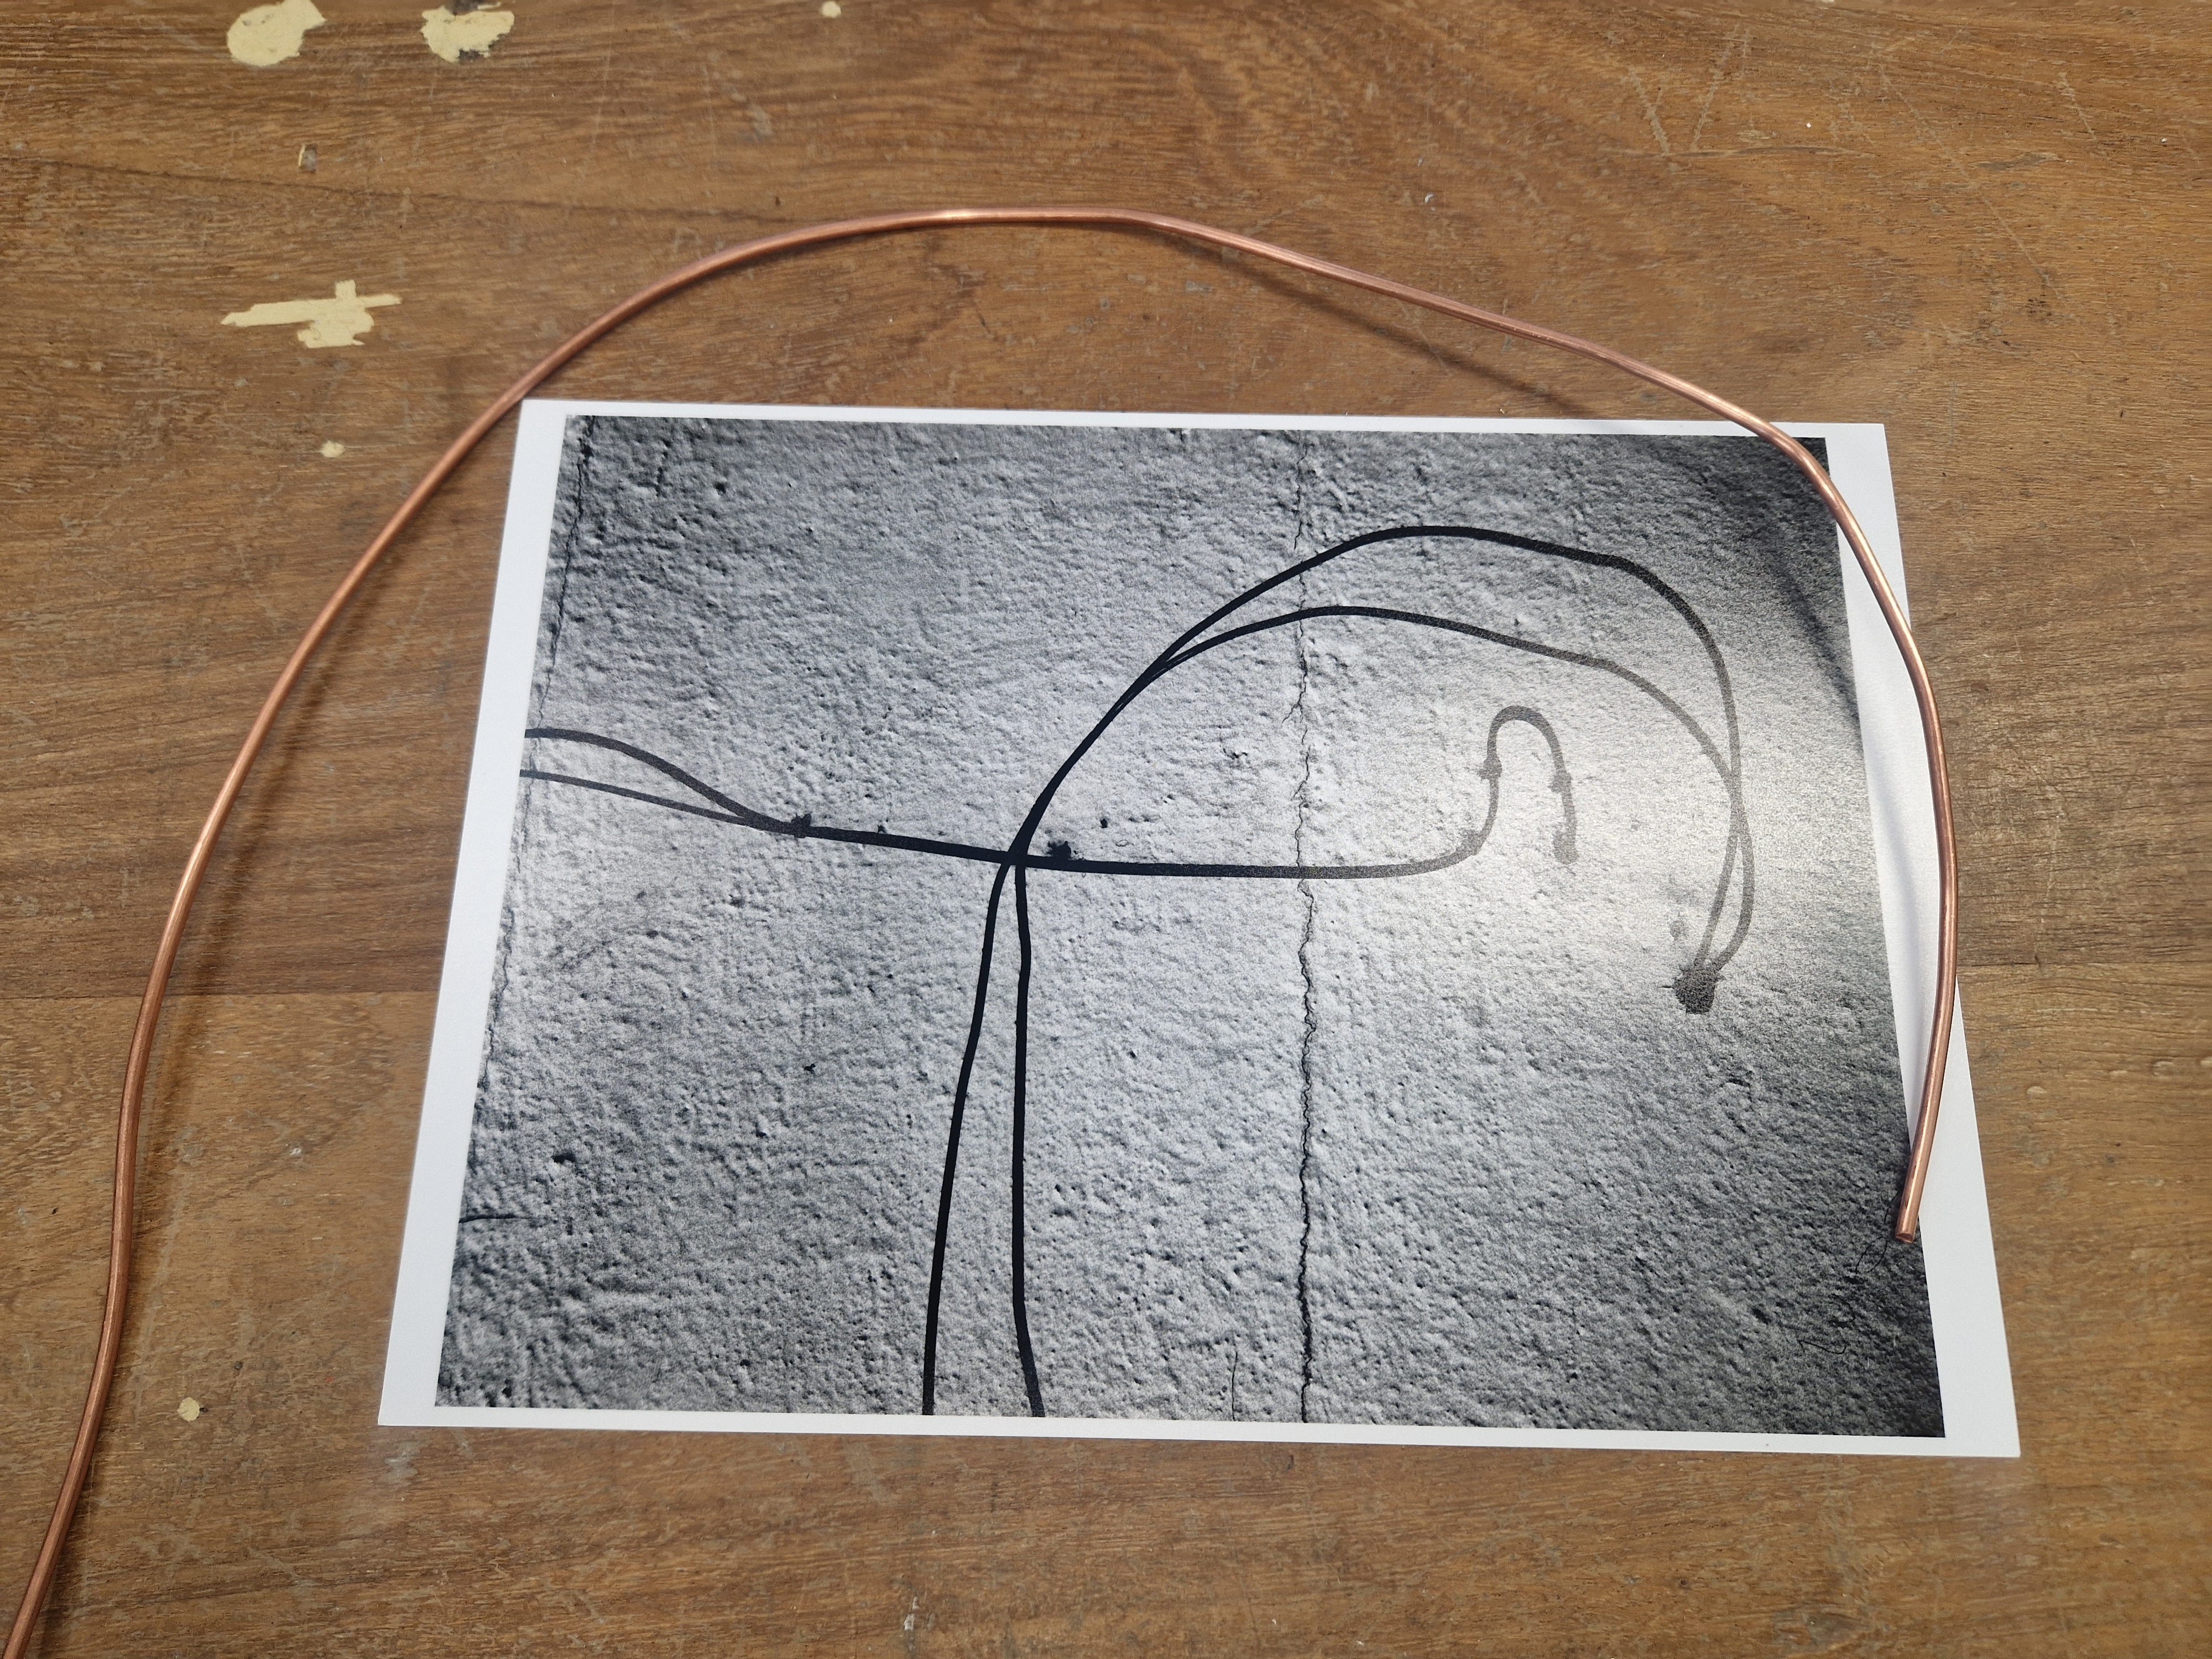
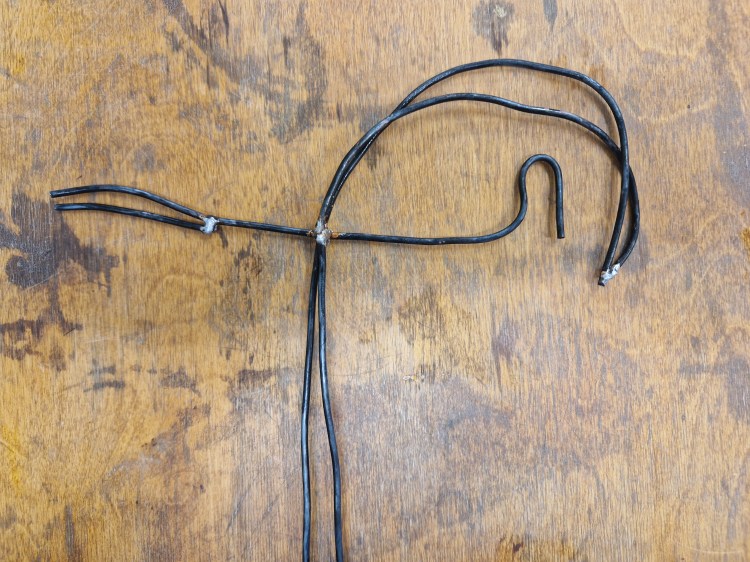
TRAVEL TO STOCKPORT TO REVISIT THE PLACE OF MY PHOTOGRAPH
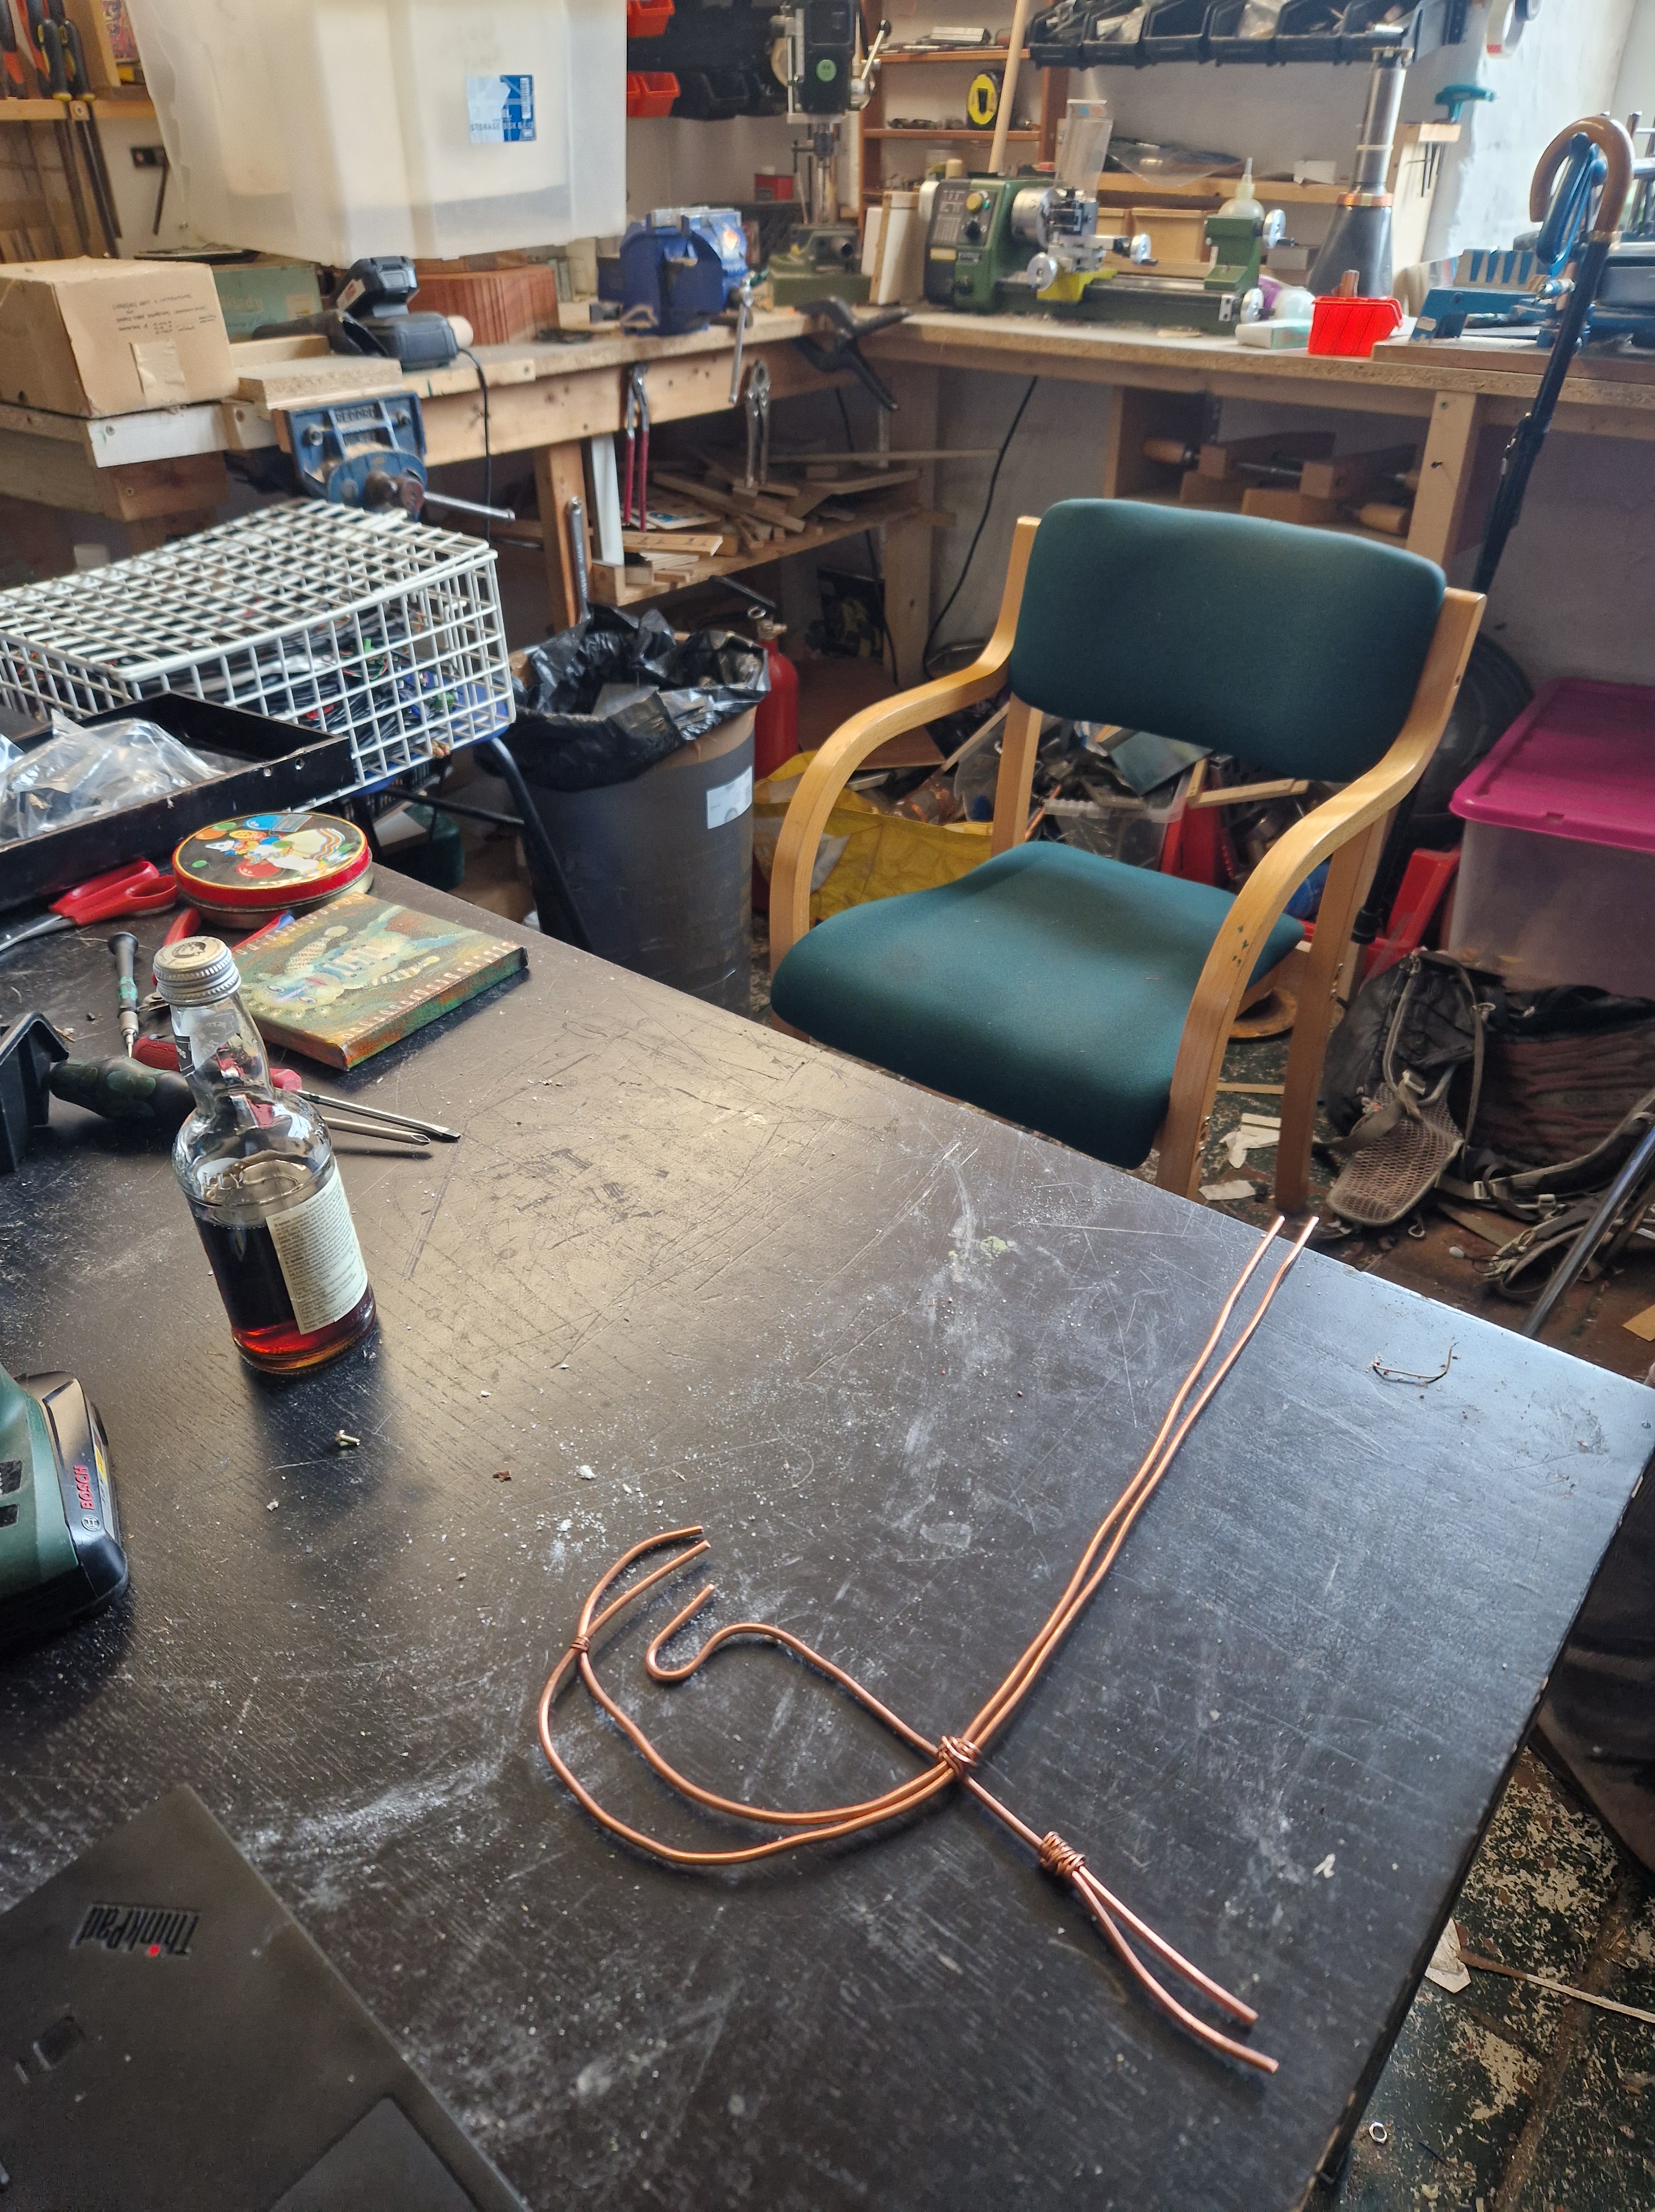
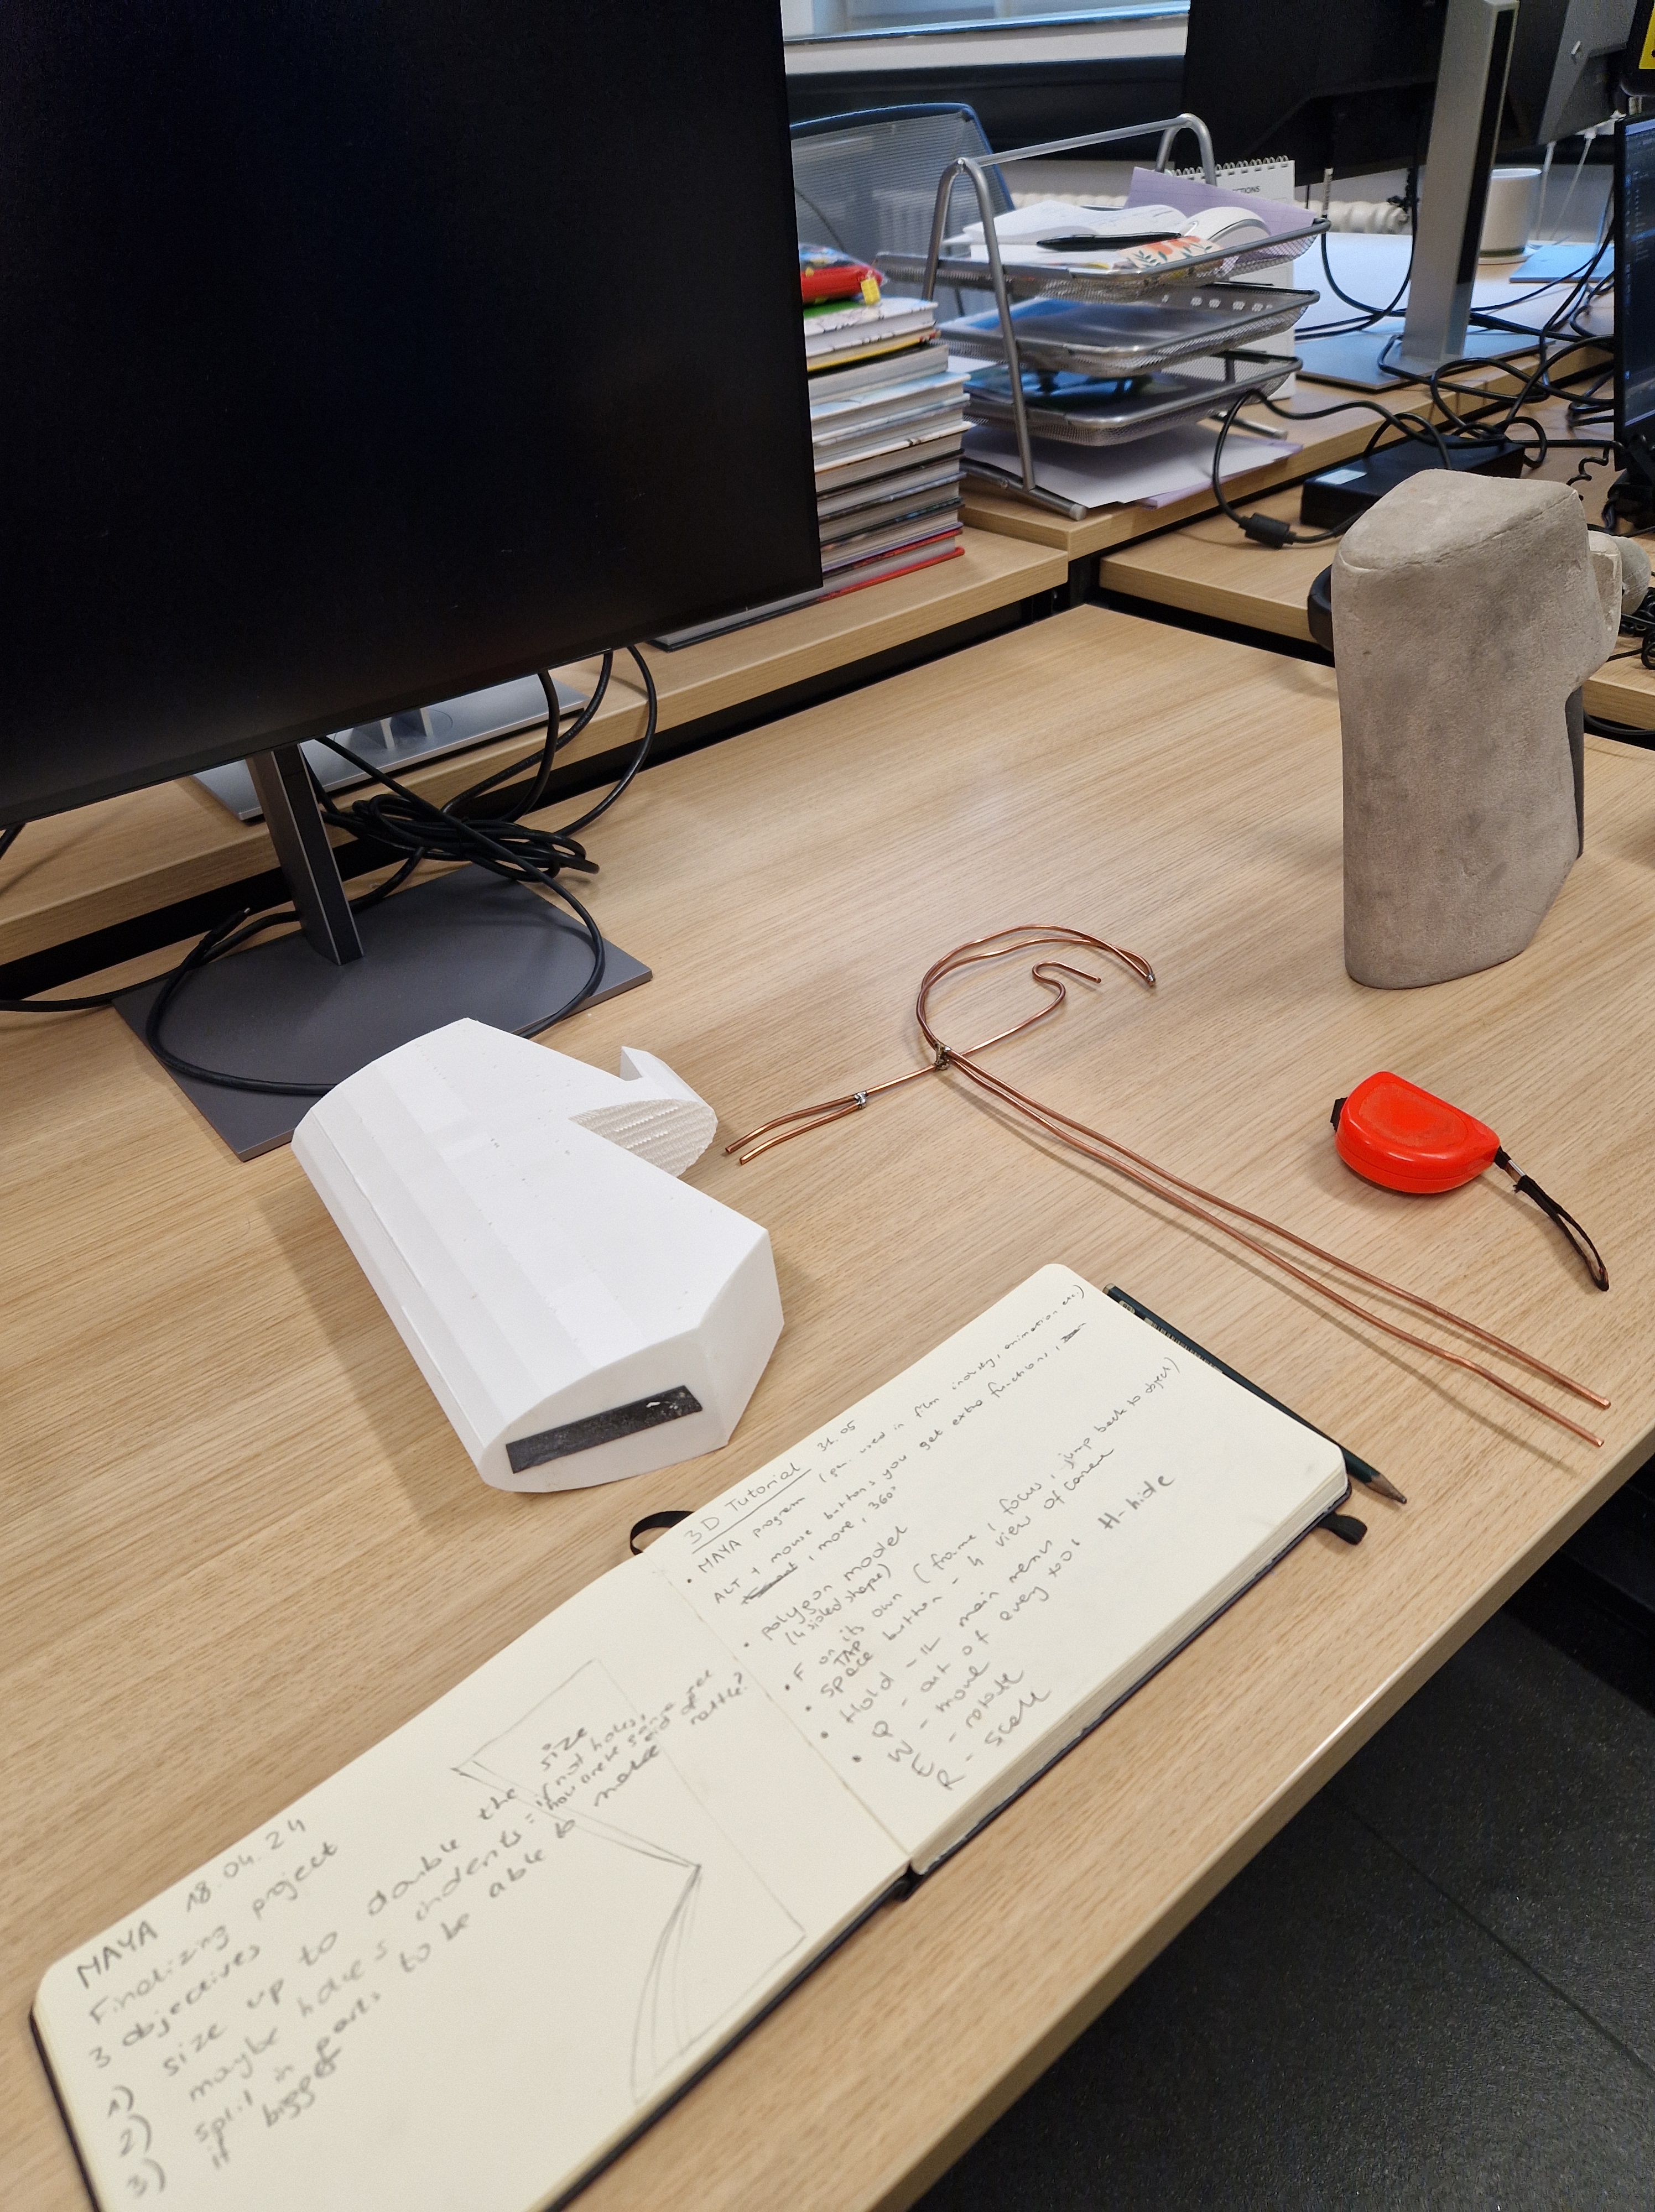
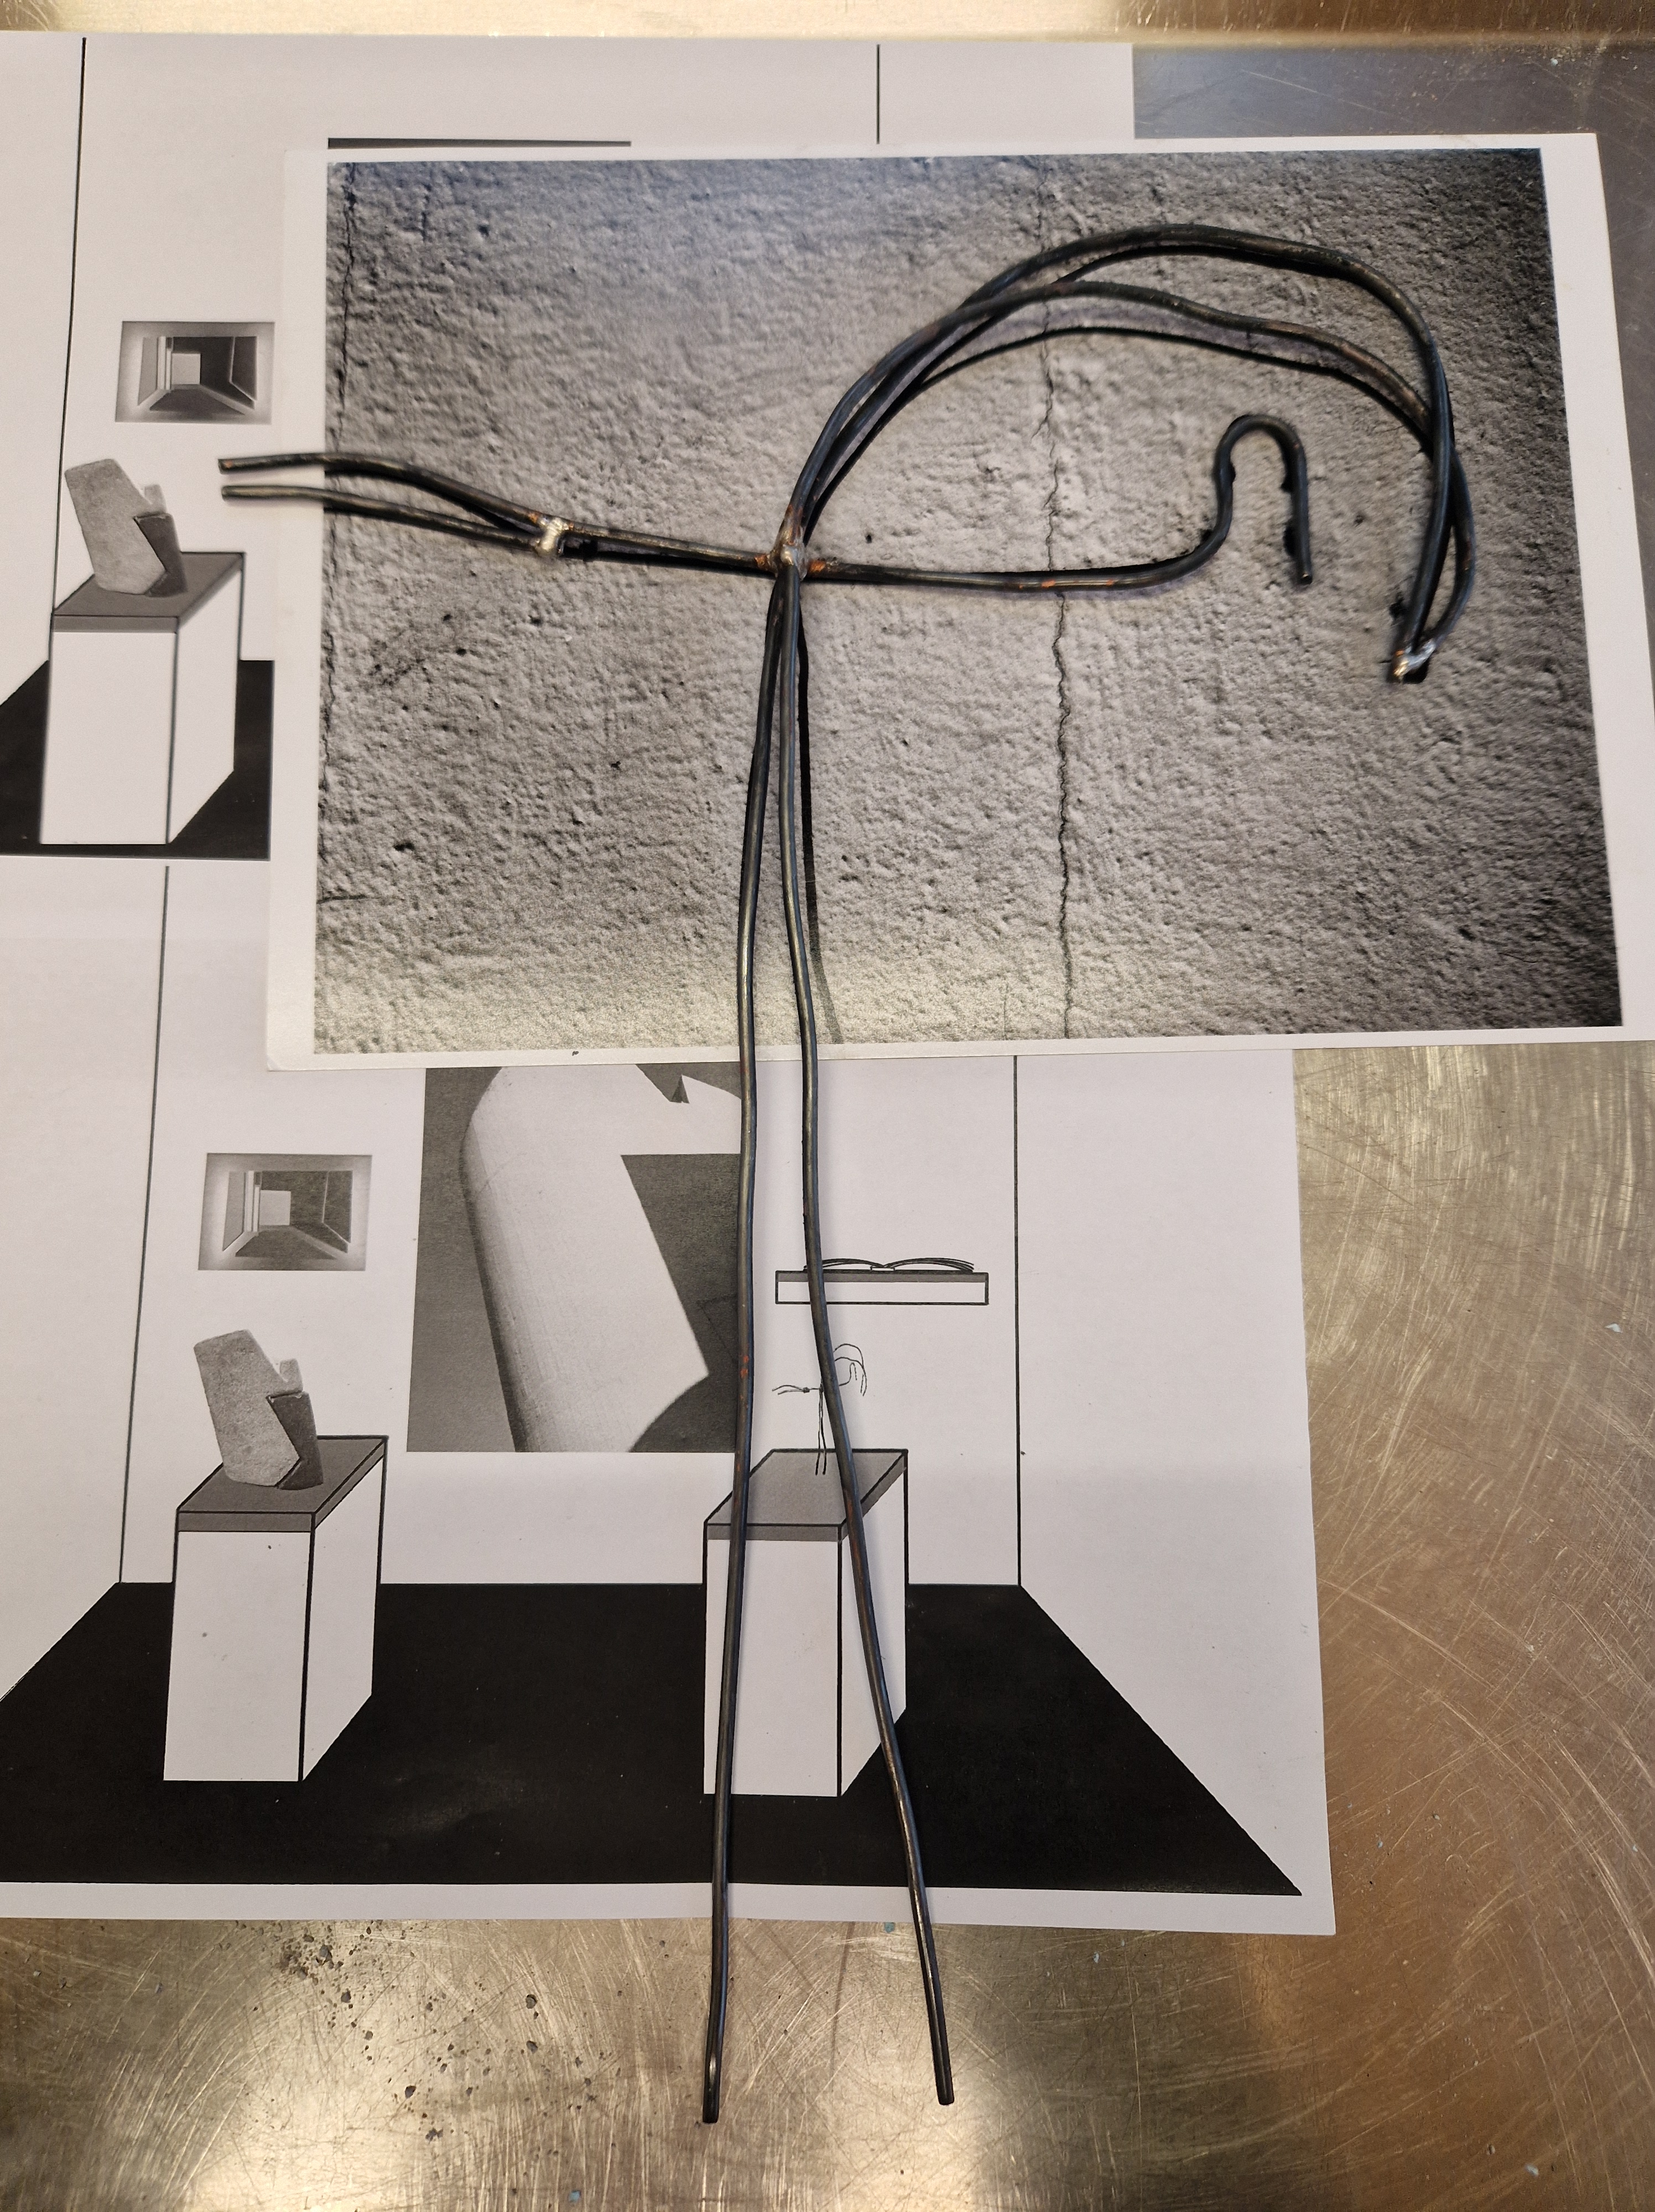
STUDY OF THE WIRE
Before making the wire sculpture I travelled to Stockport to revisit the place where I found my photograph, and studied the wire portrayed in it, in preparation for making a sculpture tomorrow.
WEDNESDAY
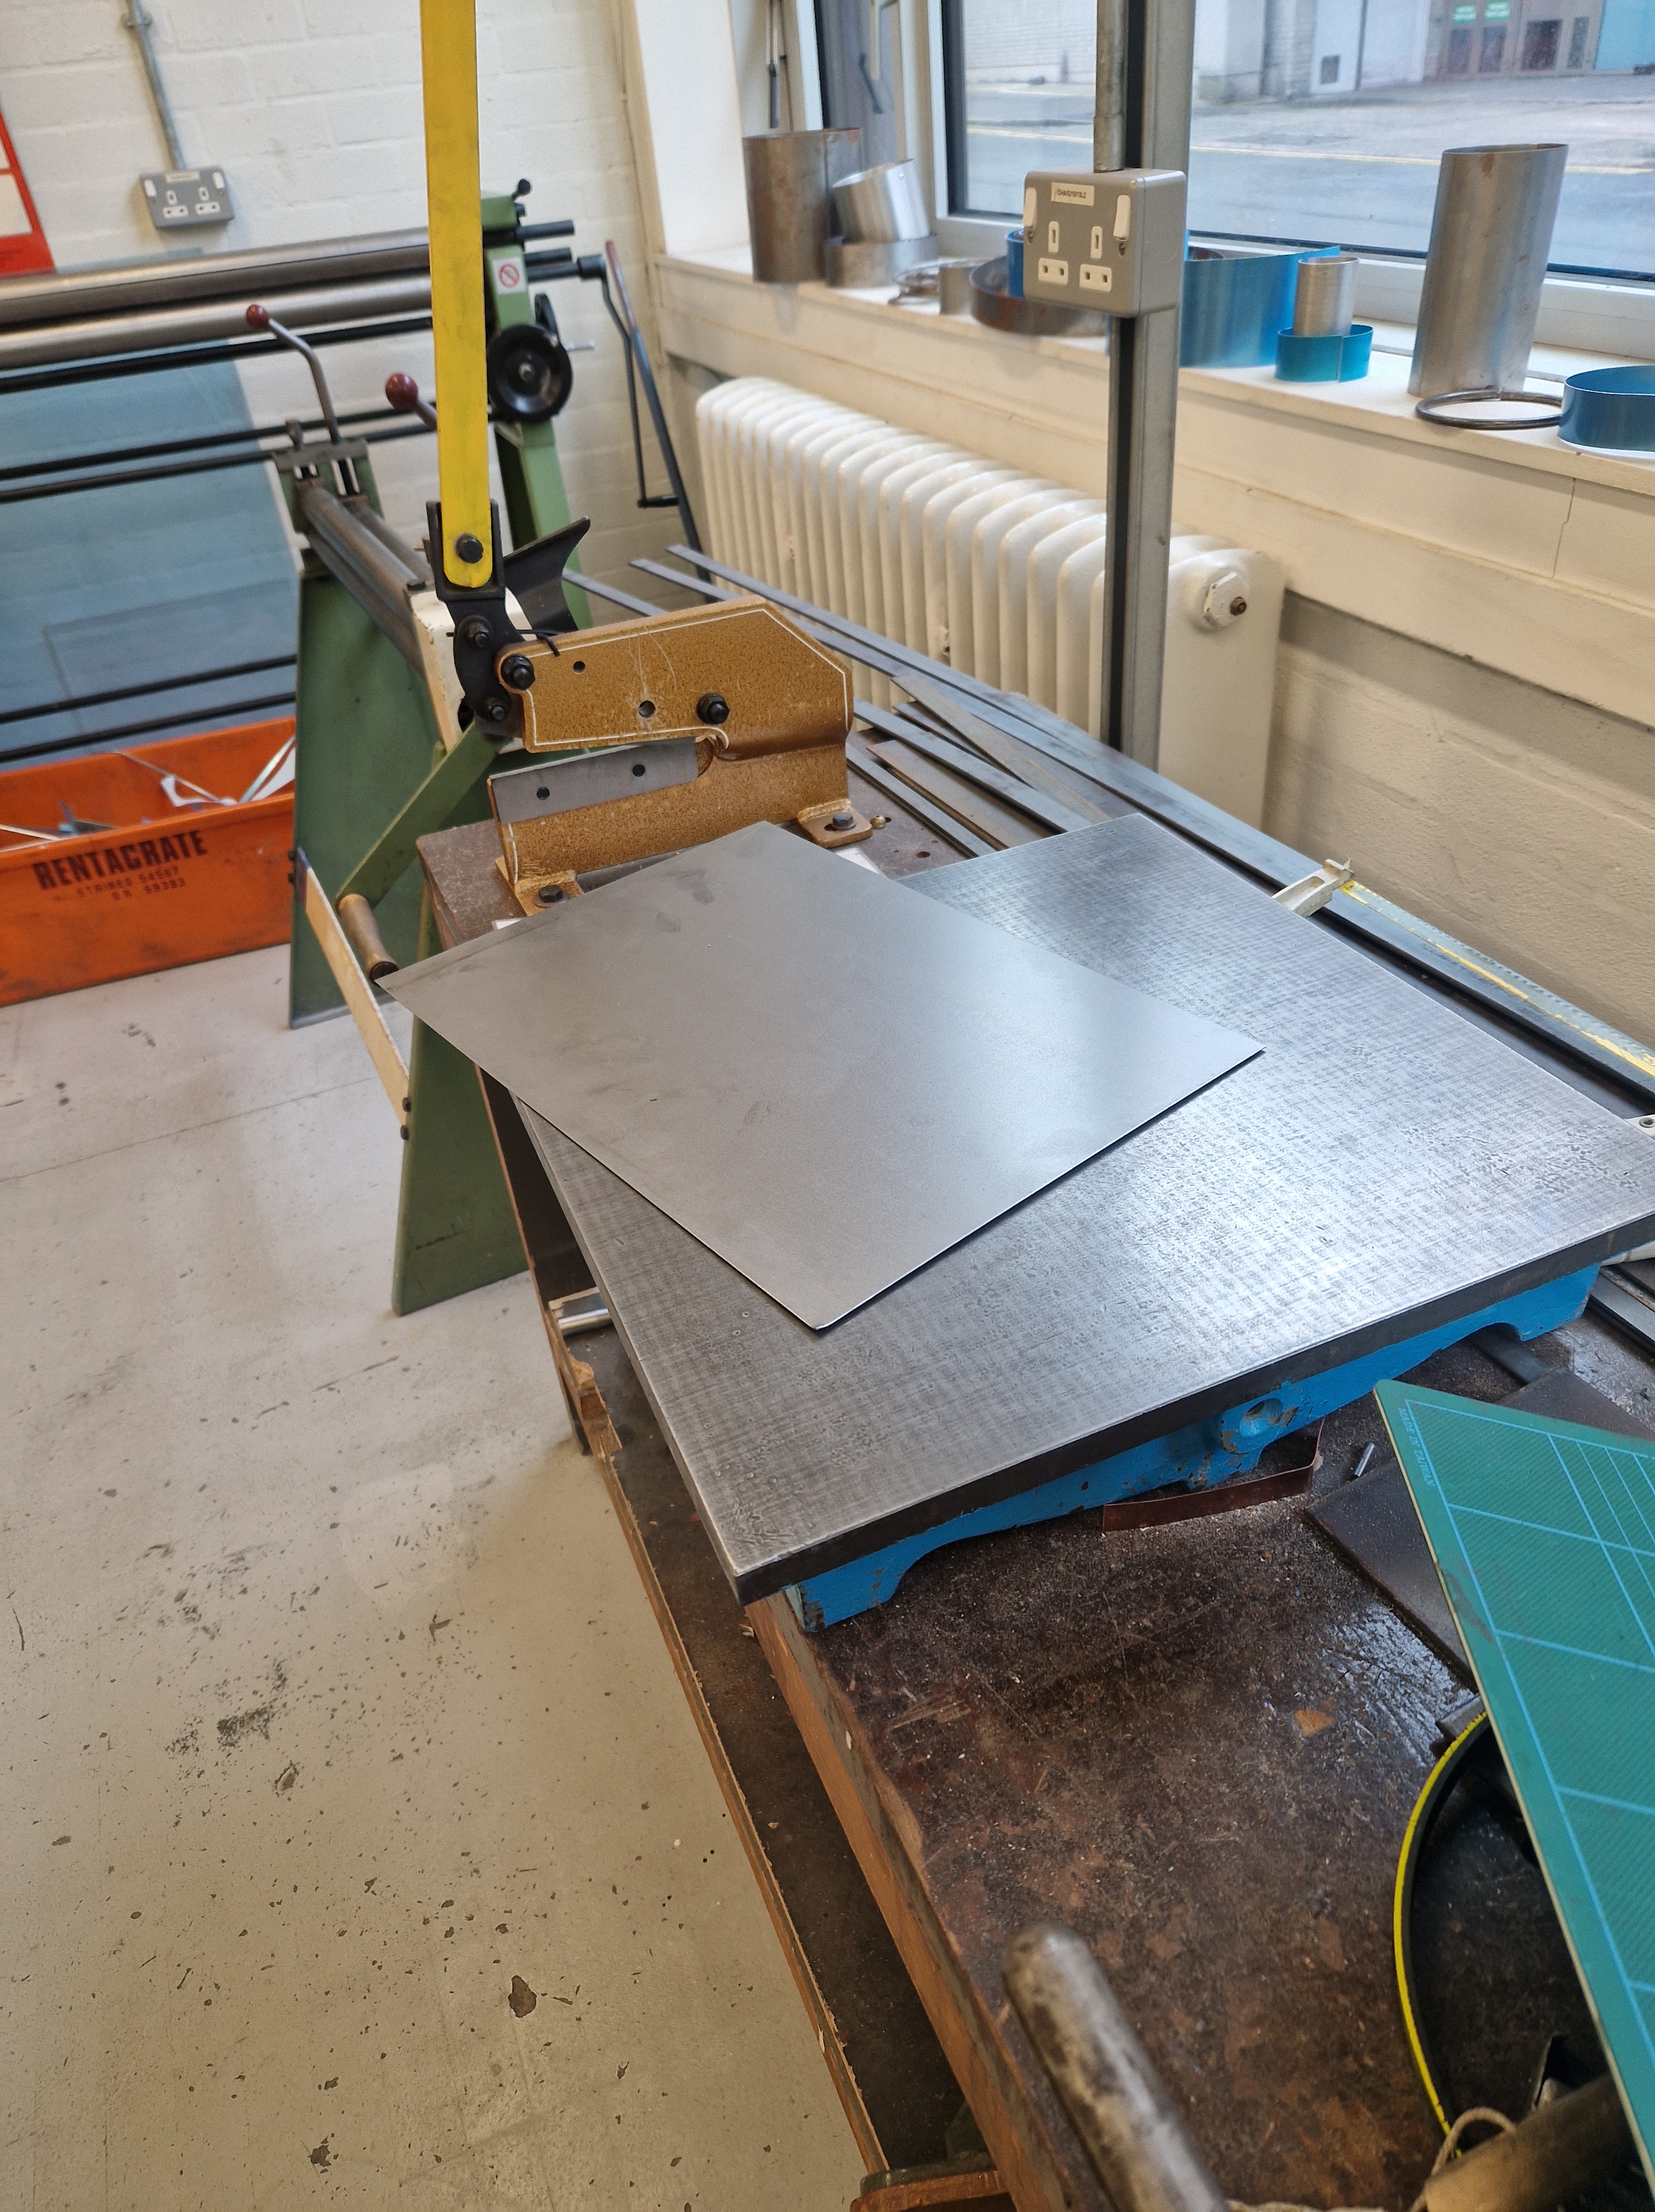
METAL WORKSHOP
In order to finalise two sculptures I needed a few things from the metal workshop (wire and a large sheet of steel).
First I visited the workshop to check out the materials I will be working with and booked an Easter break session.

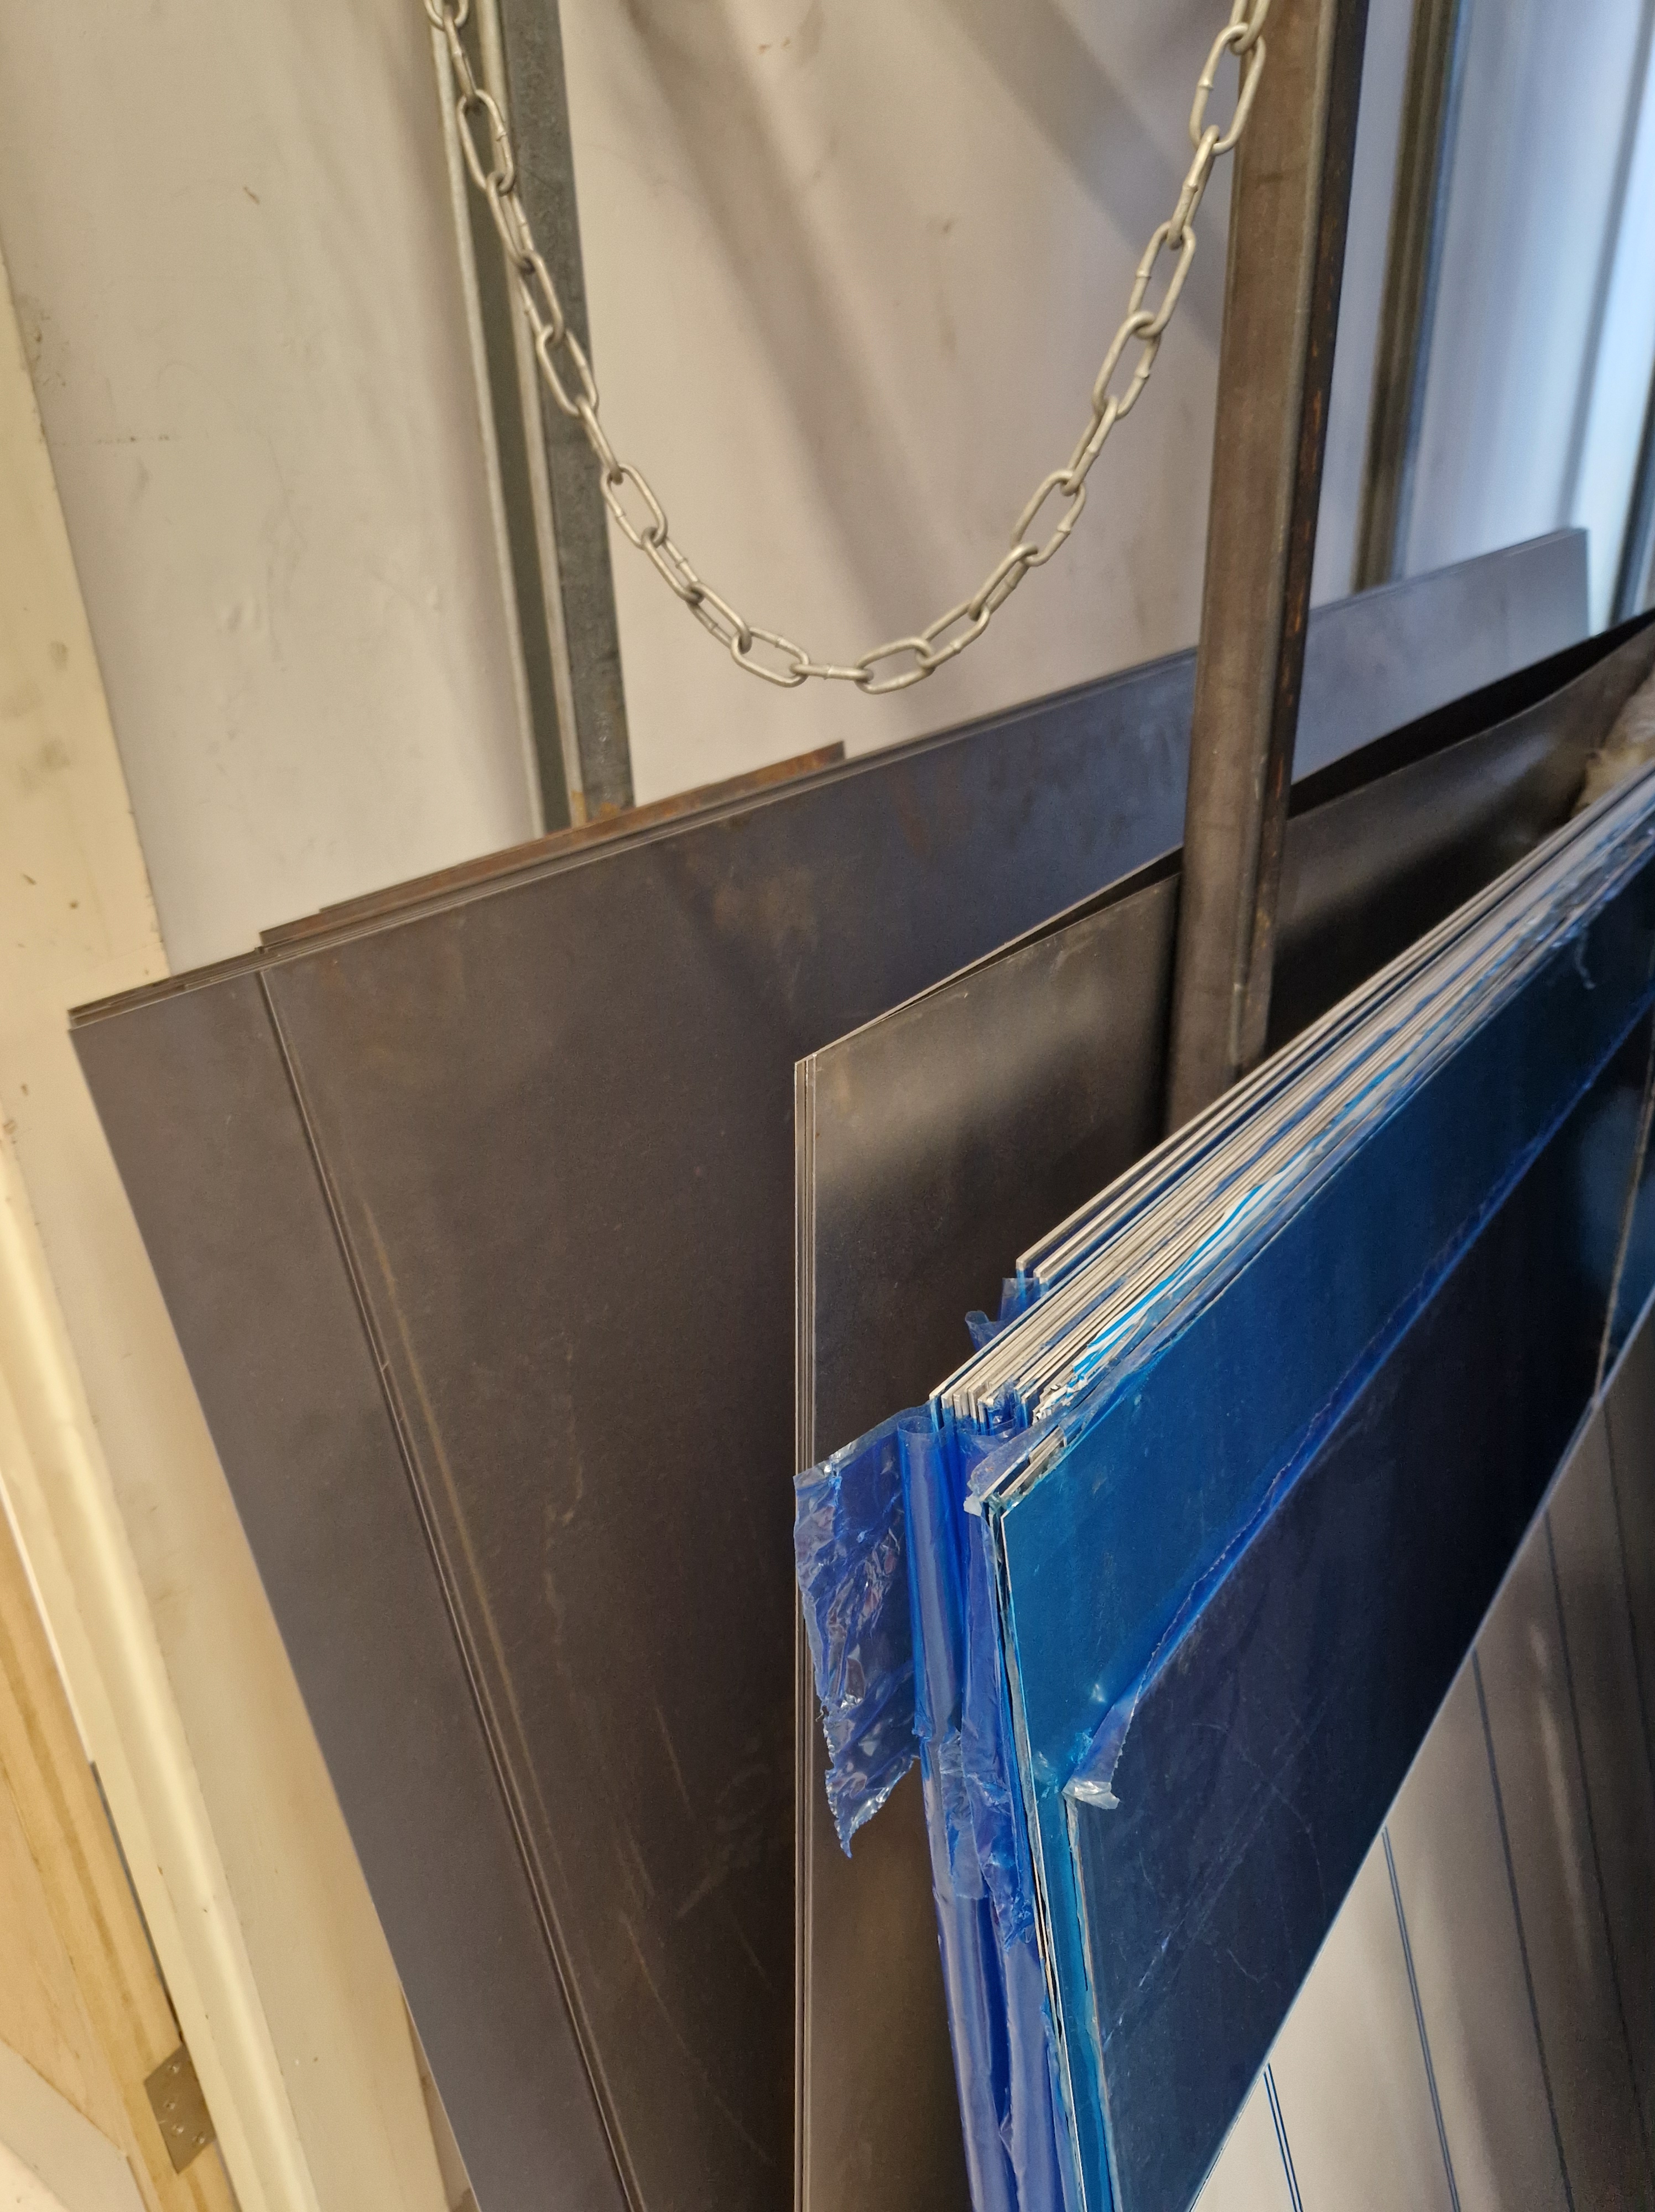
I was assisted in cutting the steel sheets I required for my sculpture.
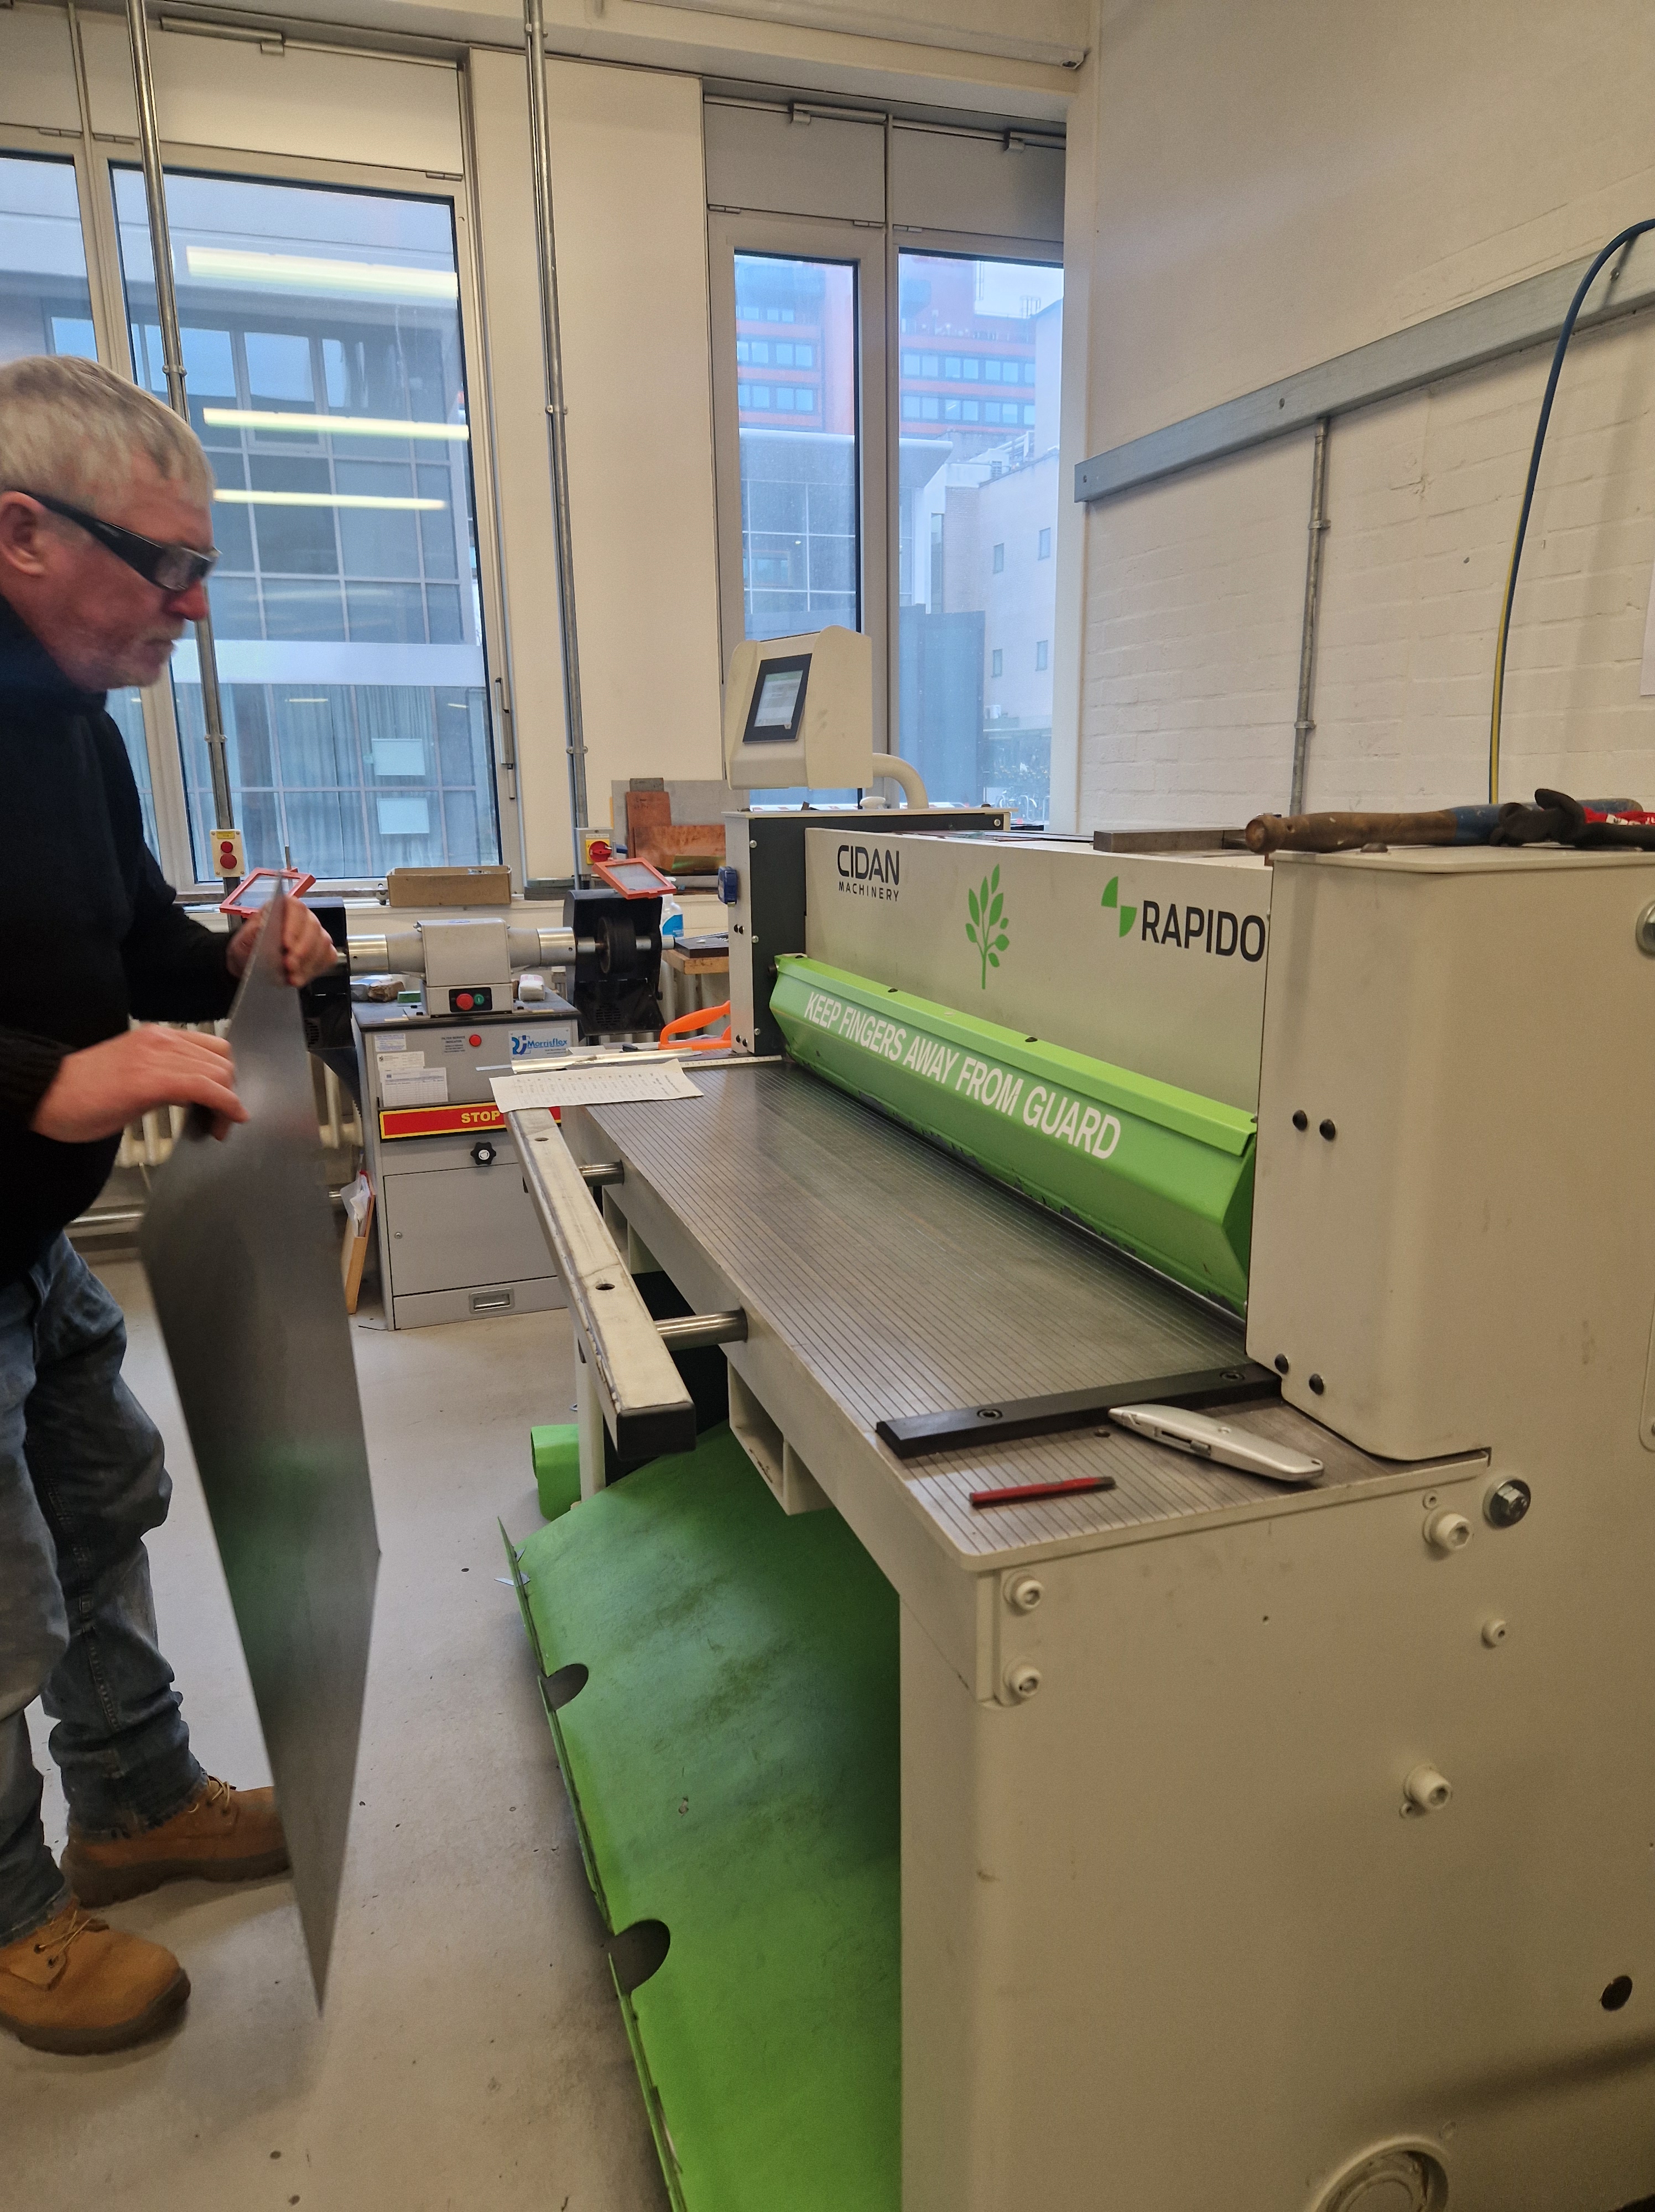
Then, I made a sculpture using copper wire and some tools provided.

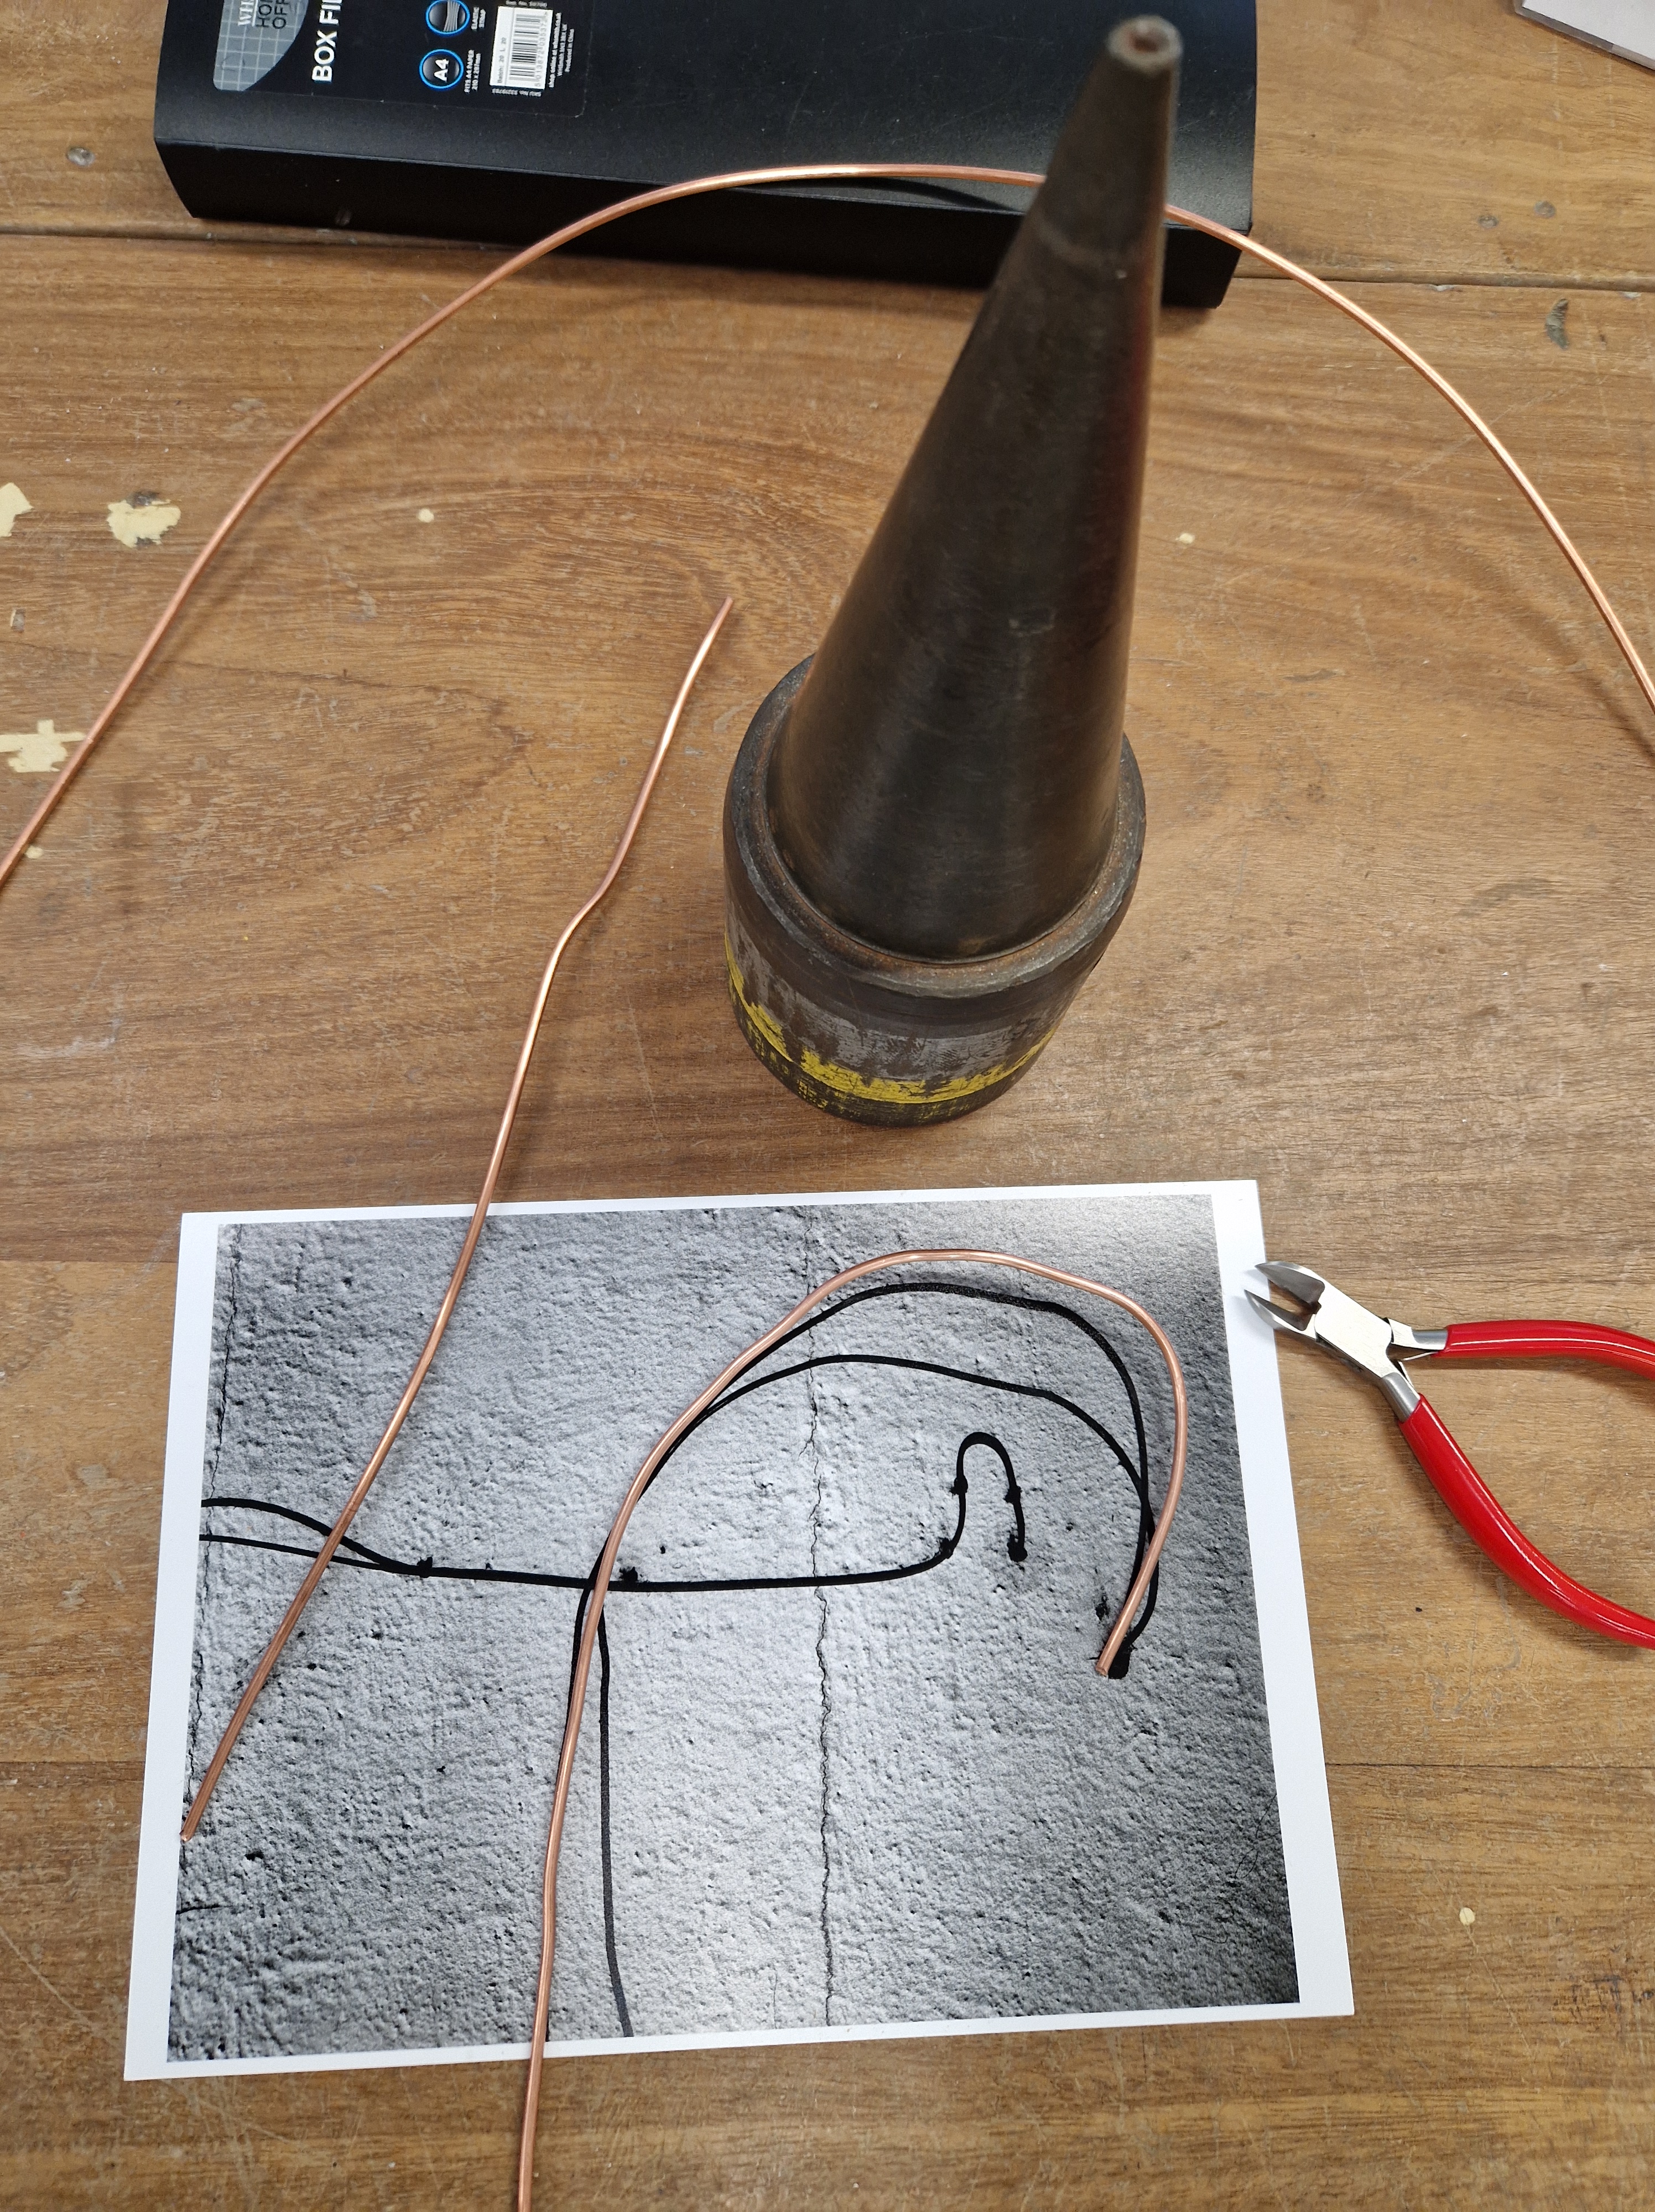
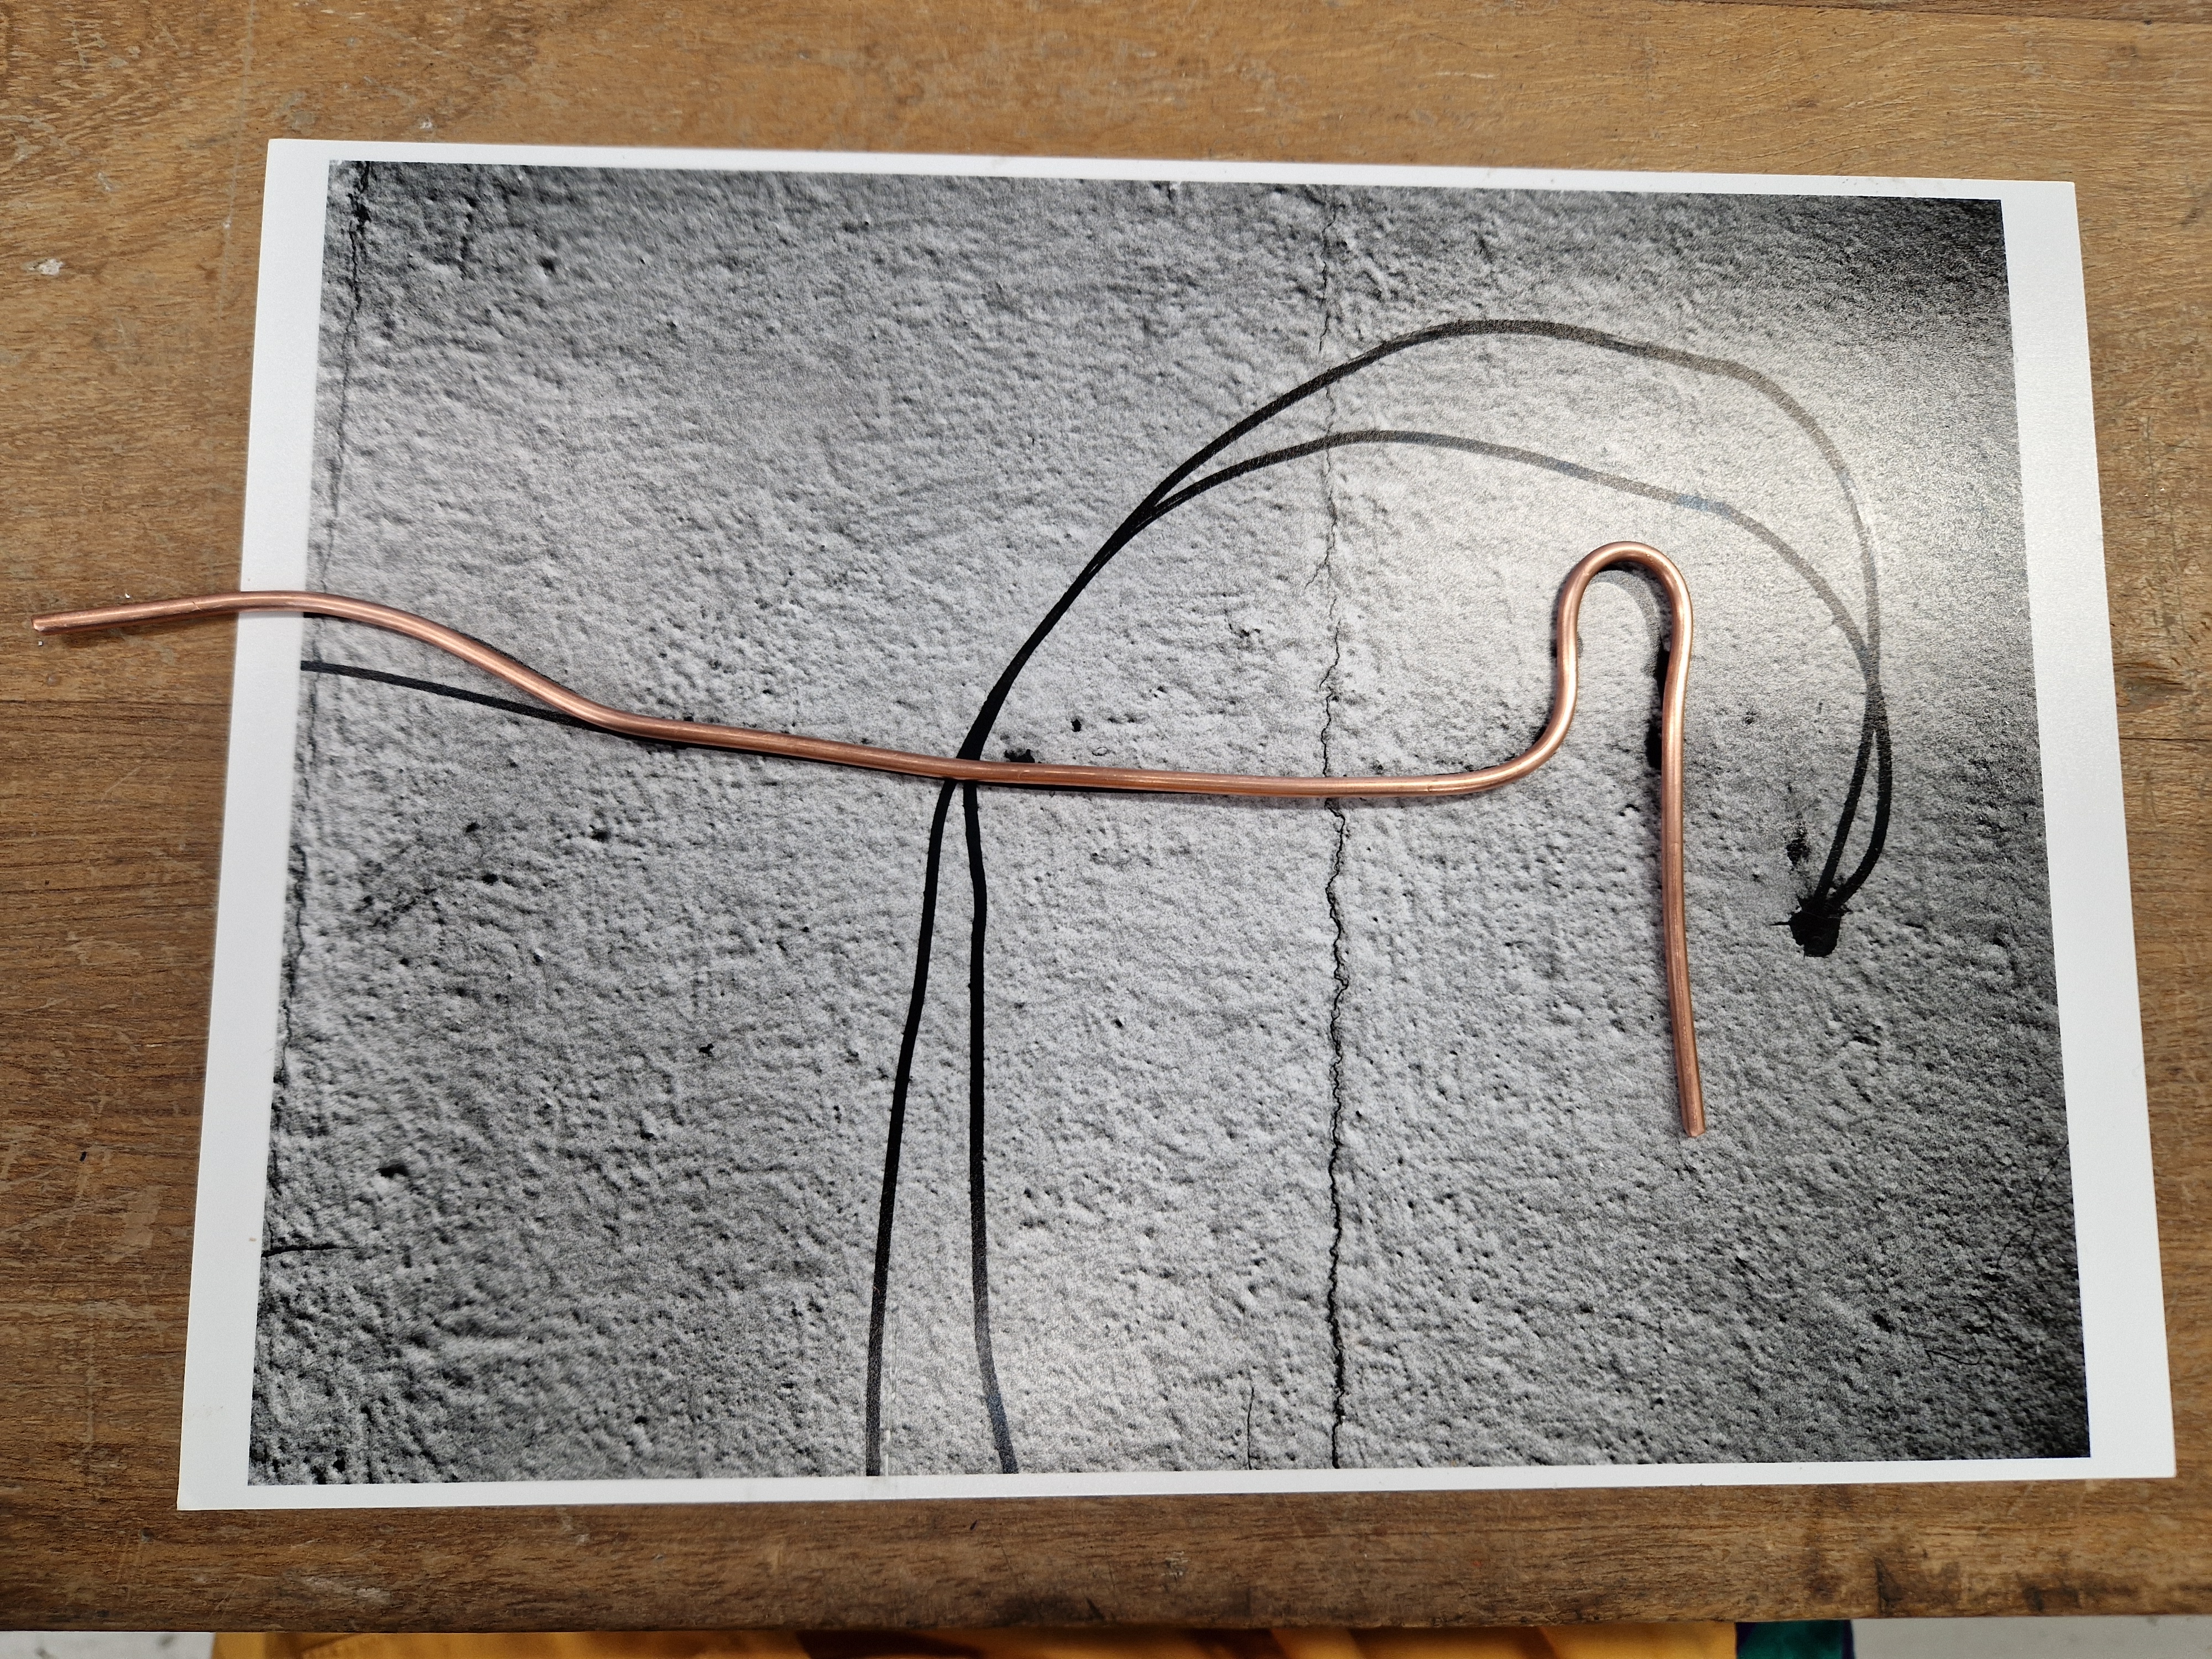
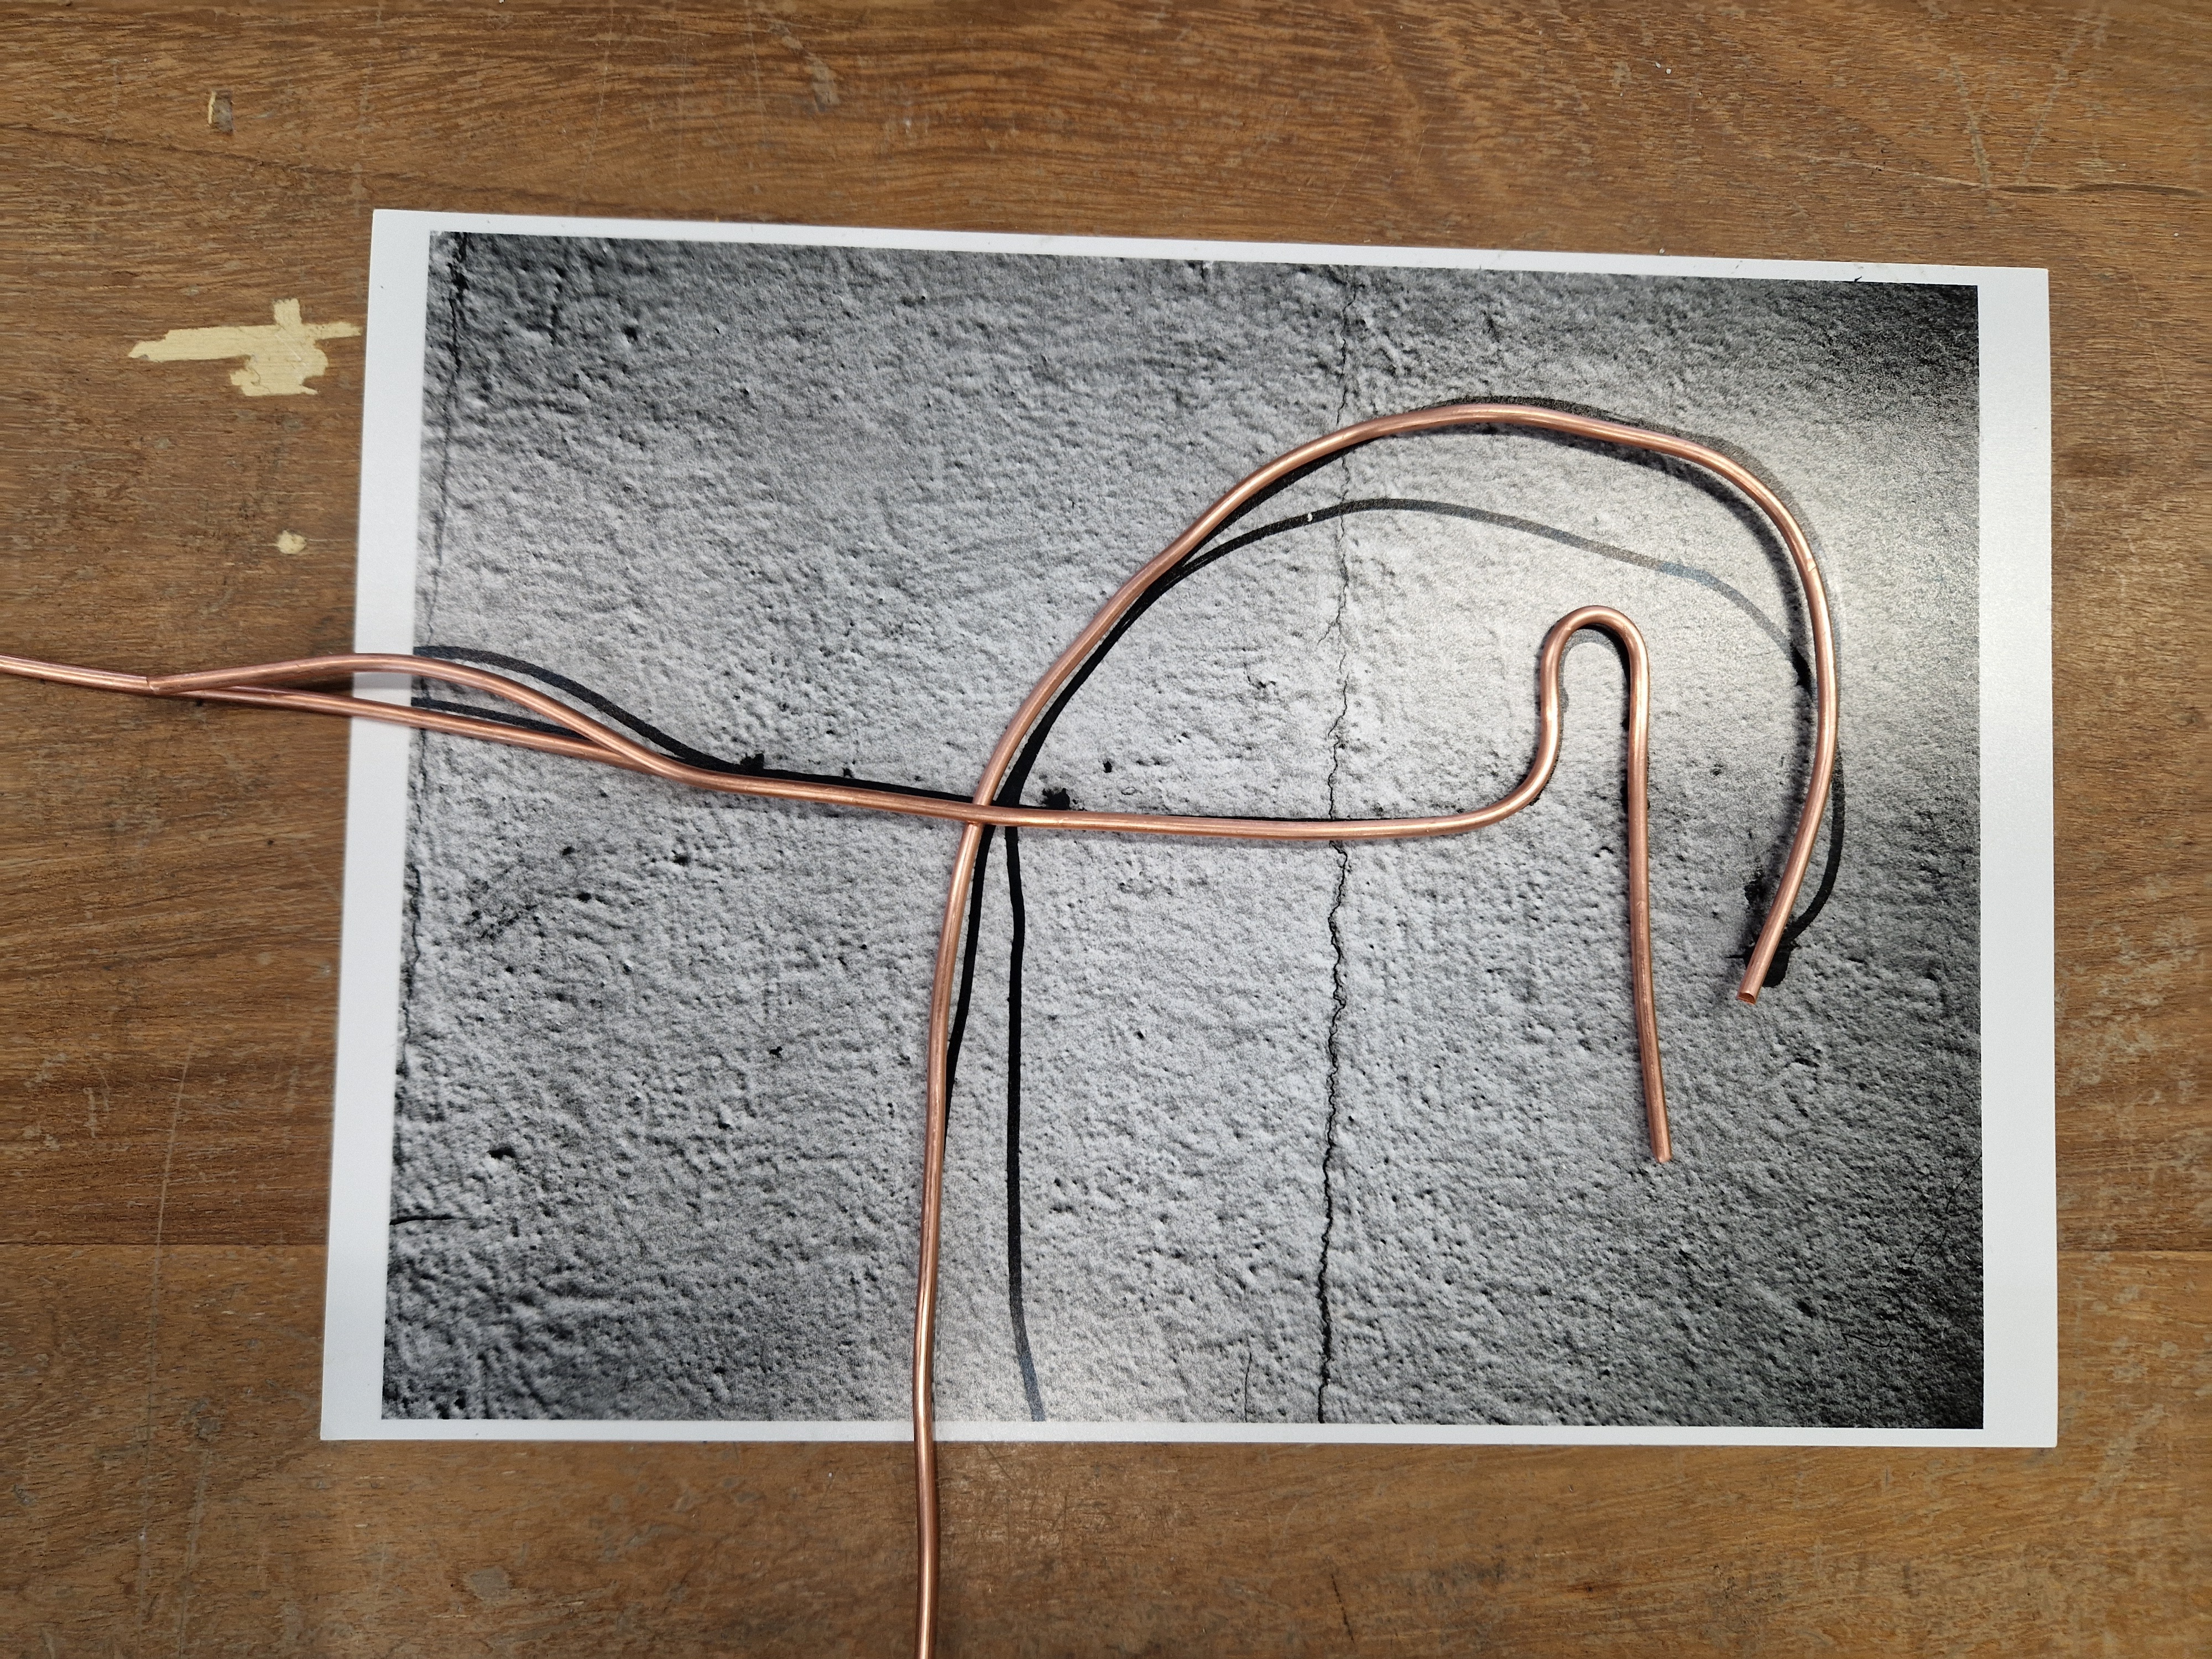
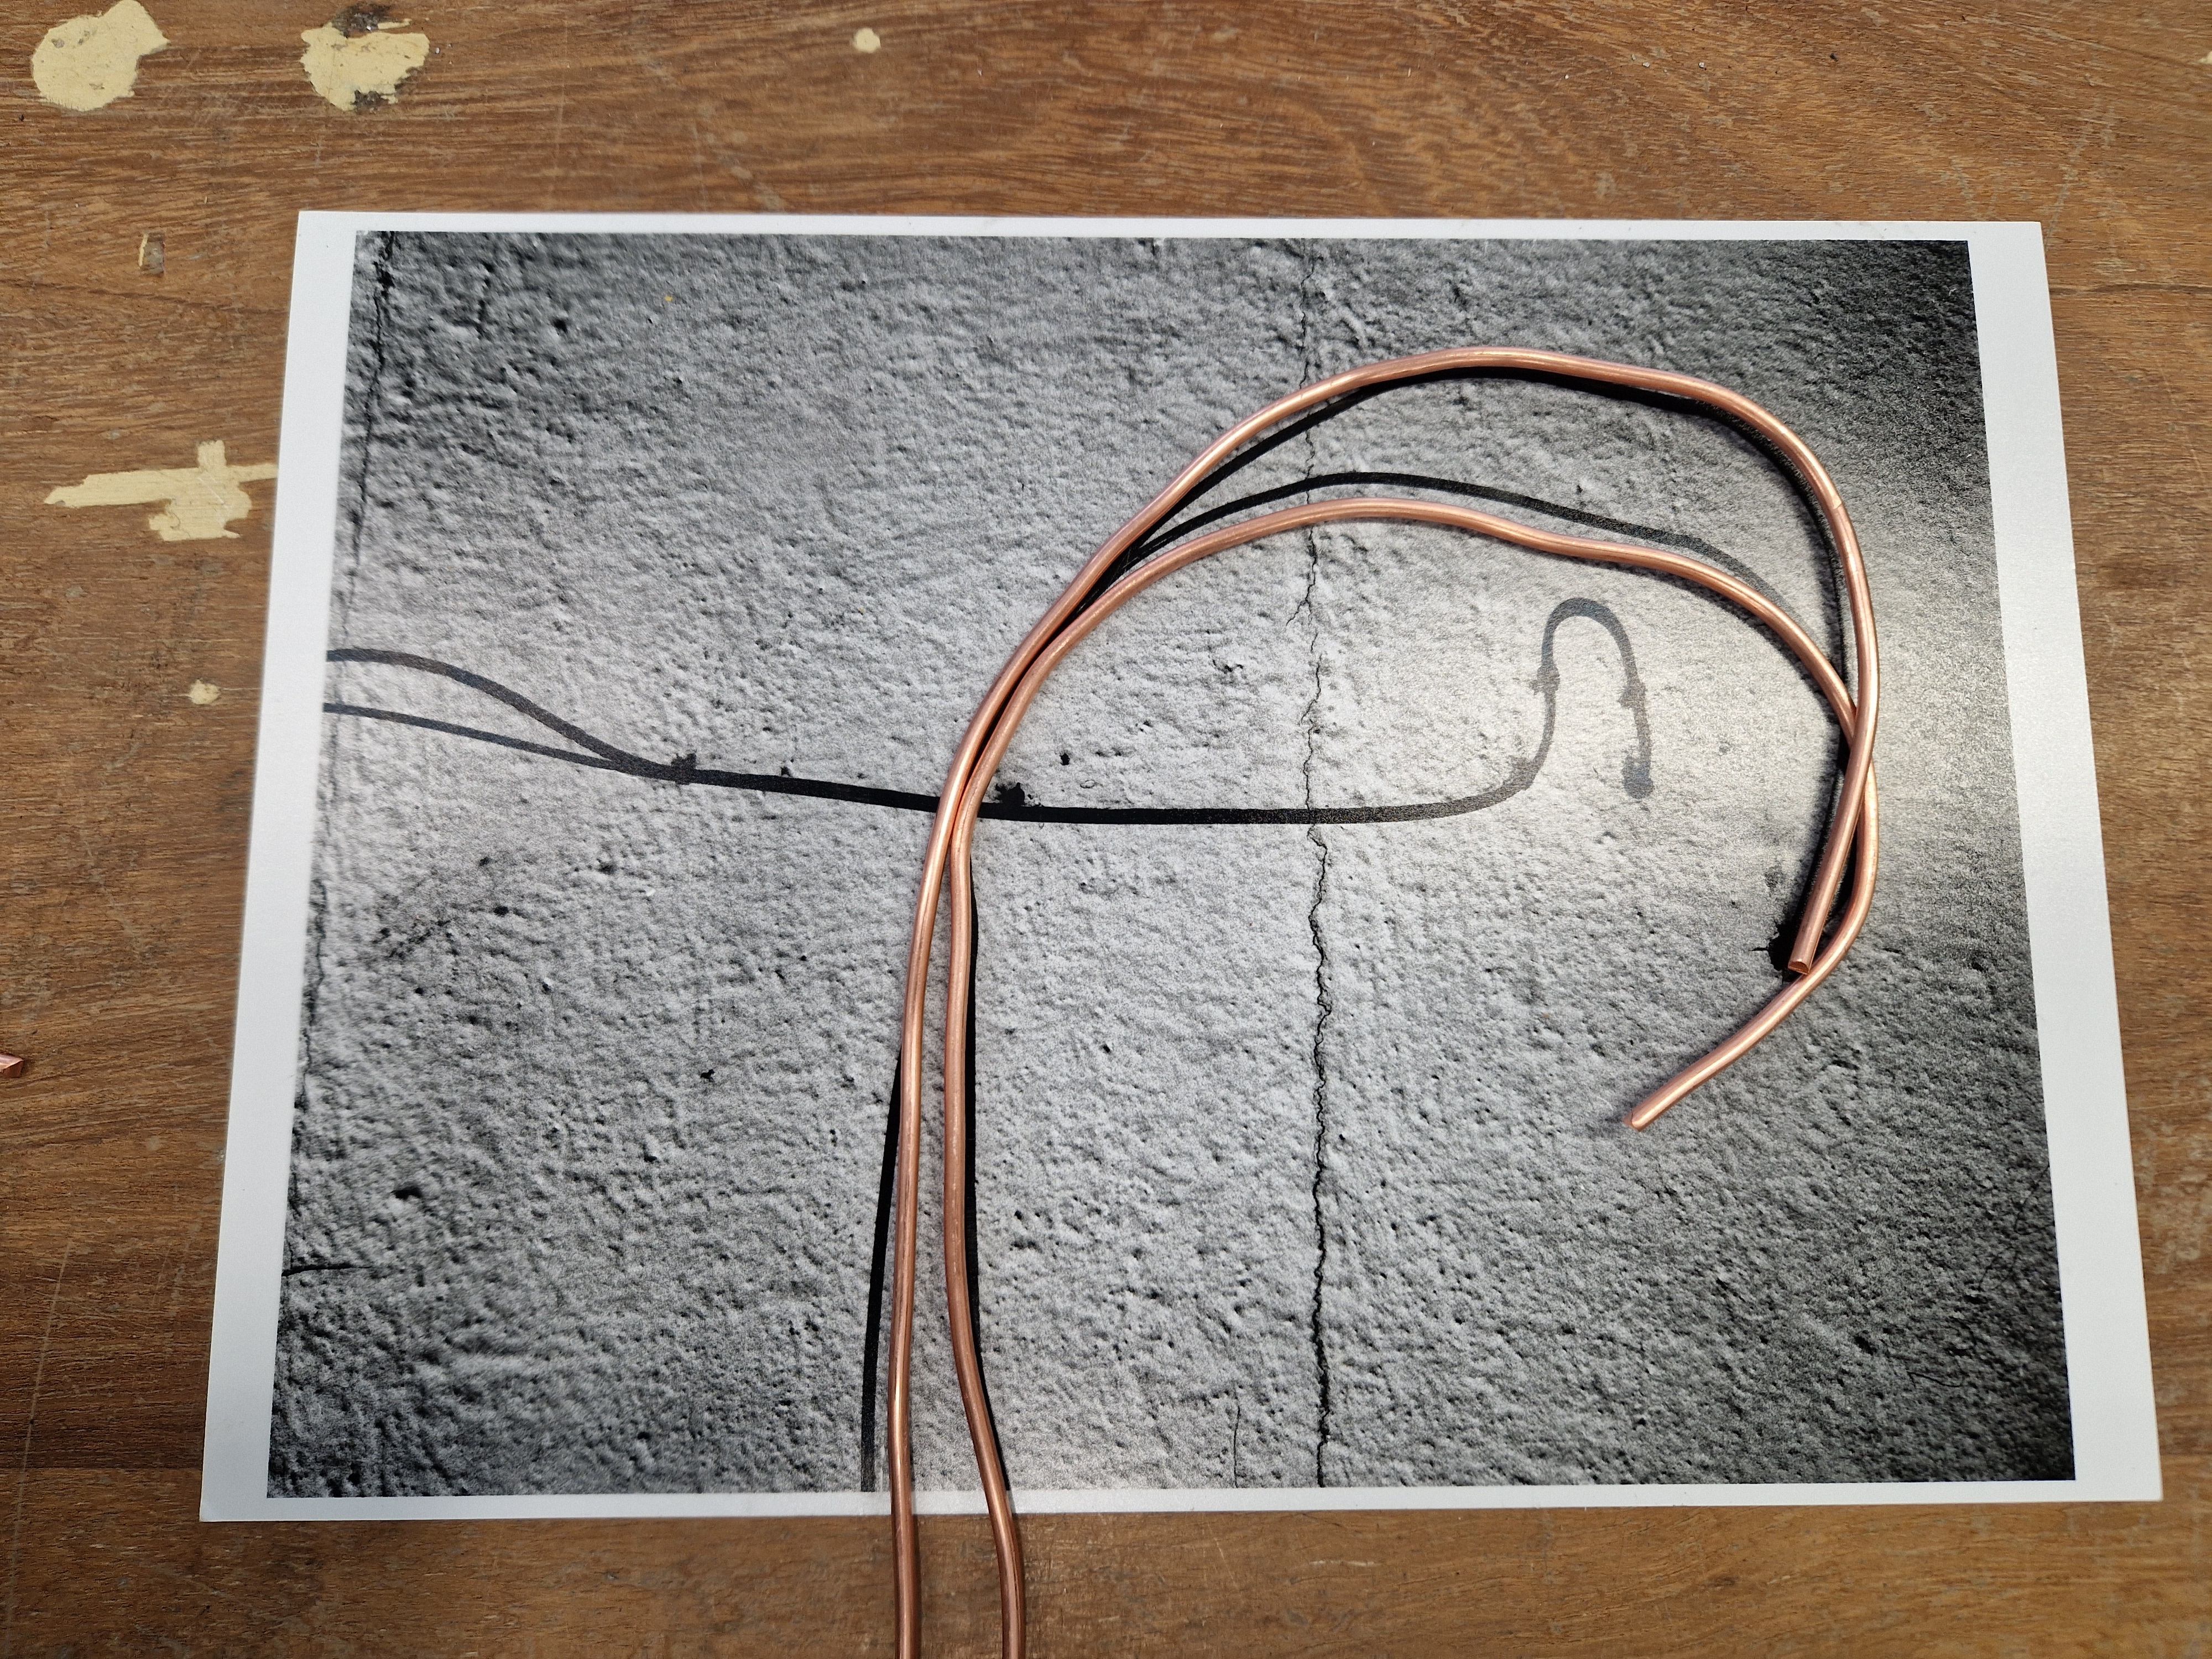
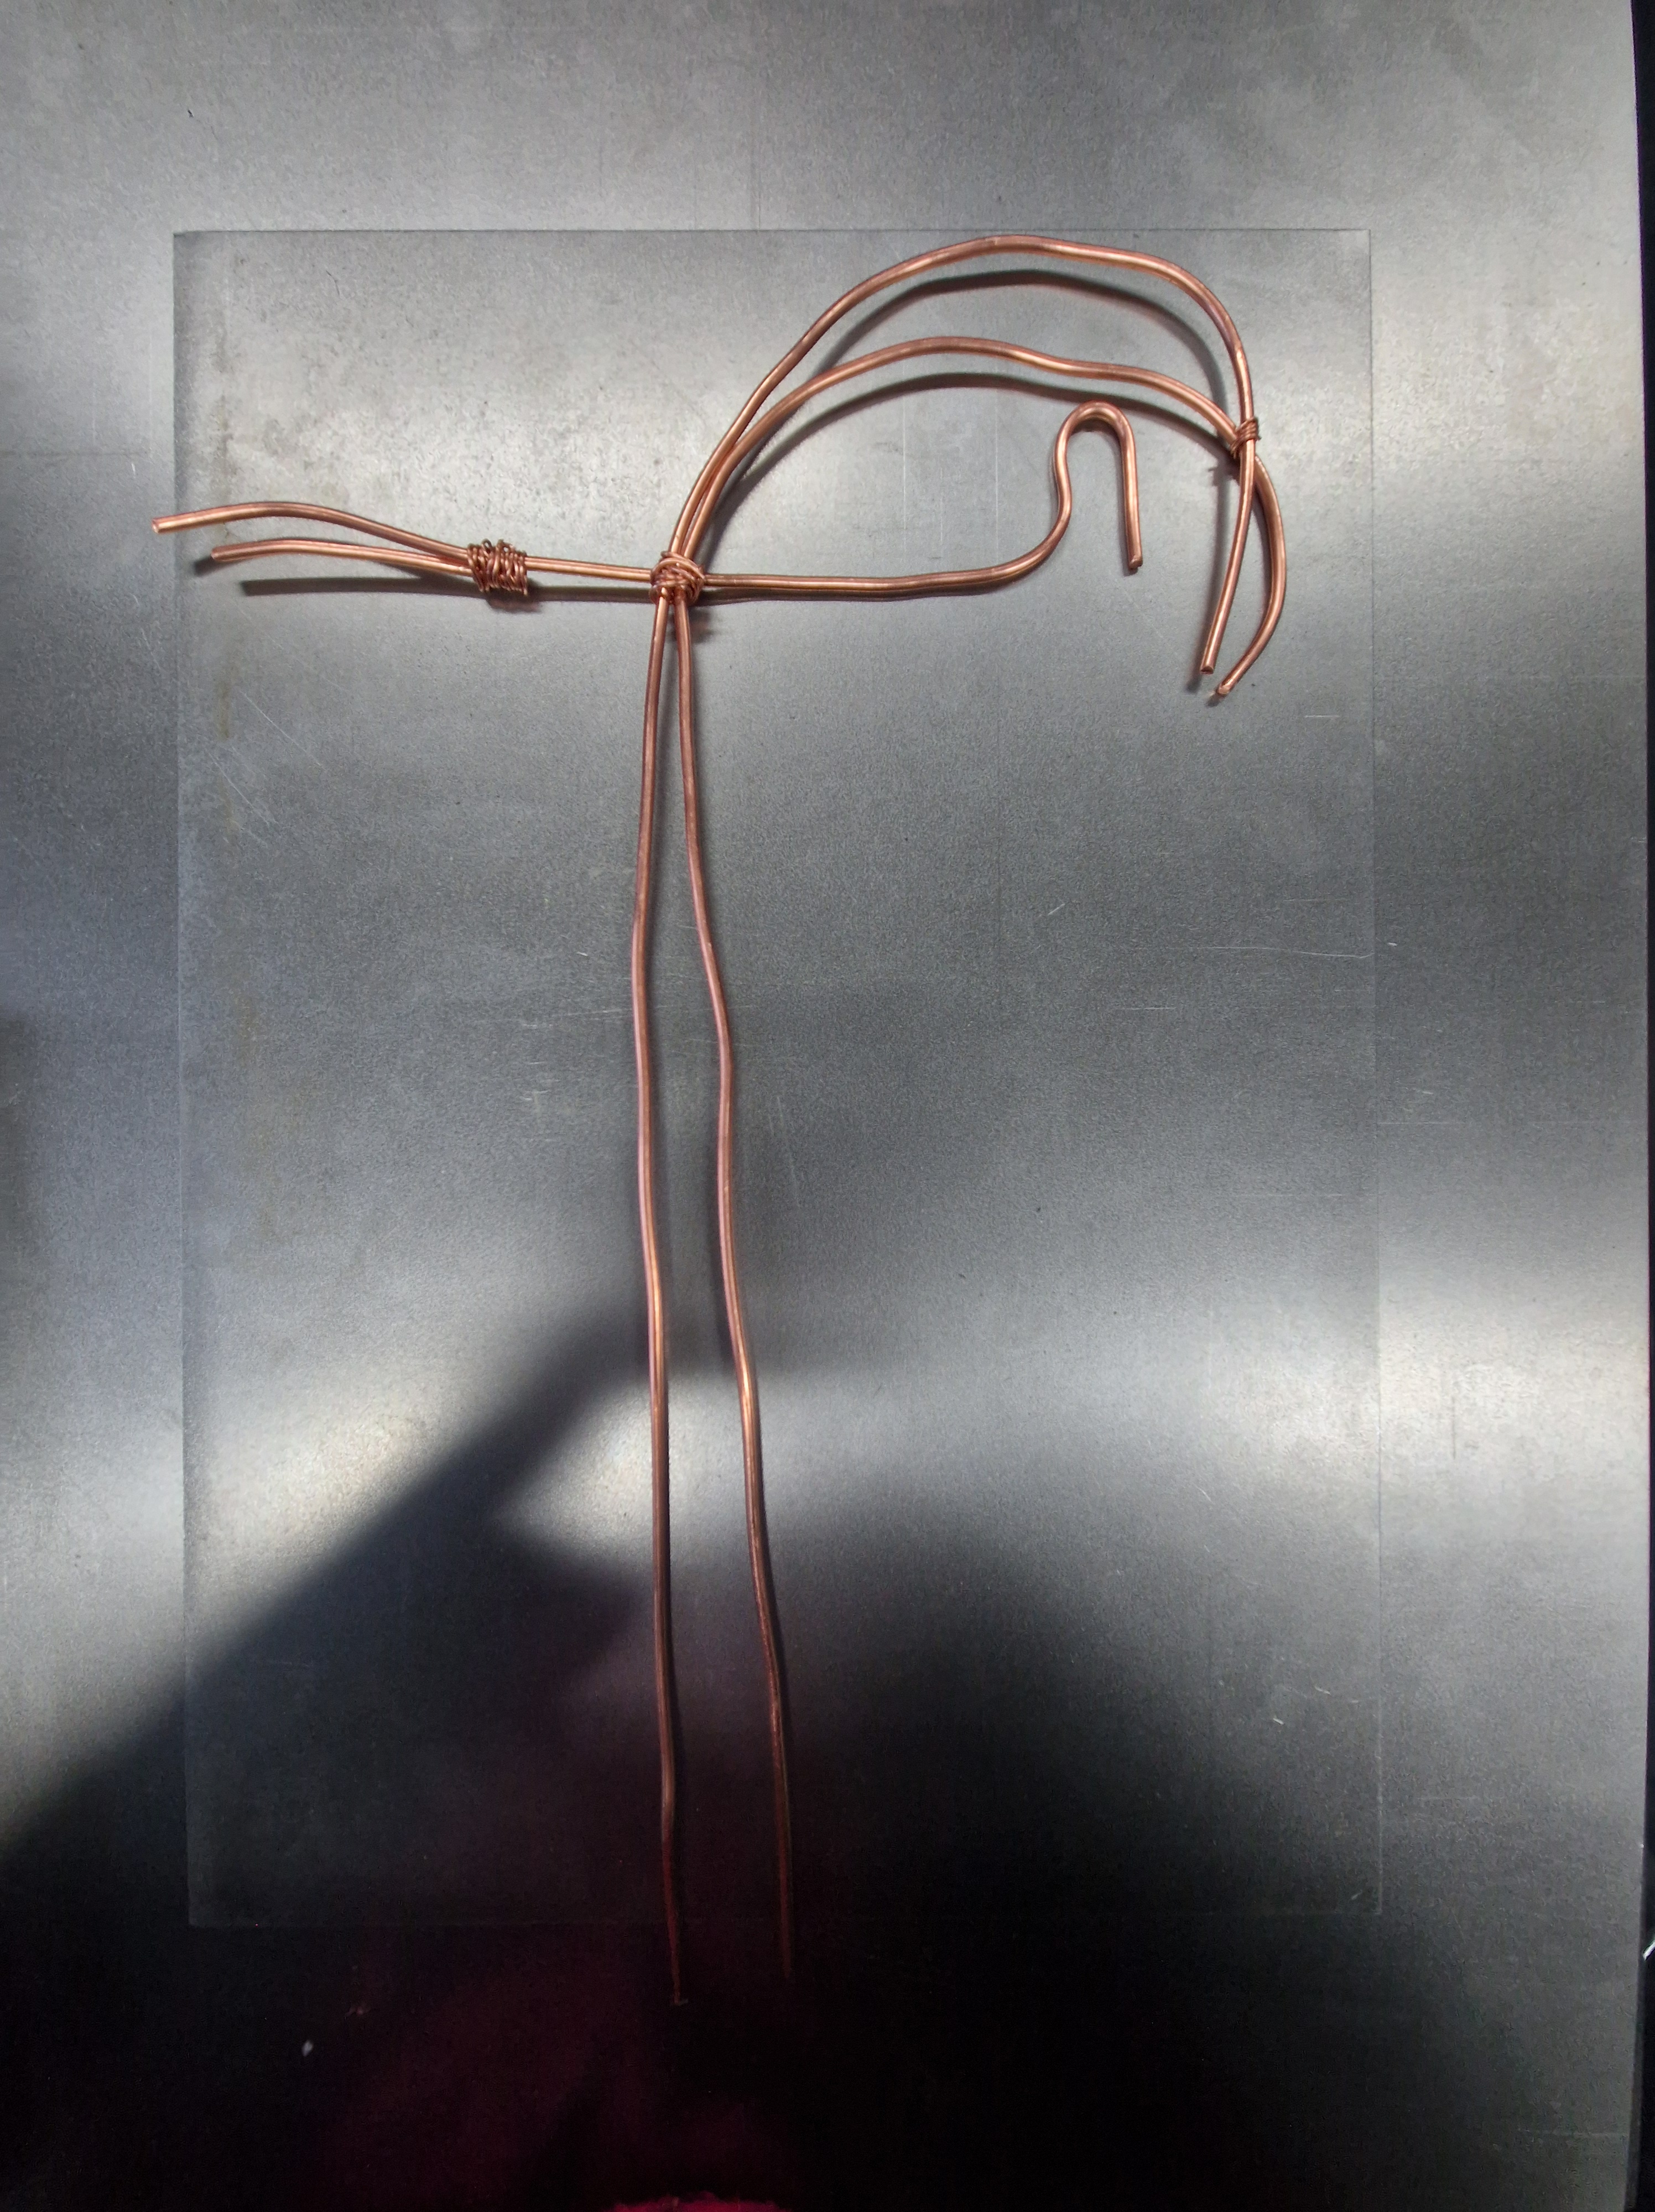
REFLECTIONS: I thoroughly enjoyed working on this sculpture. It made me realise how much I love the action of just DOING. Really getting immersed in the process, connecting with and getting to know the behaviour of the material. It's exciting and satisfying, more of that forever please! So refreshing!
TUTORIAL WITH THOM ABOUT DEGREE SHOW
Discussing layout options and troubleshooting.
FRIDAY
PHOTO NORTH FESTIVAL IN LEEDS
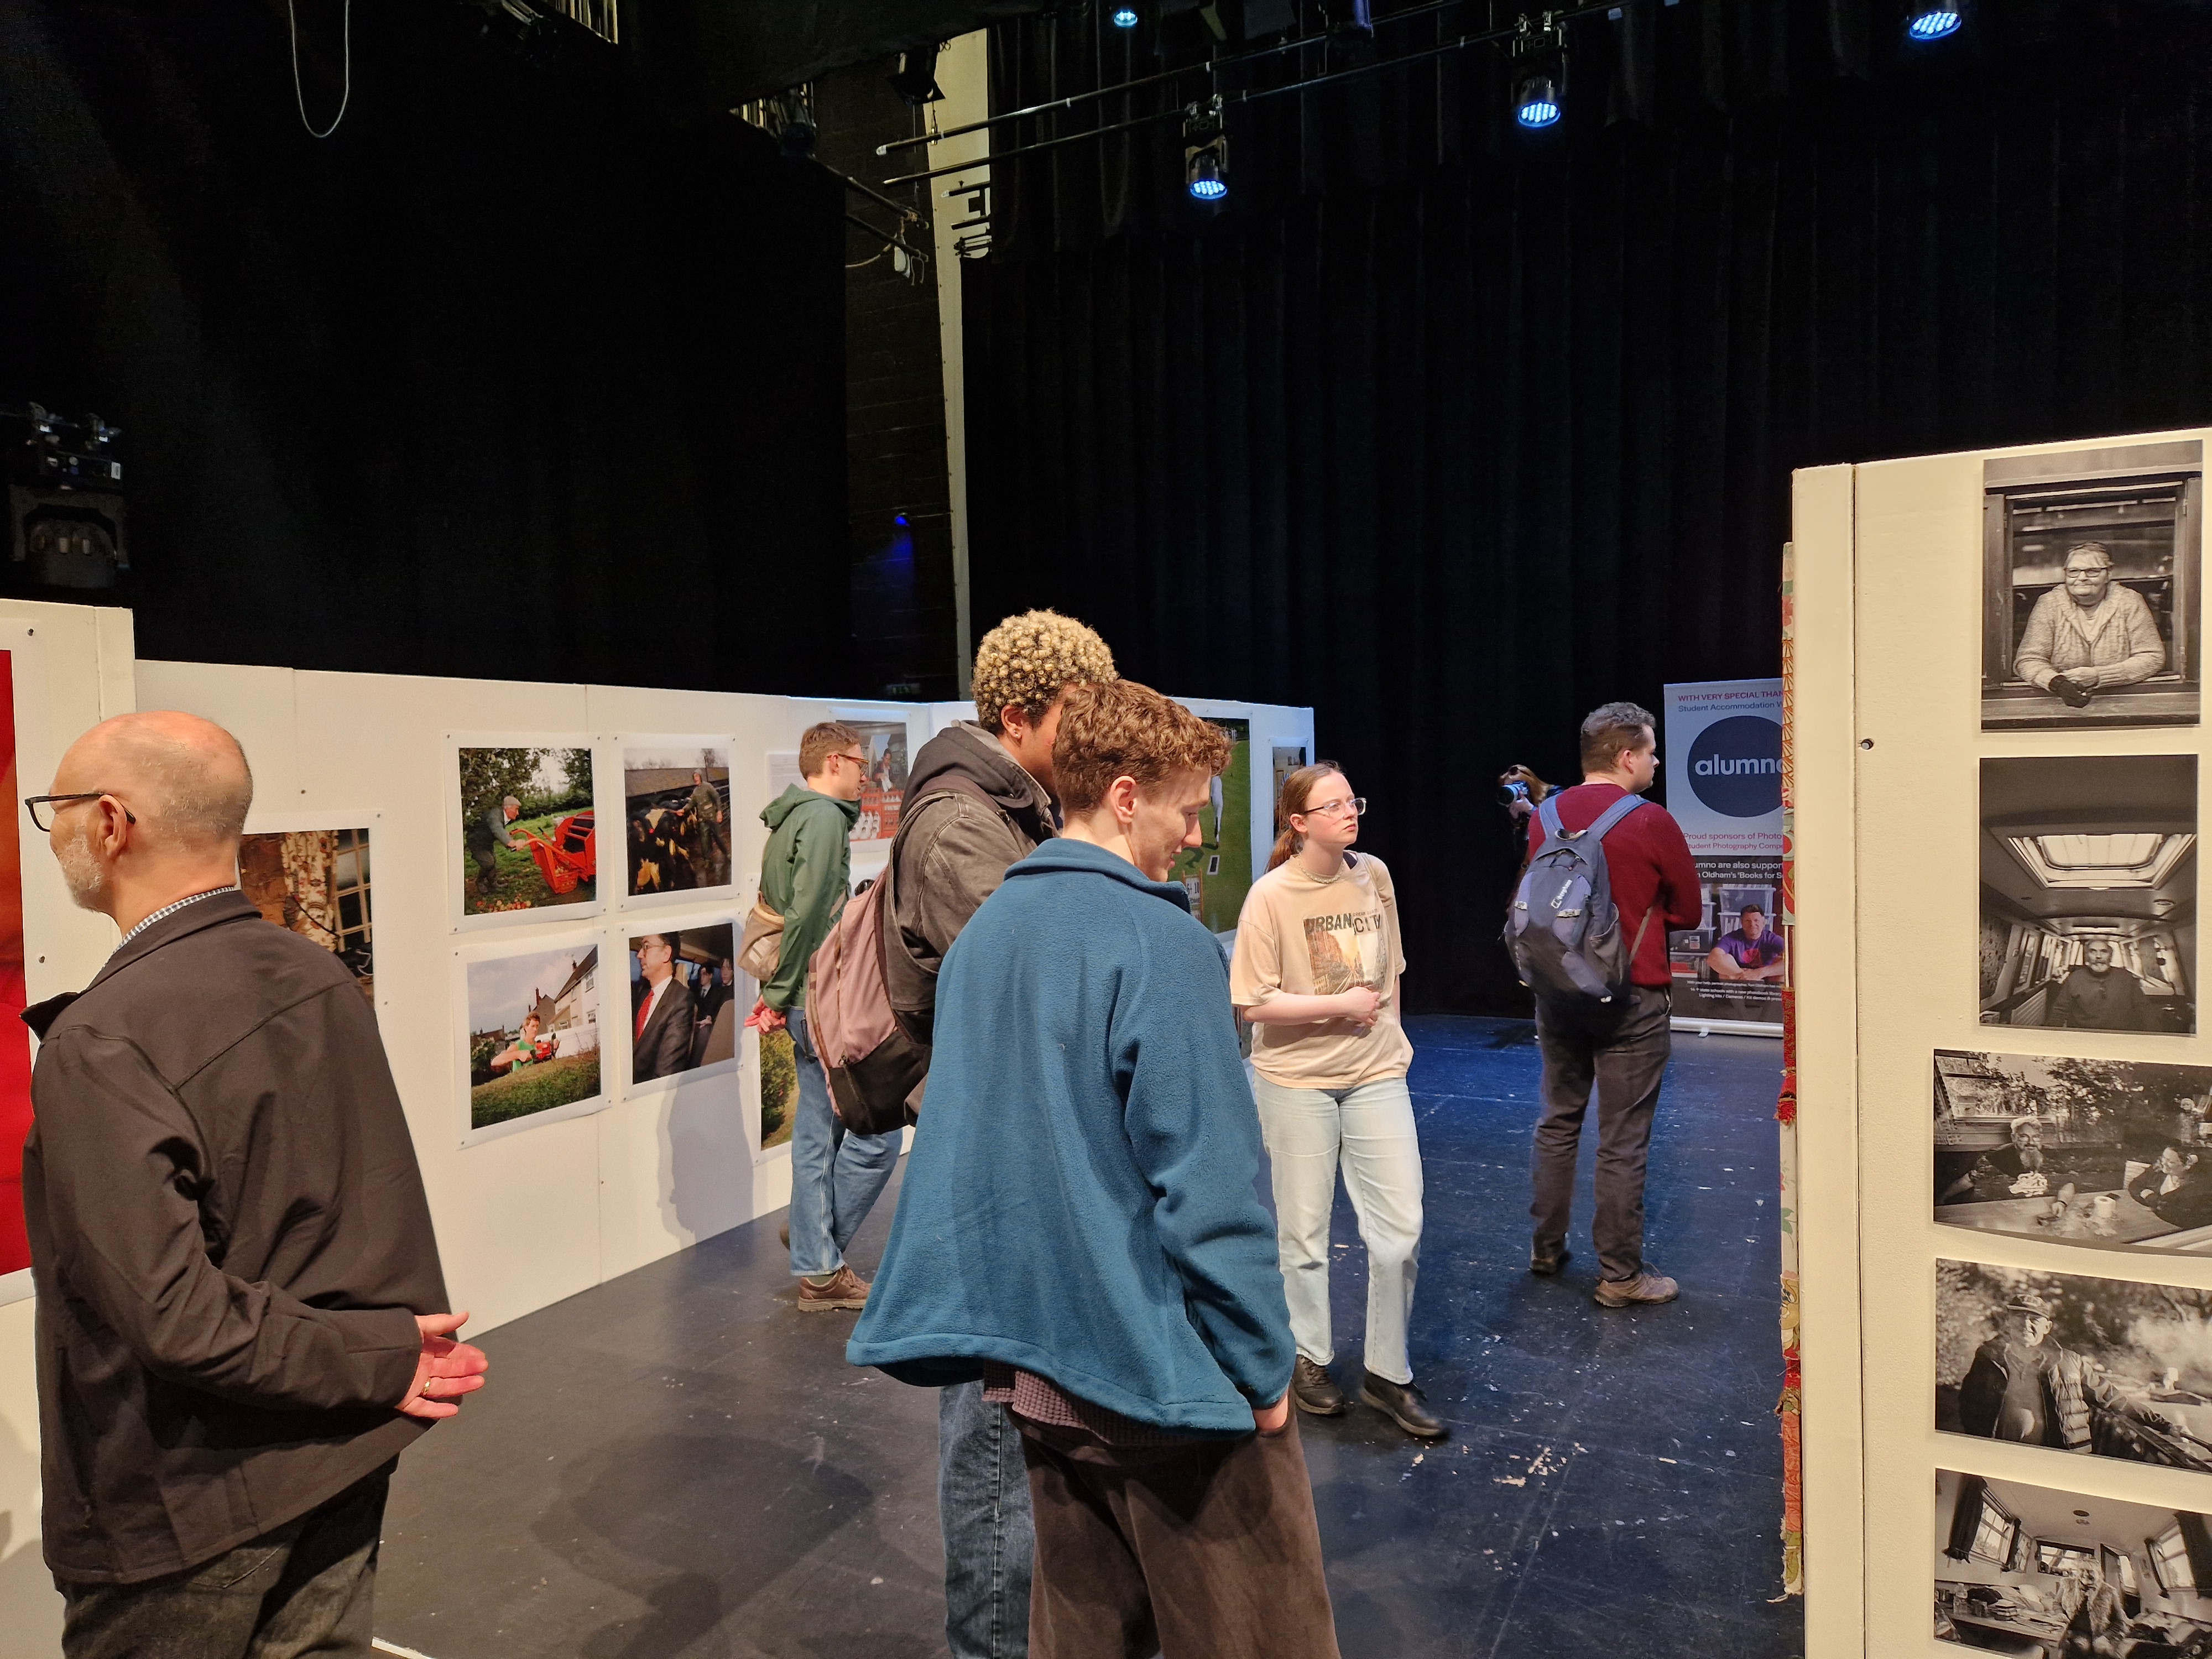
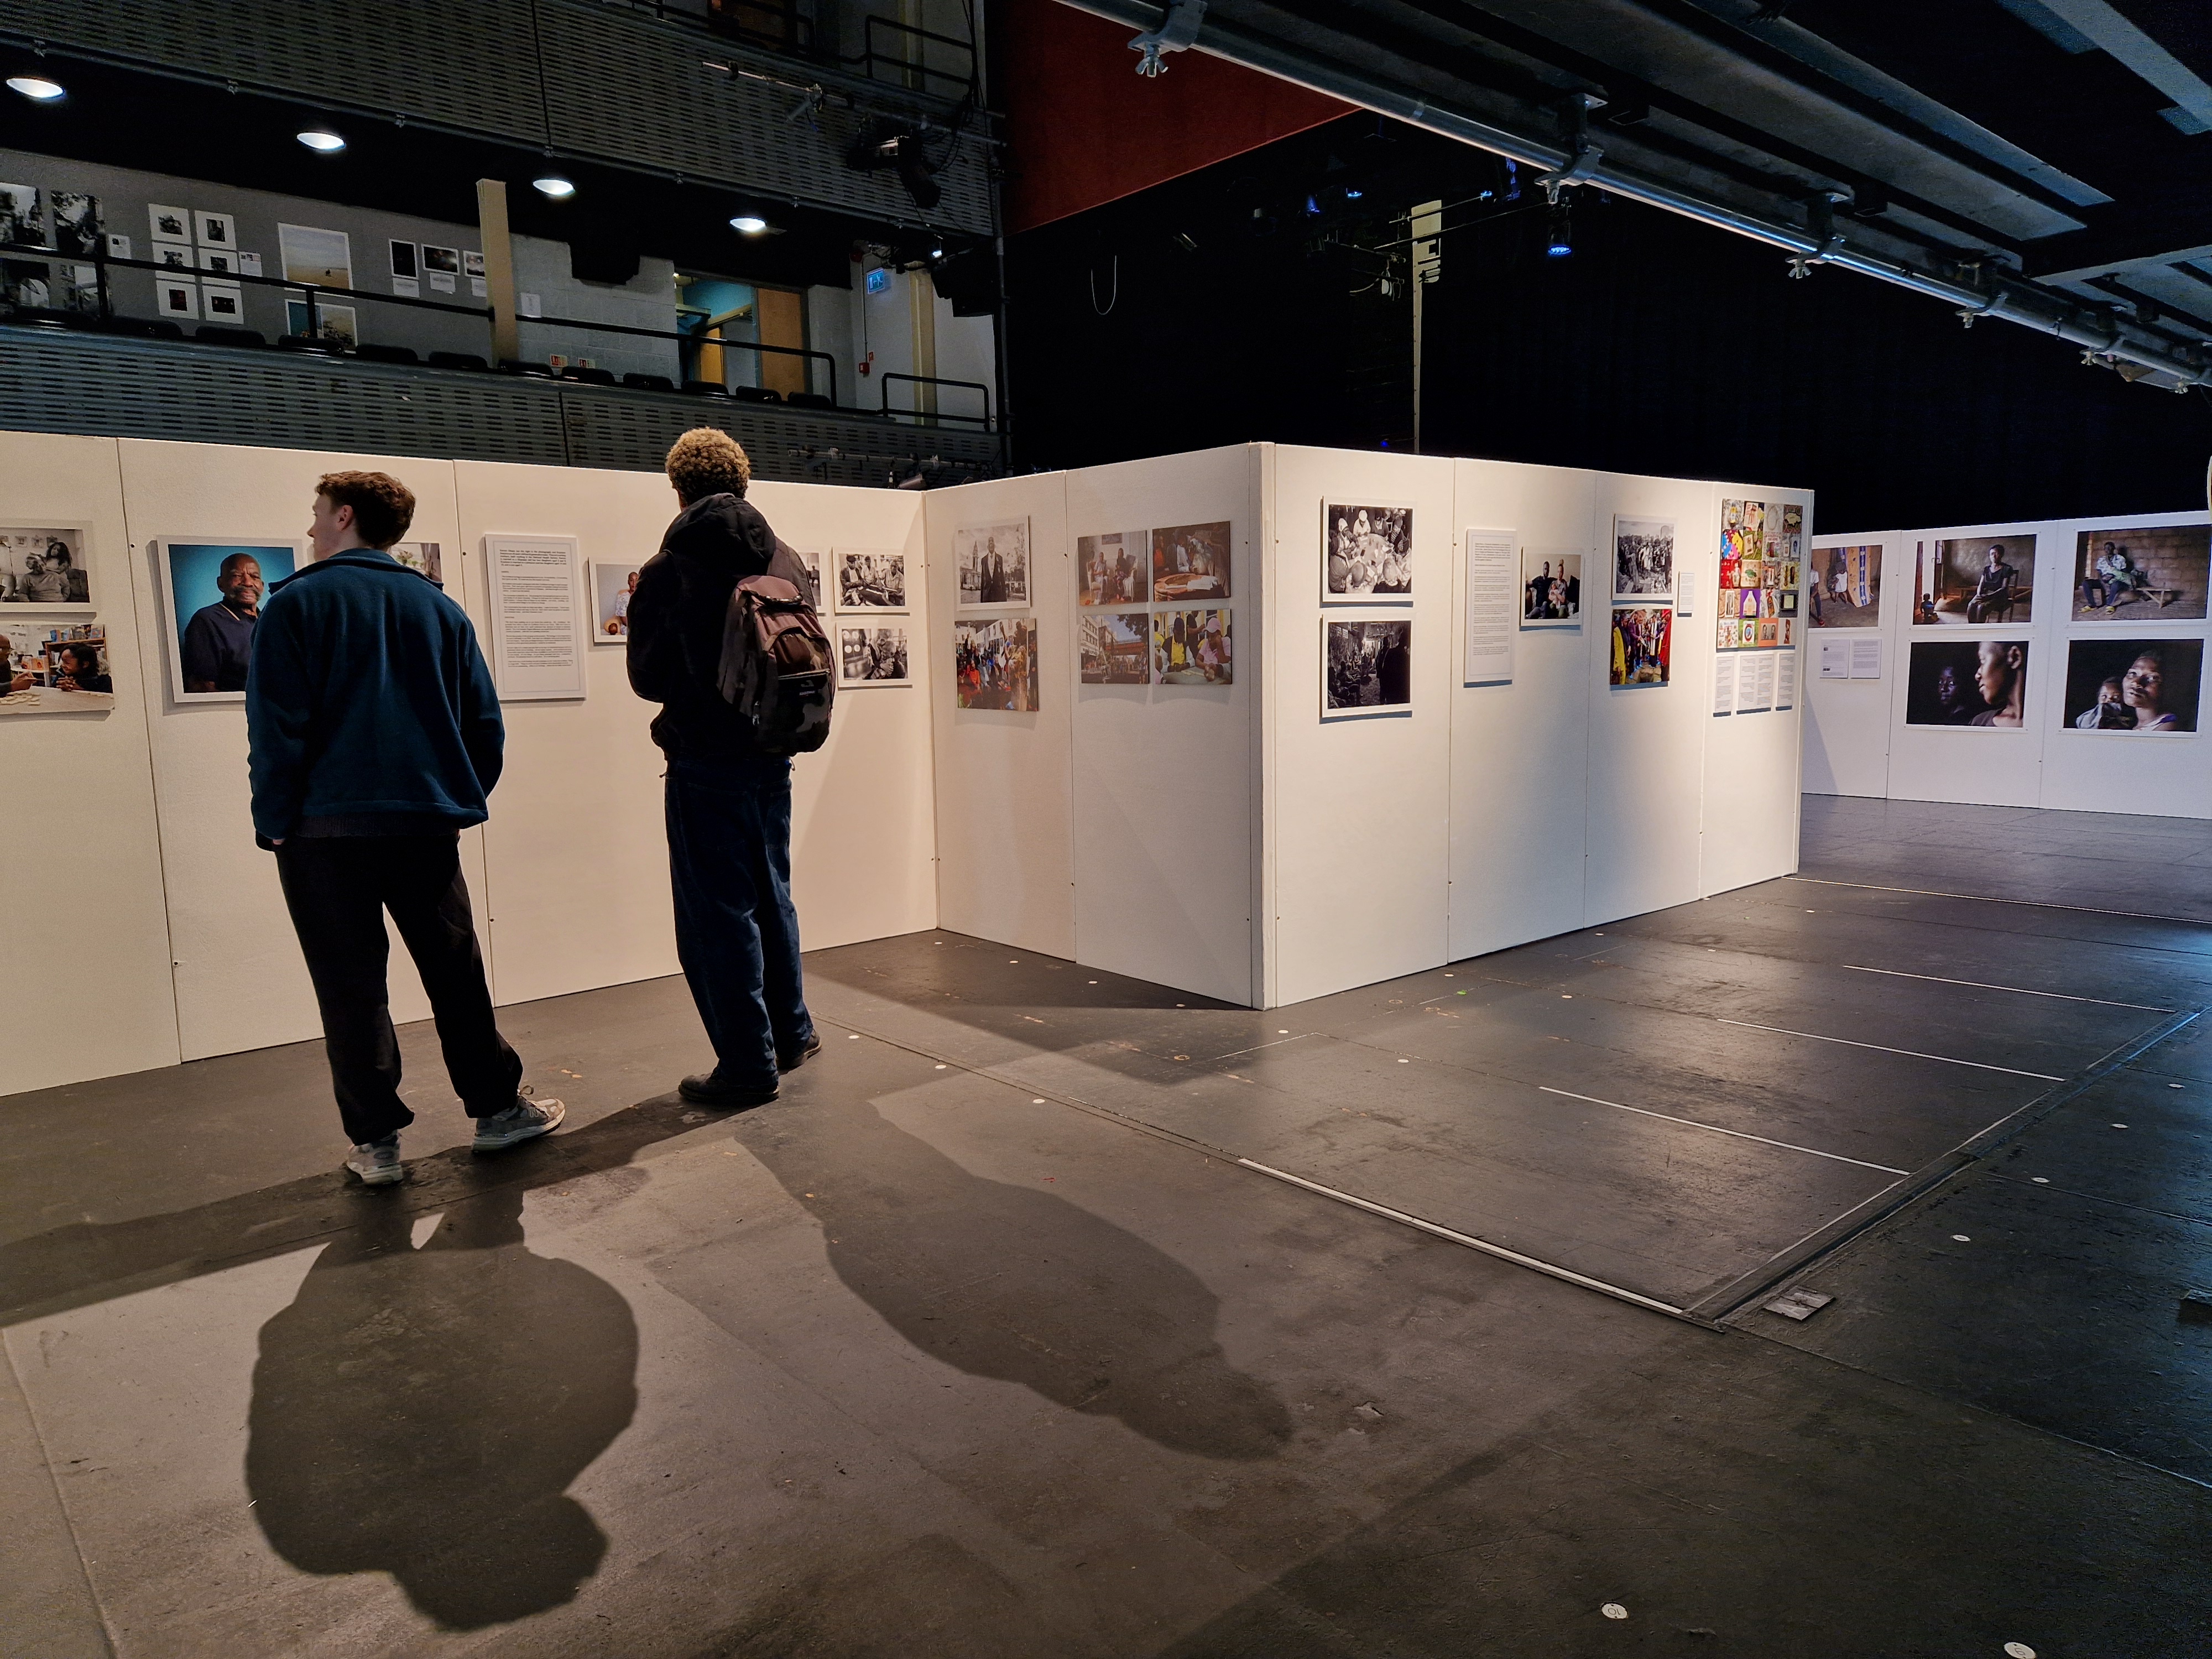
REFLECTIONS: Photo North was a great opportunity to meet fellow photographers (especially analogue ones), and connect with some darkroom businesses and even a charity. It was interesting, as always seeing people’s work, however, personally, I would like to see a broader range of themes (all of the photography was social-documentary and portrait). My first portfolio review was a satisfactory experience and I am looking forward to putting myself out there and attending more portfolio reviews to get feedback on my work and see how it influences people.
WEEK 13: 15-21 APRIL
MONDAY
CRIT PREP WITH SARAH
A session dedicated to critical reviews, ways of conveying and improving, and preparation.
FREE WRITING AROUND CRITICAL FRAME DOCUMENT
In this session, we free-wrote trying to answer several questions regarding our project.
I copied all the messy free writing into a Google Doc document and started building my critical frame document around this text as a starting point.
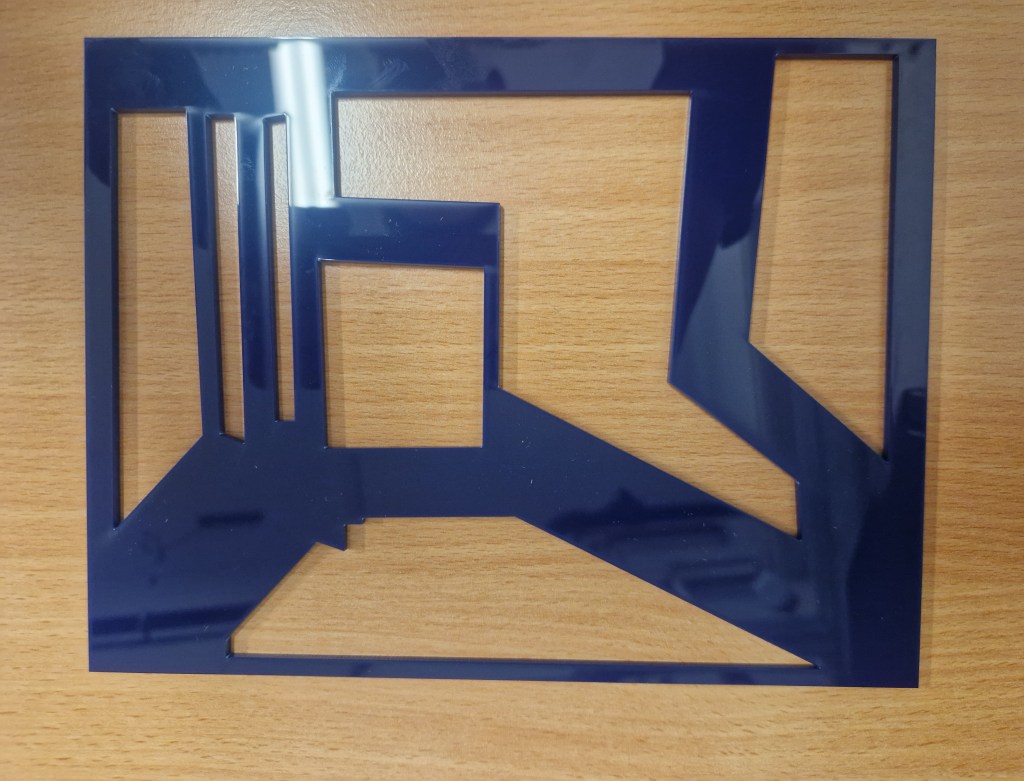
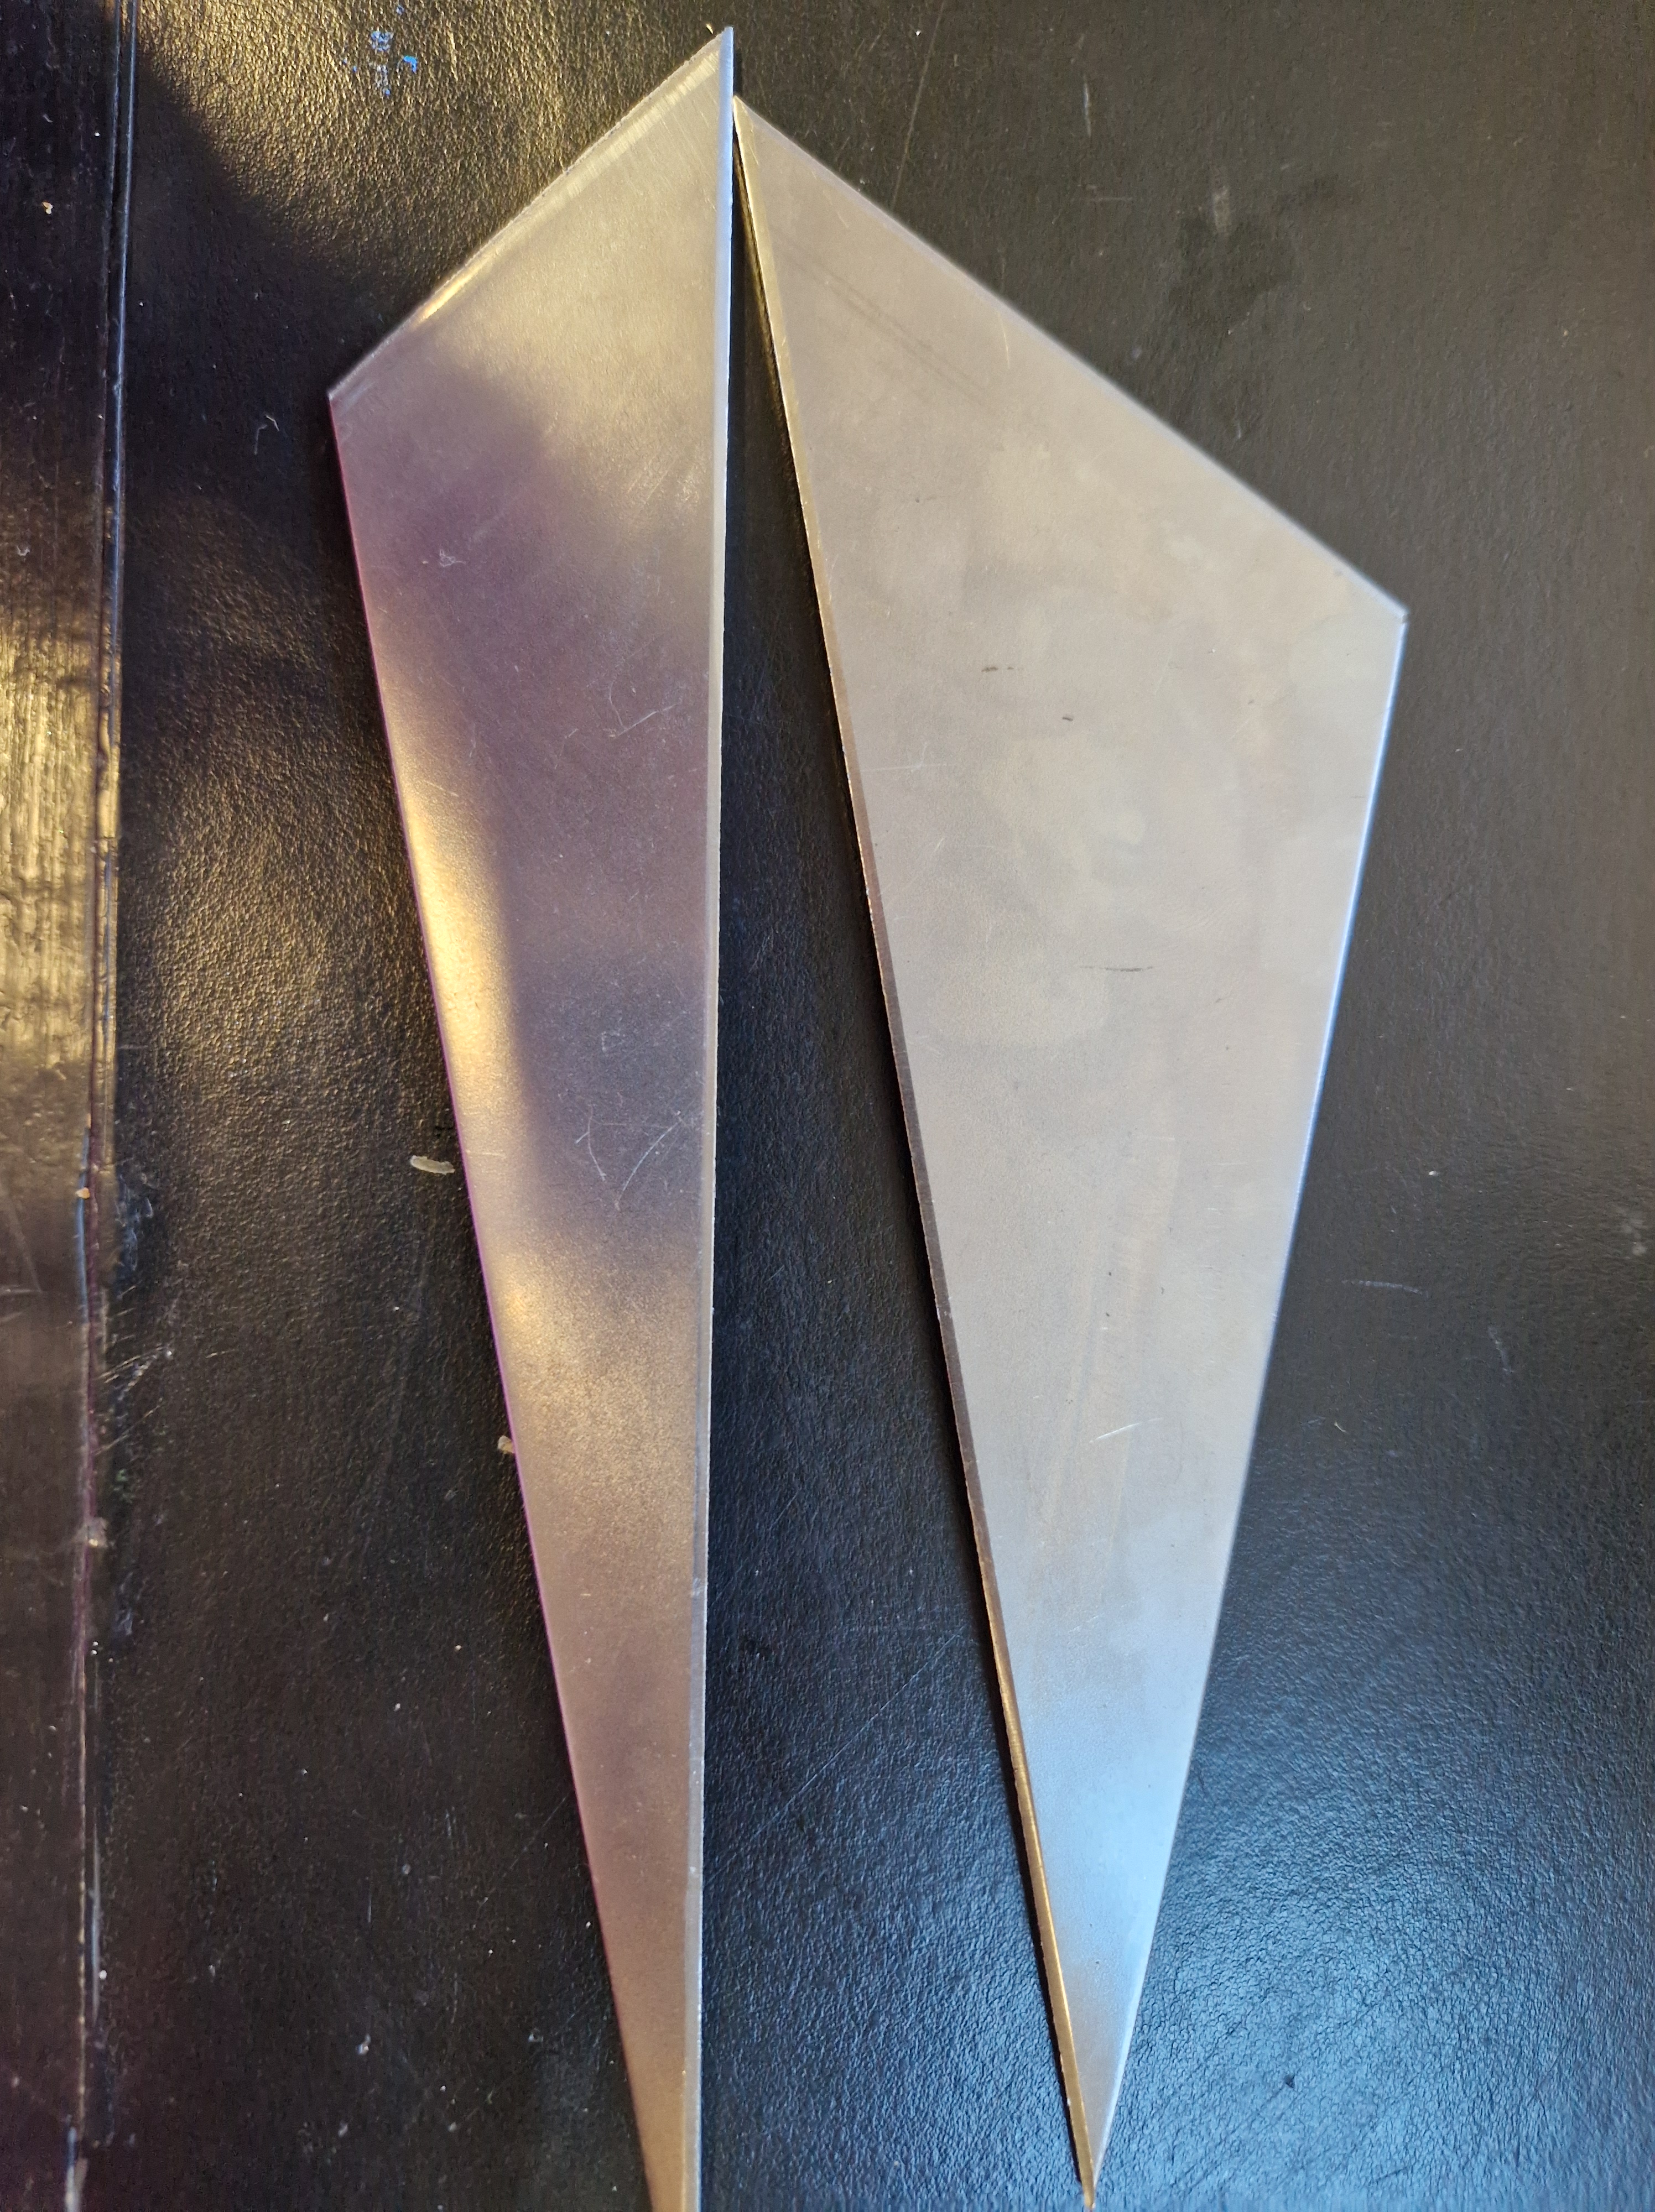
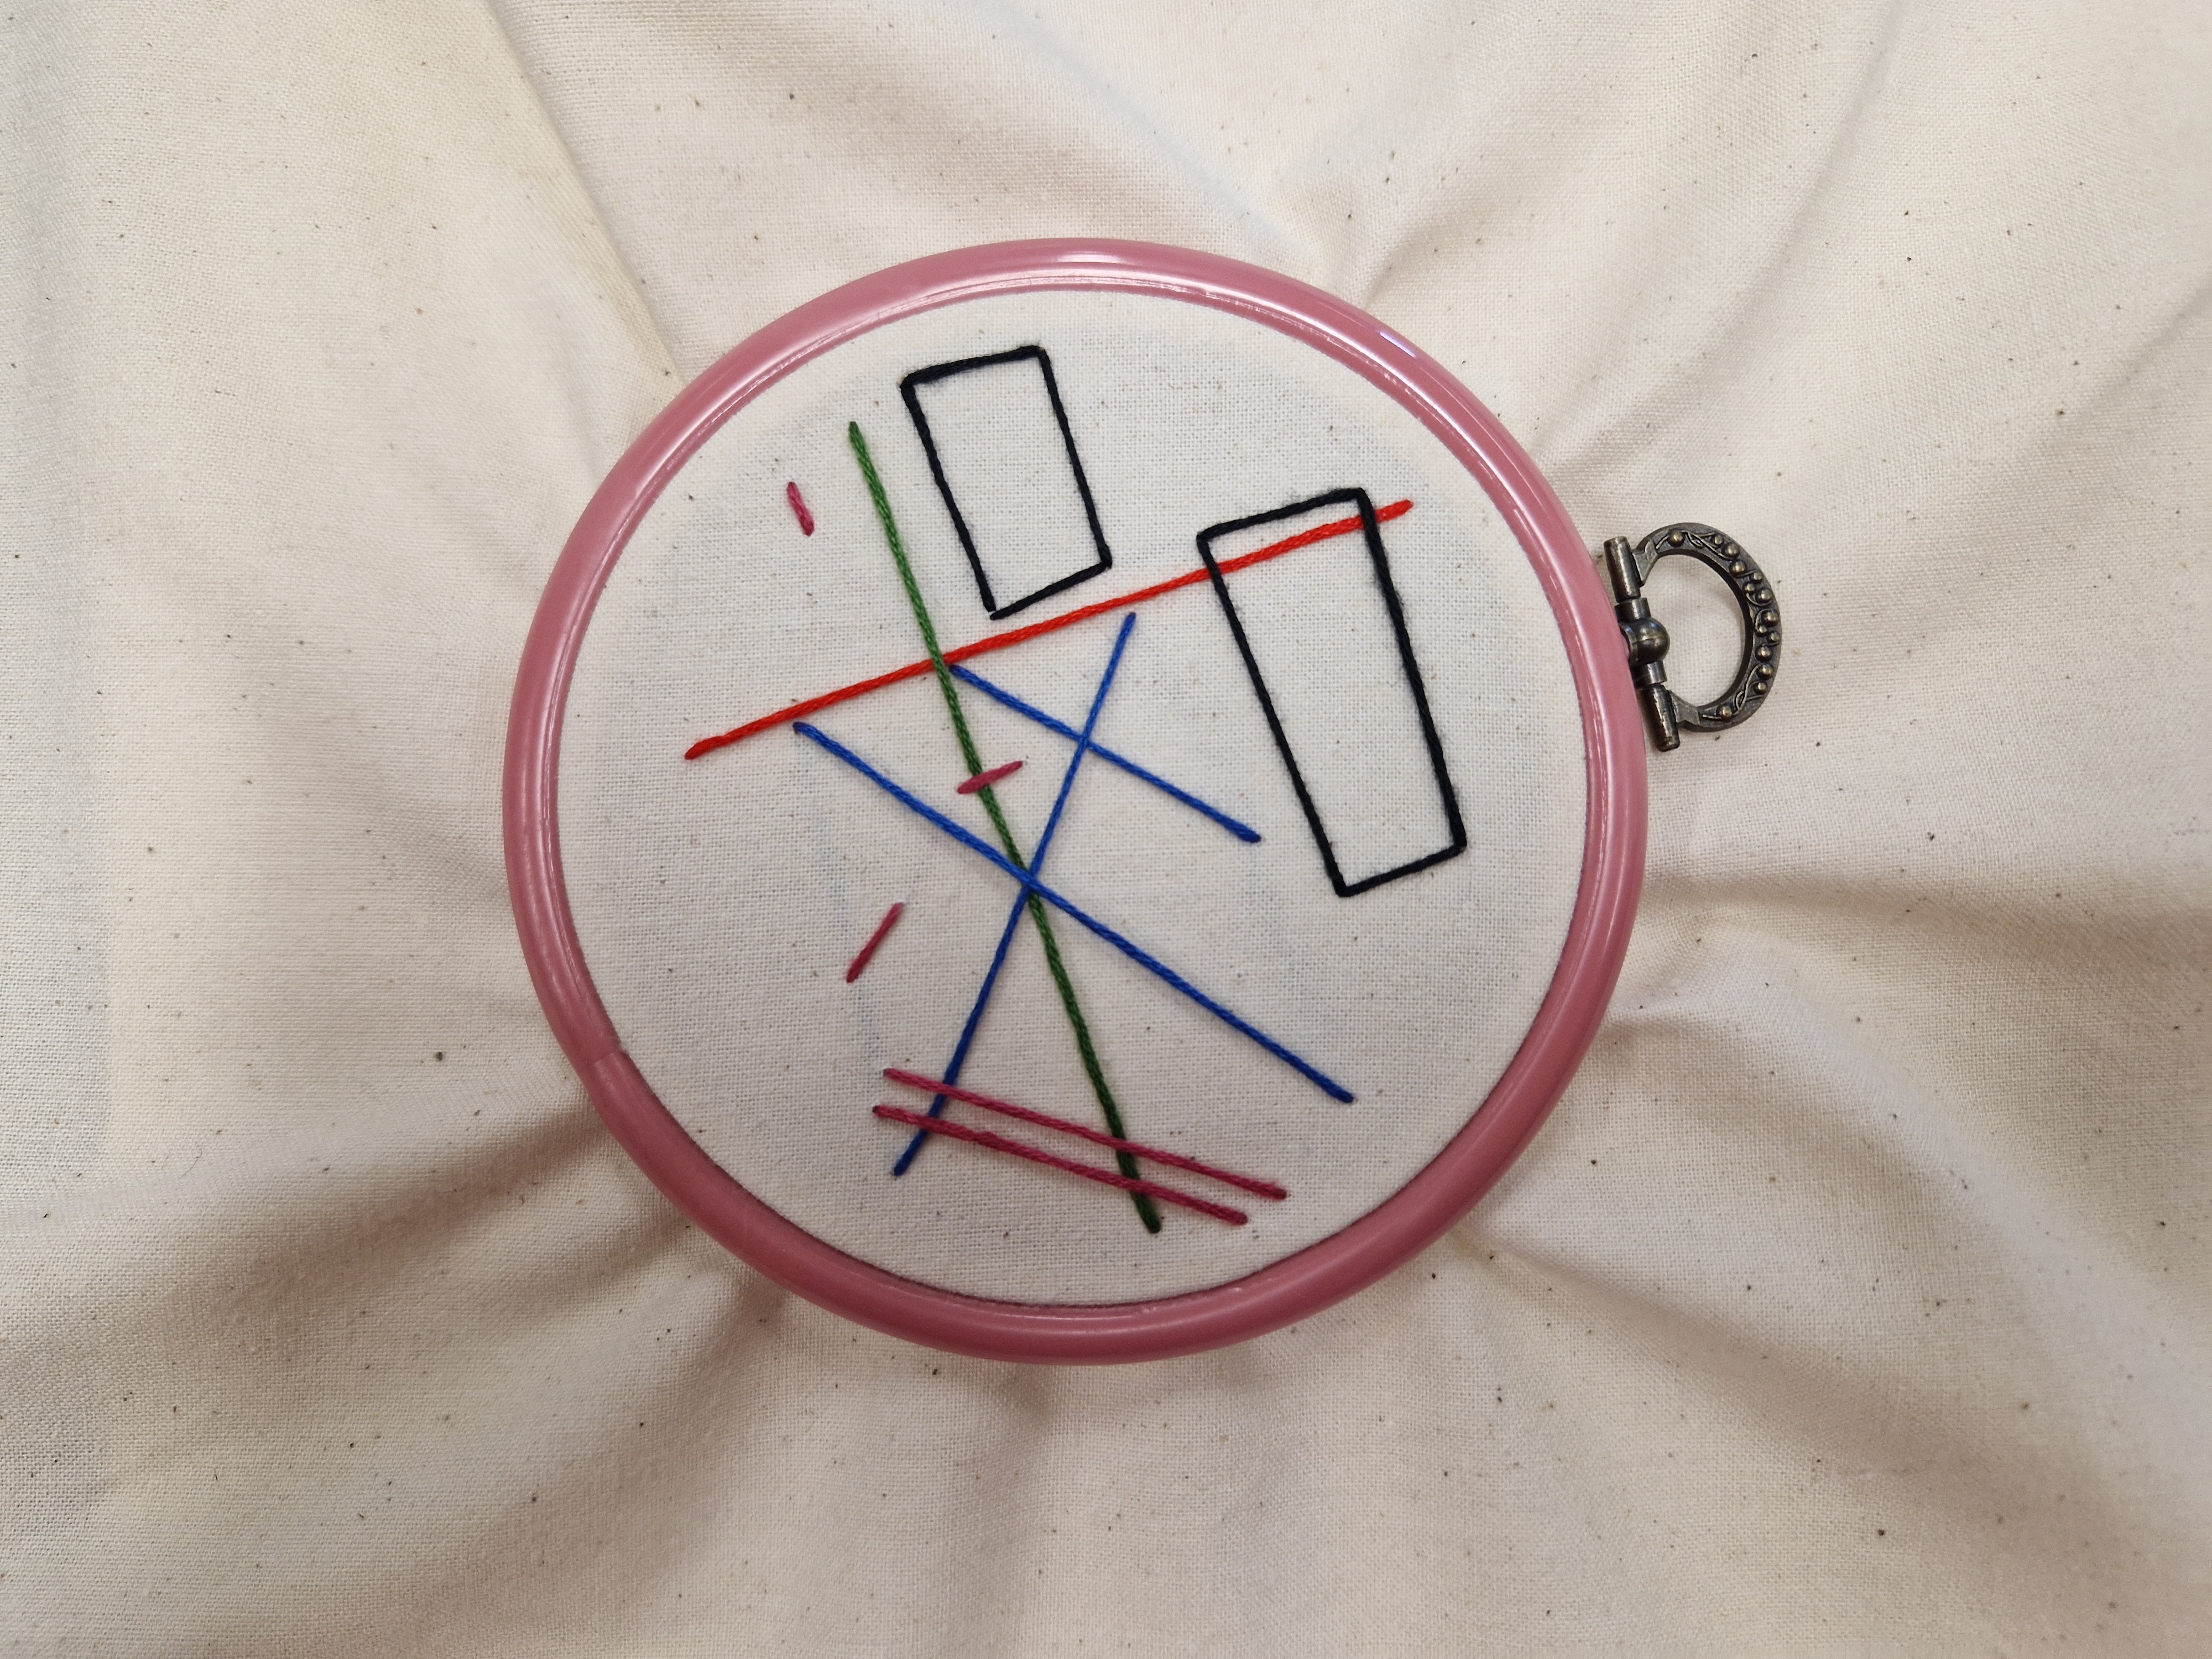
FINAL CUTTING OF LASER-CUT SCULPTURE
As I made one small mistake last time, I had to book another slot and wait a week in order to finalise my sculpture (lesson learned I hope). This time I asked for help and I successfully cut the remaining piece of the puzzle. I am very happy with the results and I am excited about attaching magnets to it and seeing how it works (and if).
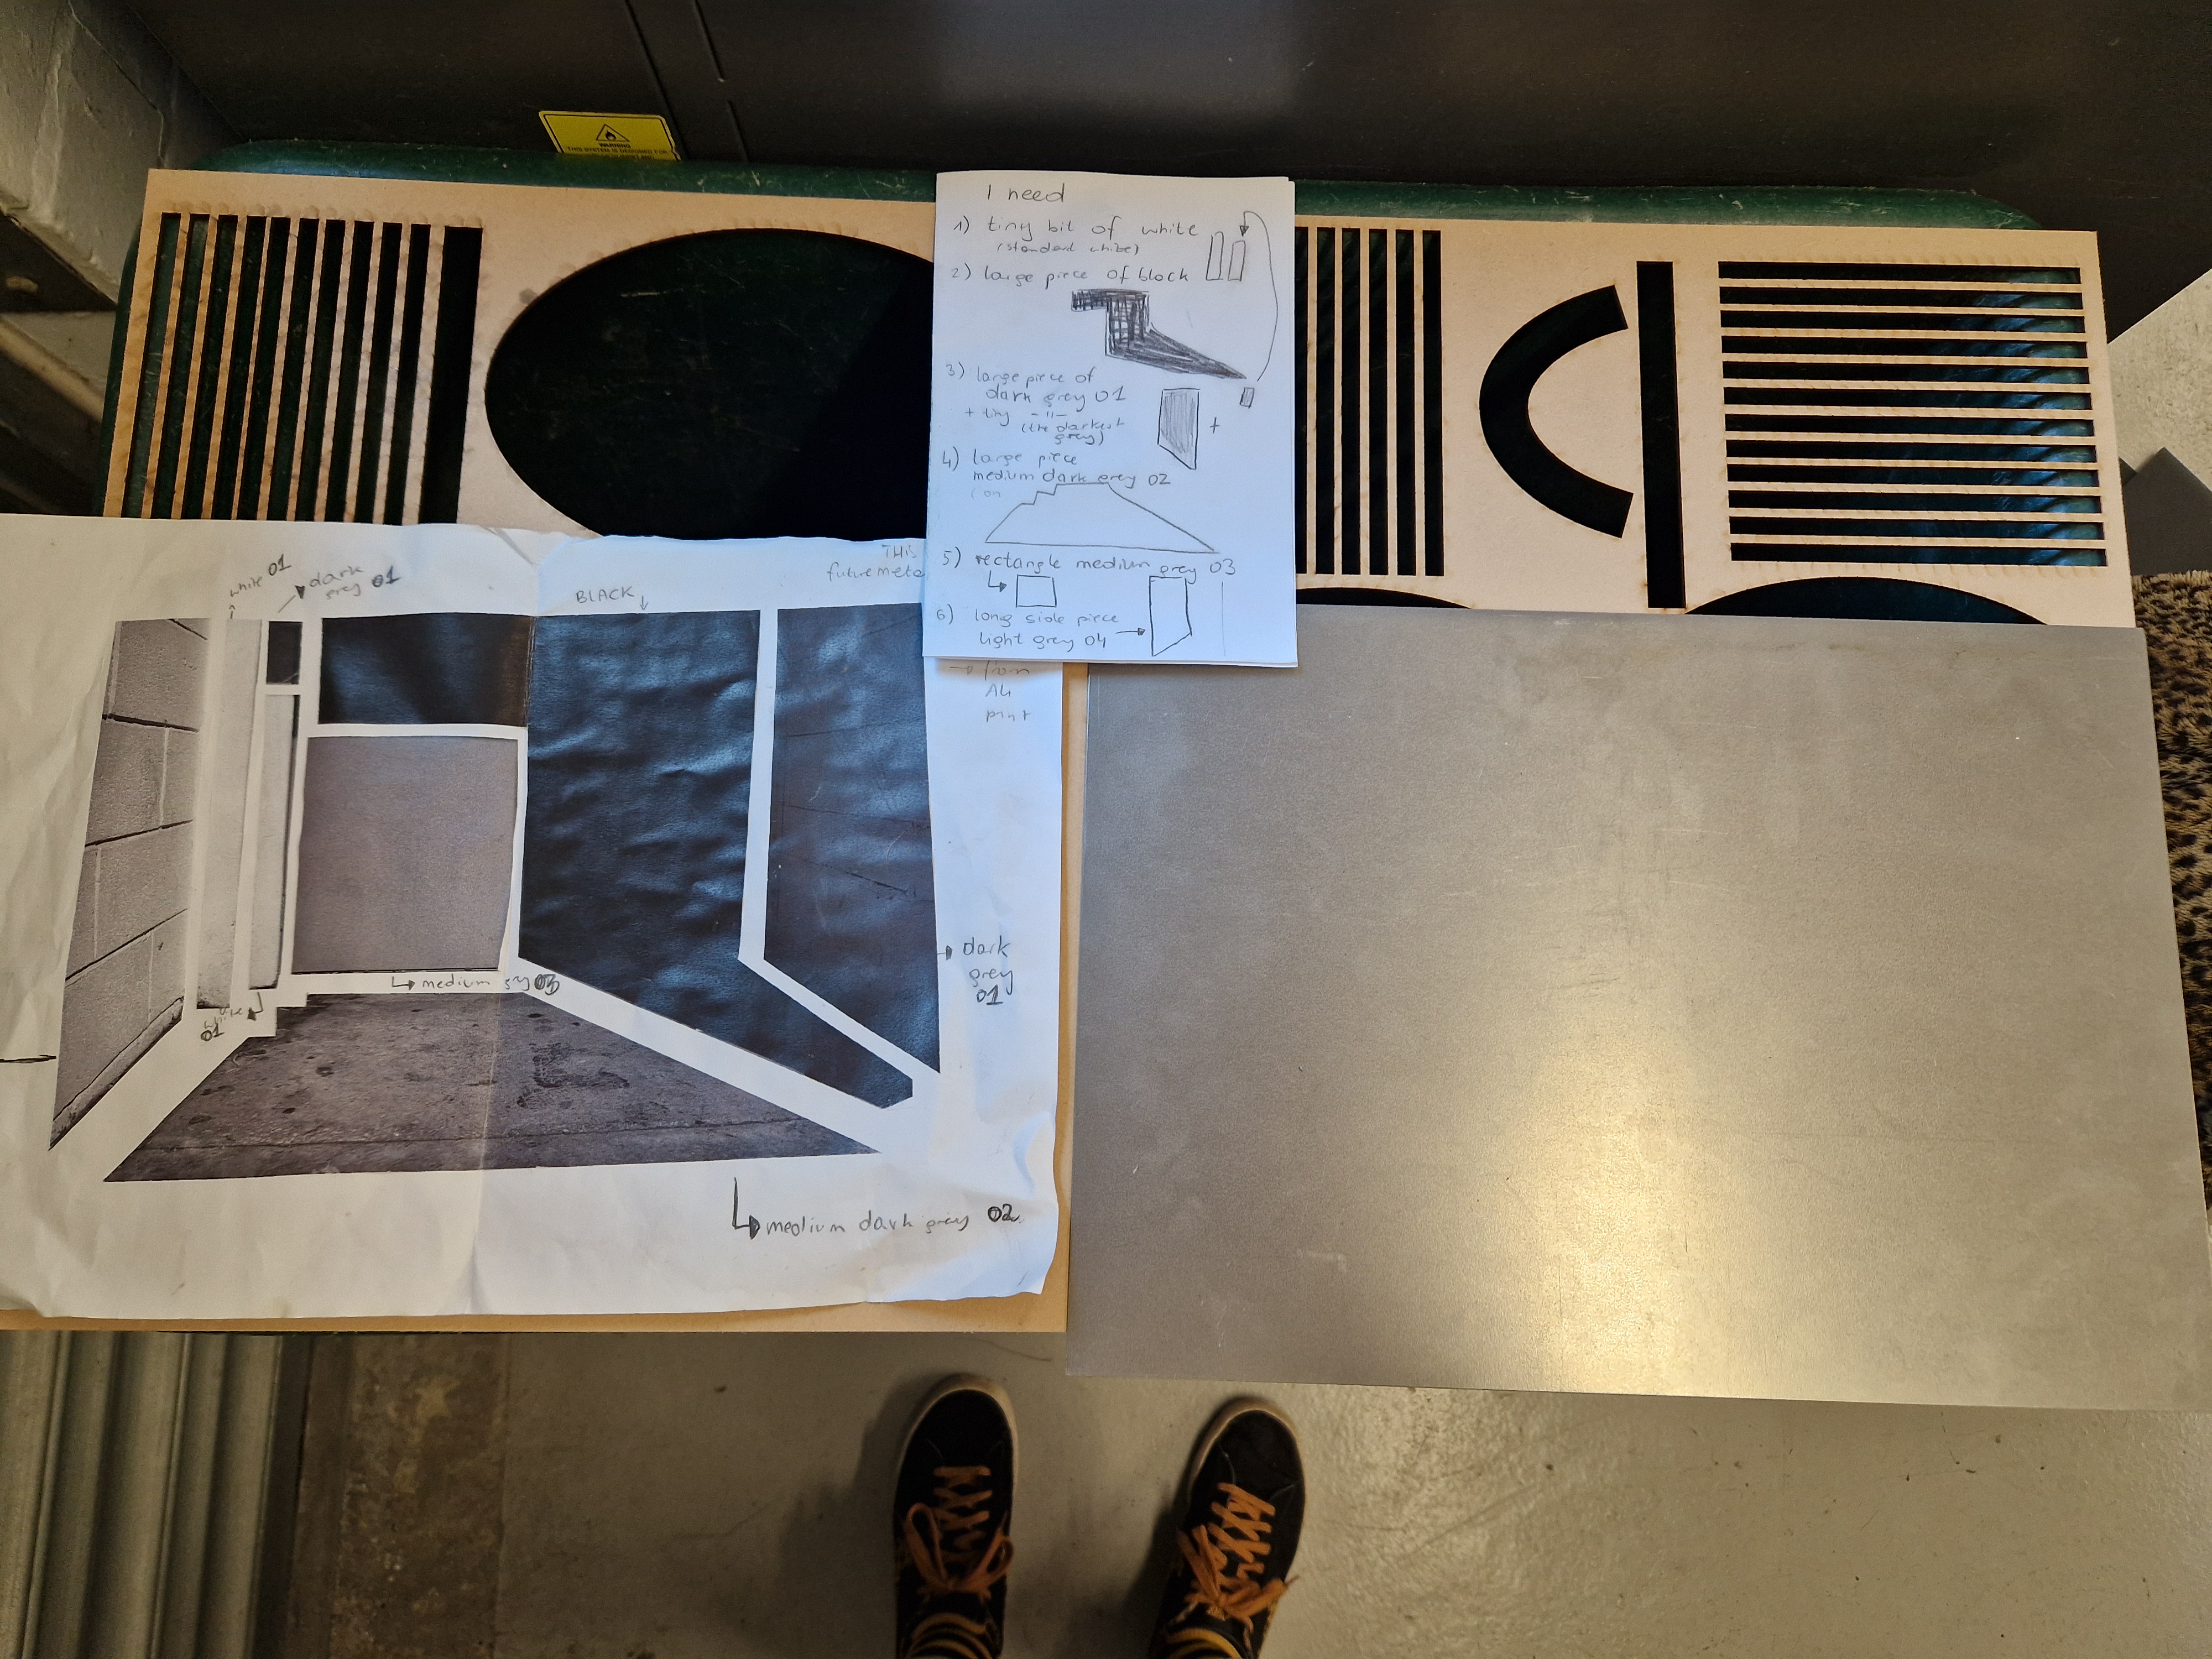
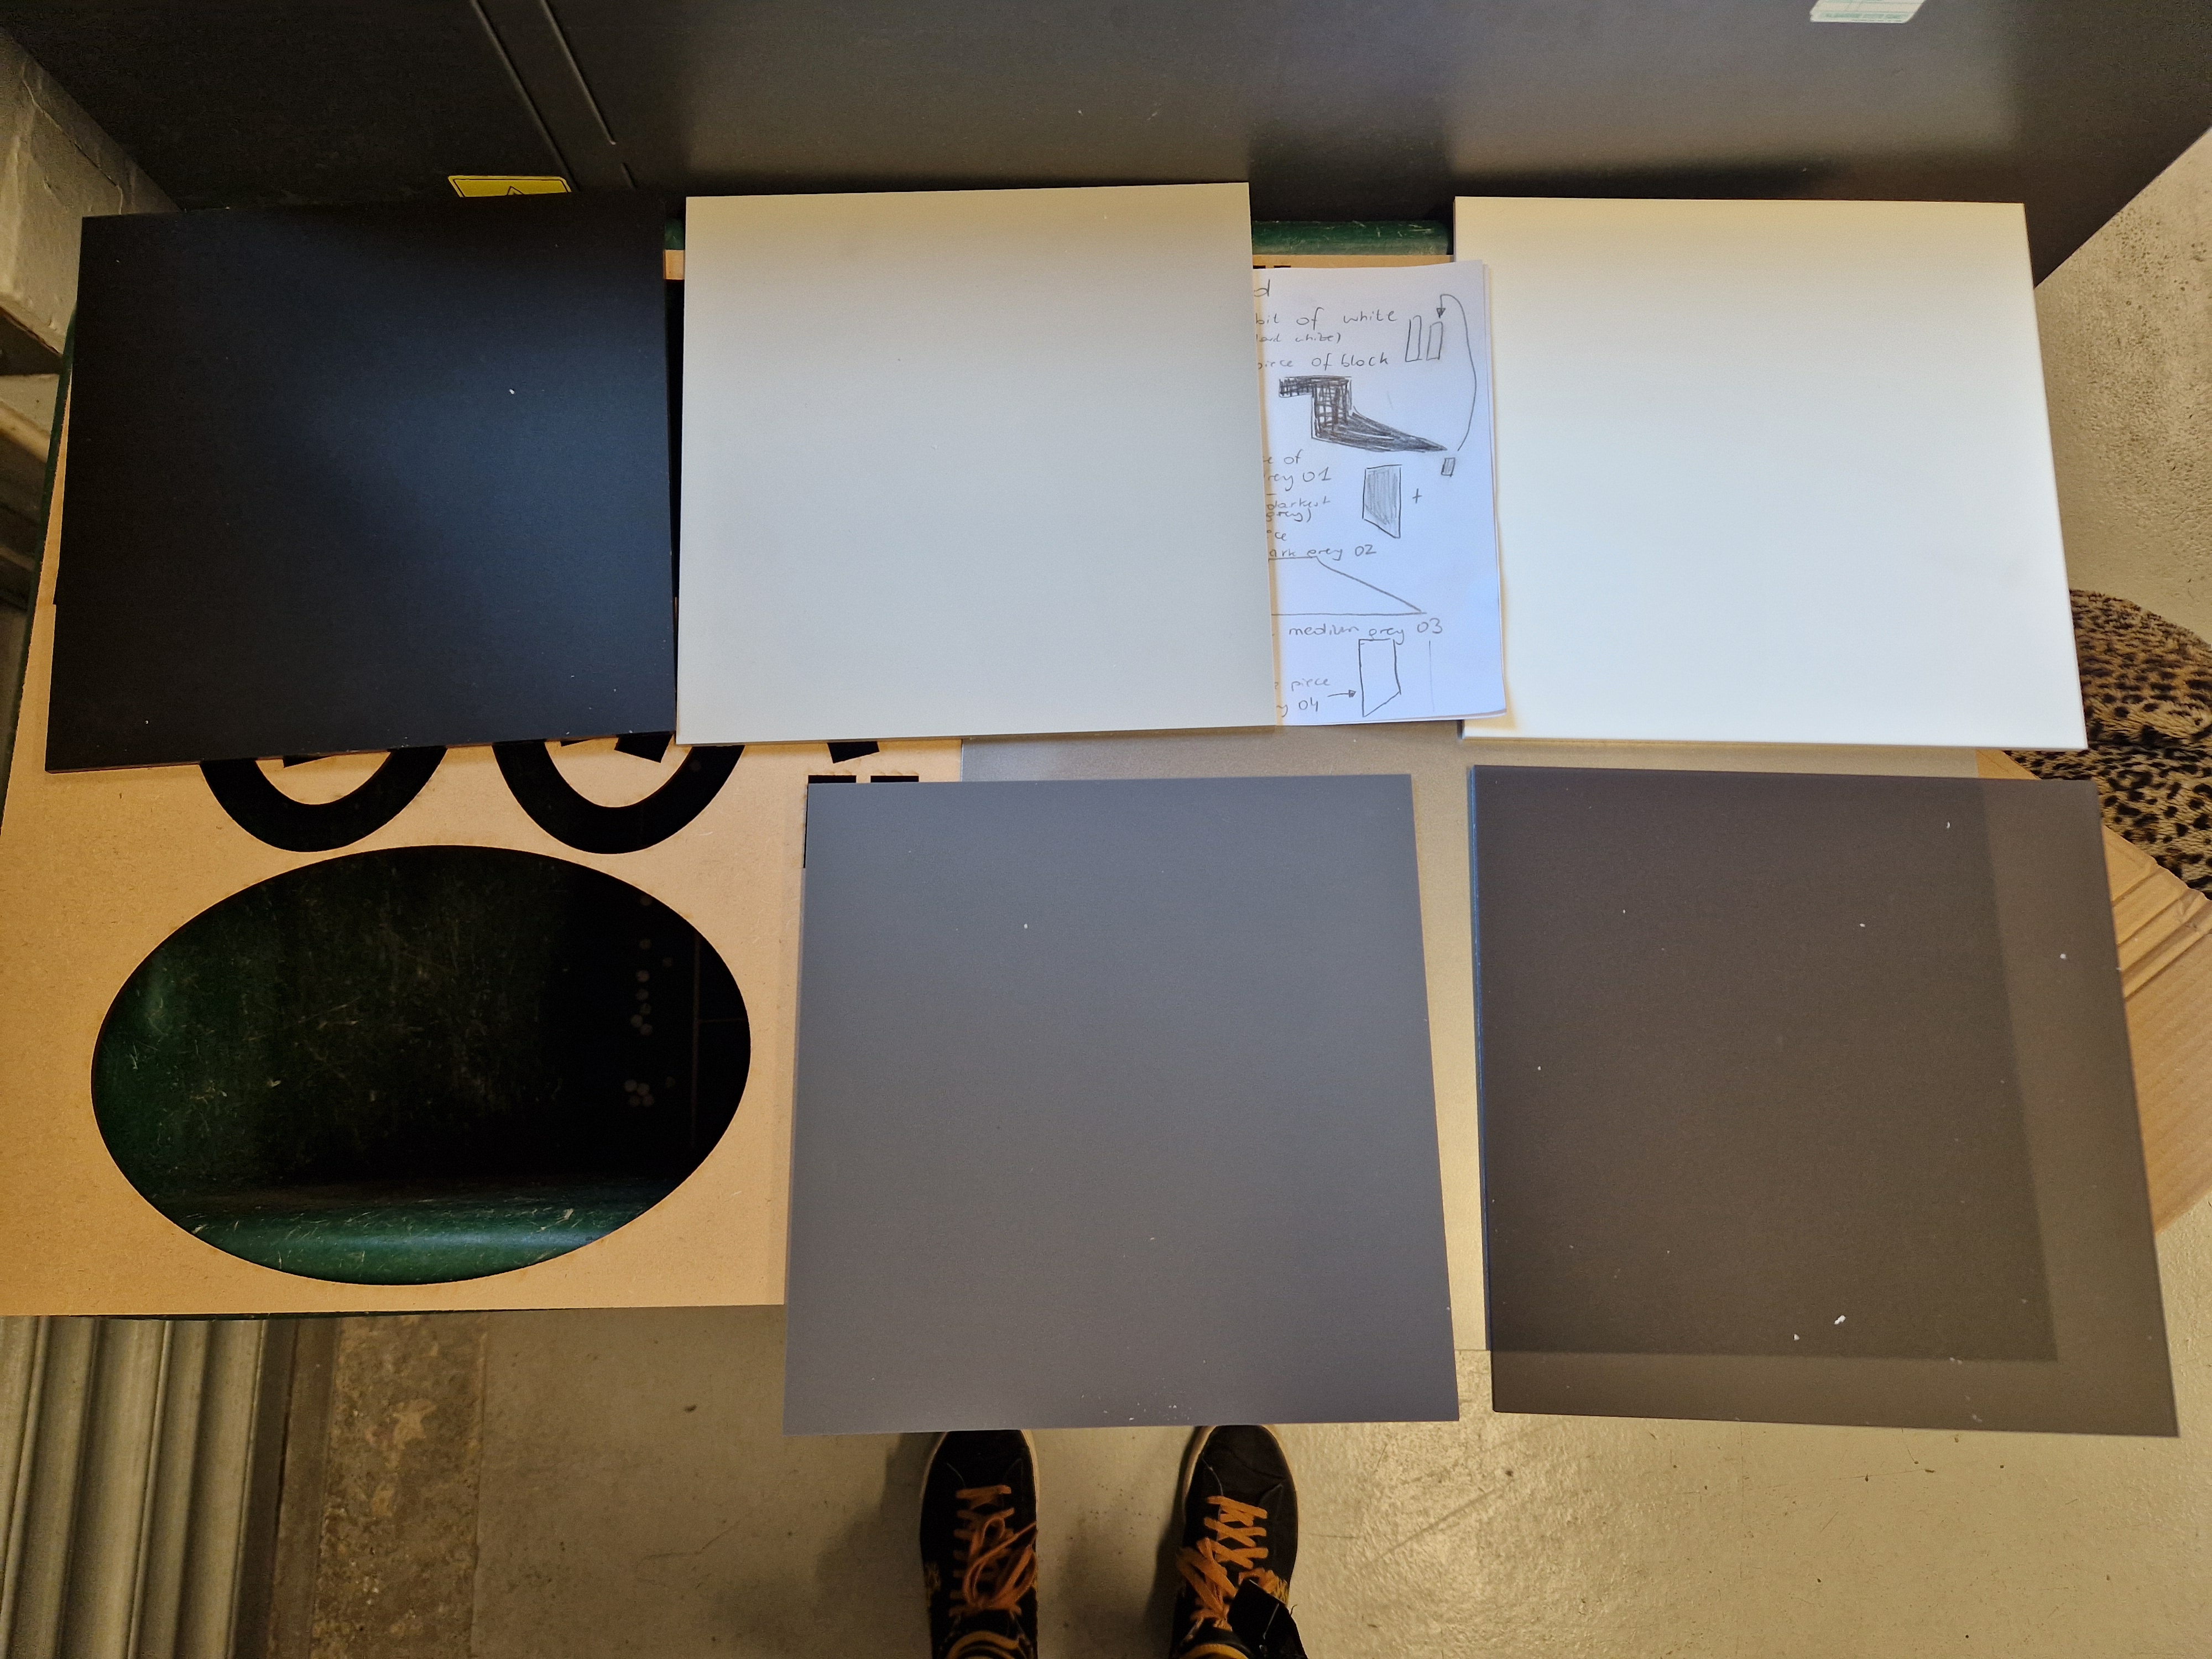
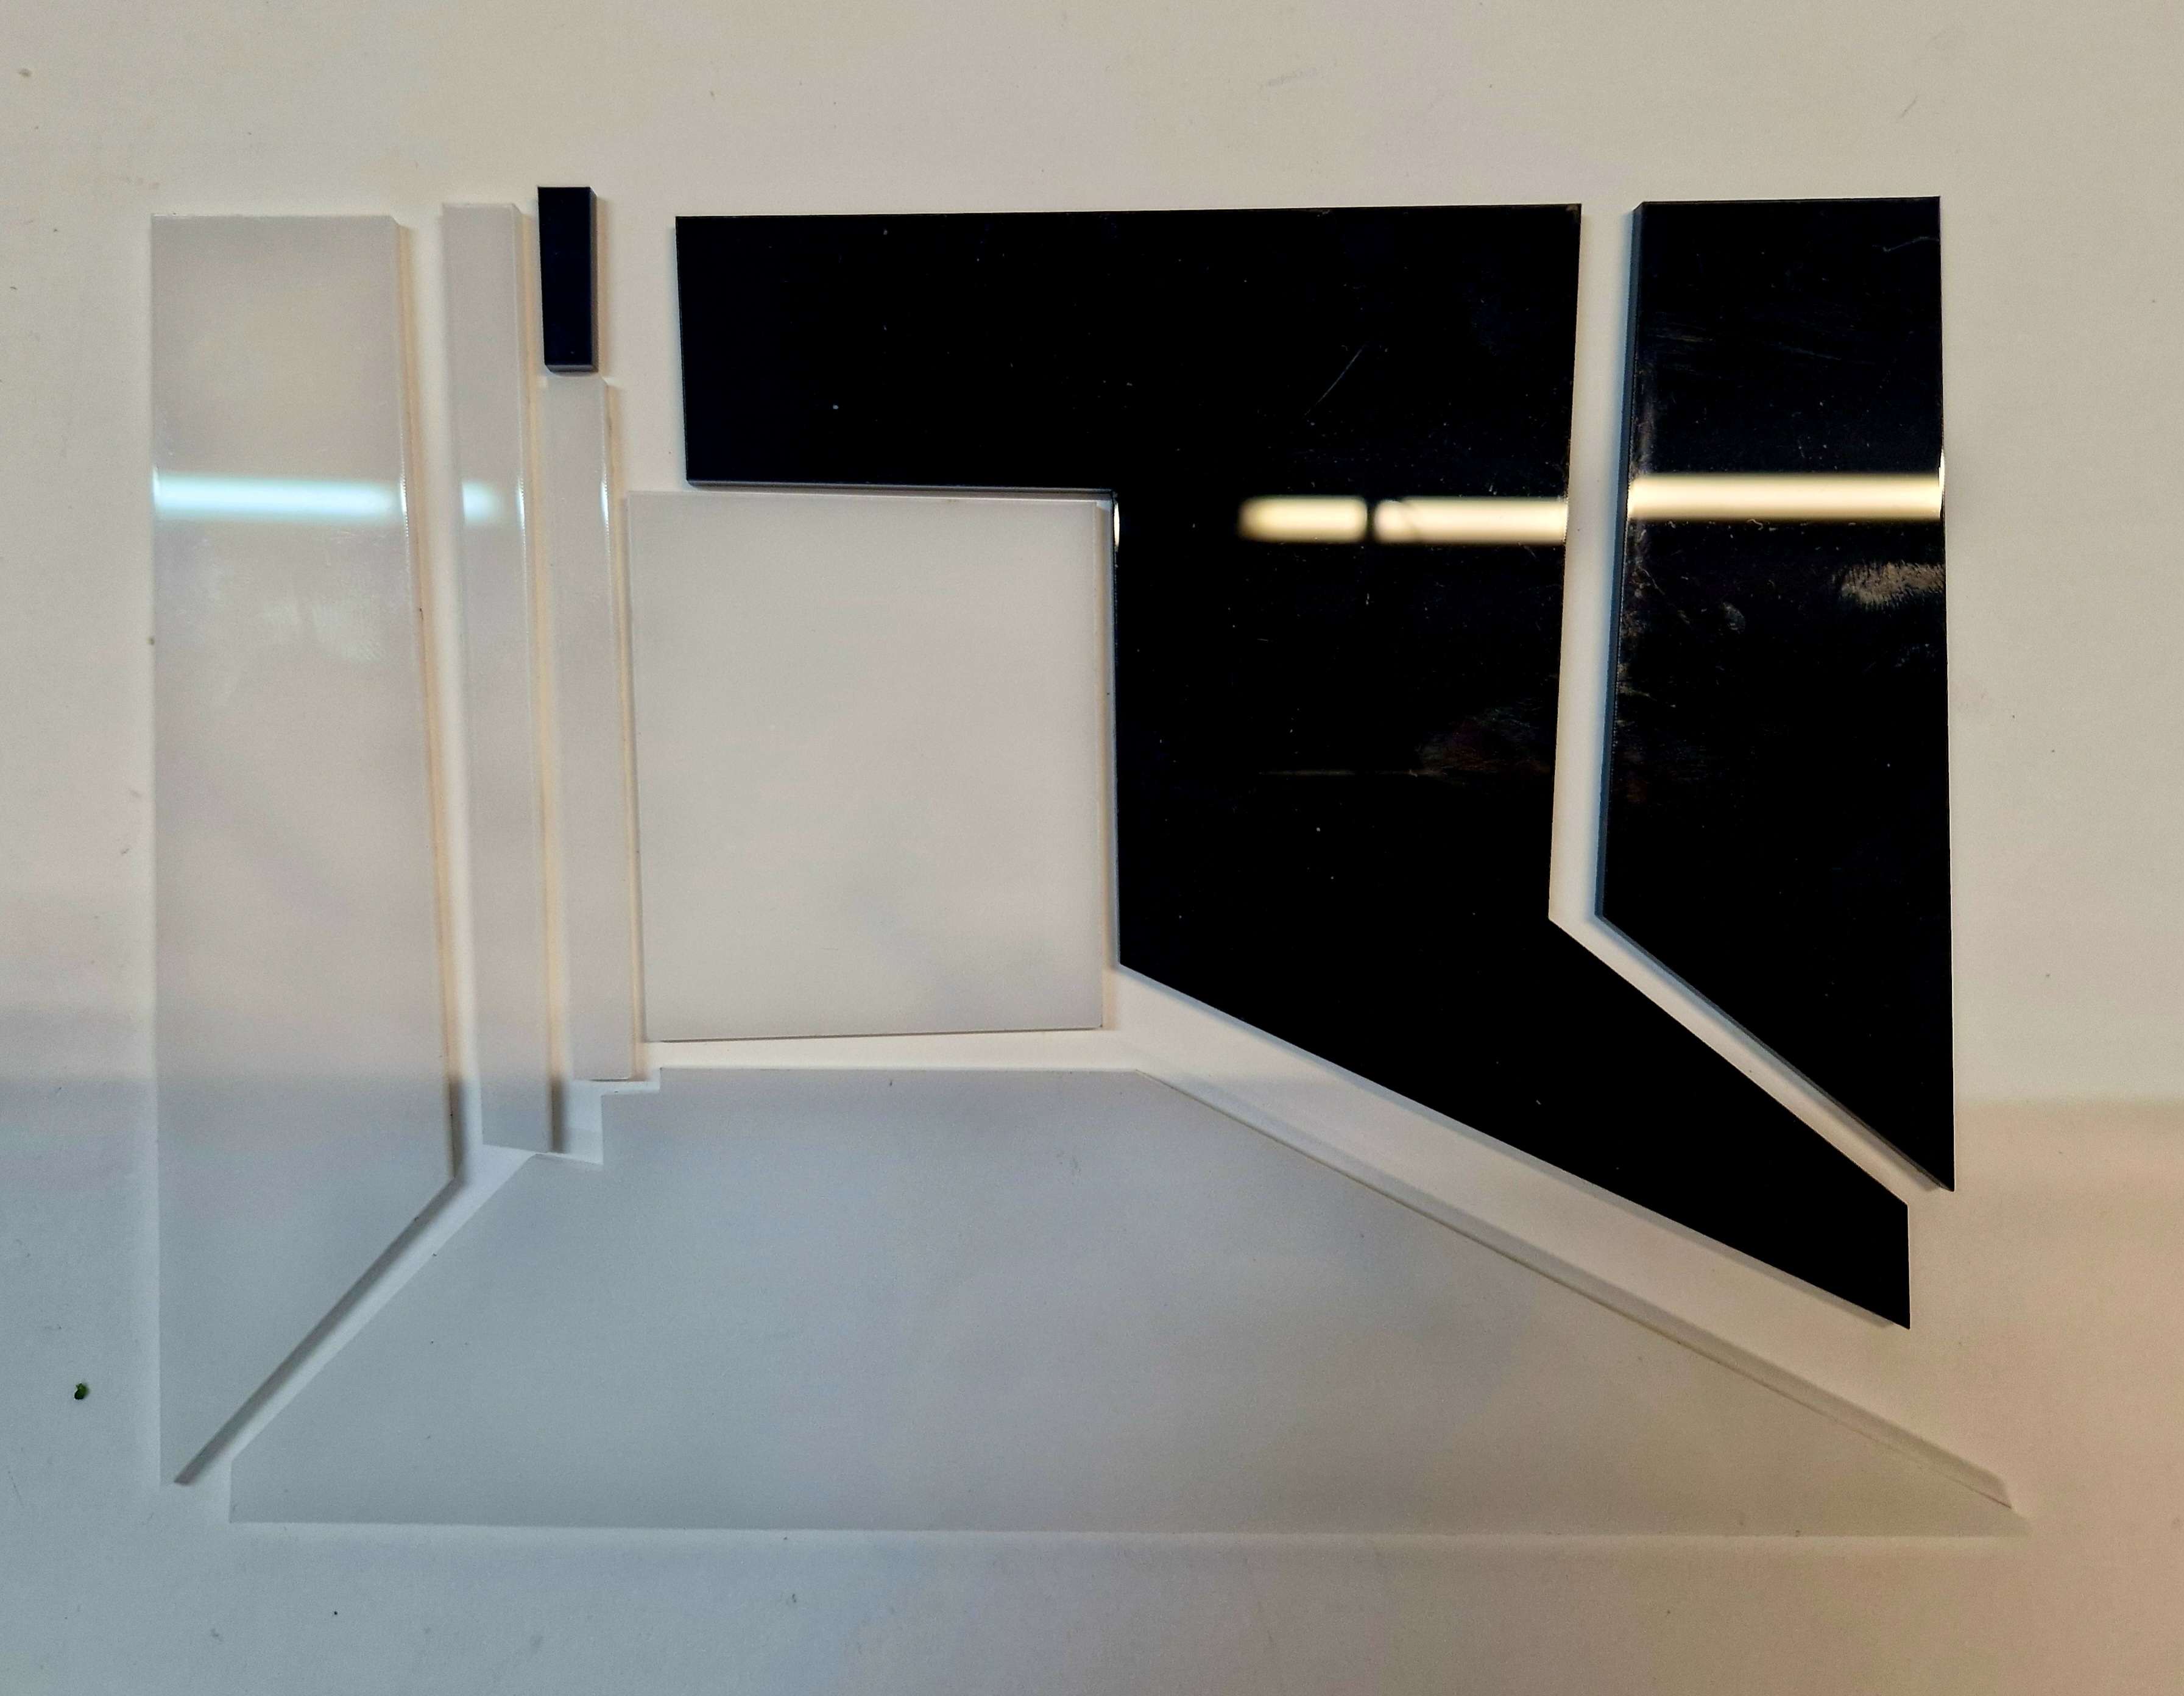
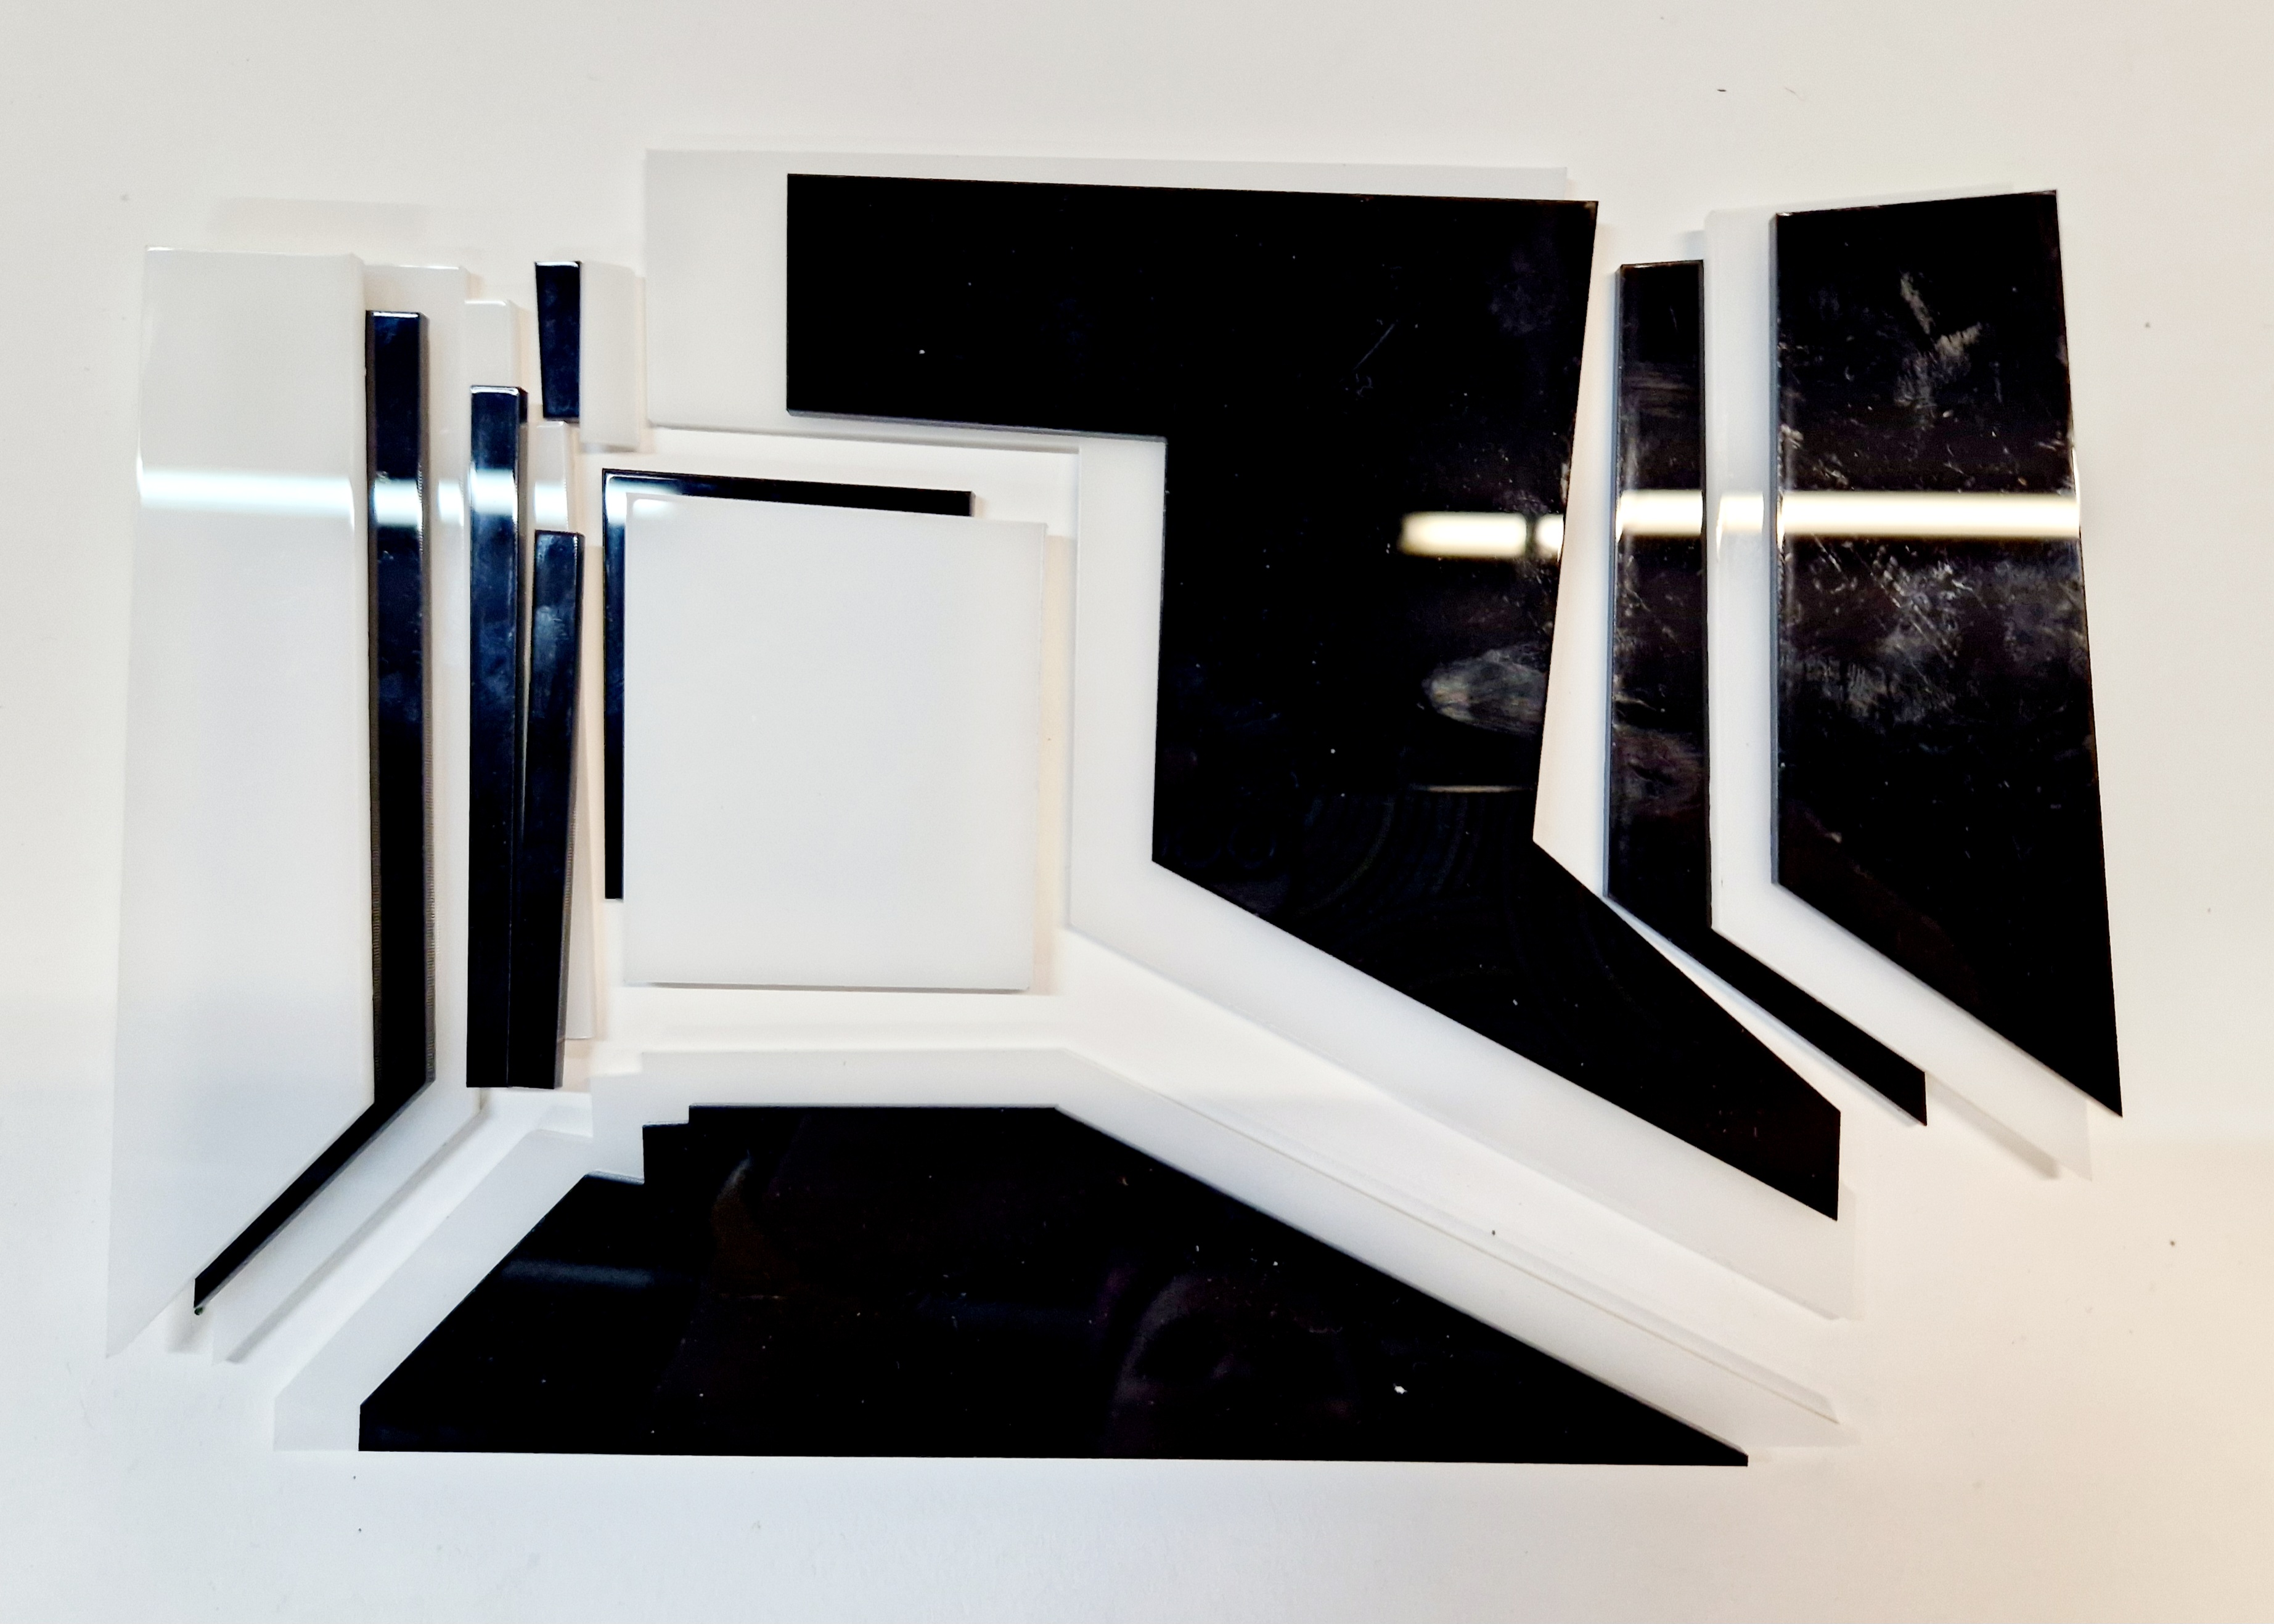
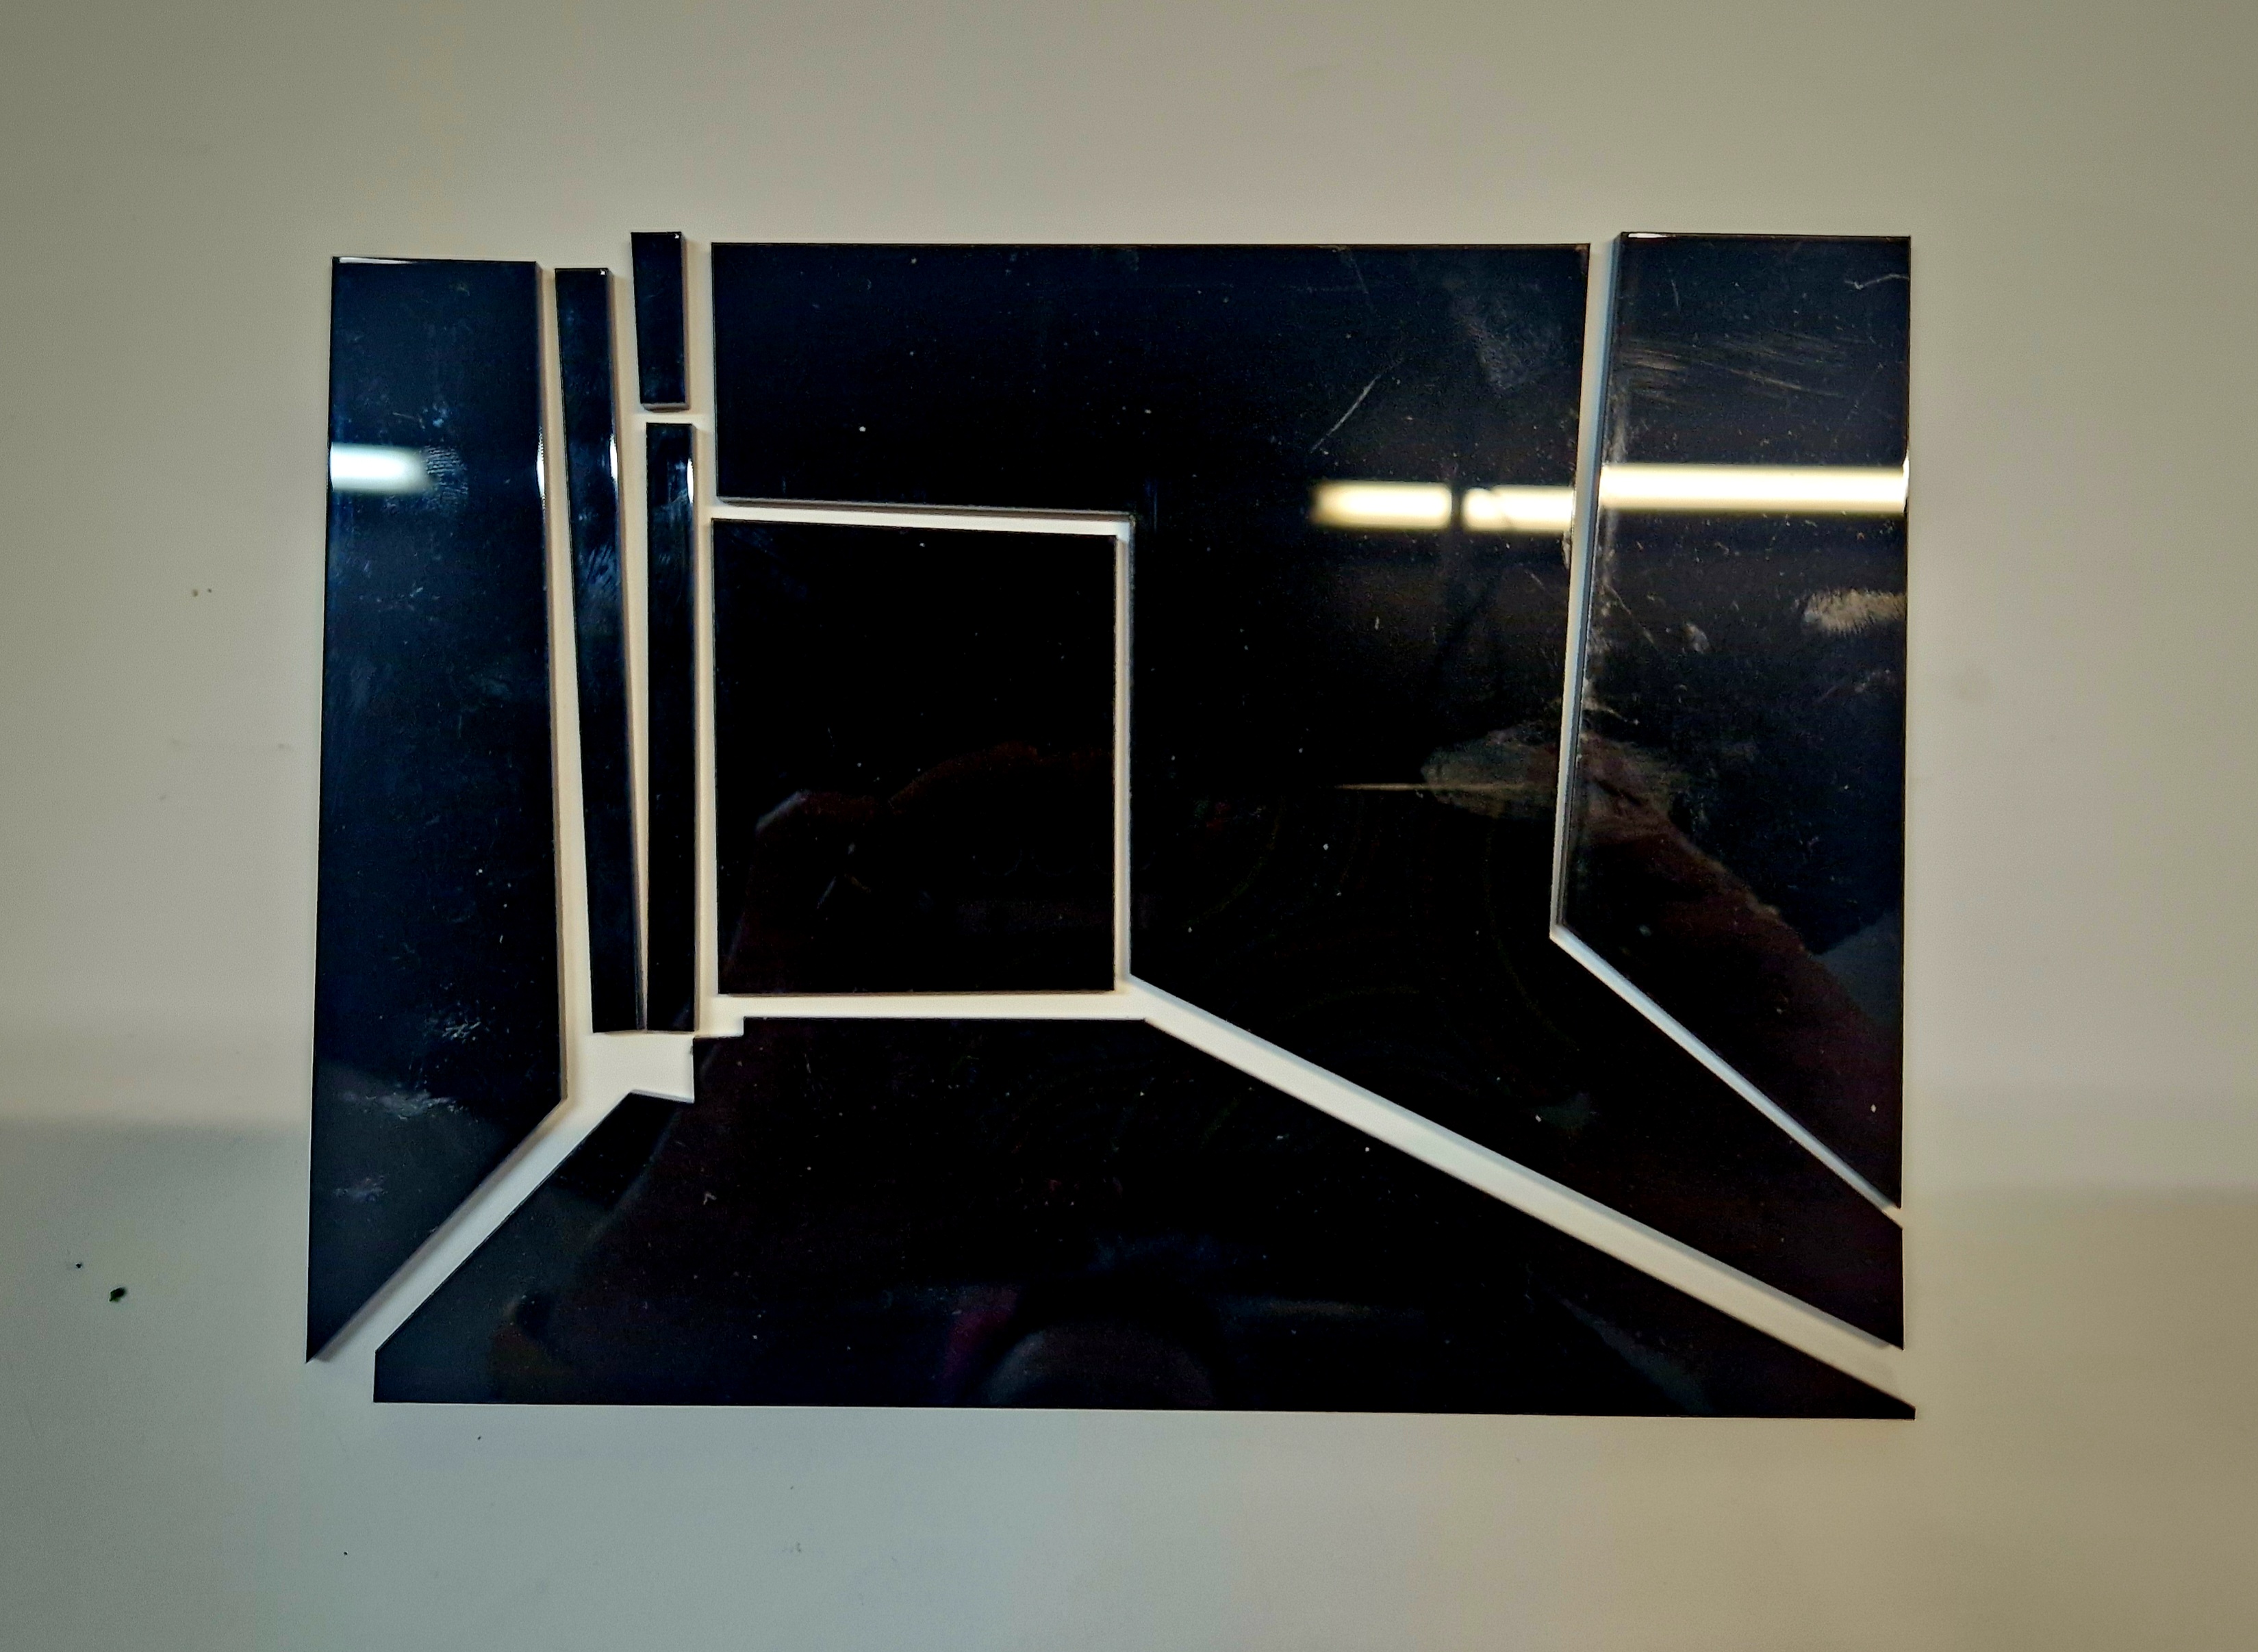
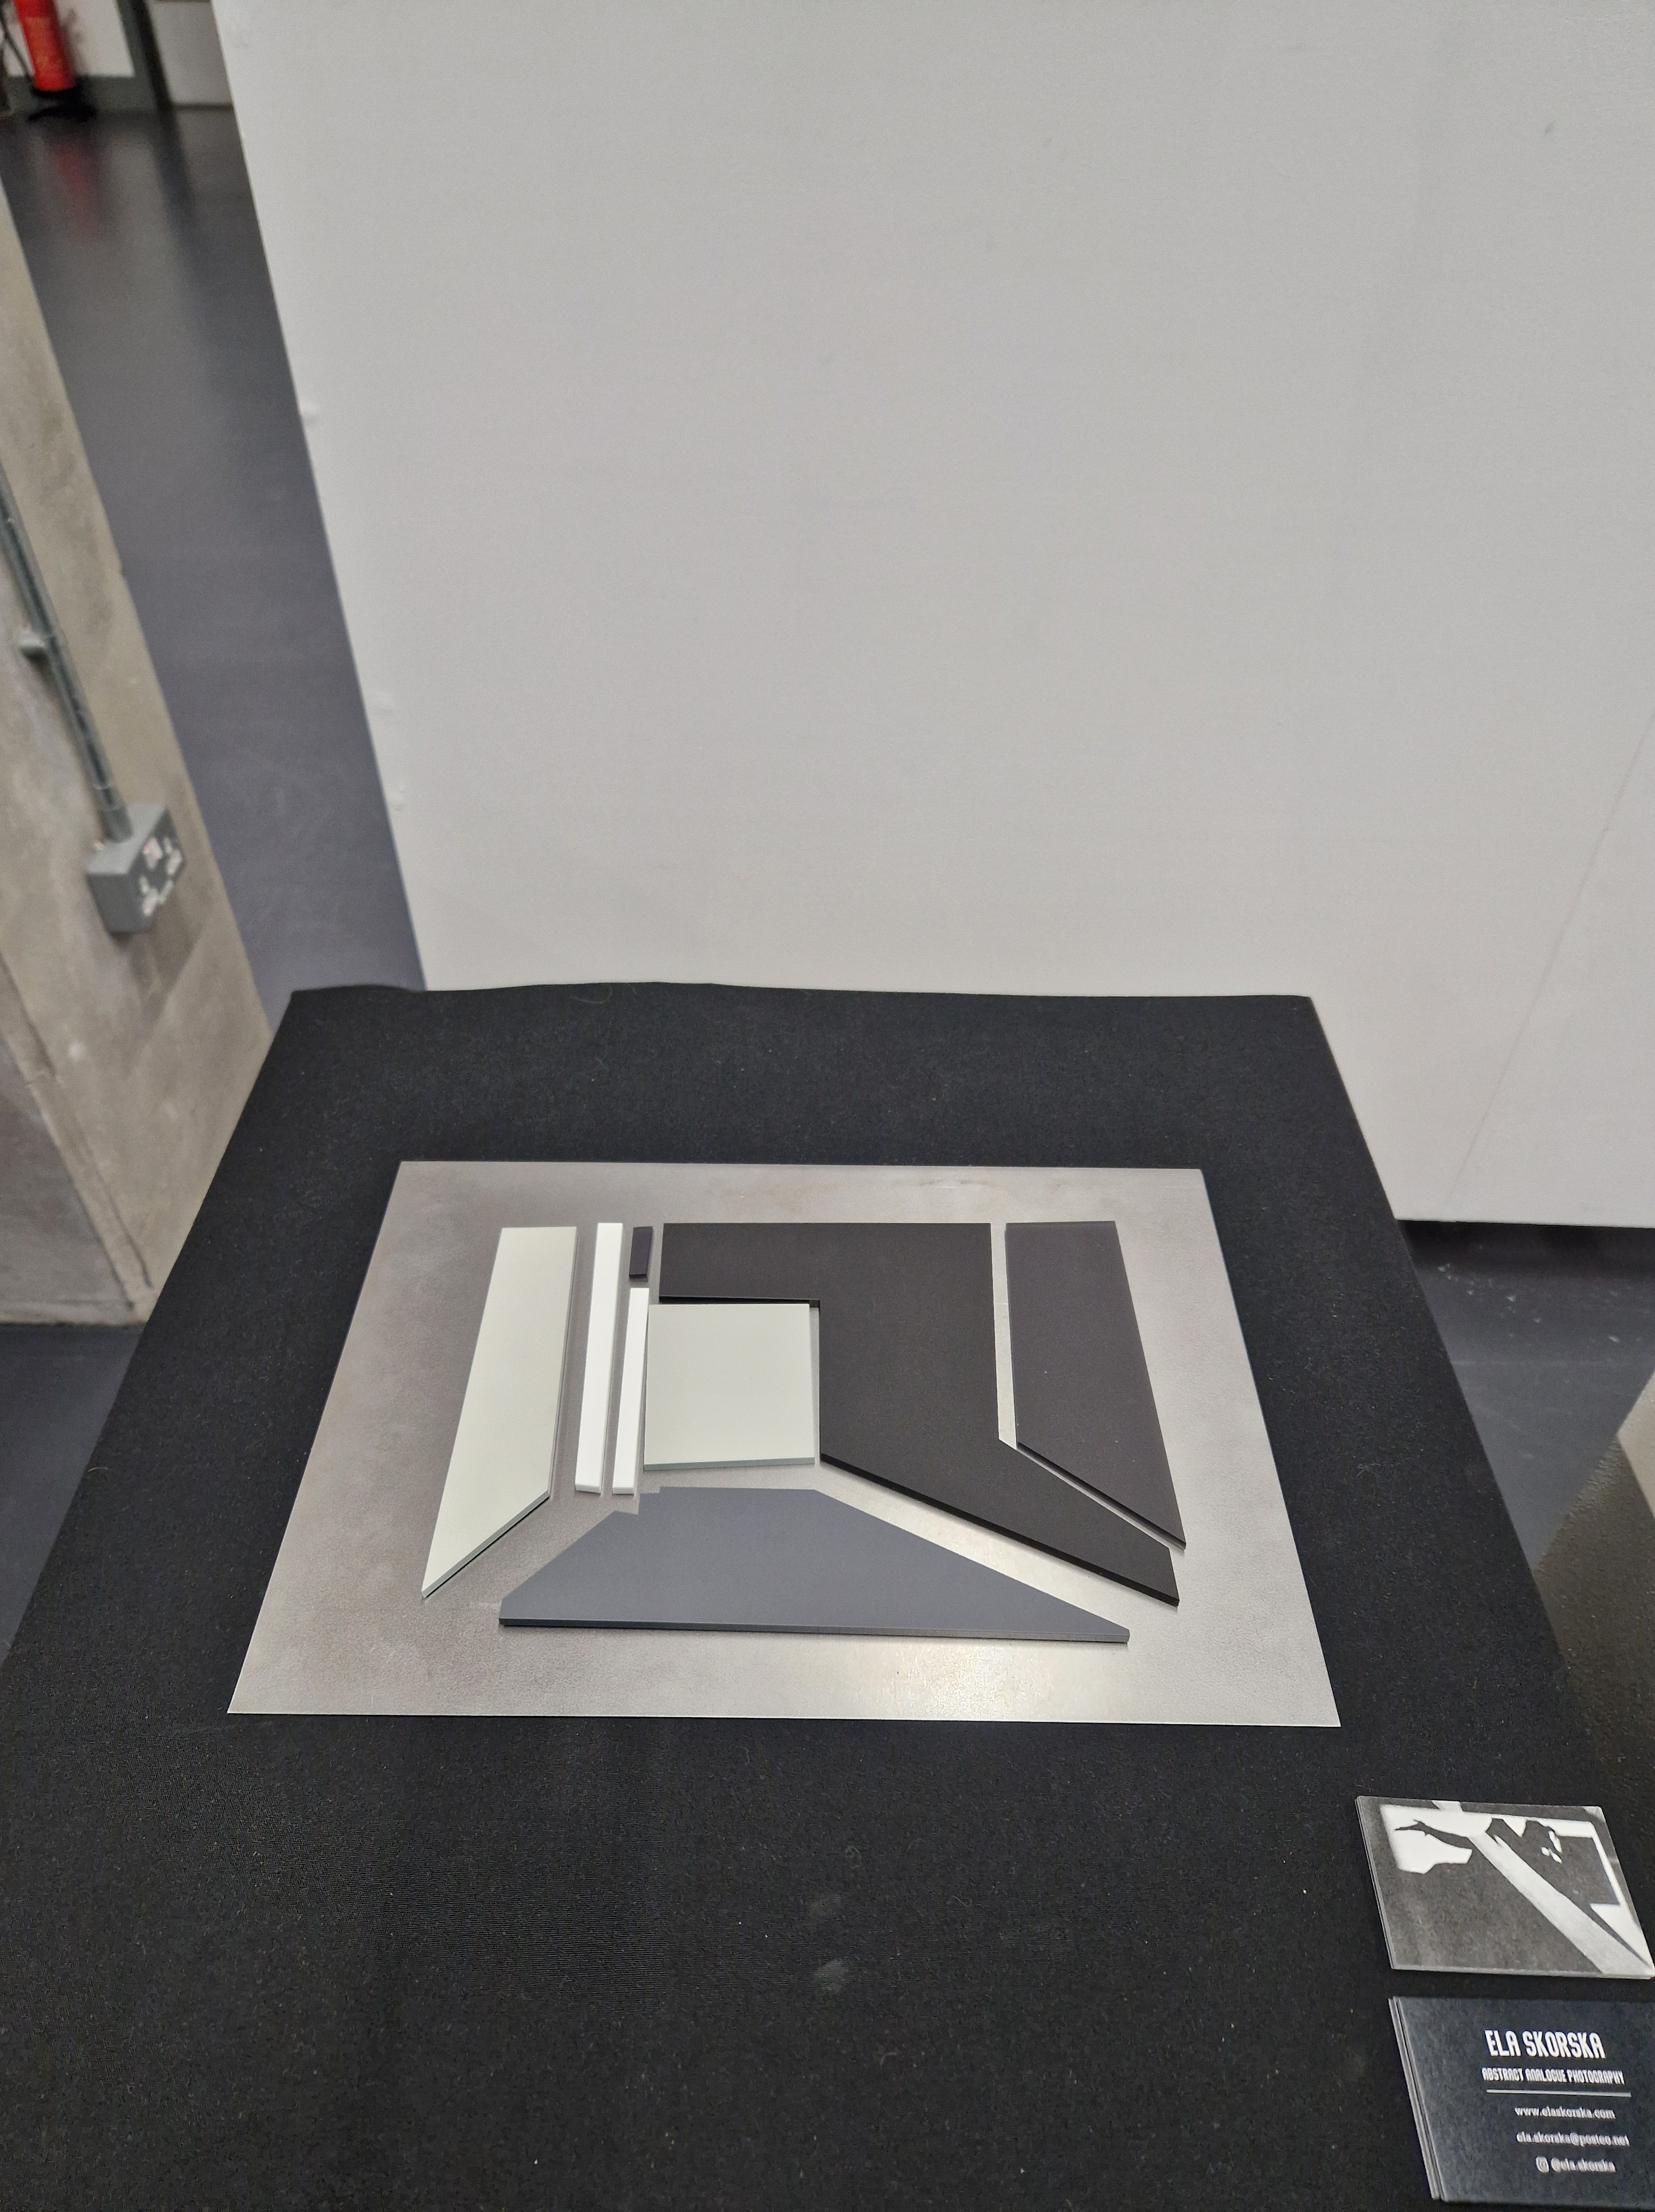
FINAL PERSPEX SCULPTURE
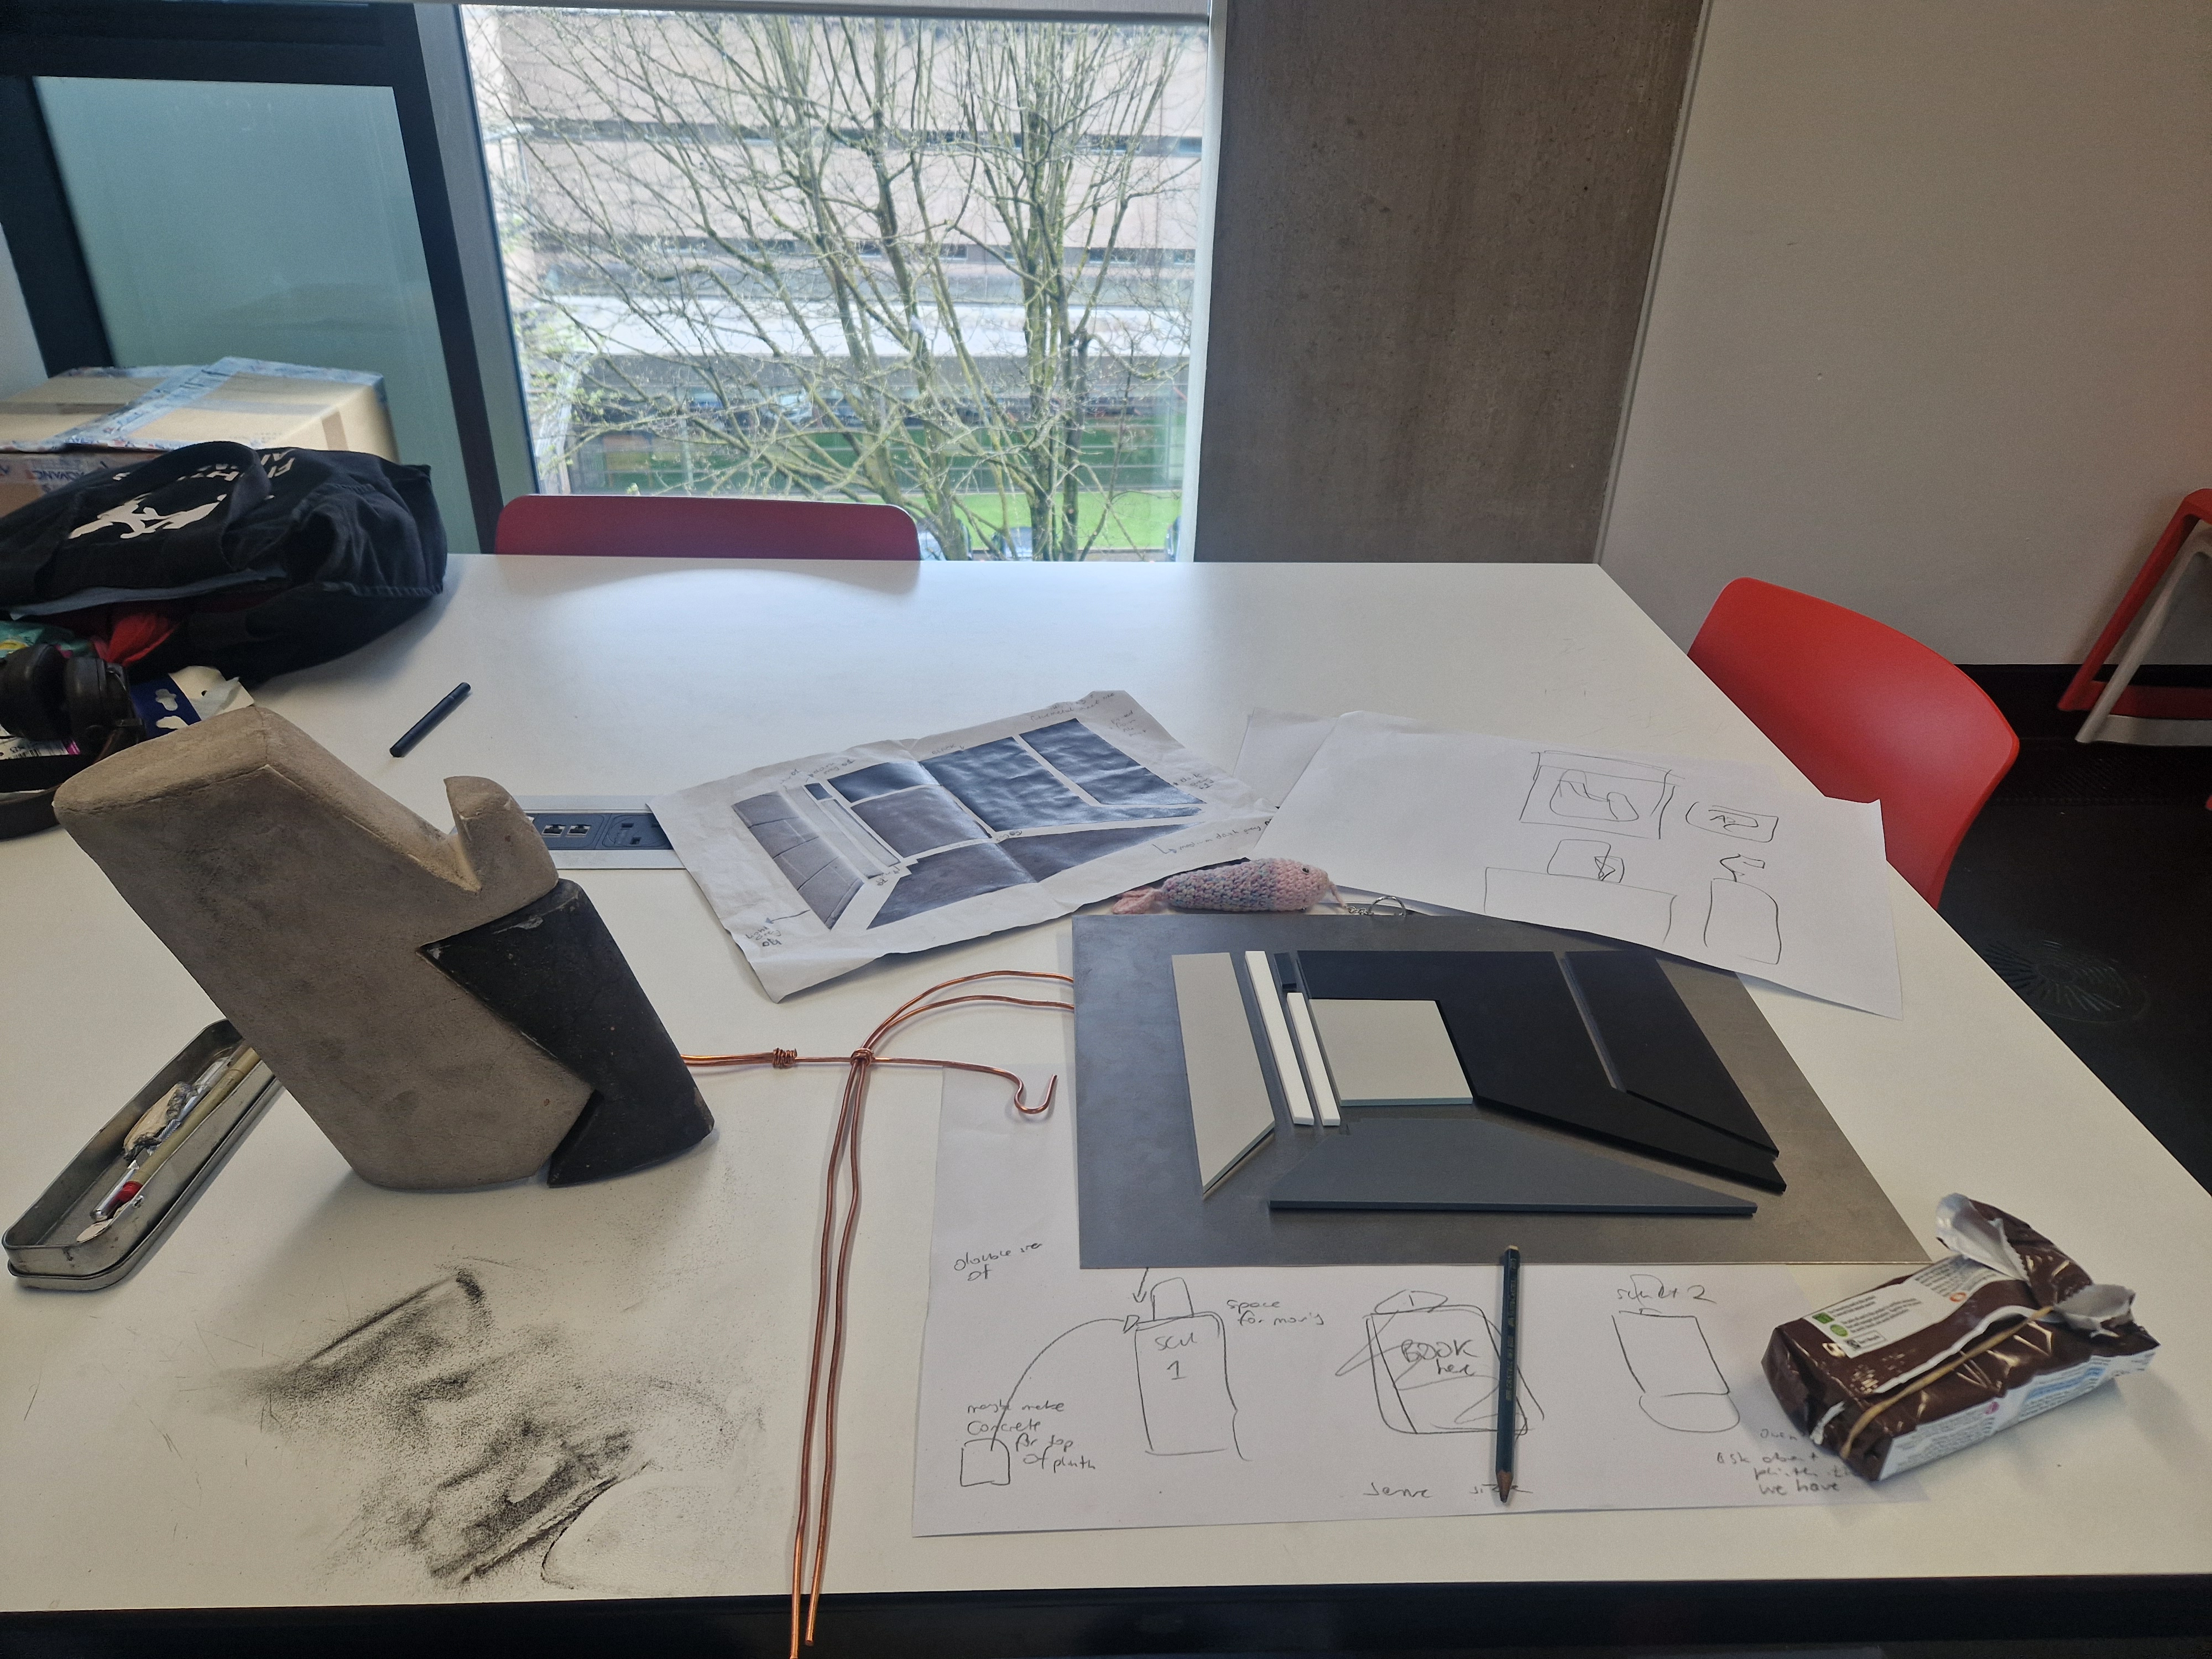
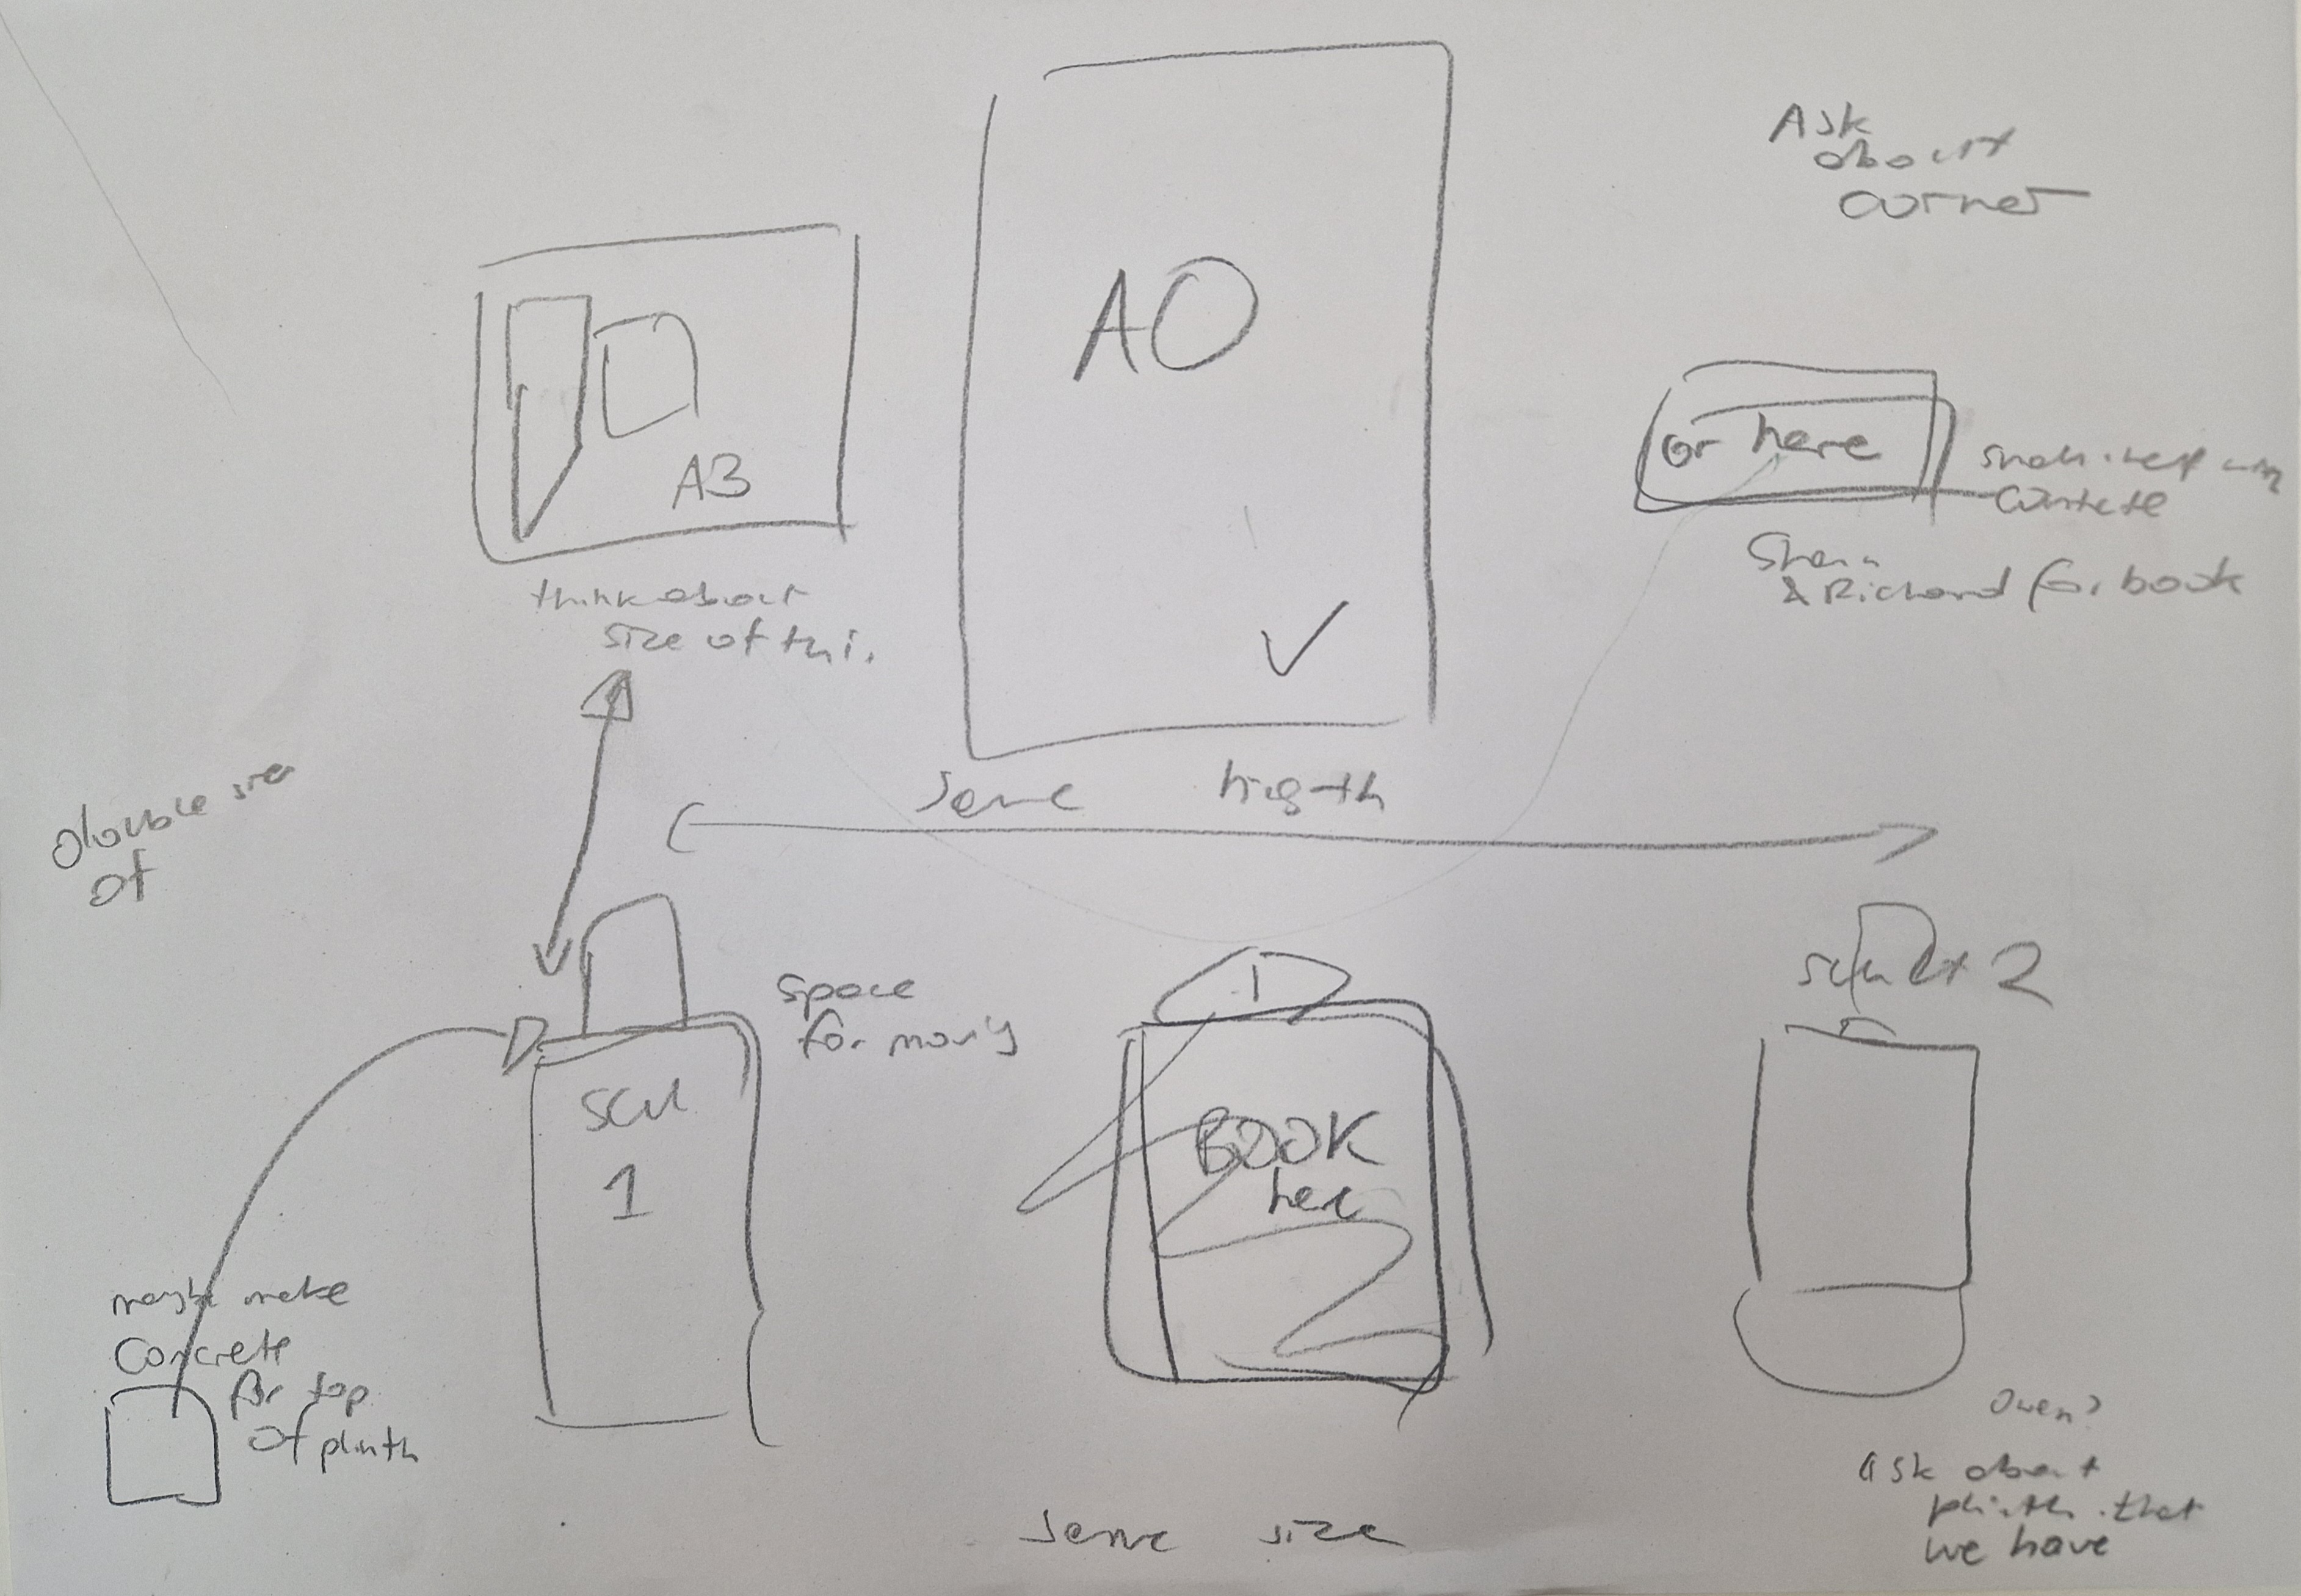
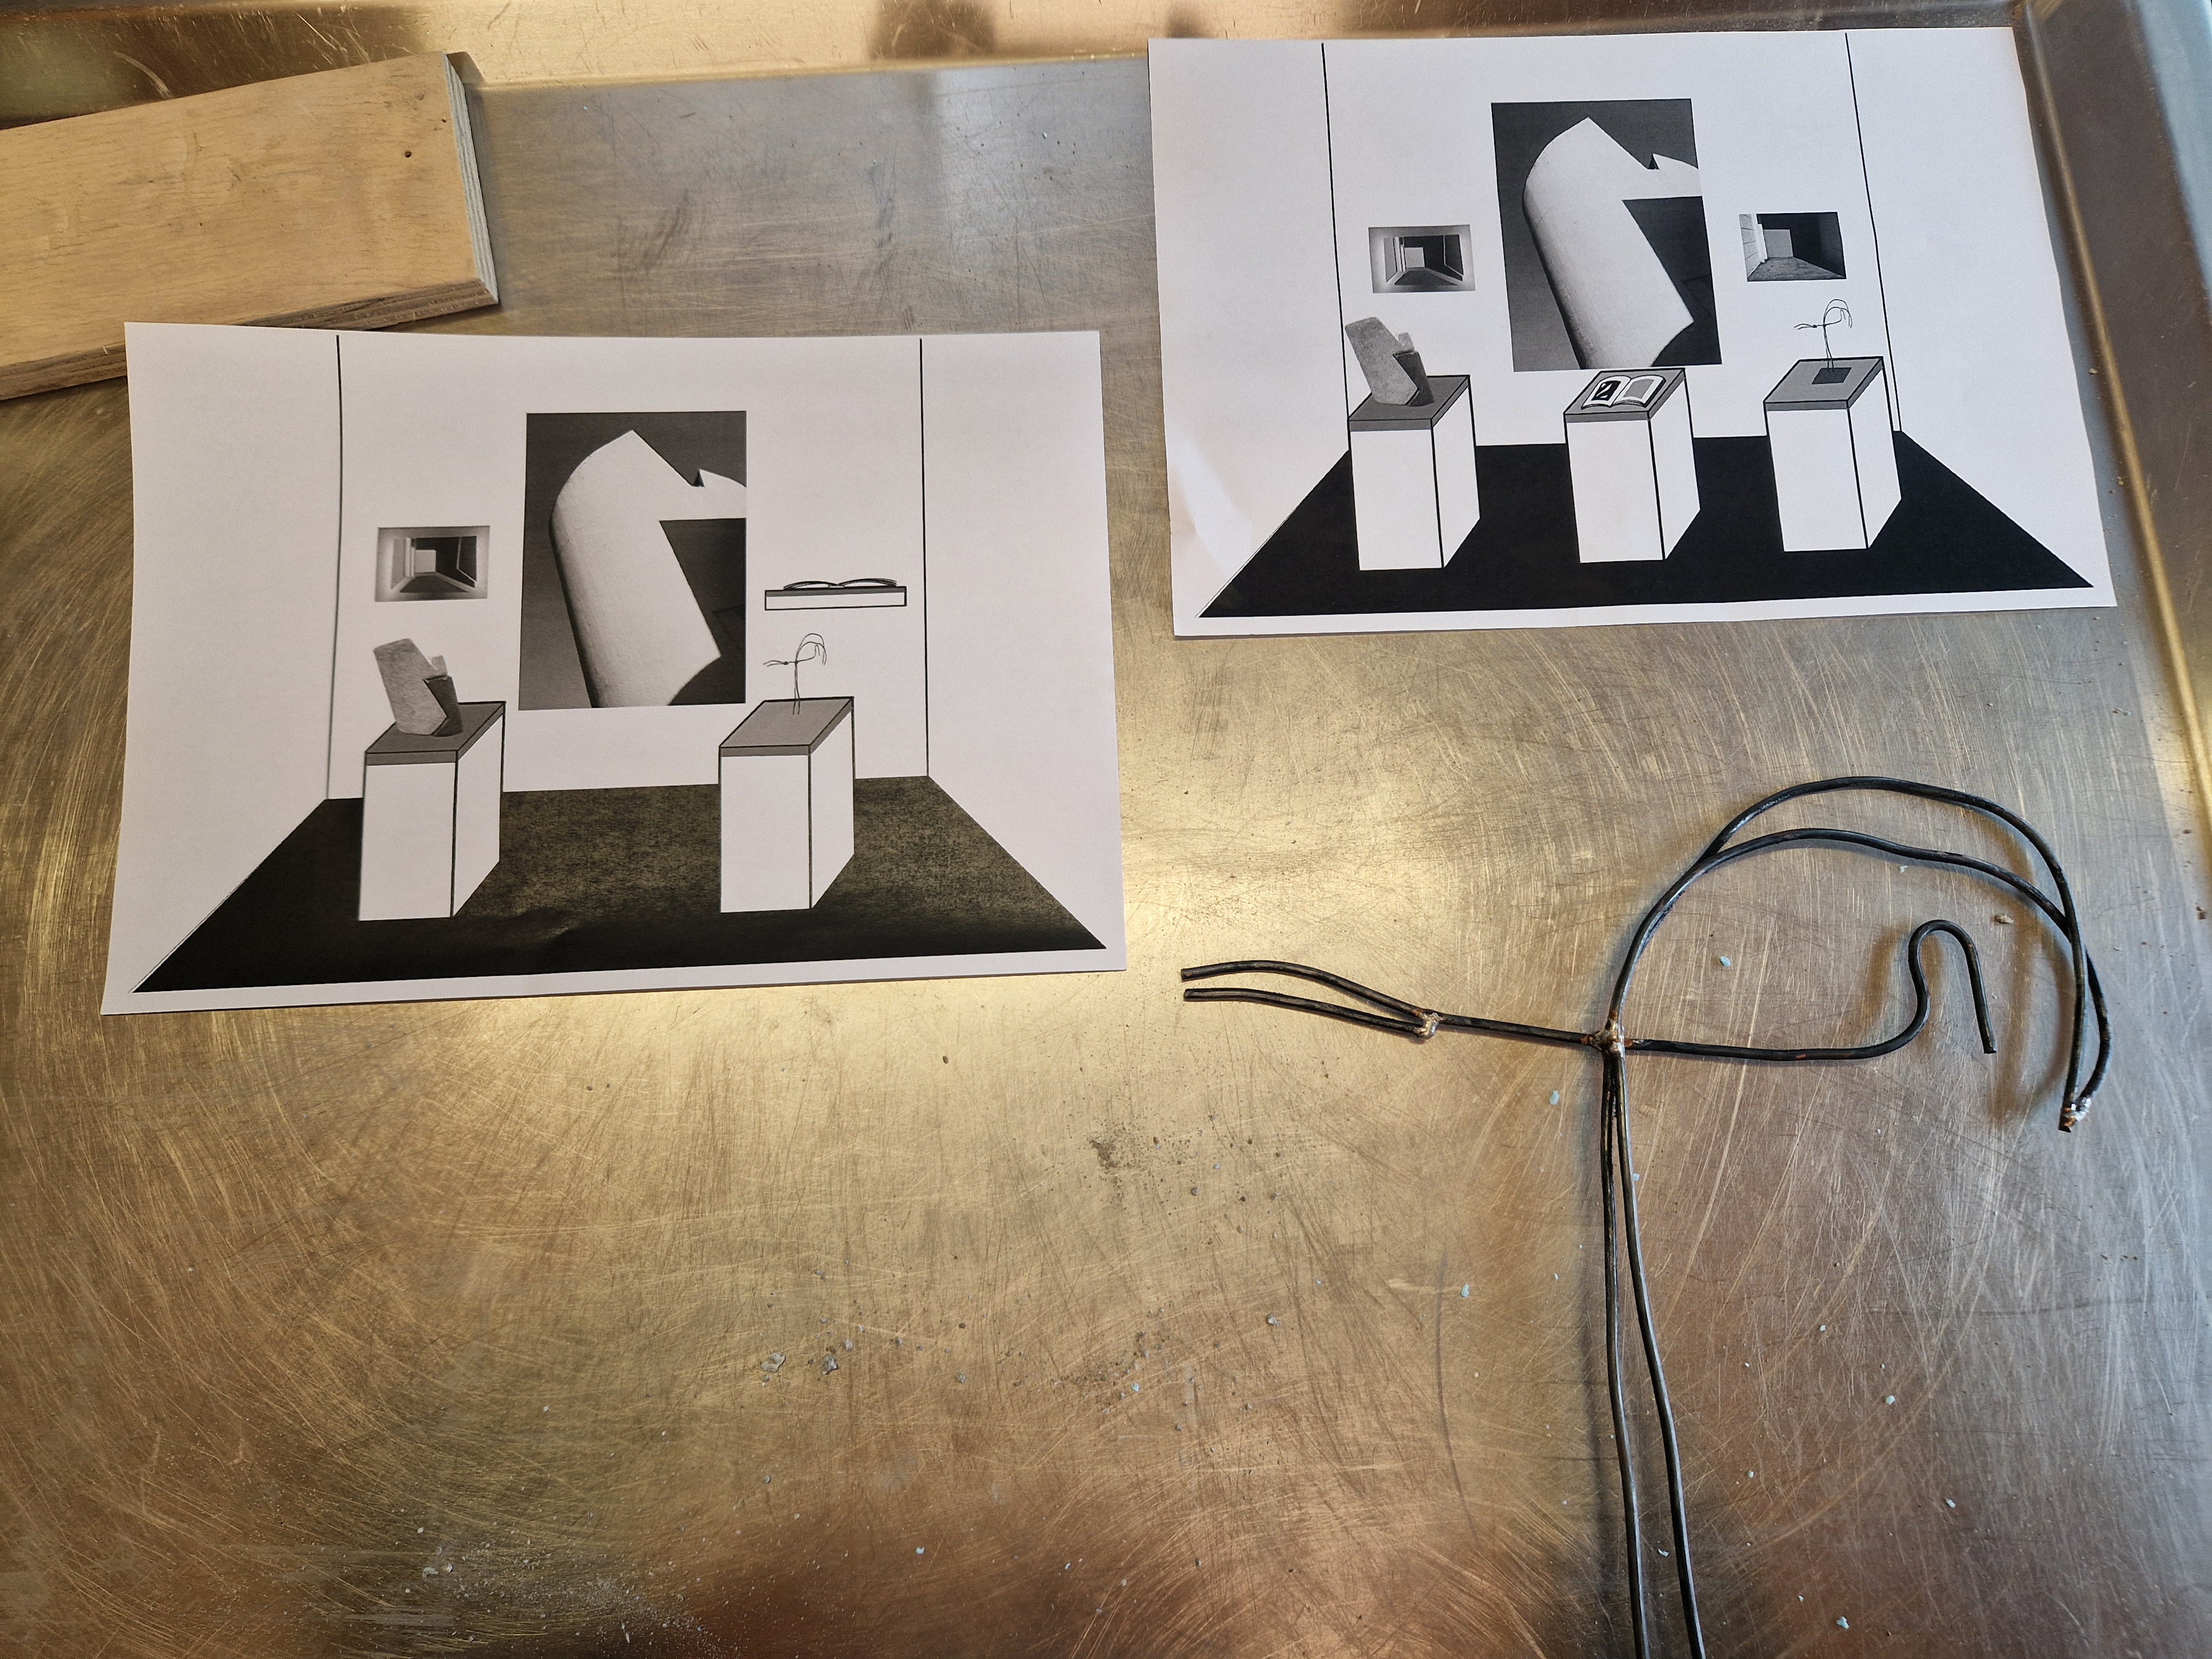
DEGREE SHOW PROJECT PLAN
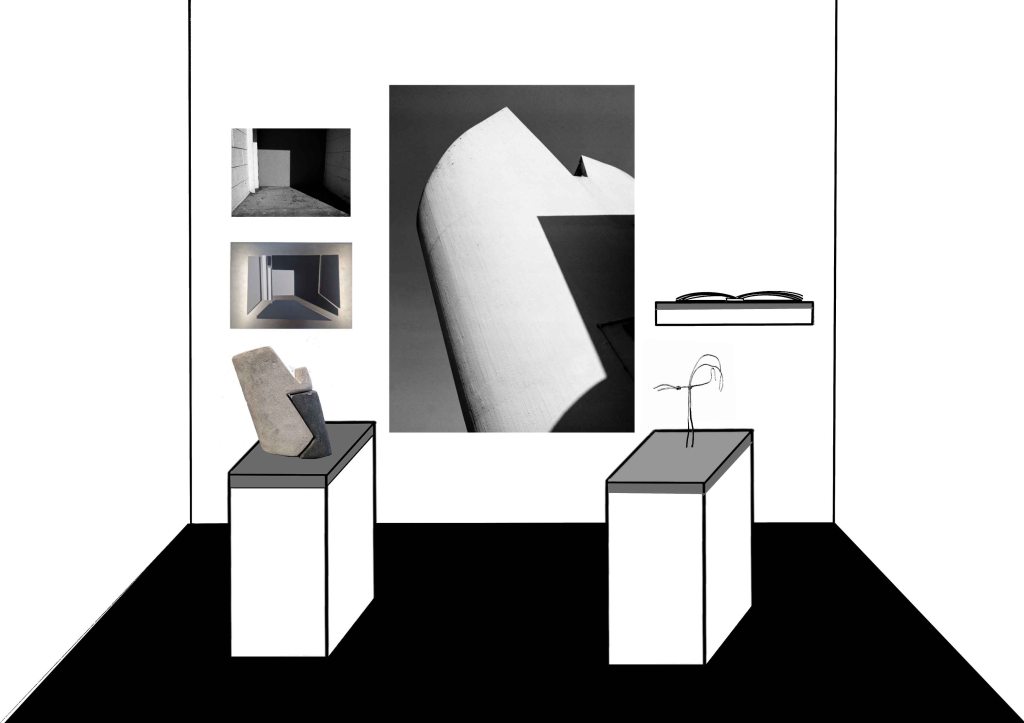
Starting with a very basic drawing I expanded to a more professional-looking visualisation of my project presentation during the degree show.
STARTING POINT :
EQUIPMENT: I need the following technical equipment for my work (please specify as a list, including quantities of all items, for example, headphones, headsets, plinths, shelving (e.g. 1x flatscreen, 2x headphones, 1x media player).
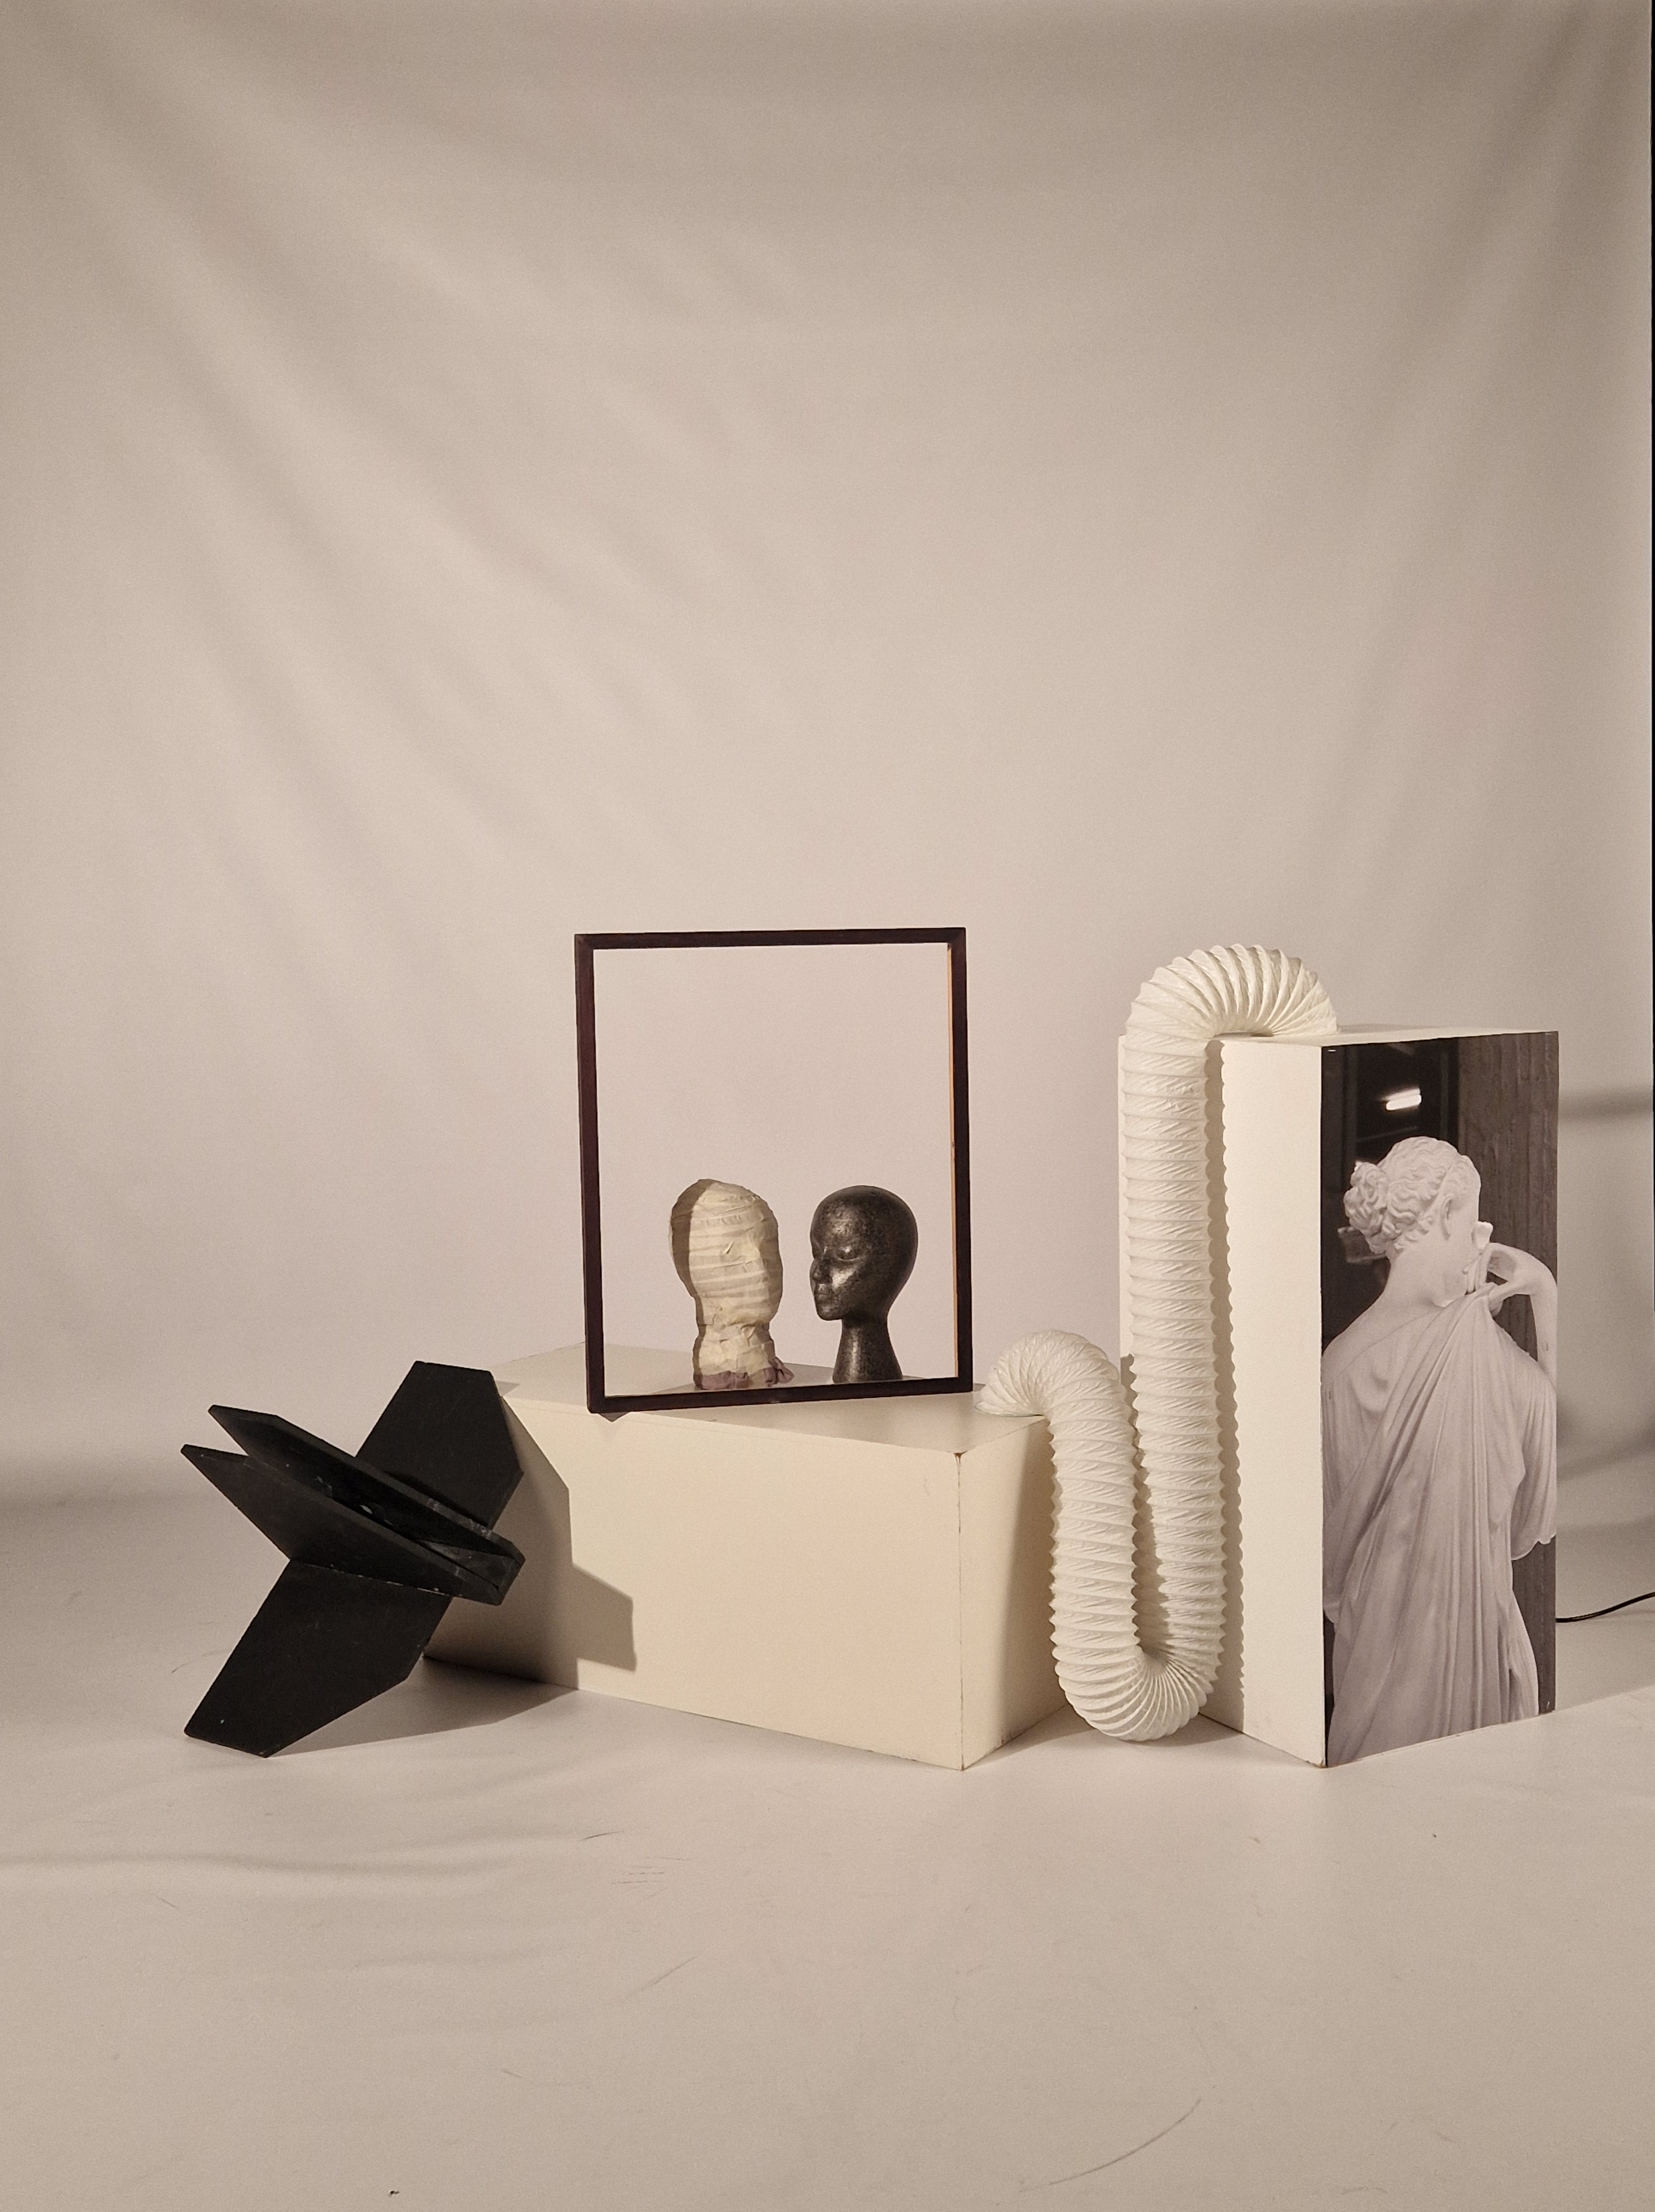
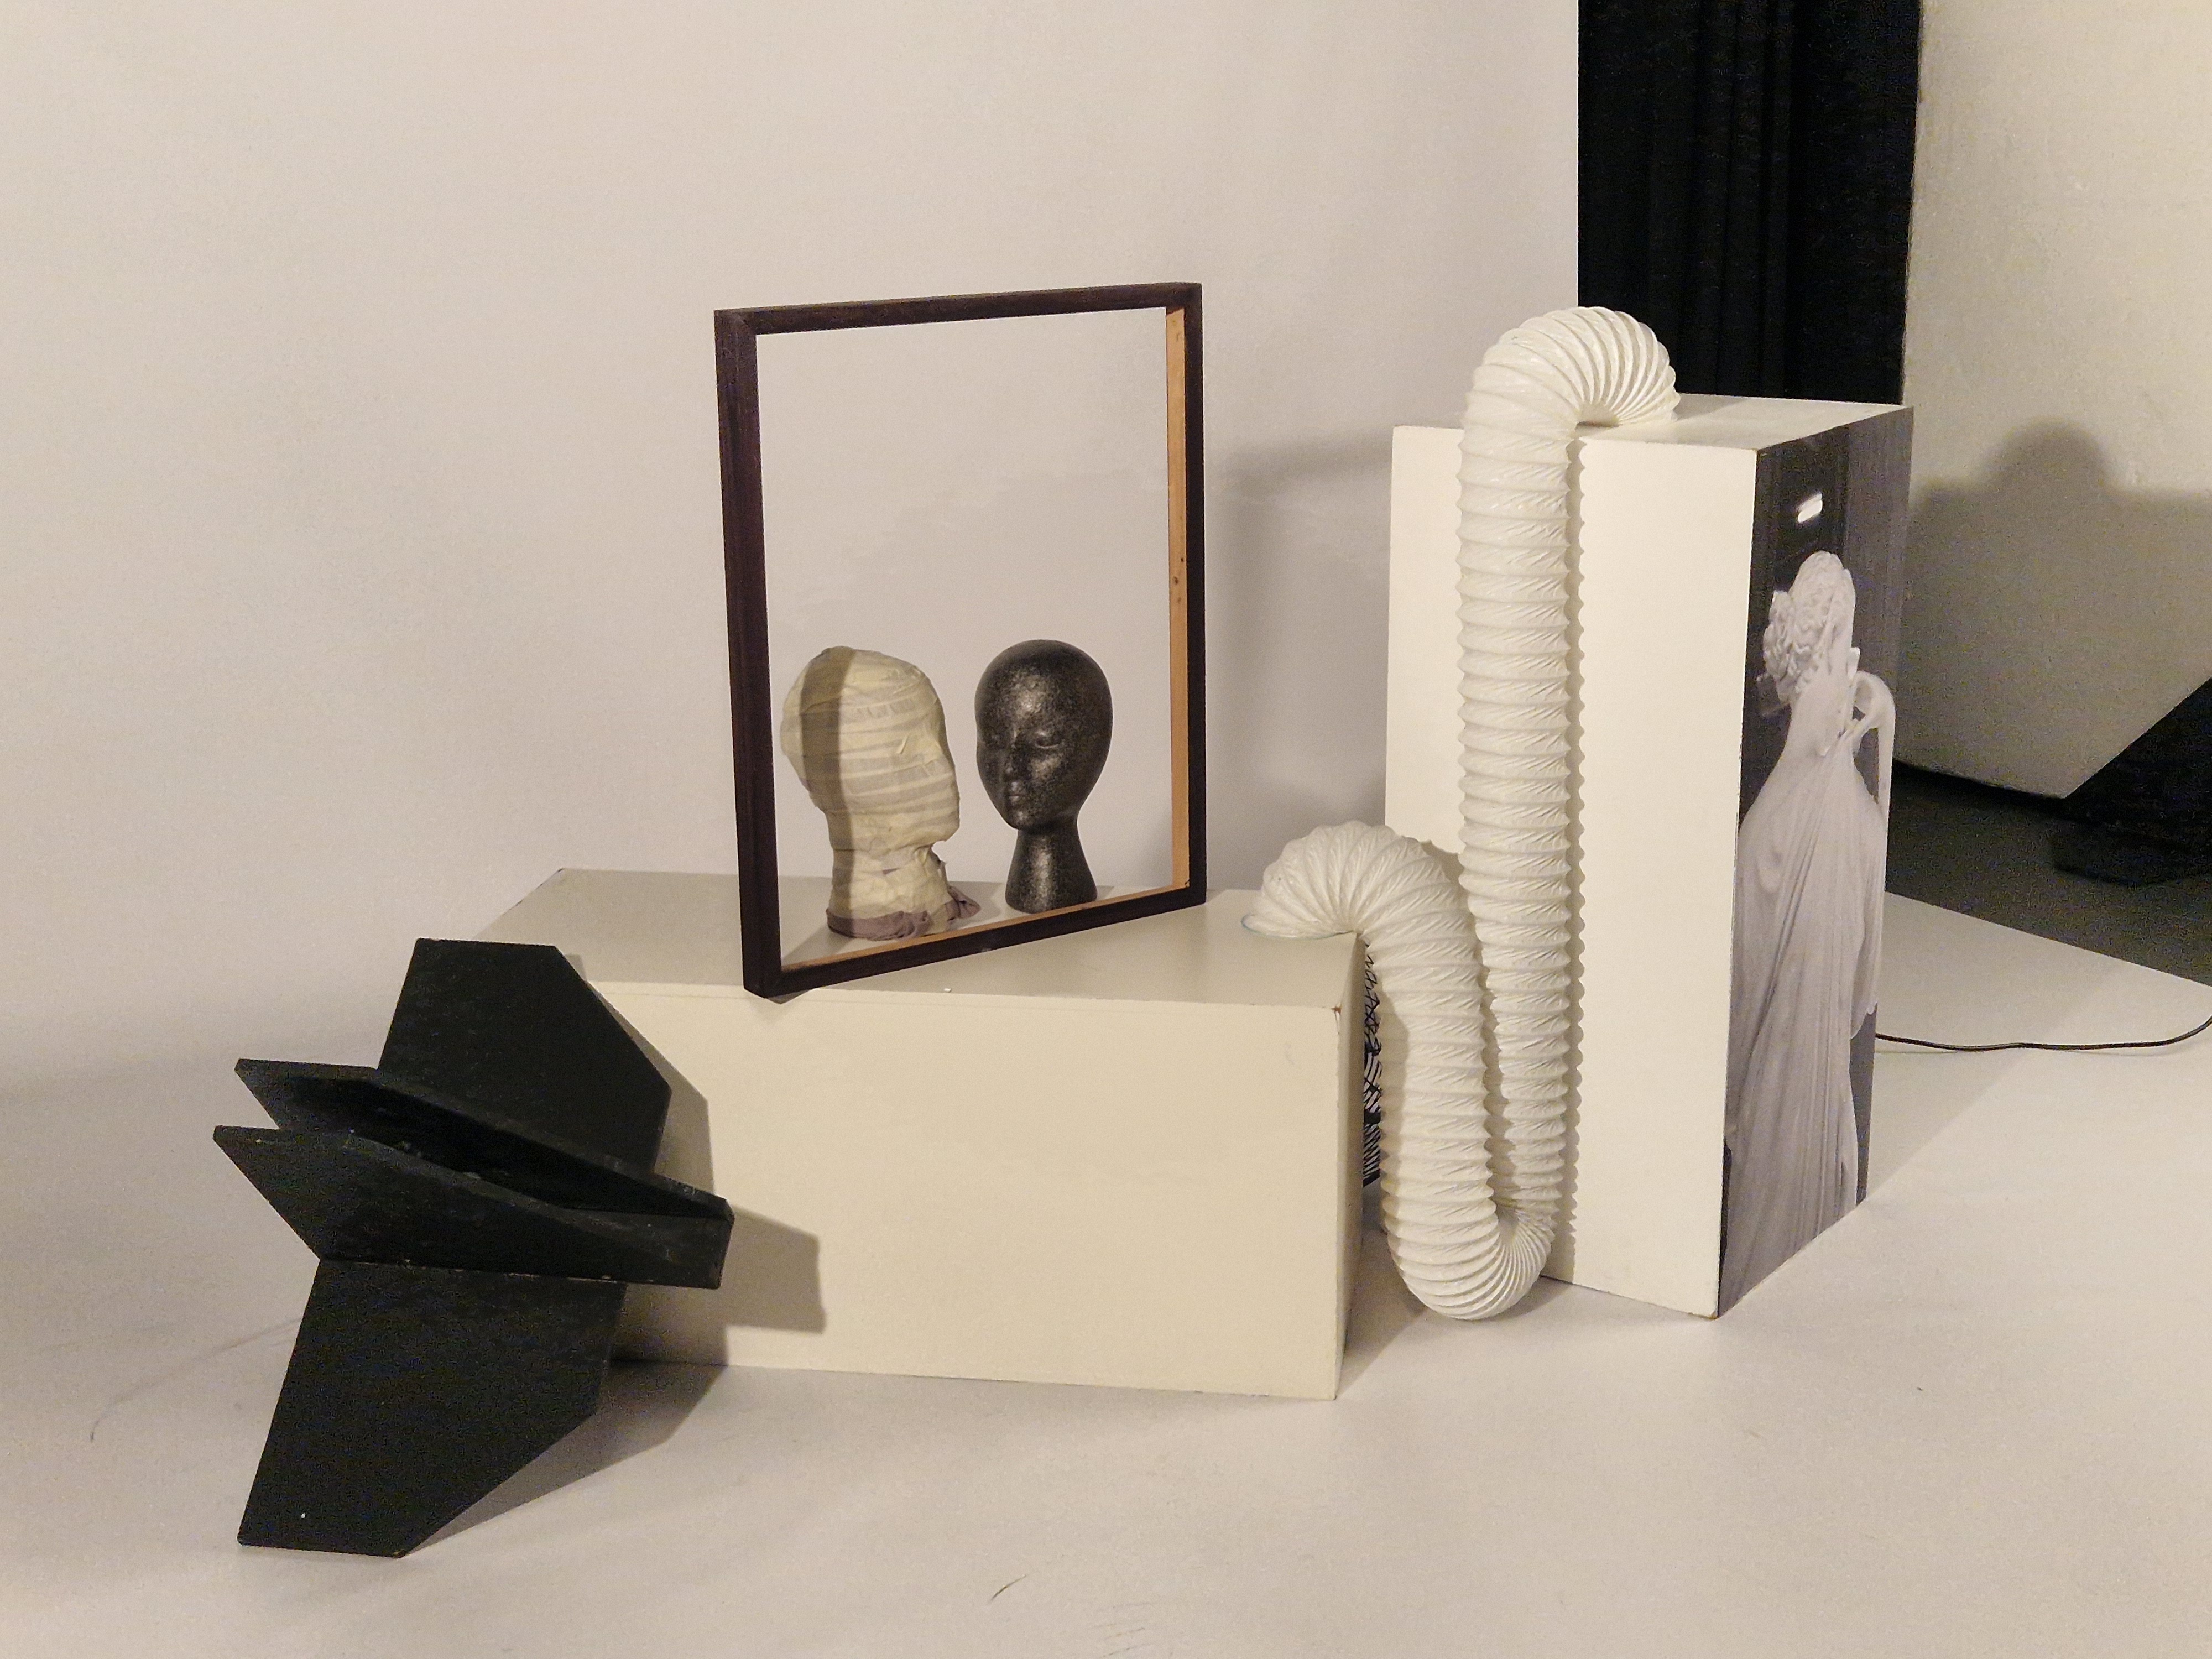
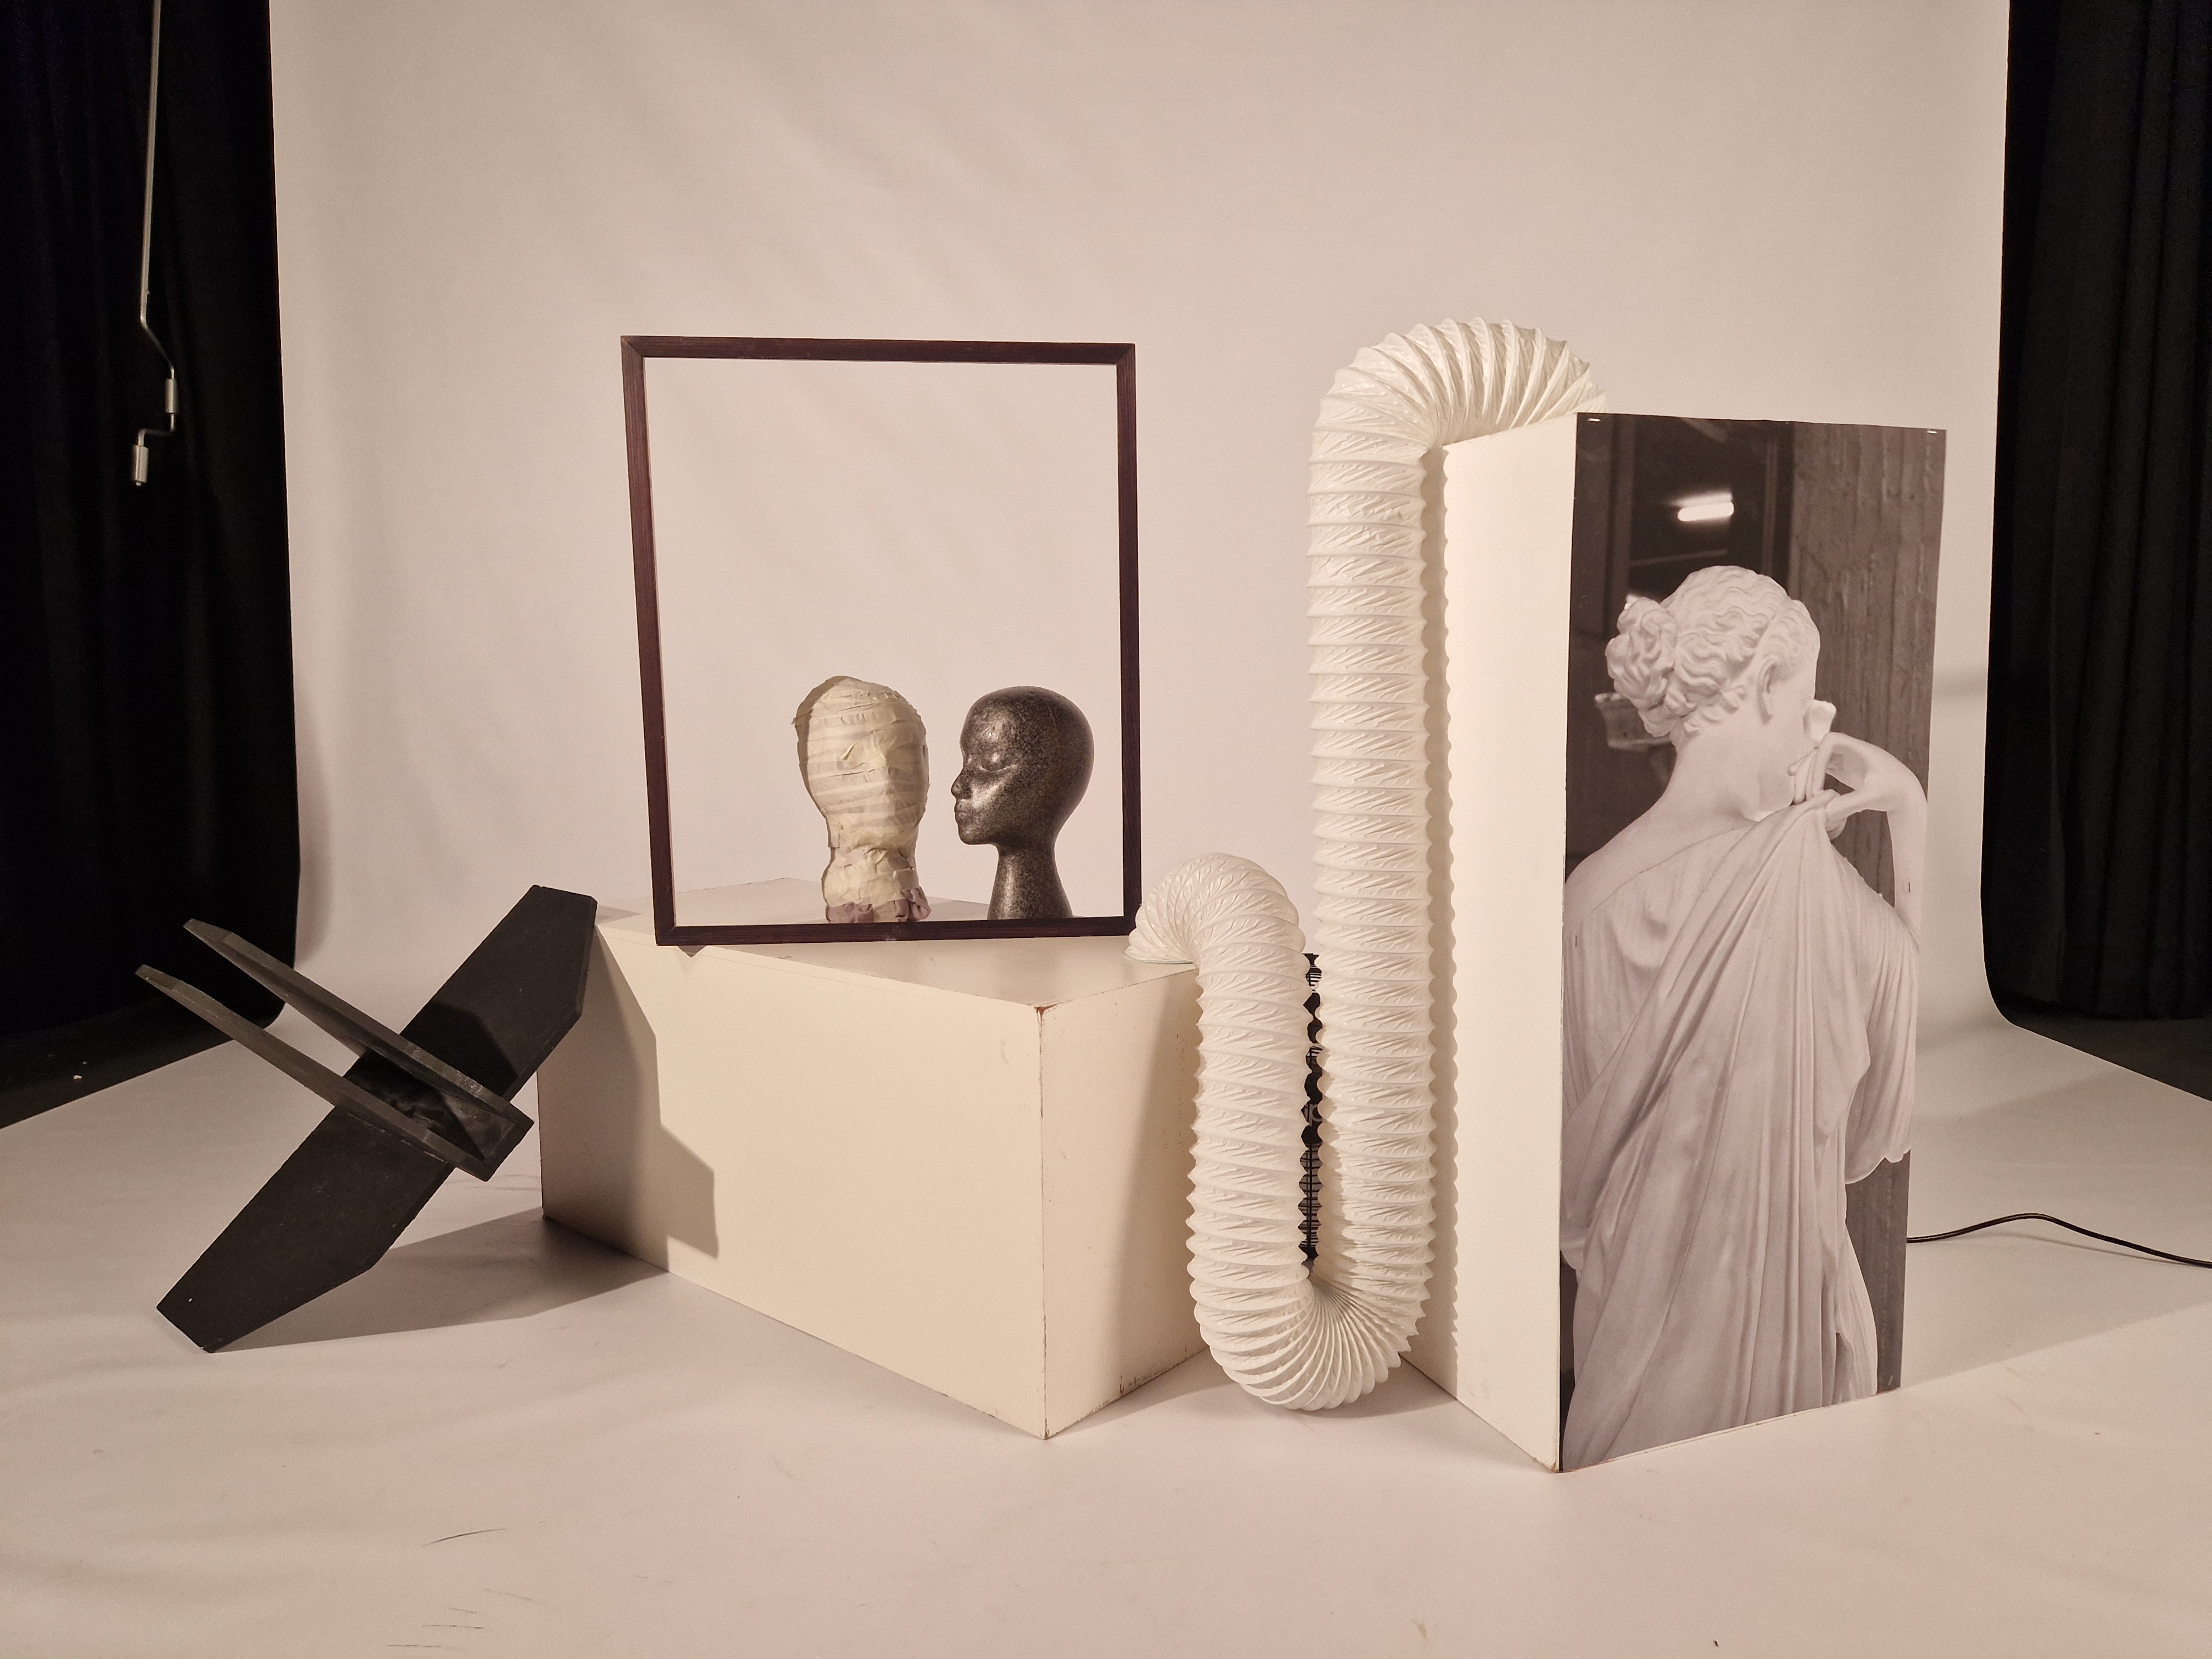
I will need a table (not a plinth) for my sculpture. Wooden, grey – corresponding to the frame. I am playing with the idea of adding sound to the installation (through shower speakers, recording by contact microphone of the ambience inside the building), but I will explore this in the end stages of the project if A) I have enough time B) I can gain access to the inside of the building C) if everything comes together I will decide after testing the idea to see if it works with installation or not (my worry is it might overwhelm it, but perhaps it will be harmonising it)
Please include any other notes or details that it might be important to know about your exhibition work (50 words or less):
I would like my sculpture and photograph to be quite centred, not tucked away in the corner or back wall. I think it’s important for it to take out some space, to exist in a space in which it could emanate the feeling I want to convey. Additionally, I want my sculpture to be an interactive, sensory experience and I would like to invite the viewers to touch the sculpture made through 3D printing and concrete – hence the central positioning and allowing space is very important.
VERSION 1
This then evolved into a more precise and sophisticated plan with three options to consider. Tutorials and Crits formed the basis for the progression of the plan, which I documented throughout the journal.
VERSION 2 – 3 OPTIONS
1

2
3

CONCLUSIONS:

- AO aluminium white di-bond print of my main image on a wall, no frame
- A3 steel sheet with Perspex sculpture on magnets on it, no frame (wooden backing for stability and hanging brackets)
- a table (to be sourced) for the sculpture 50 cm high, situated somewhere in the room opposite the image (but not in front of it).
-positioning of the original image that inspired the Perspex sculpture to be resolved once I see the space I have been given - resolved during installation (printed in a way that corresponds to other pieces, so no frame).
THURSDAY
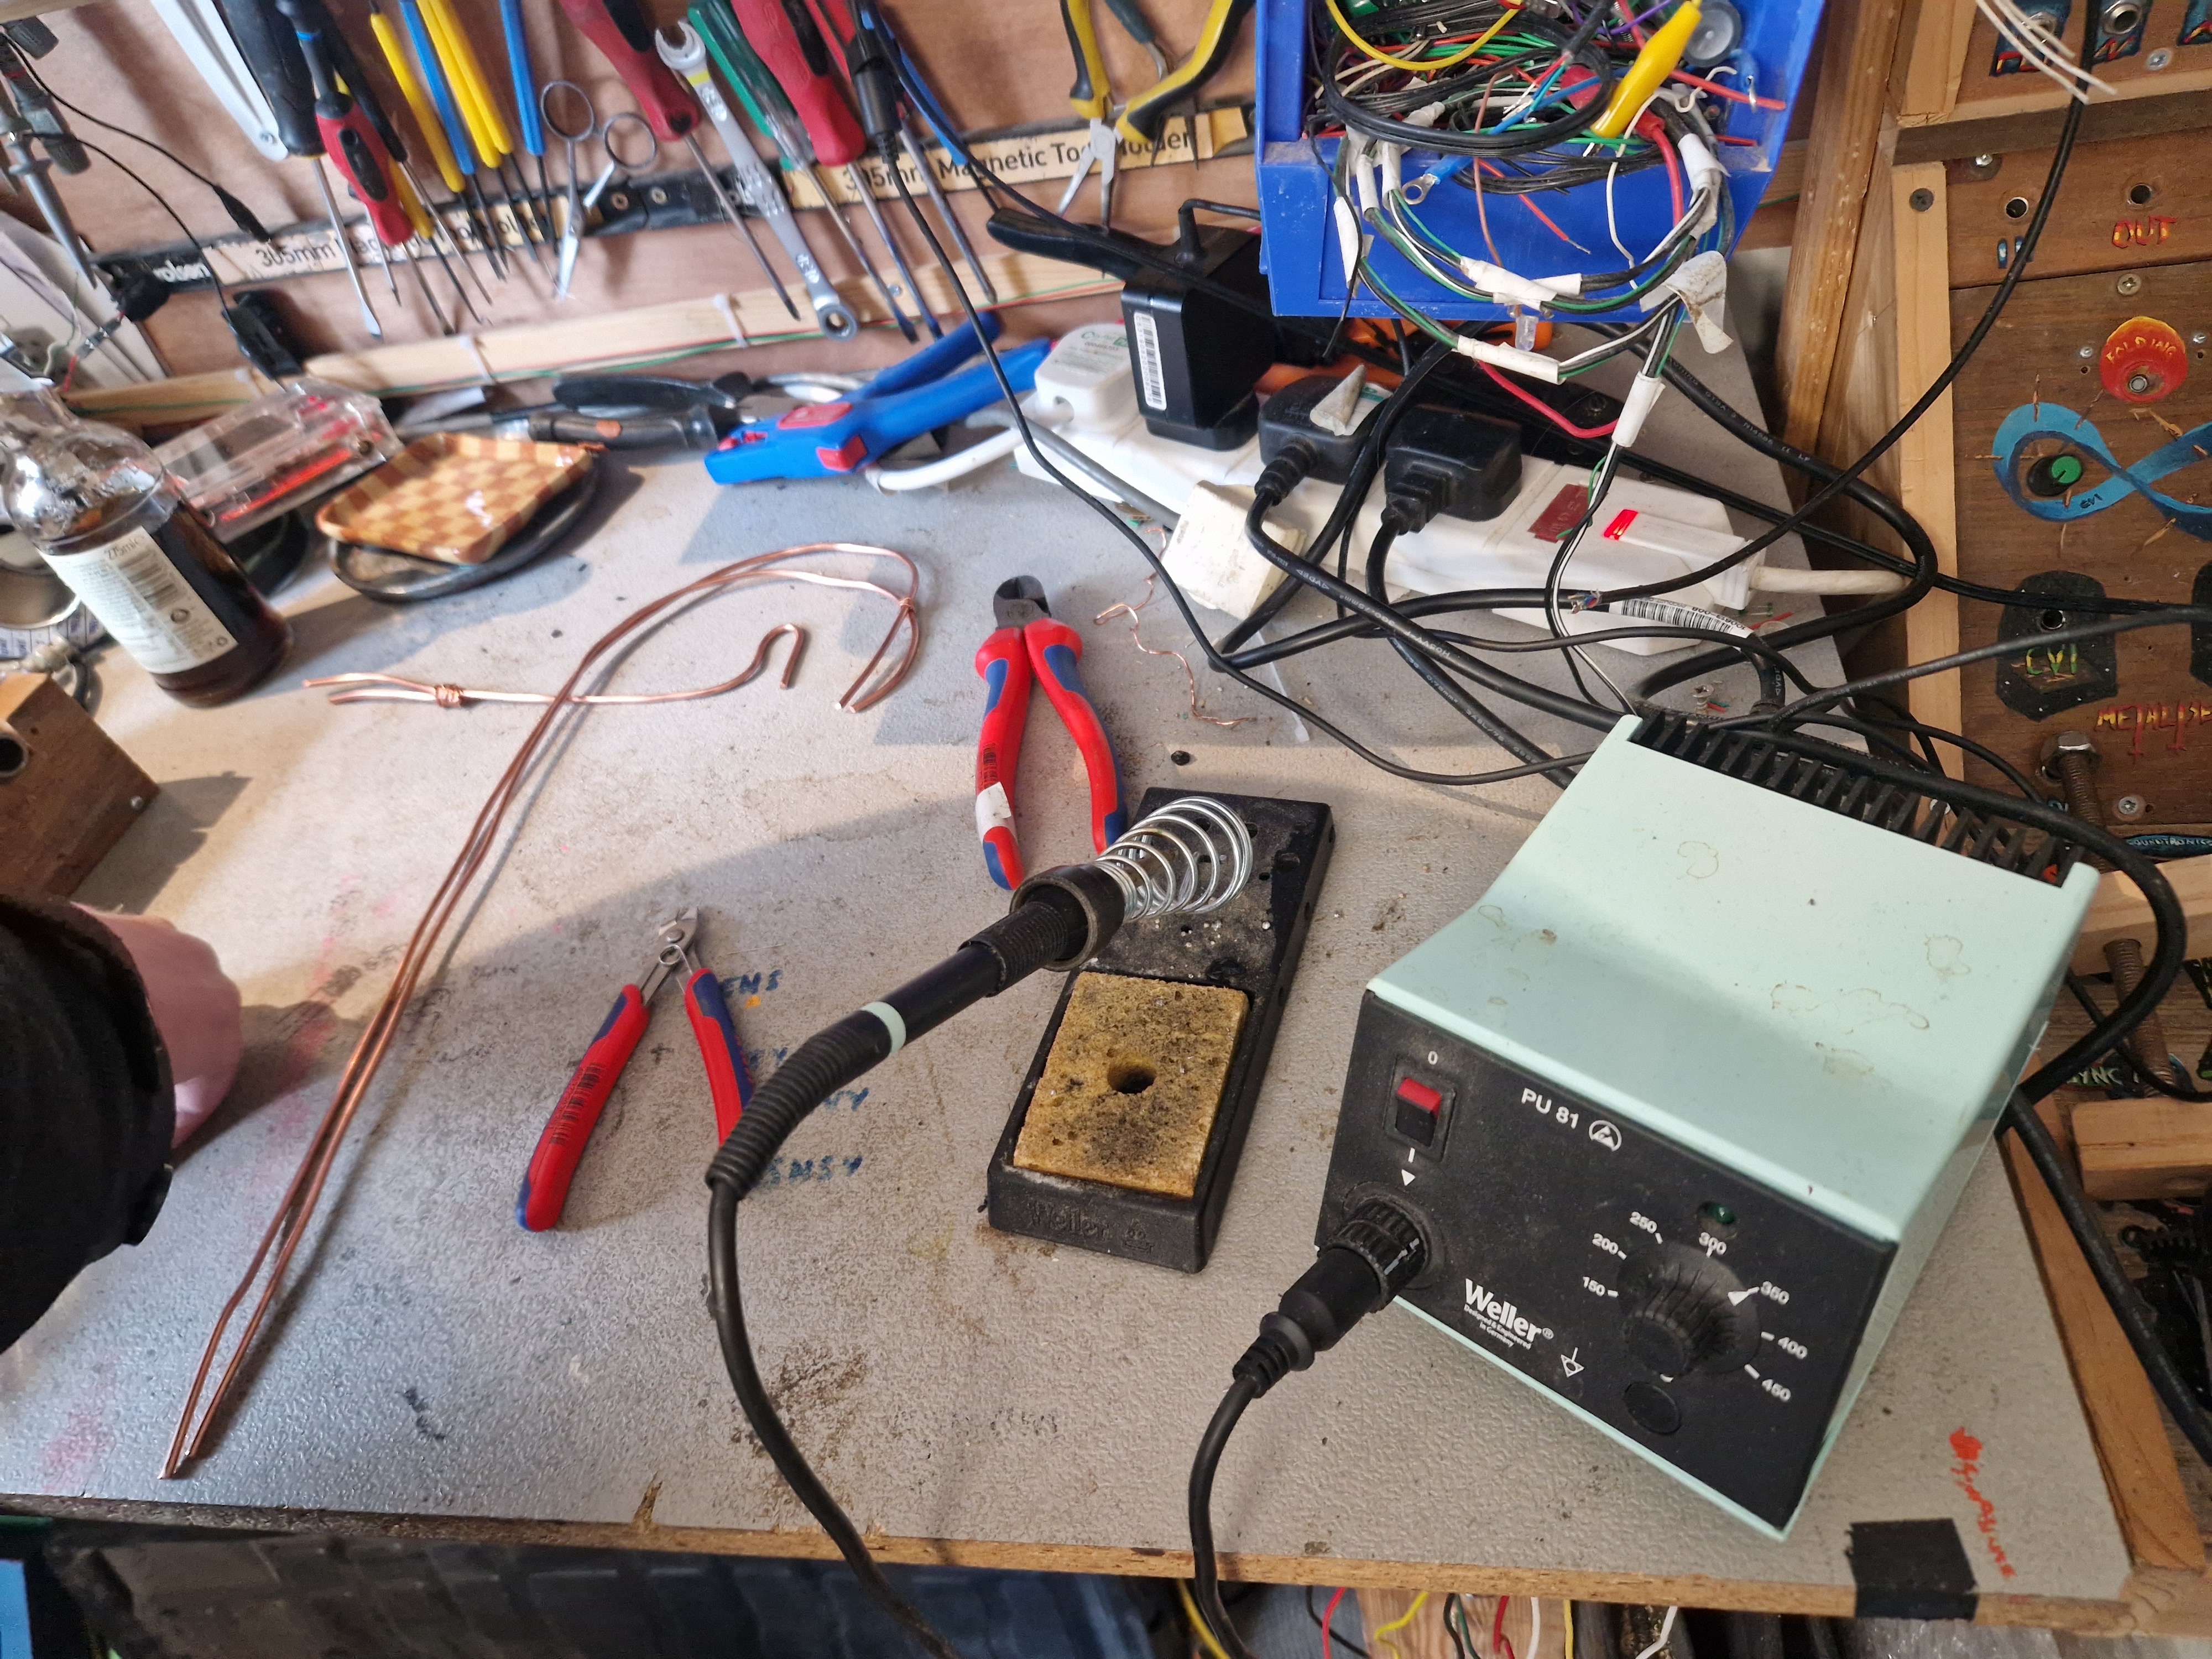
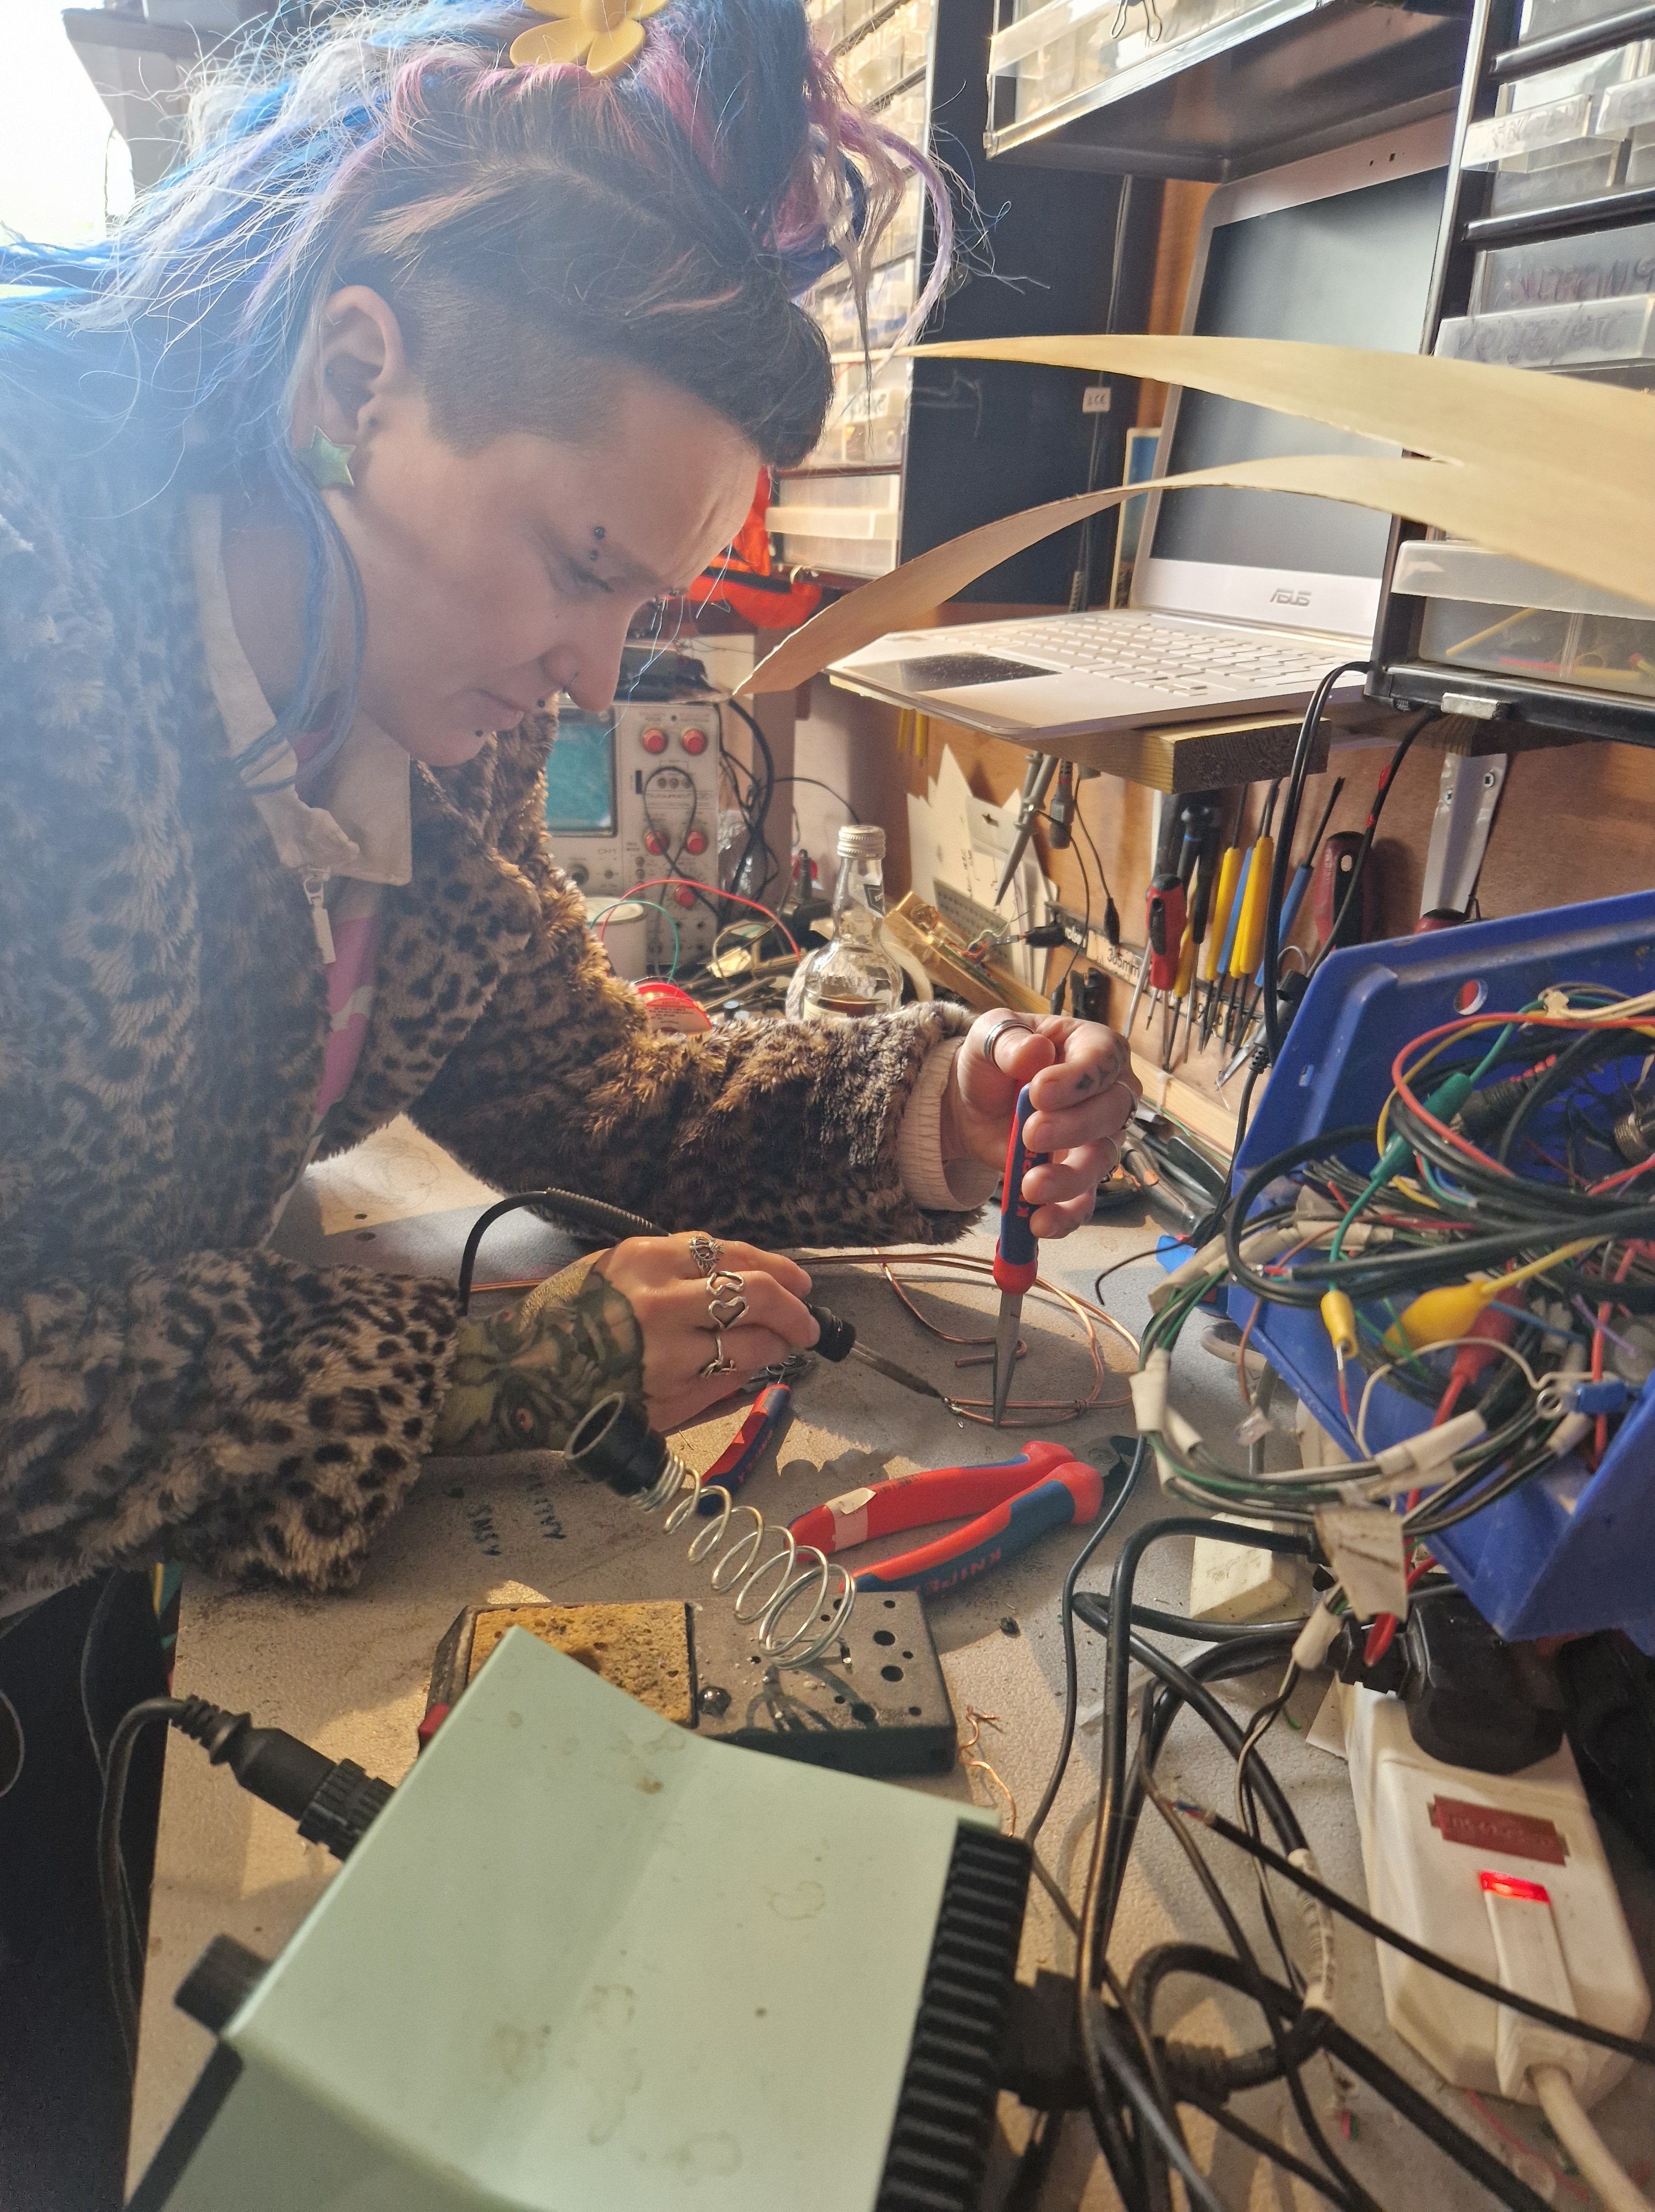
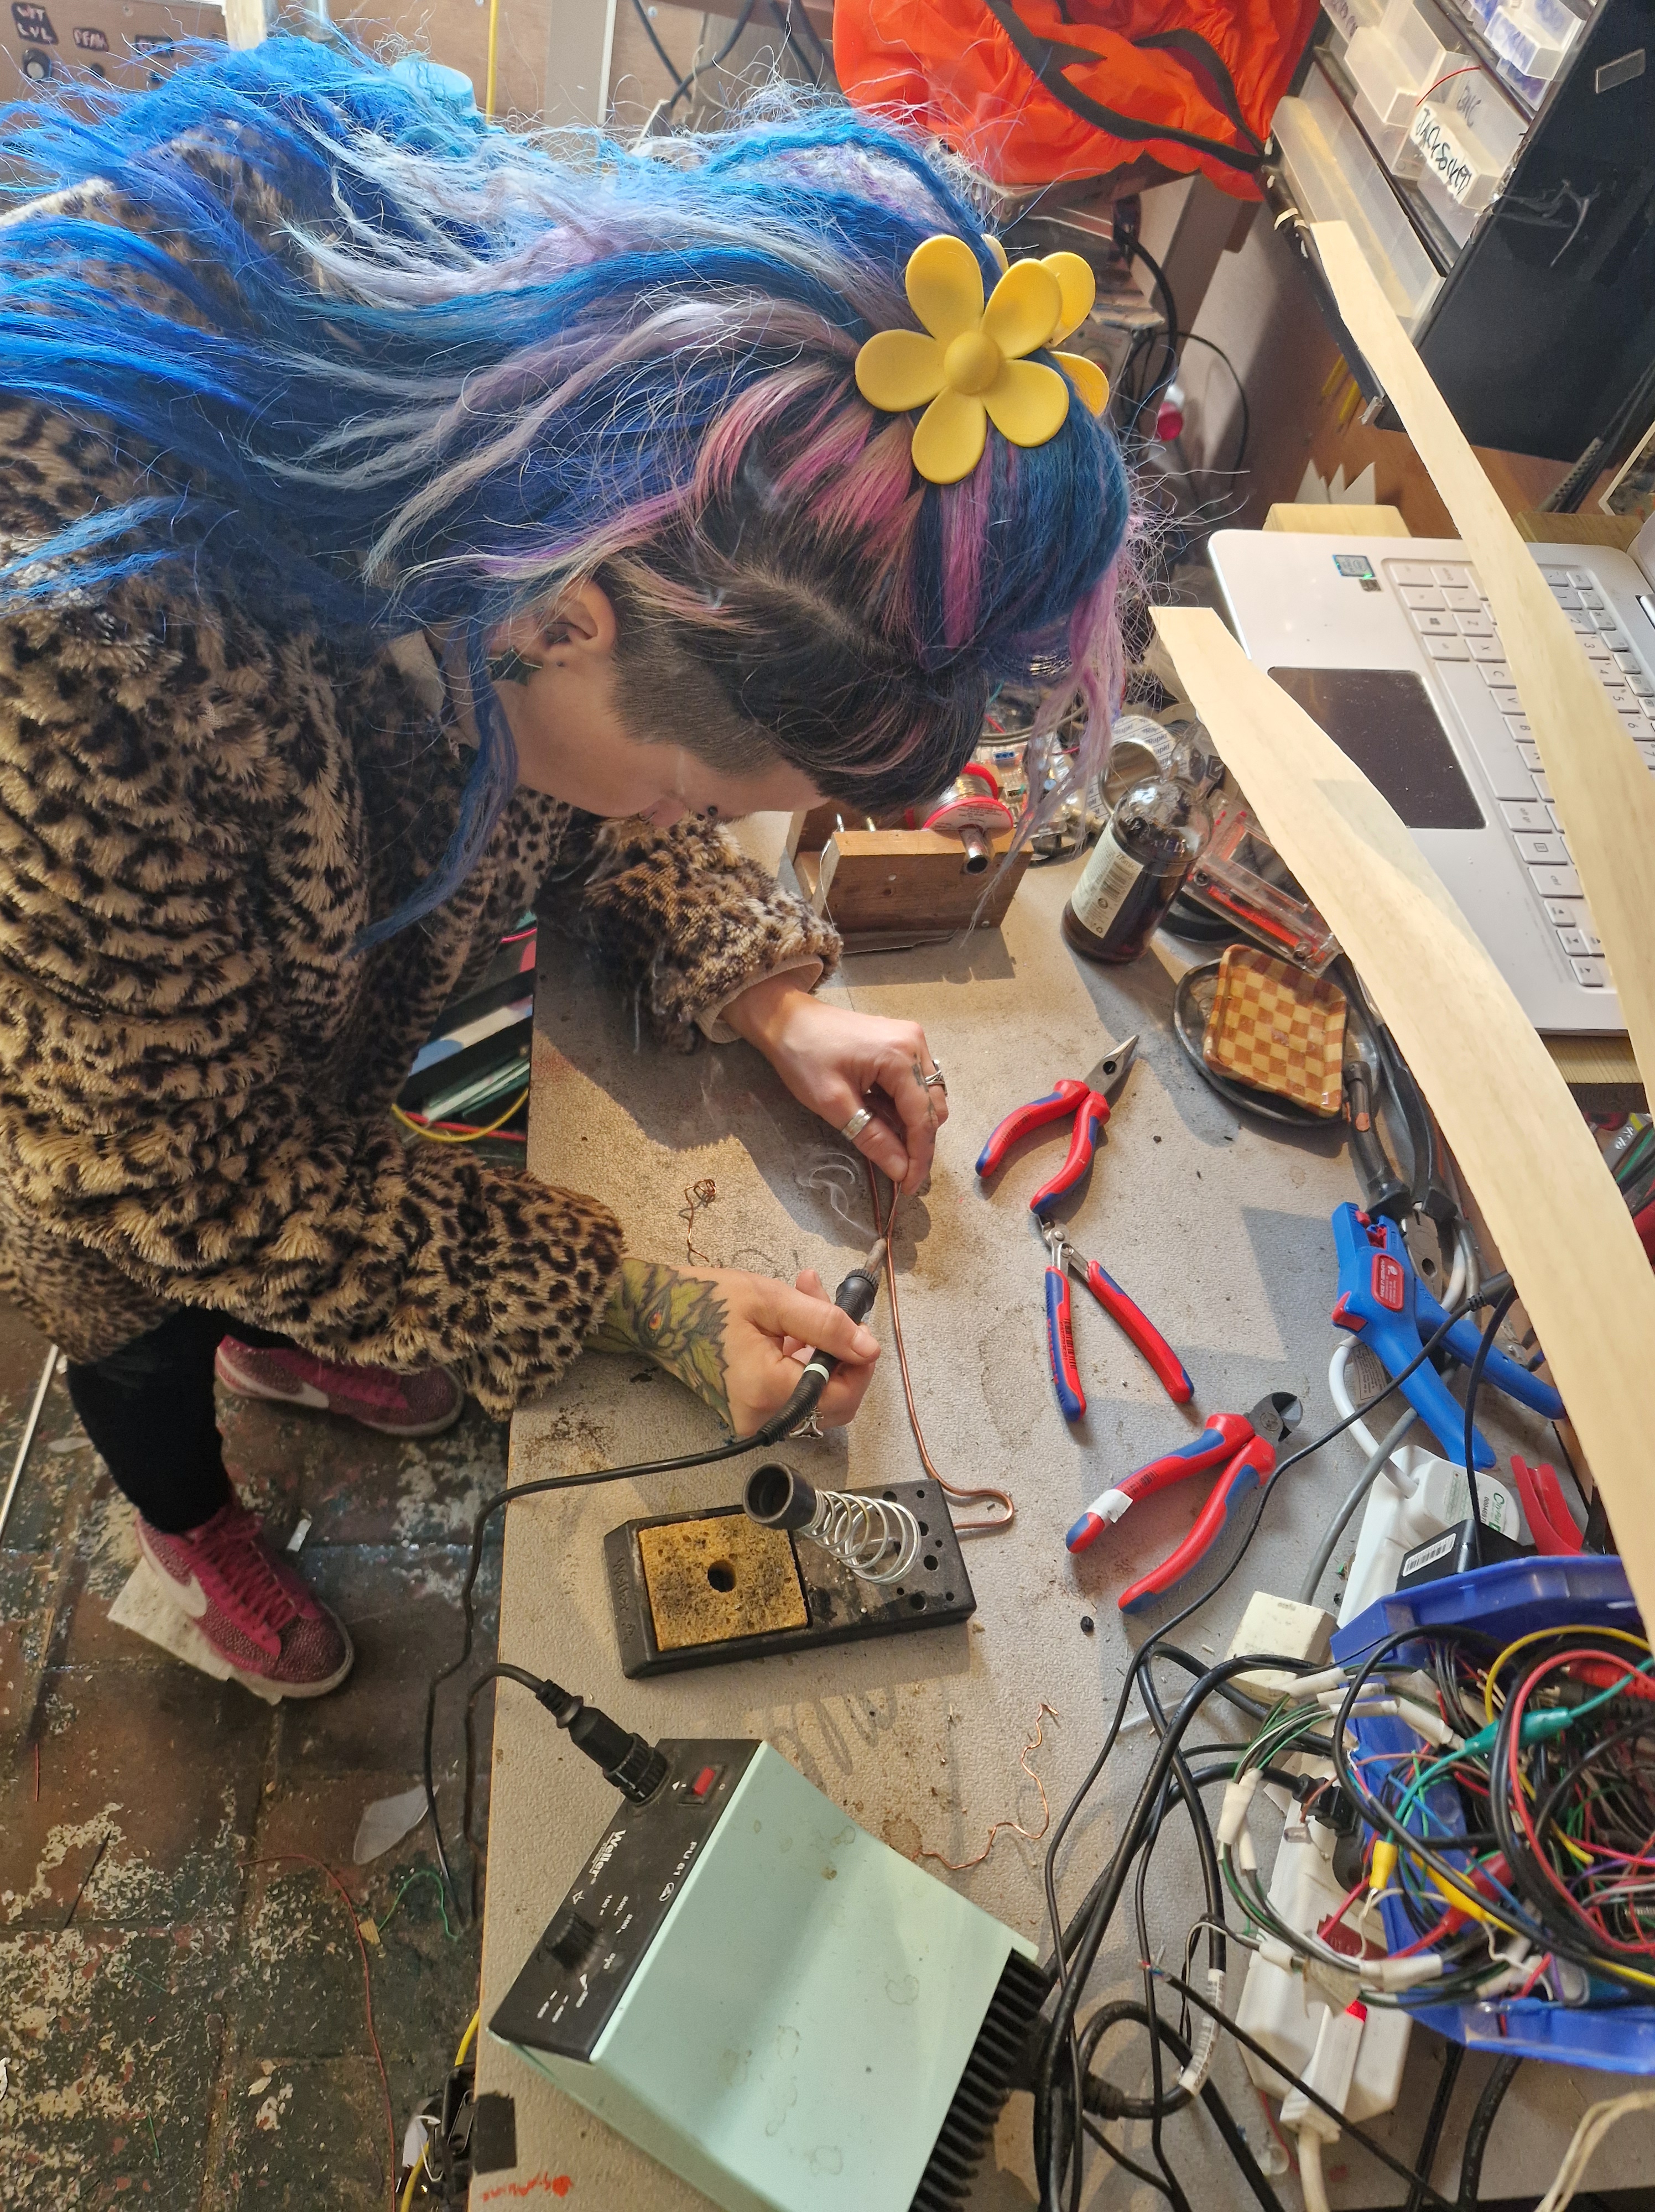
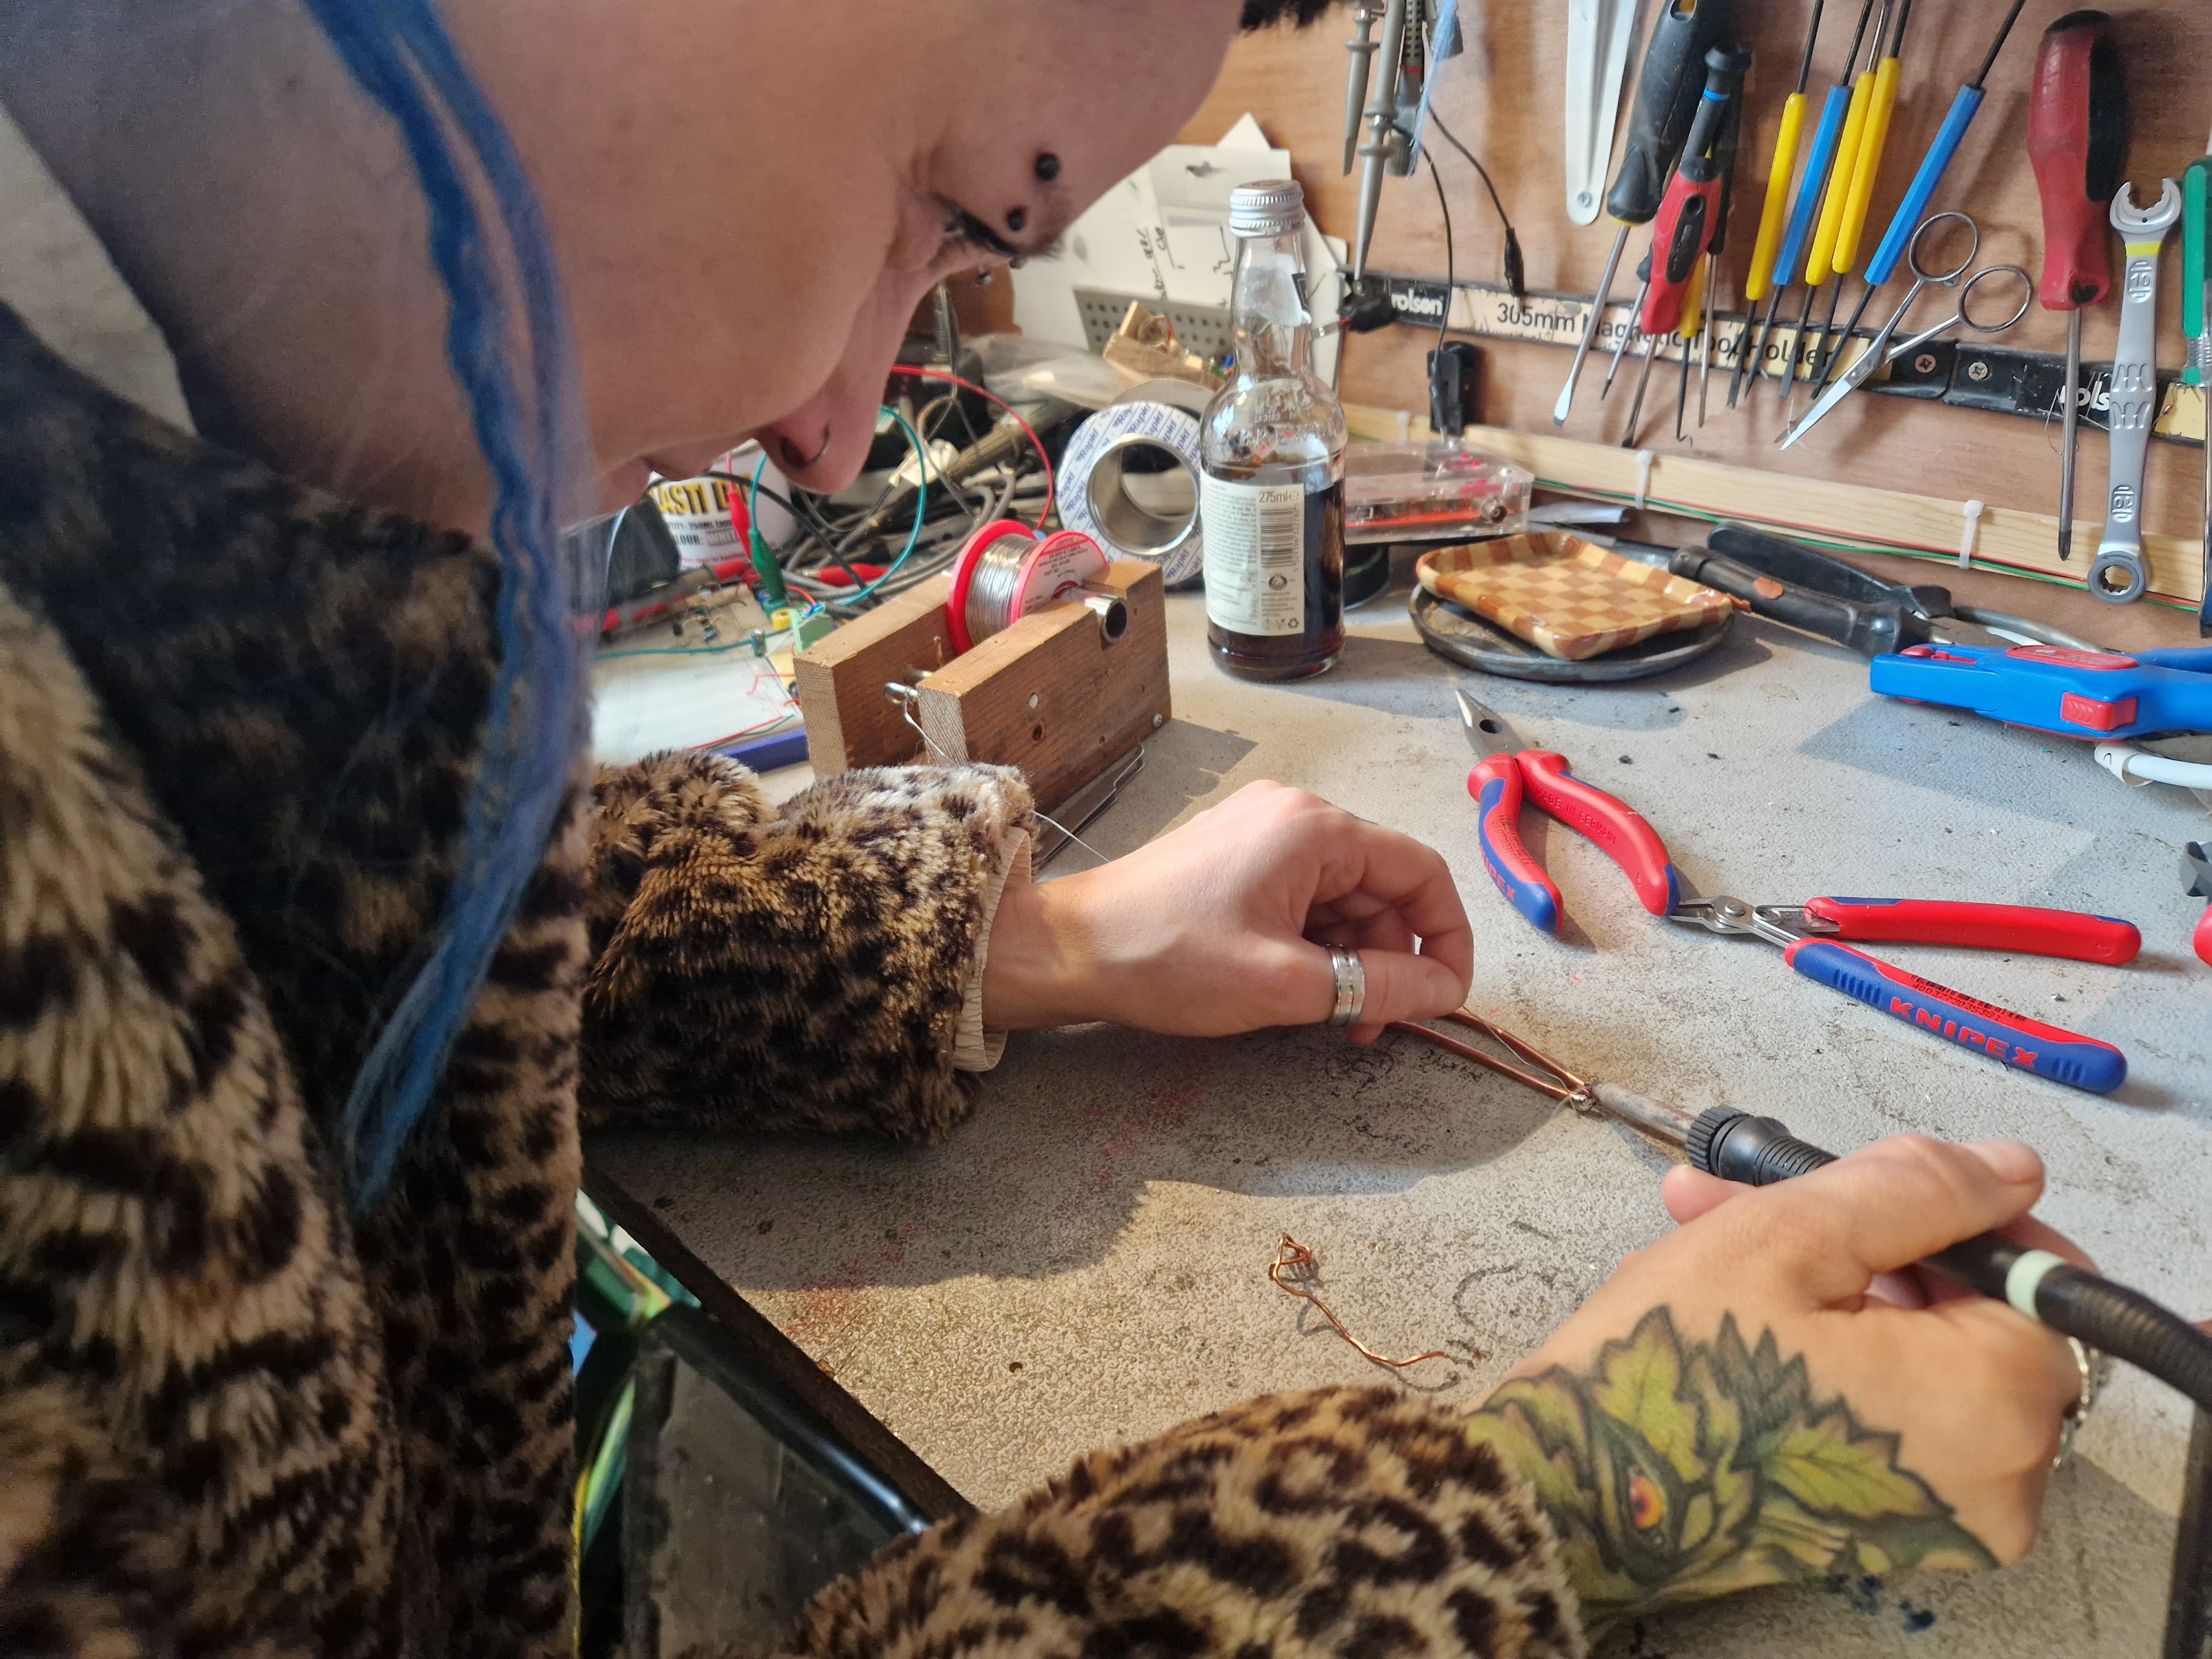
SOLDERING SCULPTURE
As I couldn’t use the solder at the university due to not being inducted (and inductions not being given anymore after Easter), I reached out to a friend at Islington Mill, who was happy to let me use his equipment and even taught me how to solder!
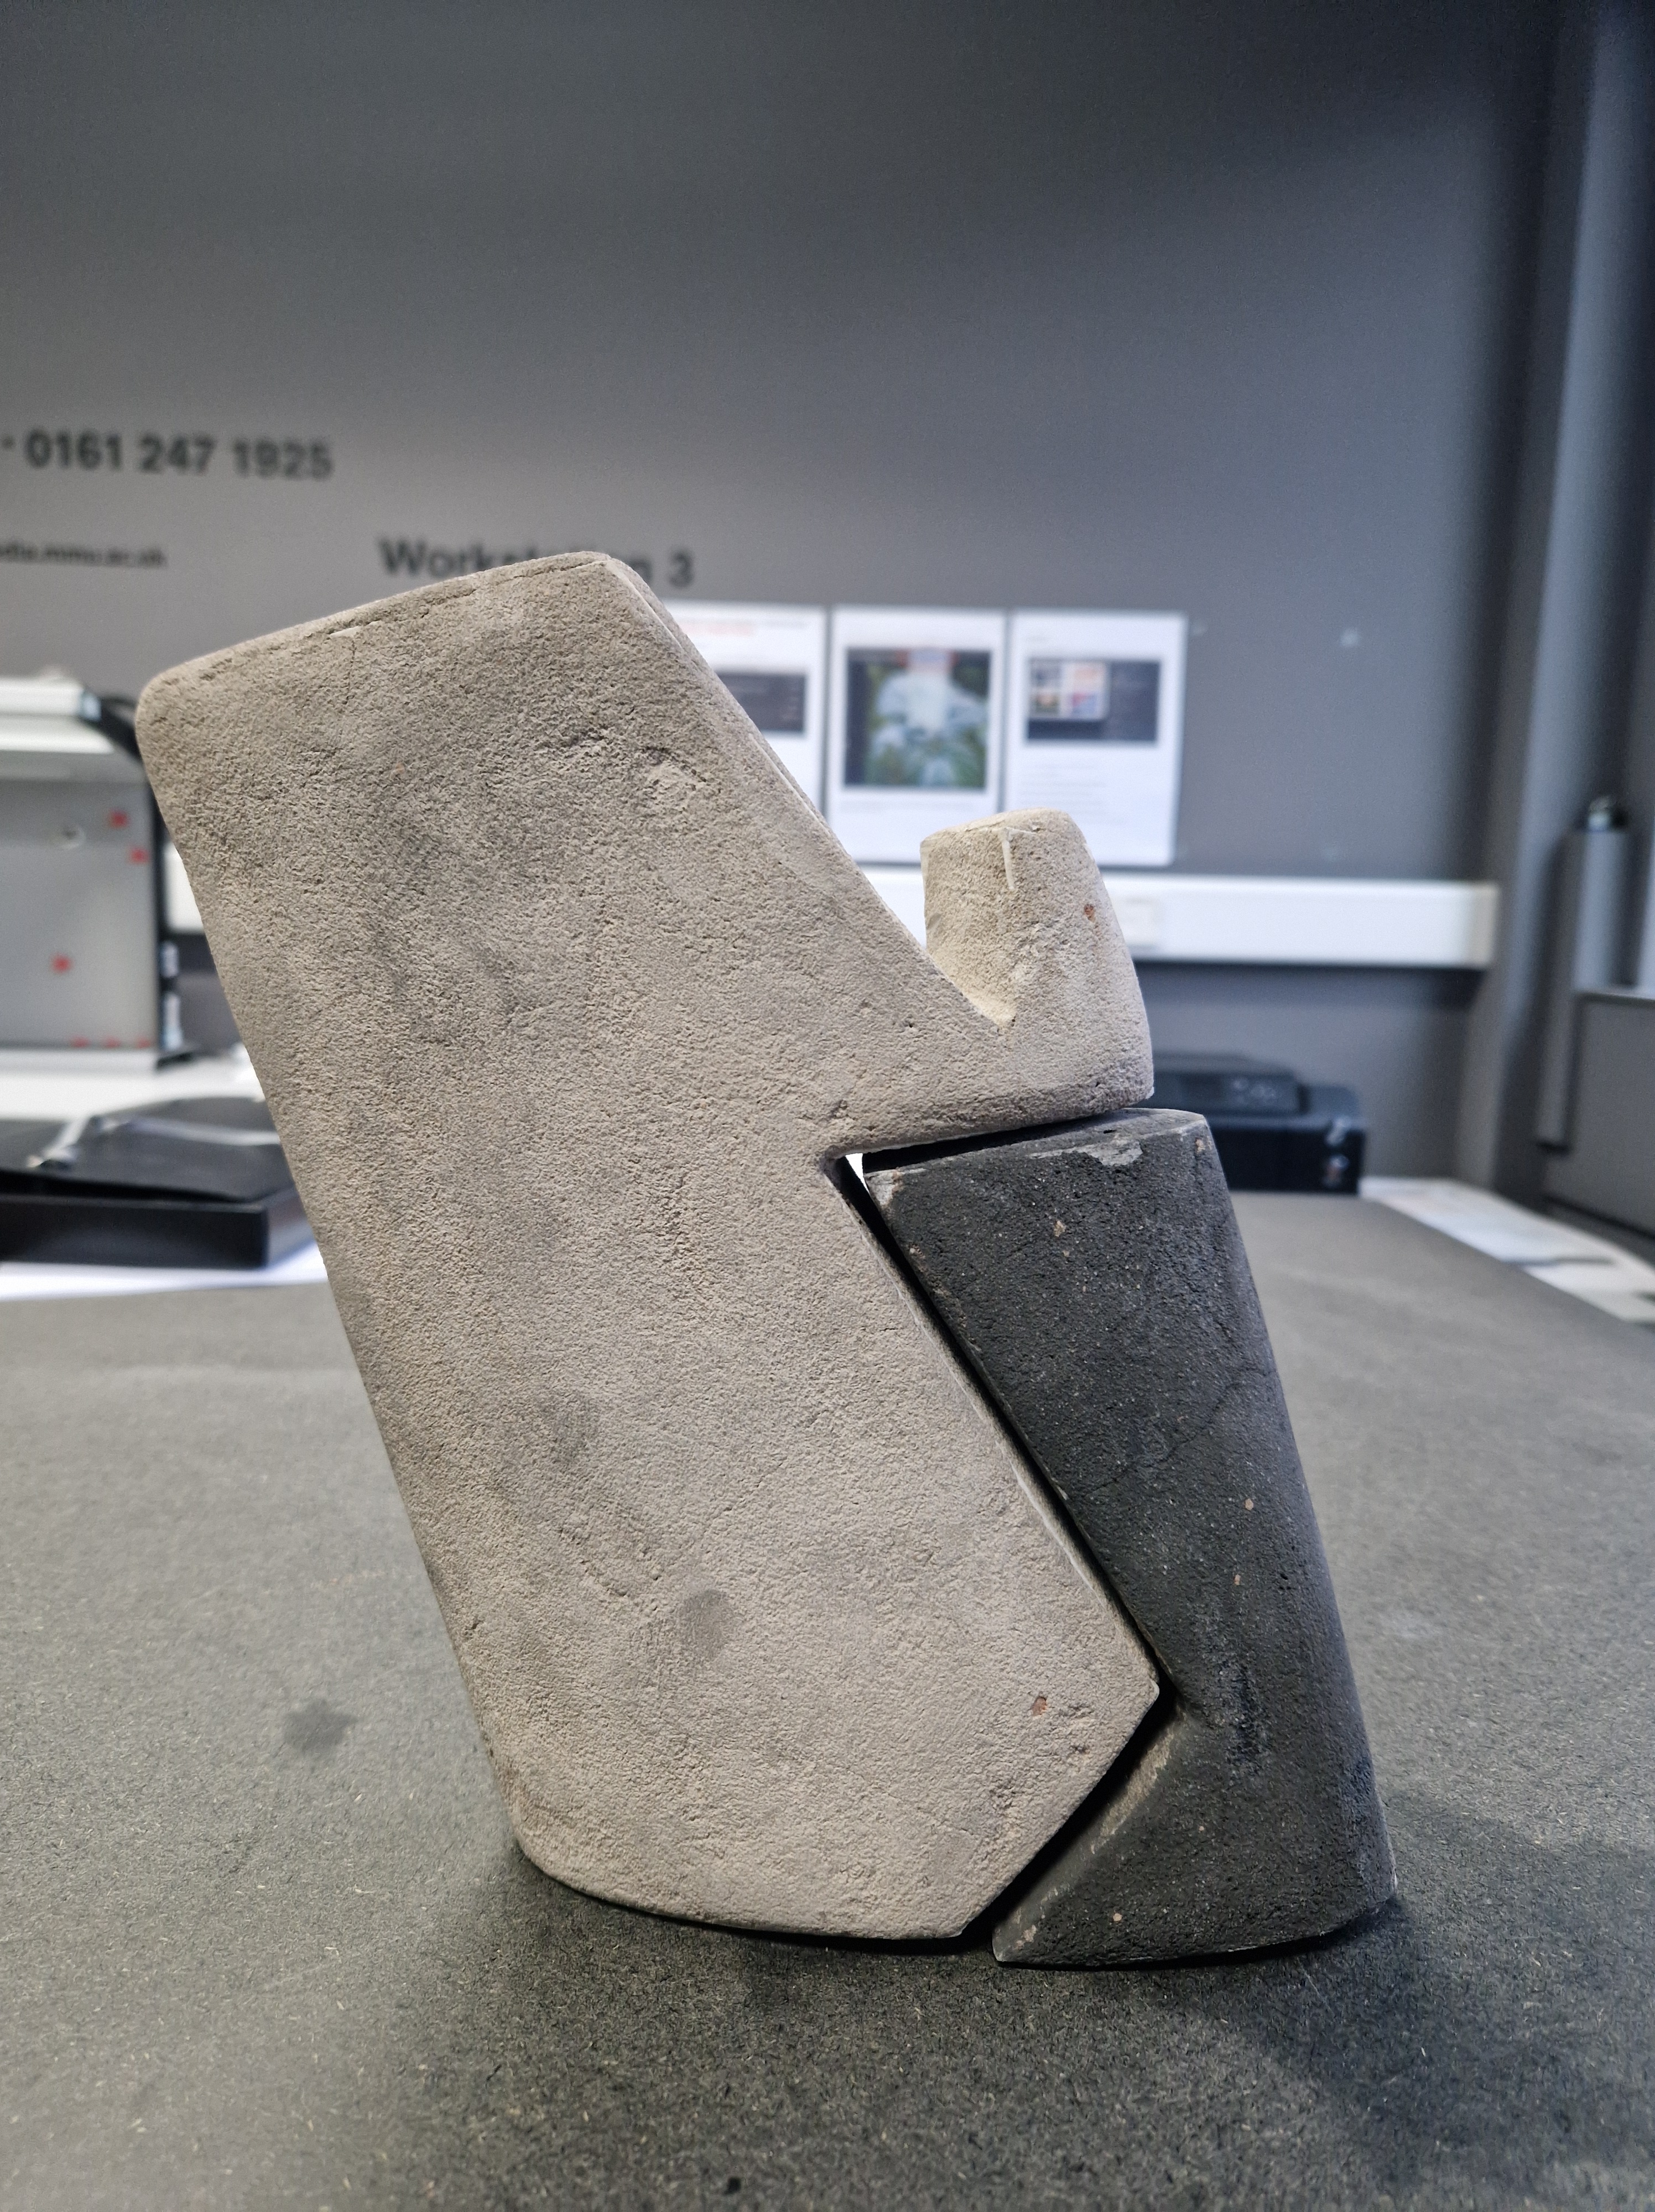
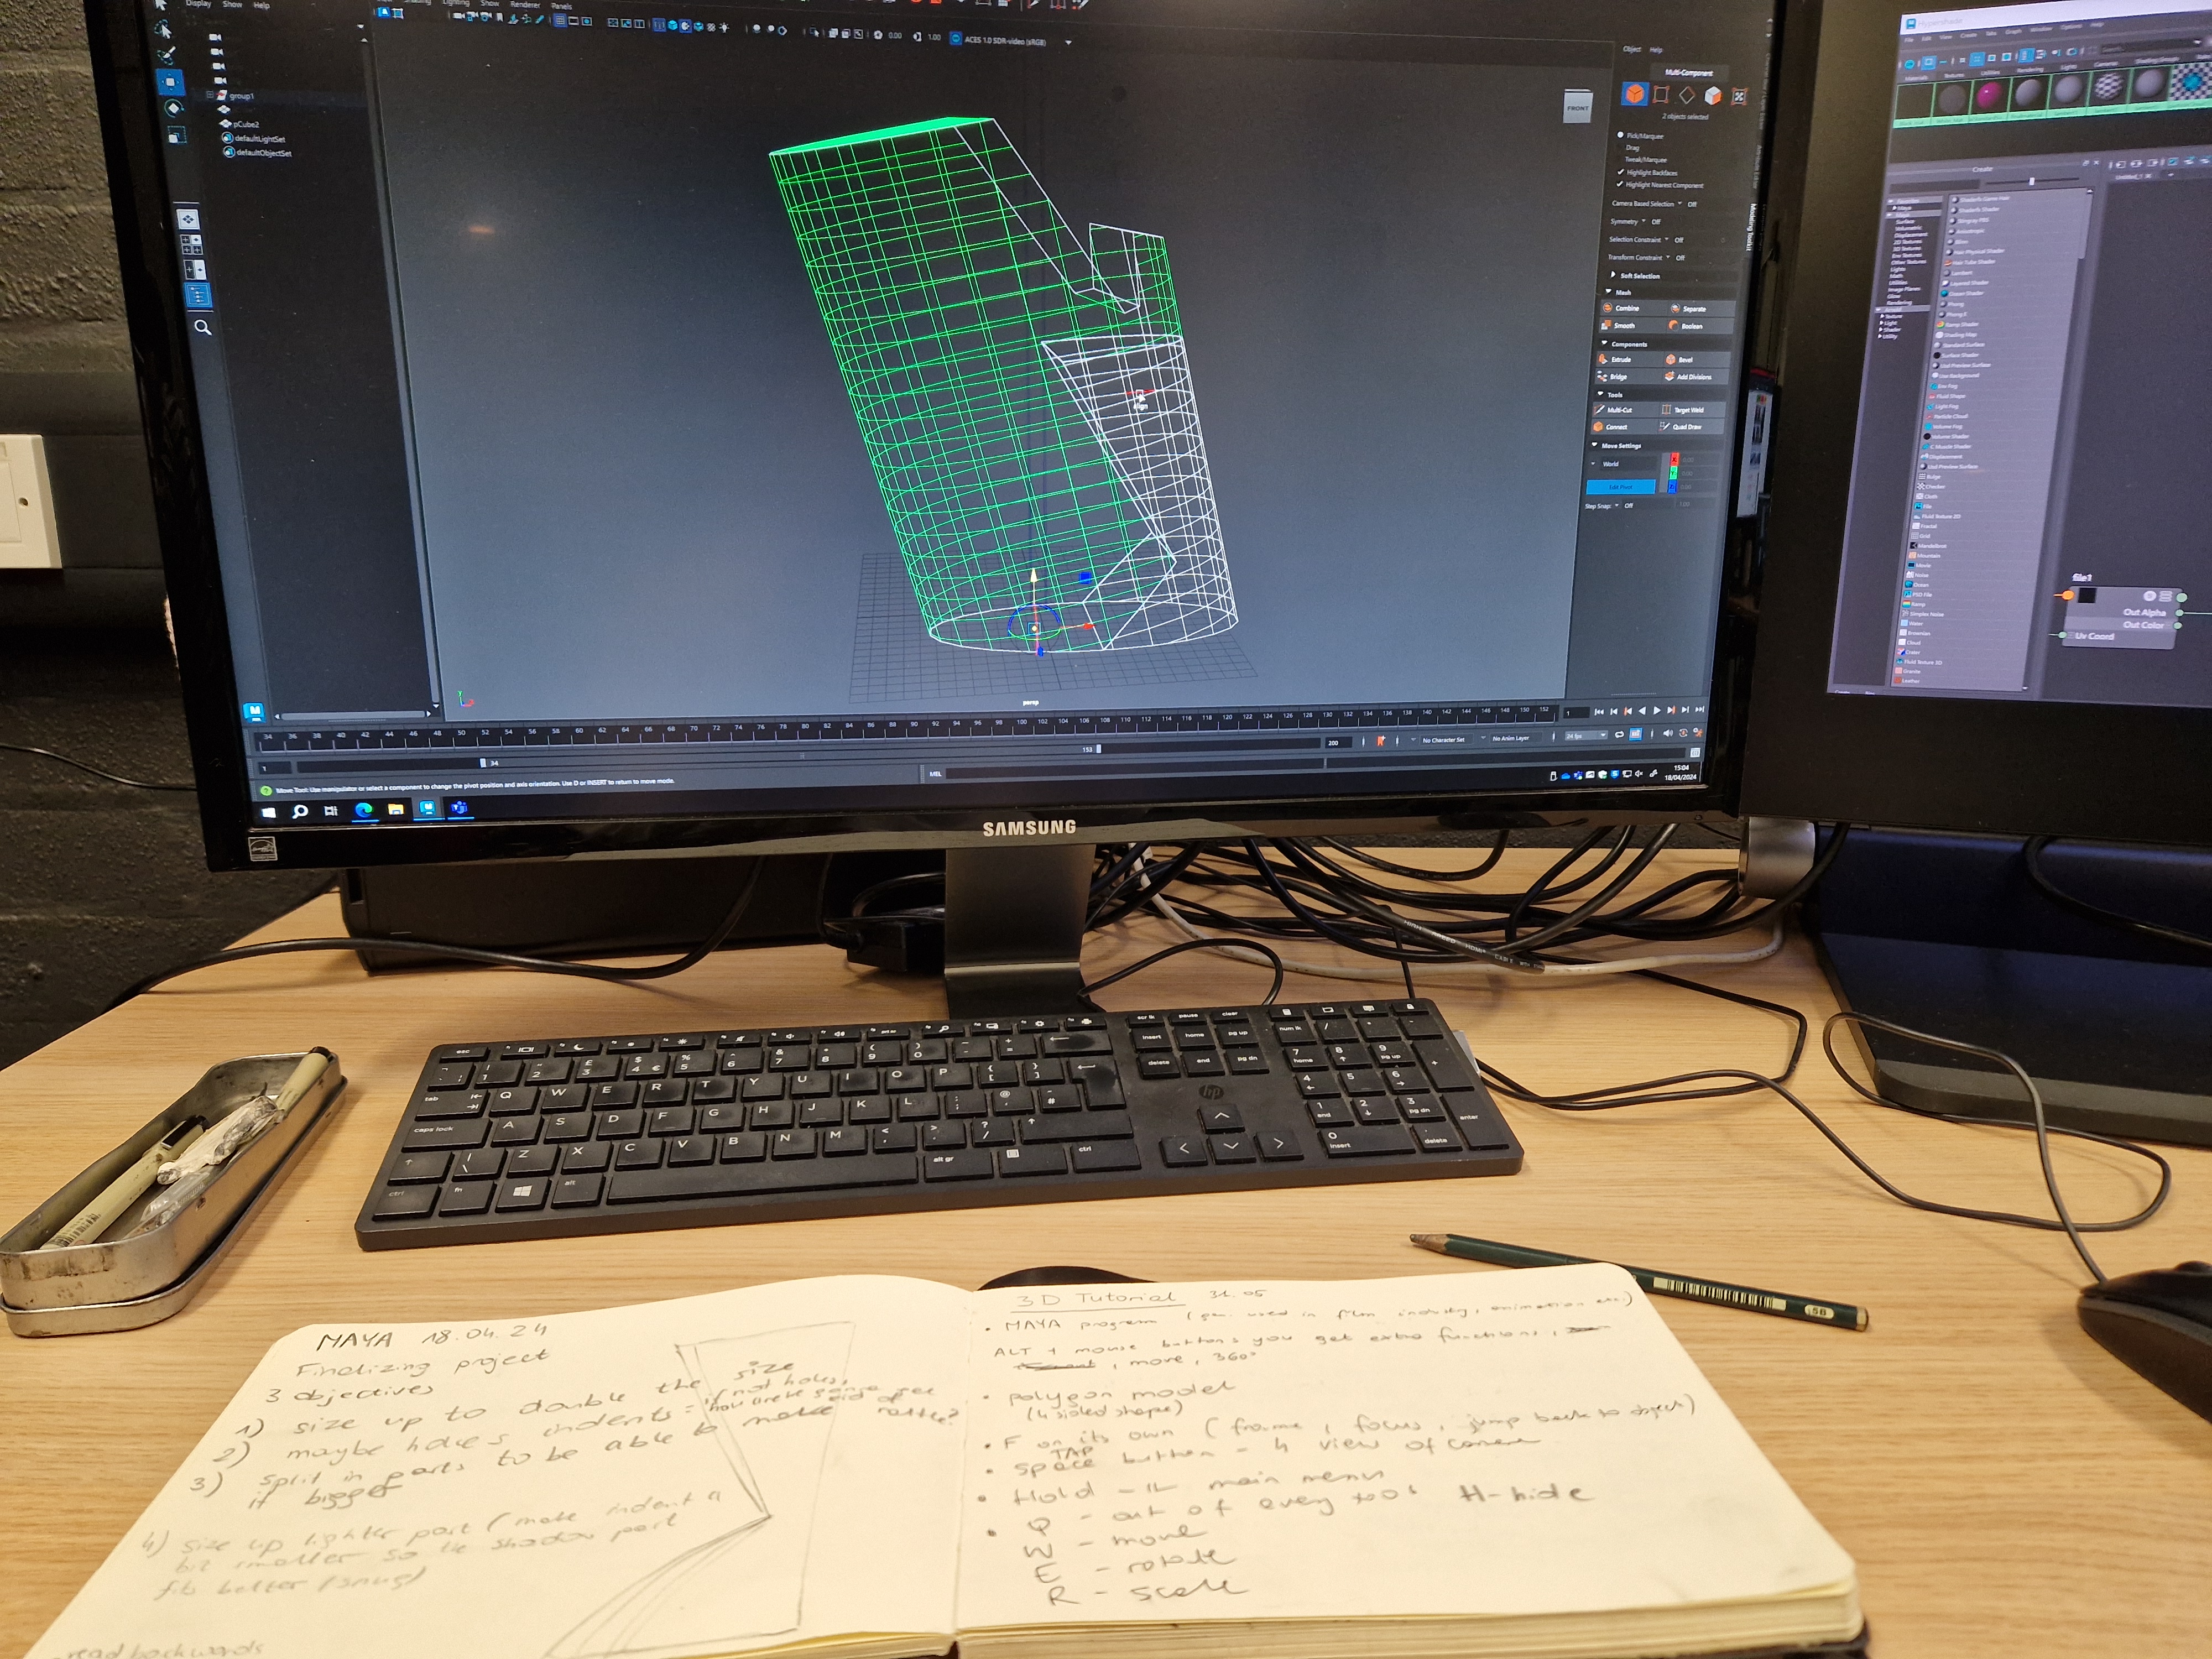
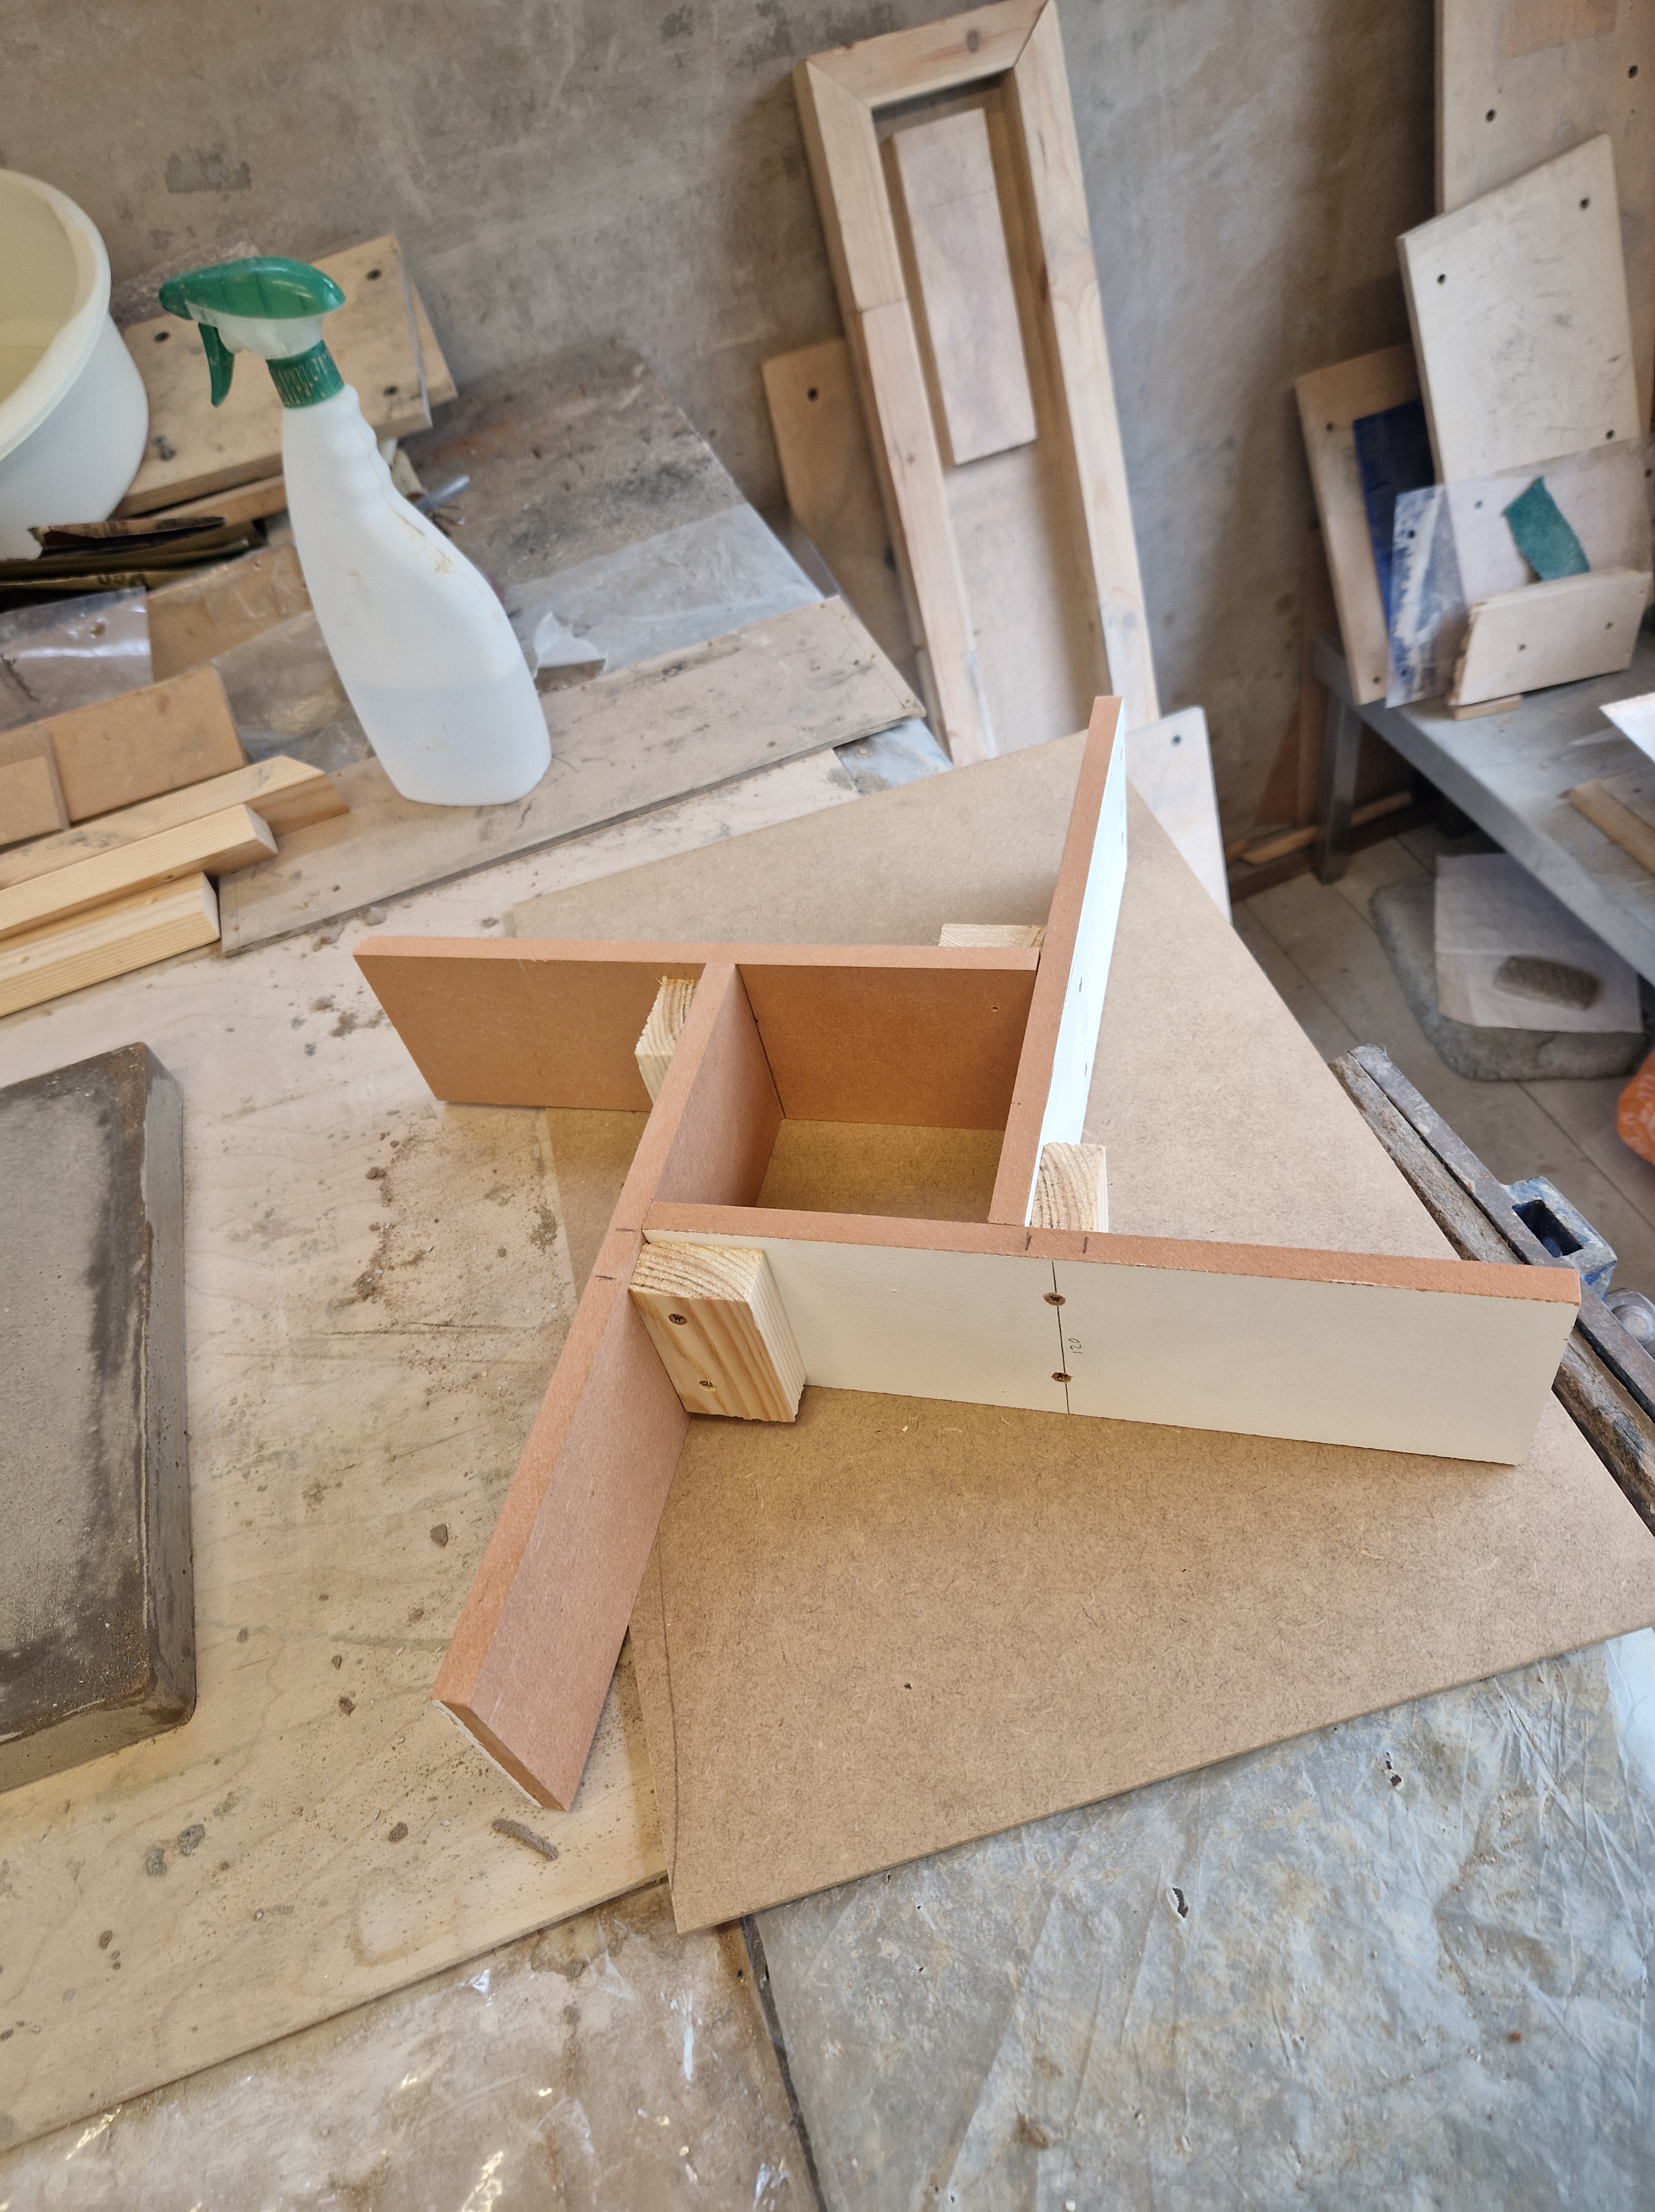
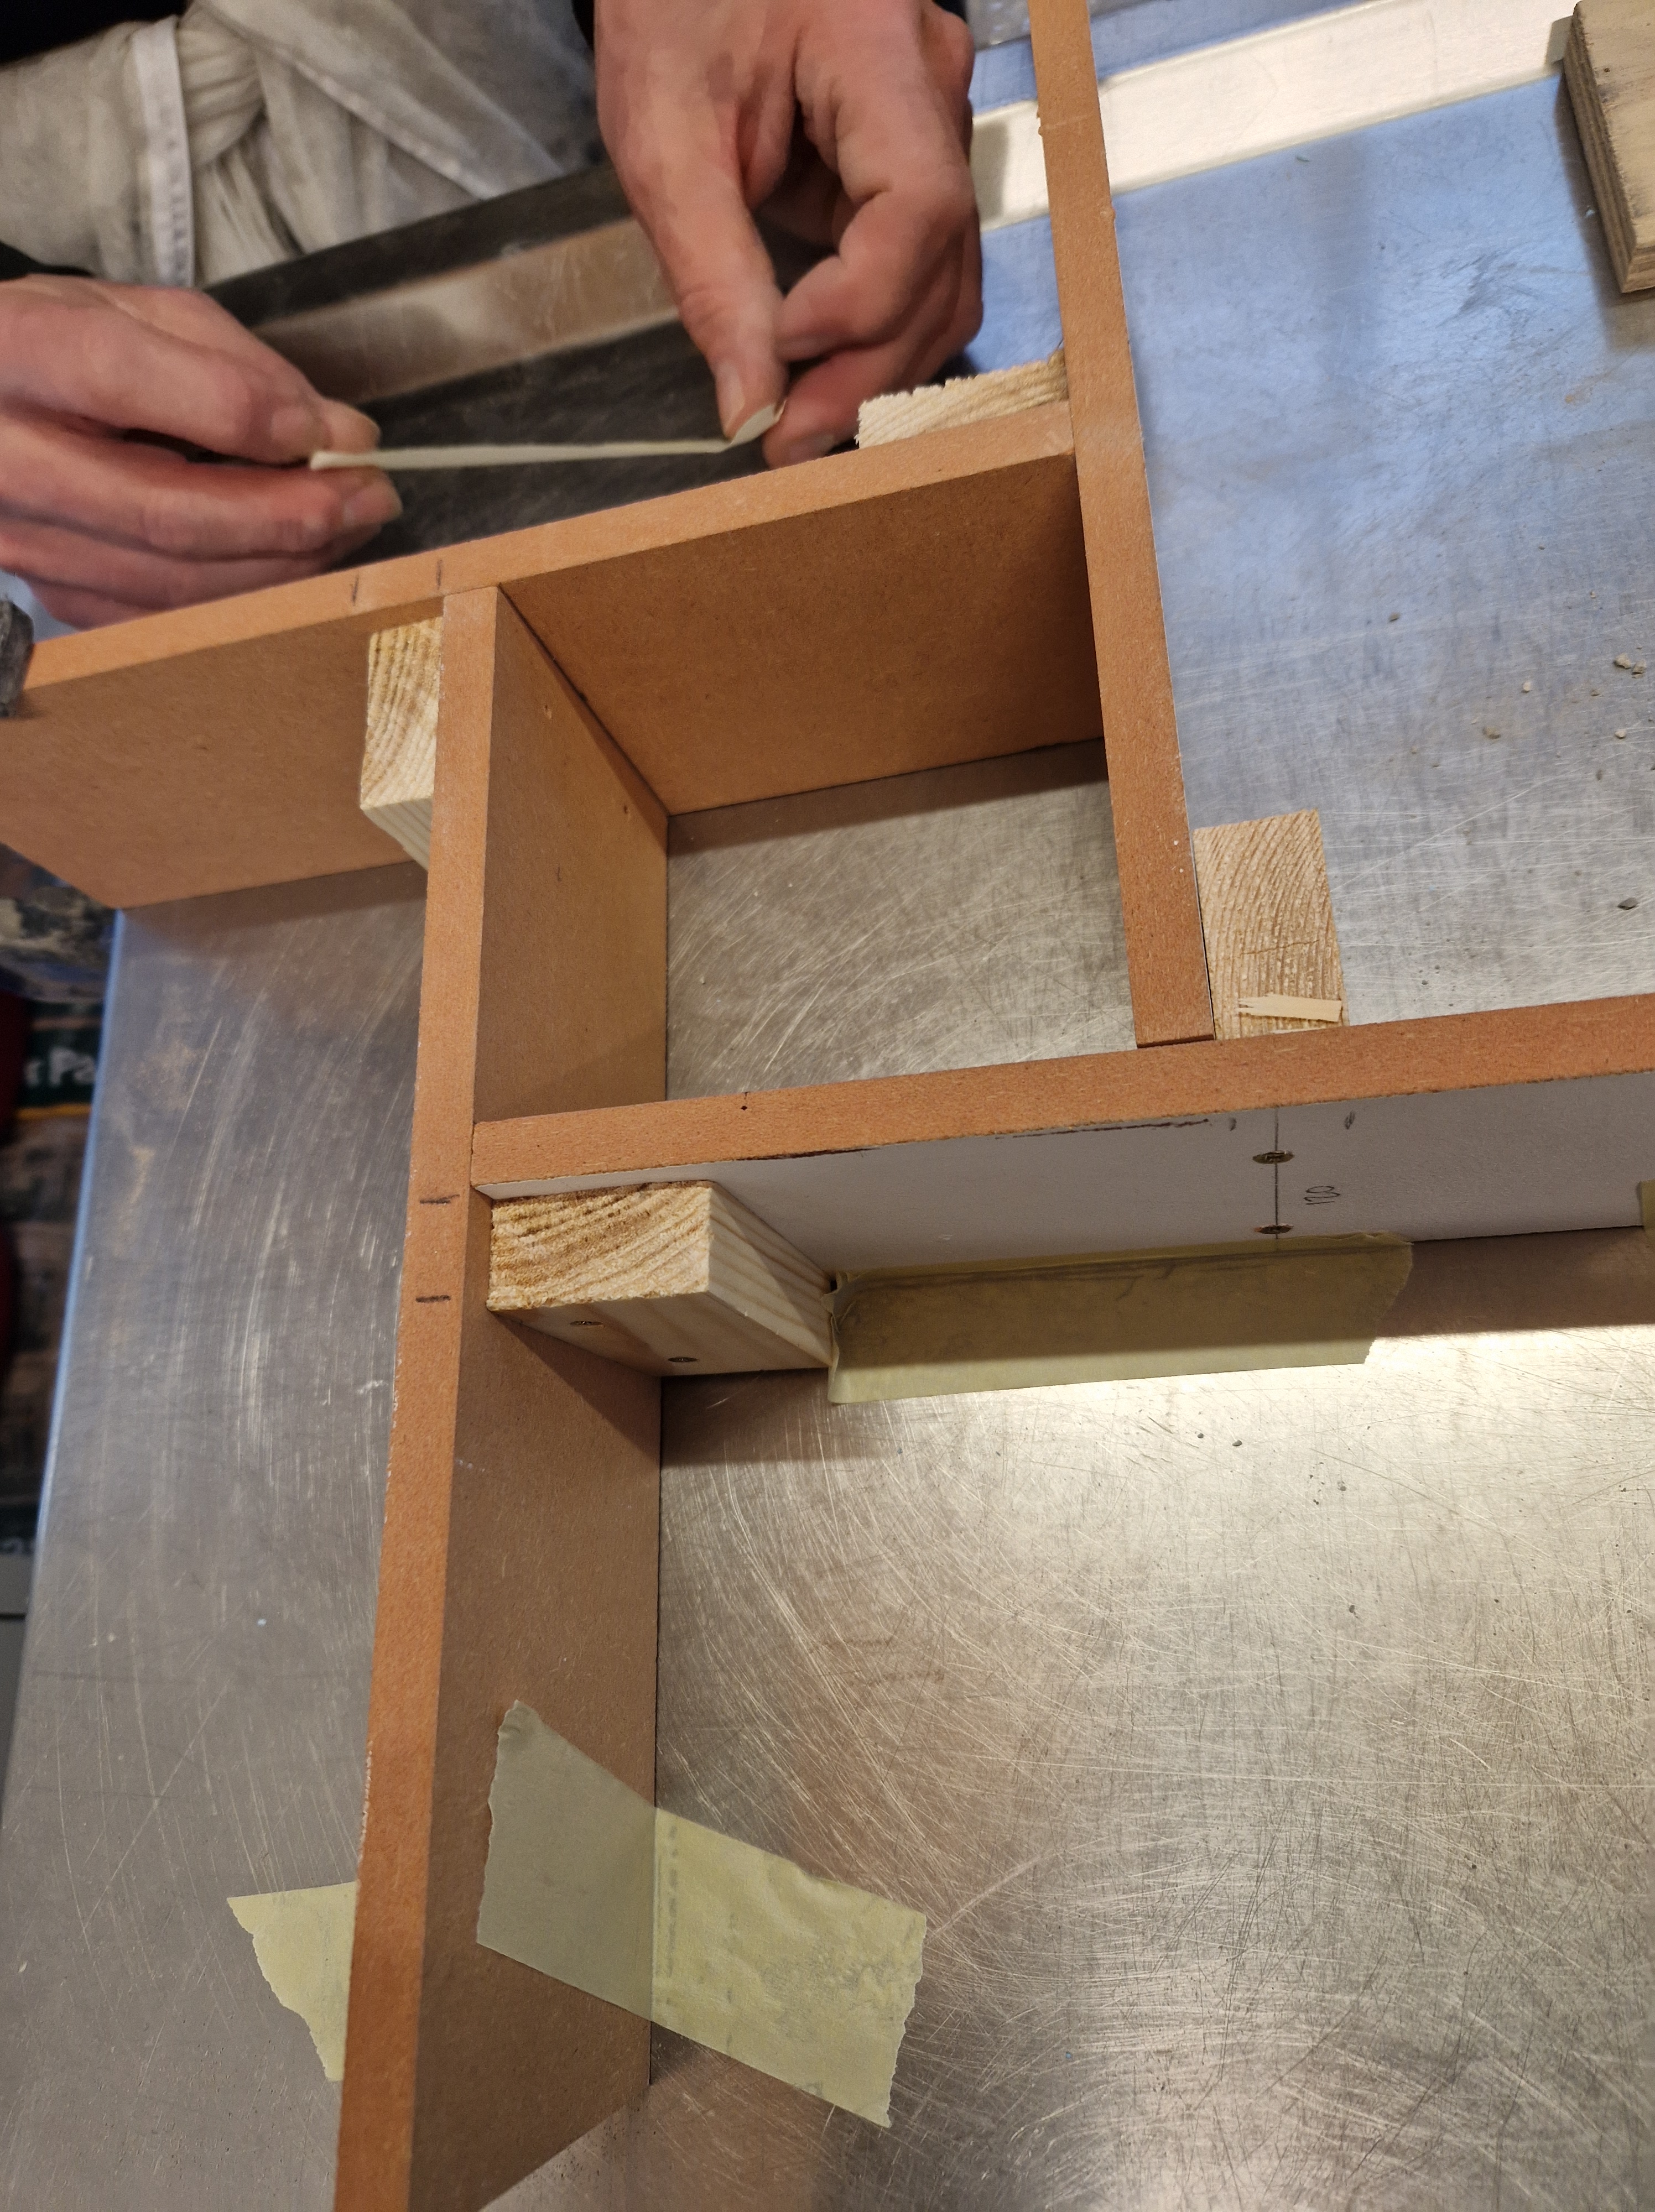
RESIZING 3D MODELLED SCULPTURE
We resized the model from 30 cm to half a metre with Dan’s support. We also added indents as we needed holes to support the cement holding onto the structure.
Previously Jim and I drilled holes to achieve that, which worked well, but unfortunately created rattling inside the sculpture from all the drilled-out bits being stuck on the inside structure, and I wanted to eliminate it.
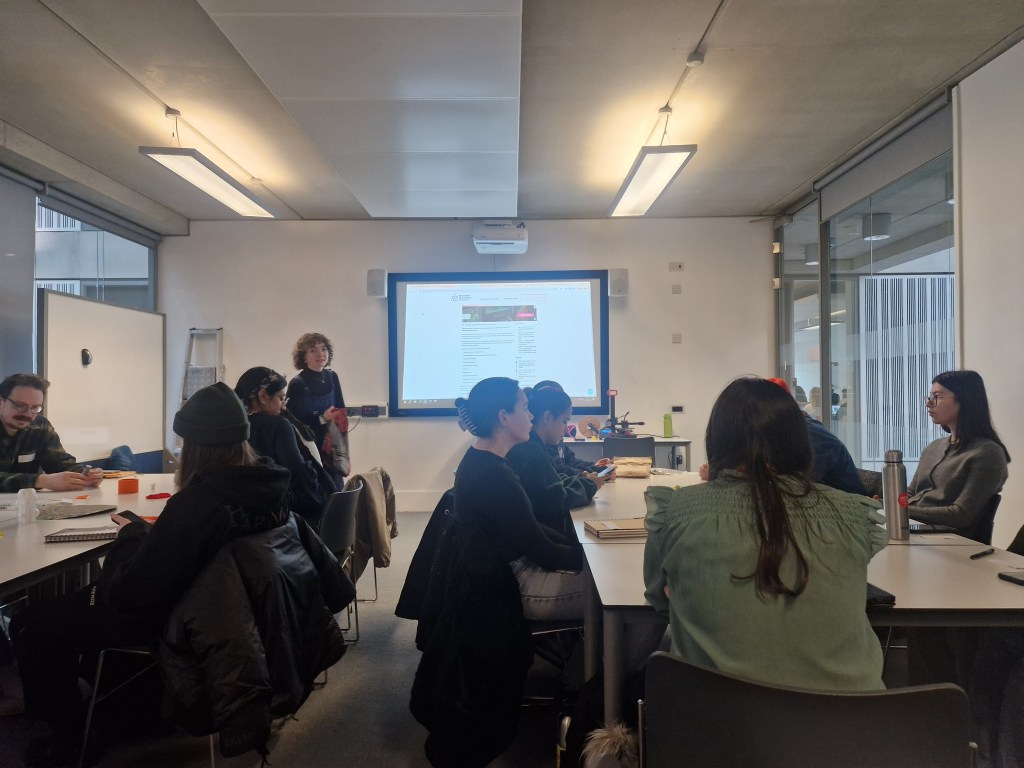
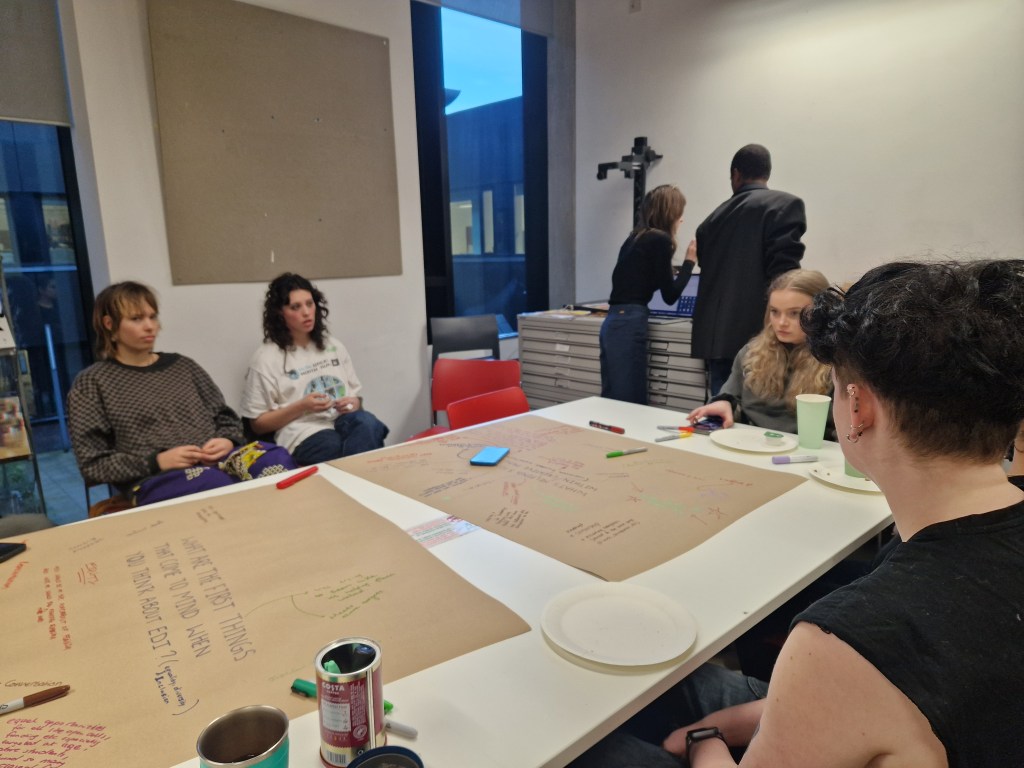
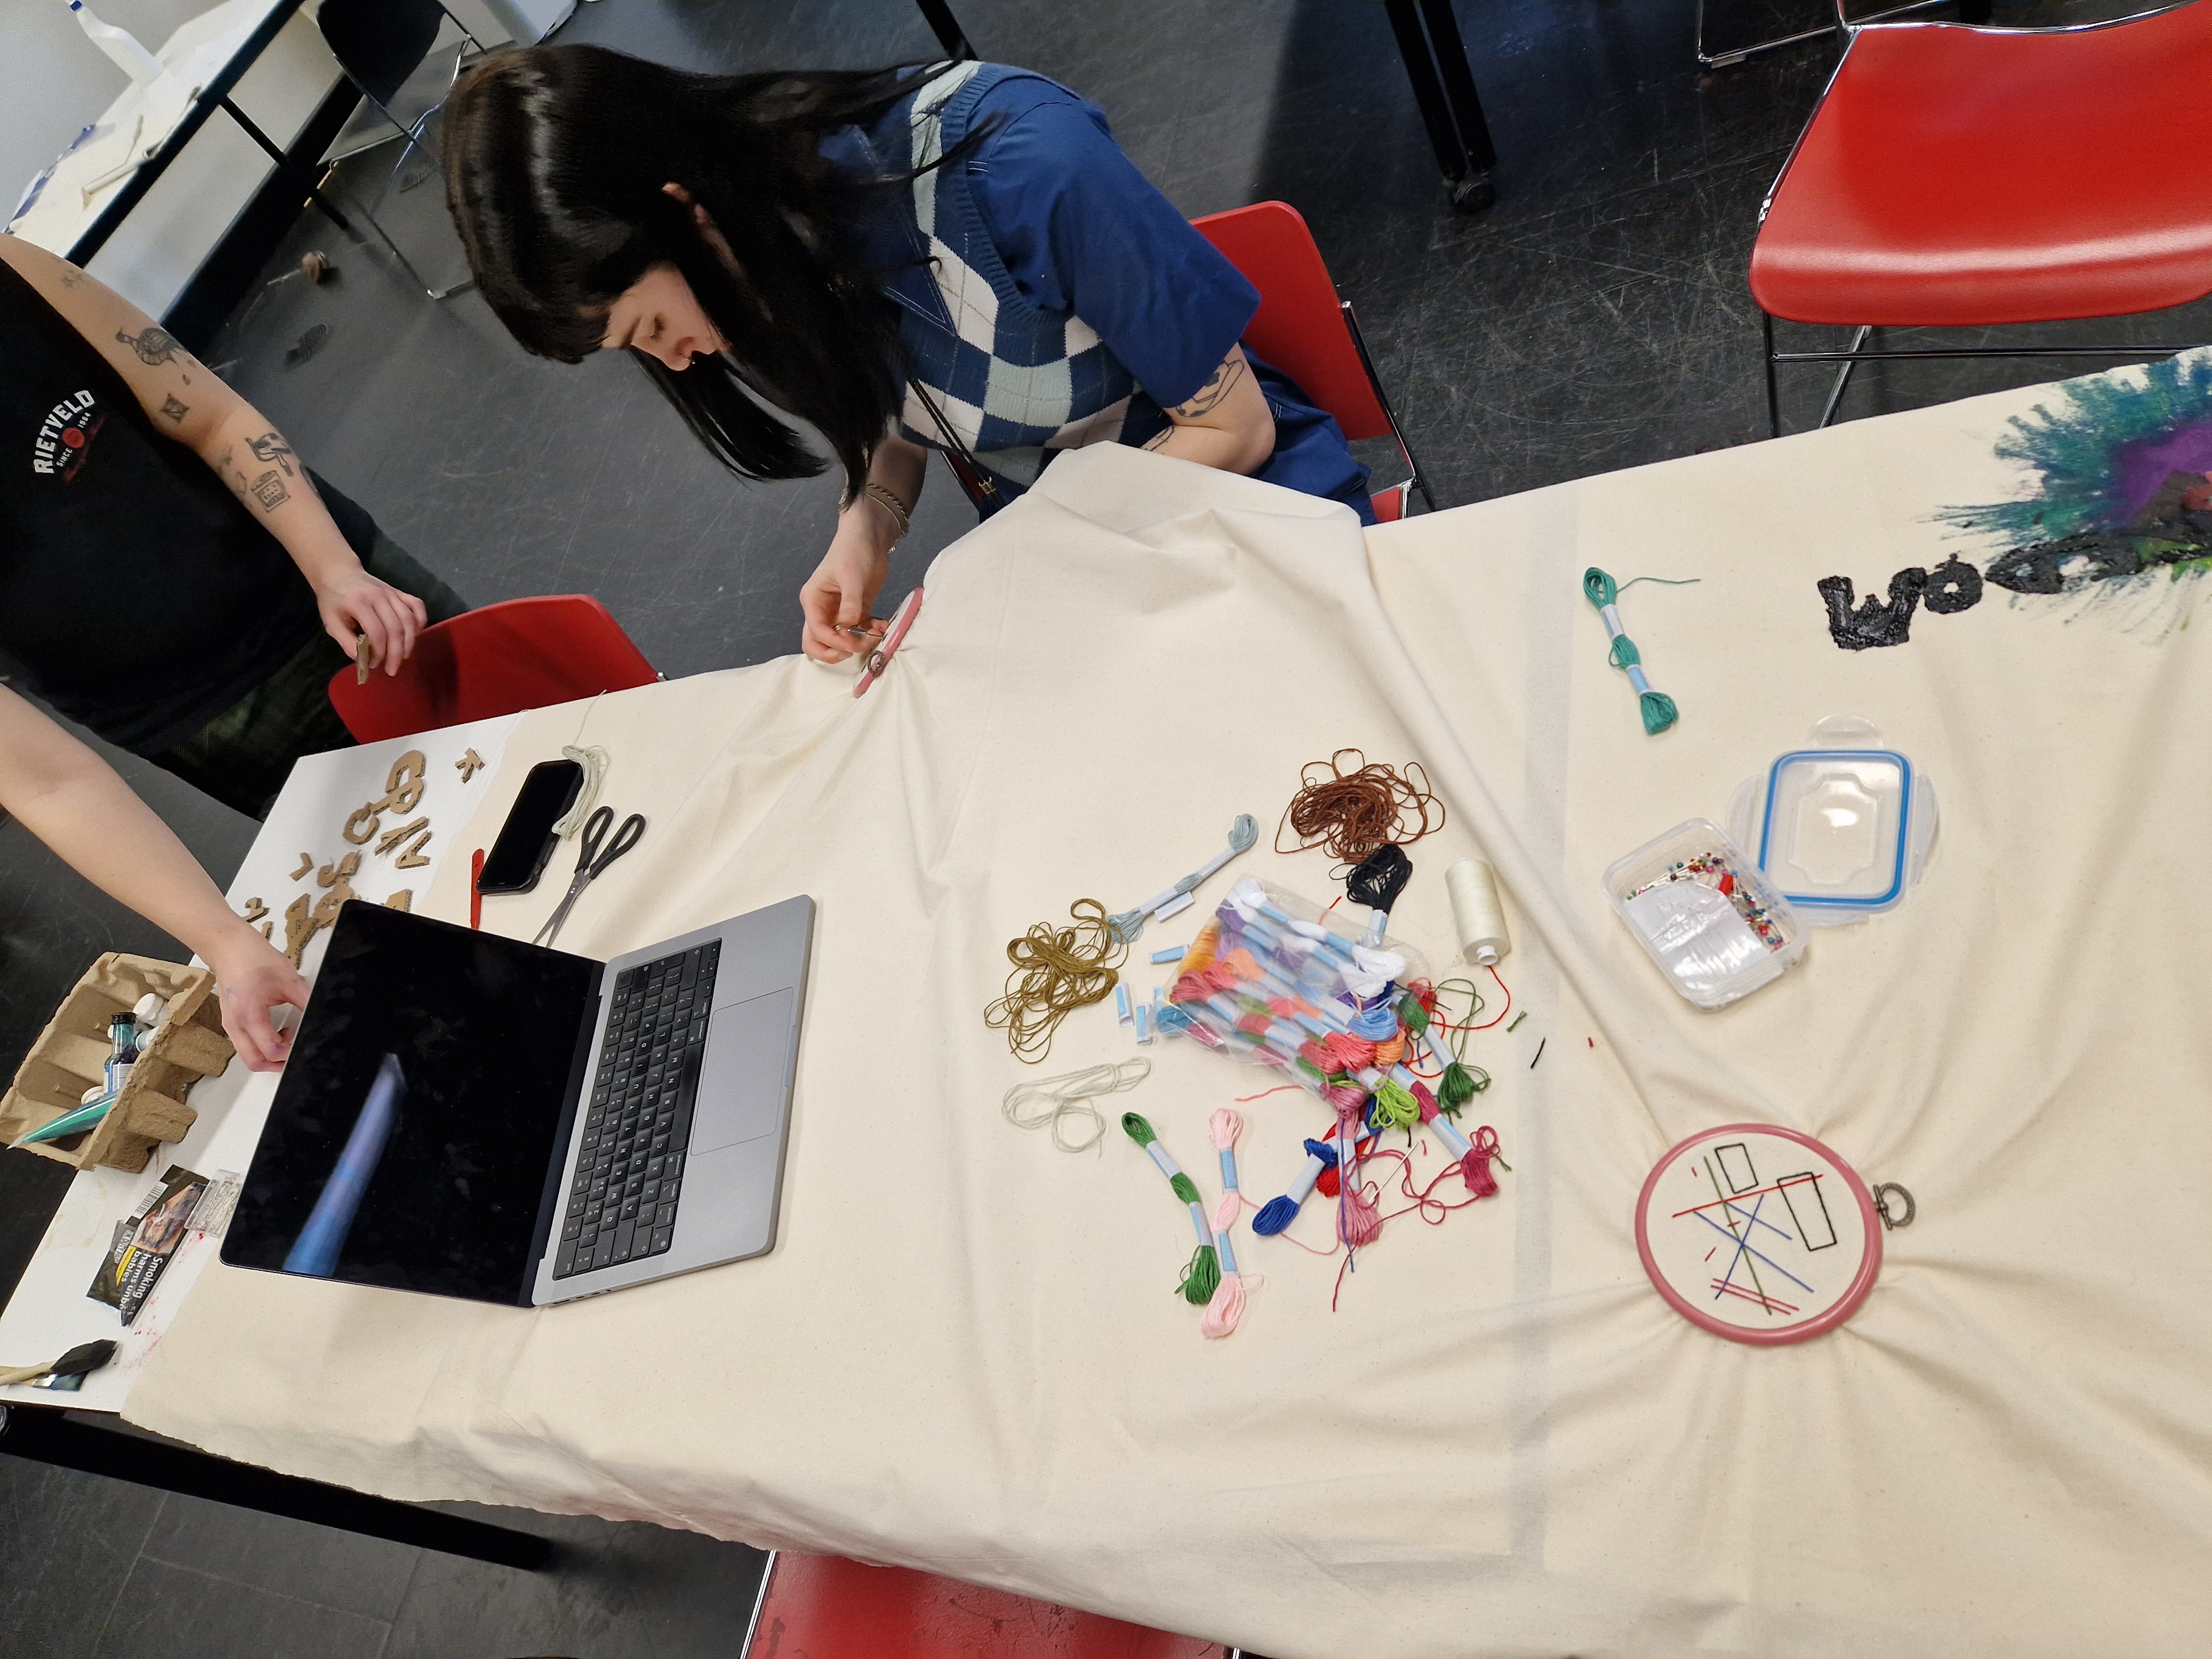
WORKSHOP WITH MELODY AND ABI
In this workshop we created while discussing language, what home means to us and themes around these topics. It was an enriching session and conversation.
FRIDAY
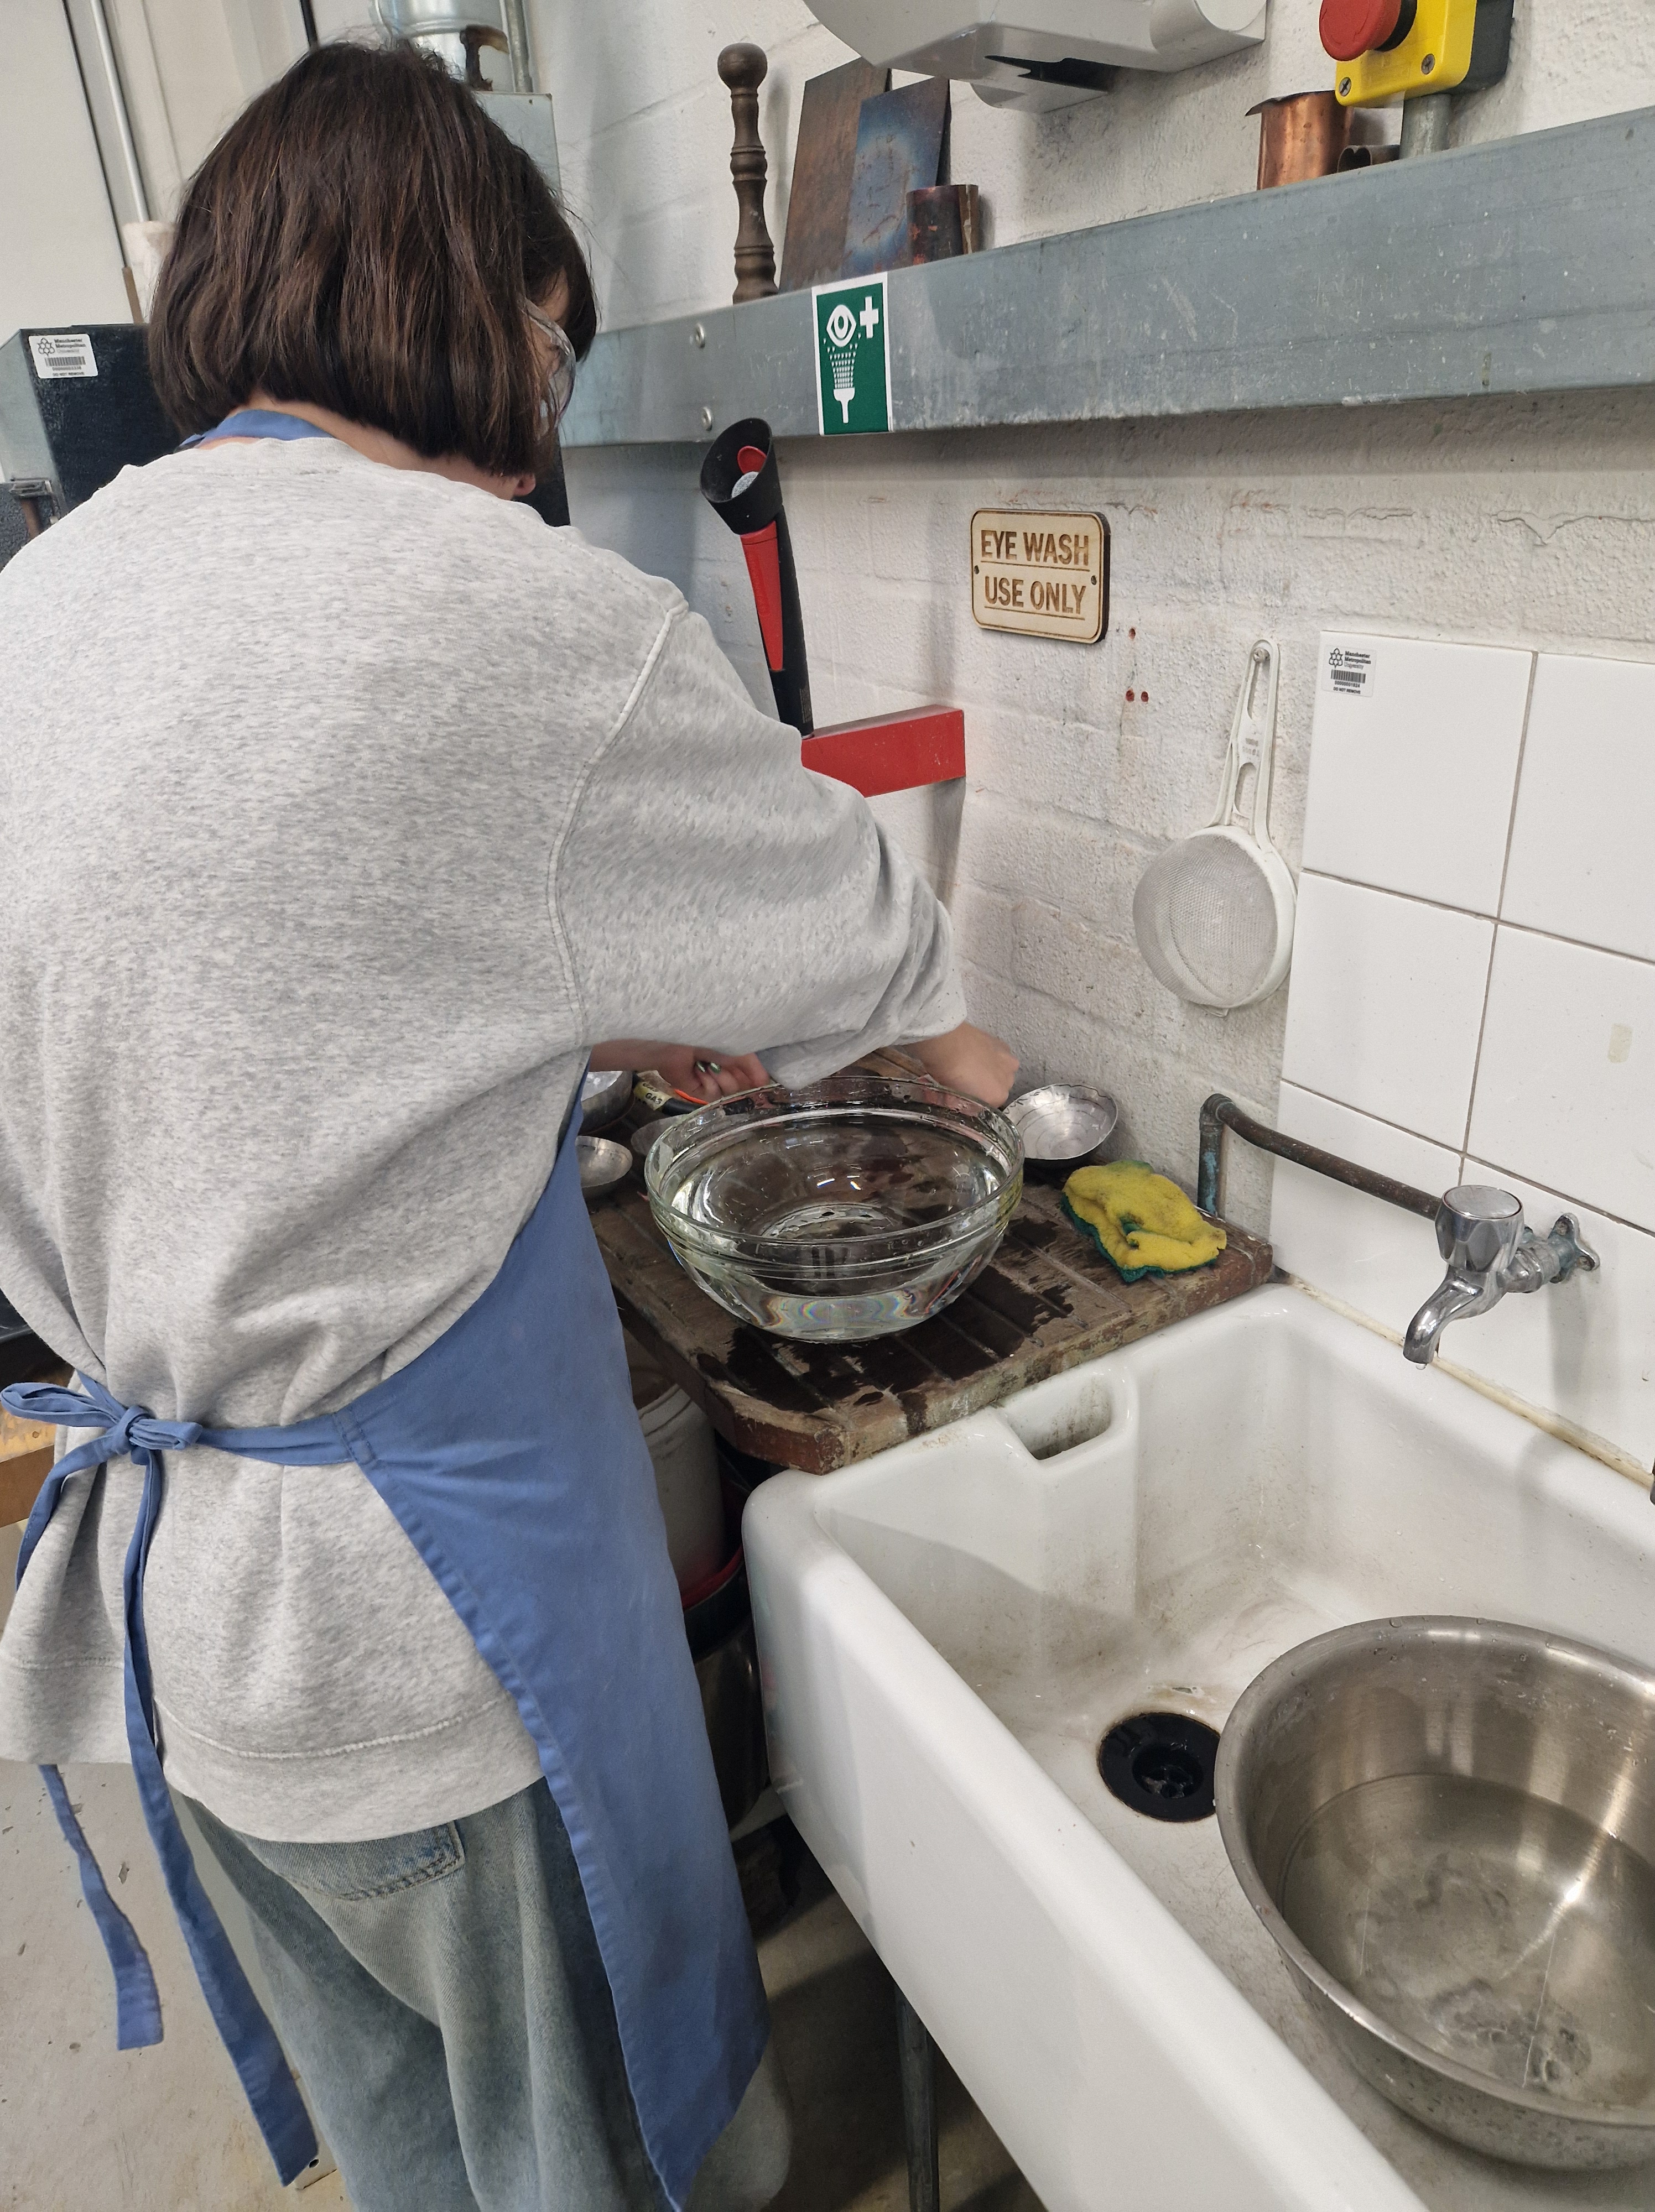
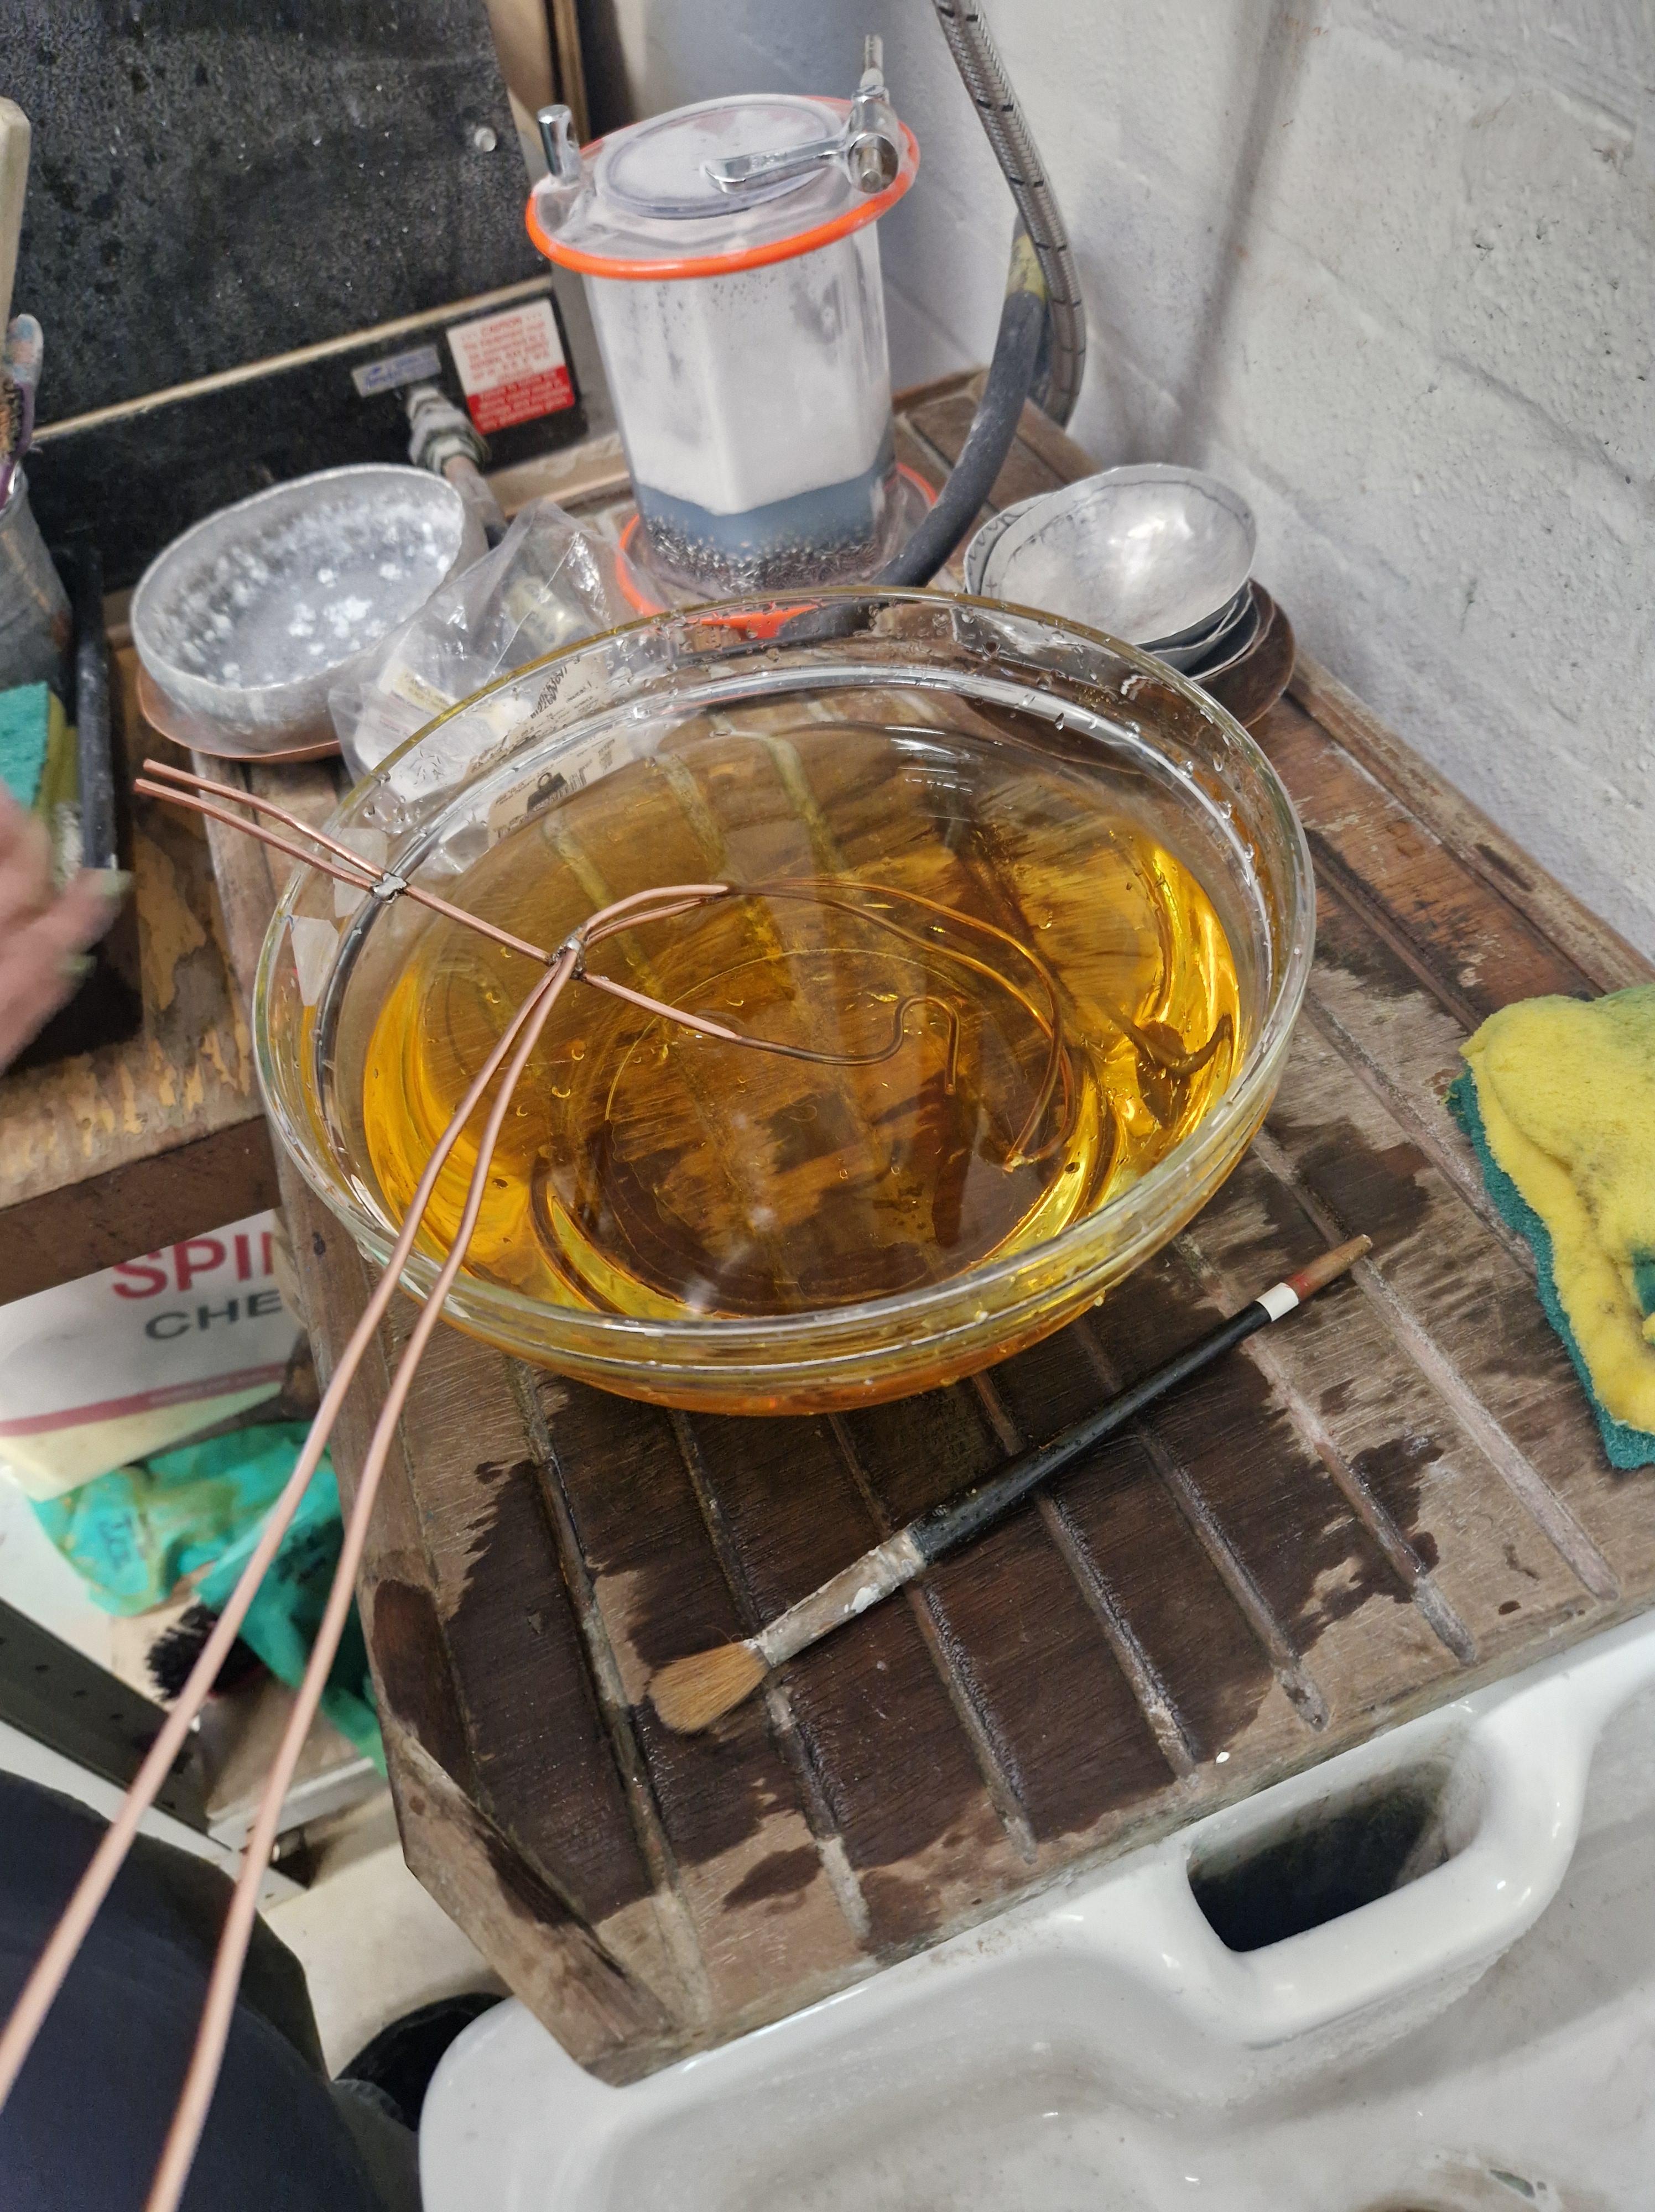
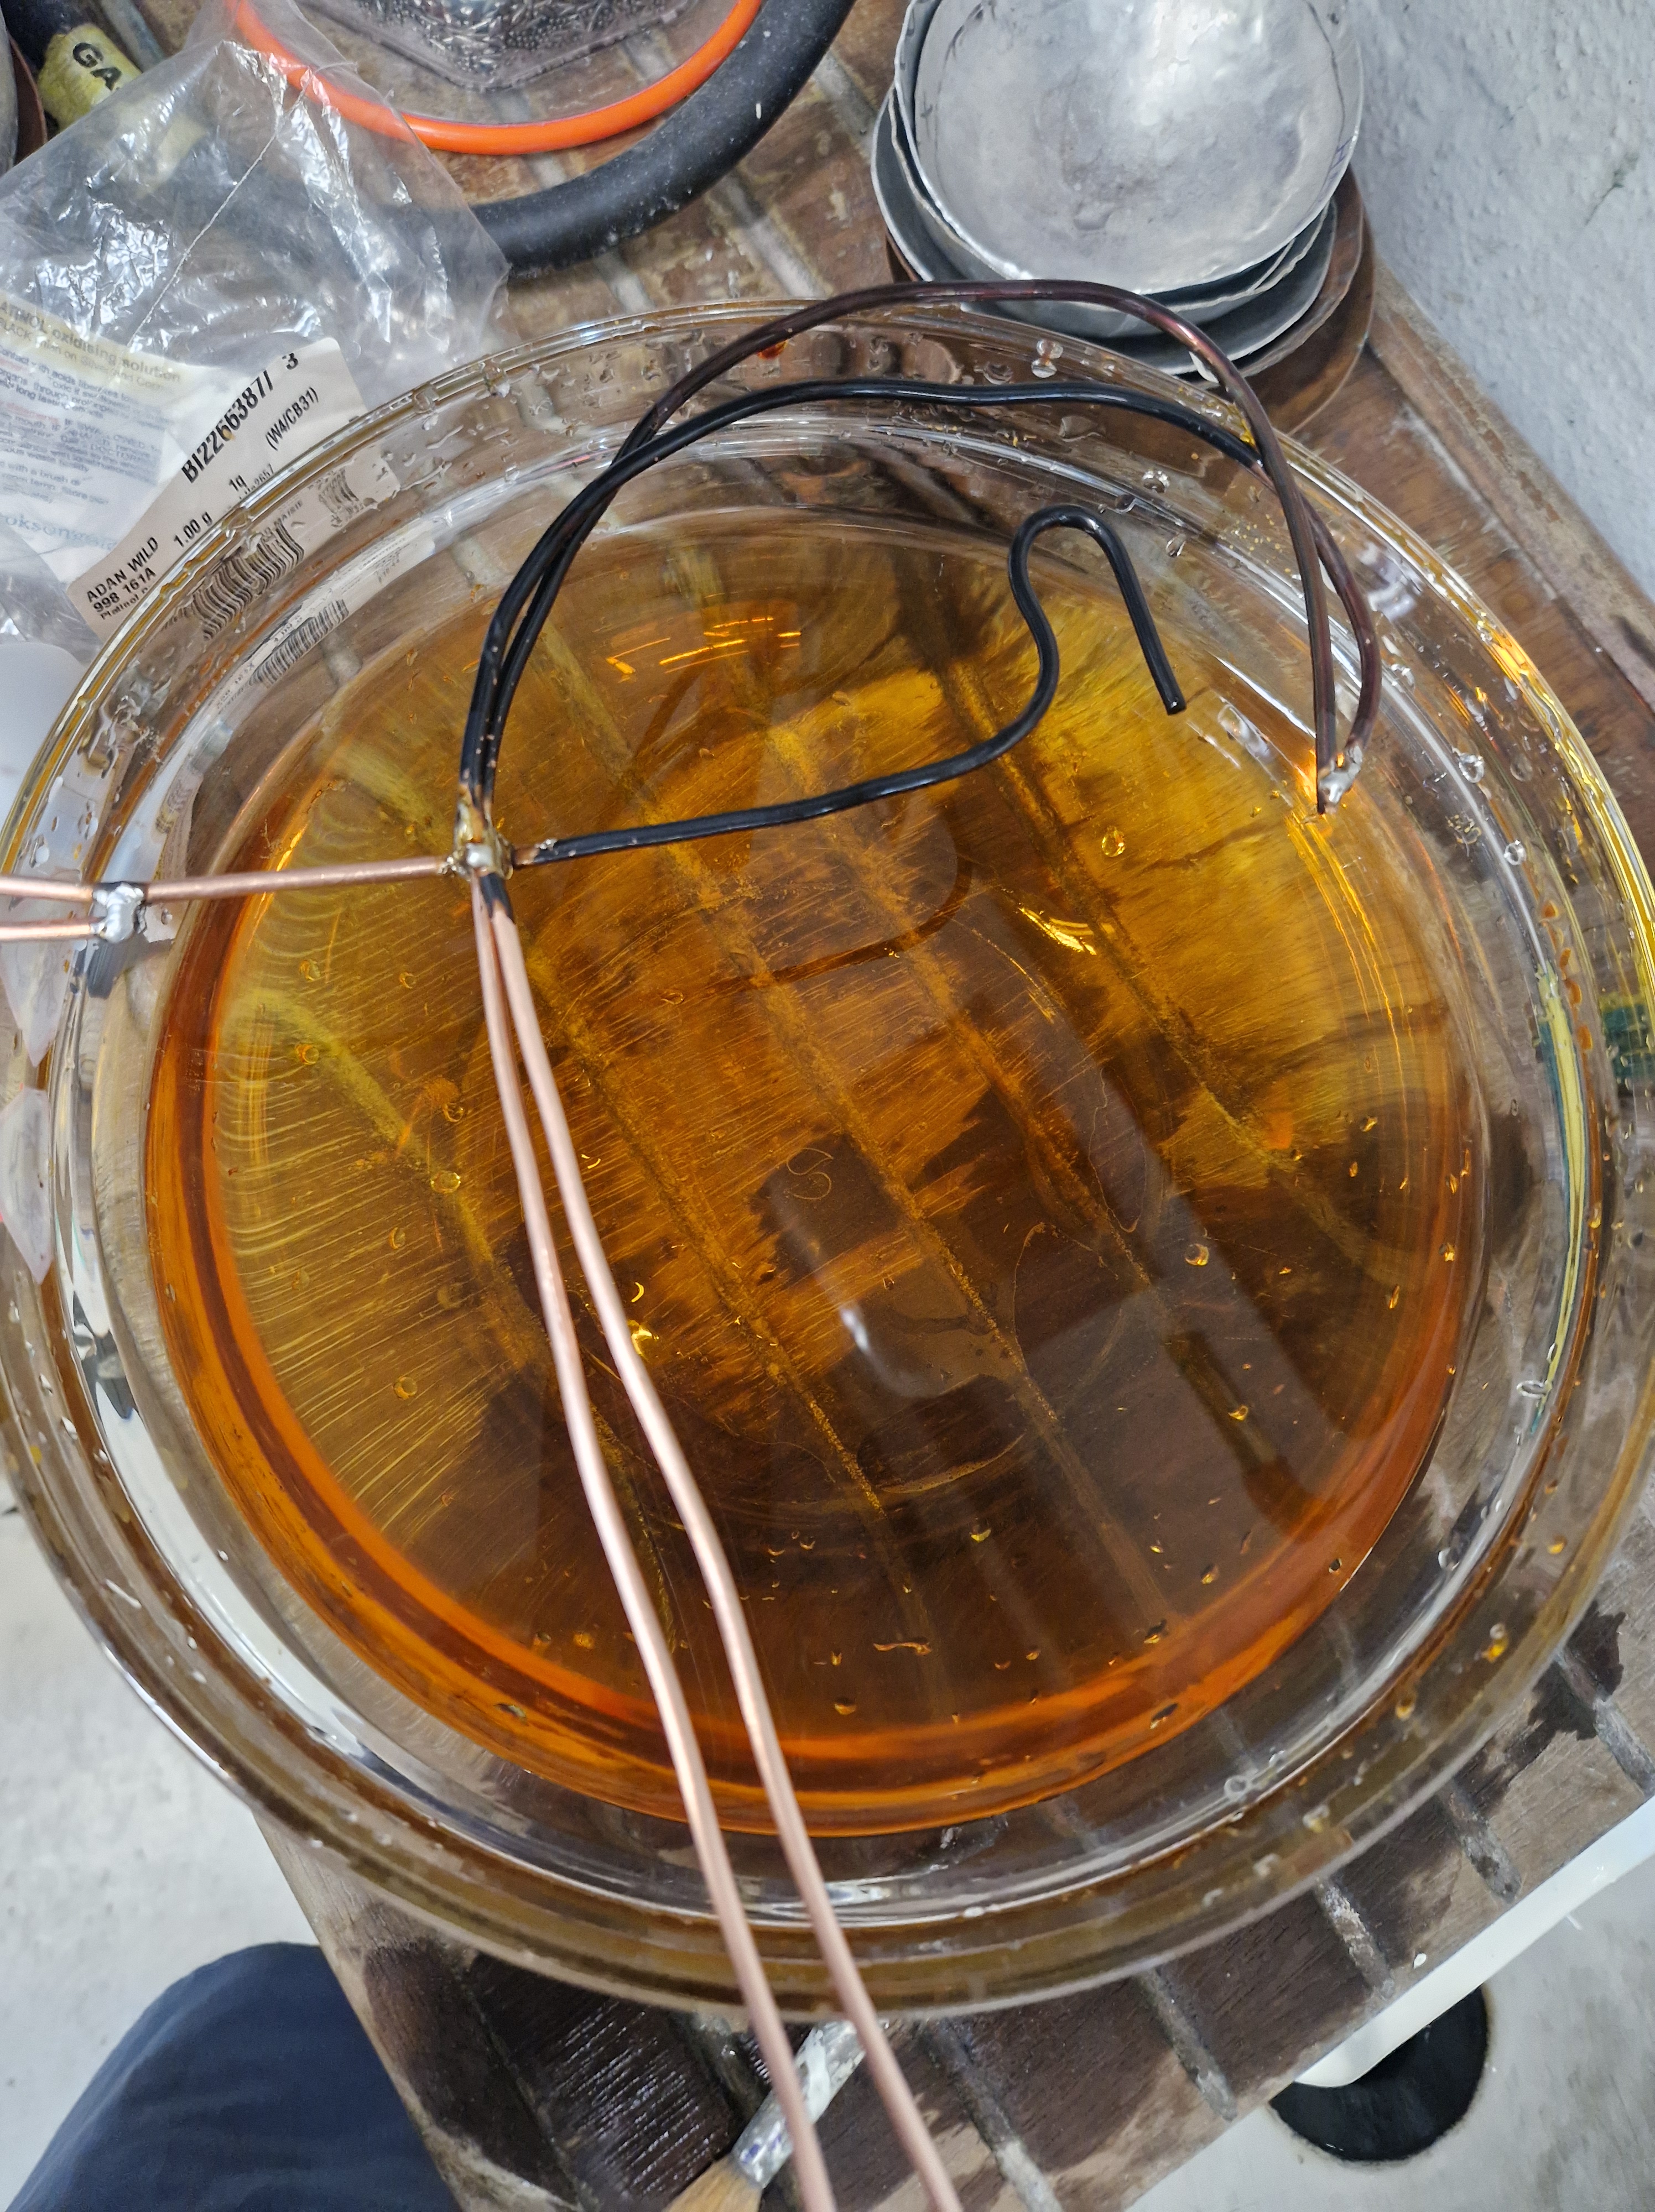
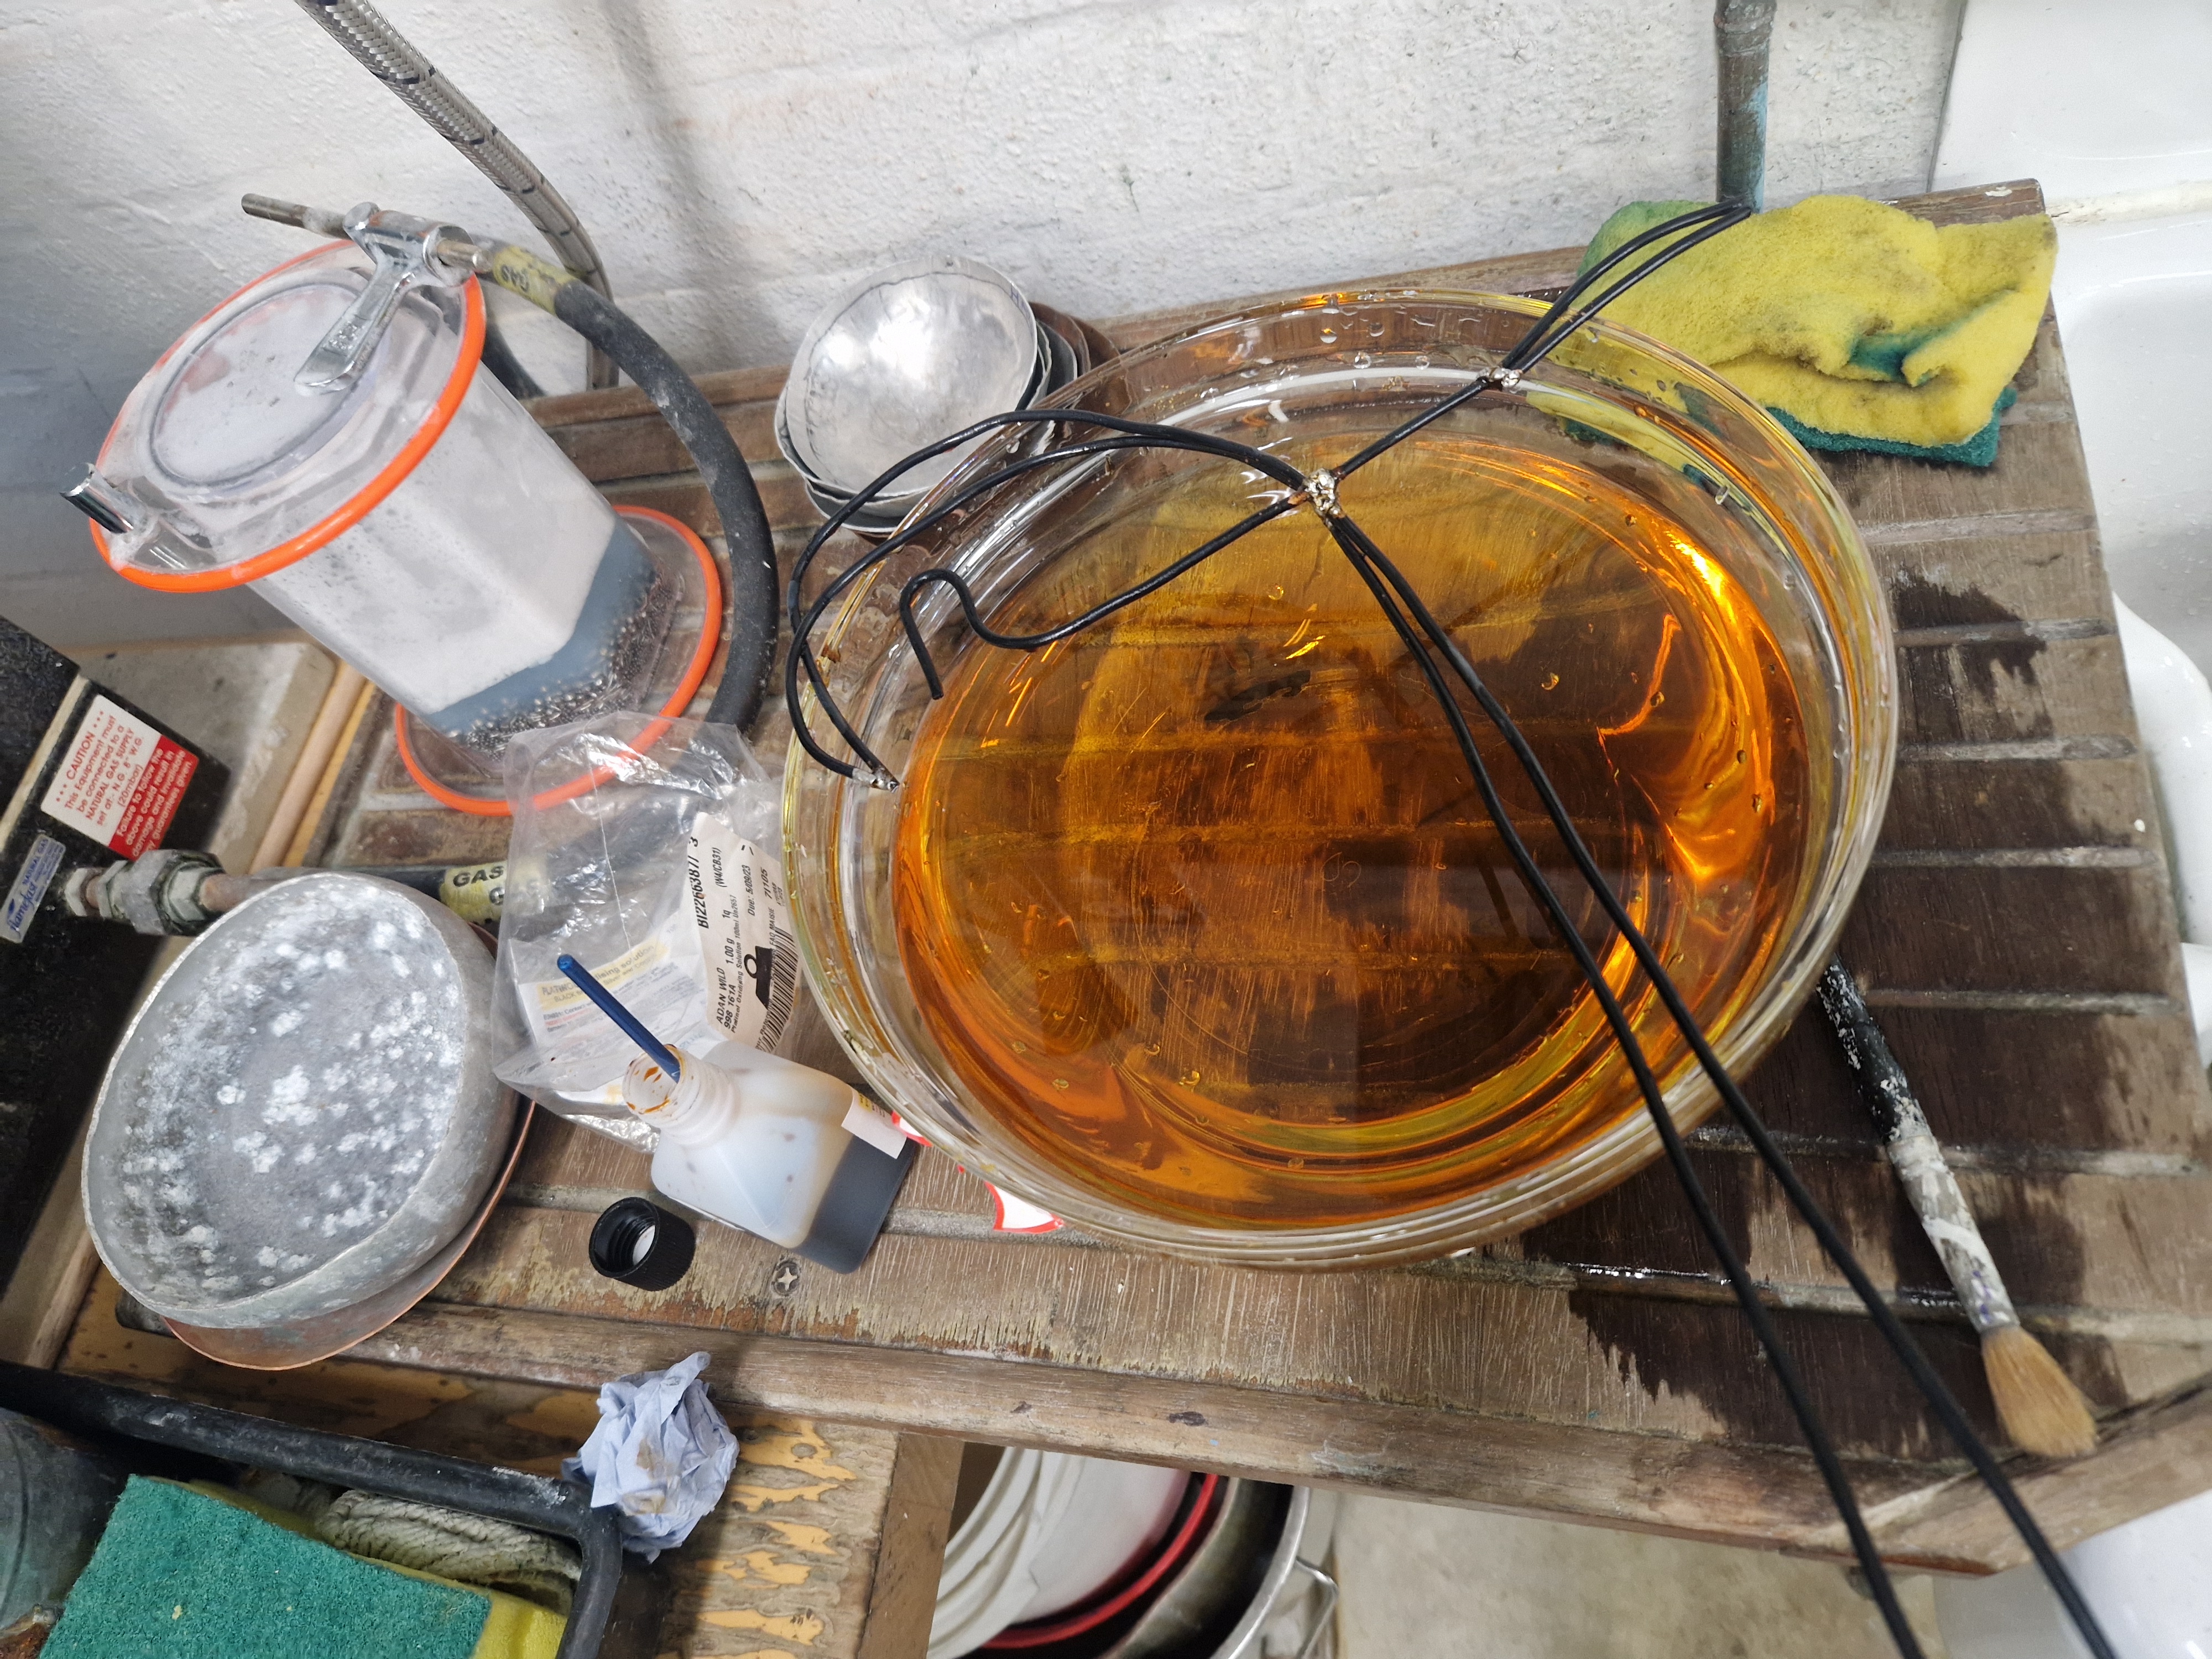
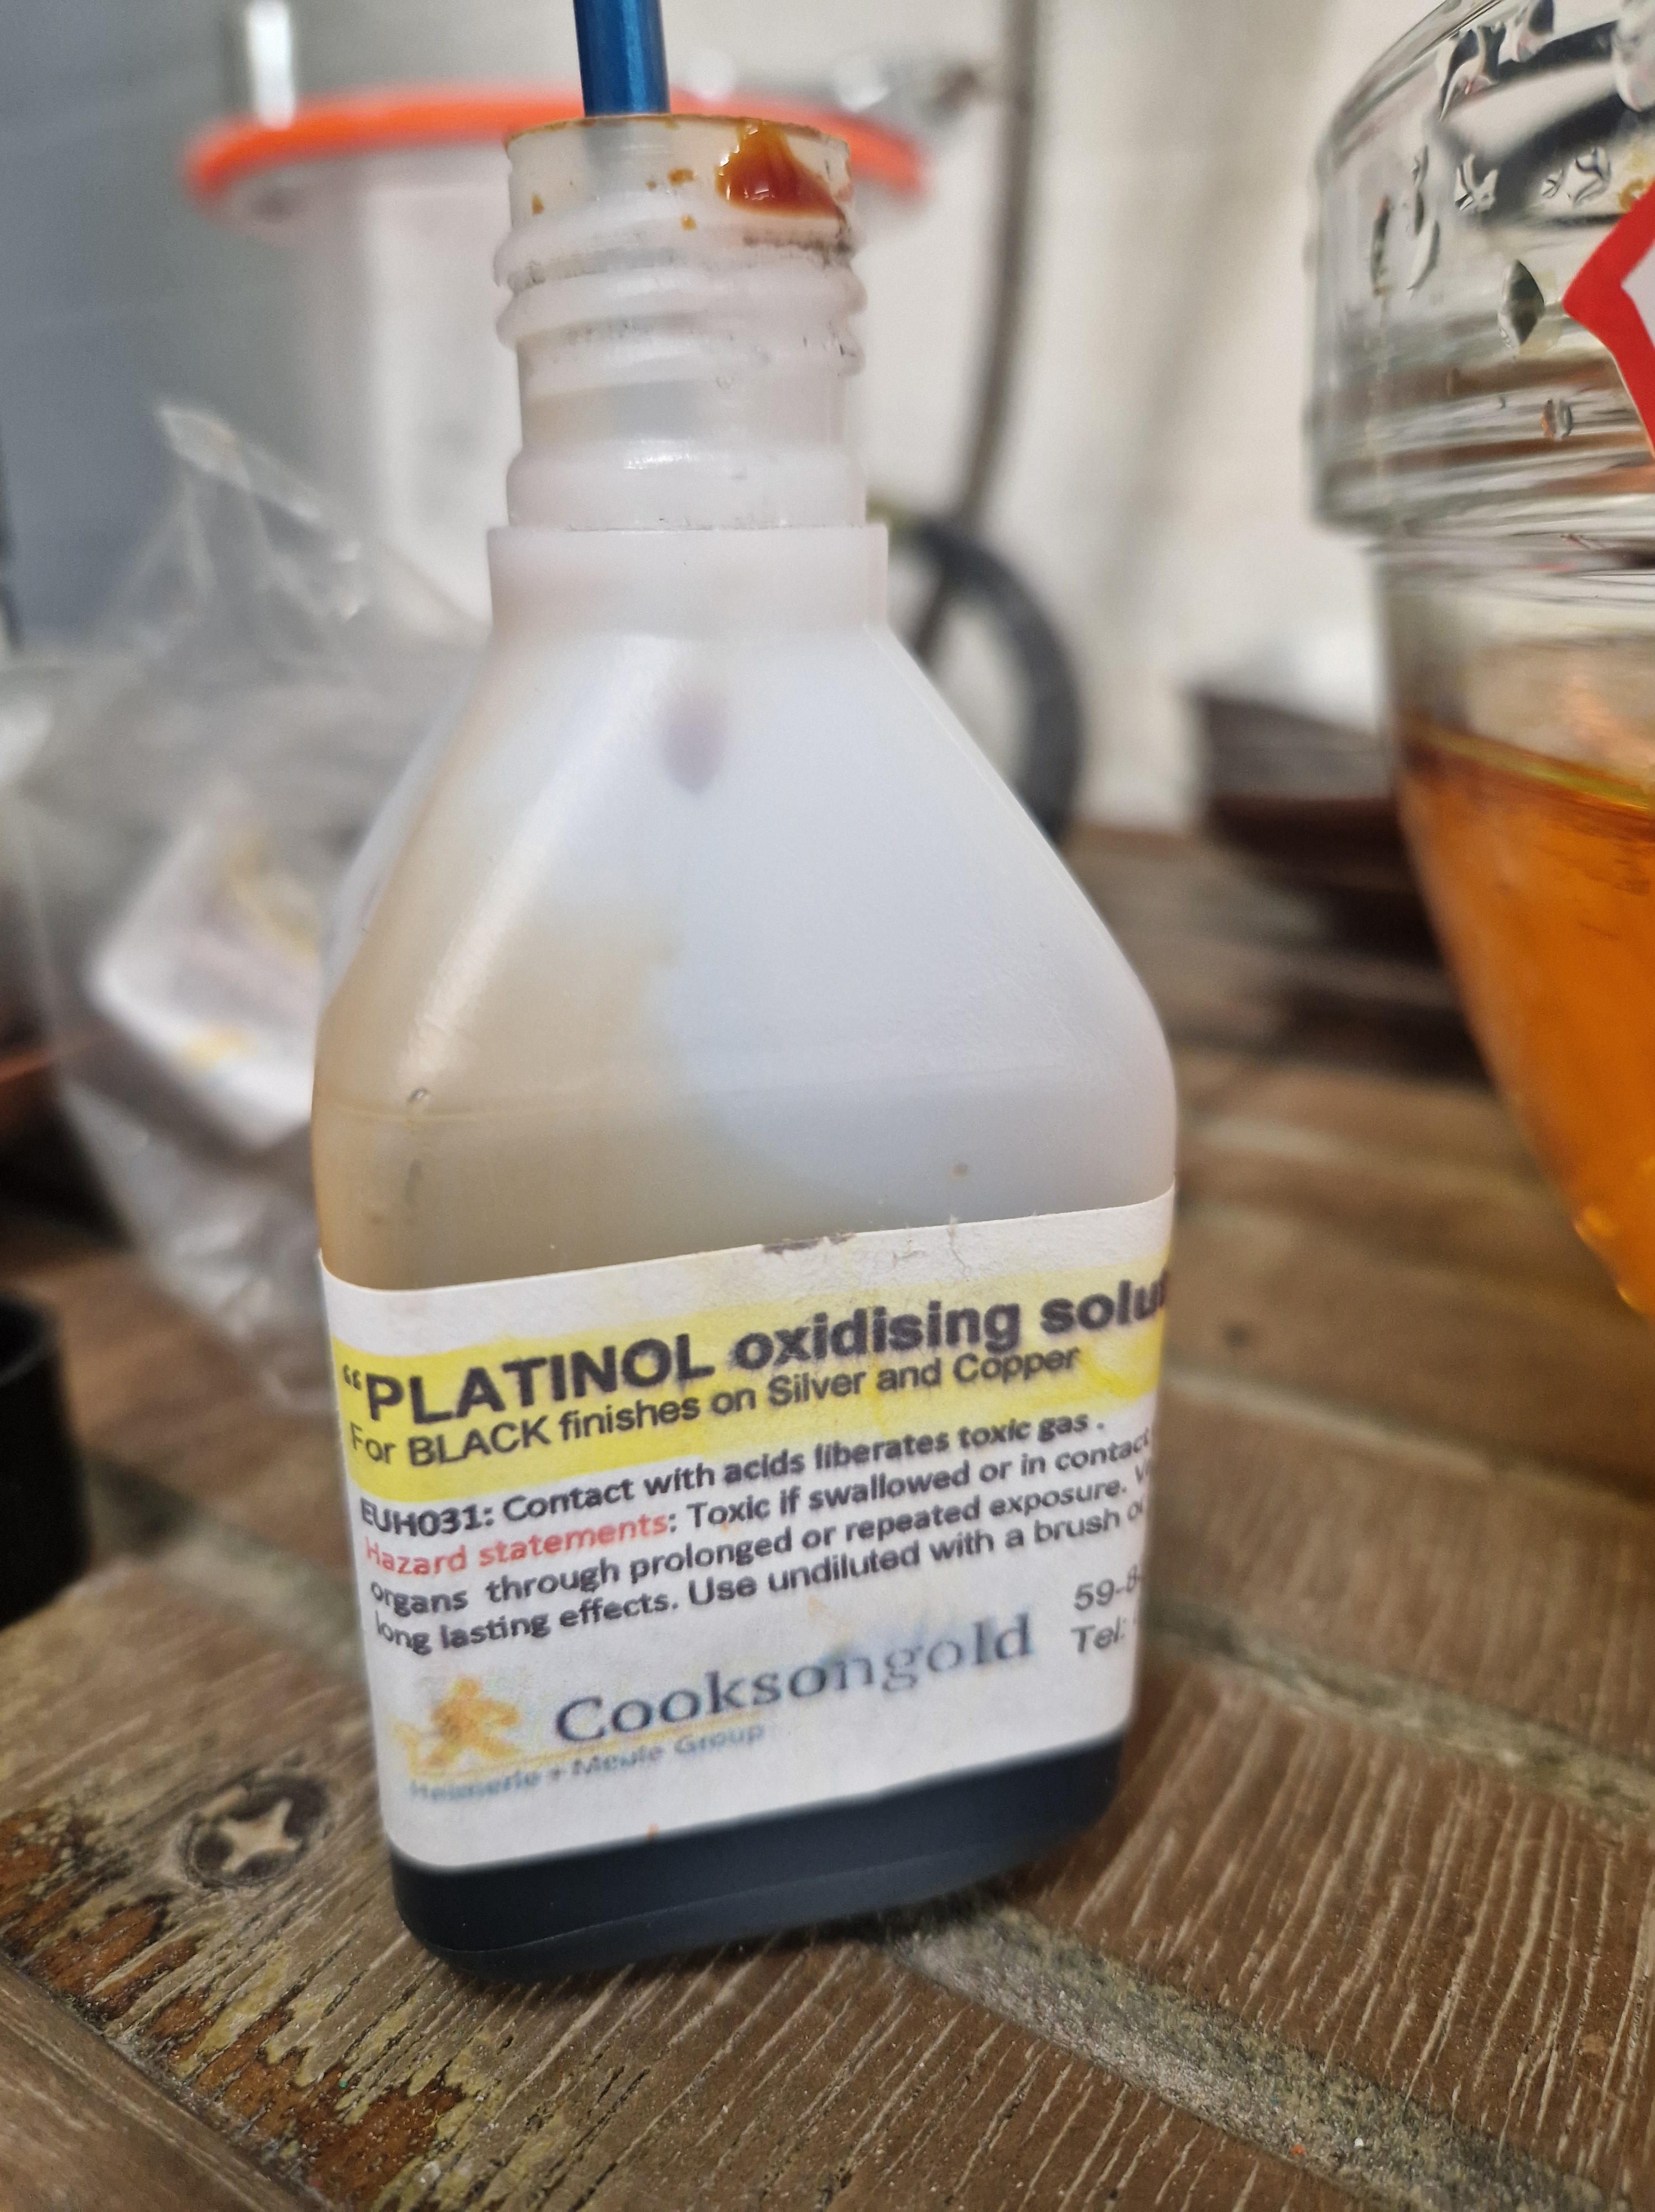
METAL WORKSHOP – OXIDISING COPPER
I booked a session to oxidise my wire sculpture, which would turn it black.
In the end I was not 100% happy with the results so I decided to spray paint it matt black.
CONCRETE WORKSHOP – MAKING STAND FOR WIRE SCULPTURE
Using an adjustable box and concrete, I made a stand for my wire sculpture.
WEEK 14: 29 APRIL – 5 MAY
MONDAY
CRIT III
NOTES
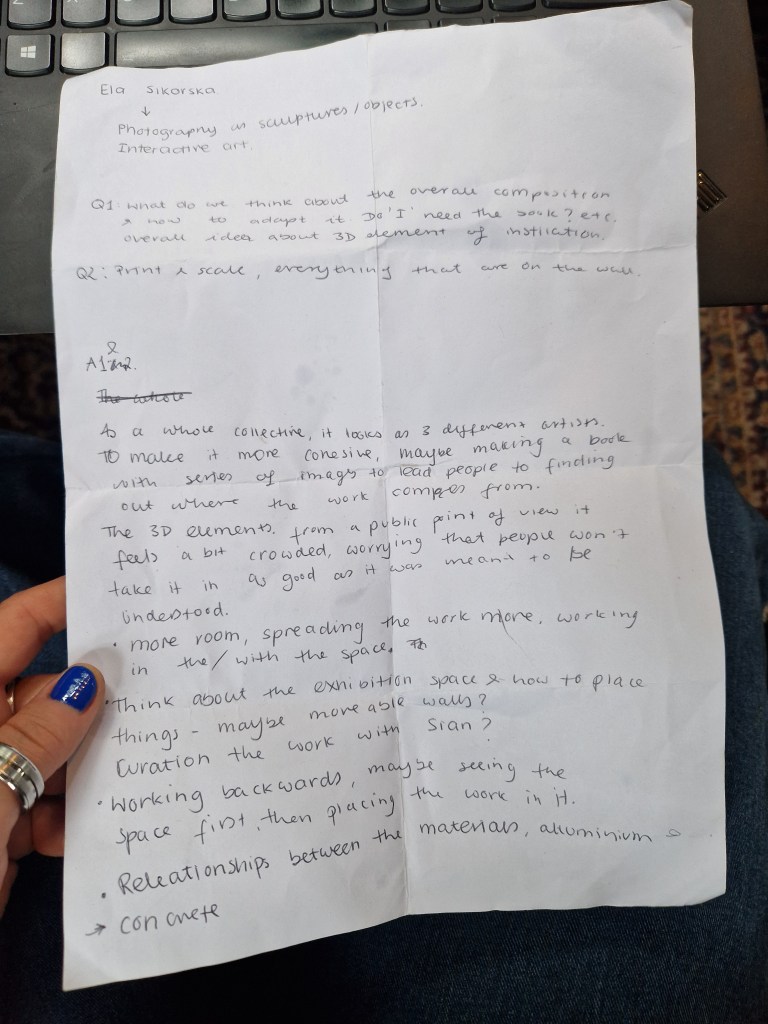
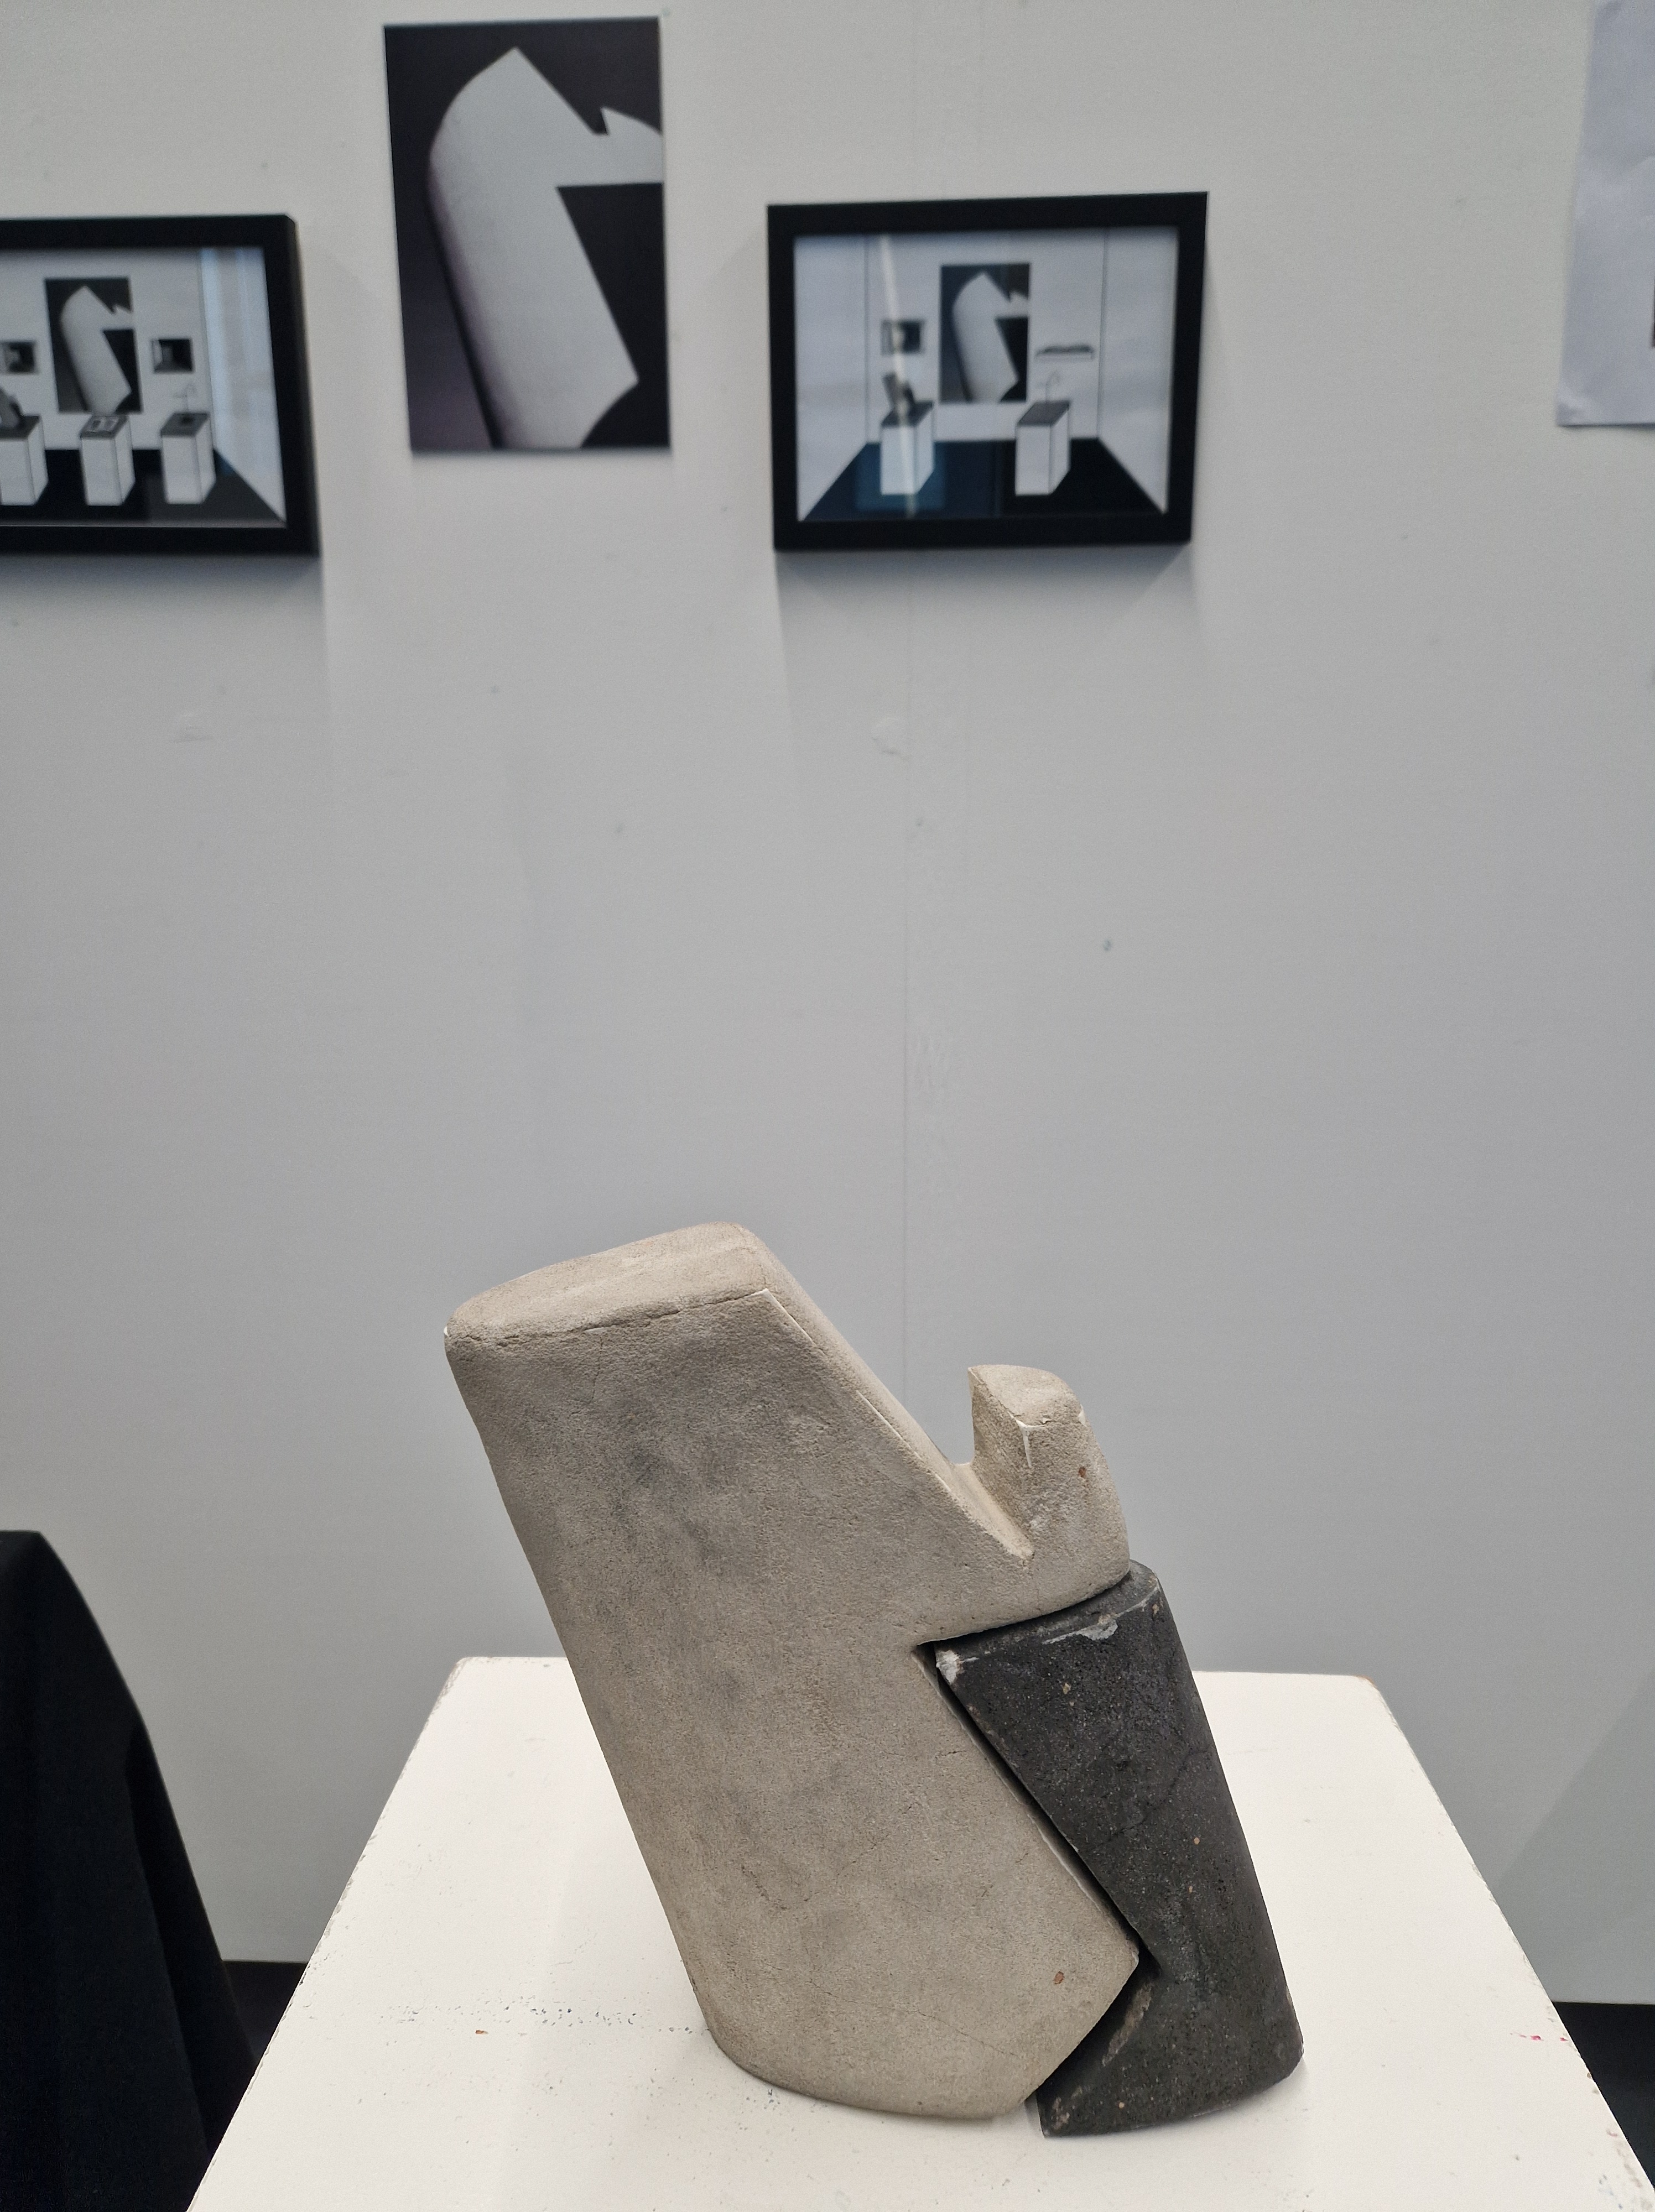
- photography as sculpture/interactive art
- as a whole collective it looks like three different artists
I disagree with this comment, as the works are connected by a concept, I don’t think everything should be obvious and over explained, I hope to make the viewer think and work things out, not have everything handed on a plate
- to make it more cohesive maybe make a book with a series of images to lead people to find out where work comes from
That was my initial idea but I was told that I couldn’t have my book displayed next to my images as many students have books that will be displayed in a designated area. This killed my idea of the book as it only made sense and served its purpose when presented with the rest of the artwork.
- the 3D elements, from a public point of view, feel a bit crowded, worrying that people won’t take it as well as it was meant to be understood (more room, spreading the work more, working with and in the space)
I found a very limited space to present my work in this crit due to so many students hanging their work as well, so I was conscious not to take too much space, thinking of others, so yes the display is crowded, but it was not my intention and I wouldn’t arrange it this way given more space.
- think about the exhibition space and how to place things maybe movable walls
- curation of work with Sian during the instal
- working backwards, seeing the space first, then placing the work without
- relationship between materials, aluminium-concrete
REFLECTIONS: A valuable session, as always, but I felt like there was a lot of criticism unrelated to my work over which I had no control due to lack of space (like spacing sculptures and images, placing a book in the space). I was also disheartened that my vision and concept were not fully understood and the works felt separated. I would be interested in exhibiting it anyway at some point in Manchester, the way I envision it and observe viewers' reactions - get a broader spectrum of opinions.
TUTORIAL WITH THOM
NOTES:
- discussing title – start thinking about the title e.g. EQUIVALENTS
The Alfred Stieglitz Collection. Equivalents.https://archive.artic.edu/stieglitz/equivalents
Equivalents
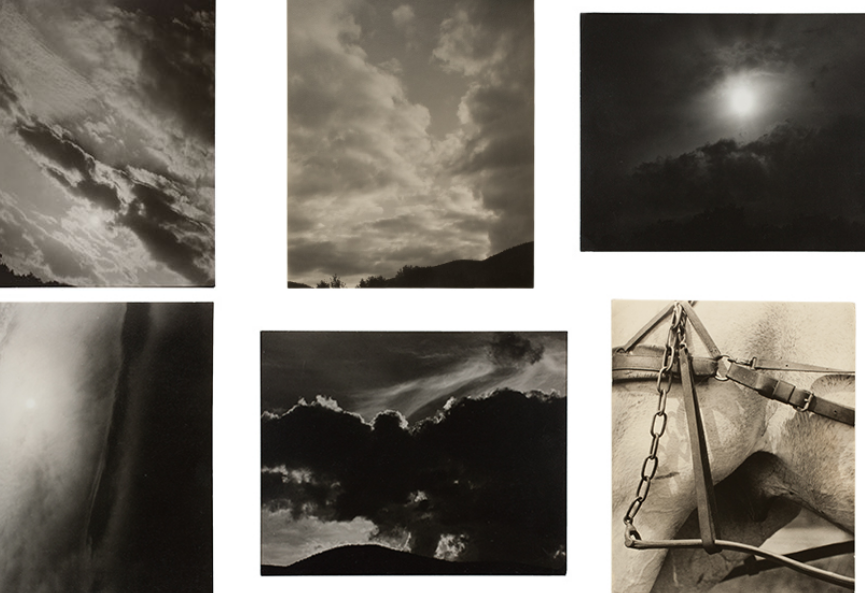
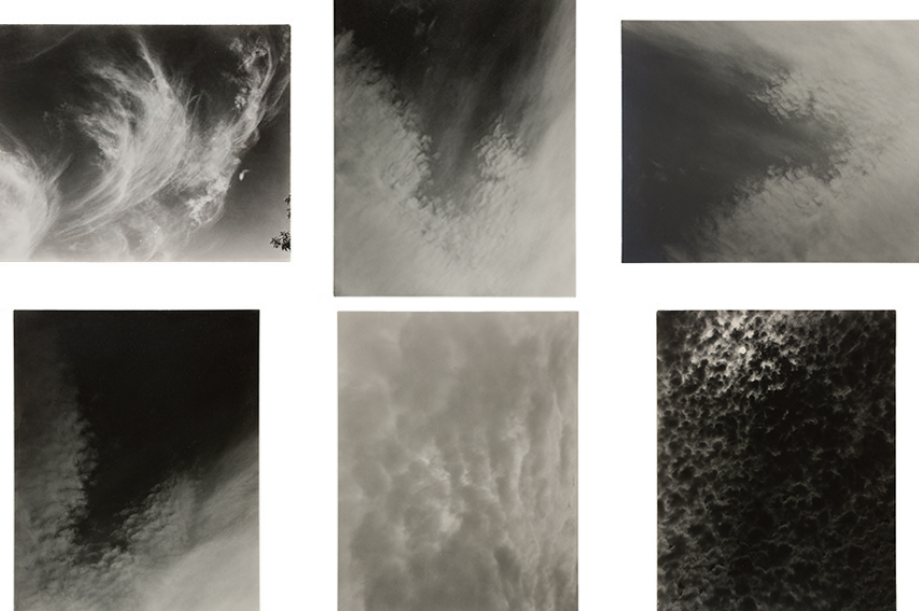
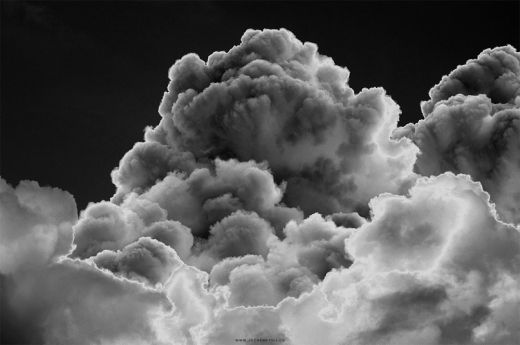
In the summer of 1922, Alfred Stieglitz began to take photographs of clouds, tilting his hand camera towards the sky to produce dizzying and abstract images of their ethereal forms. In an article the following year, Stieglitz maintained that these works were a culmination of everything he had learned about photography in the previous forty years: “Through clouds [I wanted] to put down my philosophy of life—to show that my photographs were not due to subject matter—not to special trees, or faces, or interiors, to special privileges, clouds were there for everyone—no tax as yet on them—free.”[1] Over the next eight years, he made some 350 cloud studies, largely produced as contact prints on gelatin silver postcard stock.
Stieglitz called these photographs Equivalents. More than describing the visible surfaces of things, the works could express pure emotion, paralleling the artist’s own inner state. Stieglitz, along with many of the artists of his circle, argued that visual art could assume the same nonrepresentational, emotionally evocative qualities as music. Indeed, music was an inspiration for the Equivalents, and this is reflected in the early titles he gave them: Music: A Sequence of Ten Cloud Photographs (1922) and Songs of the Sky (1923). Stieglitz did not limit himself to clouds, or allusions to music, in these photographs: one notable work, Spiritual America, shows a close-up of the nether regions of a harnessed gelding (a castrated male horse), the image serving as a metaphor for the artist’s impression of a diminished American culture in the same way that his depictions of clouds represented his emotions.
Stieglitz often presented the Equivalents in series or sets, recombining different groupings of prints for exhibition. Georgia O’Keeffe donated thirty of the works to the Art Institute of Chicago, including Set A, made up of eight photographs, and Set E, made up of three photographs printed from the same negative.
- discussing degree show proposals, especially ways of presenting the image to go with a Perspex sculpture.
Jessica Eaton https://bradleyertaskiran.com/en/artists/jessica-eaton-en/
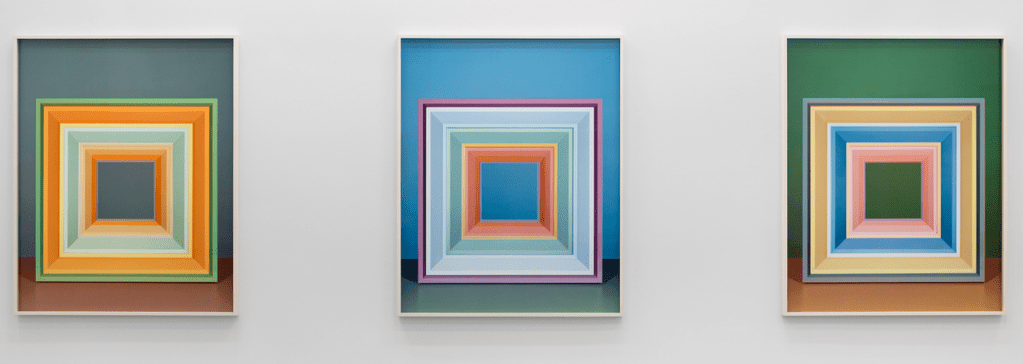
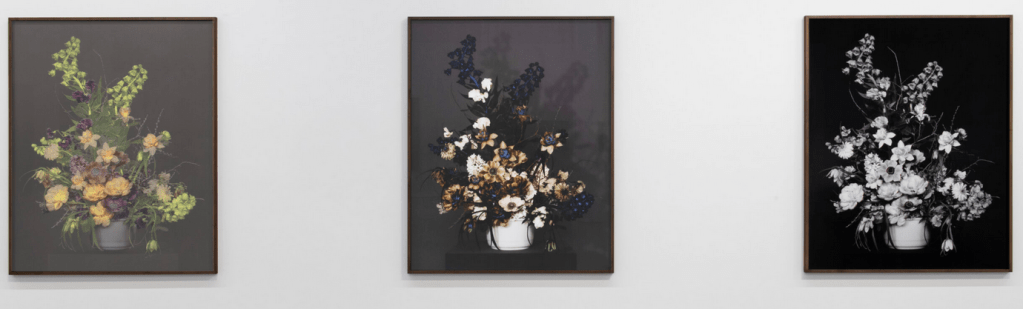
Using a large-format film camera, Jessica Eaton has developed a complex and experimental approach to image-making and her work considers the very nature of photography. Eaton came to international acclaim through her Cubes for Albers and LeWitt (commonly referred to by the acronym cfaal)—a series of vibrant photographs that deconstruct her studio practice. Like the majority of Eaton’s works, these optically charged images are made by taking multiple in-camera exposures of common studio supplies. Through her abundant use of traditional analog photography practices—such as colour-separation filtering and in-camera masking—Eaton imbues her large-format images with an aesthetic more reminiscent of the paintings and drawings of hard-edge geometric abstraction than the photographs of traditional studio work.
HORIZONTAL NOT VERTICAL
Munch Museum Oslo woodblock prints (Oct 2023)
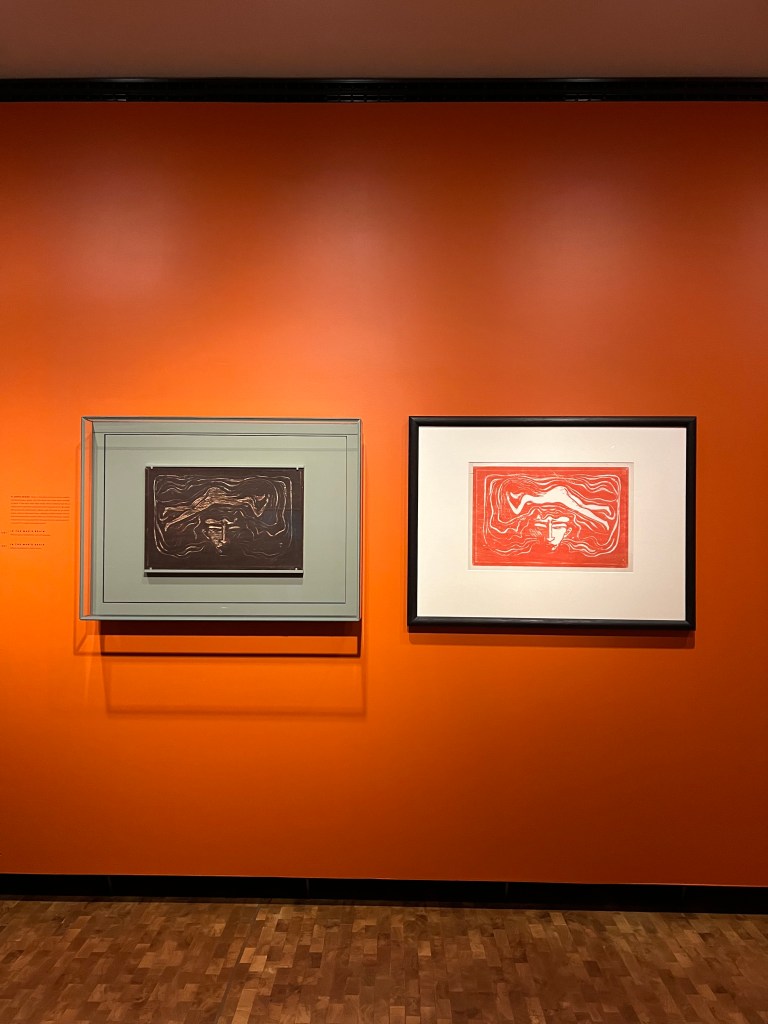
TUTORIAL HELEN
Might need this for a critical frame https://www.mmu.ac.uk/library/search-tools/subject-guides/photography-subject-guide
SPRAY PAINTING WIRE SCULPTURE
I was not completely happy with how the oxidising turned out, so I decided to spray paint the sculpture matt black to reflect my vision and the image that inspired it.
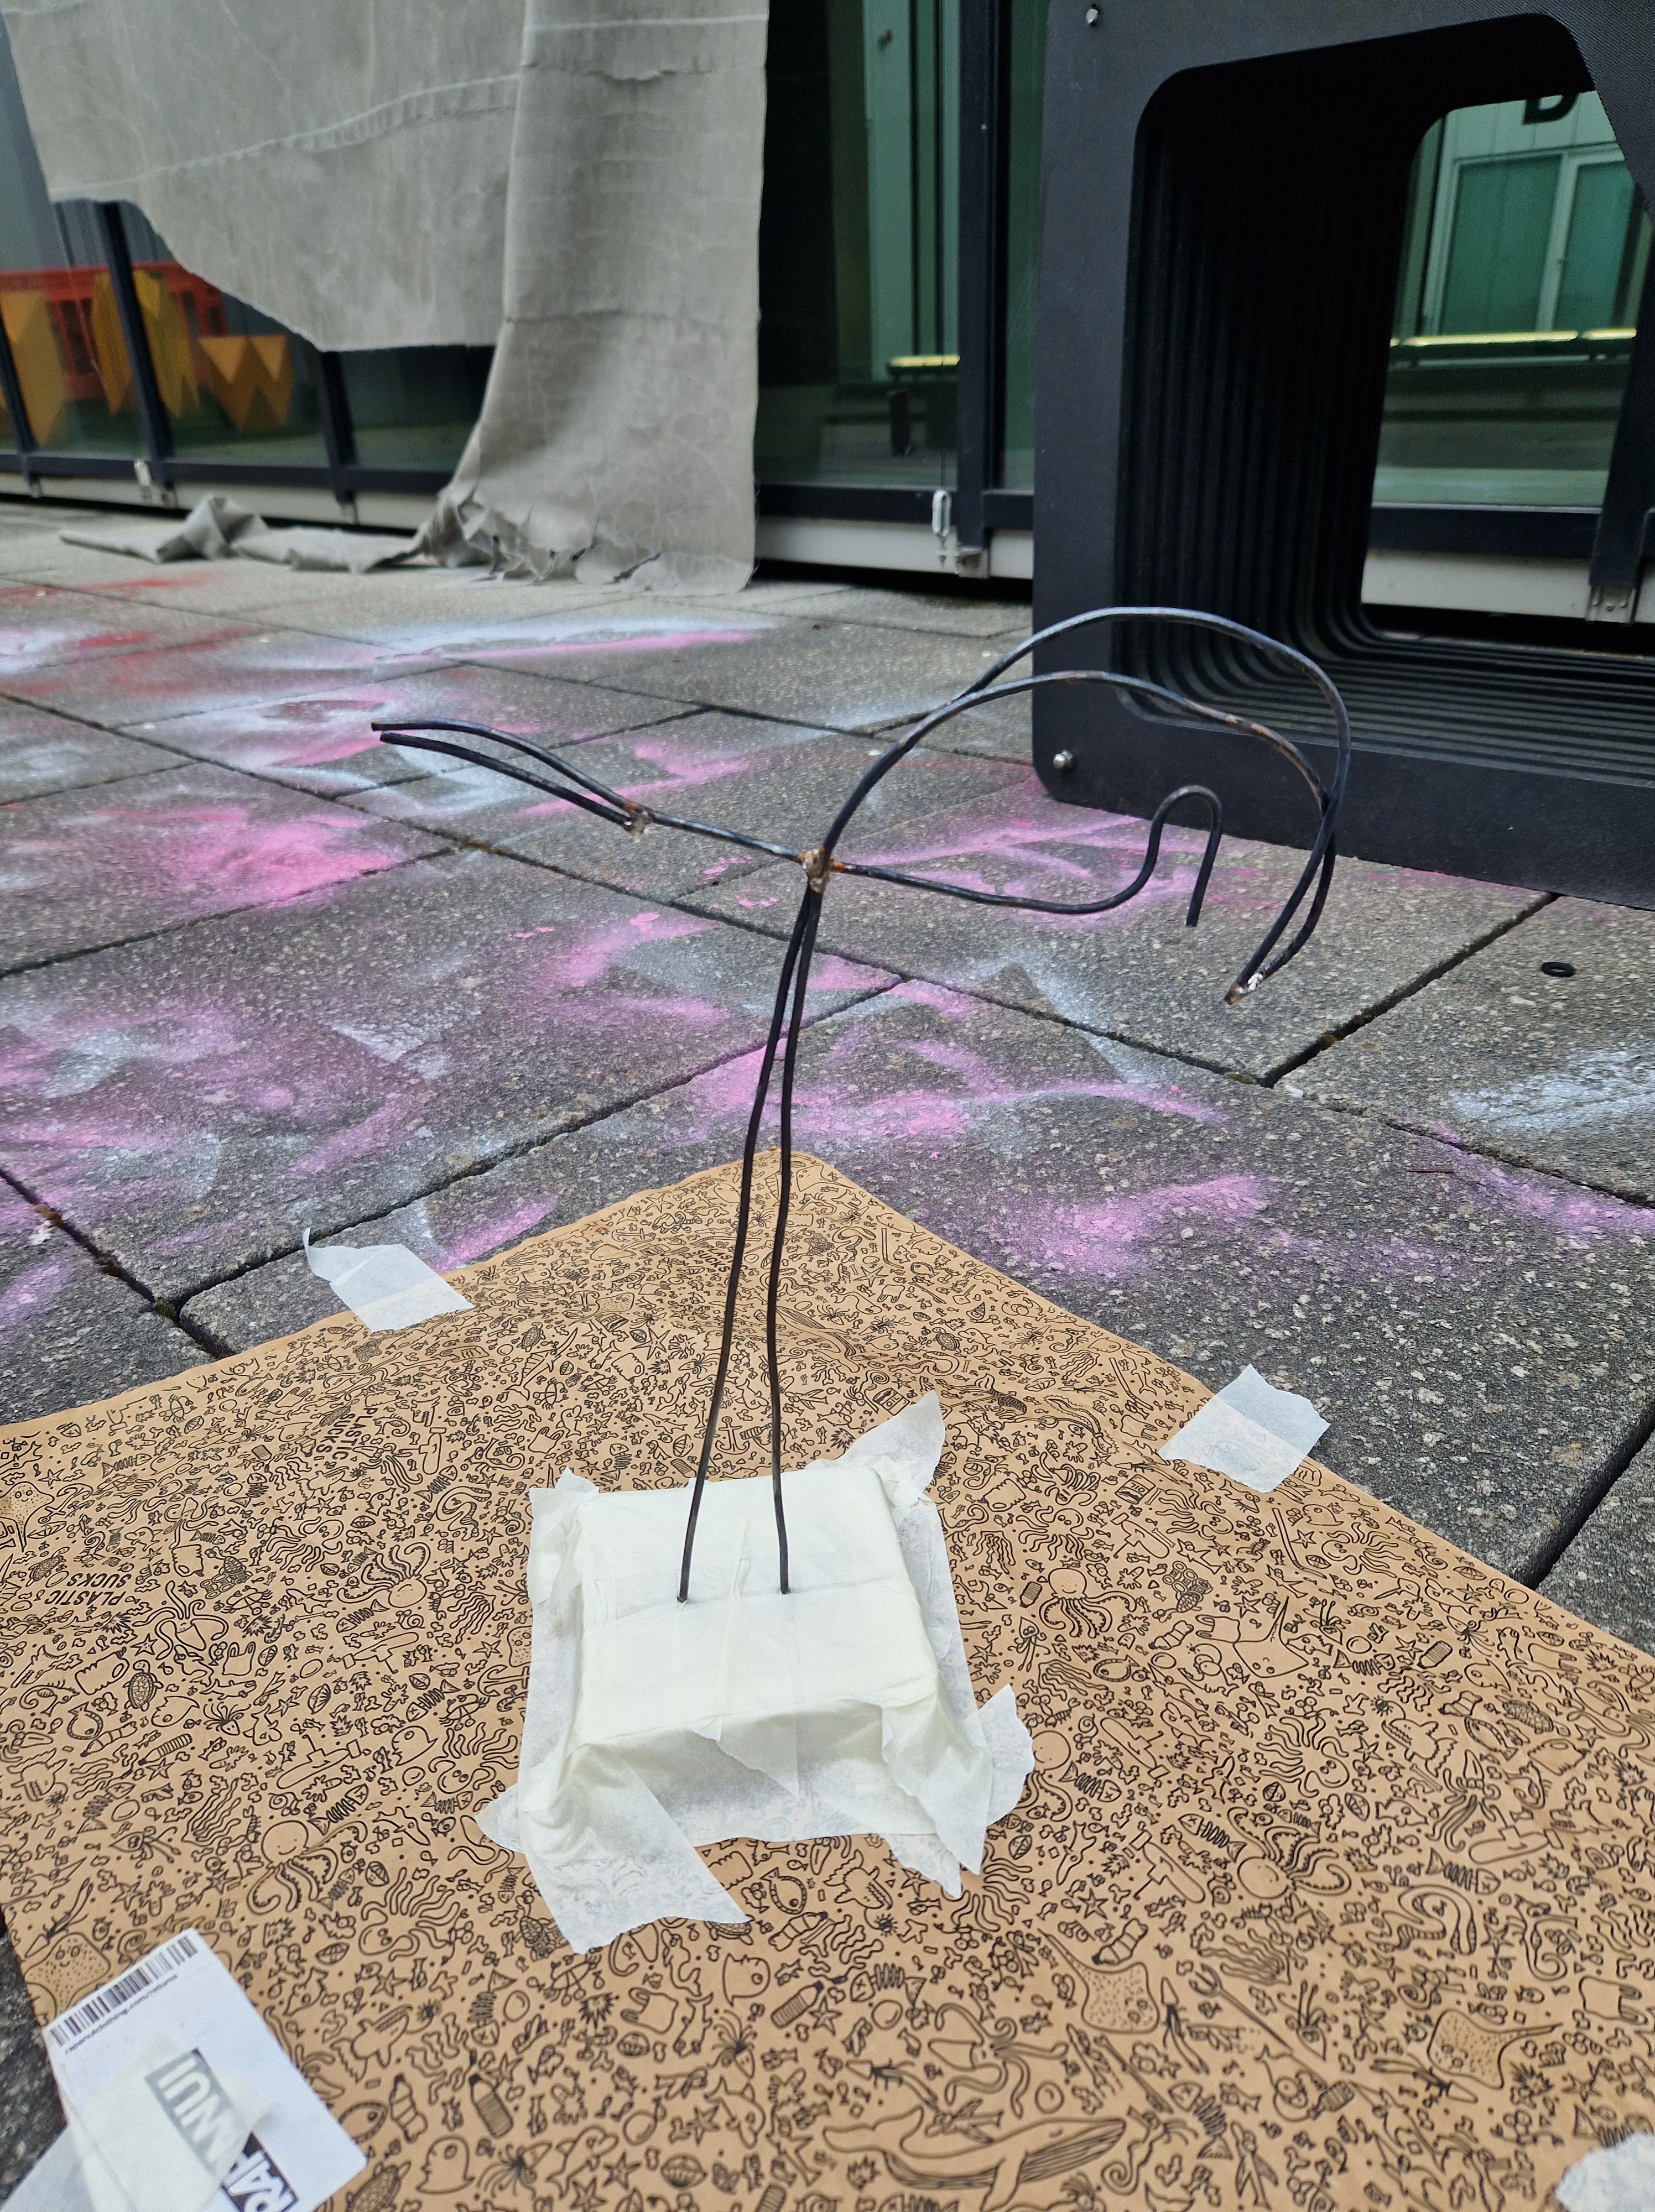
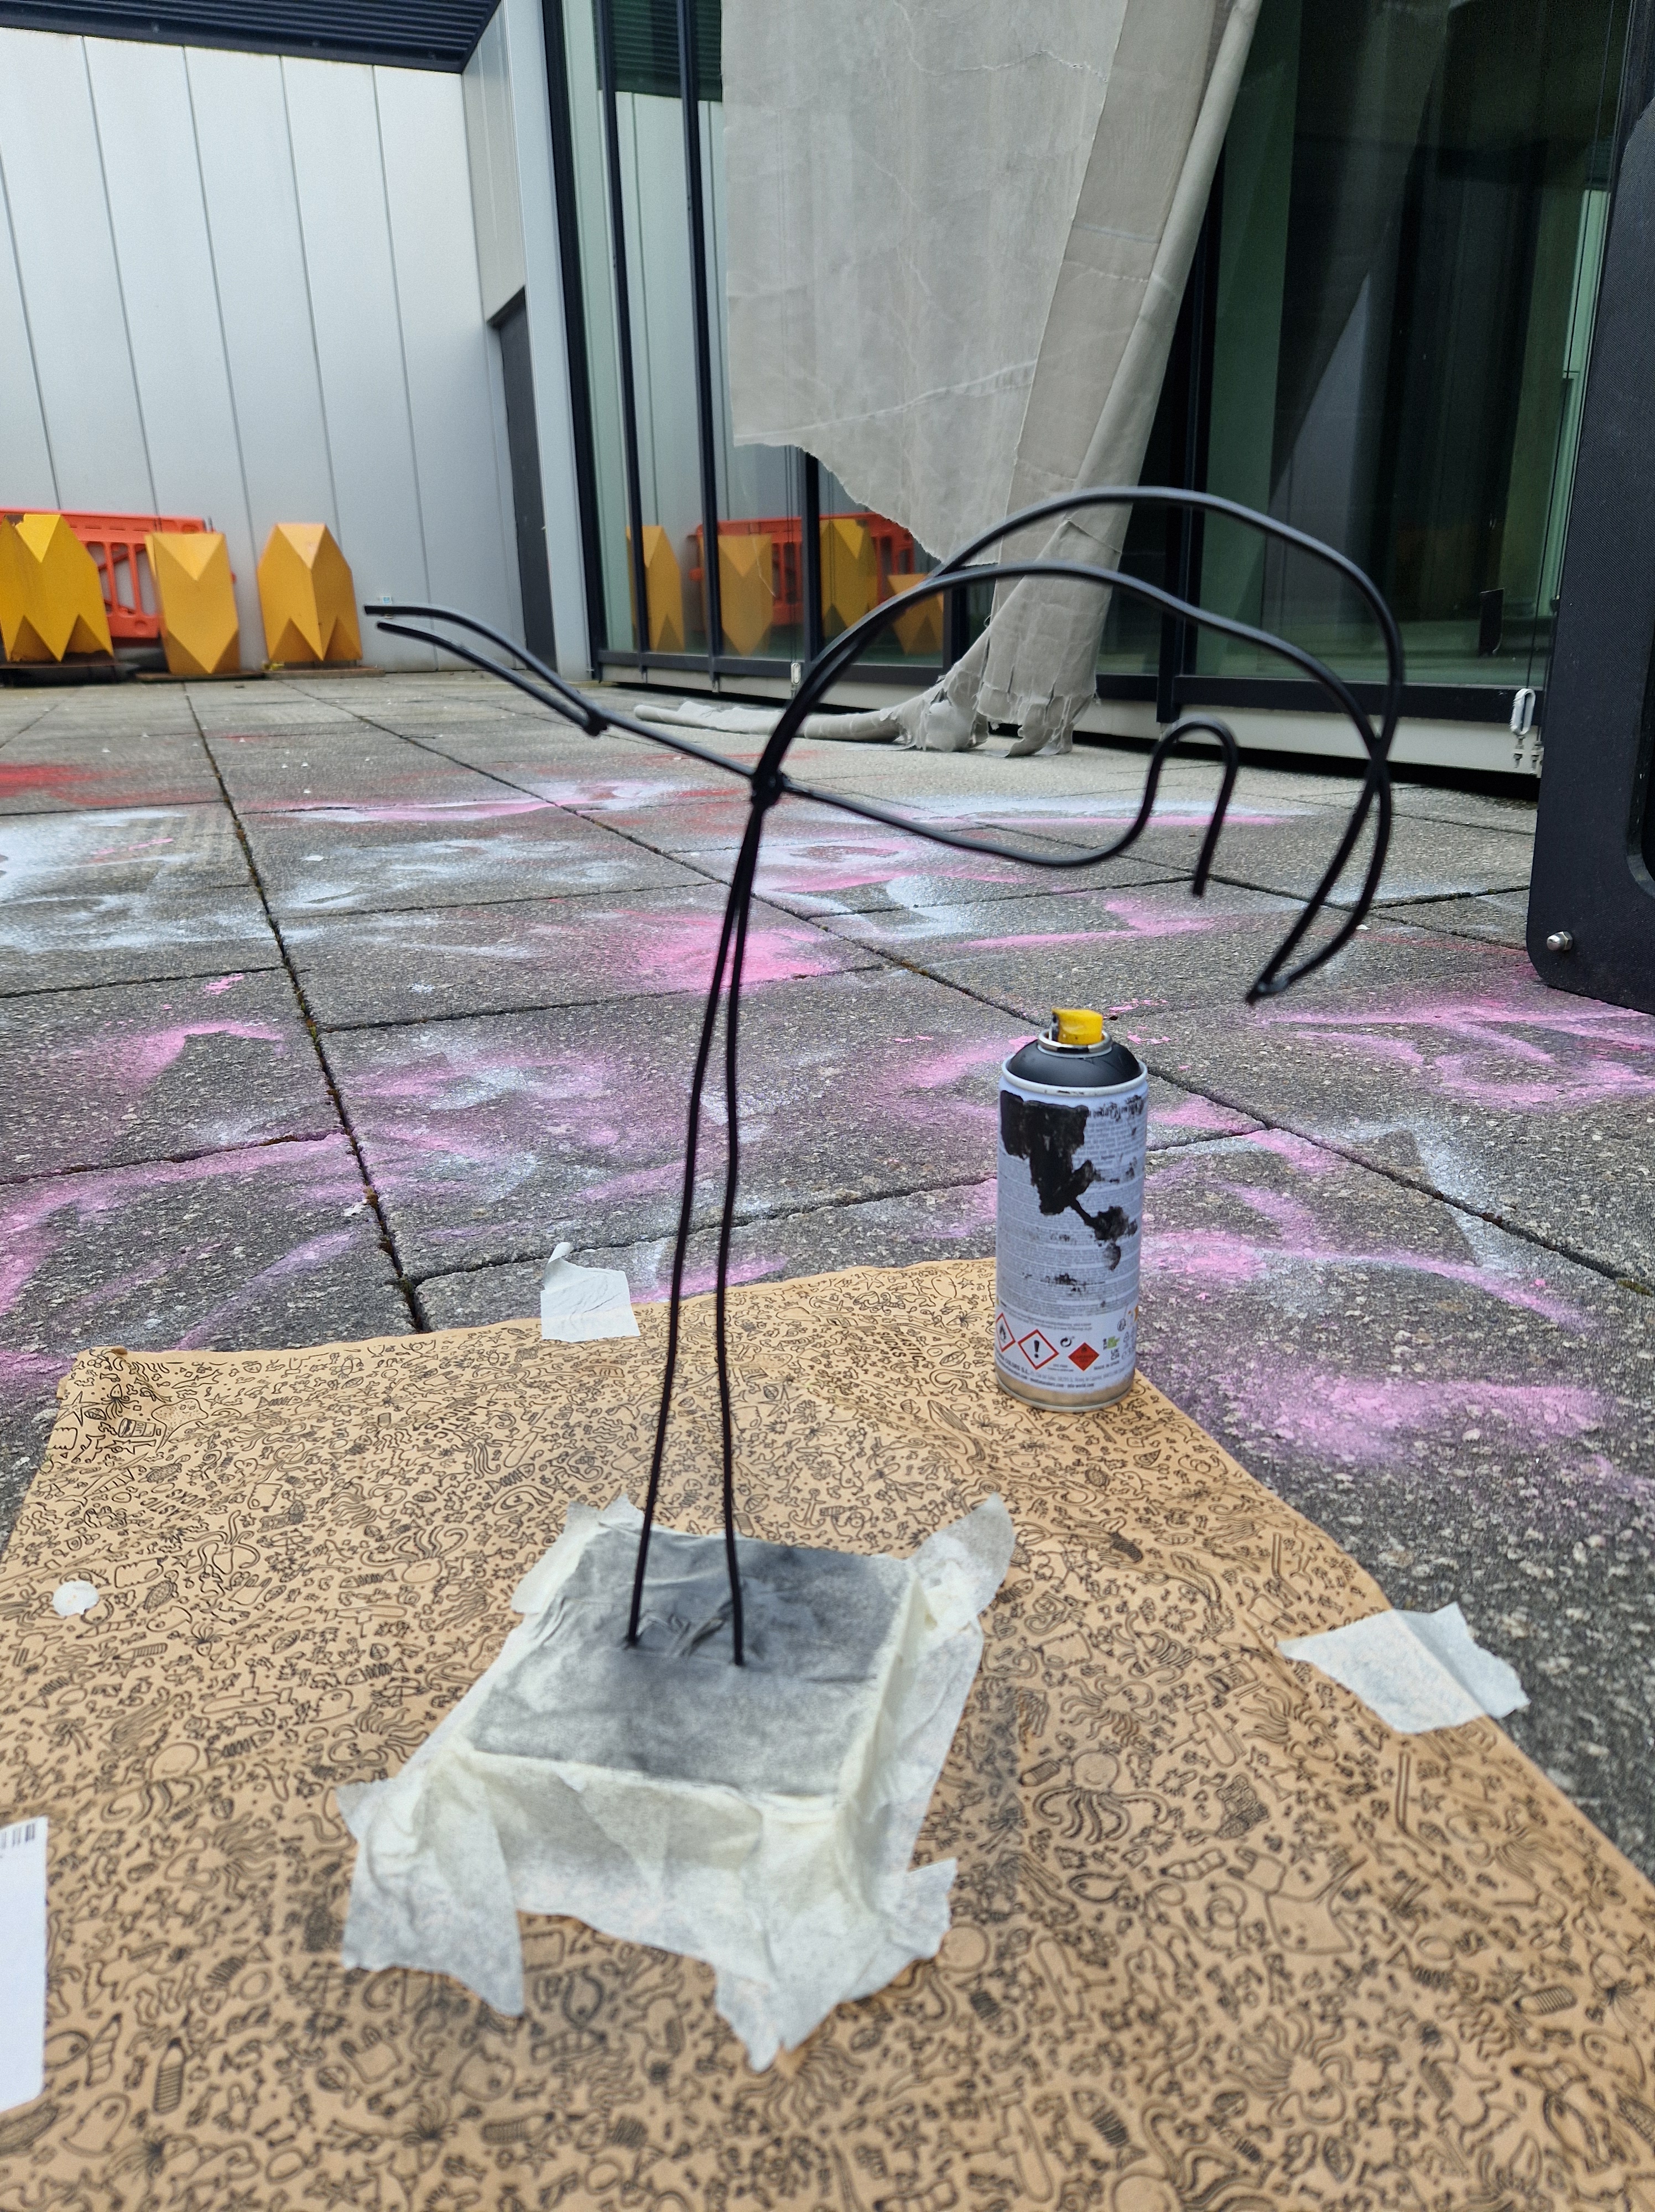
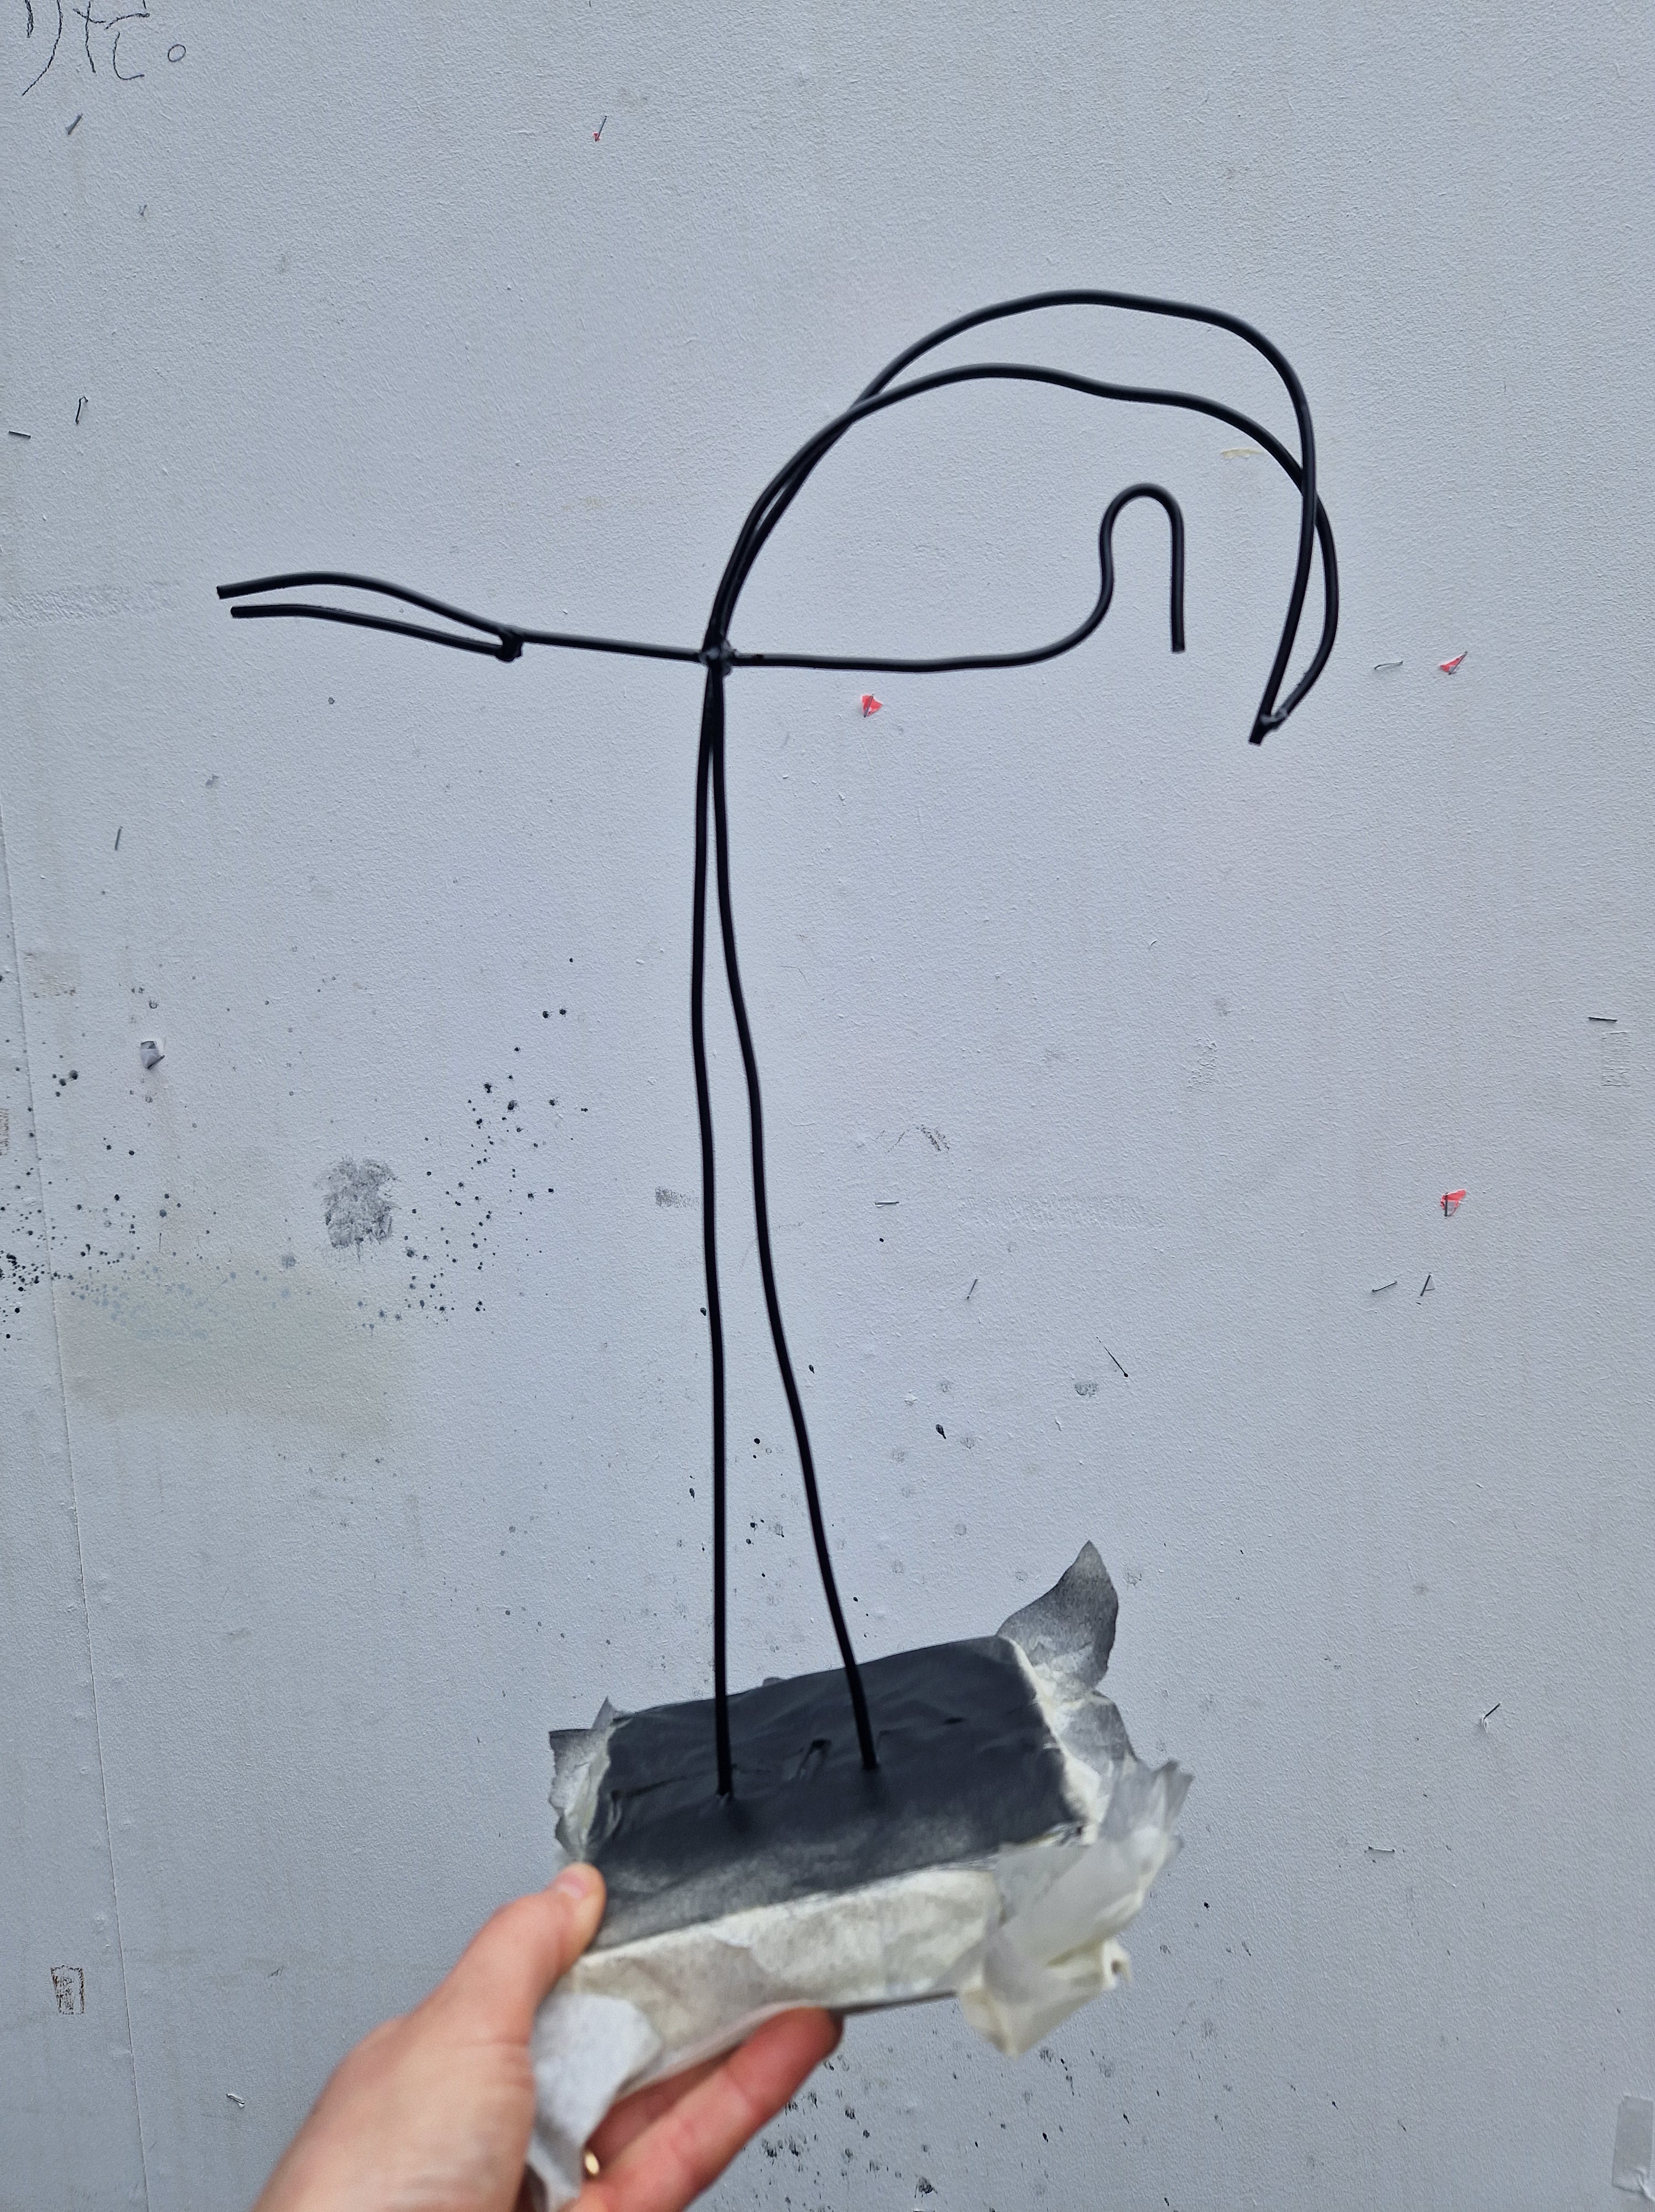
CUTTING OUT MAGNETS FOR LASER-CUT SCULPTURE
I spent good two hours cutting the magnets to the shape of each perspex piece, A final stage of this sculpture.
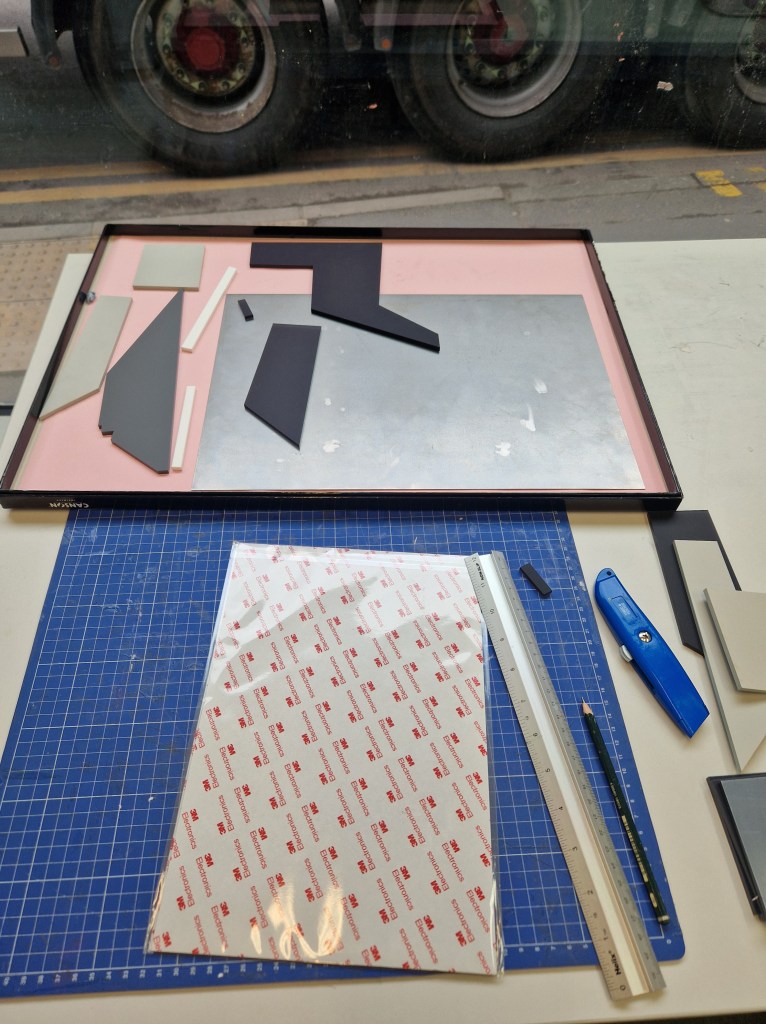
TUESDAY
STUDIO PHOTOSHOOT
I booked two studio spaces, Bay 3 for an hour to photograph laser-cut sculpture and Product Table for a few hours to shoot the other two. Great session, after which I processed and scanned films, ready to print them for my portfolio. A very long, 12-hour satisfying day.
BAY 3
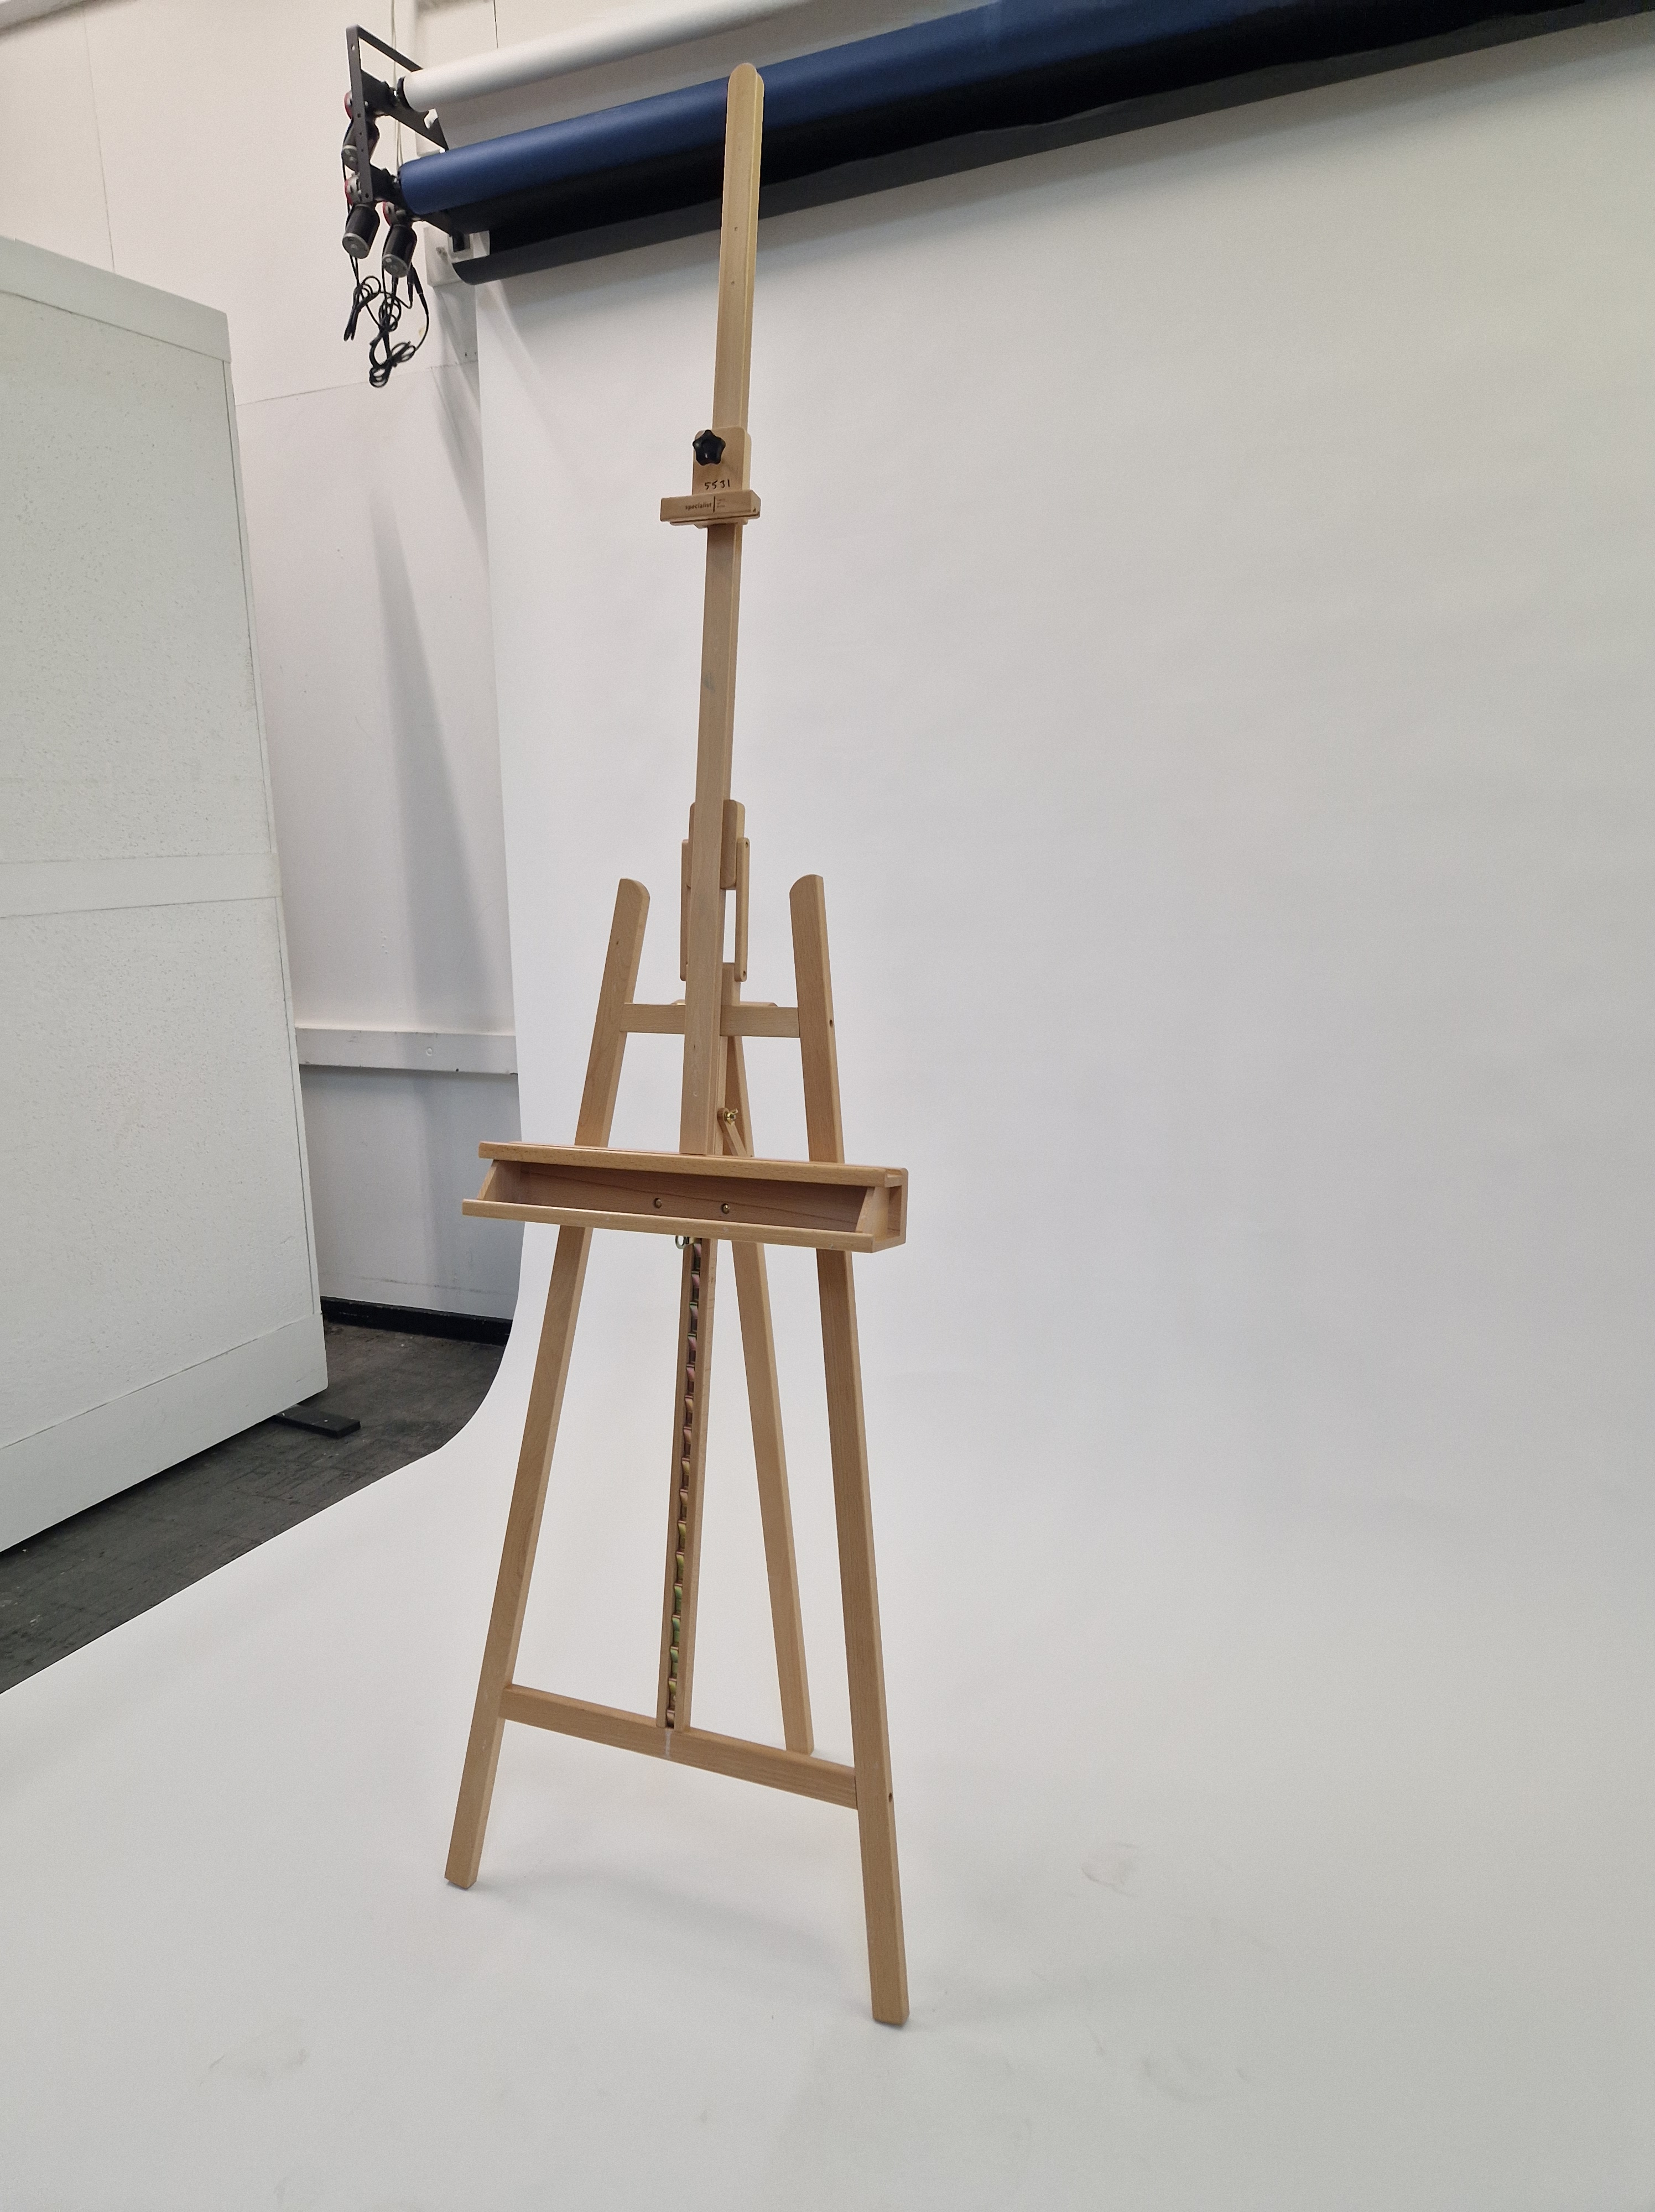
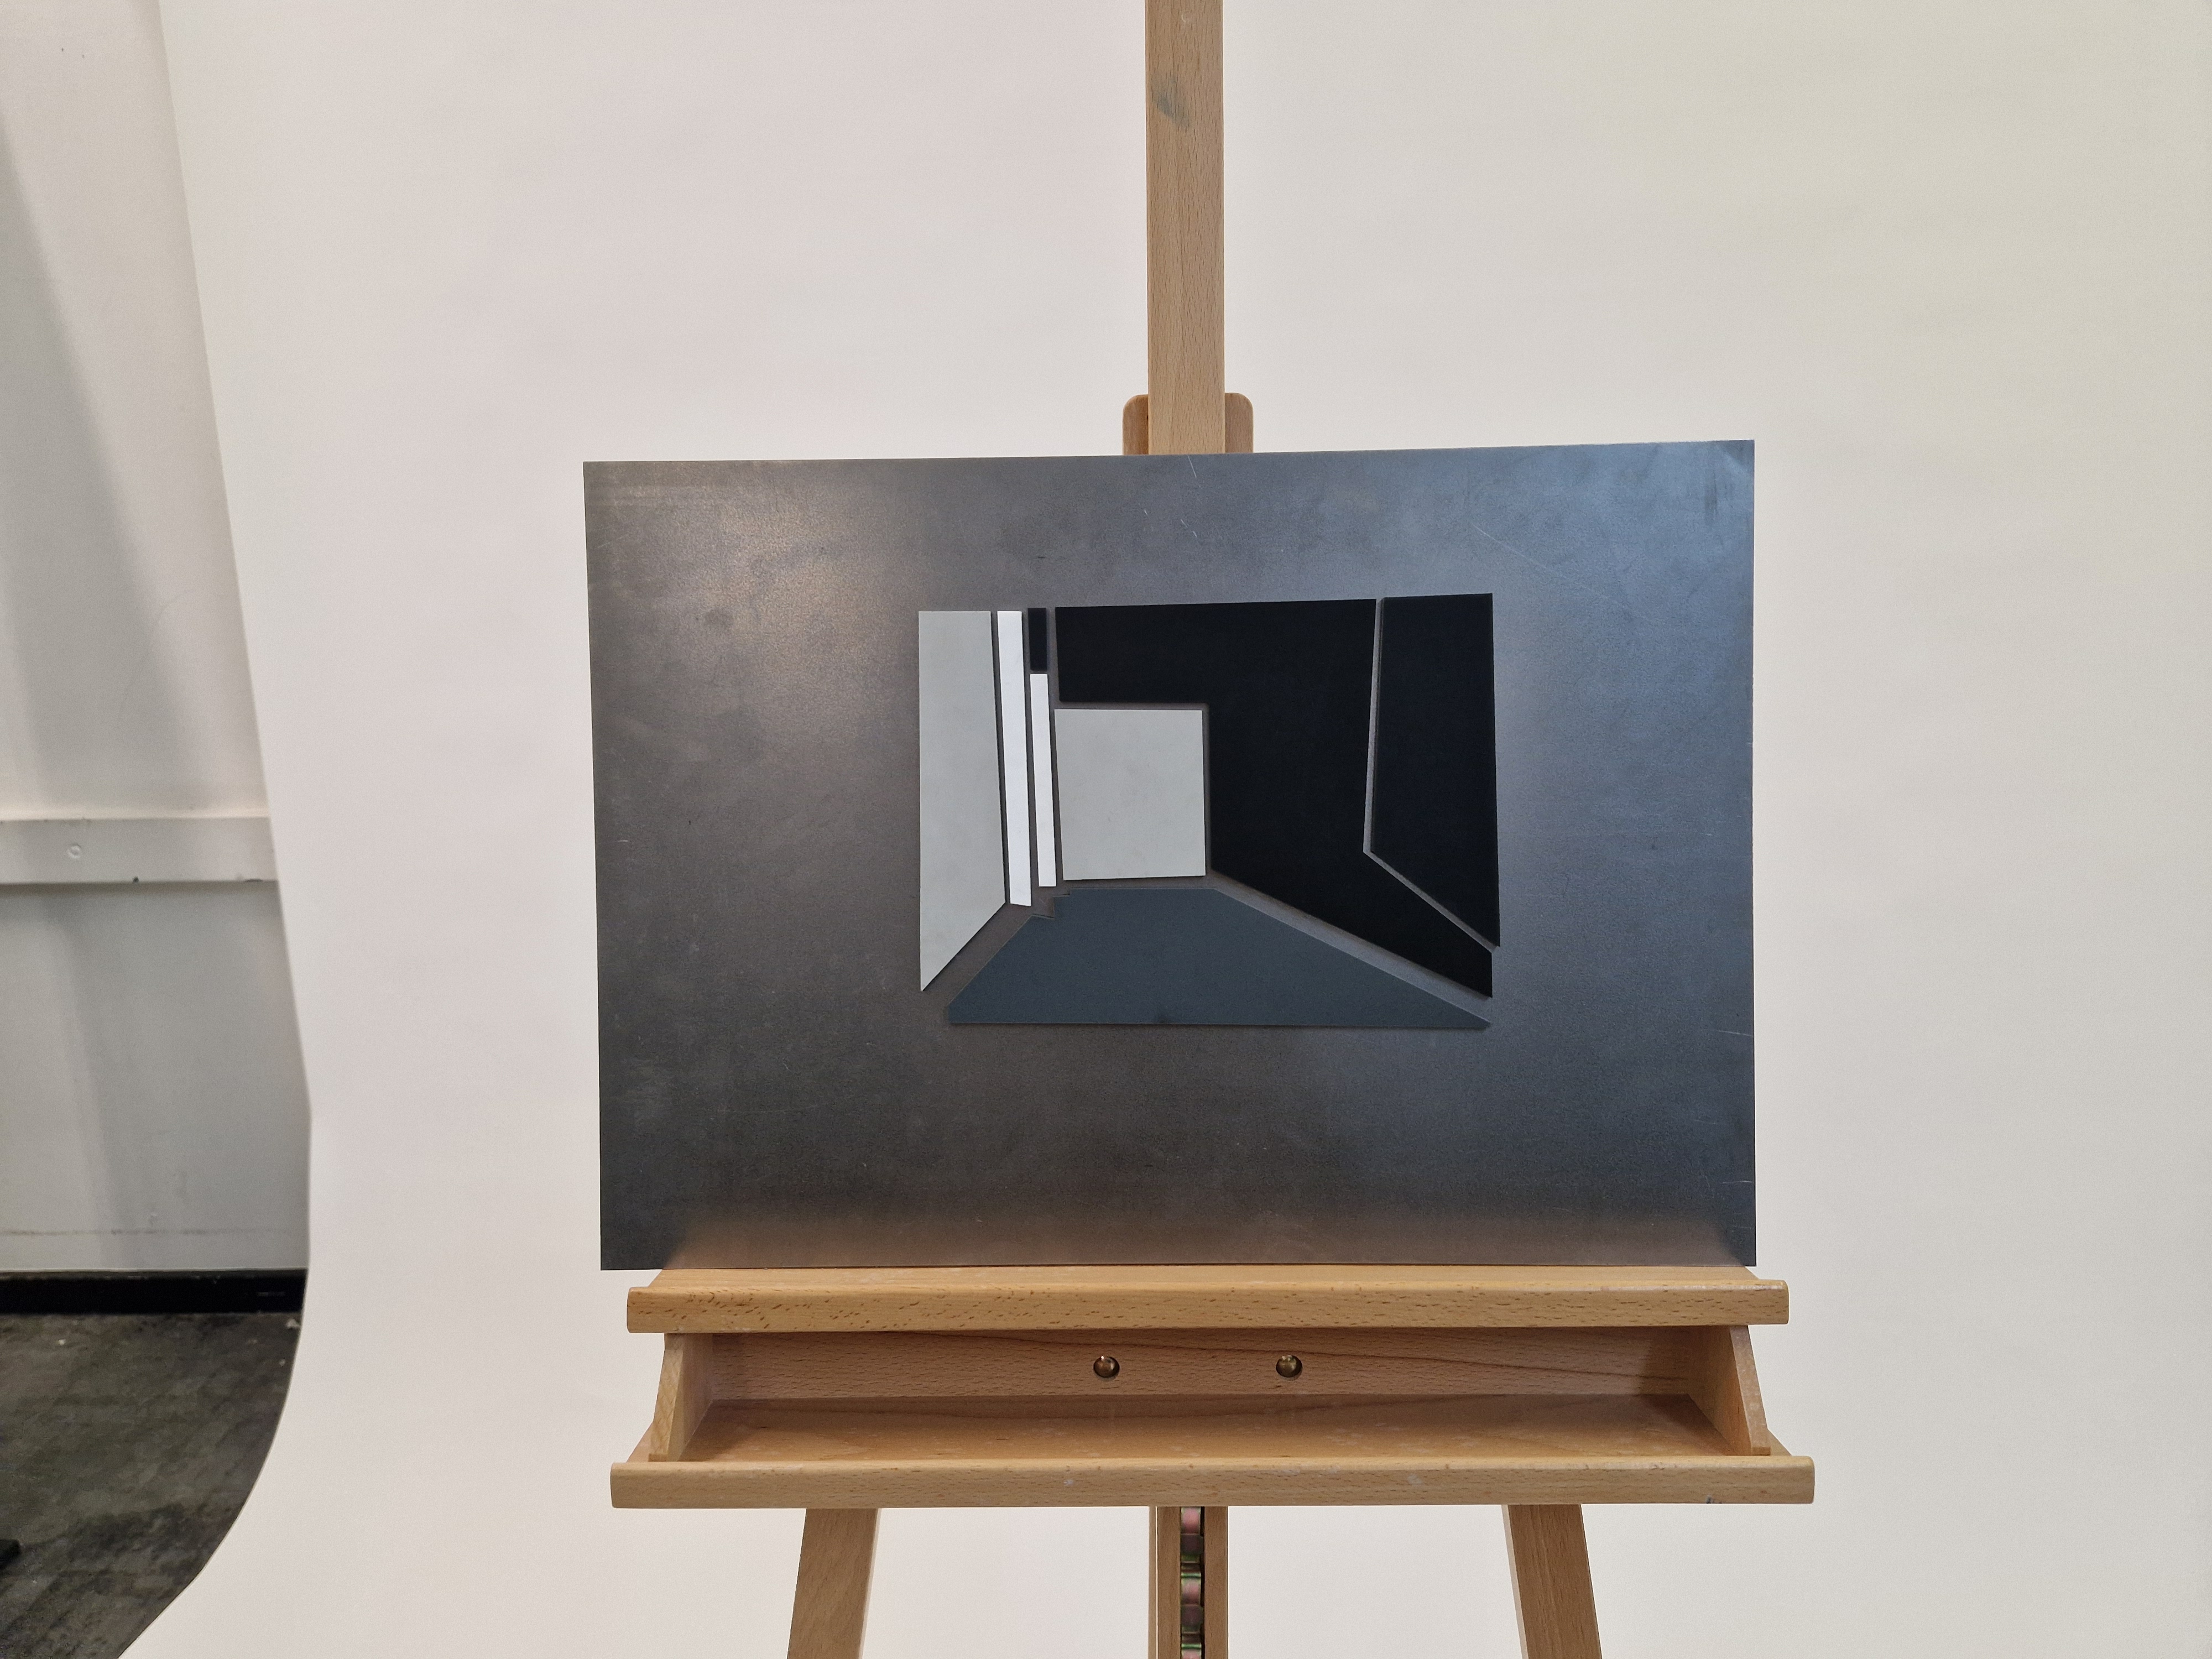
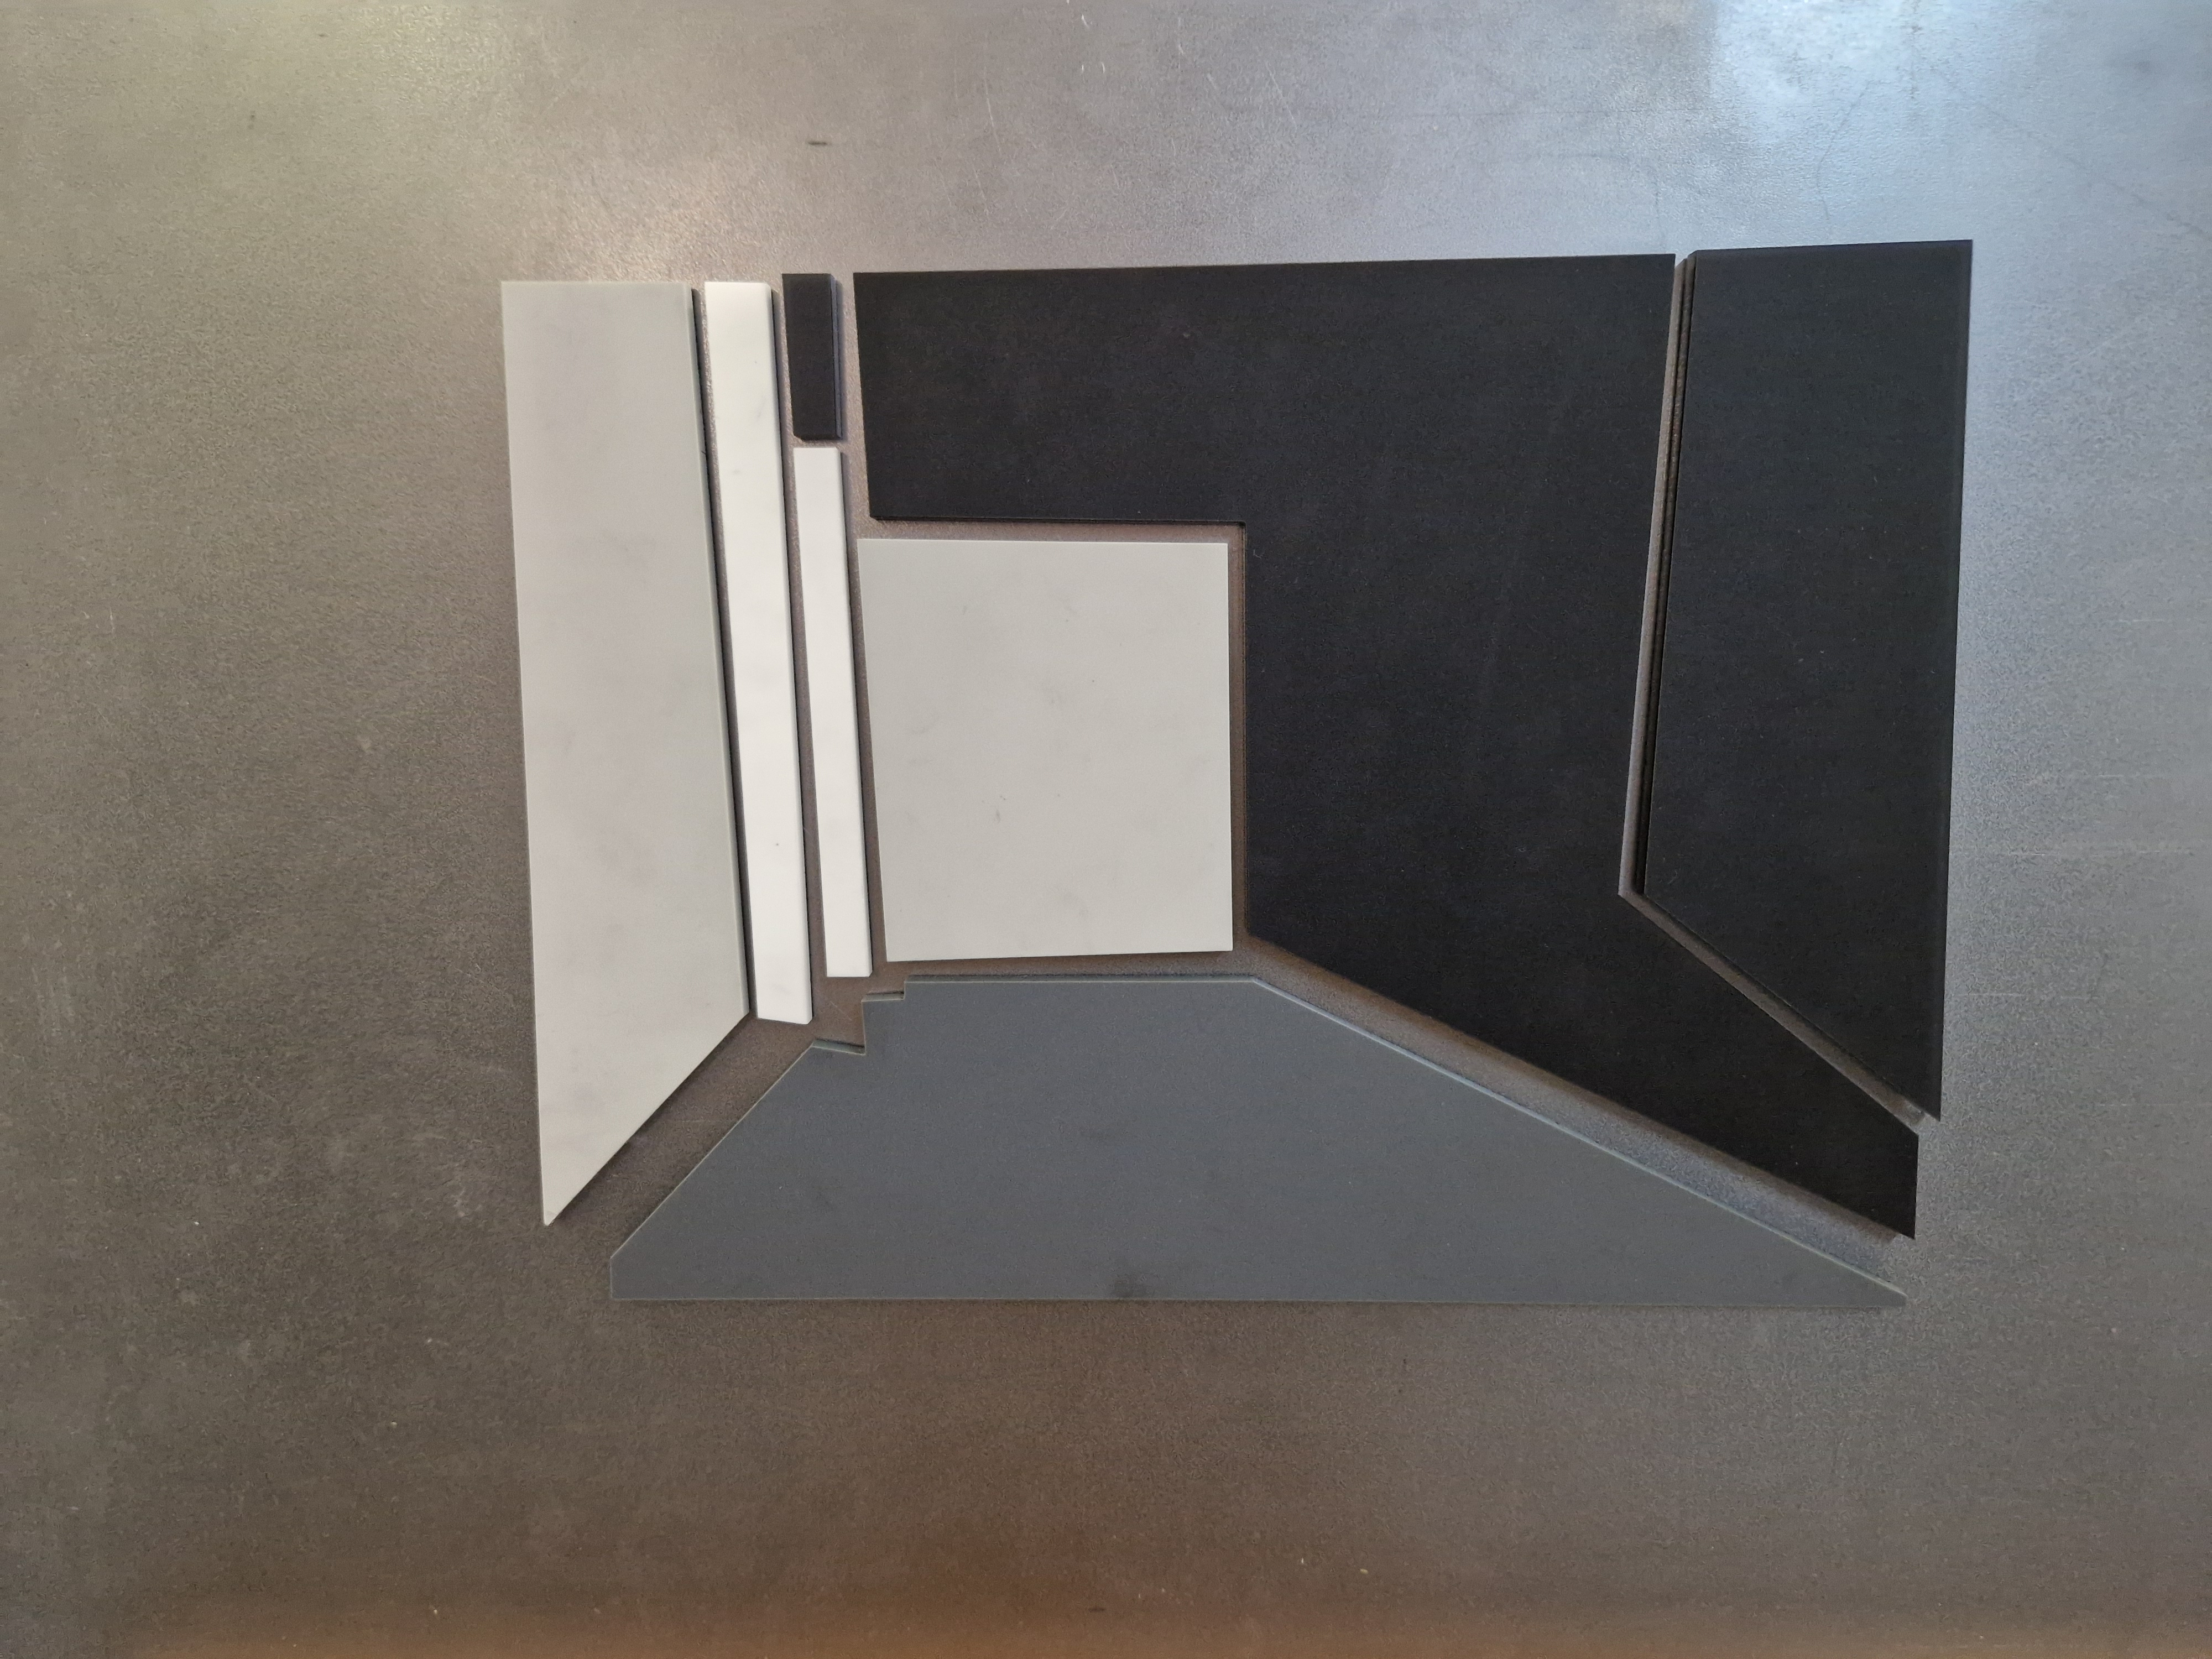
PRODUCT TABLE
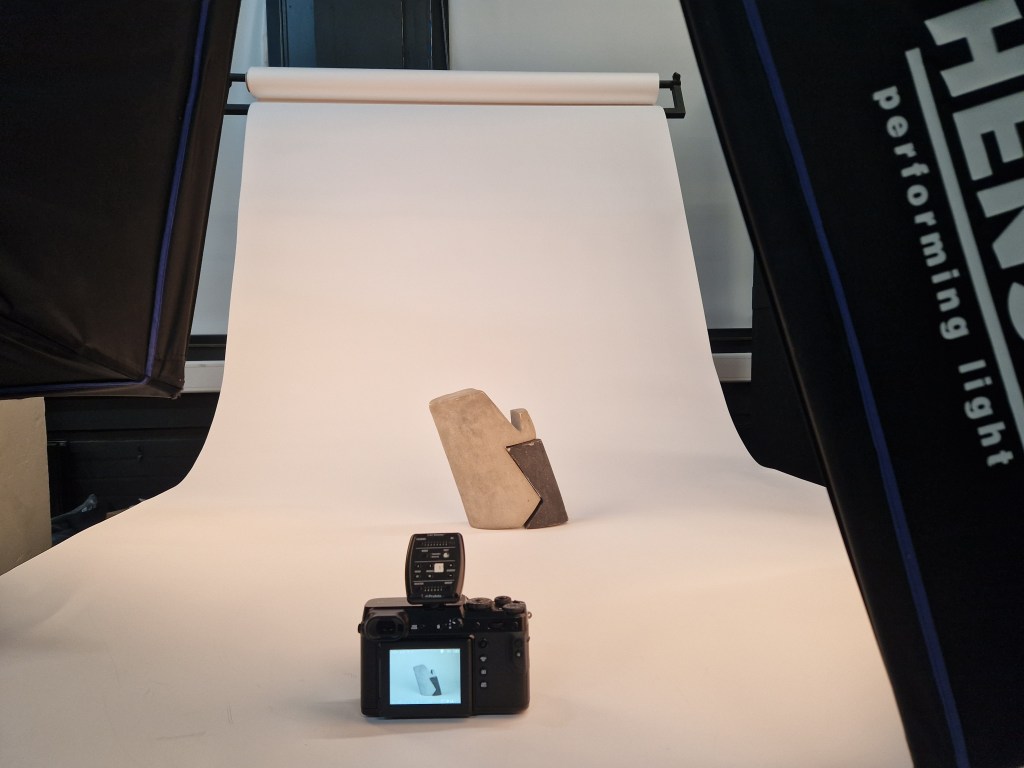
RESULTS RESULTS ON MAMIYA 645 PRO TL
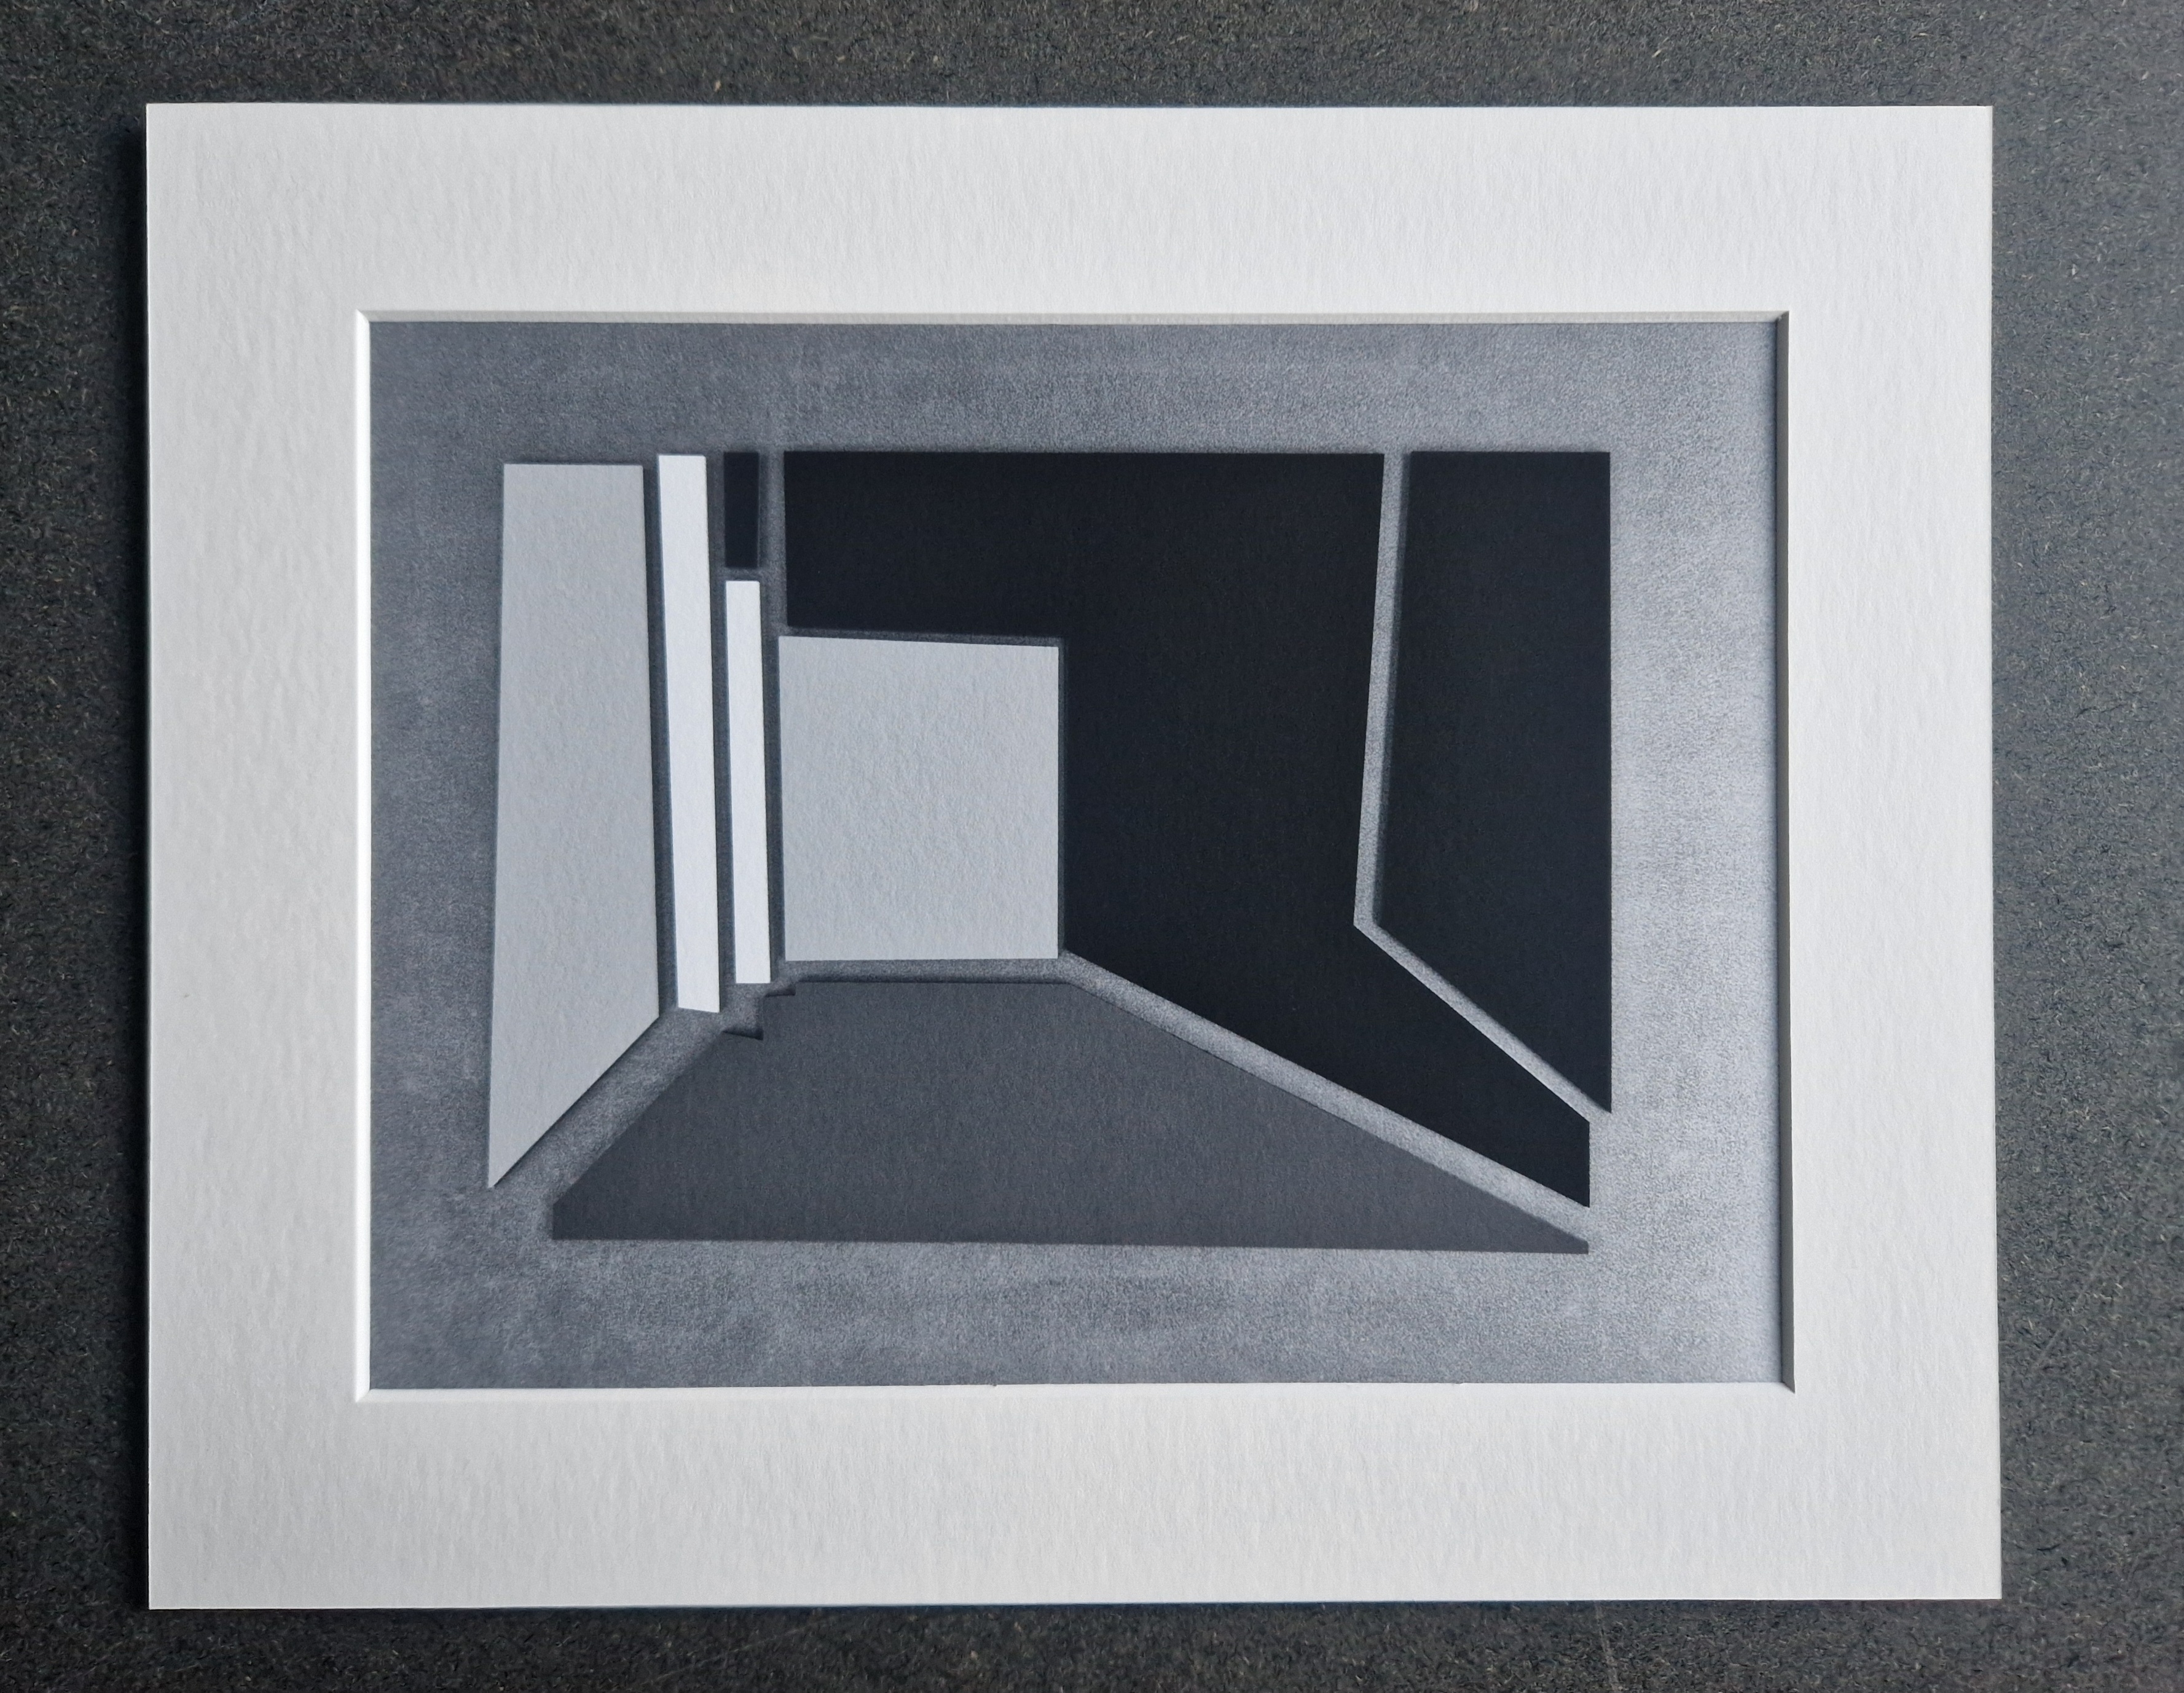
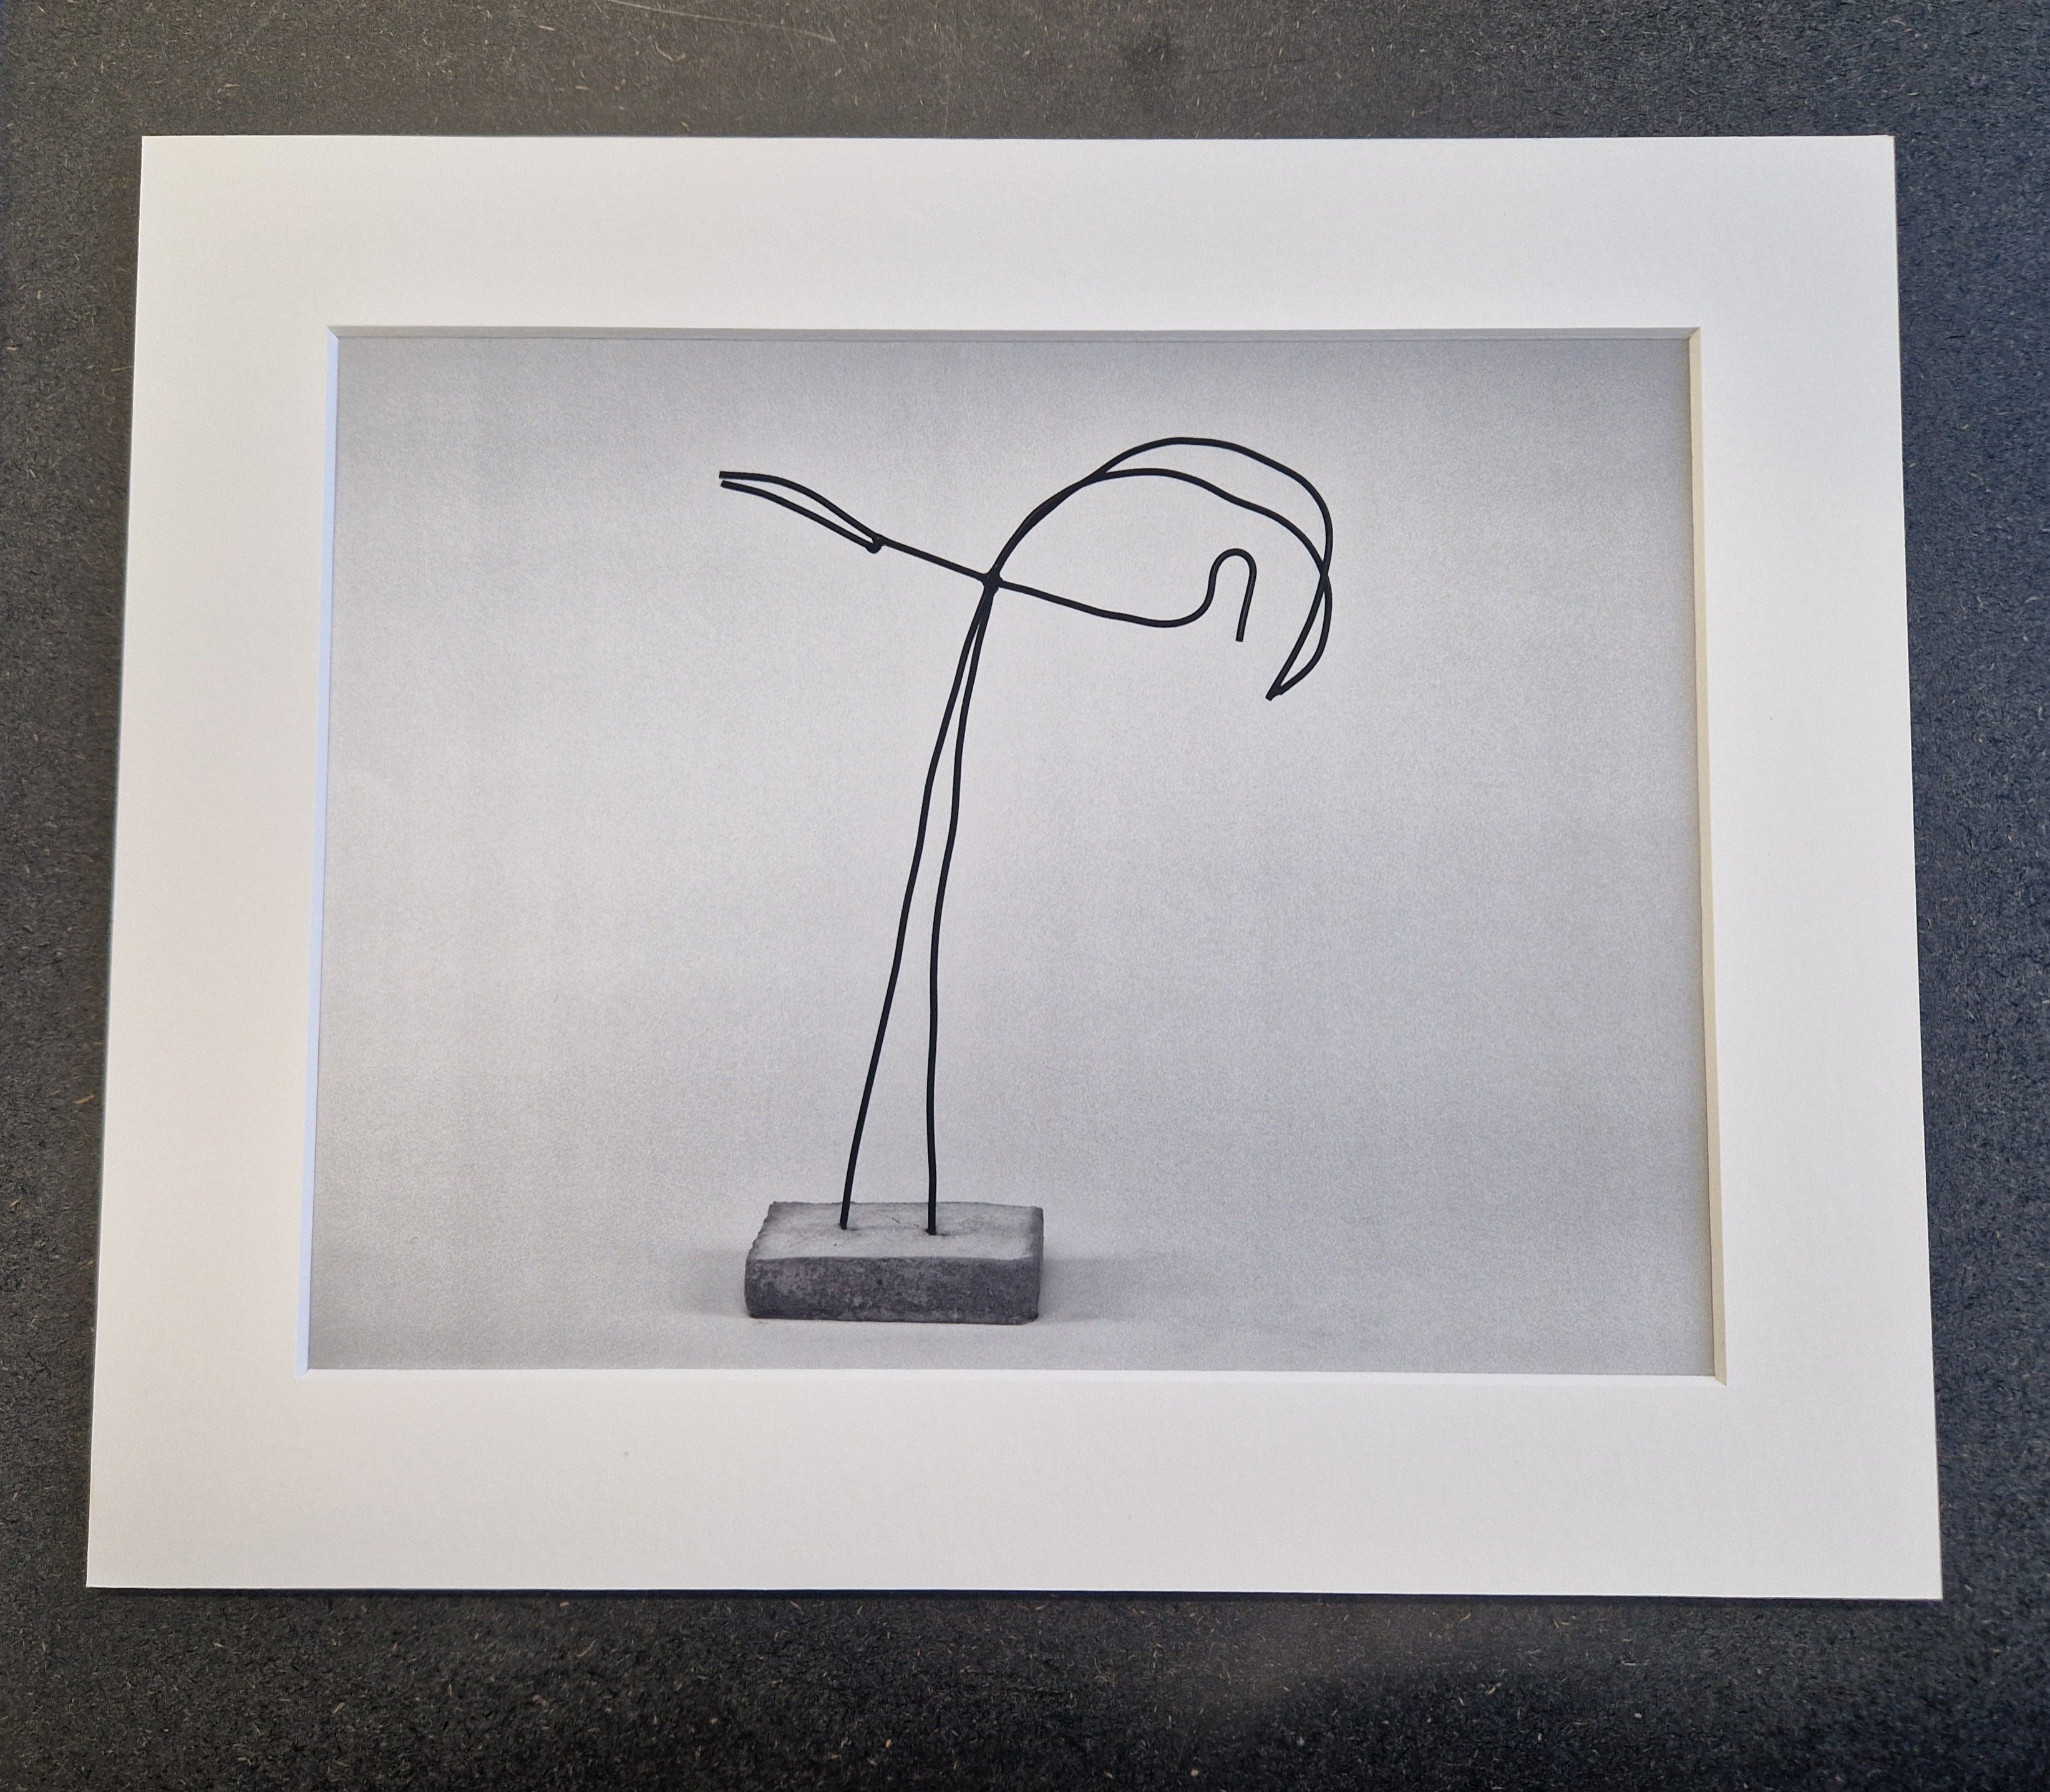
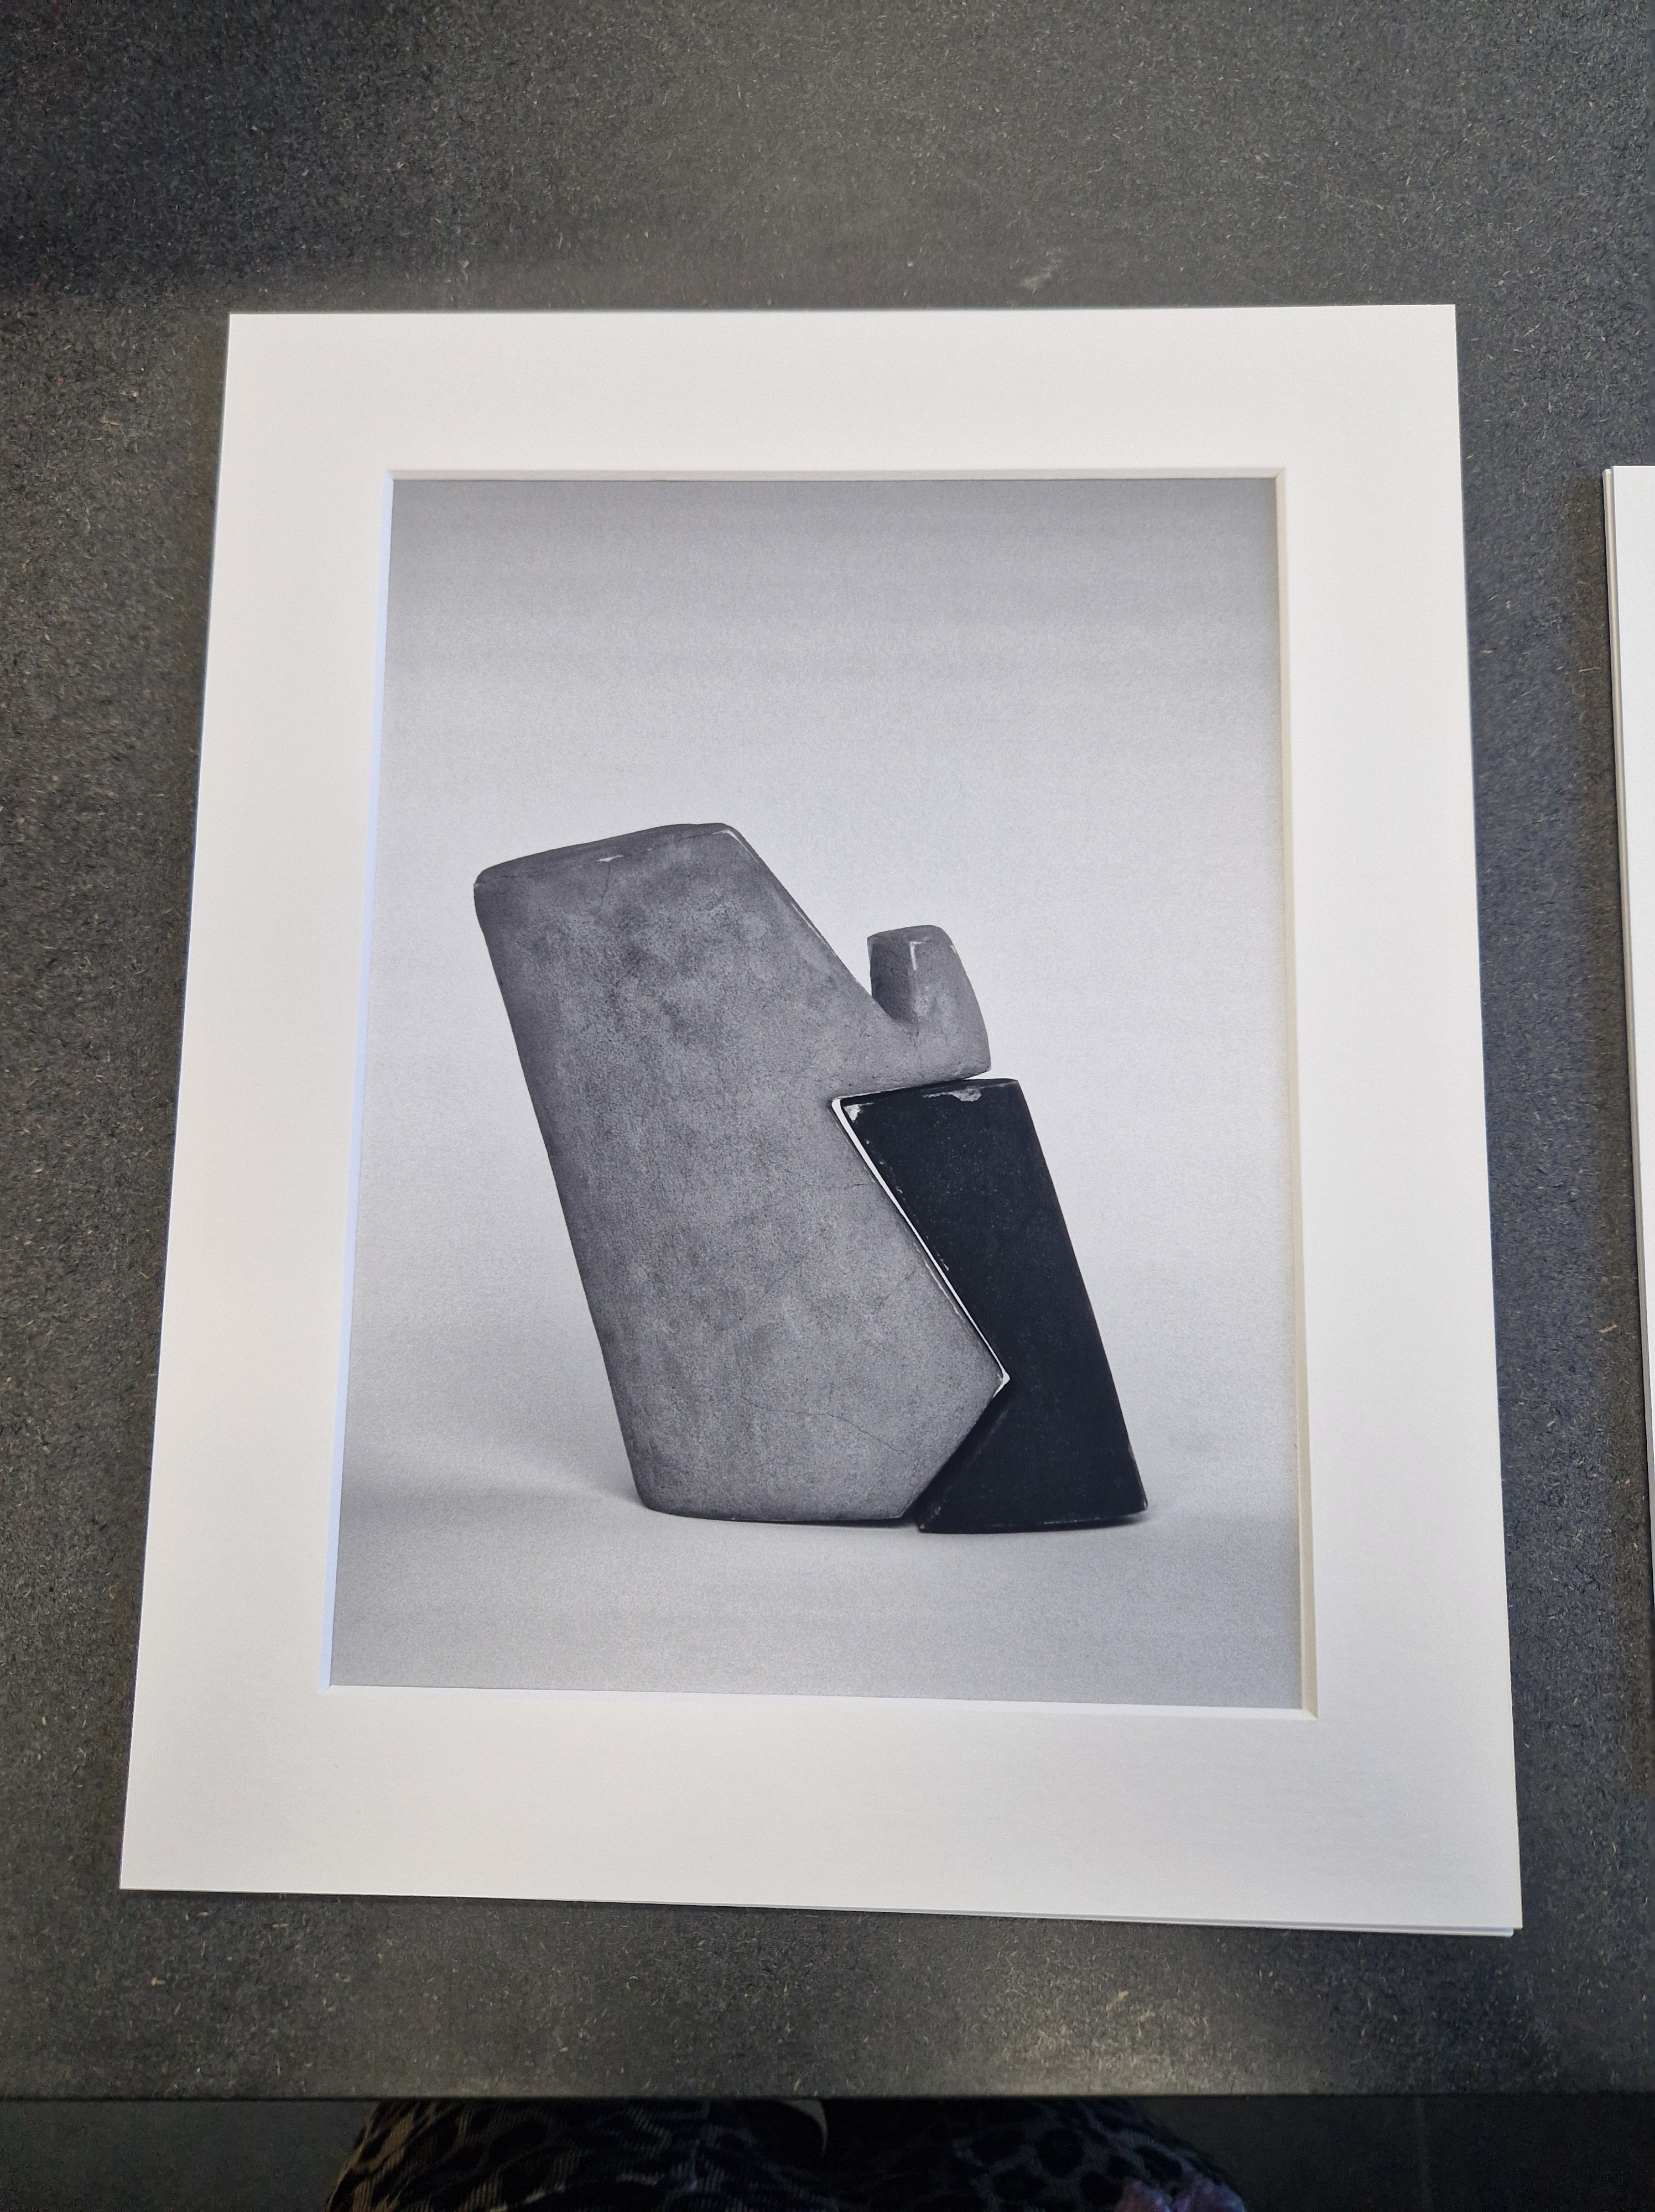
MAKING NEW STAND FOR WIRE SCULPTURE
I was not completely happy with the stand and the way the sculpture was sitting in it, so I decided to redo it. This time, I glued the bottom into a small wooden block first to allow more centred positioning and for the sculpture to stand up straighter. Perfection is not possible, but it is essential to refine and improve things where possible.
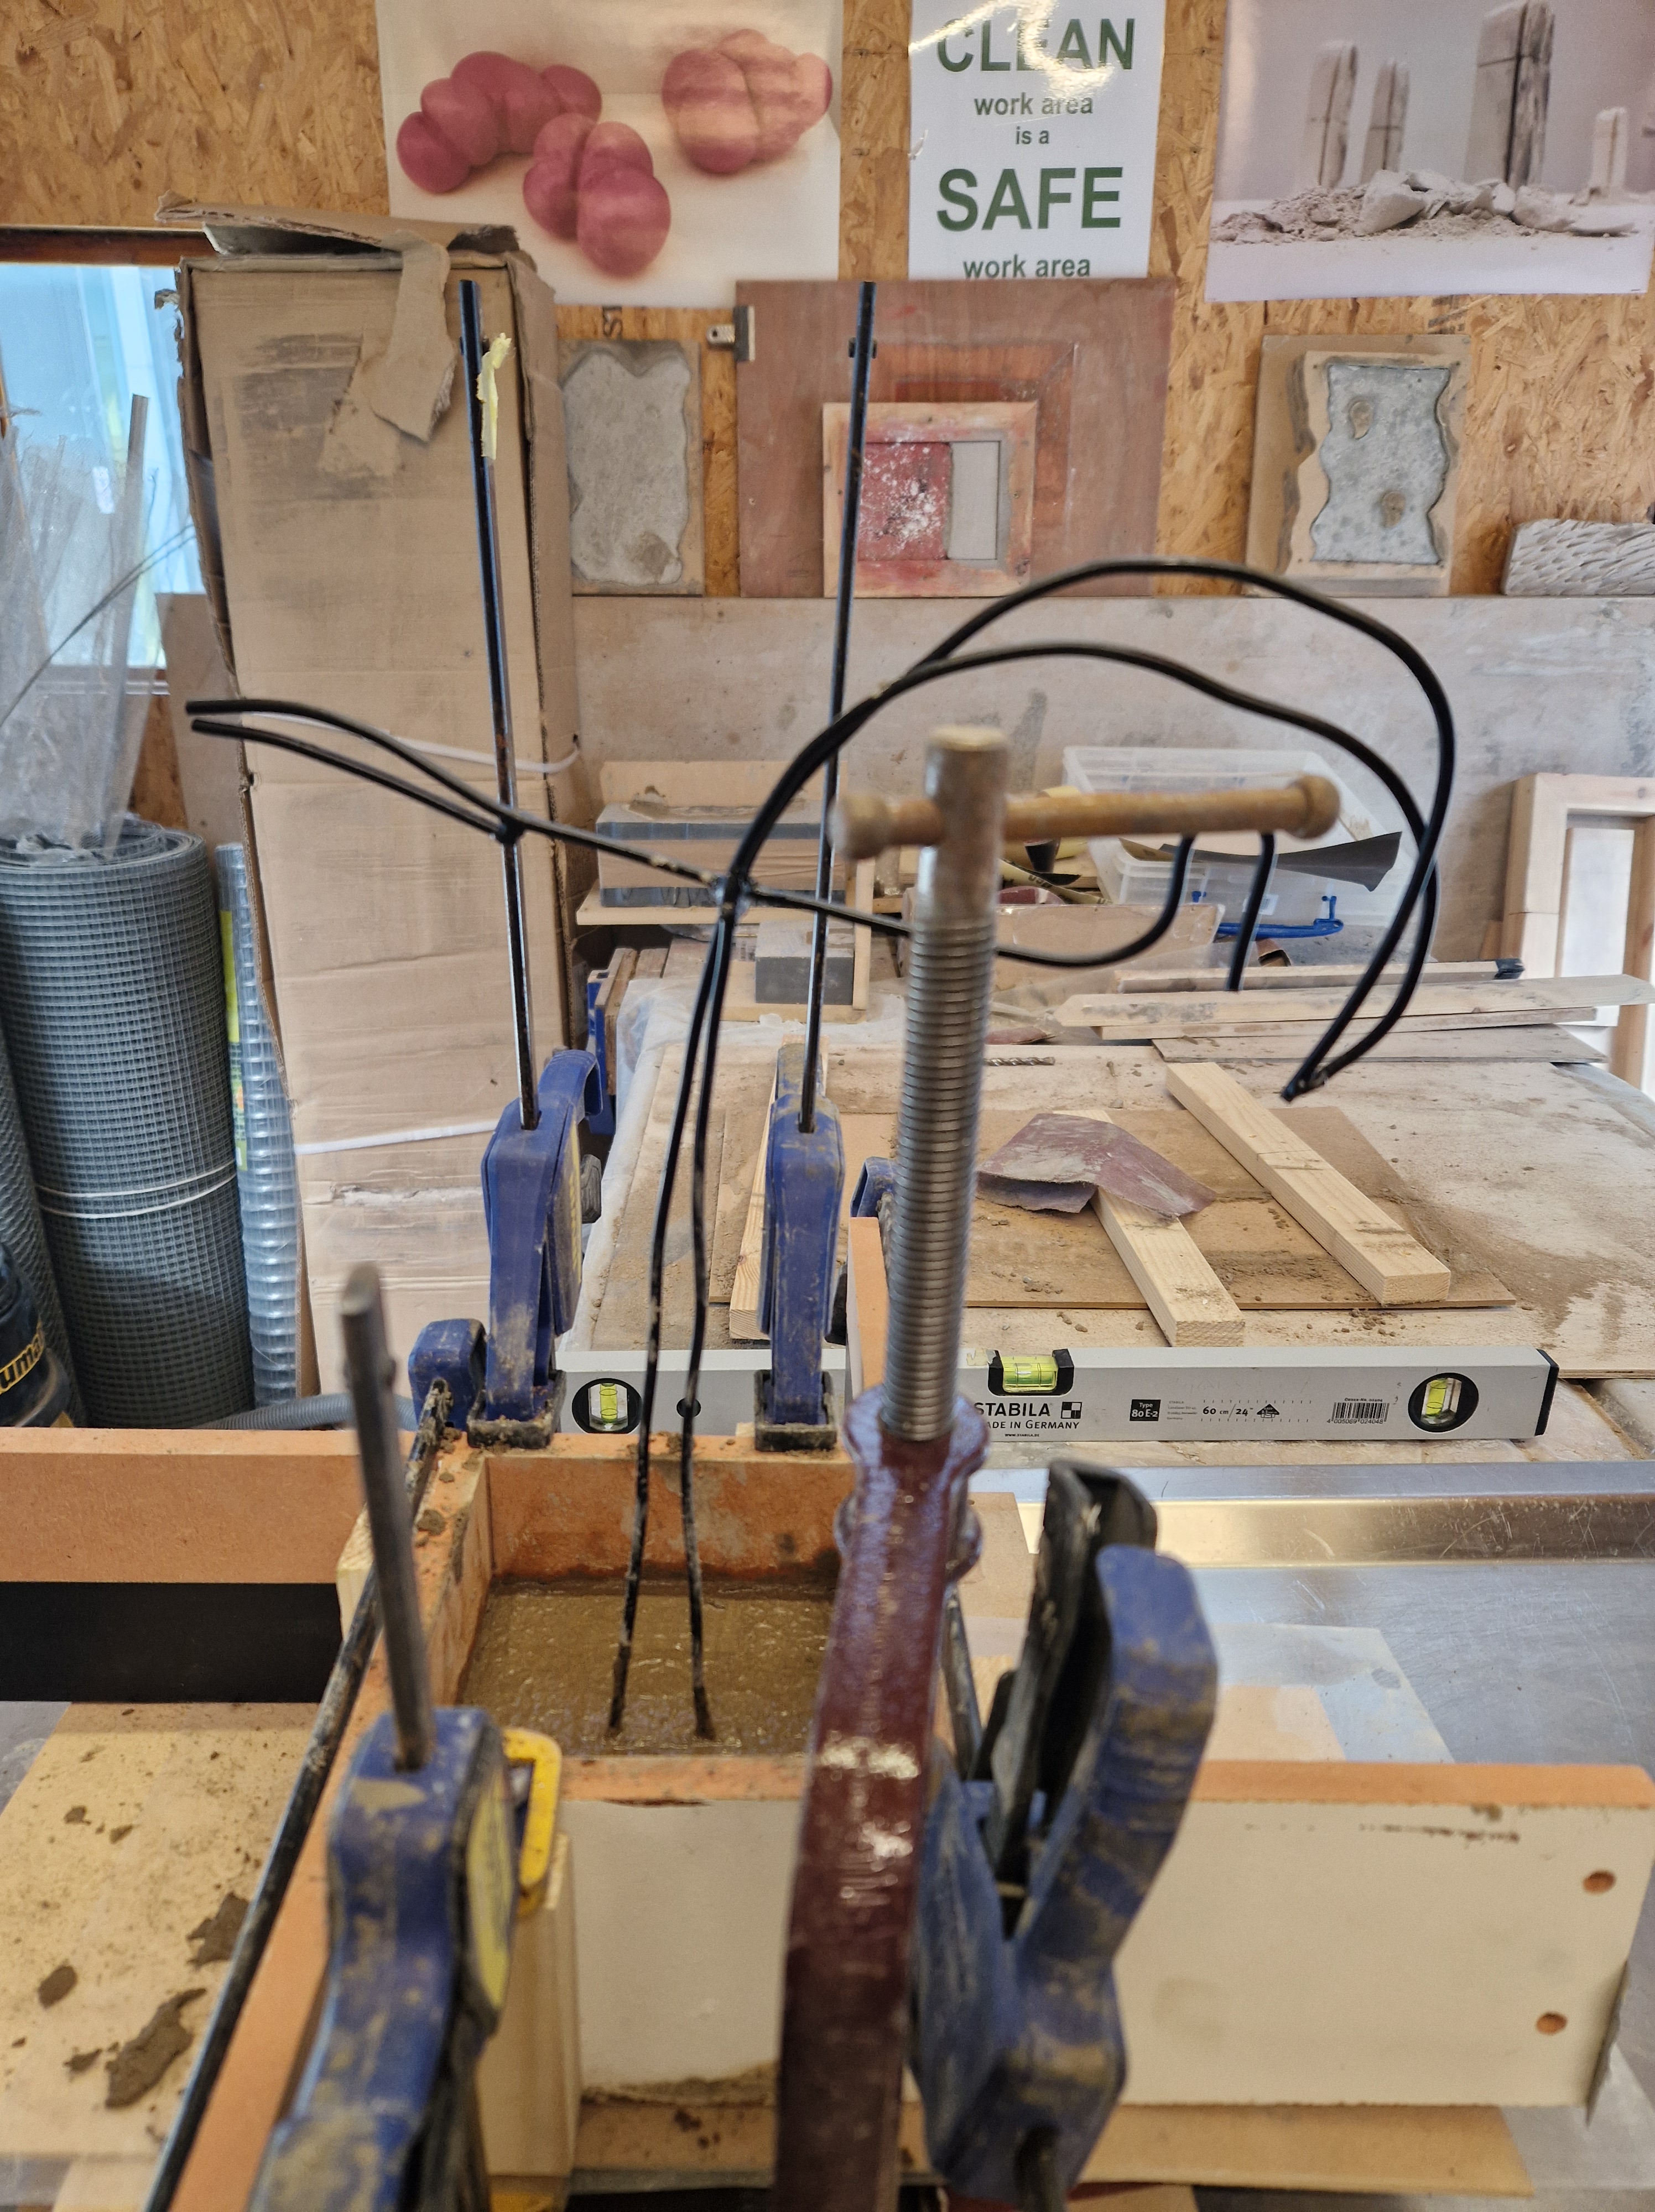
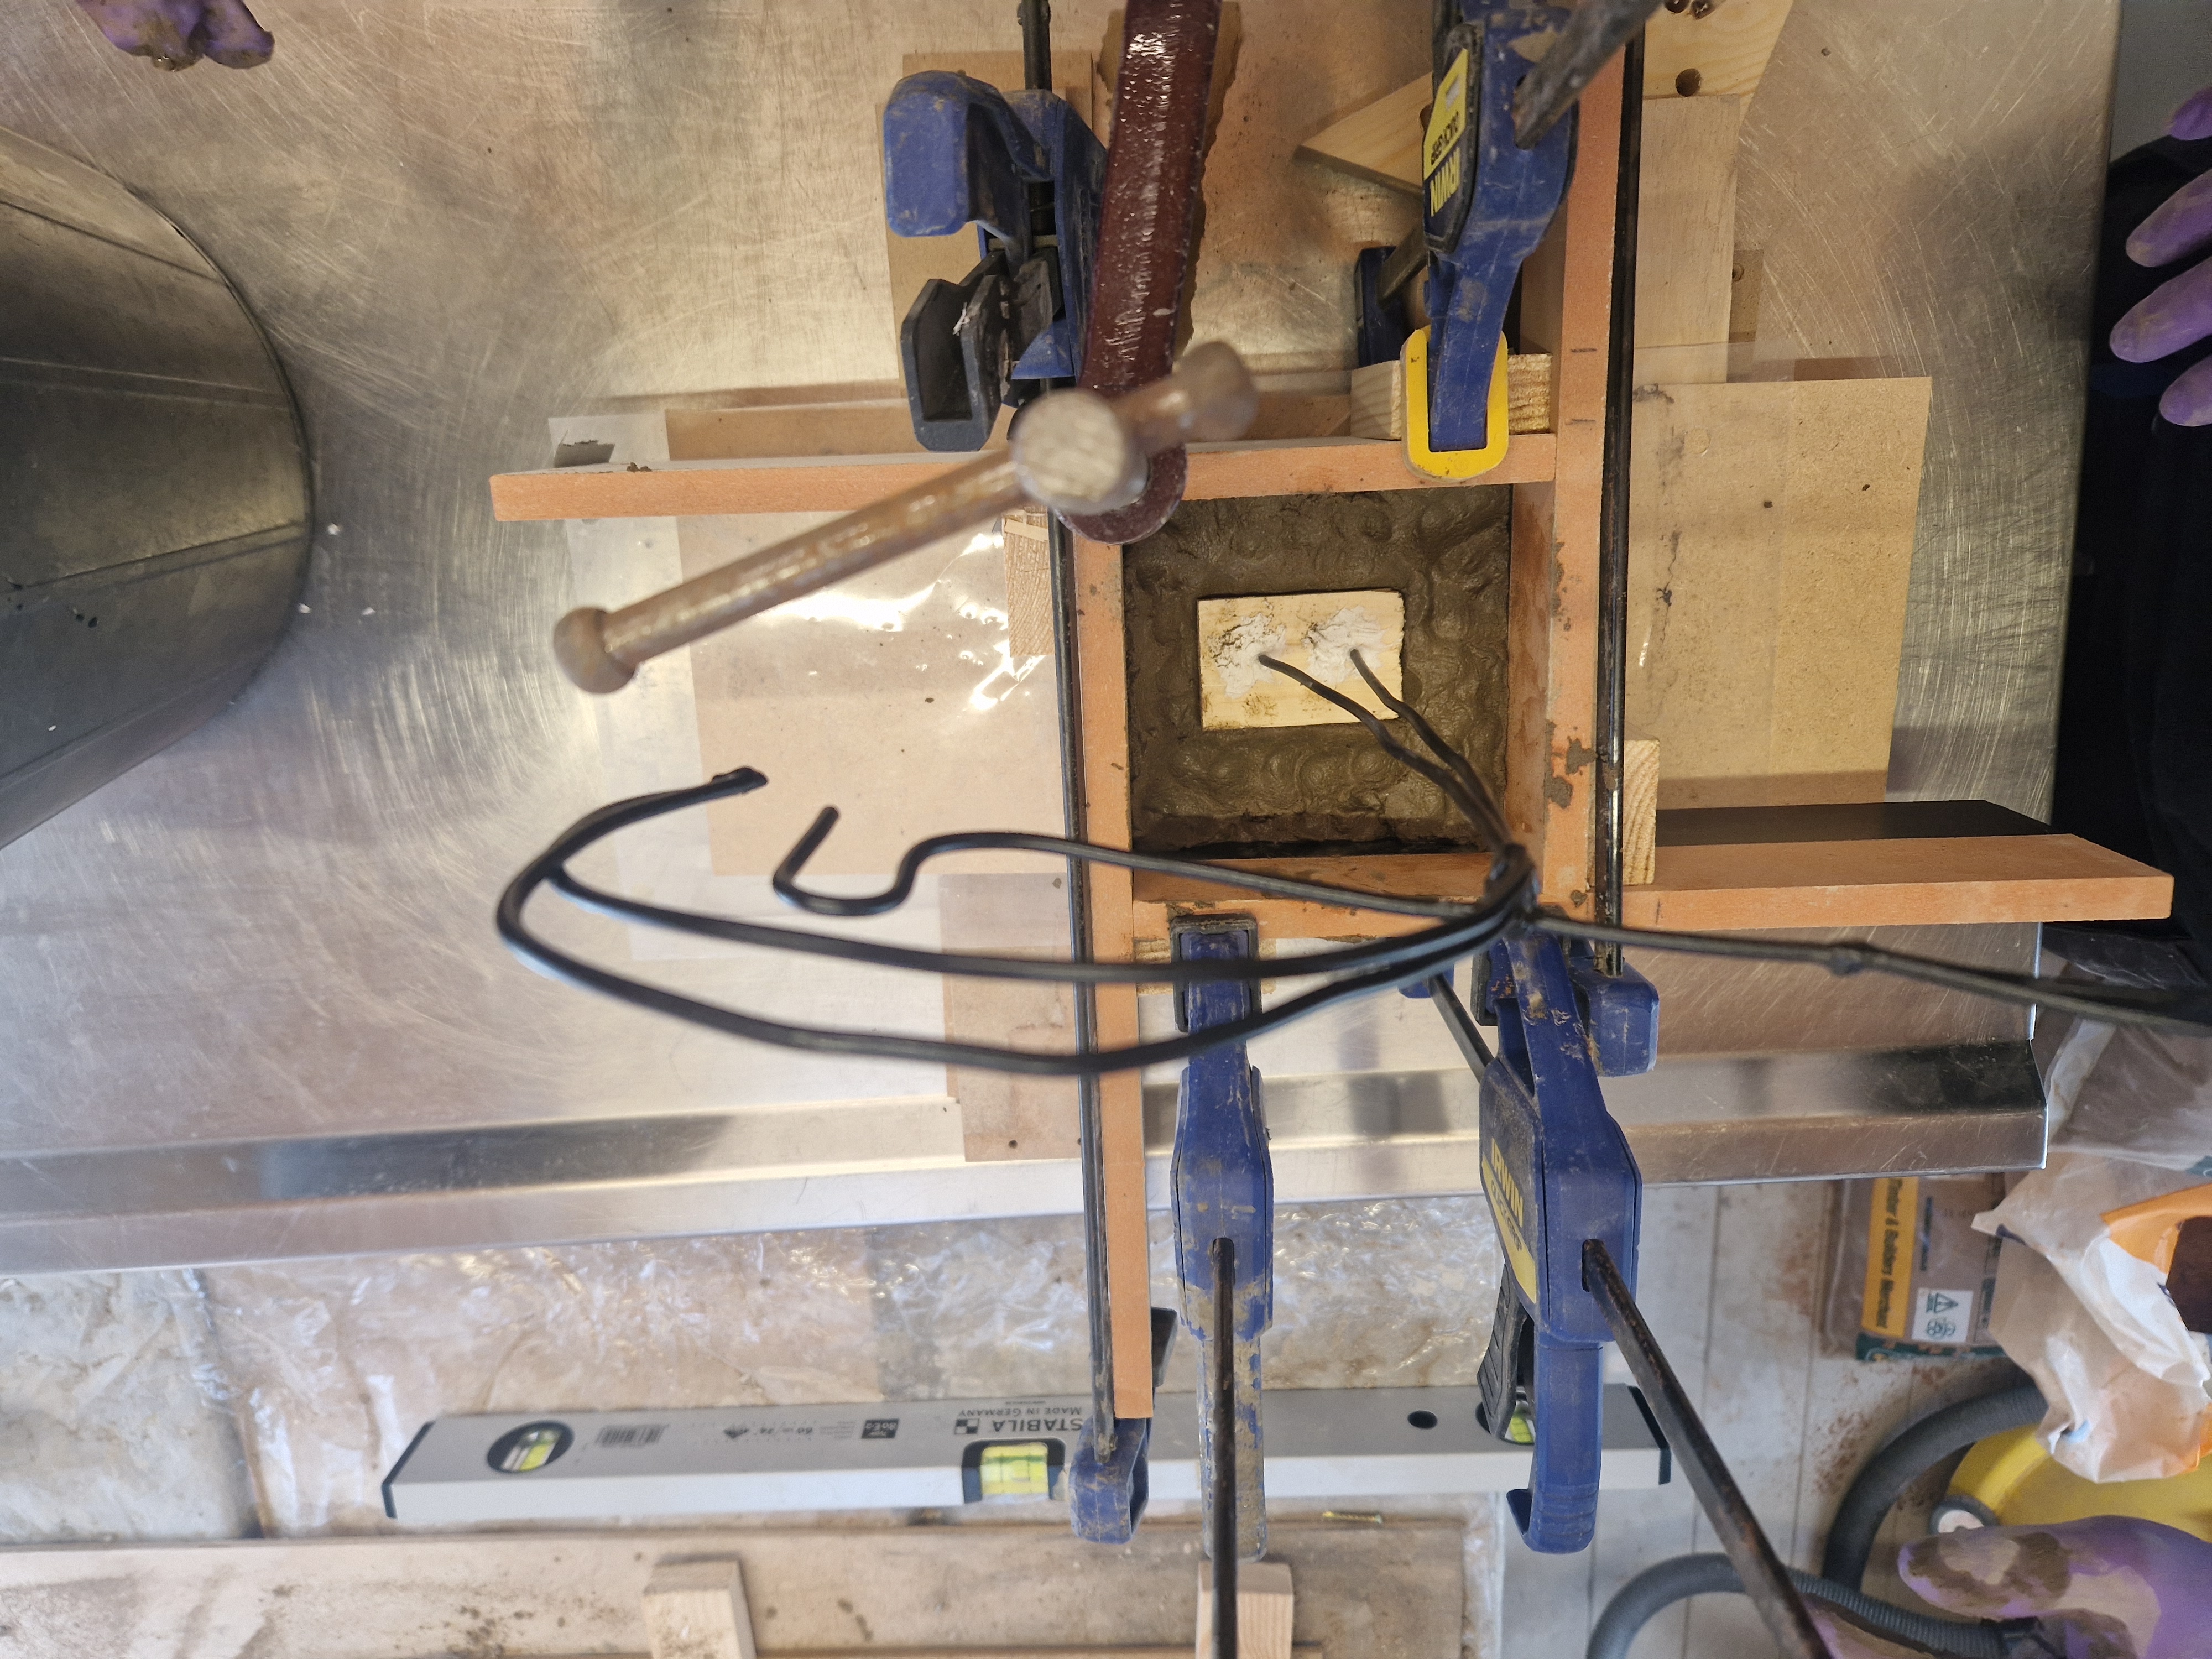
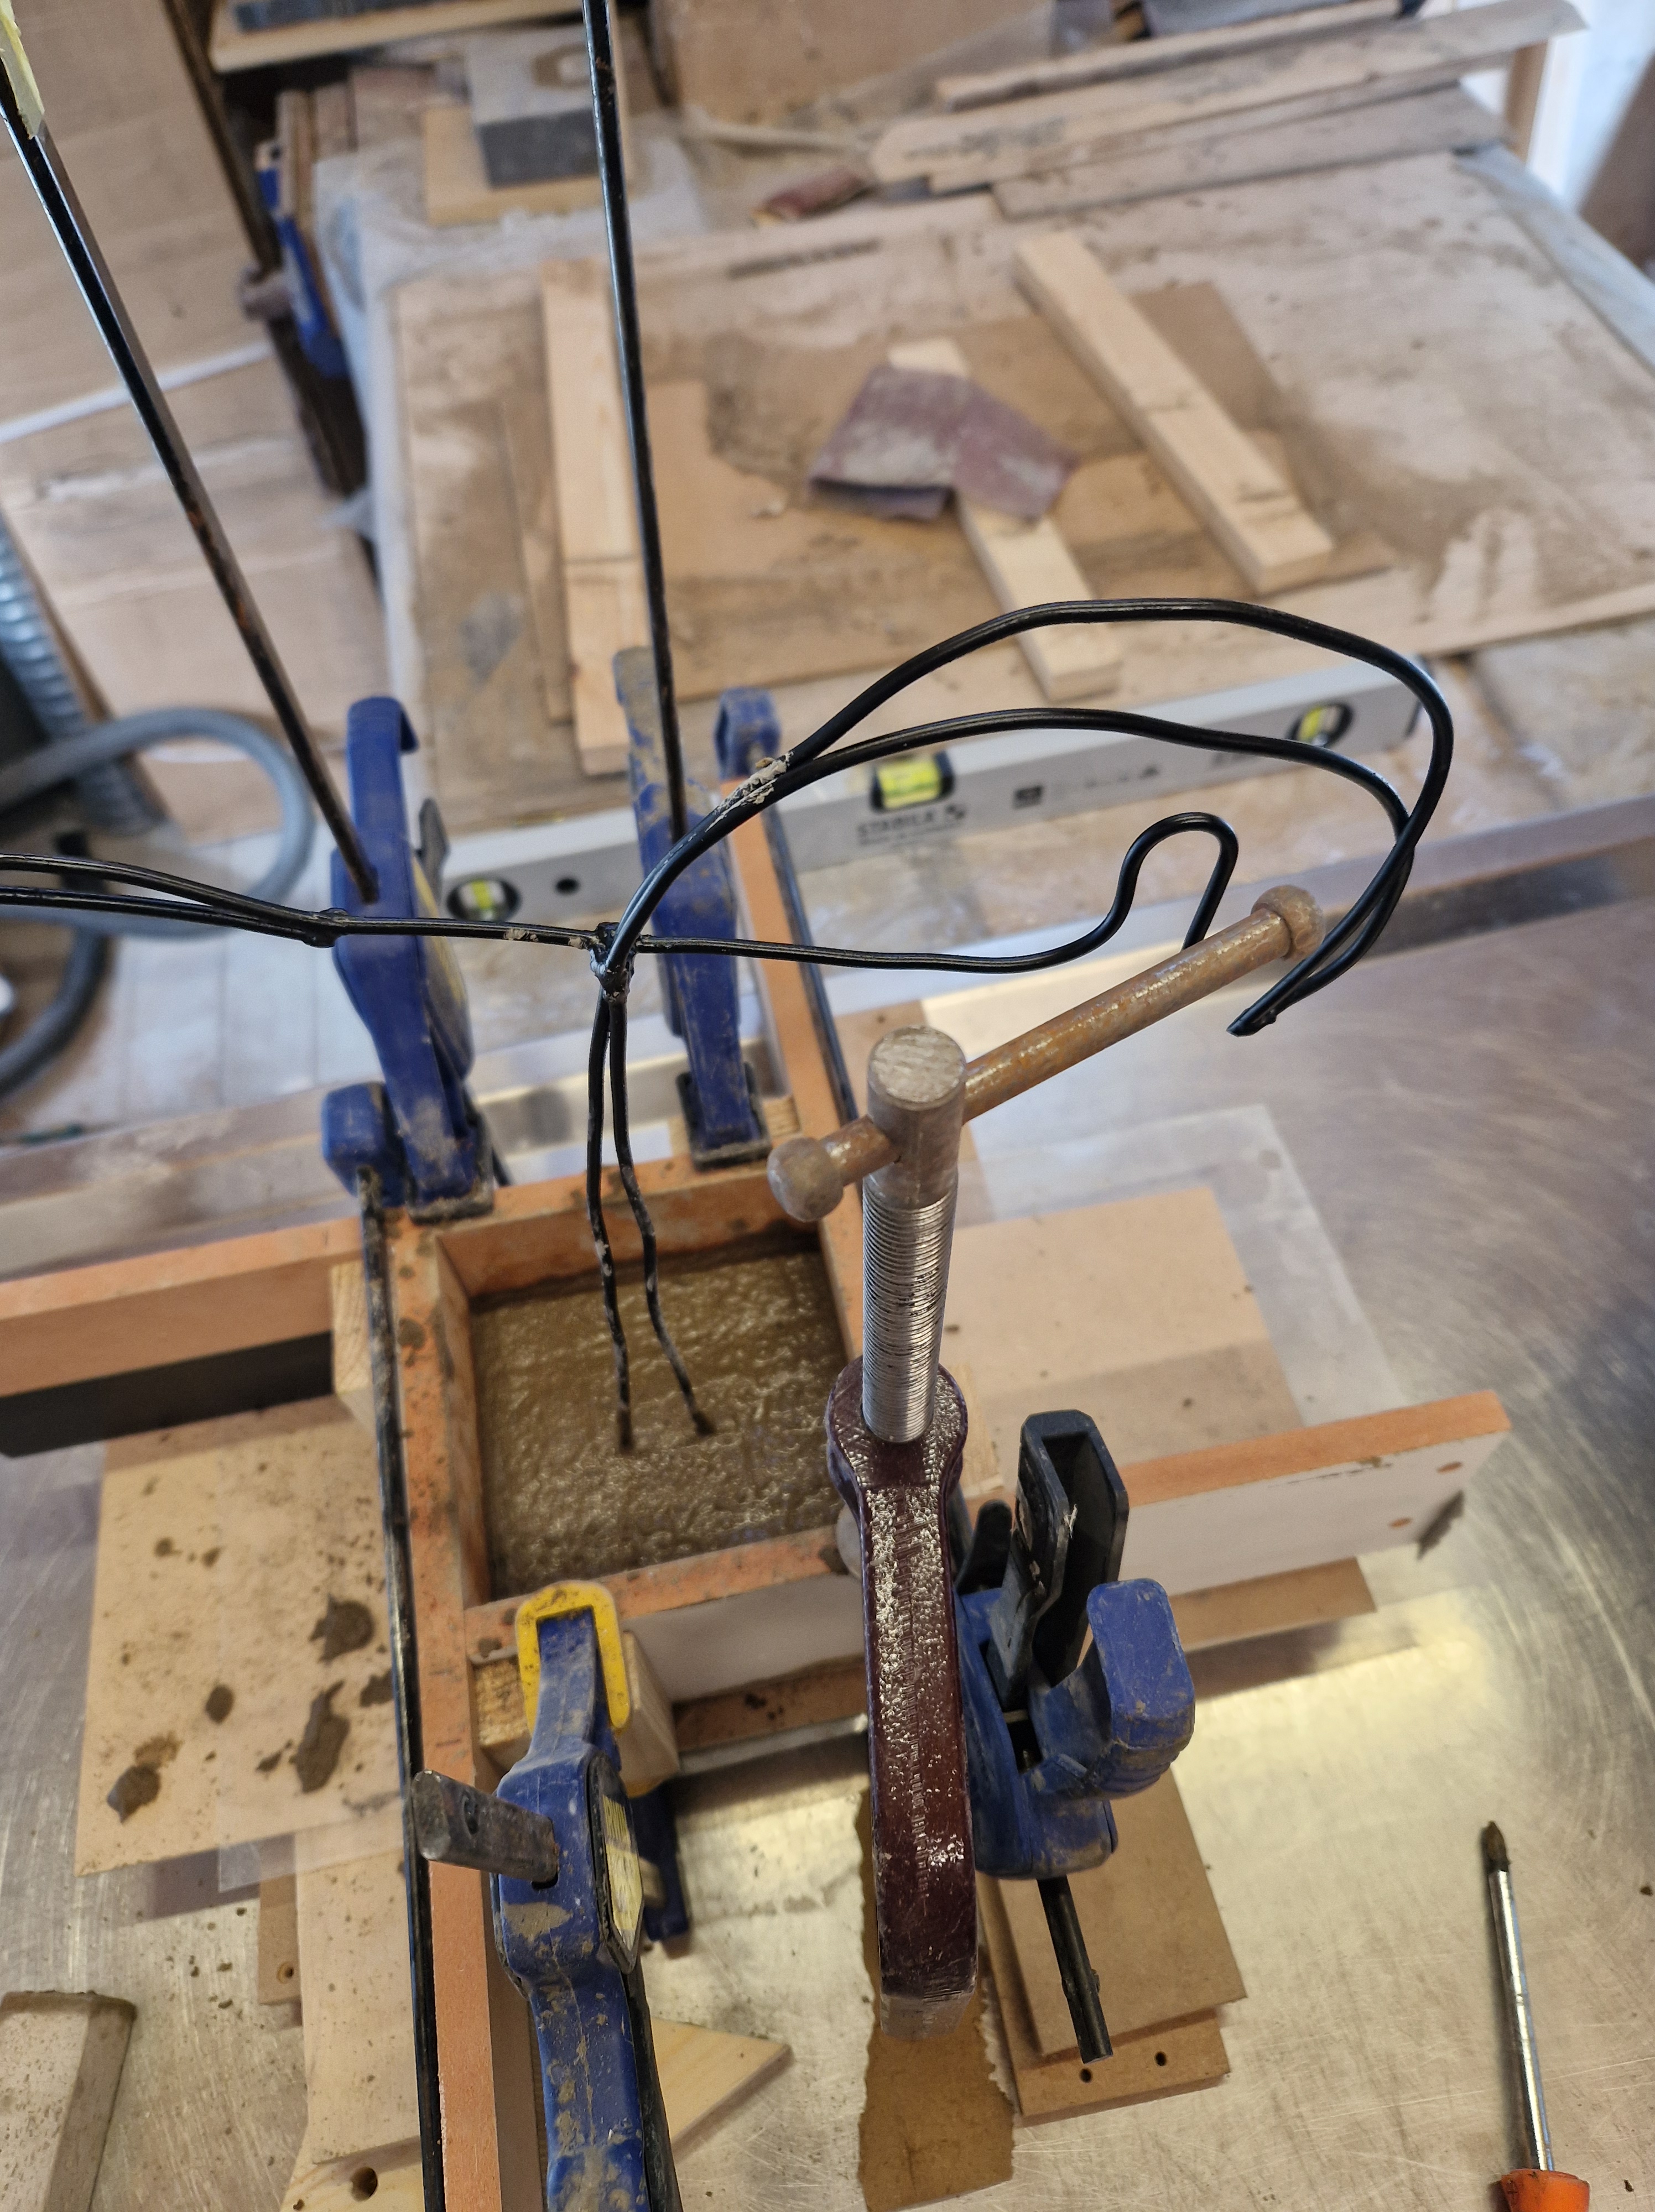
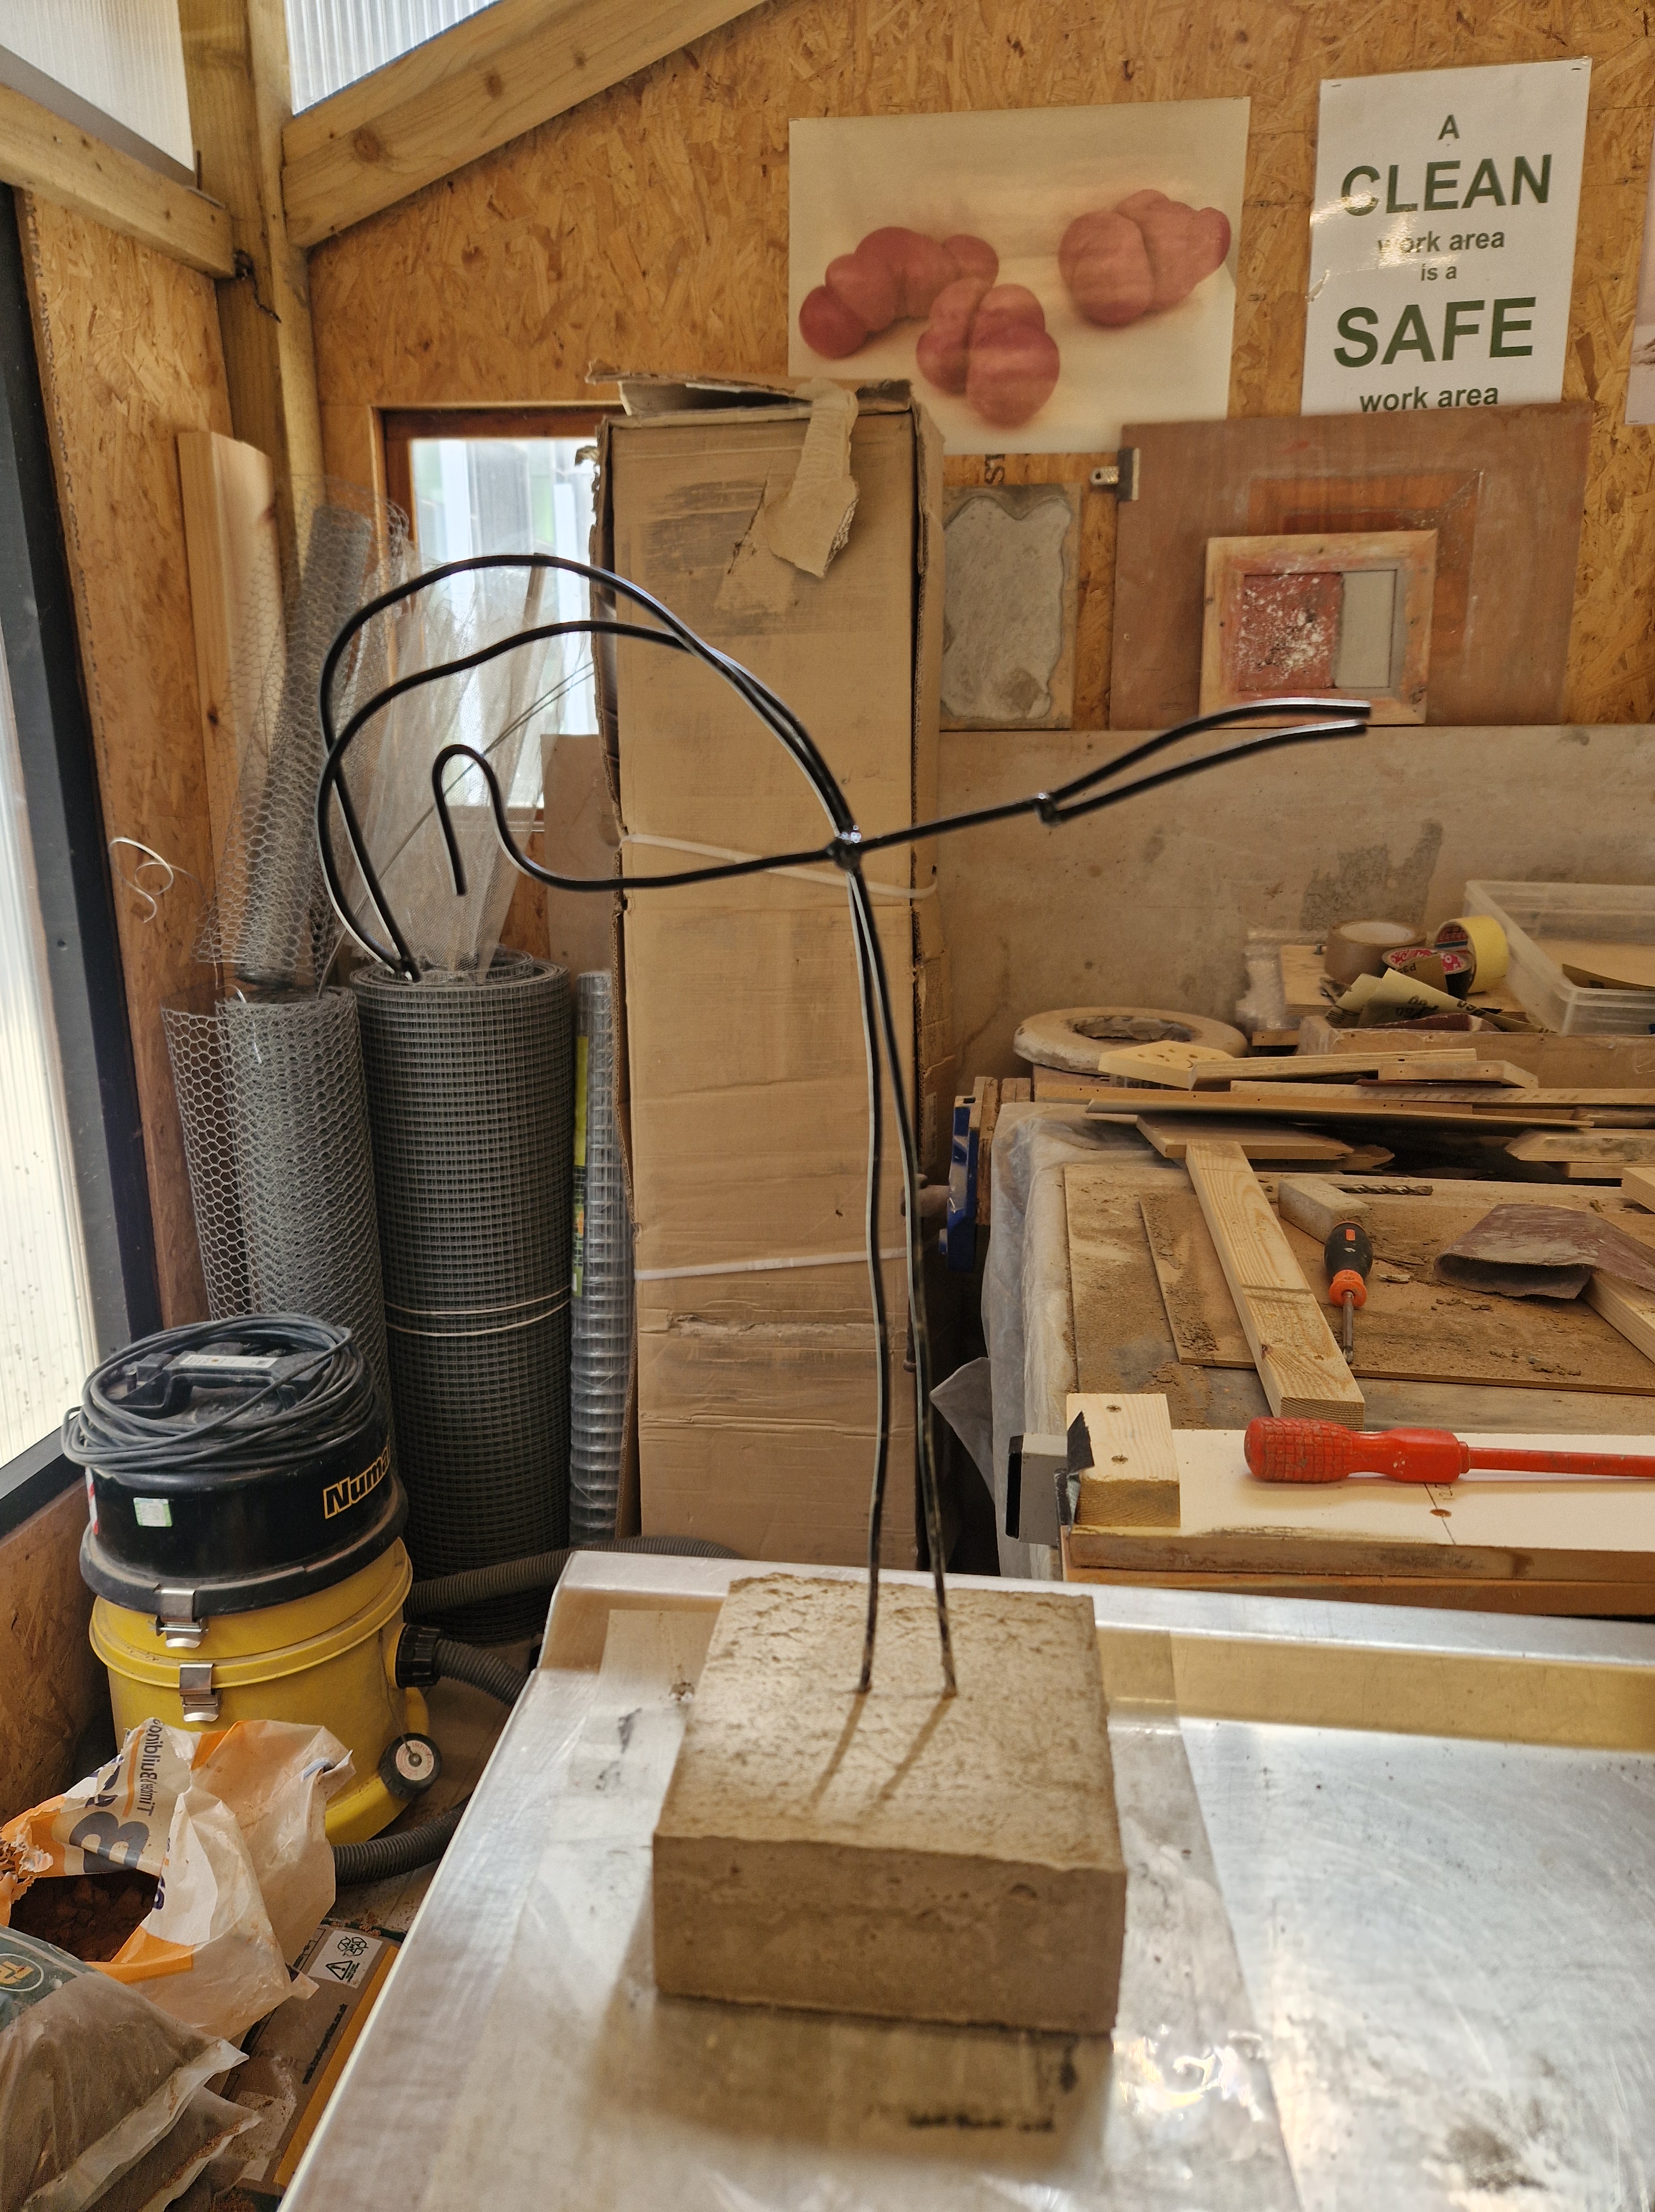
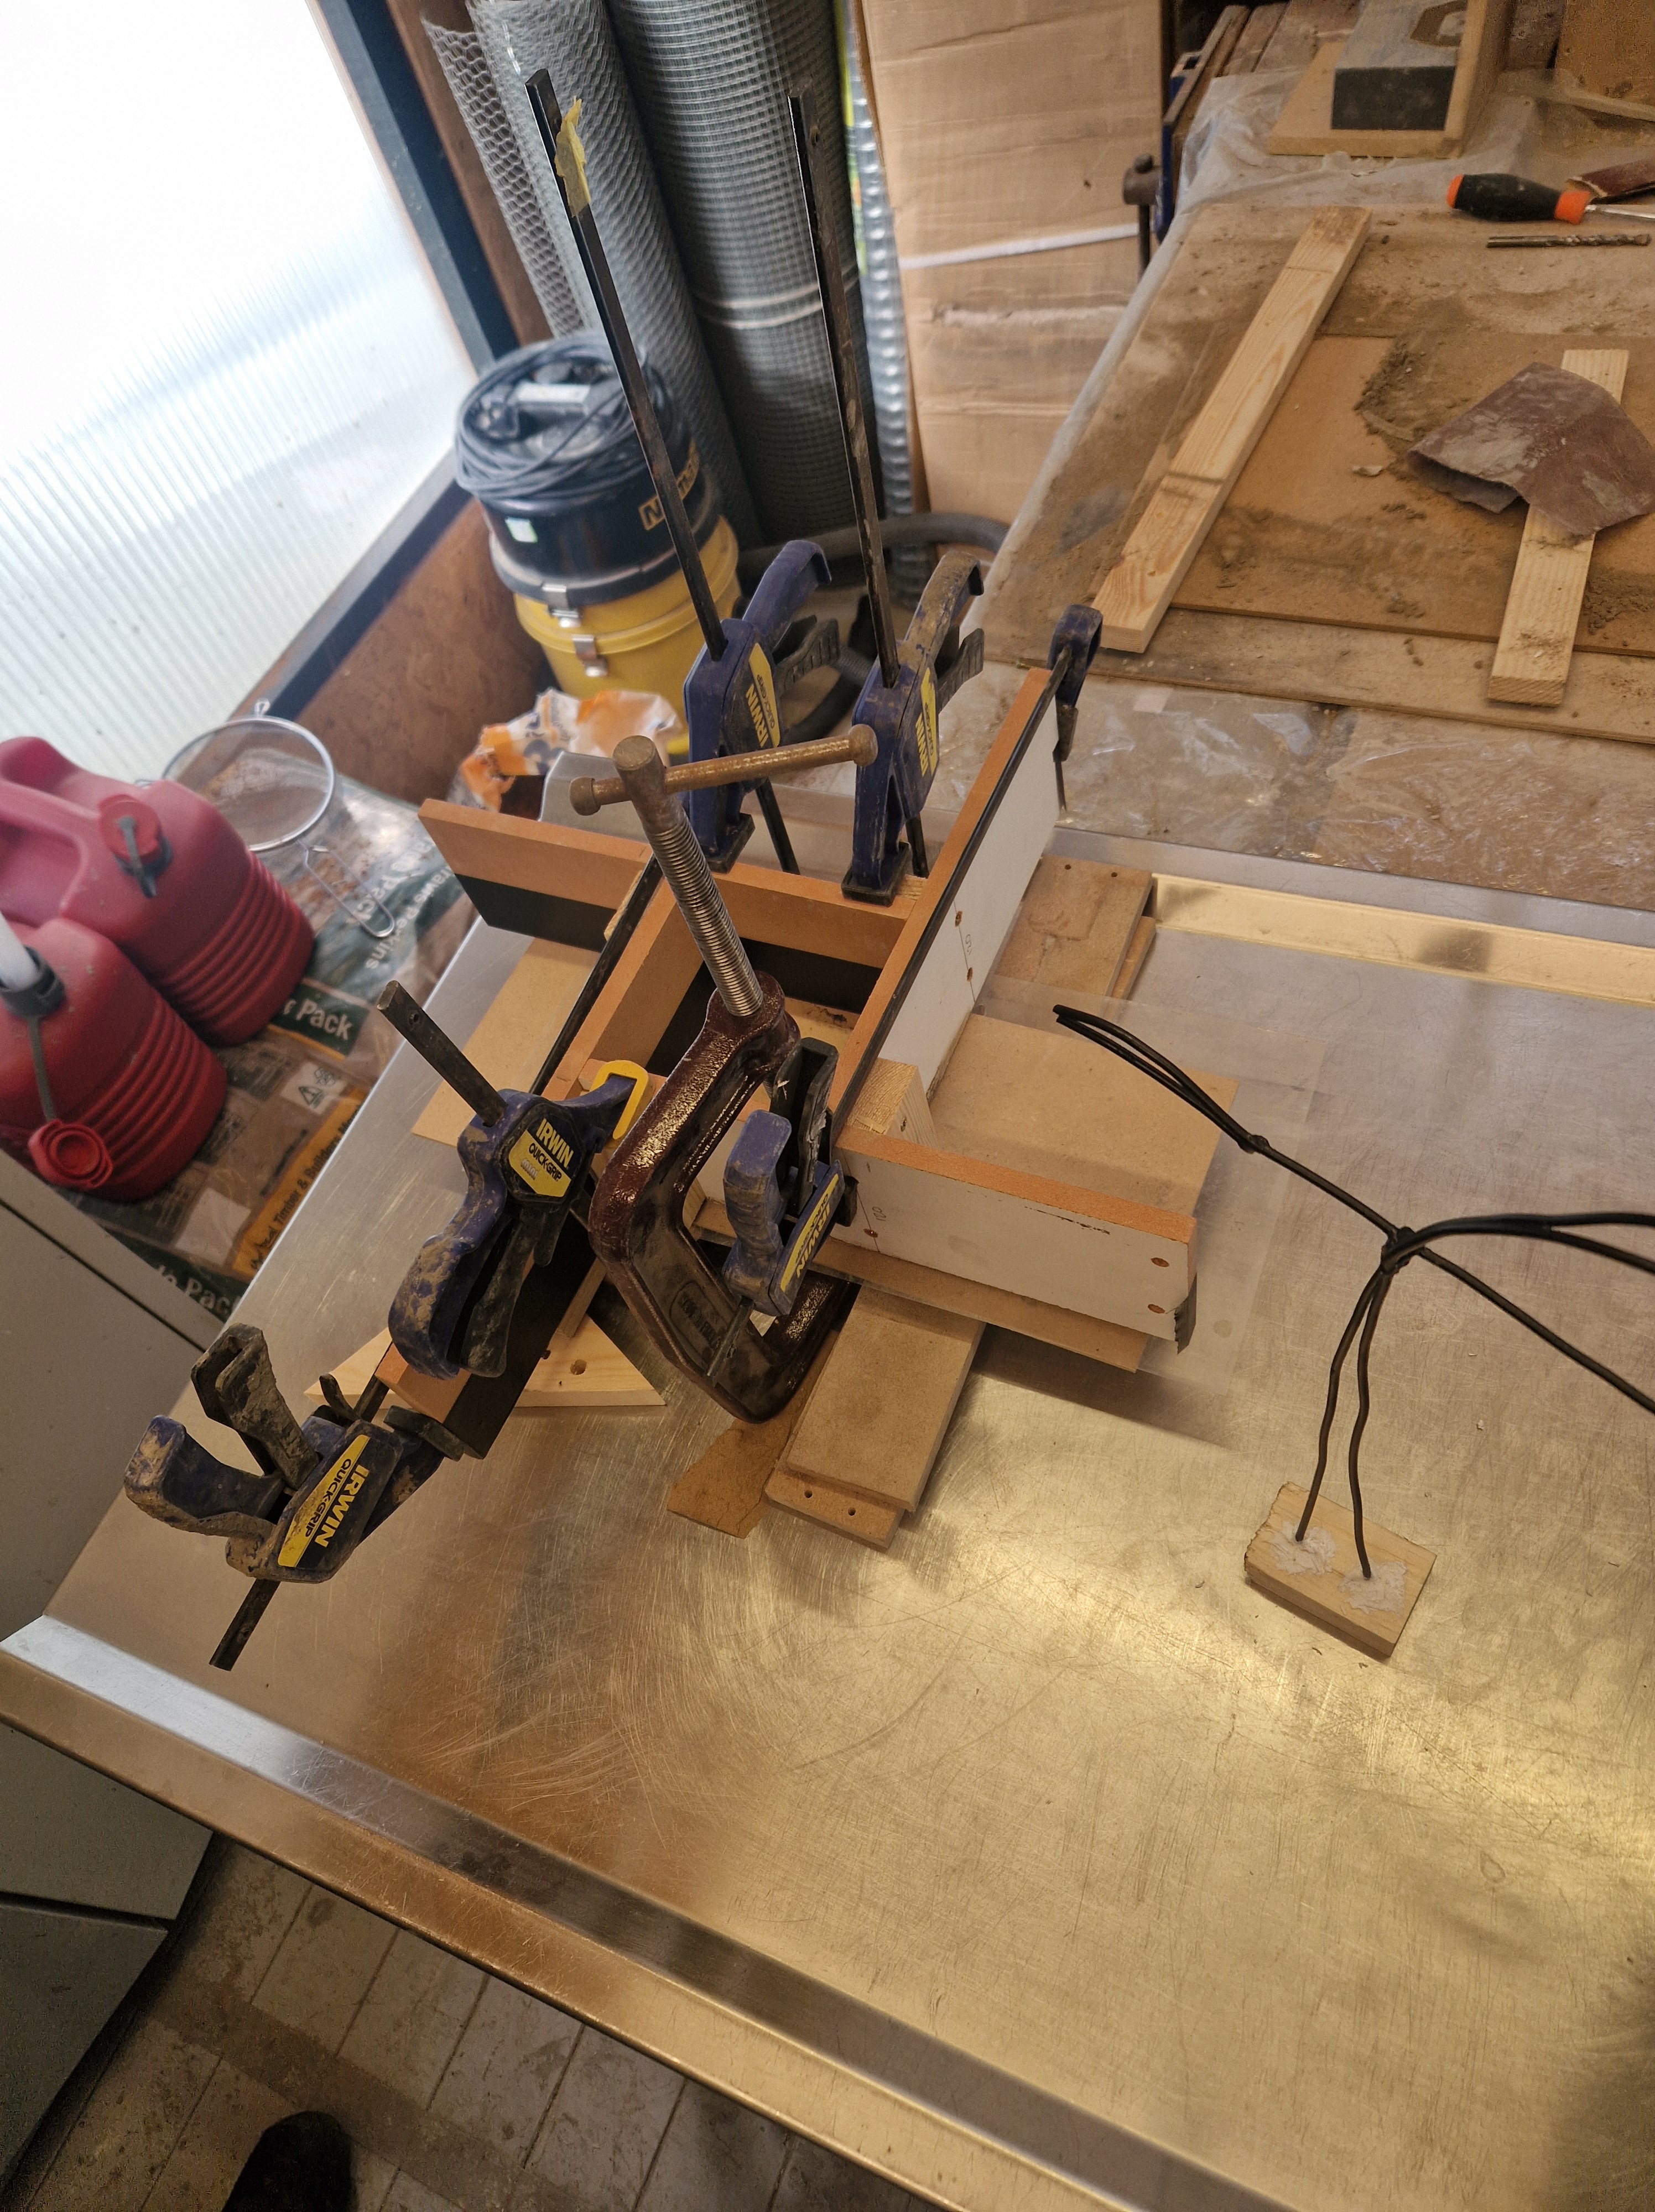
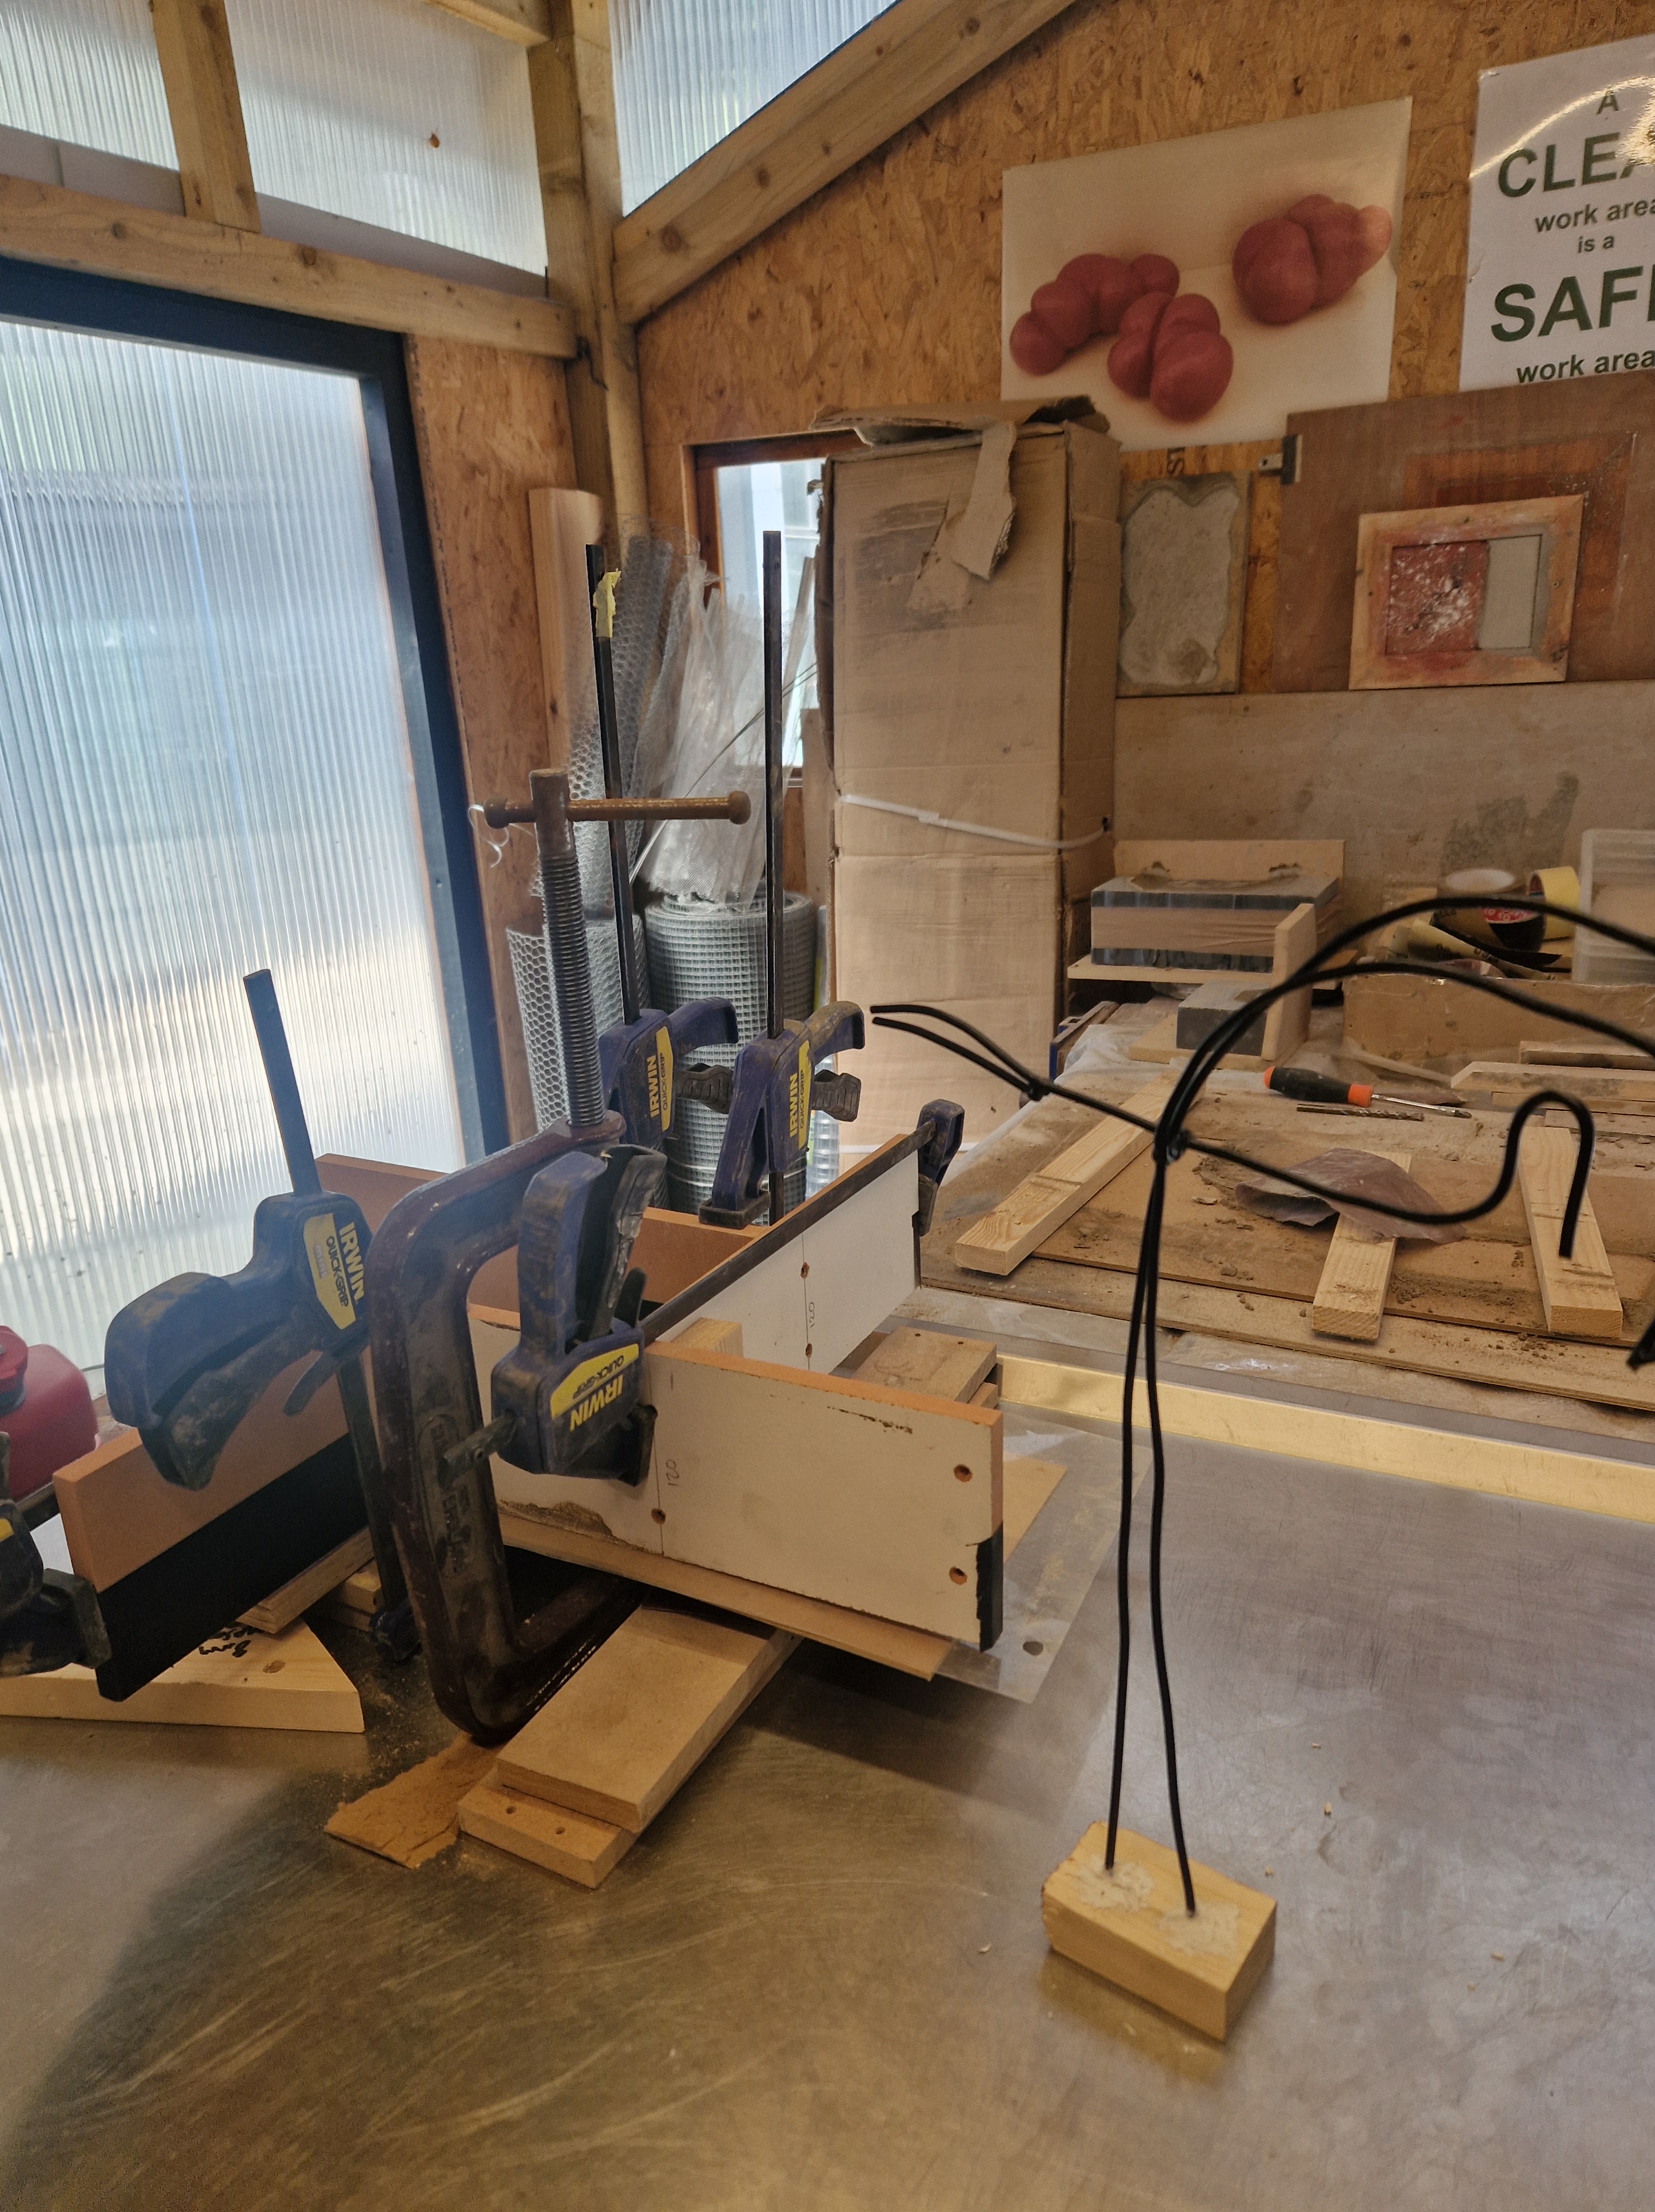
WEDNESDAY
GLUEING WOOD TO STEEL SHEET
Finalising my Perspex sculpture by glueing a wooden backing to the steel sheet.
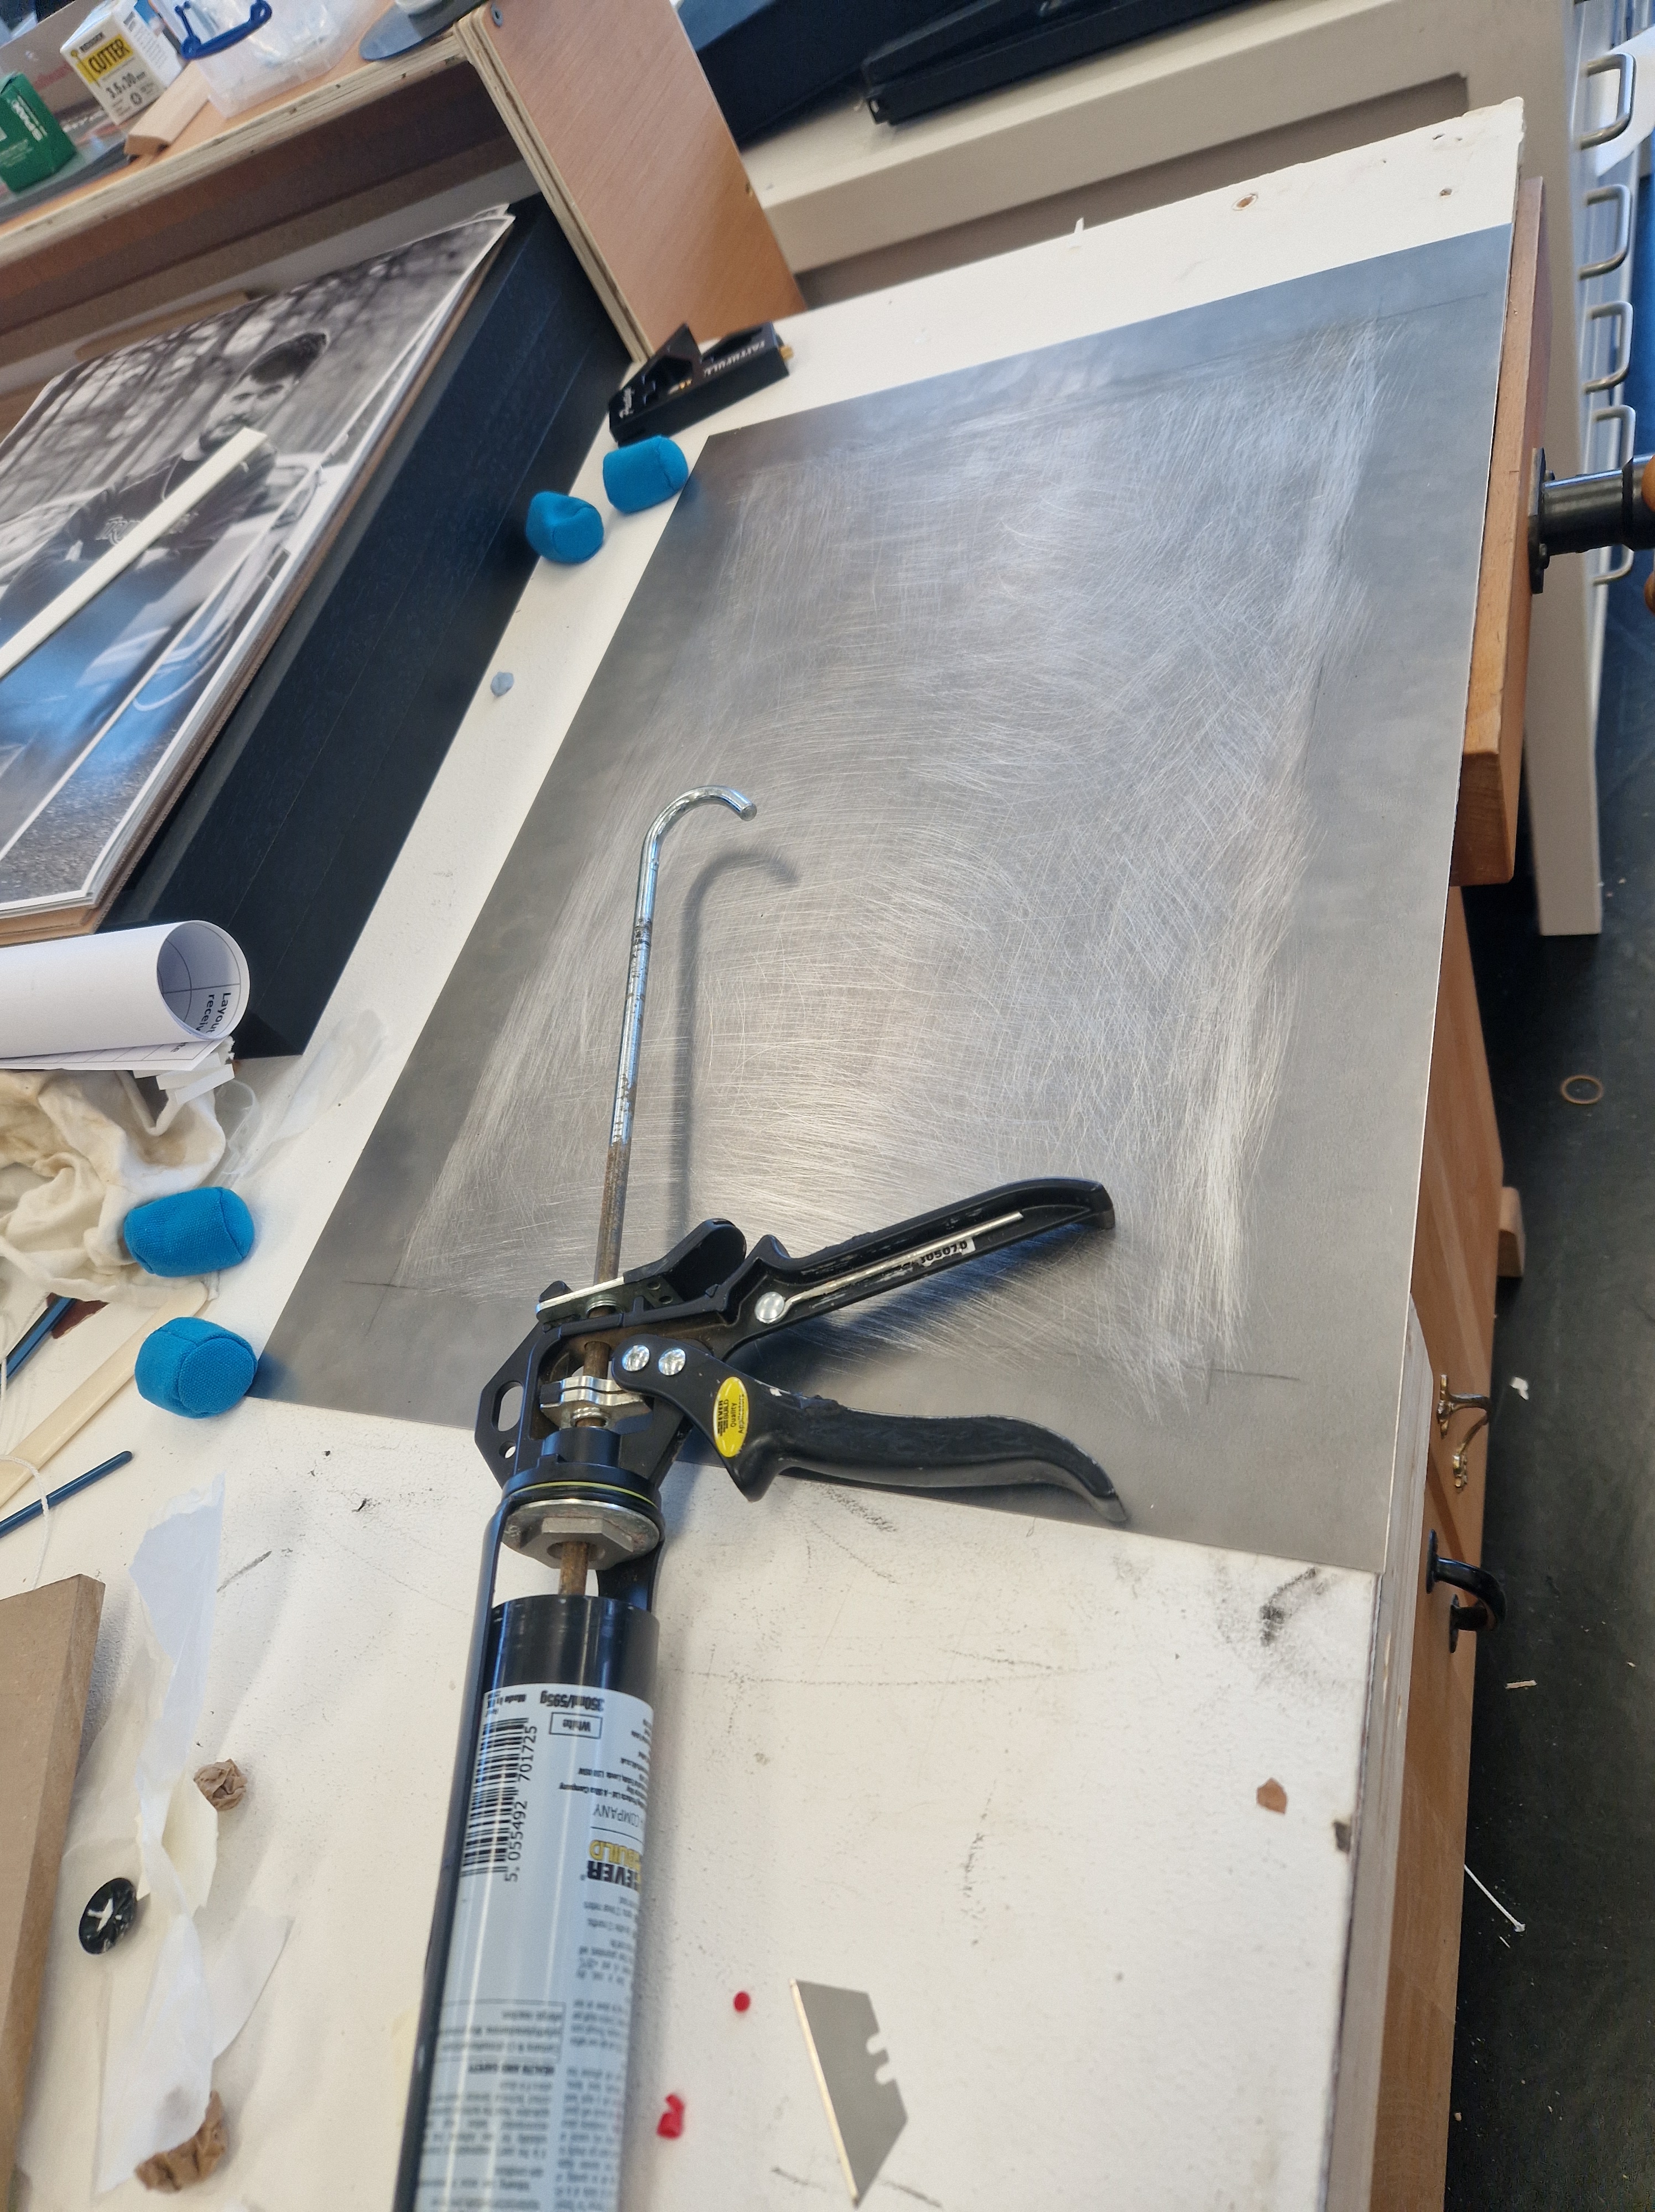
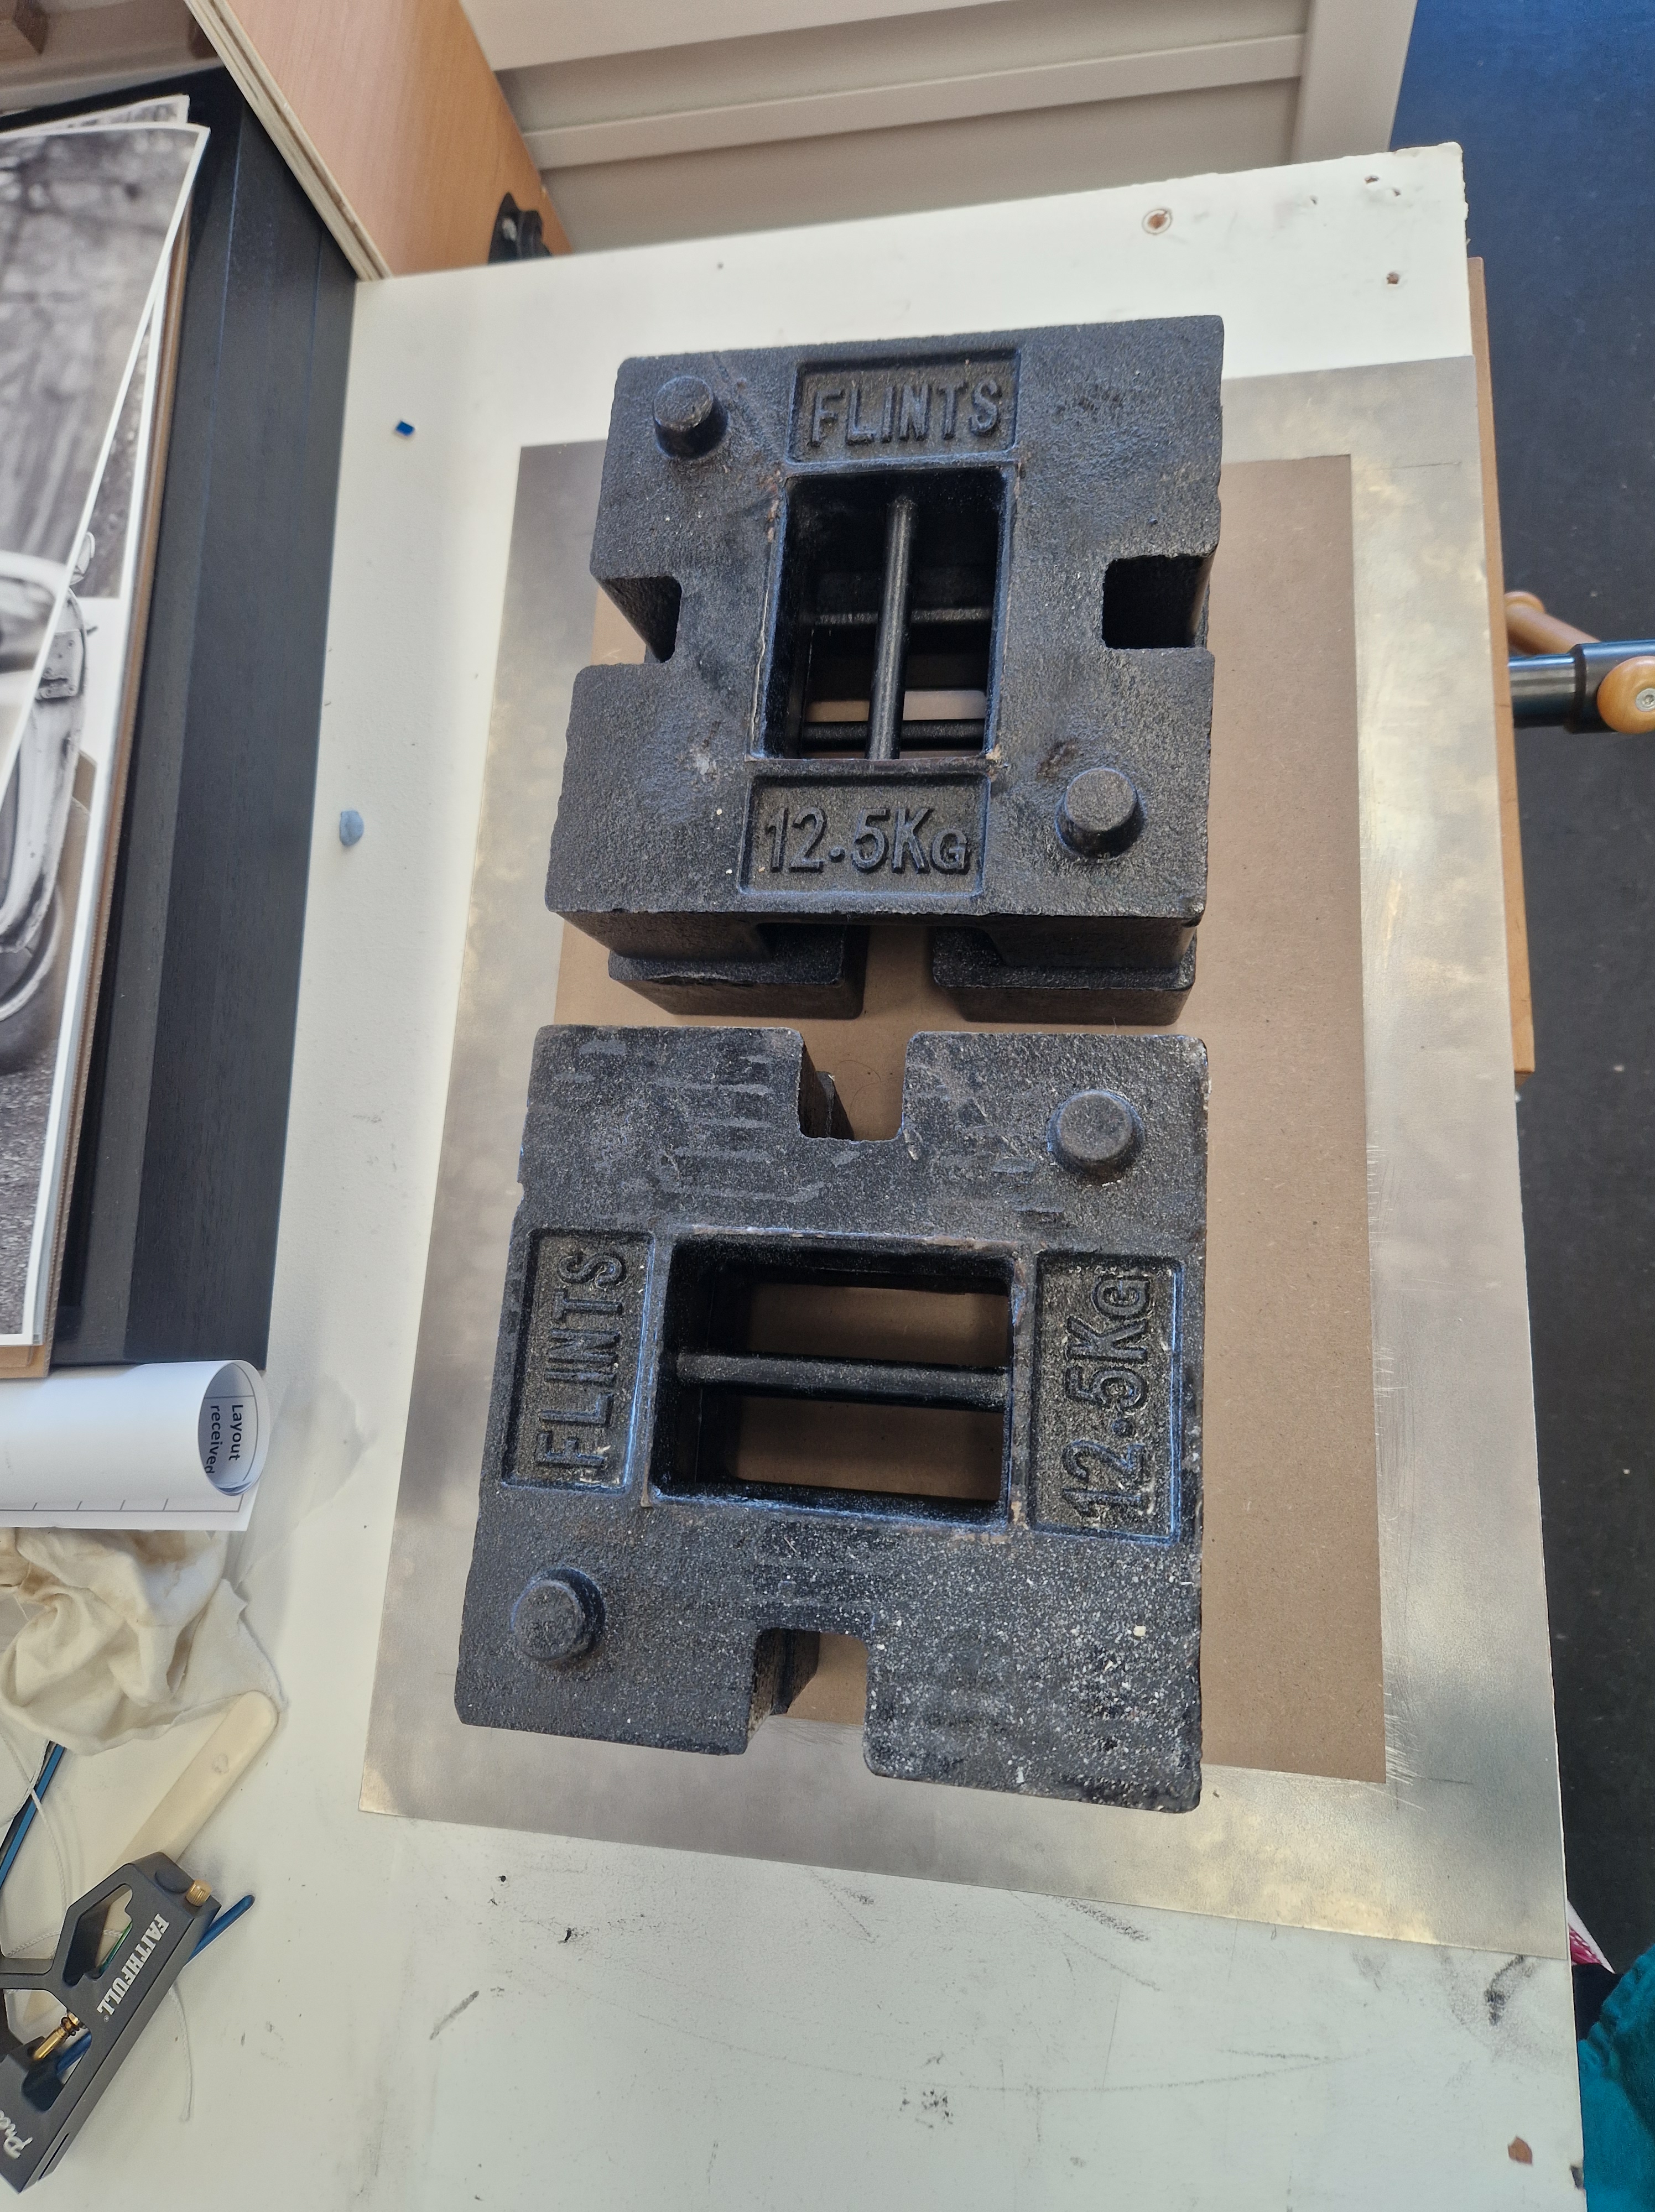

FRIDAY
PORTFOLIO REVIEW
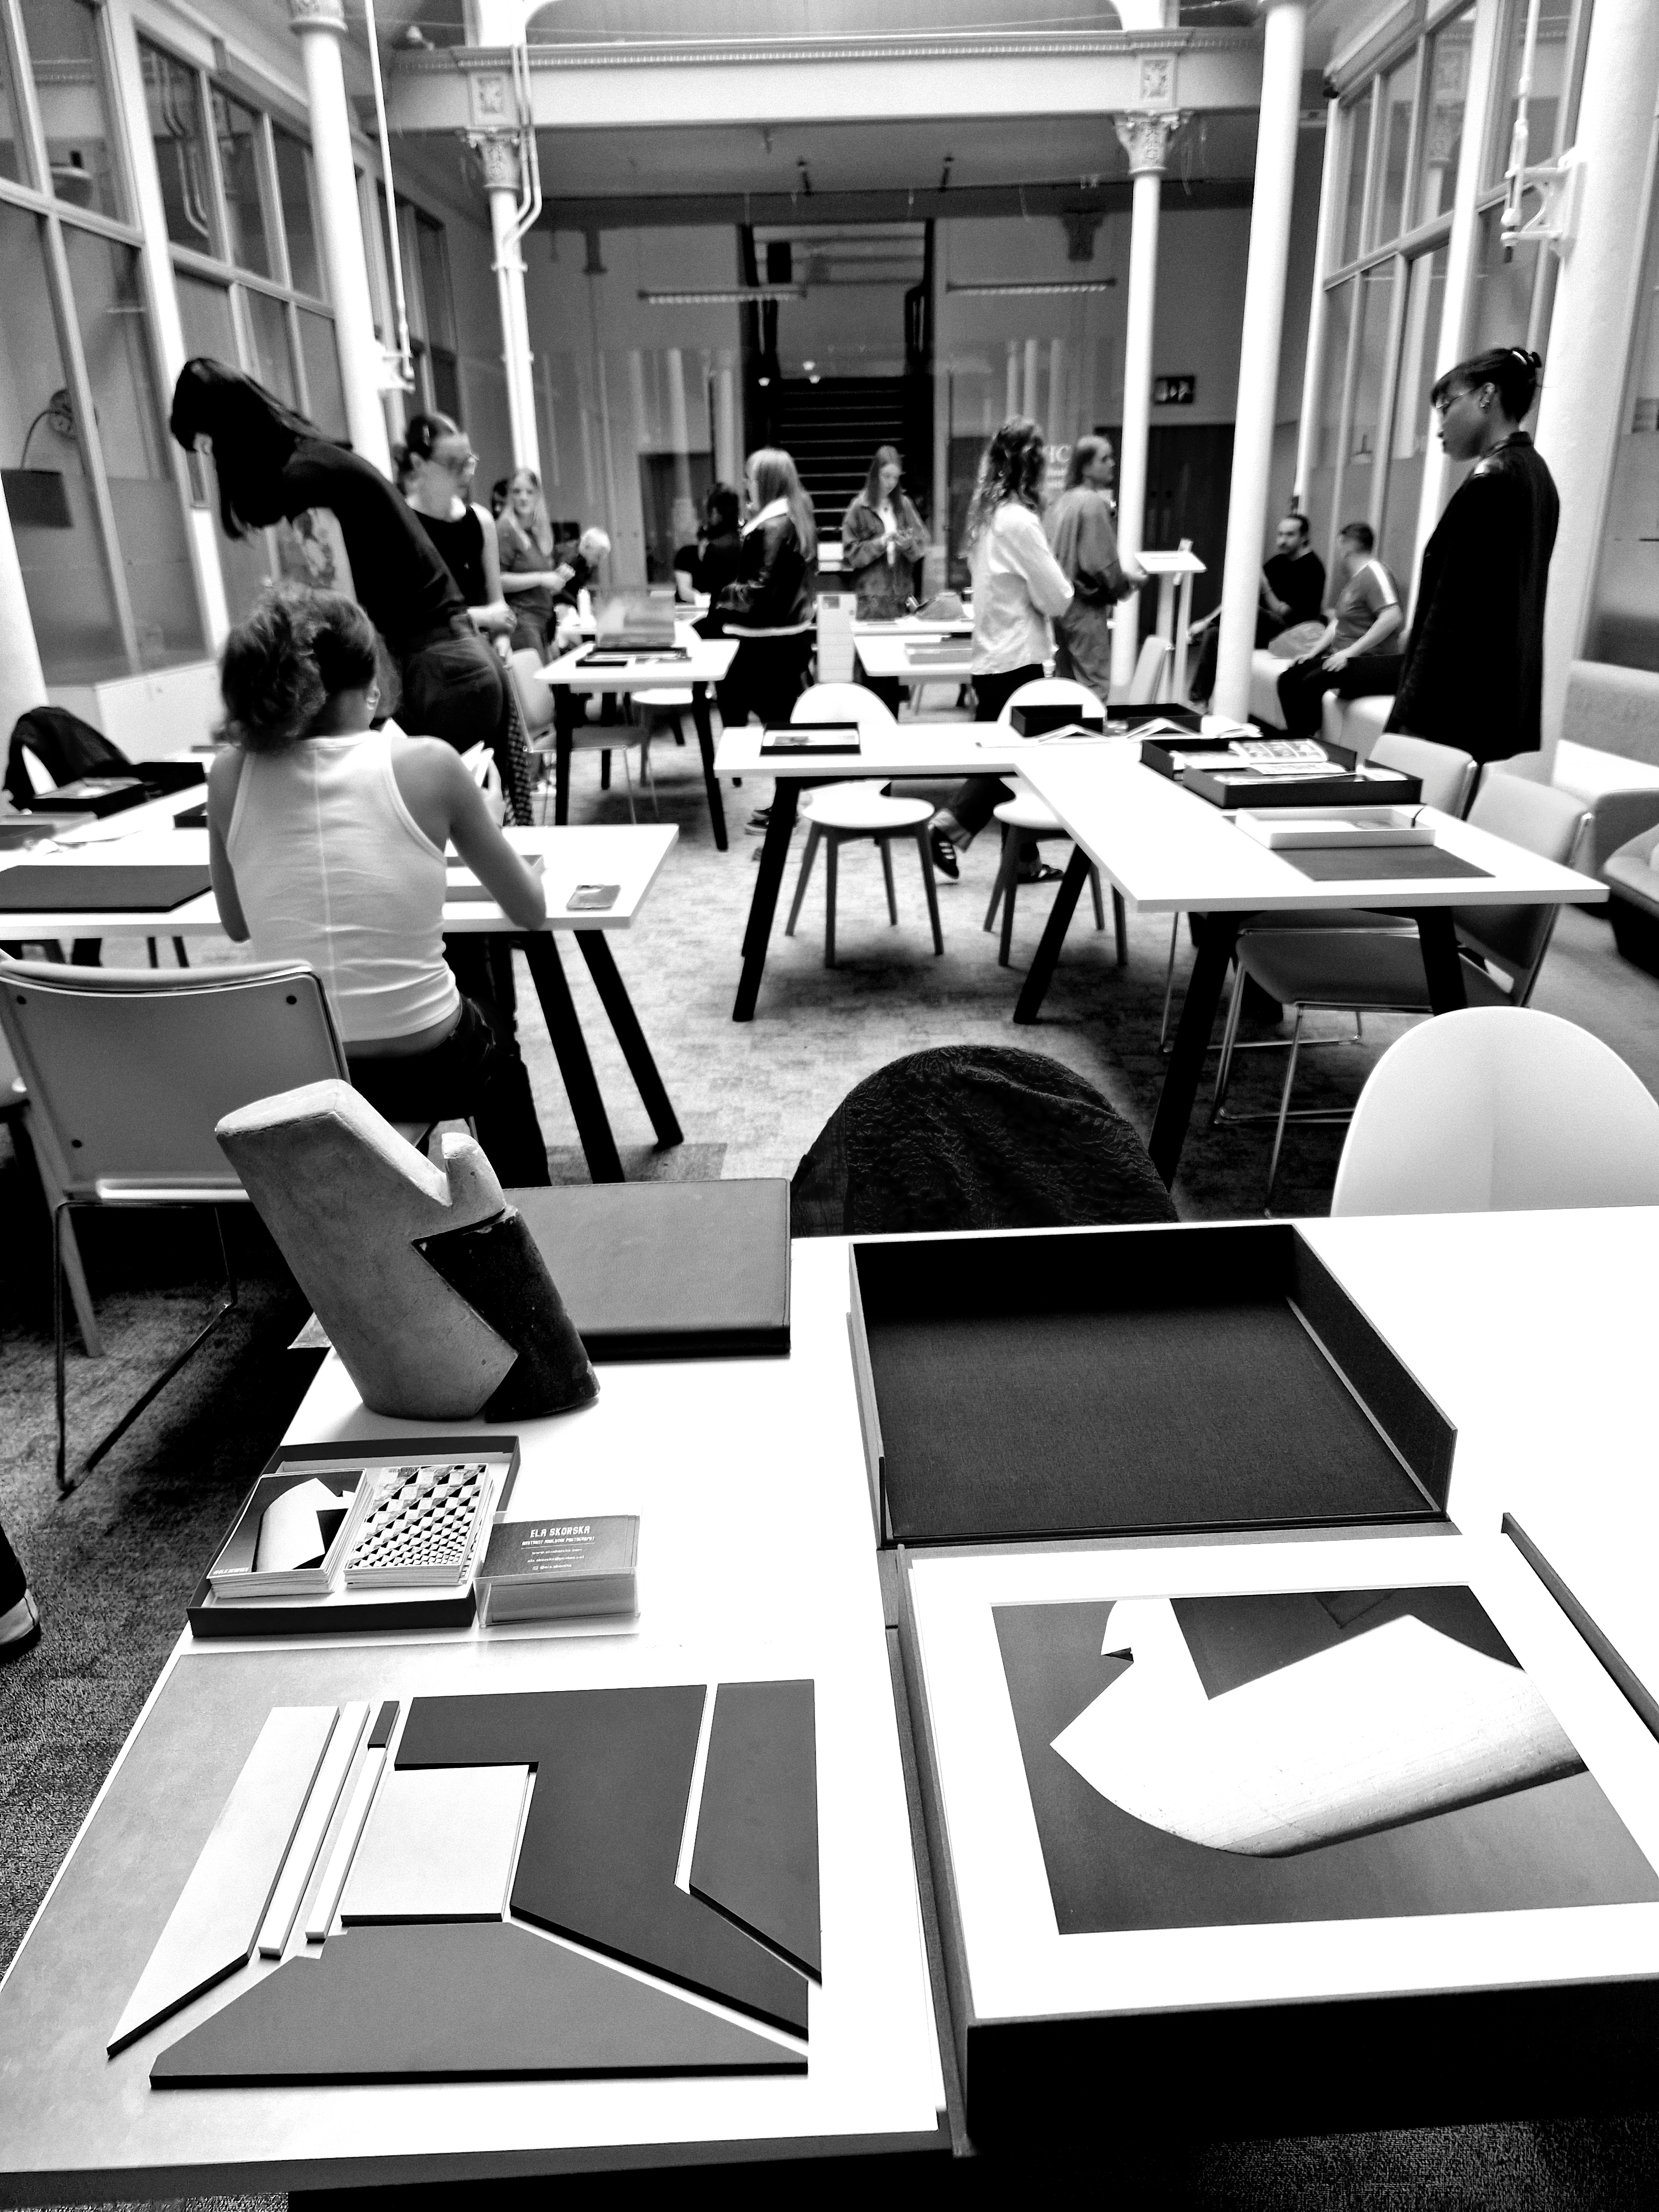
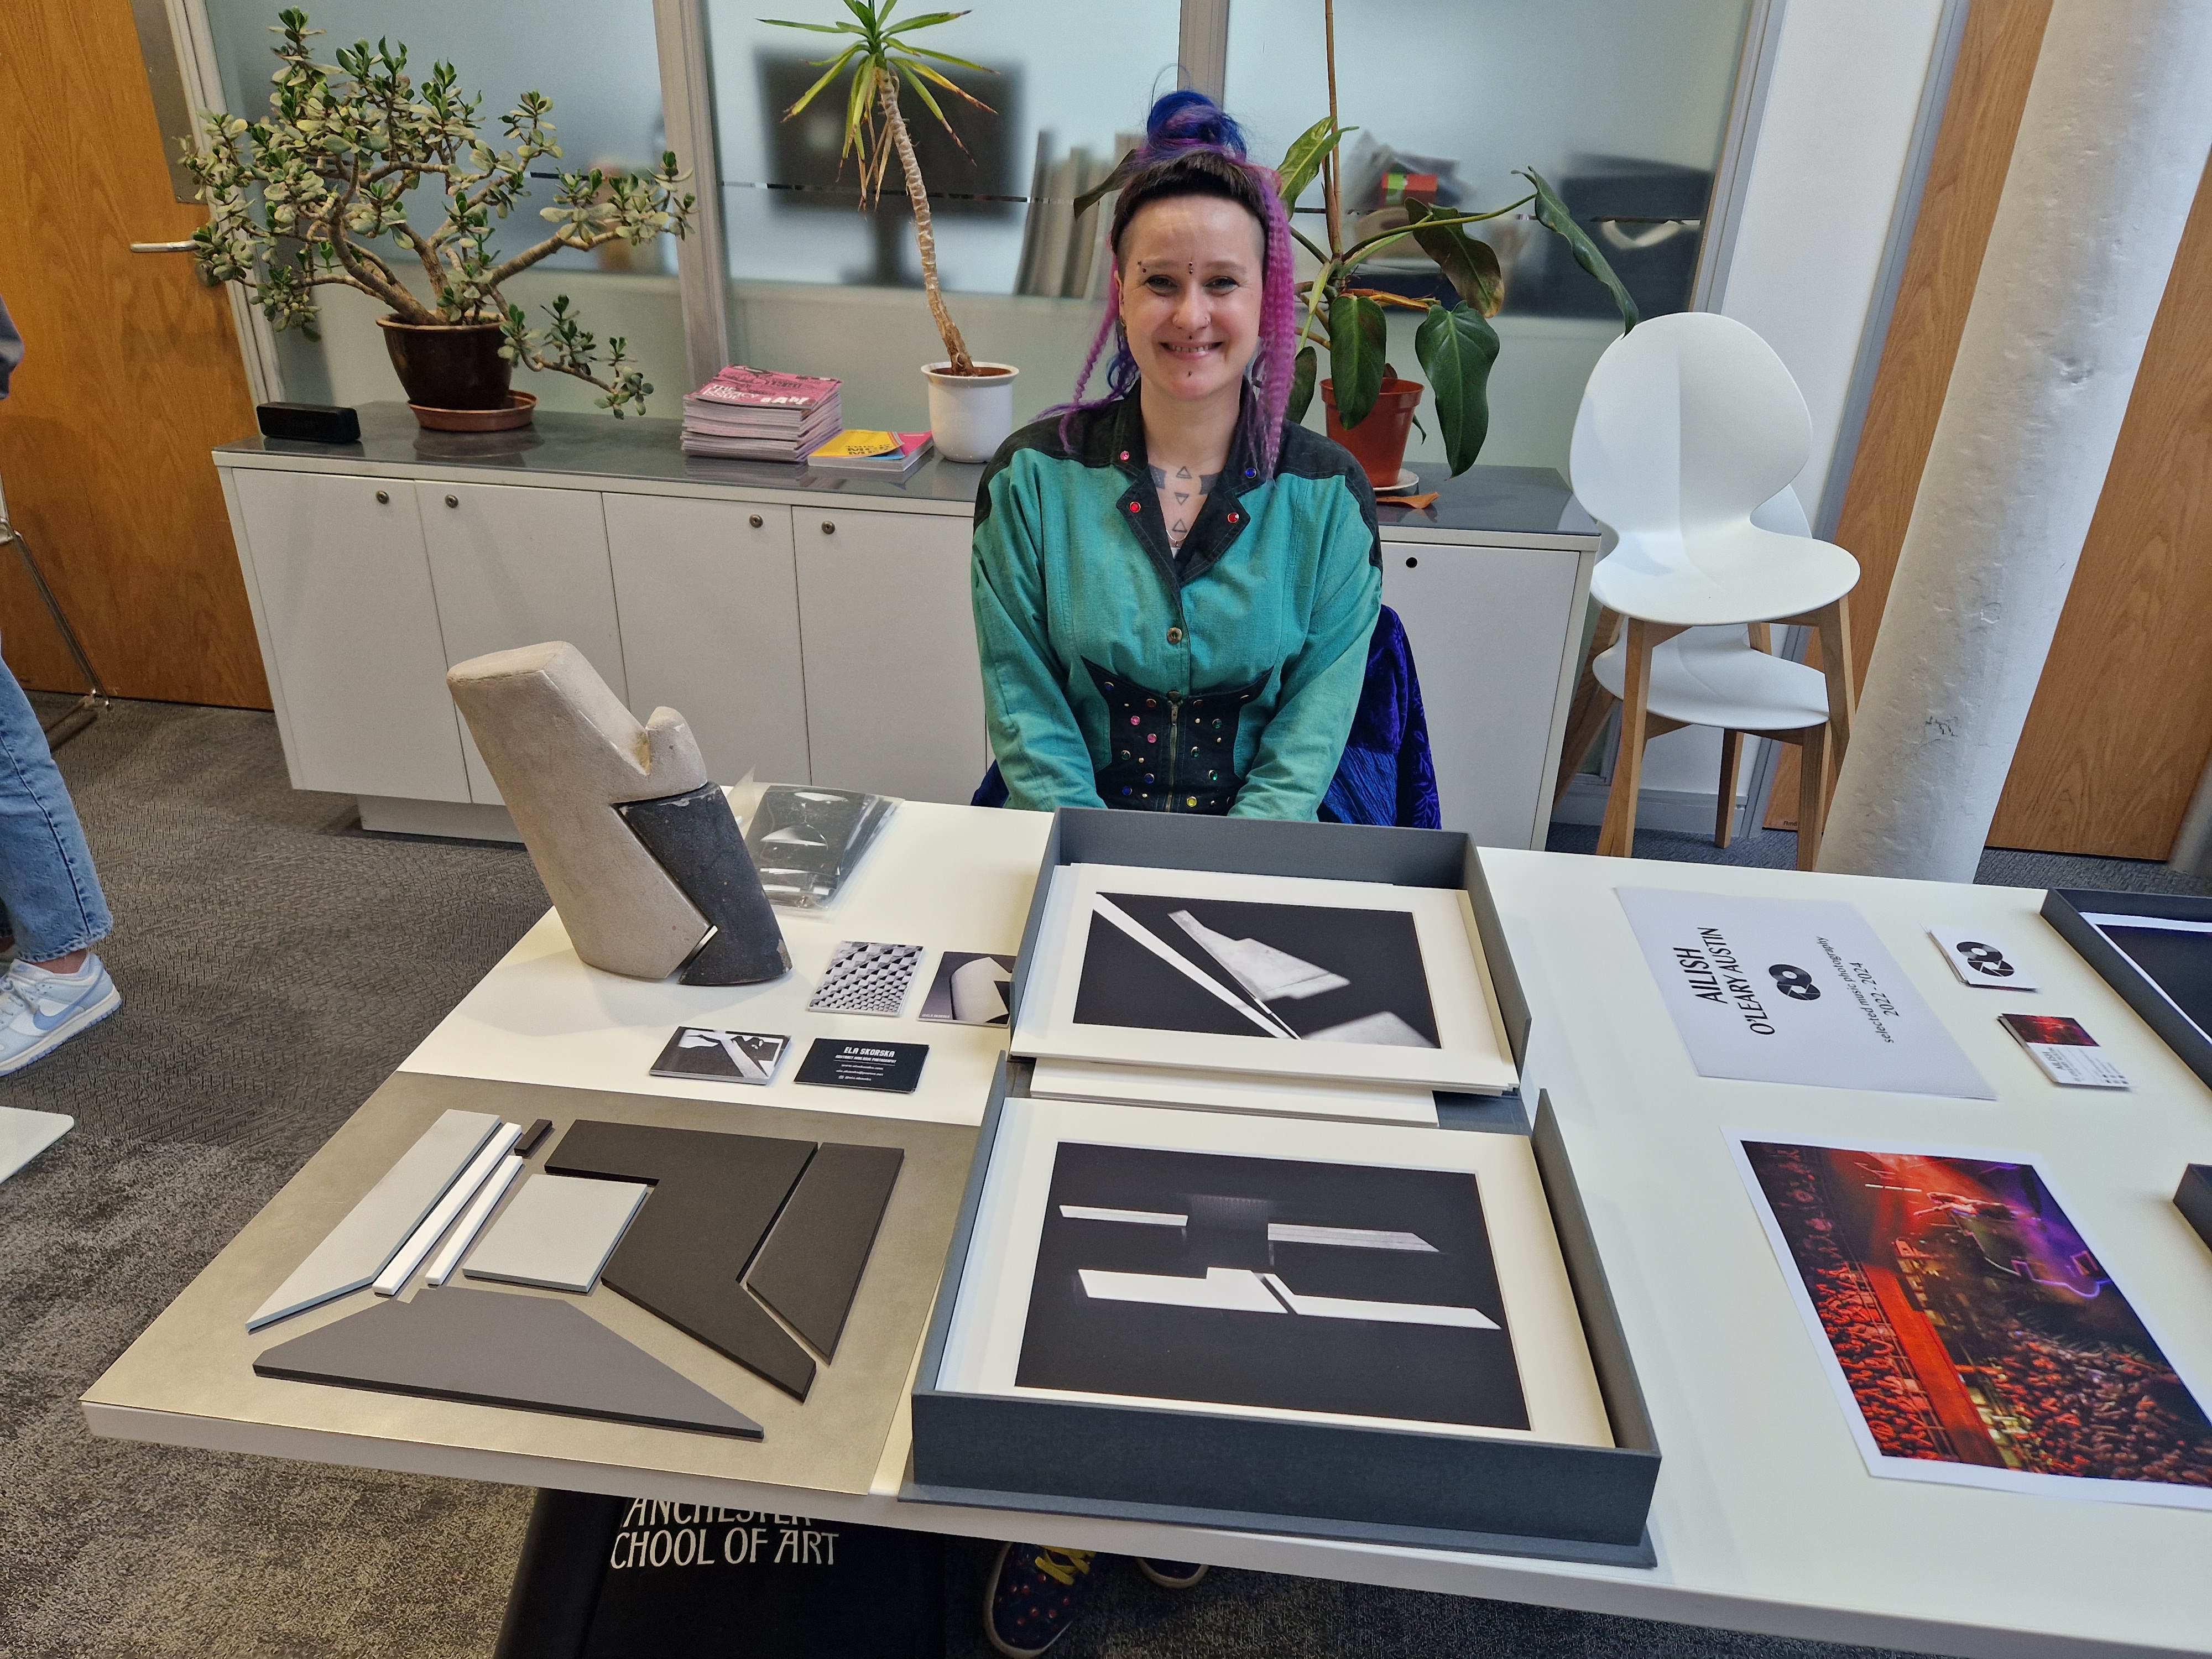
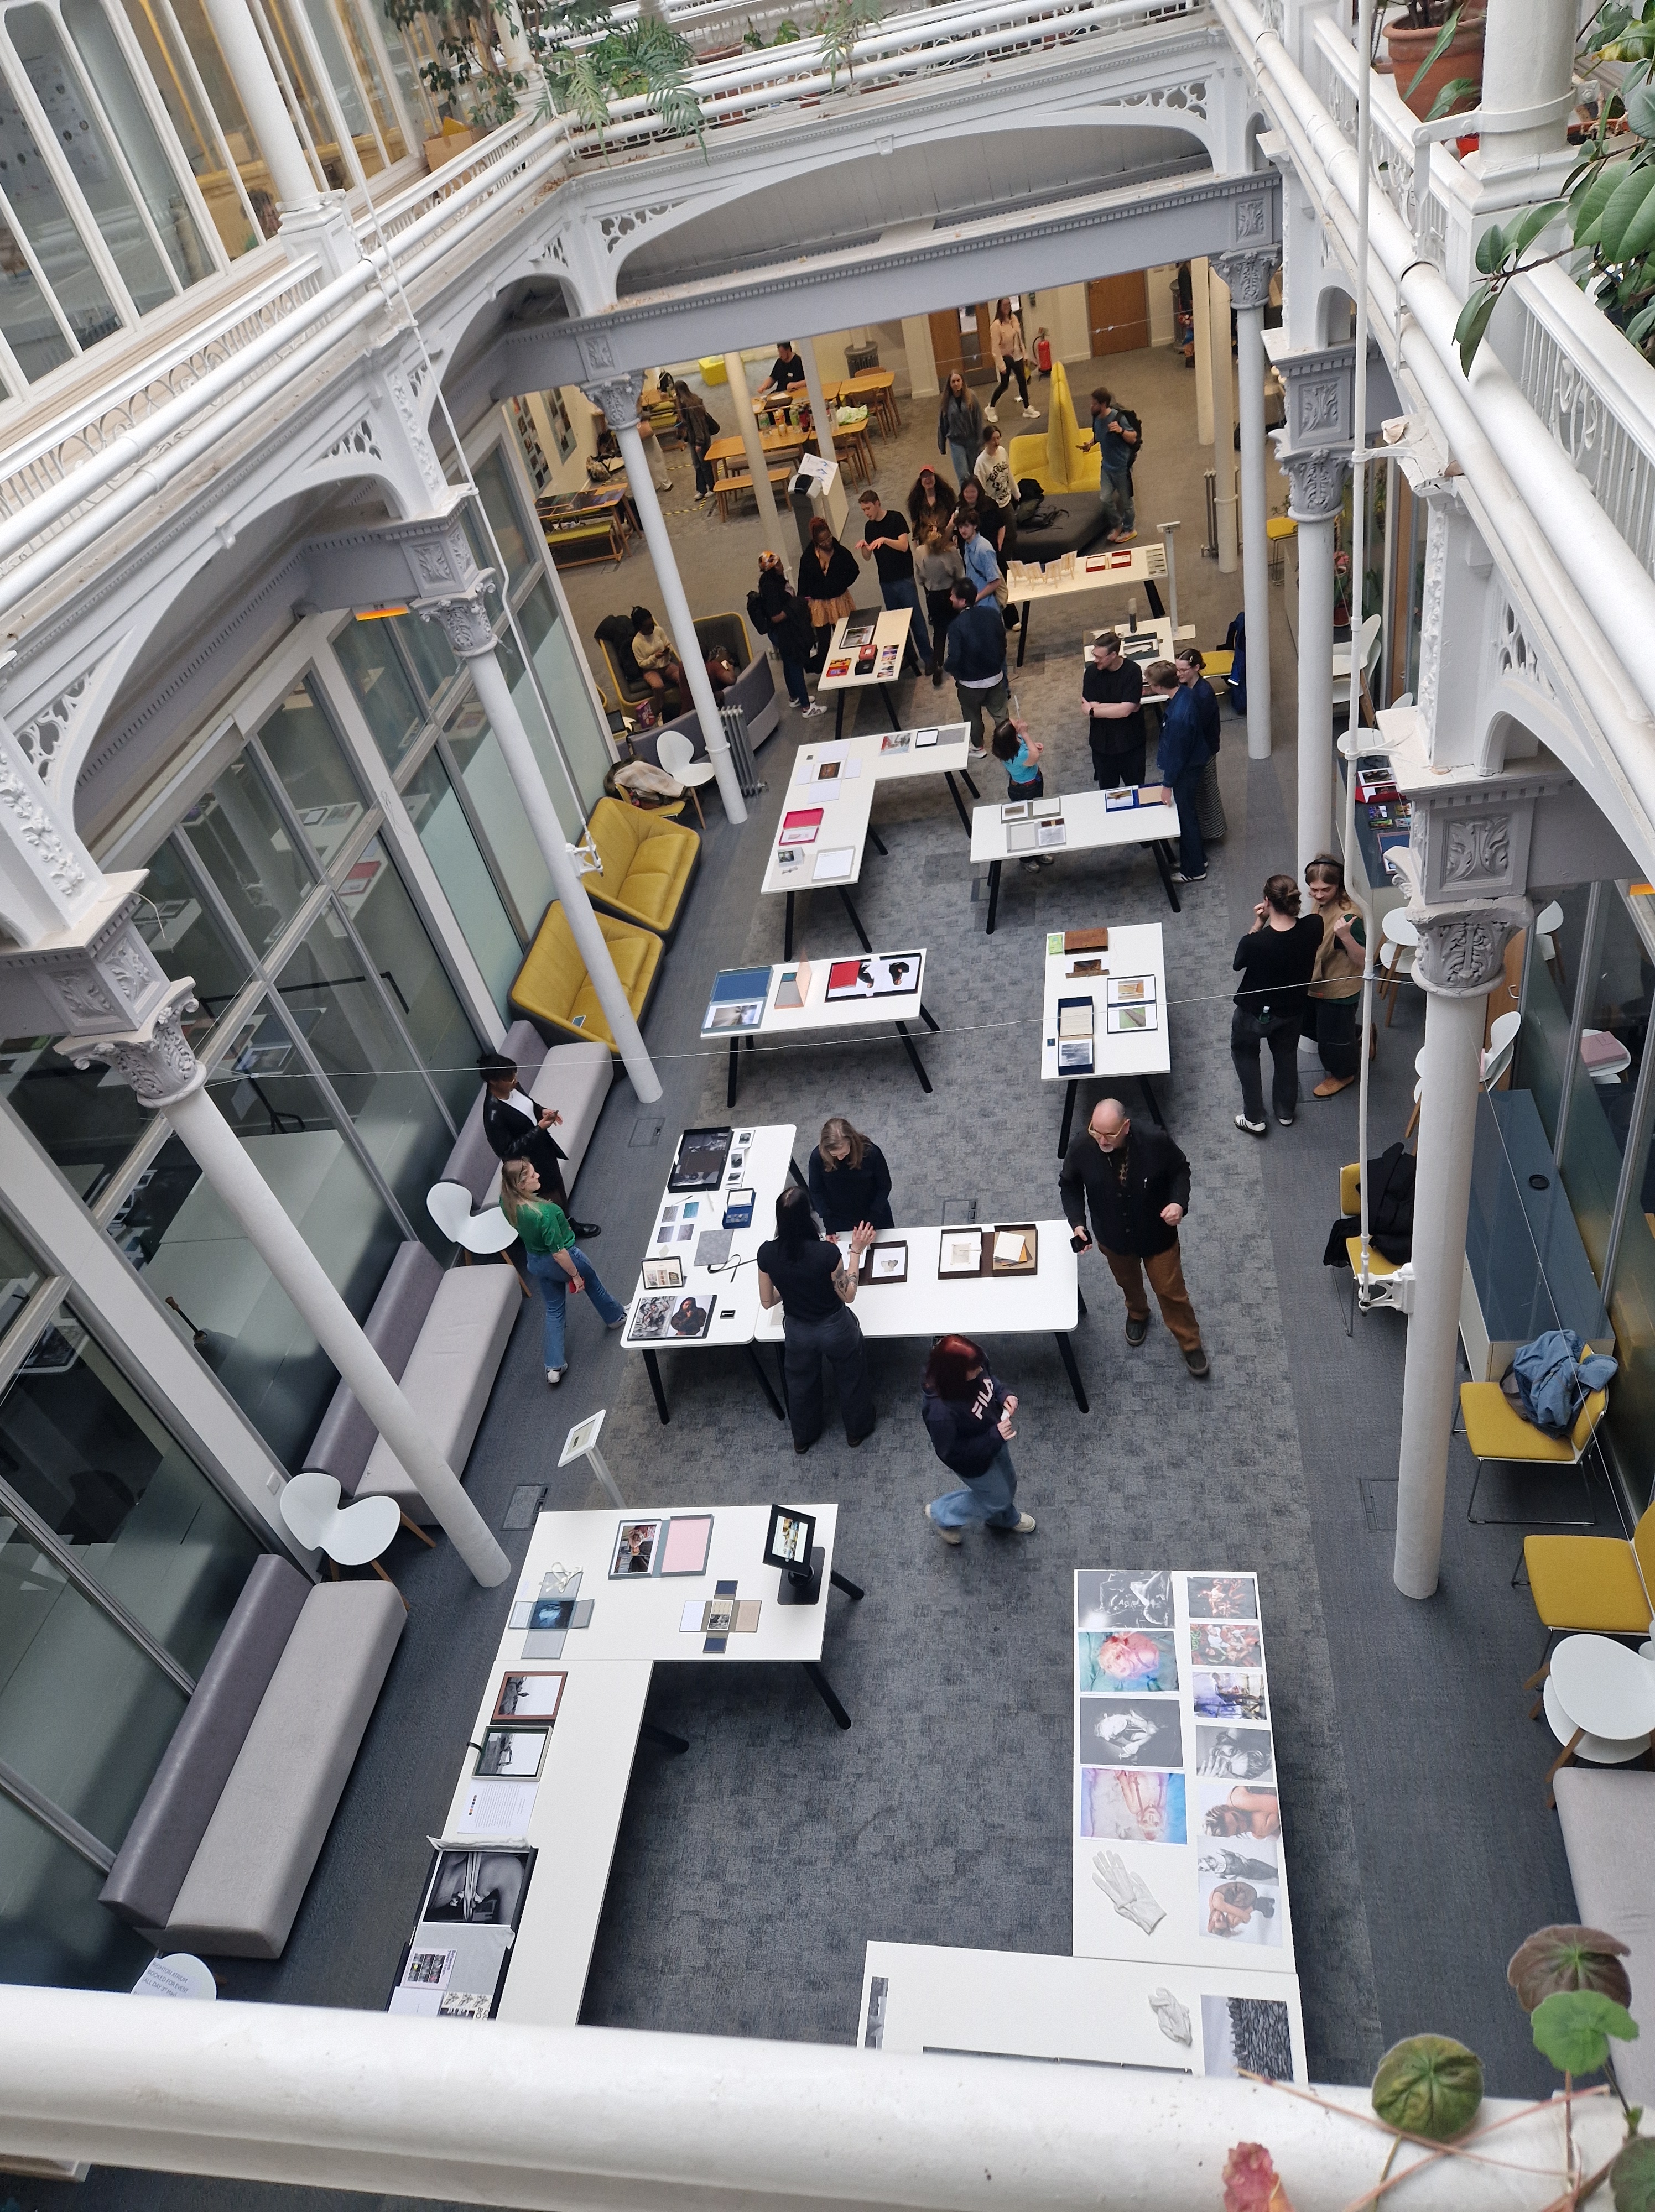
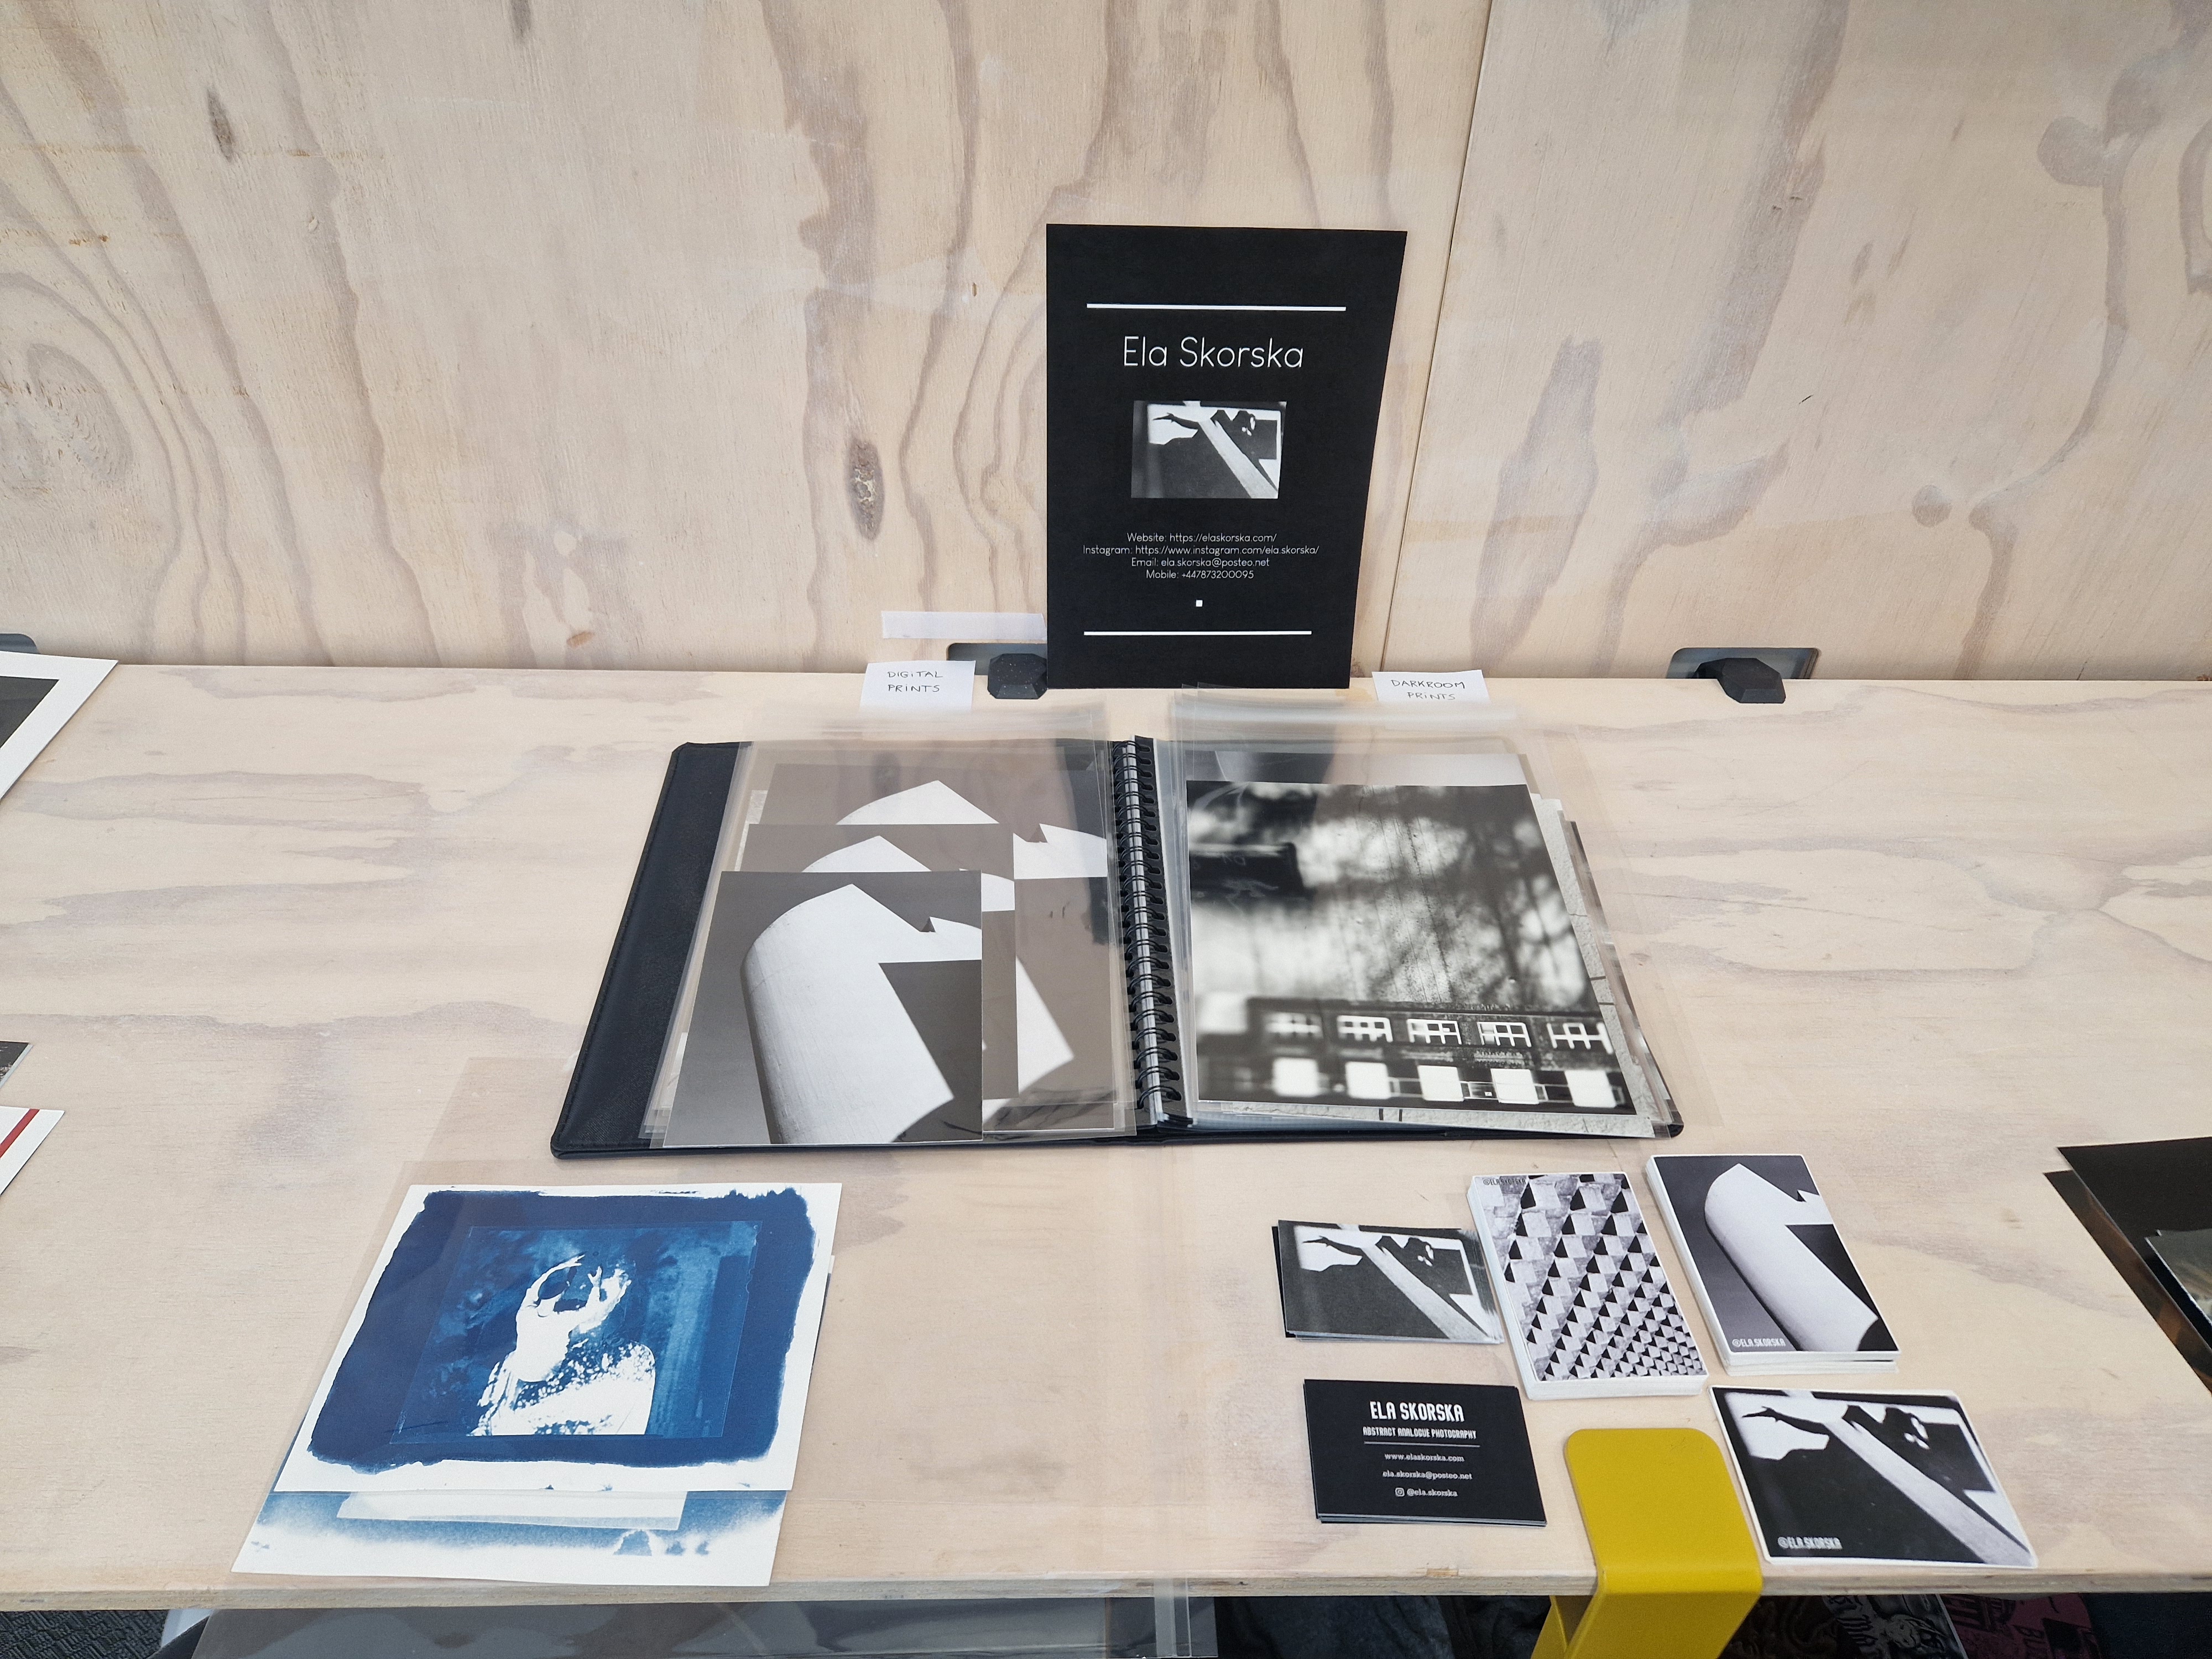
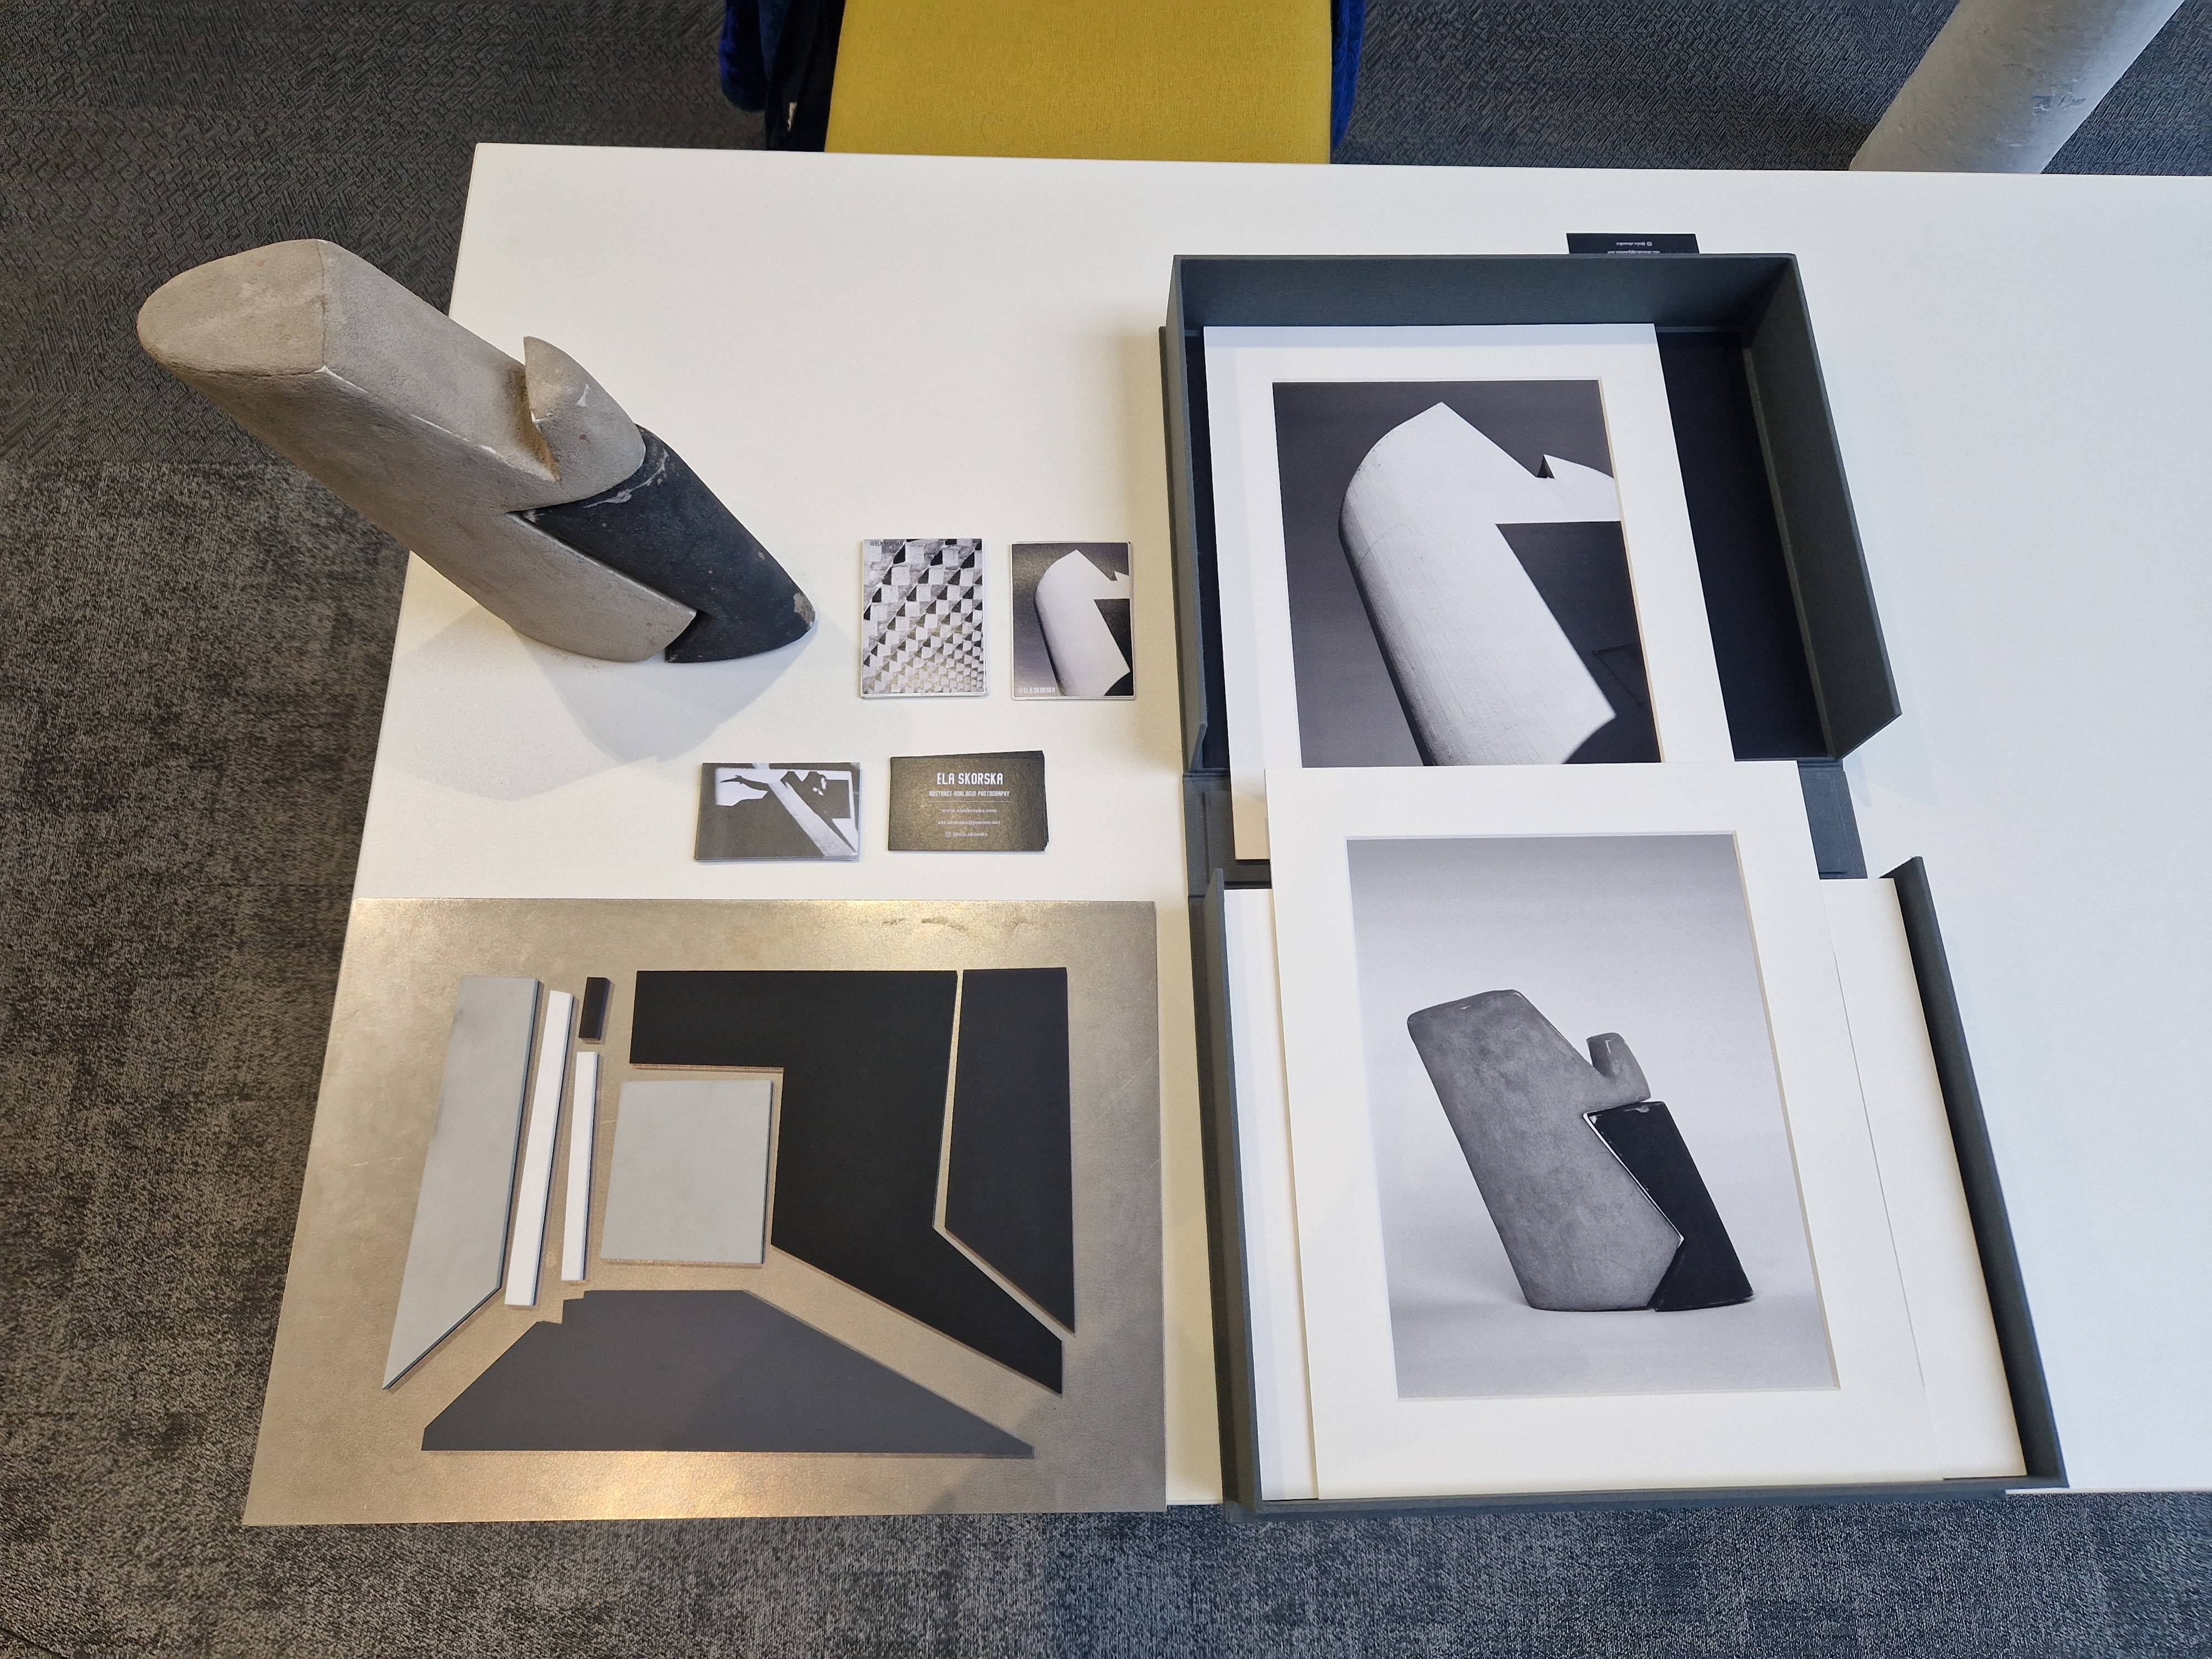
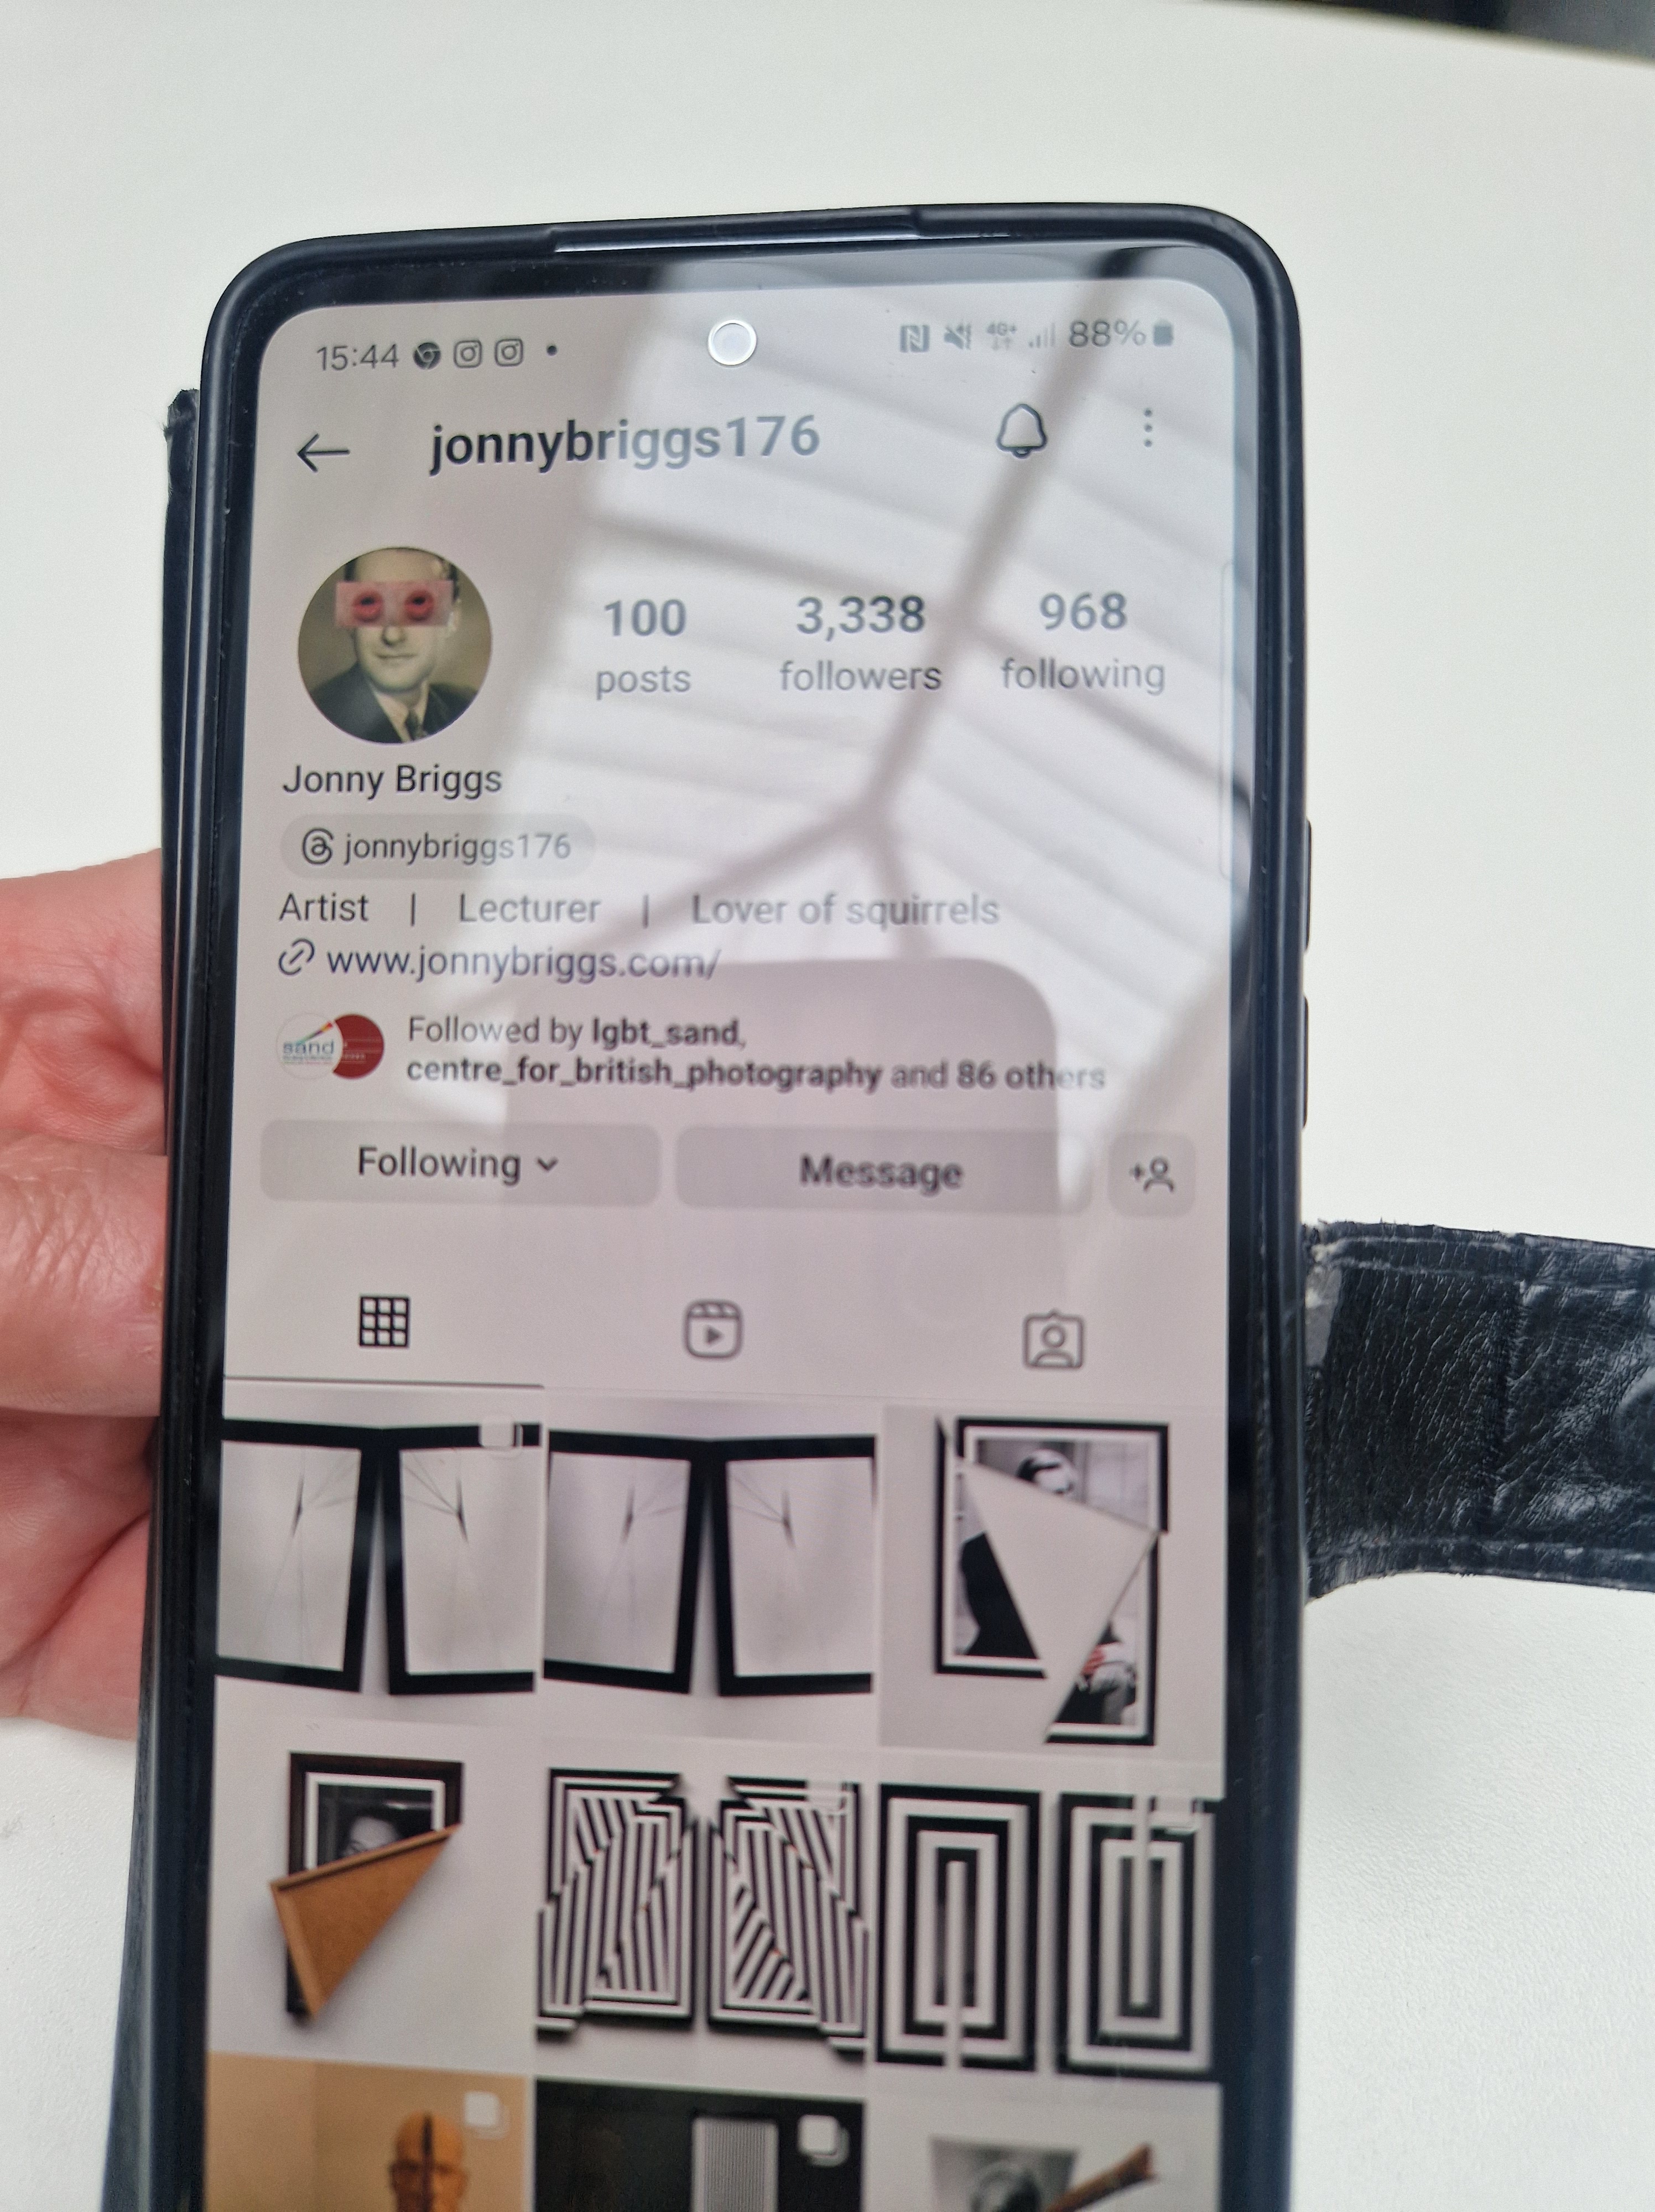
NOTES FROM DUNCAN:
- Julio Gonzales
- Equip myself with sculptural knowledge
- be conscious of speaking to both audiences
- Radicl Geometry show
- Jan Svoboda collab with Koliball
- Elsworth Kelly painter
- Falstone Malotti
- Robert Morita Gallery in Berlin -see them
- Photo London -see them
- Lydia Goldbaci
NOTES FROM NICOLA SHIPLEY:
- MA at Royal Colledge or Goldsmiths in London
- Johnny Bricks
- Steward Whips
- Andrew Lacon
- MA Bristol Aaren Shumman
- MA in Holand, Berlin, Barcelona
- Handful of Dust show, catalogue and book!
- David Campany — see him speak (e.g Youtube)
- Brancaster Studio
REFLECTIONS:  Portfolio even was one incredible experience! I was lucky enough to have two reviews with two amazing people notes above), both given me amazing feedback, guidance and plenty to research and think about.

On top of that, unexpectedly (I didn’t think this many people will show up), we had an amazing turnout for the event! I connected with so many people, which was a great opportunity to meet but also talk about my art and the concept for the project.

Absolute icing on the cake was returning home to an email inviting me to an exhibition with https://www.gwenrileyjones.com/ and https://hattereditions.com/   in October.

Very excited! Hard work pays.
SATURDAY
TALK WITH TOM LOVELACE
In a collaboration between the Centre for Contemporary Photography (CCP) and Manchester Metropolitan University (MMU), this event considers photography’s capacity to inform us of the past, while also revealing and speculating something of the future. This talk marks the final week of CCP’s current exhibition, ‘Only the future revisits the past’ which brings together artists whose works look towards the past—via archives, institutional and museum collections, family histories, and historic depictions—to speculate future states and possibilities.
This live discussion will be chaired by MMU’s Duncan Wooldridge, Reader in Photography in the School of Digital Arts, and feature artist Tom Lovelace and CCP exhibiting artist Nikki Lam. This talk takes inspiration from CCP’s current exhibition and Wooldridge’s recent publication ‘To Be Determined: Photography and the Future’ (SPBH Editions, 2021) which features the work of artists, like Lovelace, to assert that ‘photographic technologies and processes are geared toward a world to come, not a world that has been’.
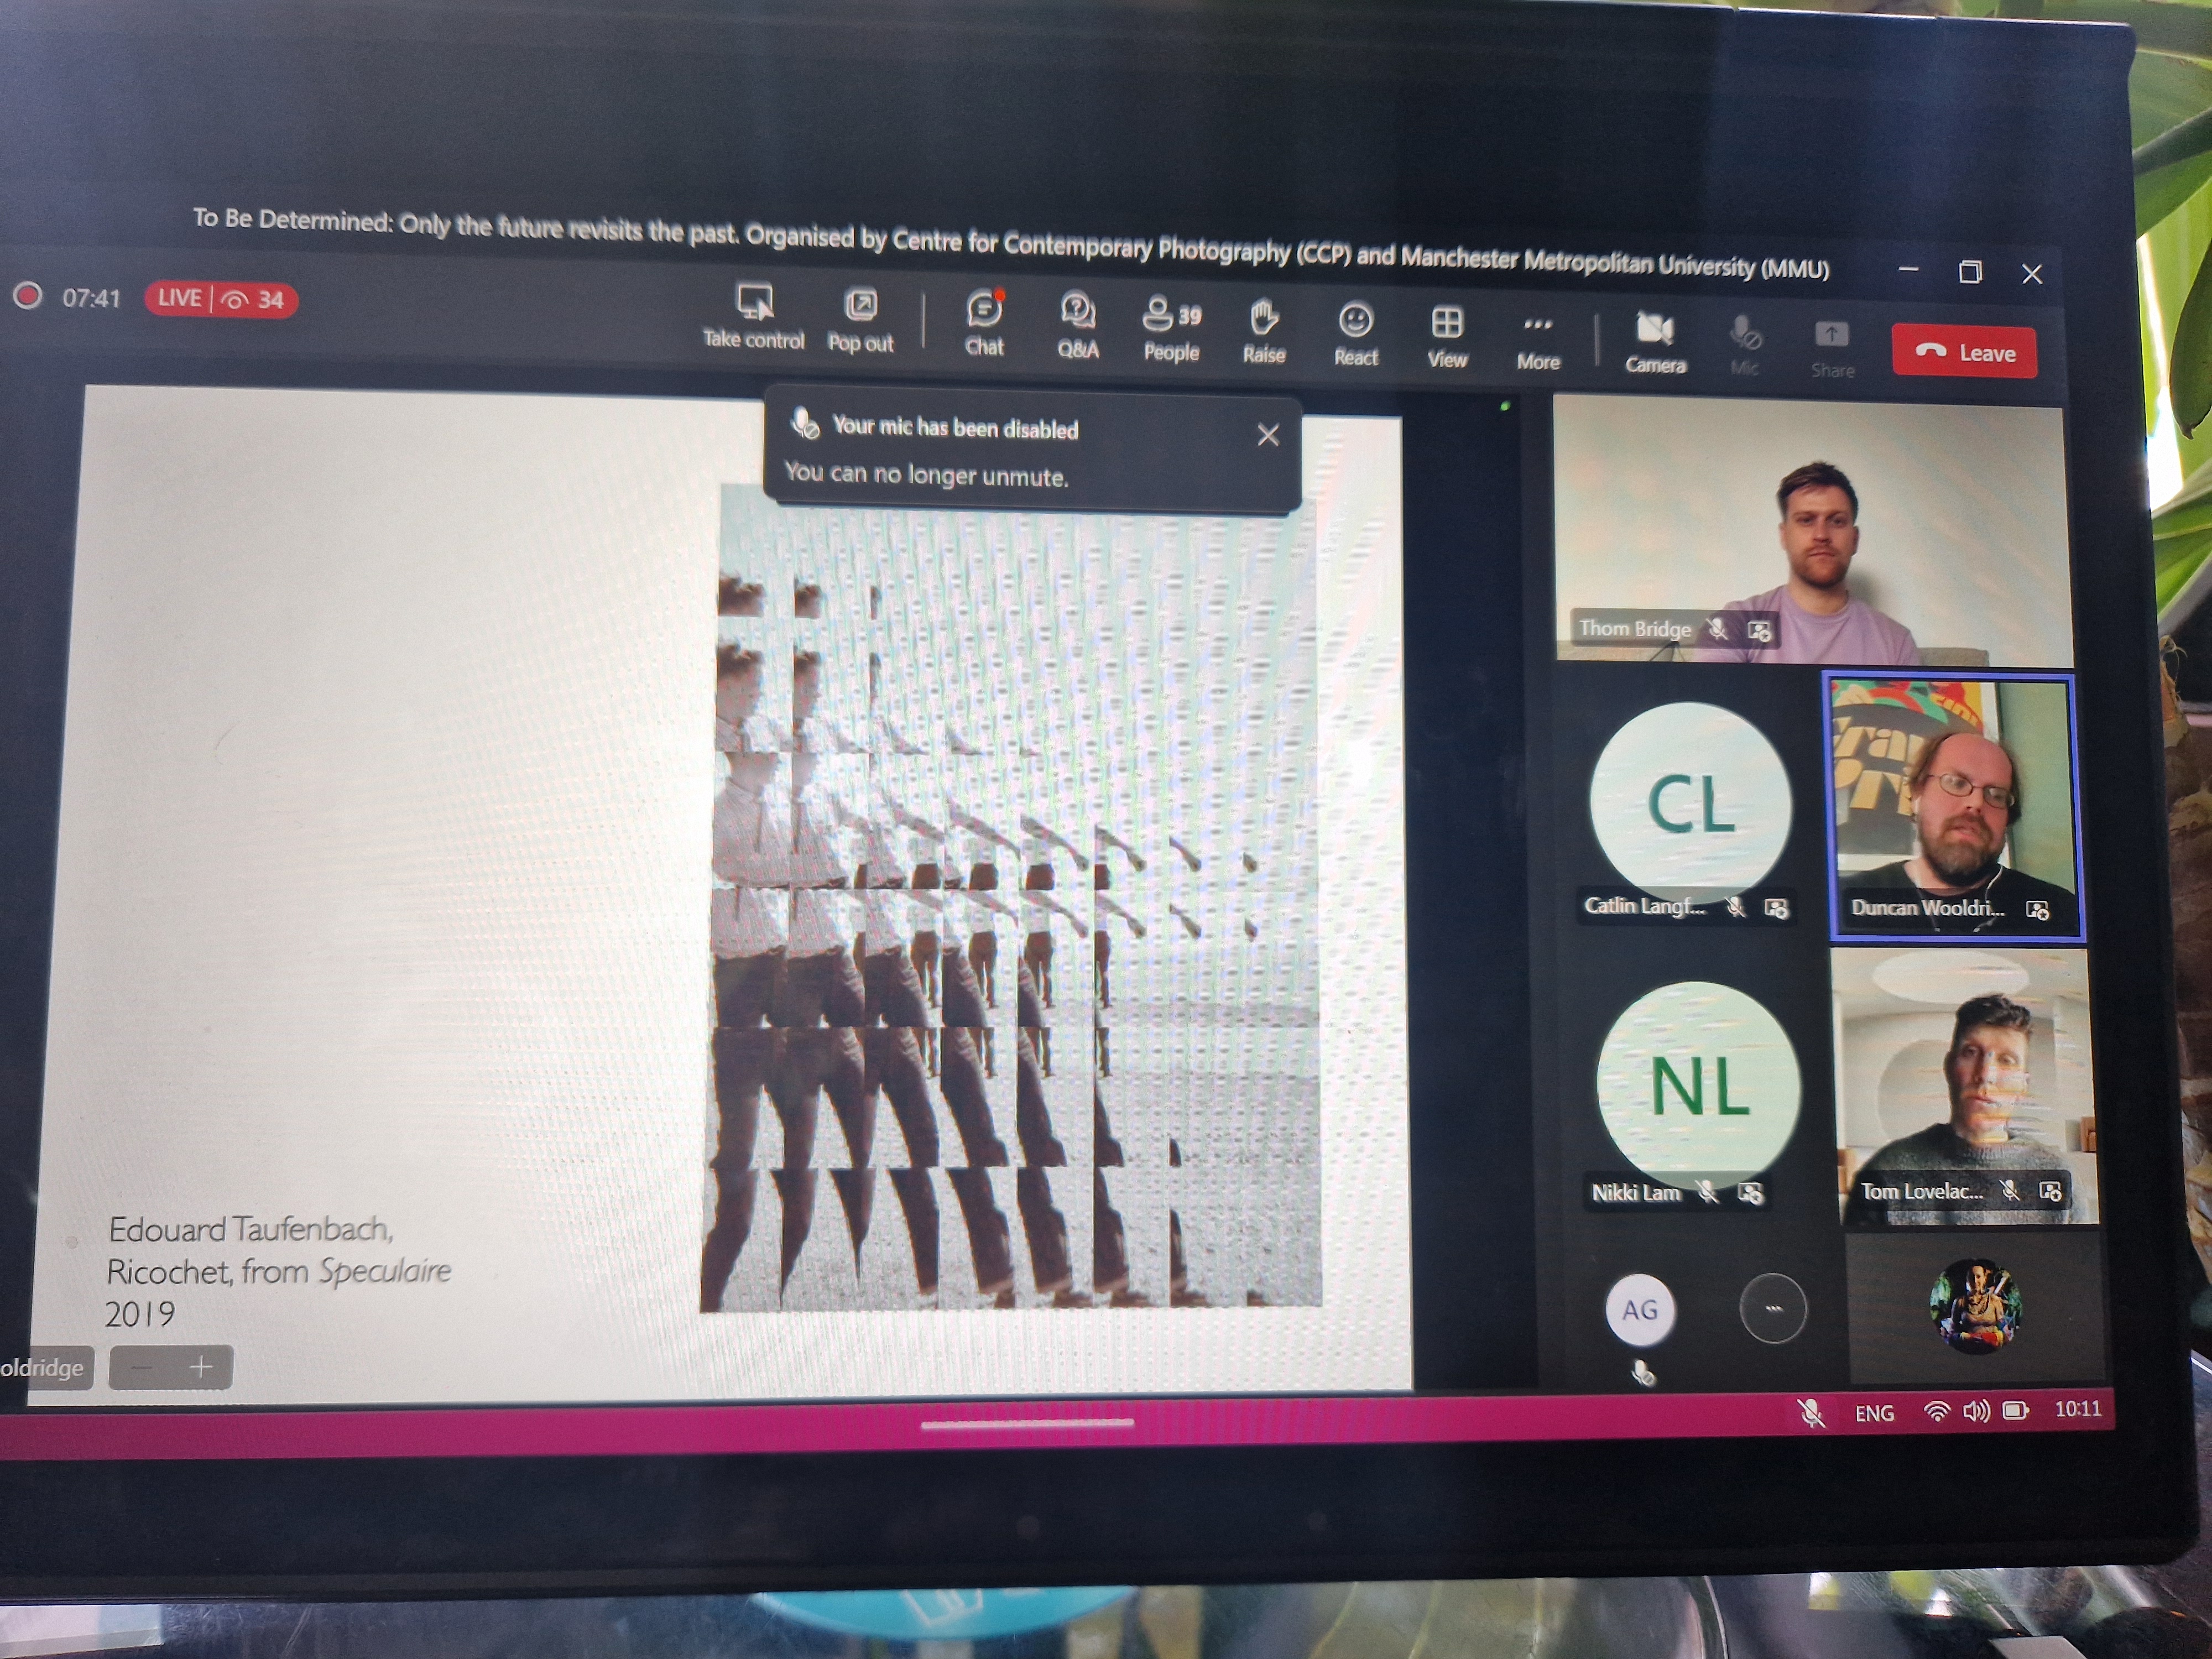
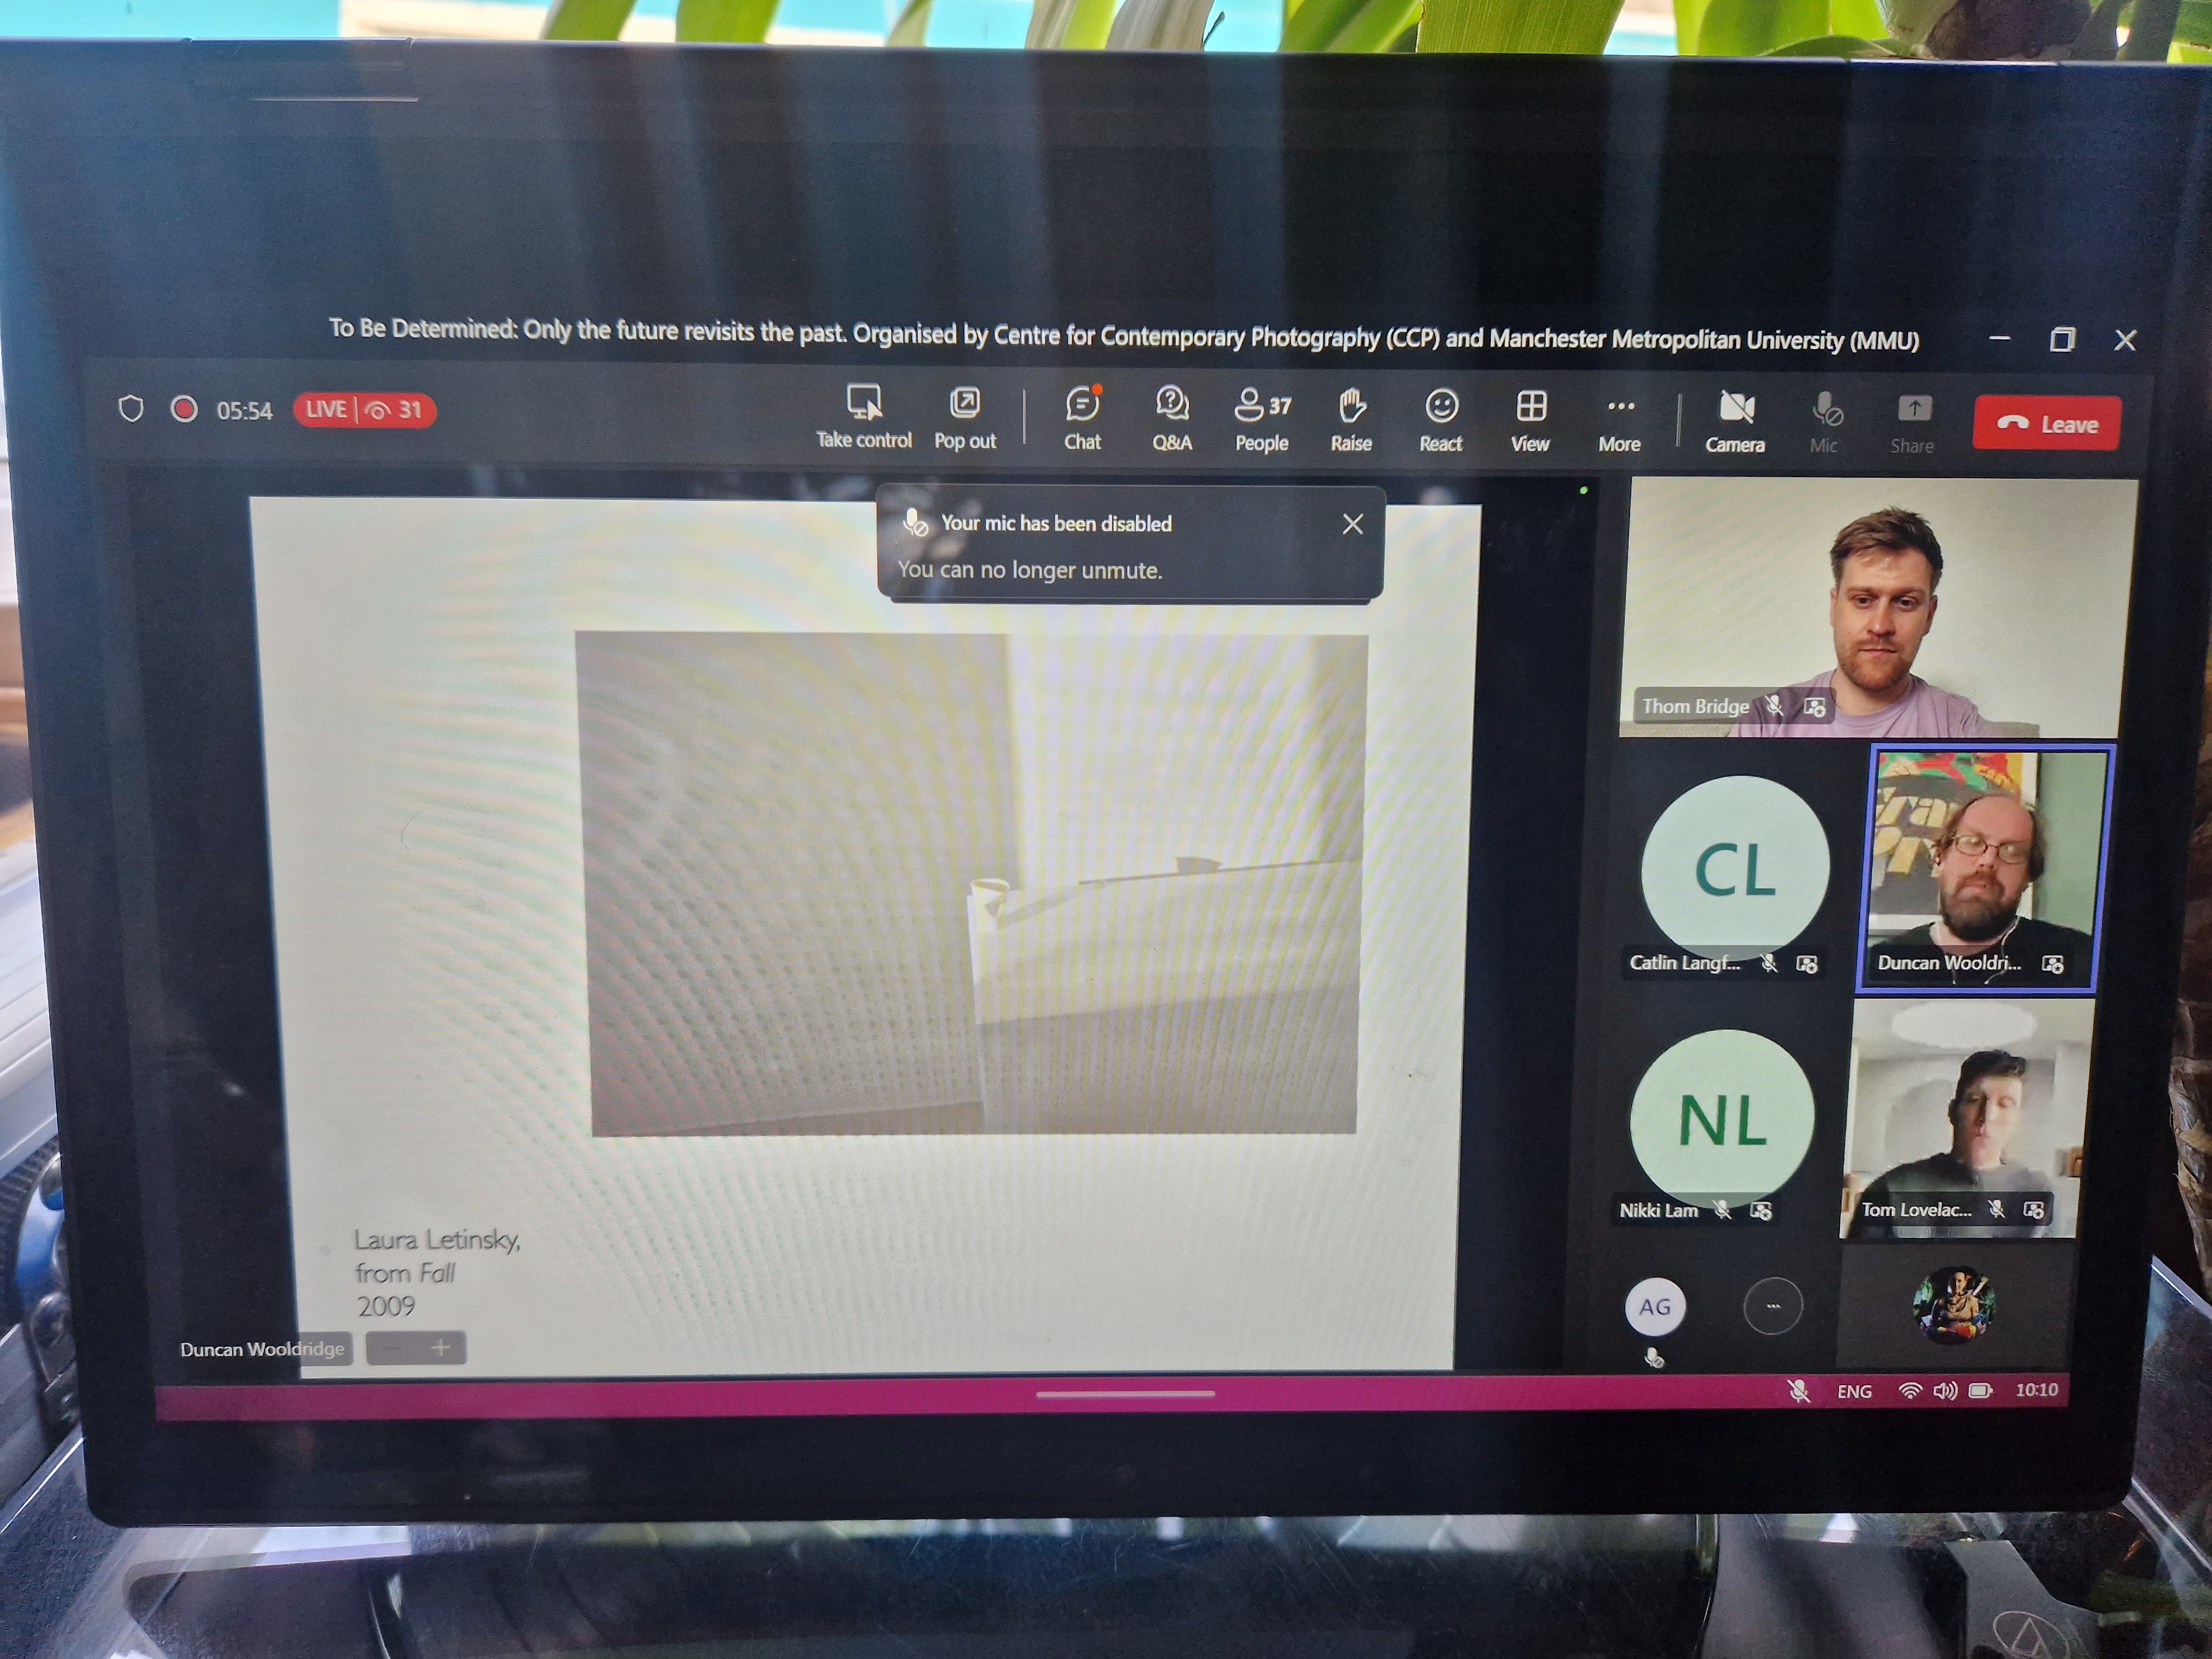
REFLECTIONS: An incredibly interesting and insightful talk. The main points of discussion were video art by Nikki Lam and Tom Lovelace's artwork tackling the subject of breaking the standards by which photography is experienced as a viewer - something very close to my practice and my way of thinking. It made me reflect on my approach and feel like I am on the right track.
WEEK 15: 6-12 MAY
MONDAY
ATTACHING BRACKETS TO STEEL SHEET
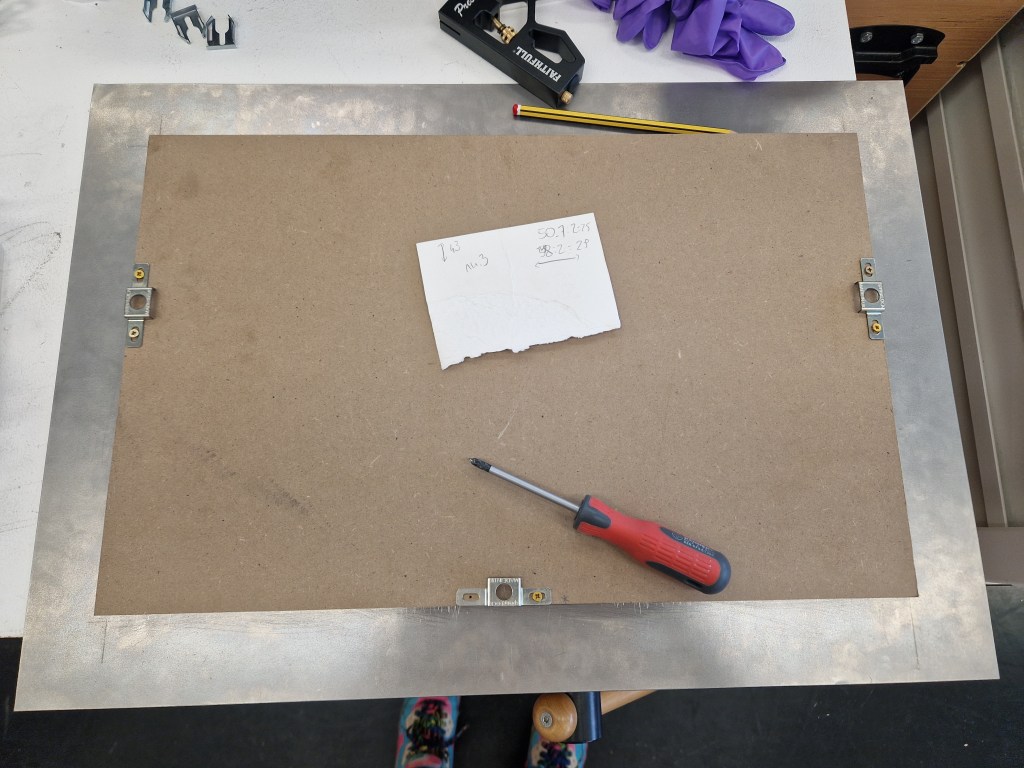
WORKING ON THE FINAL RESIZED SCULPTURE
Entering the last stage of making my sculpture, I ventured to the concrete workshop to cover the inner part with concrete mixed with black pigment. I will leave it a few days to dry and sand it down.
In the meantime, I will await the rest of the sculpture to be printed.
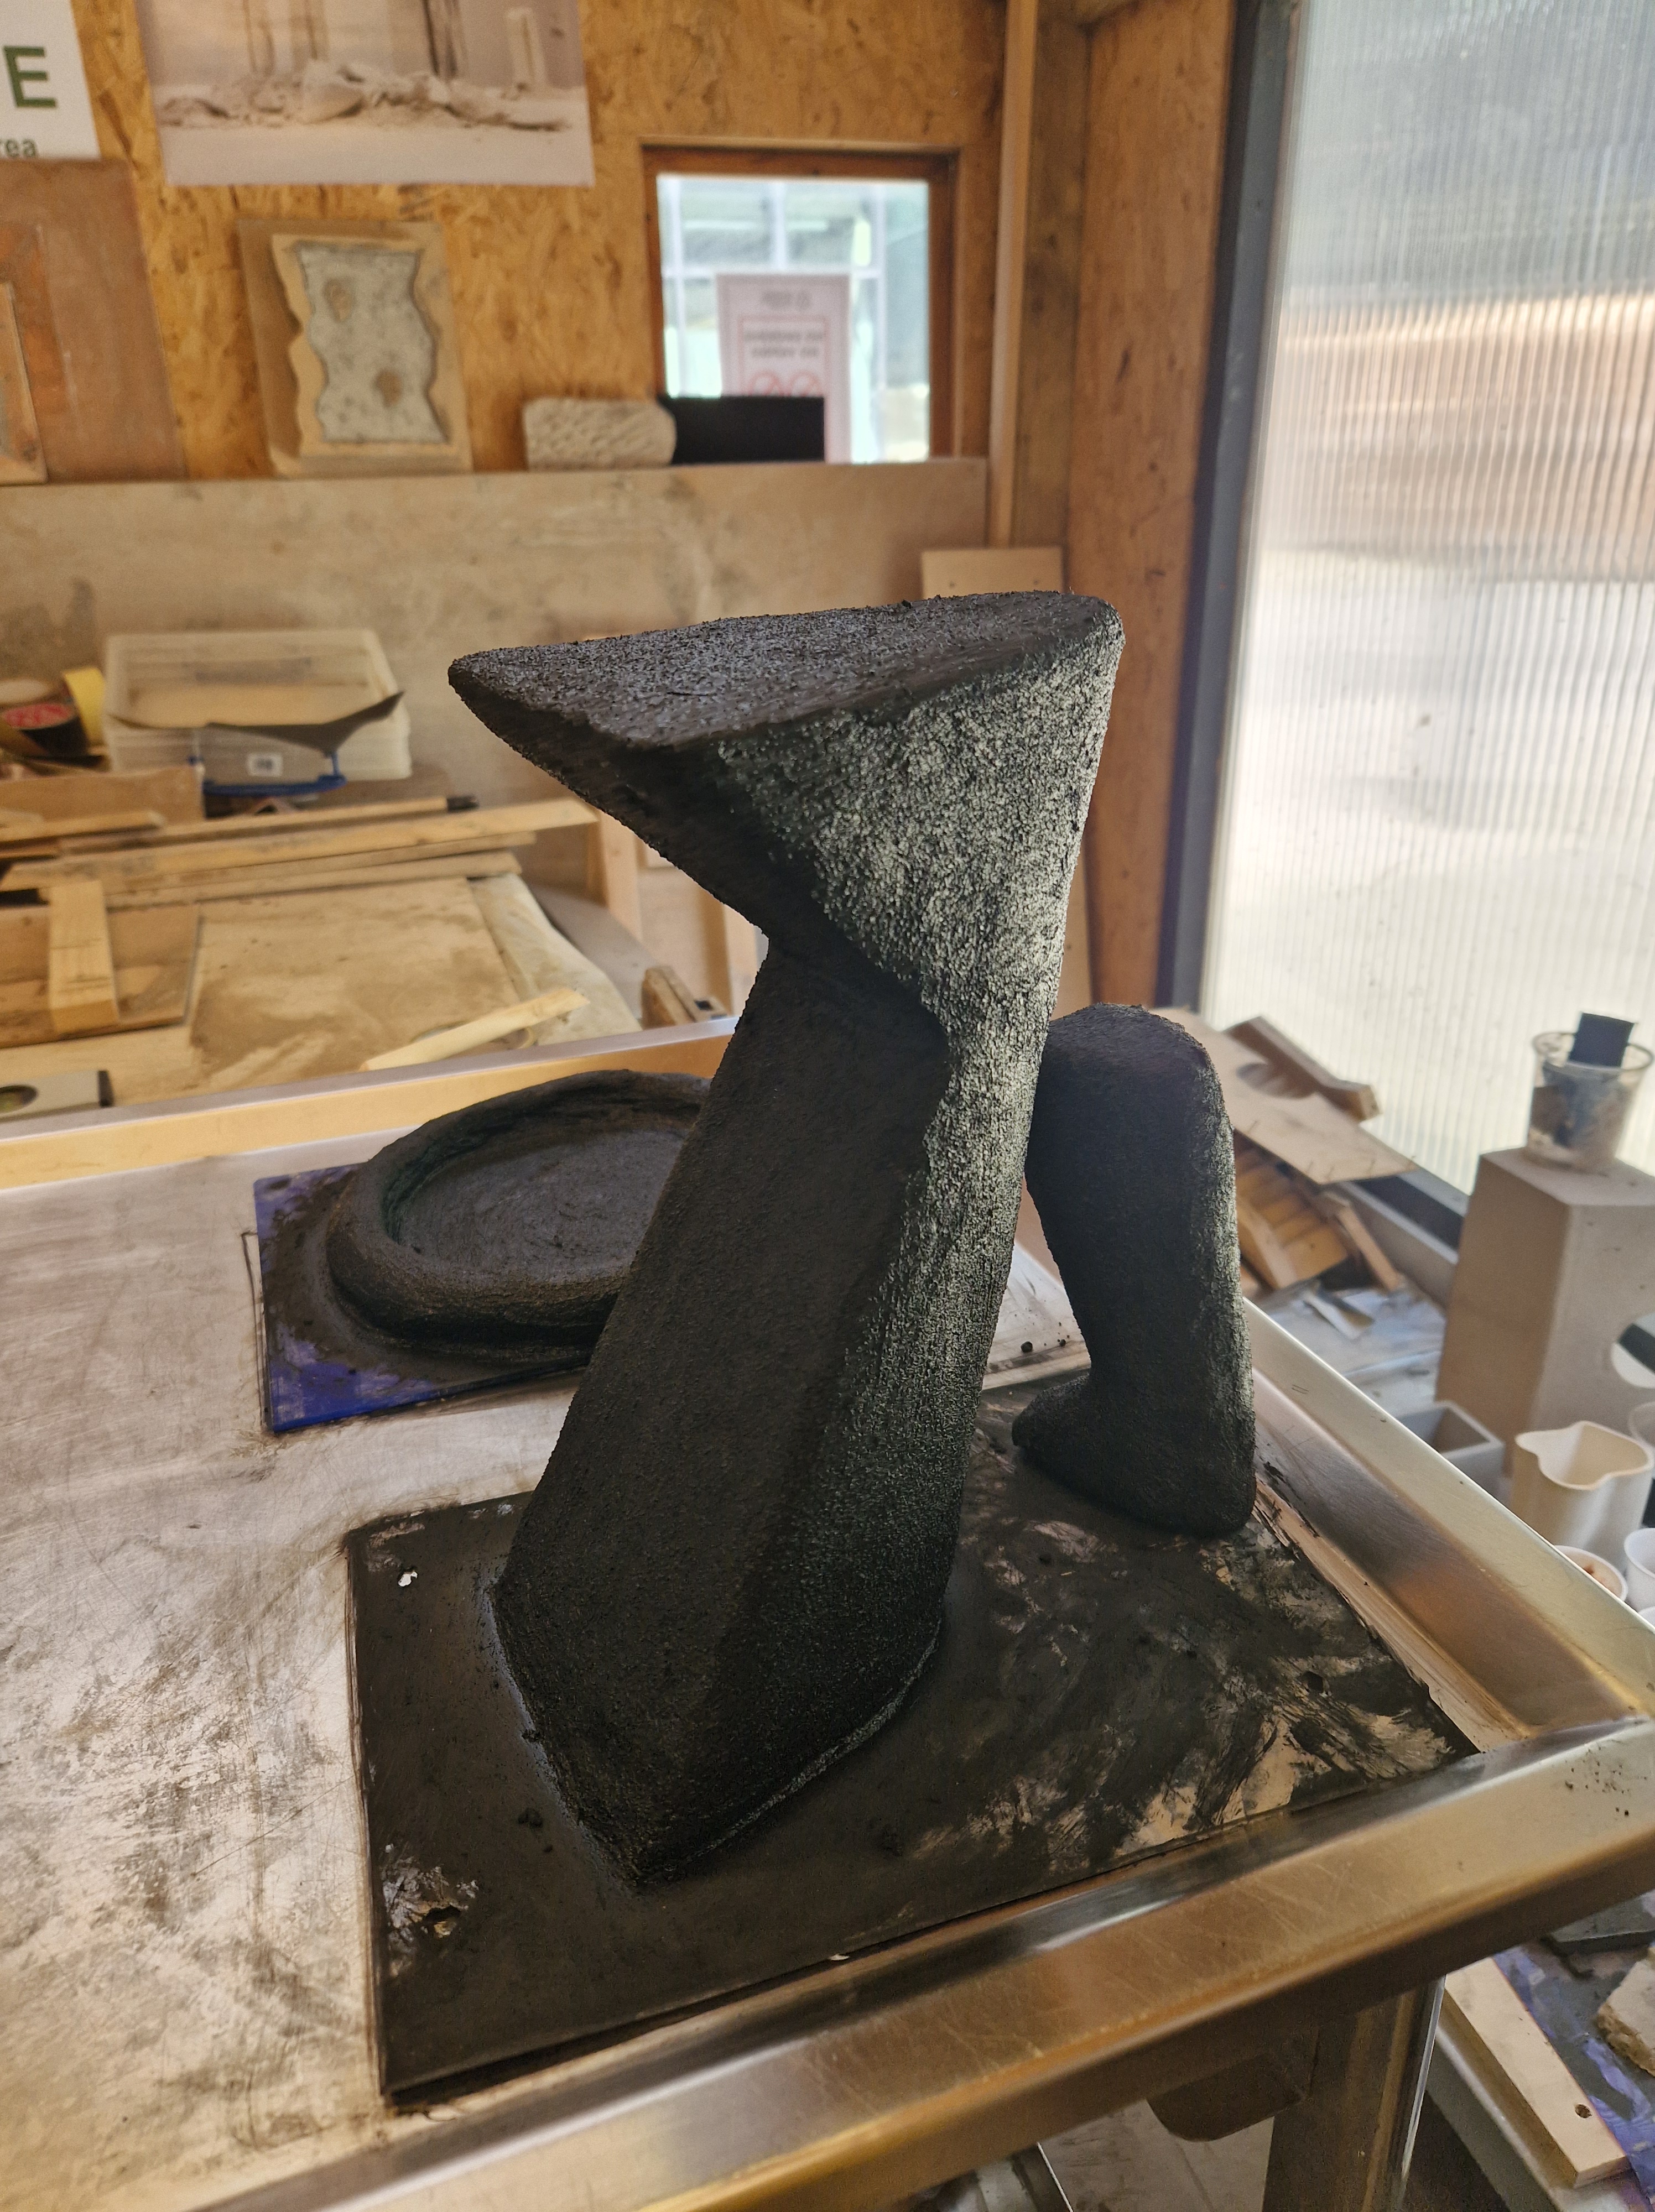
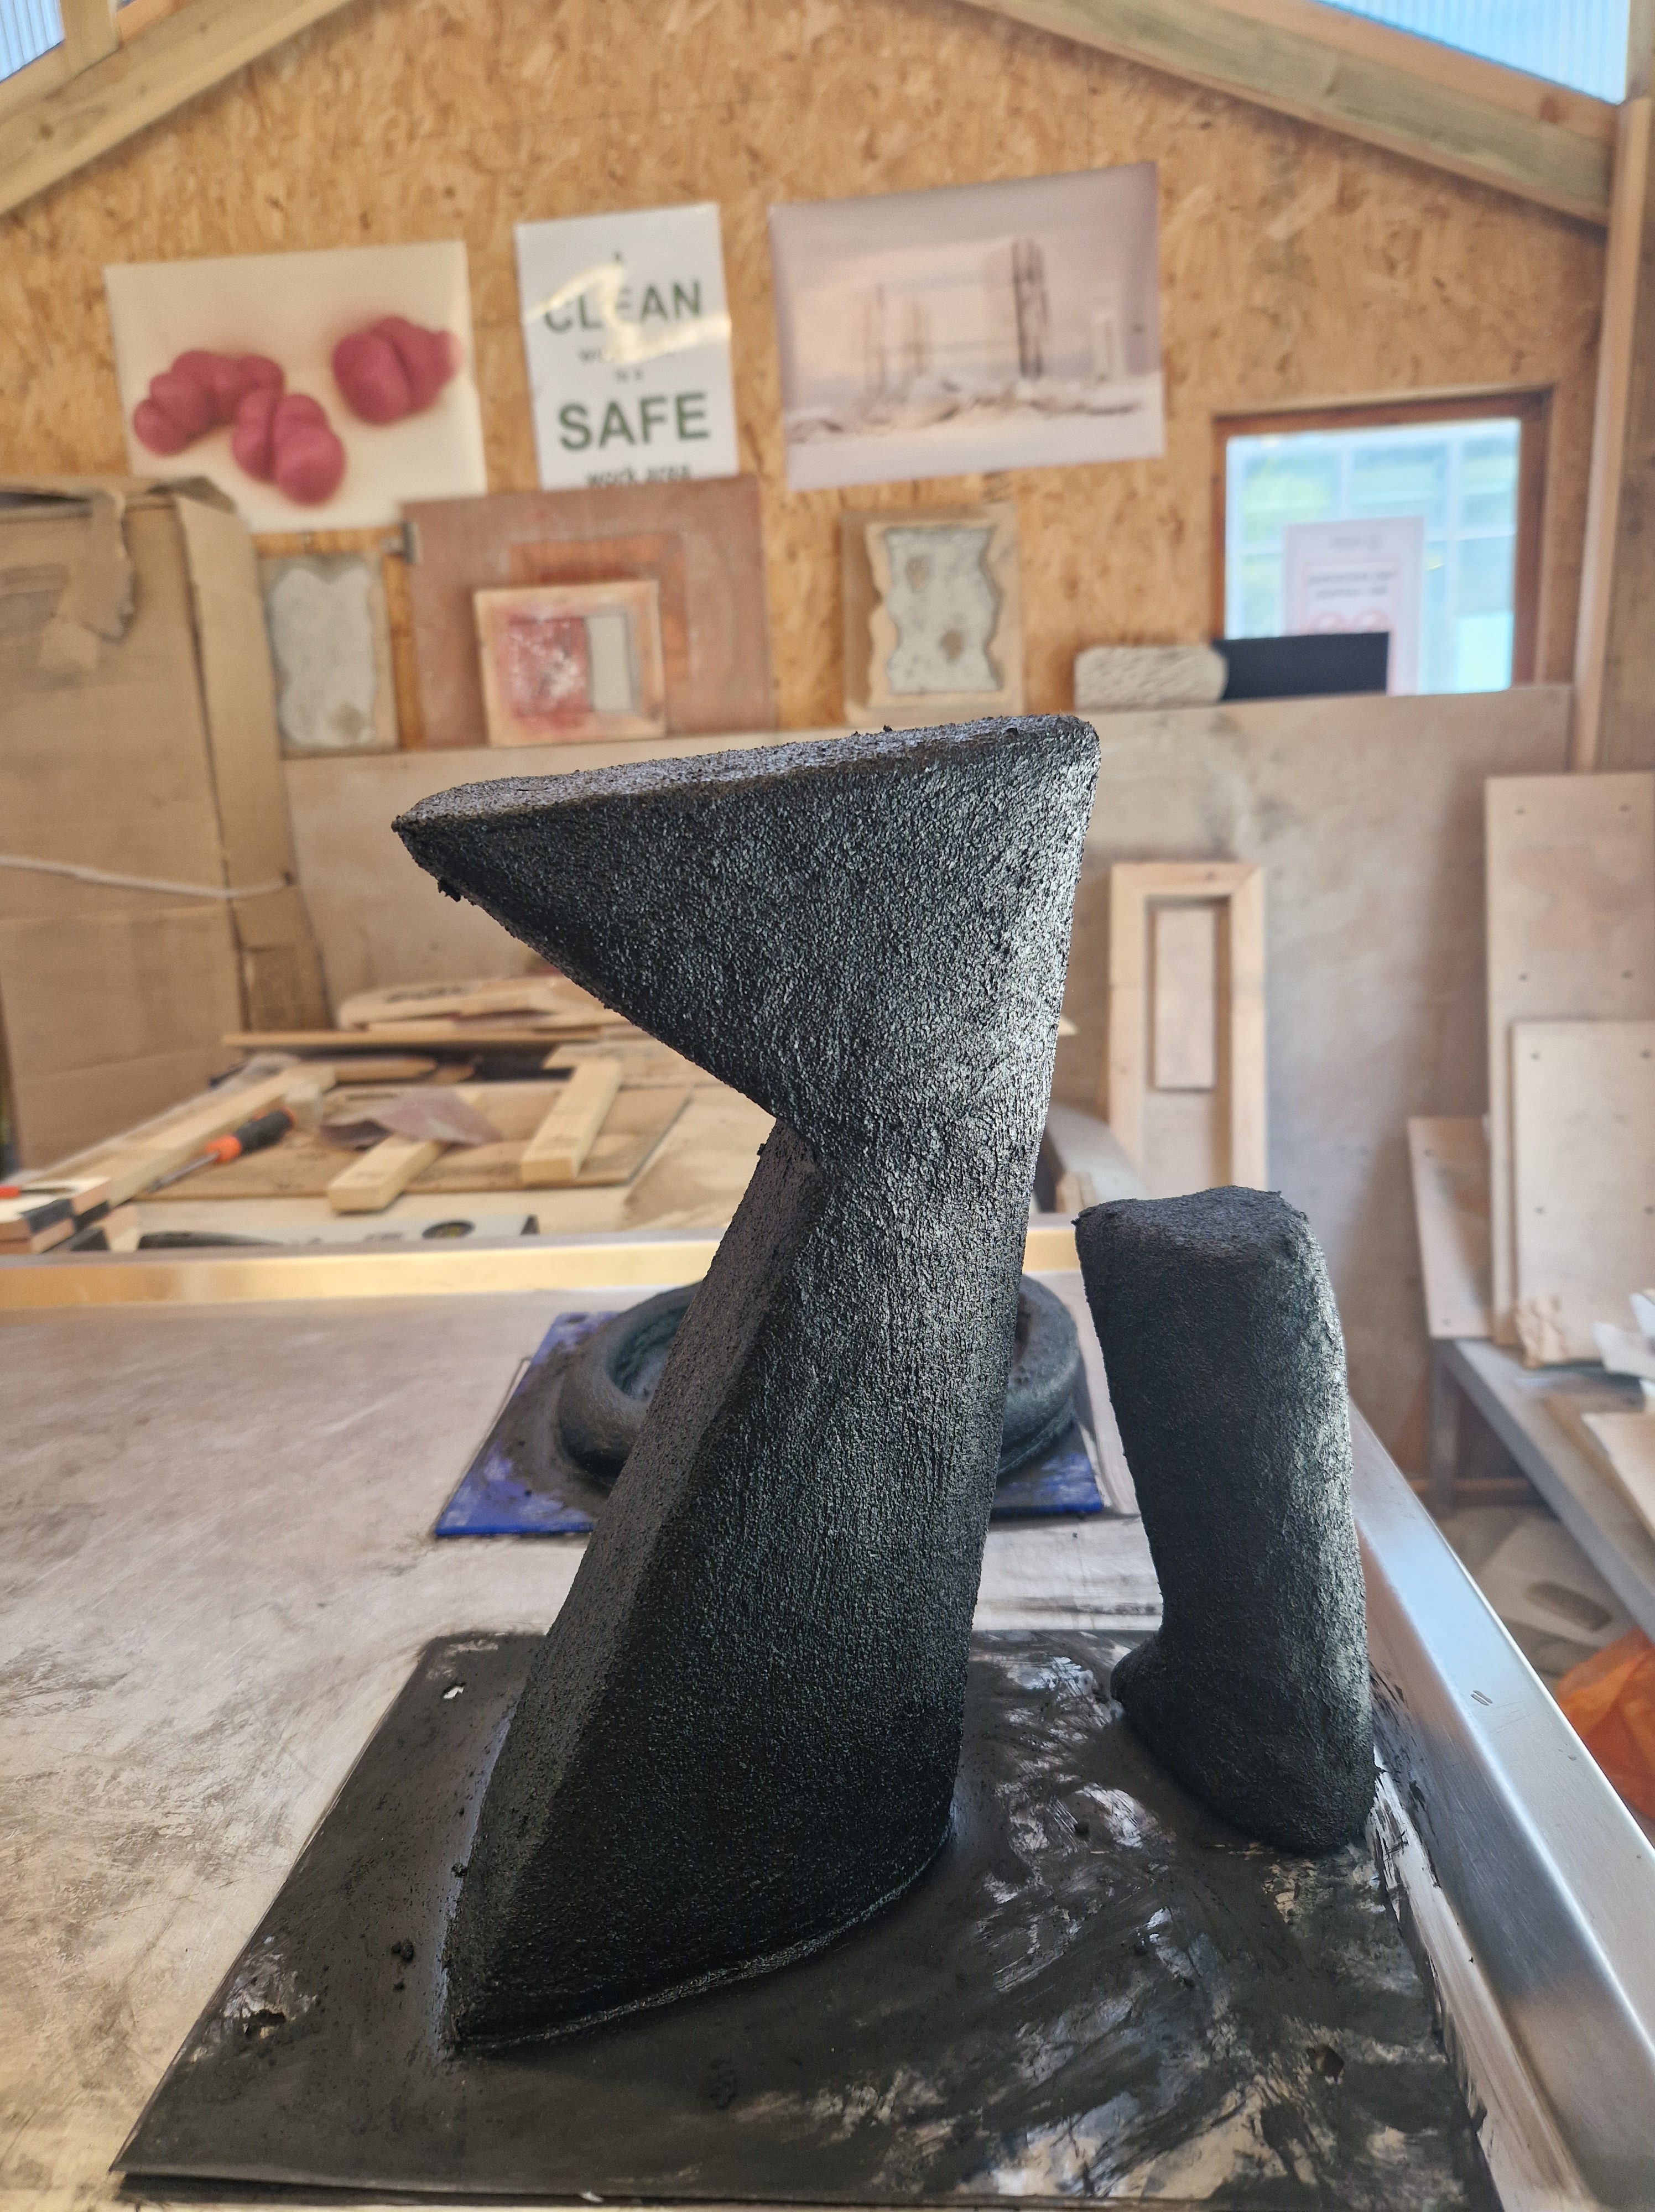
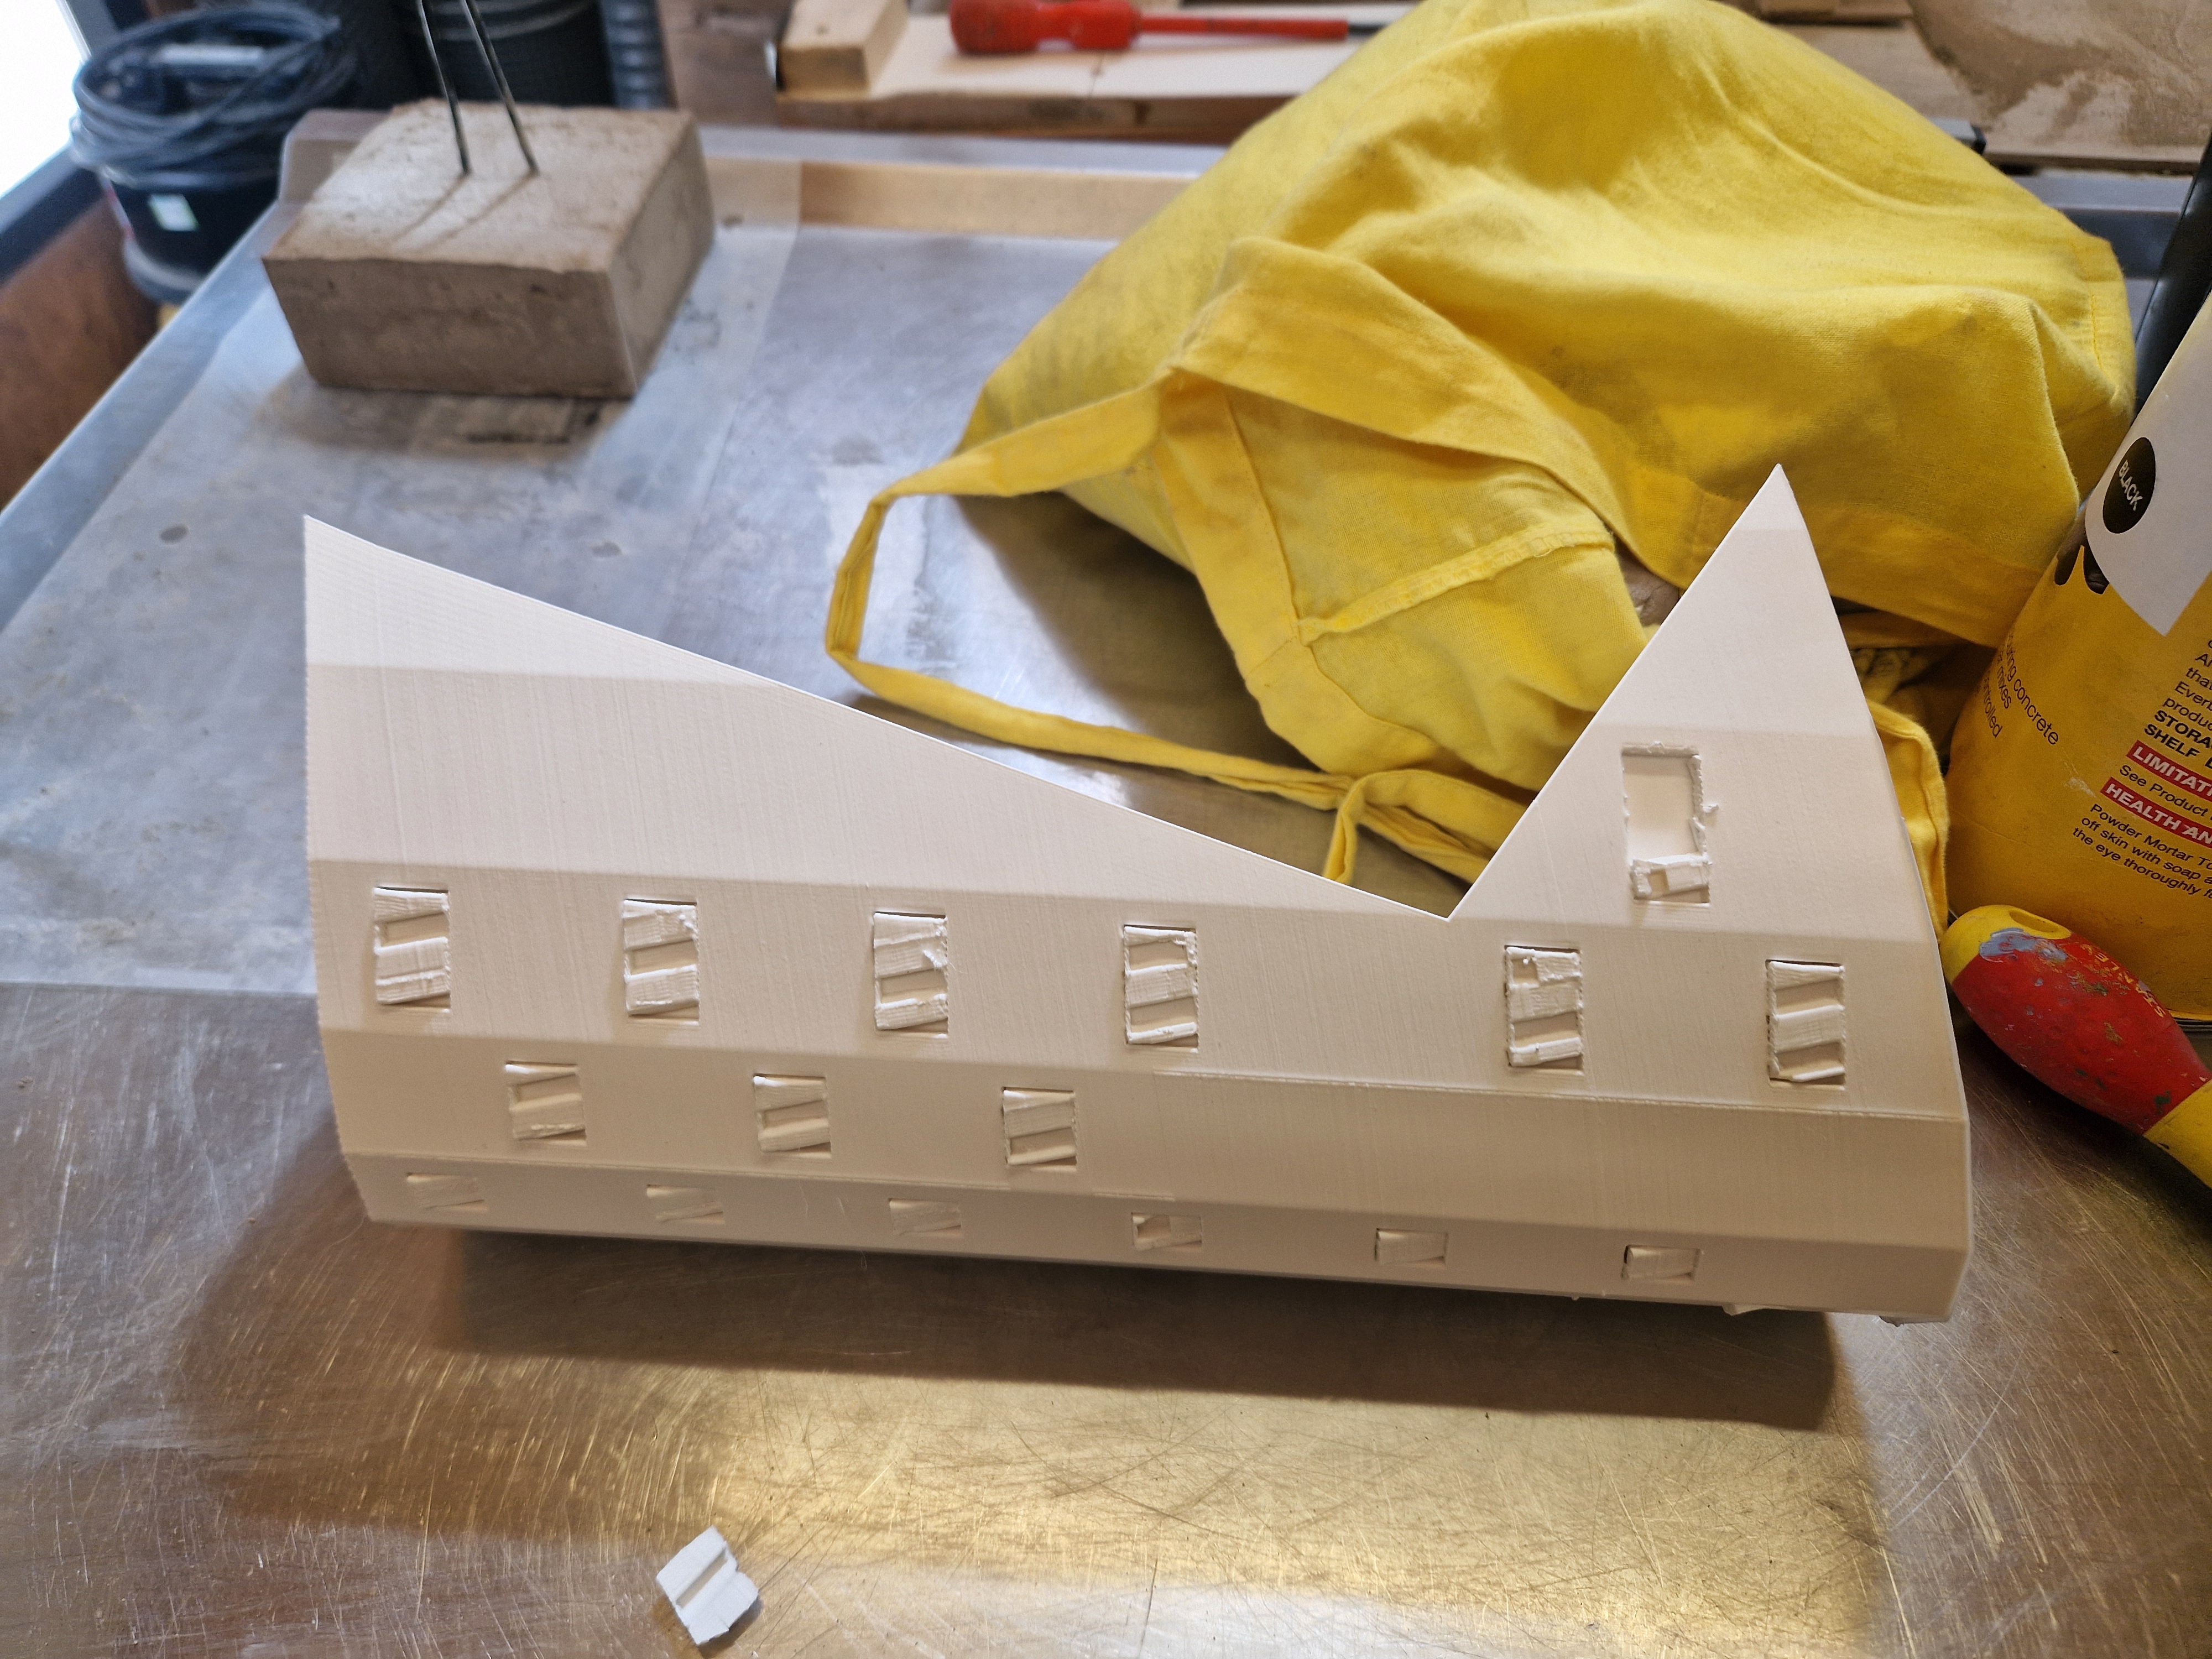
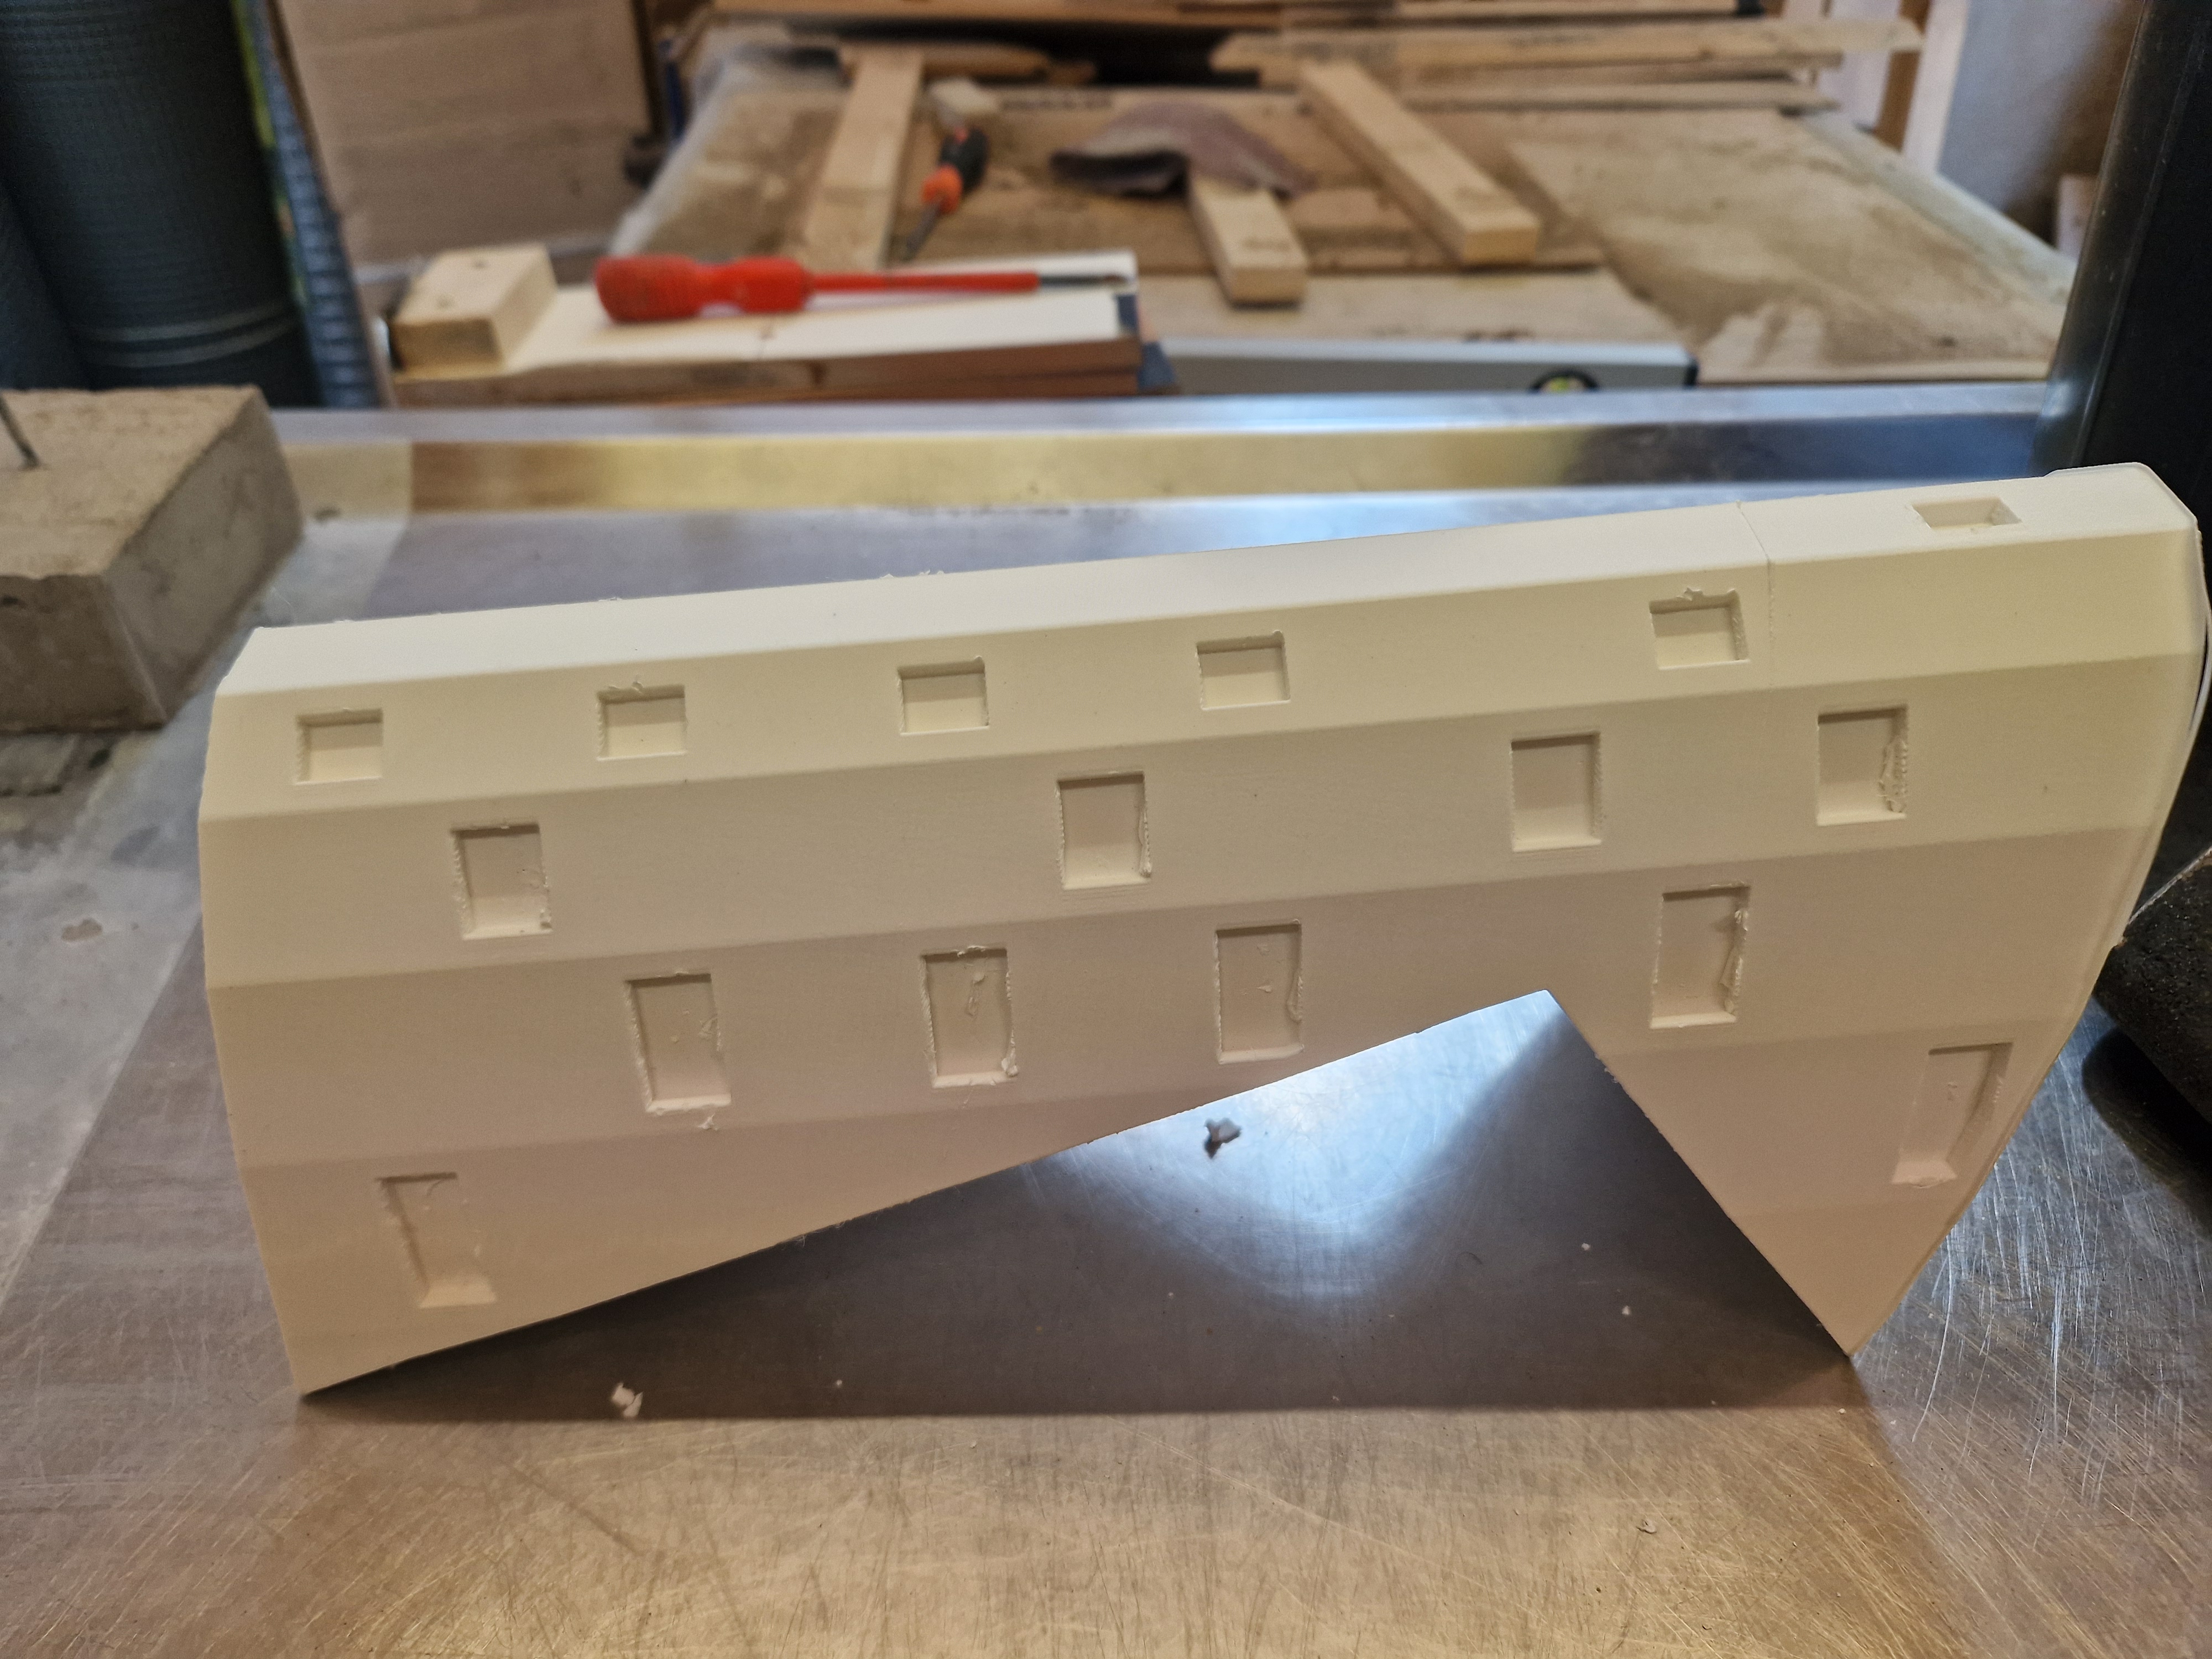
Visiting Print City to pick up part of the sculpture and observe their concrete 3D printing.
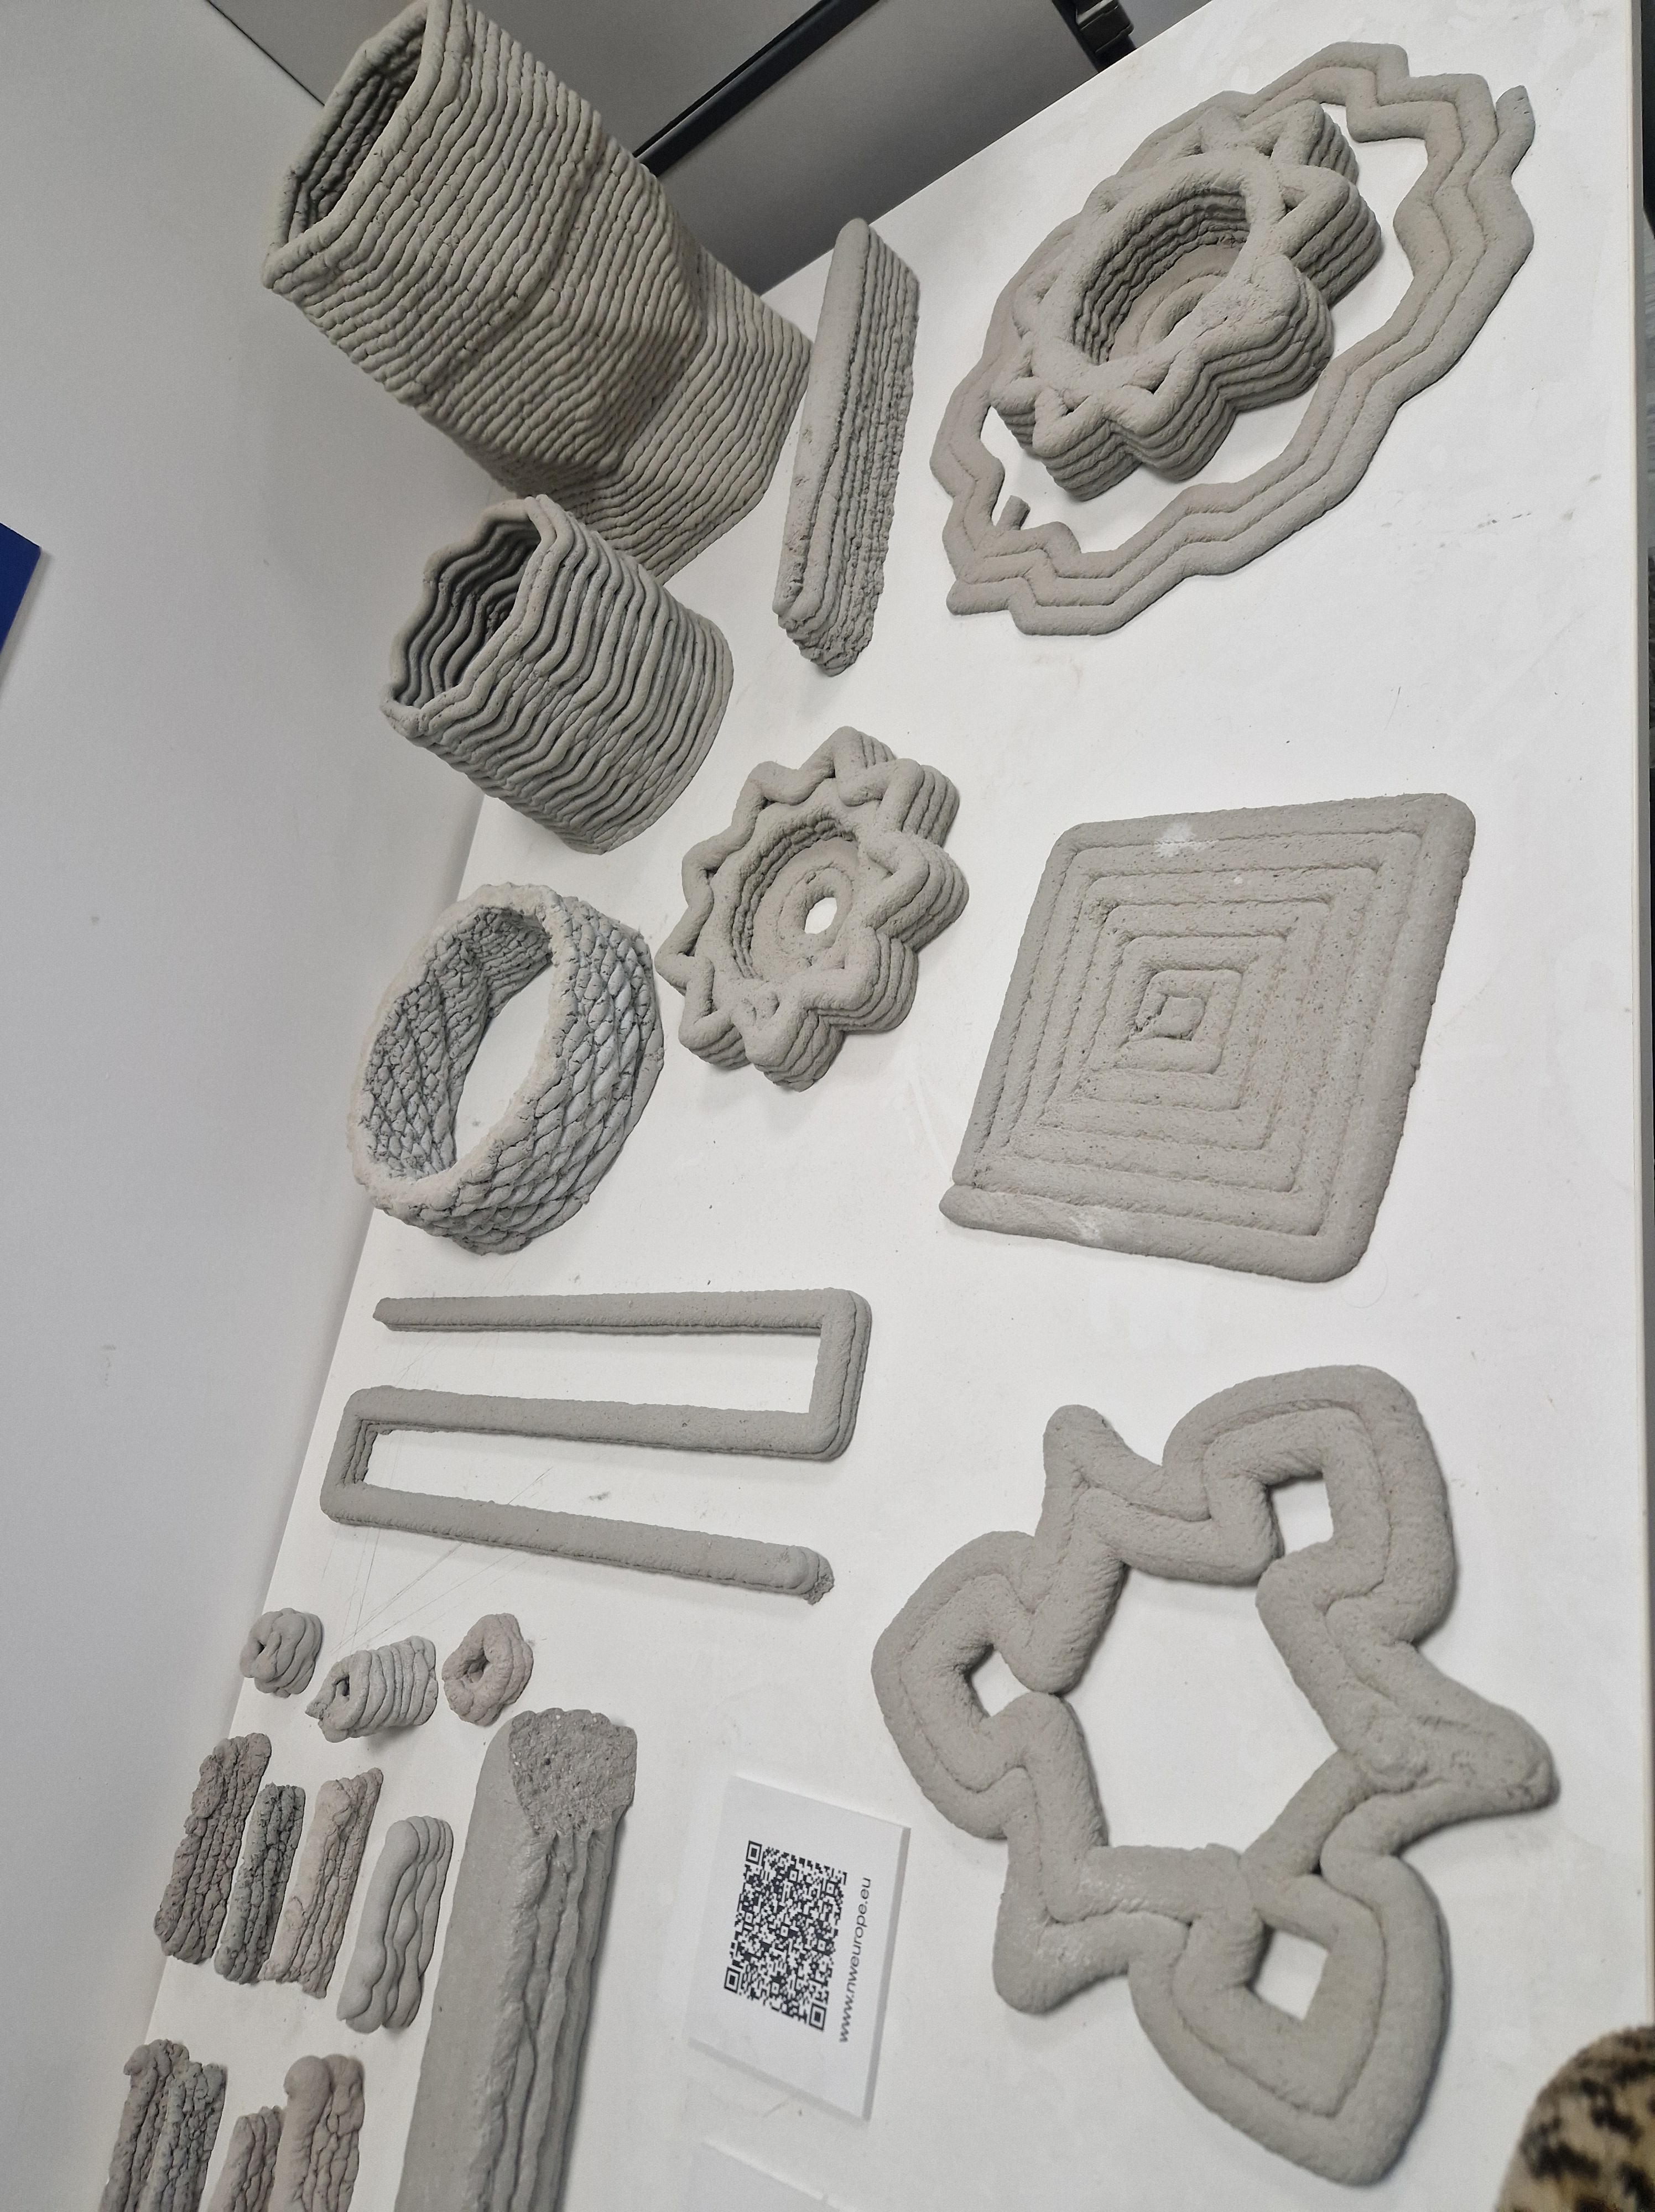
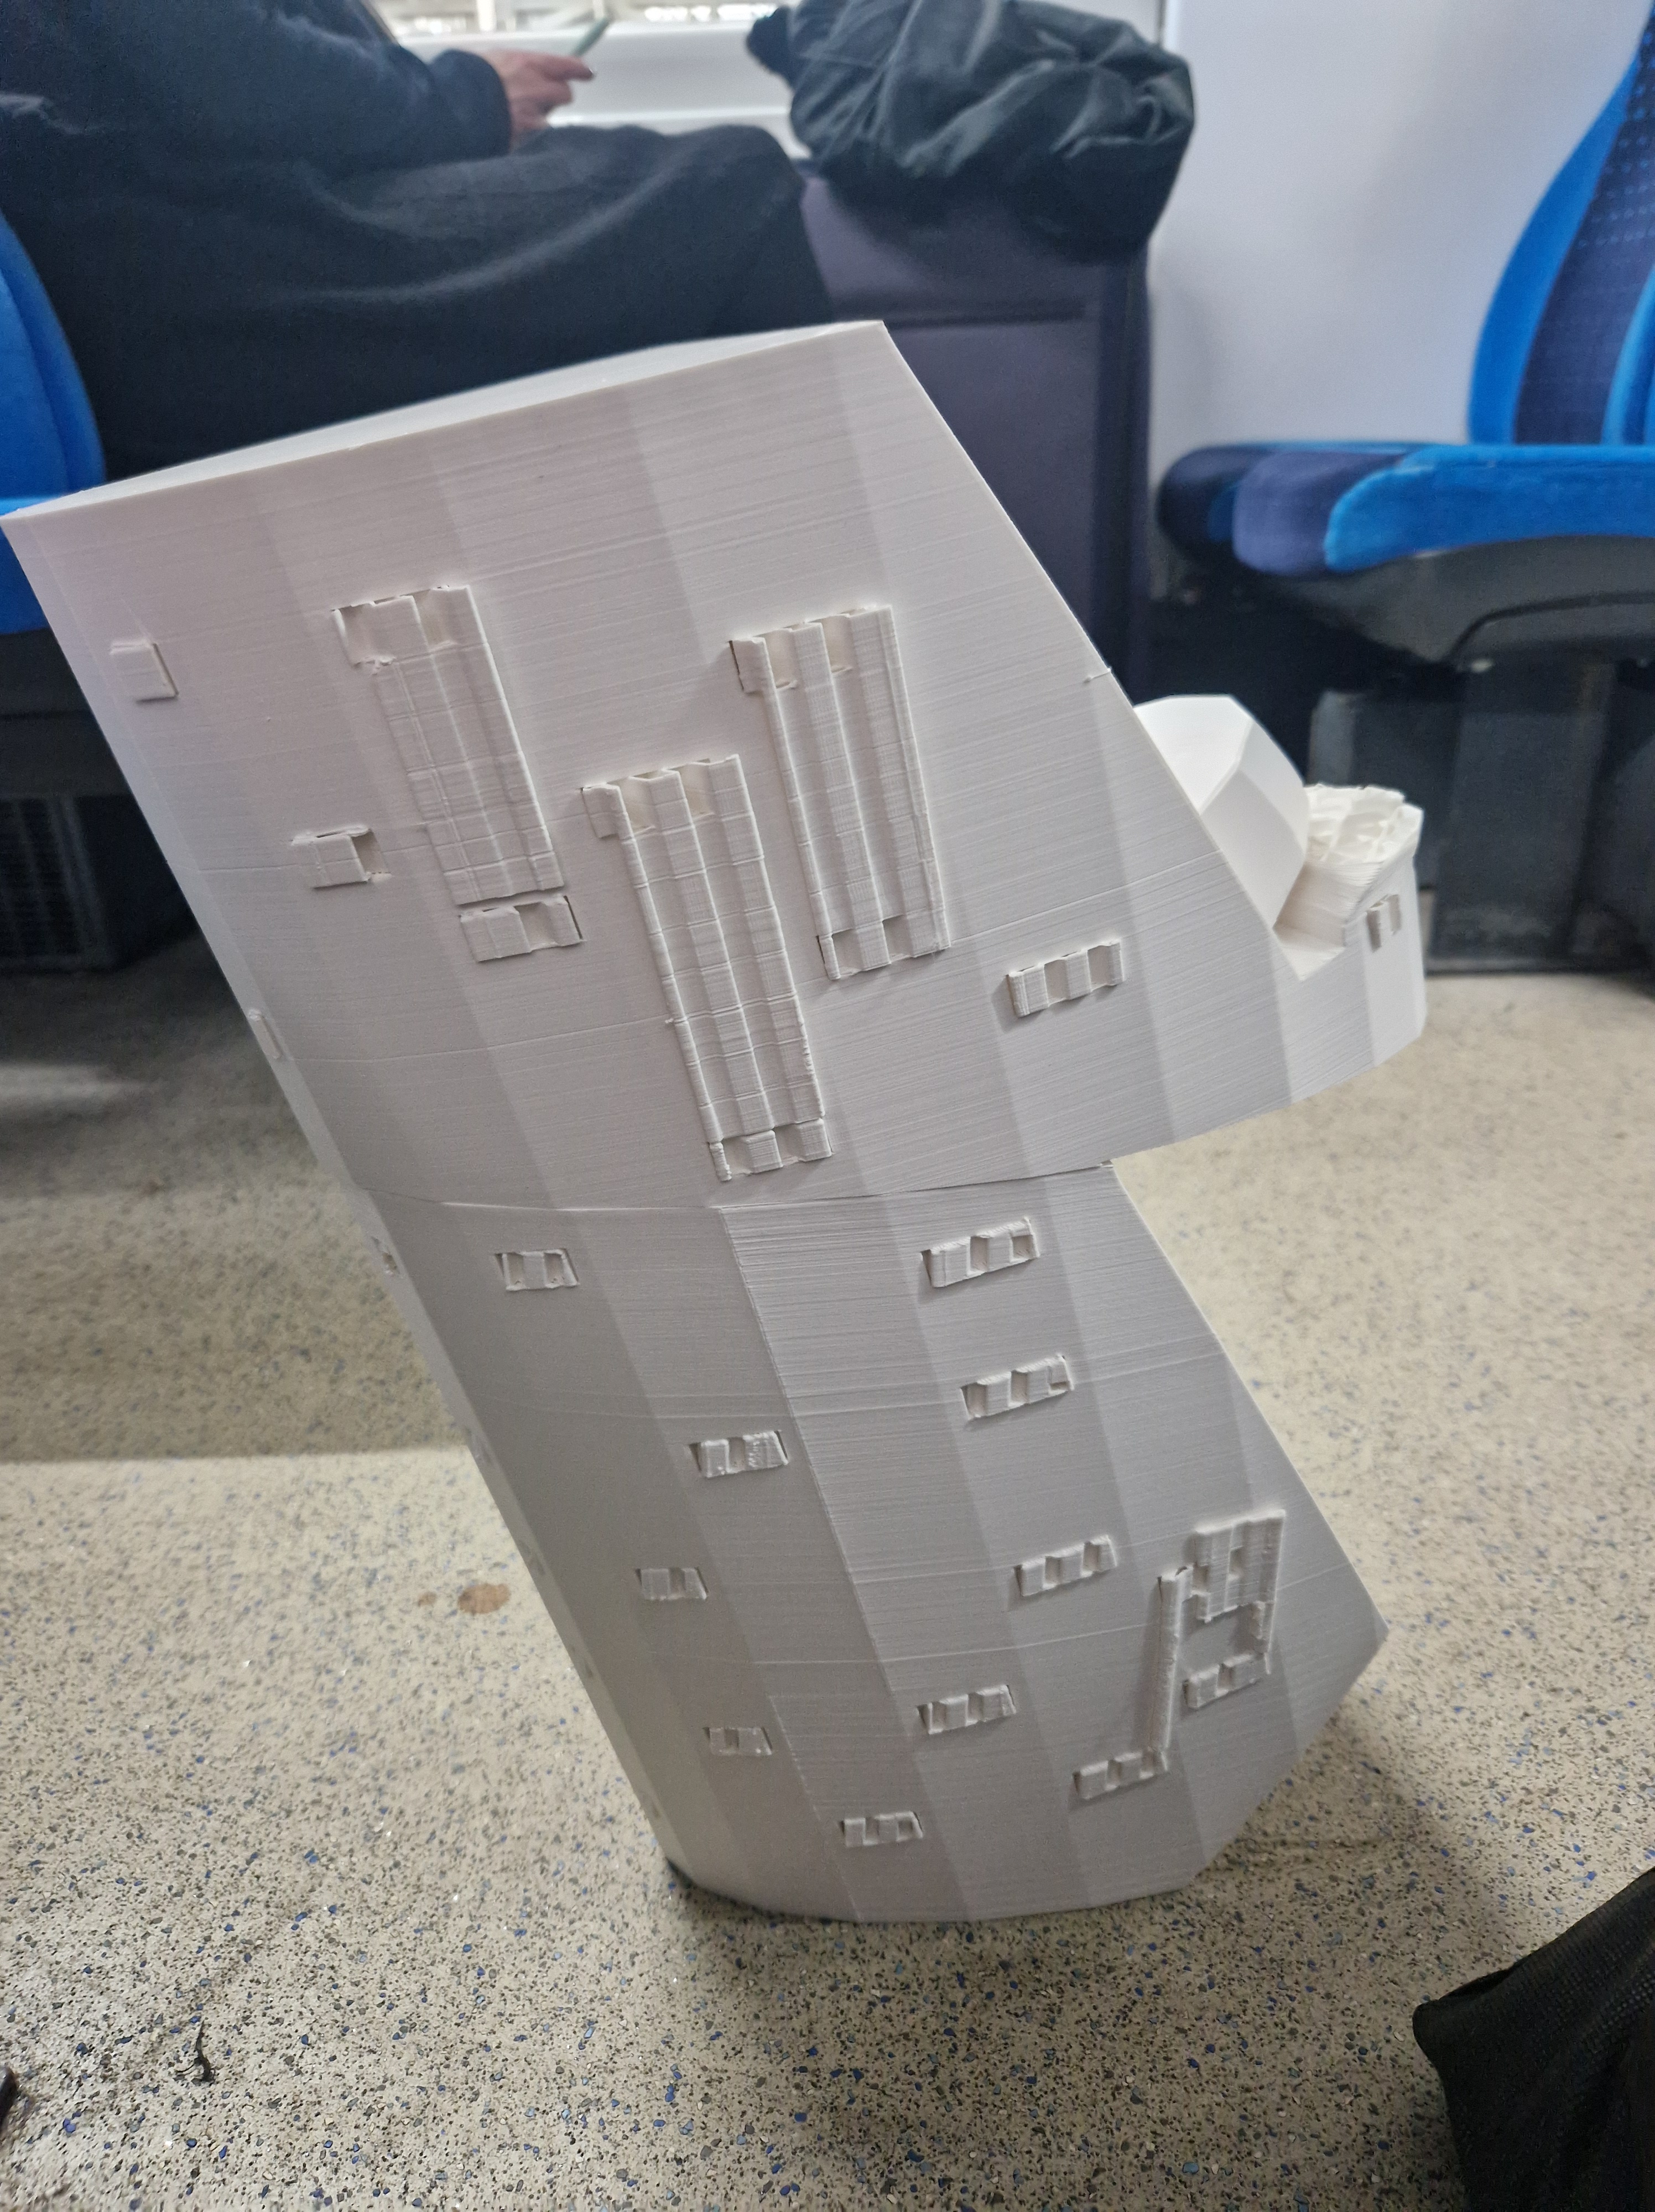
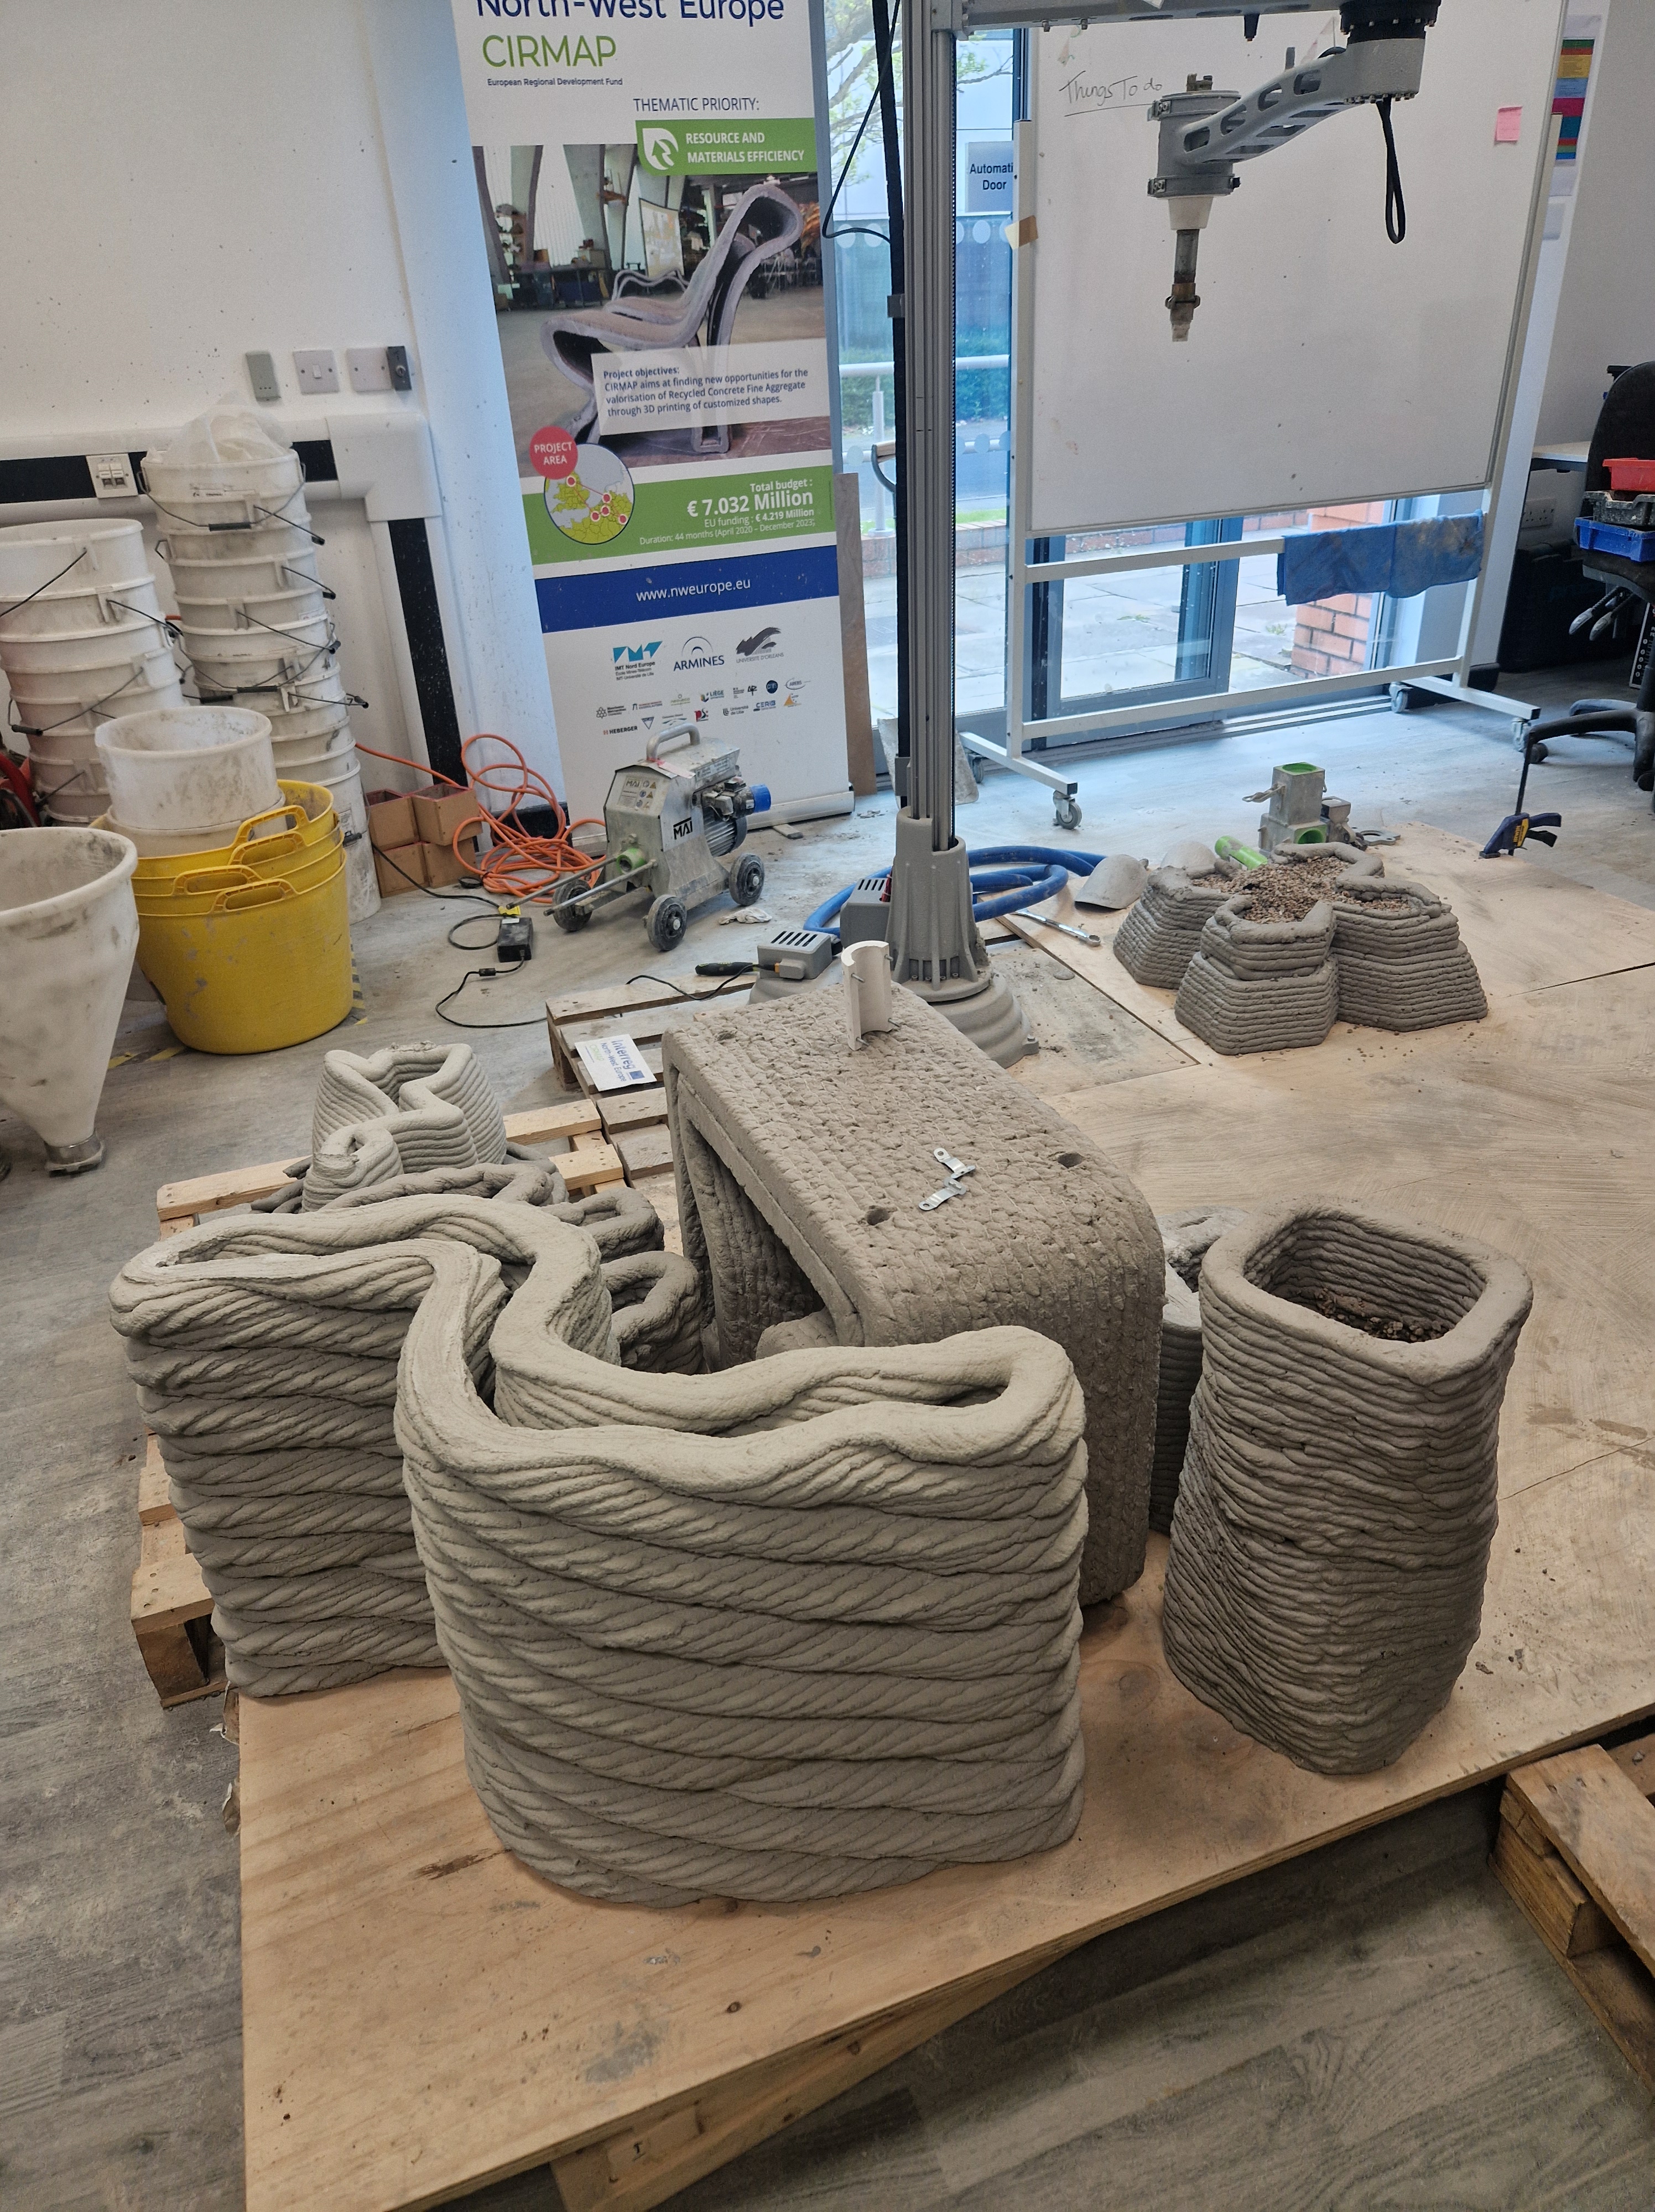
WEEK 16: 13-17 MAY
MONDAY
WORKING ON RESIZED SCULPTURE
SANDING AND GLUEING TWO REMAINING PARTS
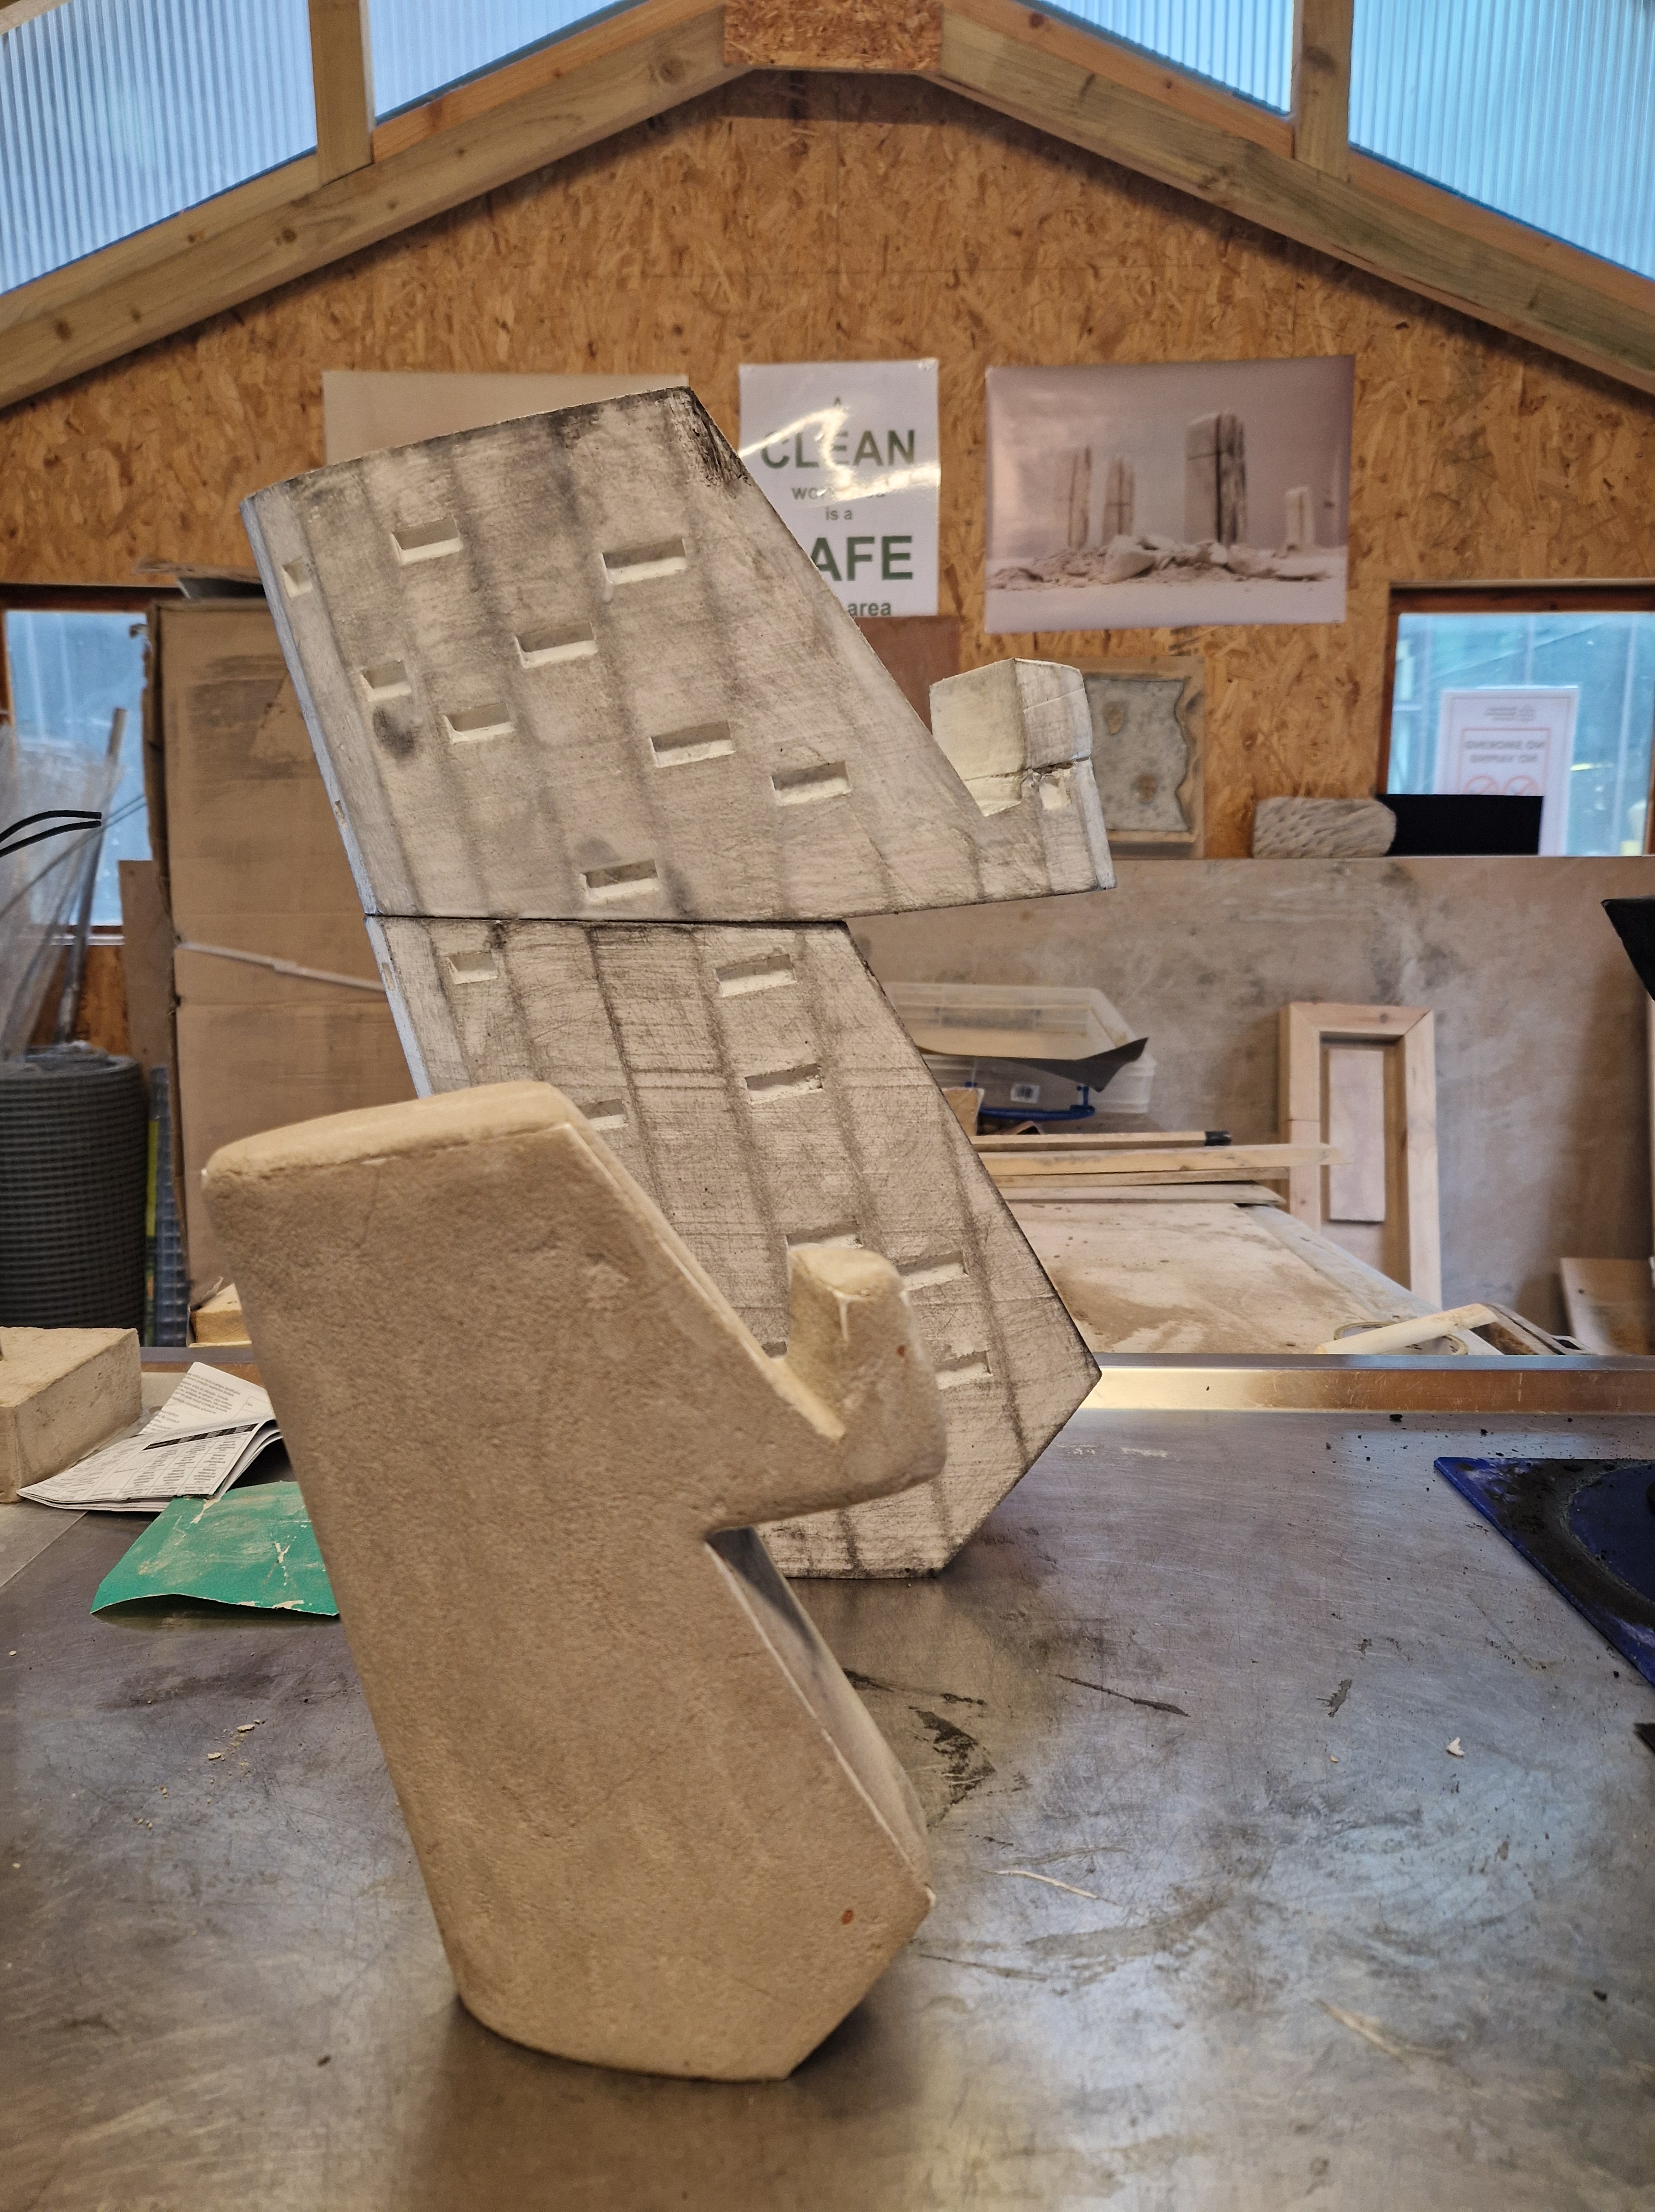
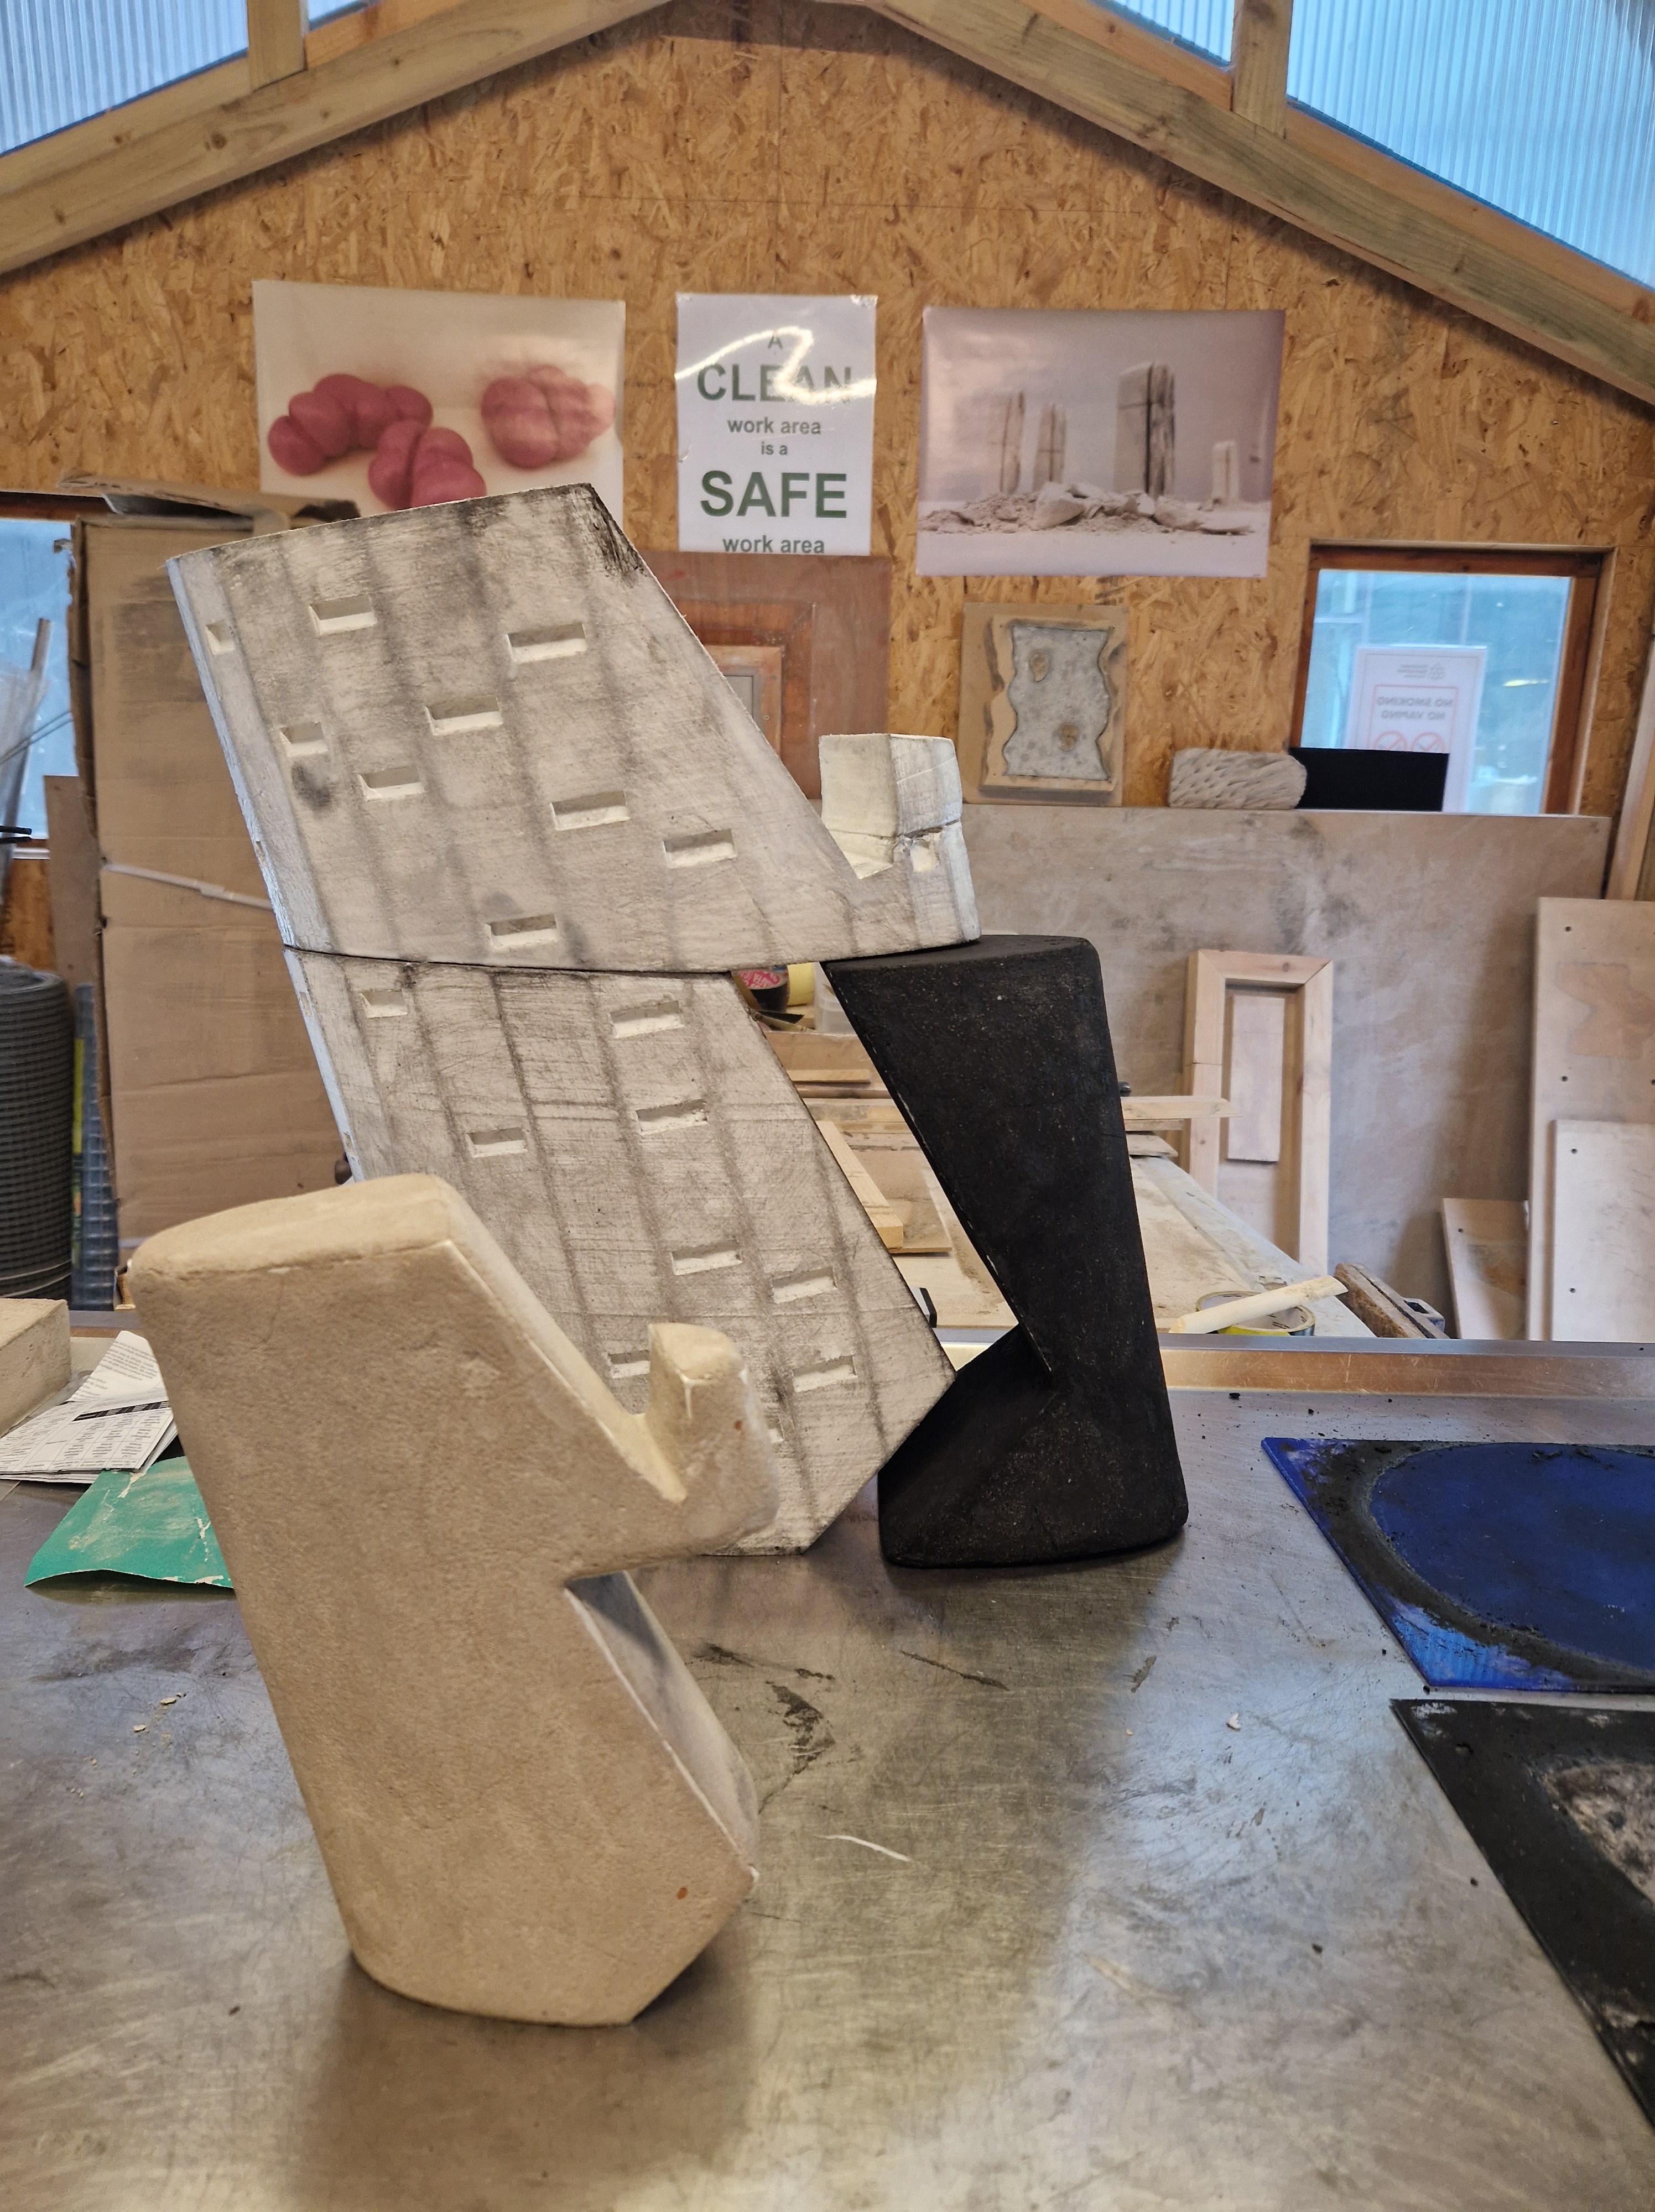
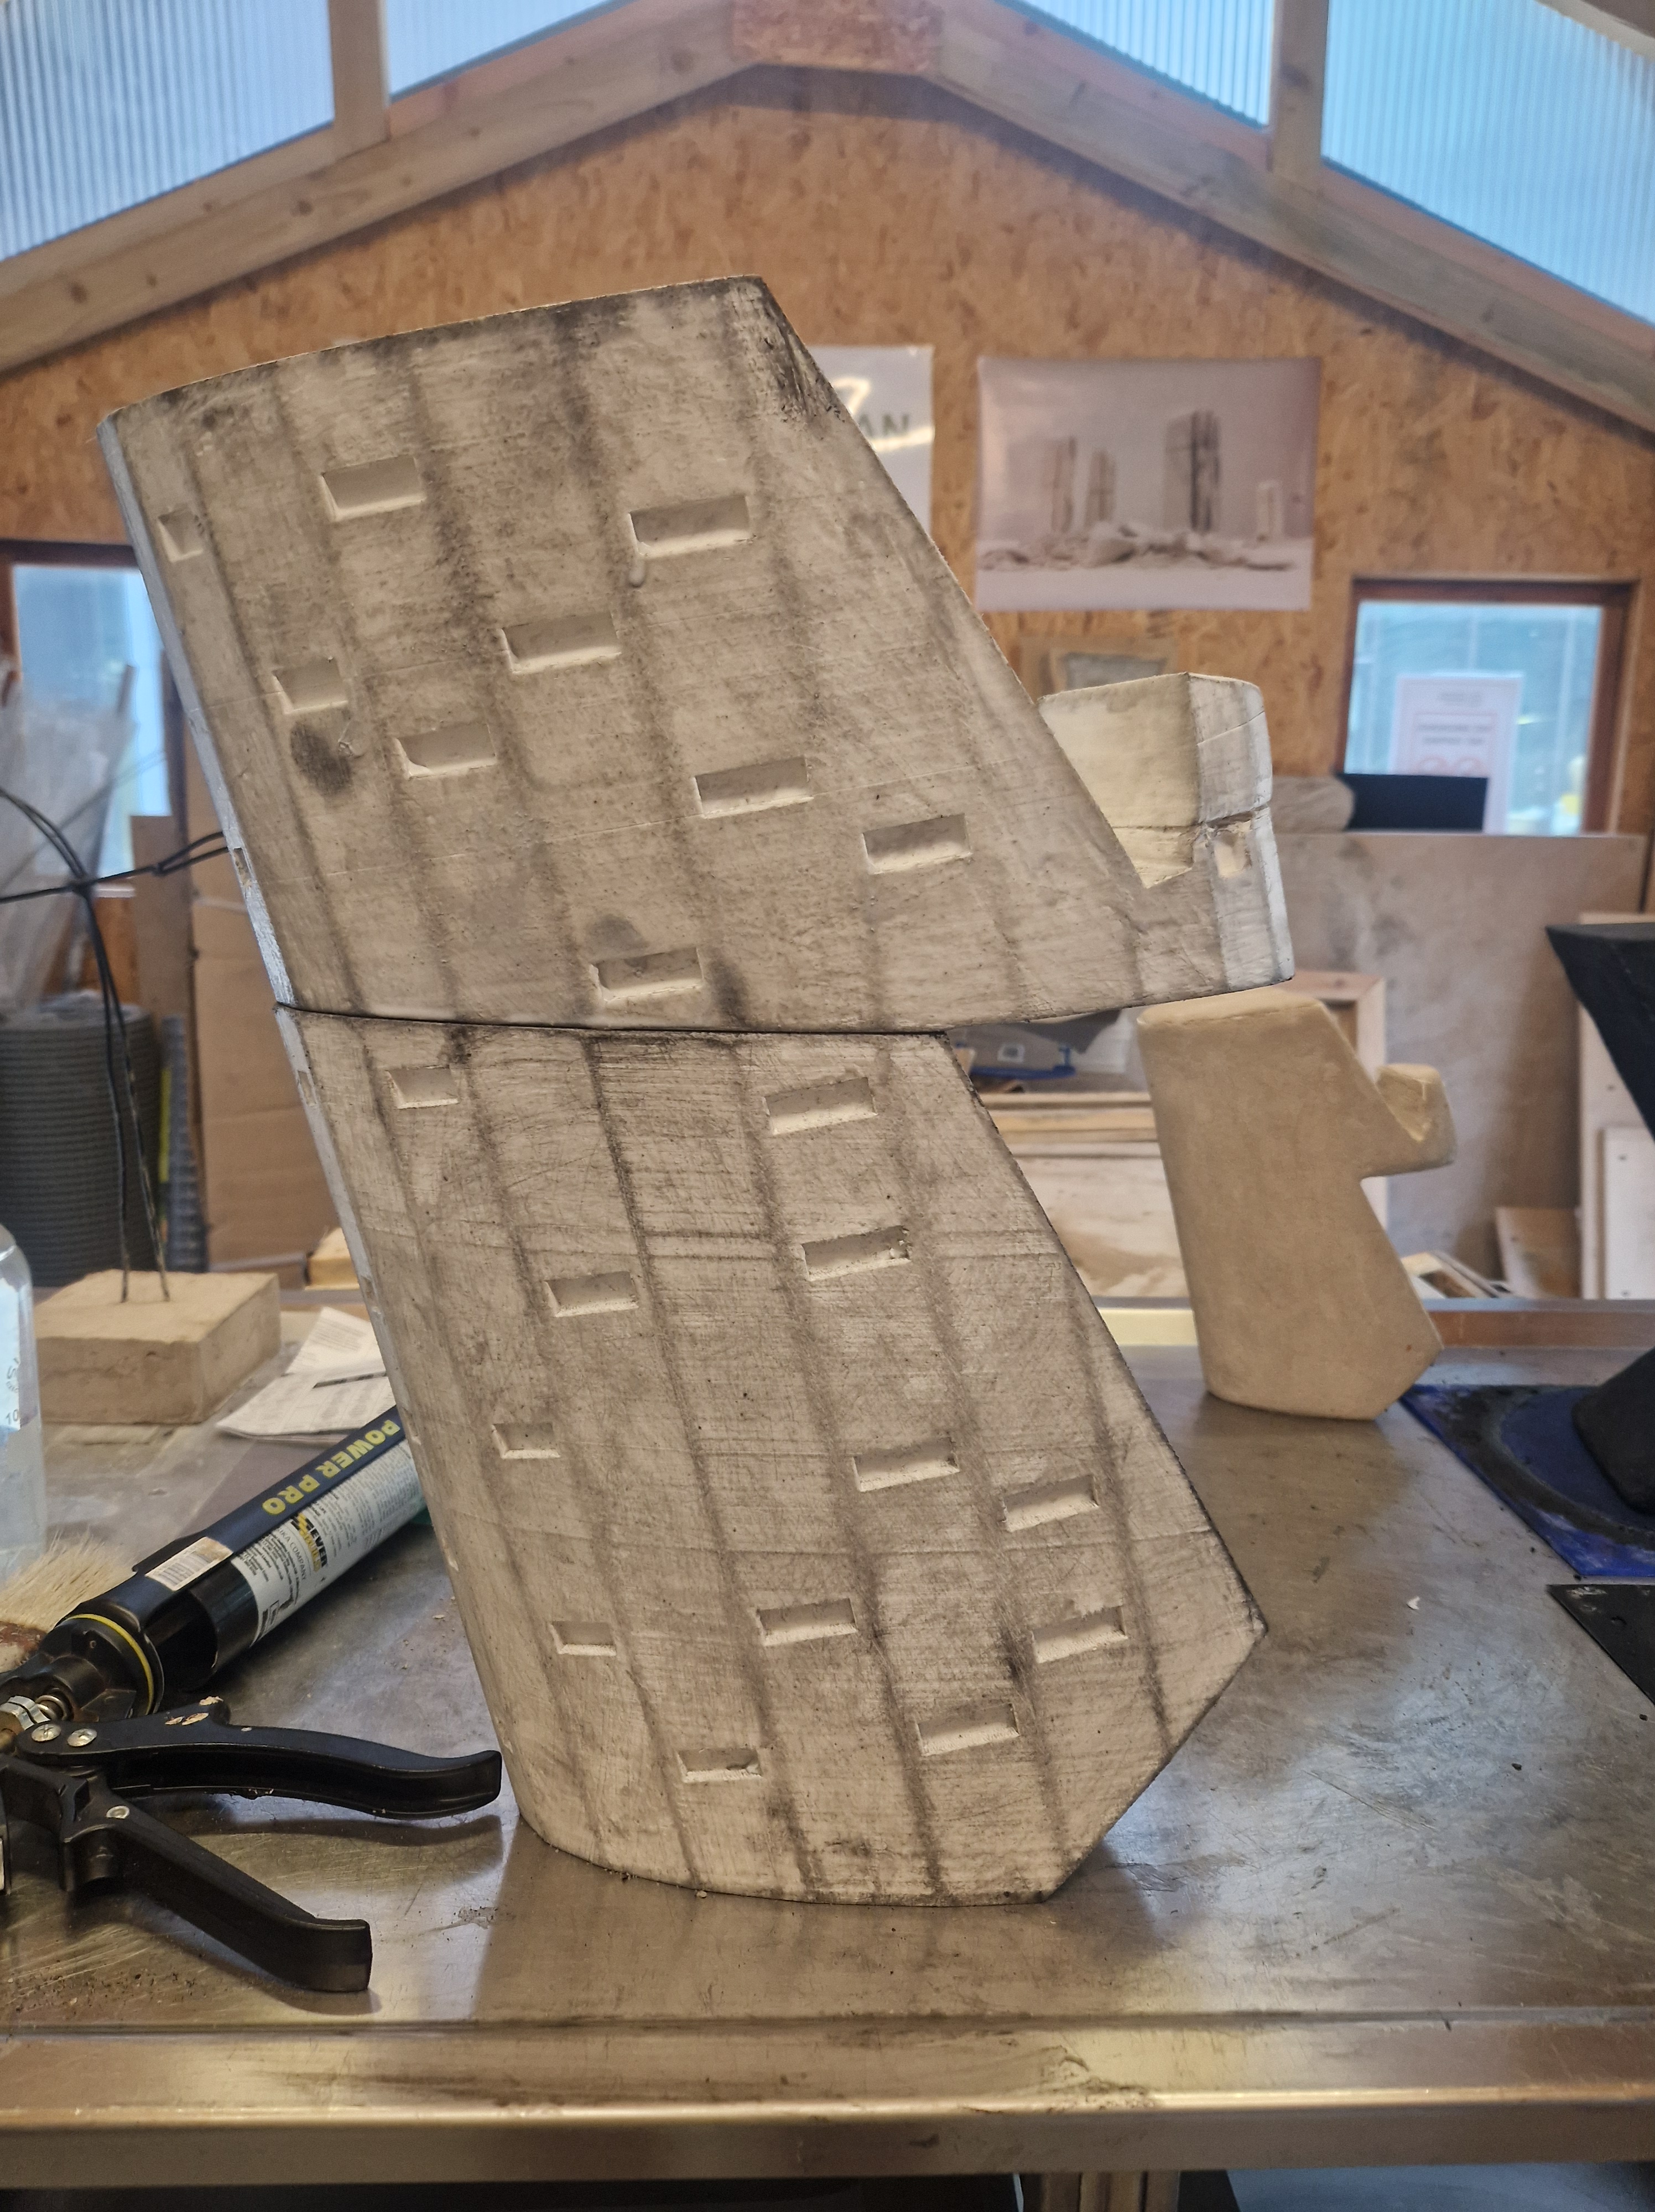
The sculpture is ready for the application of concrete, which I plan to do on Thursday.
All that will be left then is to leave it to dry for a few days and then sand it next week.
THURSDAY
On this day I spent a couple of hours applying concrete to the sculpture. Very happy with the final results, I left it to dry, with the aim to sand it and deliver it to the exhibition room on Tuesday (it needs a few days to cure)

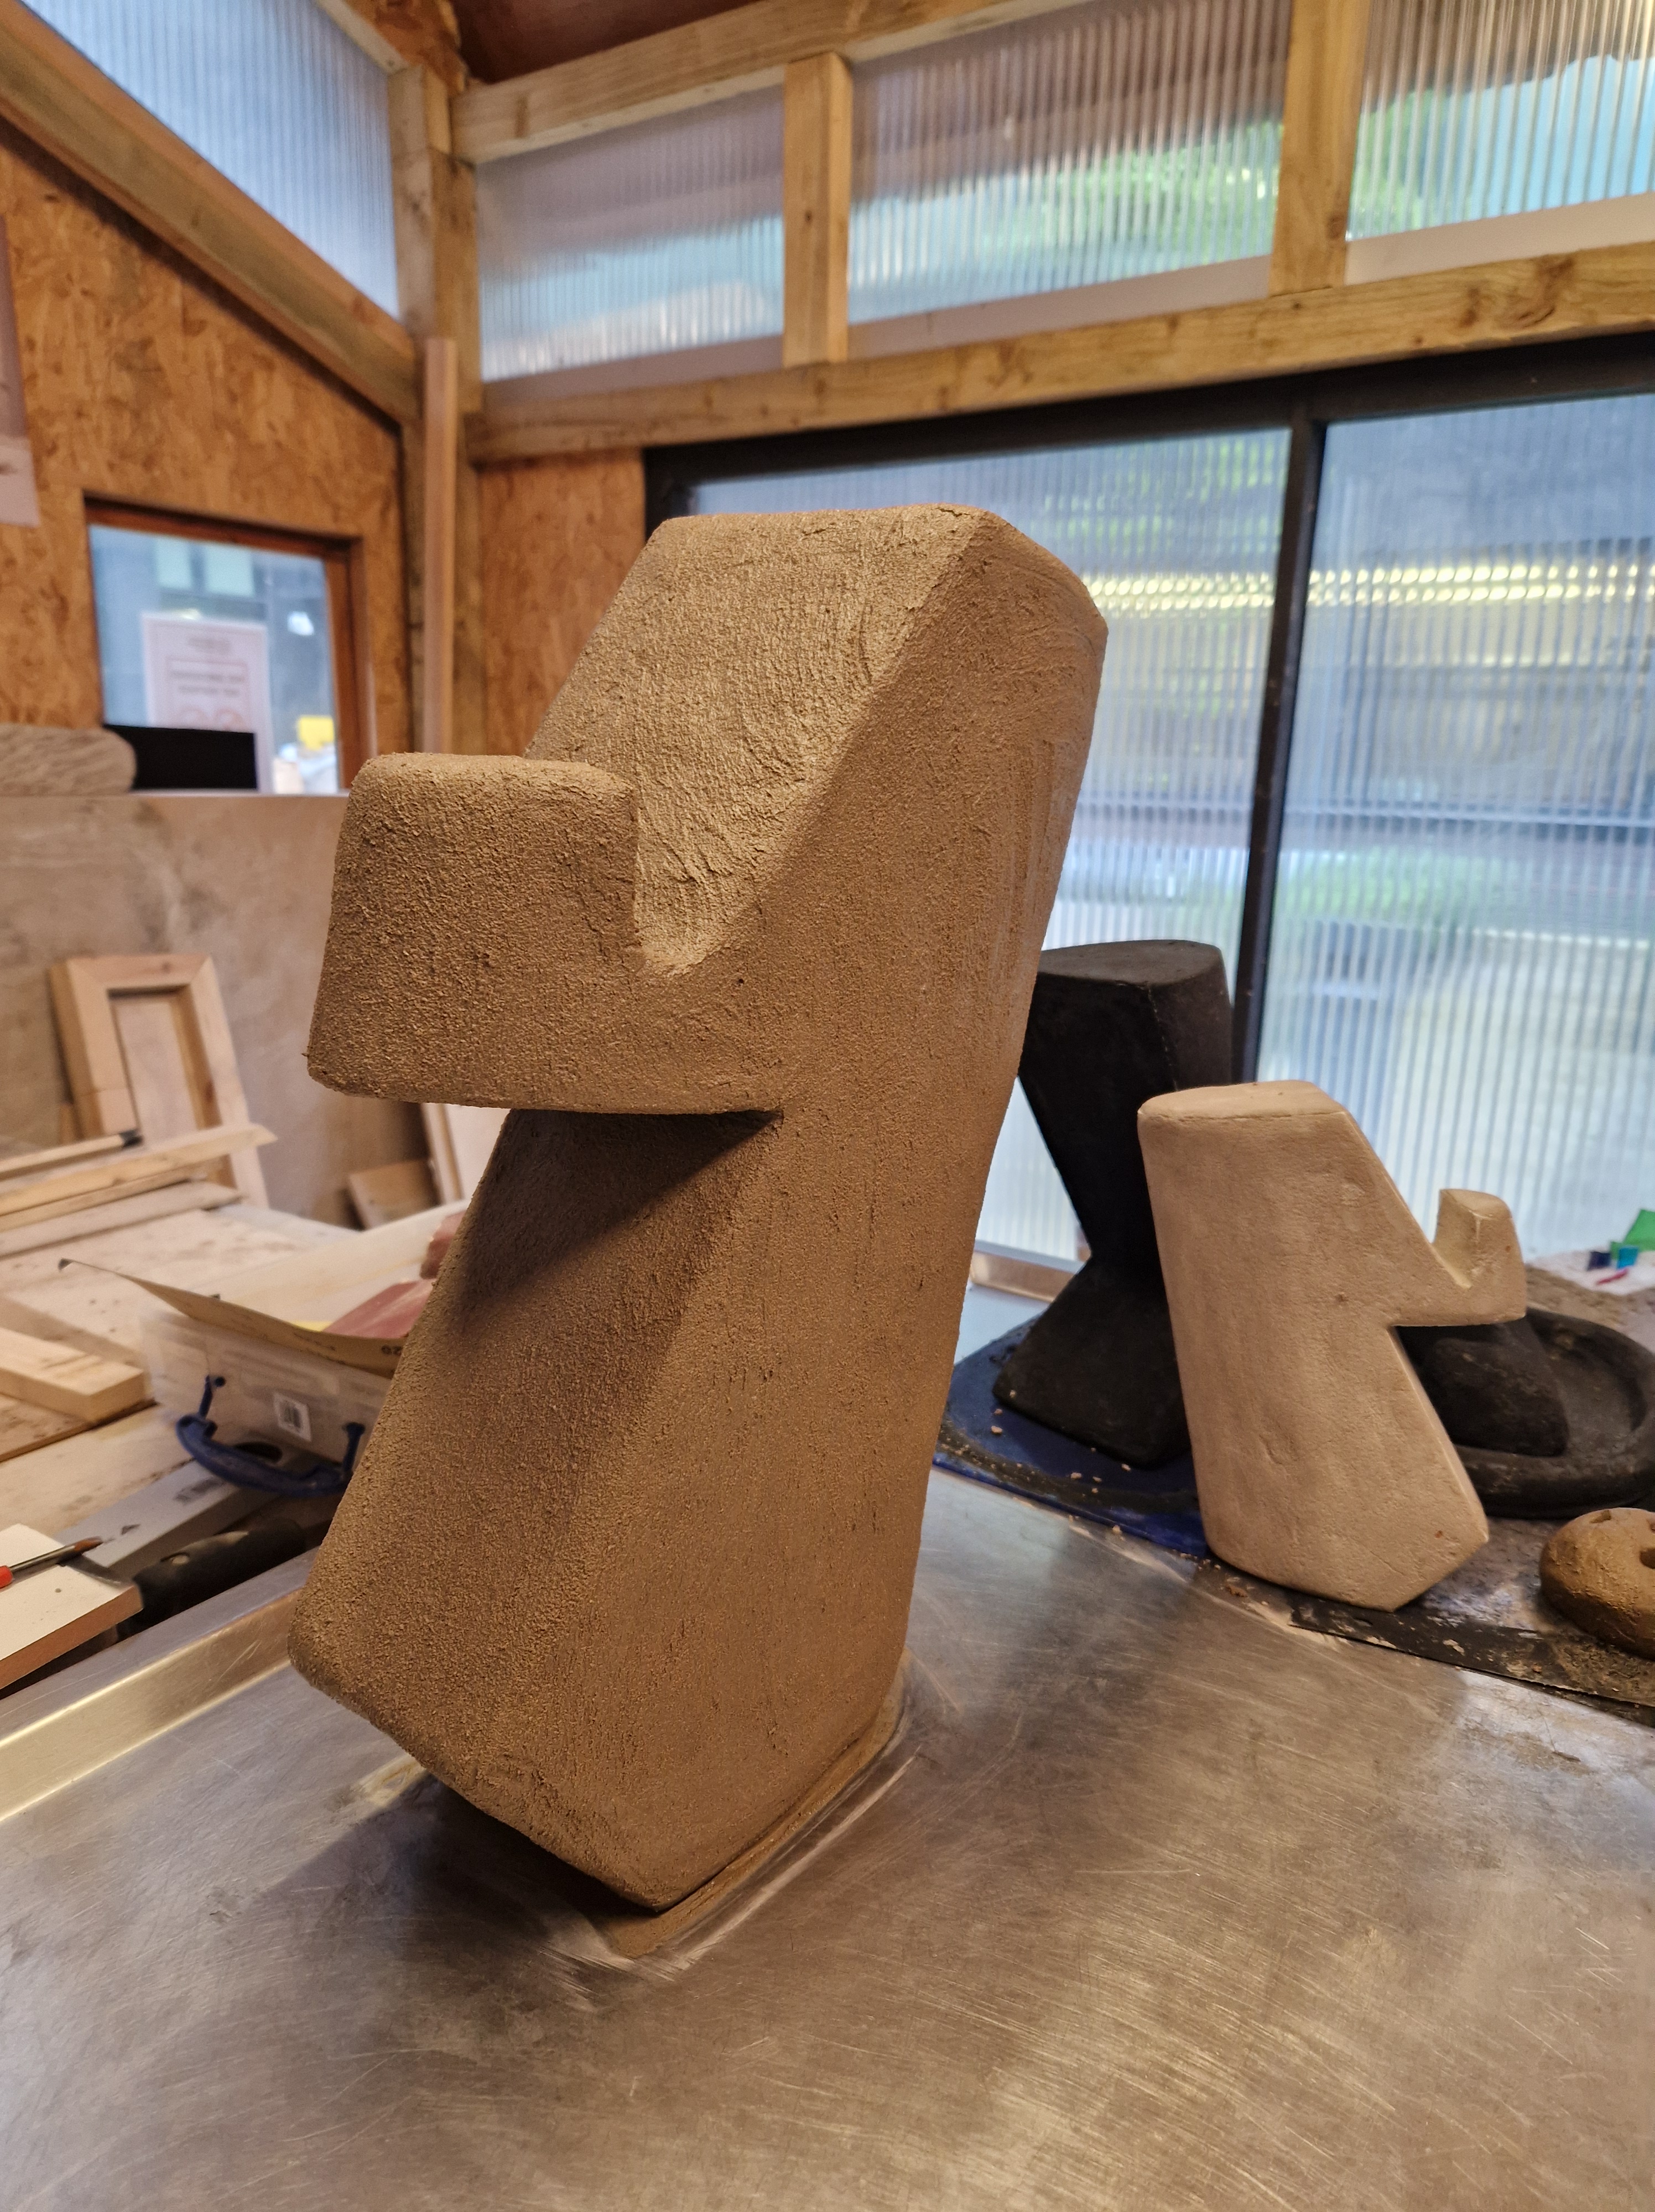
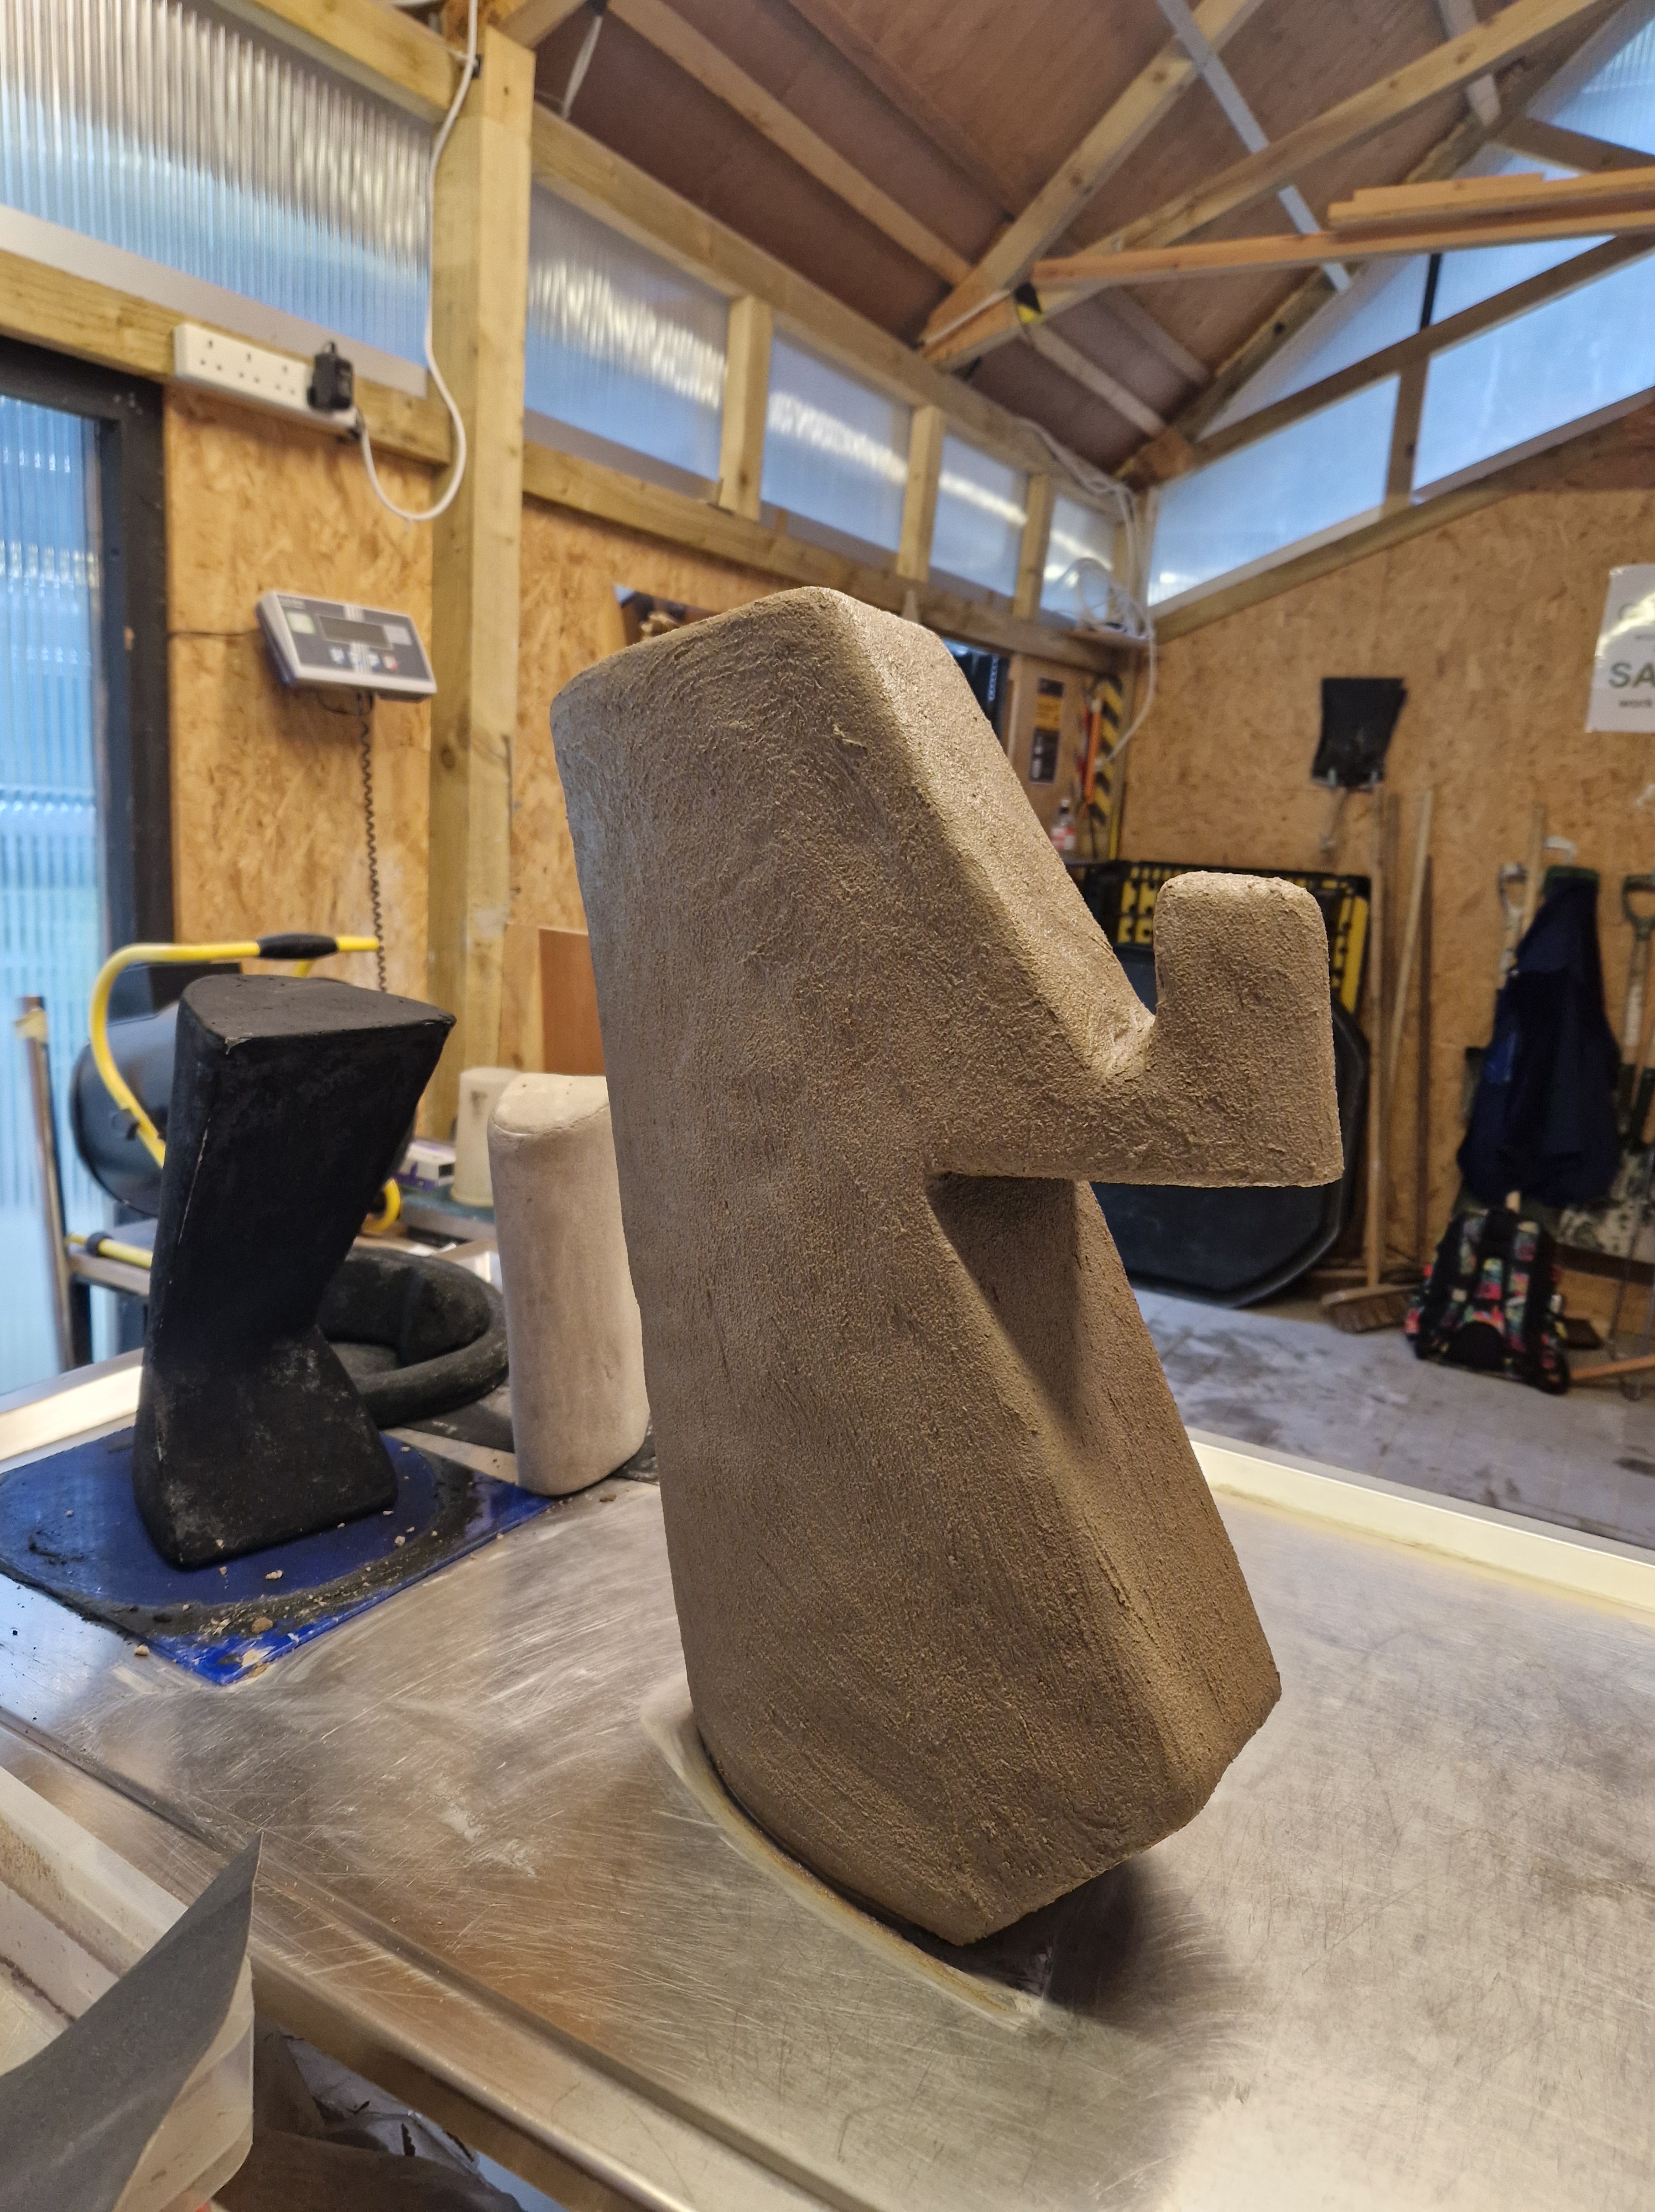
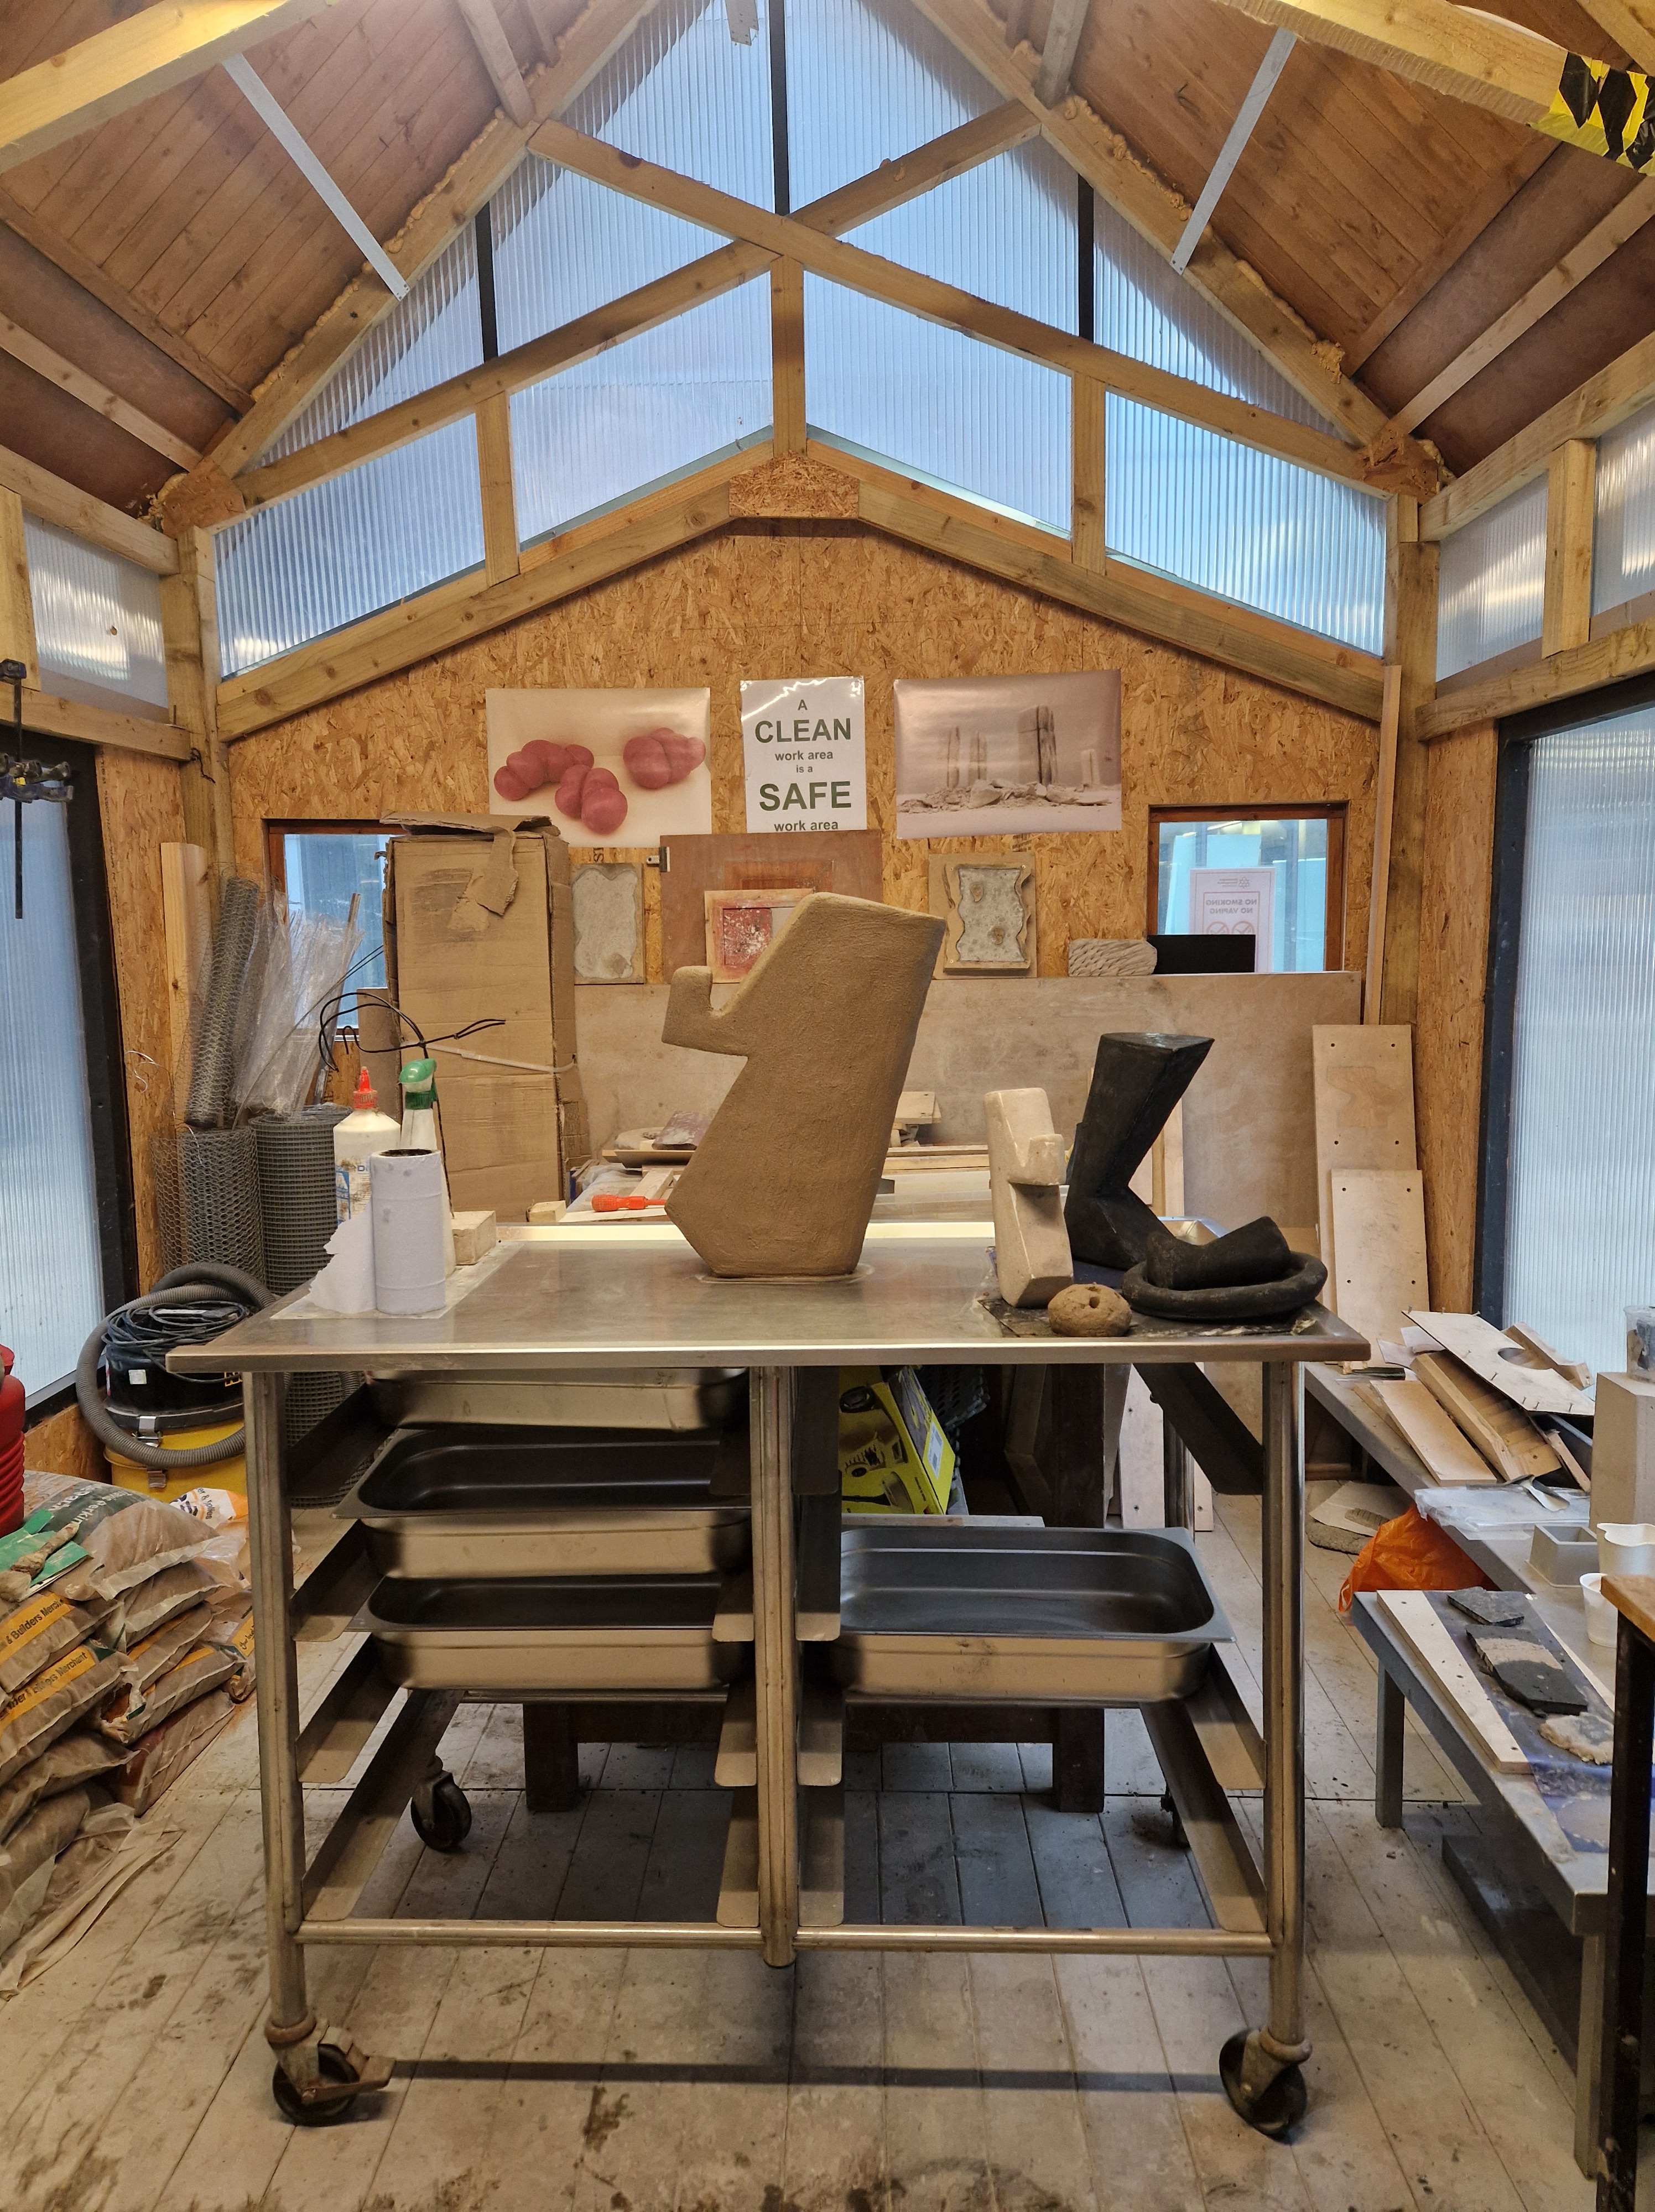
IMPORTANT NOTICE: In creative collaborations, I was very often dependent on others, their timeline and responses. Sadly, in this case, it resulted in a small delay in having this sculpture finished by the 17th of May (it will be ready in the week after that). I was at the mercy of a person from Print City replying to me and even though I contacted them about the final print on the 19th of April (after resizing the model to a fifty centimetres sculpture), I did not get a reply for days, phone not answering ever (one day I tried to ring them 19 times - no response). When I finally got the answer, about a week later, I was quoted a three-week printing time, to which I agreed after speaking to Jim from a concrete workshop about access and Sian, getting reassurance that I could in fact submit this sculpture after the deadline on the 17th (with having everything else handed in), as long as I articulate it in the journal.
I encountered another issue with an error happening on my last print, and when I tried to solve it/reprint it, I didn't get a reply for a week, by which point I gave up on this terrible communication and had to proceed with misprinted part, rescuing it by glueing it together.
I have attached screenshots as proof of this delay.
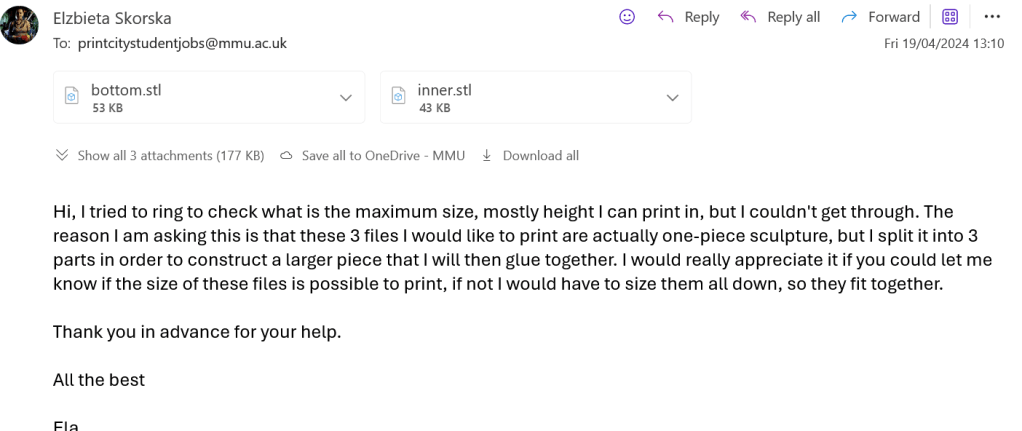
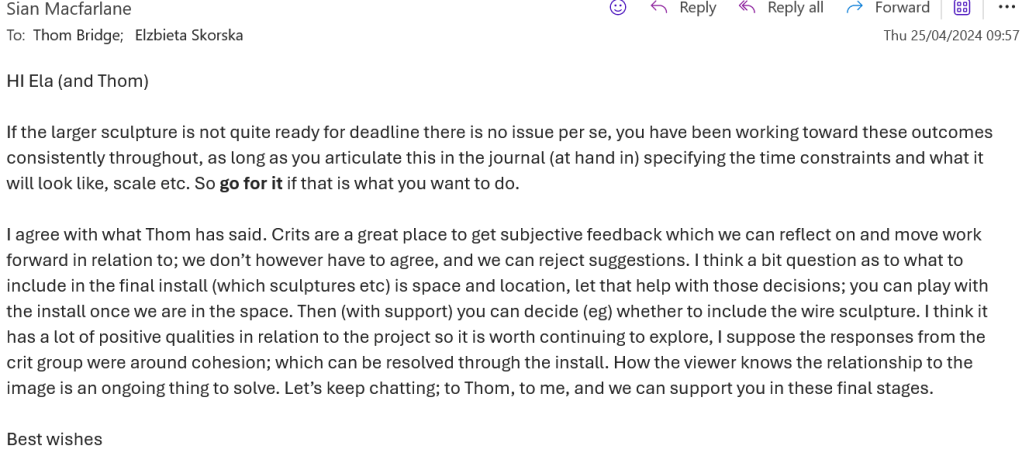
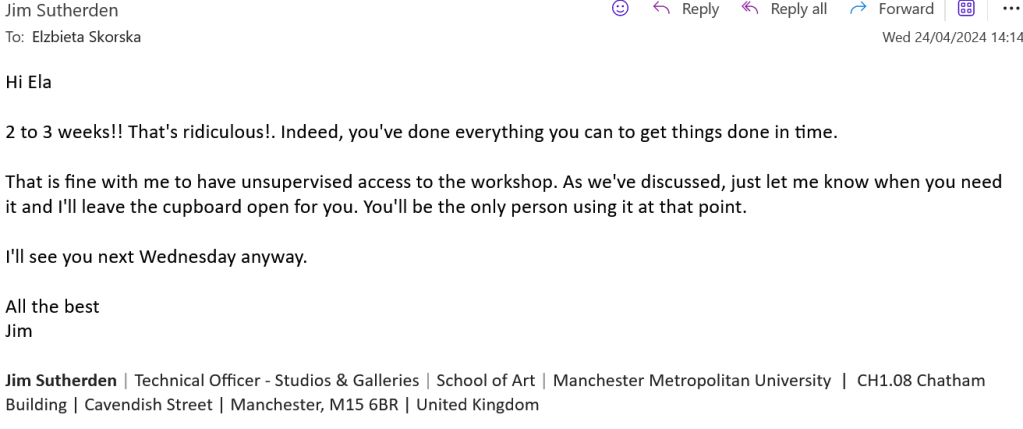
ADDITIONAL RESEARCH
IDEAS:
- sculpture
- sculpture and photography
- photography as sculpture
- photography as object
PHOTOGRAPHIC SOURCES:
- The British Journal of Photography
- SOURCE: THE PHOTOGRAPHIC REVIEW
- FOAM
- PHOTOWORKS
- APERTURE
PLACE TO GET PERSONALISED PLACARDS
BOOK
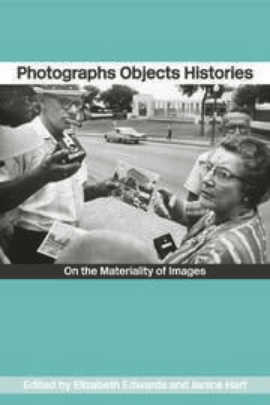
Photography and Sculpture: The Art Object in Reproduction (Video 1 of 4)
This symposium explores the intersections between sculpture and photography. Speakers discuss a wide range of images and cultural artifacts to investigate the broader role of photographic reproductions in the writing of art history and the impact of reproductive media on artistic practice. Exploring the material, procedural, and historical tensions between two mediums, these lectures open a broader conversation about the study of art history, architecture, anthropology, film, new media, archaeology, the history of collecting, and museum display.
SCULPTURE
RICHARD SERRA
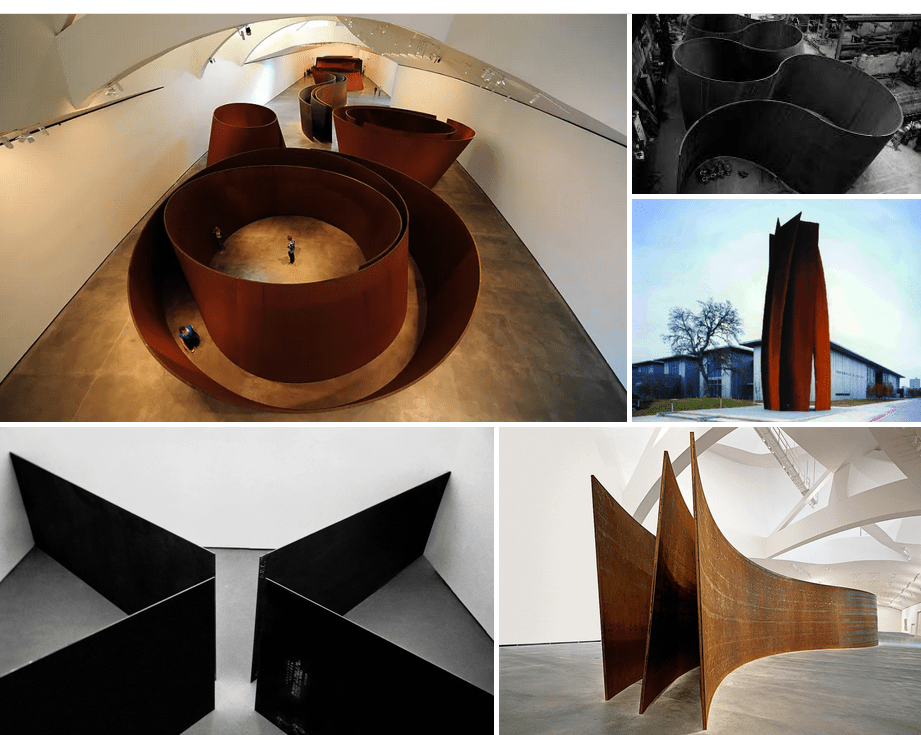
Richard Serra: Equal | ARTIST STORIES
Richard Serra: Equal | ARTIST STORIES. https://youtu.be/ML1BkhqKo1Q
Richard Serra Answers: Why Make Art?
Richard Serra Answers: Why Make Art?. https://youtu.be/mWoiAf_qMA4
Richard Serra explores the ways an artist’s perception of the world can be impacted by their creative process, and vice-versa.
So I think, works of art engage, possibly, an internal memory bank that isn’t linear, and it can make you see the outside reality in that way, also. Like, you probably see the world in ways that you would not have seen it if those artists had not existed.
You Are The Subject: Richard Serra at Glenstone
You Are The Subject: Richard Serra at Glenstone. https://youtu.be/odeTxf3cIUA?si=mYQ16anqW9XLArWN
REFLECTIONS: Serra is one of my biggest influences. I love his use of space and materials and the power they/he manifests with them. I also love hearing him talk about art - he is one of those artists who have that magic about him, and his words are like spells.
His creations, bordering on the verge of sculpture and architecture, make a powerful statement. They are here to stay, and so is art! Humans, perhaps will prevail, art made by humans - undoubtedly, it transgresses us and time. In Serra's work, the message is clear. Art - the monument, our greatest accomplishment, our legacy.
NAUM GABO
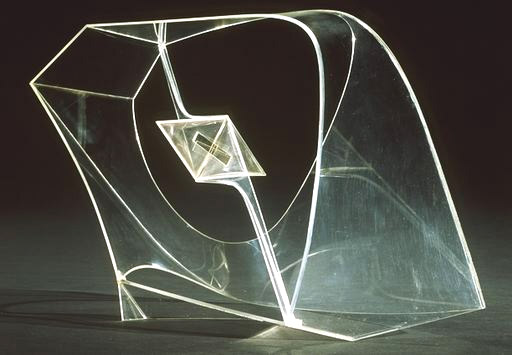
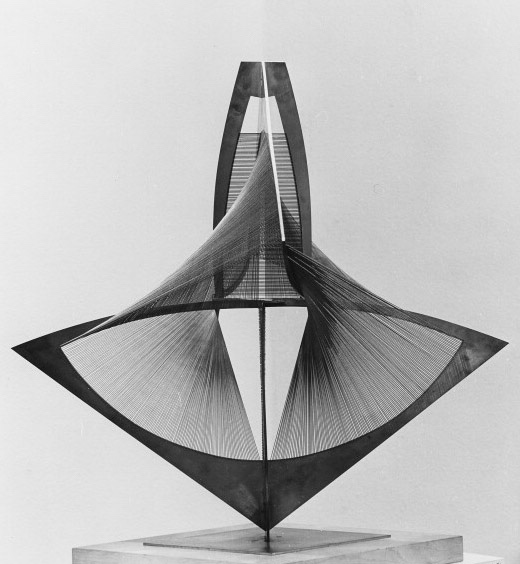
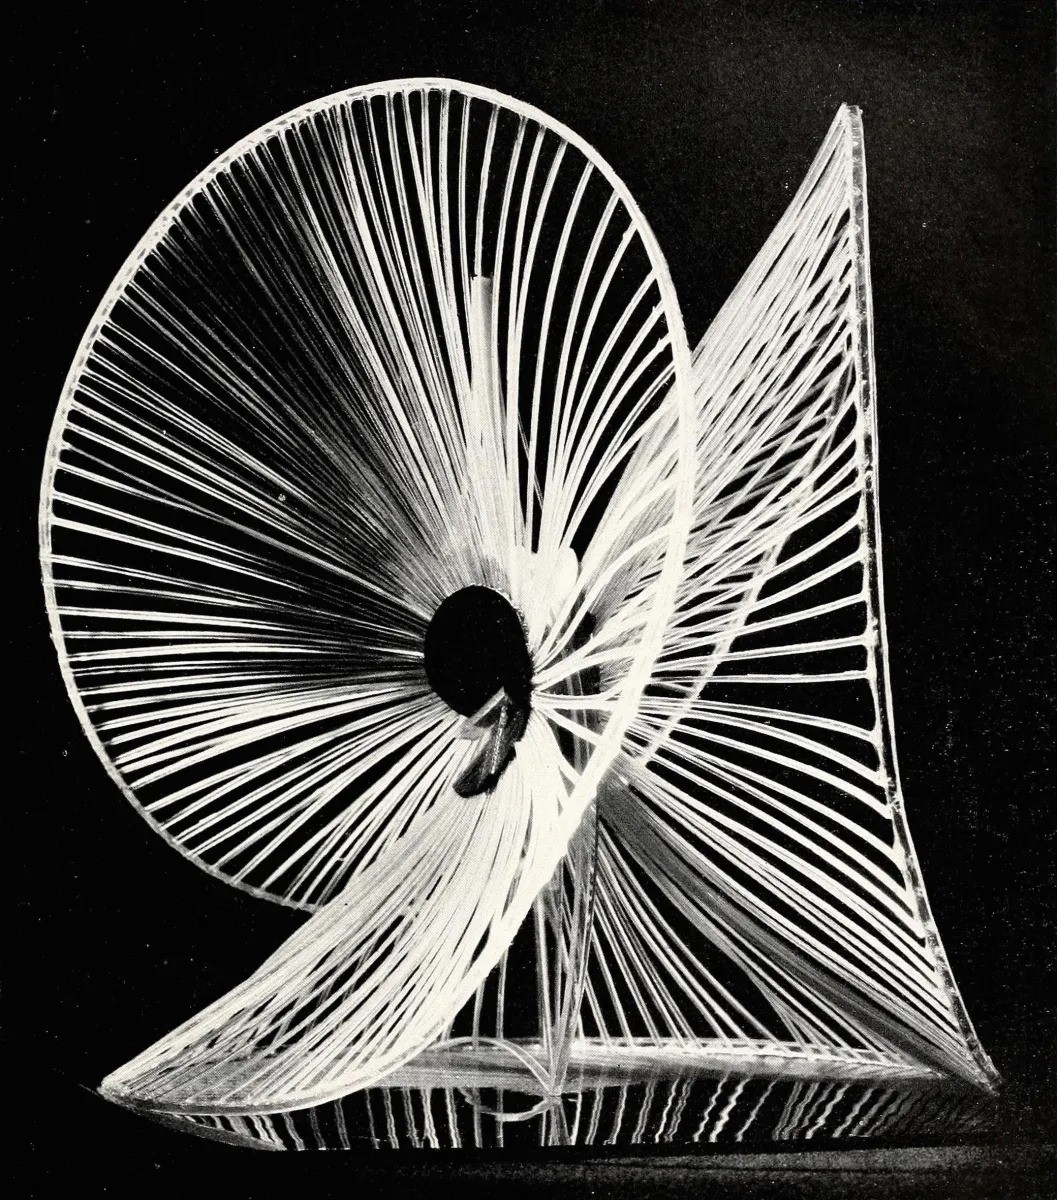
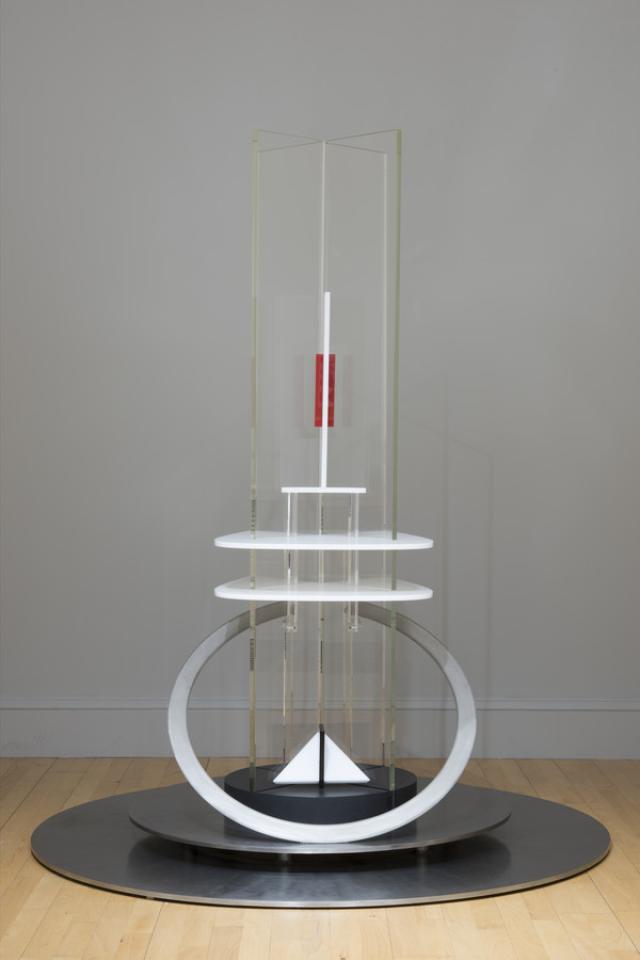
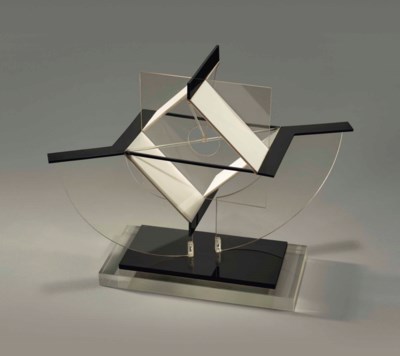
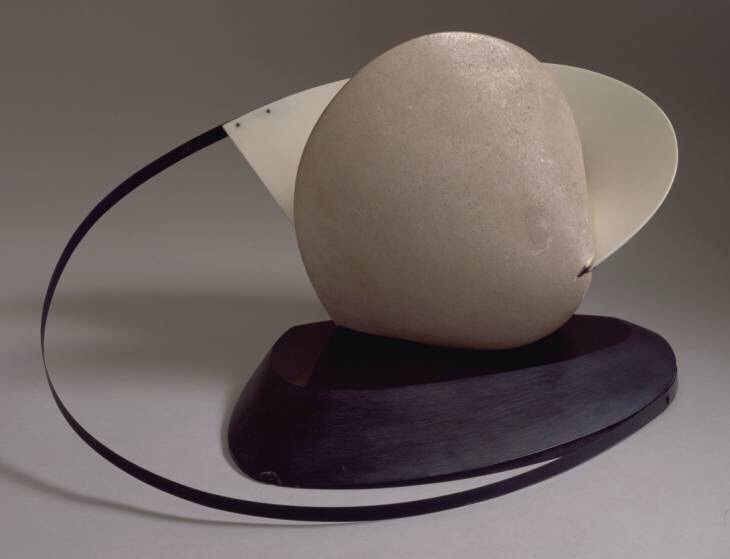
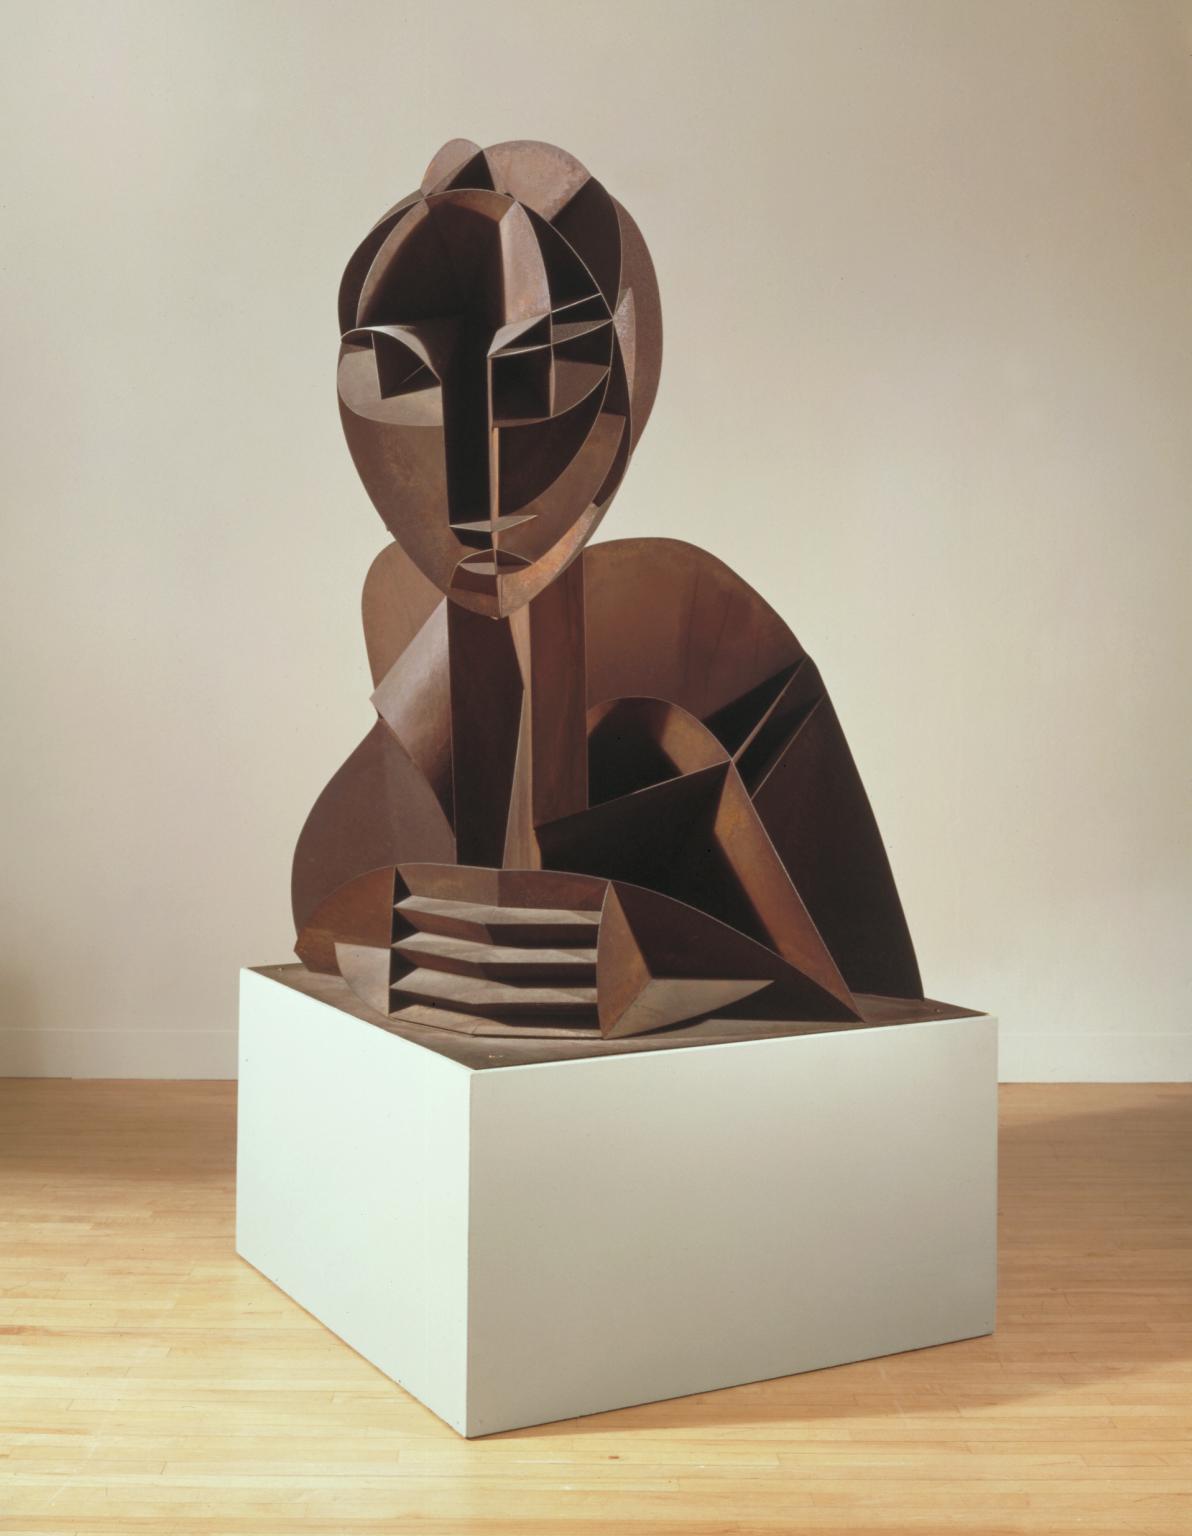
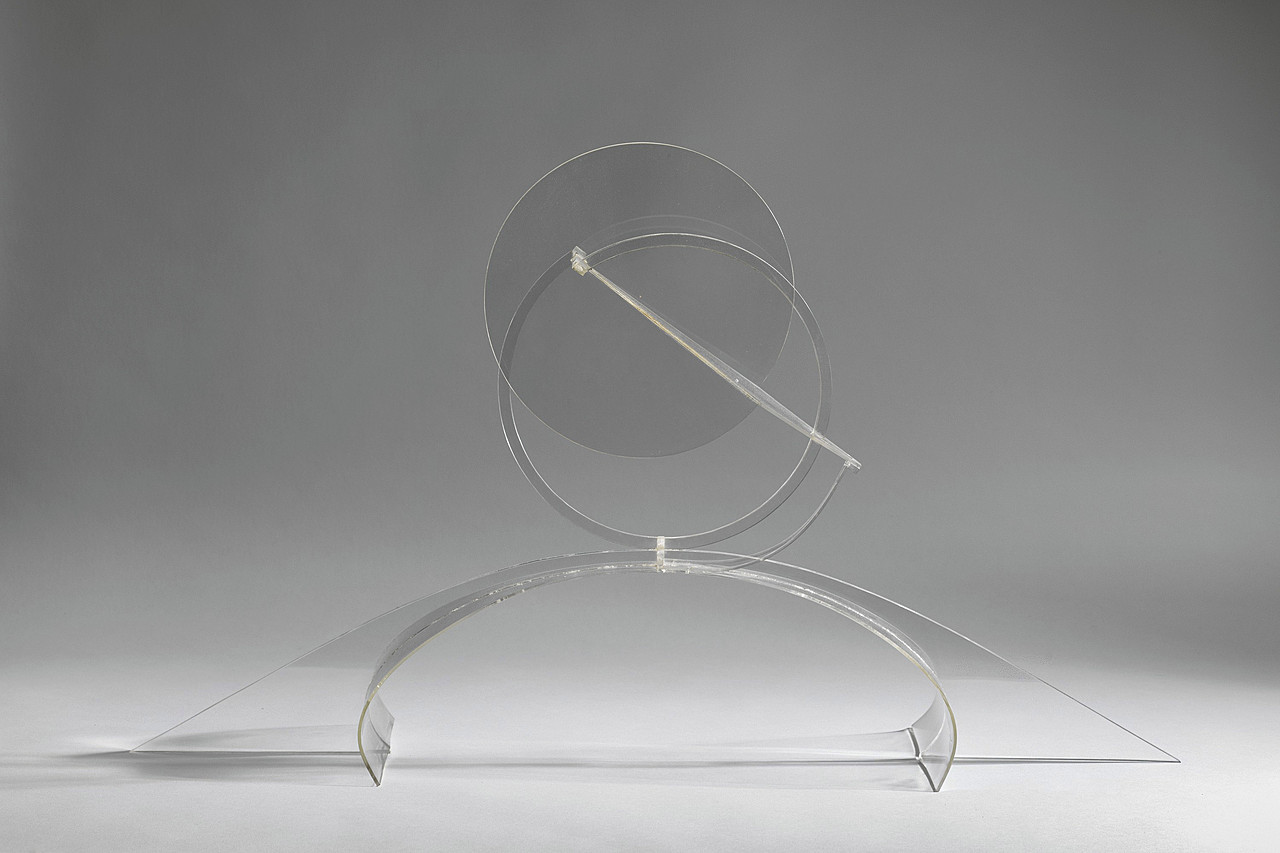
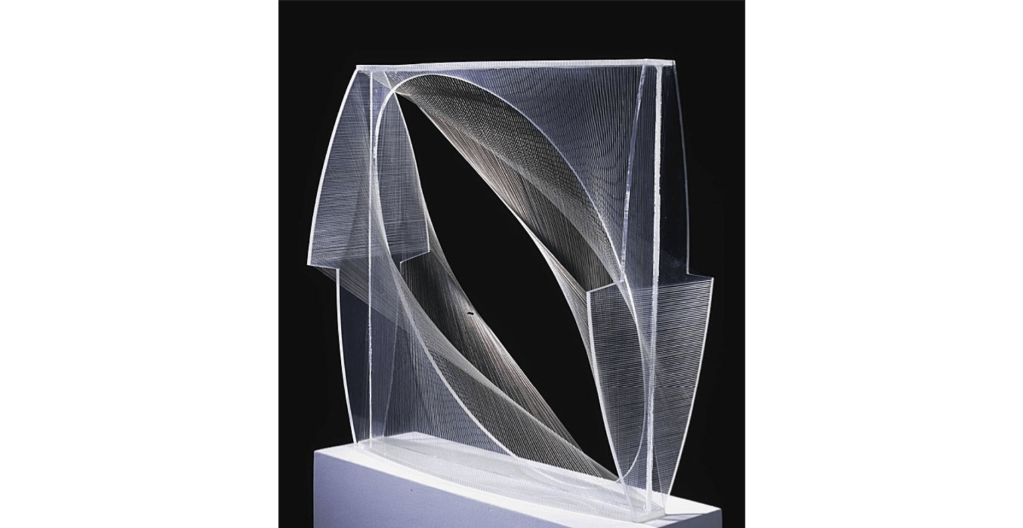
Naum Gabo 1890-1977
Constructive sculptor and painter. Born in Briansk in Russia, named Naum Pevsner; younger brother of the sculptor Antoine Pevsner. Entered Munich University in 1910, studying first medicine, then the natural sciences; also attended art history lectures by Wölfflin. Transferred in 1912 to an engineering school in Munich. Met Kandinsky and in 1913-14 joined his brother Antoine (then a painter) in Paris. After the outbreak of war moved first to Copenhagen, then Oslo; began to make constructions in 1915 under the name Naum Gabo. 1917-22 in Moscow with Pevsner, Tatlin, Kandinsky and Malevich; wrote and issued jointly with Pevsner in 1920 a Realistic Manifesto proclaiming the tenets of pure Constructivism. Lived 1922-32 in Berlin in contact with the artists of the de Stijl group and the Bauhaus. First one-man exhibition with Pevsner at the Galerie Percier, Paris, 1924. With Pevsner, designed the set and costumes for Diaghilev’s ballet La Chatte 1926. 1932-5 in Paris, a member of Abstraction-Creation; 1935-46 in England, first in London, then from 1939 at Carbis Bay in Cornwall. Edited Circle jointly with J.L. Martin and Ben Nicholson in 1937. Moved in 1946 to the USA and settled in 1953 at Middlebury, Connecticut; became a US citizen in 1952. Professor at the Graduate School of Architecture at Harvard University 1953-4. From 1950 onwards carried out several large sculpture commissions, including a sculpture for the Bijenkorf store in Rotterdam 1955-7. Created Hon. KBE 1971. Died at Waterbury, Connecticut.
A pioneering Constructivist artist, Naum Gabo developed a transformative approach to sculpture, breaking solid mass into interlocking planes, lines, and geometric shapes punctuated by open spaces. Using glass, metal, and plastics, Gabo worked additively, building his sculptures piece by piece to create precise, linear forms, buoyed by lightness and dynamism. His works were mostly abstract and architectural, like Column (c. 1923), a clear vertical column ringed by an open circle and sliced by multicolored planes. Gabo sought a new visual language that was in sync with society and humanity, with space and time as its basic elements. He outlined his approach in his Realistic Manifesto, which he published with his brother, Anton Pevsner. “Space and time are the only forms on which life is built,” he wrote, “and hence art must be constructed.”
Naum Gabo
REFLECTIONS: It is undoubtedly one of my main discoveries - I don't know how I lived my life without knowing about Naum Gabo! Thanks to research from one of the other units, I am finally aware of who is now one of my favourite artists! He's one of those people who takes your breath away, and you can just stare at his art for ages in awe. I am, of course, completely mesmerised by his use of materials, geometry and order in compositions. The way he resolves the space is so inspiring to me, and the minimalism just makes it more poignant and impactful. Everything that I love and makes me happy in one man's creations.
RESEARCH INTO THE THEORY OF THE SUBCONSCIOUS
I am very interested in creating art in the flow state from the subconscious.
When you get so immersed in the activity, things start to happen out of your control, unexpected exquisite surprises from within.
On this note I commenced my research into Freud’s theory of subconscious, hoping to develop some understanding of this fascinating subject.
Sigmund Freud’s conscious mind, preconscious mind, and unconscious mind!(Iceberg Analogy)
This video explains Freud’s analogy of an iceberg in illustrating our conscious, preconscious, unconscious and nonconscious mind.
What Is Freud’s Concept of the Unconscious Mind?
In this video, Rafael Sharón, psychoanalyst in Princeton NJ, http://ModernPsychoanalyst.com explains Freud’s concept of the unconscious mind. “I want to talk, in some detail, about the unconscious mind. In Freud’s topographical model of the mind, there were three levels. There’s the conscious, the preconscious, and the unconscious. Everybody says subconscious today, but that was not a term Freud used. The conscious is what we’re discussing right now. Quite easy. The preconscious is if I ask you your birth date. Suddenly, it’s right there. It’s moved from your preconscious into your conscious. It’s accessible. And then there’s the unconscious. Freud used the idea of an iceberg to describe it, where just the tip sticks out, which is the conscious and the preconscious. The bulk of what’s going on is unconscious, and is submerged below the surface. It’s my belief that every word we choose, every action we take, is unconsciously motivated. It’s hard to get your arms around that, and if that’s correct, then accessing the unconscious and being able to understand it better, is very helpful. I’ll give you some stories of unconscious communication: The first one that comes to mind is a woman I’ve worked with for many years, an elderly woman, who suffers from Crohn’s and irritable bowel syndrome. Years into the treatment, she says, “By the way, I was raised in Flushing, New York.” And I hear the word “flushing” and I almost burst into laughter and I say, “Tell me about your years in Flushing.” There’s got to be a clue there. A patient went to the Freud Museum in London and brought me a gift. She brought me eyeglass cleaners with a picture of Freud on them. I was hearing two things, one is I’m not seeing something in this case. “Clean your vision, pal.” And two, see it like Freud. So, it was great. Another thing we talk about in unconscious communication is why something may happen at the beginning of a session. The thought is: What happened at the end of the last session? Freud said, “The unconscious doesn’t know time,” so if something appears to be triggered at the beginning of a session, I will always go back and think about how the last session ended. Freud also said, “There’s no such thing as an accident,” that everything happens for a reason. I went out early this morning to start my car. It’s dark. And I hit the unlock button, but no, I hit the lock button twice so my horn honks. I’m thinking, “Okay, that’s an accident.” But no. I must be angry with one of my neighbors. Why do I want to wake them and their family up so early this morning?” ~ Rafael Sharón
ANA MENDIETA
https://www.anamendietaartist.com
“My art is the way I reestablish the bonds that unite me to the Universe. It is a return to the maternal source.”
—Ana Mendieta
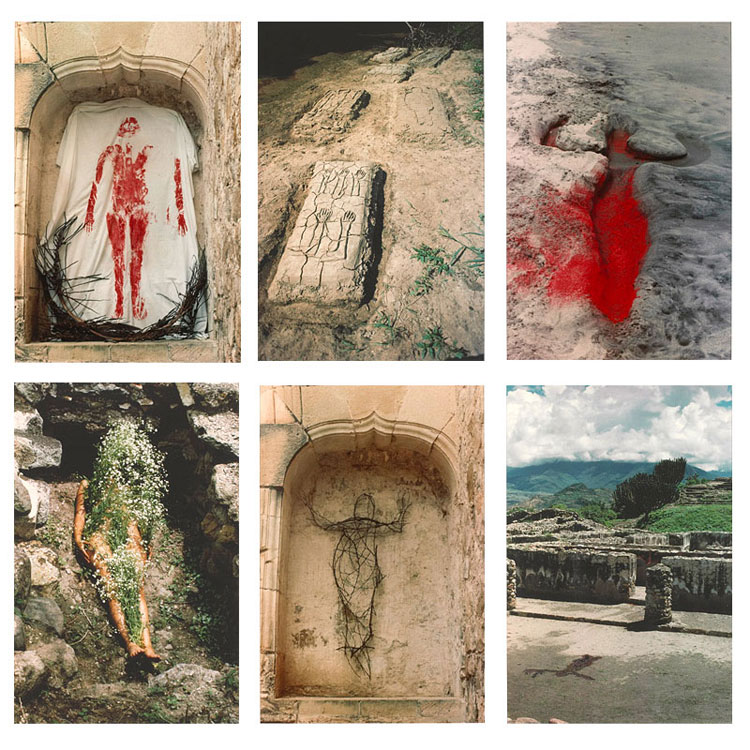
“To question our culture is to question our own existence, our human reality,” the artist Ana Mendieta once said. “This in turn becomes a search, a questioning of who we are and how we will realize ourselves.”1 Born in Cuba, Mendieta moved to Iowa at age 12 with her sister as part of a US government asylum program for adolescents after the Cuban revolution. Mendieta eventually enrolled at the University of Iowa and, upon completing her undergraduate degree, began her graduate studies in art. After training as a painter, Mendieta quickly grew dissatisfied with the medium and transitioned to the university’s new MFA in Intermedia program, where she began to develop her interdisciplinary work.
As a graduate student, Mendieta created her first performances, which survive through photographic documentation. These early works deal with the theme of violence against women, as Mendieta evokes the suffering of the female body.2 In Untitled (Glass on Body Imprints—face) (1972), Mendieta presses her face forcefully against a pane of glass at differing angles. Beyond demonstrating her bodily distress, the distortion of her face across the various images disturbs the work’s function as a portrait. In other words, Mendieta’s photographs of her face do not cohere as representative of herself, thereby disrupting how others view her and draw conclusions about her identity. Related to these concerns, Untitled (Facial Cosmetic Variations) shows Mendieta manipulating her appearance using make-up and wigs, in some instances lightening her skin and hair to call into question her racialization in the US.
In the Silueta series (1973–80), Mendieta staged performances where she laid down in natural landscapes or covered her body in organic materials and then documented the resulting imprints or silhouettes. Untitled (1978) shows a dark indentation made in a sandy landscape covered in scrub, the outline of her body suggesting its absence. These performances recall Mendieta’s experience as an exile who was separated from her homeland at a young age. In her Silueta performances she marked the land, leaving the trace of her absent body. This trace perhaps serves as a metaphor for her absence from her birthplace; she was unable to return to Cuba until the 1980s.3 A later work, the earthen sculpture Nile Born, lends Mendieta’s silhouette a physical form using organic materials—a wooden support covered in sand. Installed on the floor, the sculpture’s low profile allows the work to register as a physical manifestation of a shadow.
Throughout her career, Mendieta’s explorations of representation were grounded in an intersectional conception of identity where race, gender, age, and class operated simultaneously. “As non-white women, our struggles are two-fold,” Mendieta wrote in a curatorial statement for an exhibition of women artists of color. “This exhibition points not necessarily to the injustice or incapacity of a society that has not been willing to include us, but more towards a personal will to continue being ‘other.’
REFLECTIONS: Something a little different in my research. I have been recommended this artist many times, so I decided to dive in. She mainly deals with representation and violence against women but I am particularly interested in her series Silueta which evokes in me a mixture of connections to different forms of expression, something I am very interested in. This series is executed as a performance but documented as images, it takes on photographic and sculptural properties. One medium flows into another, extending one another, building depth and expanding the way the viewer is experiencing it.
READING
Link:
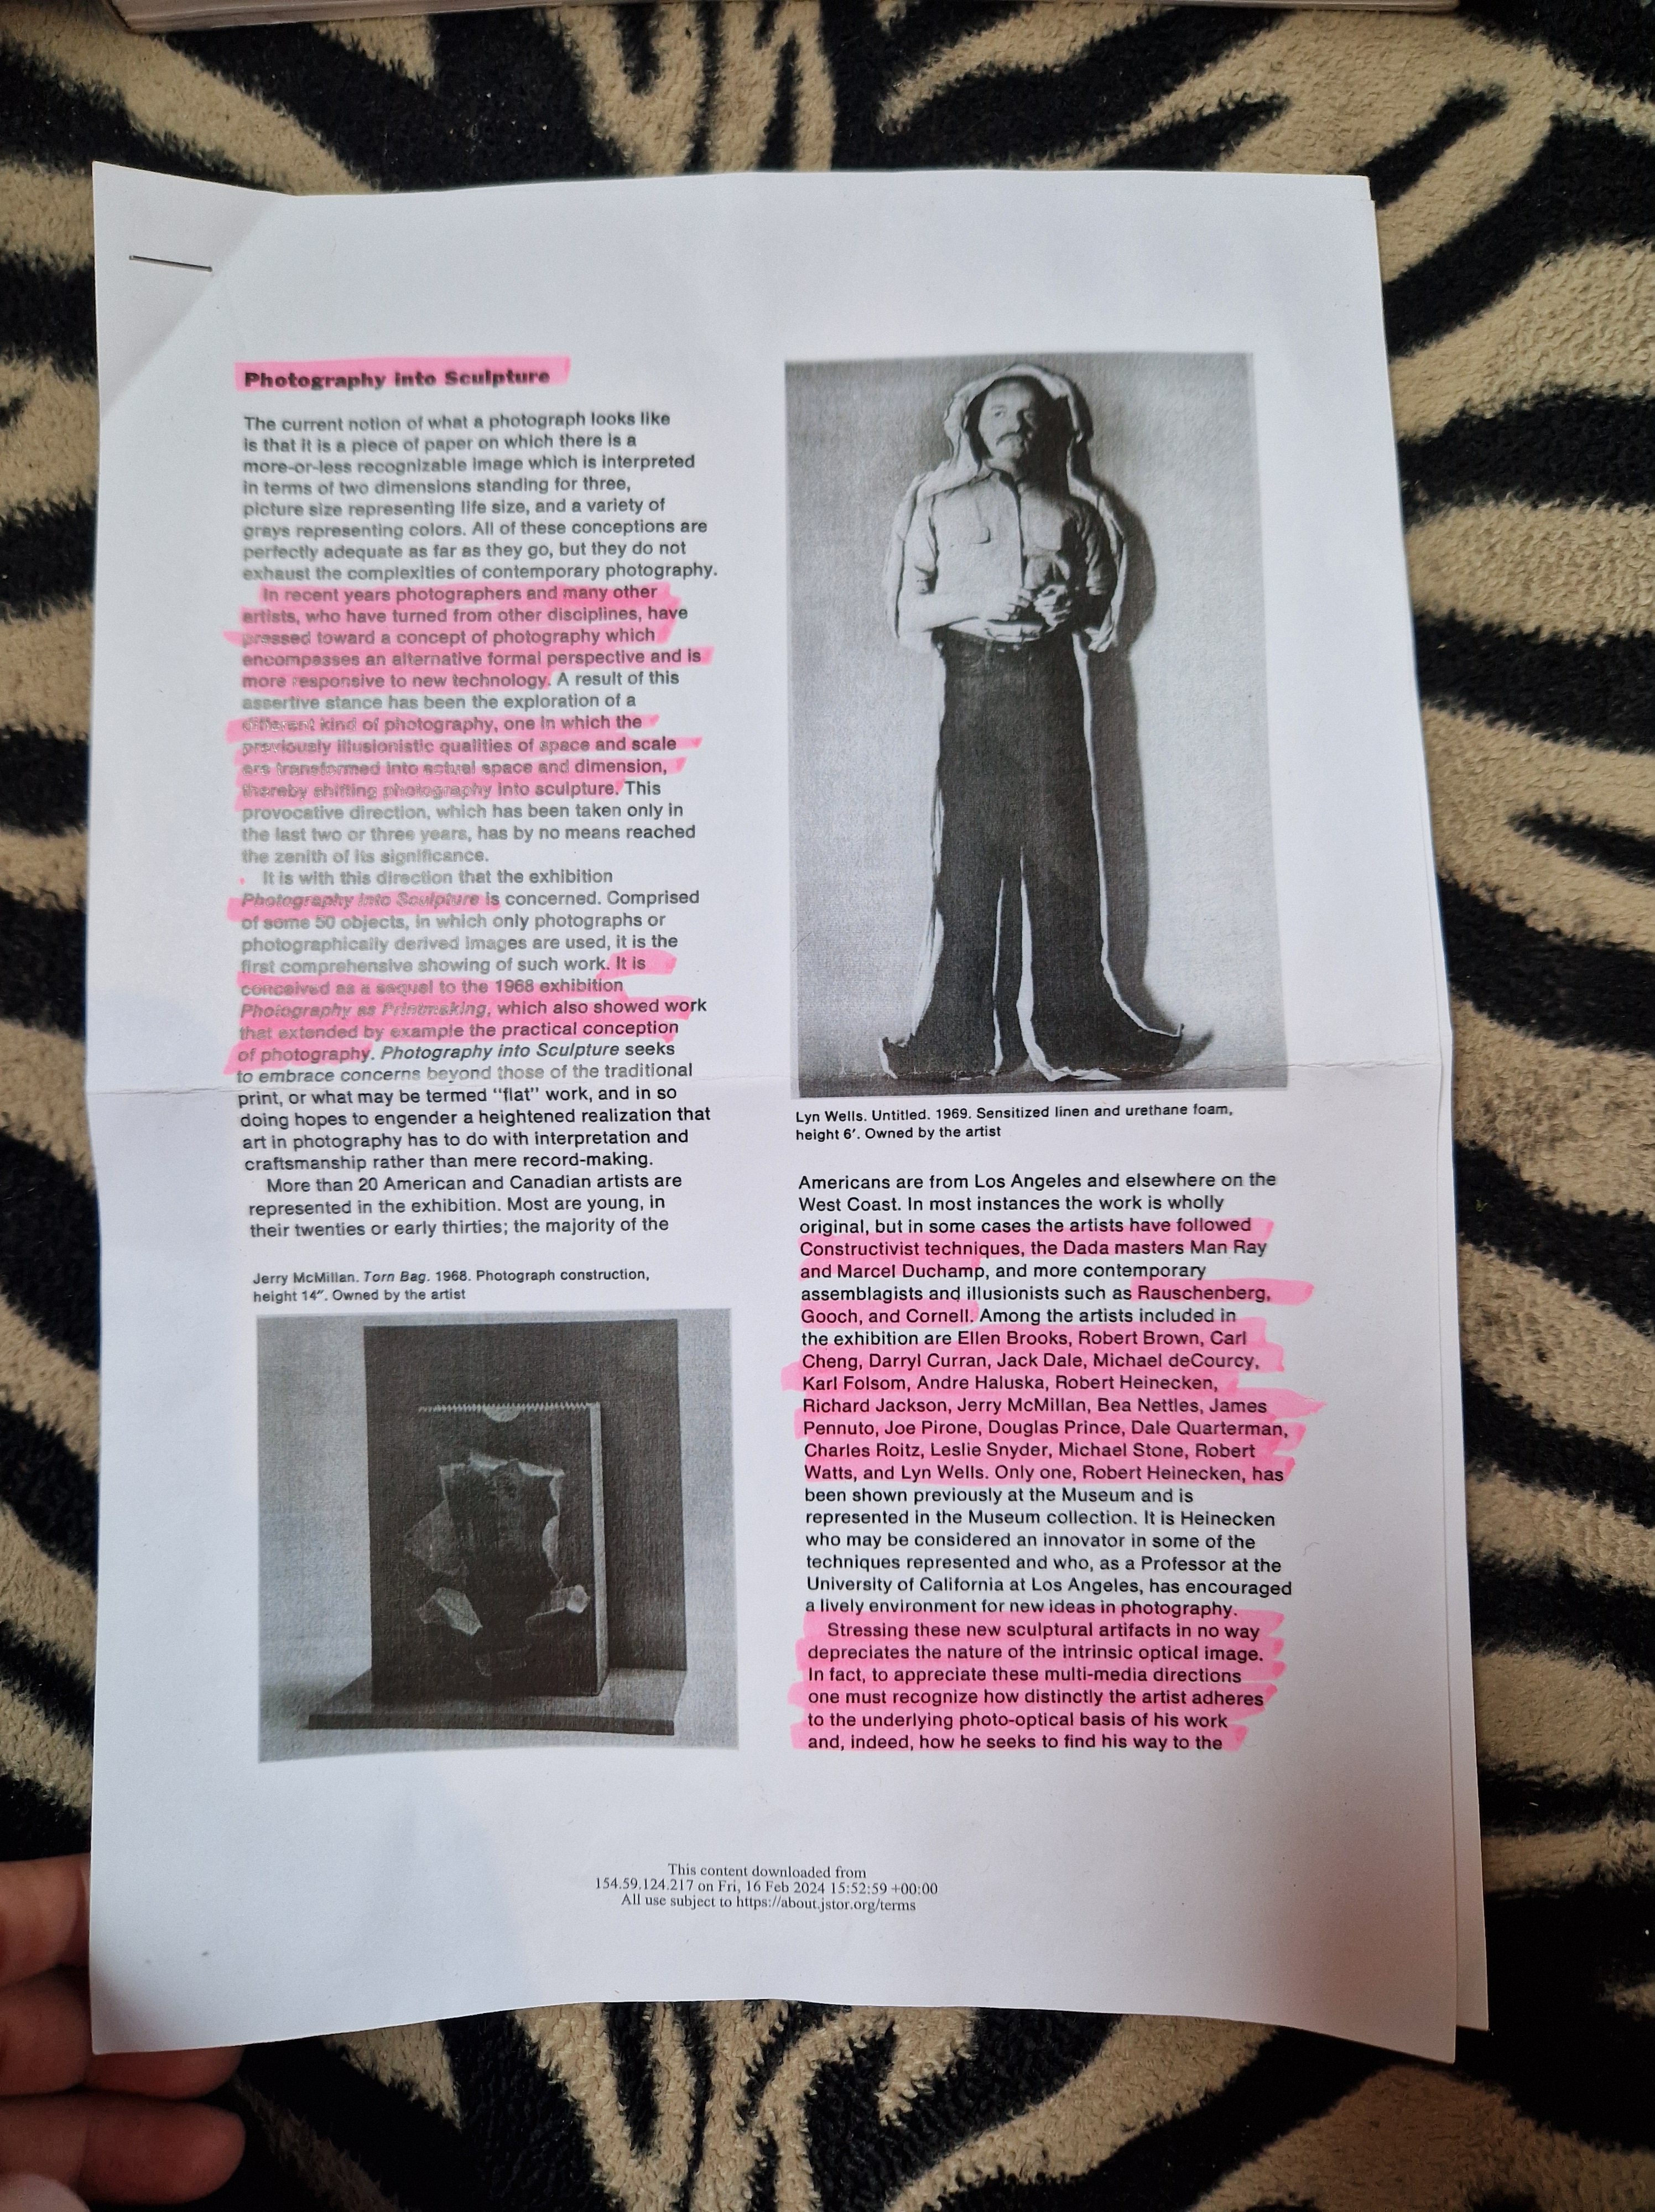
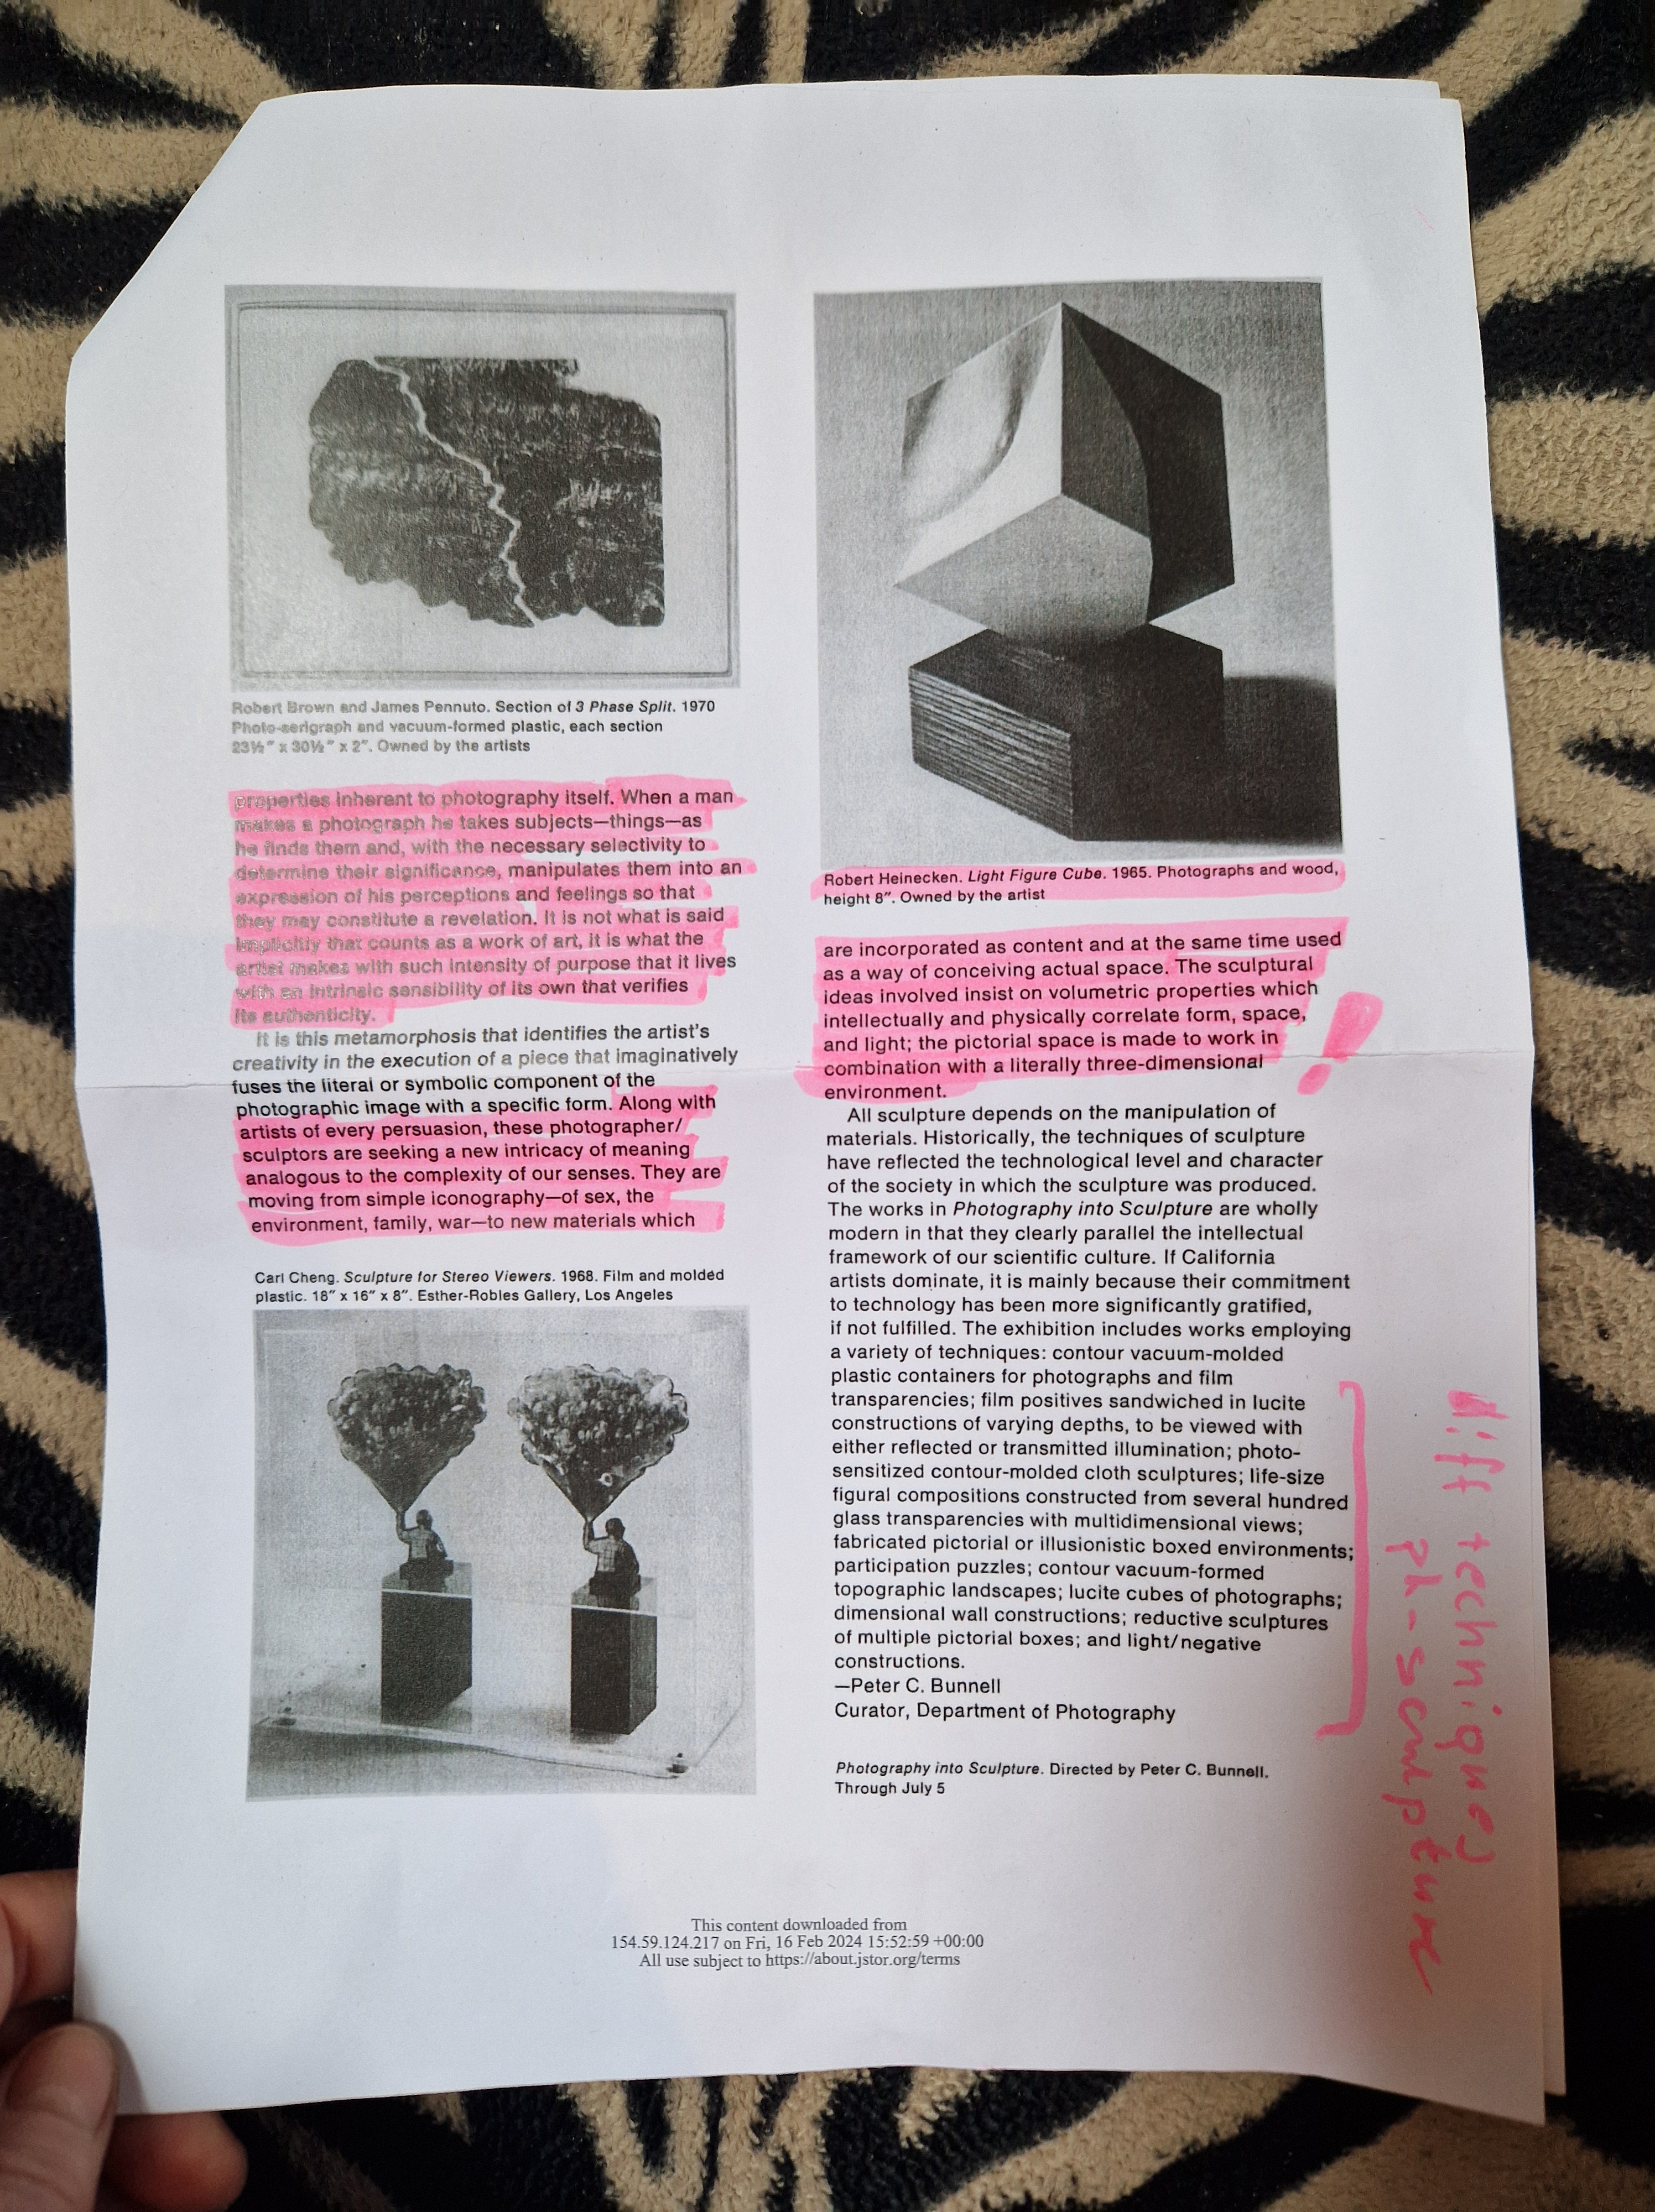
REFLECTIONS: An important read building my understanding of the relationship between photography and sculpture and how the latter was activated by the first. All of a sudden with the invention of photography, sculptures were accessible to everyone, not just those who travelled to see them, what a breakthrough in the sculpture world!
https://www.moma.org/calendar/exhibitions/2694
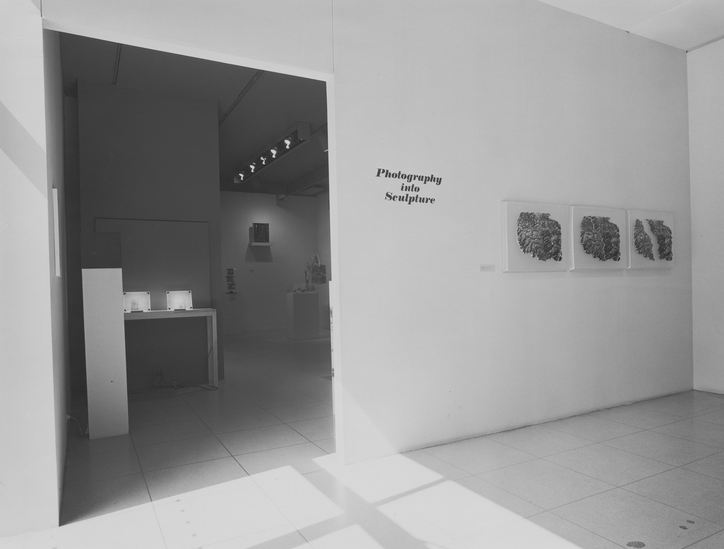
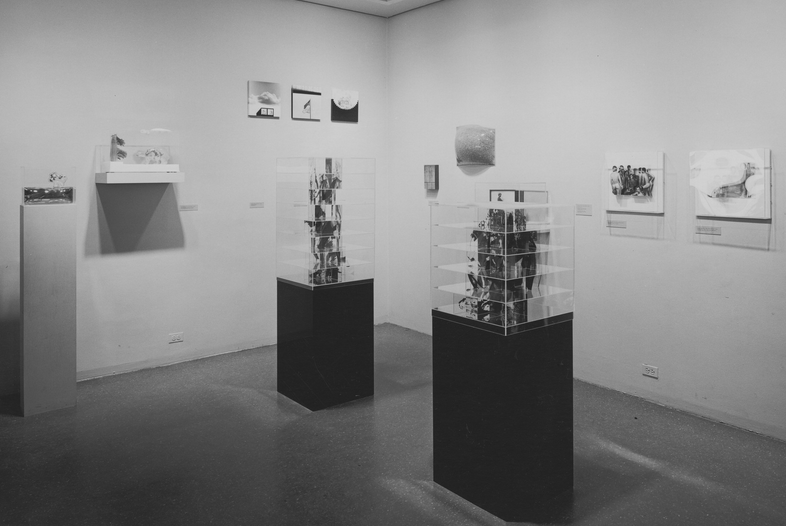
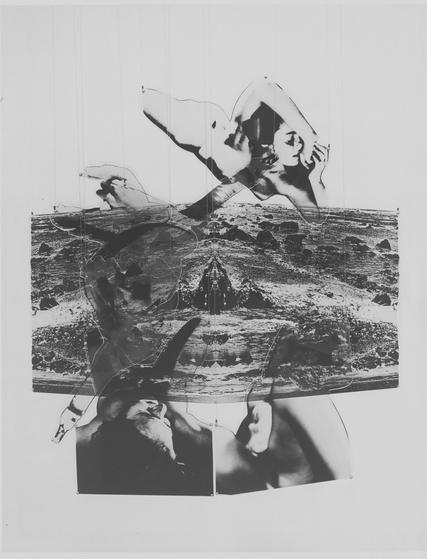
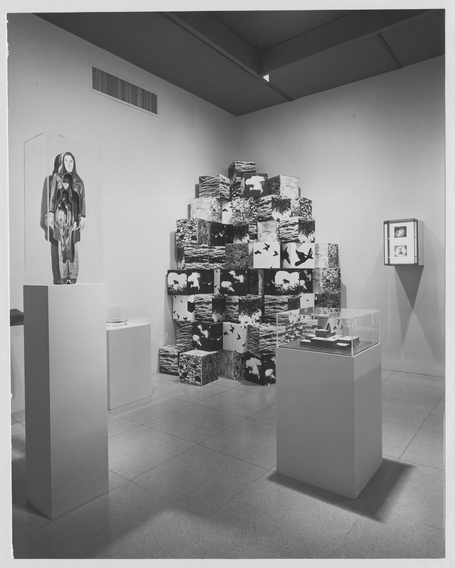
Between Photography and Sculpture
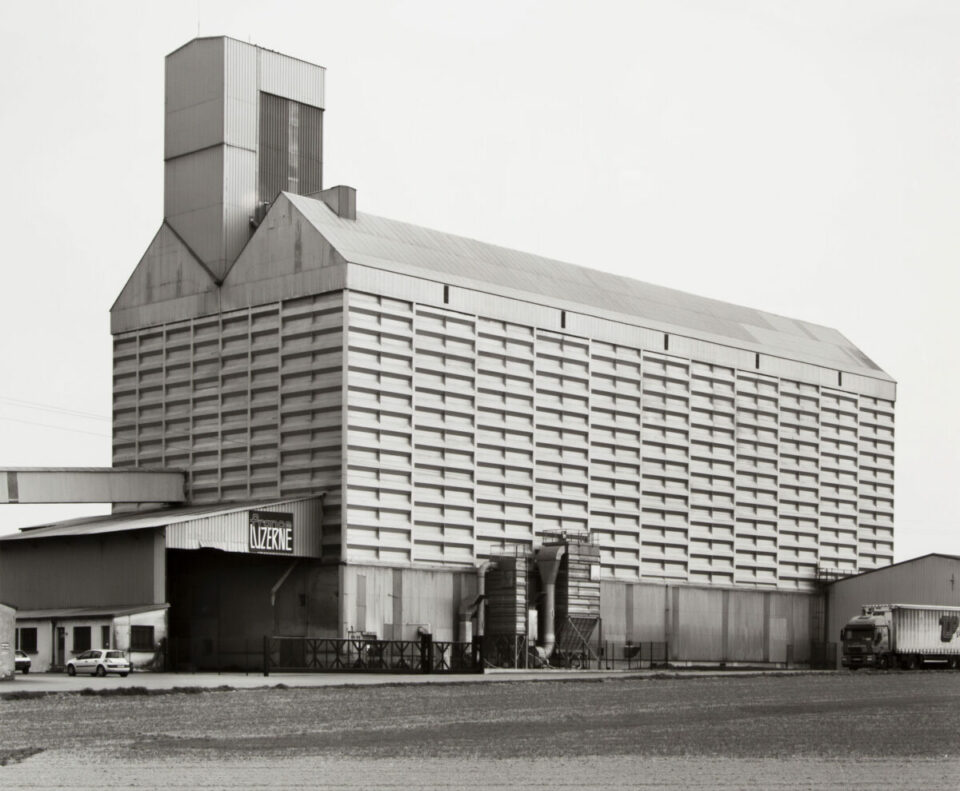
In April 1970, Museum of Modern Art, New York, opened a landmark show. Titled Photography into Sculpture, it was marketed as “the first comprehensive survey of photographically formed images used in a sculptural or fully dimensional manner.” The exhibition featured more than 50 artworks, including Robert Heinecken’s (1931-2006) illusionist film and plexiglass puzzles, and three-dimensional landscape prints by Ellen Brooks (b. 1946). The Curator, Peter C. Bunnell, defined these multidisciplinary pieces as “beyond those of the traditional print, or what may be termed ‘flat’ work.”
https://aestheticamagazine.com/between-photography-and-sculpture
BOOKS FOR THIS SEMESTER
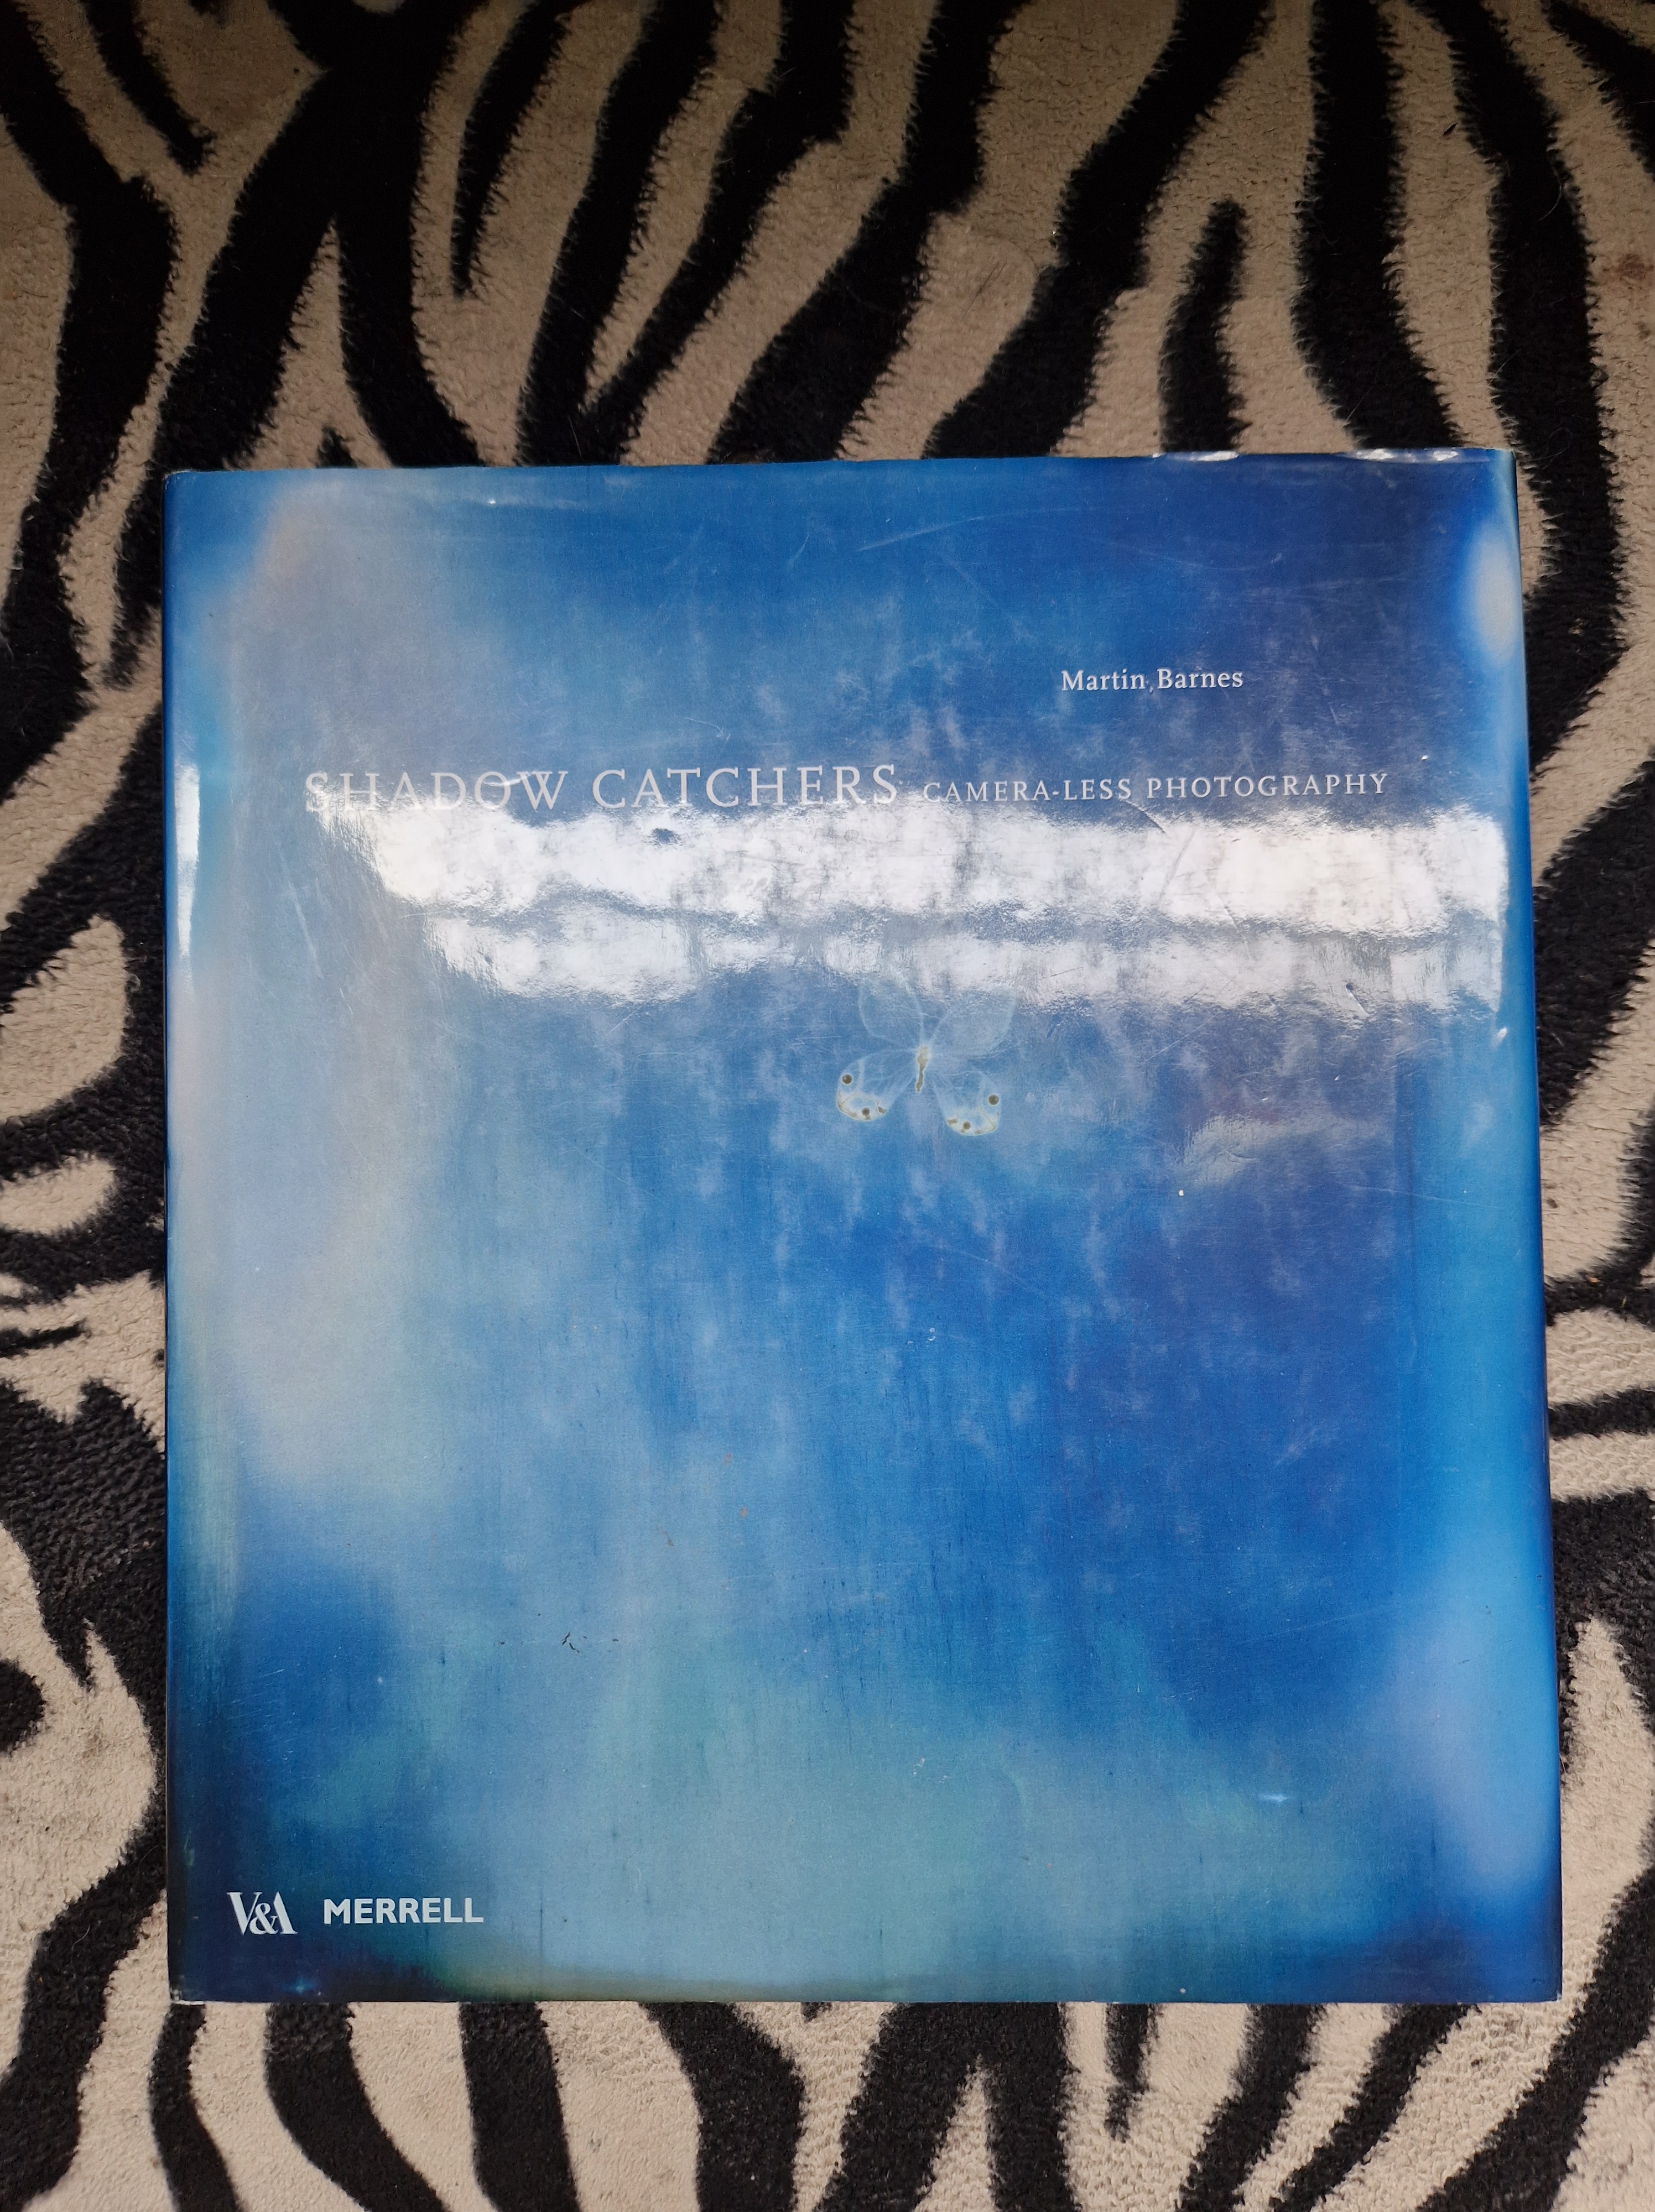
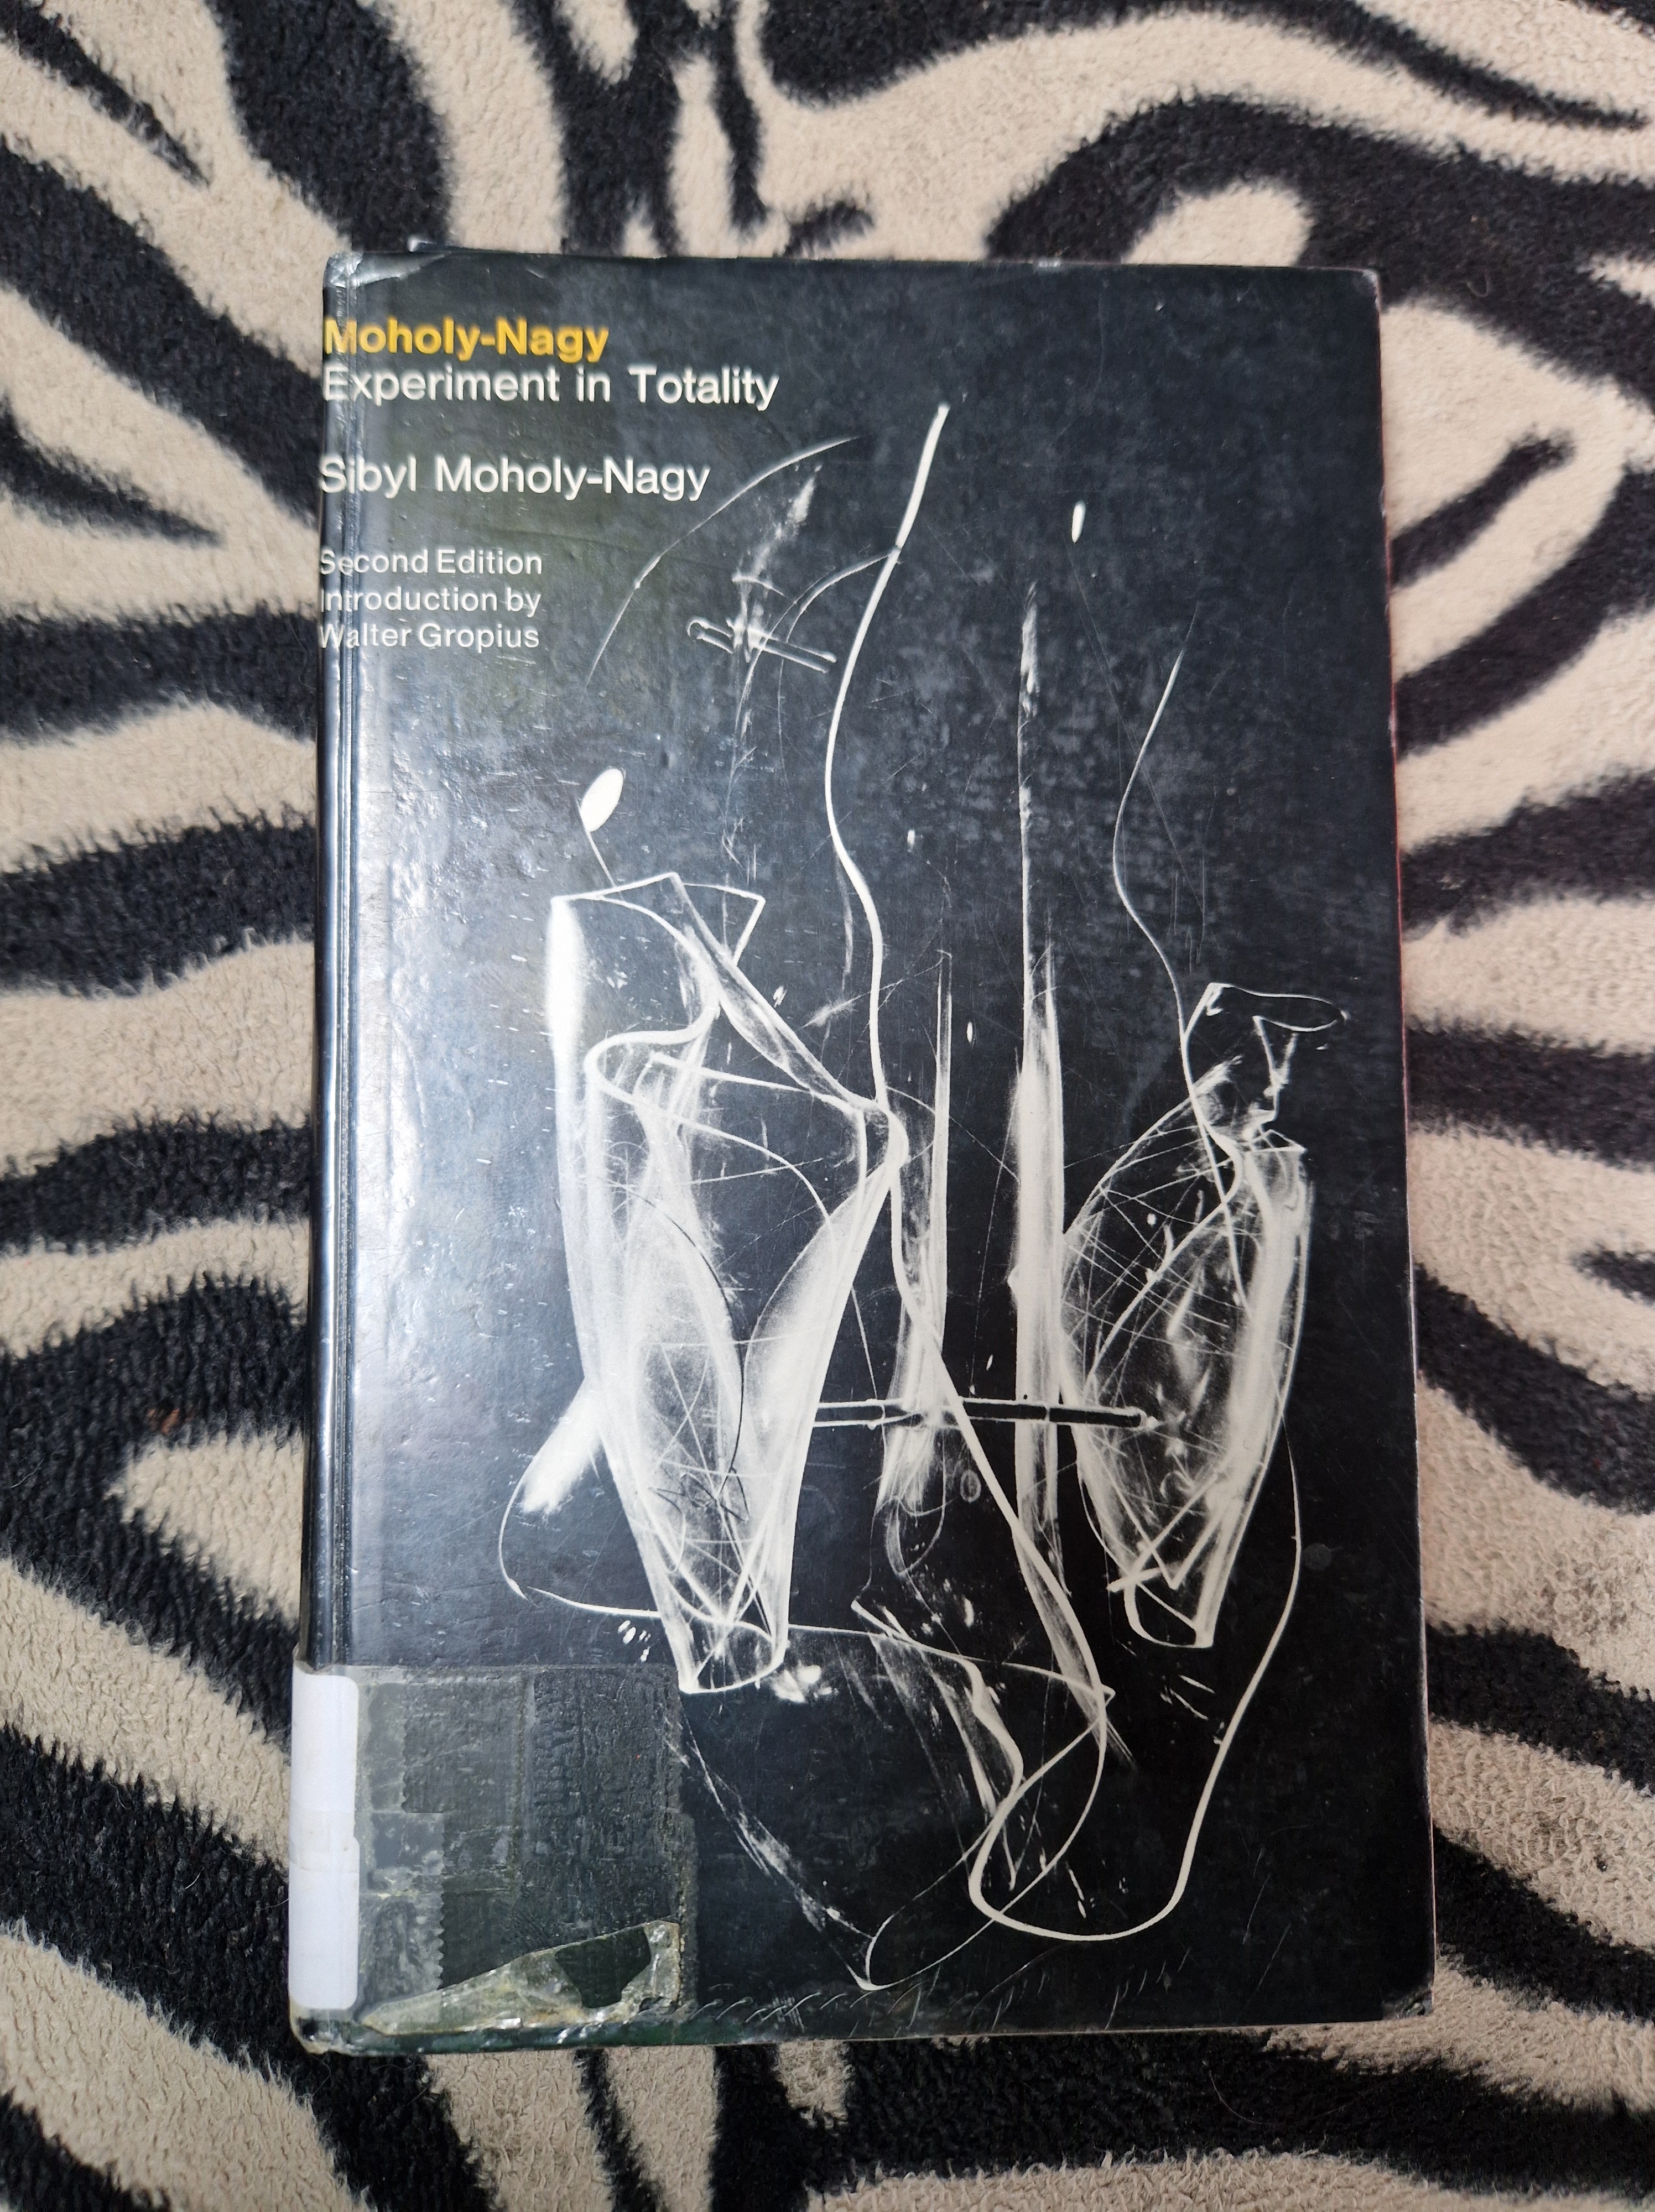
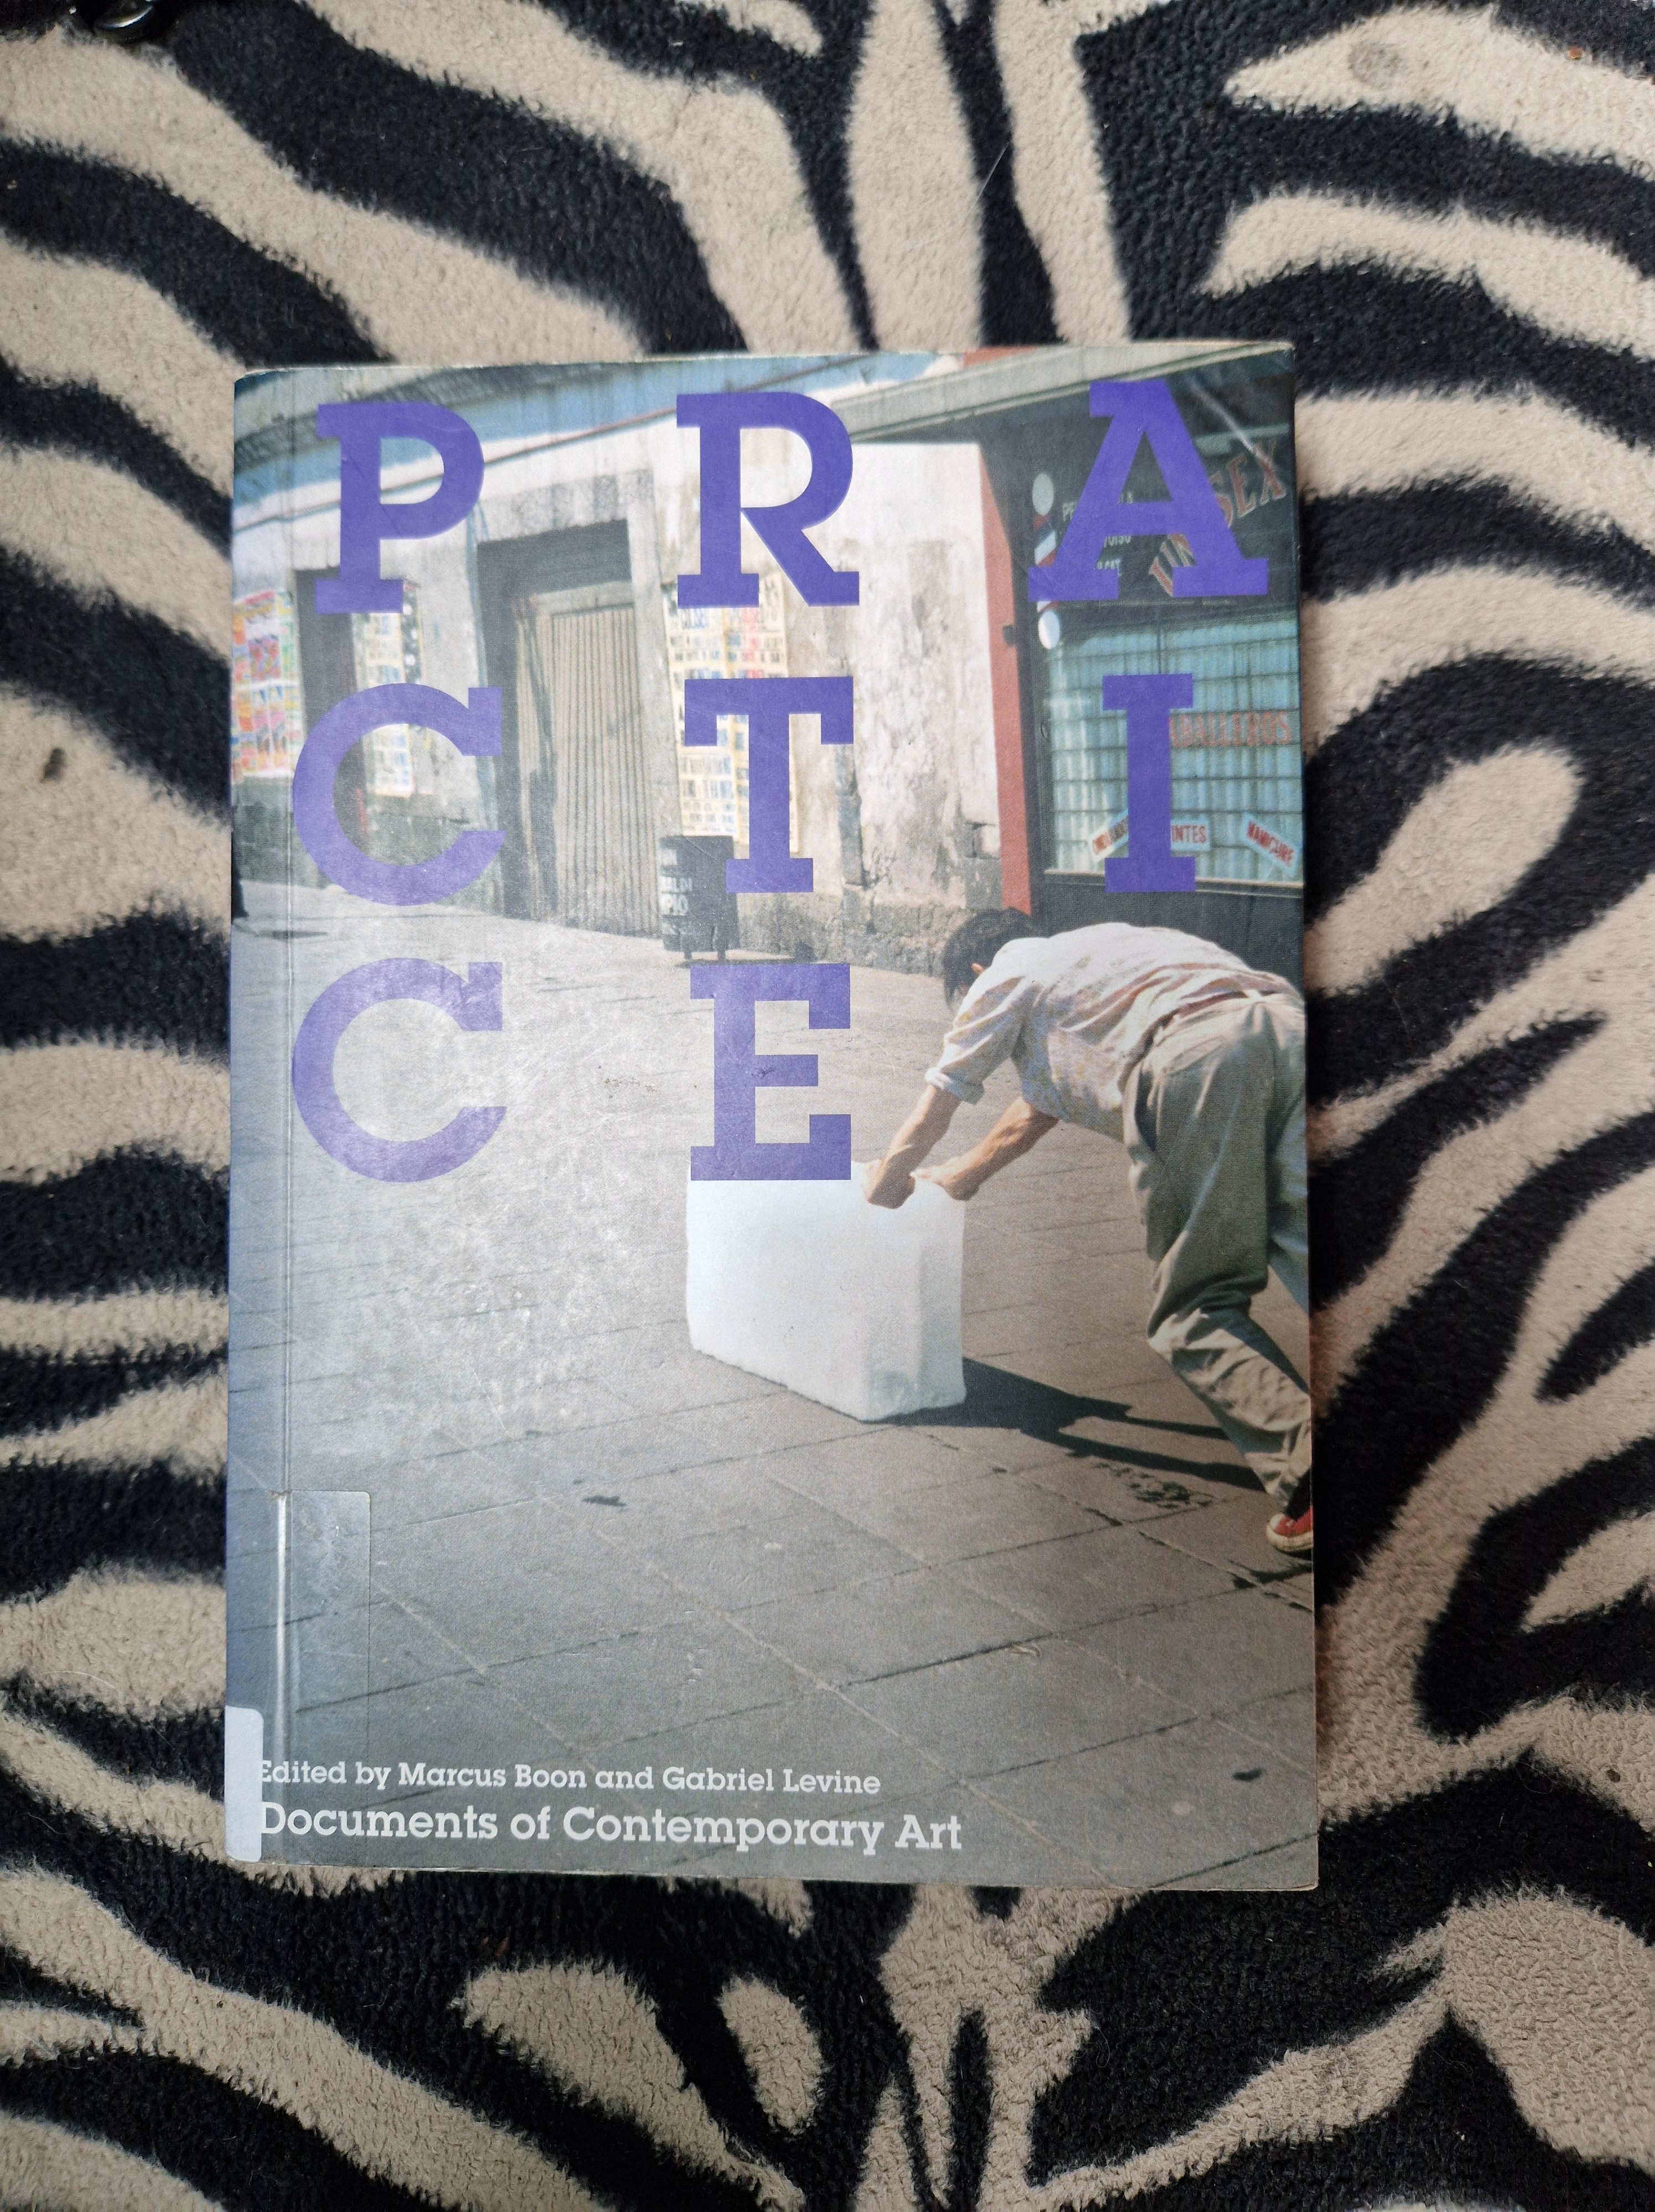
REFLECTIONS: I have obviously not read all of these books, but I dabbled and they formed a basis for my photographic investigations and contemplations.
Once I finish my degree and have more time on my hands I intend to dive deep into these readings as they are invaluable in building my practice and expanding my way of thinking.
REFERENCES
ACRYLIC or ALUMINIUM prints? Watch before deciding! Eric in the wild. [Online video] Available through YouTube [Accessed on 05/02/24] https://www.youtube.com/watch?v=Co-lU2M6Xl
Alex Burke Photography. Choosing a 4×5 Camera and Lenses.[Online] [Accessed on 01/03/24] https://www.alexburkephoto.com/blog/2018/2/13/choosing-a-4×5-camera-and-lenses
Artsy. Naum Gabo. [Online] [Accessed on 01/03/24] https://www.artsy.net/artwork/naum-gabo-linear-construction-in-space-no-1-1
DARKROOM PHOTOGRAPHY PROCESS – SOLARIZATION. Shoot Film Like a Boss.DAR [Online video] Available through YouTube [Accessed on 05/02/24] https://youtu.be/5JOs4nQE5Us
Digital Photography School. How to Use a Gray Card in Your Photography (Step By Step). [Online] [Accessed on 22/02/24] https://digital-photography-school.com/how-to-use-a-gray-card-to-get-more-accurate-exposures-and-color/
Galeria Massimo Mini. Haris Epaminonda. [Online] [Accessed on 14/03/24] https://www.galleriaminini.it/artist/haris-epaminonda/
Getting Started with the Intrepid 4×5 MK2 Camera. Intrepid Camera. [Online video] Available through YouTube [Accessed on 05/02/24] https://youtu.be/ai1uZ9rD4LY
Film Photography: Factoring in Bellows Extension. Nick Carver. [Online video] Available through YouTube [Accessed on 01/02/24] https://youtu.be/AXR_cYU6BRs?si=dh0Y3MQtgwufmJdl
Interalia Magazine. Consider Falling. [Online] [Accessed on 01/03/24]https://www.interaliamag.org/interviews/sarah-howe/
Intrepid Camera. Setting up the Intrepid 4×5 Camera. [Online] [Accessed on 01/02/24] https://intrepidcamera.co.uk/blogs/guides/setting-up-the-intrepid-4×5
Korg CM 300! The CHEAP Contact Microphone for Field Recording. Free To Use Sounds. [Online video] Available through YouTube [Accessed on 01/02/24] https://youtu.be/jqiIbCnyPpk?si=e2ueMqX_mVqe6x1F
Man Ray: Solarization. Virginia Museum of Fine Arts. [Online video] Available through YouTube [Accessed on 05/02/24] https://youtu.be/QITcY3W0mto
Marian Goodman Gallery. Nairy Baghramian: Misfits. [Online] [Accessed on 01/03/24] https://www.mariangoodman.com/exhibitions/449-nairy-baghramian-misfits/
Mixing Photography and Sculpture with Osang Gwon. VICE. [Online video] Available through YouTube [Accessed on 05/04/24] https://youtu.be/odeTxf3cIUA?si=aQhCtHEvlnVKxbsV
MoMA. Ana Mendieta. [Online] [Accessed on 01/04/24] https://www.moma.org/artists/3924
https://www.moma.org/calendar/exhibitions/2694
Moma. Drawing in Motion – Zilvinas Kempina’s Double 0 at MoMA. [Online] [Accessed on 20/03/24] https://www.moma.org/explore/inside_out/2010/12/21/drawing-in-motion-zilvinas-kempinass-double-o-at-moma/
Naum Gabo. Esperanza Muino. [Online video] Available through YouTube [Accessed on 05/02/24] https://youtu.be/_RJHshFTPTA?si=d89HKnUCYZF4ceo1
Owen Kydd: West Jefferson Wall. Canadian Art. [Online video] Available through YouTube [Accessed on 01/03/24] https://youtu.be/0okkCNF8Mbs?si=Jaw_TXtP0o7cNRQP
Photography and Sculpture: The Art Object in Reproduction (Video 1 of 4). Getty Research Institute. [Online video] Available through YouTube [Accessed on 01/03/24] https://youtu.be/kAH5SAU8FF0?si=ZmiYS-Oe9CAKwozh
Richard Serra Answers: Why Make Art?. San Francisco Museum of Modern Art. [Online video] Available through YouTube [Accessed on 01/04/24] https://youtu.be/mWoiAf_qMA4
Richard Serra: Equal | ARTIST STORIES. San Francisco Museum of Modern Art. [Online video] Available through YouTube [Accessed on 01/02/24] https://youtu.be/ML1BkhqKo1Q
Szabelski, T. ‘Through the Screen. Riga Photography Biennial 2022 curators and artist in conversation’. (2022). Block Magazine. [Online] 23 June 2022. [Accessed on 16/03/24] https://blokmagazine.com/through-the-screen-riga-photography-biennial-2022-curators-and-artist-in-conversation/
Sigmund Freud’s conscious mind, preconscious mind, and unconscious mind!(Iceberg Analogy). BRIGHT IDEAS of HJD. [Online video] Available through YouTube [Accessed on 01/02/24] https://youtu.be/EHfYbjUjahs?si=8jeLHzAAr607UwKo
solarization in the darkroom. emma jukes. [Online video] Available through YouTube [Accessed on 05/02/24] https://youtu.be/6BjuGwebBWA
Tate. Solarisation. [Online video] Available through YouTube [Accessed on 05/02/24] https://www.tate.org.uk/art/art-terms/s/solarisation
Tate. Naum Gabo. [Online] [Accessed on 01/03/24] https://www.tate.org.uk/art/artists/naum-gabo-1137
What Is Freud’s Concept of the Unconscious Mind?.
Modern Psychoanalyst. [Online video] Available through YouTube [Accessed on 01/02/24] https://youtu.be/YNmMLHN2d20?si=gIUtCSr0dakVNcTj
Eesti Kunstnike Liit. Sigrid Viir and Cloe Jancis in Riga. [Online] [Accessed on 15/03/24] https://www.eaa.ee/en/sigrid-viir-and-cloe-jancis-riga
Weiss, H. ‘Haris Epaminonda’s work transforms ordinary objects into art’. (2017) Interview Magazine. [Online] 8 December 2017. [Accessed on 15/03/24] https://www.interviewmagazine.com/art/haris-epaminondas-work-transforms-ordinary-objects-abstract-art
Wikipedia. Contact Microphone. [Online] [Accessed on 01/03/24] https://en.wikipedia.org/wiki/Contact_microphone
You Are The Subject: Richard Serra at Glenstone. Glenstone Museum. [Online video] Available through YouTube [Accessed on 01/02/24] https://youtu.be/8R7ypLGUN44
Zilvinas Kempinas ‘Double O’. Brian Peel. [Online video] Available through YouTube [Accessed on 01/03/24] https://youtu.be/8R7ypLGUN4 https://youtu.be/CSEK-RyreZM?si=0LeupMdCNXKxXKxL

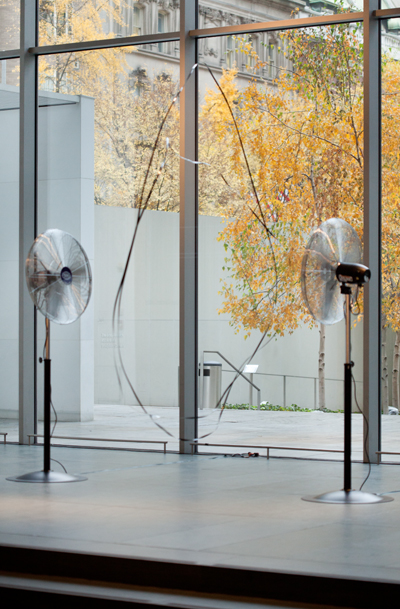